|
|
Gunsumer Reports TM Providing Detailed Objective Reviews for Firearms and Firearm Accessories |
Ruger Gunsite Scout Rifle Review
Part 4 - Disassembly and Internal
Features
March 27, 2011

In this part of the review, I cover disassembly and some internal features of the Ruger Gunsite Scout Rifle (Model M77-GS). Since this rifle is so similar to the Ruger M77 Hawkeye Rifle, you can see some good videos produced by Ruger that cover Disassembly, Cleaning, Reassembly, and Mounting A Scope. Go to their M77 Hawkeye Standard Extras webpage and scroll down to the bottom in the video window to select these videos. My sequence of instructions below covers the same basic steps for disassembly, but I provide more and better photos as well as additional commentary along the way. I'm going to follow the same basic steps outlined in the Instruction Manual so you can also follow along there. You should always read the Instruction Manual and pay careful attention to the red text providing warnings and safety related information. Having said that, make sure the gun is unloaded by visually inspecting the chamber and magazine.
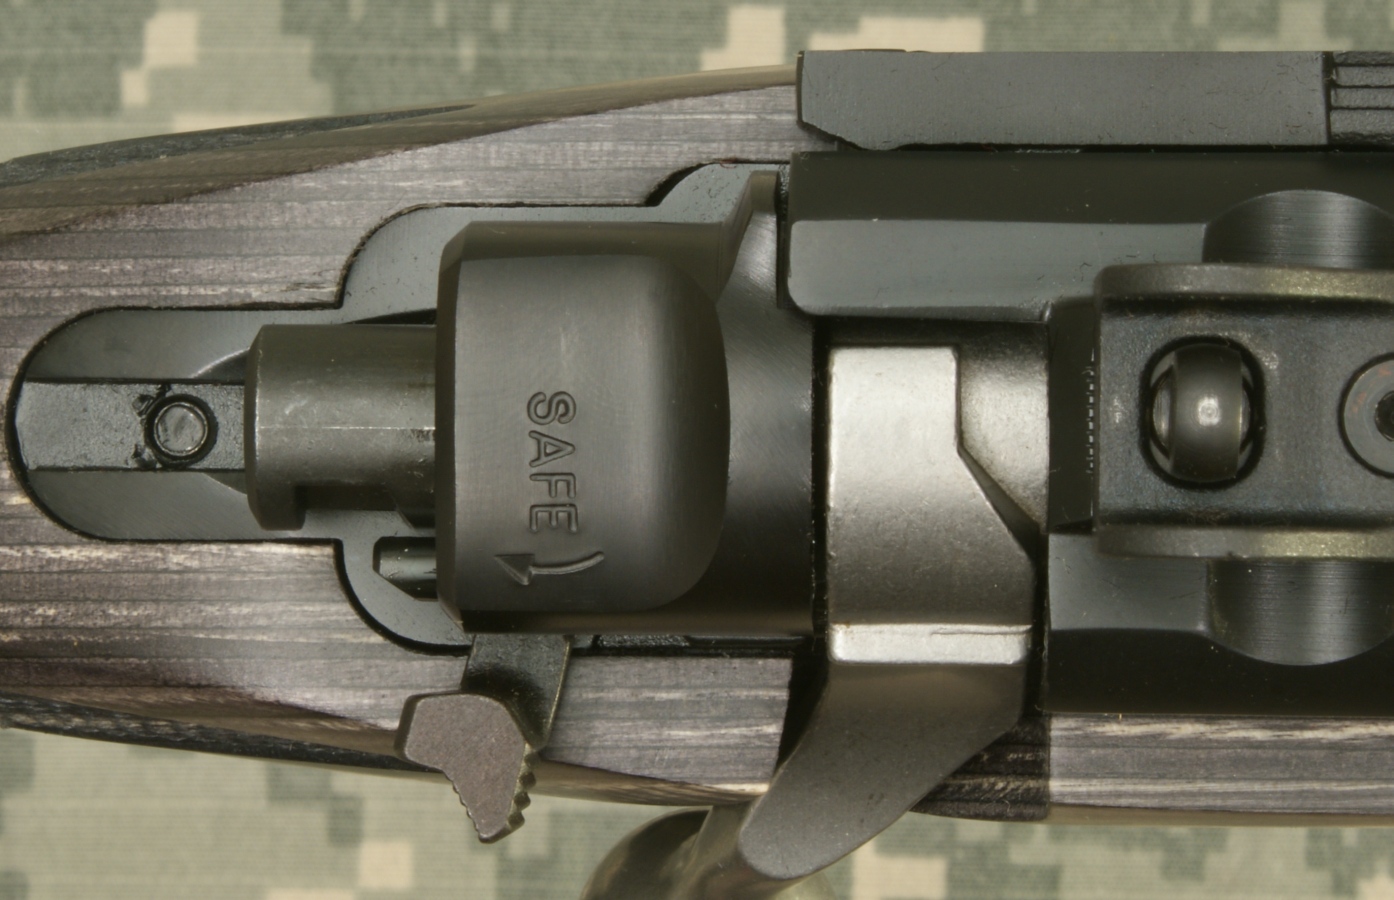
Step 1 - Put the 3-position safety in the "Load-Unload" position (middle position).
Figure 1
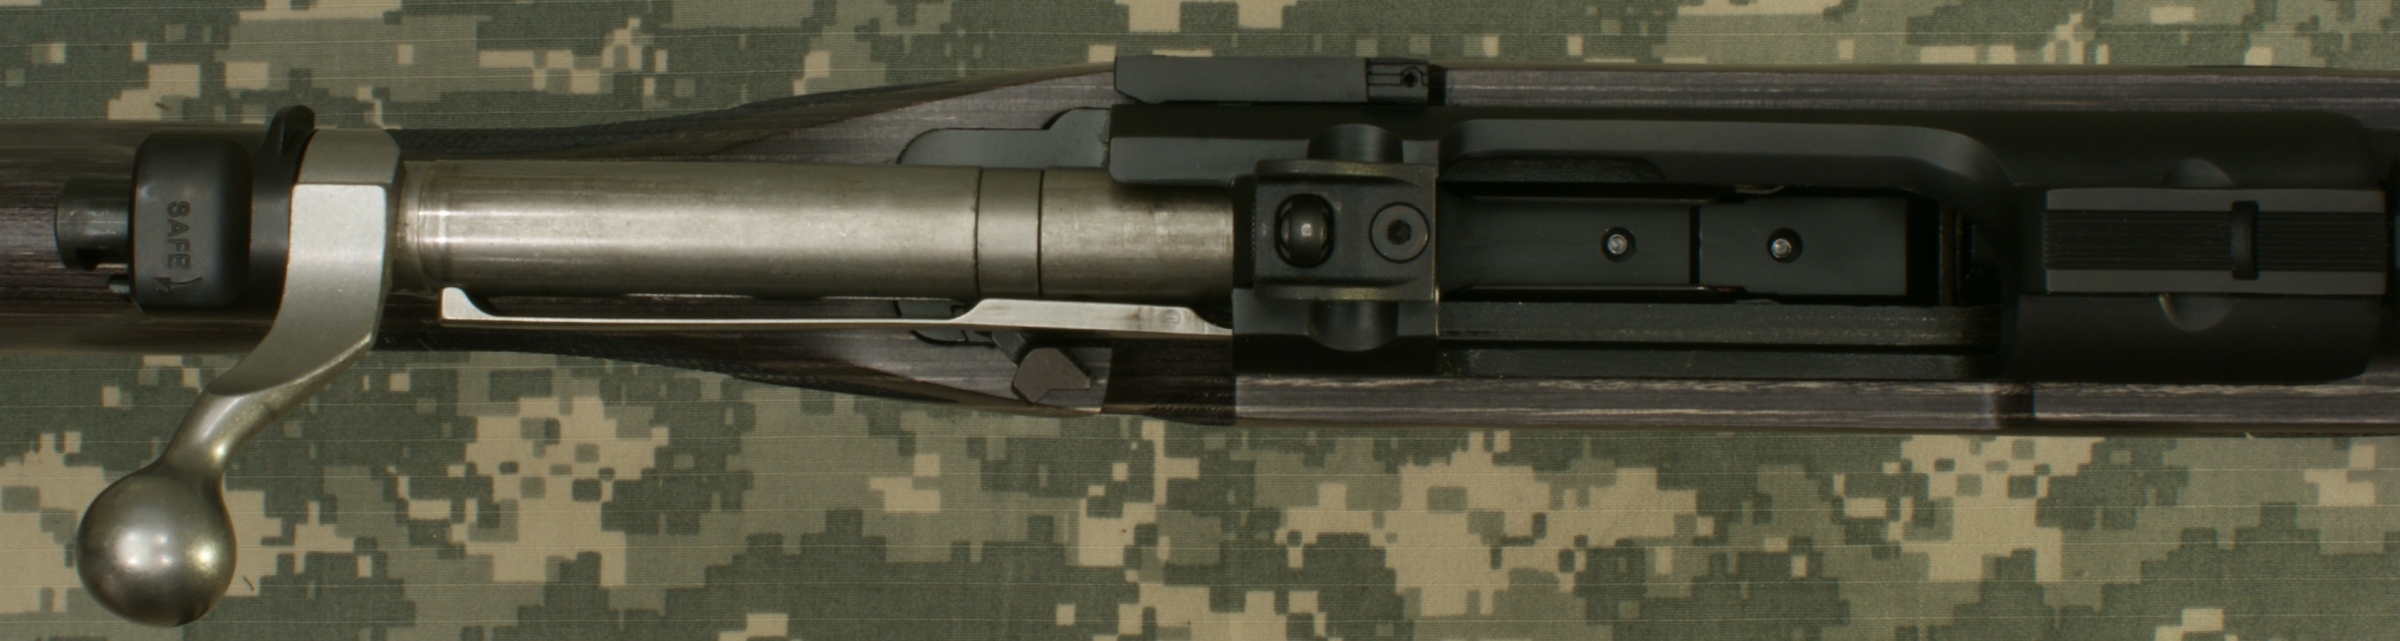
Step 2 - Open the bolt and pull it all the way to the rear.
Figure 2
Step 3 - Recheck and make sure the chamber is empty, then do it again.
Step 4 - Remove the magazine.
Step 5 - Remove The Bolt
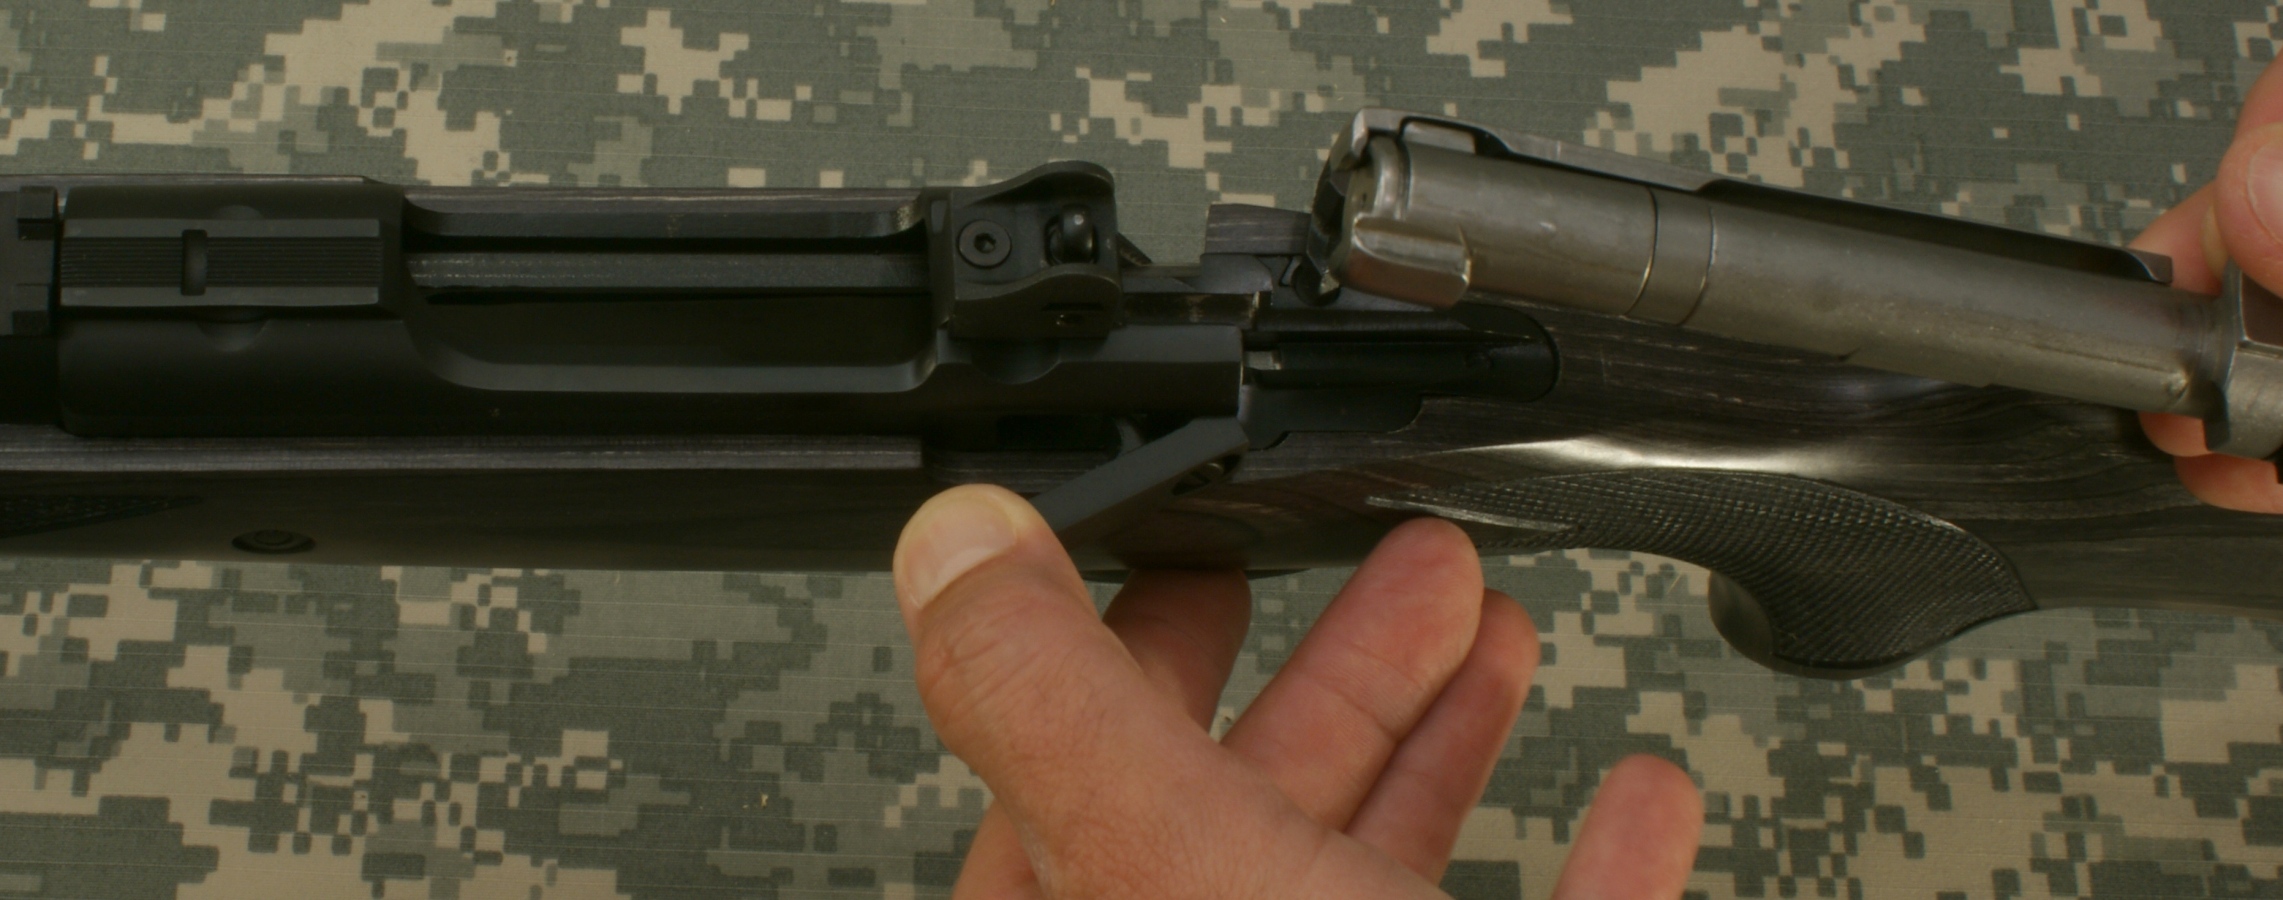
Pivot open the Bolt Stop Lever and continue pulling the bolt out of the receiver. The Ruger Instruction Manual states, "this is as far as you need to dismantle the rifle for a routine cleaning", and I would have to agree. Starting with an unloaded rifle, these steps took less than 10 seconds and were simple and easy.
Figure 3
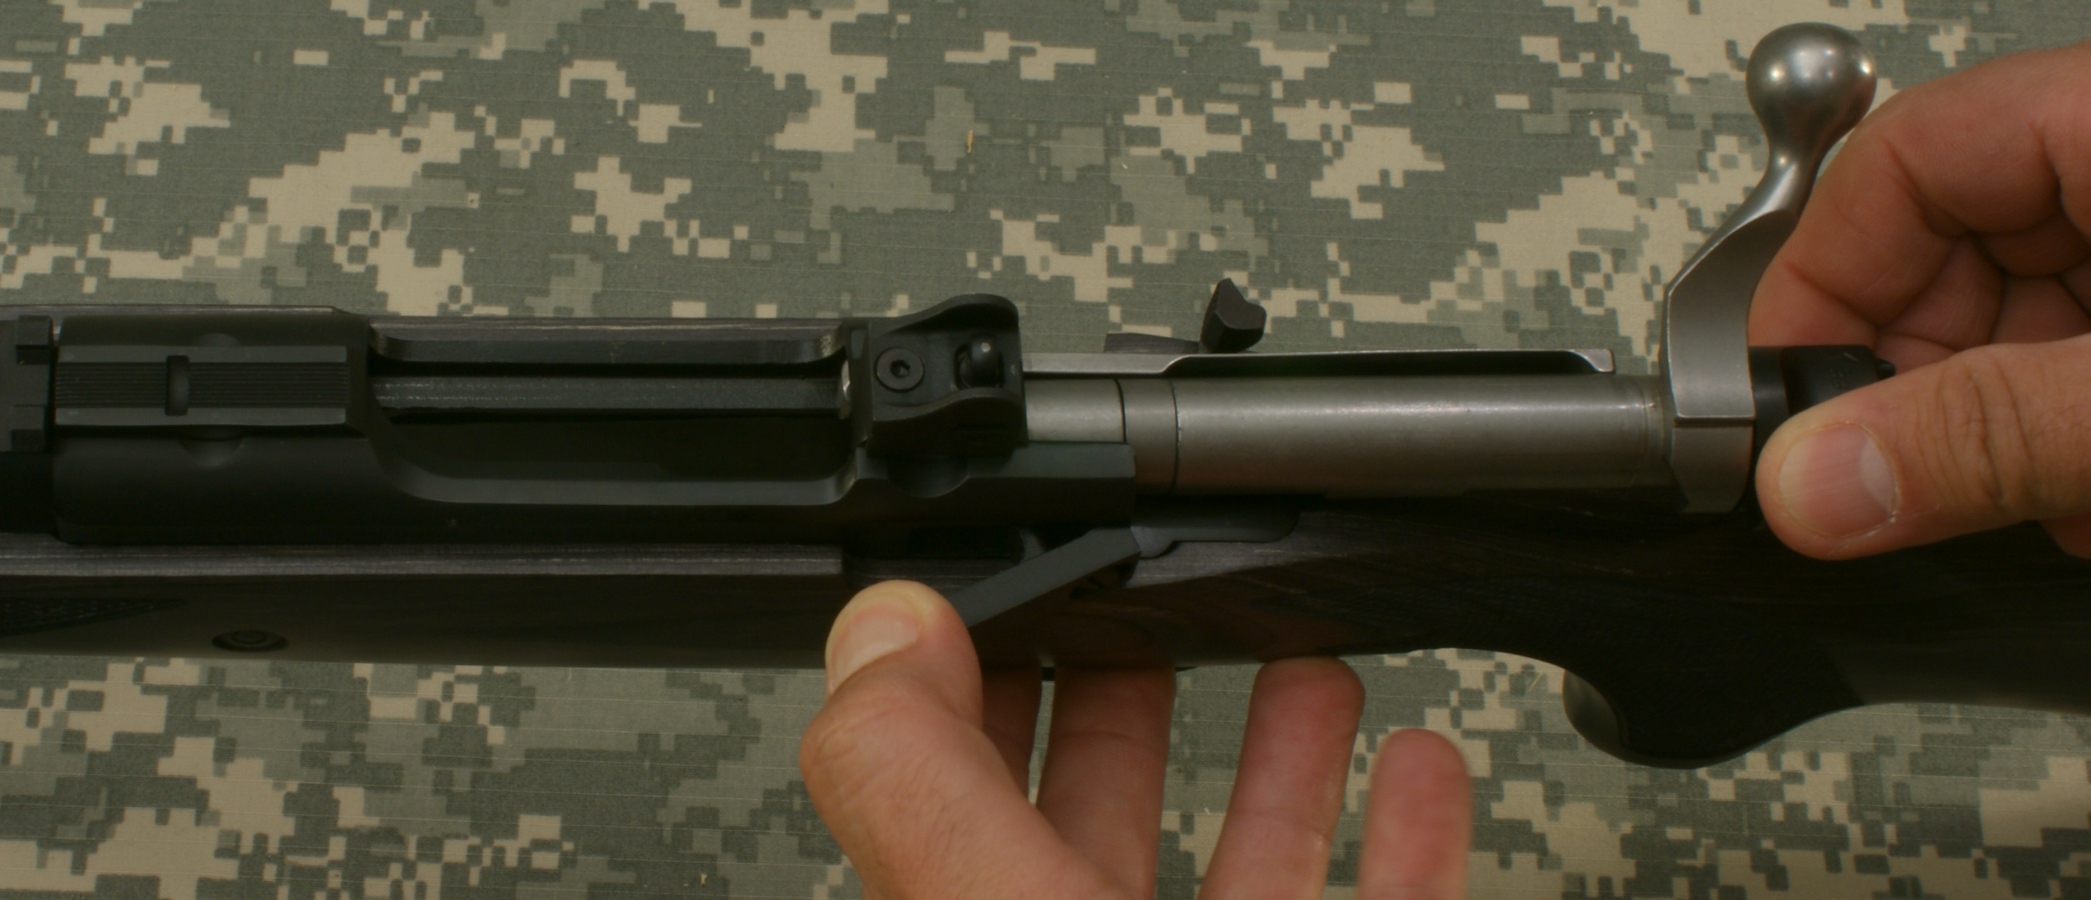
Figure 4
The remaining steps are provided to allow you to fully disassemble the rifle to a "maximum" practical level for extensive cleaning.
Step 6 - Remove Firing Pin Assembly
Figure 5
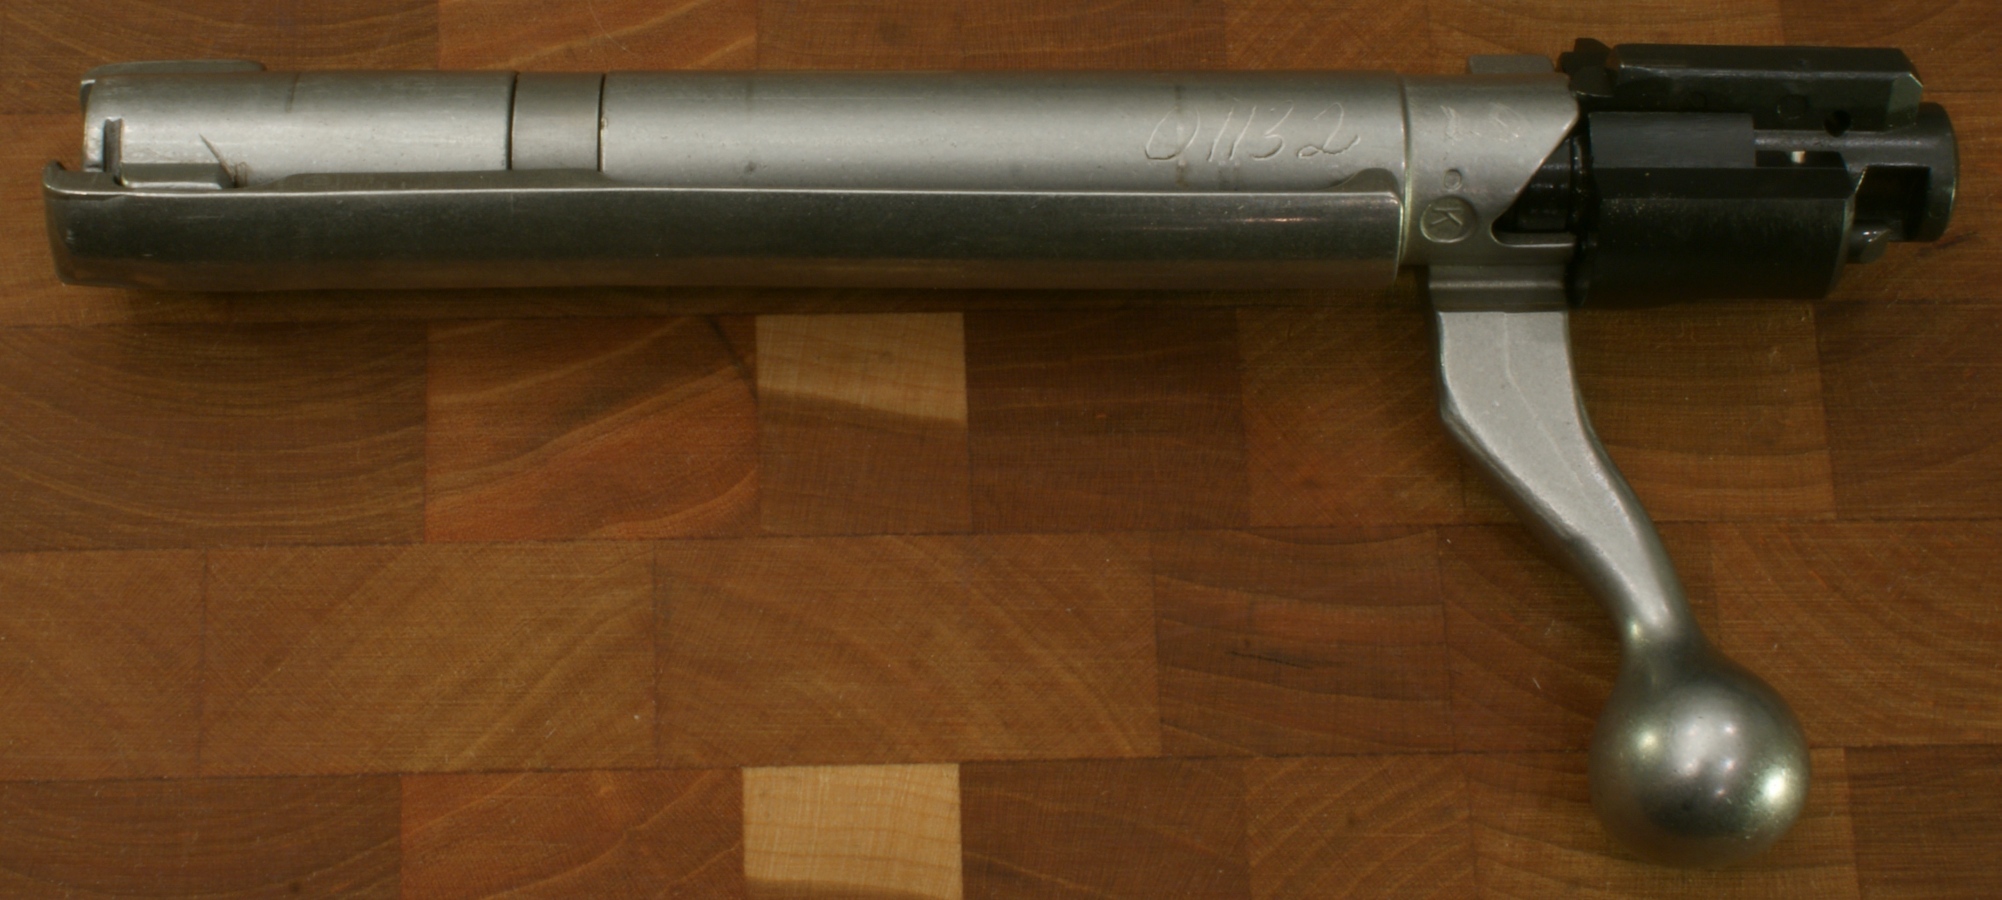
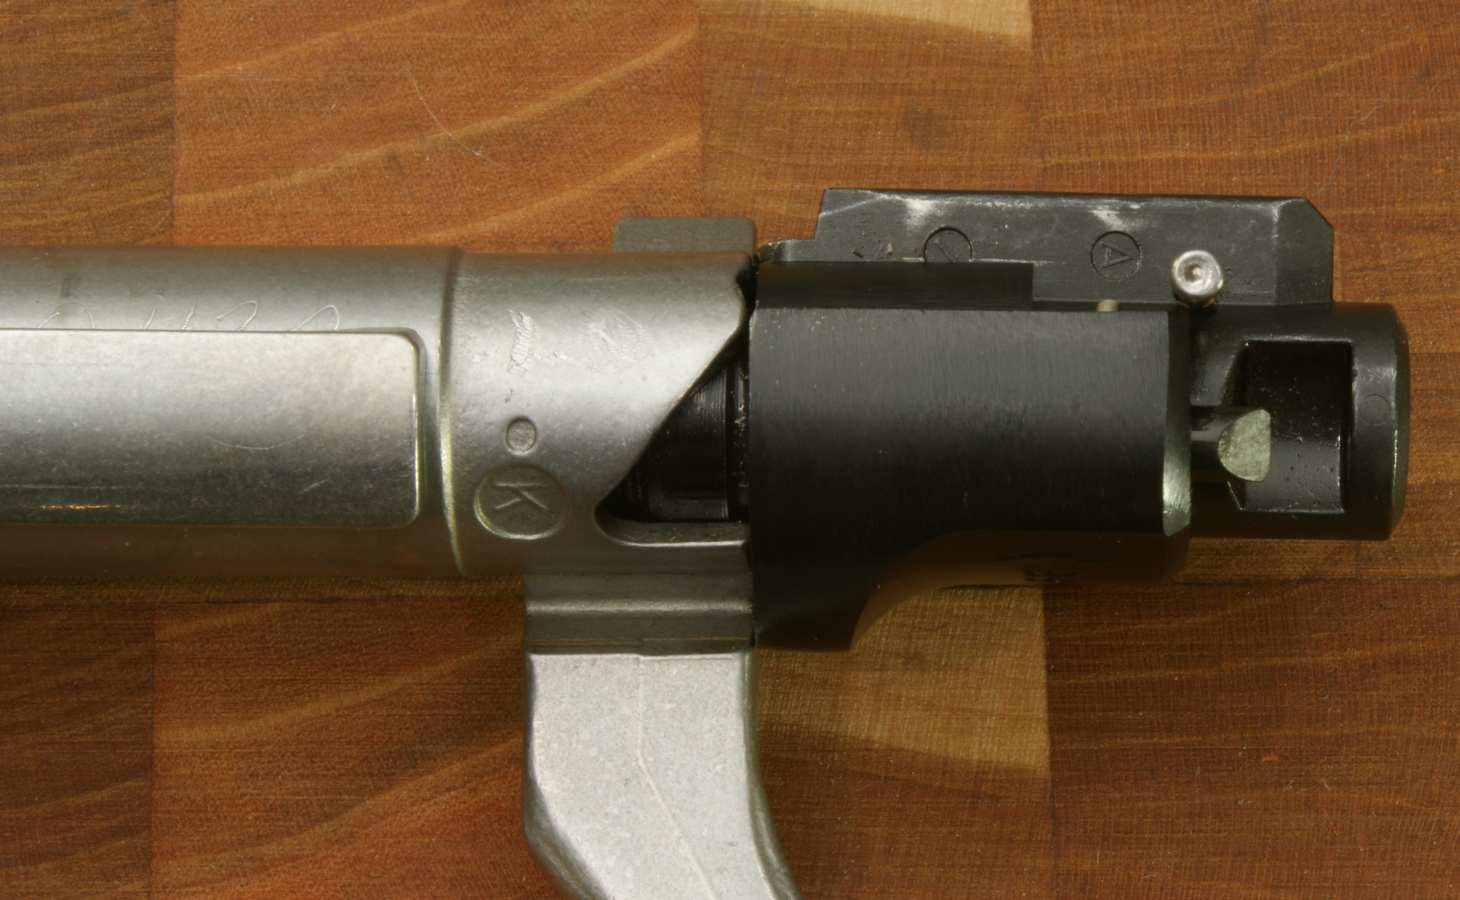
In the photo below, notice that the cocking piece is resting in an indent in the back of the bolt.
Figure 6
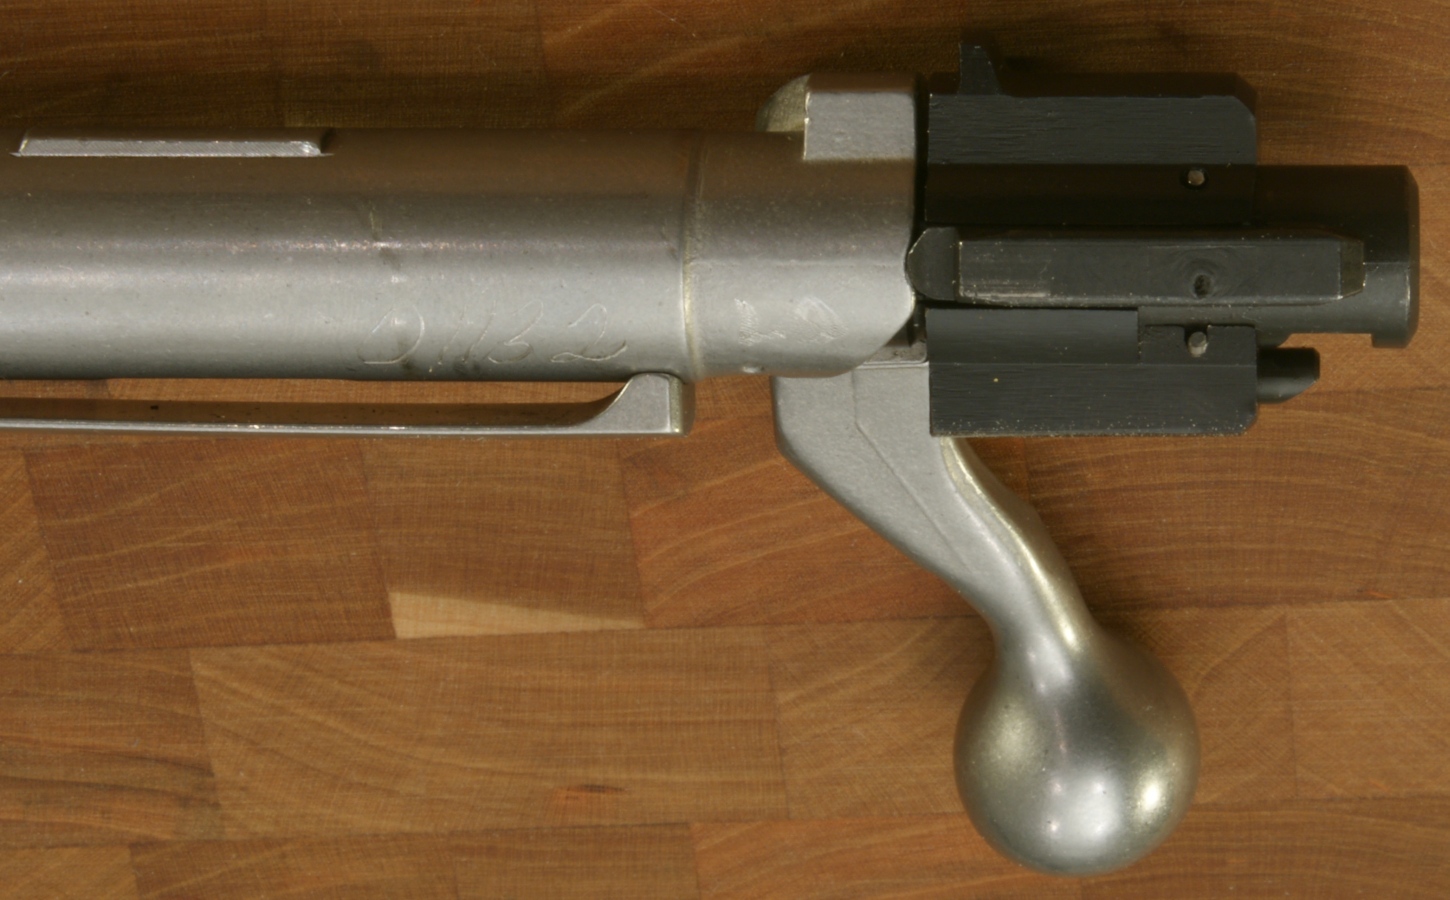
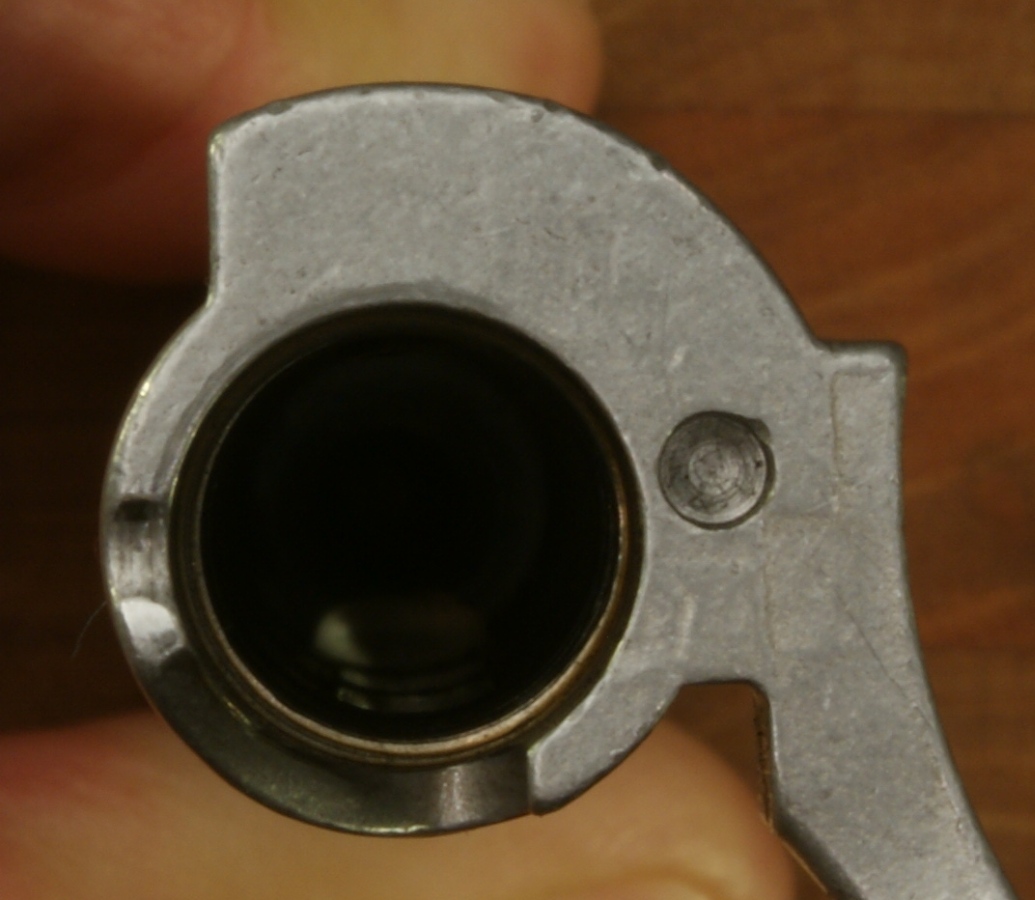
While the cocking piece is in the indent, you can see in the photo below that the disassembly hole is partially blocked.
Figure 7
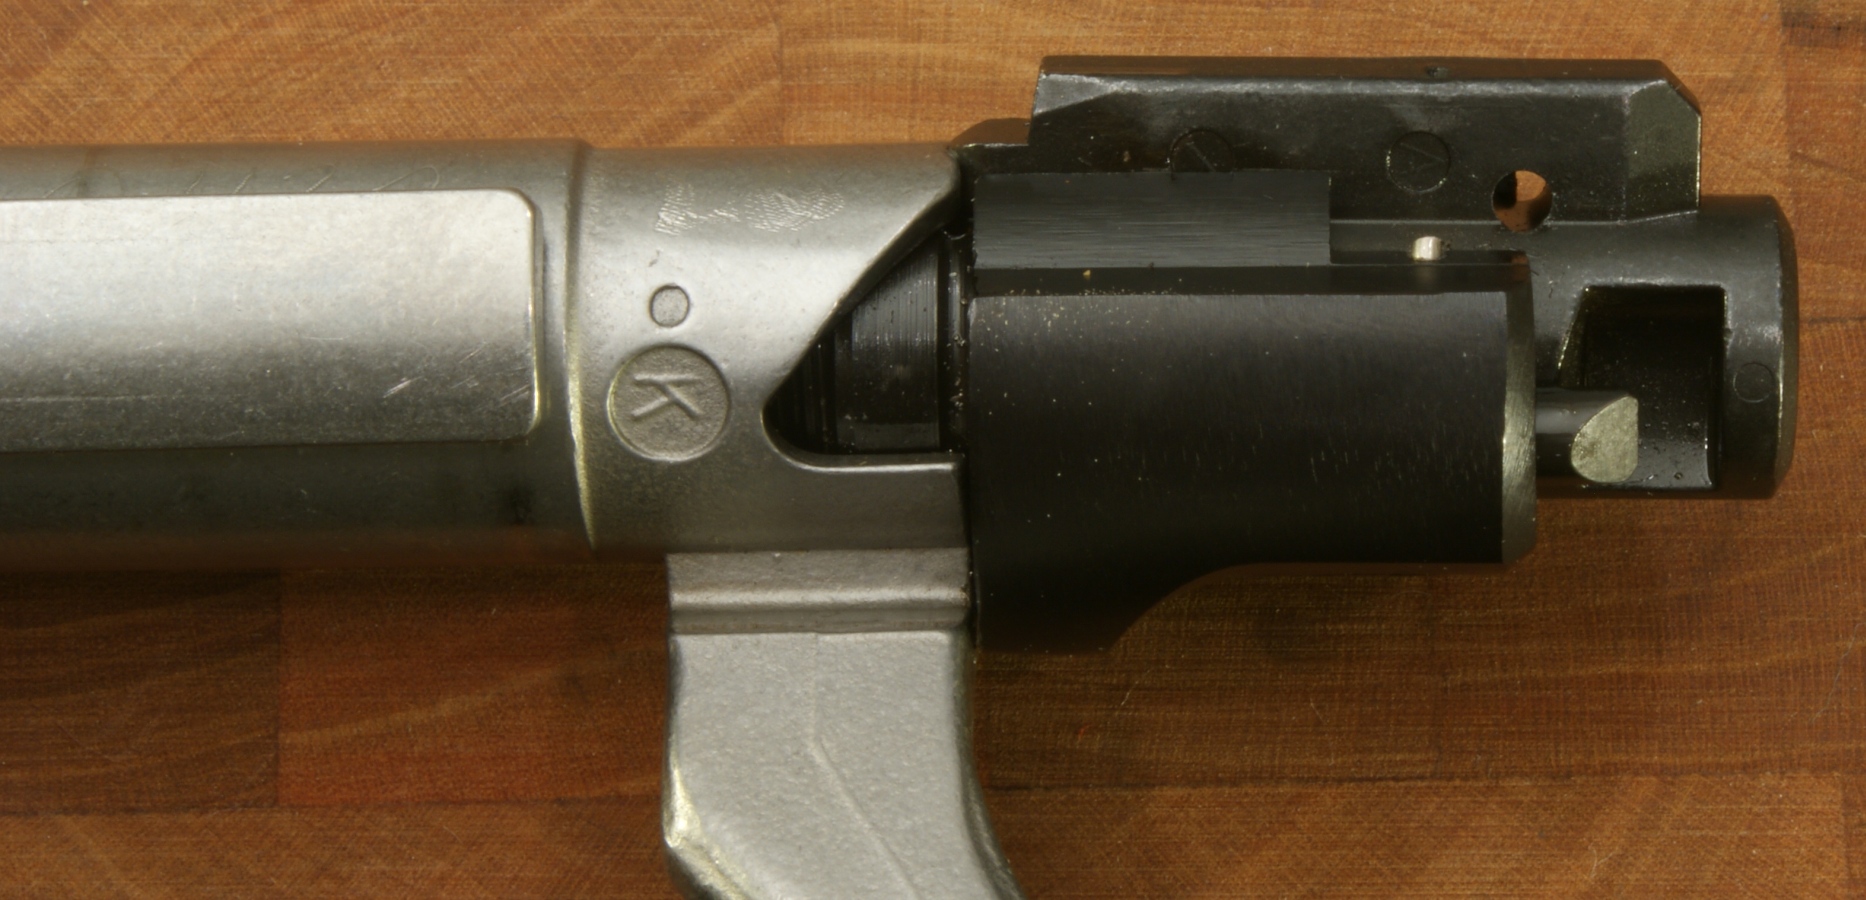
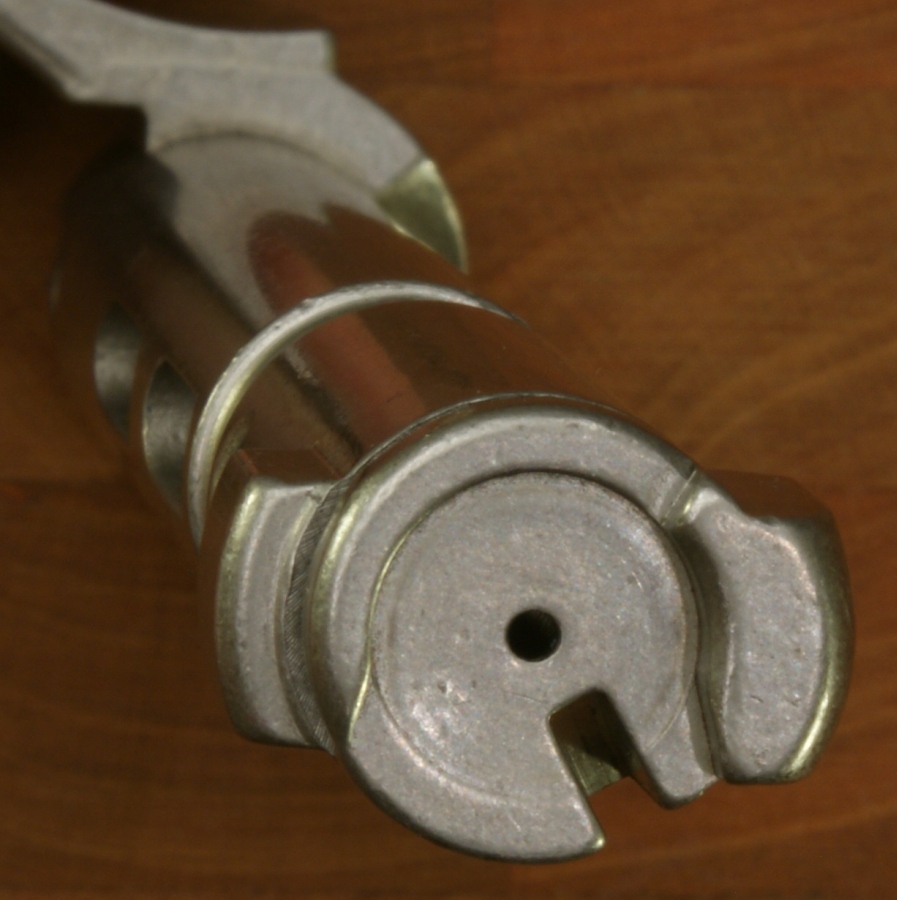
Rotate the cocking piece clockwise (looking from the rear end) while holding the bolt fixed until the cocking piece rotates out of the indent as shown below. You can now see that the disassembly hole is fully open.
Figure 8
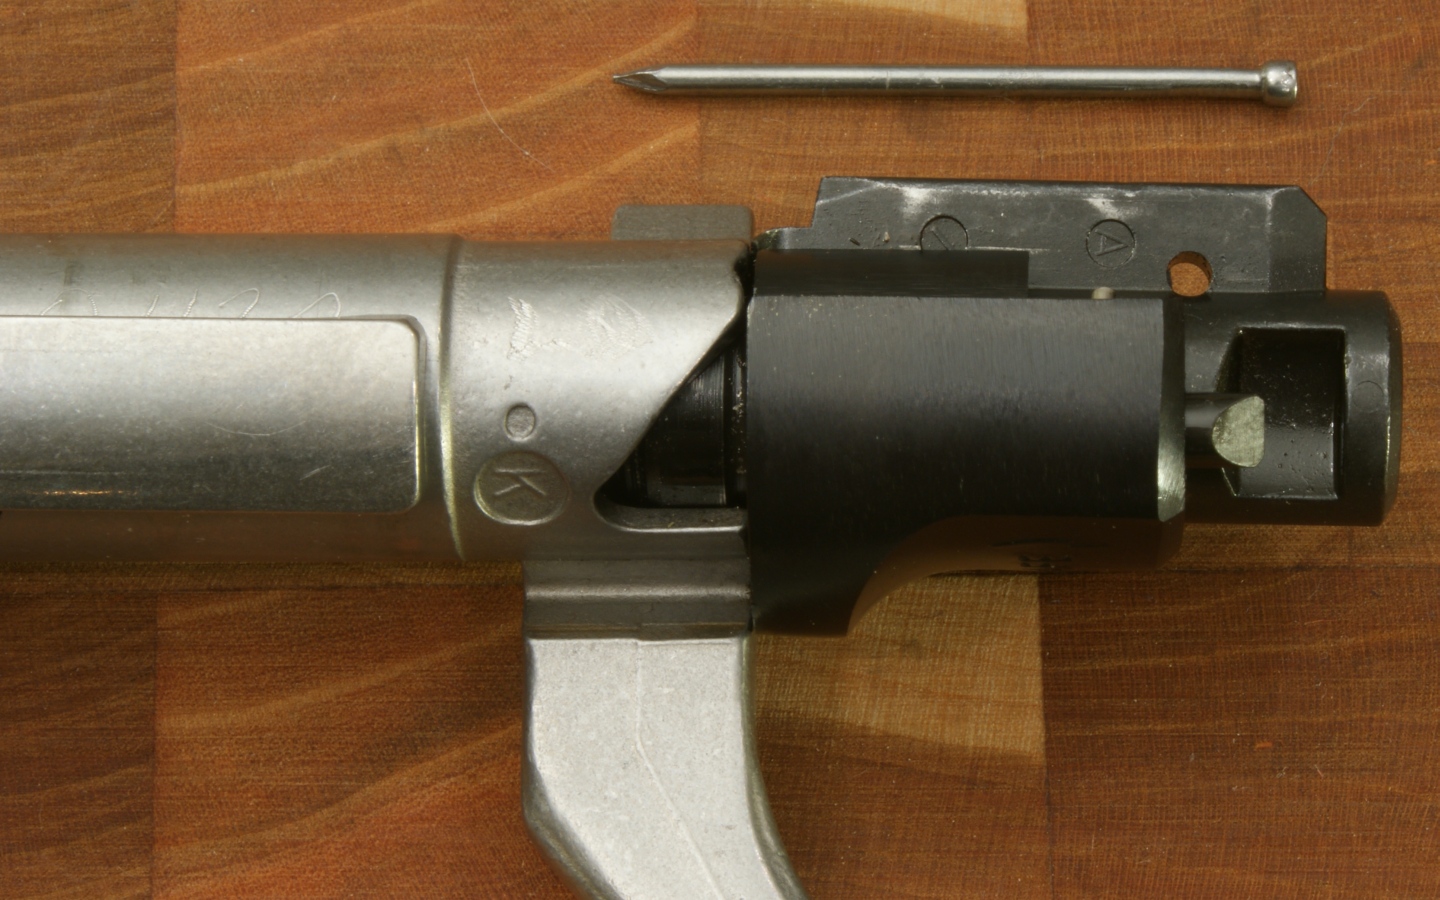
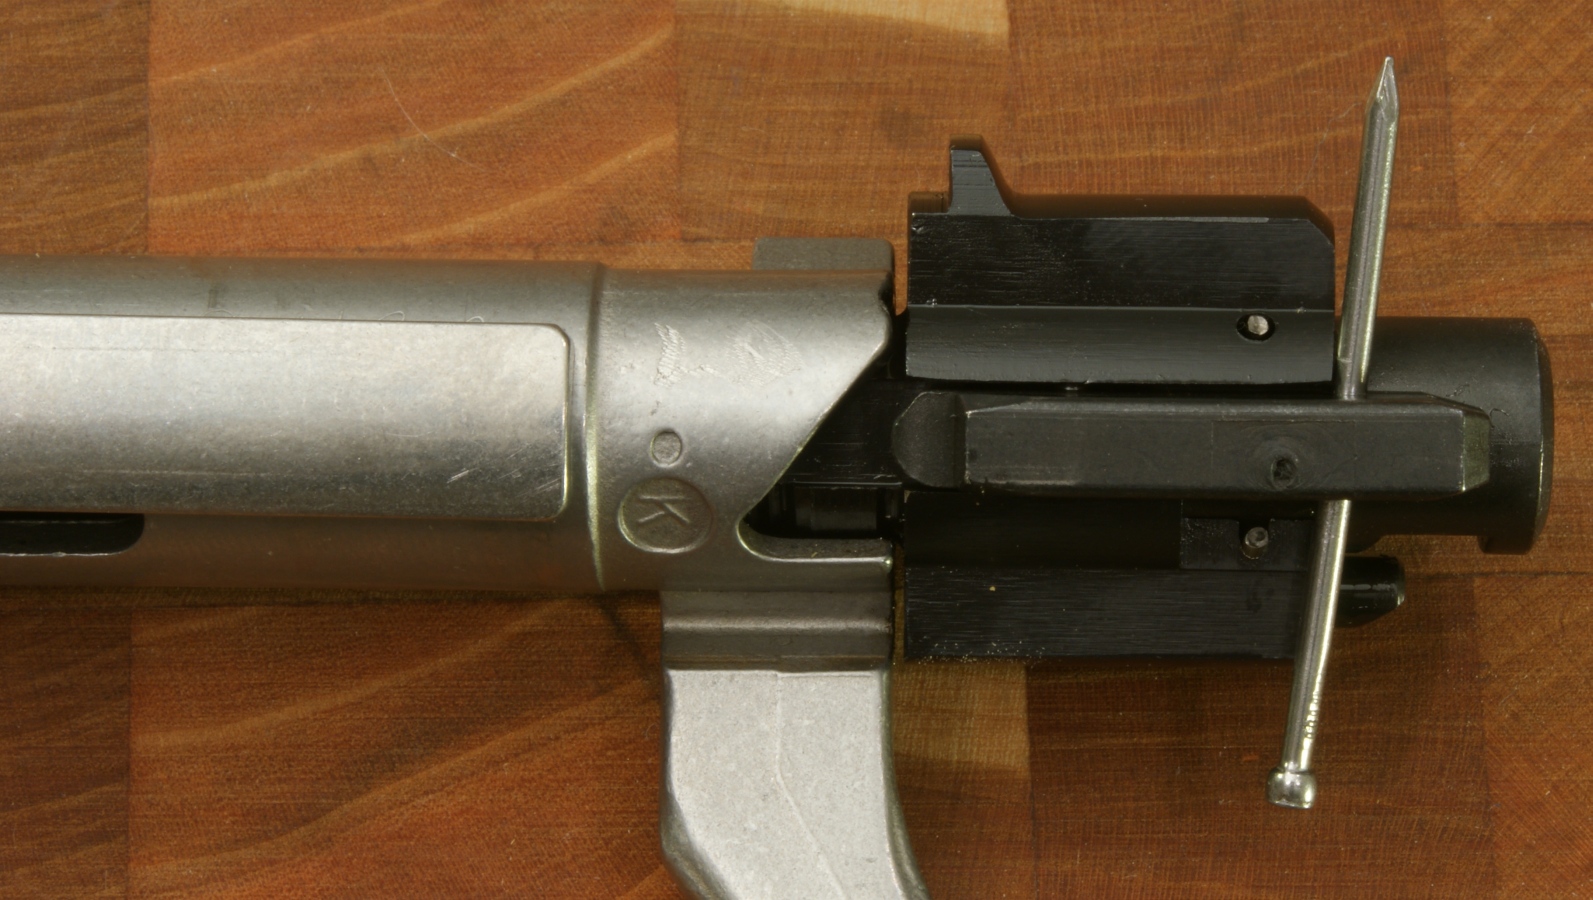
Insert a pin or nail into the hole. Try to find one that fits the hole without much clearance.
Figure 9
The nail will hold the cocking piece back and allow you to turn the firing pin assembly counterclockwise and unscrew it out of the bolt. The photo below shows that I have positioned the cocking piece lug on the firing pin above the cocking ramp on the bolt and the nail is preventing the firing pin from moving forward.
Figure 10
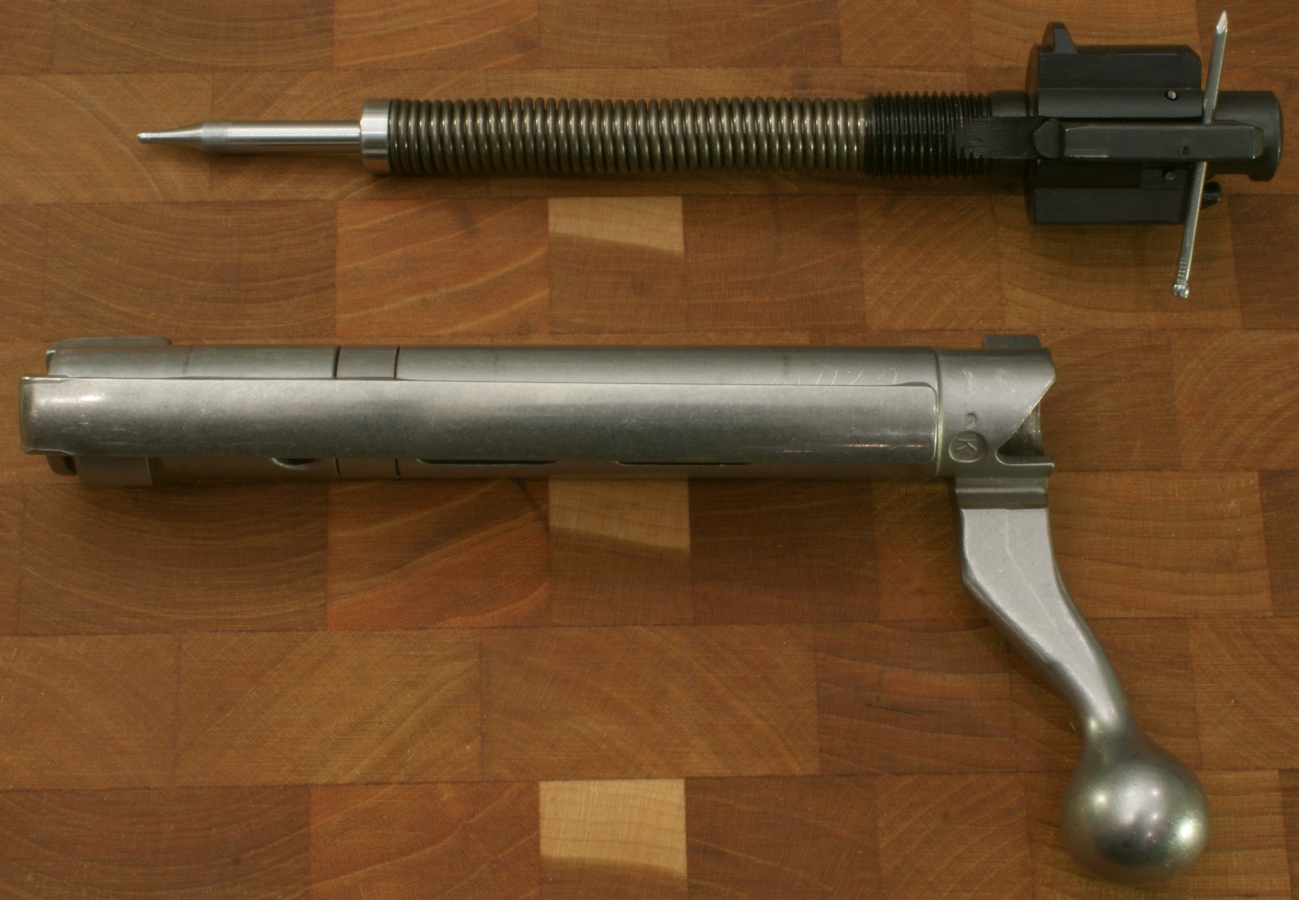
The photo below shows the firing pin assembly removed form the bolt. Ruger considers the firing pin assembly to be a permanent assembly and should not be disassembled any further.
Figure 11
Step 6a - Remove Extractor
Removing the extractor is not in the Instruction Manual, but it looked easy enough so I decided to give it a try. The next two photos show the extractor in it's normal position on the bolt.
Figure 12
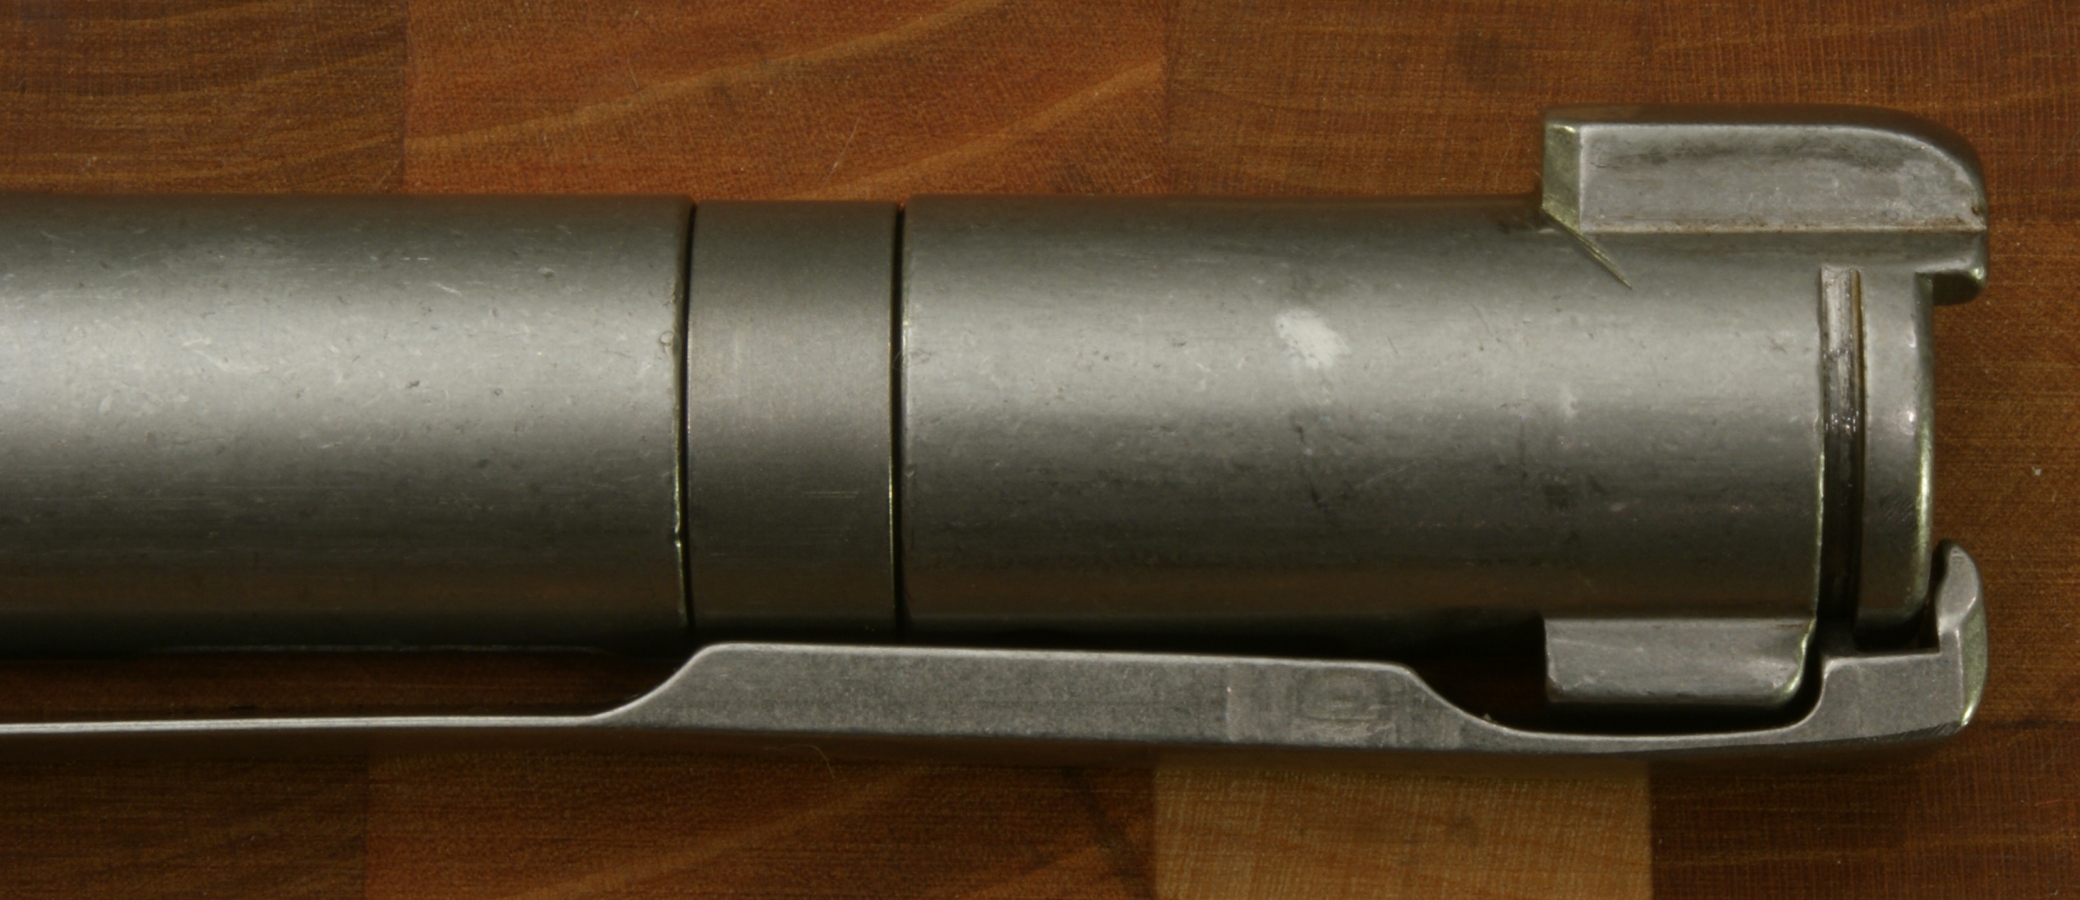
Figure 13
Rotate the extractor around the bolt towards the ejector slot. This allows the extractor tab to move out of the slot in the bolt.
Figure 14
You can now push the extractor forward with your thumb until it disengages from the extractor band.
Figure 15
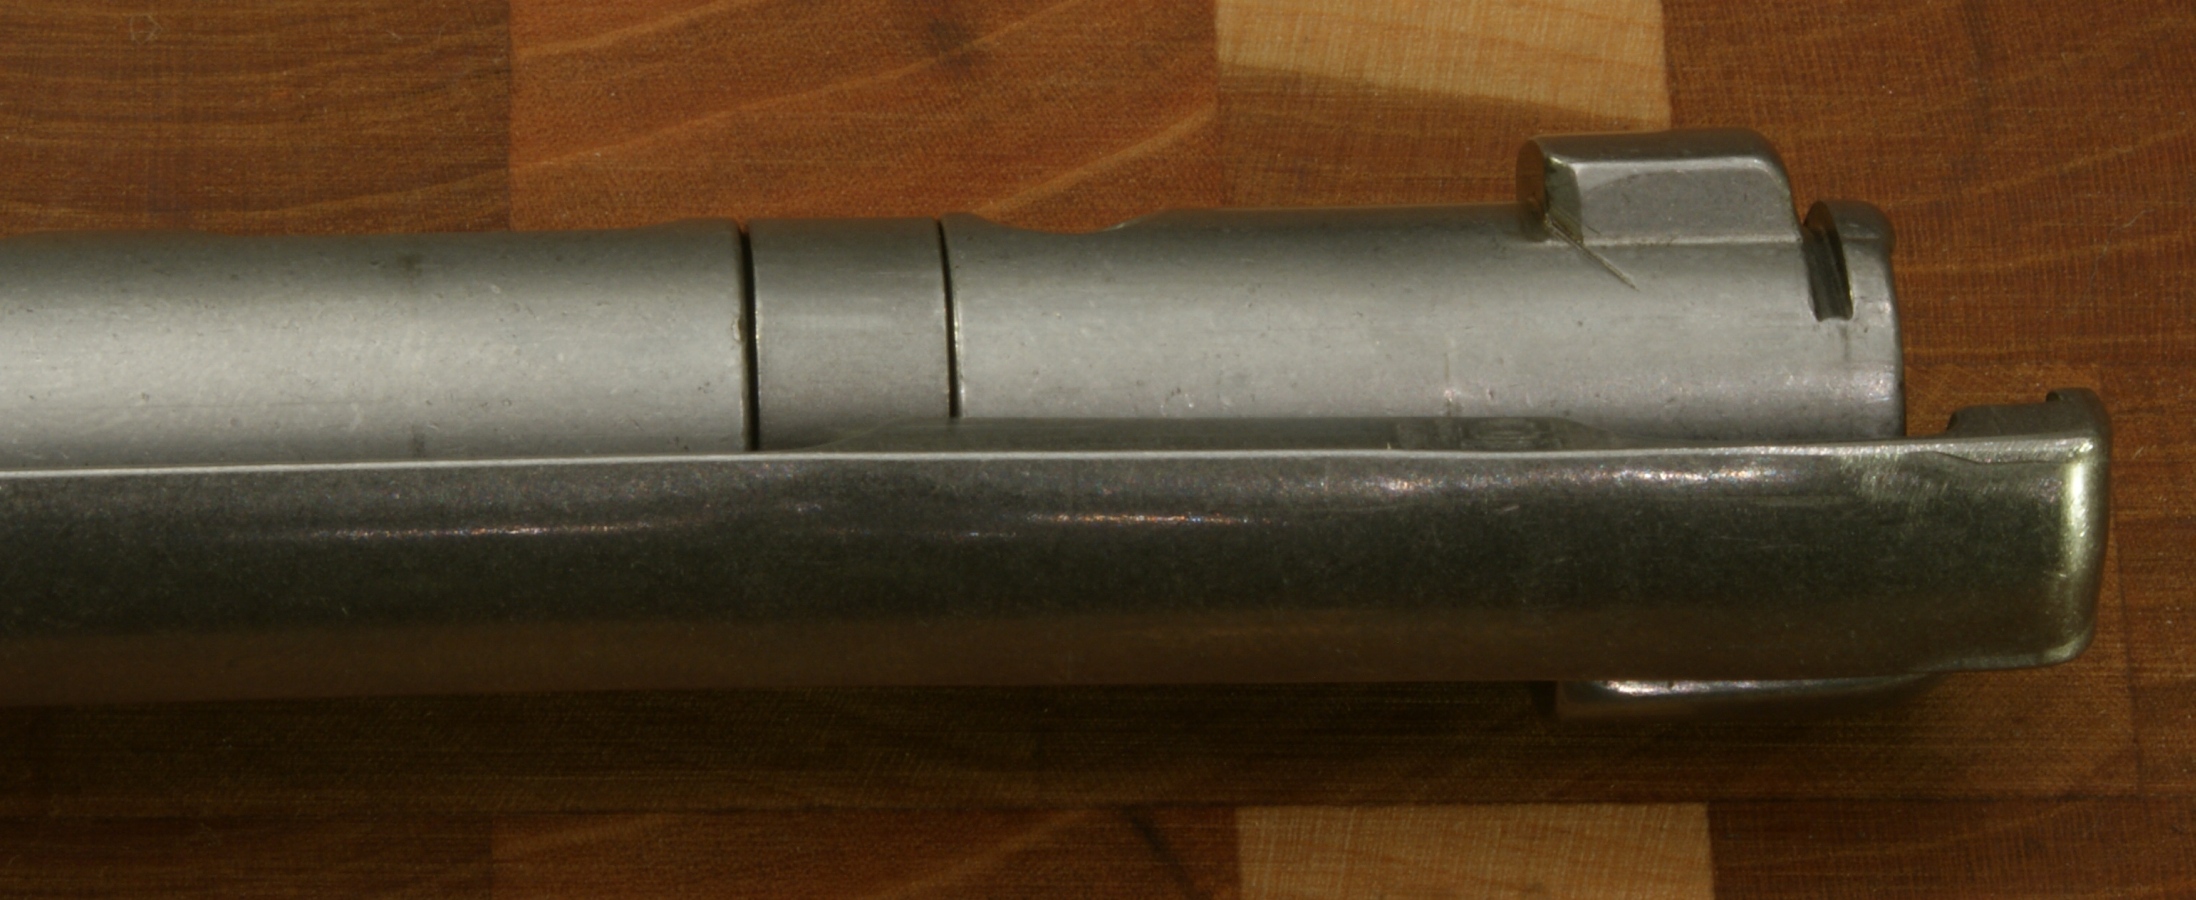
Figure 16
The extractor band can be removed by spreading it slightly and sliding it over the bolt. The photo below shows the bolt fully disassembled.
Figure 17
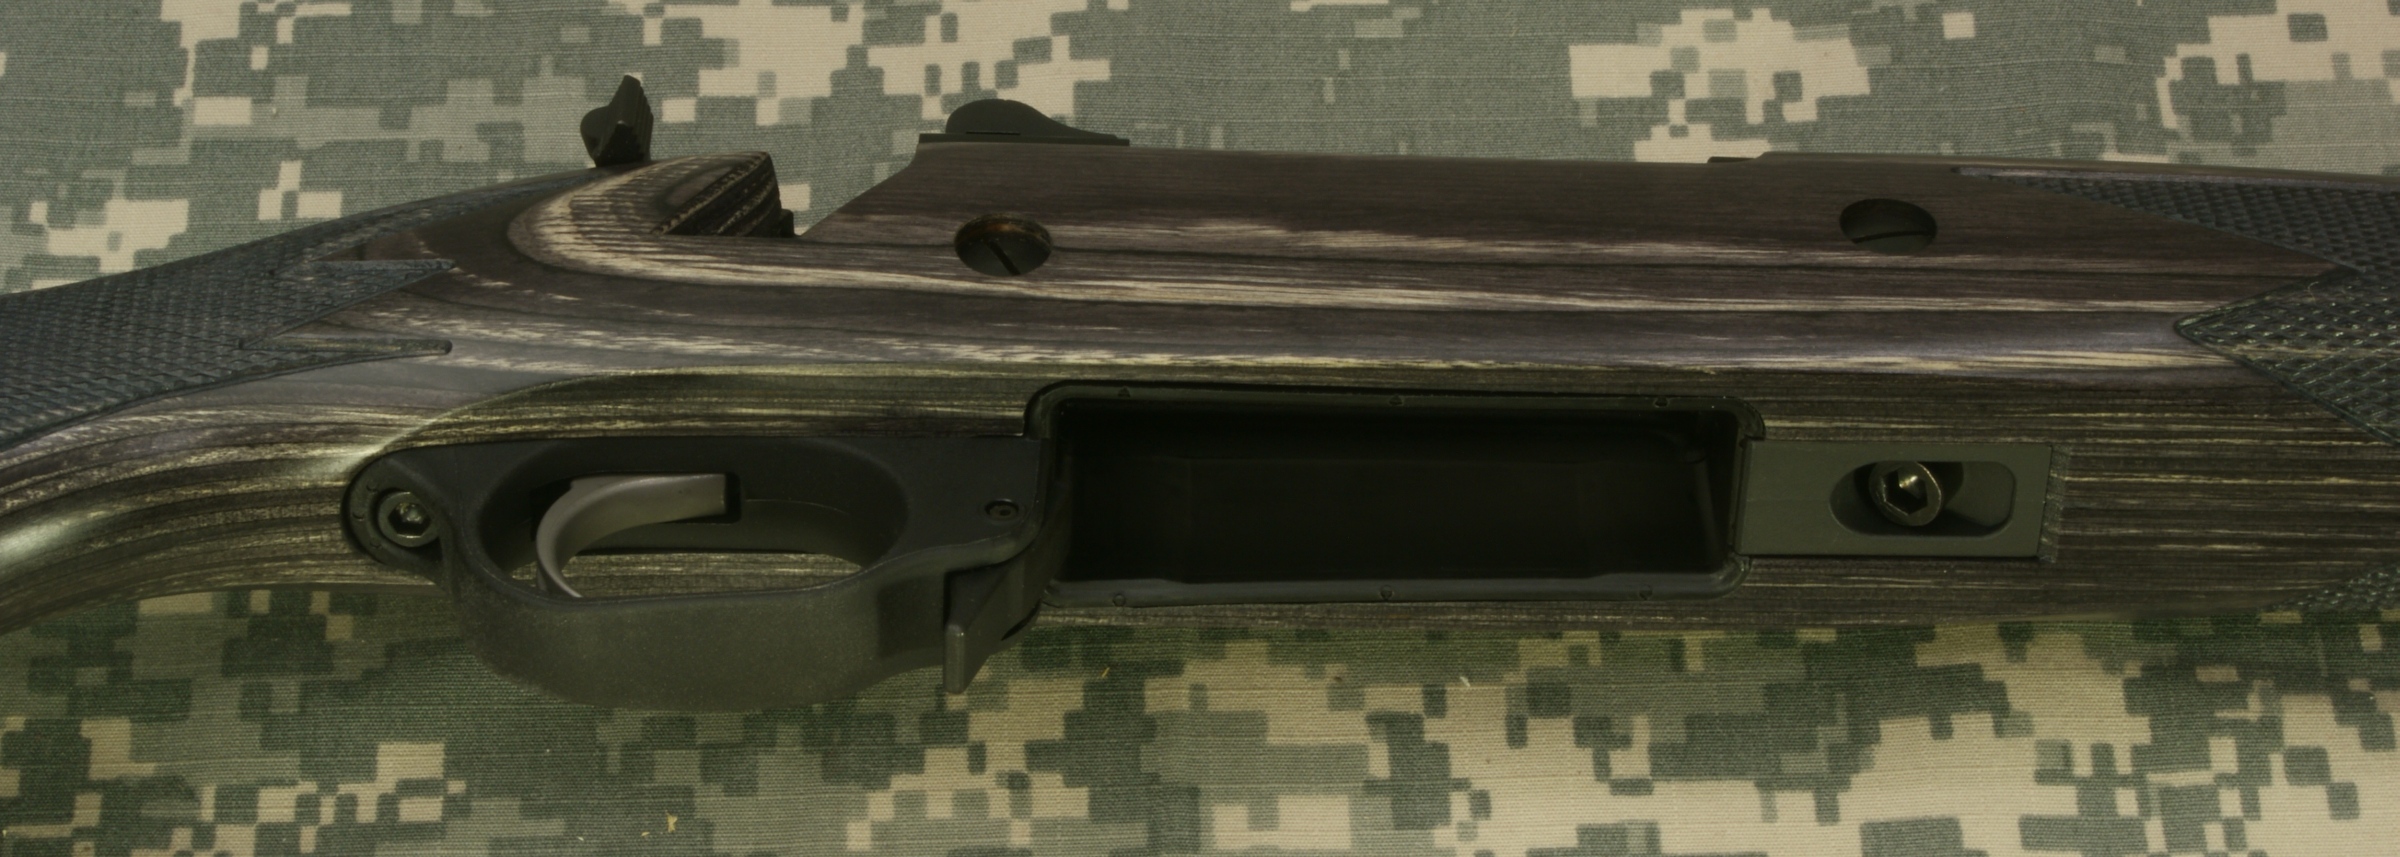
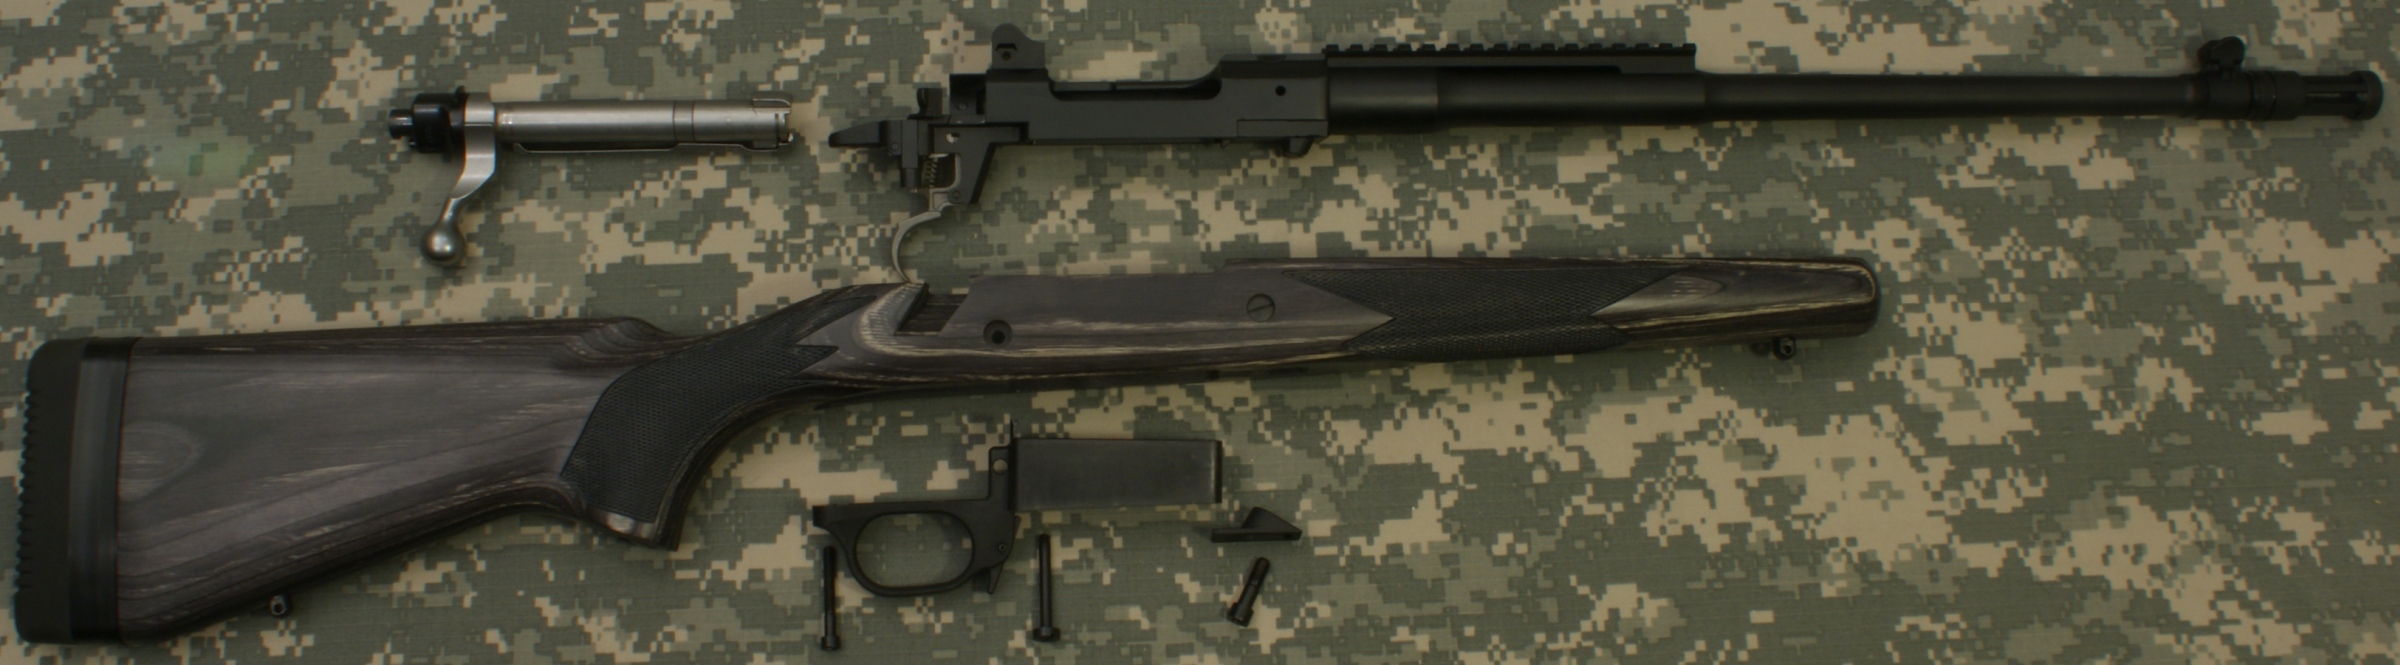
Step 7 - Removal of Stock
Position the rifle on it's side so you can access the mounting bolts.
Figure 18
Using a 3/16" Allen wrench, remove the Front Mounting Lug. On reassembly, it is extremely important that you properly tighten this lug so that you seat the barrel-action into the bedding surface of the stock. Ruger states this should be tightened to a torque of 90 in-lbs. My point here is that you can disassemble with an Allen wrench, but you should reassemble with hex tip in a socket so you can apply the torque required using a torque wrench. Also, you should recheck this torque a couple of time after you have been shooting the rifle. Because wood can compress, the recoil may increase the seating force causing more wood compression and loosen the bolt slightly. After checking it a couple of times, you should be good from that point further (or until you remove the stock again).
Figure 19
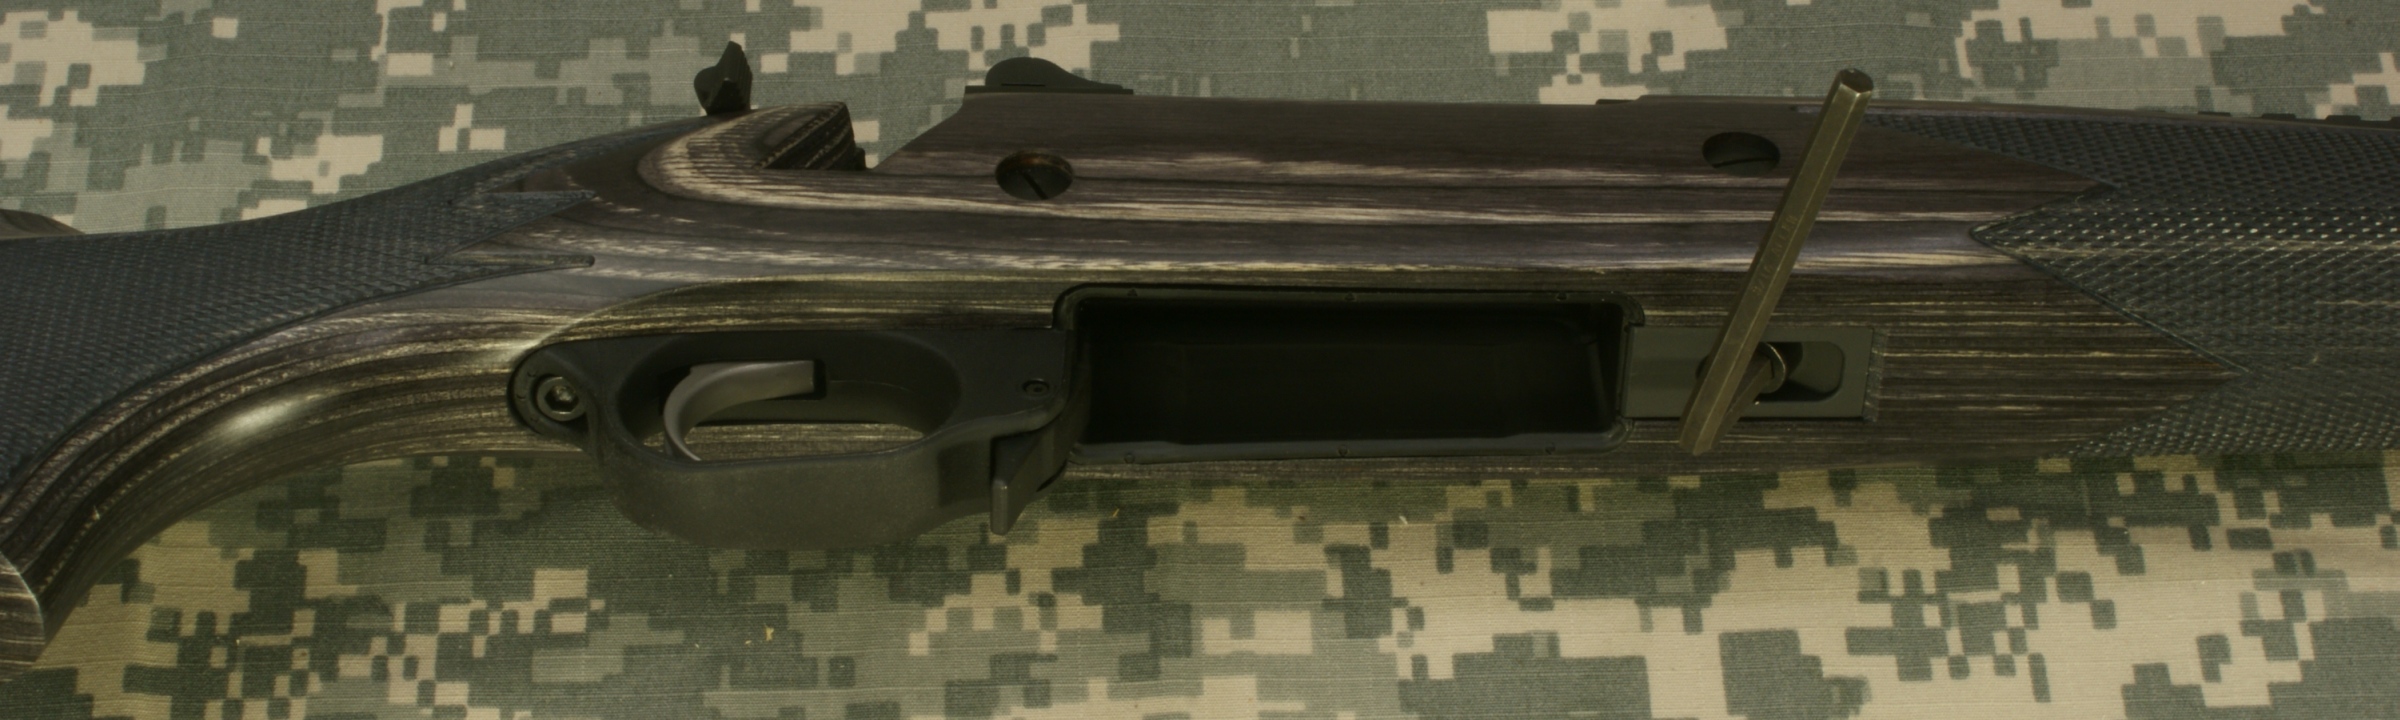
Figure 20
Next, using a 5/32" Allen Wrench, remove the screw in the rear portion of the Trigger Guard/Magazine Well. On reassembly, this screw should be torqued to 20 in-lbs and it should be rechecked after shooting just like the one above.
Figure 21
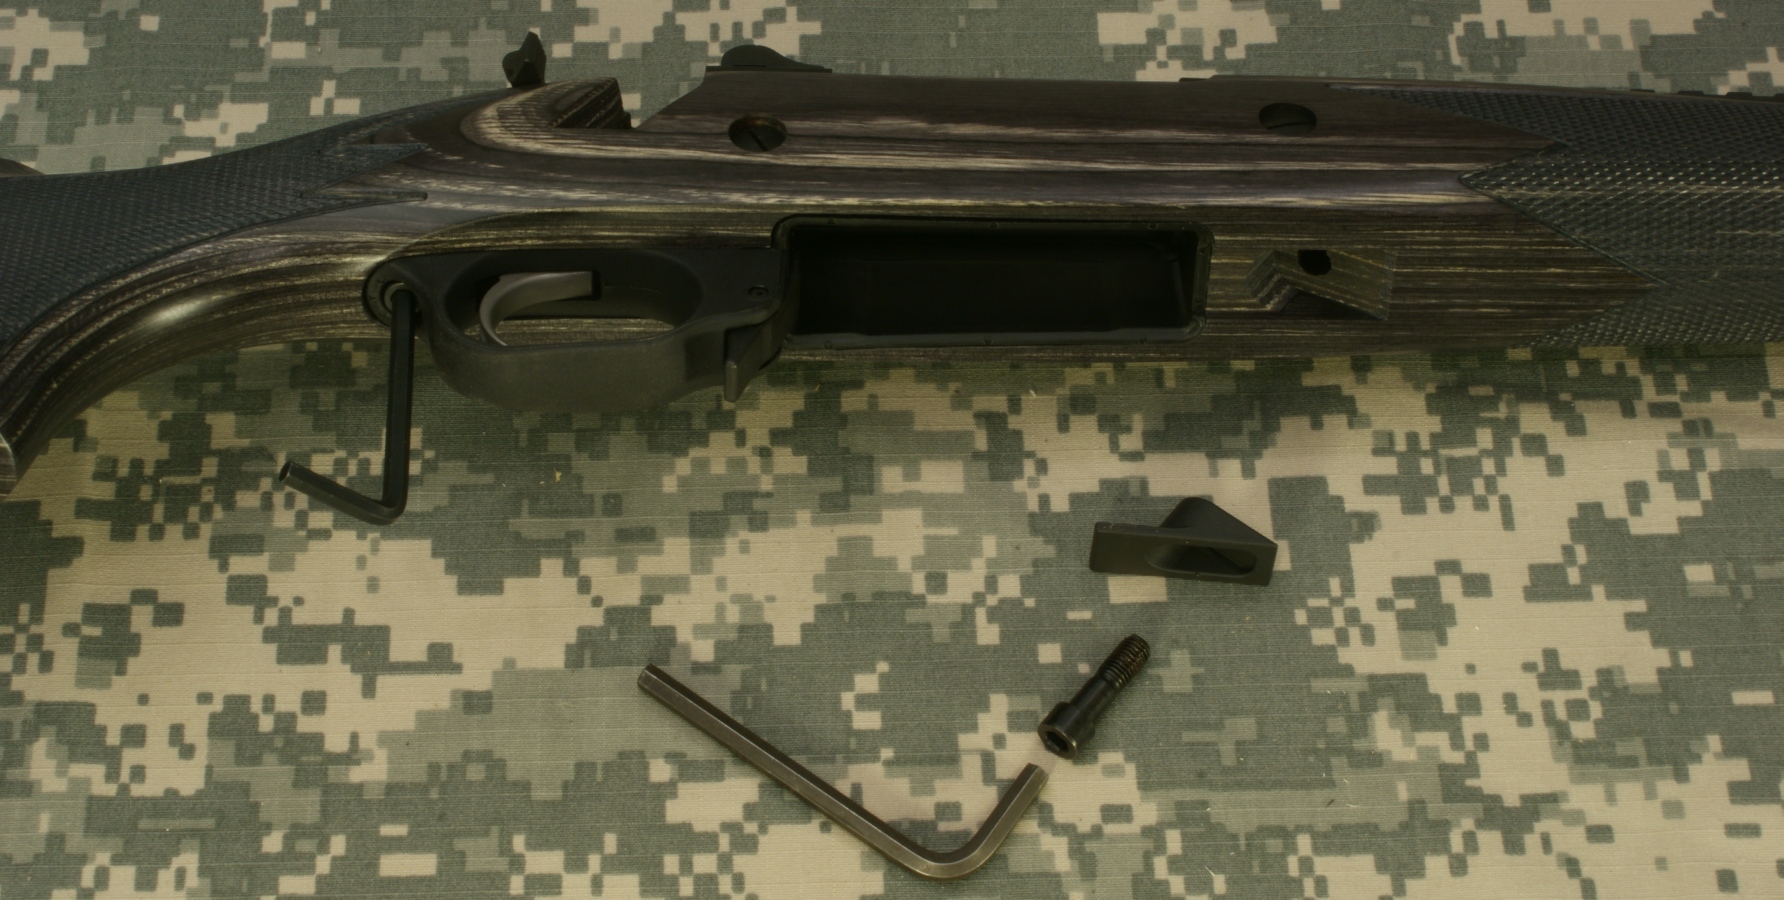
Figure 22

Remove the rear cross bolt that runs through the stock. If for some reason you remove both, they are actually two different bolts and you should pay attention on reassembly to get them in the right locations.
Figure 23
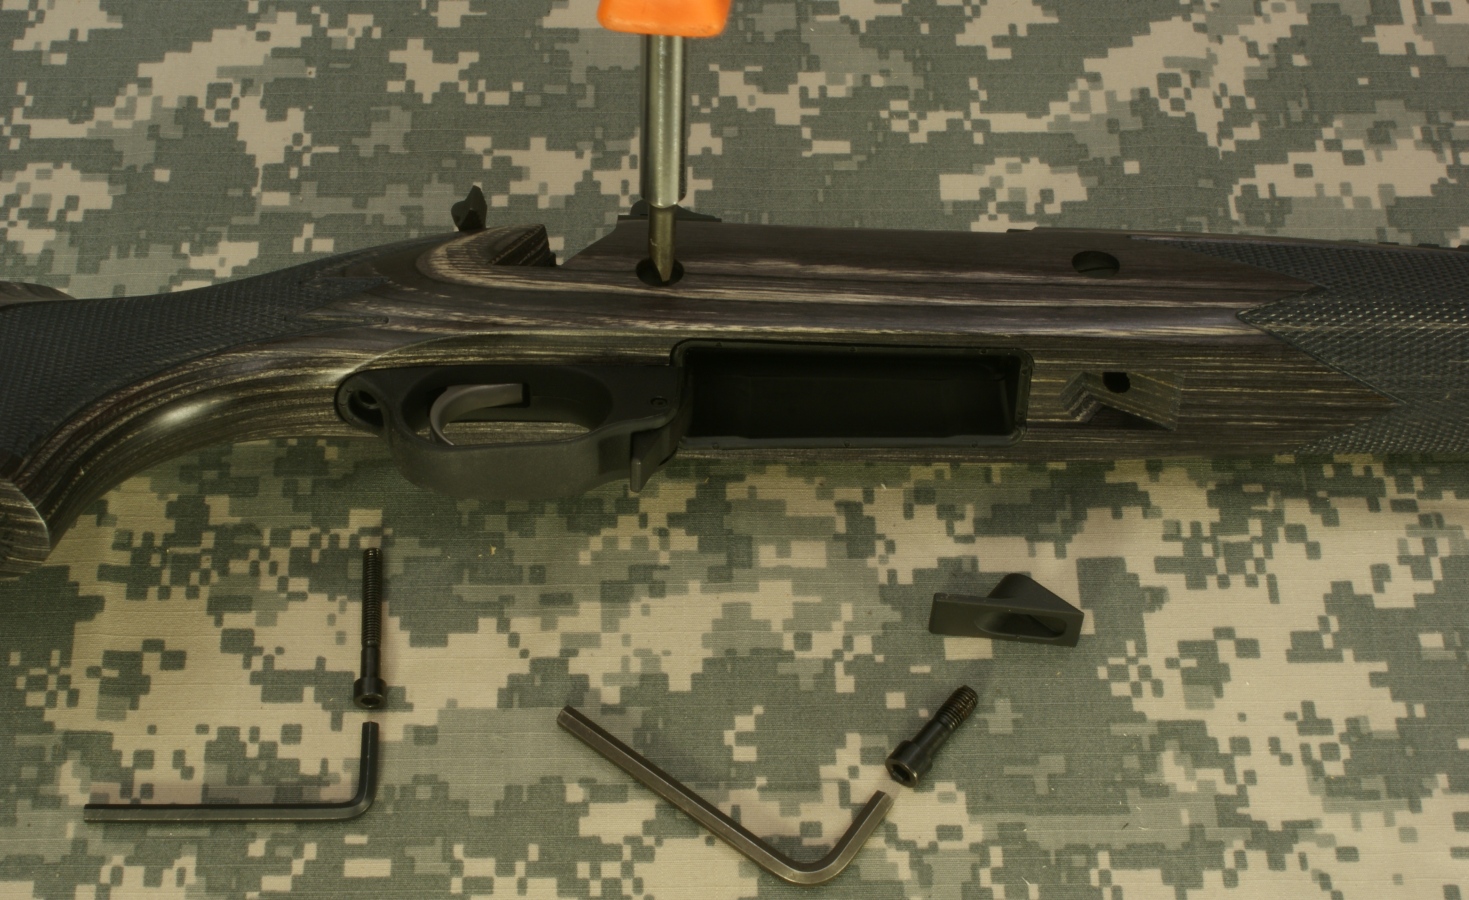
Figure 24
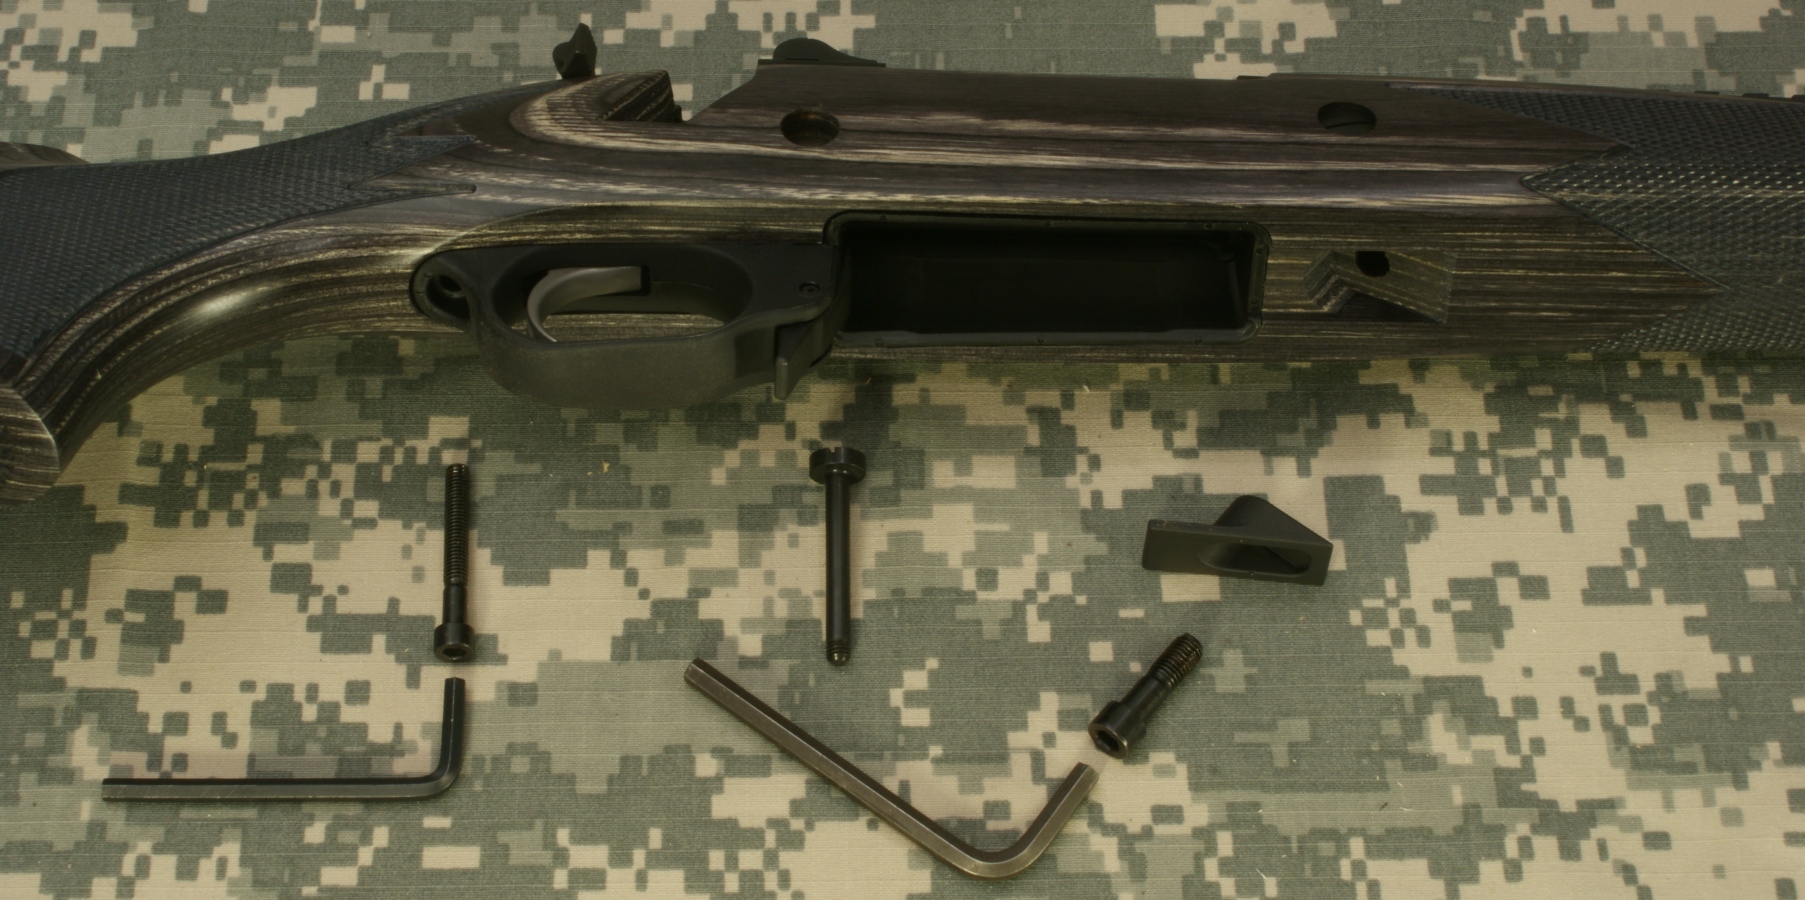
The Trigger Guard/Magazine Well can now be removed from the rifle.
Figure 25
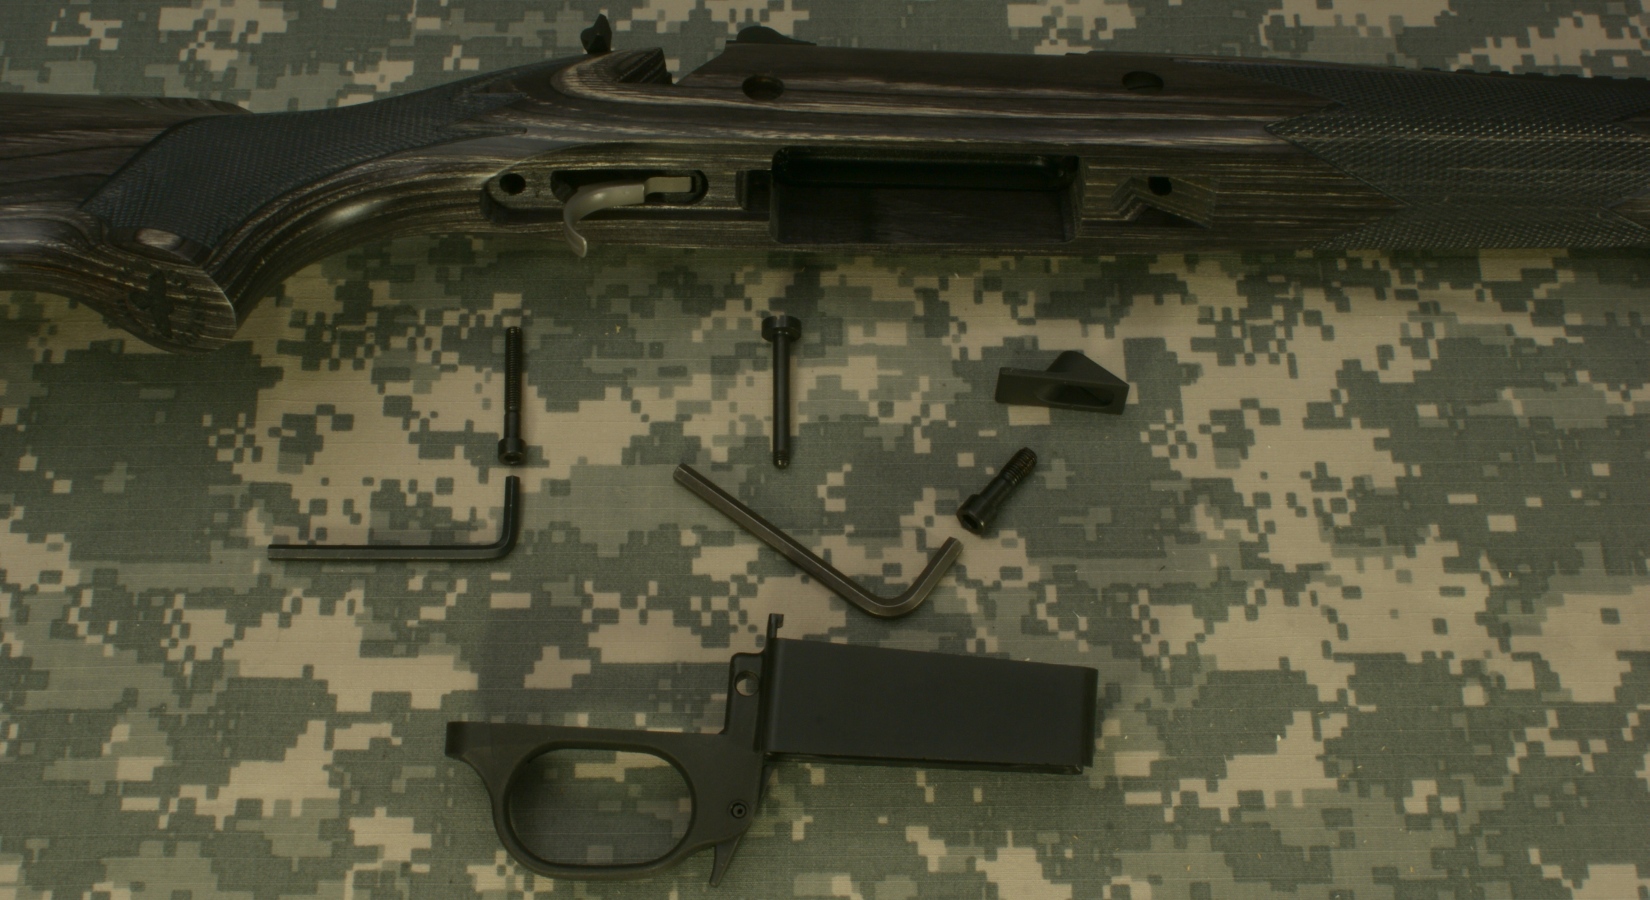
The next step is to lift the barrel/receiver up and out of the stock. You should try to lift it directly up and not rotate it out of the stock. Rotating it could damage the stock or trigger.
Figure 26
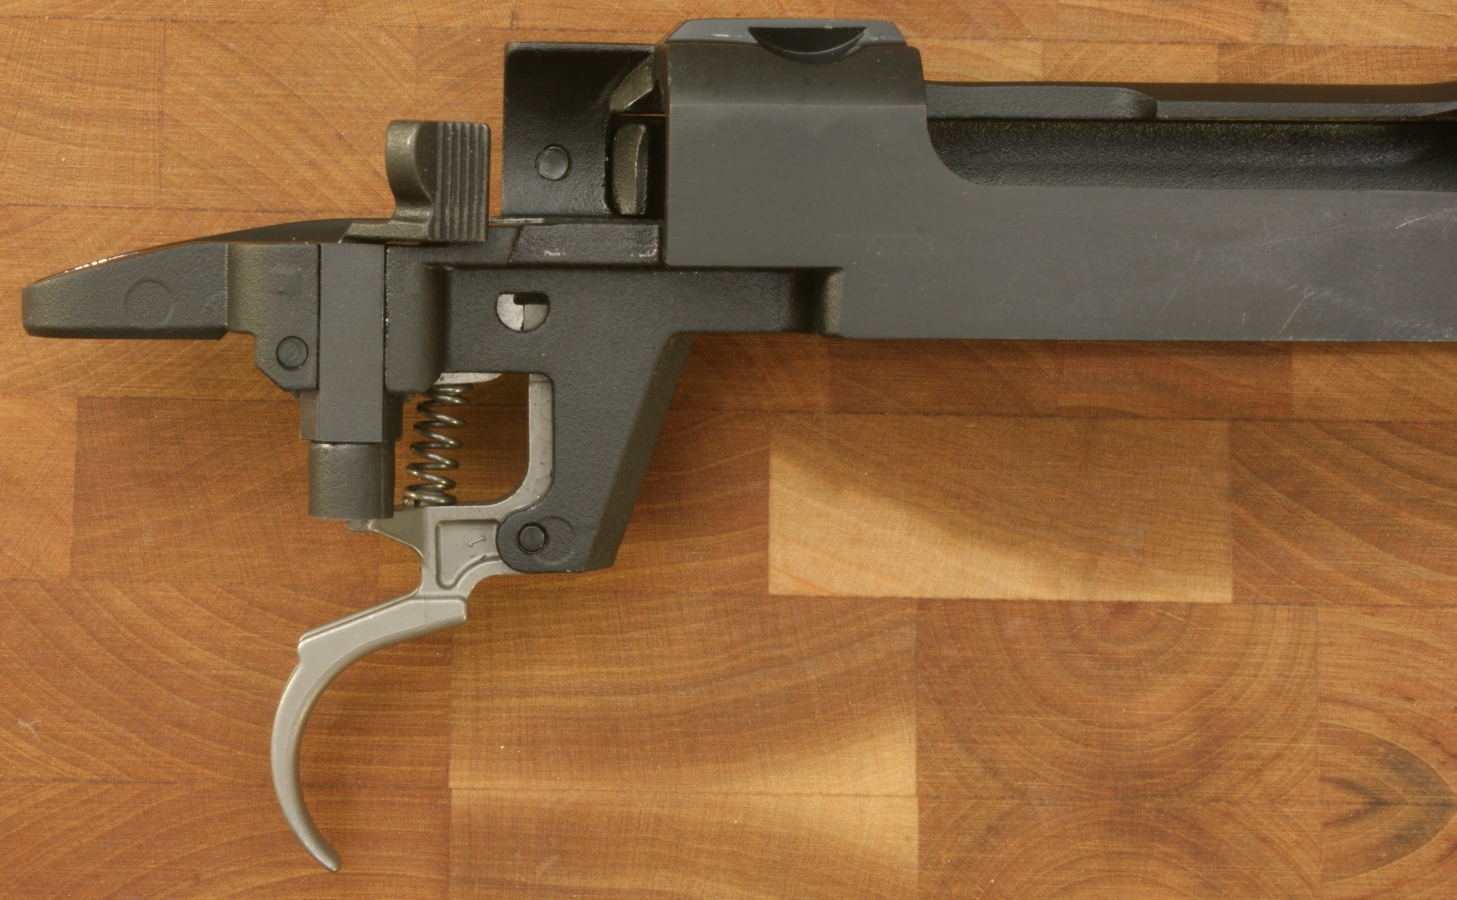
Step 8 - Remove the Trigger
To remove the trigger, the safety selector should be in the fire position.
Figure 27
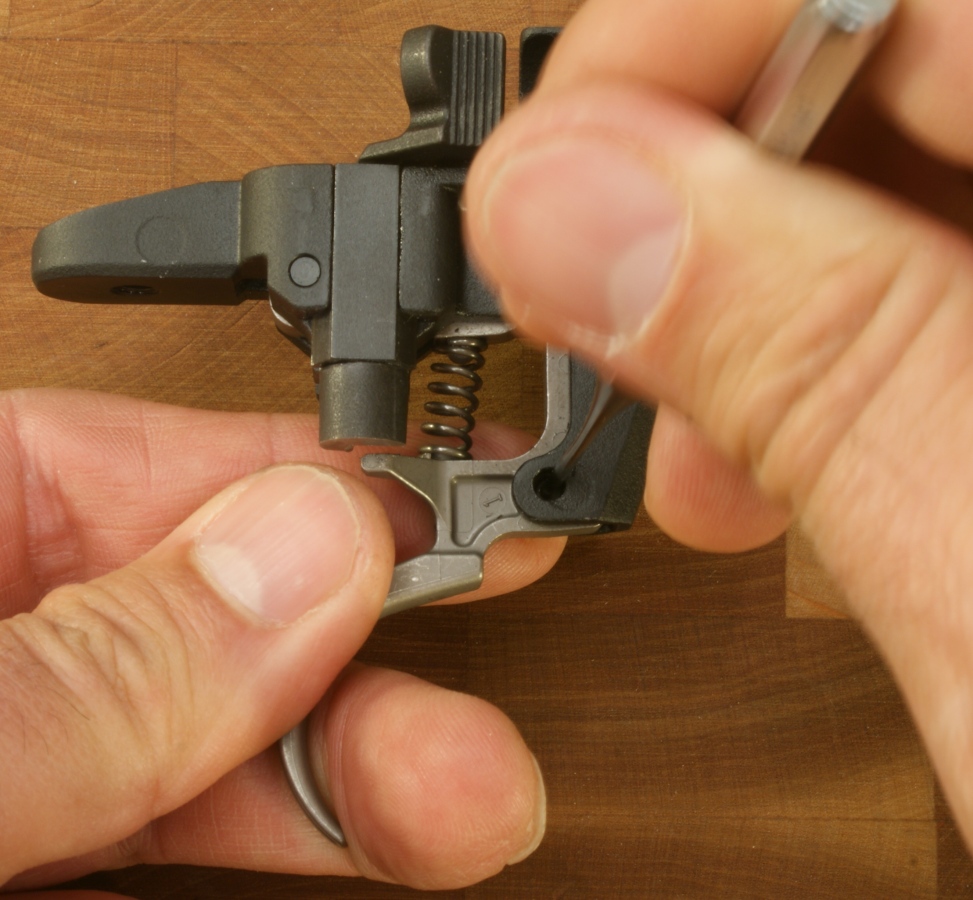
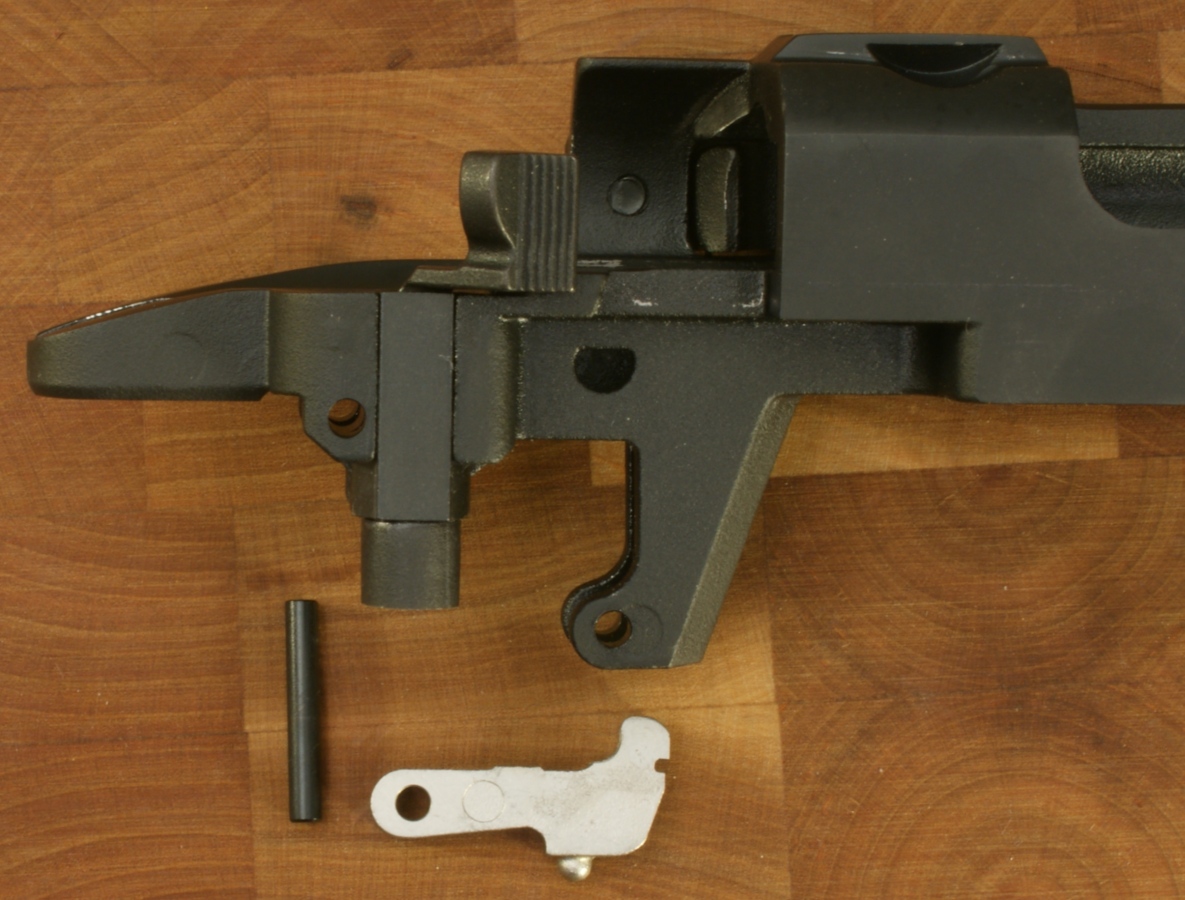
You should press up on the trigger to remove the spring force from the pivot pin and then press the pivot pin out with a small punch.
Figure 28
Figure 29
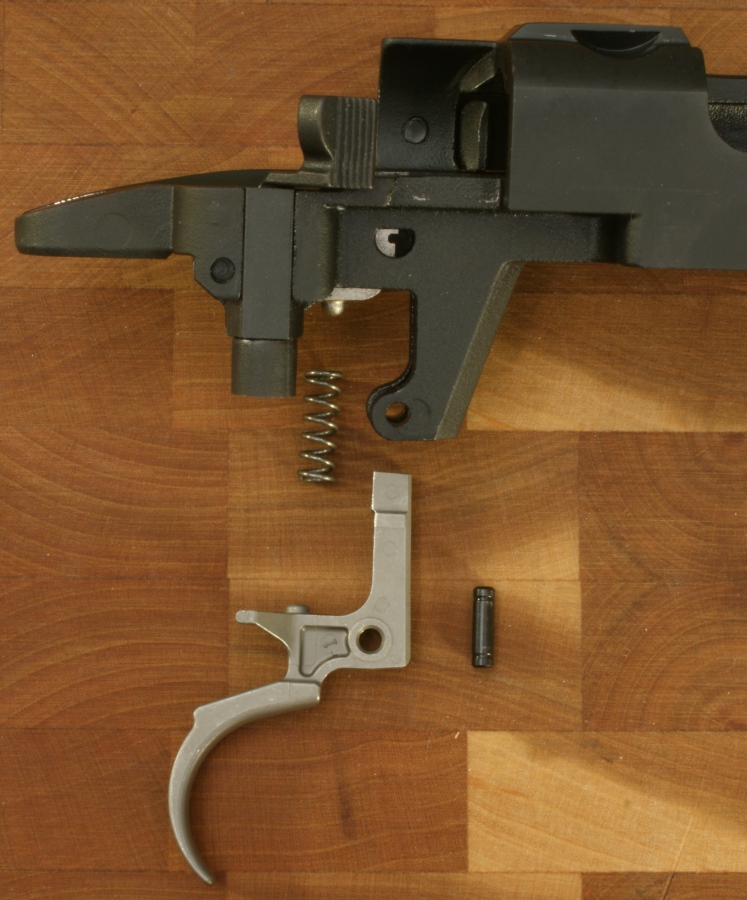
Step 9 - Remove the Sear
With the trigger and spring removed, there is no longer any force on the sear and sear pivot pin. The pivot pin will easily push out and you can rotate the sear forward and up out of the receiver. Rotating the receiver over makes this easy to do.
Figure 30
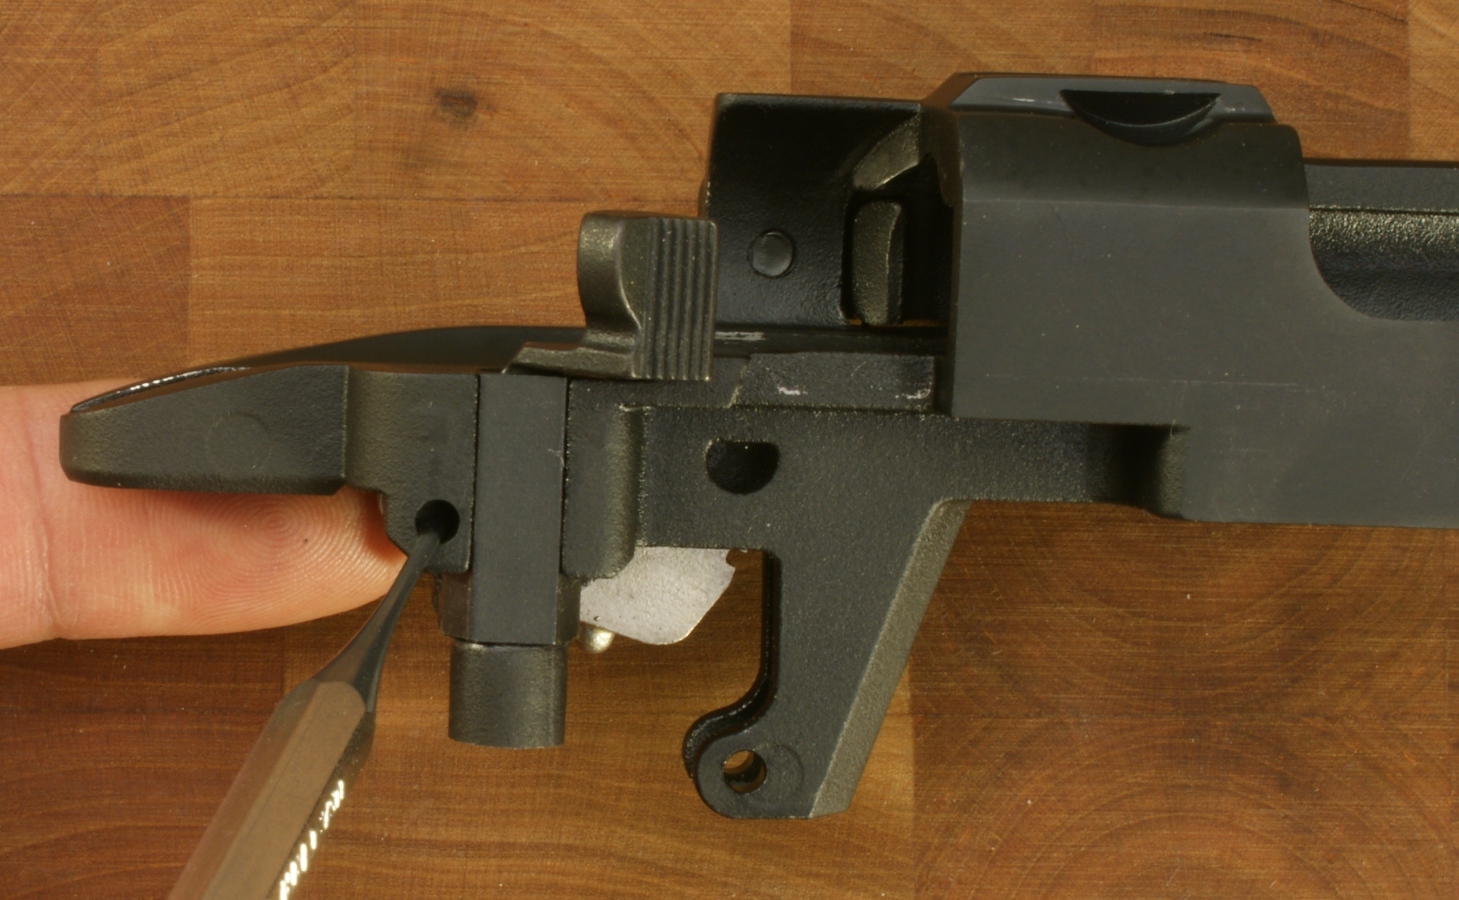
Figure 31
Step 10 - Remove Safety Assembly
Rotate the safety selector so that the upper portion is completely over the center of the receiver rear tang.
Figure 32
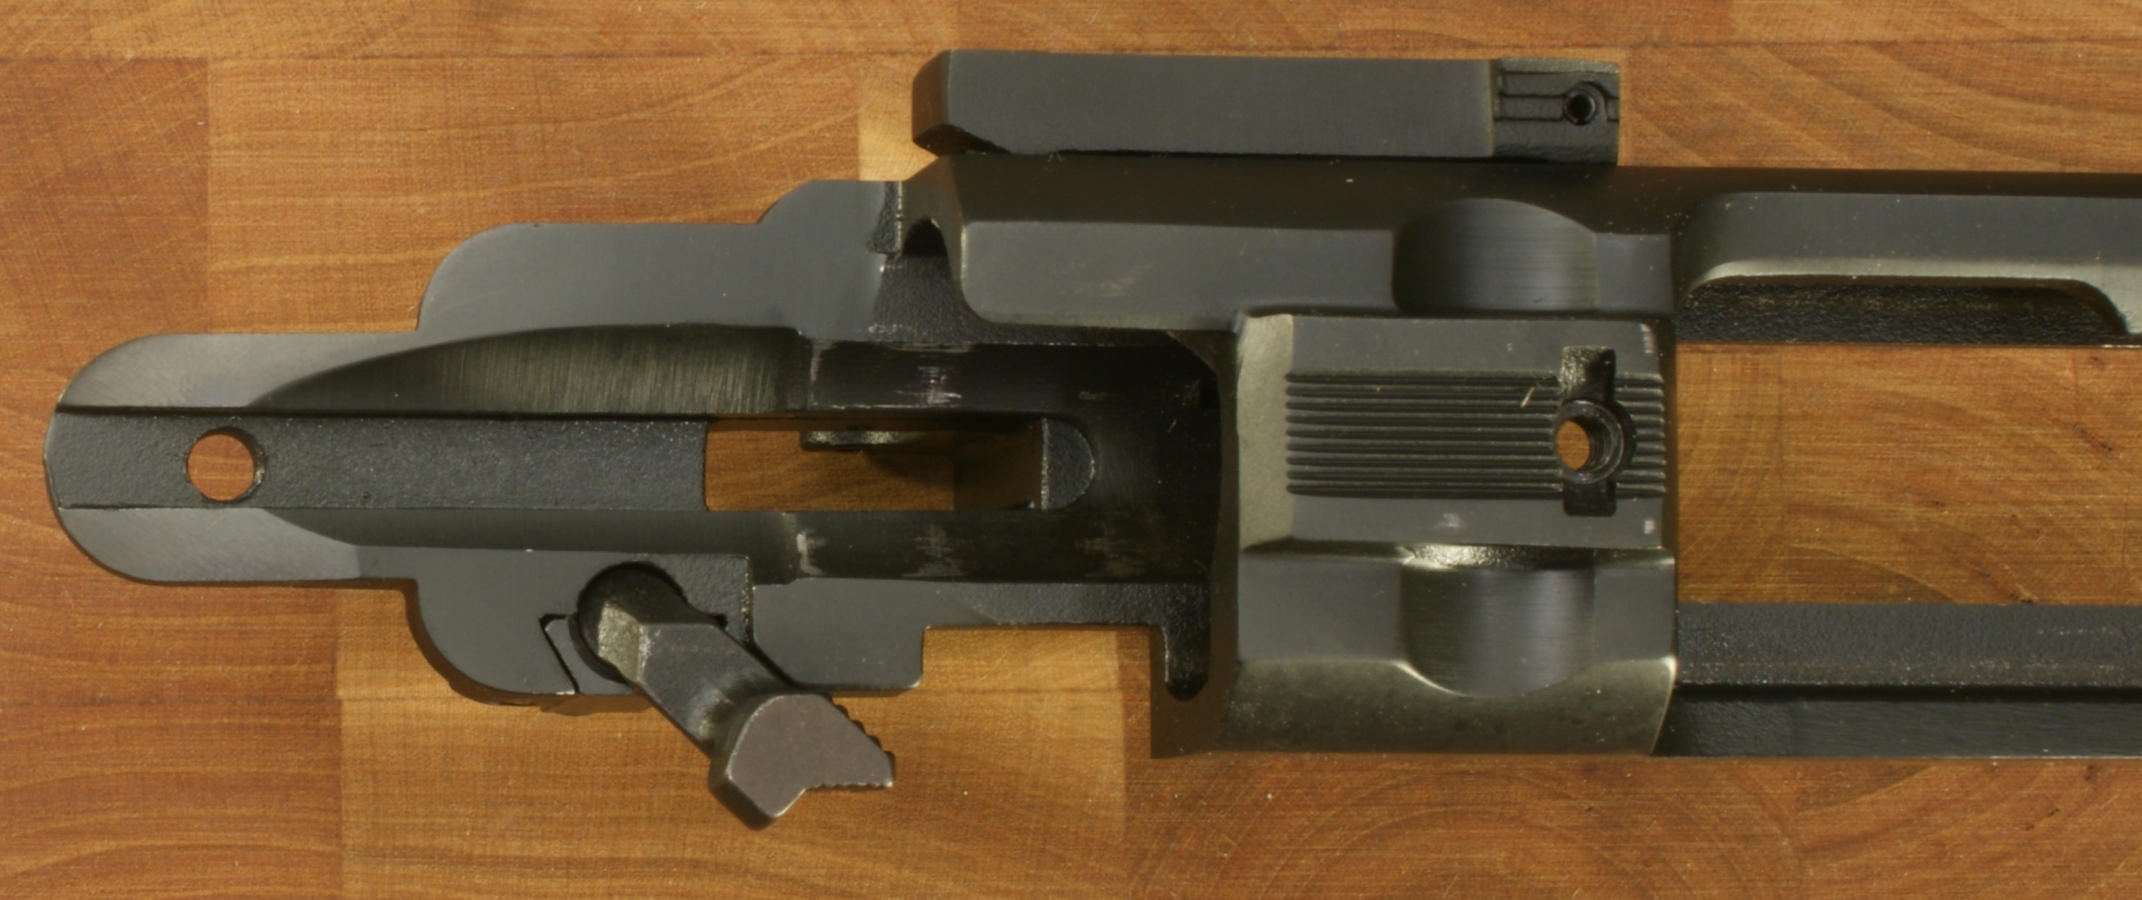
Figure 33
You are going to hold the top and bottom of the safety selector firm against the receiver as you slide the dove tailed retainer up and out of the slot. I suggest doing this on a soft light colored surface. The safety selector has a spring loaded plunger just behind the selector. If you are not careful, this plunger will pop out and finding it may be difficult.
Figure 34
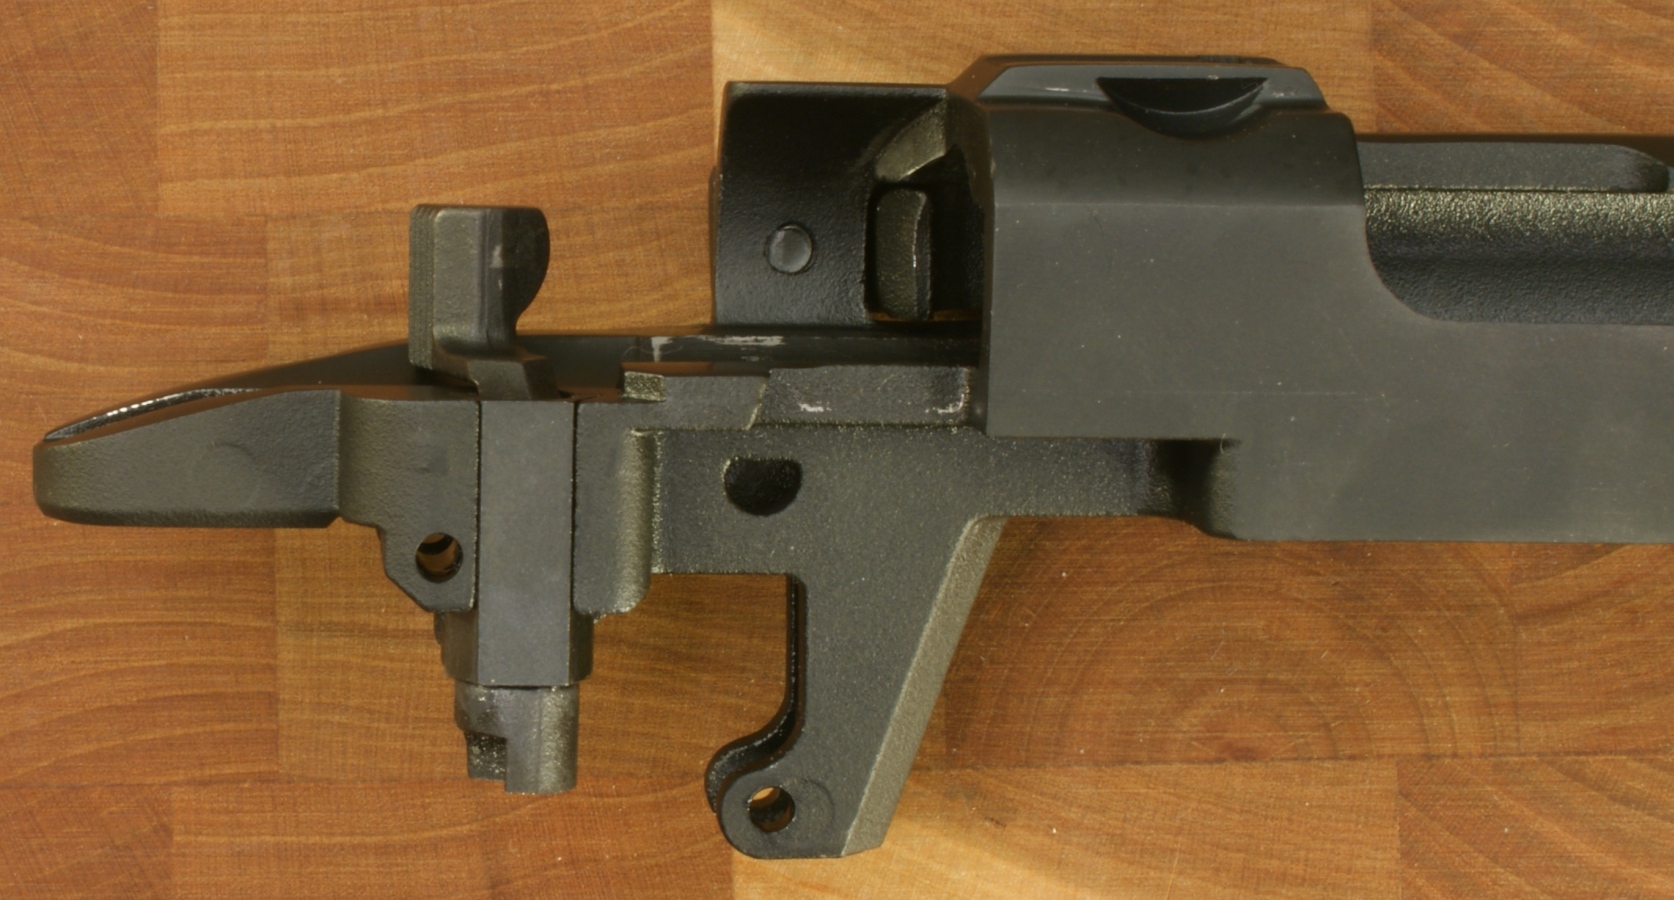
Figure 35

You can see all the pieces associated with the safety selector below. One thing I want to point out is that the spring seemed to have one end larger than the other. Make sure the smaller end is the one in contact with the plunger. I had it the other way when I first reassembled the rifle and the larger diameter end was sticking in the hole and preventing good contact of the plunger with the safety selector which was causing a rattle. After I flipped the spring, it was back to the original condition with no rattle.
Figure 36

Reassembly
In general, reassembly is the reverse of disassembly. This is covered in the Instruction Manual and also in the video mentioned above. The critical difference is that you need to properly torque the bolts attaching the barrel/receiver to the stock. I talk about this further in Step 7 above. Also, you should lubricate the parts at all potential wear locations.
Rail Removal & Rail
Since I had checked my rail mounting screws and knew they were only snug tight, I decided to go ahead and remove the rail and take a couple of more photos.
Figure 37
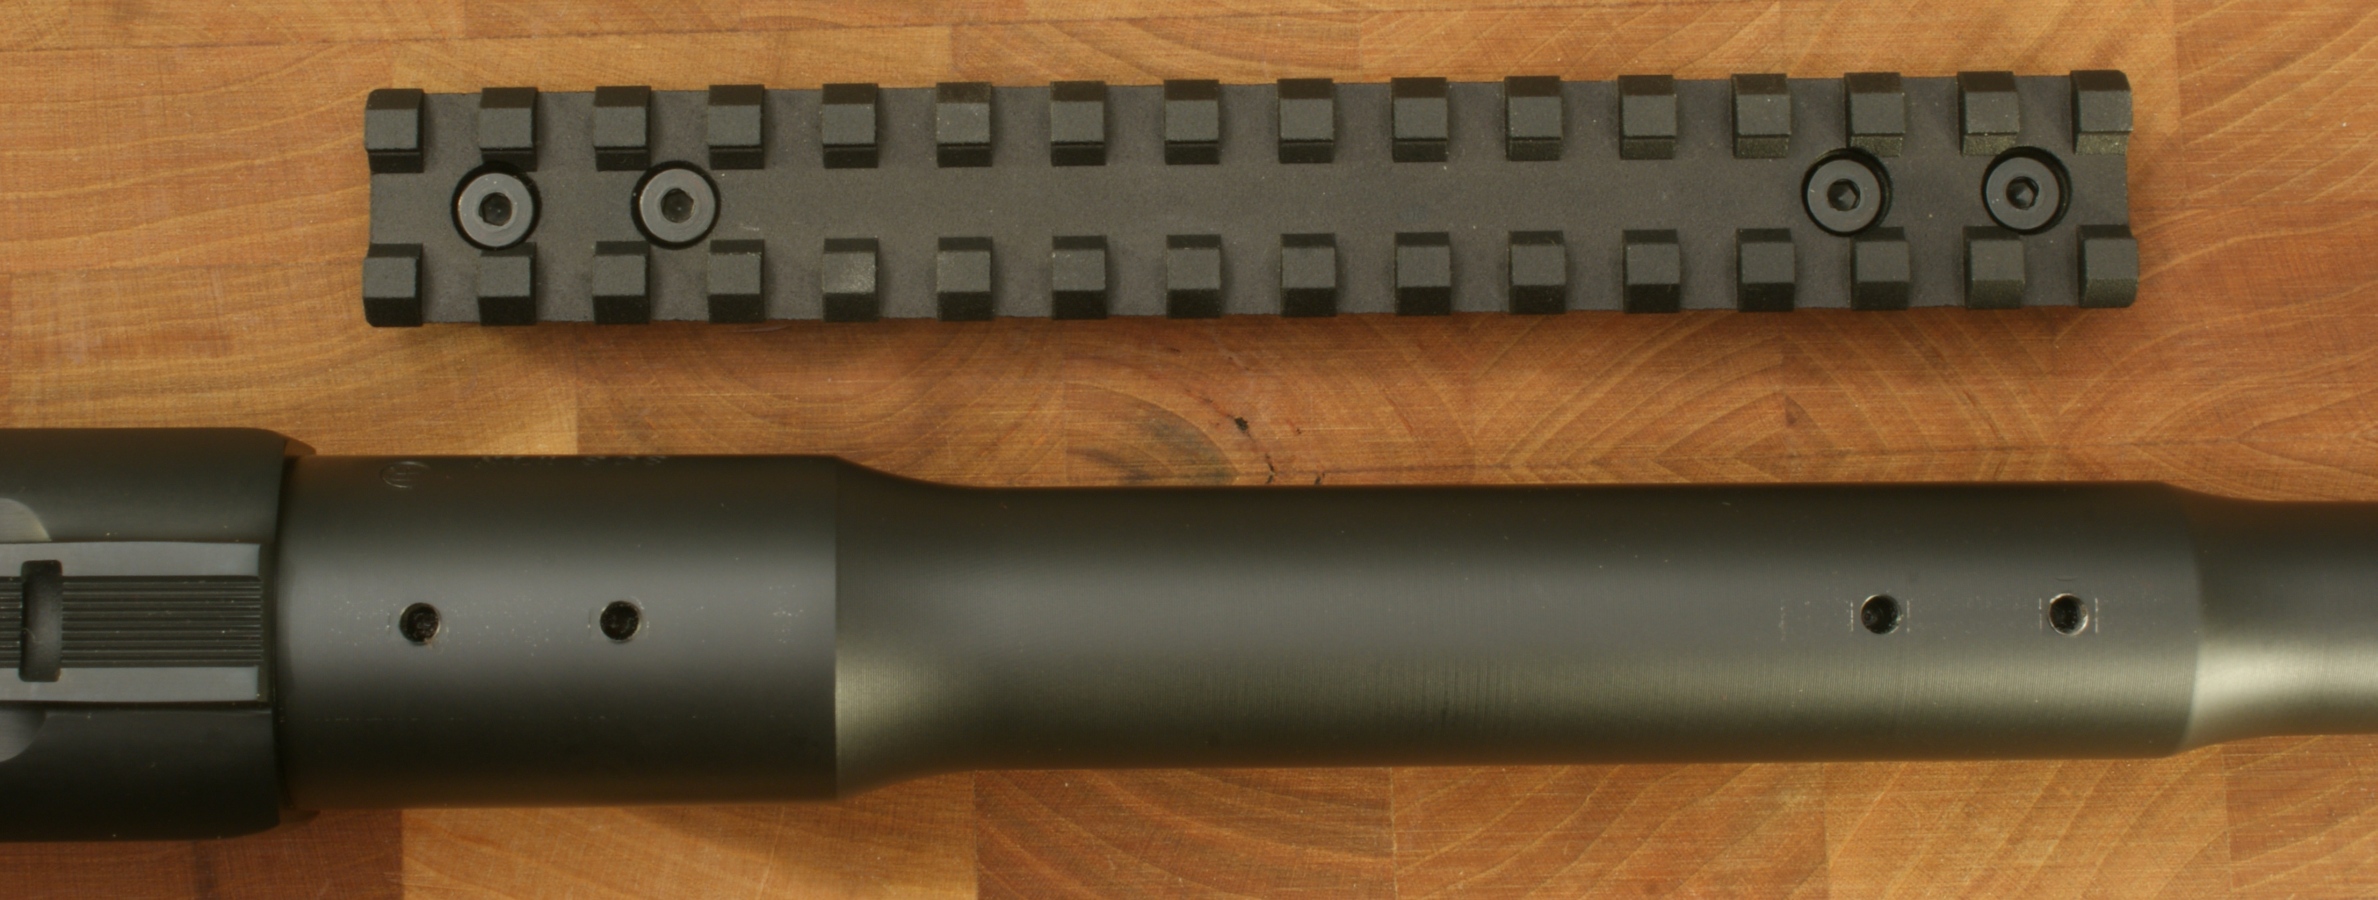
Figure 38

Figure 39

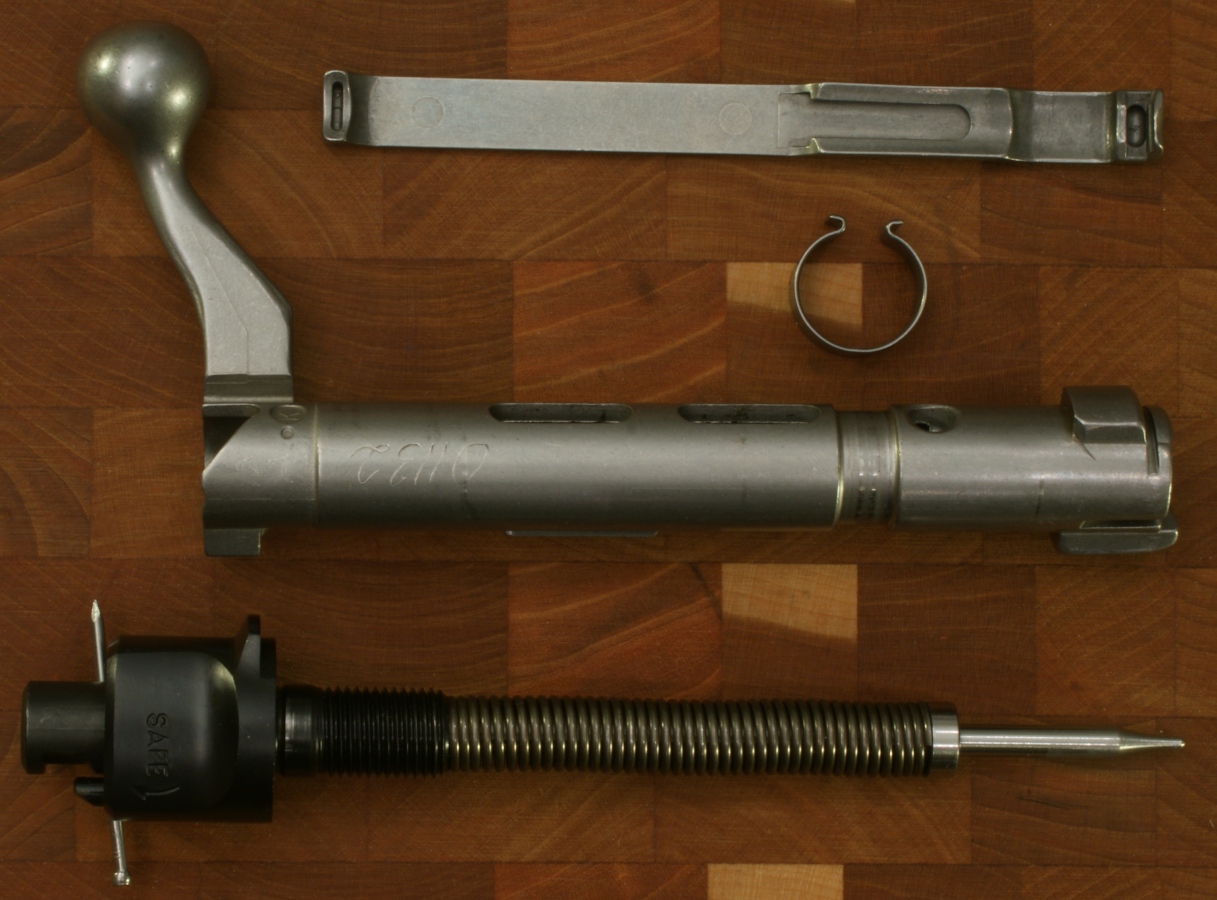
General Photos
This next group of photos show more details of the disassembled parts and are provided for your viewing pleasure. I didn't spend much time on the commentary, but I have pointed out a few details.
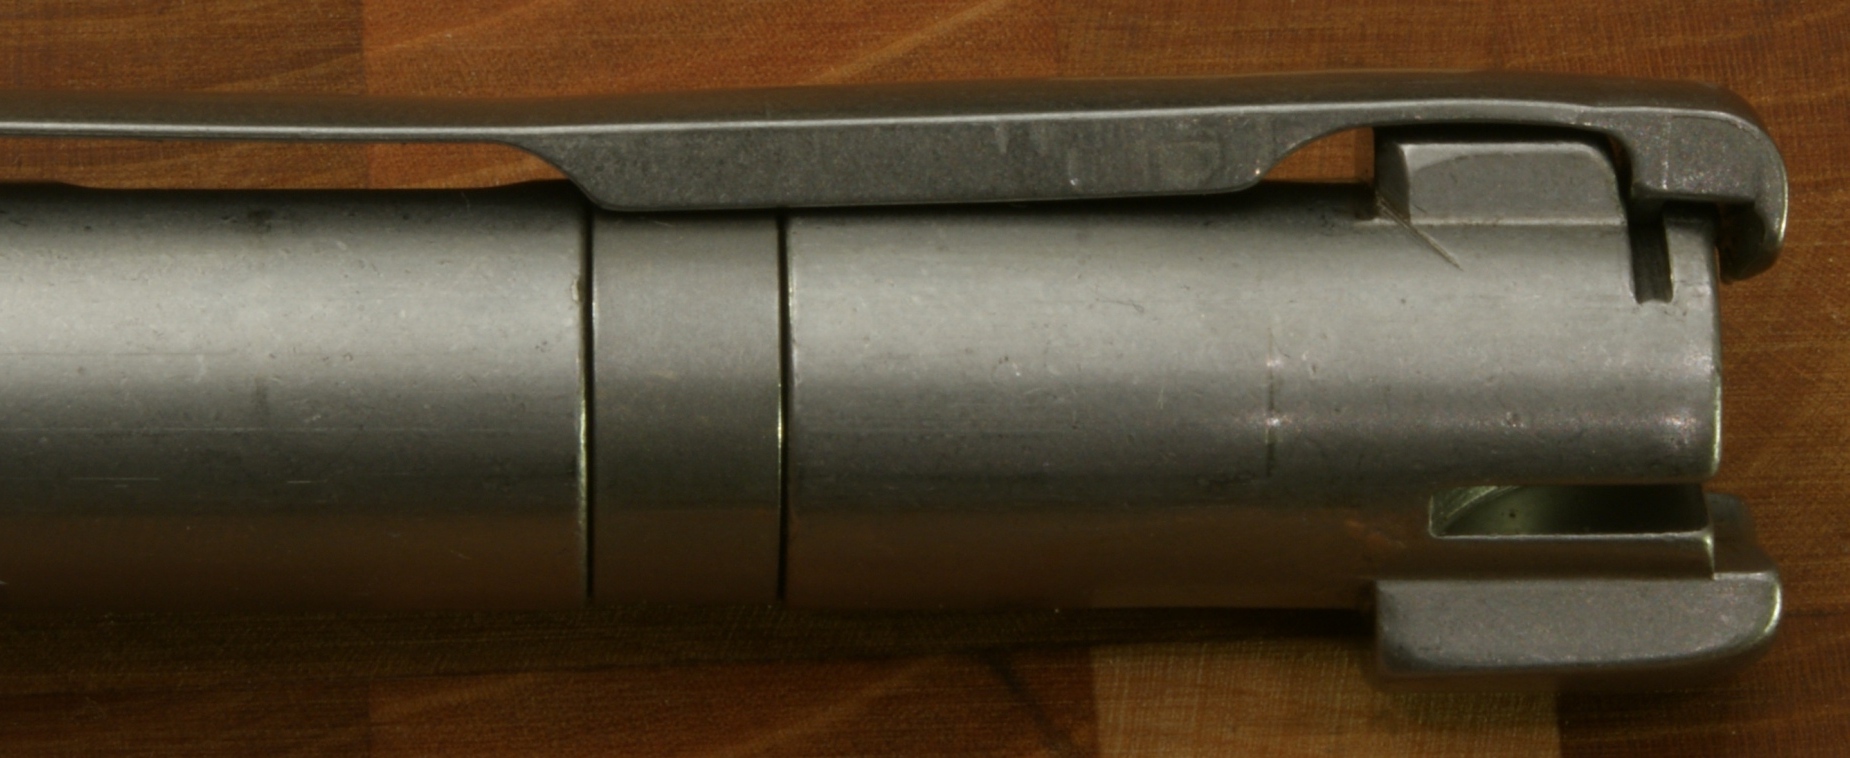
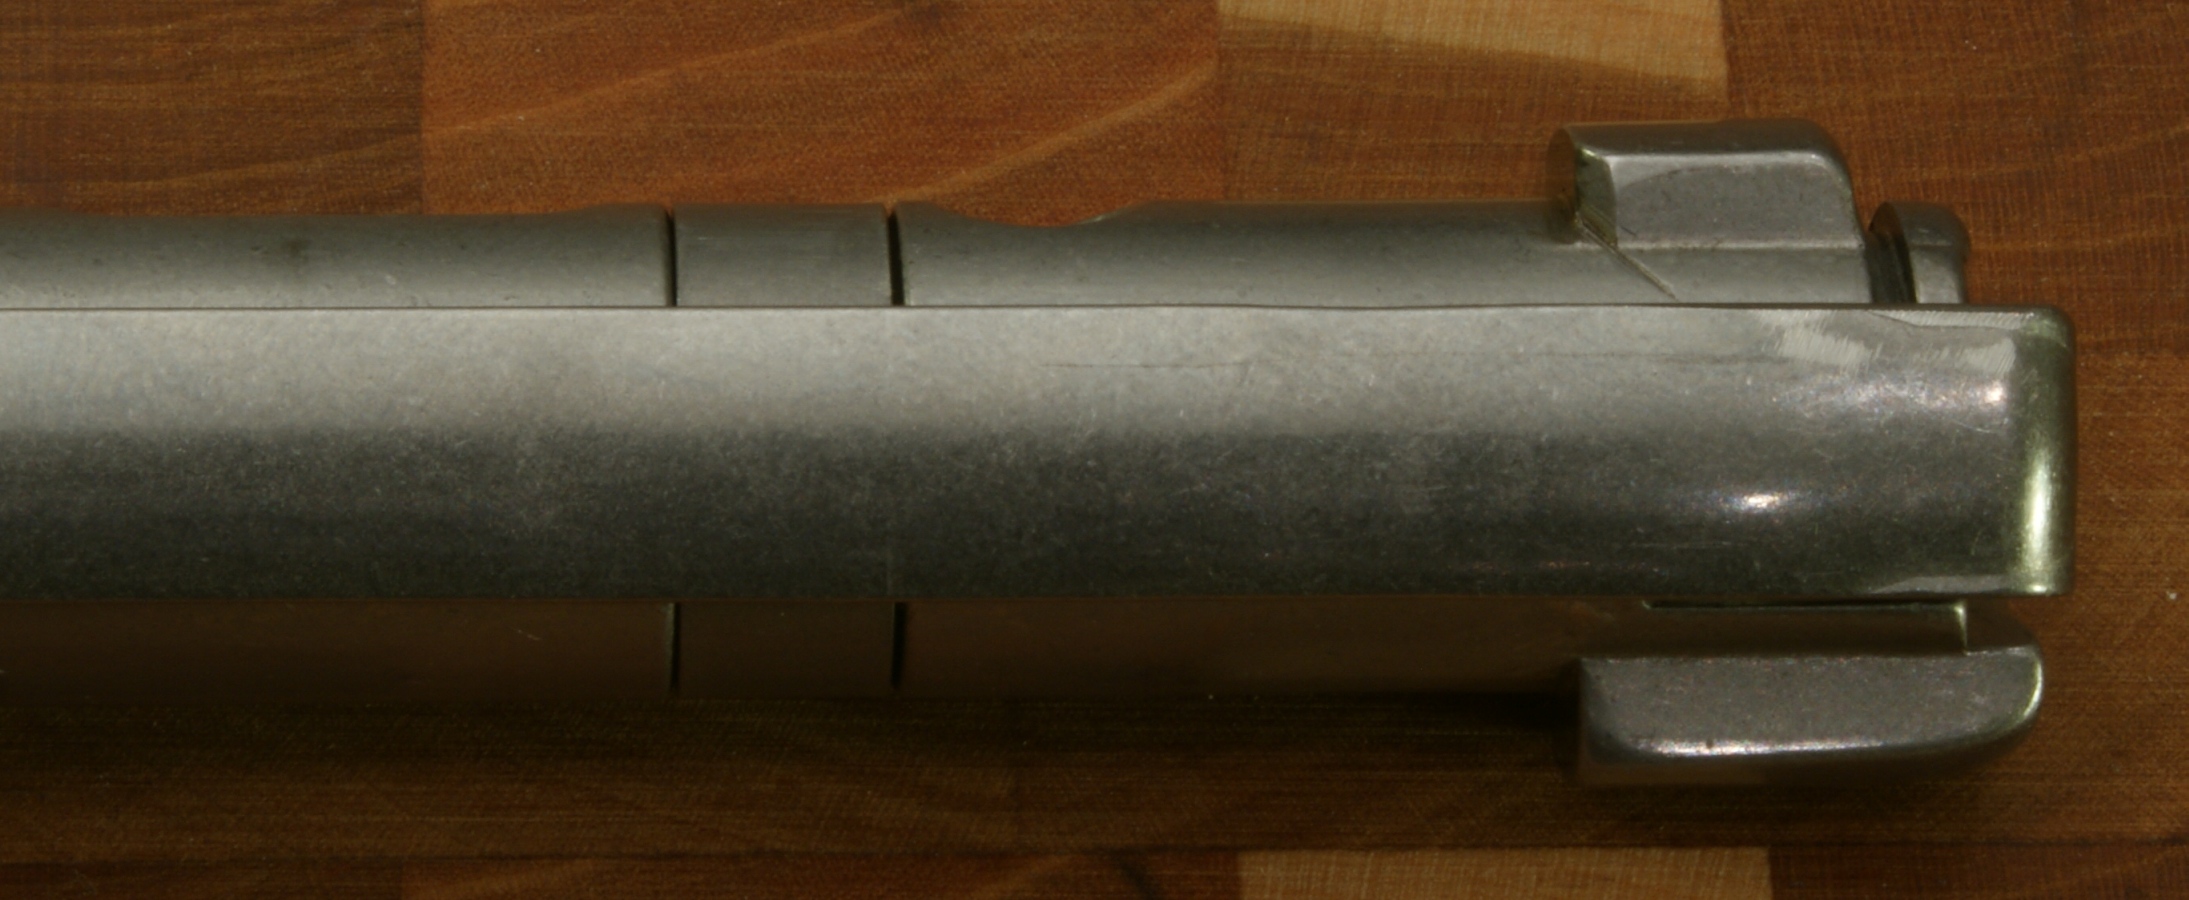
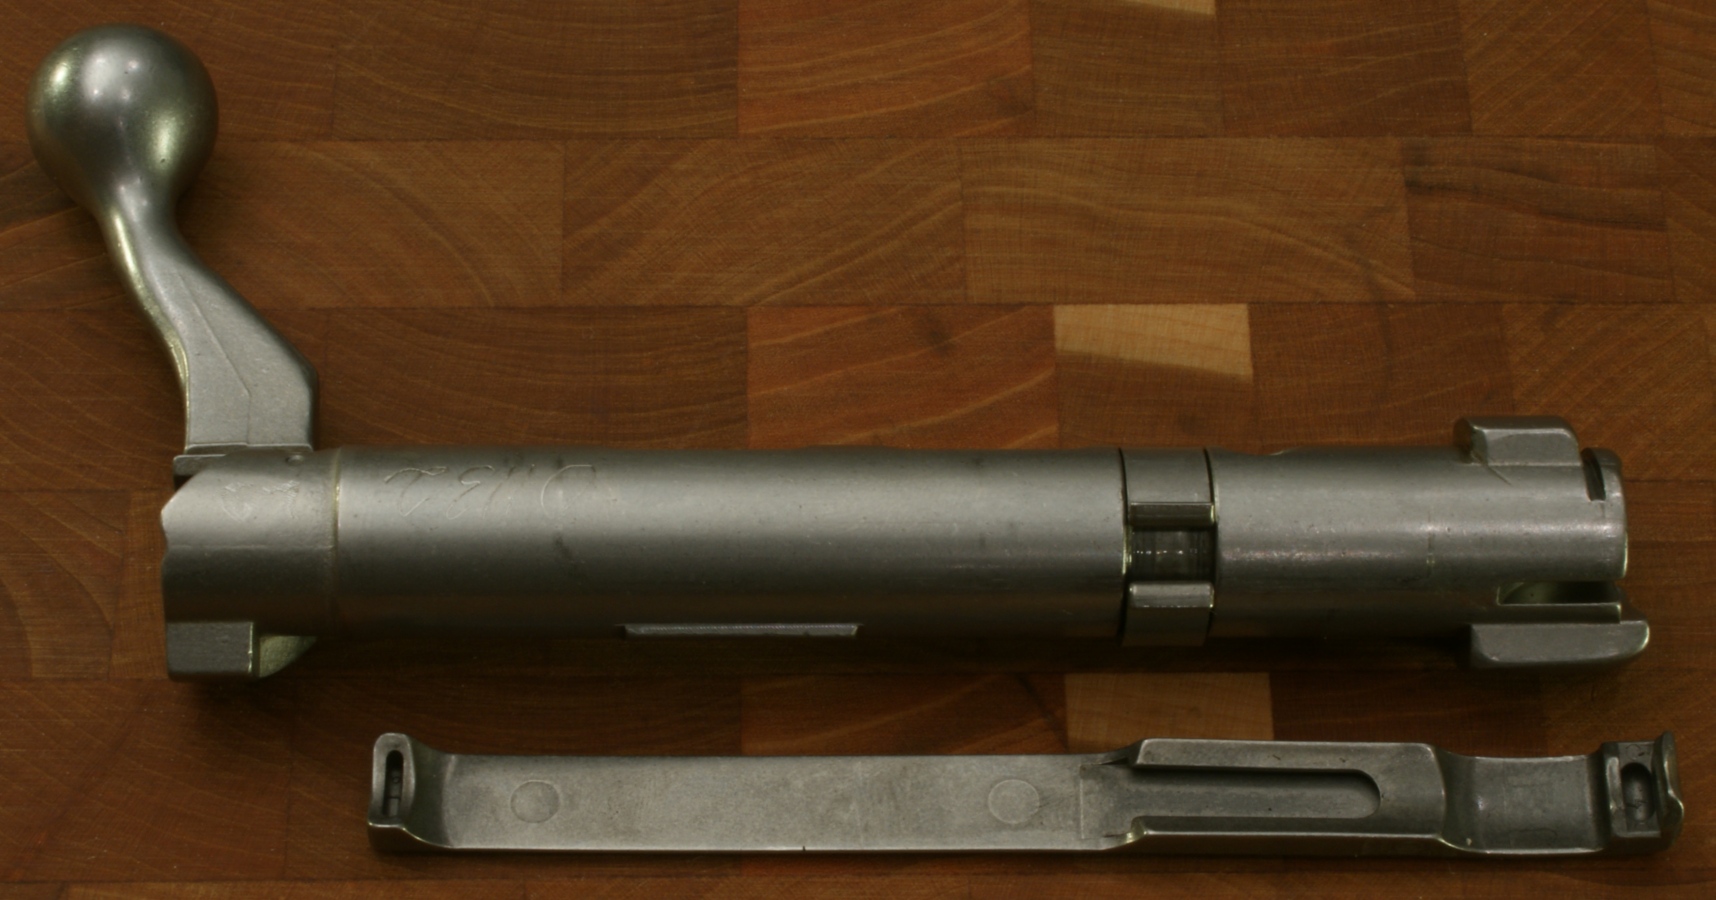
Bolt
The bolt is a one-piece investment casting that is made from 415 stainless steel which is a Ruger proprietary blend in between 410 and 420 stainless steels and gives a good combination of toughness and strength. The bolt is final machined and polished in critical areas. You can see that the bolt is engraved with the serial number of the rifle.
Figure 40
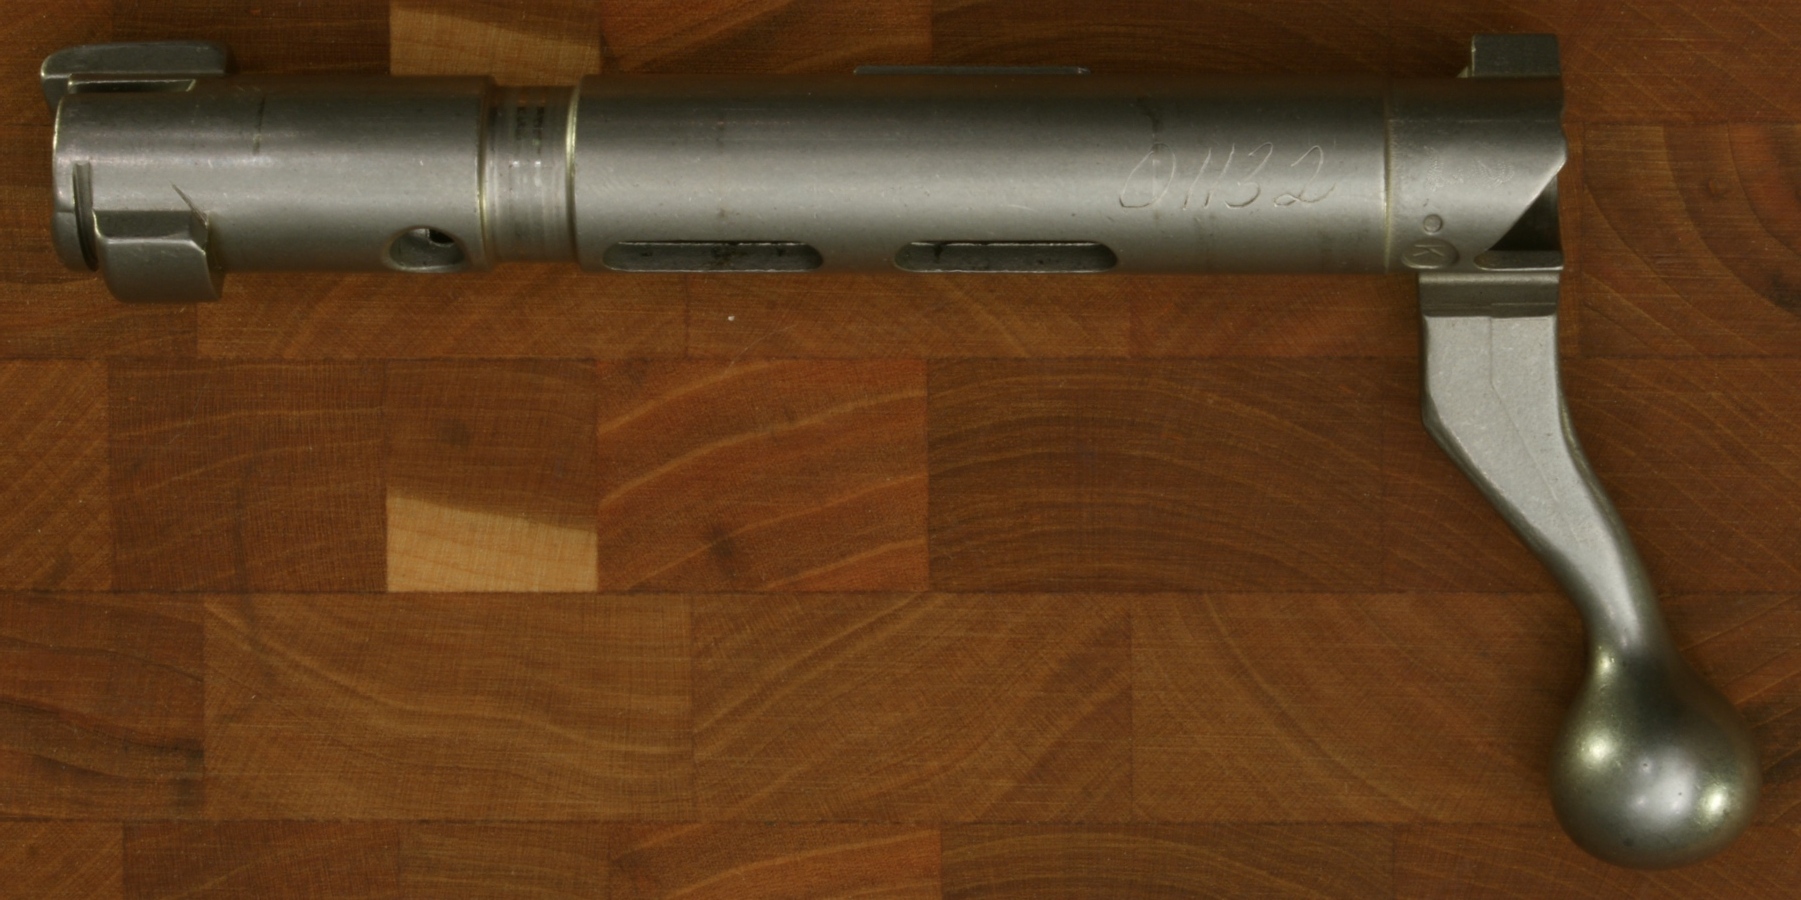
Figure 41
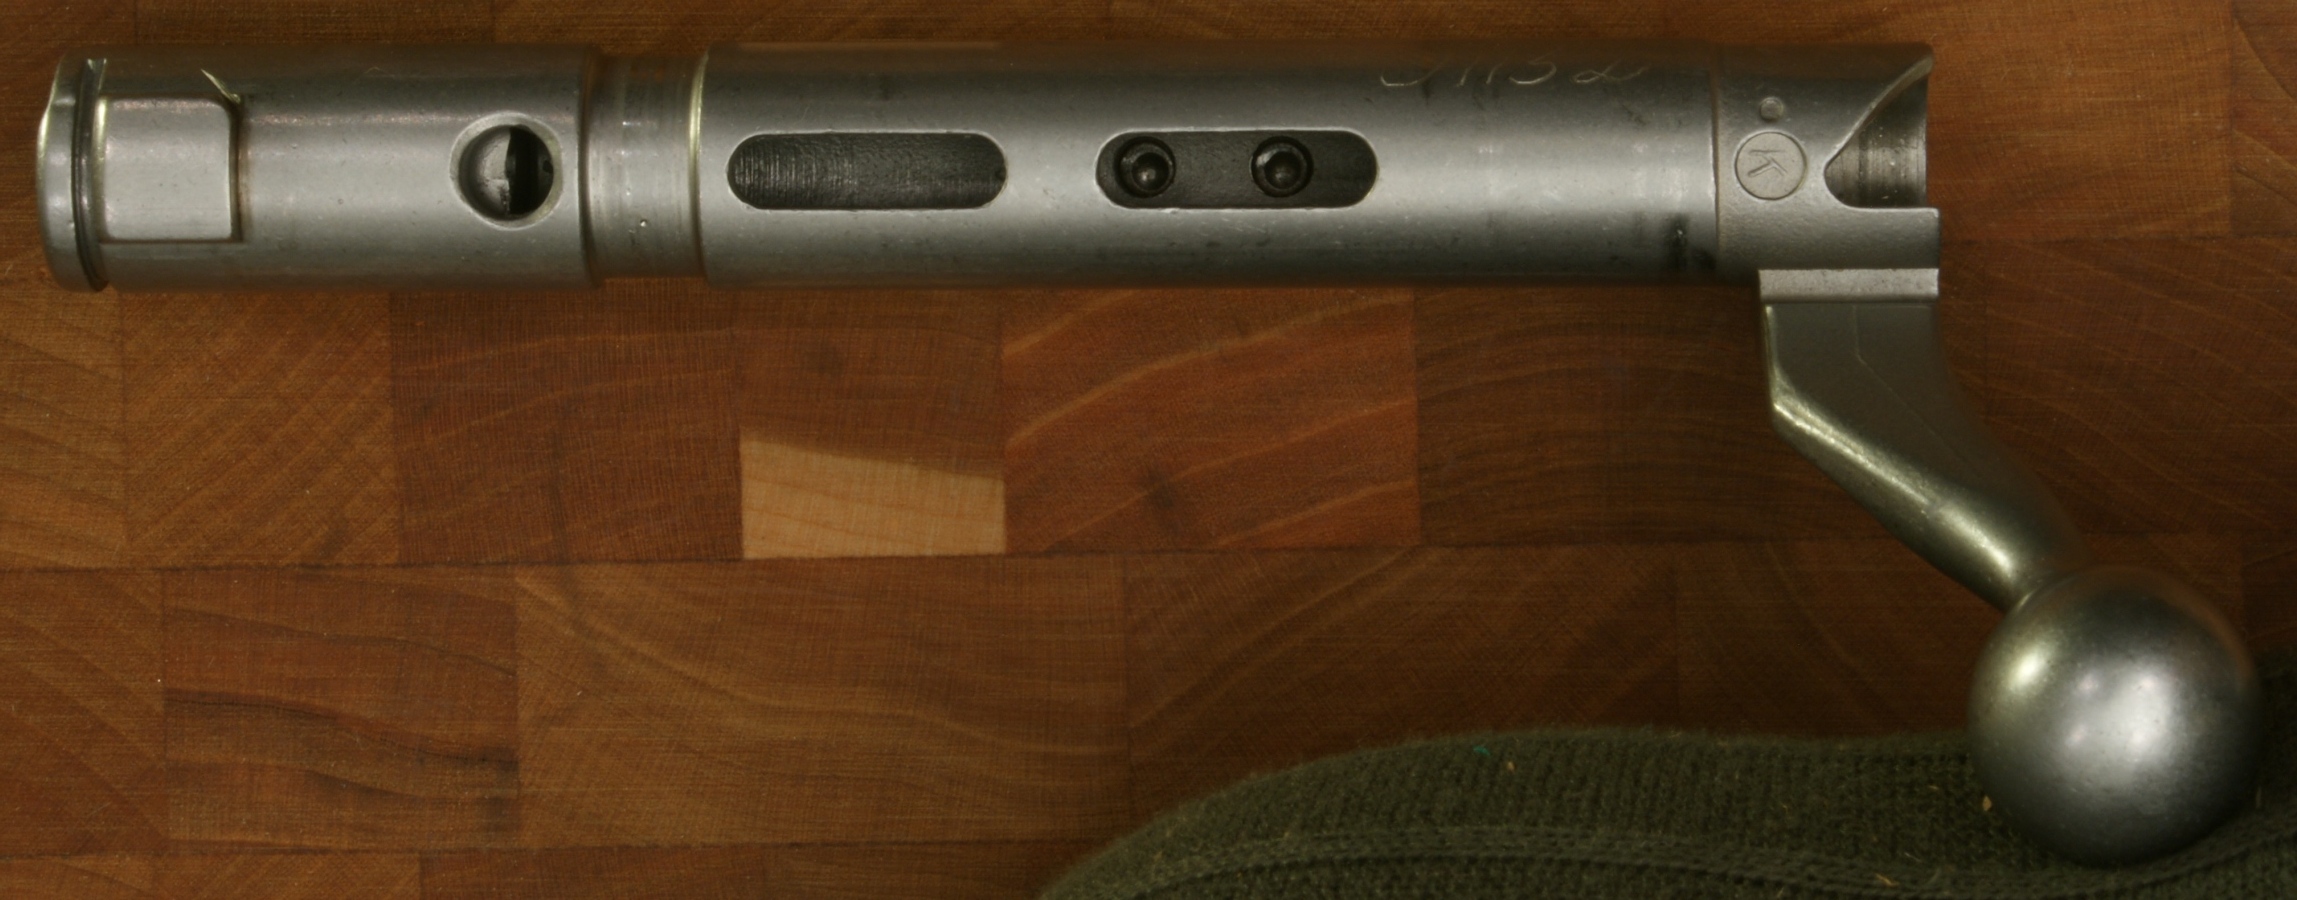
Figure 42
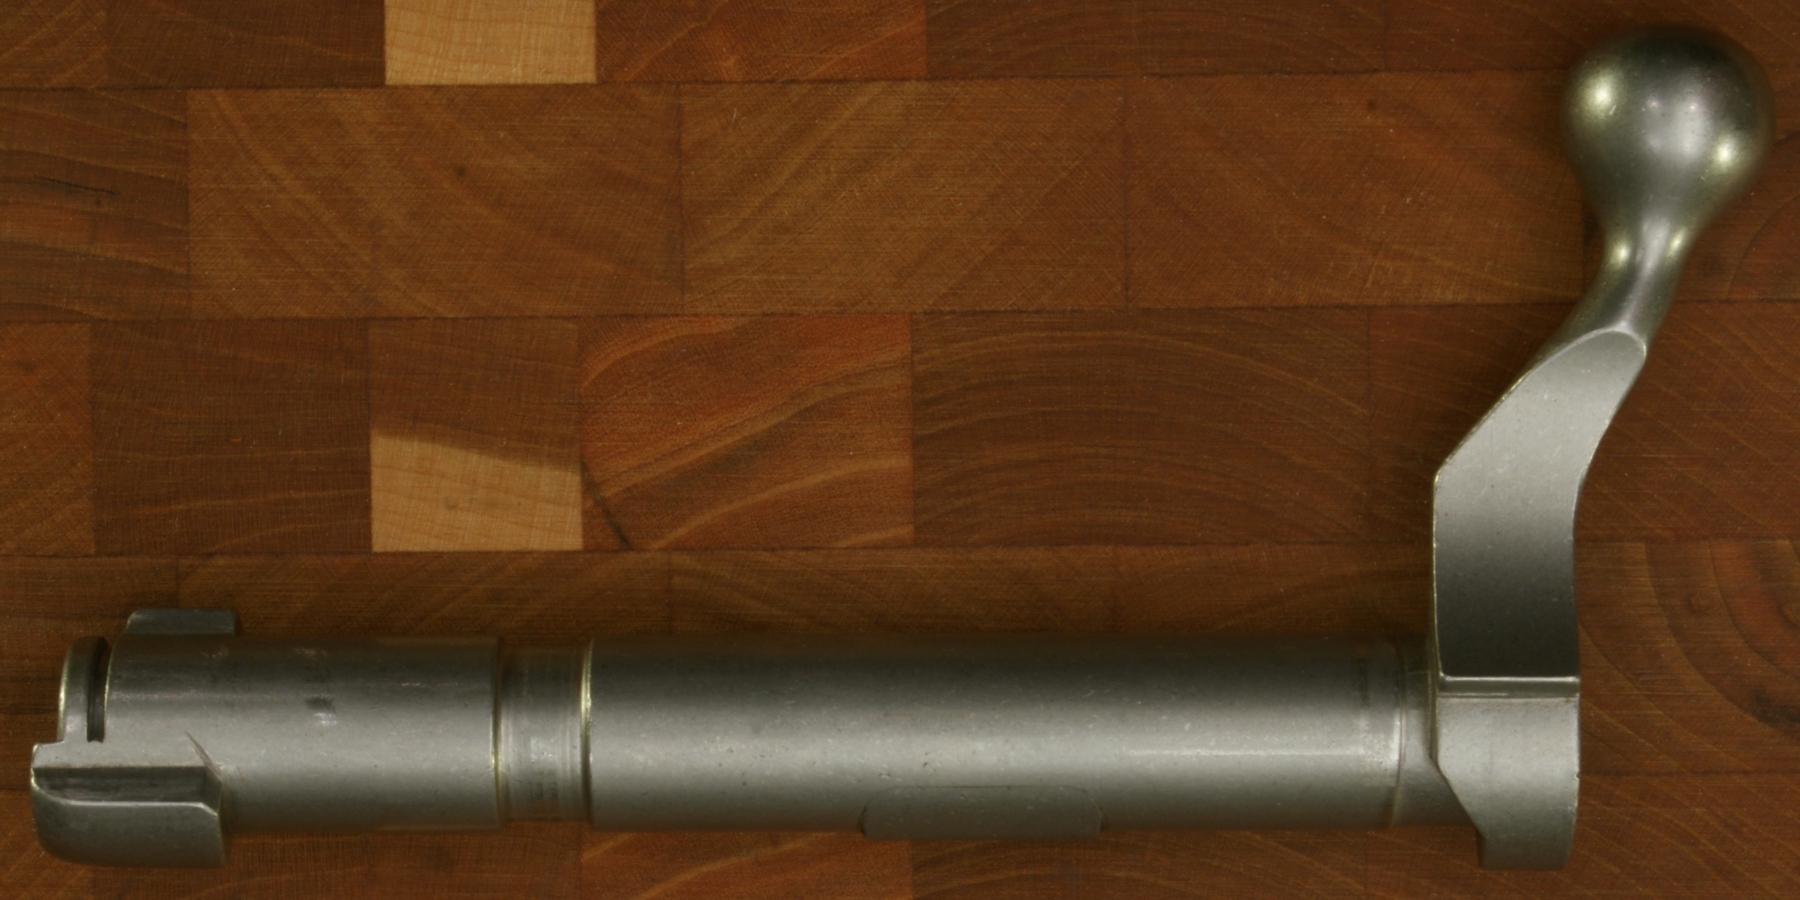
Figure 43
Figure 44
Firing Pin Assembly
Figure 45
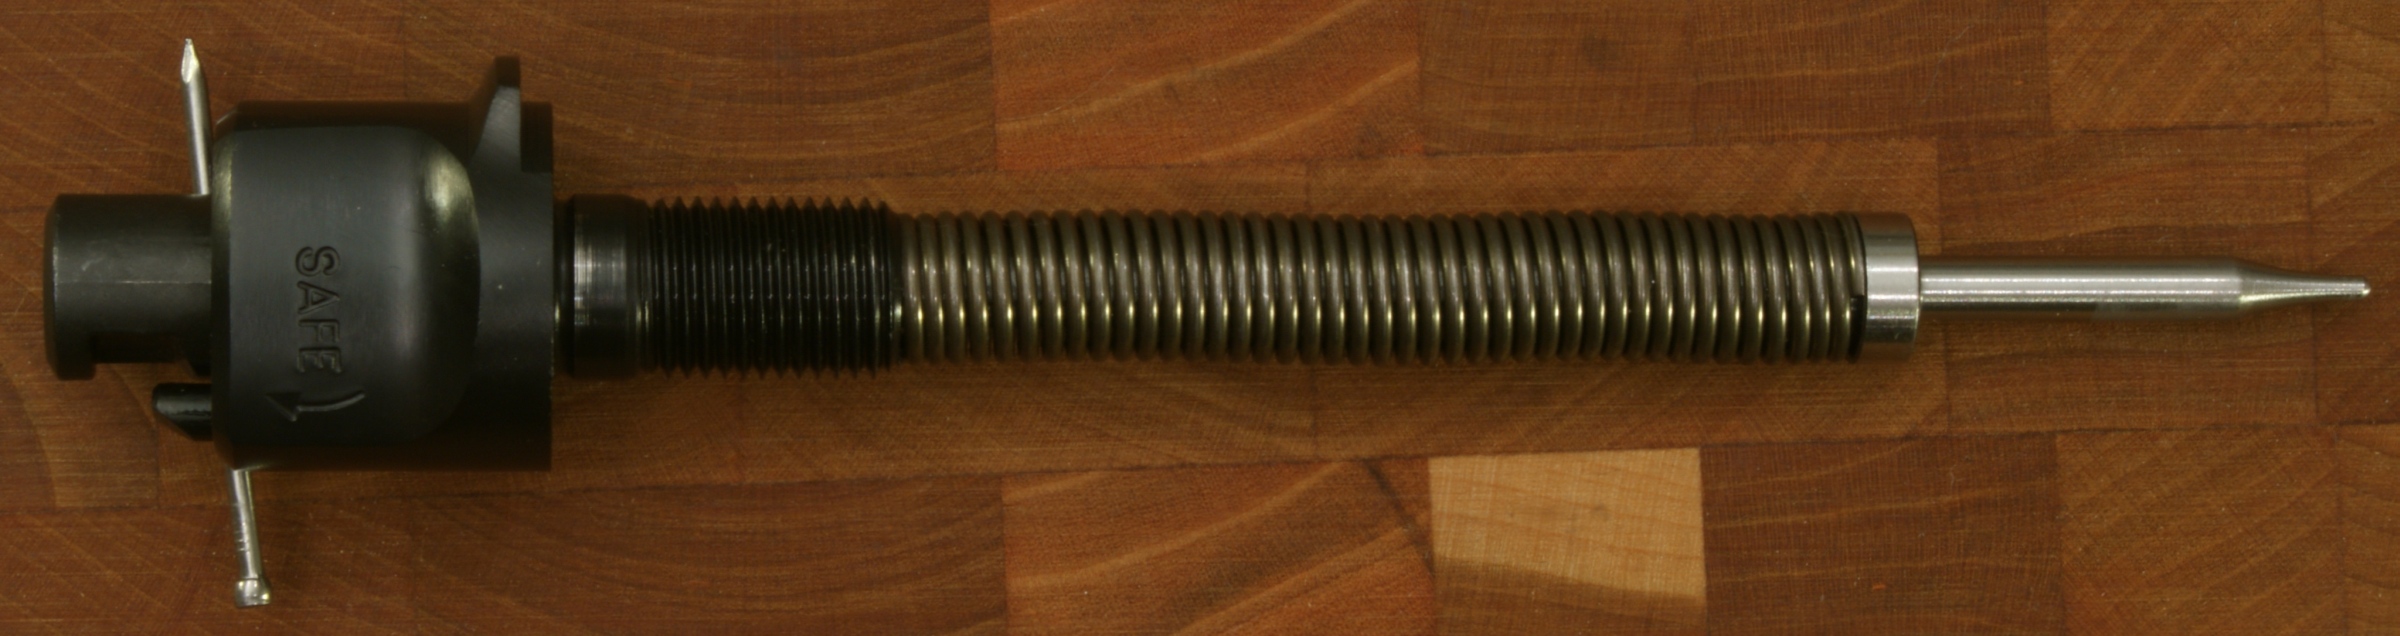
Figure 46

Figure 47
Figure 48
Extractor
The extractor shown is an investment cast stainless steel part, but Ruger has switched over to manufacturing this part using a Metal Injection Molding (MIM) method.
Figure 49

Figure 50

Figure 51

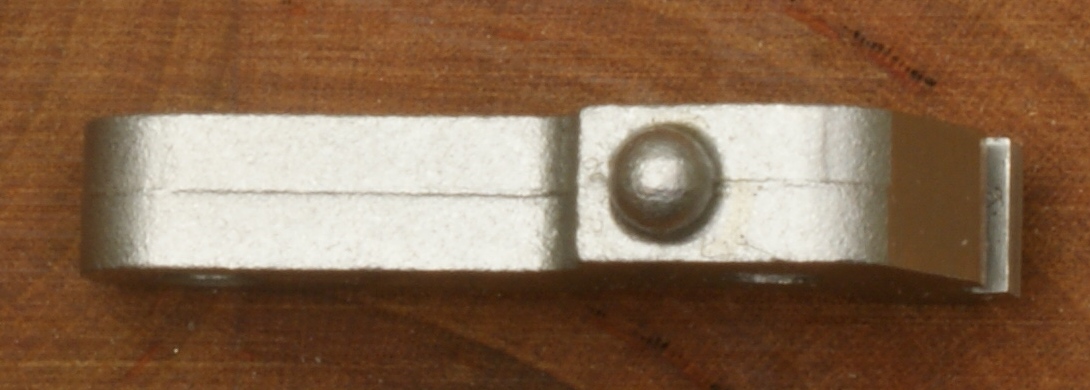
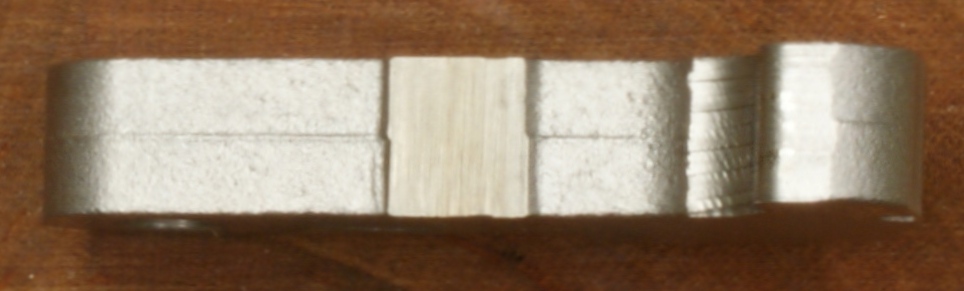
Extractor Band
Stainless steel part.
Figure 52
Figure 53
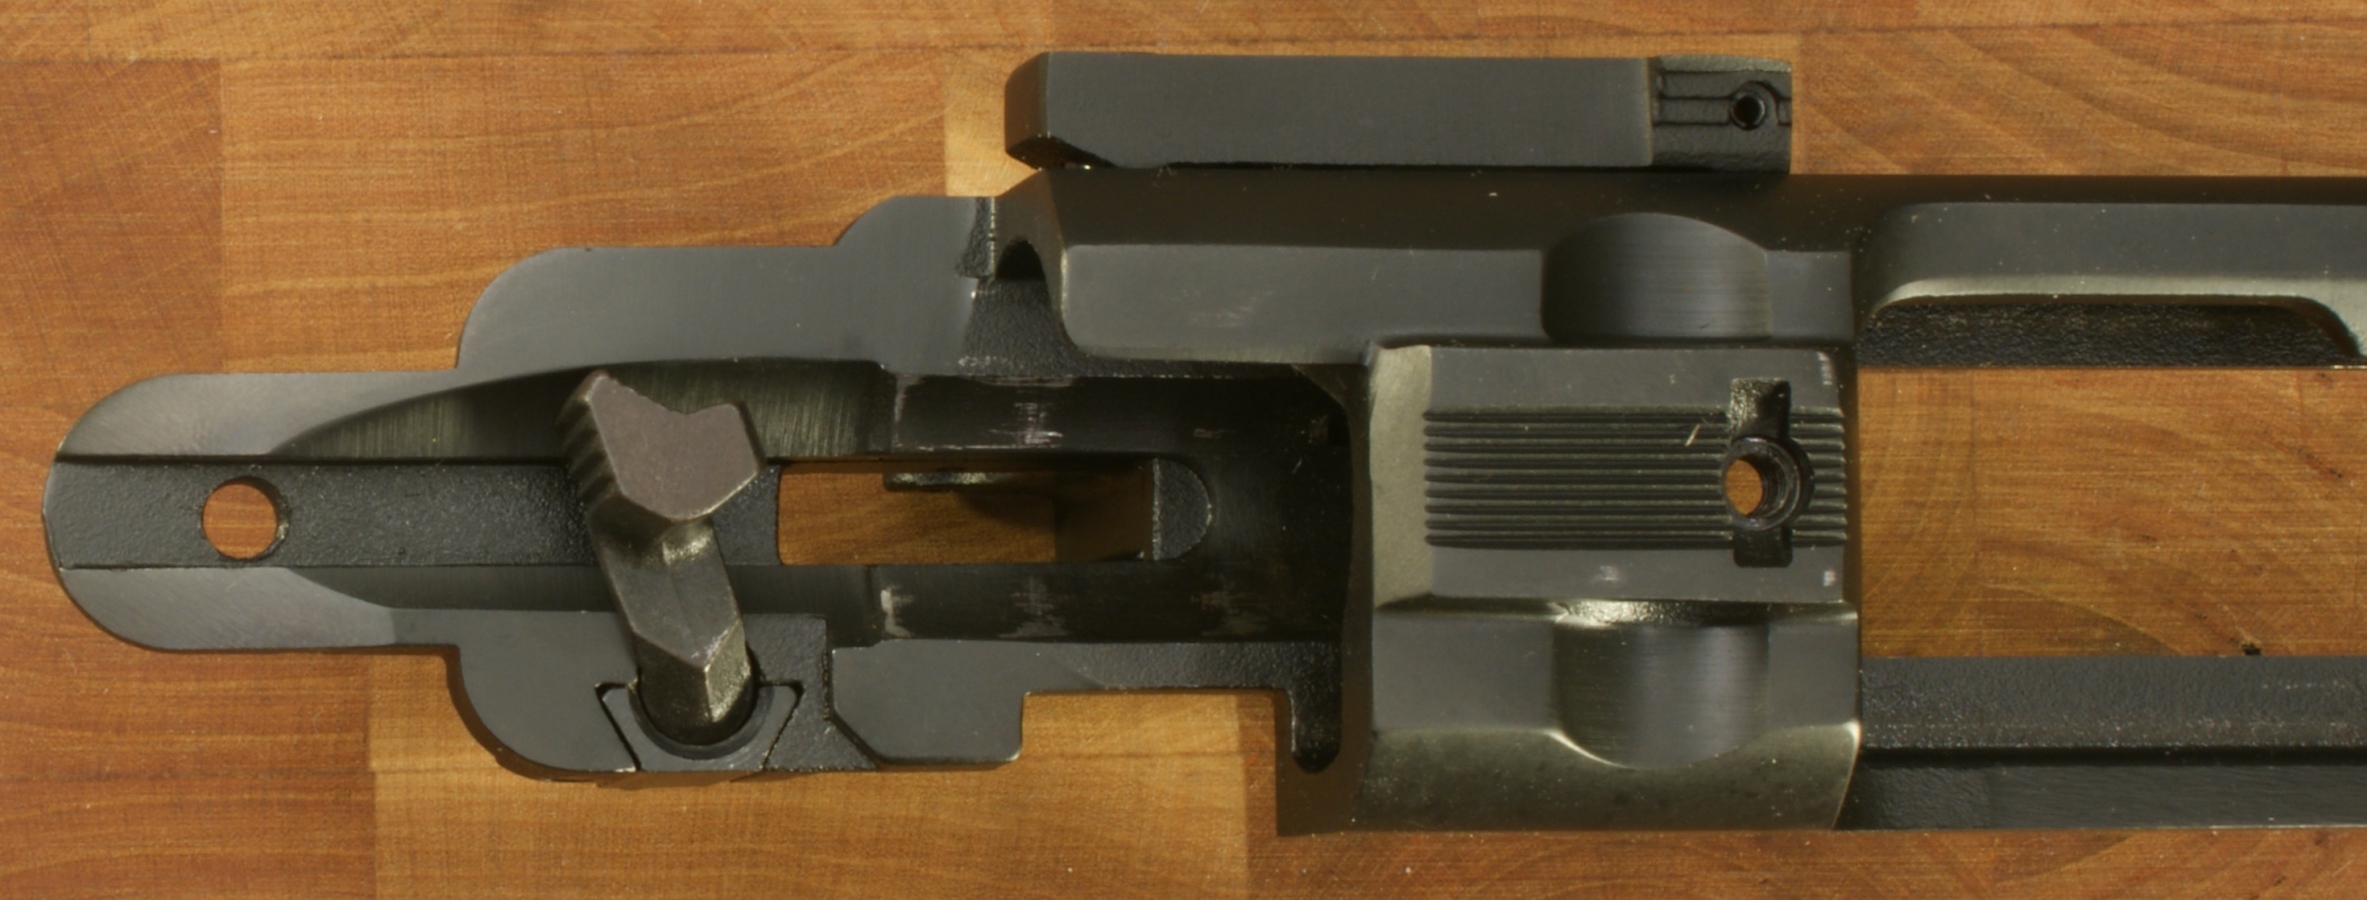
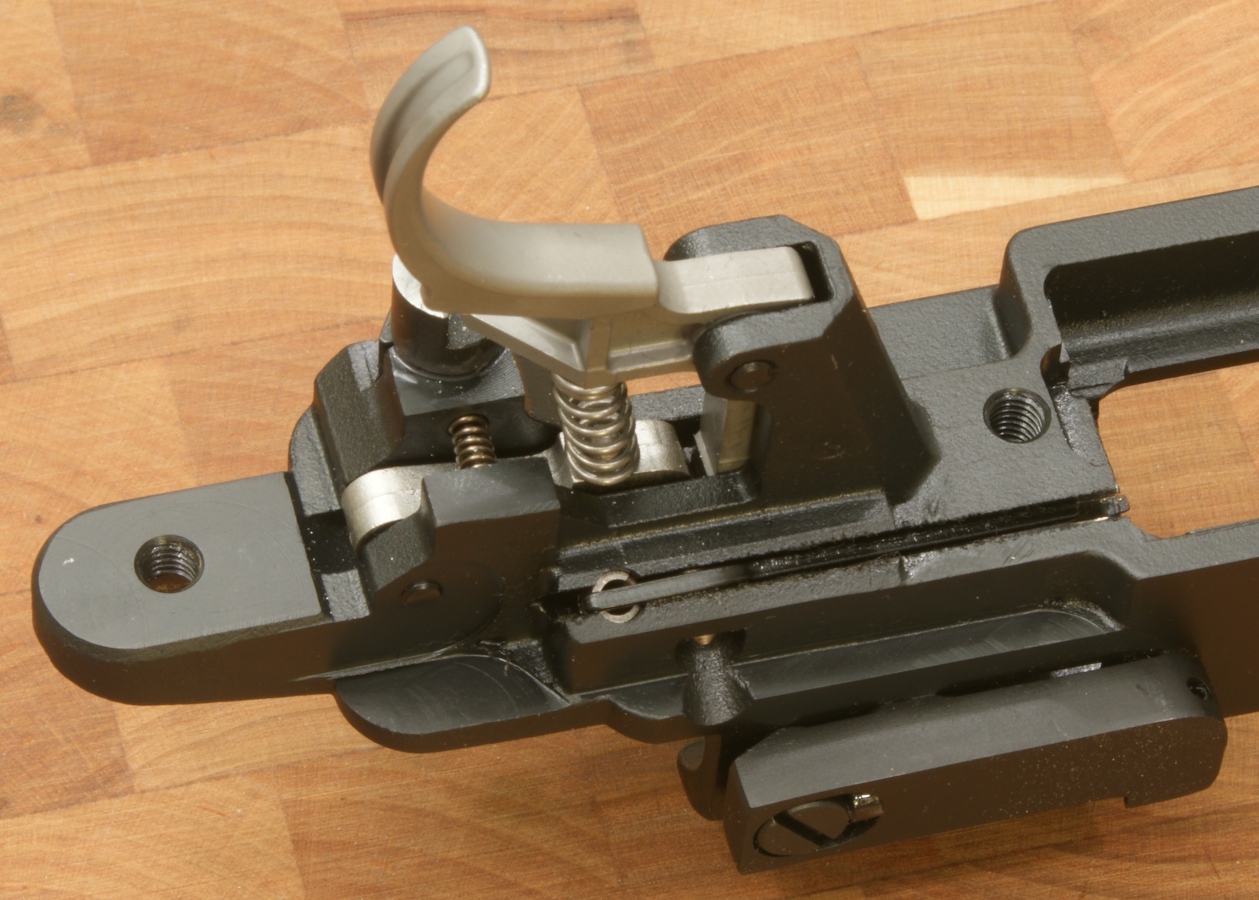
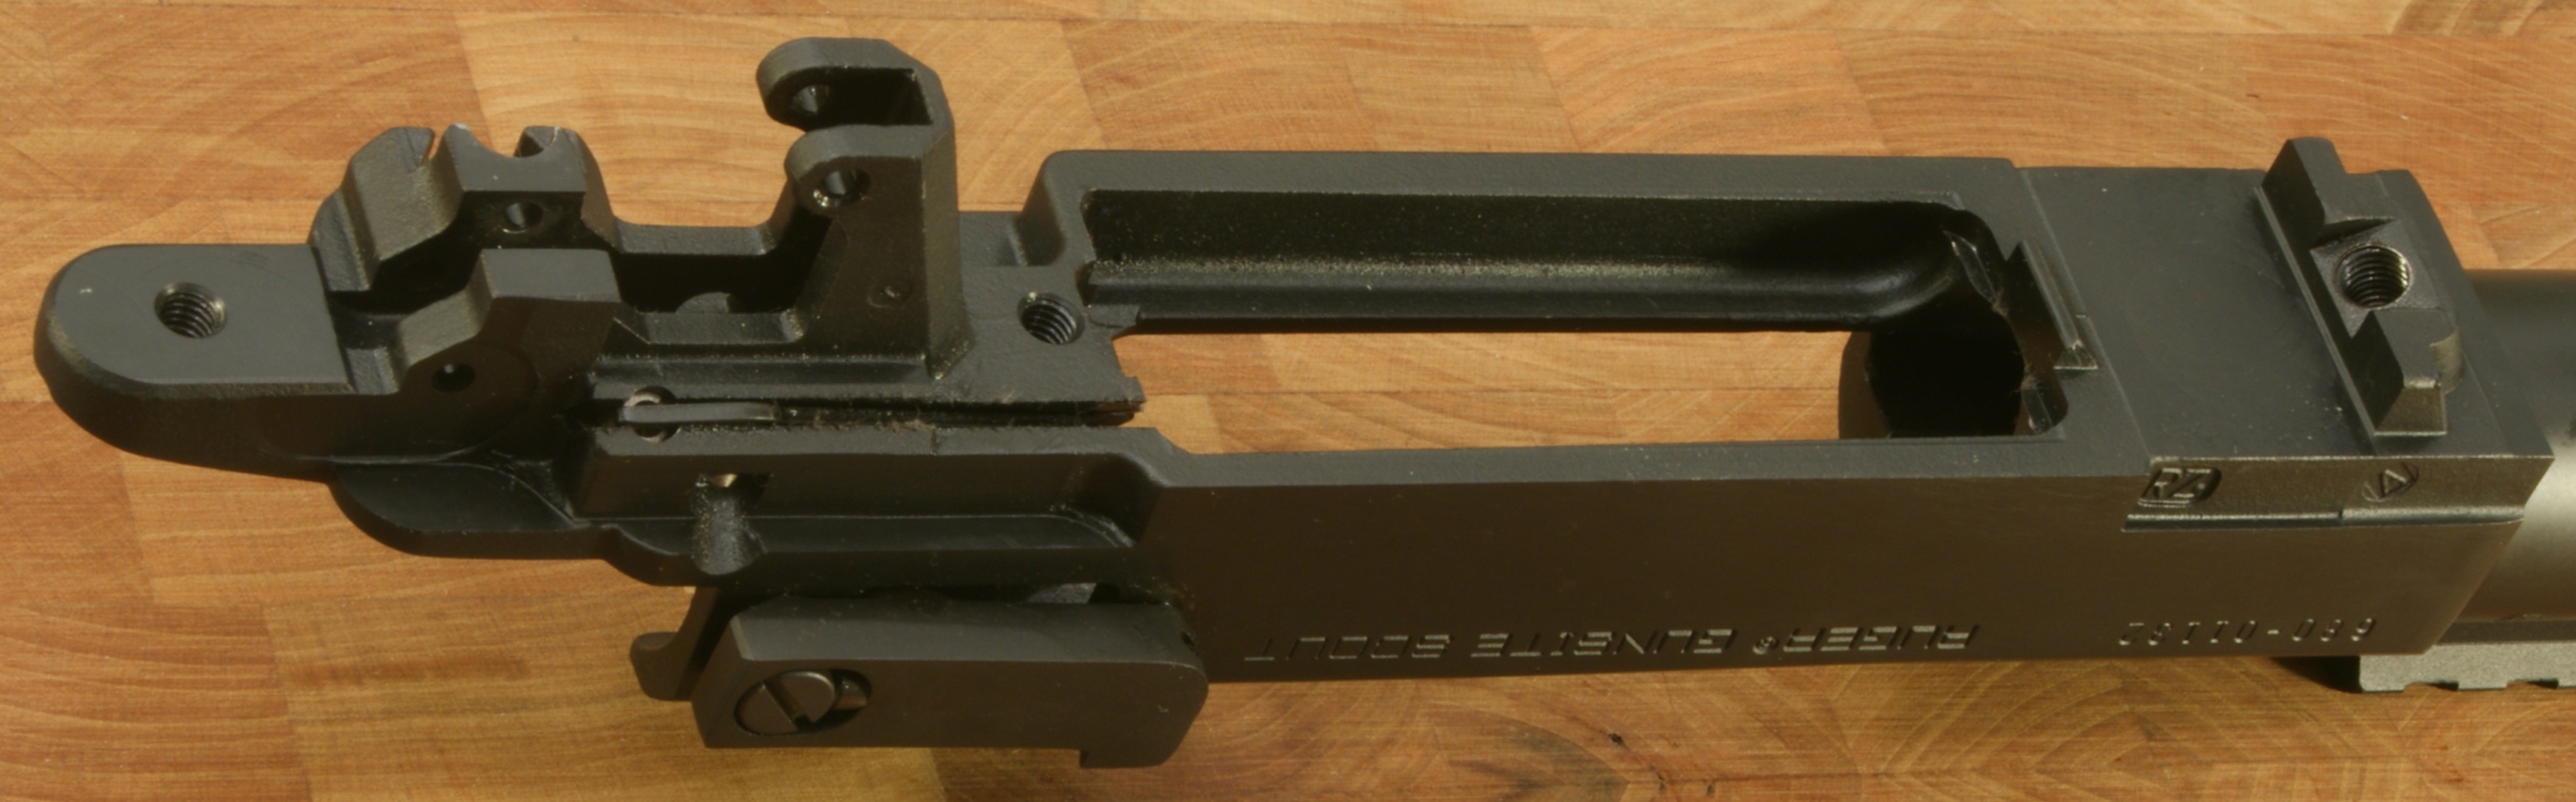
Receiver
This group of photos gives you an overall look at the receiver with the trigger, sear and safety selector still installed. Specifically, in the next two photos, take a look at how the safety operates with the trigger. Rotating the safety selector moves a flat portion on the end of the selector under the trigger safety bar preventing the trigger from being pulled. Simple and effective.
Figure 54
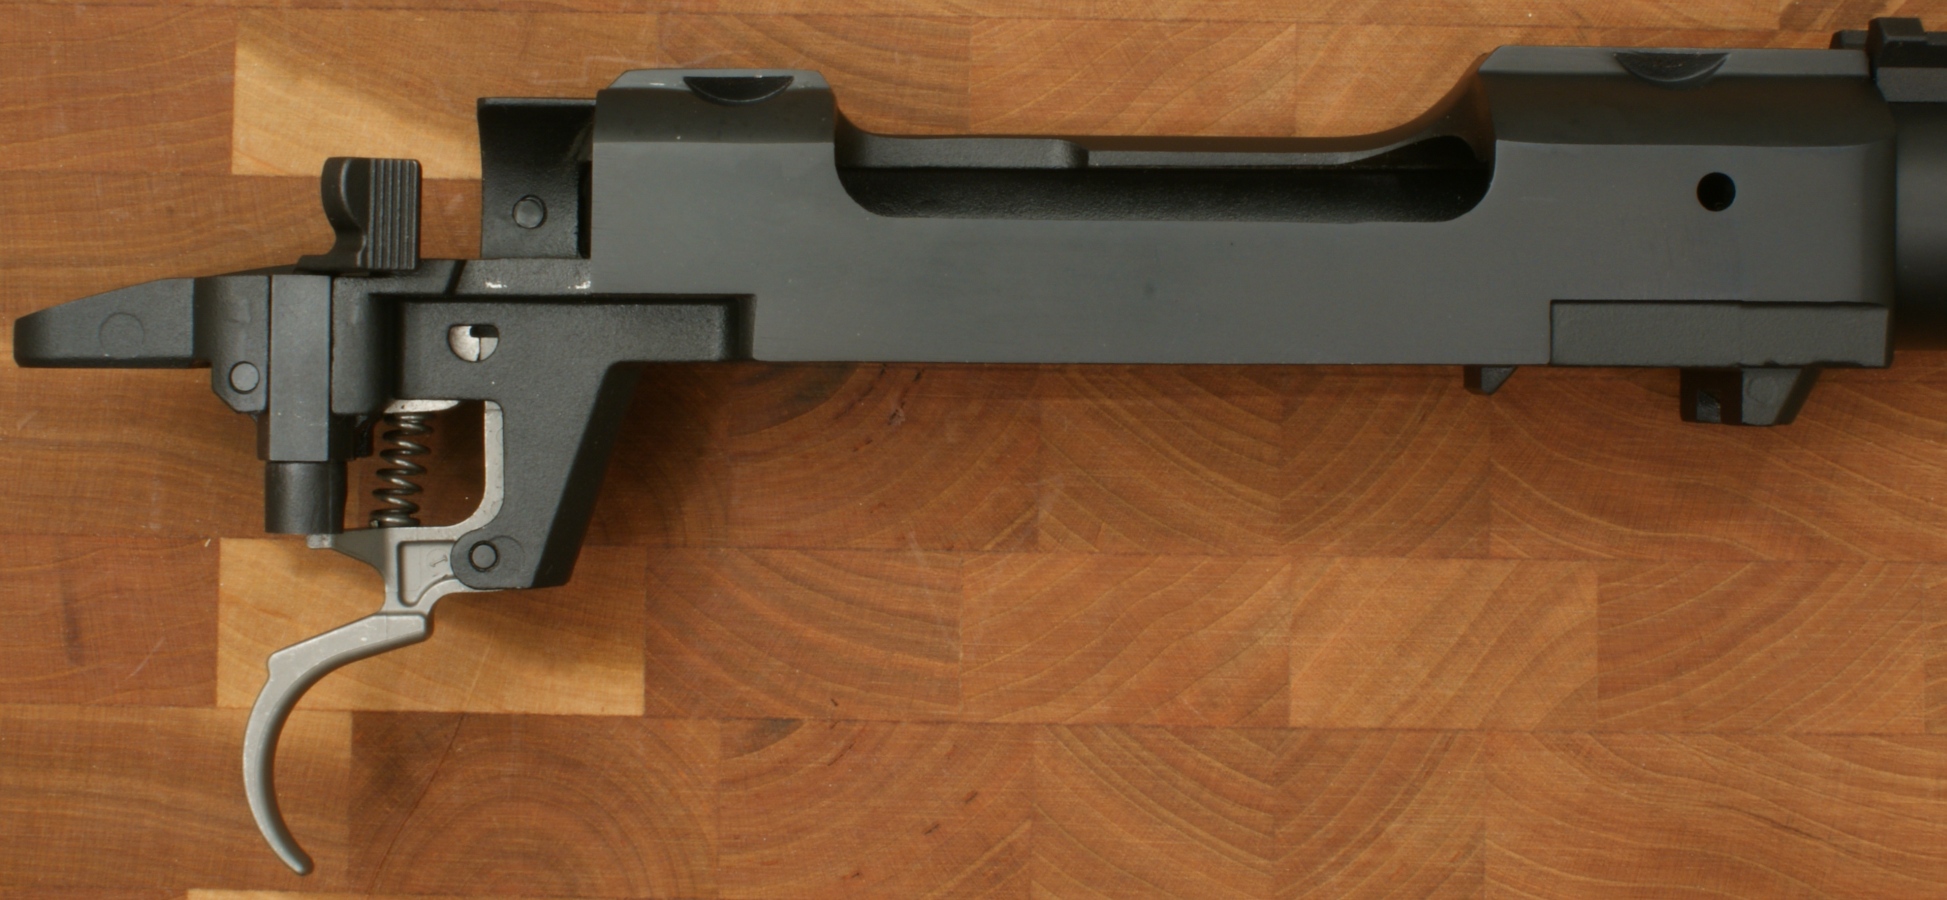
Figure 55
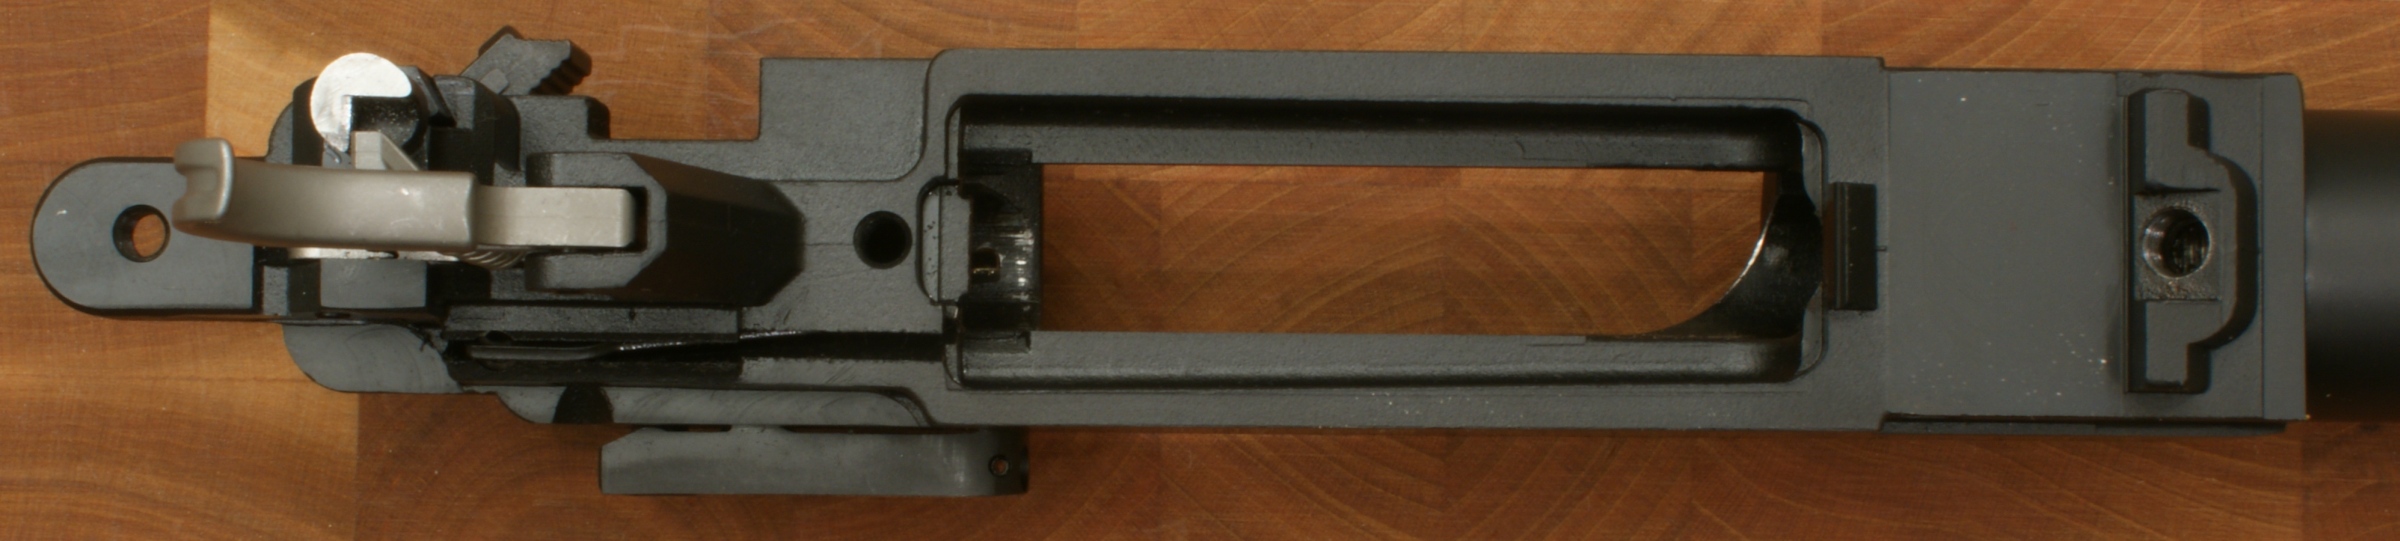
Figure 56
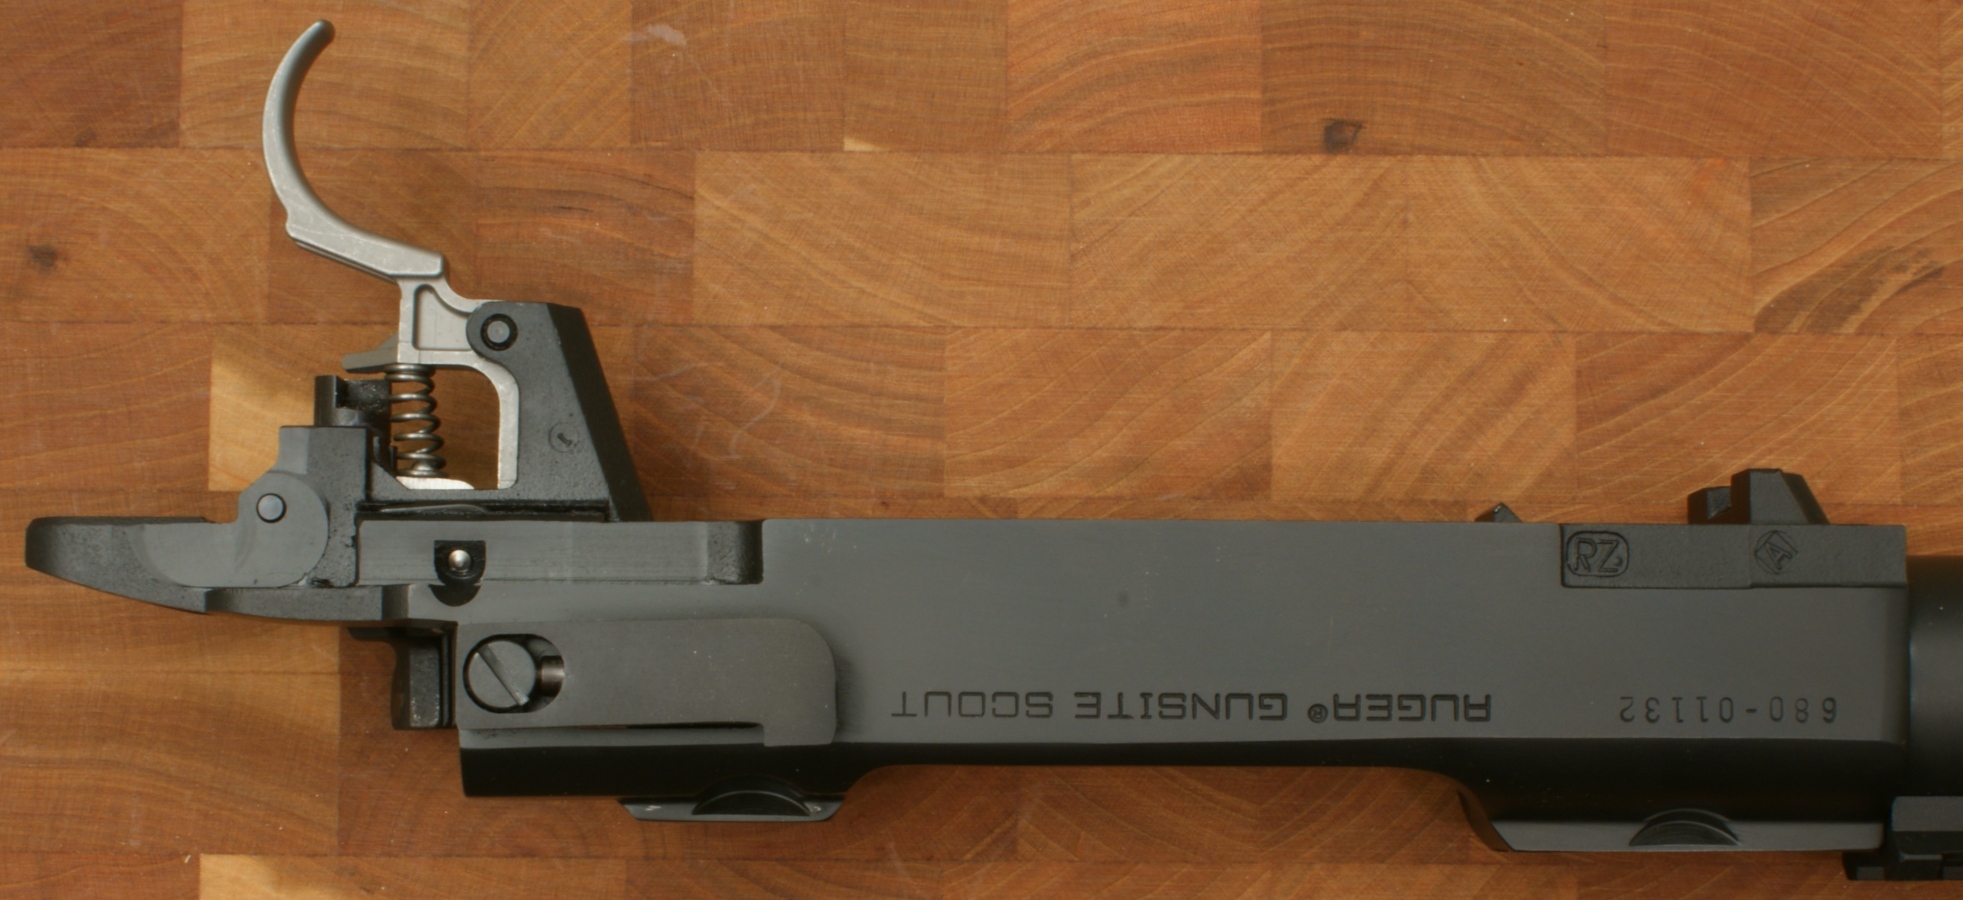
Figure 57
In the photos below you can see the ejector inside the receiver.
Figure 58
Figure 59
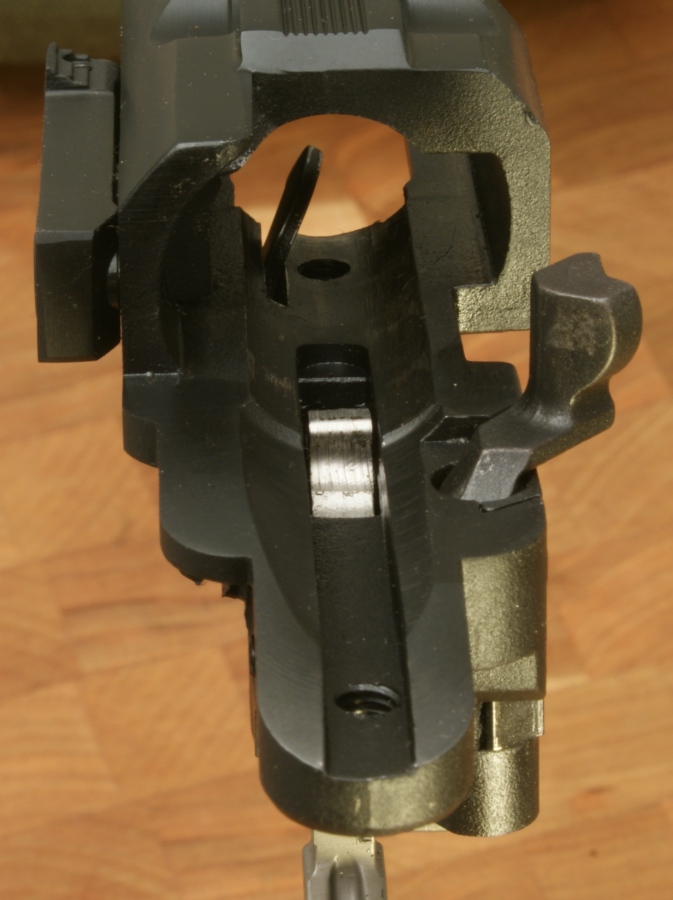
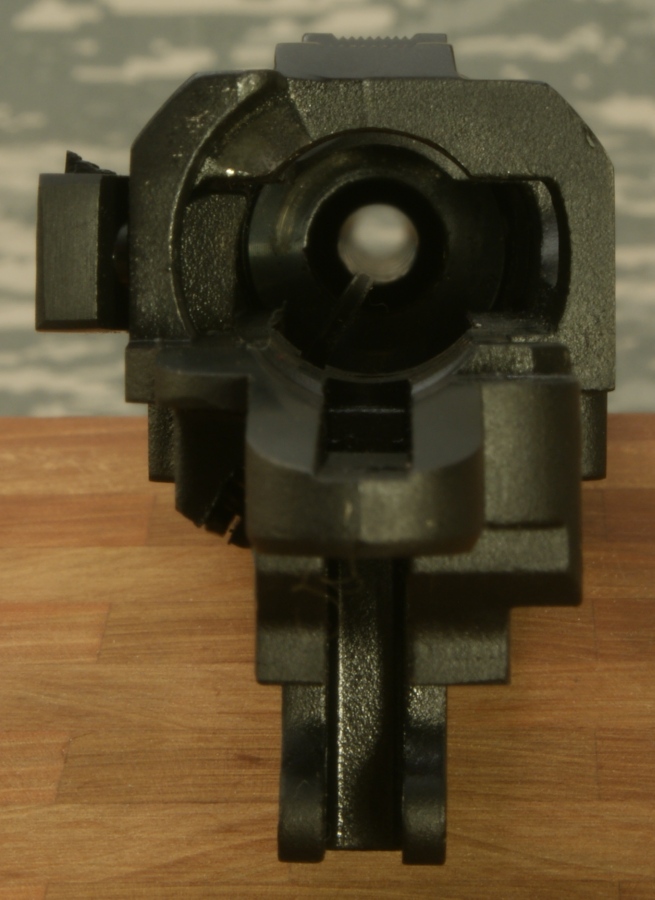
Figure 60
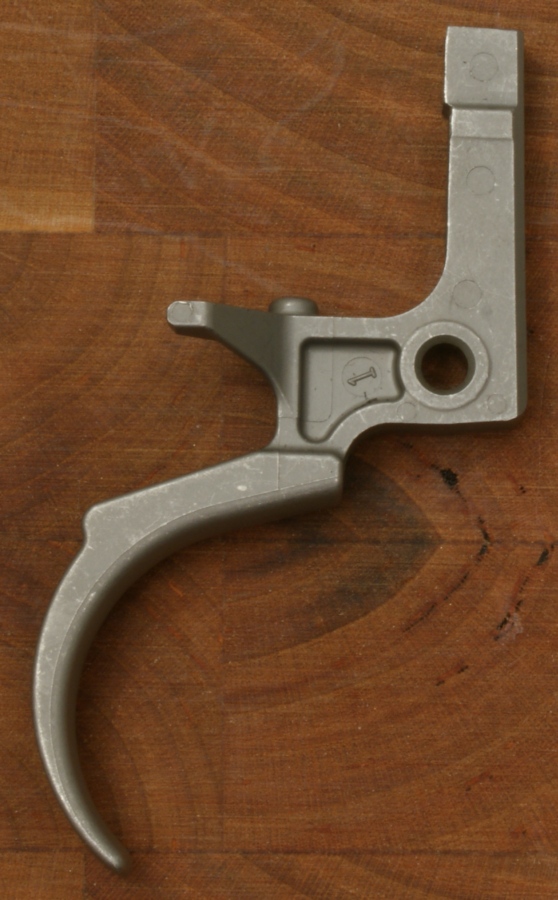
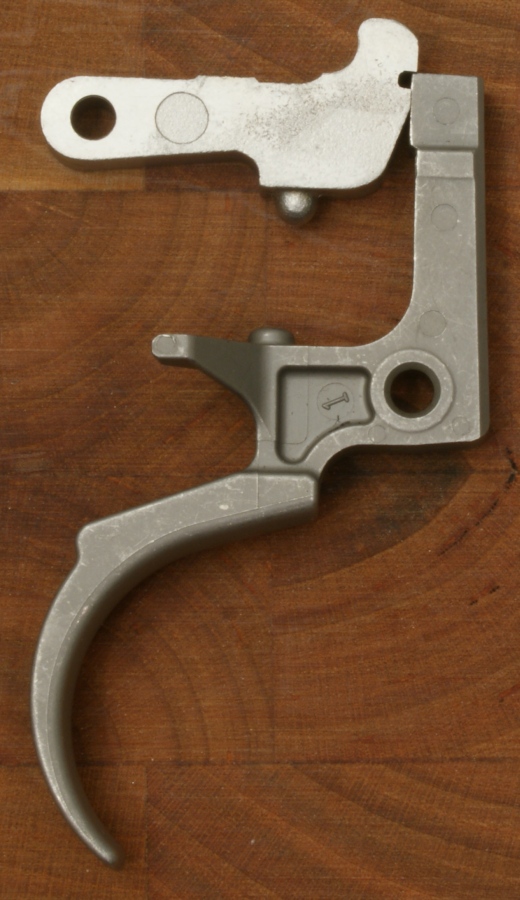
Trigger
The trigger shown is an investment cast stainless steel part with critical features final machined, but Ruger has switched over to manufacturing this part using a Metal Injection Molding (MIM) method.
Figure 61
Figure 62
Figure 63

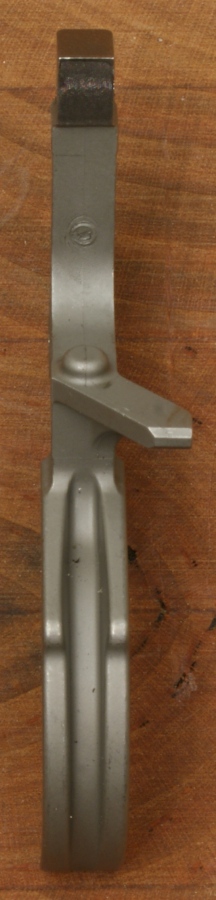
Sear
Investment cast stainless steel part with critical features final machined.
Figure 64
Figure 65
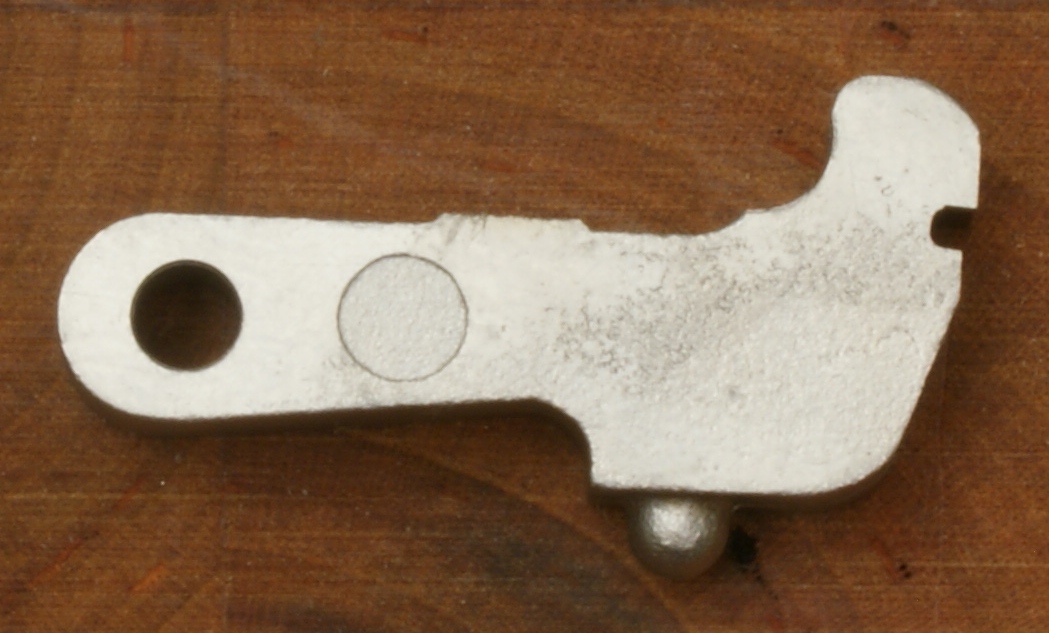
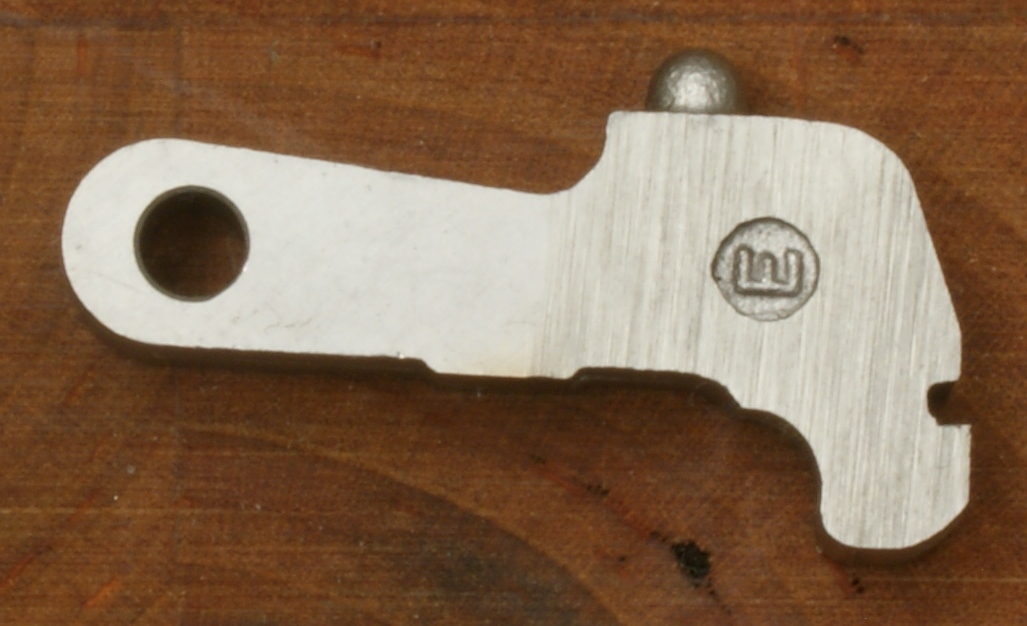
Figure 66
Figure 67
The photo below shows the sear/trigger relationship when in the cocked and ready to fire state.
Figure 68
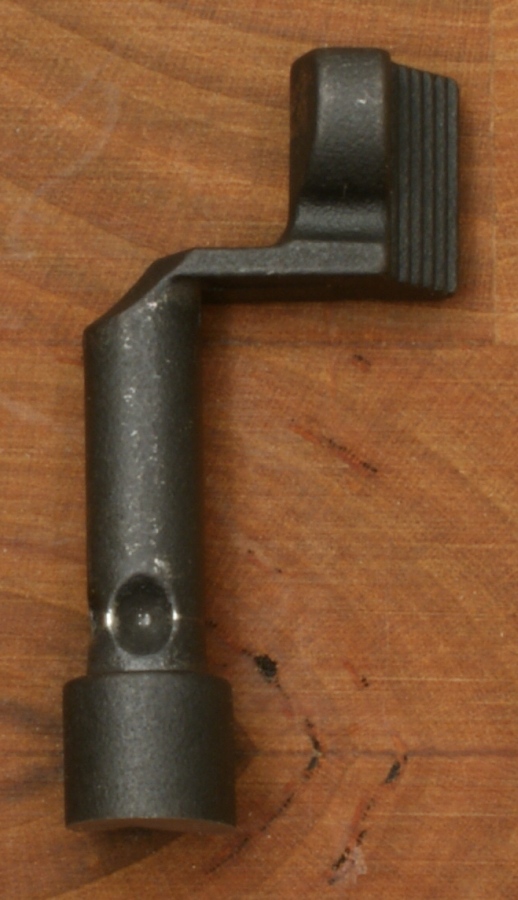
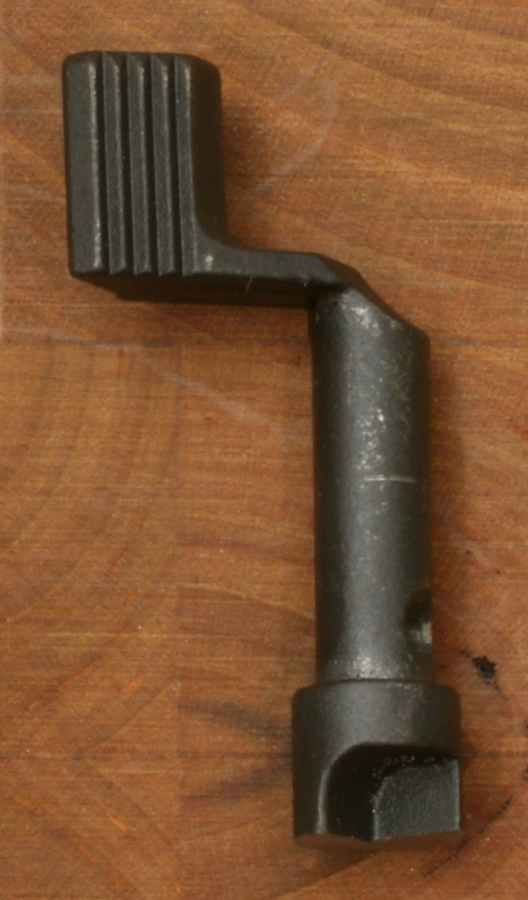
Safety Selector
You can see the indents in the safety selector which causes it to seat into 3 positions.
Figure 69
Figure 70
Safety Selector Retainer
Figure 71
Figure 72
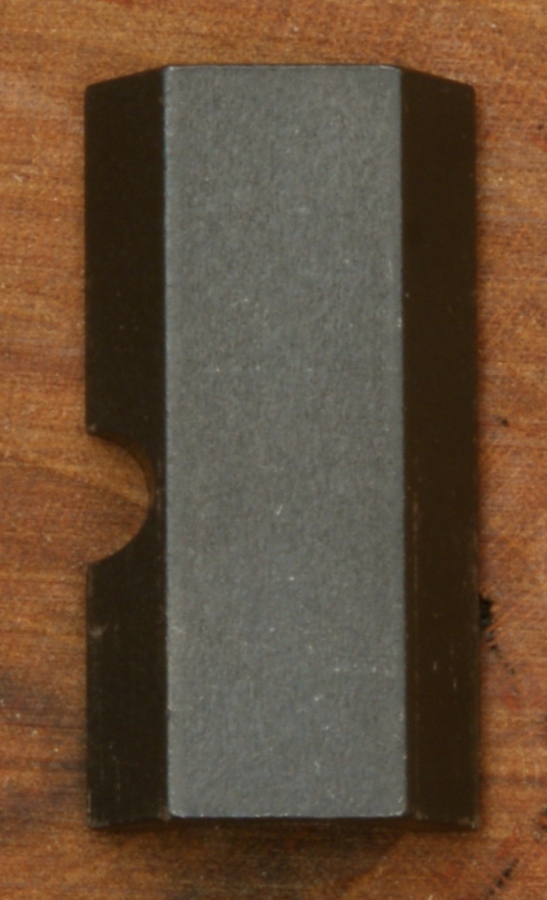

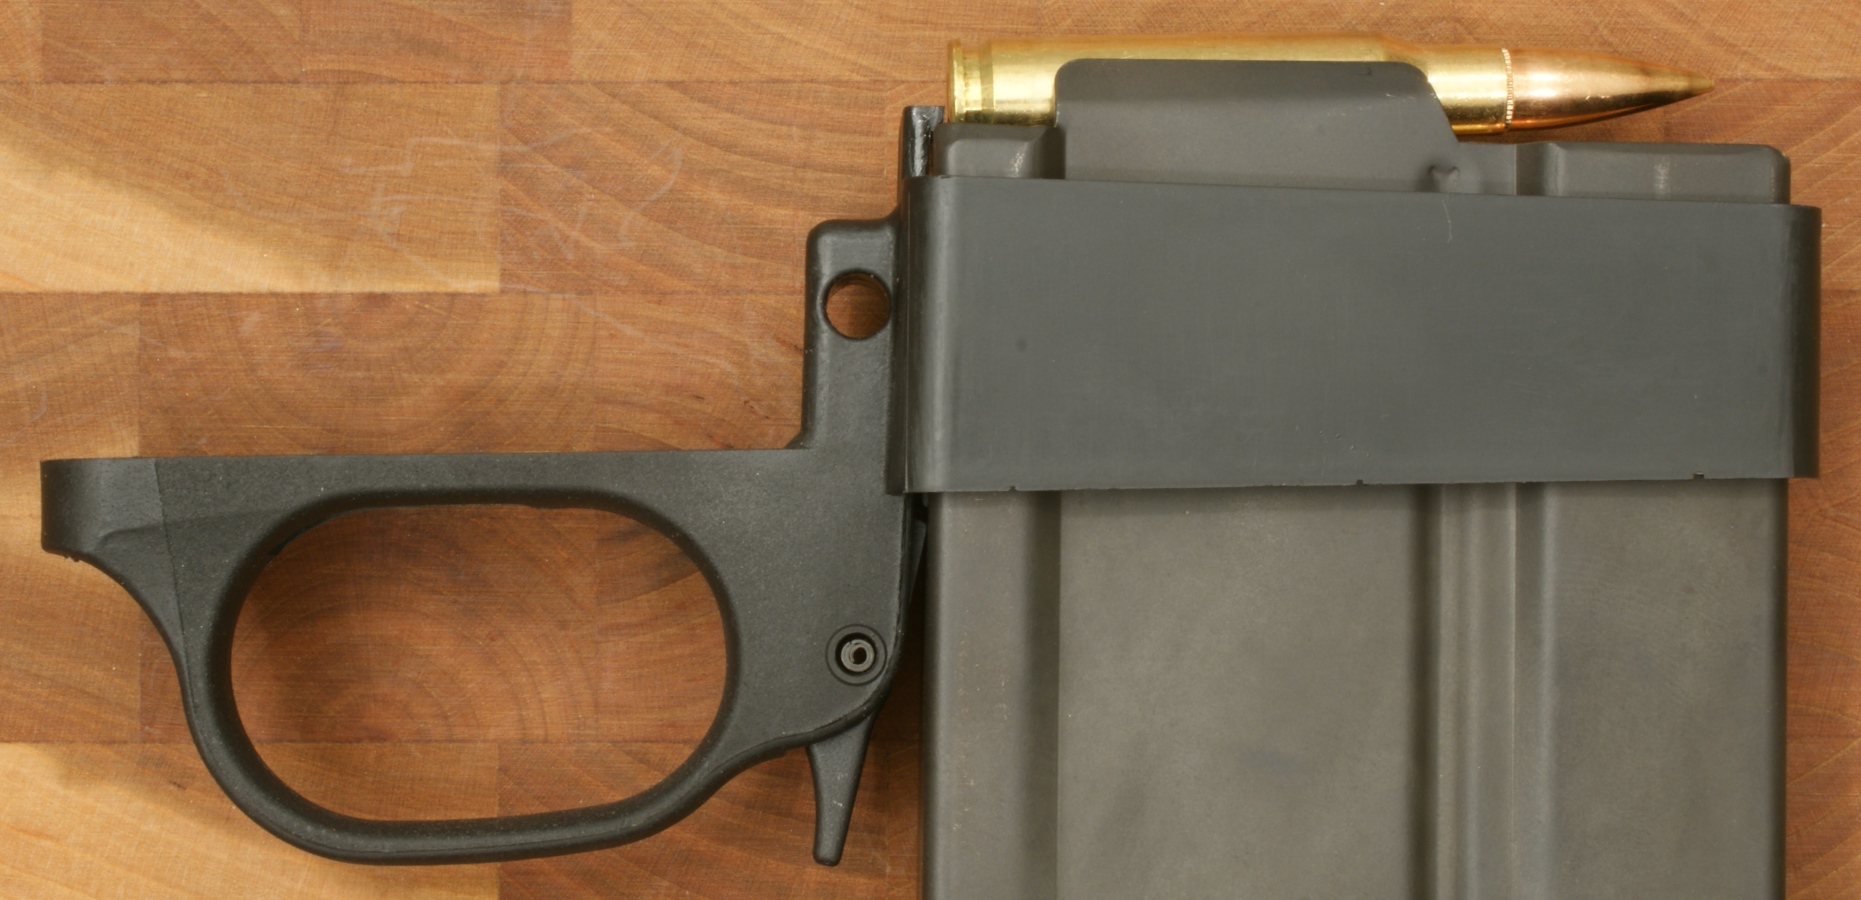
Trigger Guard / Magazine Well
The Trigger Guard/Magazine Well is a glass filled nylon part. Notice that there is a stop at the back of the magazine well that limits the position of the back of the magazine. Although I don't think it is possible to incorporate a stop in the front on the magazine well, it would be nice if Ruger could have added a front stop somewhere inside the well to limit the front upward tilt of the magazine when you push on the bottom.
Figure 73
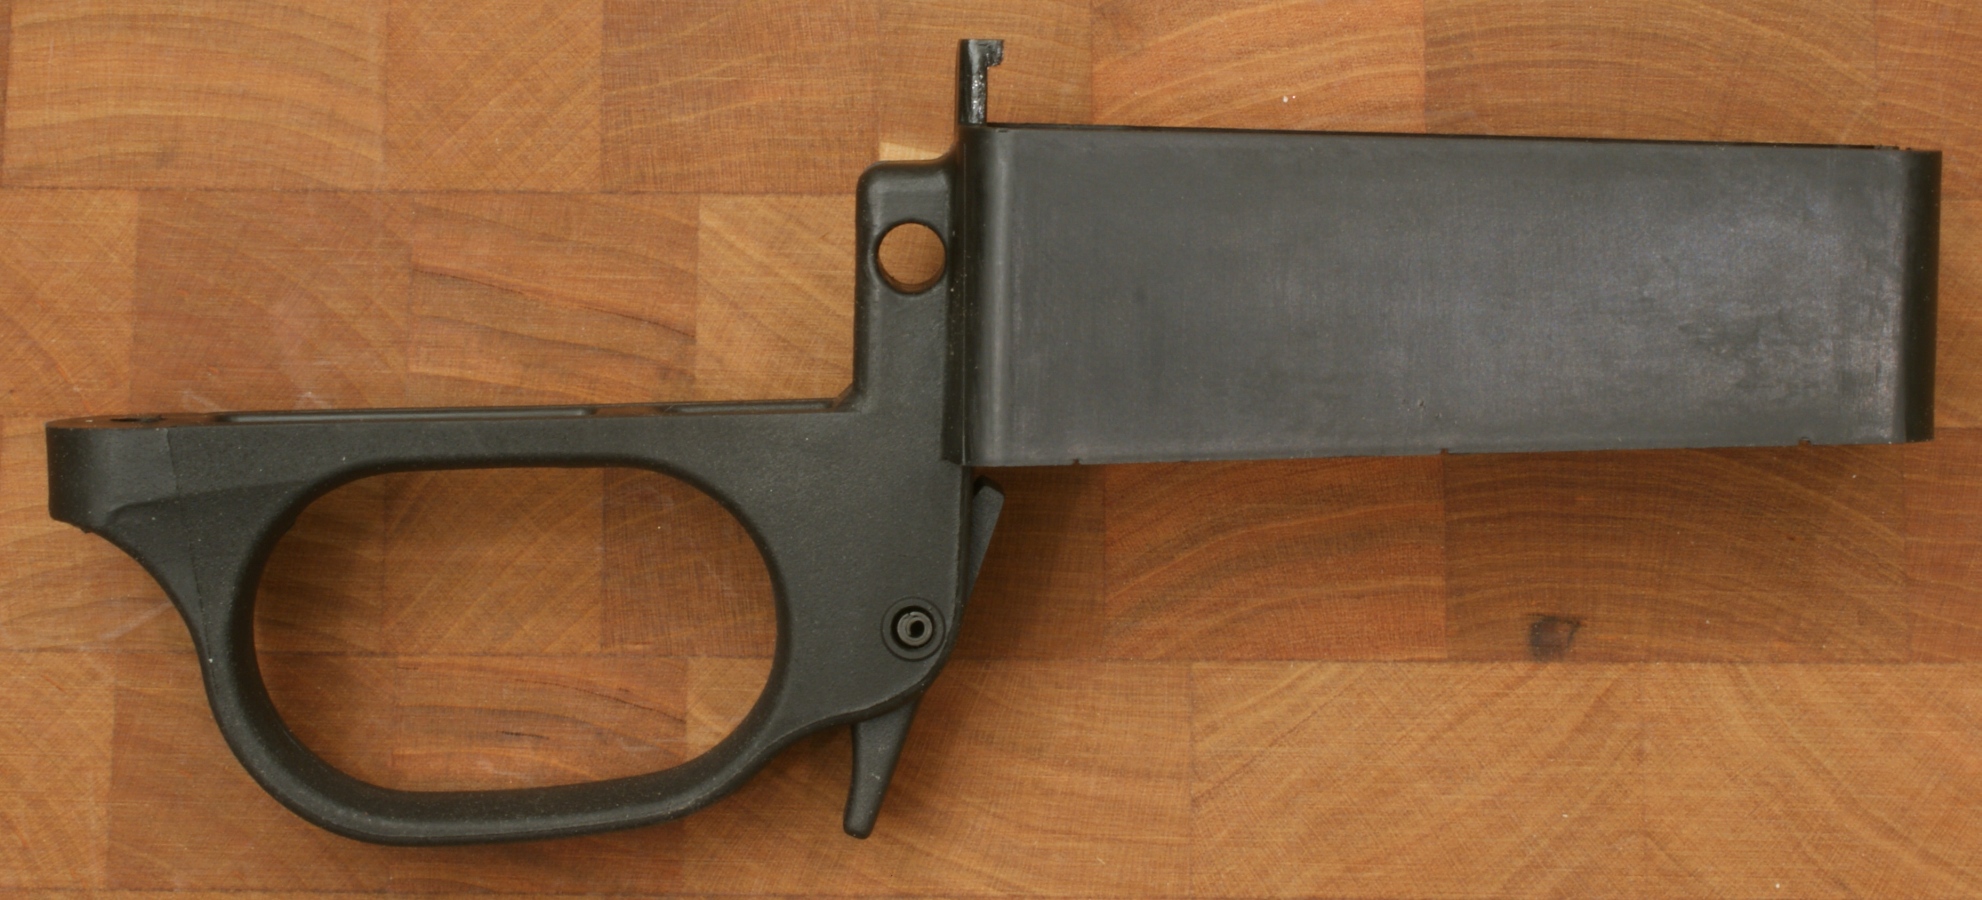
Figure 74
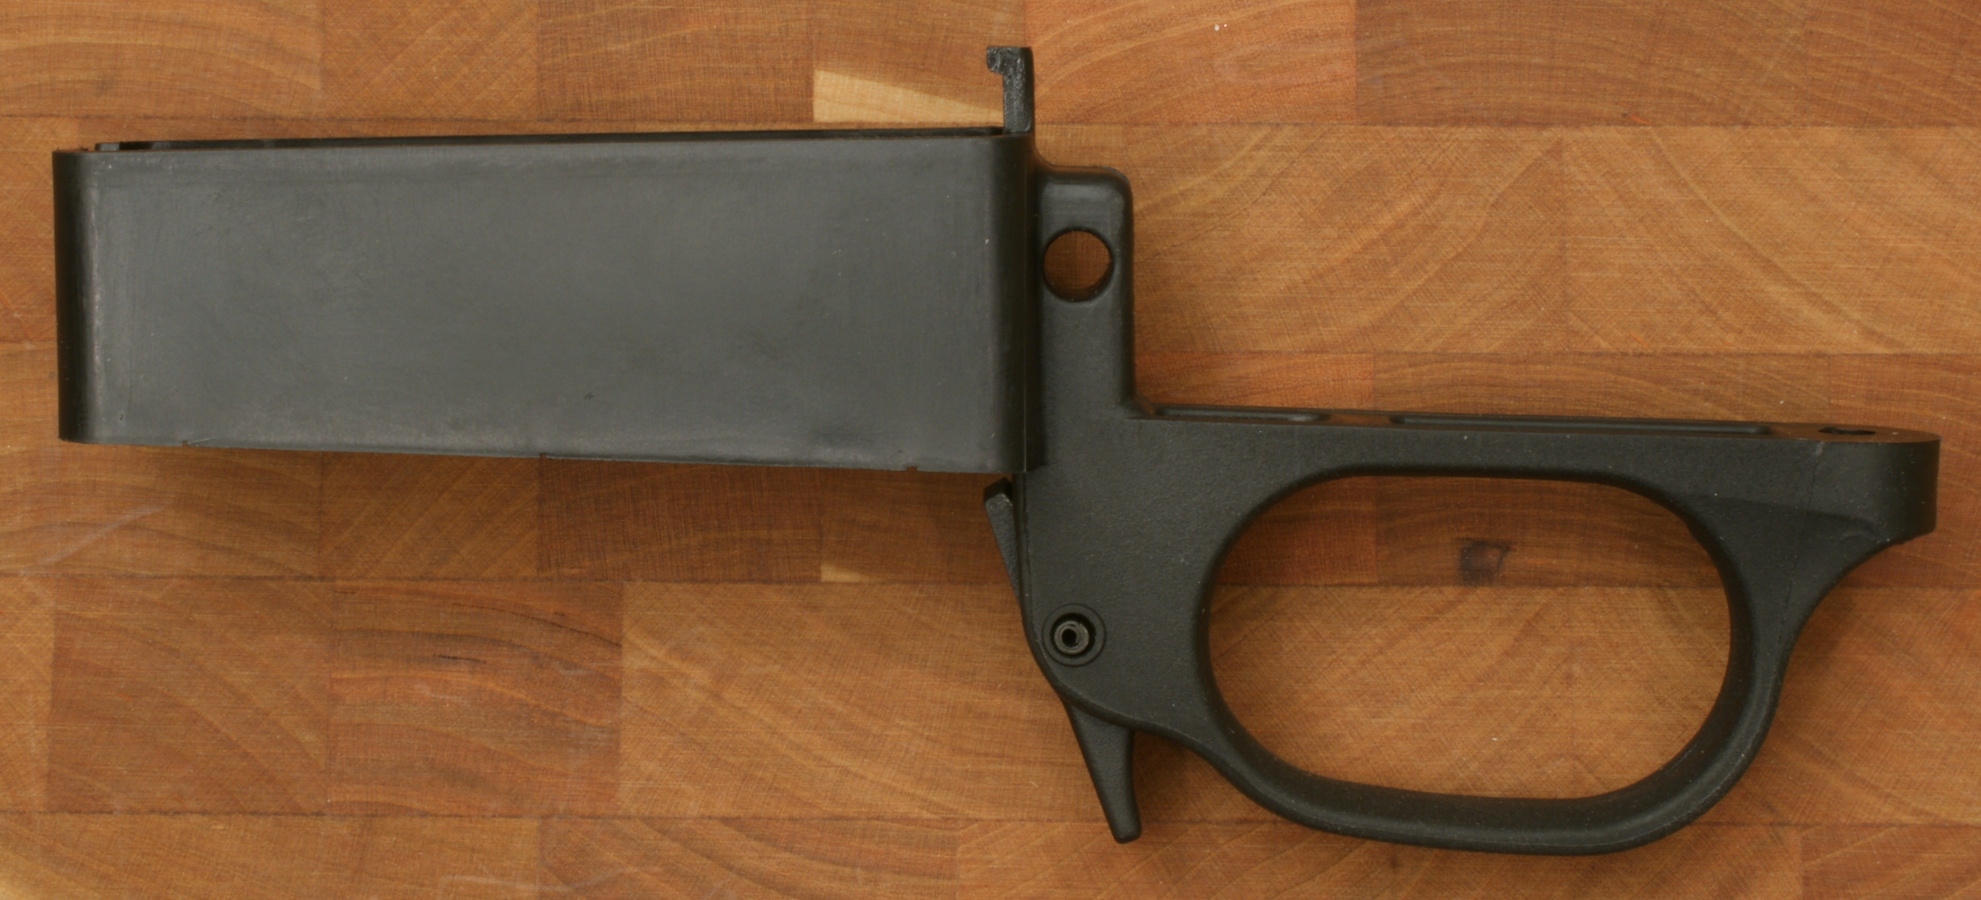
Figure 75
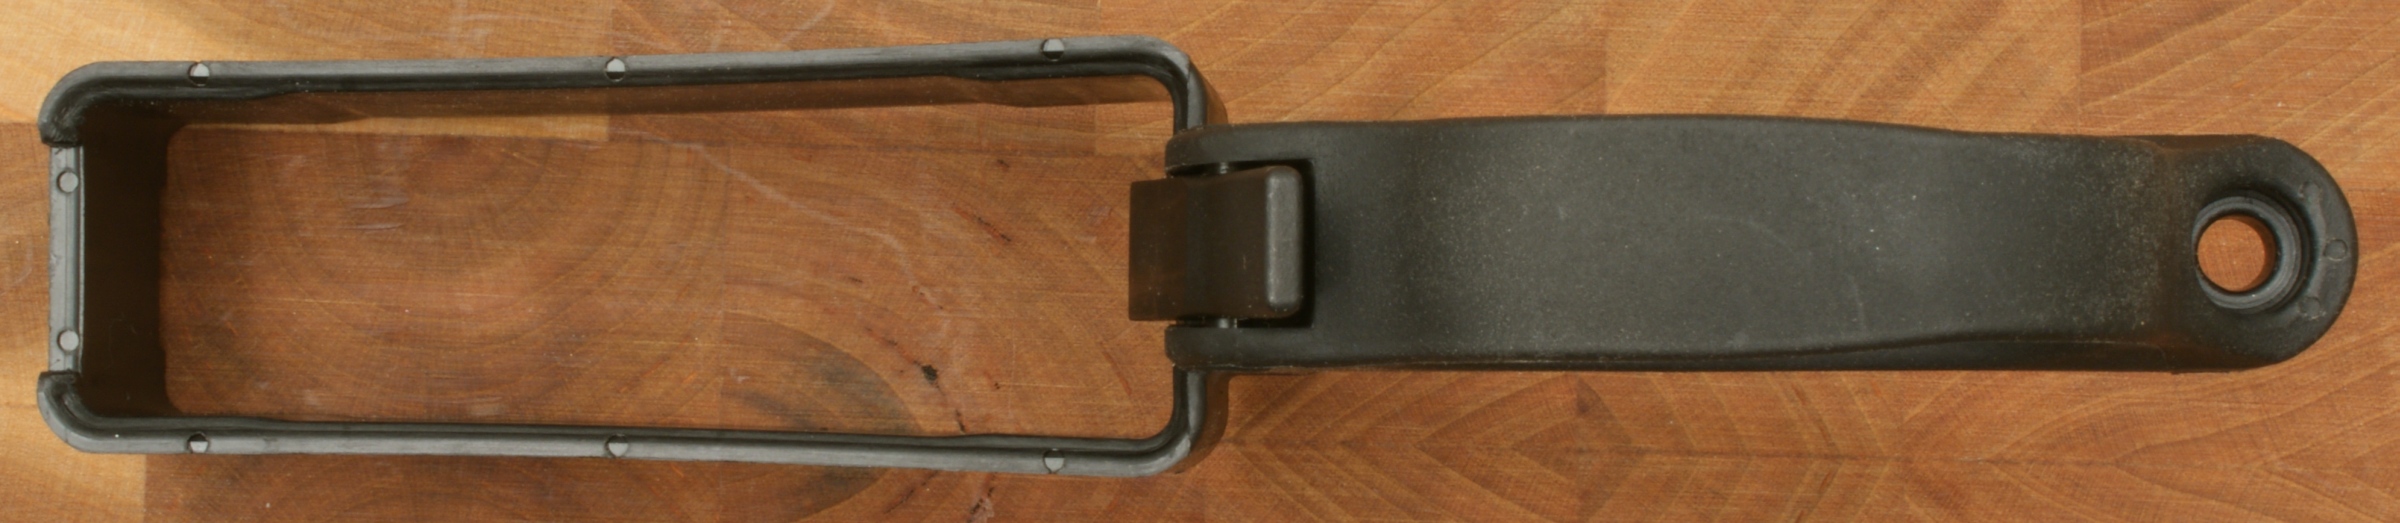
Figure 76
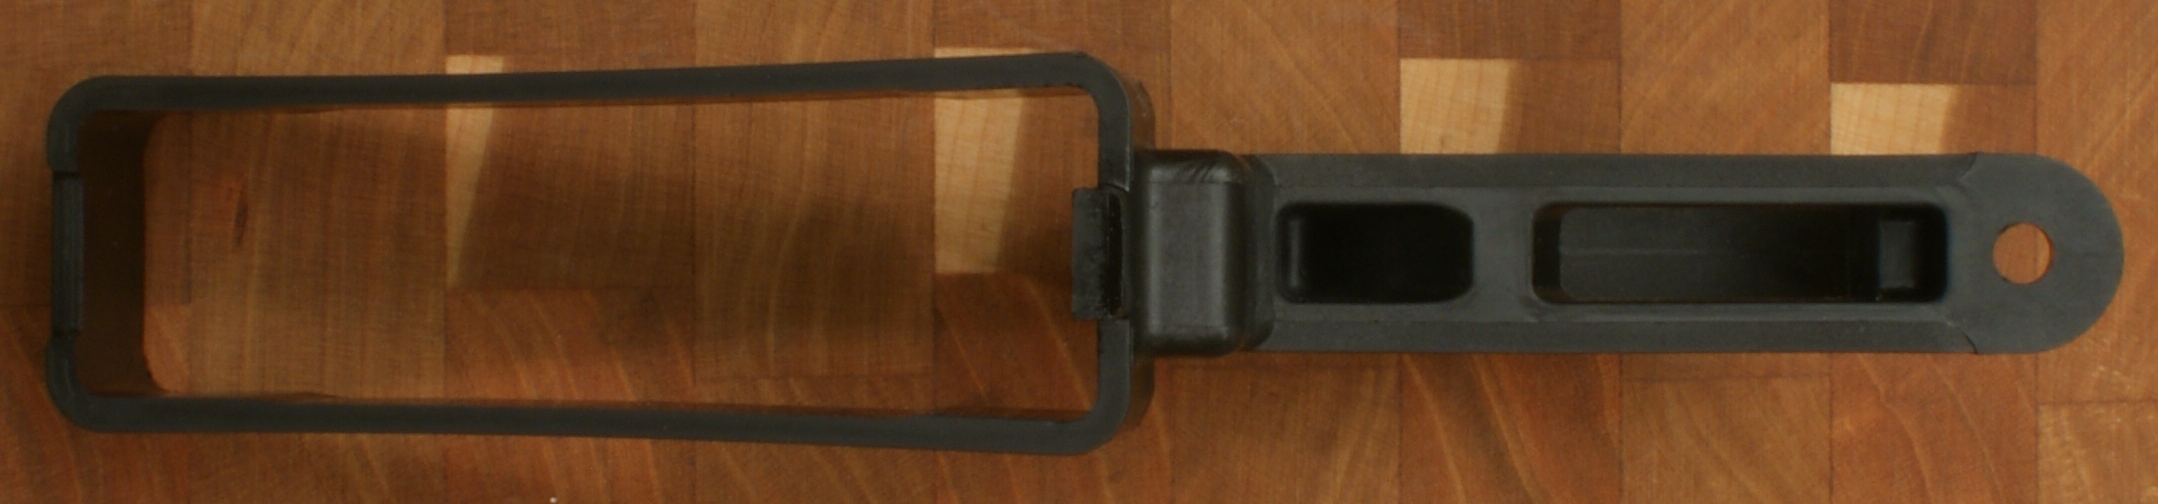
Figure 77
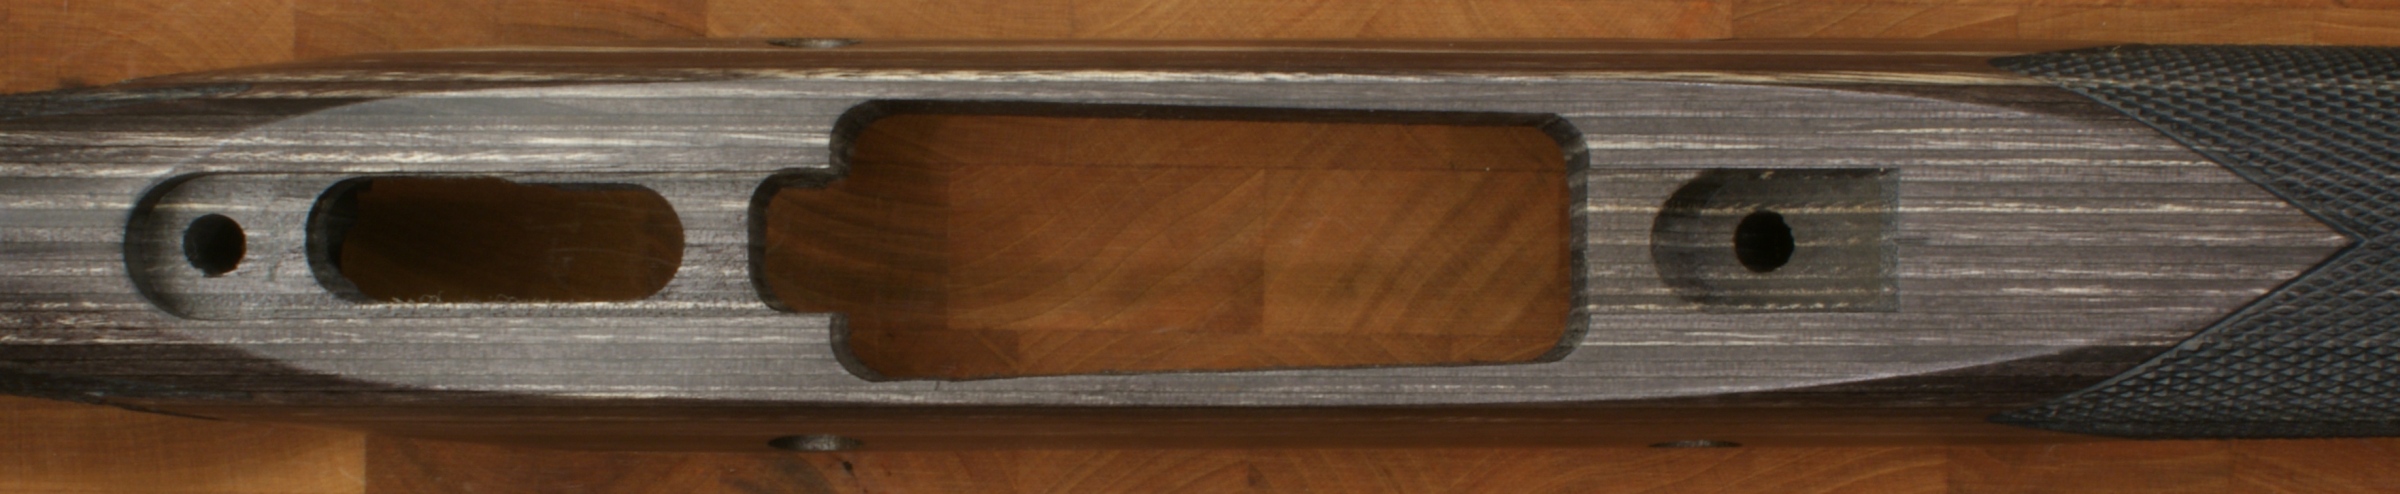
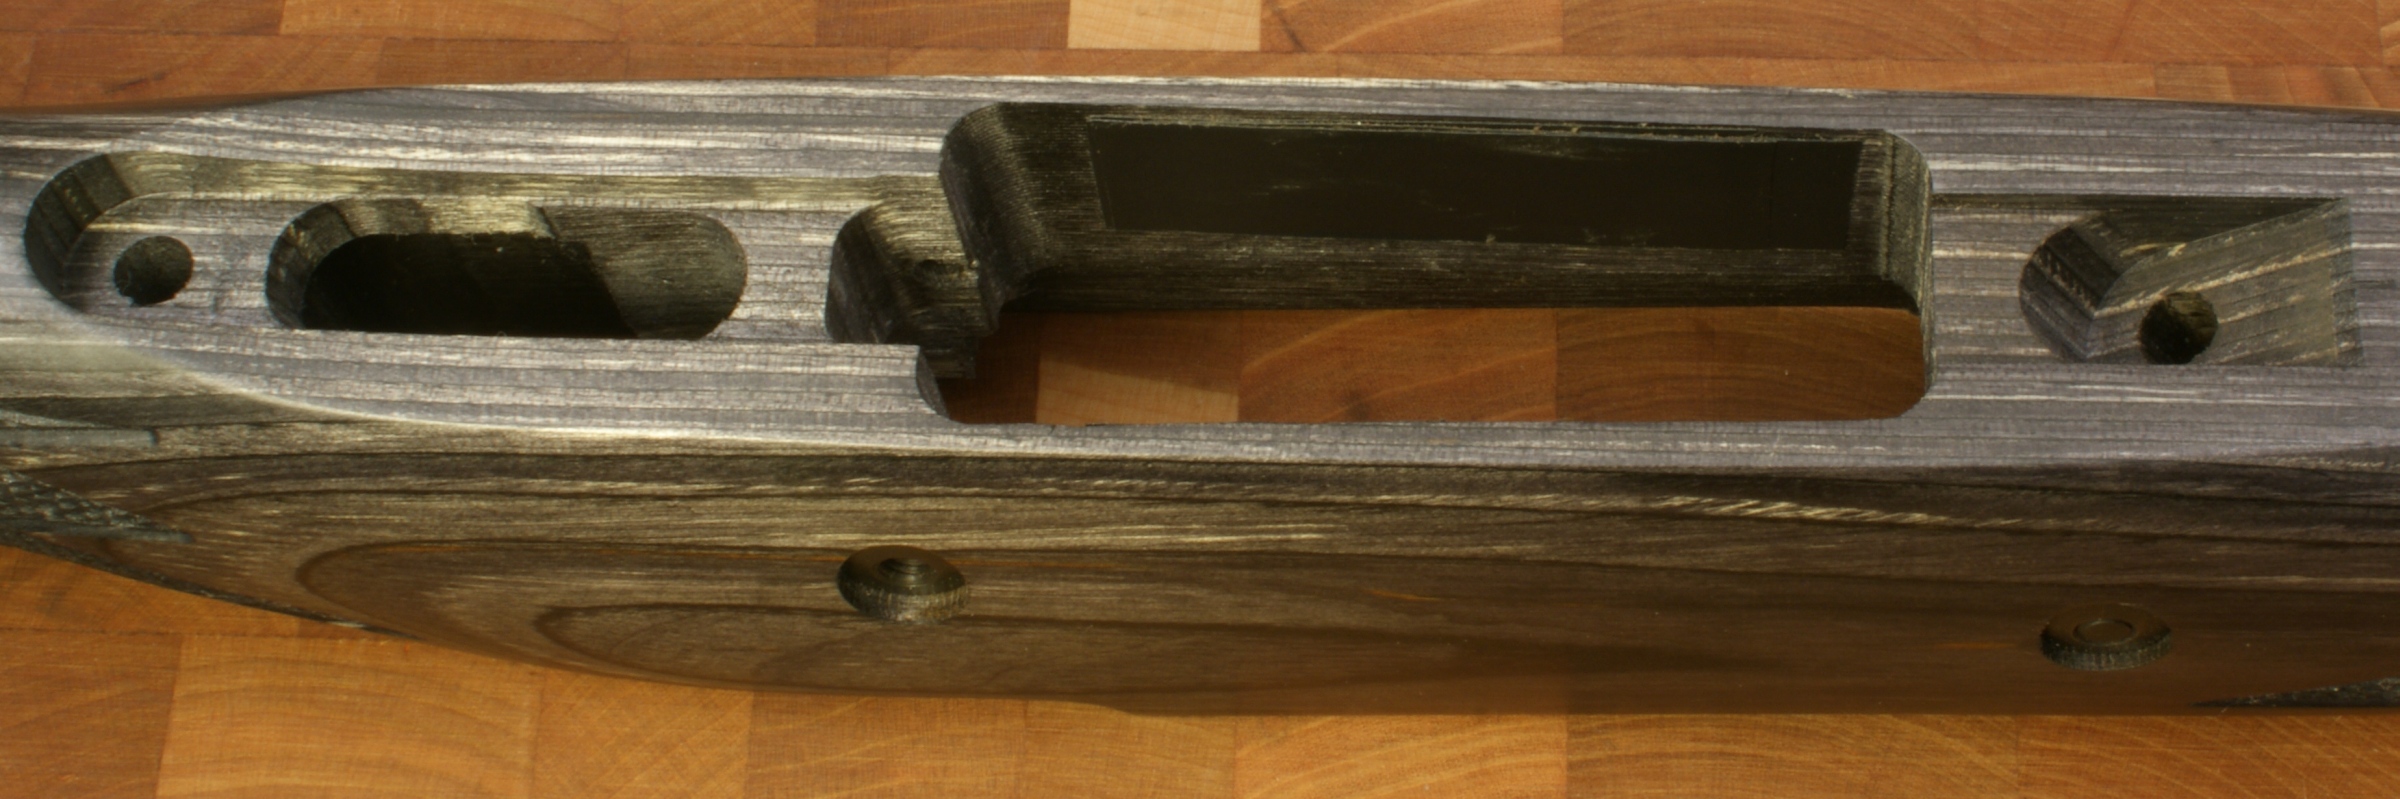
Stock
Figure 78
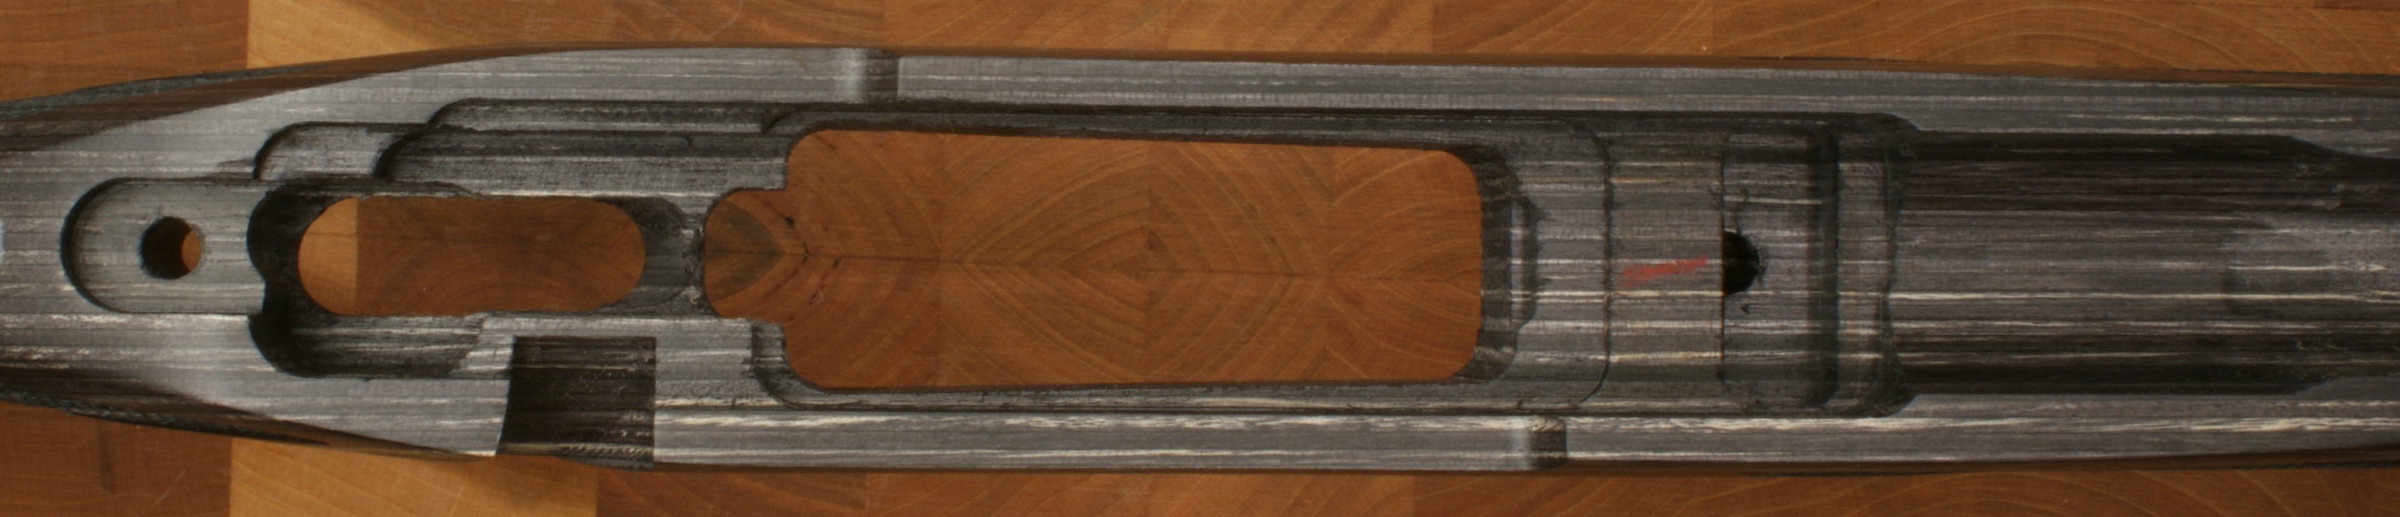
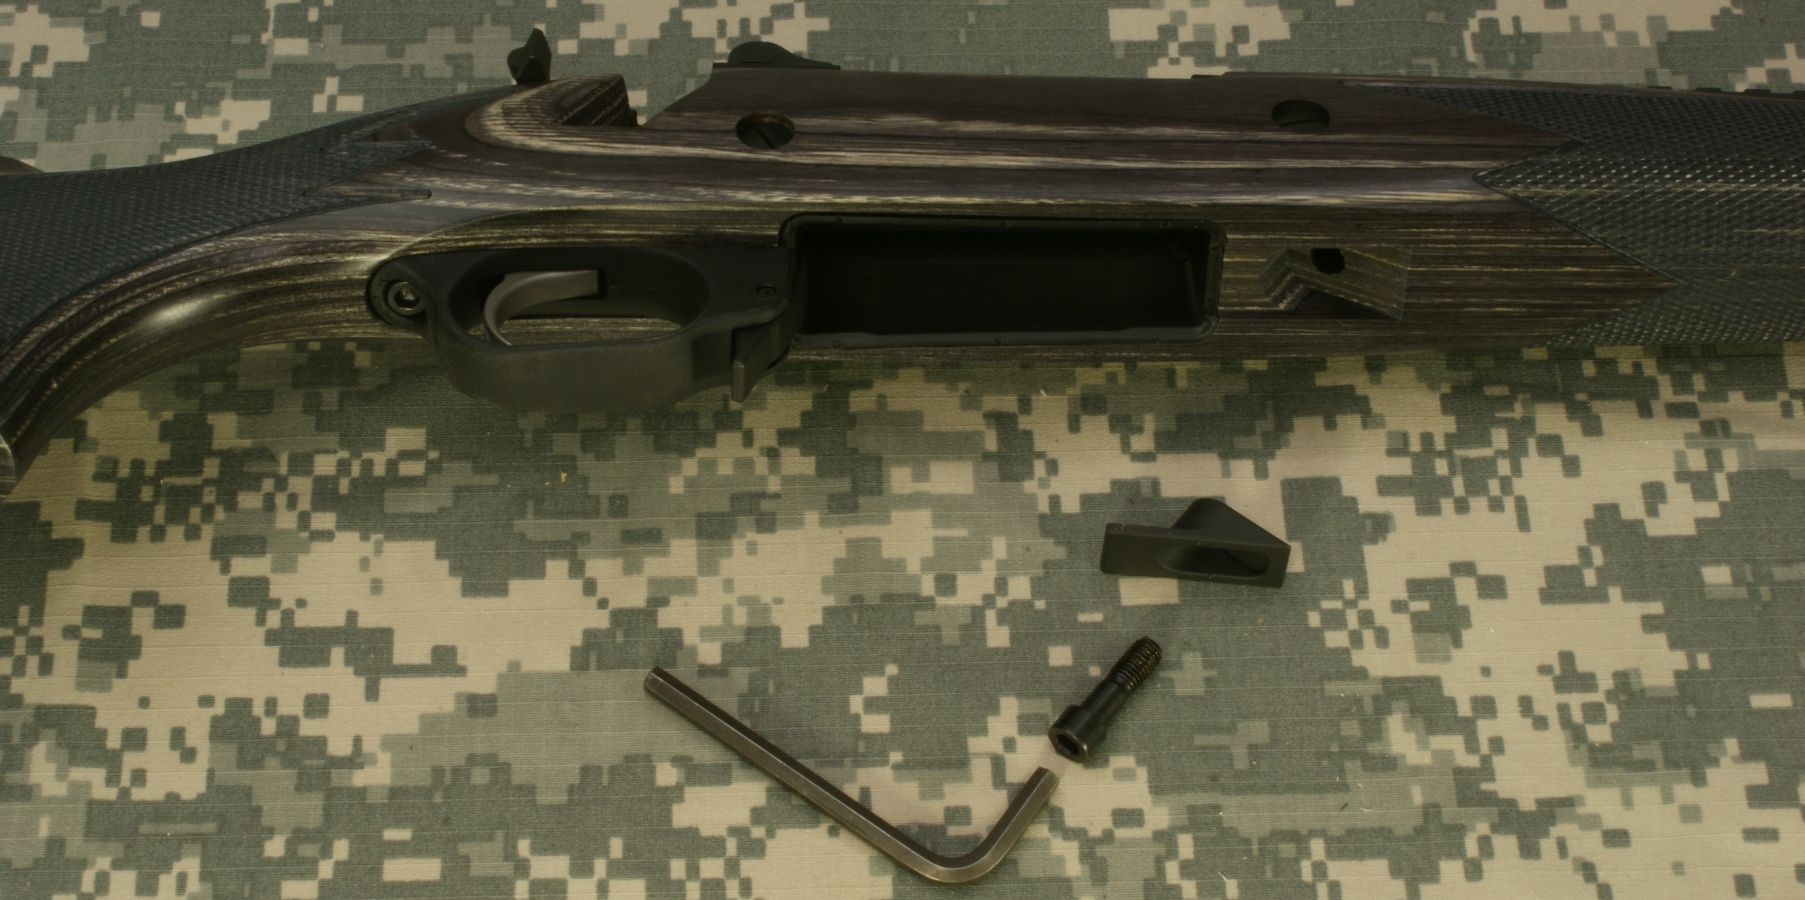
There is an insert in the forearm of the stock to allow the use of the front sling swivel stud.
Figure 79
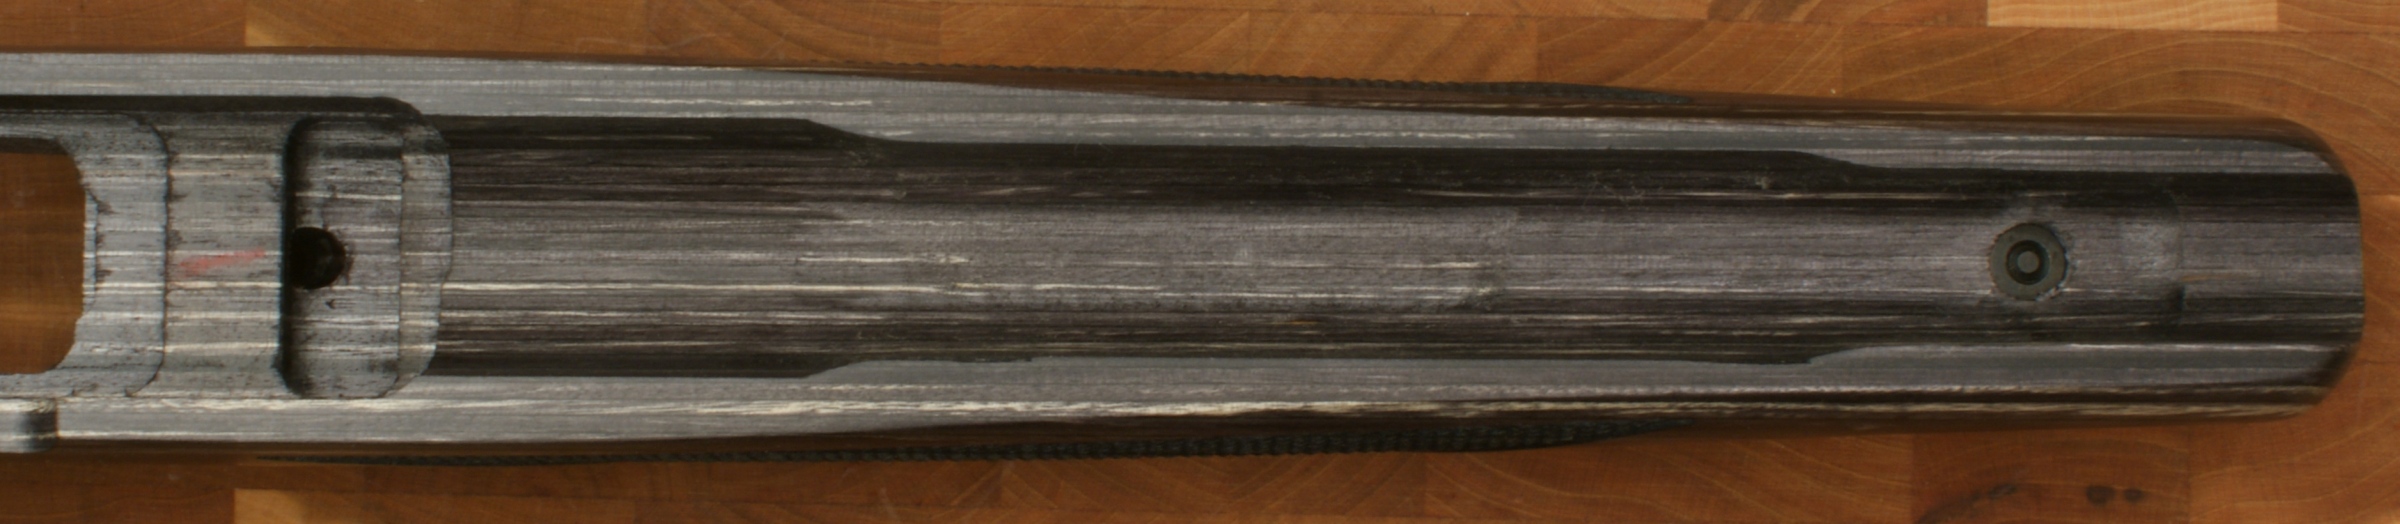
Figure 80
In Part 3 of the Ruger Gunsite Rifle Review, I mentioned about the side to side rattle for the magazine. The photo below shows how I placed 3 layers of black electrical tape on each side of the magazine well. Once I fully reassembled the rifle, the added tape was able to get rid of the rattle of the magazine inside the well.
Figure 81
The Ruger Gunsite Scout Rifle is very easy to disassemble and reassemble, including the trigger group components. Clearly, Ruger has leveraged their use of investment castings in an effort to keep costs down while trying to provide a very functional and reliable rifle.
In Part 5 of this review, I setup the rifle in several different optics configurations and cover range testing. You can navigate to other parts of this review using the links below.
- Ruger Gunsite Review: Part 1 - Introduction, Specifications and Summary
- Ruger Gunsite Review: Part 2 - What's in the Box
- Ruger Gunsite Review: Part 3 - External Features
- Ruger Gunsite Review: Part 4 - Disassembly and Internal Features (this page)
- Ruger Gunsite Review: Part 5 - Range Test
Or
If you would like to be notified about future Gunsumer Reports reviews via Facebook, make sure "You Like This" by clicking the Facebook "Like" button at the bottom or top of this page. If it already says "You Like This" beside the button, clicking it again will uncheck the "Like" status and you will not be notified.
| Share on Facebook | |
© 2010, 2011, 2012, 2013, 2014, 2015, 2016, 2017, 2018, 2019, 2020, 2021, 2022, 2023 & 2024 Gunsumer Reports™, All rights reserved.
FTC Disclosure