|
|
Gunsumer Reports TM Providing Detailed Objective Reviews for Firearms and Firearm Accessories |
Ruger Gunsite Scout Rifle Review
Part 3 - External Features and
Accessories
March 21, 2011
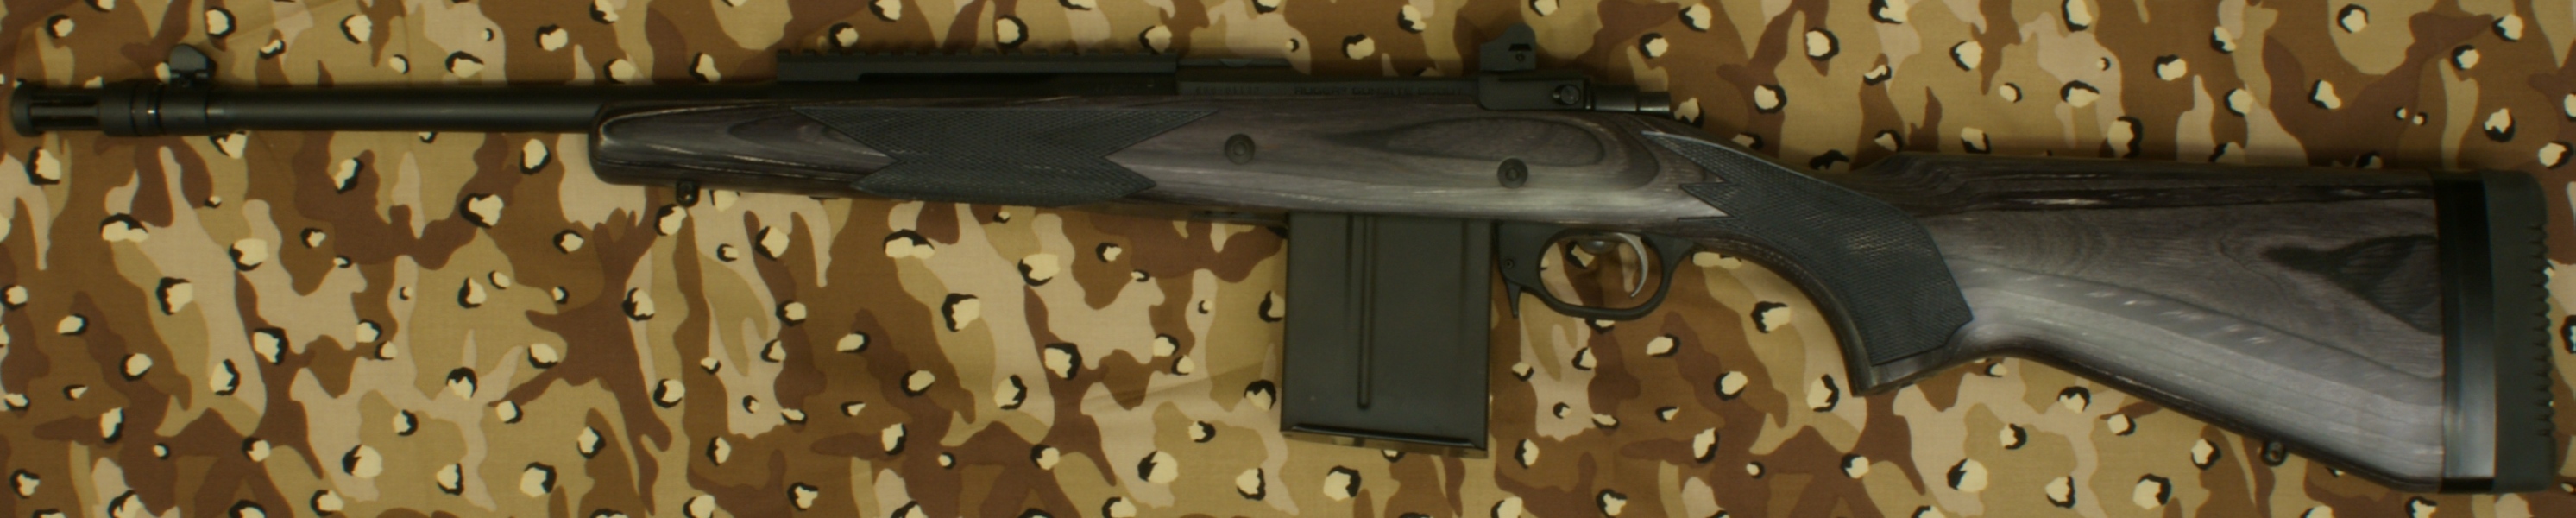
In this part of the review I show all of the externally visible features of the rifle along with the accessories. The group of photos below give you the overall views of the Ruger Gunsite Scout Rifle. Most of the other 75+ photos are zoomed in to show specific details. Throughout this review, you can click on a photo to bring up a high definition photo showing even finer detail.
Figure 1 - Right View

Figure 2 - Top View

Figure 3 - Bottom View

Figure 4 - Left View
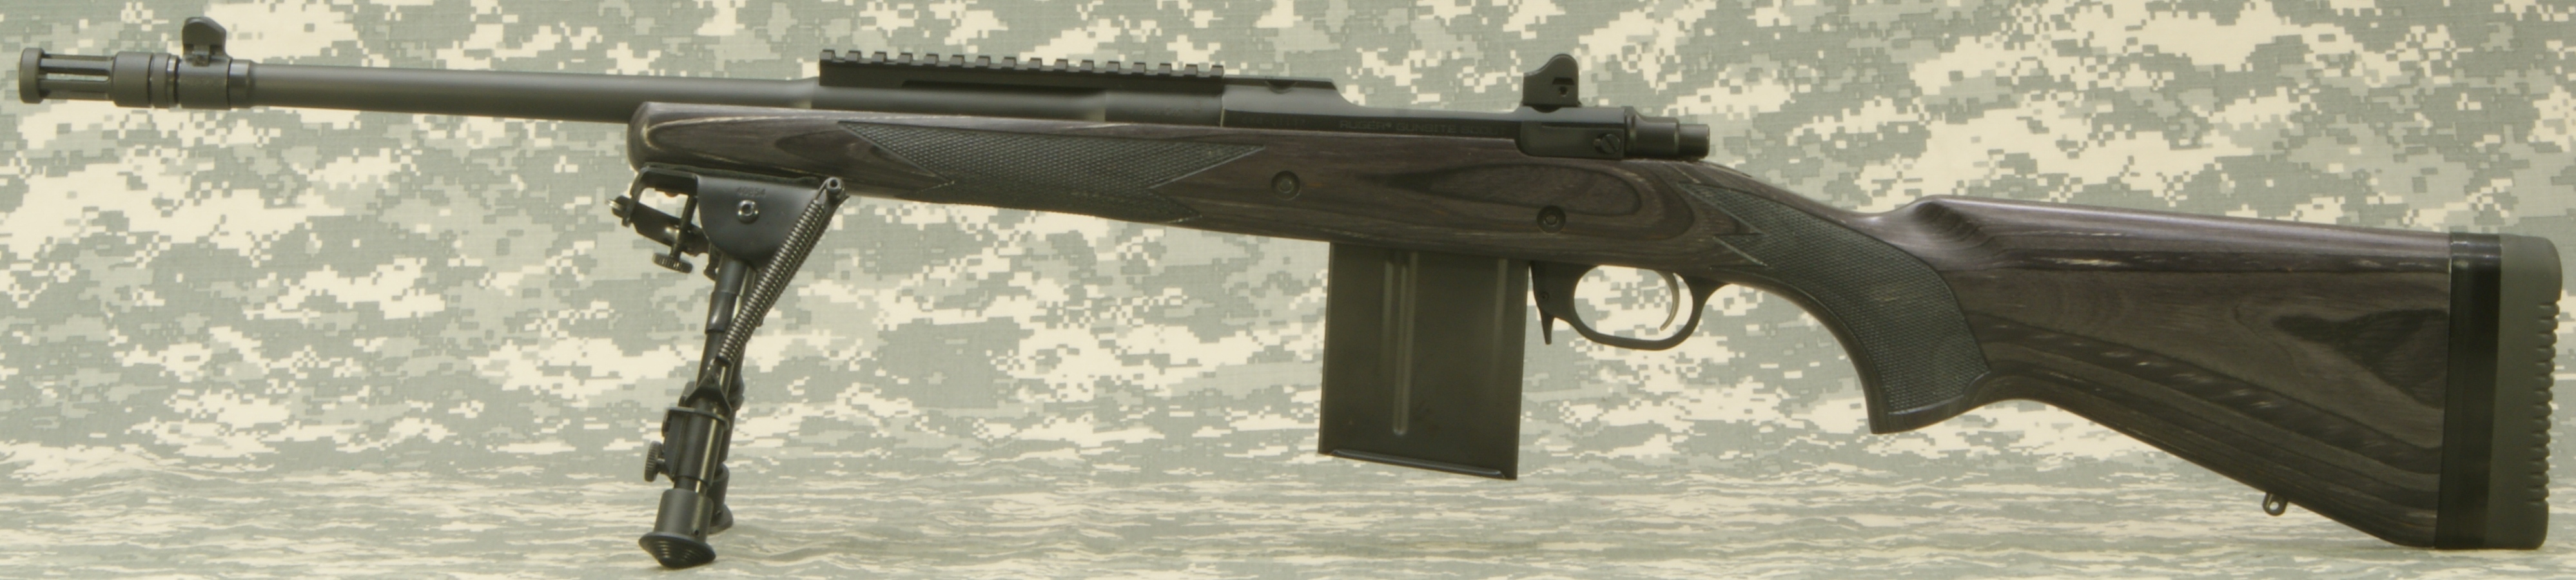
I have included the next two photos to give you an idea of how the rifle sits on a 5.75" bipod. This bipod does not come with the rifle, but I use it throughout the review to help support the rifle for photos.
Figure 5 - Right View on Bipod
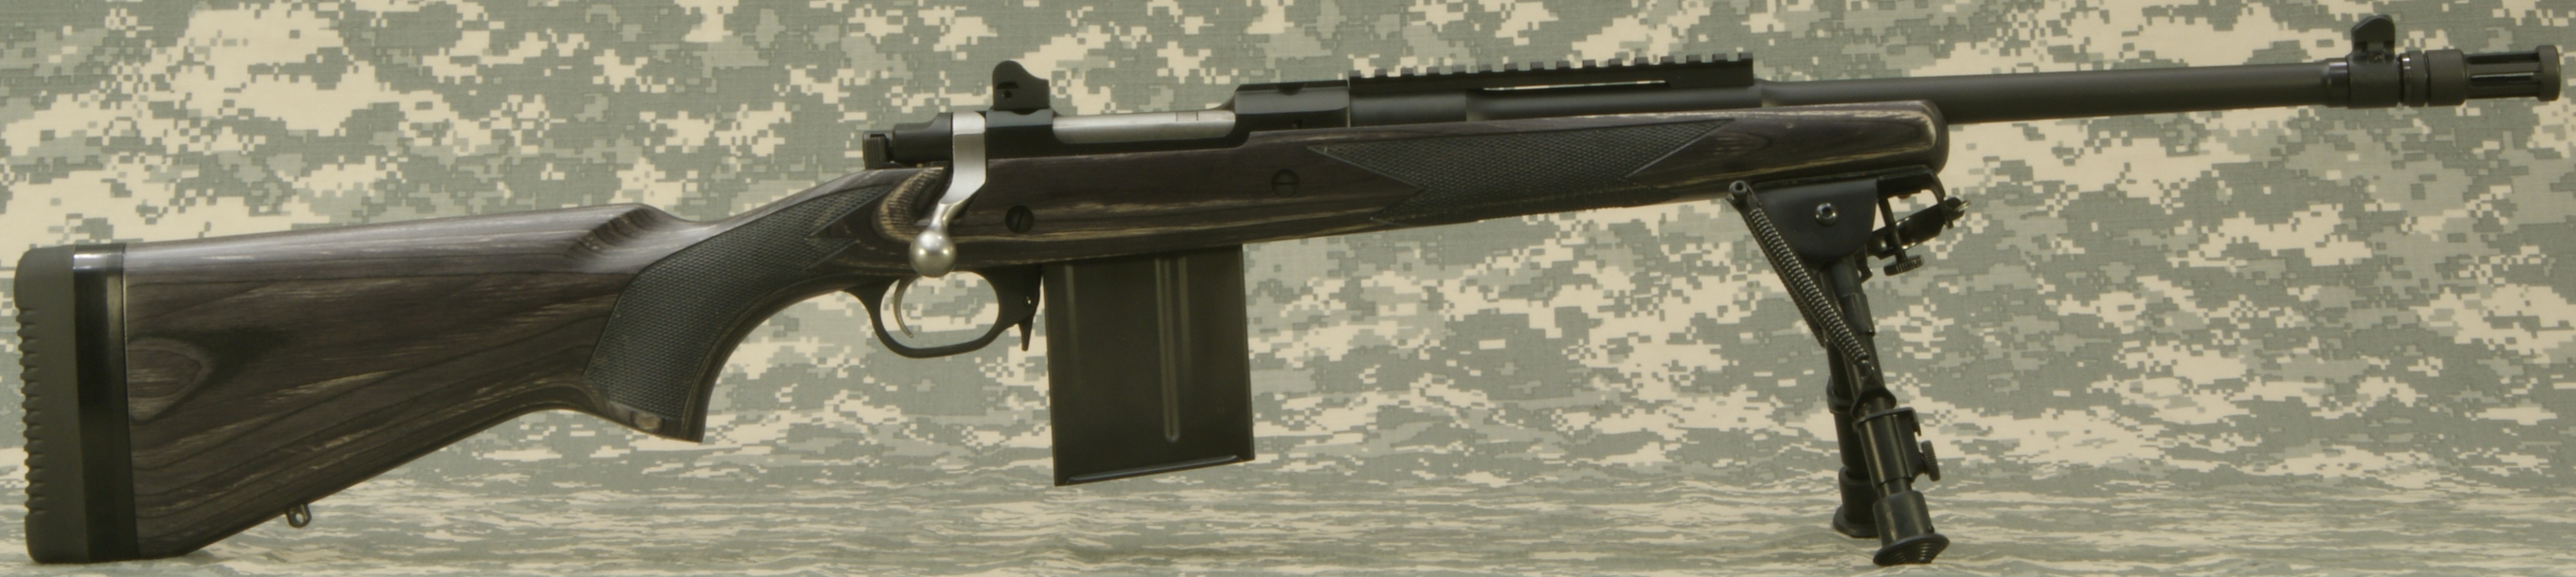
Figure 6 - Left View on Bipod
Flash Suppressor and Front Sight
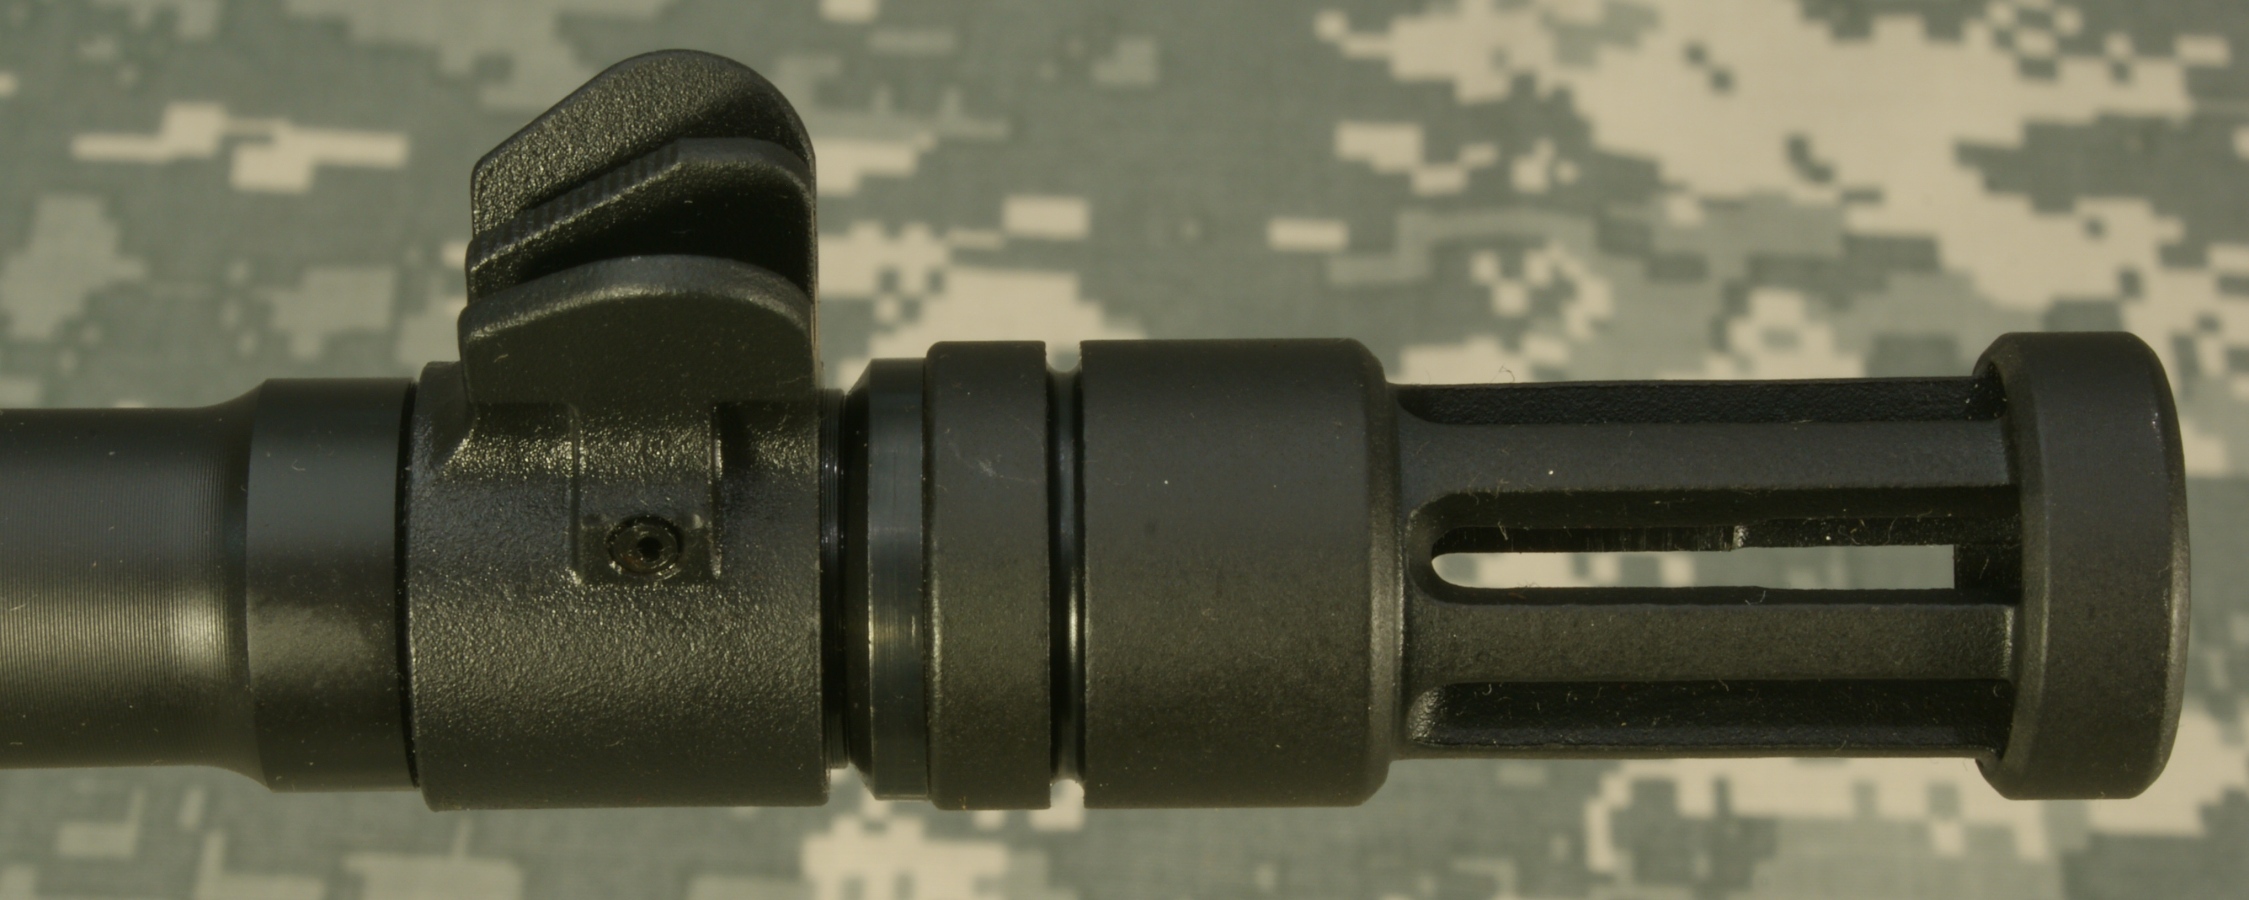
The flash suppressor is the same style that Ruger puts on all of their rifles. The only significant difference I can see from those on their other rifles is the bore diameter is larger to accommodate the larger .308 Winchester bullet.
Figure 7
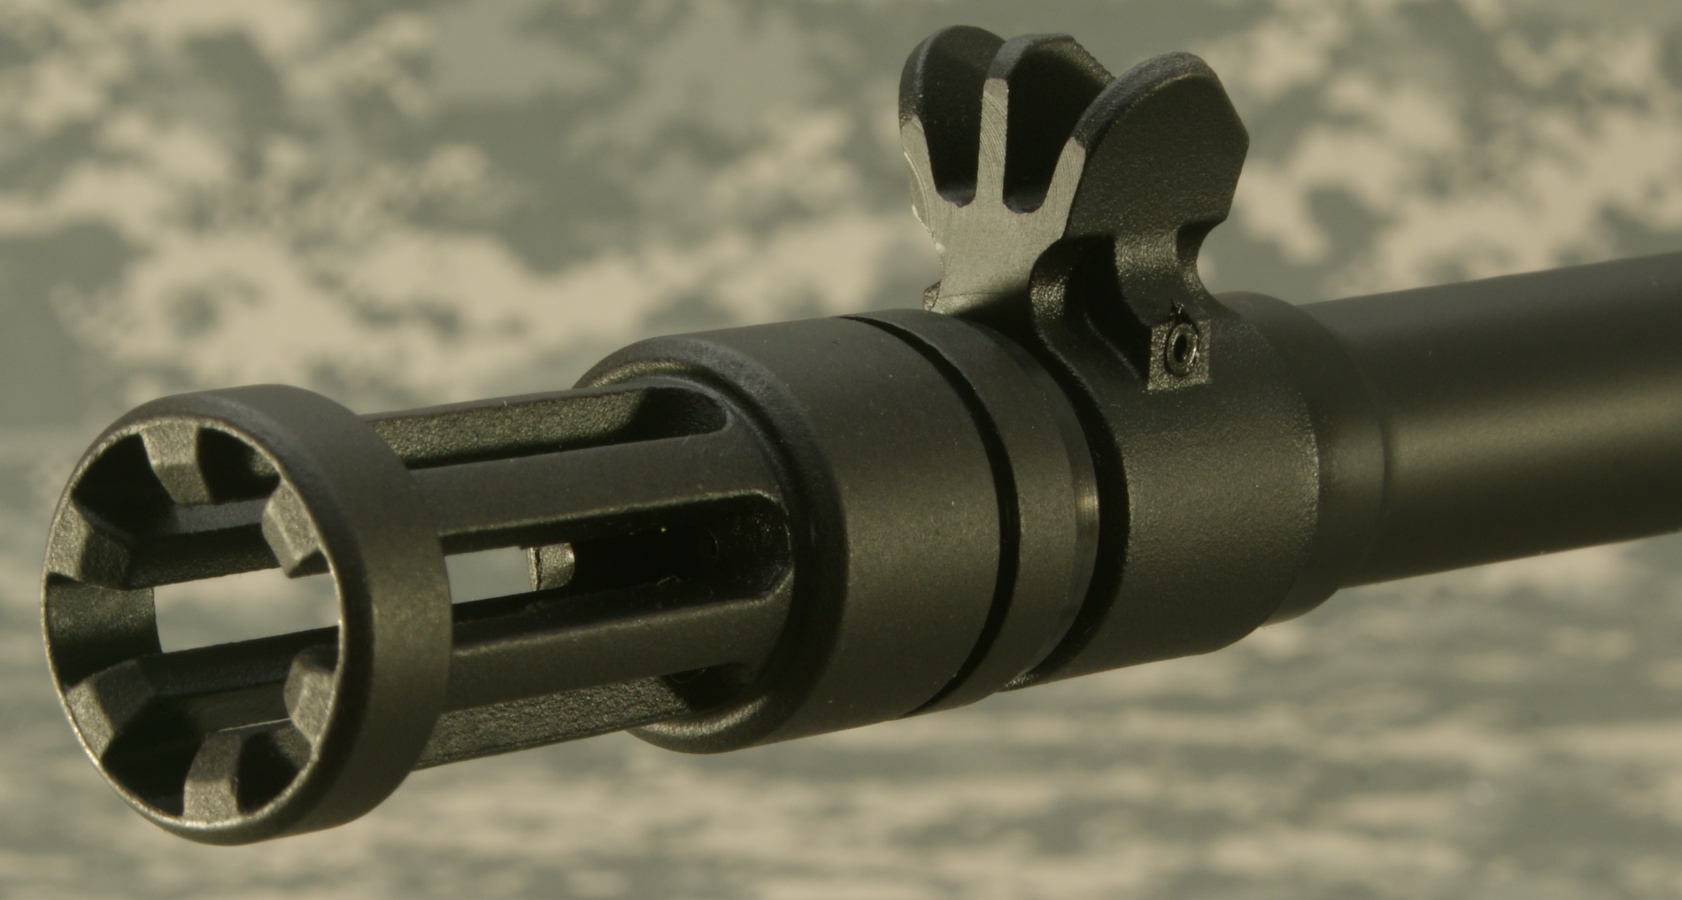
The flash suppressor (A) is an investment casting that is made in Ruger's Pine Tree Castings facility. The flash suppressor is threaded on to the end of the barrel with a 5/8-24 thread which allows the ability to easily install other types of flash or sound suppressors. Immediately behind the flash suppressor is the flash suppressor washer (B). The front sight (C) slides over a non-threaded portion on the end of the barrel and is held in place by a cross pin. The end of the barrel has a flared out portion (D) which provides a stop for the front sight to rest against.
Figure 8
Based on the texturing of the front sight, I believe it is also an investment casted part. The attachment of the sight to the barrel was solid with no free-play. In the photo below, you can see the barrel exposed just forward of the sight and behind the suppressor washer.
Figure 9
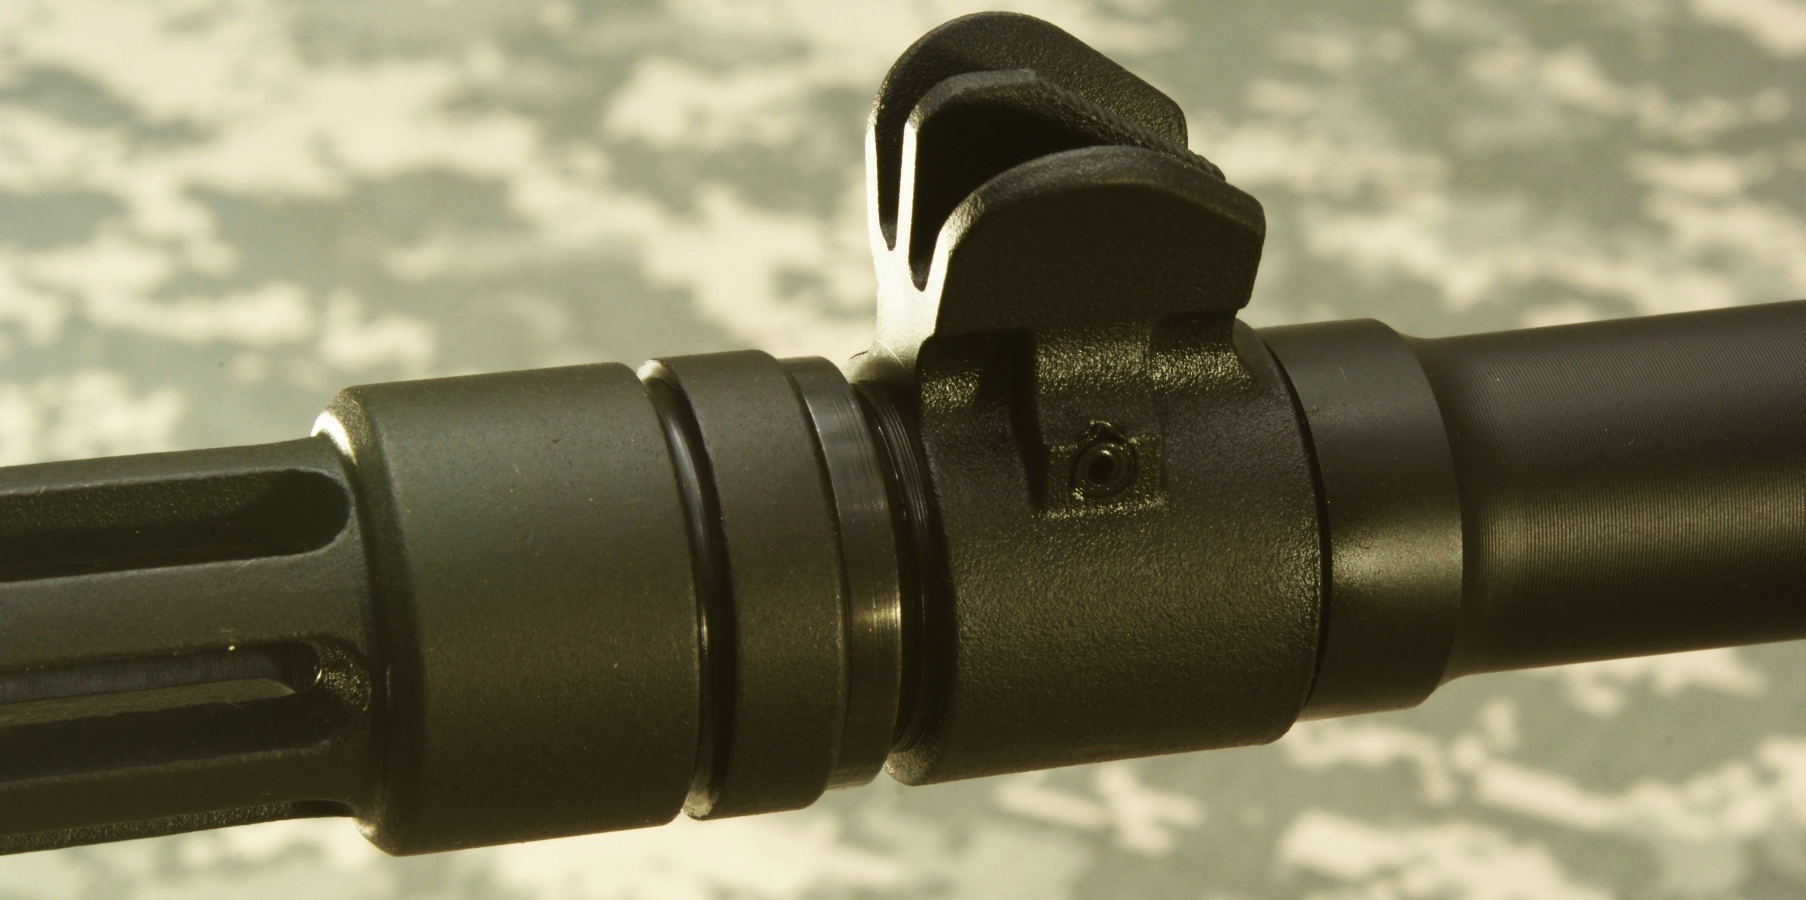
Figure 10
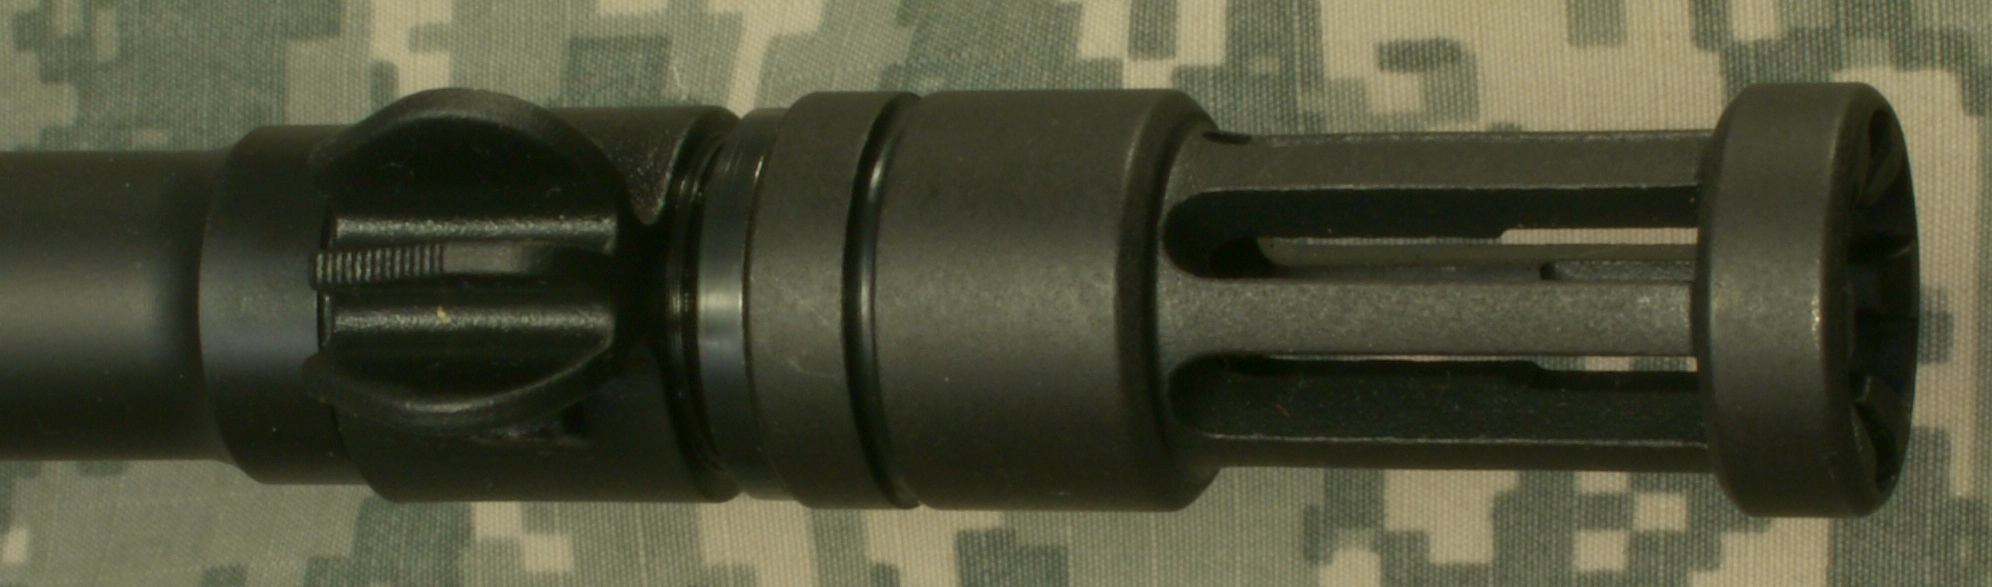
The flash suppressor measured 2.25" in length with an outside diameter of 0.86".
Figure 11
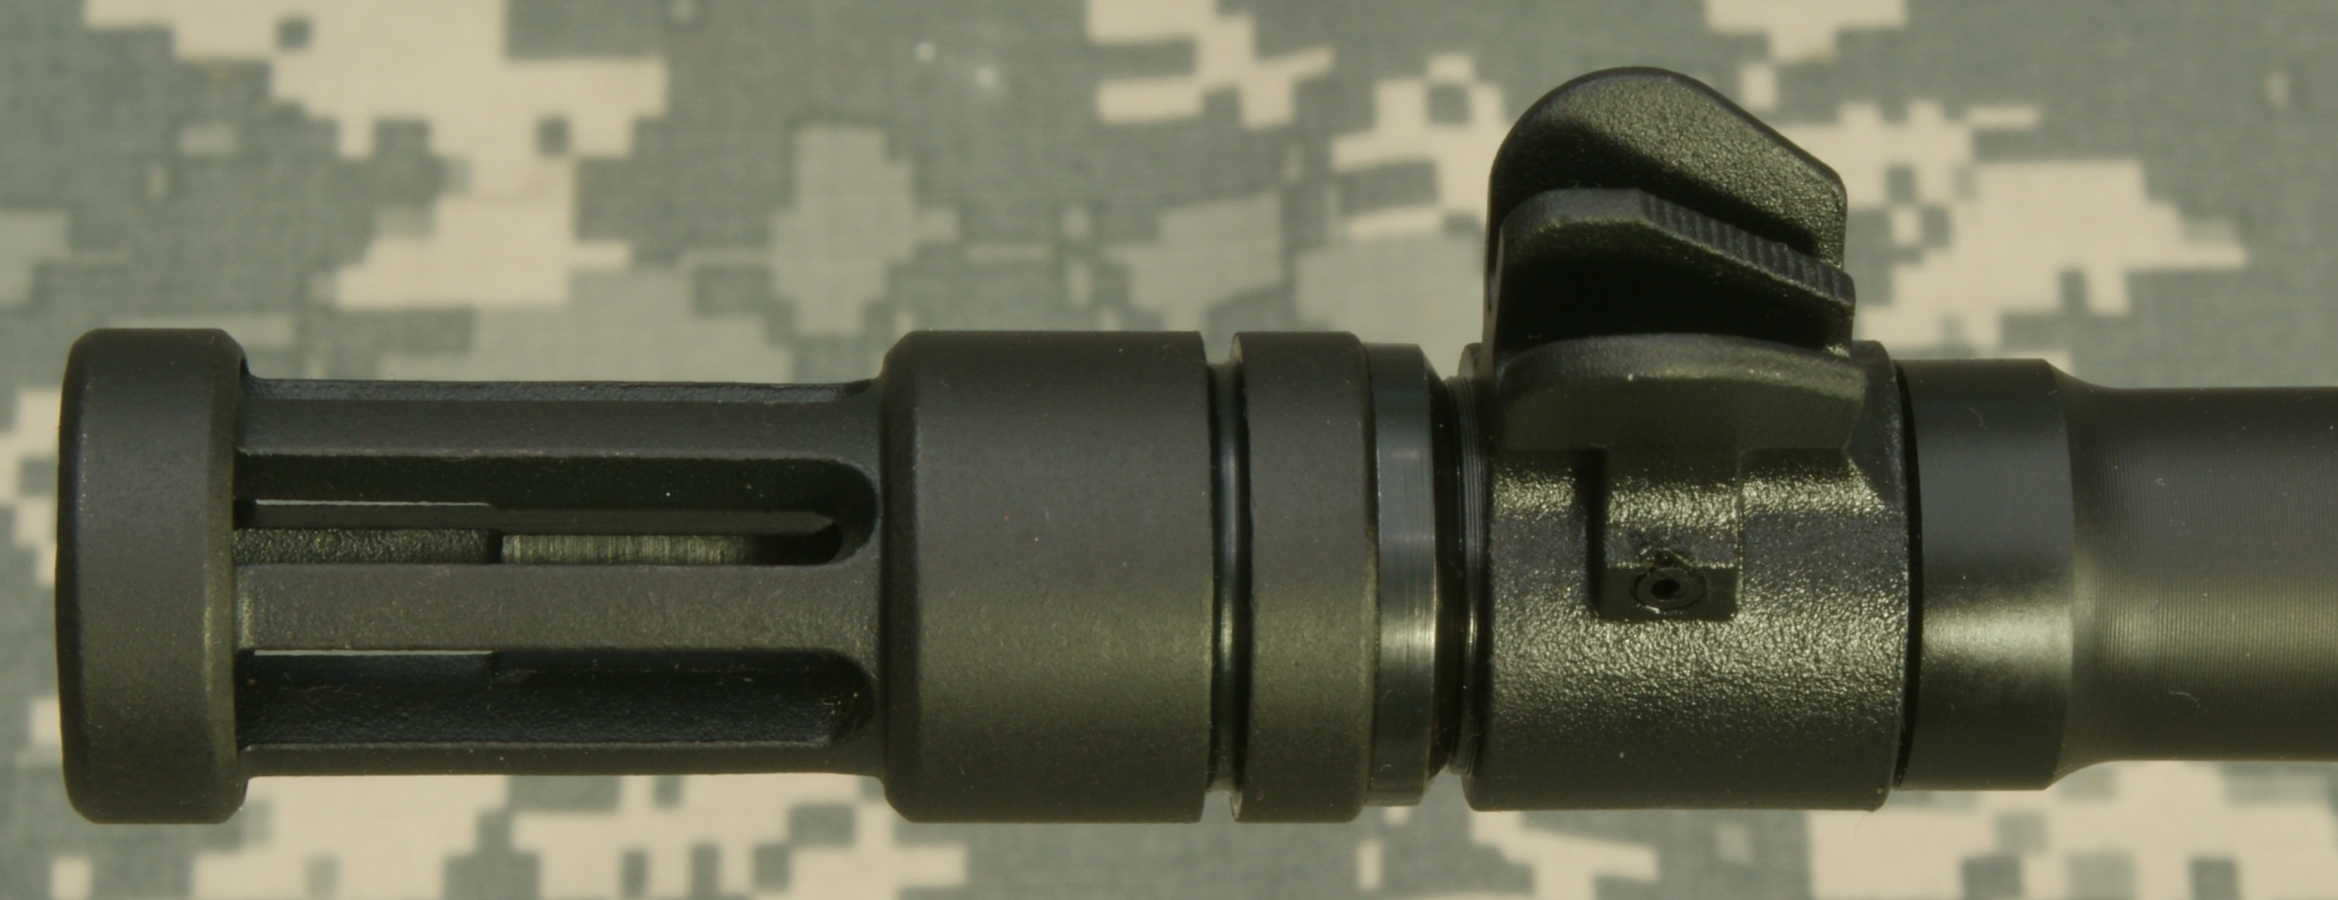
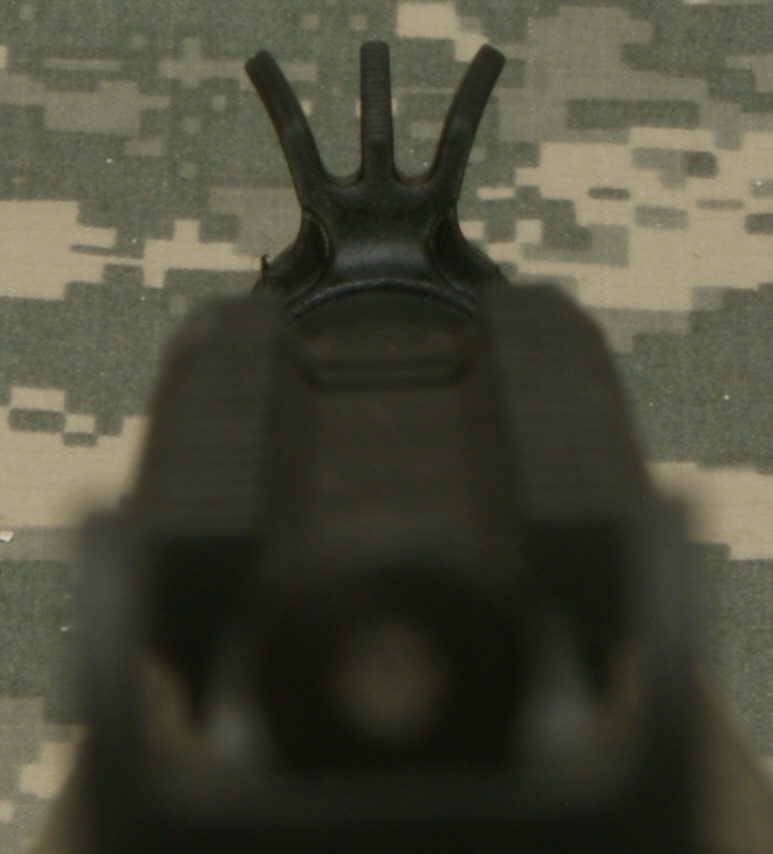
The front sight is a Mini 14 style tall thin non-adjustable sight that has protected wings on both sides. This tall thin post along with the ghost ring rear aperture sight produces a good sight picture and open view.
Figure 12
Barrel
The barrel on the Ruger Gunsite Rifle is a medium contoured barrel that measures 16.50" in length and has a 6 groove 1:10 RH twist on the rifling. The barrel is cold hammer forged from 4140 alloy steel. The barrel actually has 4 different exposed surface diameters. The first is just outside of the receiver and has a constant diameter of about 1.15". The next spans to the end of the rail and is a constant diameter of about 0.94". The third is a tapered diameter that starts at about 0.80" and ends at about 0.65". The last is the raised area just behind the front sight and measures about 0.76" in diameter. The reason for the constant diameters on the first two steps is to allow a simpler and more controllable interface for the rail to barrel contact surfaces.
Figure 13
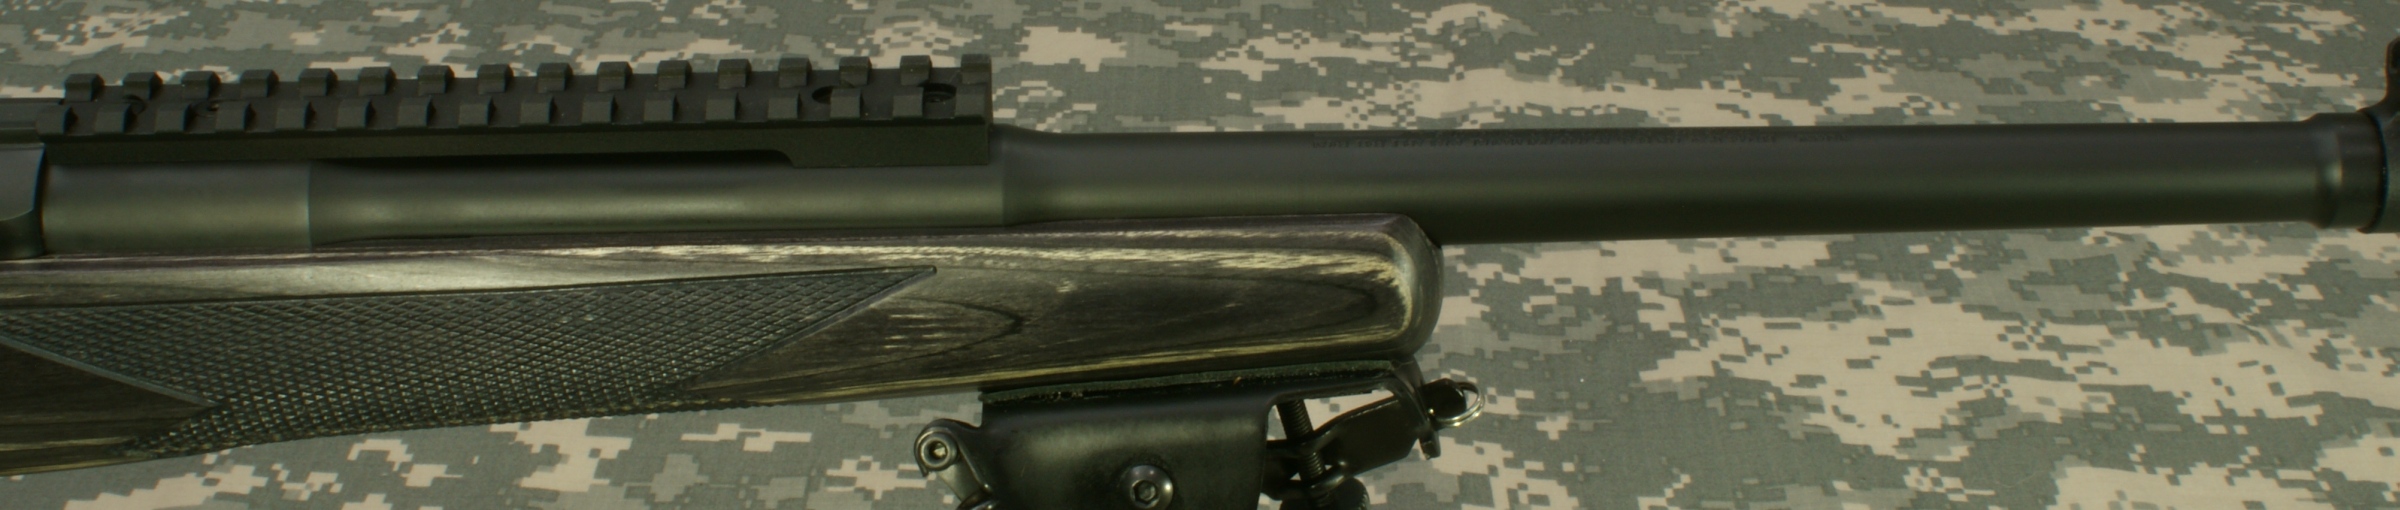
Figure 14
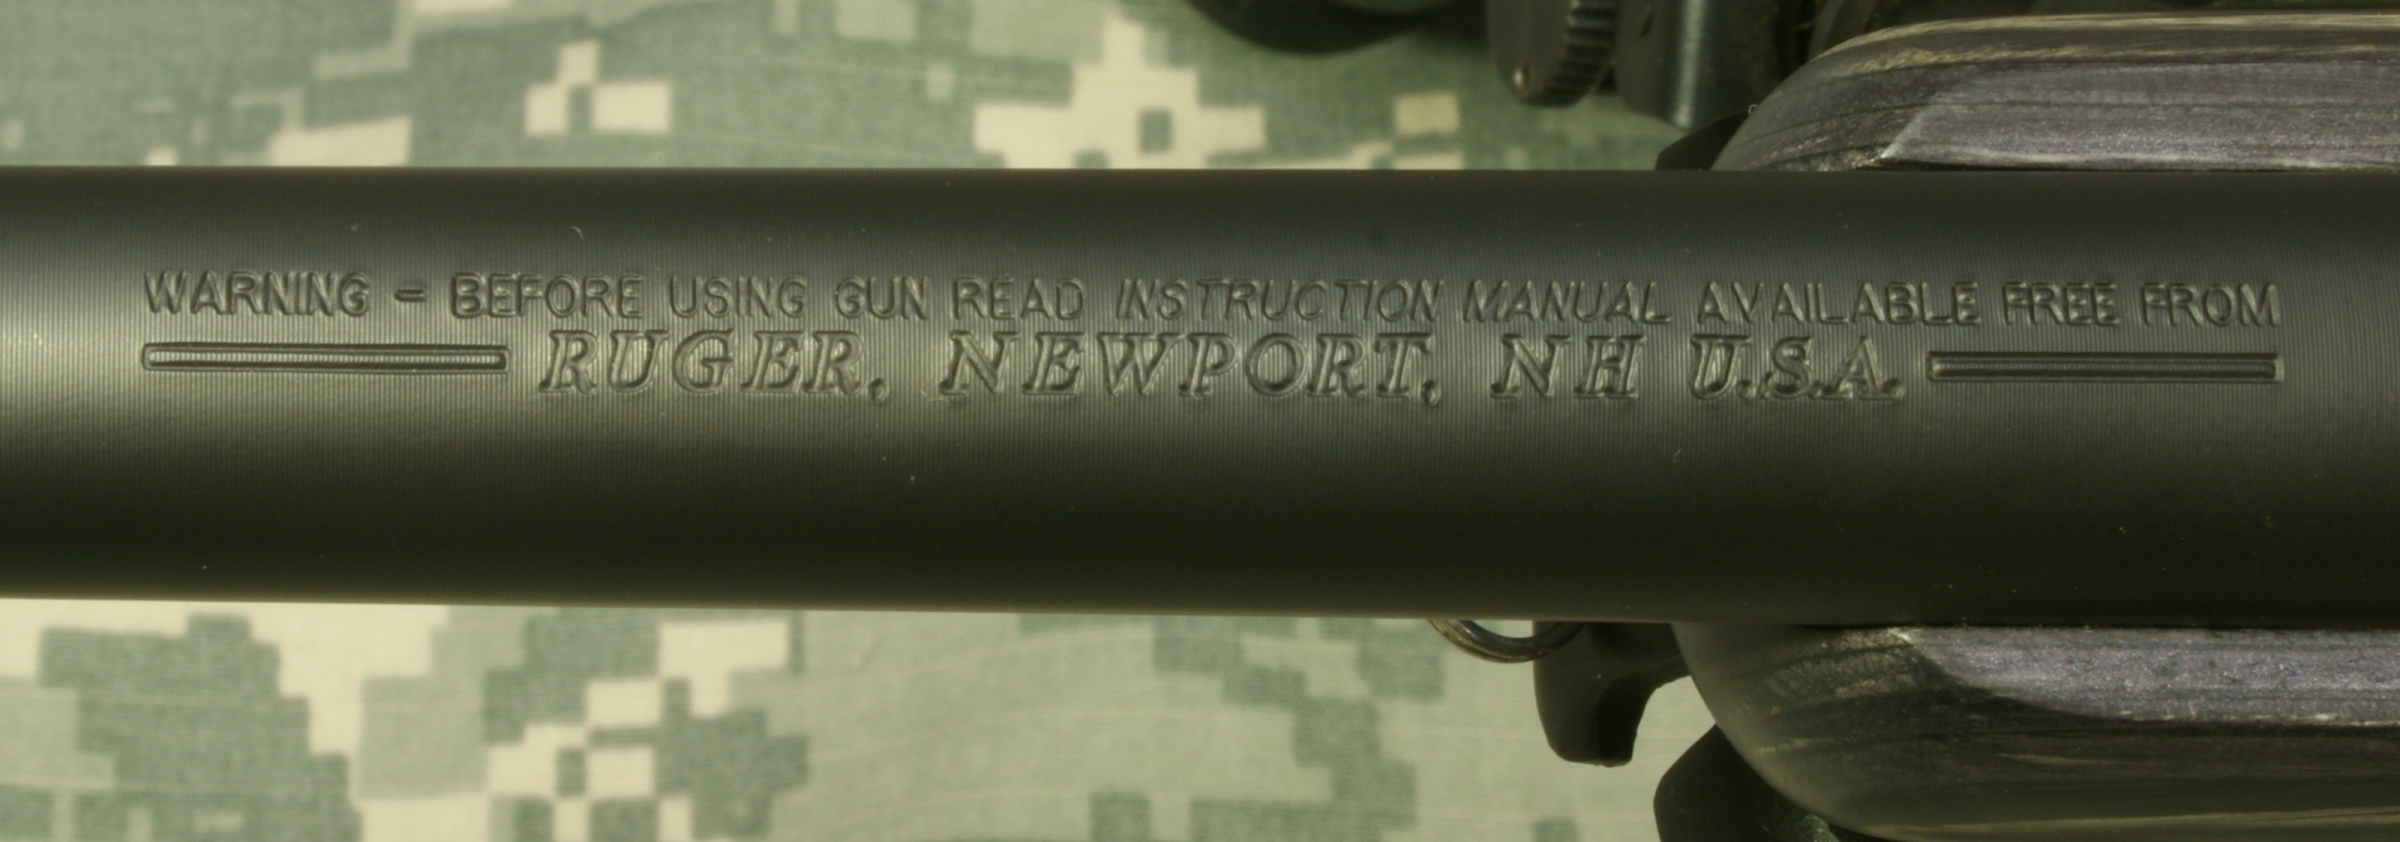
The top of the barrel just forward of the forearm is stamped with the standard warnings and Ruger information.
Figure 15
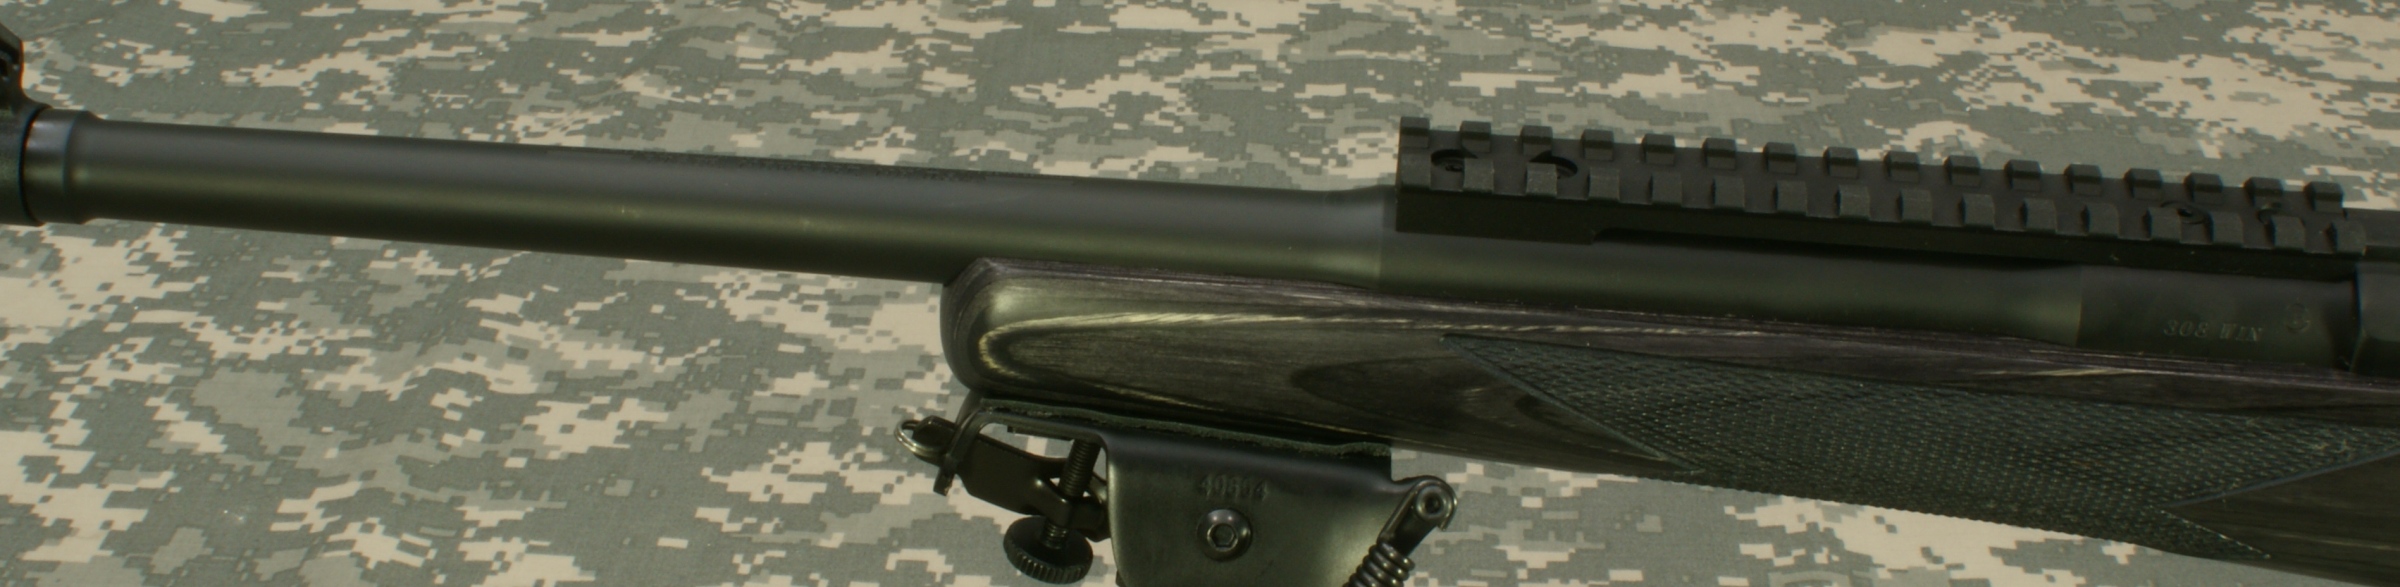
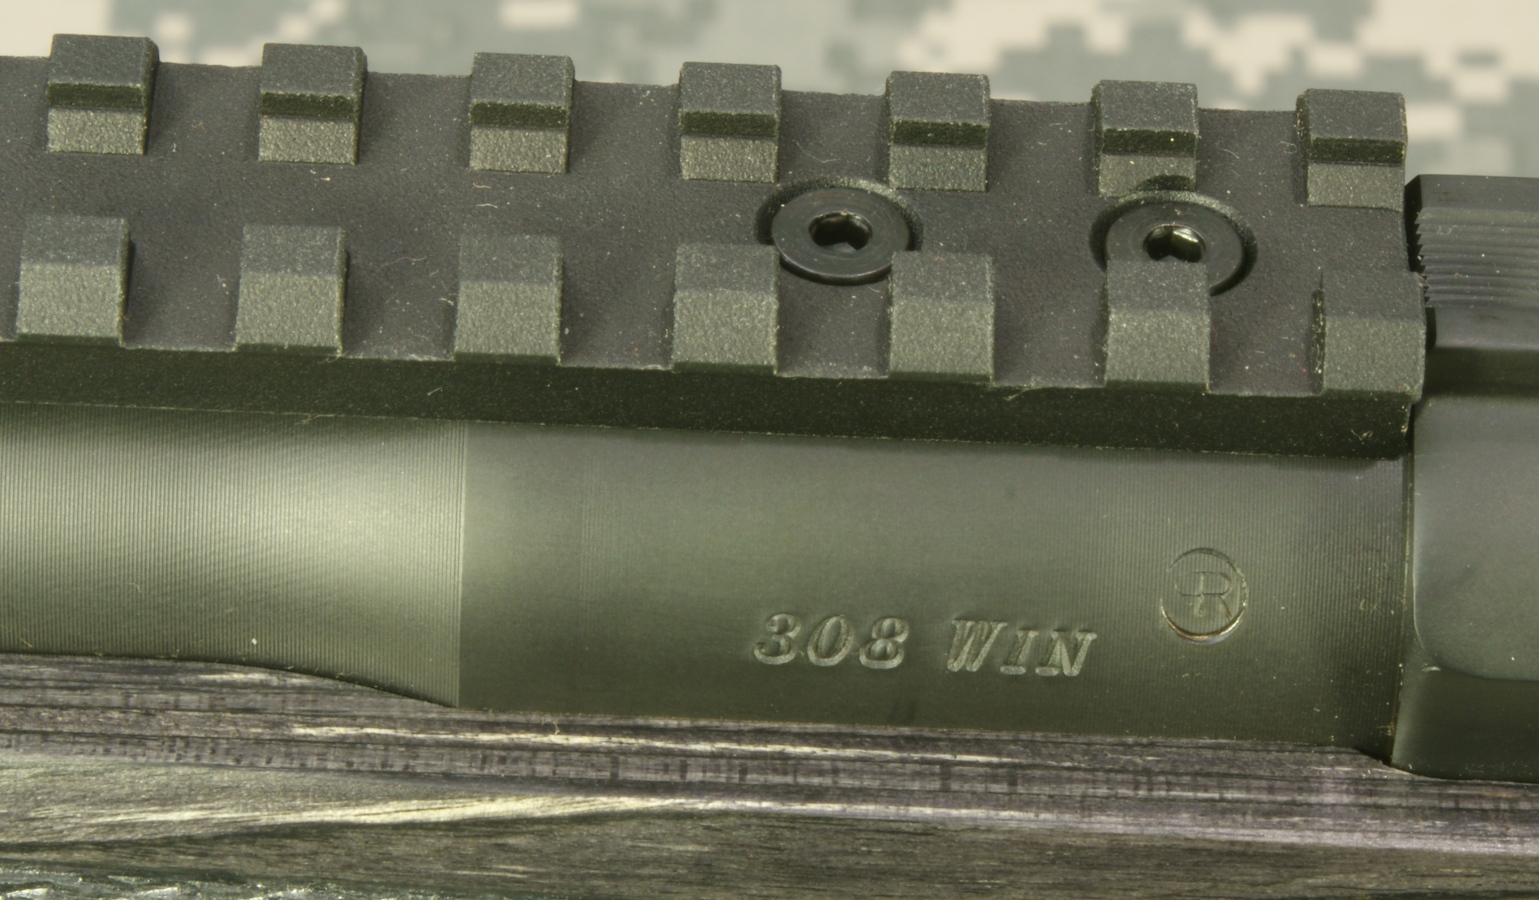
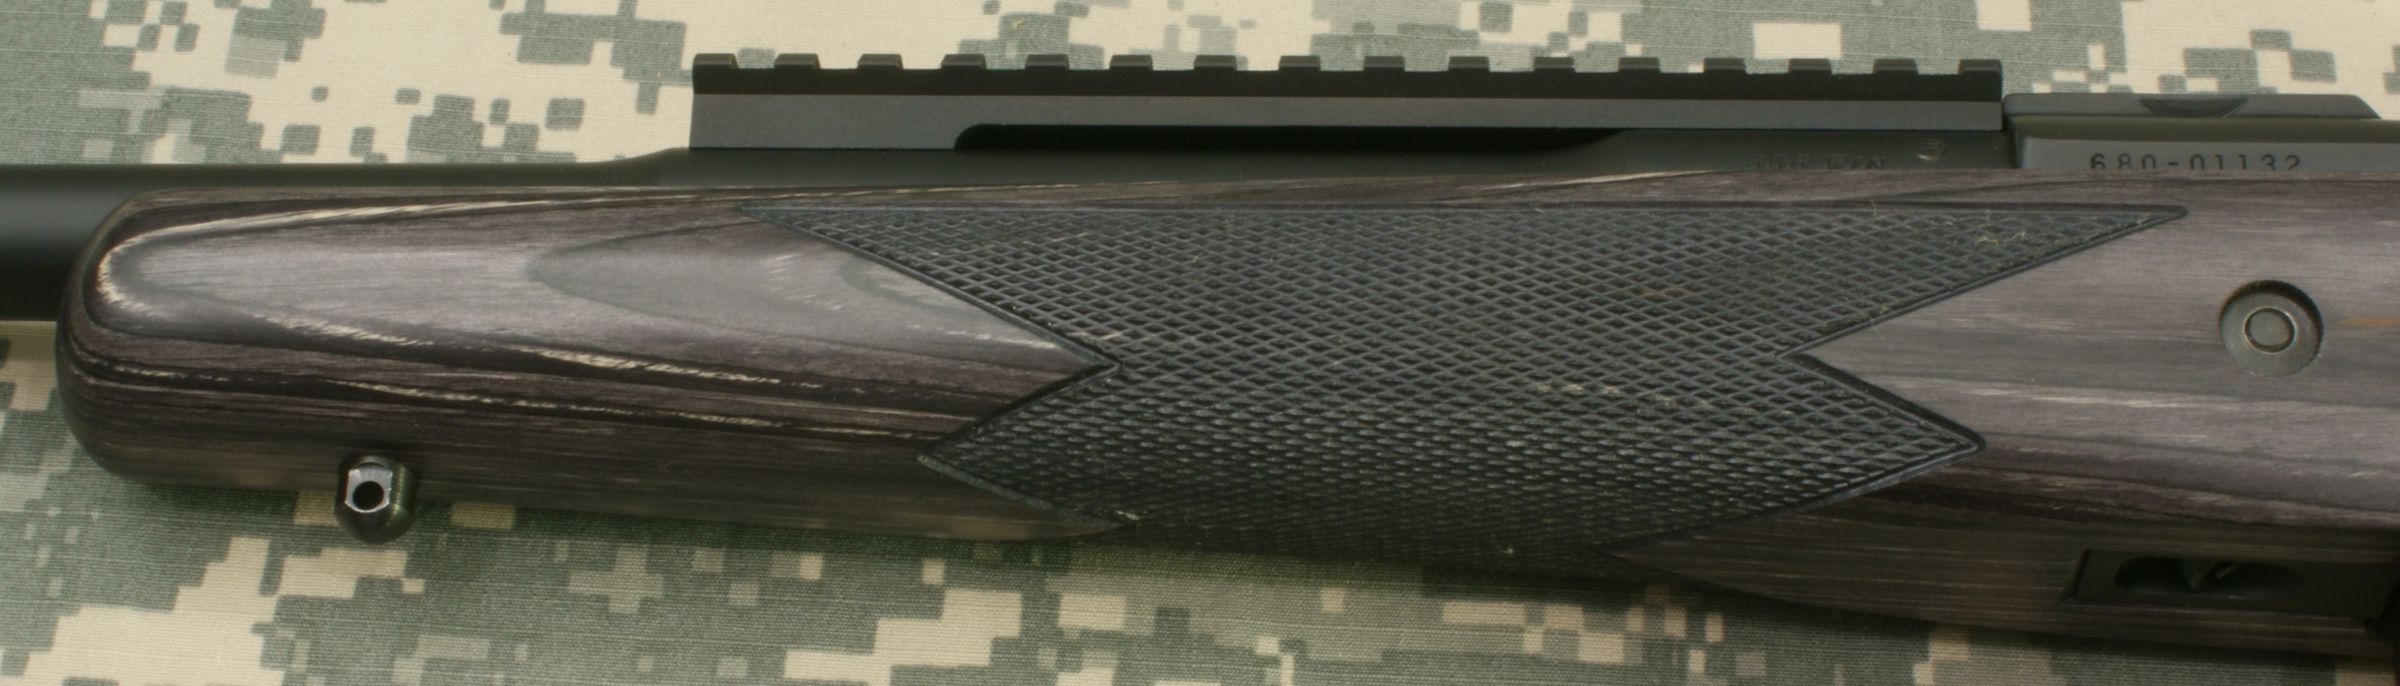
On the left side of the barrel just forward of the receiver is stamped the caliber "308 WIN" along with the proof mark showing the rifle was proof tested at the factory.
Figure 16
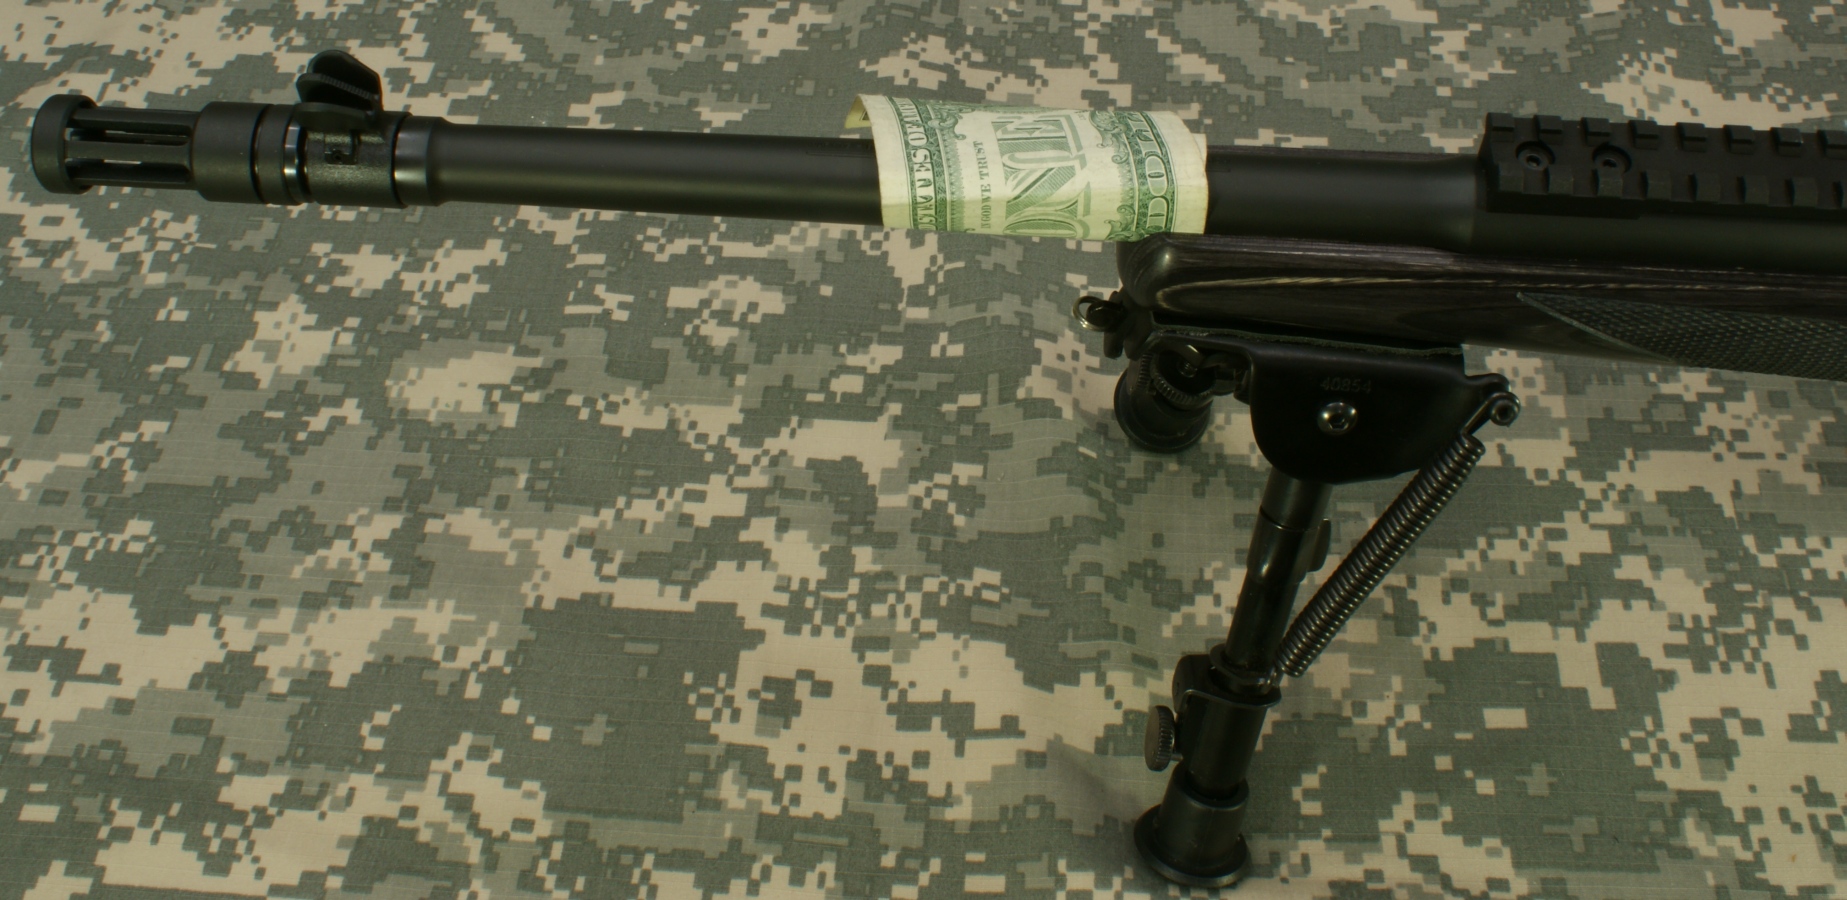
I was a little disappointed that the rifle I received did not have a fully floated barrel. The photo below shows how far I was able to get a dollar between the barrel and stock. I have not found where this is formally advertised by Ruger to be floated, but I did see a video where a Ruger engineer demonstrates that it is floated. When I contacted Ruger, I found out that on early rifles the tolerance stack-up was not giving the desired float on the barrel and that they have fixed this on their current rifles. Honestly I struggle believing this contact is going to make a significant difference in my accuracy with this rifle, especially when you consider how far the stiffer larger diameter section of the barrel goes down the forearm.
Figure 17
Picatinny Rail
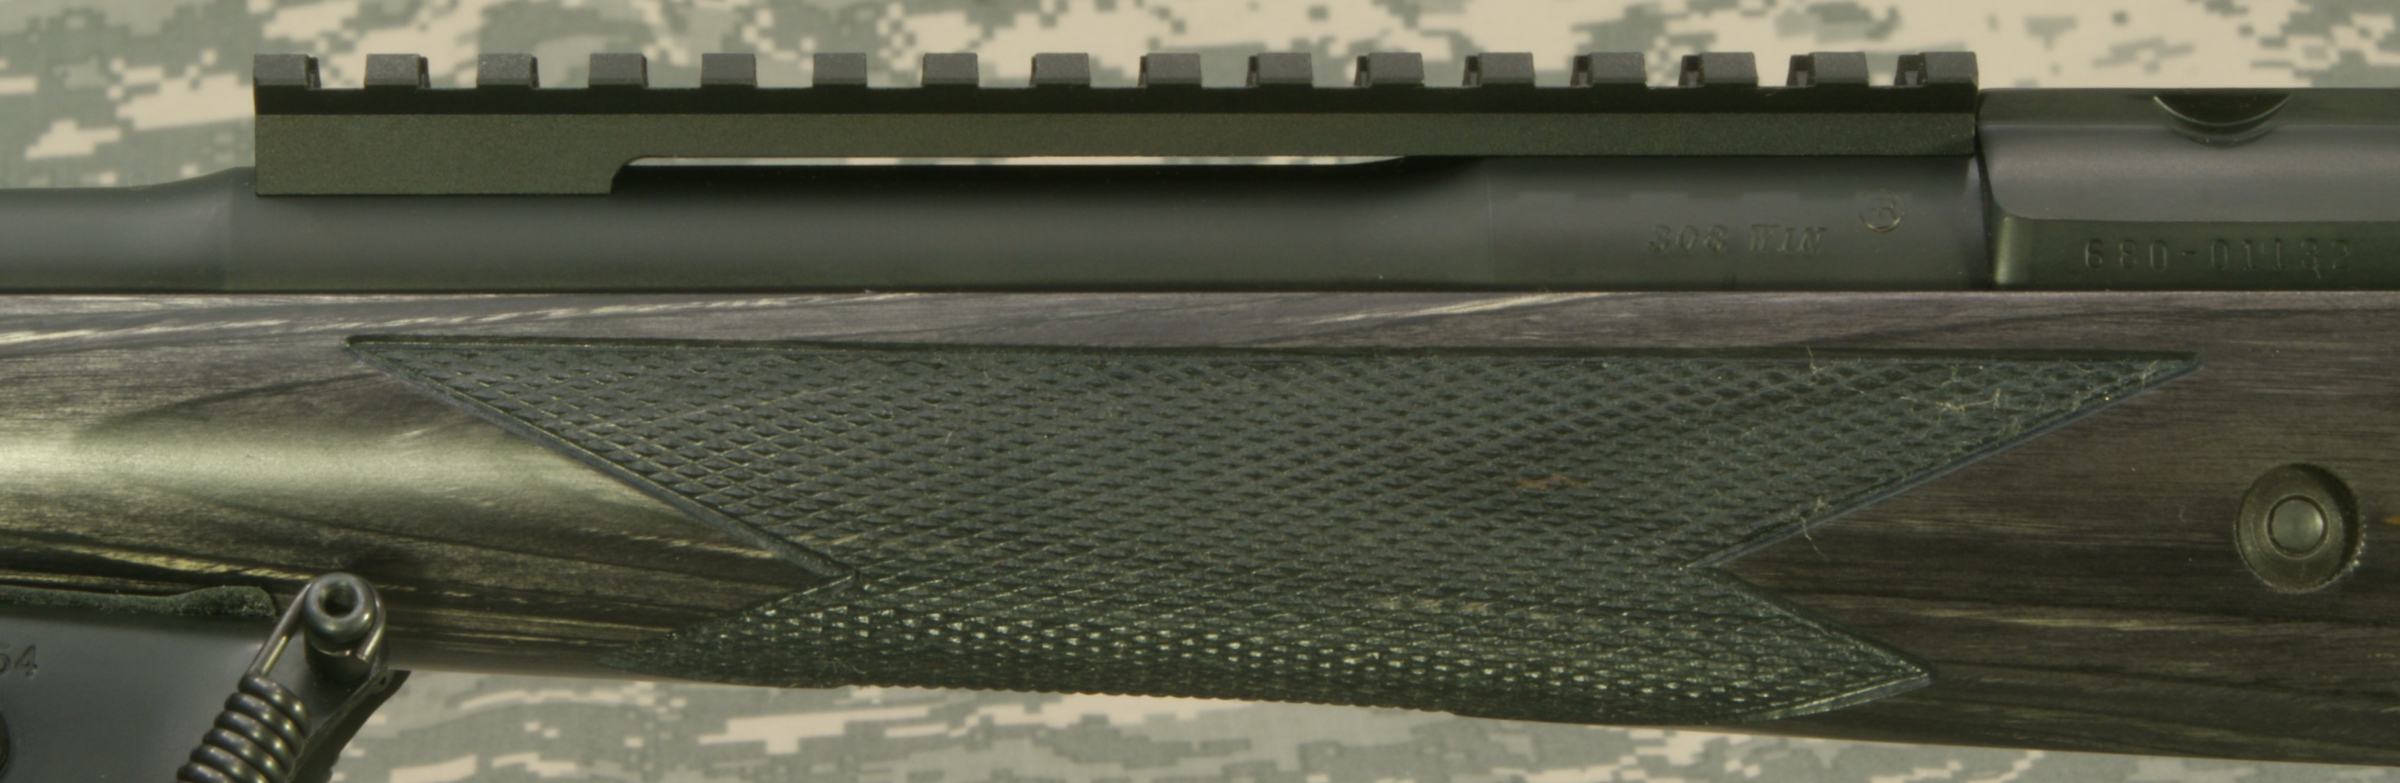
The forward mounted Picatinny rail is one of the key features of this rifle and is really intended for installing a low power long eye relief scope. The rail measures 6.12" in length and has a total of 15 slots. It is an aluminum extrusion and Type III Hardcoat Anodized.
Figure 18
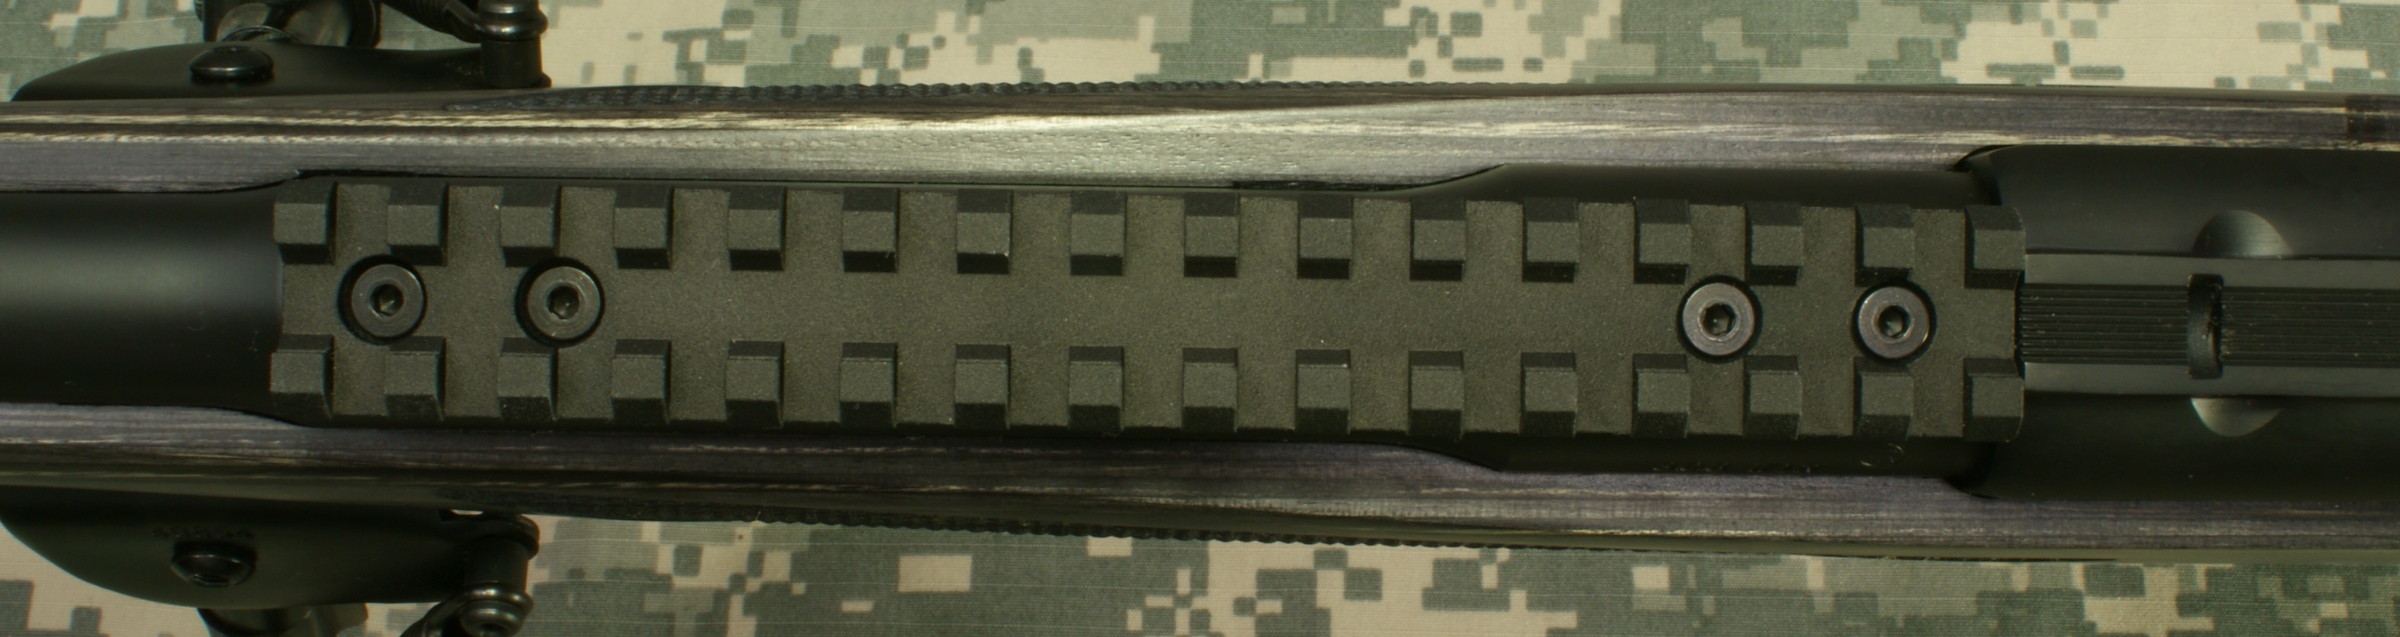
The rail attaches directly to the barrel by 4 screws. Before I install any optics on rails, I always do a quick check of the tightness of the mounting screws. I found these screws to be only snug tight which would have quickly worked loose with the extra weight of a scope when shooting.
Figure 19
Forearm
I'm a big fan of the look of wood laminated stocks and I feel Ruger did a nice job with this stock. I have seen several variations in color and darkness of the black laminate stocks and I would consider this rifle to be on the darker side. The checkering on the forearm provides a slip free surface for your hand and also adds to the look of the rifle. The forearm also comes with a front sling swivel stud.
Figure 20

Figure 19
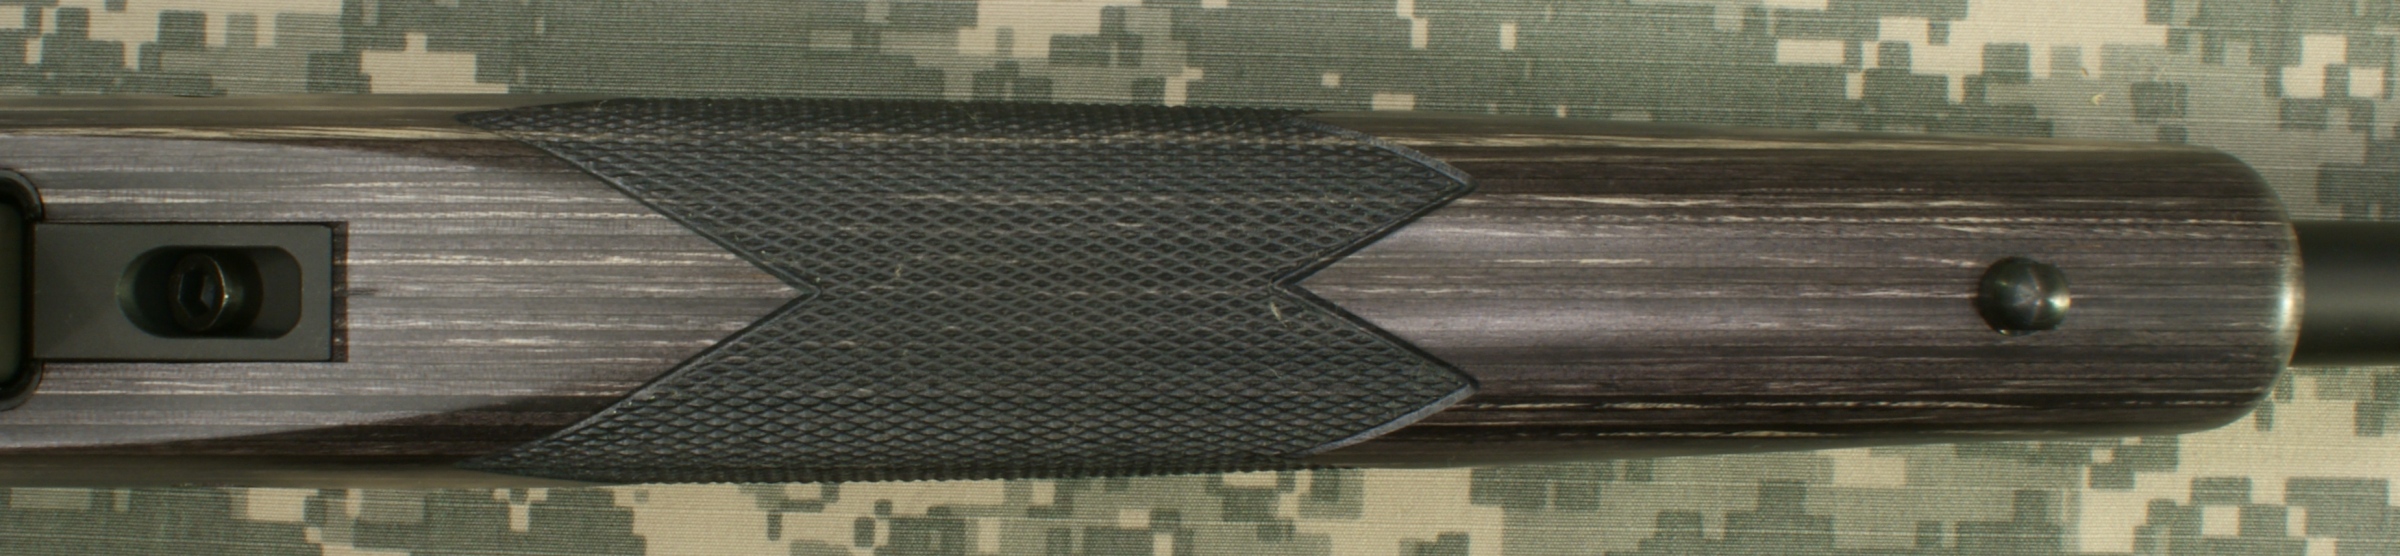
Figure 20
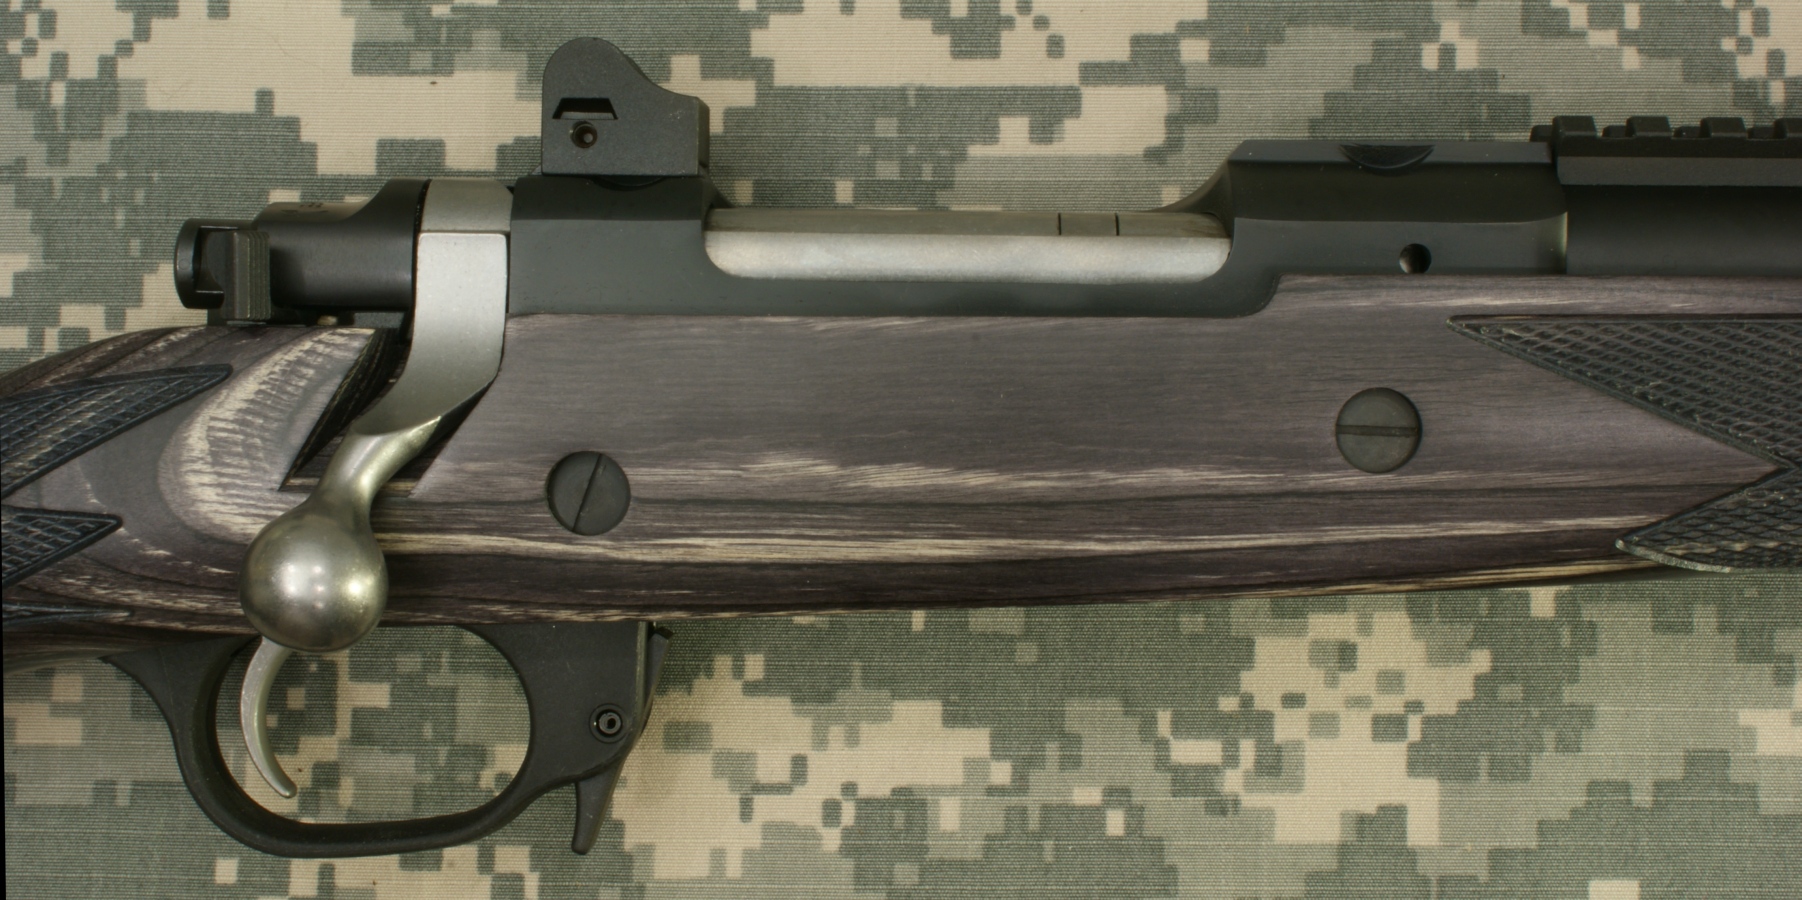
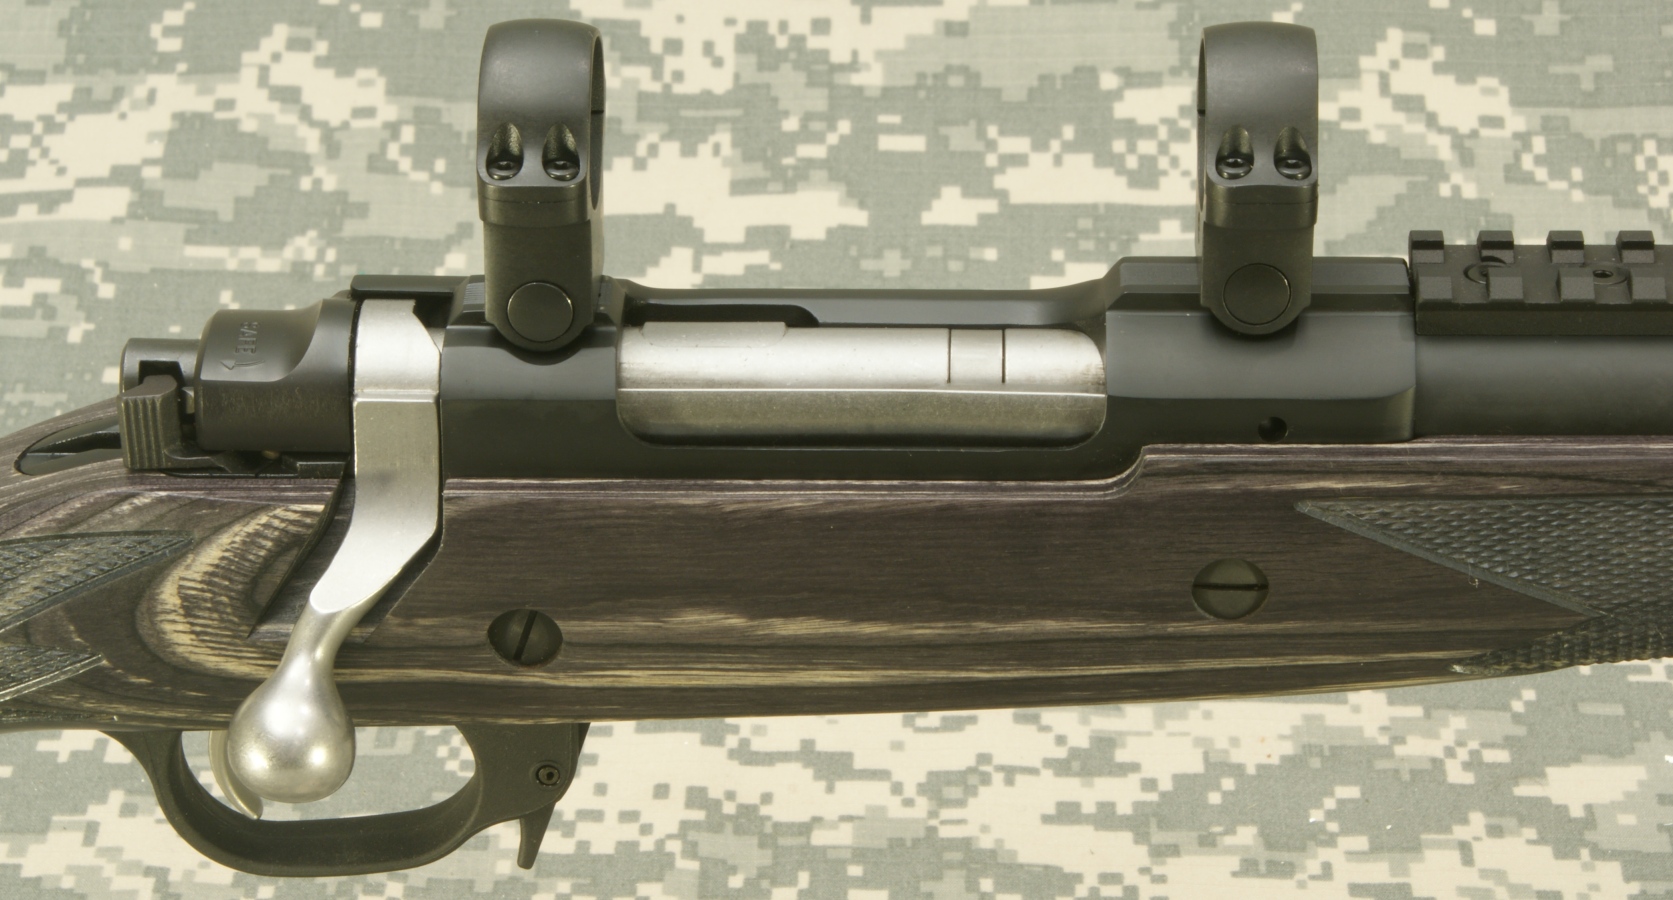
Receiver & Bolt
The receiver and bolt used on the Ruger Gunsite Scout Rifle are the same basic style receiver and bolt used on Ruger's M77 Hawkeye rifles. The receiver is an investment casting that is made from 4140 alloy steel and final machined in the critical areas and is also machined to give a smooth surface finish on the exterior surfaces. The bolt is a one-piece investment casting that is made from 415 stainless steel which is a Ruger proprietary blend in between 410 and 420 stainless steels and gives a good combination of toughness and strength. The bolt is final machined and polished in critical areas. I will cover these in more detail in the next part of the review which deals with disassembly and the internal features.
Figure 21
The receiver also includes integral scope ring attachment mounts which I cover in more detail later in this part of the review.
Figure 22
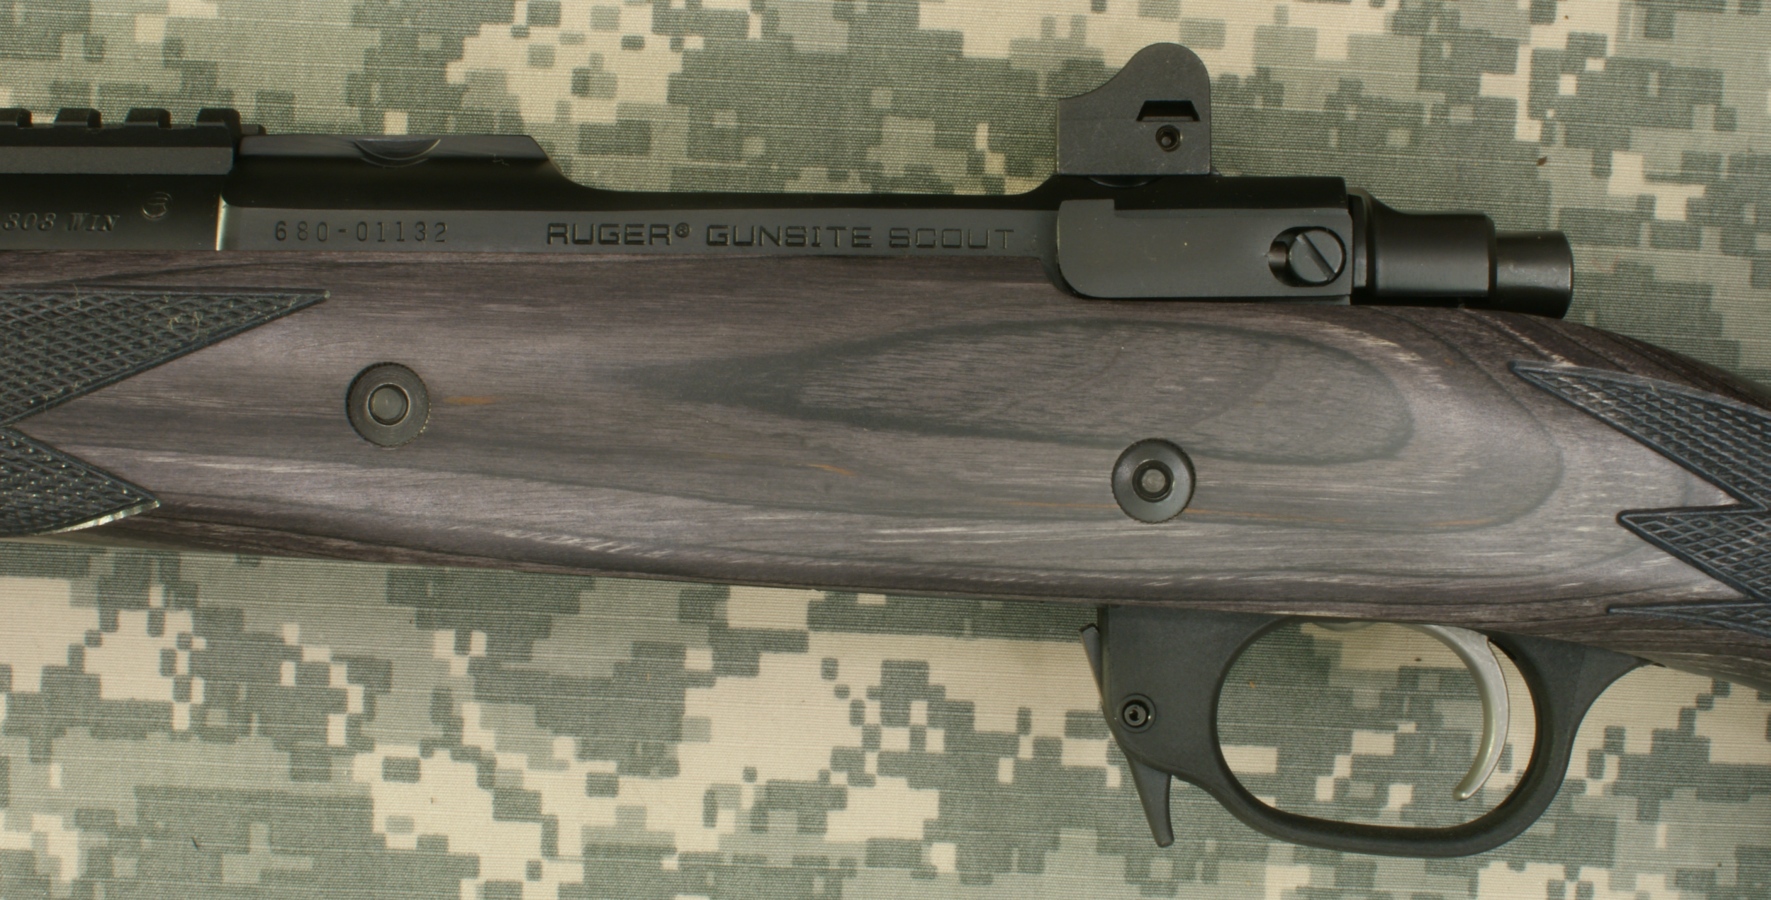
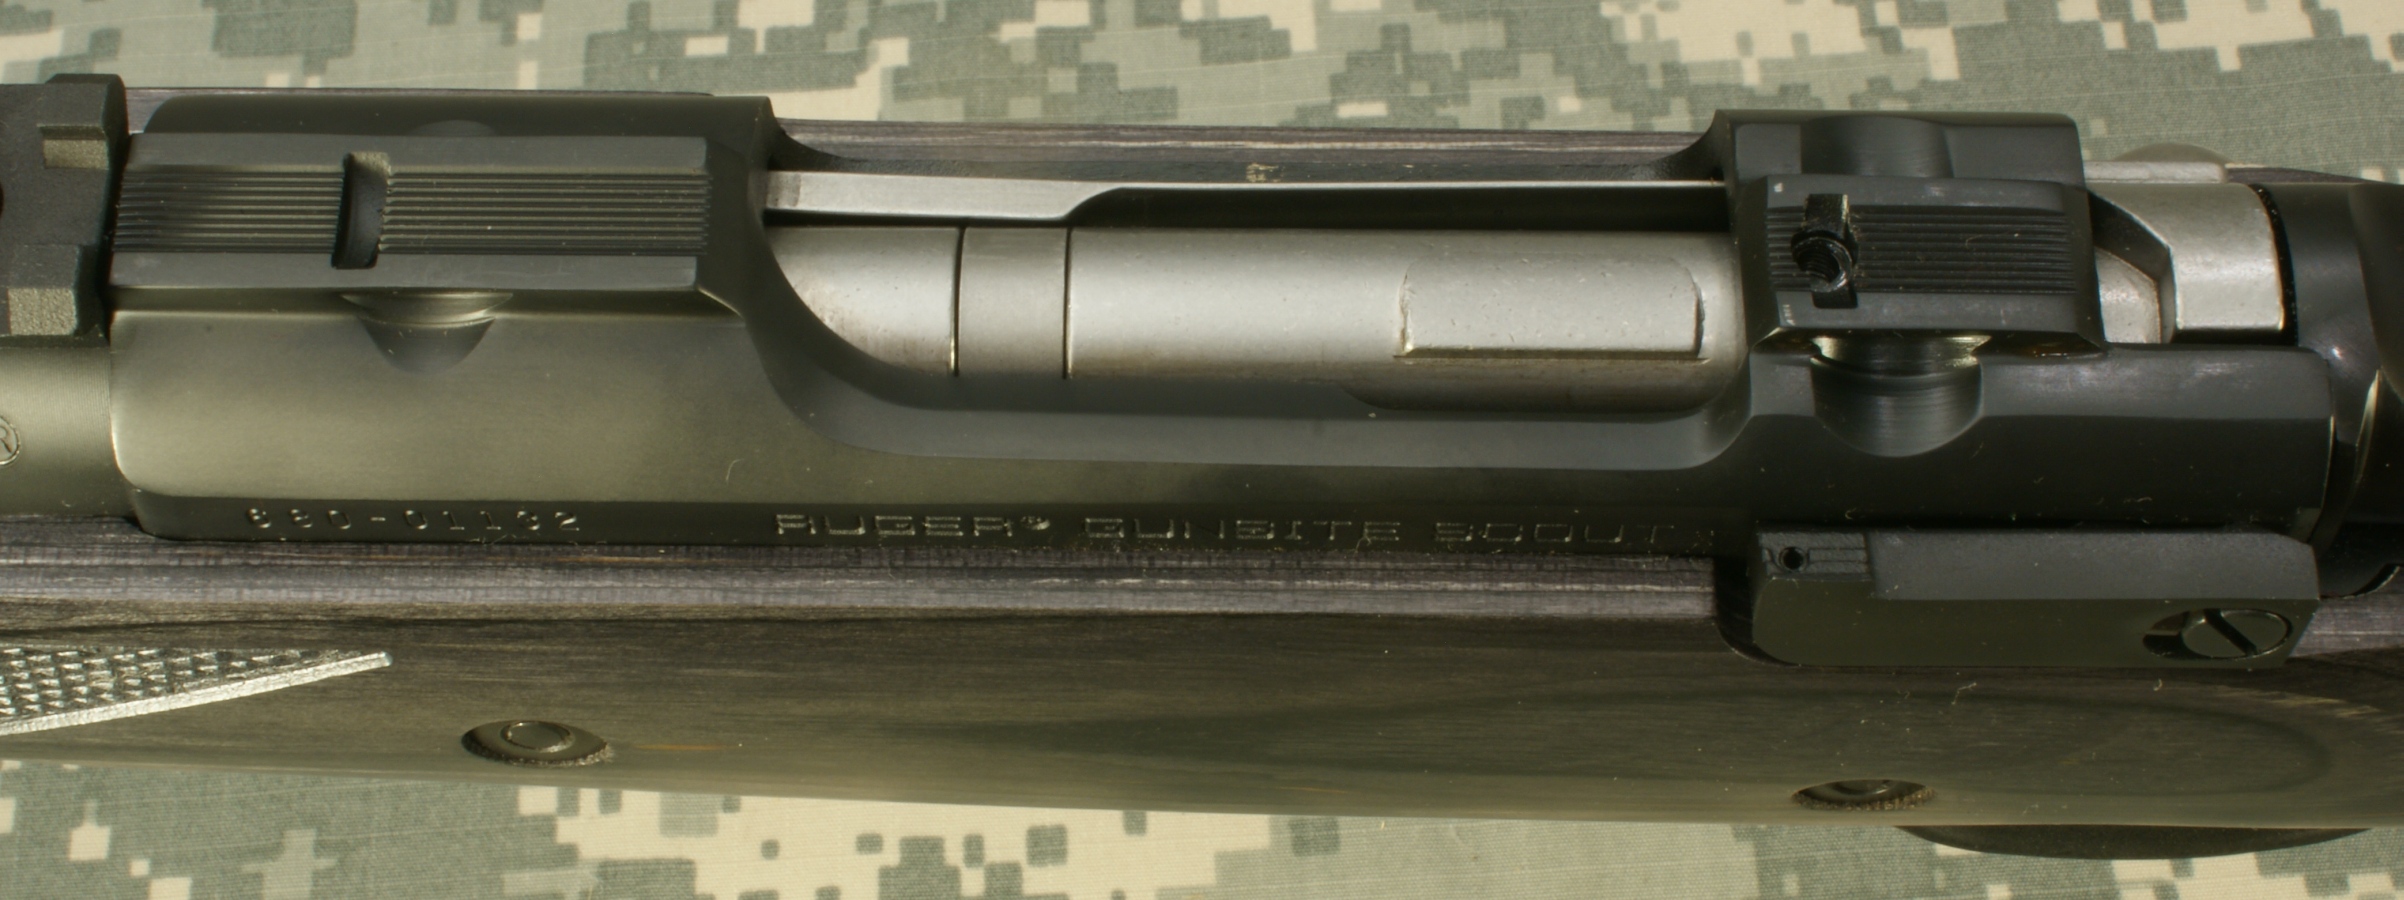
The serial number and "RUGER GUNSITE SCOUT" are stamped into the left side of the receiver. The bolt stop lever is also located on the left side of the receiver.
Figure 23
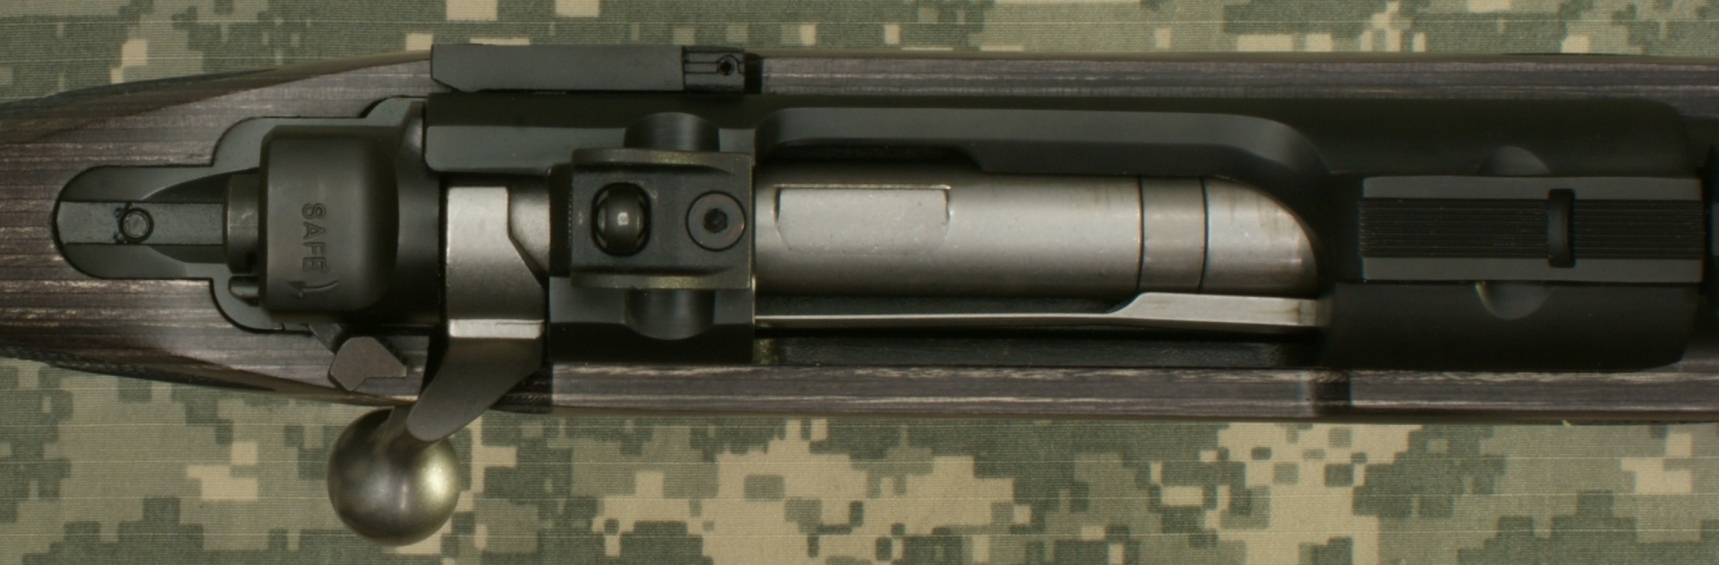
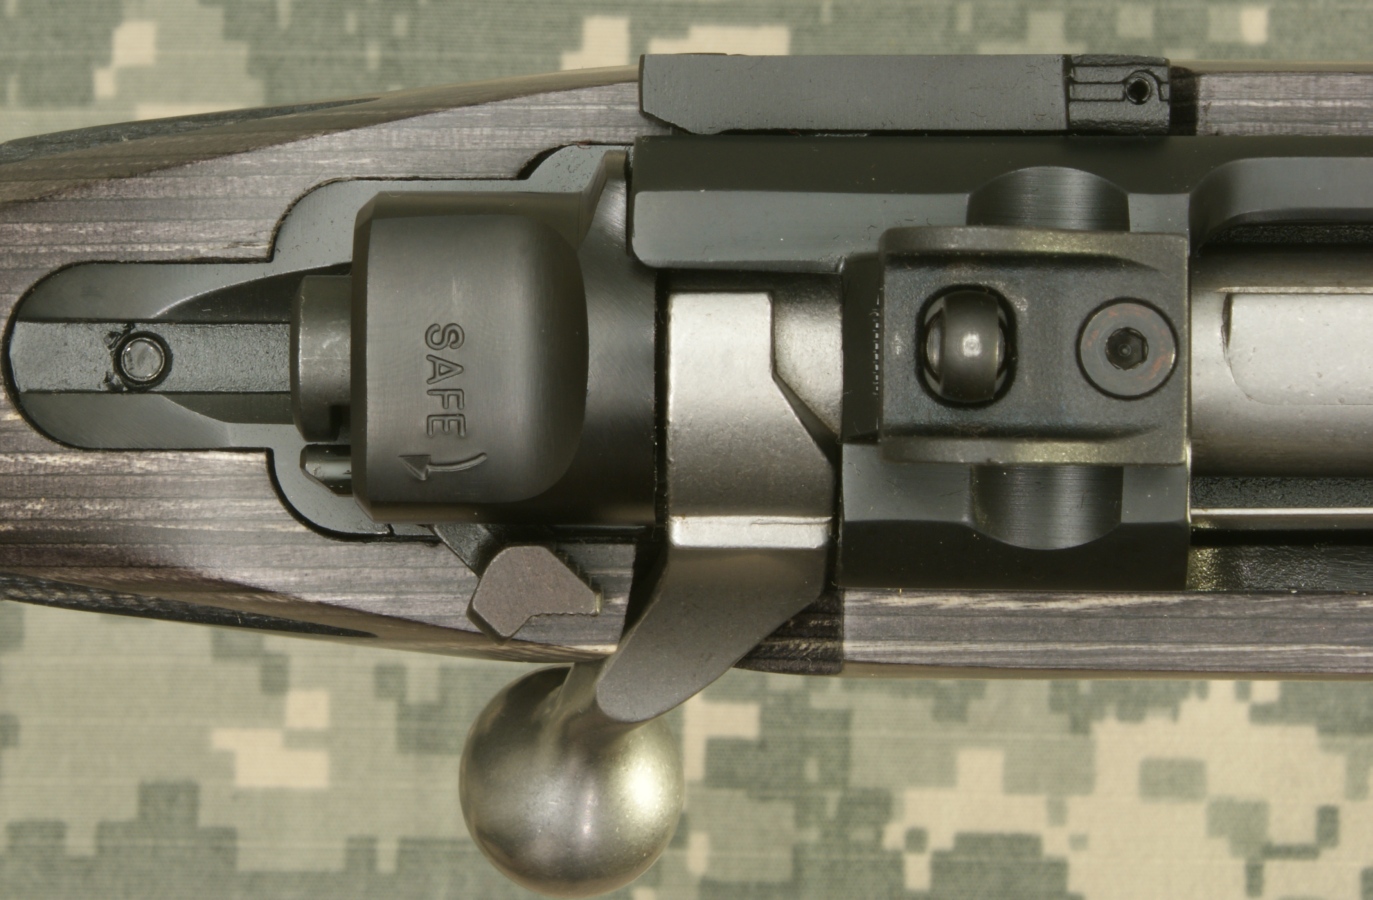
3-Position Safety
The Ruger Gunsite Rifle includes Ruger's standard three position safety. The safety can be positioned in the "Safe", "Load-Unload" and "Fire" positions, but can only be positioned in the "Safe" and "Load-Unload" positions when the firing pin is cocked.
Figure 24 - Safe Position (1)
In this position, the bolt can not be operated and the trigger can
not be pulled to fire the rifle.
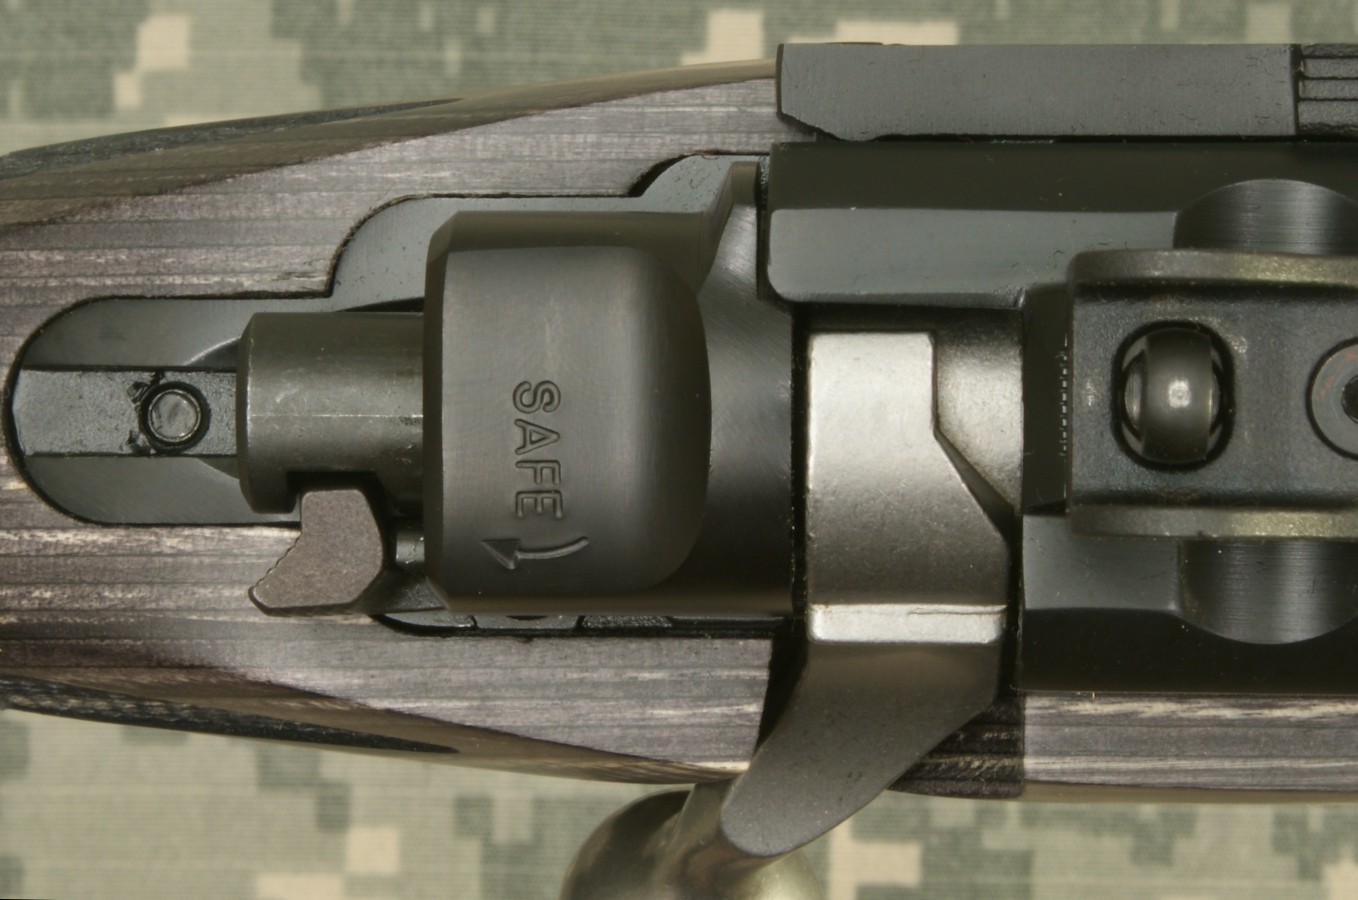
Figure 25 - Load-Unload Position (2)
In this position, the bolt can be cycled, but the trigger can not be
pulled to fire the rifle.
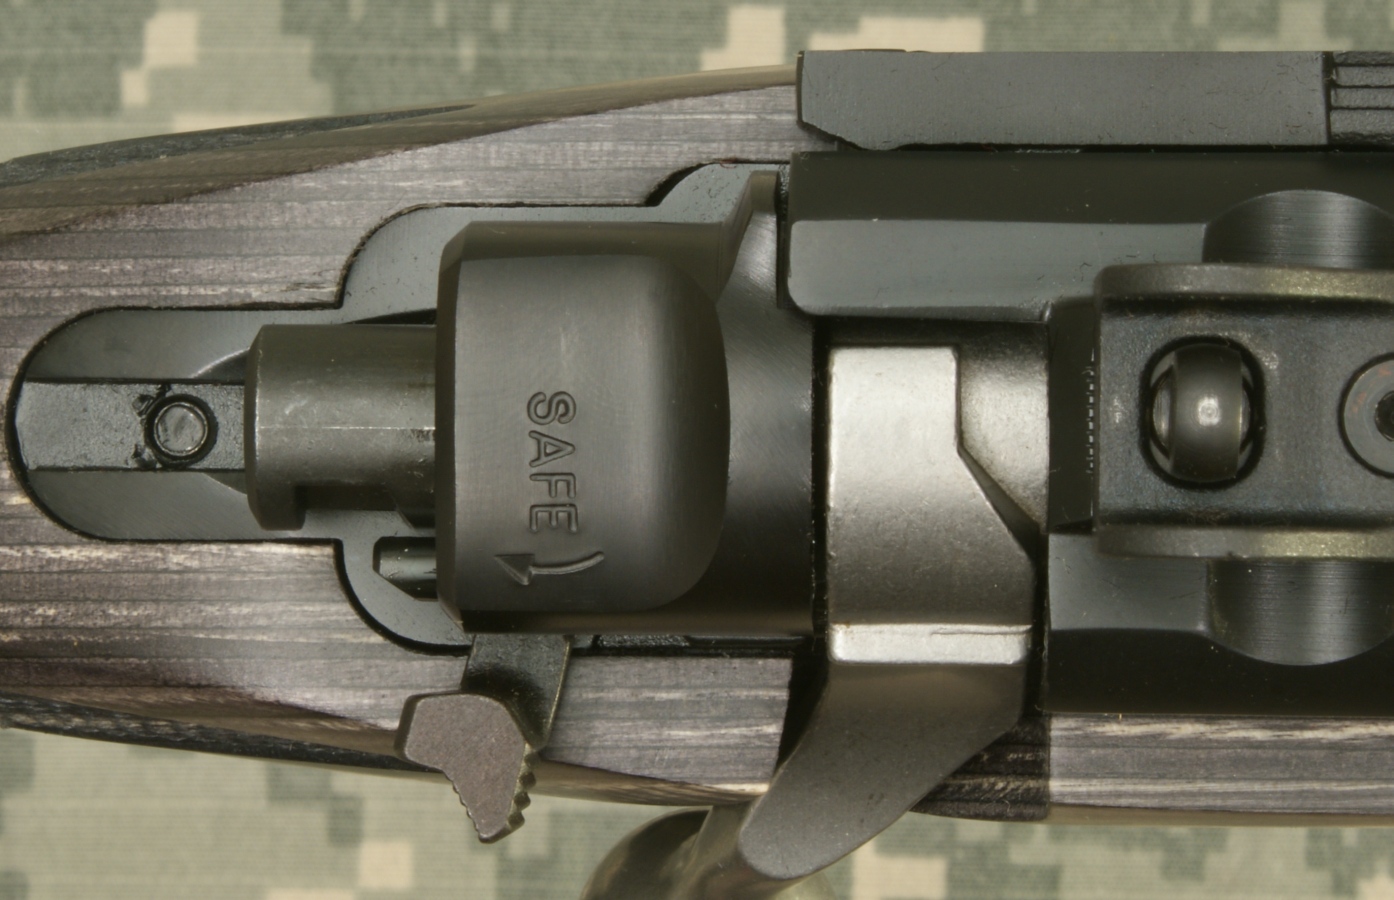
Figure 26 - Fire Position (3) and Firing Pin
Cocked (A)
In this position, the bolt can be cycled and the trigger can be
pulled to fire the rifle.
Also note that the firing pin is cocked (A).
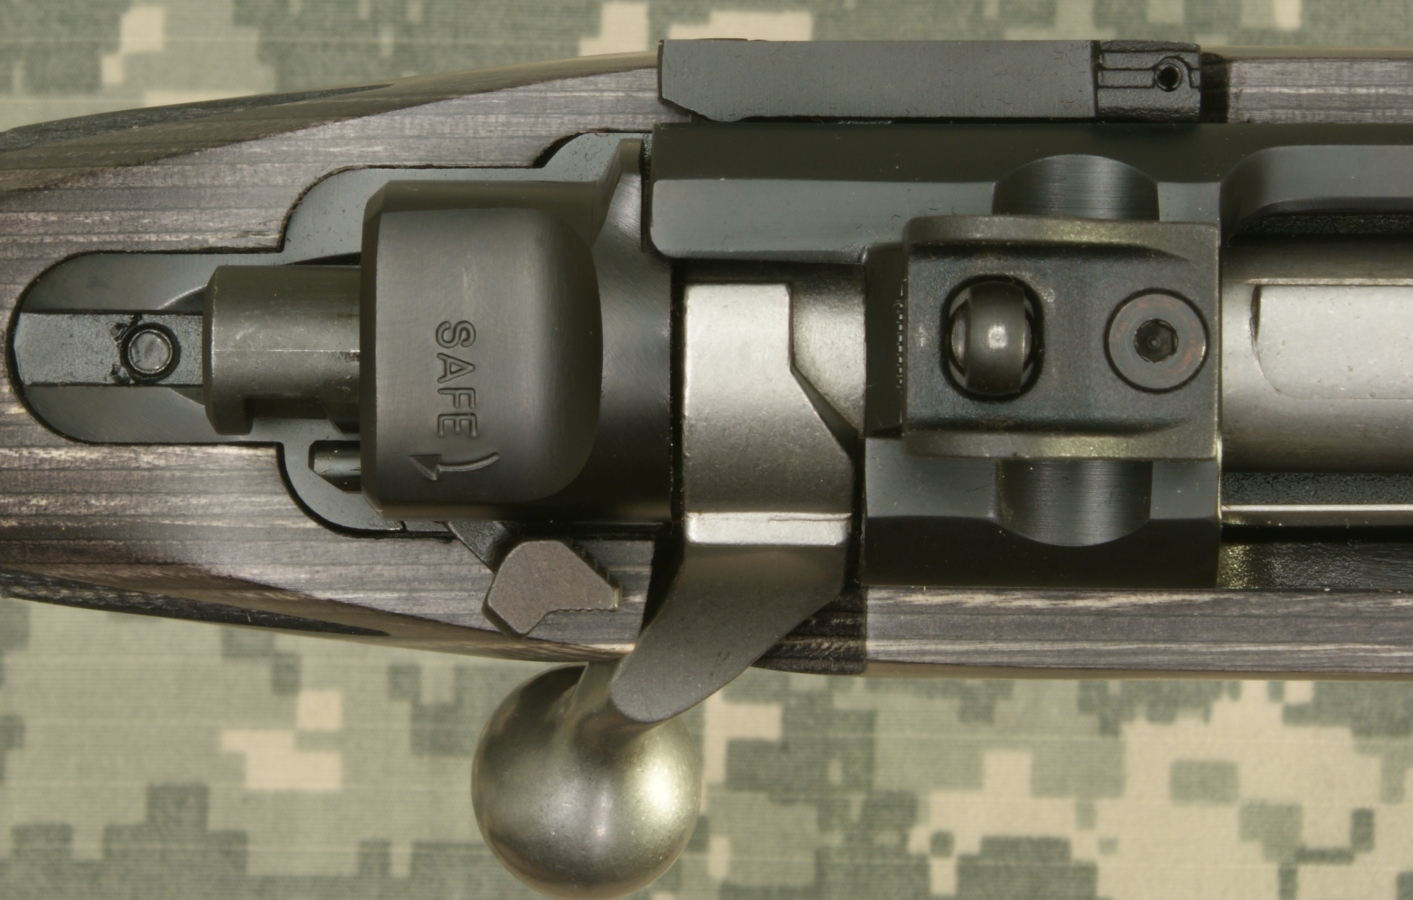
Figure 27 - Firing Pin Un-cocked (A)
This shows the position of the safety and firing pin after the
trigger is pulled and the firing pin is un-cocked.
Cocking the Bolt
I included this next set of photos to show and explain the details for cocking the bolt and the ejection of a round.
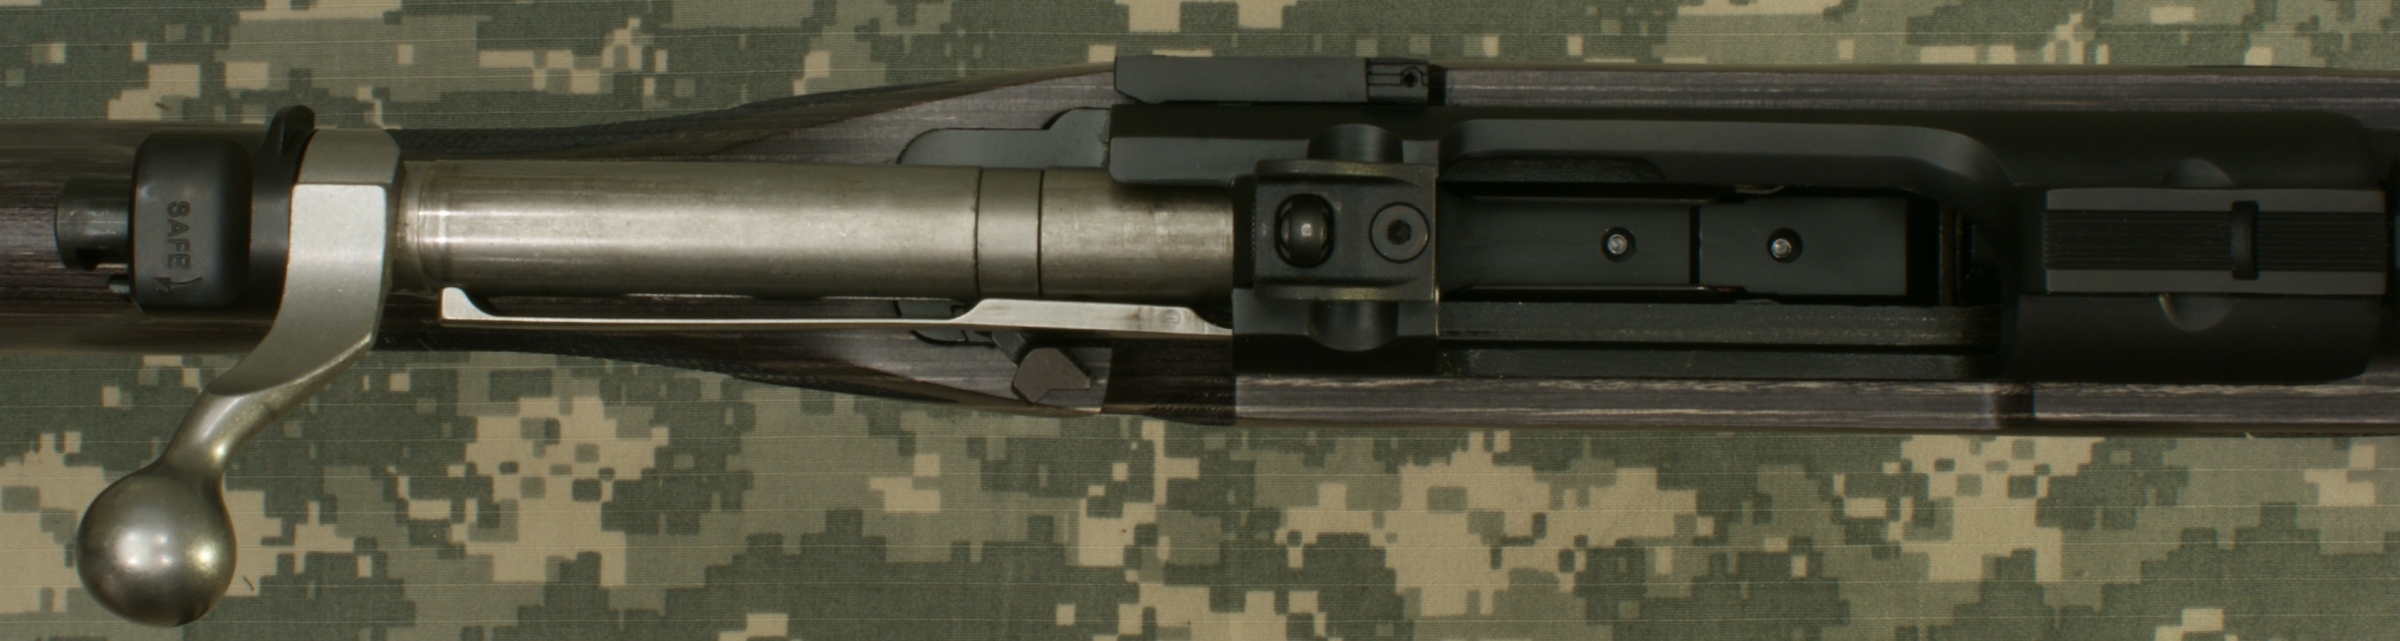
Figure 28 - Bolt Down and Un-Cocked with
Safety in Fire Position

Figure 29 - Bolt Up and Cocked with Safety in
Fire Position
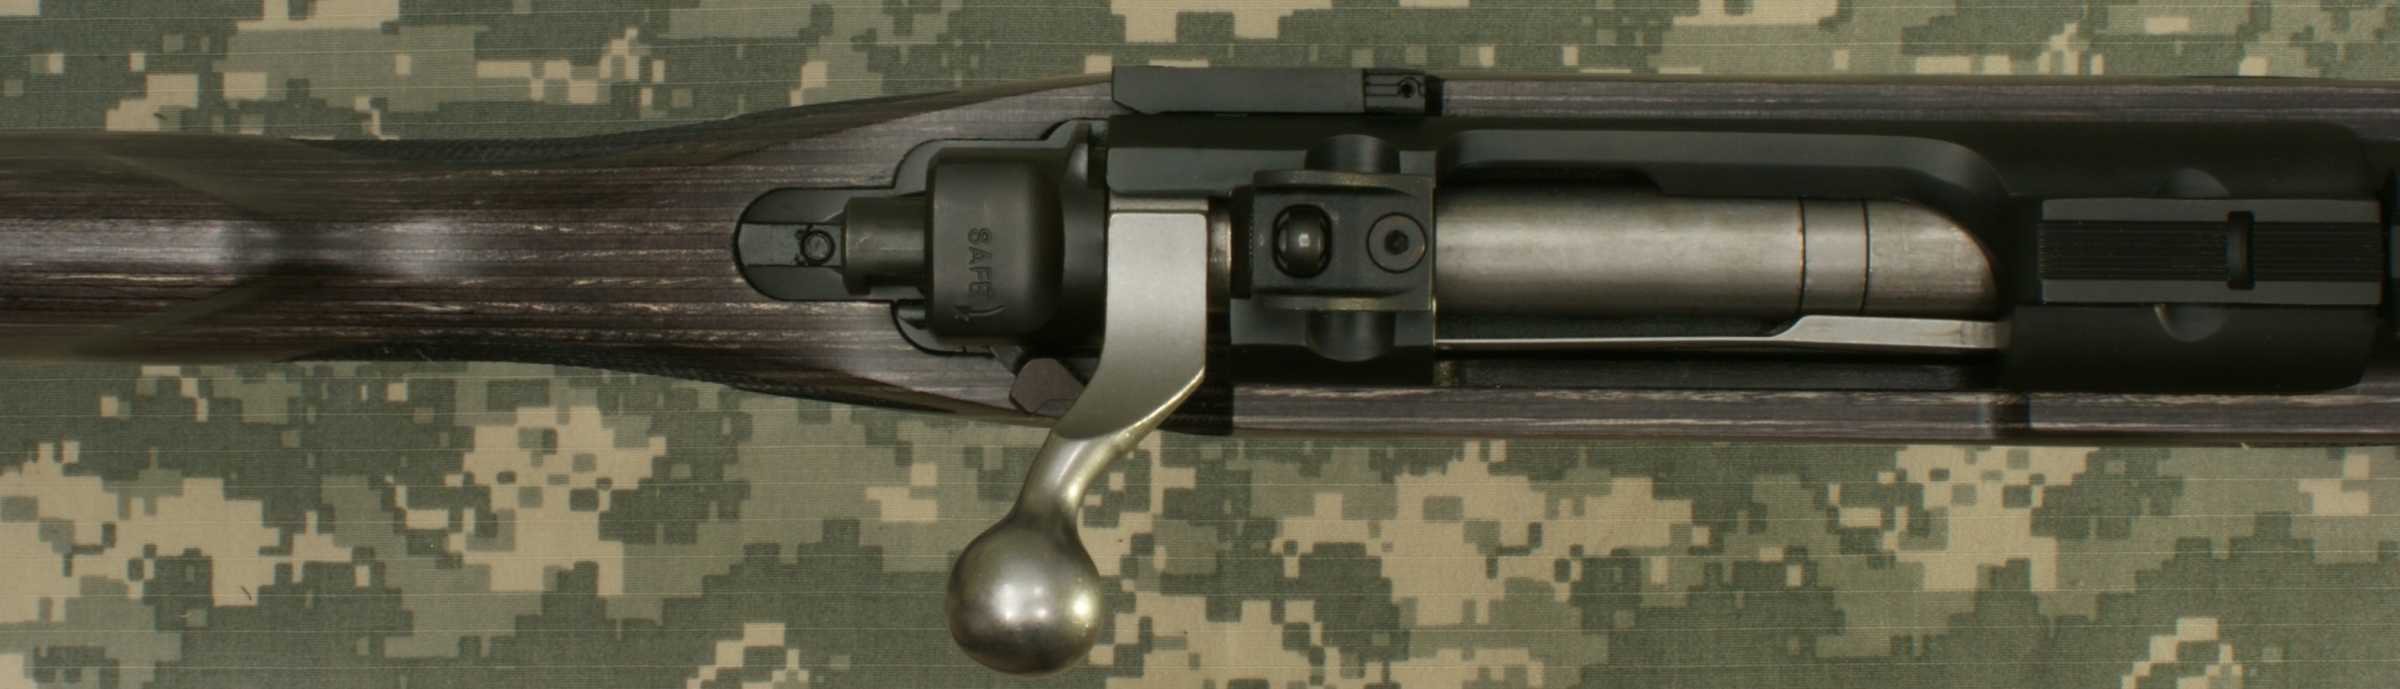
Figure 30 - Bolt Up, Fully Back and Cocked
with Safety in Fire Position
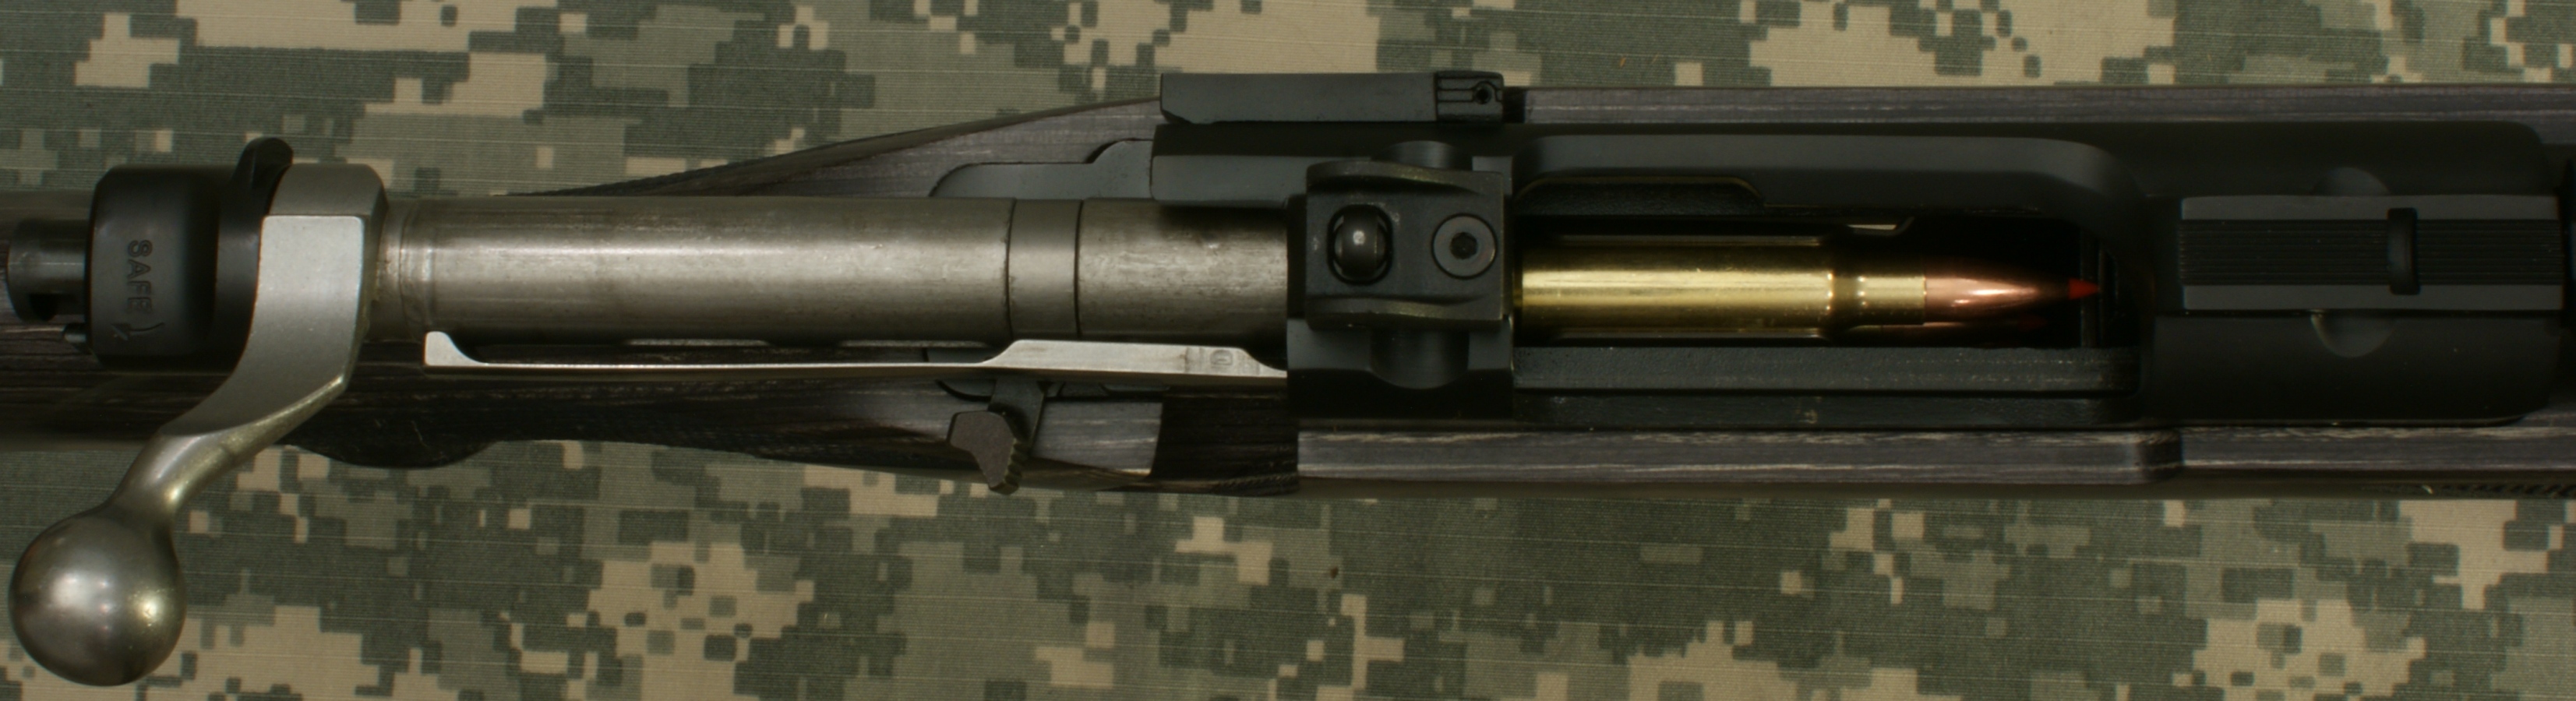
Since I was using live ammo for these photos, I put the Safety in the Load-Unload position. This photo below shows how the extractor is holding the round against the bolt face. The bolt is pulled back to where the case is just making contact with the ejector.
Figure 31
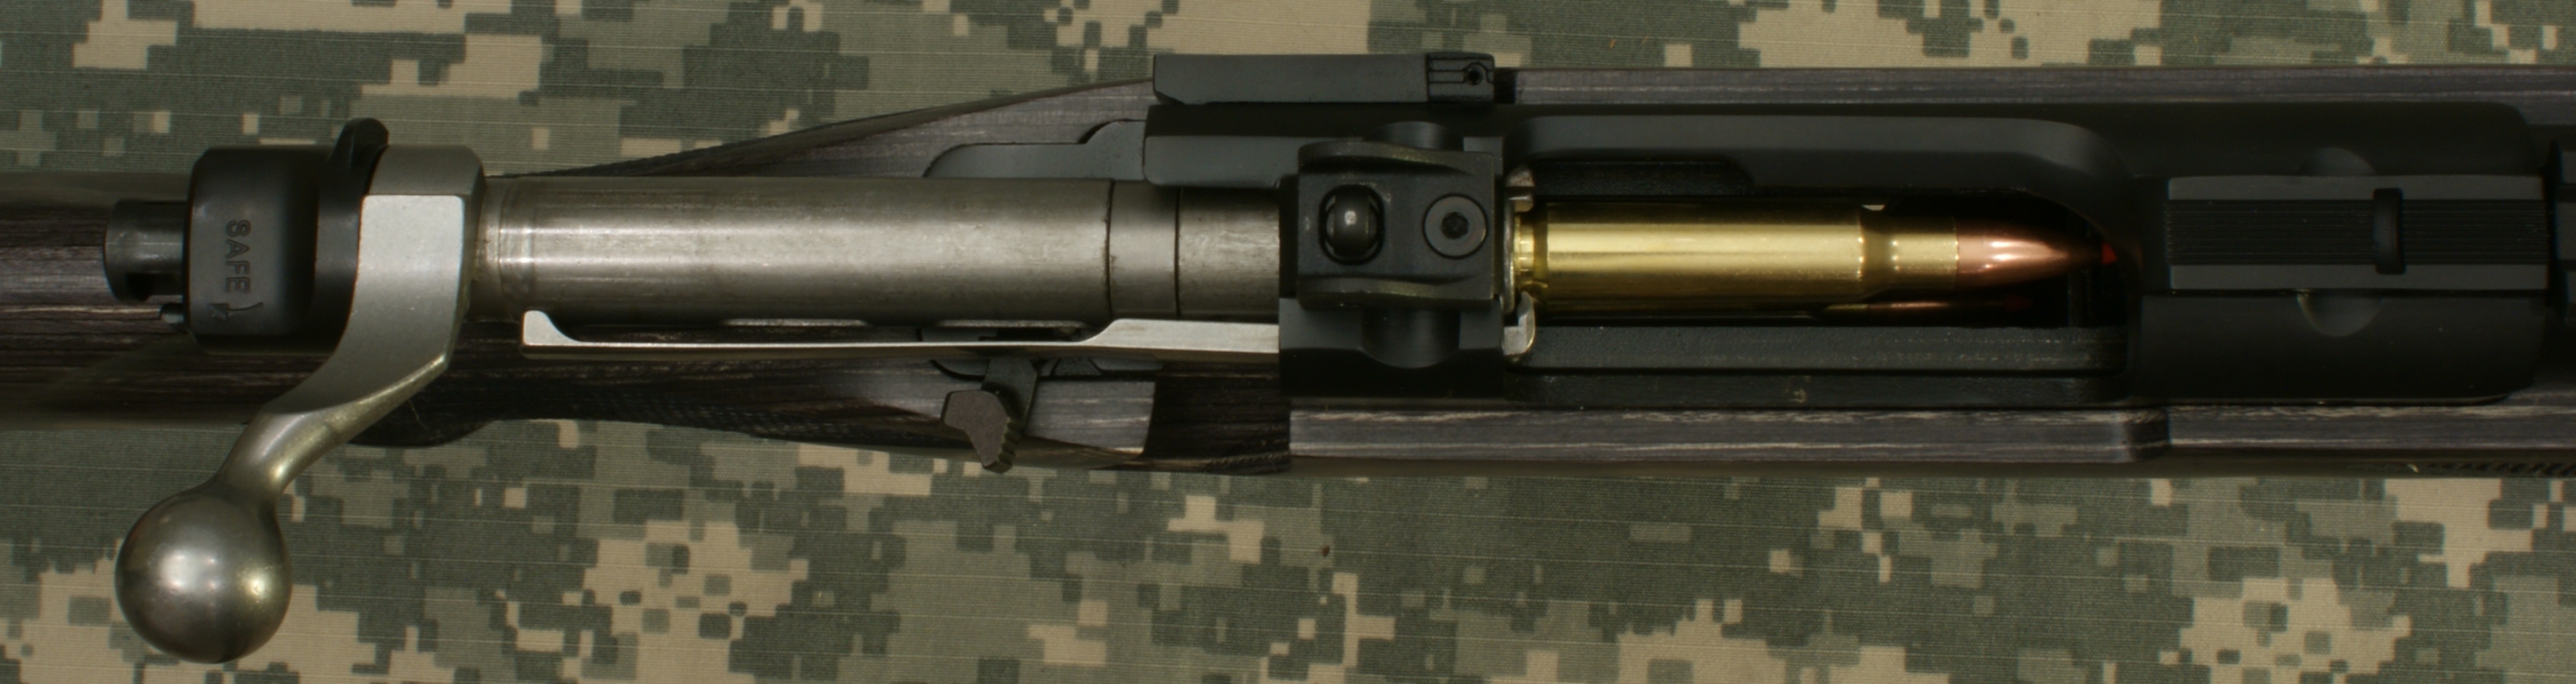
The photo below shows the bolt all the way back and the next round is in the magazine waiting to be chambered. As a note, it is possible to top load the magazine by sliding the round part way into the chamber then pushing it down and back into the magazine. Although, I wouldn't consider this to be very practical.
Figure 32
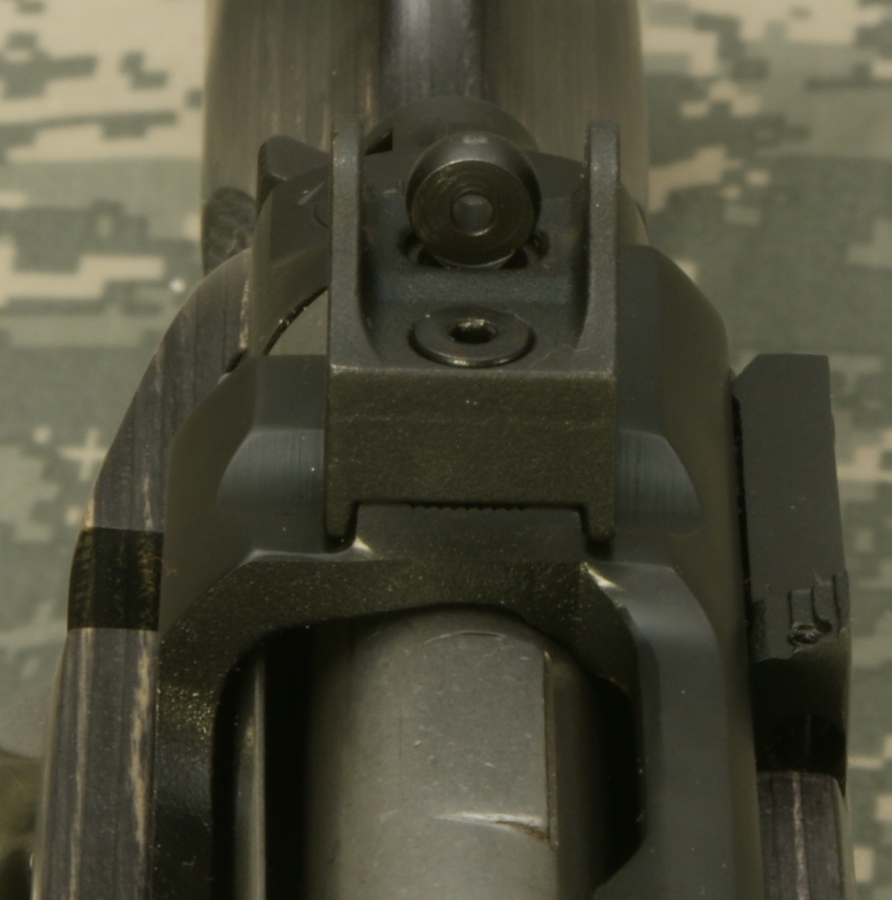
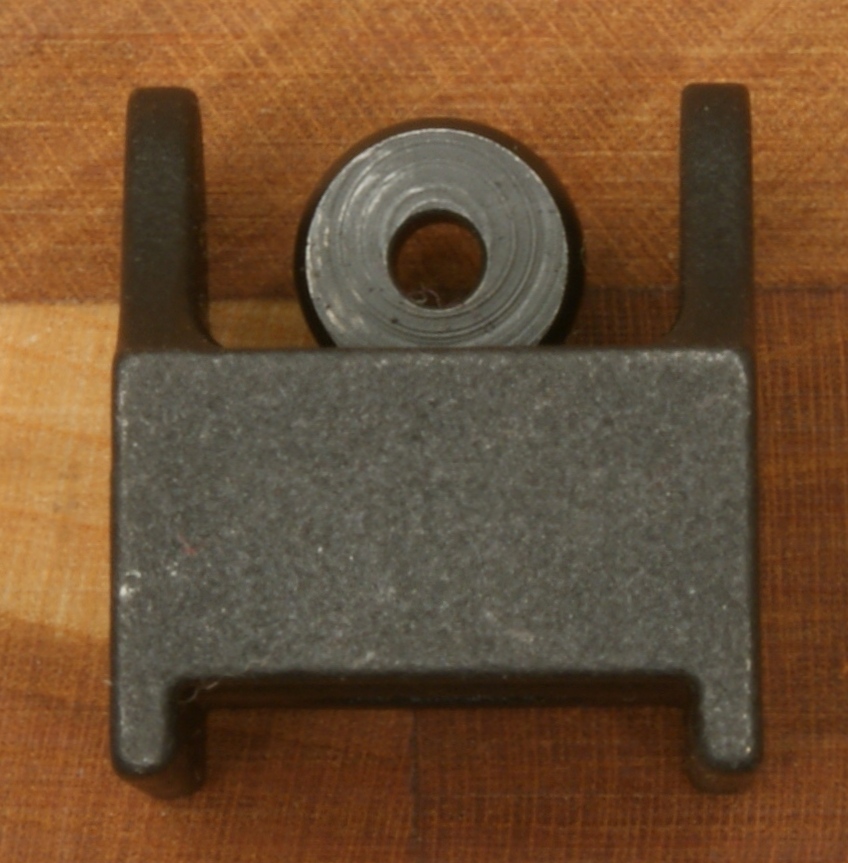
Rear Sight
The rear sight is a protected ghost ring sight that is both windage and elevation adjustable. The sighting radius measured about 20.5". The rear sight is attached to the rear integral scope ring lug by a single screw as shown below. Just like with the screws for the rail, this screw was not very tight and I recommend you checking this before you head off to the range.
Figure 33
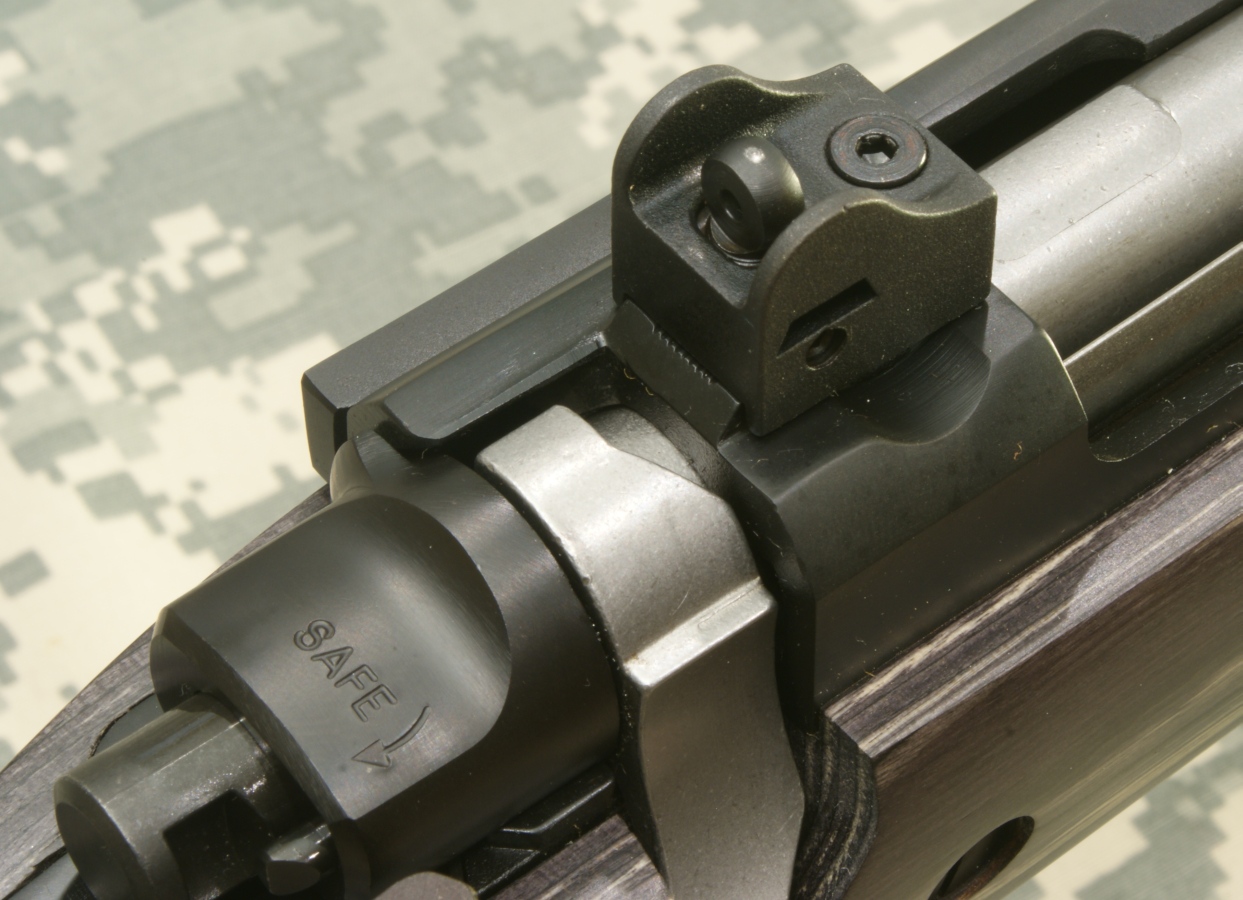
Figure 34
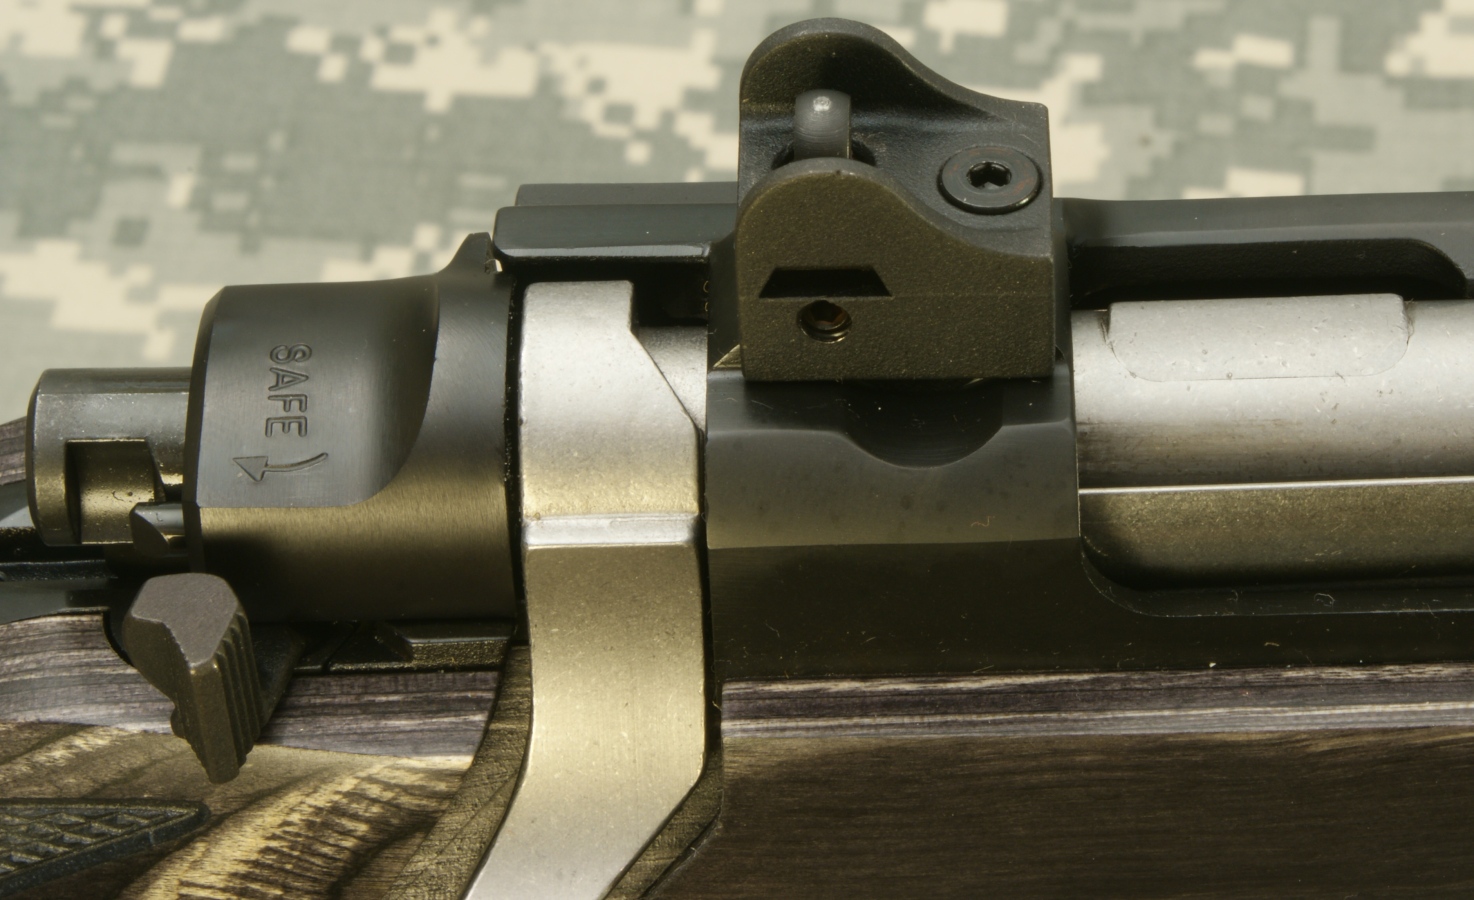
Figure 35
Figure 36
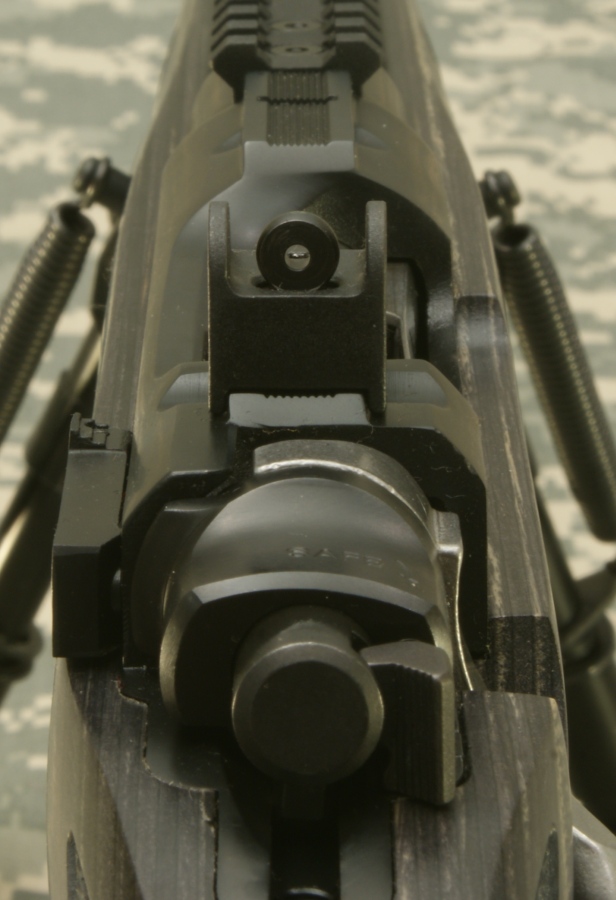
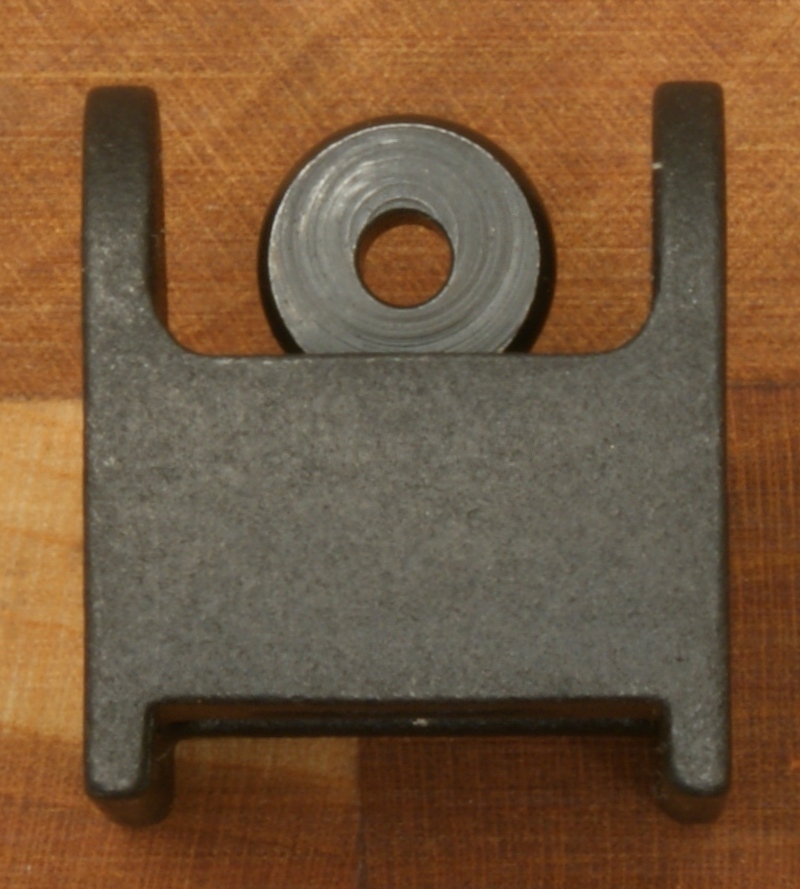
The rear sight appears to be a steel casting. The elevation is adjusted by loosening one of the side set screws and rotating the ghost ring up or down in 1/2 turn increments. To adjust windage, you loosen the set screw on one side and tighten the screw on the other.
Figure 37
Figure 38
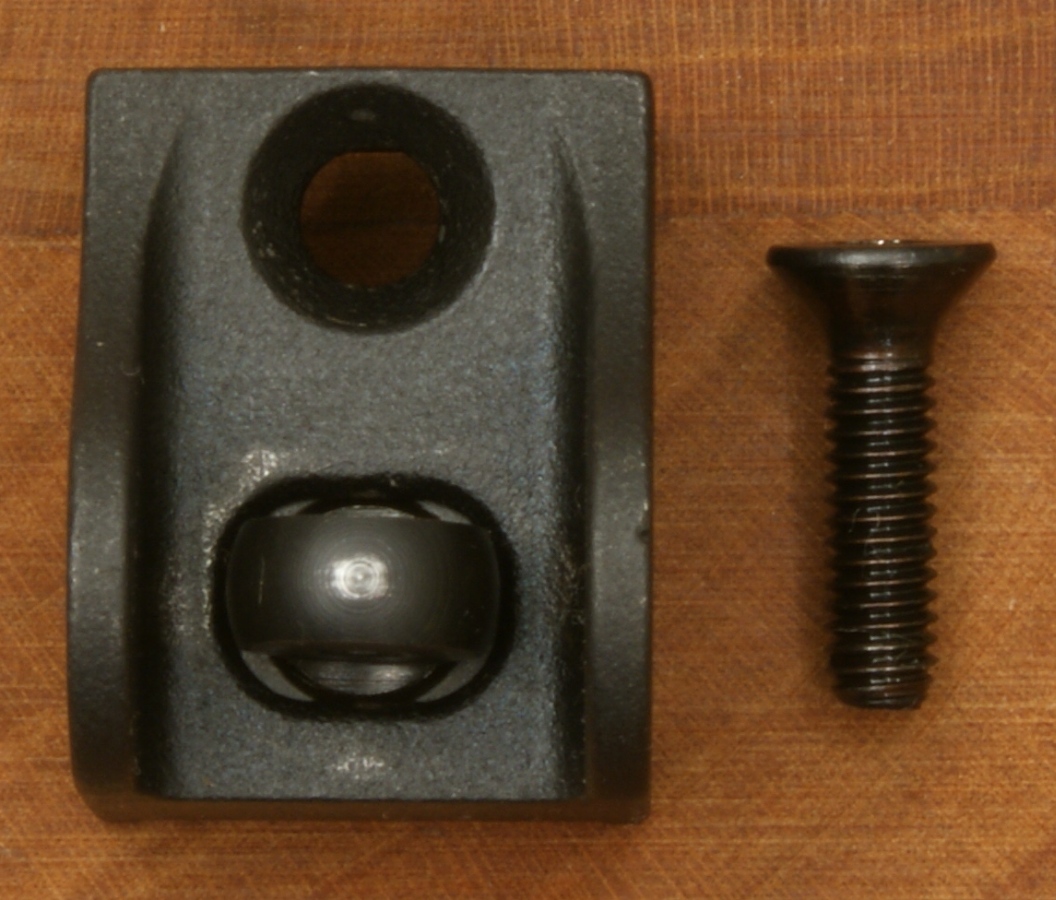
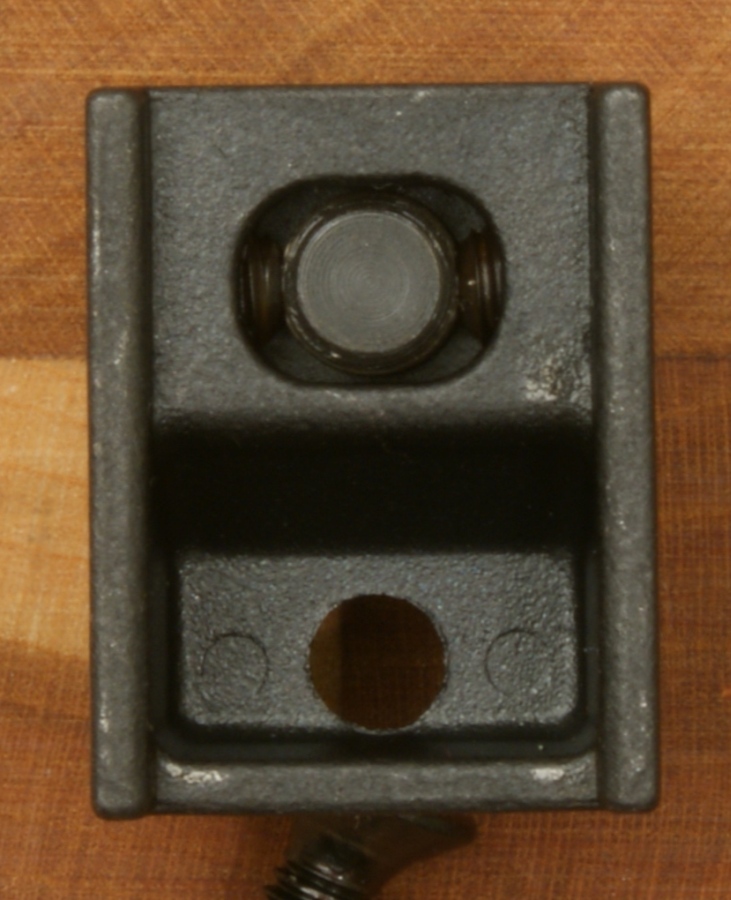
Figure 39
Figure 40
Figure 41

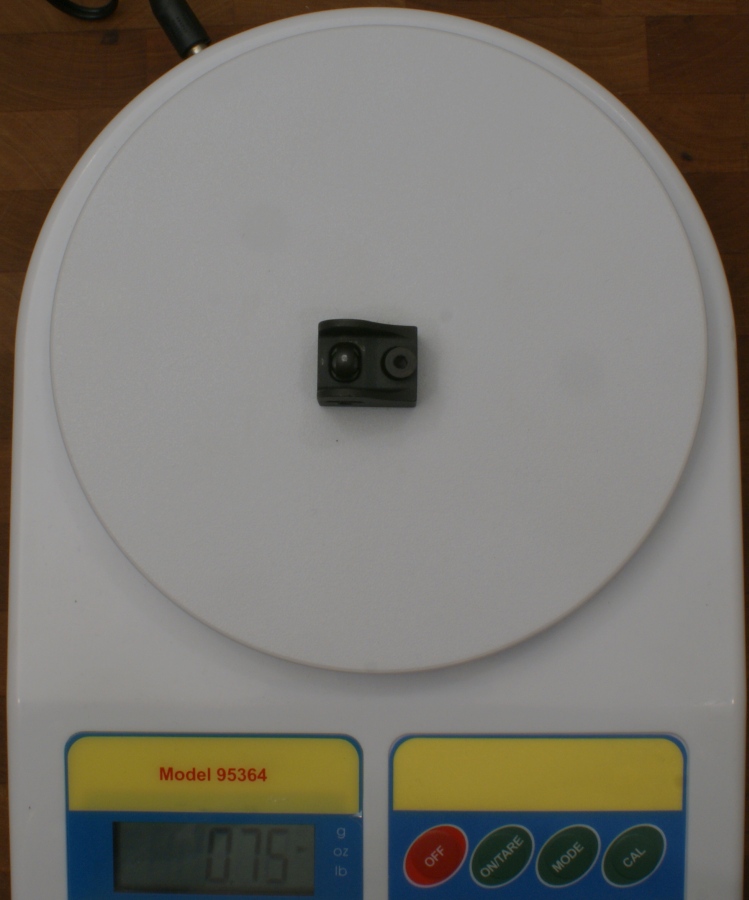
The rear sight weighed in at 0.75 ounces. The reason this is important is it represents the removed weight from the rifle in the event you choose to use the rings provided with the rifle to mount a scope in the more traditional position.
Figure 42
Ruger Ring Mounts
The receiver has the Ruger patented mounts machined directly into the top of the receiver. Although it is not apparent from these two photos below, the front mount area is slightly higher than the rear mount area.
Figure 43 - Ring Mounts
You can see the threaded hole used for attaching the ghost ring iron sight is located in the bottom of the slot.
Figure 44 - Rear Ring Mount

When the rings are installed, you have a fixed outside distance of about 4.65" and inside distance of about 3.40". You should verify that your scope works with this configuration since you cannot adjust the distance between the two rings.
Figure 45 - Rings Installed
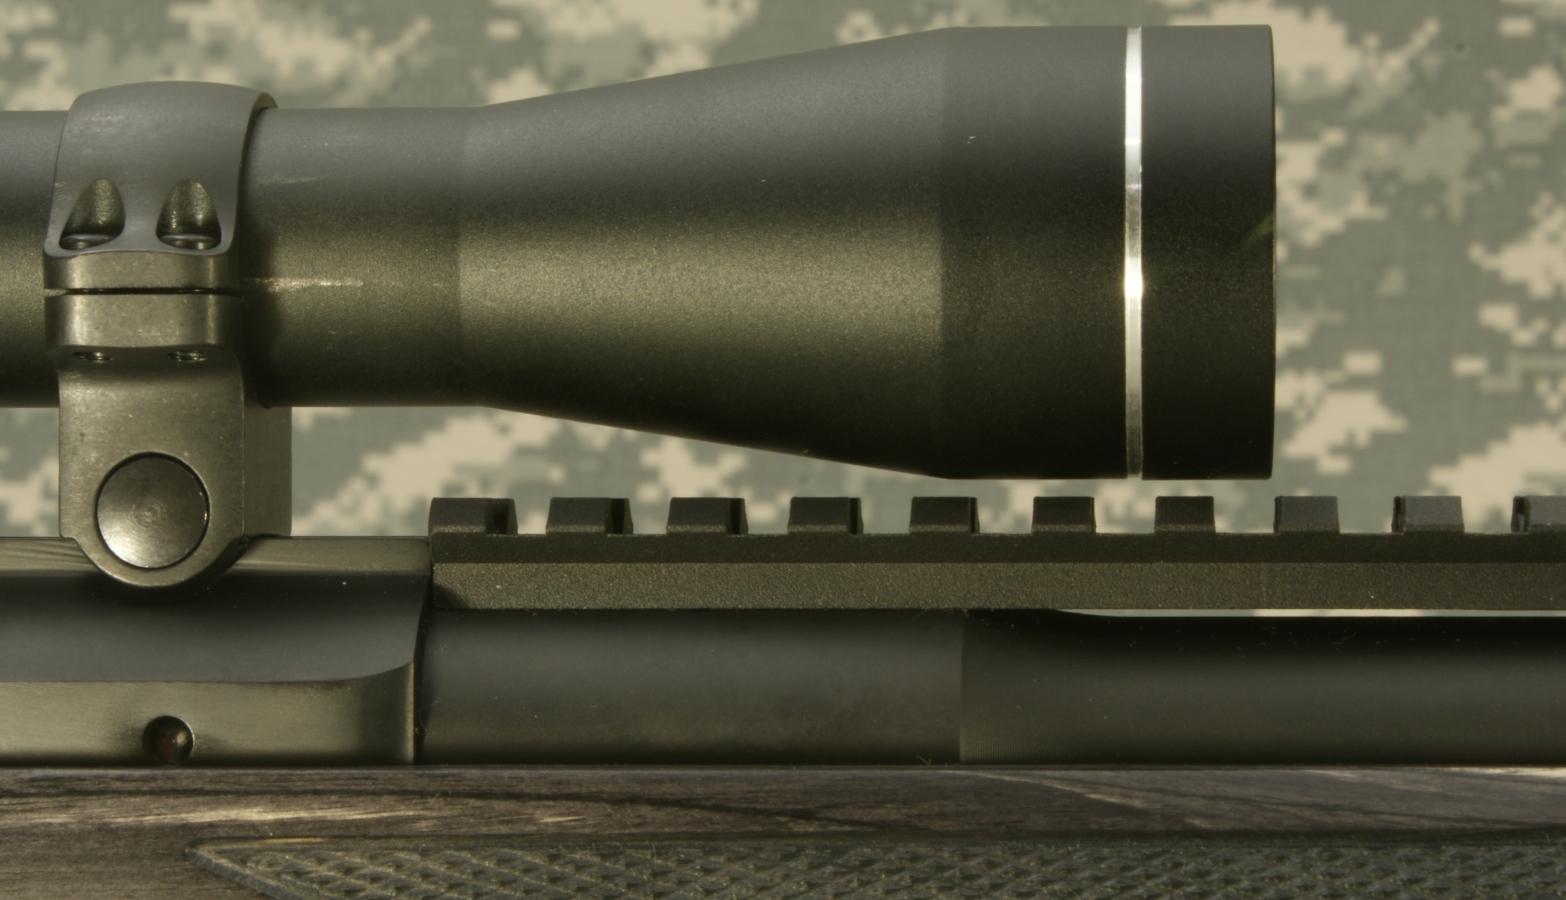
The scope I have shown below has a 32mm objective. If you are considering a scope with an objective larger than this while using the Ruger rings that came with your rifle, you will probably have to remove the front rail.
Figure 45a - 32mm Objective Scope Installed
Ruger Rings
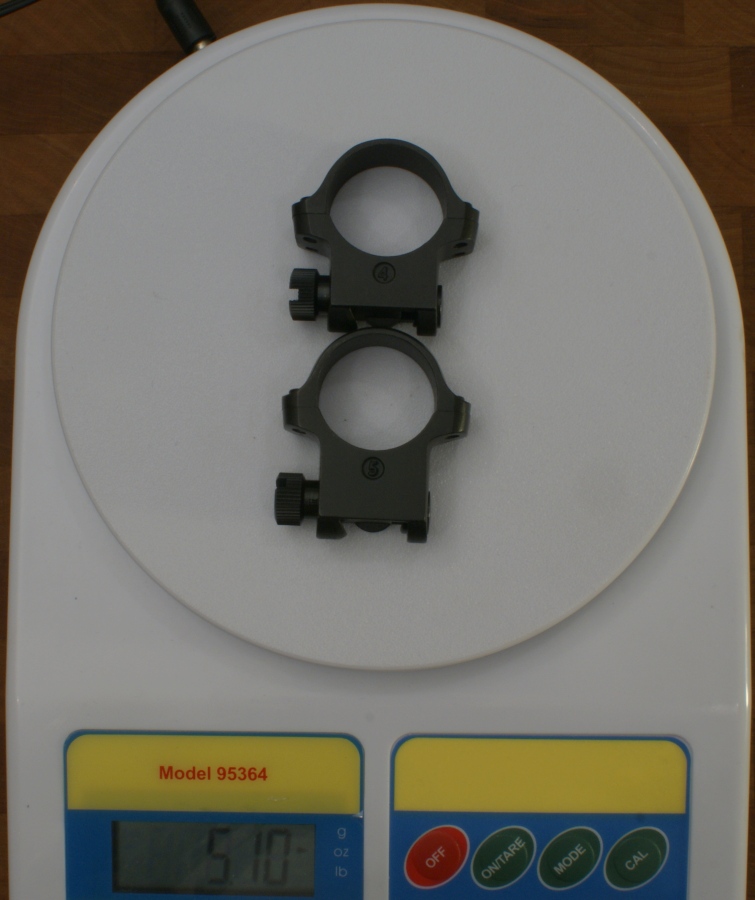
The 1" rings provided with the Ruger Gunsite Scout Rifle are Part Numbers D07111HMA (Front) and D07112HMA (Rear) which translate into 4BHM and 5BHM, respectively. These last part numbers match the style in the Ruger Ring Selection Chart, although the Gunsite Rifle is not currently listed in the chart. These are cast alloy steel mounts with a matte finish and weighed in at 5.10 ounces. It was very nice for Ruger to include a set of rings with the rifle, but if you are planning to use a scope with a different tube diameter other than 1", you will need to get new rings. Personally, I think a coupon/voucher would have been a nice touch so that you could have Ruger send the exact rings needed. I understand that if you contact Ruger, they will swap out your rings to the correct style/height for your scope.
Figure 46 - Back Side of Rings
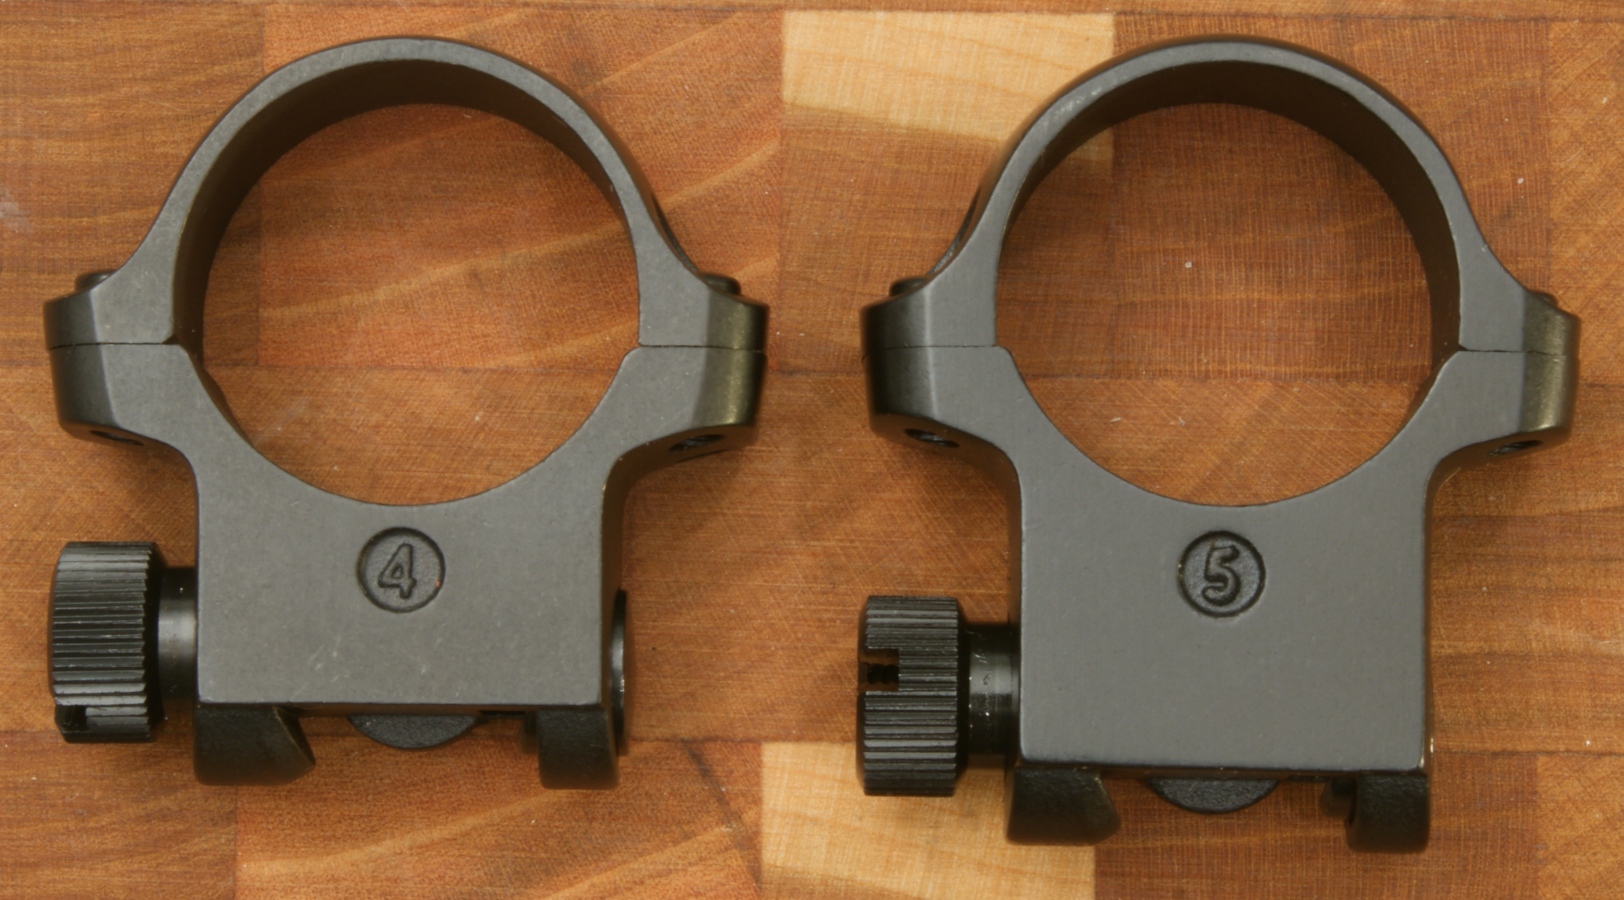
Figure 47 - Front Side of Rings
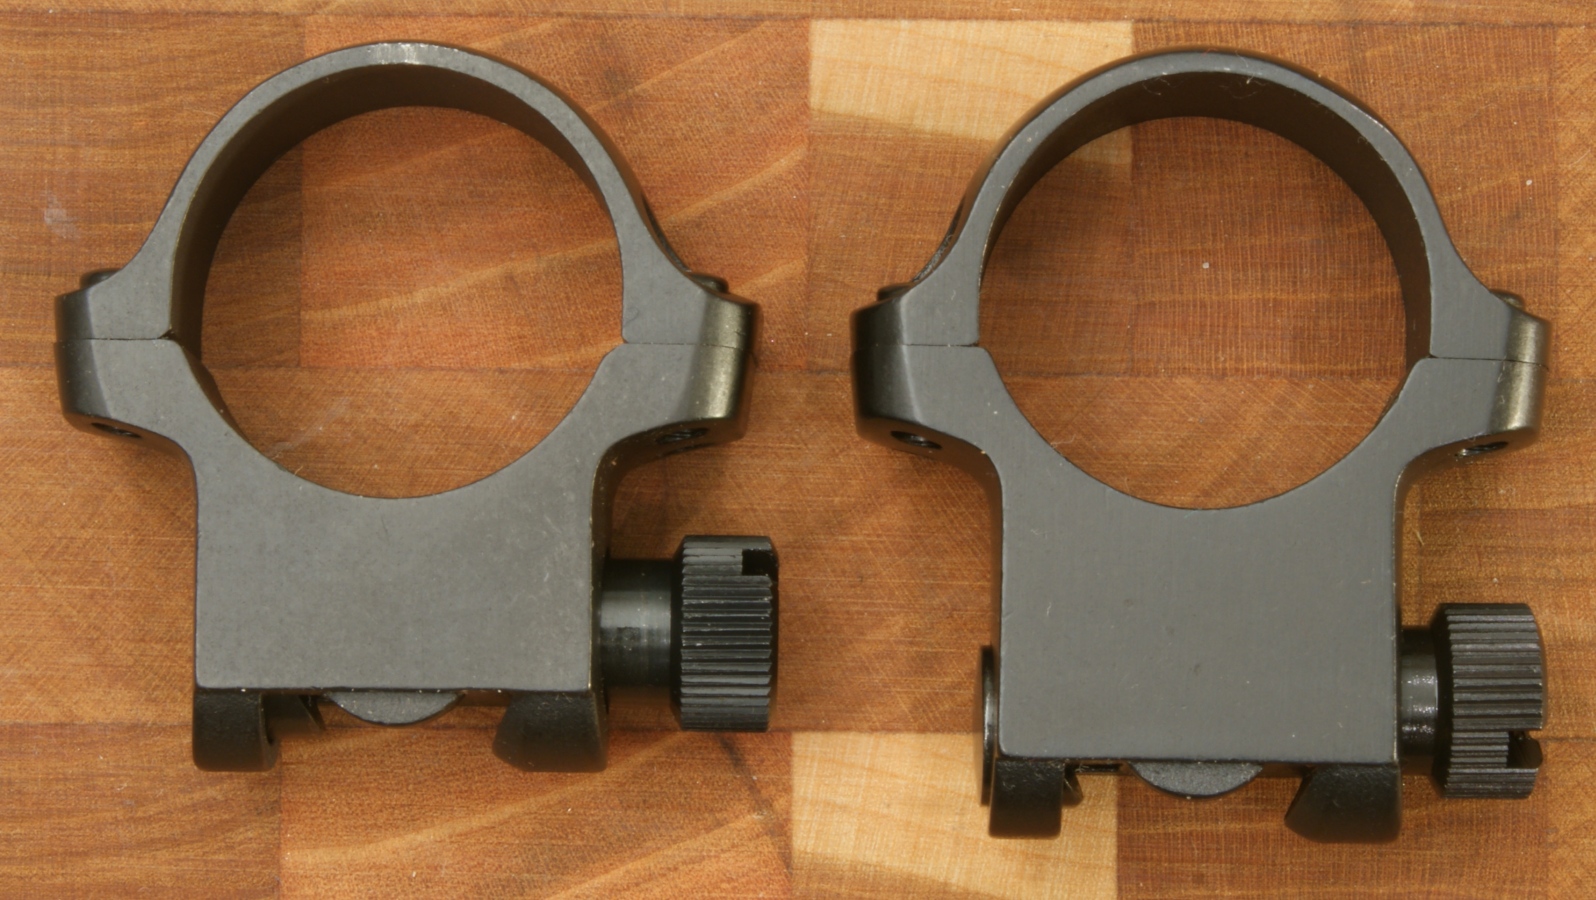
Figure 48 - Right Side of Rings
Figure 49 - Left Side of Rings
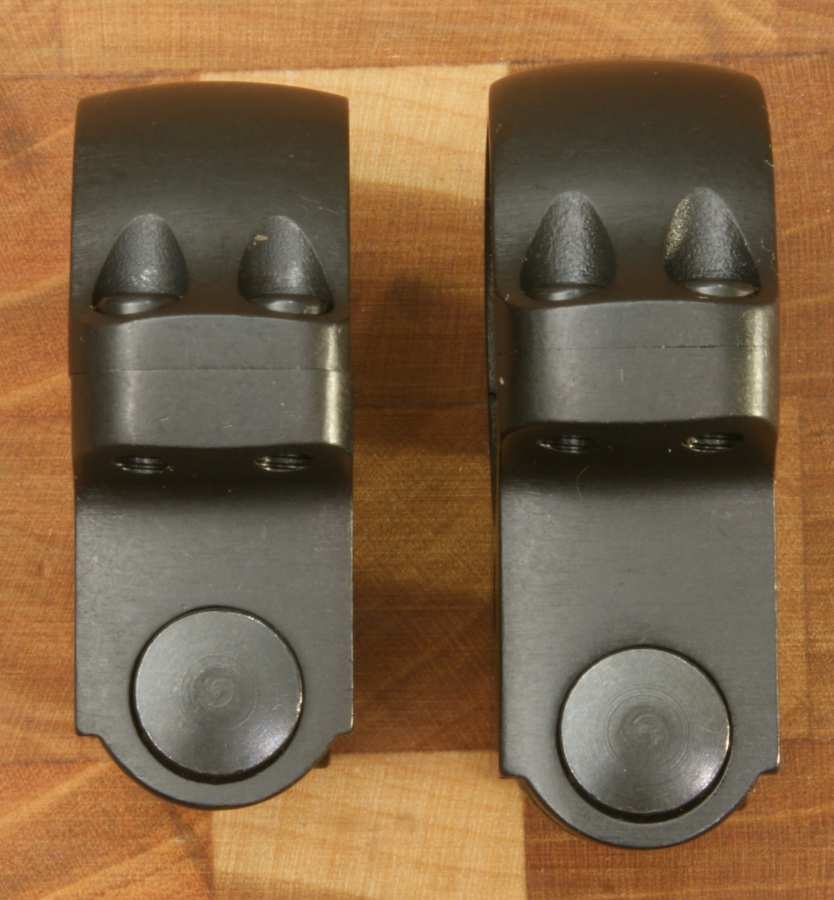
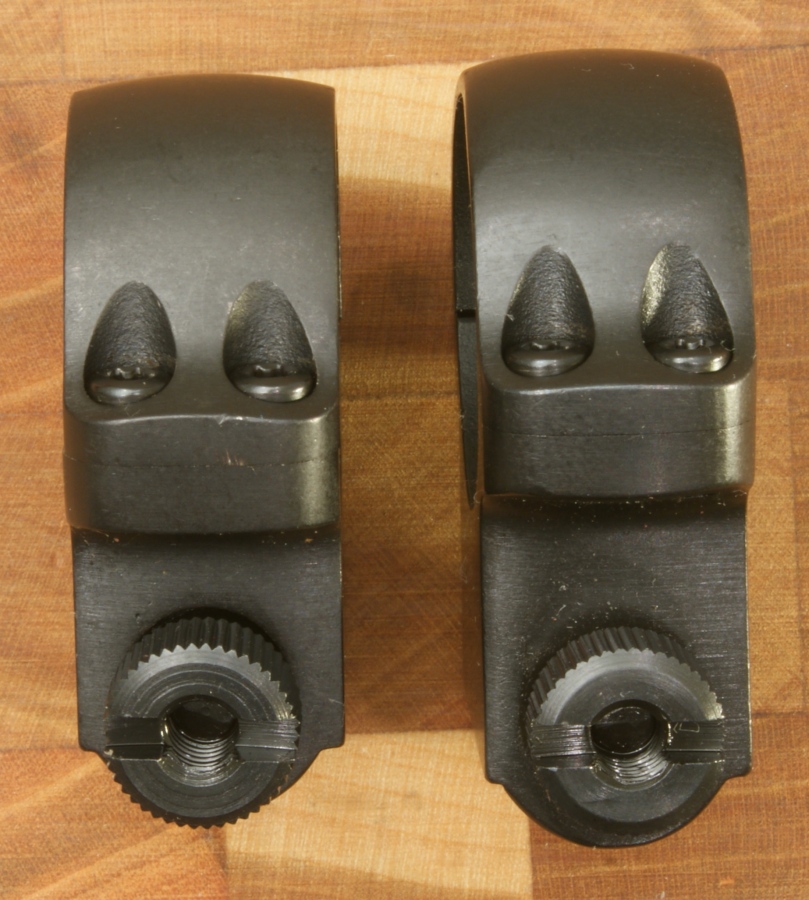
Figure 50 - Top of Rings
Figure 51 - Bottom of Rings
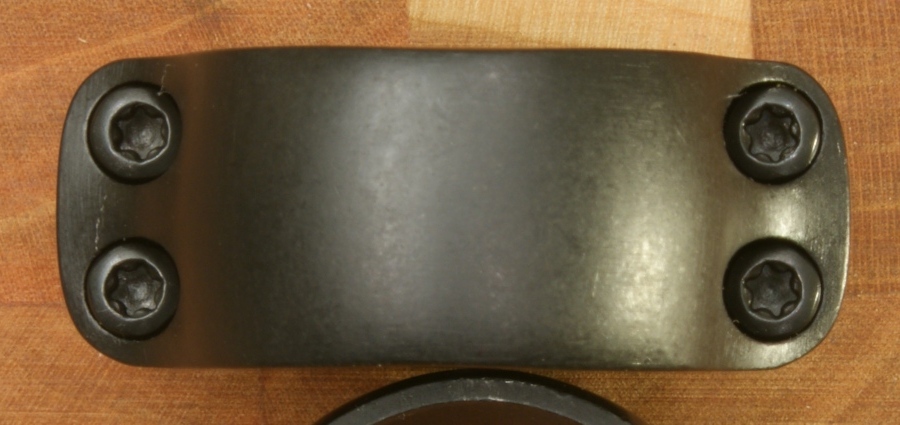
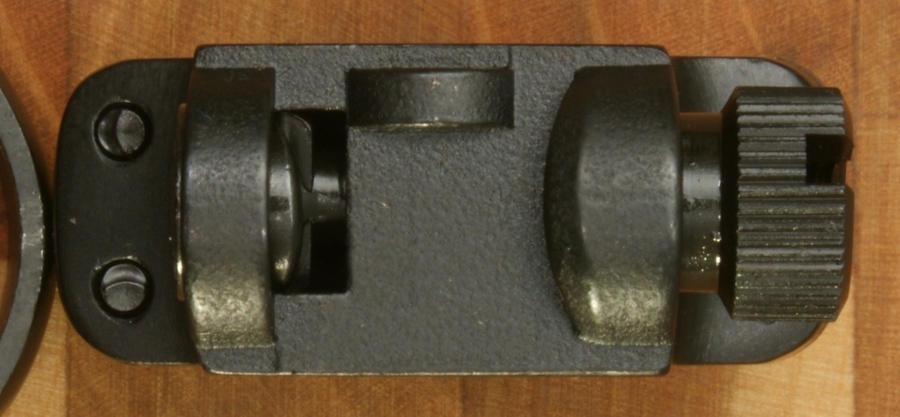
Figure 52 - Rings Weight
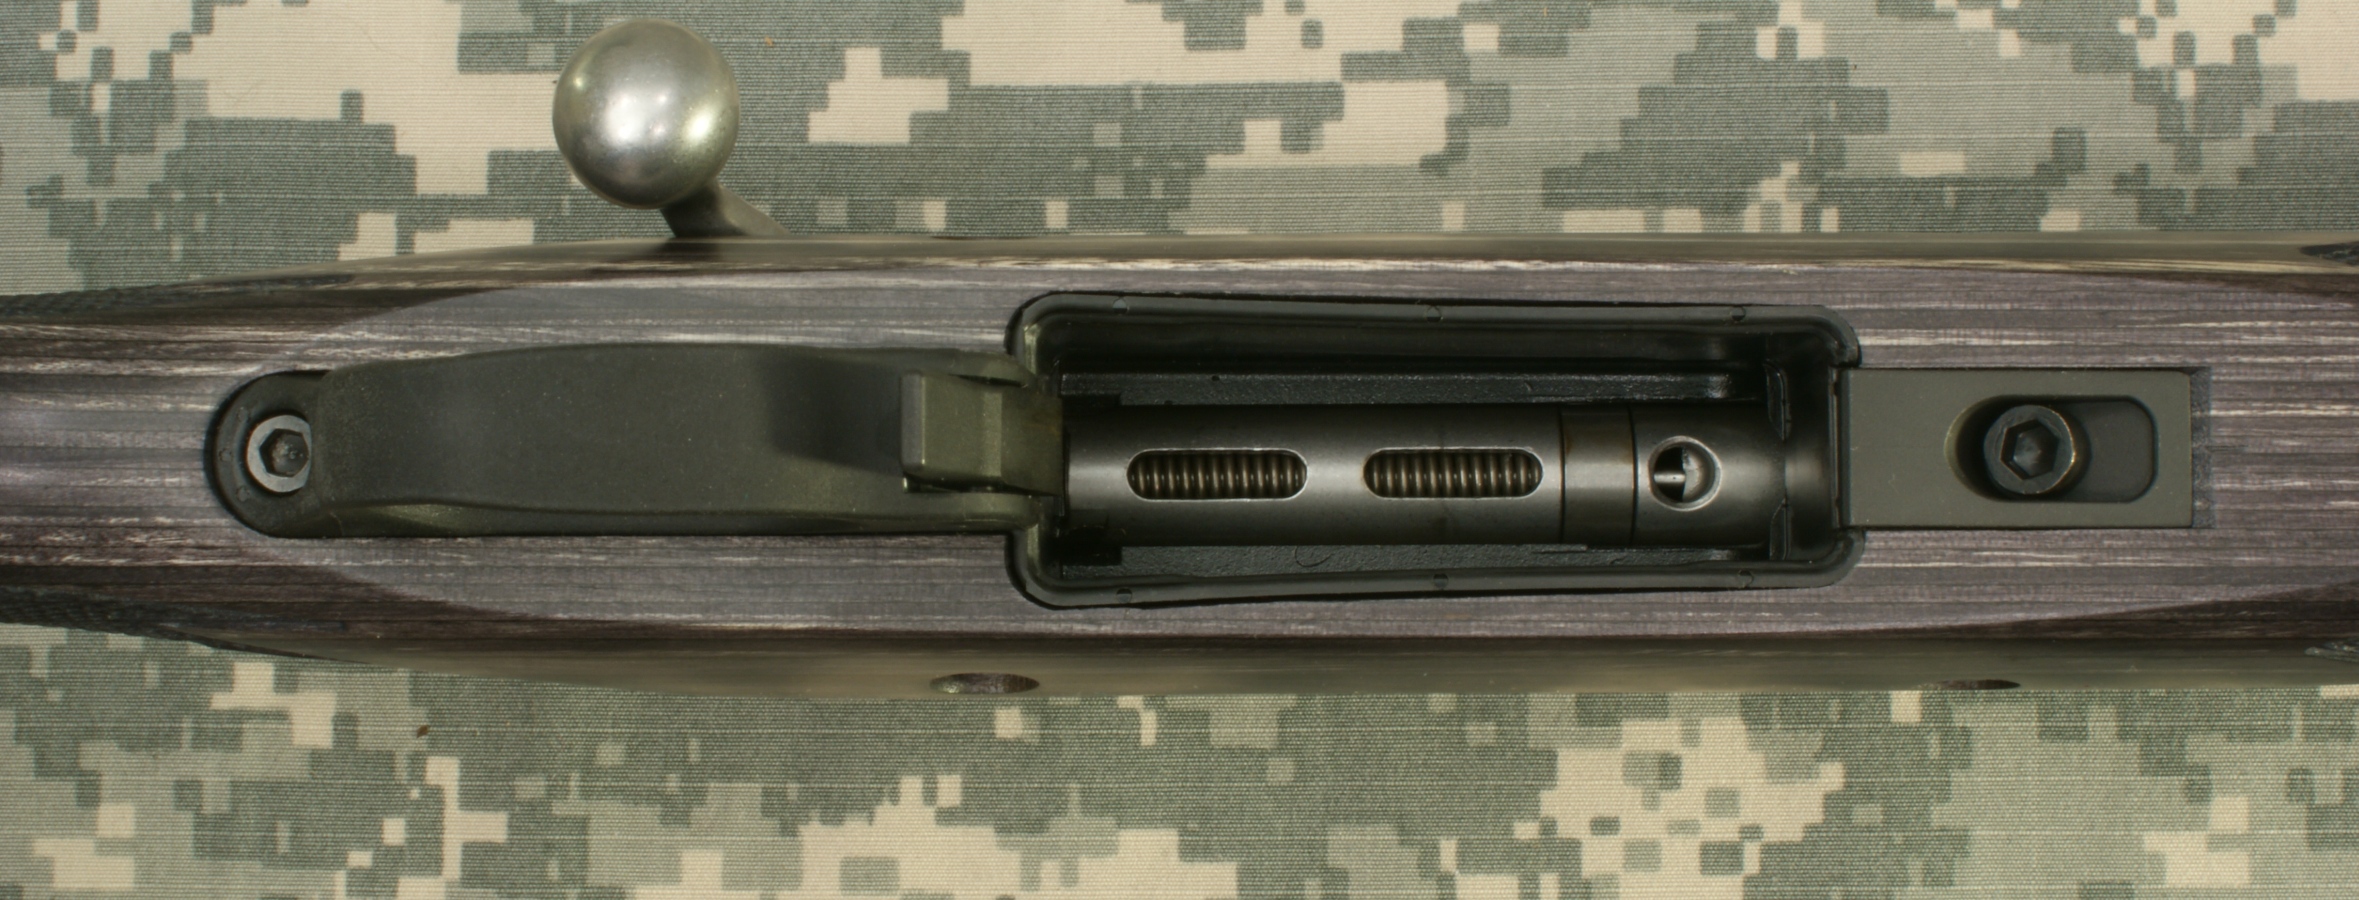
Trigger Guard, Magazine Well, Magazine Latch and Trigger
The trigger guard and magazine well are a single integrated part manufactured from glass filled nylon. This part is held in place by the rear mounting screw and the front mounting lug.
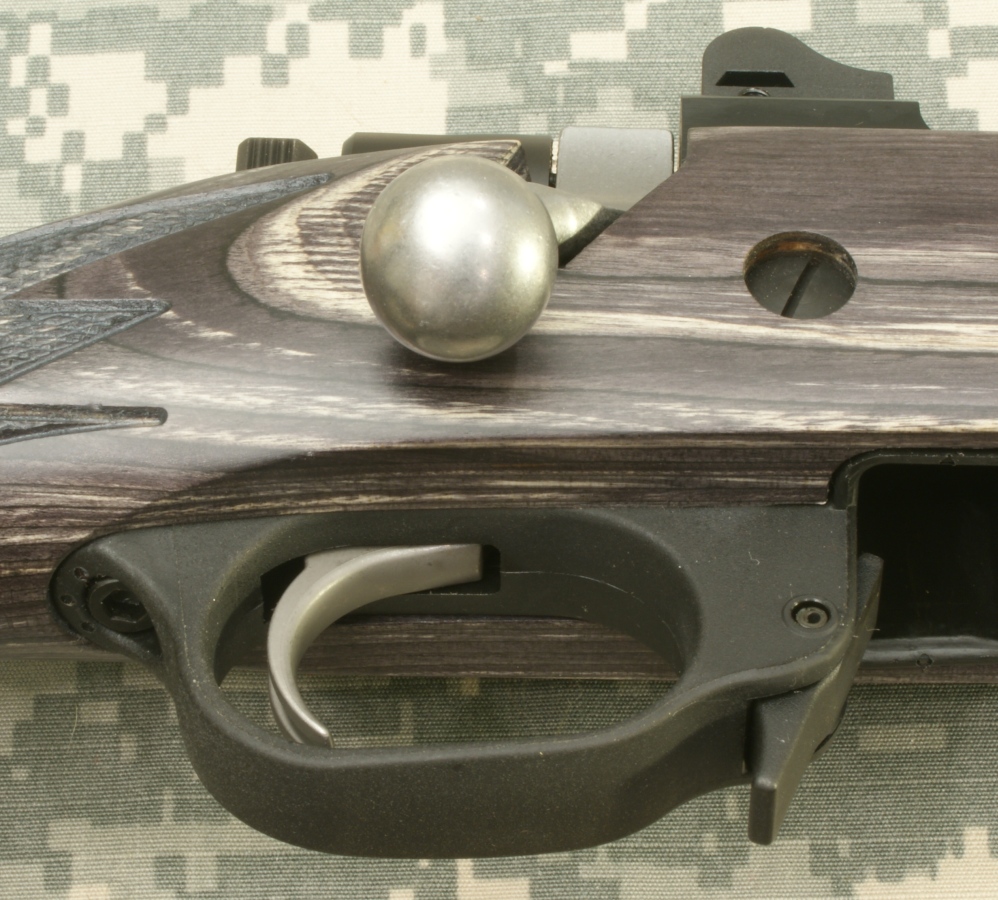
Figure 53
The magazine latch is installed on the front of the trigger guard. By pushing the bottom of the magazine latch forward, you can release the magazine. The trigger is Ruger's LC6 model and the pull measured an average 4.9 pounds for 5 pulls using a Lyman digital trigger pull scale. I would consider this trigger to have a very crisp feel with very little travel.
Figure 54
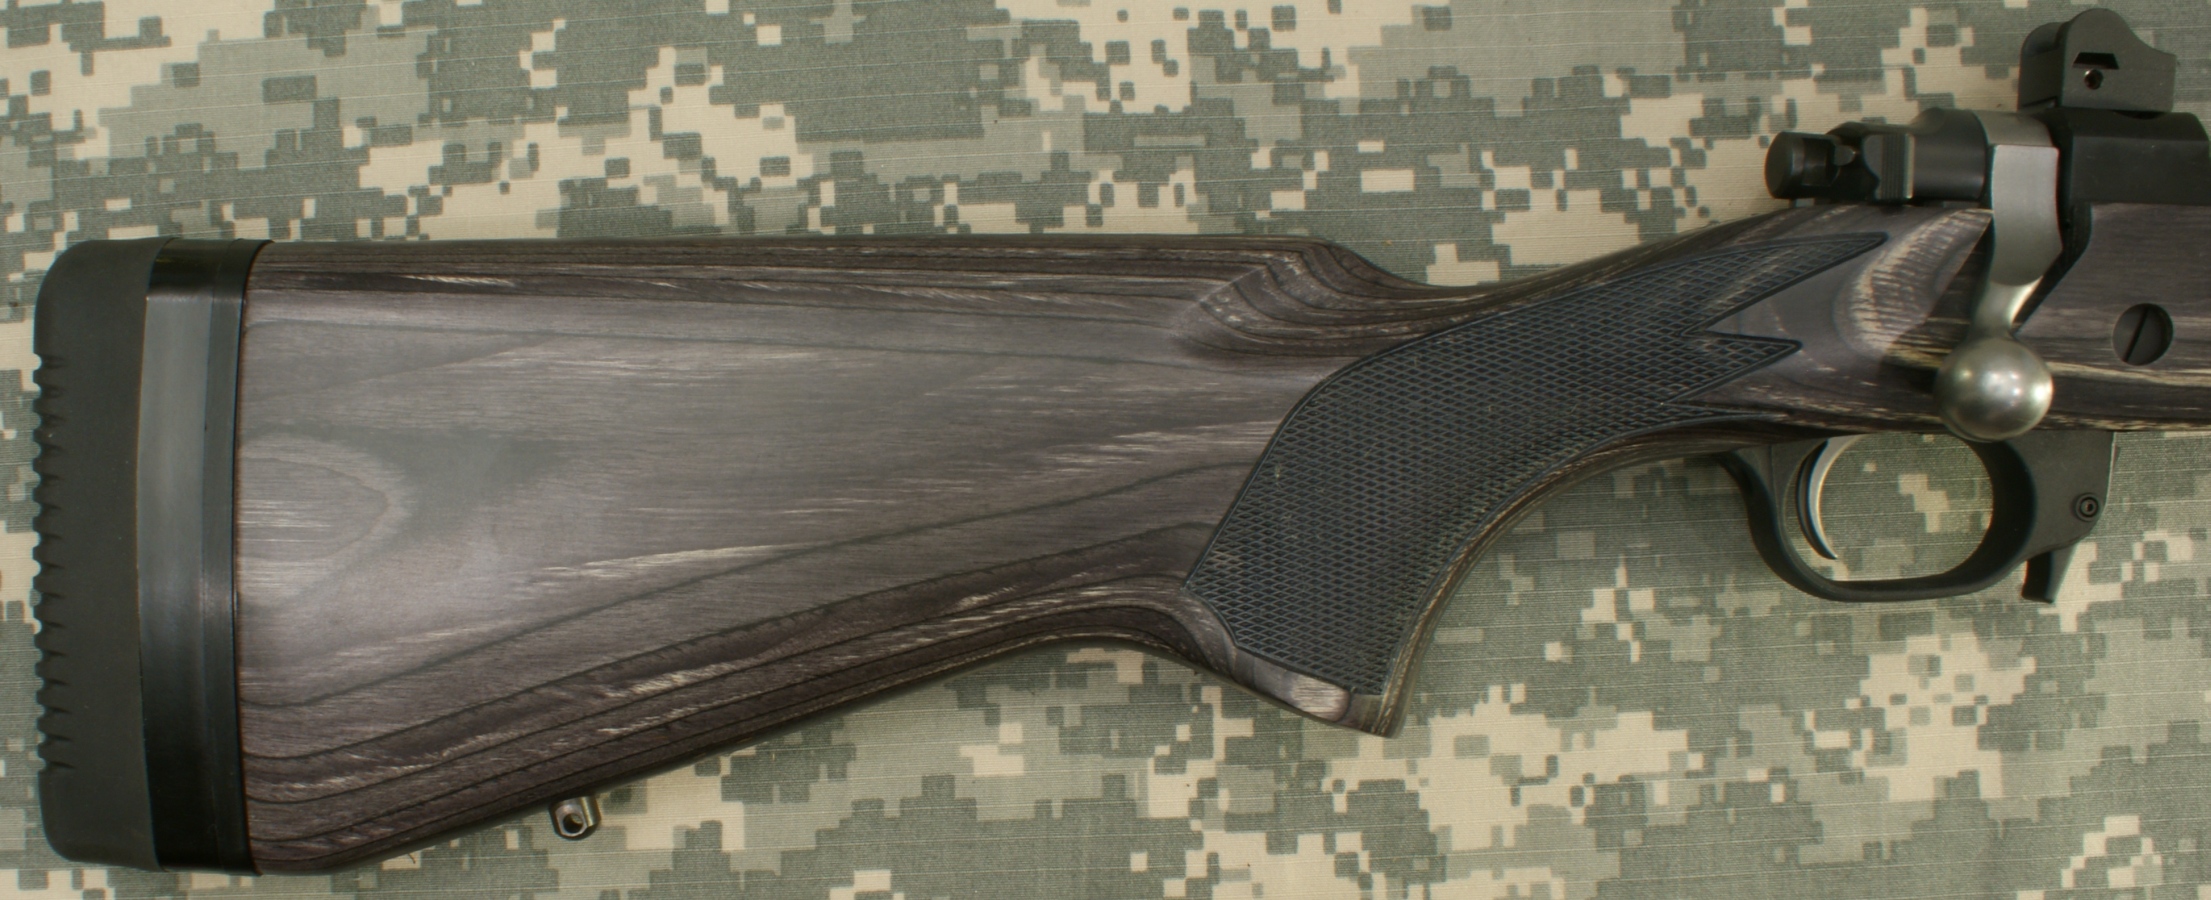
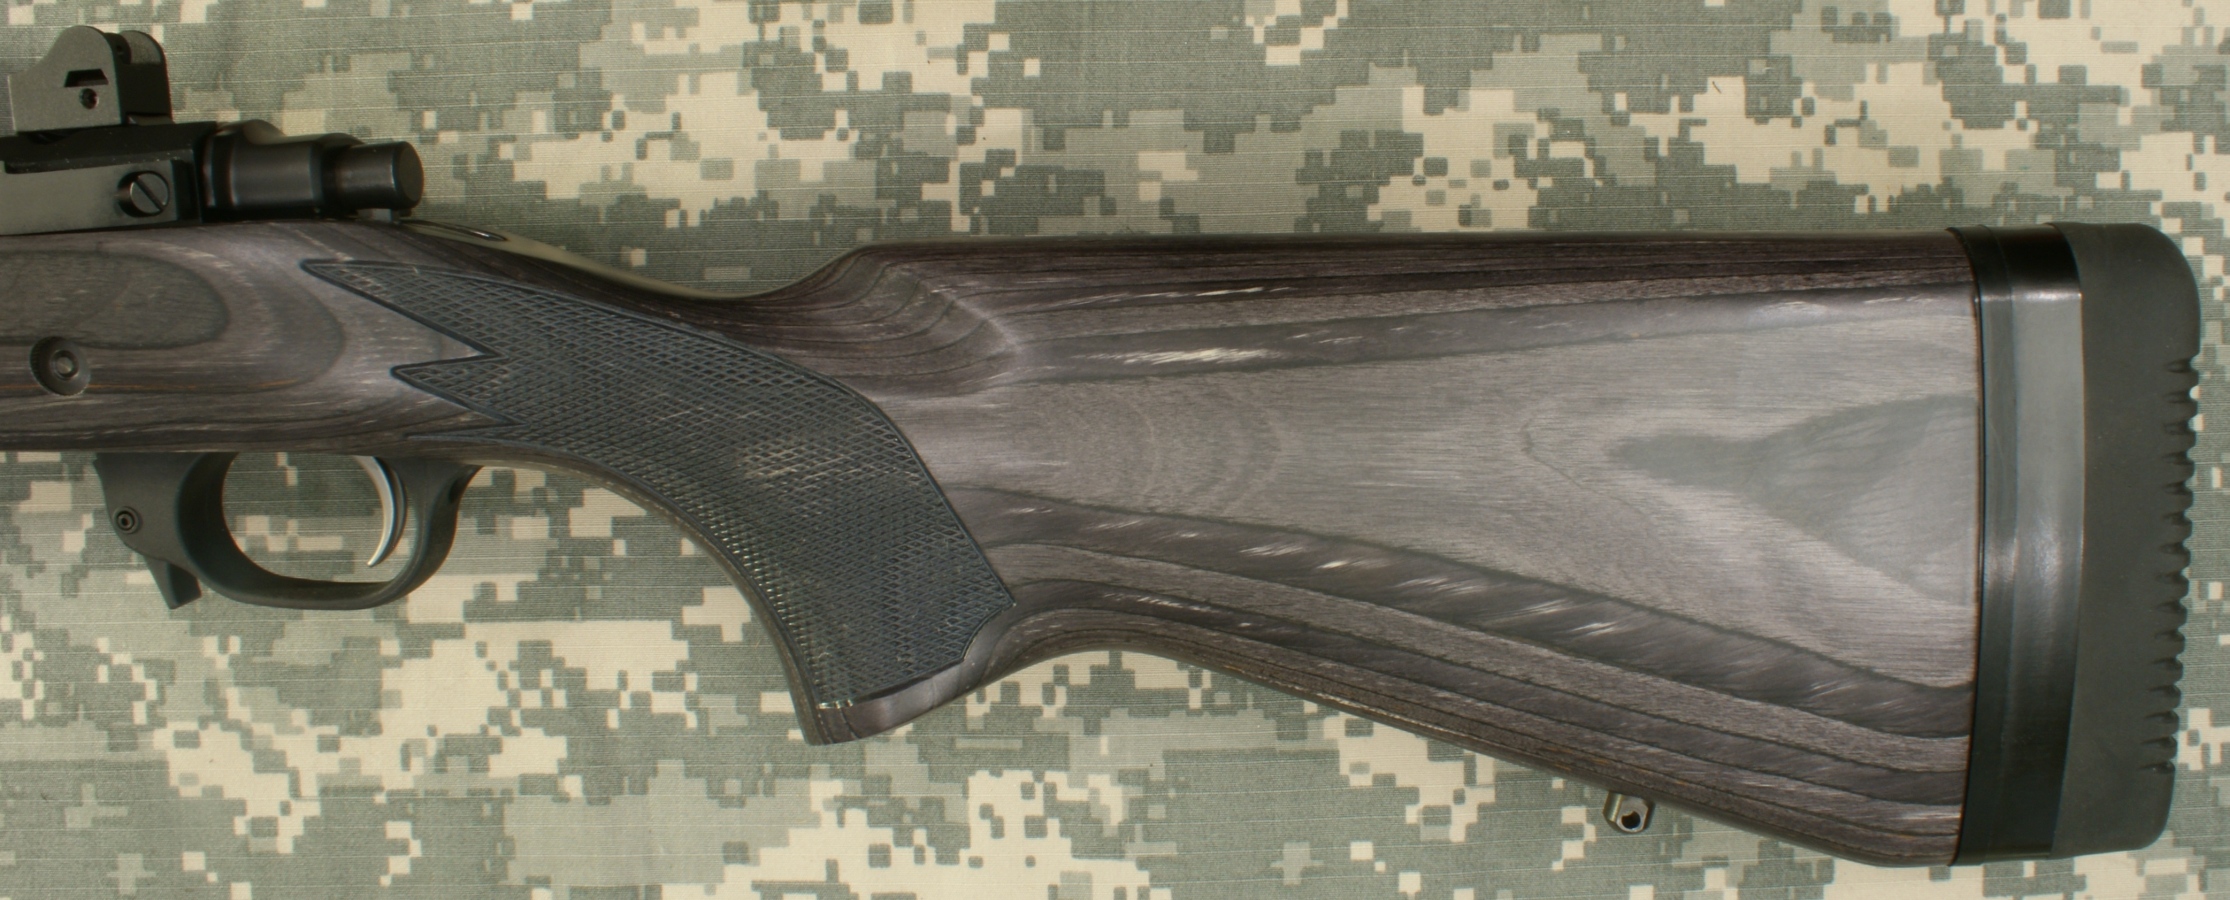
Buttstock and Buttpad
Just as I discussed on the forearm, the buttstock is an attractive black wood laminate with checkering on the grip area. The rifle comes with a single stock shim in place for an "out of the box" length of pull of 13.25". The buttpad is made of a soft rubber that I feel will be effective in reducing the felt recoil of the .308 Winchester caliber.
Figure 55

Figure 56
The grip cap is laser engraved "GUNSITE SCOUT RIFLE" along with the Gunsite Raven logo. The buttstock also includes a rear sling swivel stud.
Figure 57
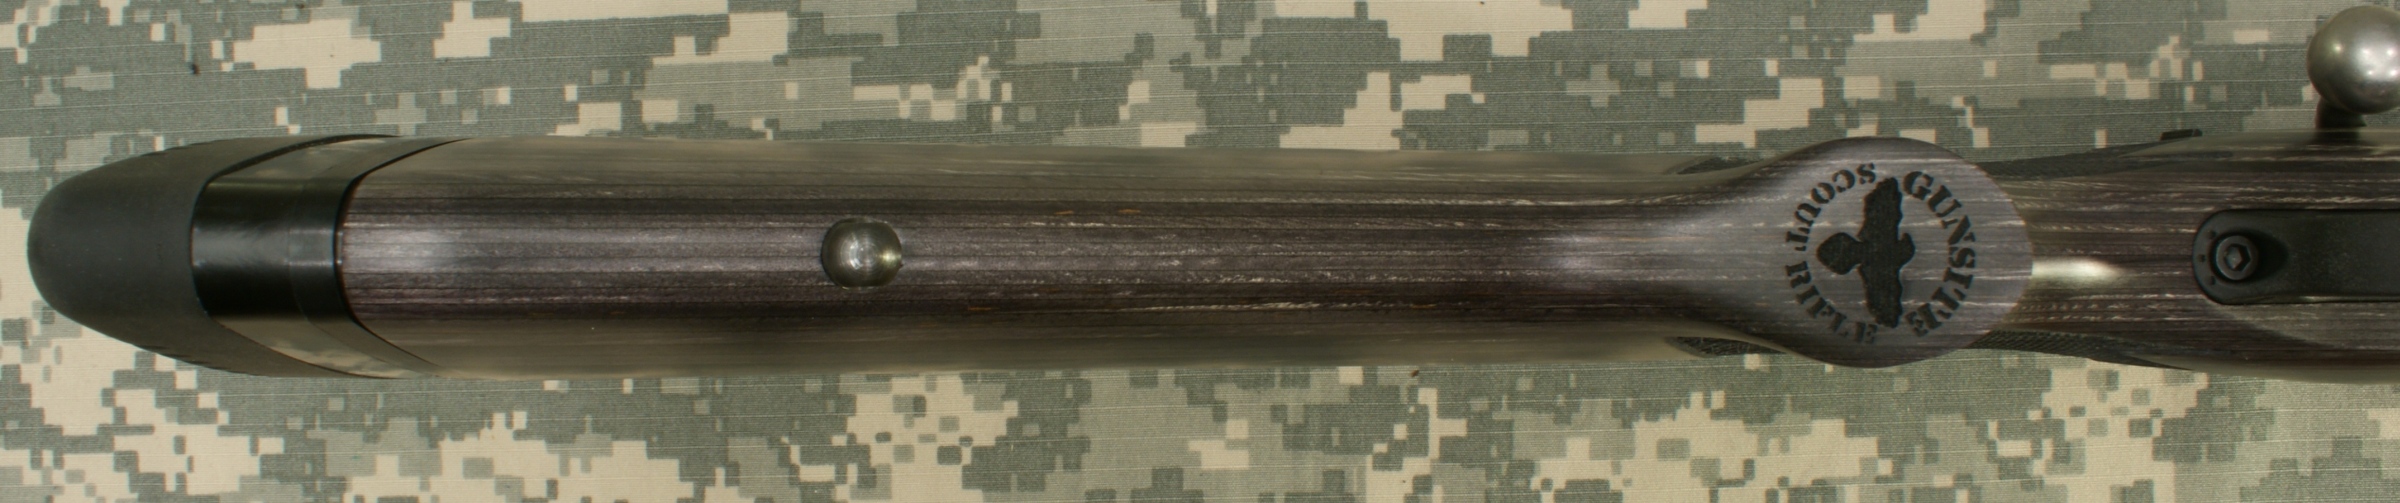
Figure 58
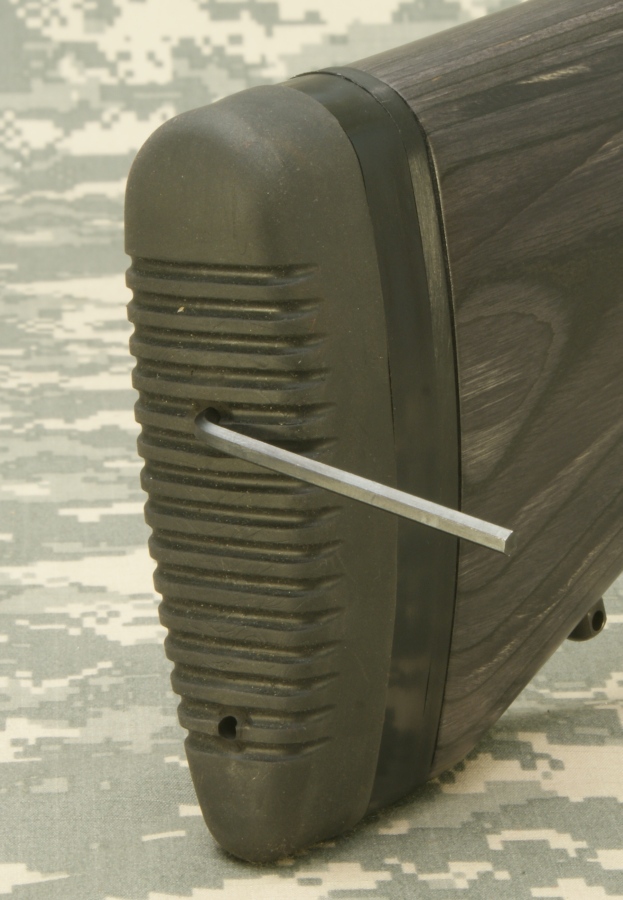
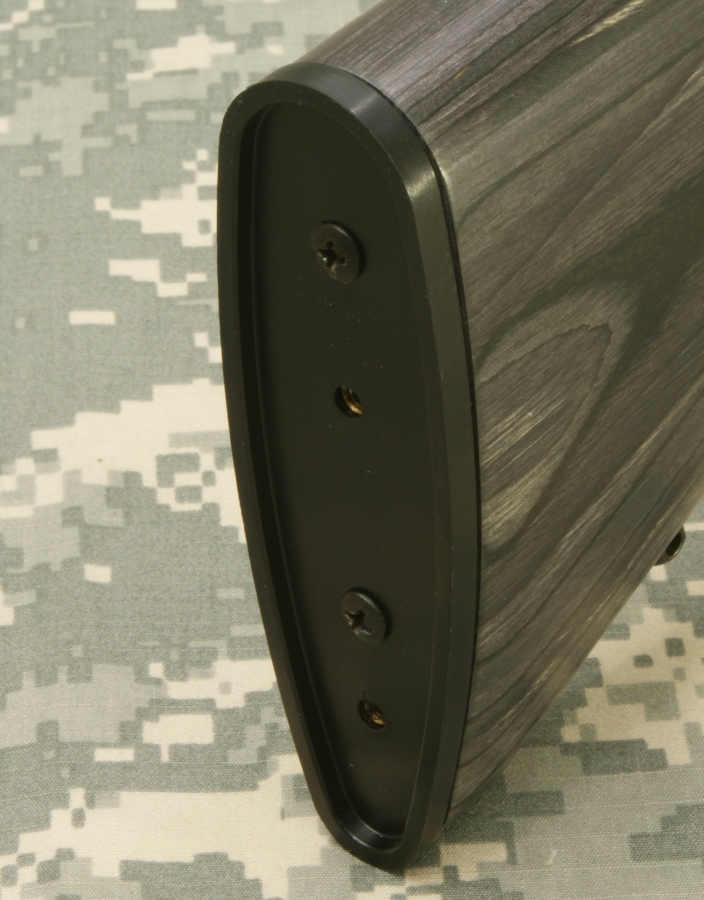
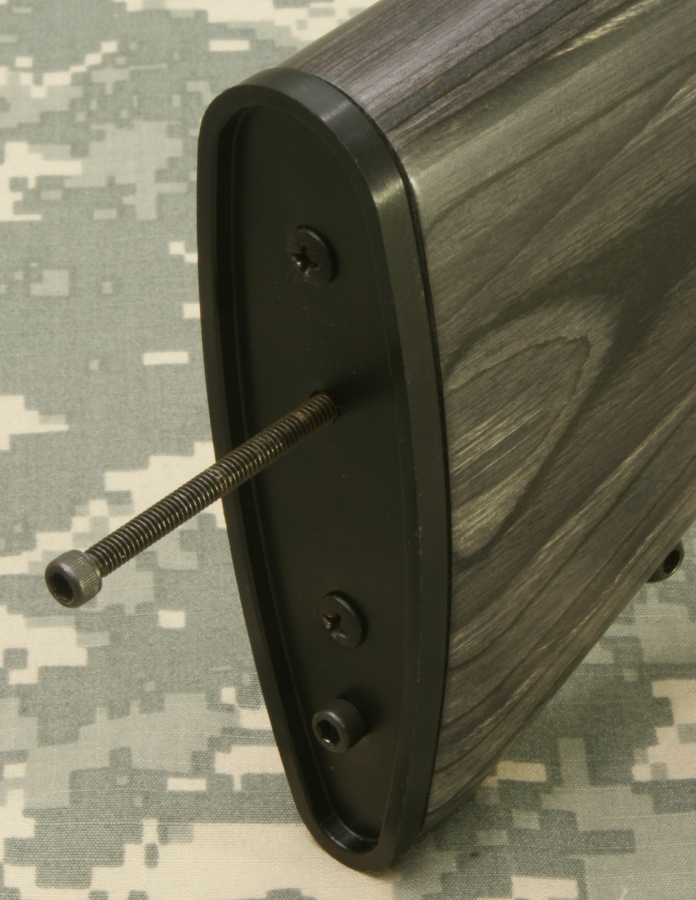
Buttstock Shims
To install the buttstock shims, you must first remove the buttpad by removing the two long bolts using the Allen wrench provided with the rifle. Once the buttpad is removed, you can see that there is a plastic cap attached to the wooden end of the buttstock. This plastic cap appears to have two brass looking nuts on the opposite side. The buttpad screws are long enough to be used with either none or all of the shims installed. You can see in the photo below the length of the screws and that the lower screw is screwed completely into the buttstock.
Figure 59
Figure 60
Figure 61
The next set of photos show the appearance of the stock for none and each additional shim installed. These shims change the Length of Pull from 12.75" to 14.25" in 1/2" increments. From an appearance perspective, the more shims installed, the less attractive the buttstock became. Since I'm going to lean towards having a short and point-able rifle, I'm going to try sticking with the single shim.
Figure 62 - No Shims Installed and a Length
of Pull of 12.75"
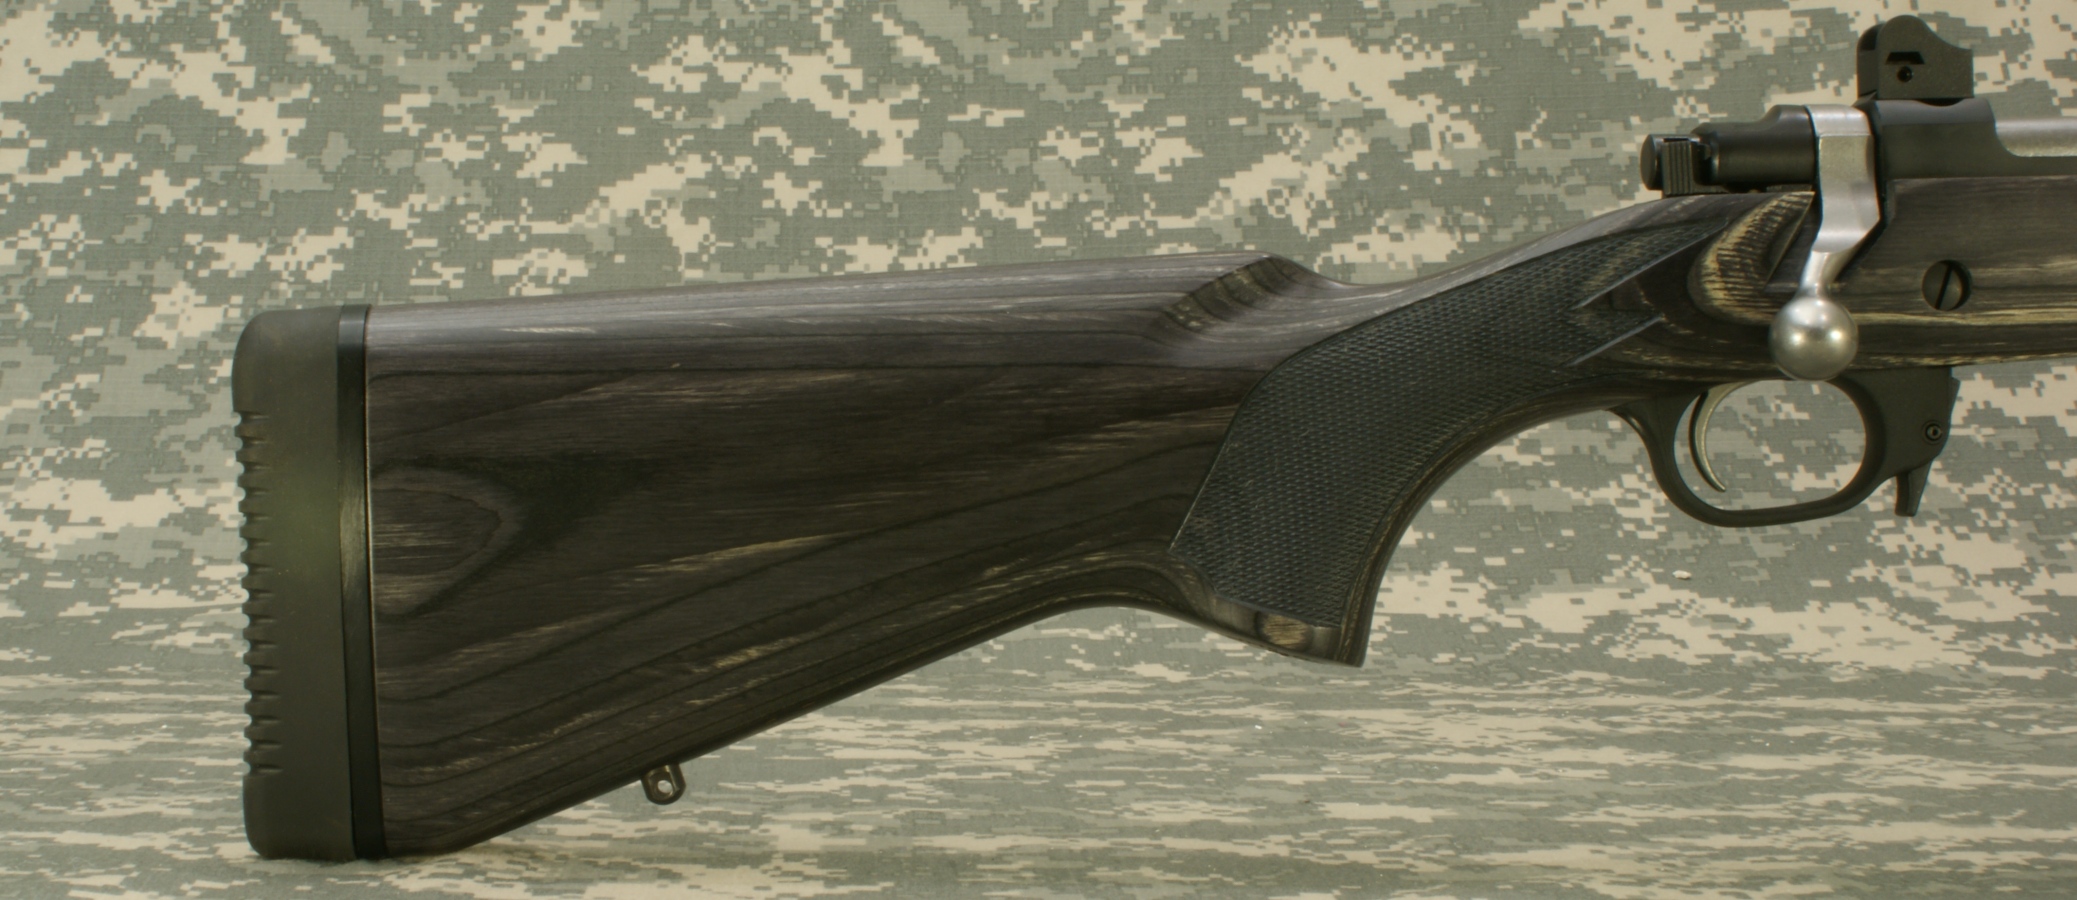
Figure 63 - One Shim Installed and a Length
of Pull of 13.25"
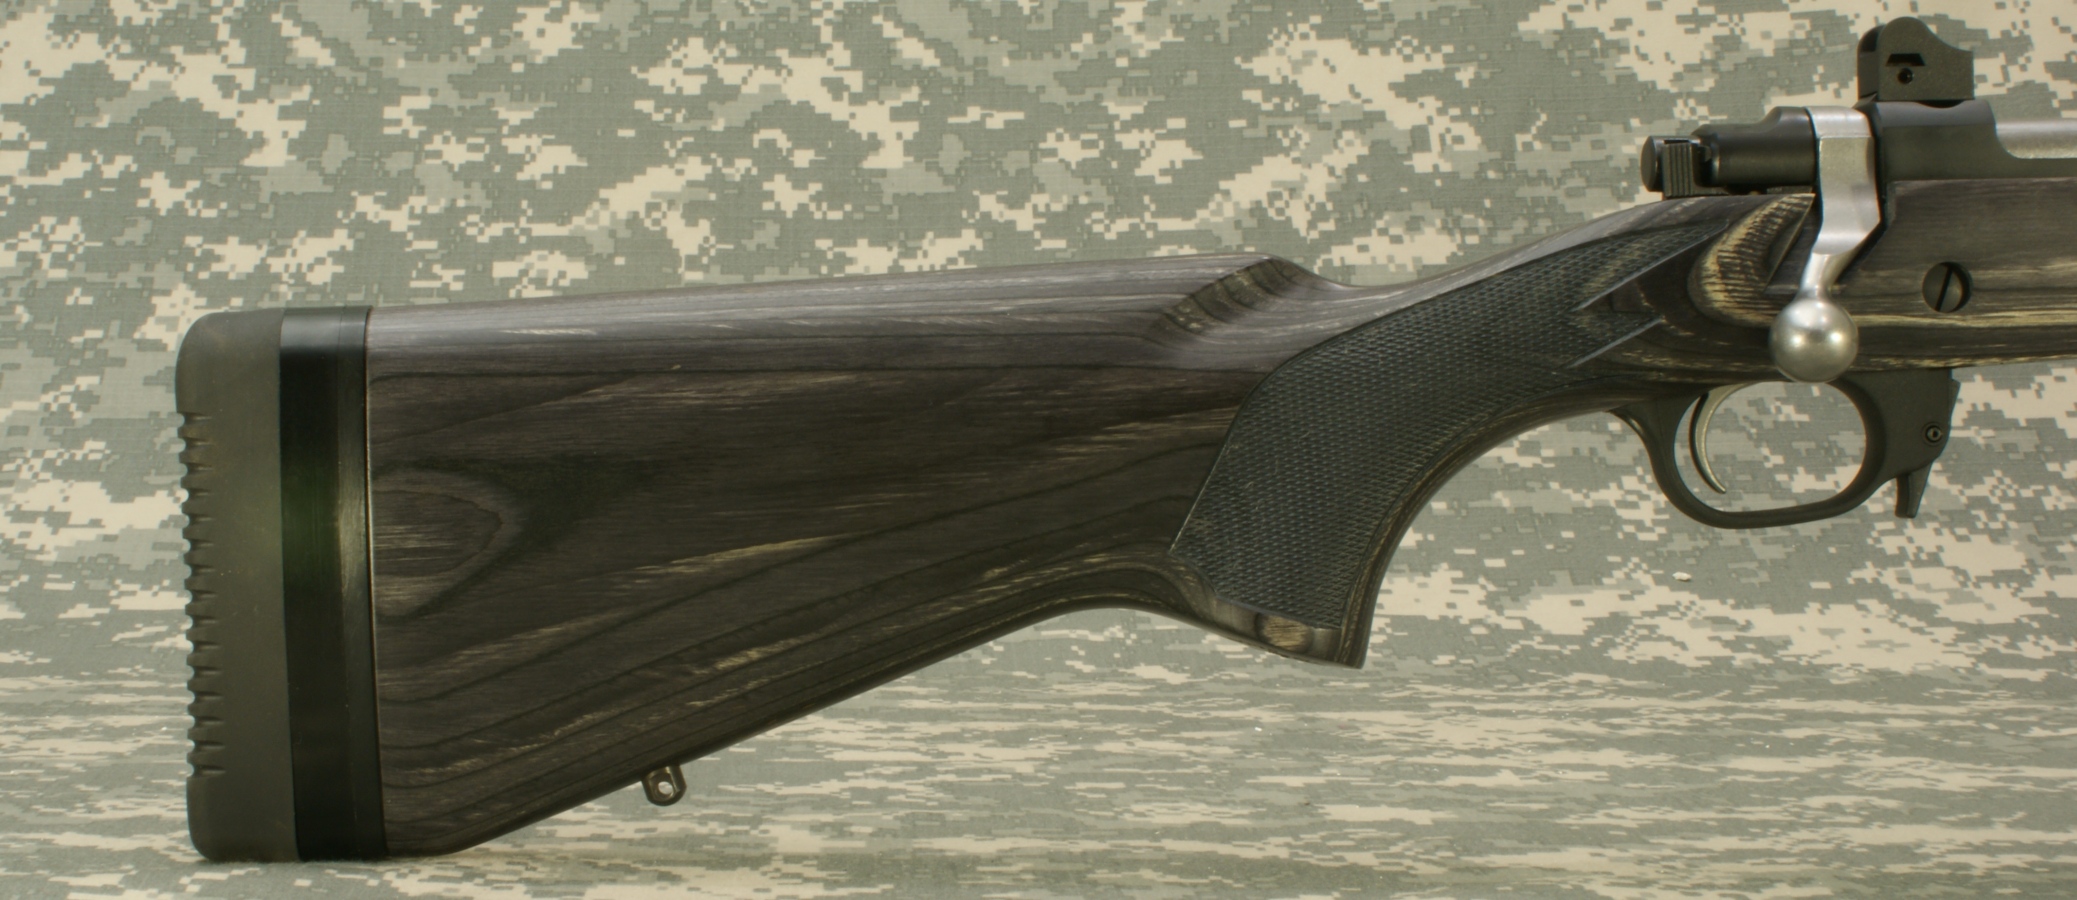
Figure 64 - Two Shims Installed and a Length
of Pull of 13.75"
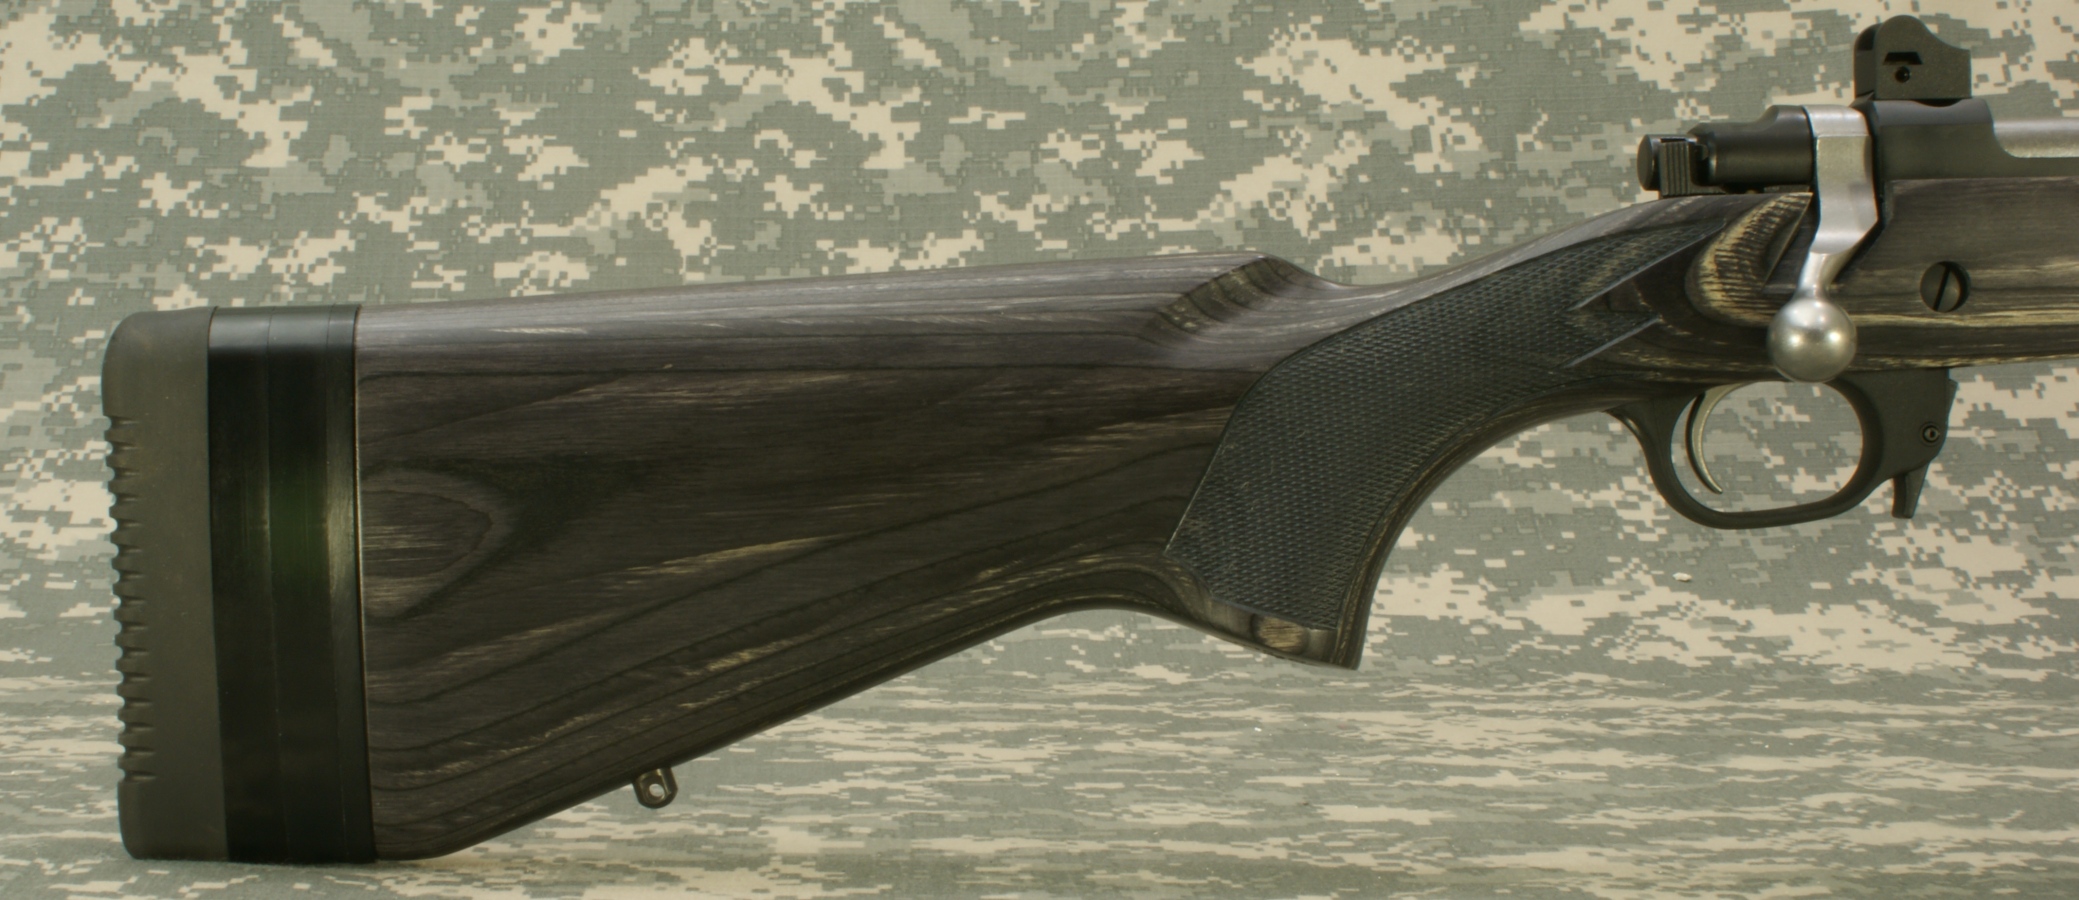
Figure 65 - Three Shims Installed and a
Length of Pull of 14.25"
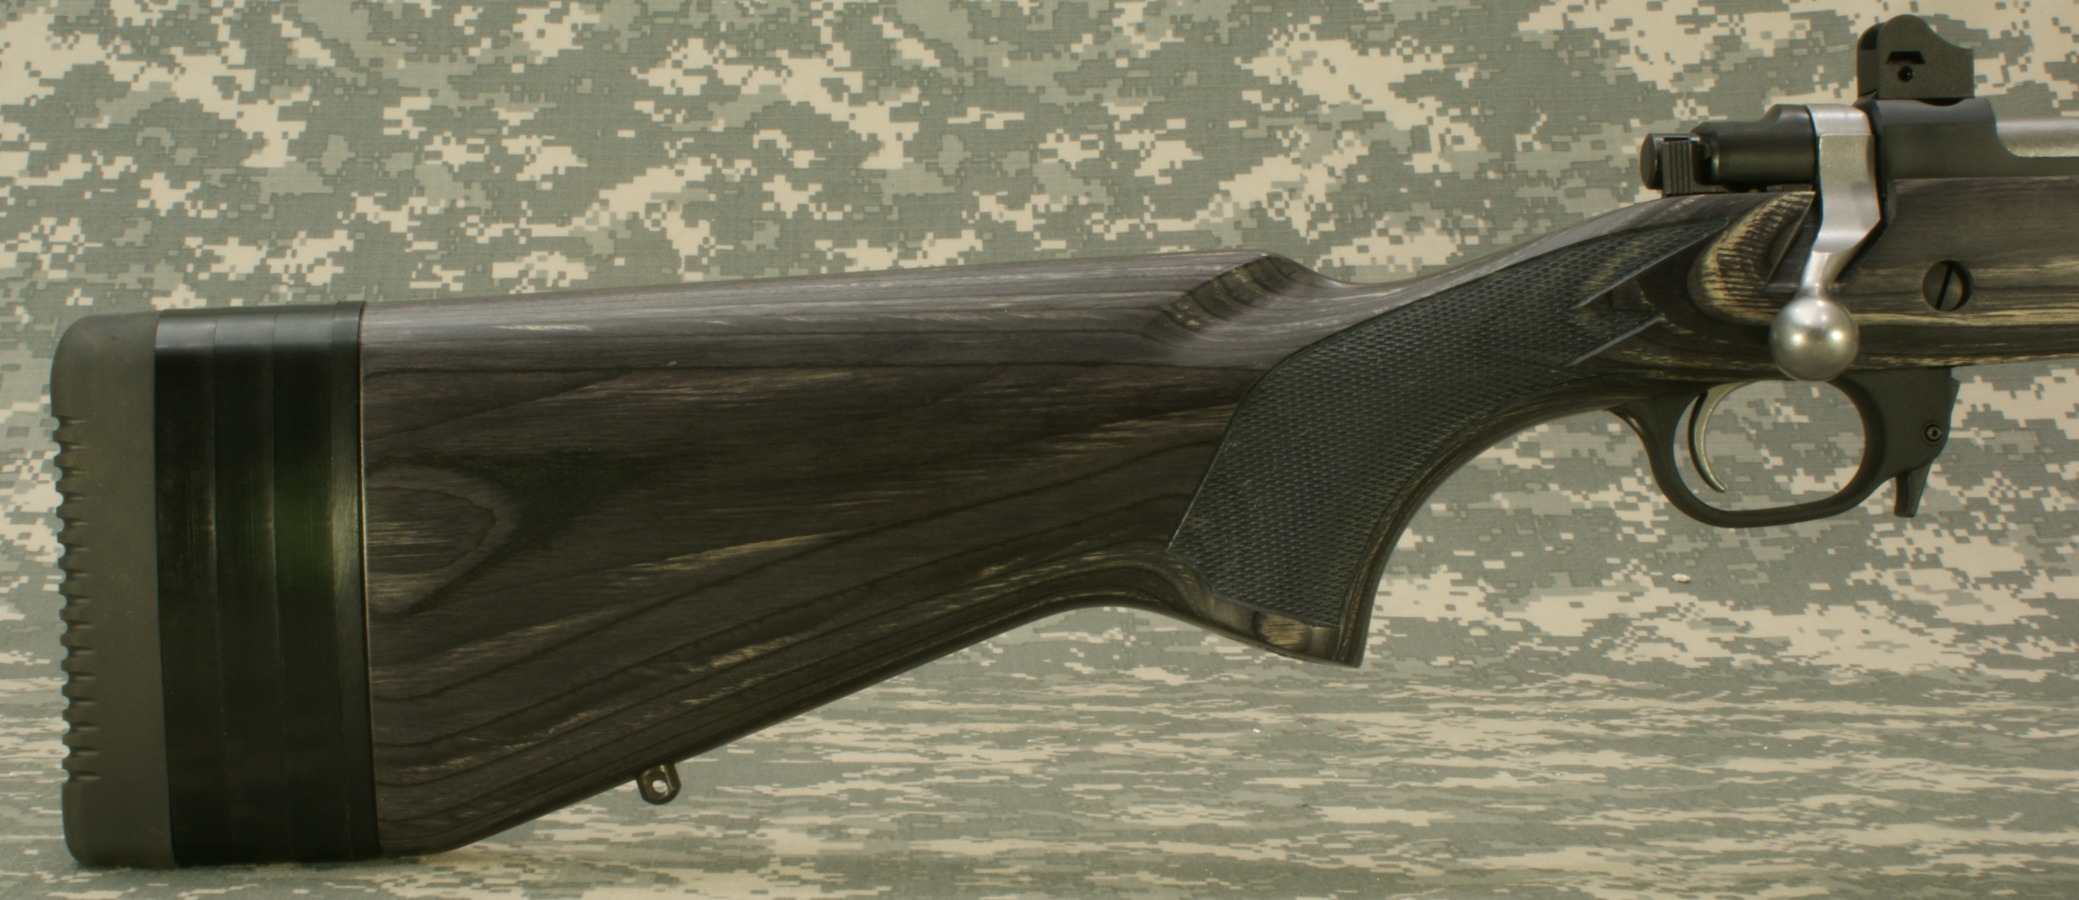
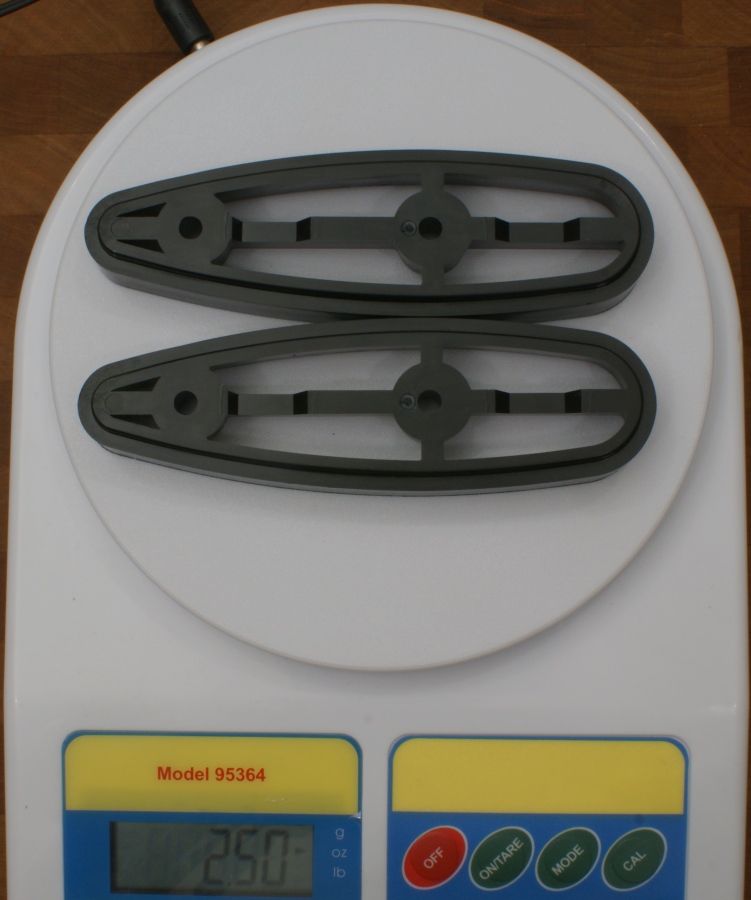
Figure 66 - Shim Weight
The shims weighed in at 1.25 ounces each.
Magazine
The Ruger Gunsite Rifle comes with a 10-round detachable magazine, which is another key feature for this rifle. Ruger made a wise decision not going with a proprietary magazine configuration (my opinion). This promotes competition between magazine manufacturers and hopefully will bring down the prices of these magazines in the future. You can purchase 5-round magazines at the ShopRuger.com website for $64 plus S&H.
Figure 67
Figure 68

The 10-round magazine that comes with the rifle is actually made by Accurate-Mag and you can see their logo "ΔM" stamped on the right side of the magazine and "ACCURATE-MAG" on the left side of the magazine in the photos below.
Figure 69 - Right Side
Figure 70 - Front Side
Figure 71 - Left Side
Figure 72 - Back Side
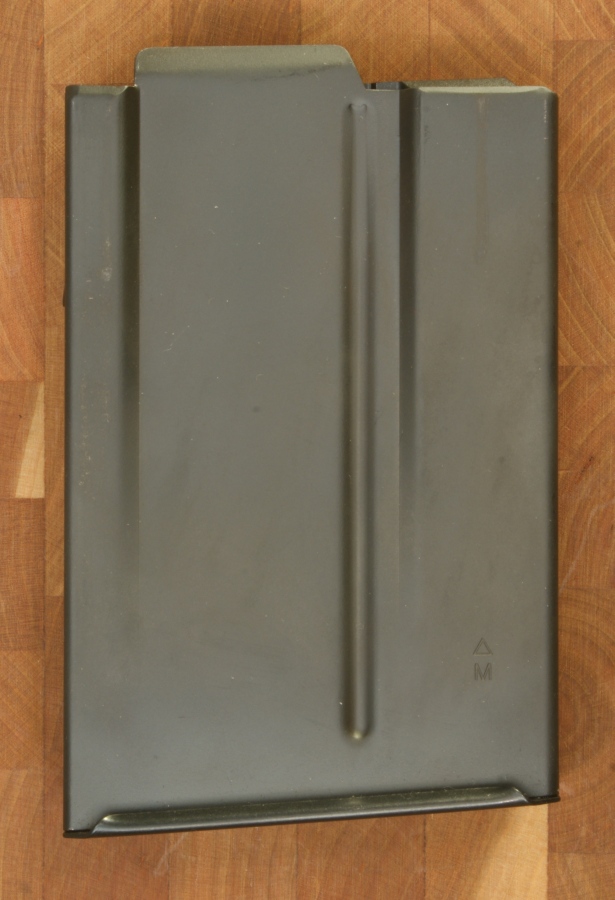
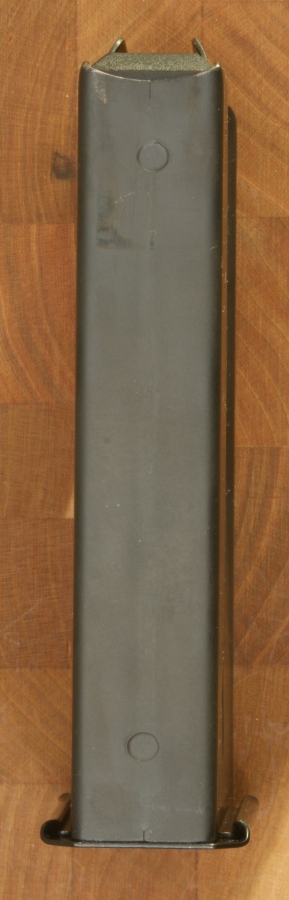
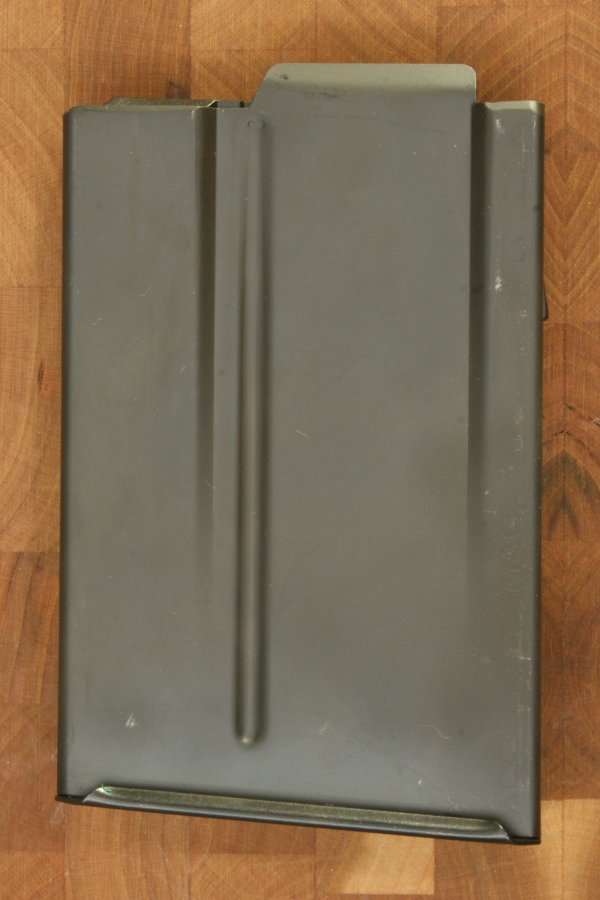

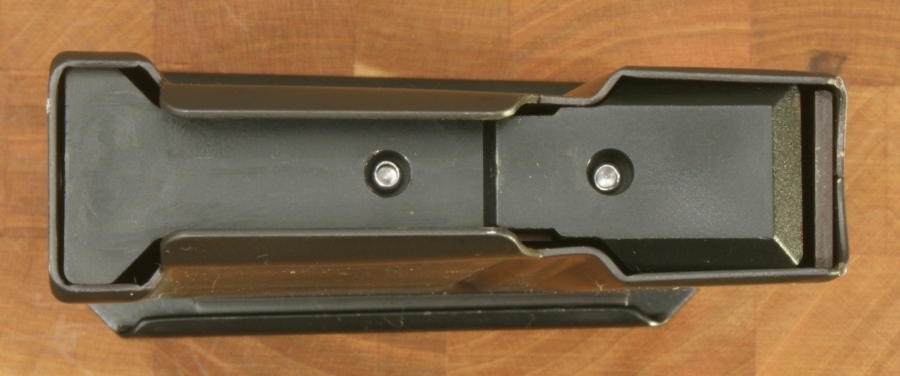
Figure 73 - Top Side
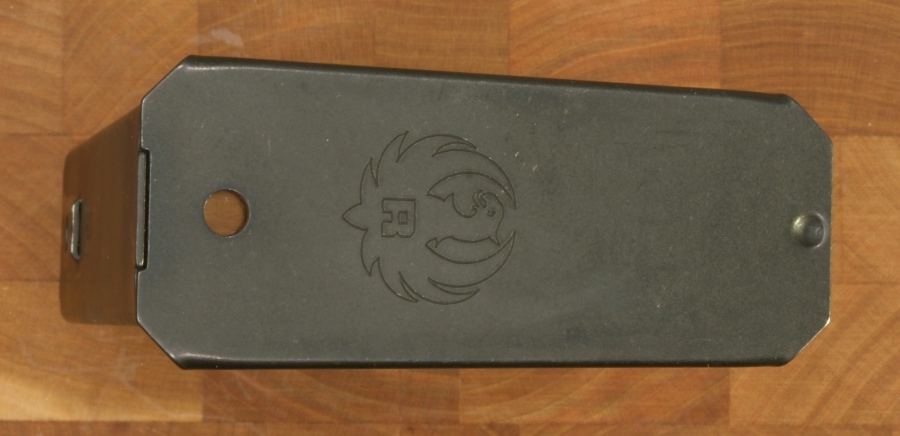
Figure 74 - Bottom Side
I loaded 10 rounds of Hornady 155 Grain A-MAX Match ammo into the magazine to checkout how it functioned. The rounds fed in nicely once I got the hang of pushing them down in the back while I slipped them in from the front. The 10th round was the most difficult to get in, but it did fit. At this point in the review, I have not been to the range yet, but the rounds did chamber as I cycled through all 10. Due to the increased spring force with 10 rounds in the magazine, it took more force to chamber the first round than the last.
Figure 75
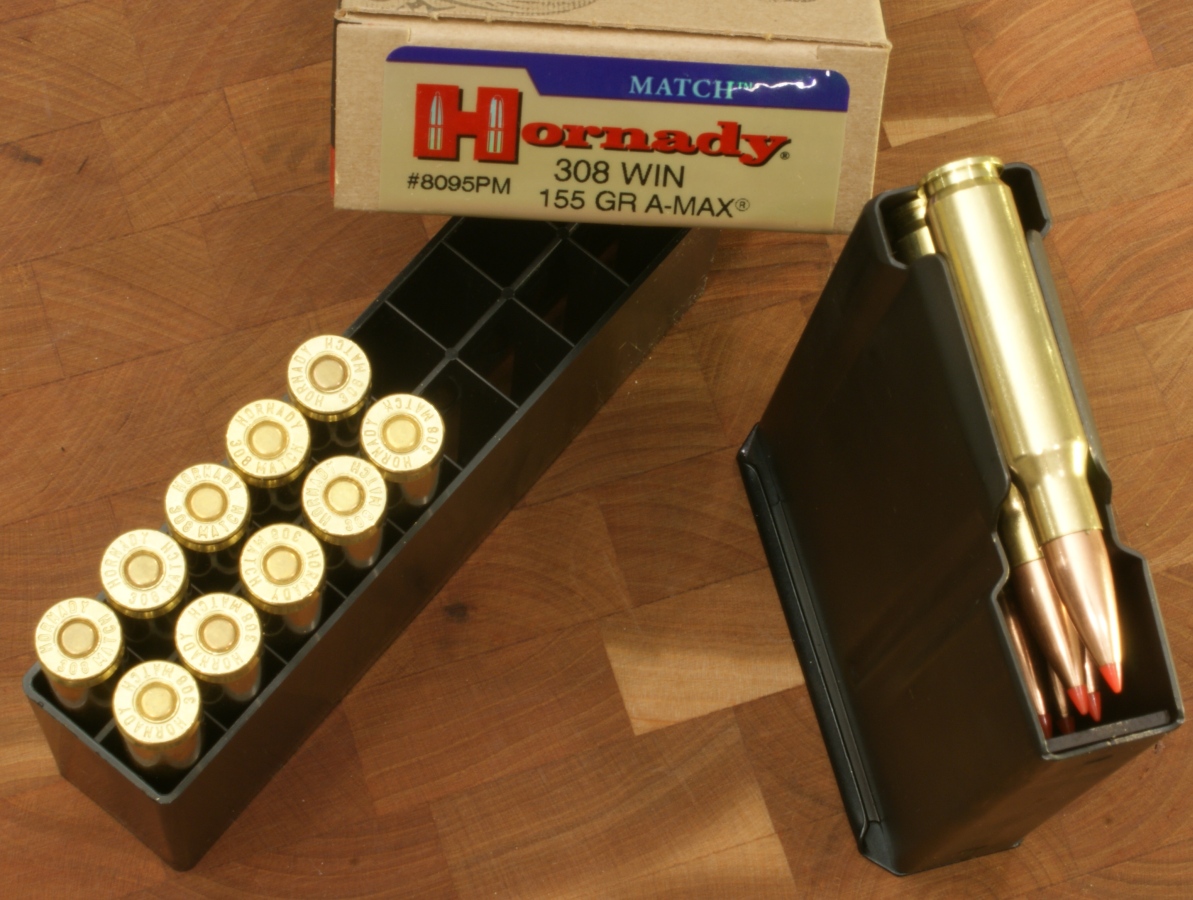
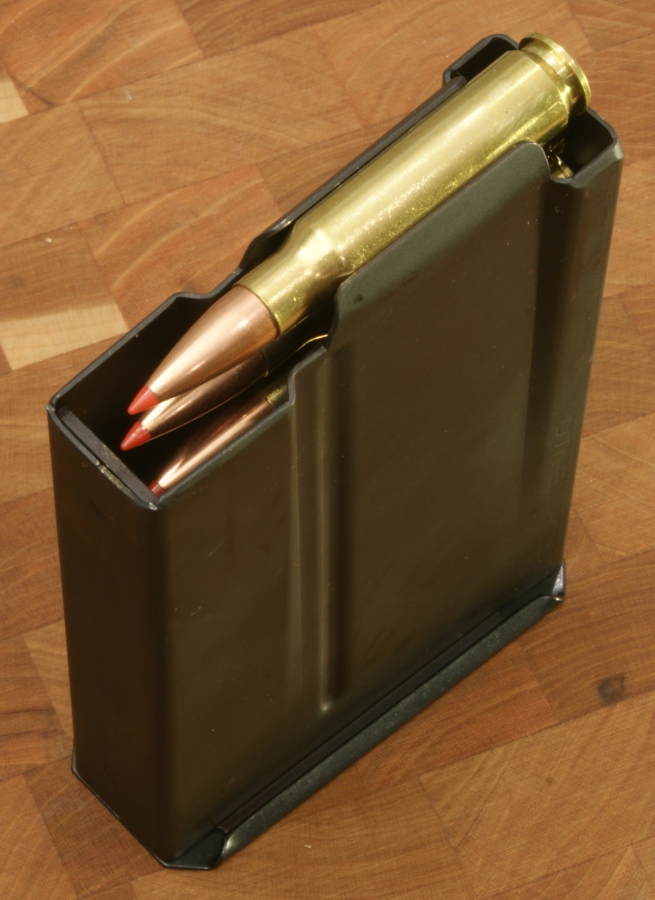
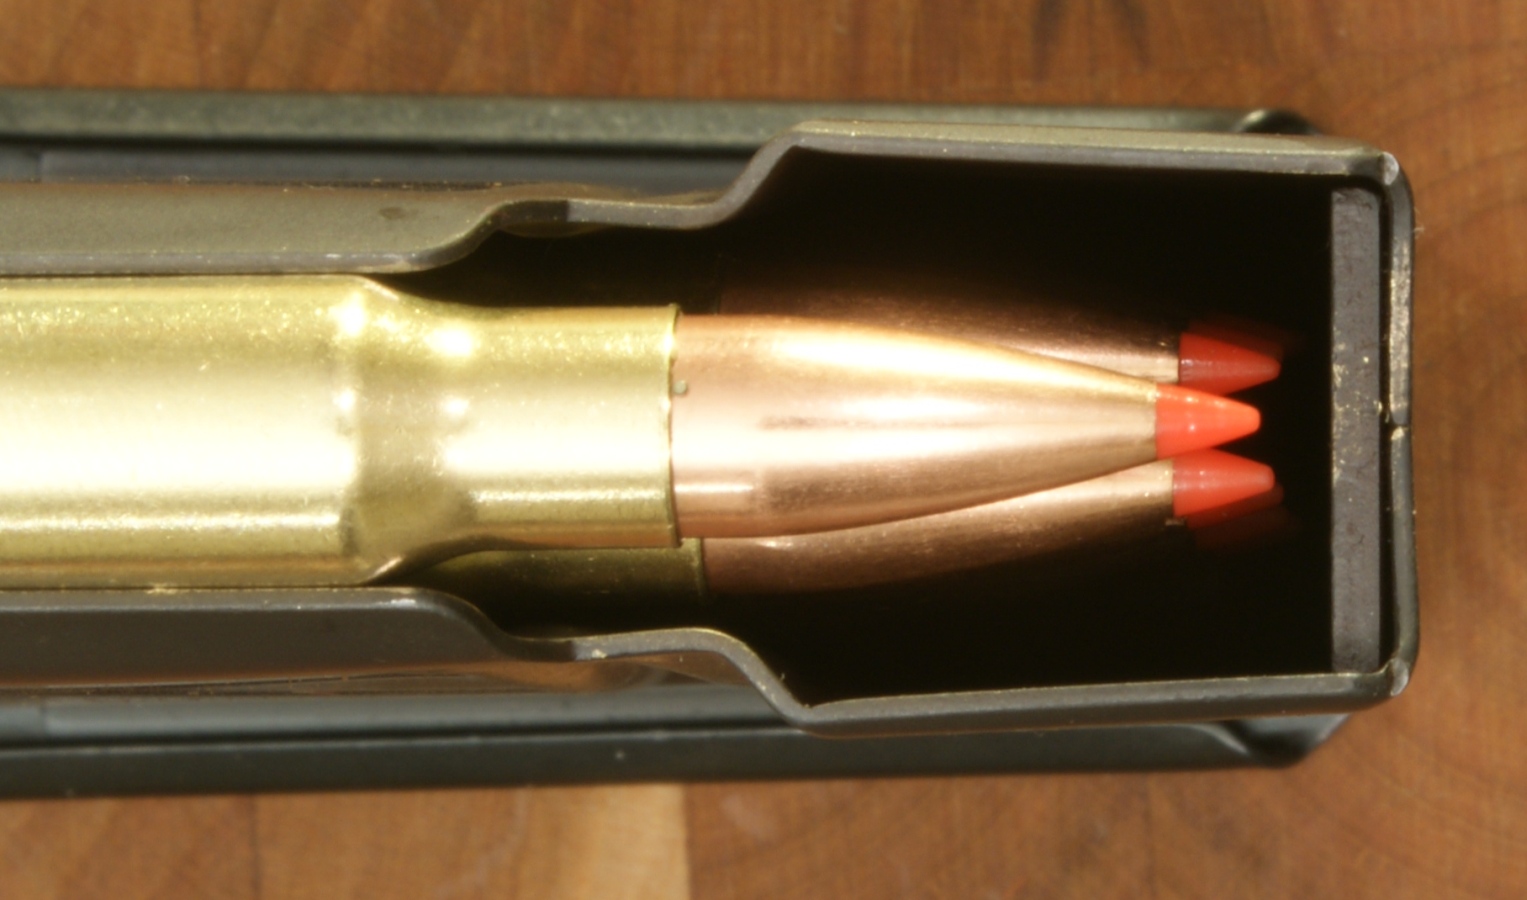
The next photo gives you a good perspective on how the bullets stack in the magazine. There is a slight taper on each side of the magazine (see photos above) so that as the bullets are inserted in the magazine, they transition towards a staggered pattern as they go further down the magazine.
Figure 76
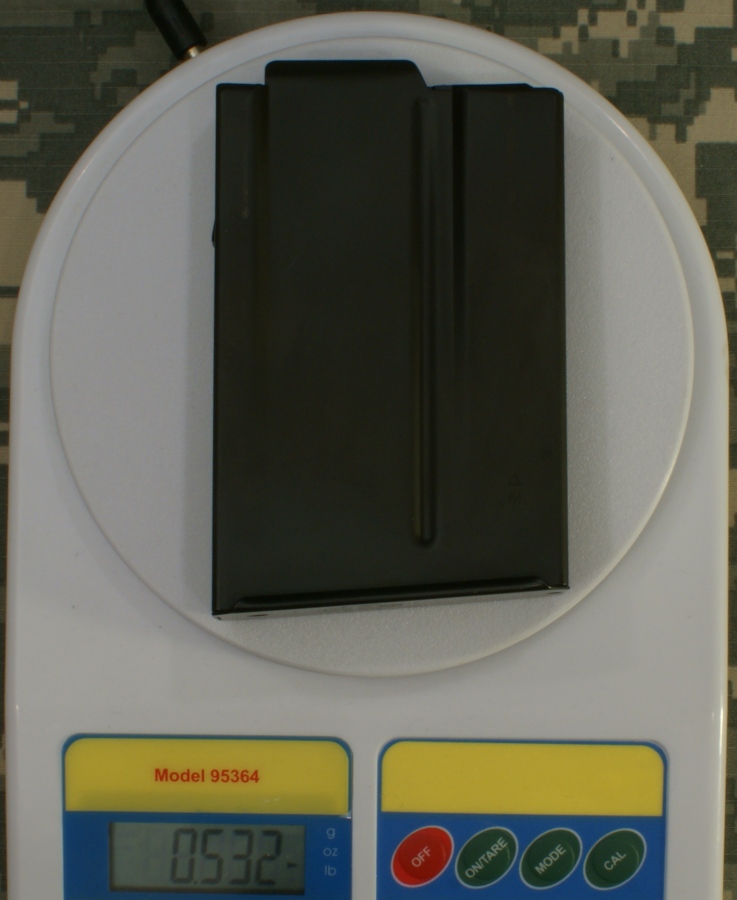
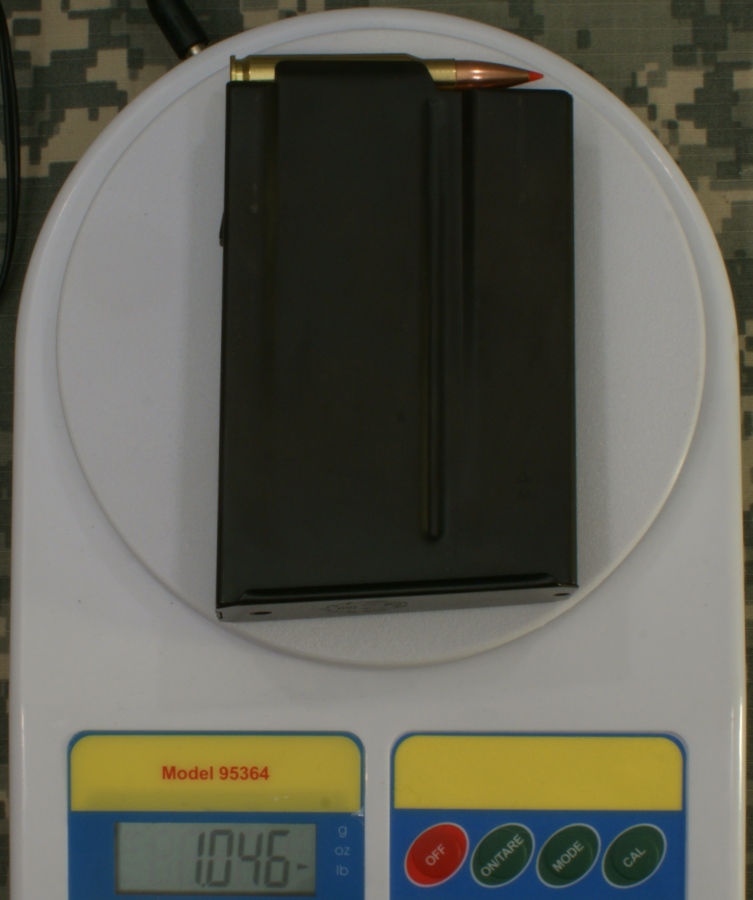
An empty 10-round magazine weighed it at 0.53 pounds and a full magazine with the Hornady 155 grain ammo weighed in at 1.05 pounds.
Figure 77
Figure 78
When an empty magazine is inserted into the rifle, the magazine had a small amount of rattle. The rattle was reduced when the magazine was loaded and a round pressed against the bottom of the bolt, but the magazine still had some free-play. For reference, I compared this against an AR style rifle and found the free-play to be similar. Since the magazine well is made of nylon and will flex (see Figure 53), I will later try shimming the the outsides of the well with tape where it touches the wood to see if I can reduce this rattle and still maintain a functional fit of the magazine.
Update 9/5/11: Alpha Industries Manufacturing also makes magazines for the Gunsite Rifle and I have done a review of their Alpha Type 2 308 WIN 10-Round Magazine. It is lighter and shorter than the magazine that comes with the rifle.
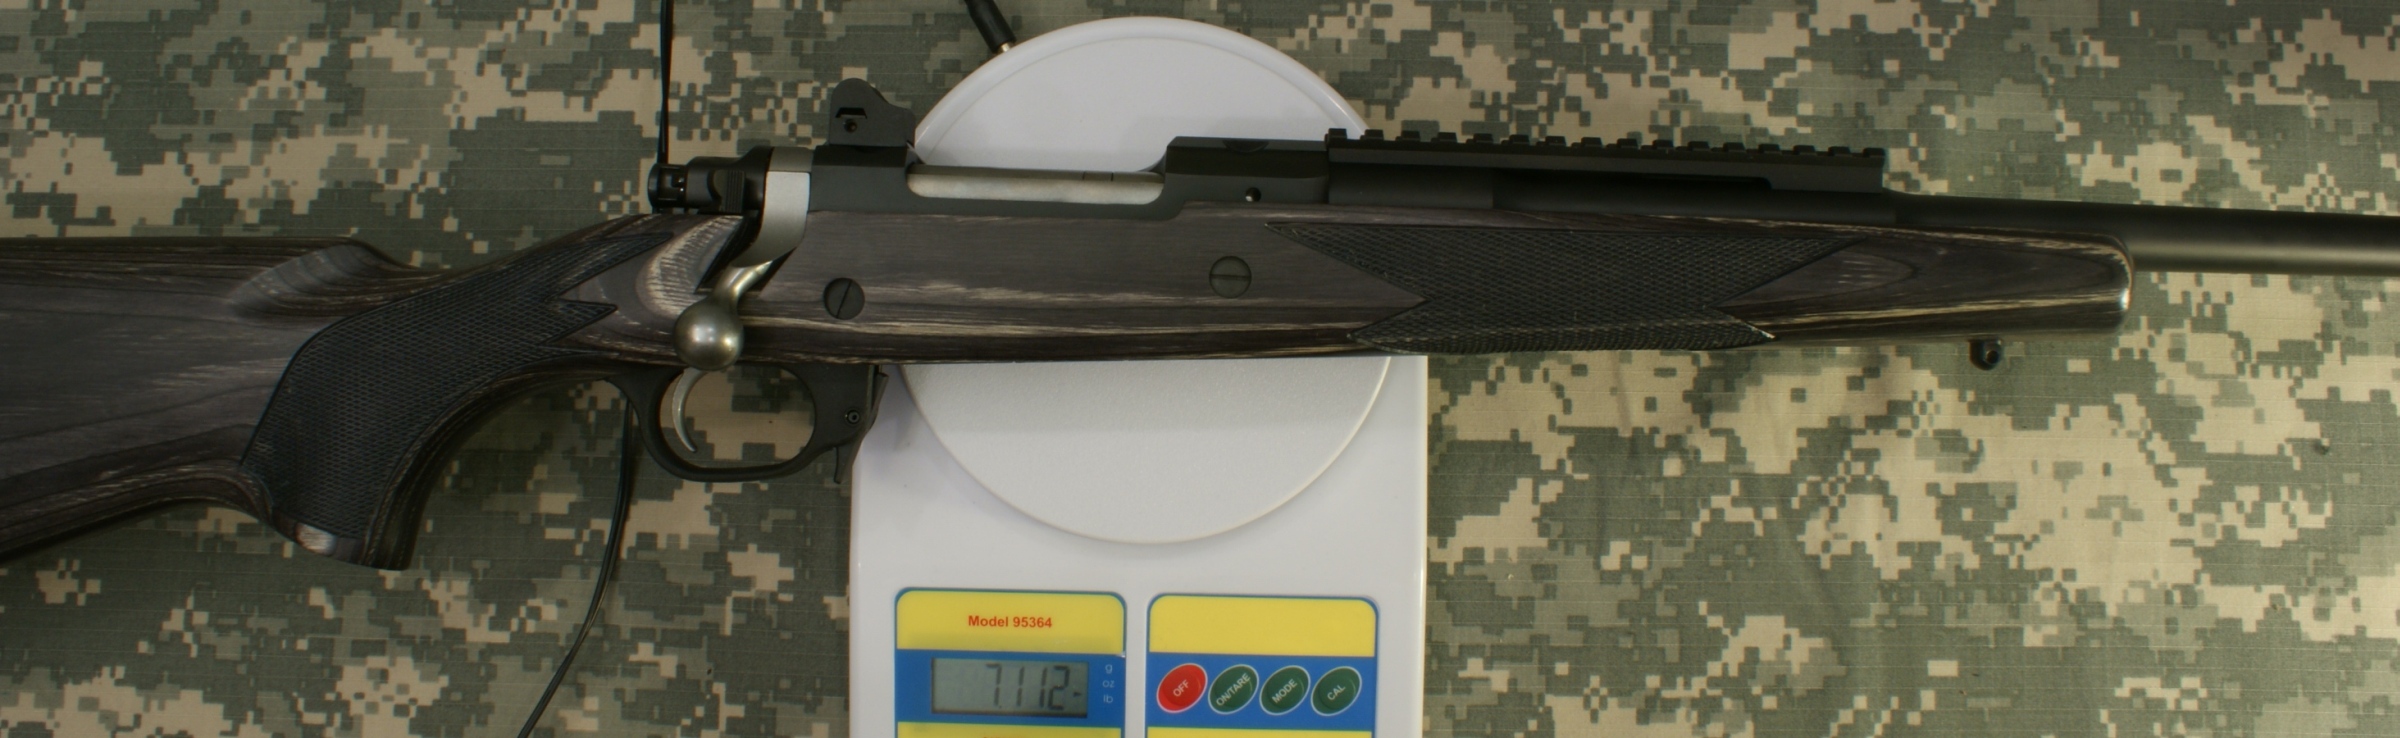
Rifle Weight
The total rifle weight out of the box, but without the magazine installed, weighed in at 7.11 pounds (7 pounds 1.76 ounces). Ruger's advertised weight of 7.00 pounds is close enough because they don't state the shim configuration and there are density variances within wood stocks. When you include a full magazine weight, the total rifle without any optics weighed in at 8.16 pounds.
Figure 79
Honestly, I had no idea that this part of the review was going to be so lengthy for a bolt action rifle. When I look back at all the features packed into this rifle, it starts to make sense (flash suppressor, sights, unique barrel shape, Picatinny rail, 3-position safety, detachable magazine, included scope rings and butt pad shims).
In Part 4 of this review, I cover disassembly and the internal features of the rifle. You can navigate to other parts of this review using the links below.
- Ruger Gunsite Review: Part 1 - Introduction, Specifications and Summary
- Ruger Gunsite Review: Part 2 - What's in the Box
- Ruger Gunsite Review: Part 3 - External Features (this page)
- Ruger Gunsite Review: Part 4 - Disassembly and Internal Features
- Ruger Gunsite Review: Part 5 - Range Test
Or
If you would like to be notified about future Gunsumer Reports reviews via Facebook, make sure "You Like This" by clicking the Facebook "Like" button at the bottom or top of this page. If it already says "You Like This" beside the button, clicking it again will uncheck the "Like" status and you will not be notified.
| Share on Facebook | |
© 2010, 2011, 2012, 2013, 2014, 2015, 2016, 2017, 2018, 2019, 2020, 2021, 2022, 2023 & 2024 Gunsumer Reports™, All rights reserved.
FTC Disclosure