|
|
Gunsumer Reports TM Providing Detailed Objective Reviews for Firearms and Firearm Accessories |
Ruger LCP II Review
Part 4 - Disassembly & Internal Features
May 7, 2017
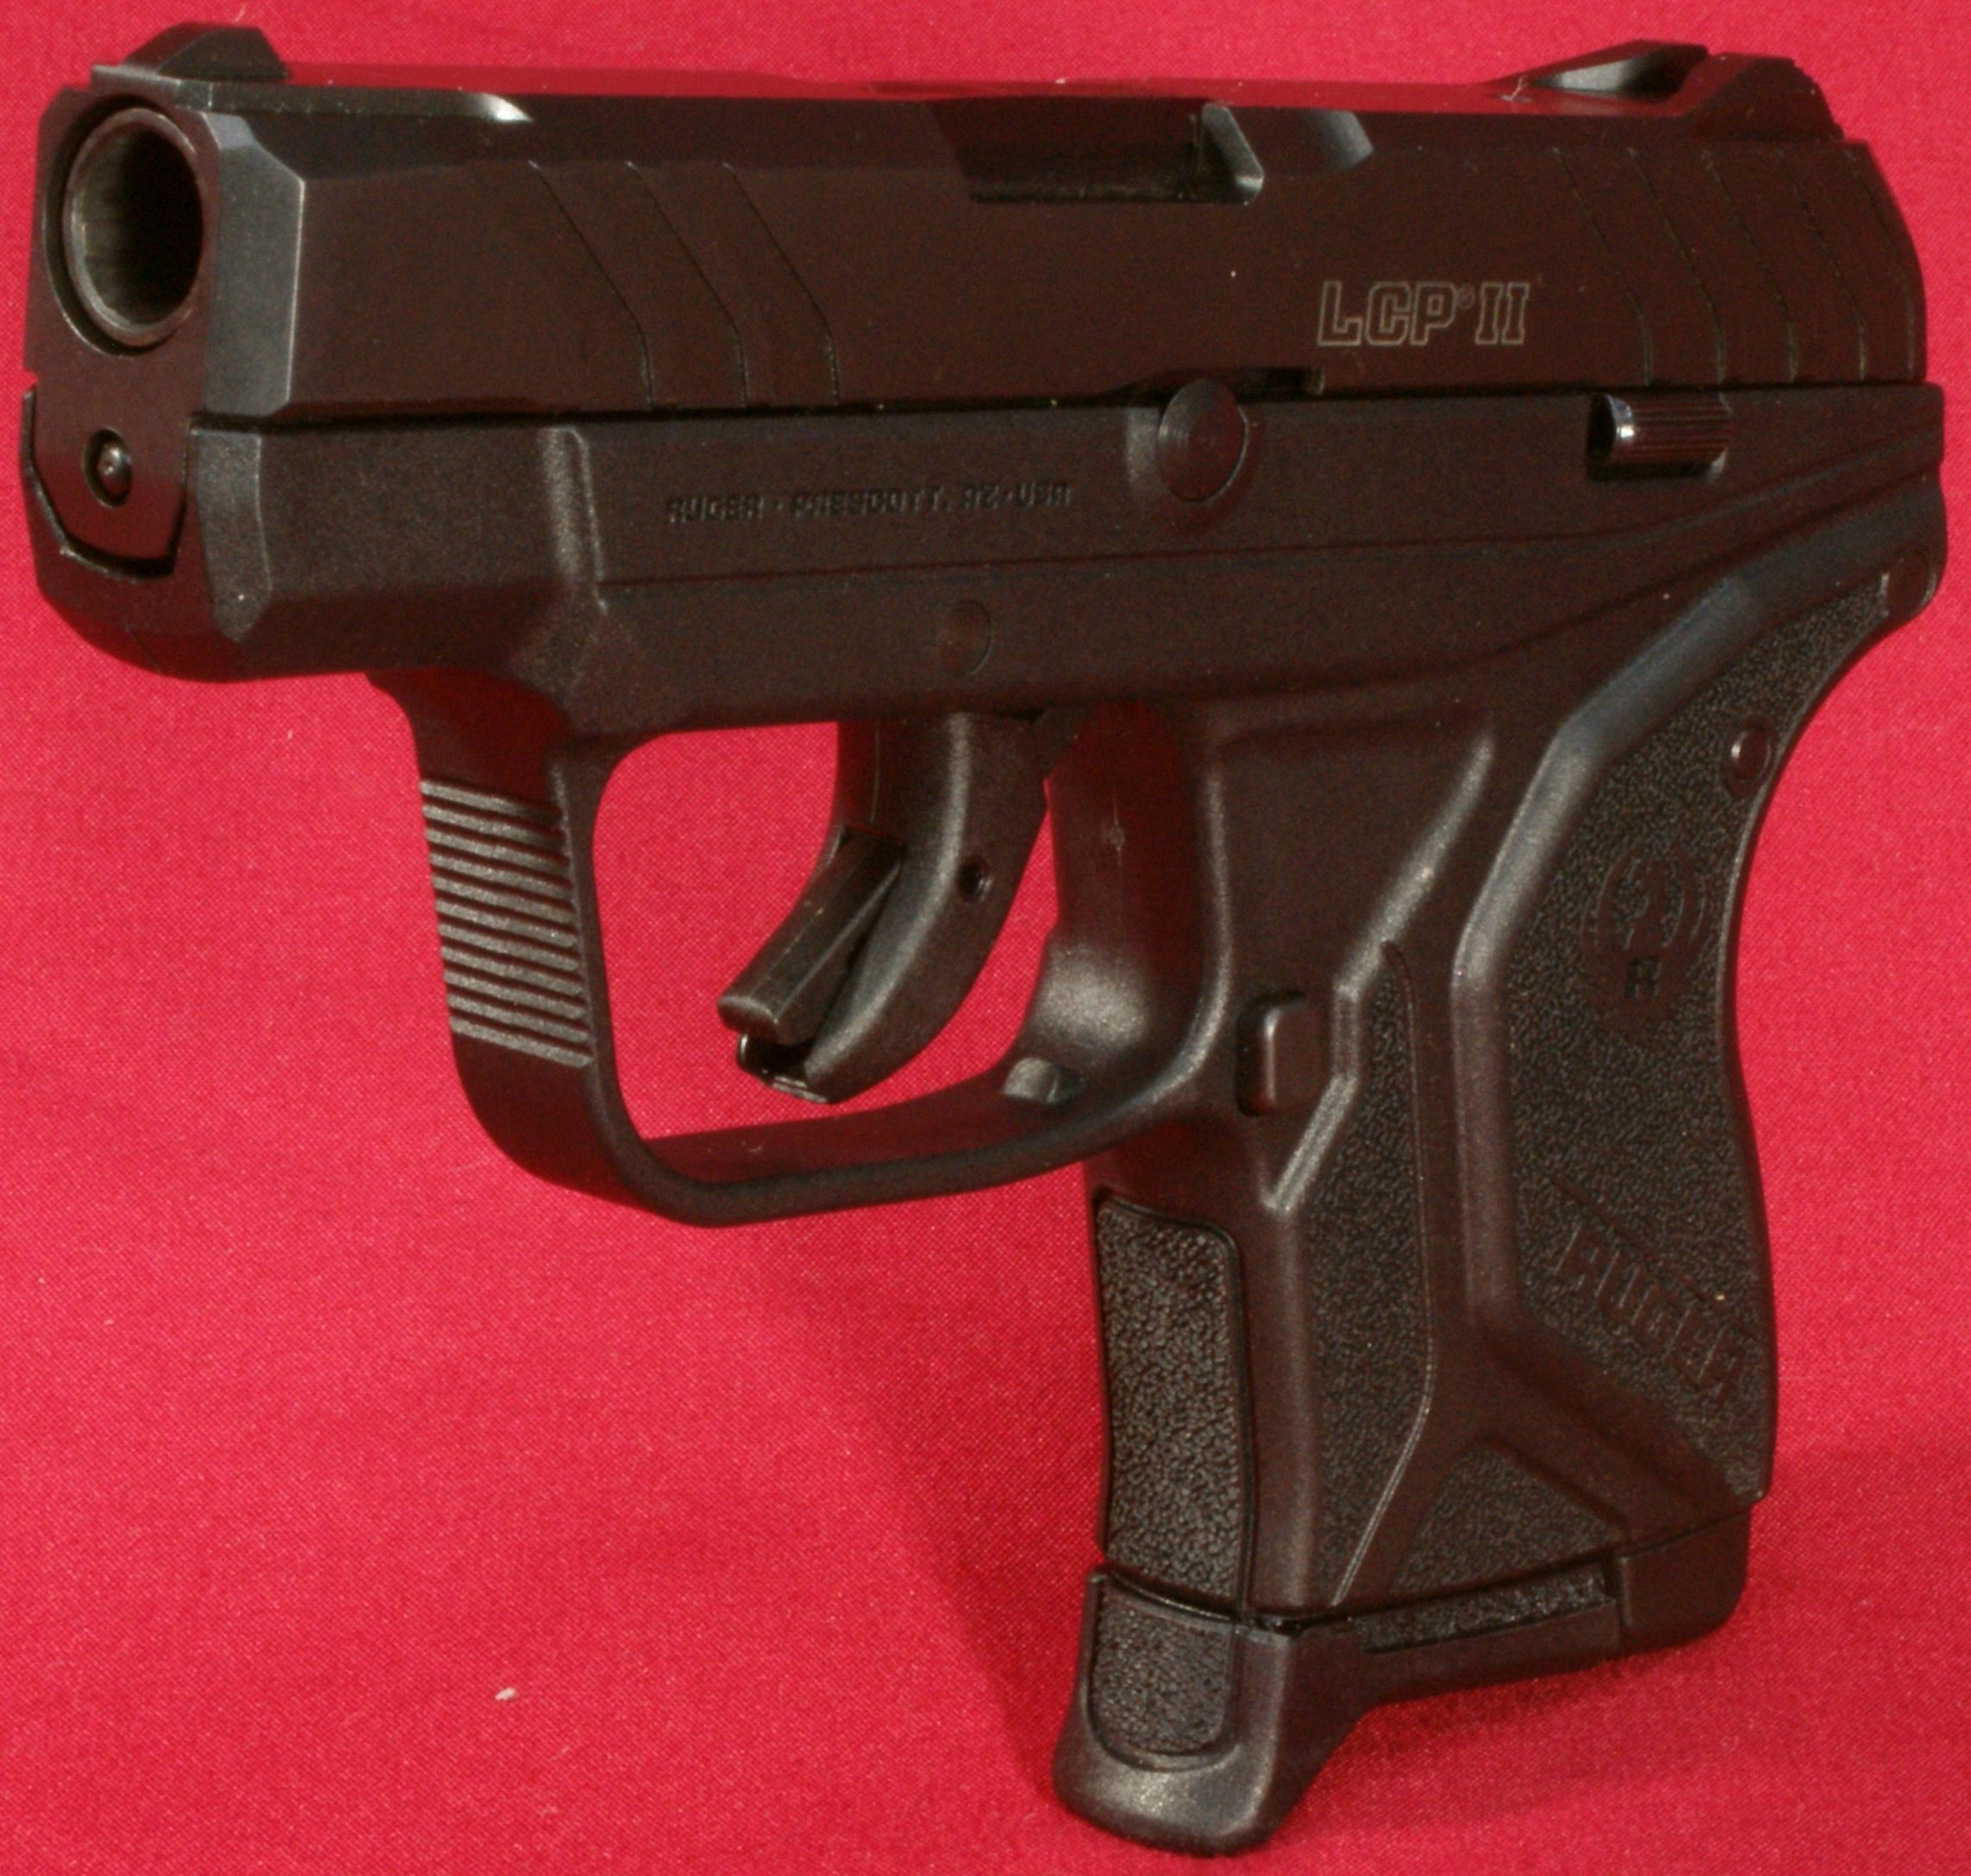
In this part of my Ruger LCP II review I'm going to show disassembly and some of the internal features of this pistol. If you are already familiar with the disassembly of the original LCP, then you nearly know everything needed to disassemble the LCP II. Keep in mind that although I show basic disassembly instructions, you should always refer to the manufacturer's Instruction Manual when disassembling any firearm because the manual will go into greater detail with warnings and other information. Also, if you are interested in comparing these details against the original LCP you can see them here.
Disassembly
Step 1 - Ensure Pistol is Unloaded
Remove the magazine and then inspect the chamber to ensure the pistol is unloaded with no round in the chamber. Afterwards, return the slide to the forward position.
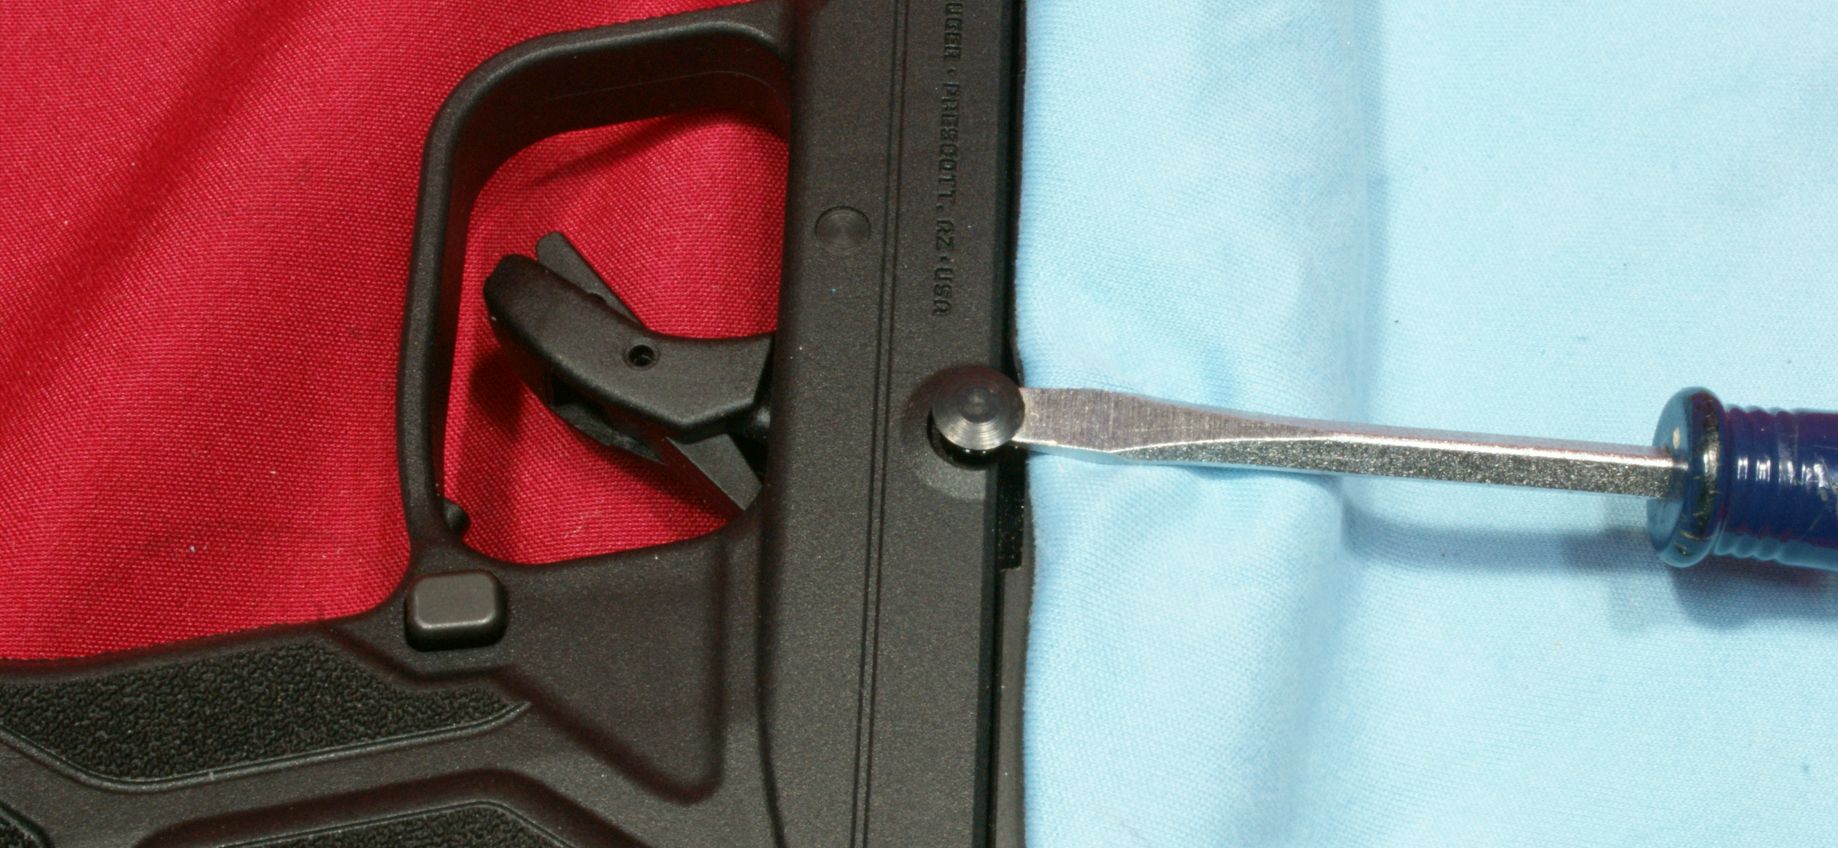
Step 2 - Remove Takedown Pin
With the slide fully forward and using a small screwdriver, pry the head of the takedown pin up until the pin passes the leg of the retention spring. I like to put a piece of cloth between the slide and screwdriver to ensure I don't damage the slide surface. I'm also shocked at how much prying force is required to get the head to move. At times I thought I was going to break the head of the pin off, but it always eventually popped loose. This step is one slight deviation from the original LCP where Ruger recommends pushing the slide back about 1/16" when prying the takedown pin out.
Figure 1
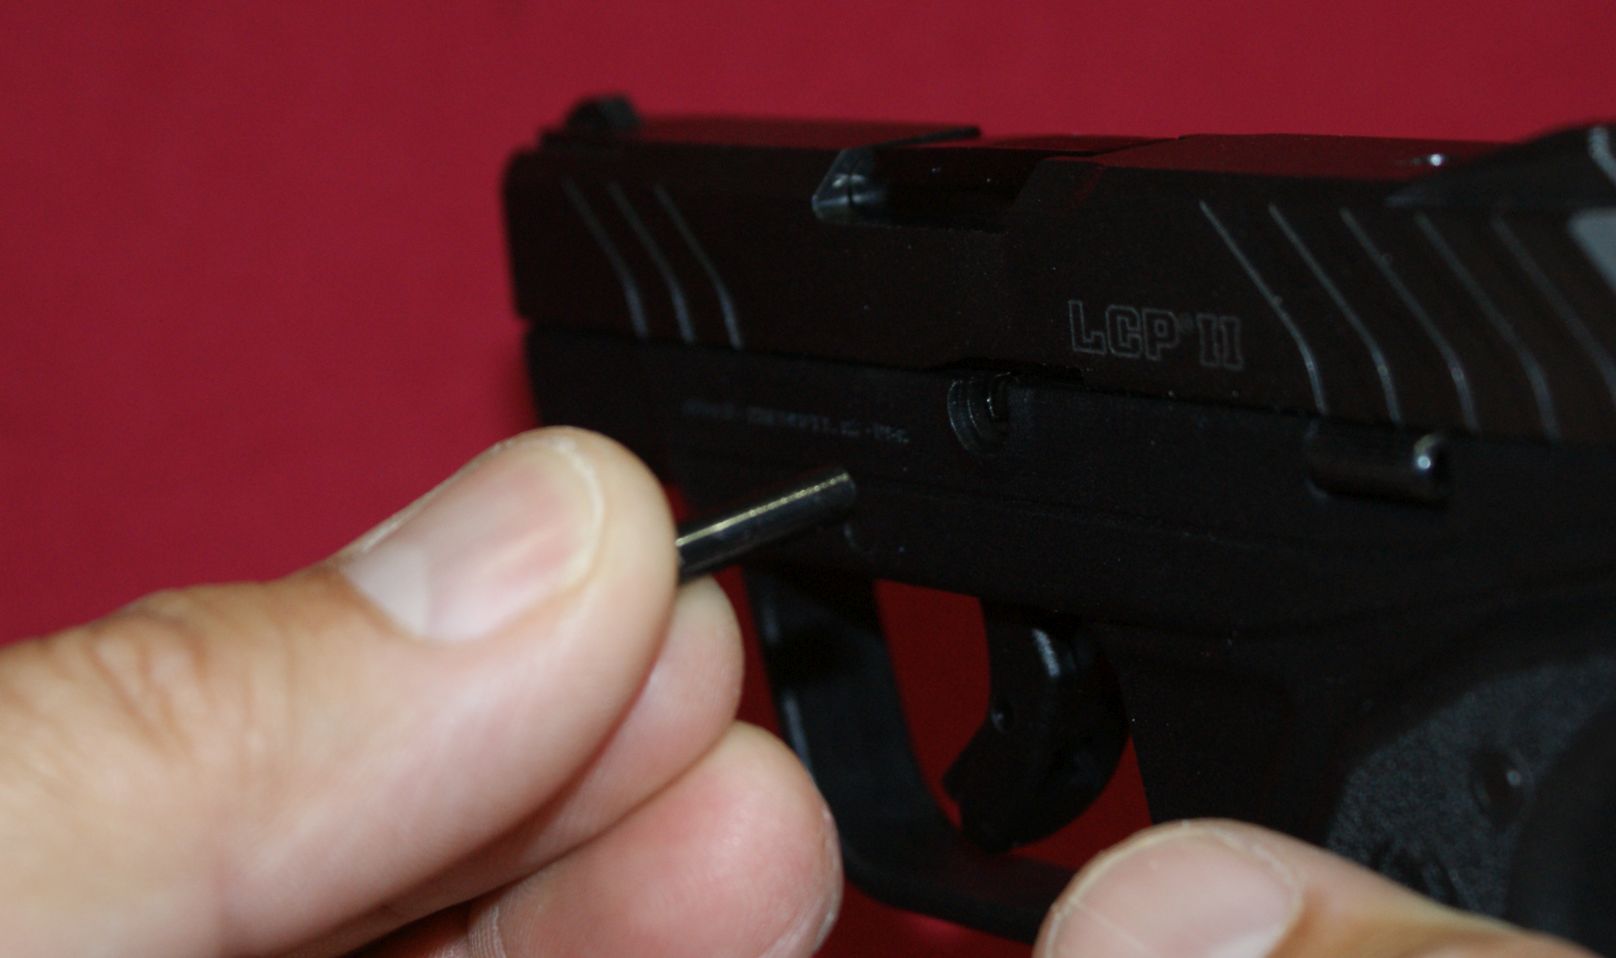
Once the pin is past the detent spring leg, you can then pull the takedown pin from the frame with your fingers.
Figure 2
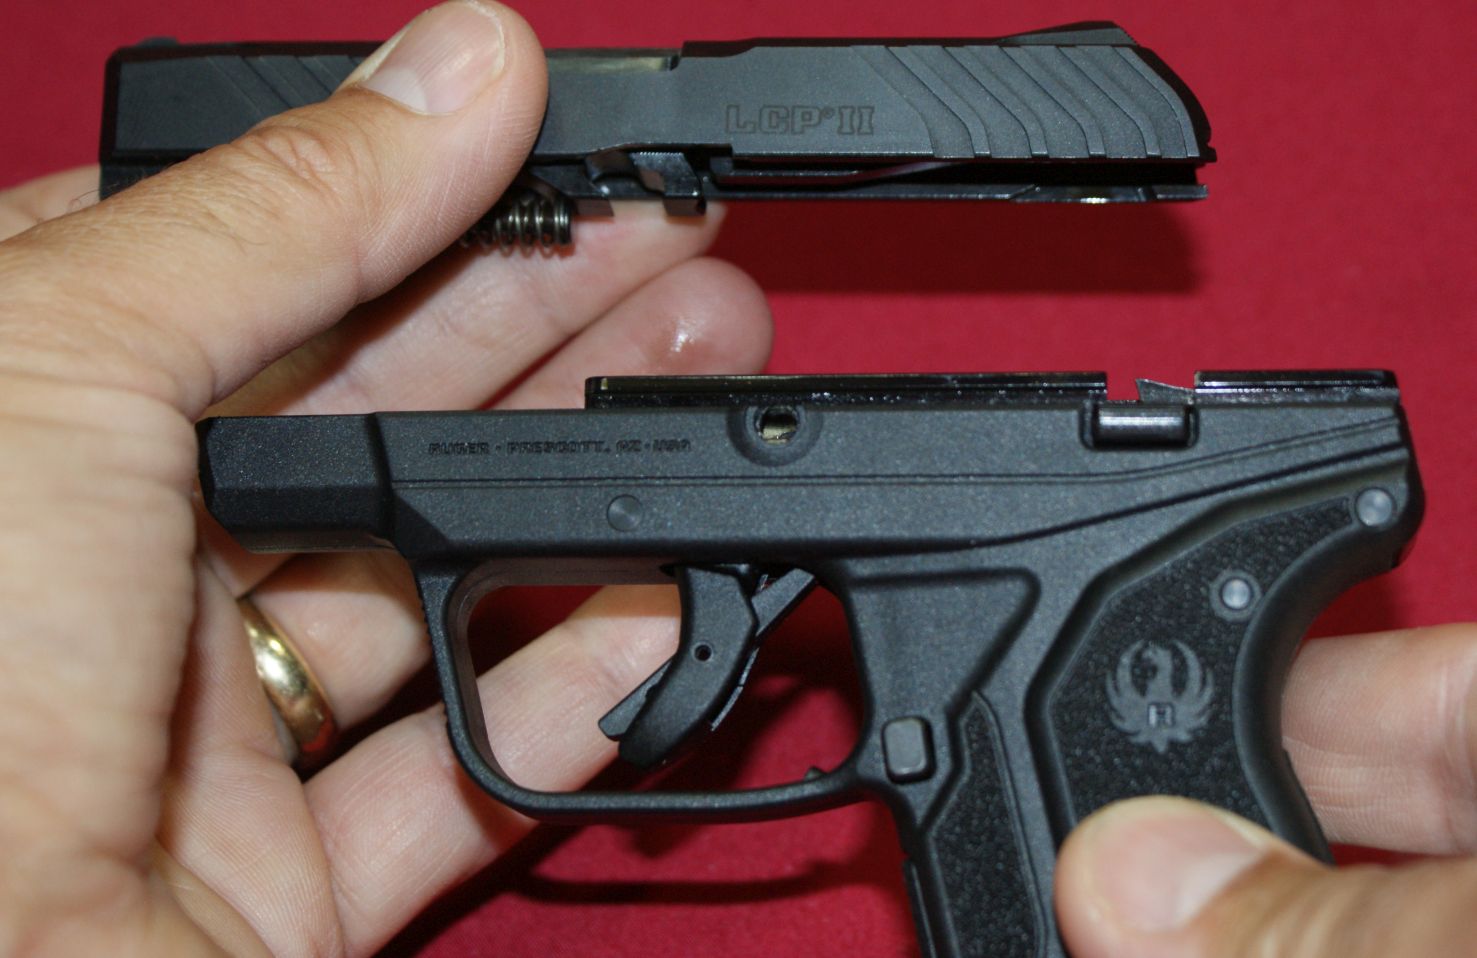
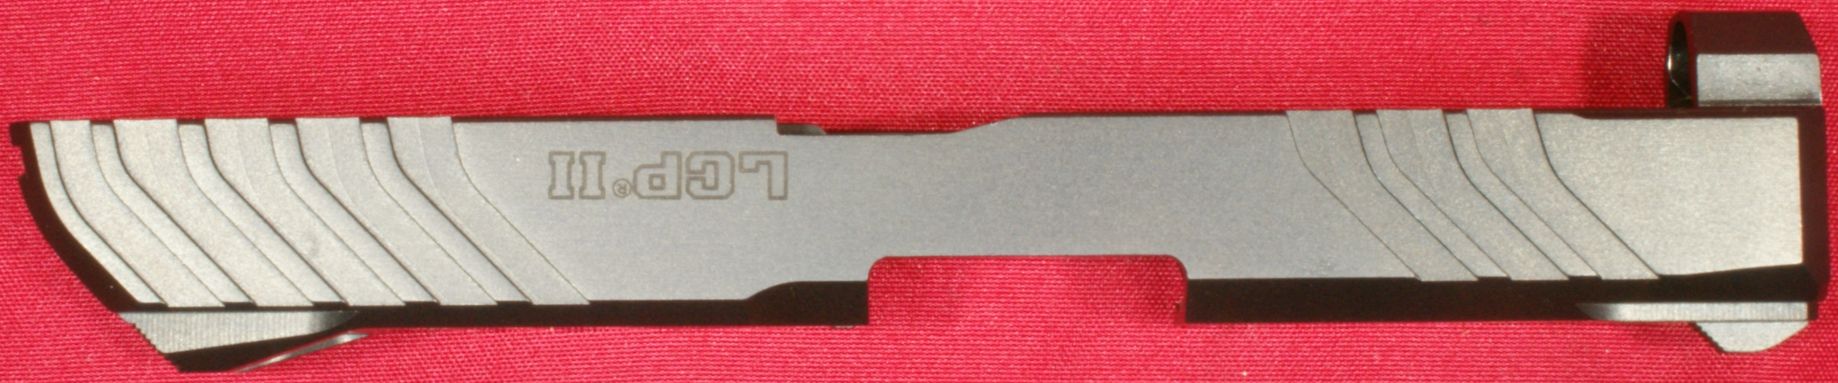
Step 3 - Remove the Slide
The slide can now easily shift forward and off the pistol frame.
Figure 3

Figure 4
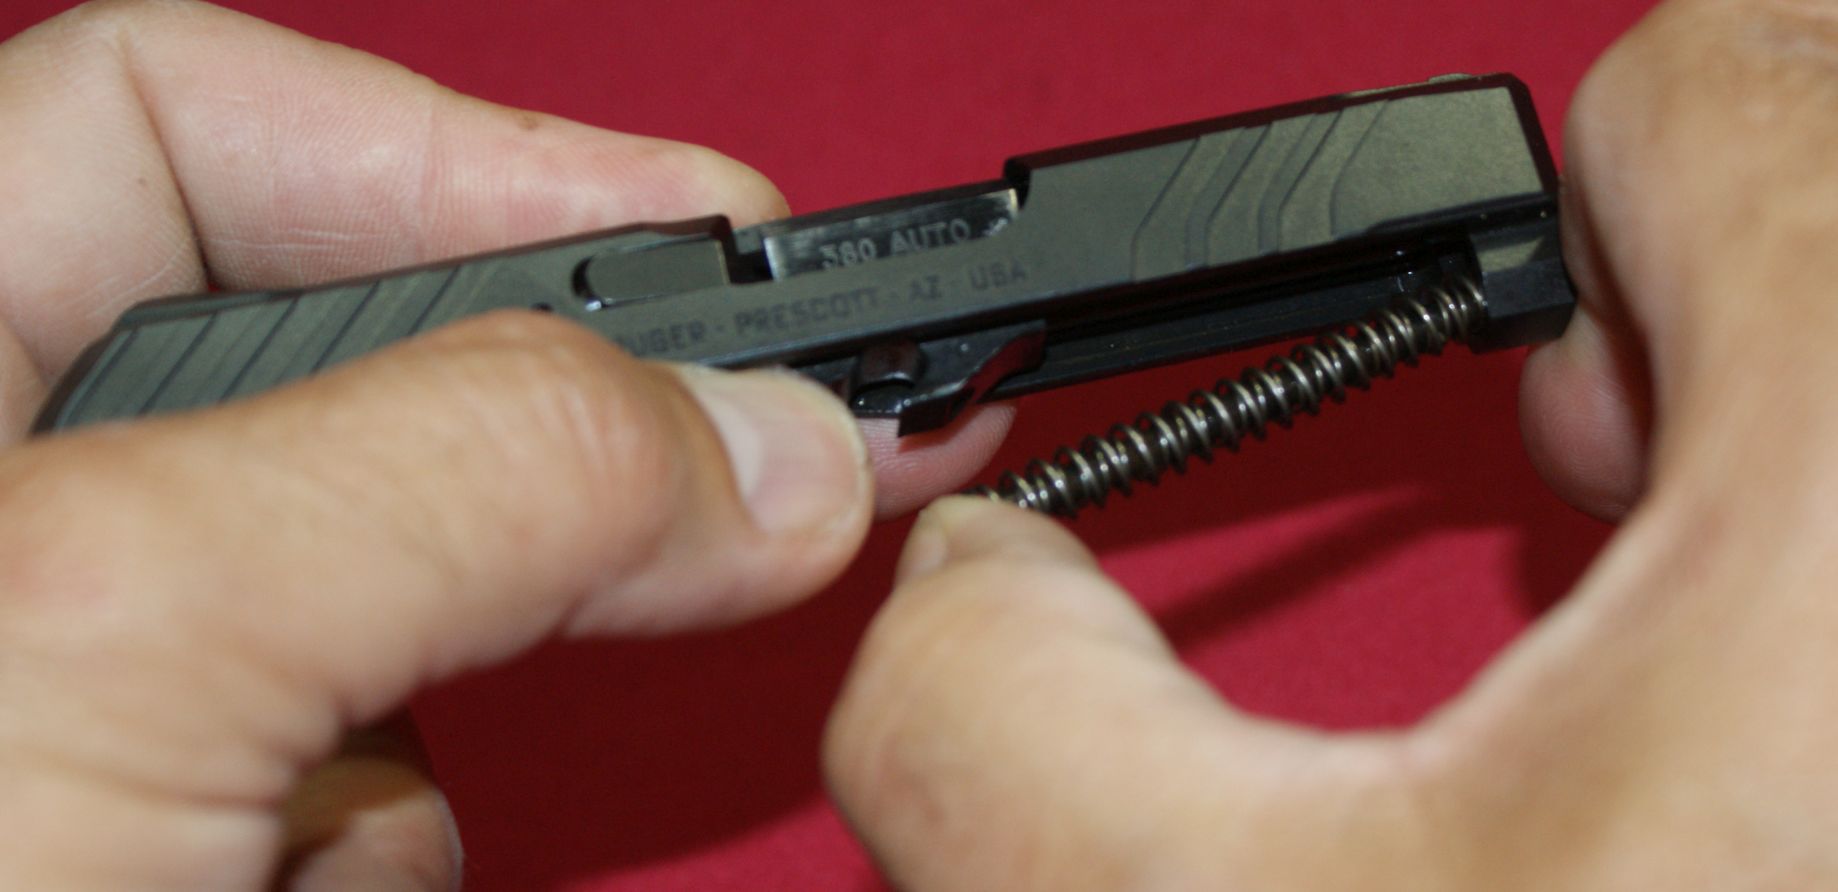
Step 4 - Remove Recoil Spring Assembly
Next, press the end of the recoil spring assembly where it seats into the barrel lug as shown and then shift that end away from the barrel and the assembly can be removed from the slide.
Figure 5
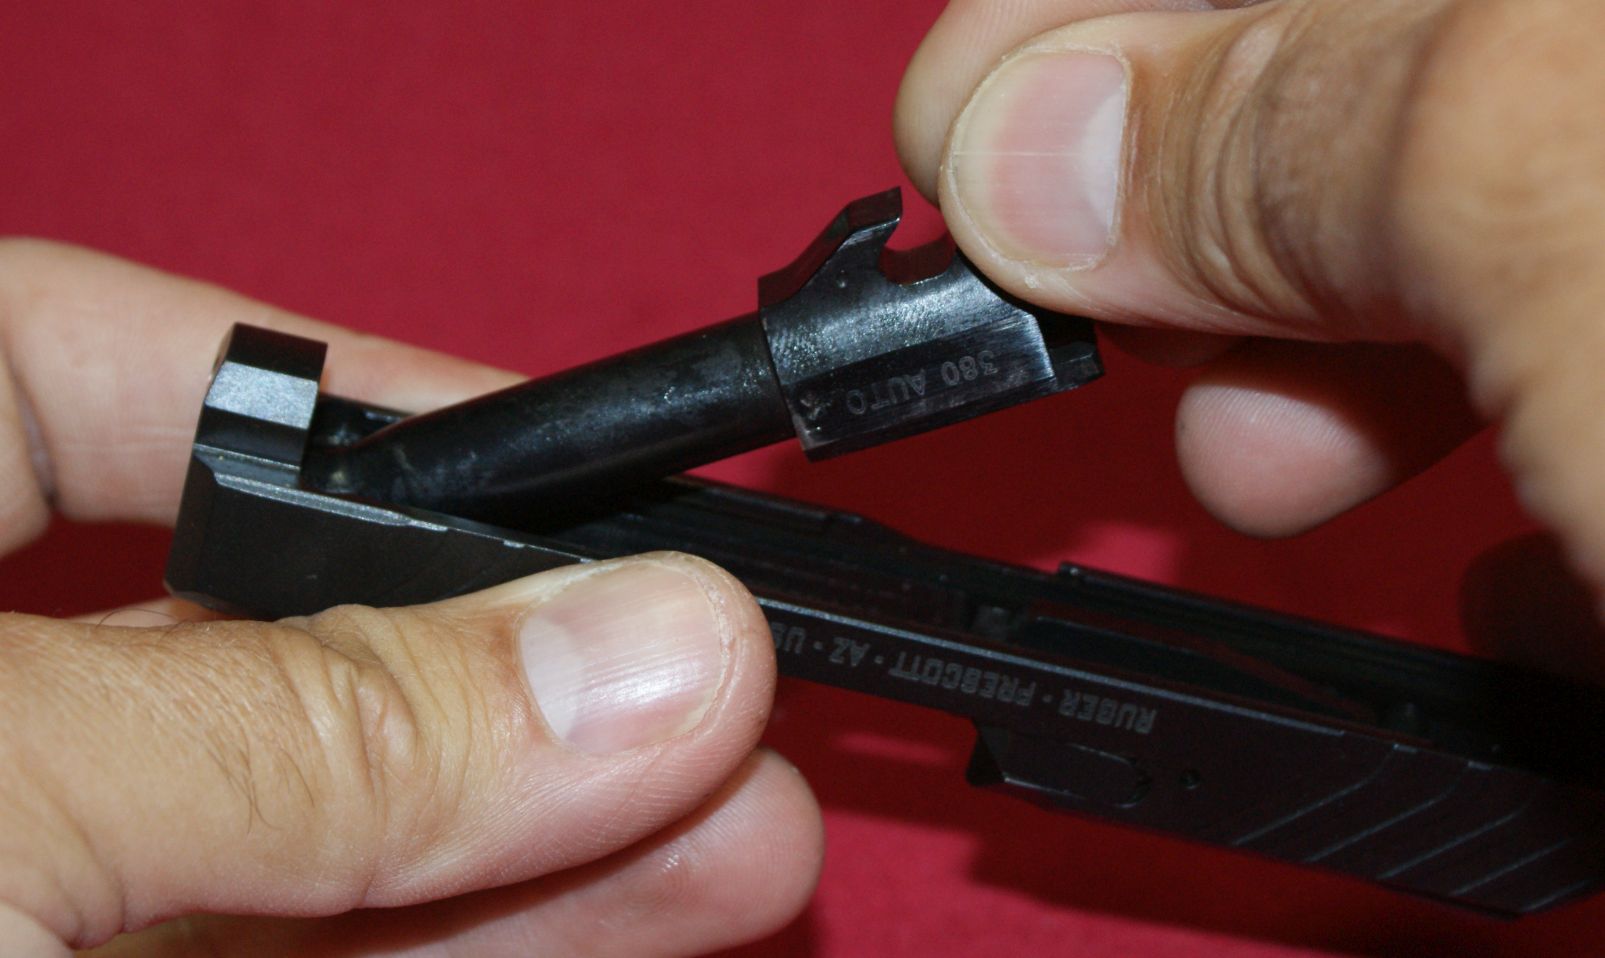
Step 5 - Remove Barrel
To remove the barrel you will need to shift it slightly forward and jiggle it a little while pulling up and then back out of the end of the slide.
Figure 6
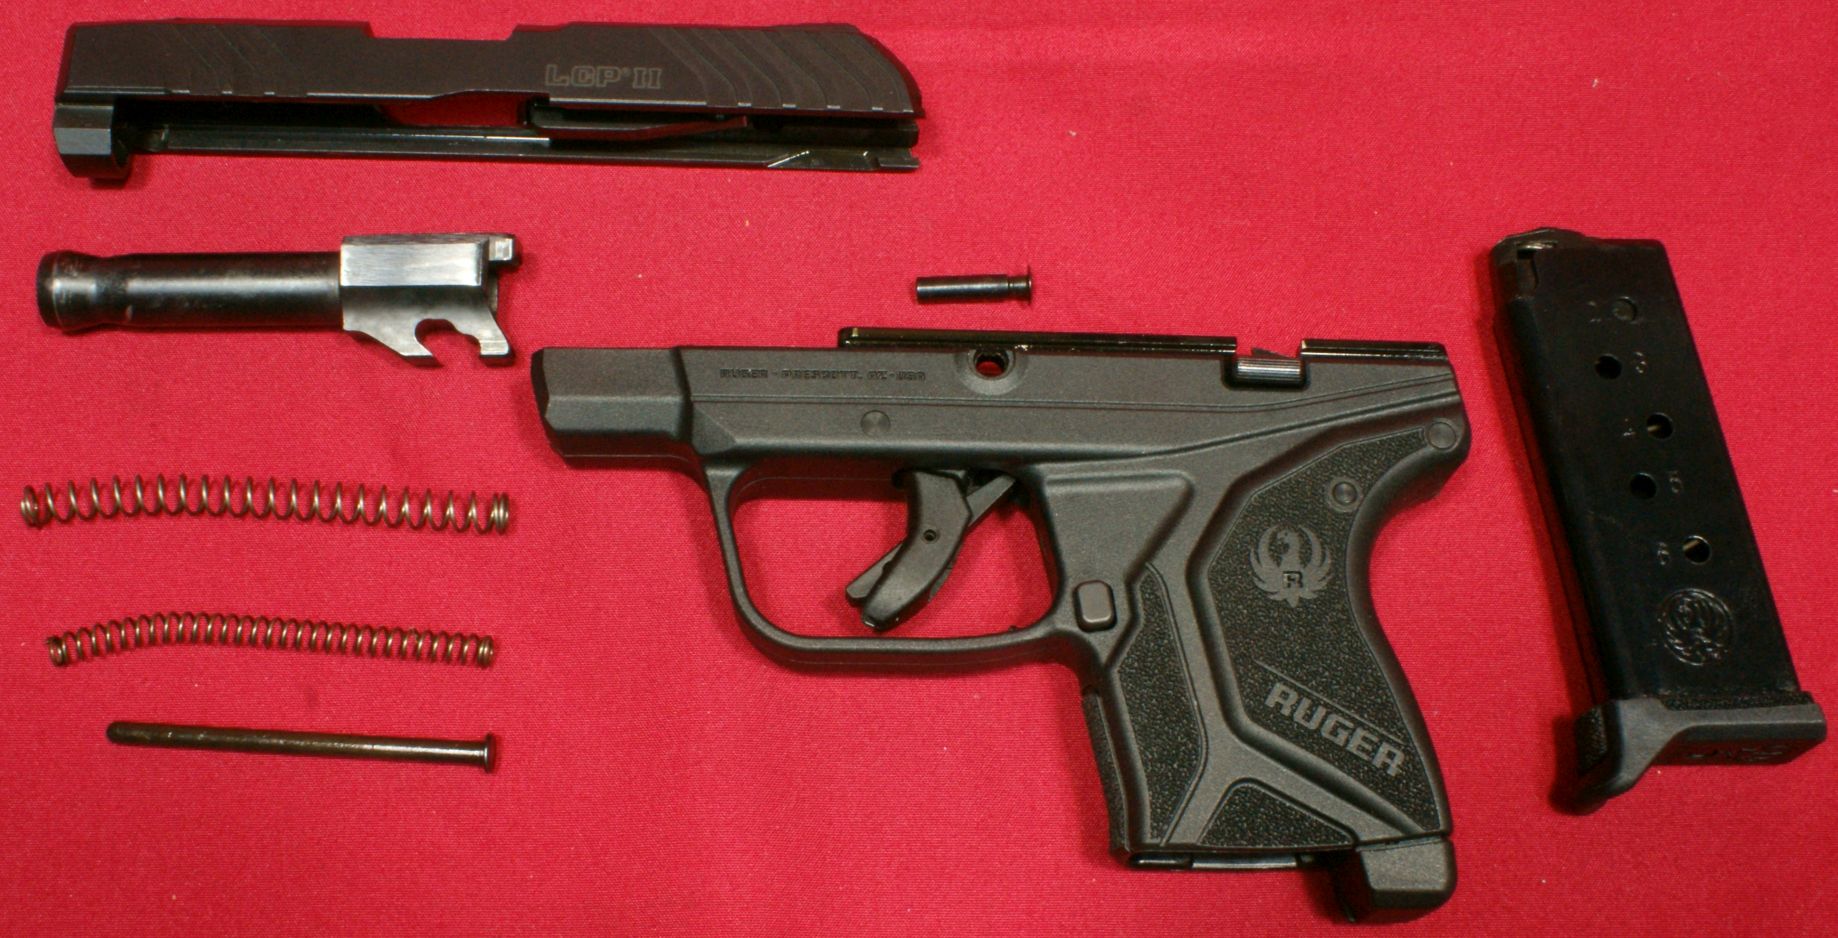
Fully Disassembled for Cleaning
The photo below shows the pistol fully disassembled for cleaning. Overall disassembly is very simple with the only part that seems uncomfortable is prying against the slide (use tape or cloth to protect) and how much prying force is required. Other than taking out the pin, disassembly is very easy. Reassembly is the opposite of the steps shown and getting the takedown pin back in place can easily be done without tools.
Figure 7
Internal Features
Many of the photos below are for your own reference and study and I comment only on those features I feel are significant.
Figure 8

Figure 9
The firing pin and spring is held in place by a roll pin while the extractor, plunger and spring are held in place by the engagement of the plunger on the bottom of the extractor.
Figure 10

Figure 11
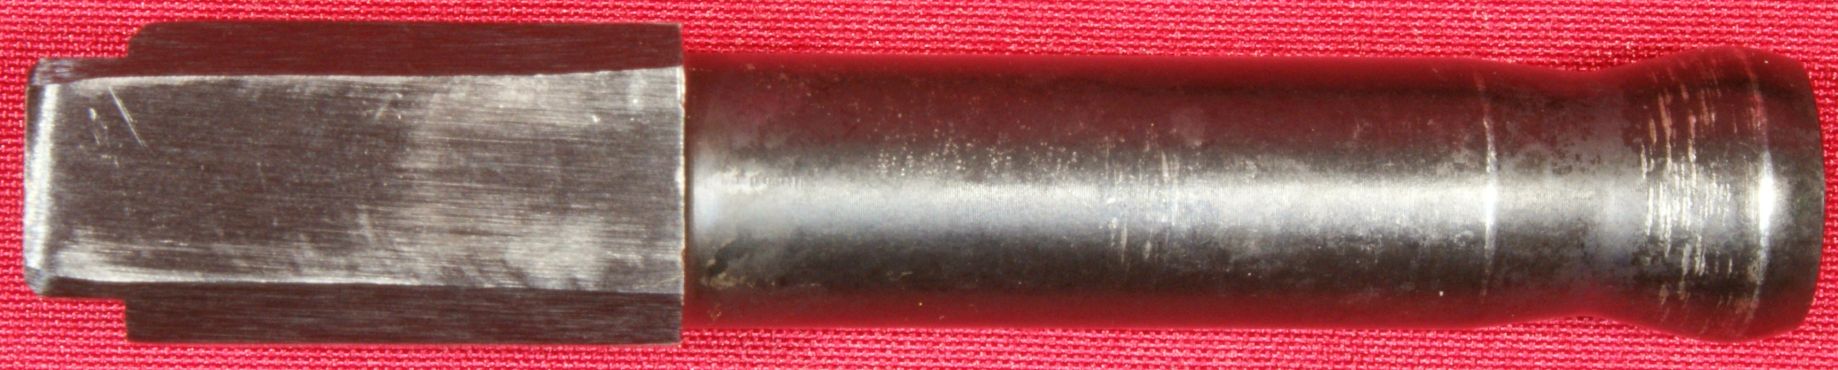
The 2.75" blued alloy steel barrel is shown in these next several photos. Unfortunately, I took these photos after range testing and you can see that the barrel does take some abuse inside the slide while cycling. The key point here is to do a good job putting some lubrication on your barrel to reduce wear over time.
Figure 12
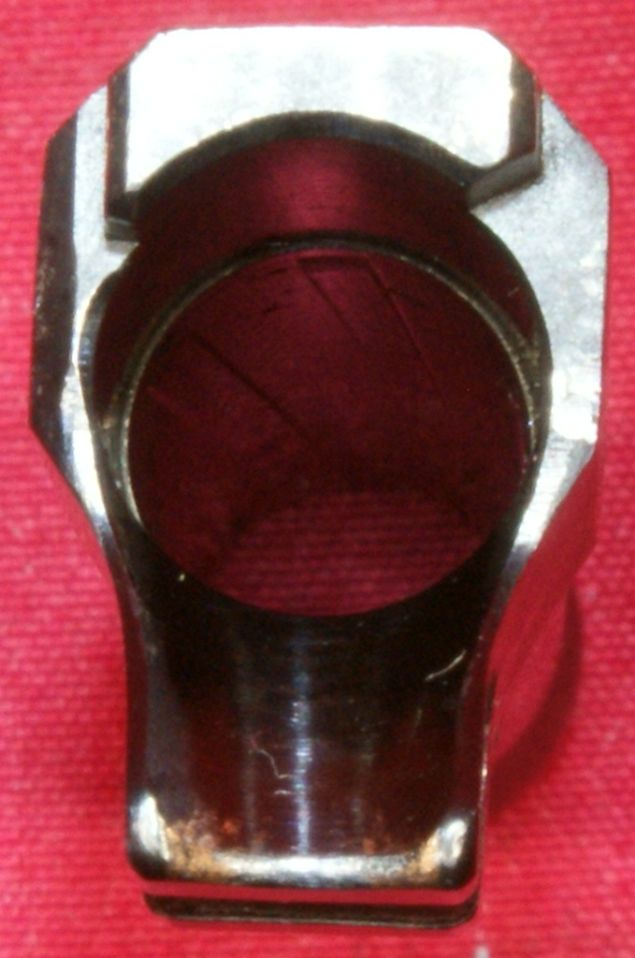
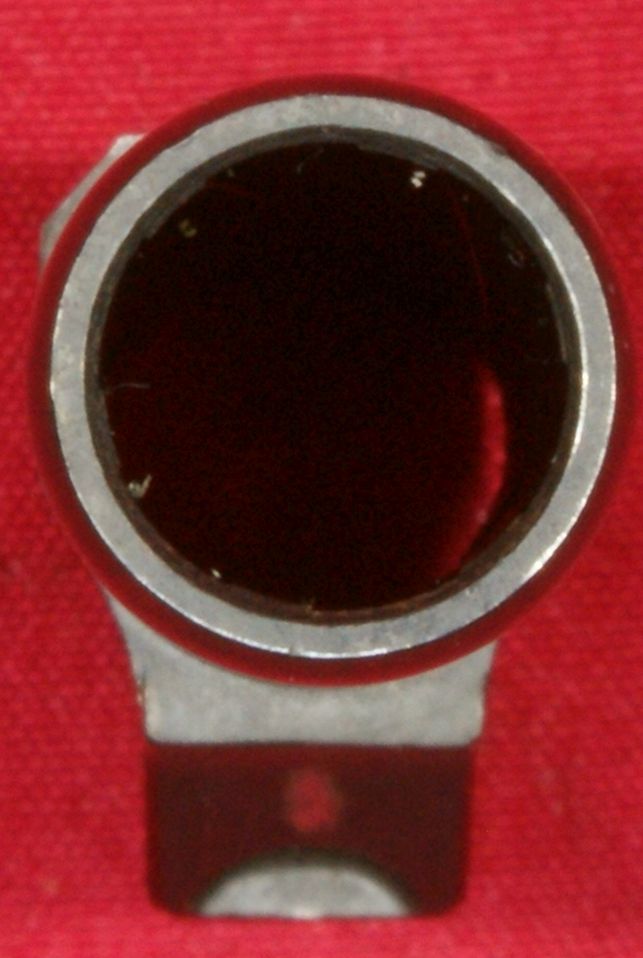
Ruger changed the shape of the camming cutout in the barrel lug to elongate the top portion slightly as compared to the original LCP. You can see this difference in the two photos below.
Figure 13 - LCP II
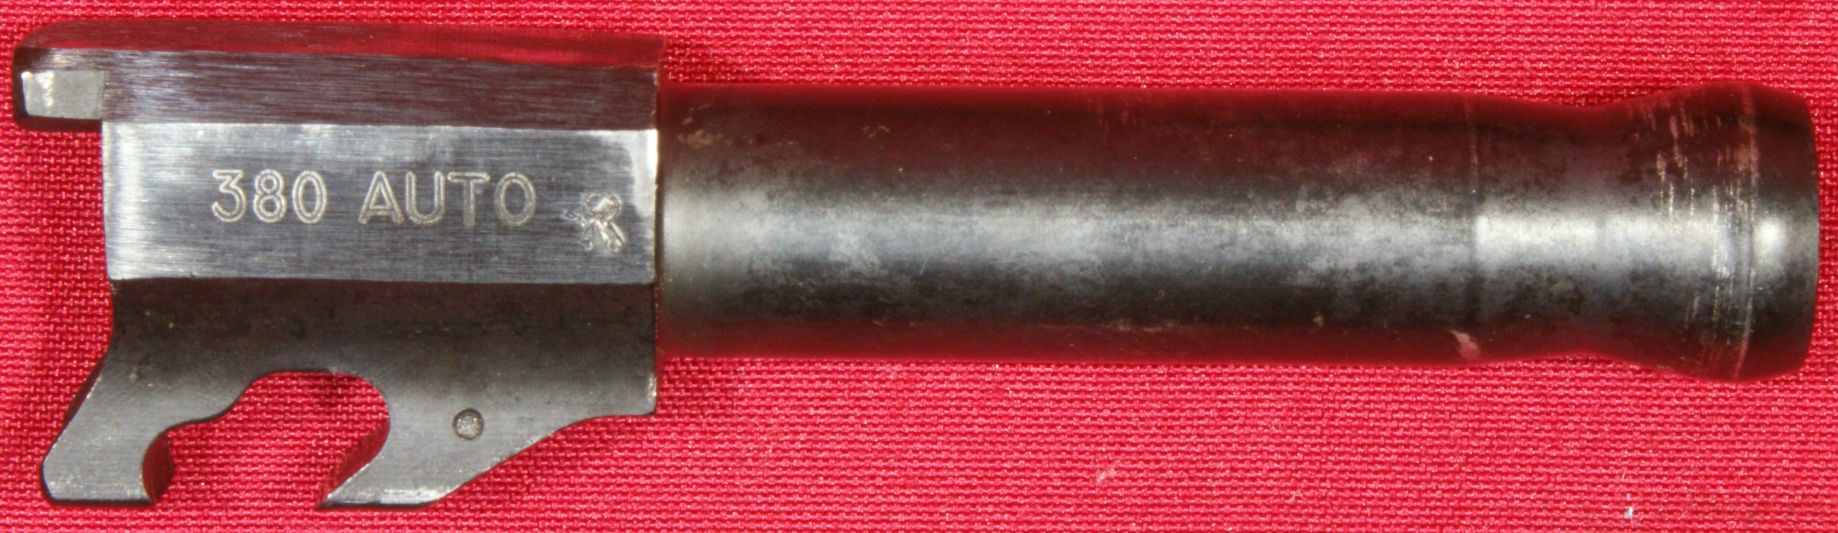
Figure 14 - Original LCP
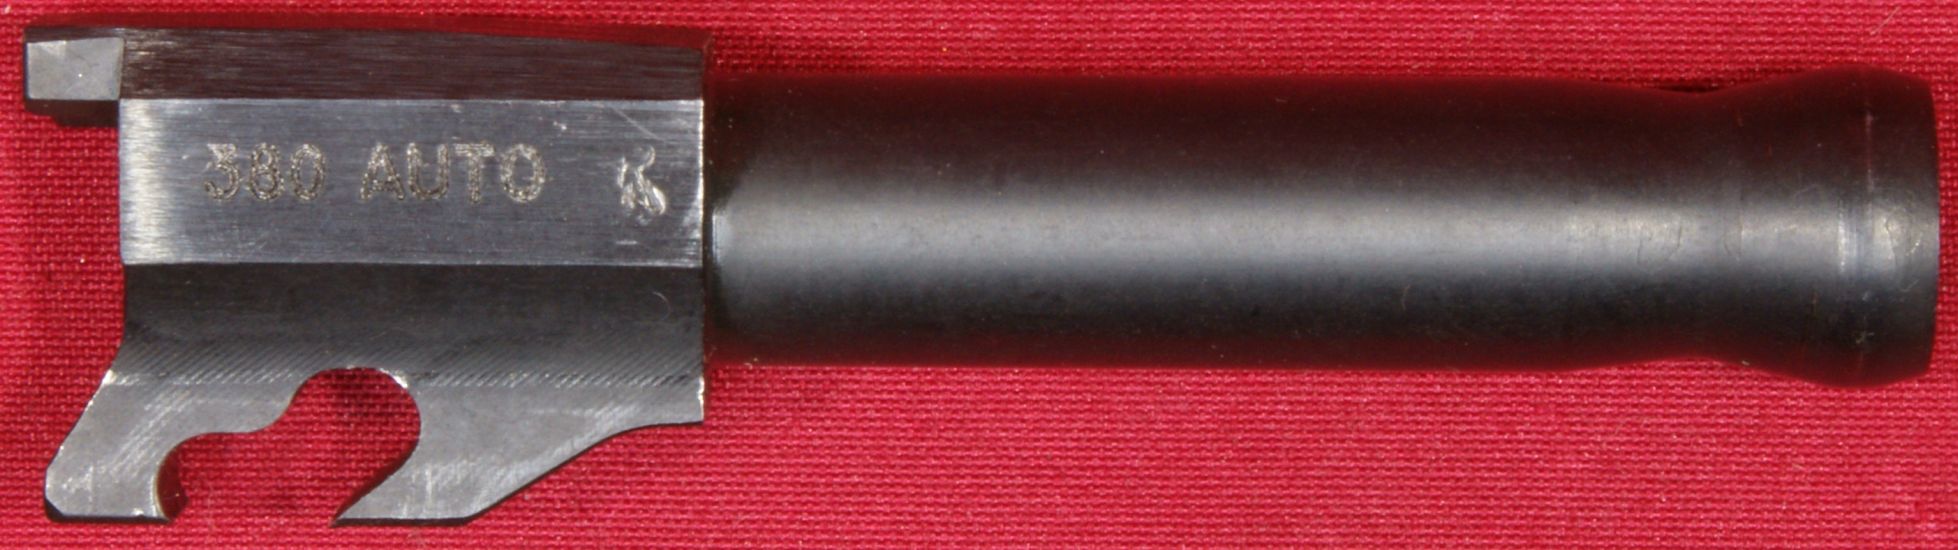
Figure 15

Figure 16
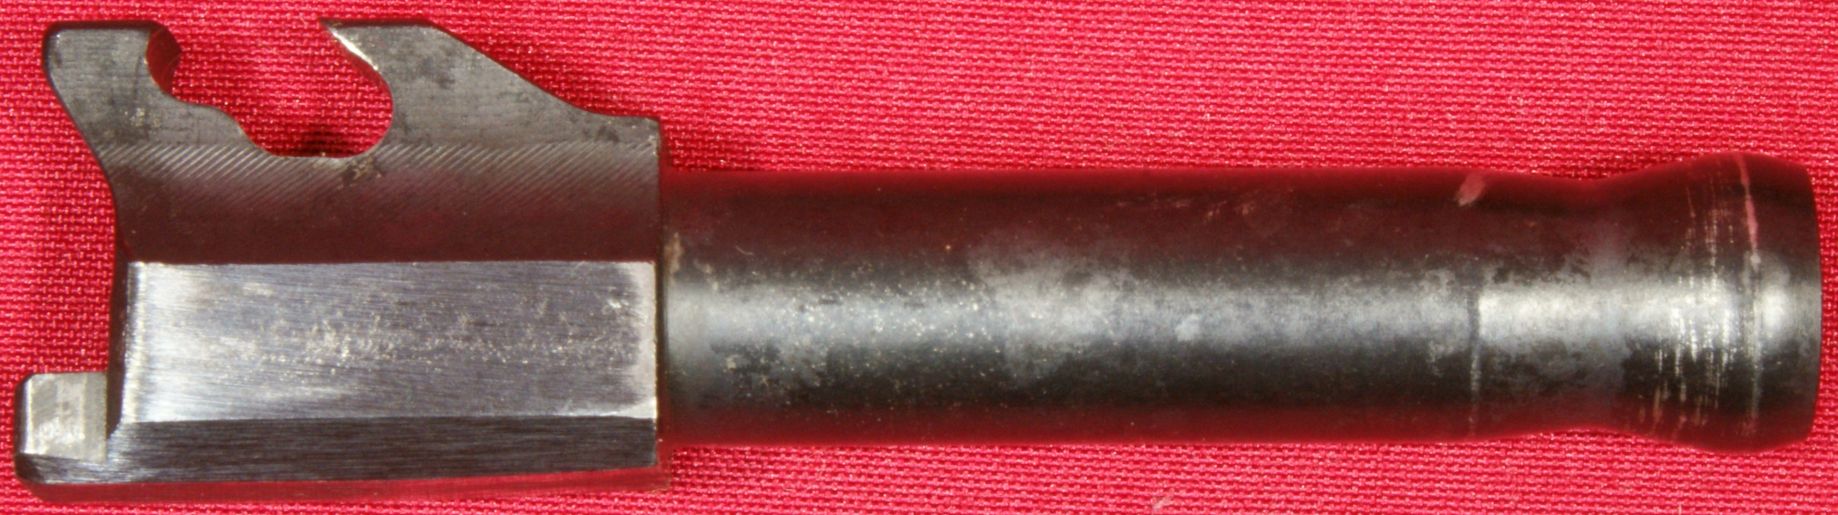
The feed ramp is integral to the barrel lug.
Figure 17
Figure 18
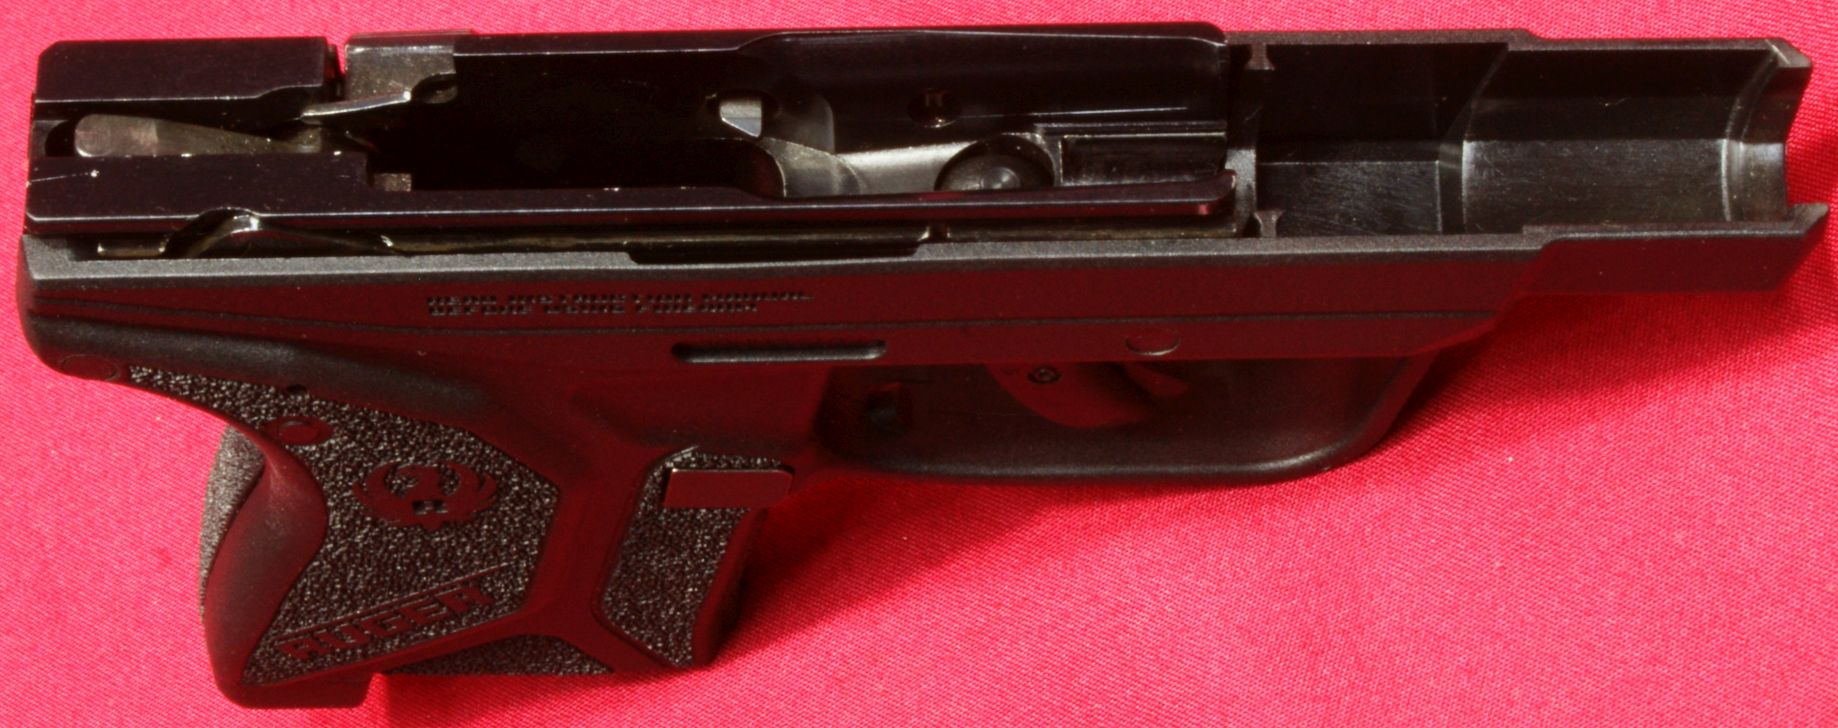
Inside the frame assembly is an aluminum frame insert which is pinned inside the grip with two frame insert pins. The interface slot for the slide extends the full length of this insert on both sides.
Figure 19
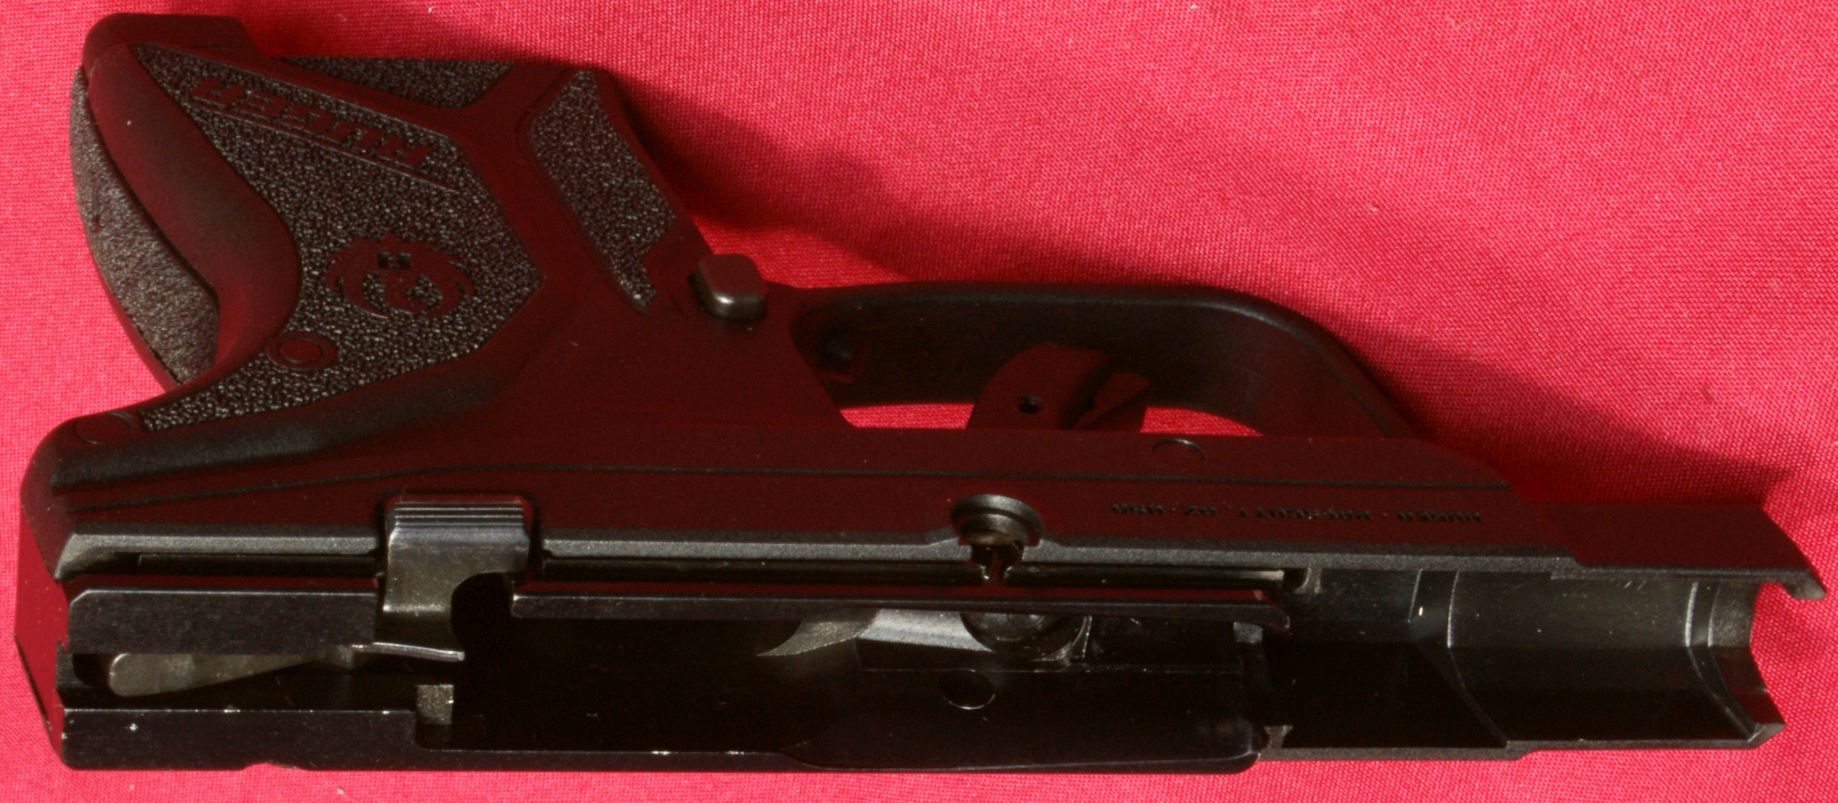
Figure 20

Figure 21
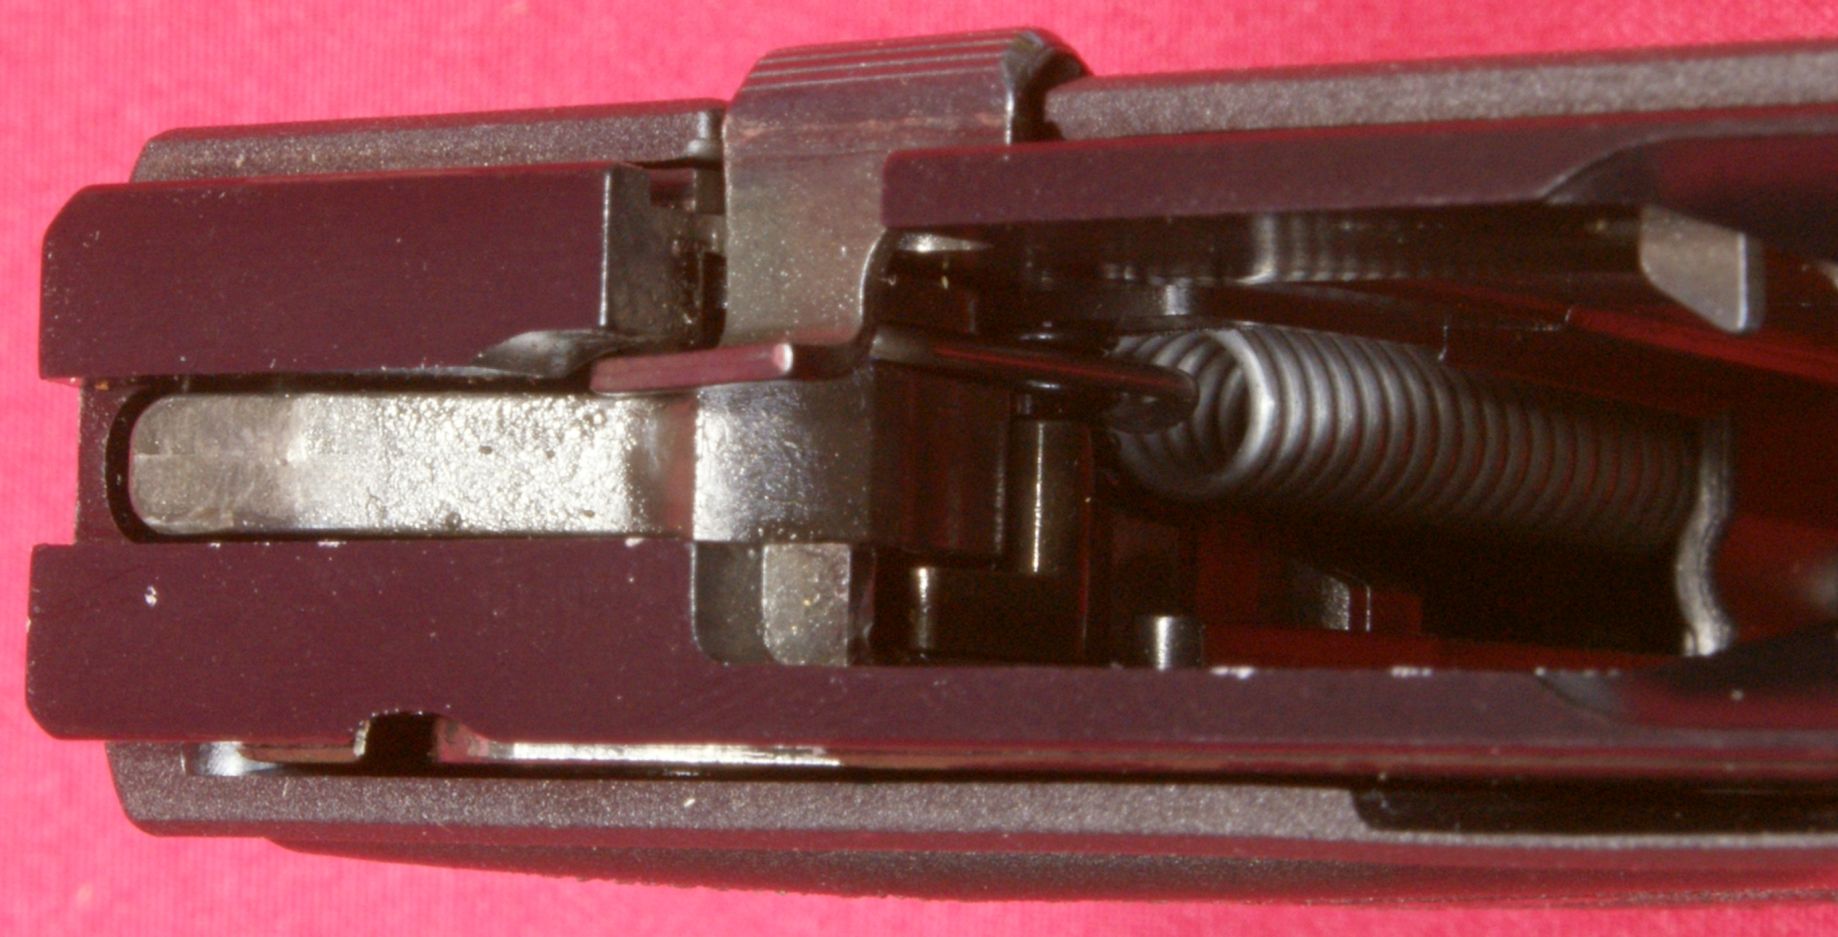
On the LCP II, it looks like Ruger has integrated the ejector into the slide stop lever which is different from the original.
Figure 22
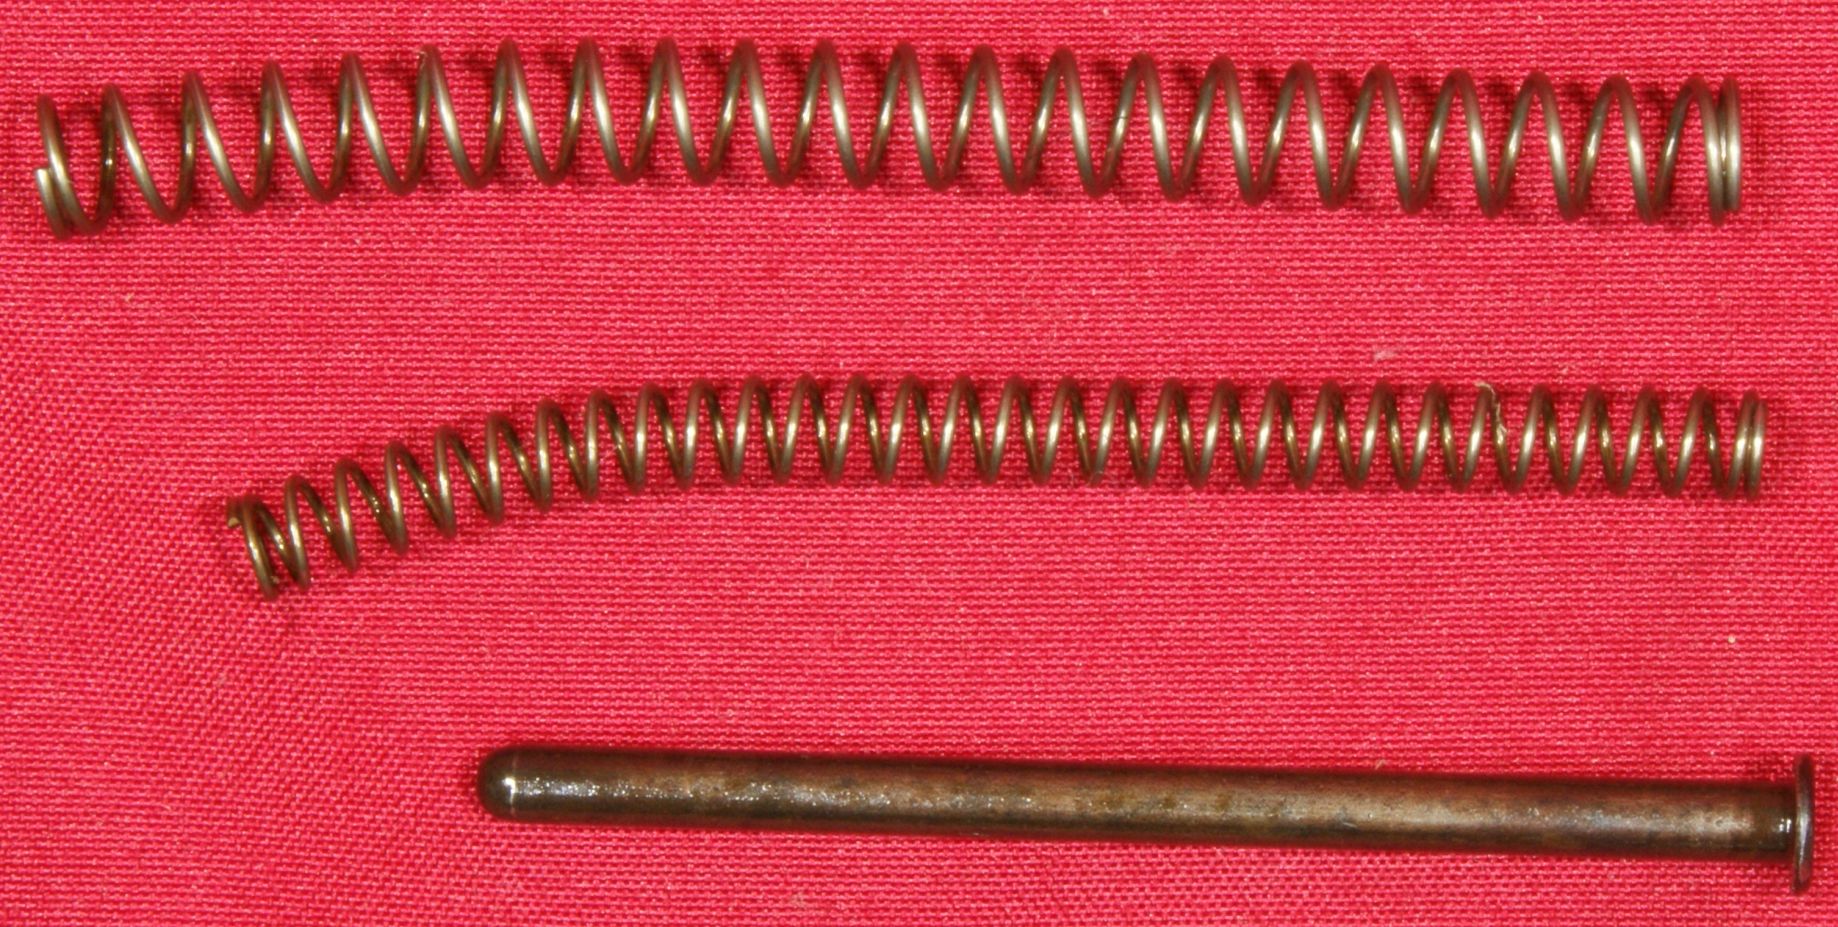
The dual recoil springs and guide rods are shown below. Although the photo gives the guide rod more of a copper-ish look, the actual guide rod has a blued look.
Figure 23
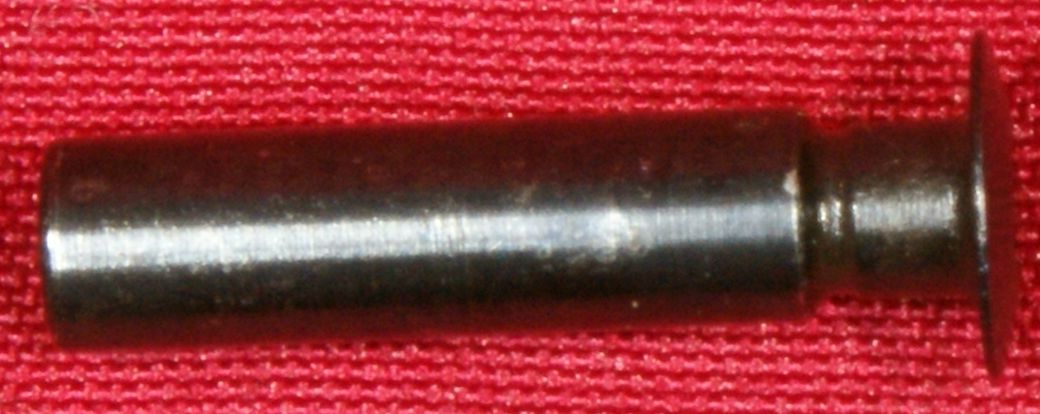
I'm still a little surprised that the head of the takedown pin is so thin.
Figure 24
Thoughts
The Ruger LCP II is a very simple pistol and easy to disassemble. Disassembly requires a small screwdriver or tool and I recommend putting tape or cloth on the slide or tool so that over time you don't scratch the finish on the slide when removing the takedown pin.
For more detailed photos and commentary, make sure you check out the other parts of this review and feel free to leave comments below. The following links are provided to help you see other parts of this review.
- Ruger LCP II Review: Part 1 - Introduction, Specifications and Summary
- Ruger LCP II Review: Part 2 - What's in the Box
- Ruger LCP II Review: Part 3 - External & Operational Features
- Ruger LCP II Review: Part 4 - Disassembly & Internal Features
- Ruger LCP II Review: Part 5 - Range Test
Or
If you would like to be notified about future Gunsumer Reports reviews via Facebook, make sure "You Like This" by clicking the Facebook "Like" button at the bottom or top of this page. If it already says "You Like This" beside the button, clicking it again will uncheck the "Like" status and you will not be notified.
| Share on Facebook | |
© 2010, 2011, 2012, 2013, 2014, 2015, 2016, 2017, 2018, 2019, 2020, 2021, 2022, 2023 & 2024 Gunsumer Reports™, All rights reserved.
FTC Disclosure