|
|
Gunsumer Reports TM Providing Detailed Objective Reviews for Firearms and Firearm Accessories |
Ruger American Rifle Review
Part 4 - Disassembly
May 4, 2012

In Part 3 of my Ruger American Rifle Review, I covered in great detail the external and operational features of the Ruger American Rifle. In this part of the review, I show the basic disassembly of the rifle. Generally speaking, I will follow the steps outlined in the Instruction Manual for disassembly and you should always consider the Instruction Manual as the primary source for any information relating to the operation and safety of your firearm.
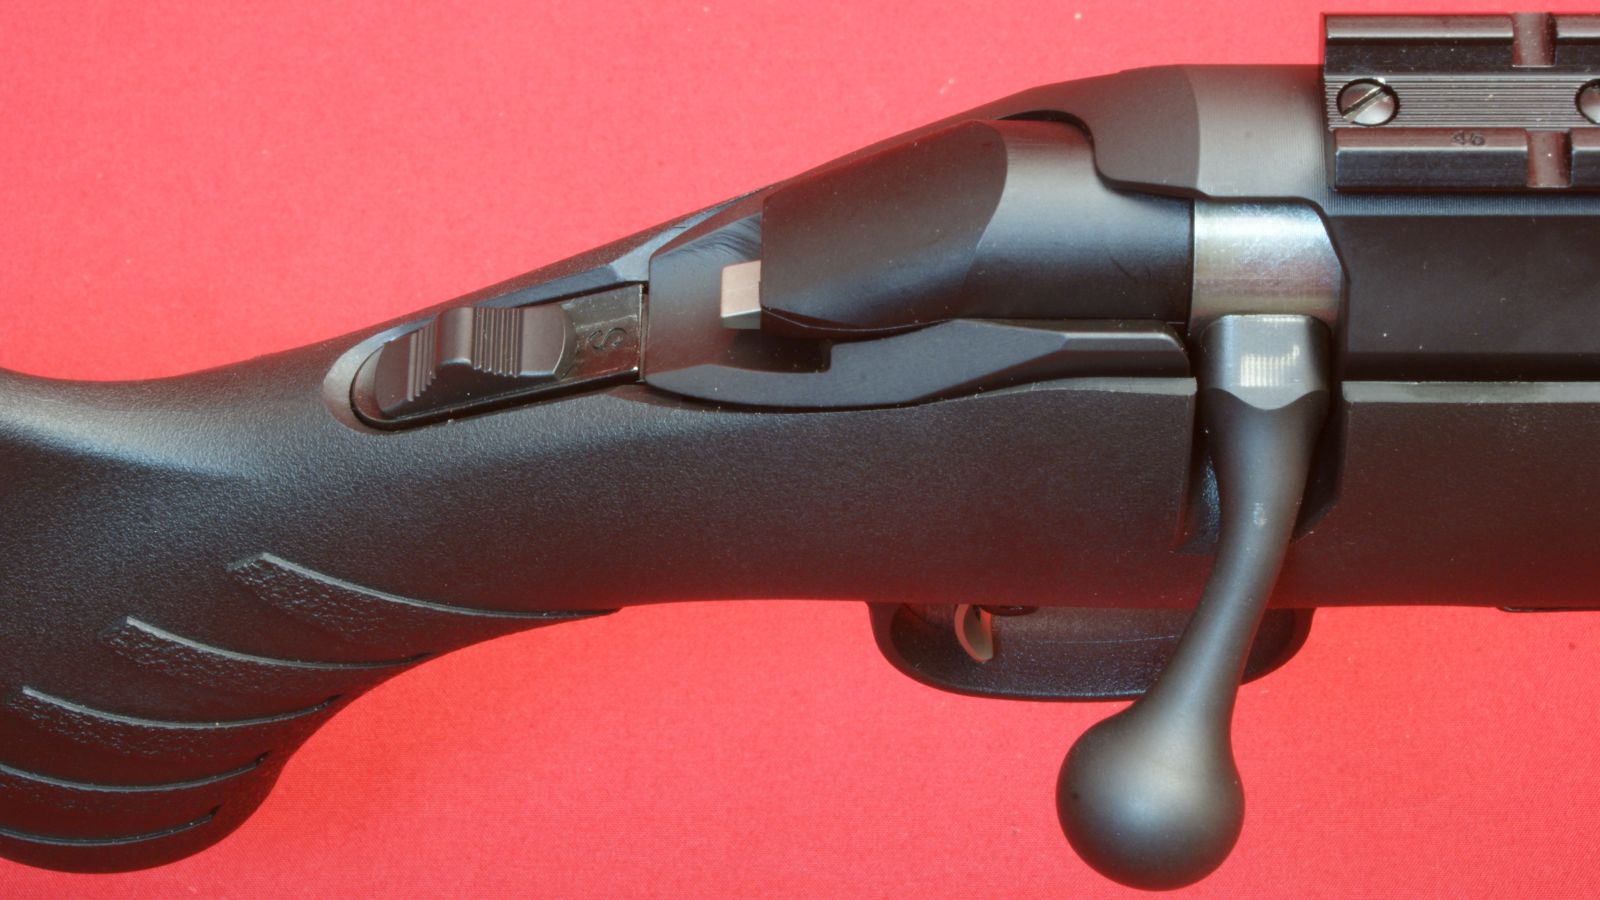
Step 1 - Safety & Cocked
The first step when working with any firearm is to make sure it is unloaded and pointed in a safe direction. Next you should make sure the rifle is cocked and the safety is on as shown below.
Figure 1
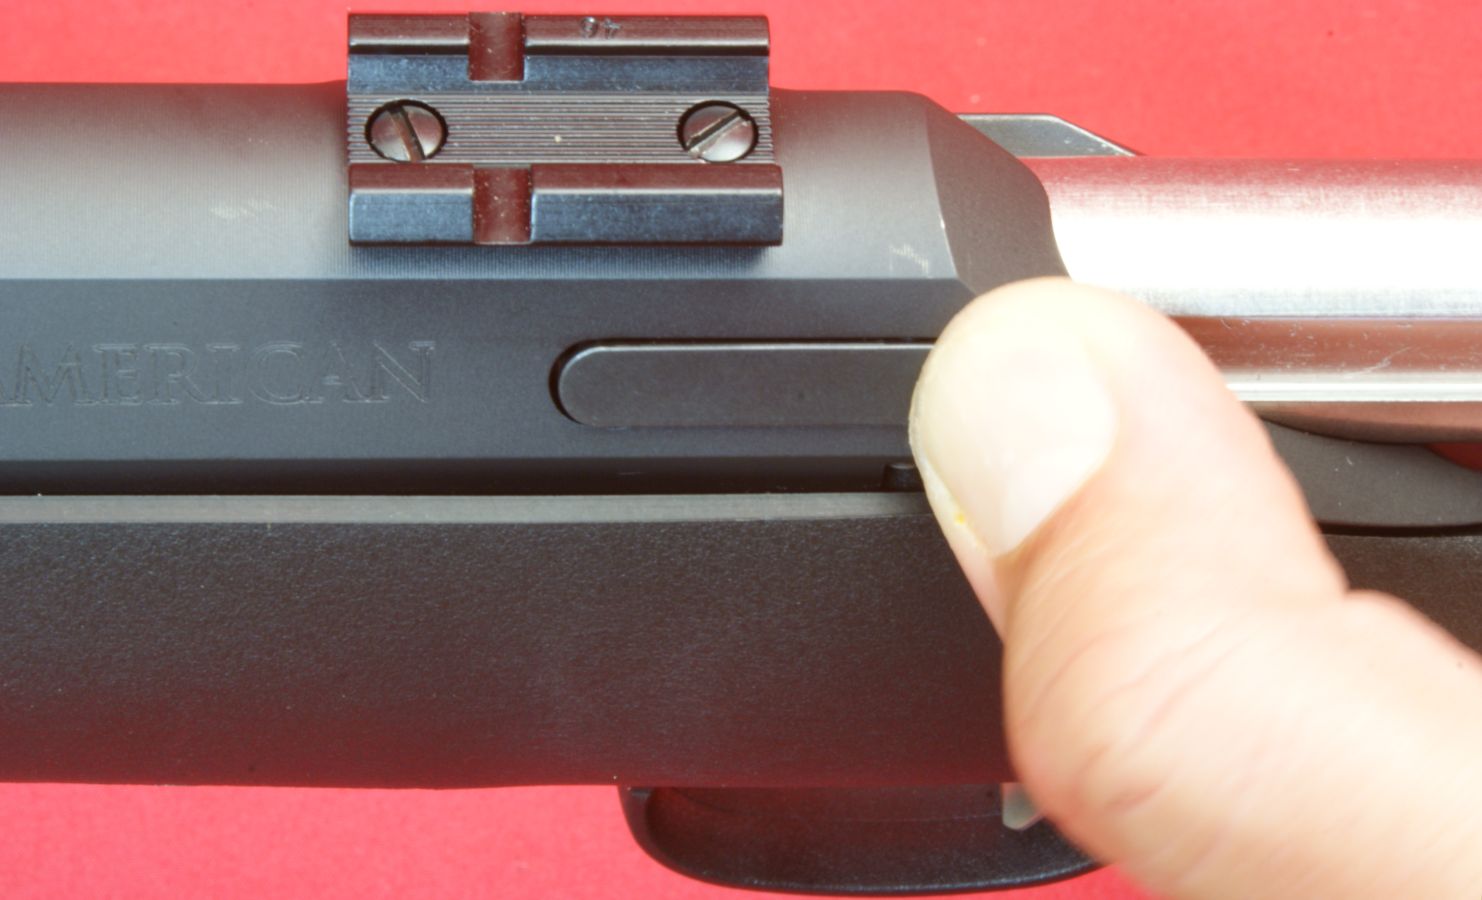
Step 2 - Remove Magazine
Next remove the magazine by pressing the magazine latch on the front of the magazine.
Figure 2
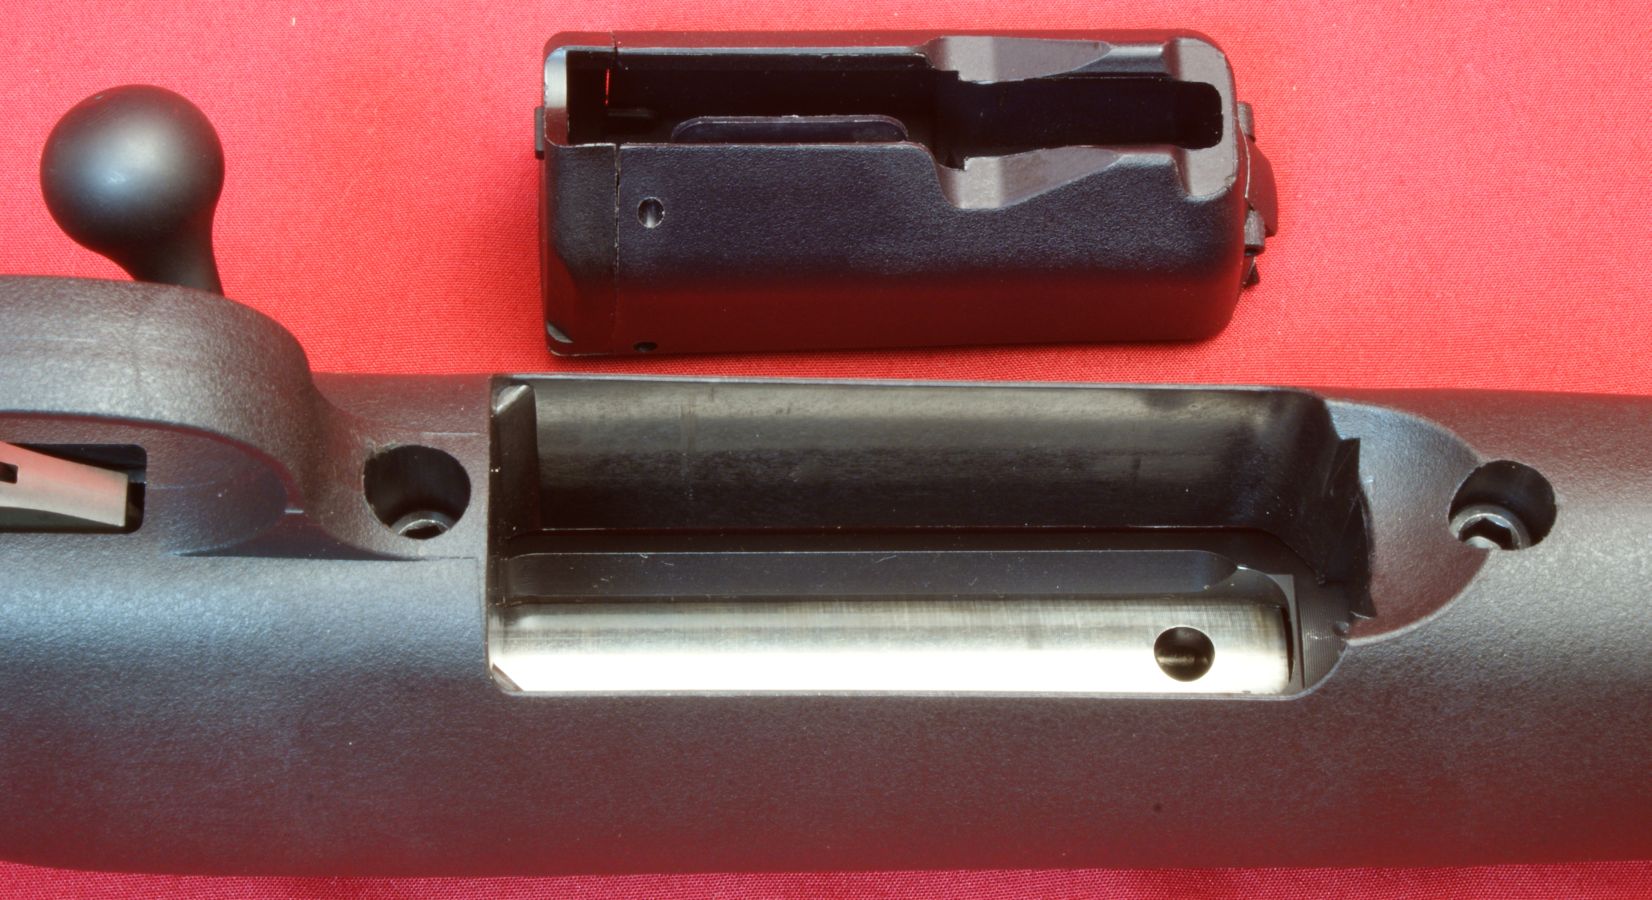
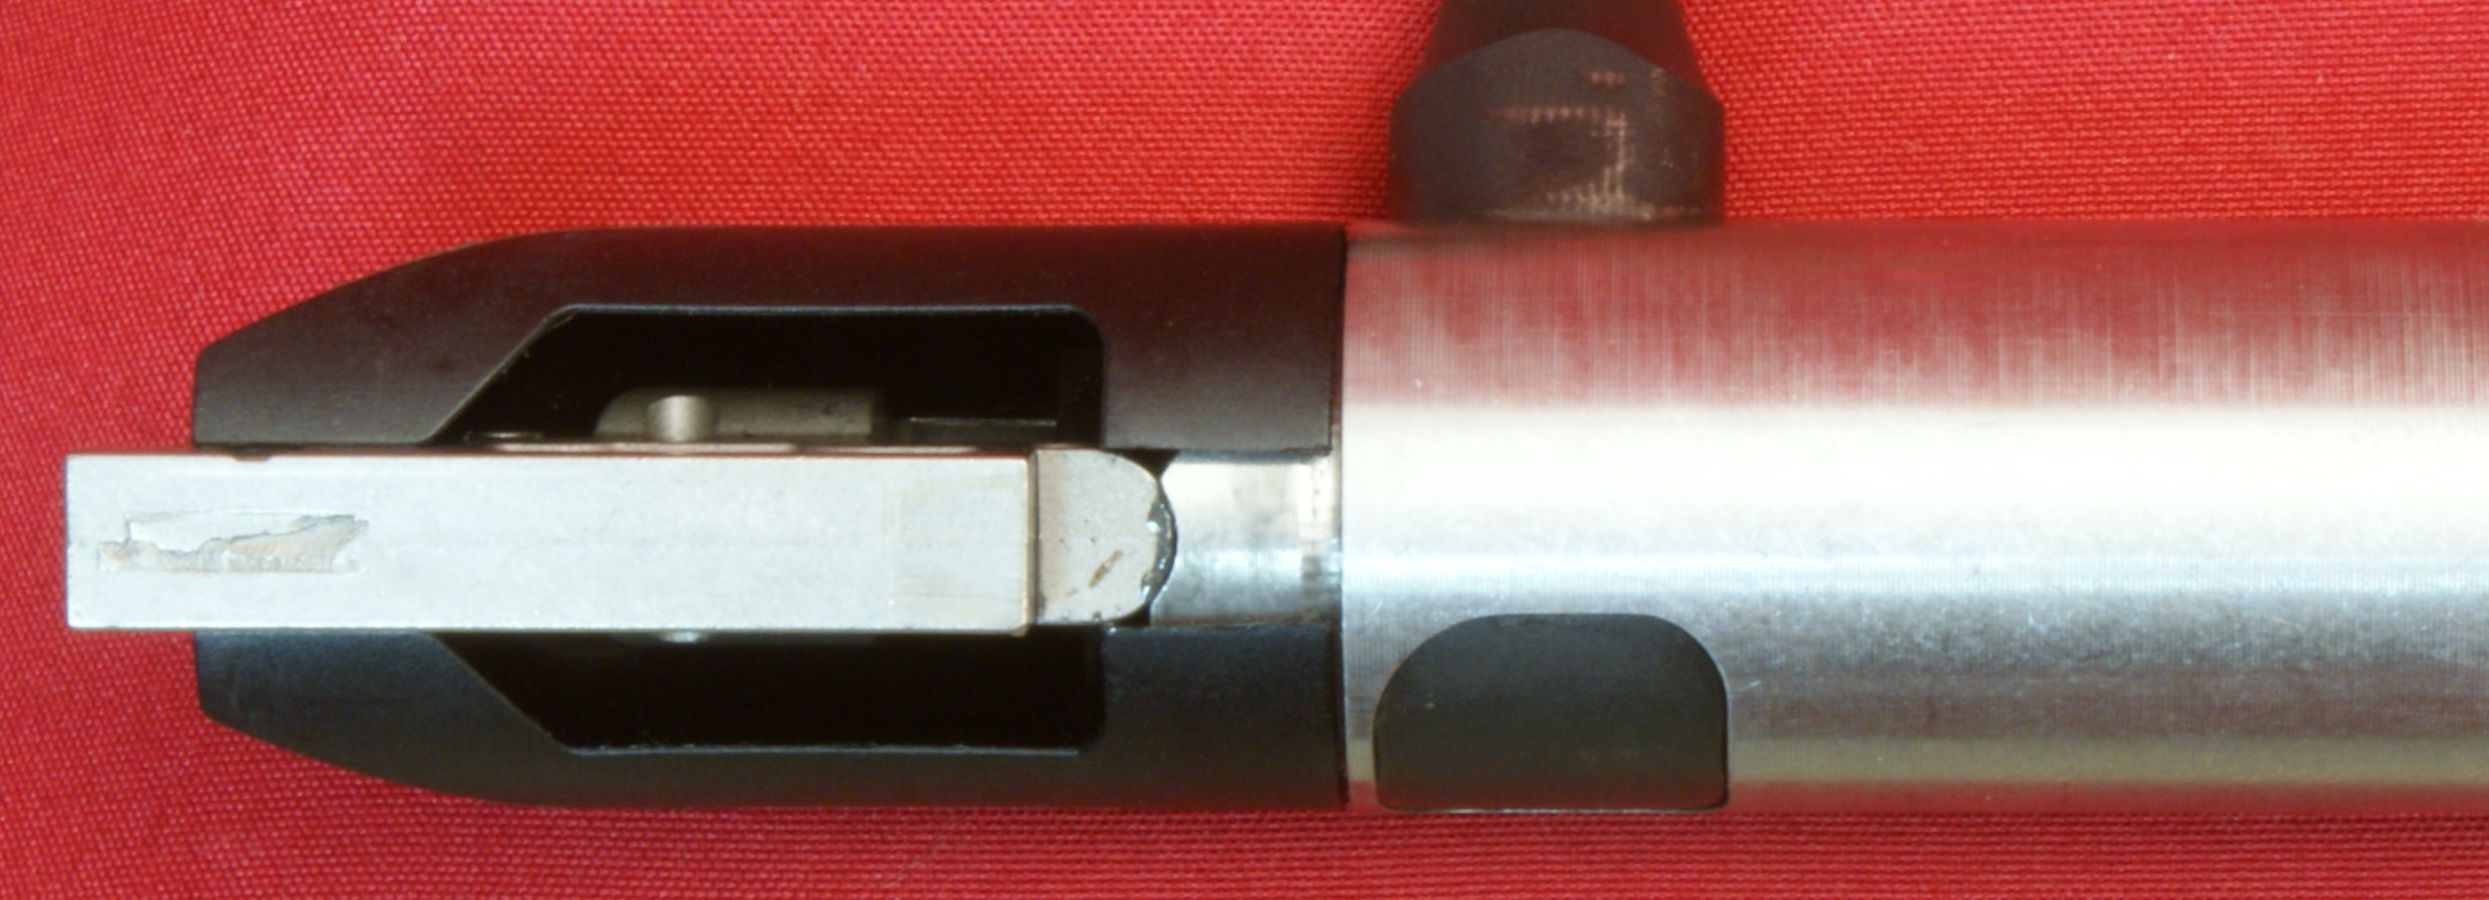
Step 3 - Remove Bolt
To remove the bolt, open the bolt and pull the bolt to the rear while also pressing on the rear of the bolt stop located on the left side of the receiver as shown below. The bolt will slide completely out of the receiver.
Figure 3
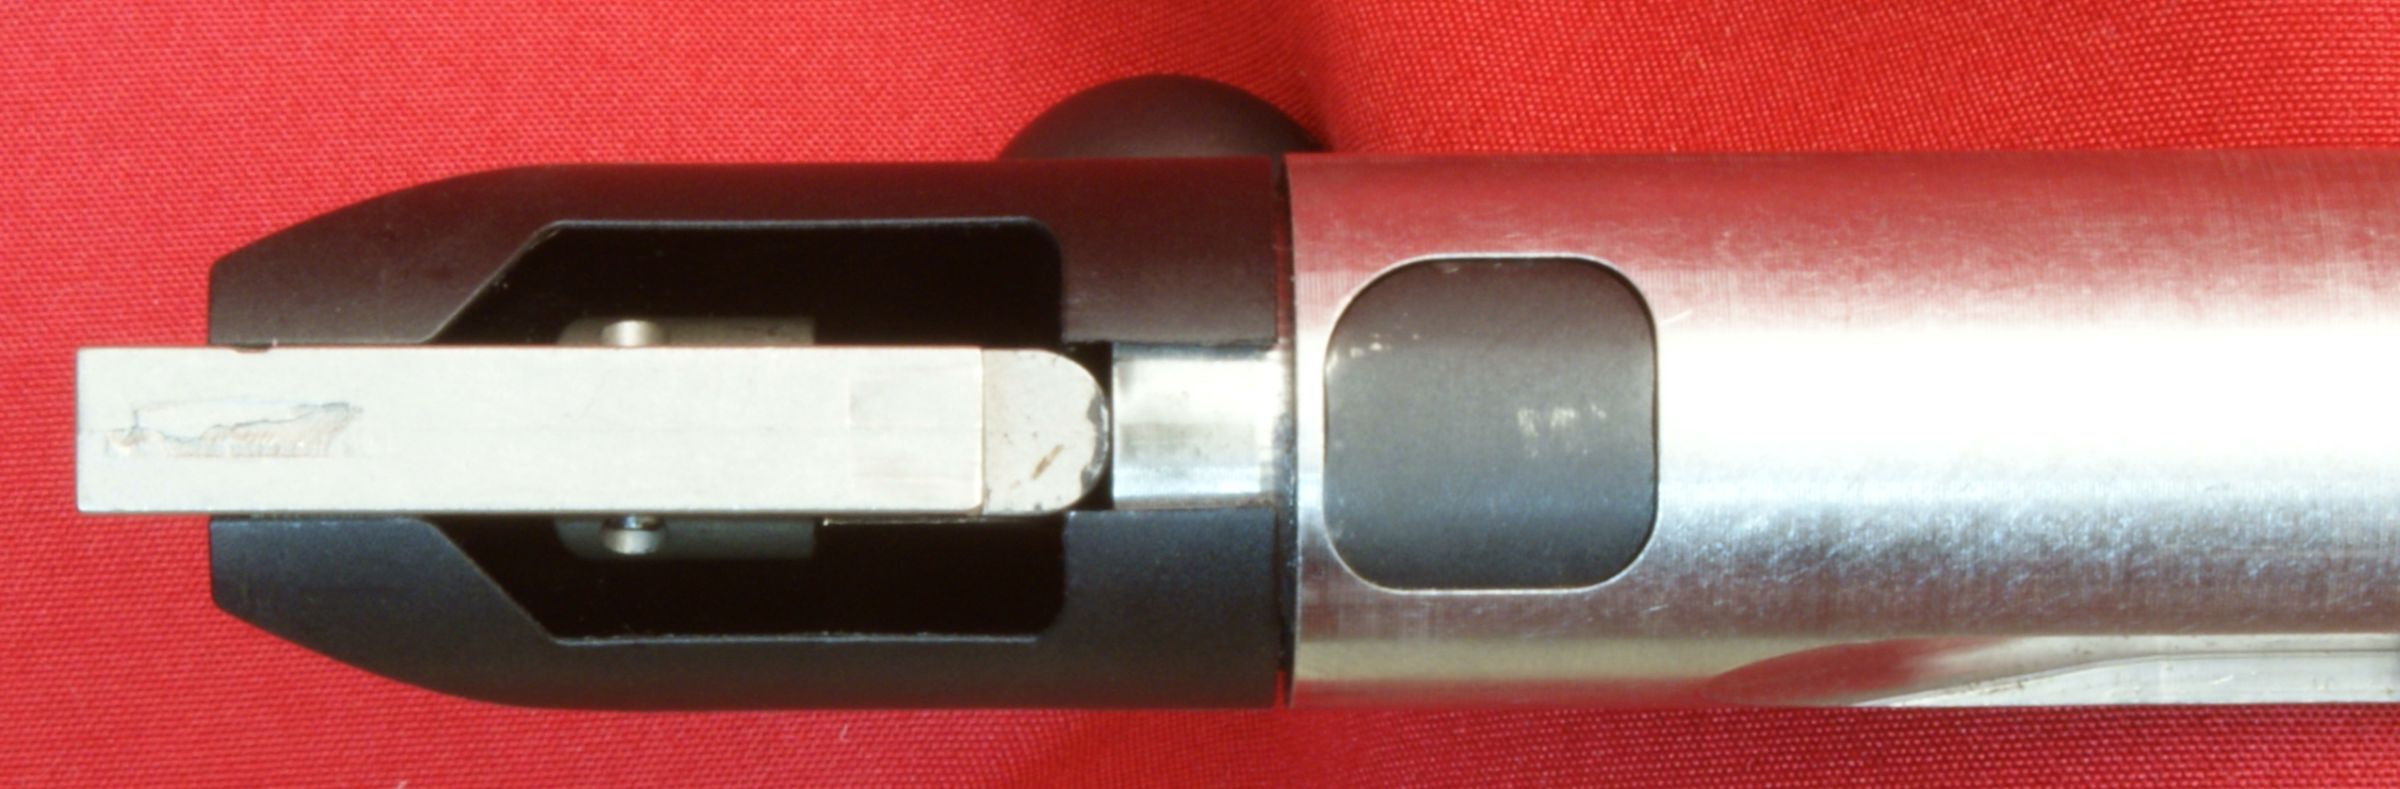
This is the maximum level of disassembly needed for normal cleaning and you will seldom need to go any further. The ease of disassembly for cleaning is one of the reasons I'm fond of bolt action rifles.
Figure 4
Step 4 - Remove Bolt Sleeve
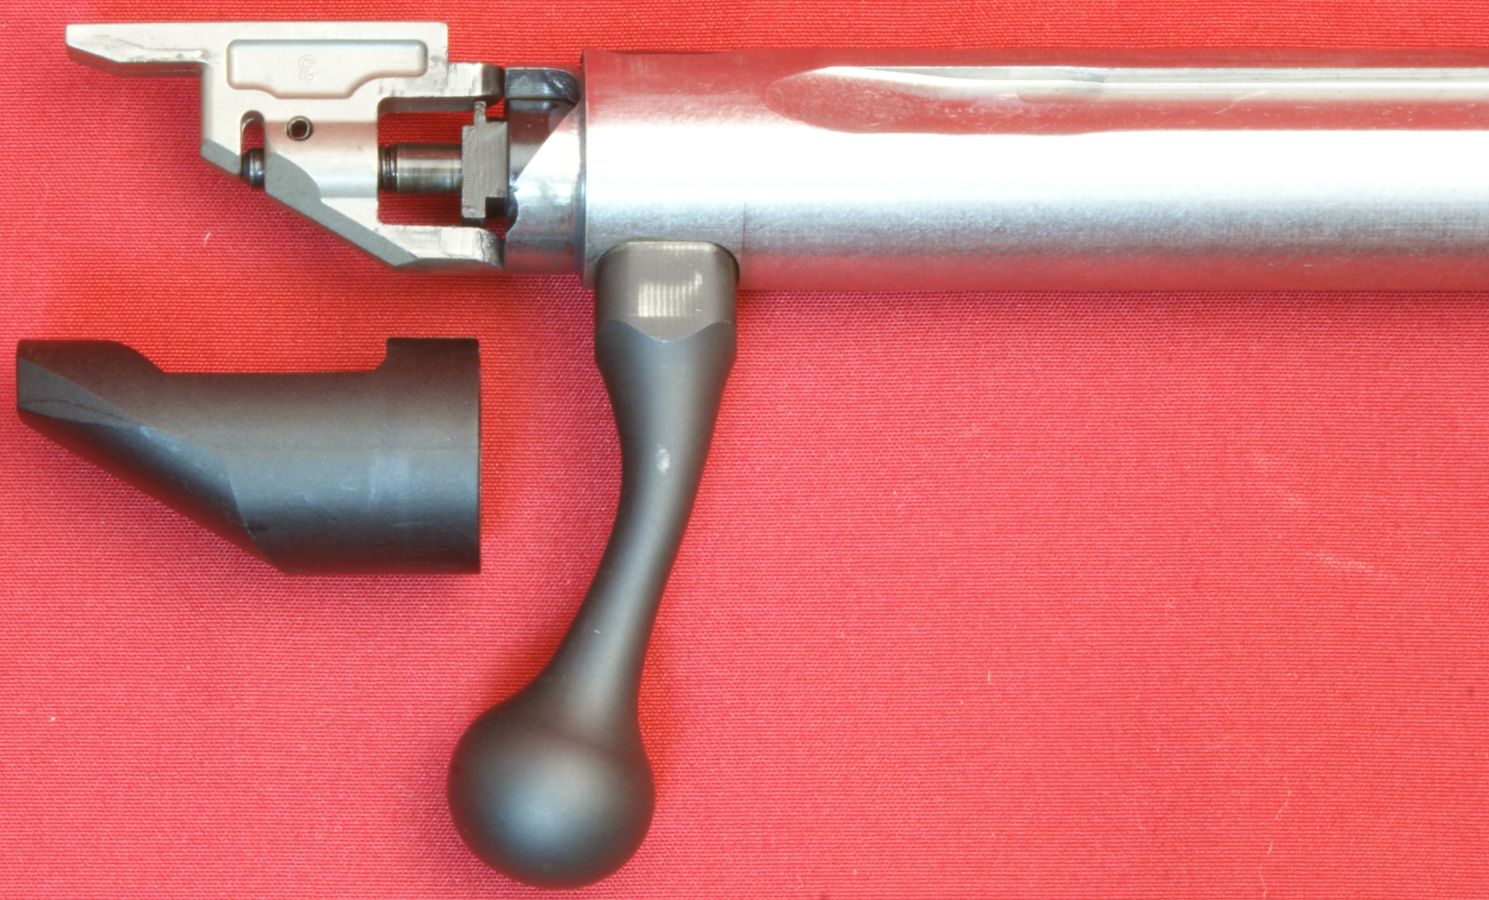
If for some reason you feel compelled to further disassemble the bolt, you can remove the bolt sleeve per Ruger's instructions. Ruger starts out with a bold note warning you "Do not rotate the cocking piece beyond the positions shown in the instructions." If you rotate the cocking piece too far, it will "fall down" to the bottom of the cocking cams and will be extremely difficult to rotate back into position. Also because it rotates in only one direction and because it is a dual cam, you will have to rotate the cocking piece over the cam twice to return it to its original position.
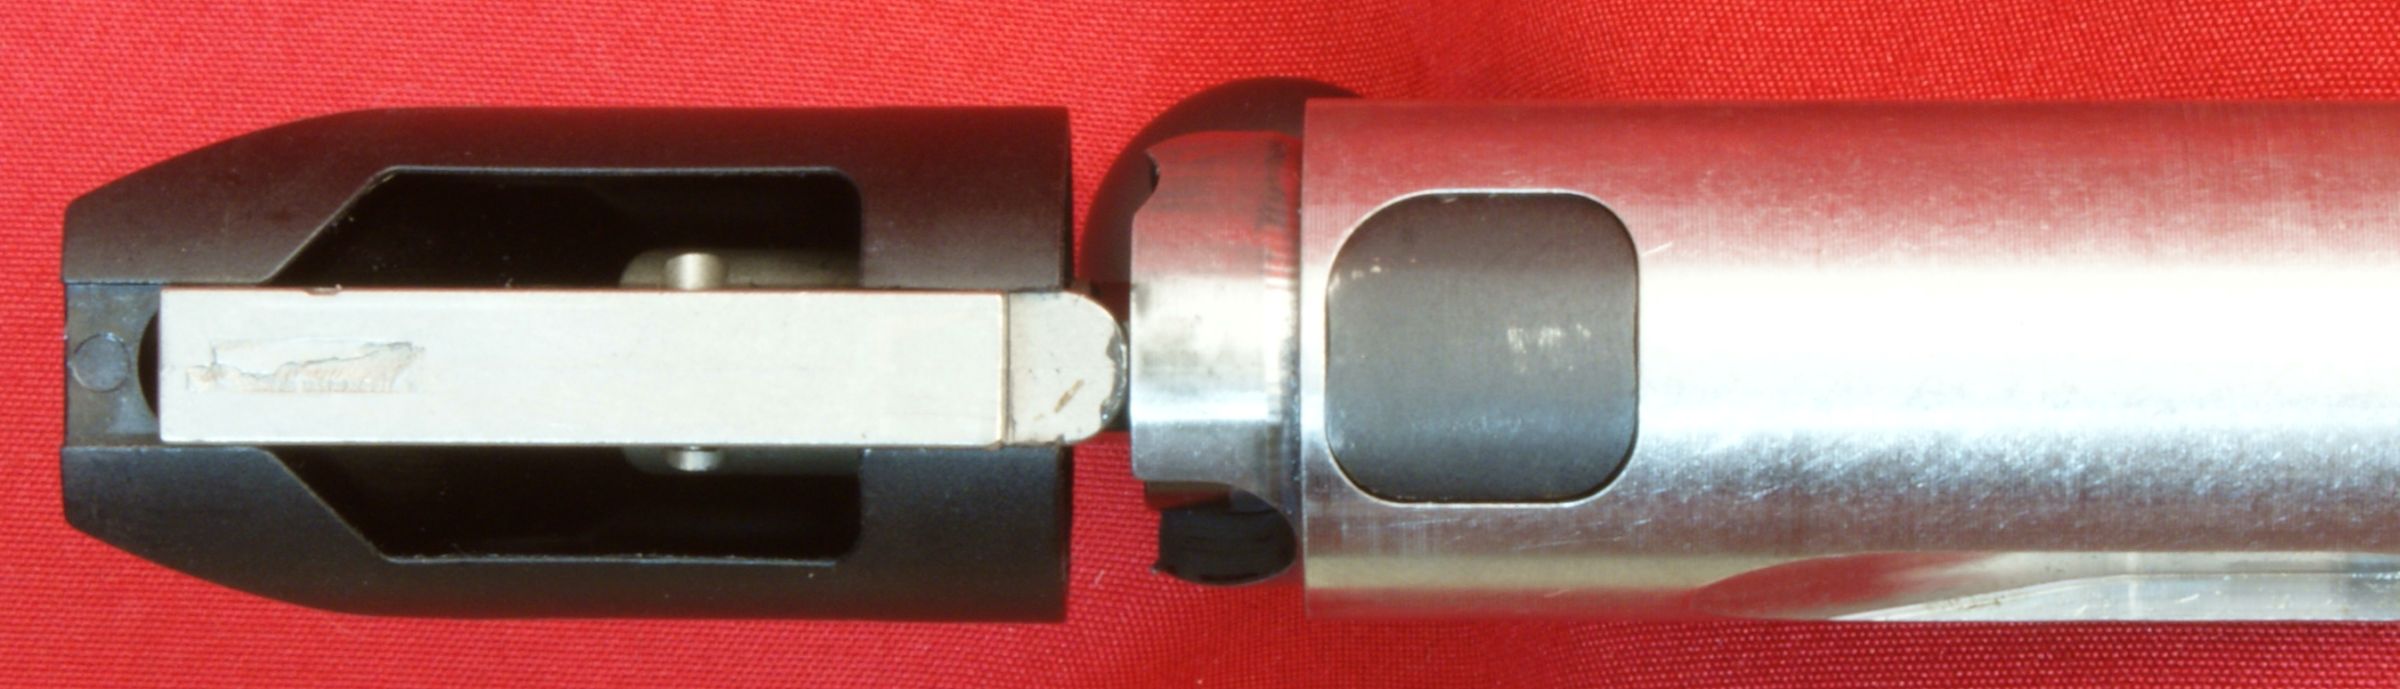
This figure below shows what the bolt should look like with the cocking piece in its normal position and at rest inside the notch on the cam.
Figure 5
This next photo shows how I have rotated the cocking piece about 30 degrees so that it lines up with the center of the bolt handle base. I was able to rotate this by hand but paid close attention not to rotate the cocking piece or bolt too far. It takes a significant amount of force to rotate the cocking piece out of the notch, then it rotates easily with much less force.
Figure 6
With the cocking piece in this position, I was able to pull the bolt sleeve rearward as shown below.
Figure 7
With the bolt sleeve rearward, I was able to pull the bolt sleeve down and off the end of the bolt.
Figure 8
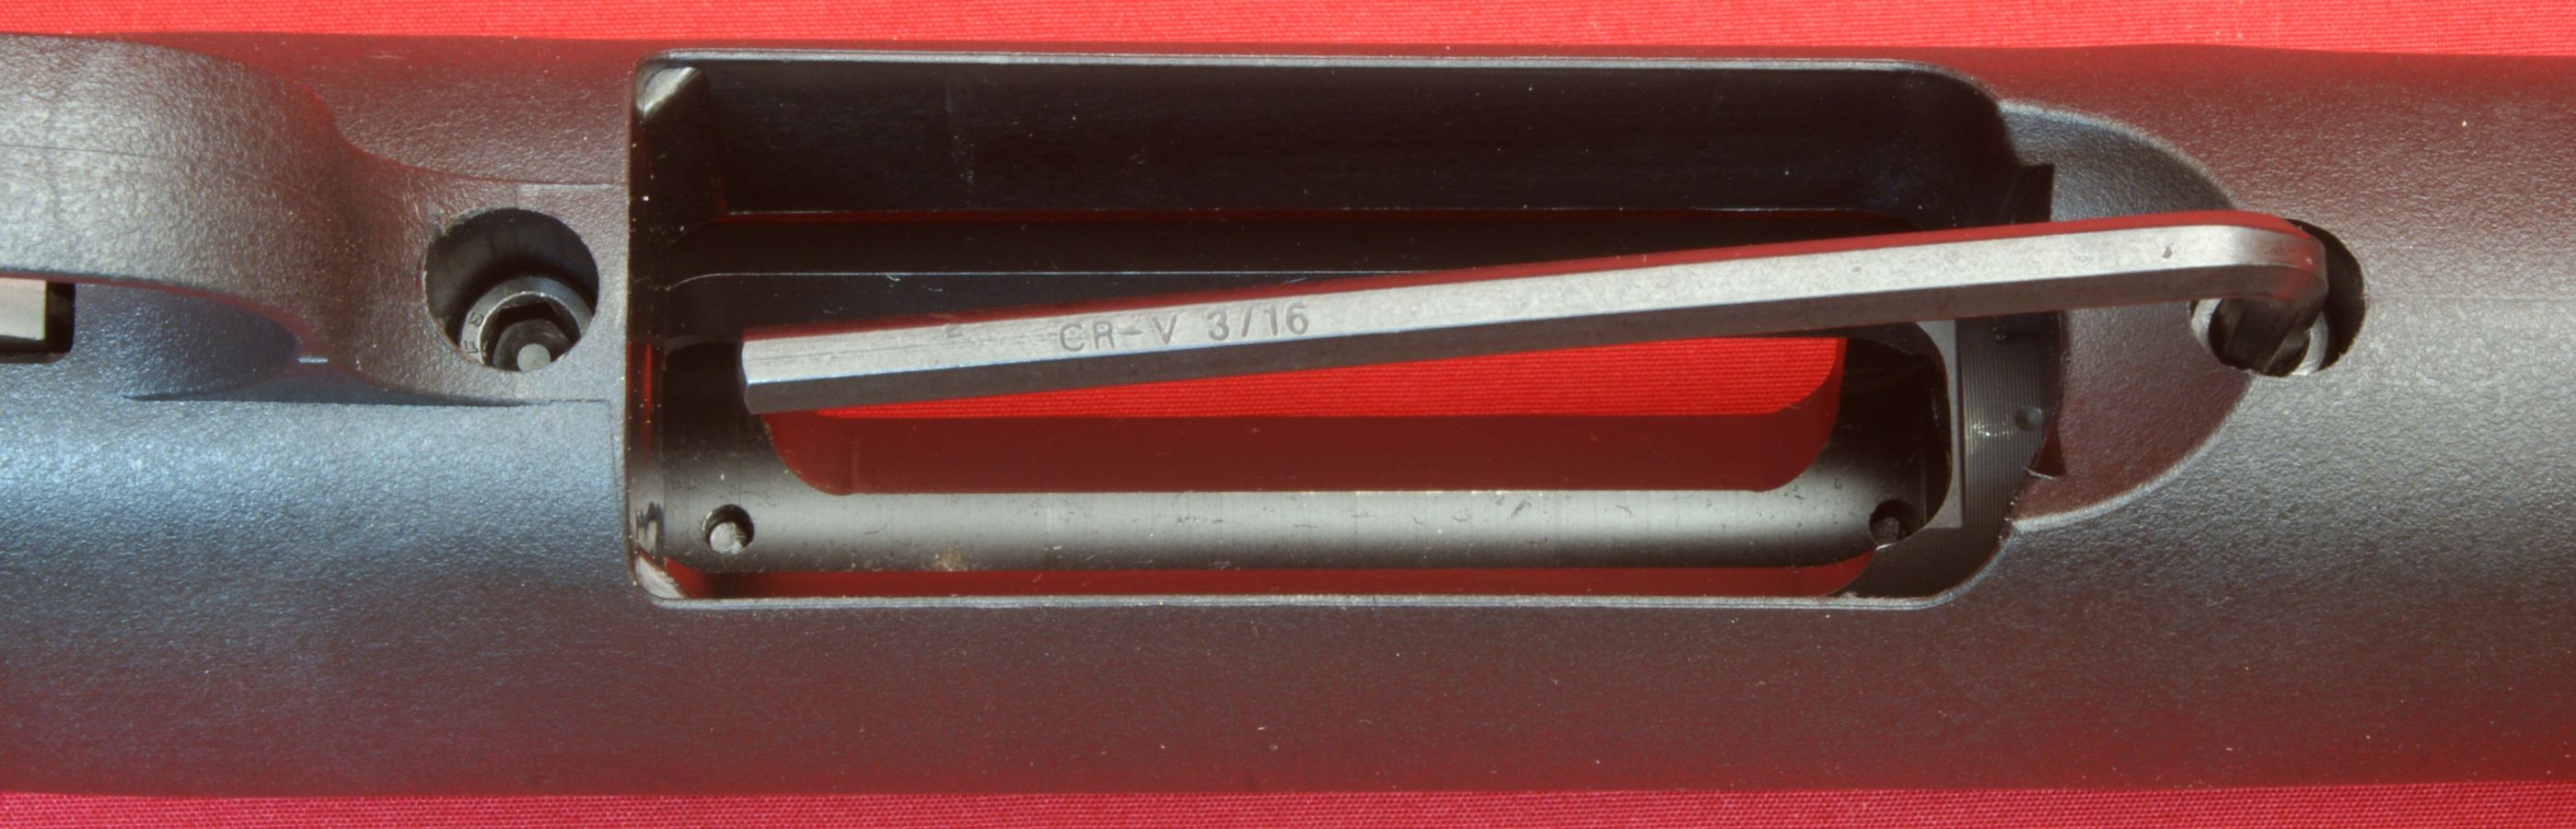
Step 5 - Remove Receiver and Barrel Assembly from Stock
Using a 3/16 Allen hex wrench, remove the two hex-head screws in the bottom of the stock and lift the barrel and receiver assembly from the stock.
Figure 9
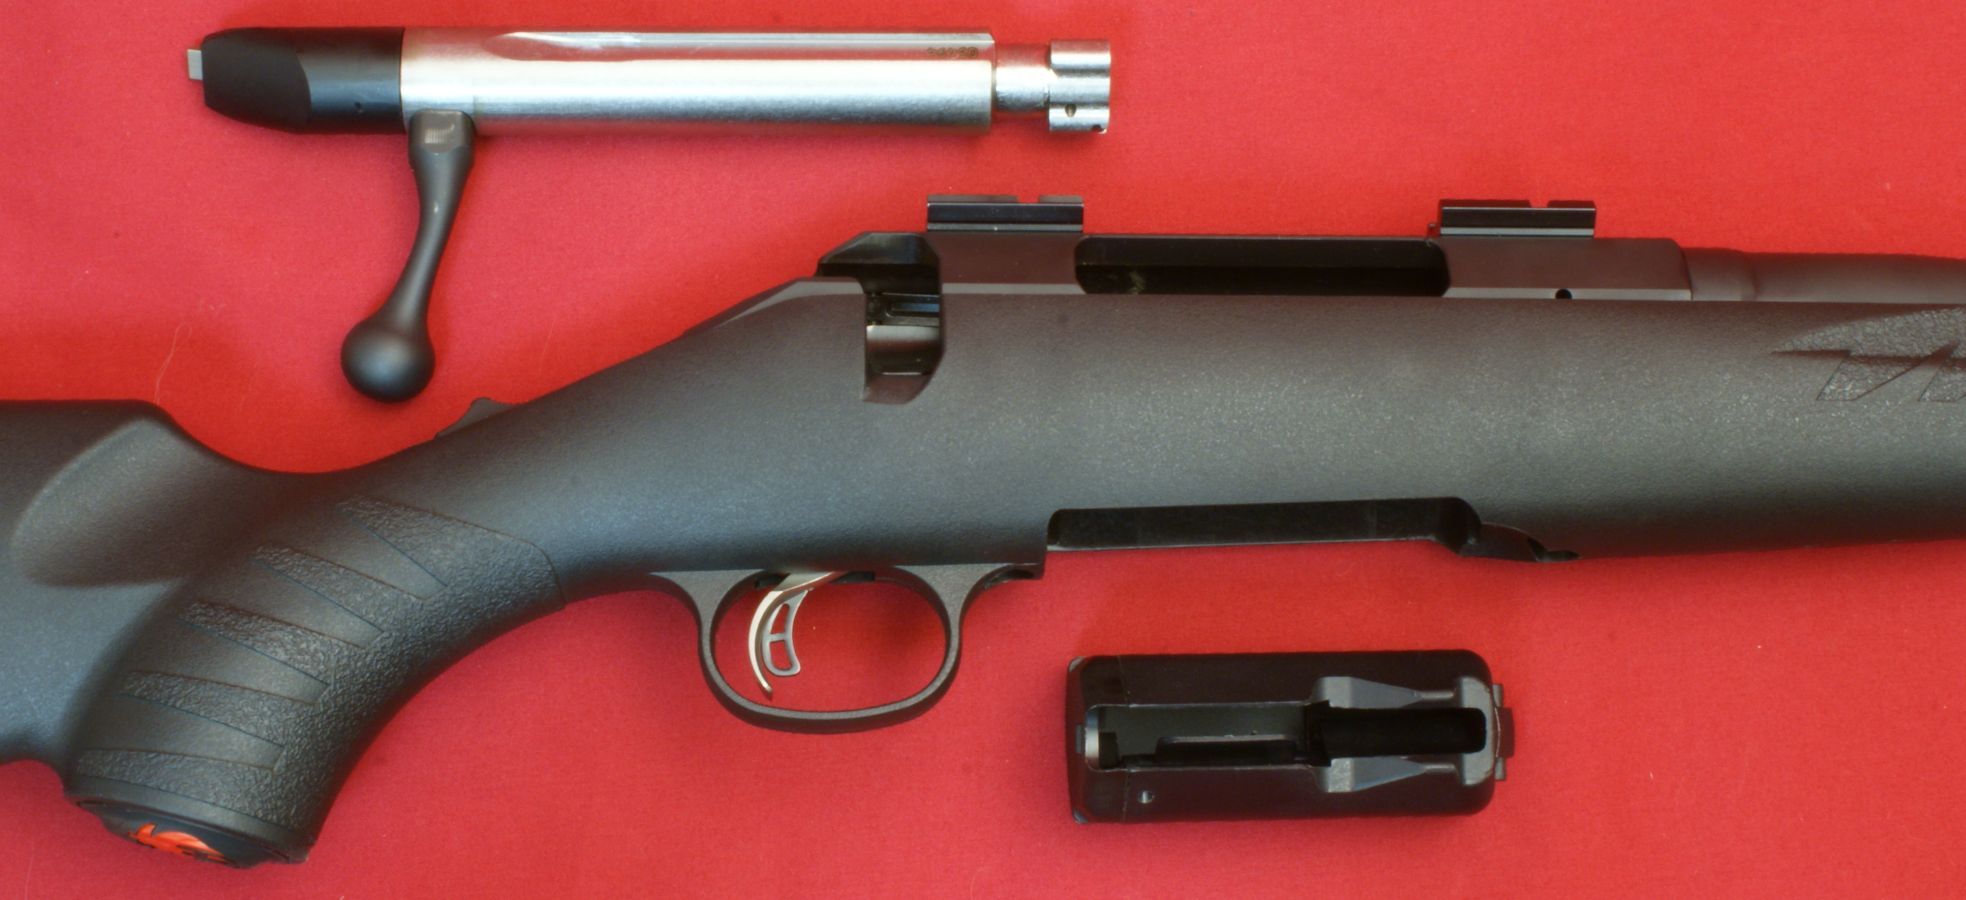
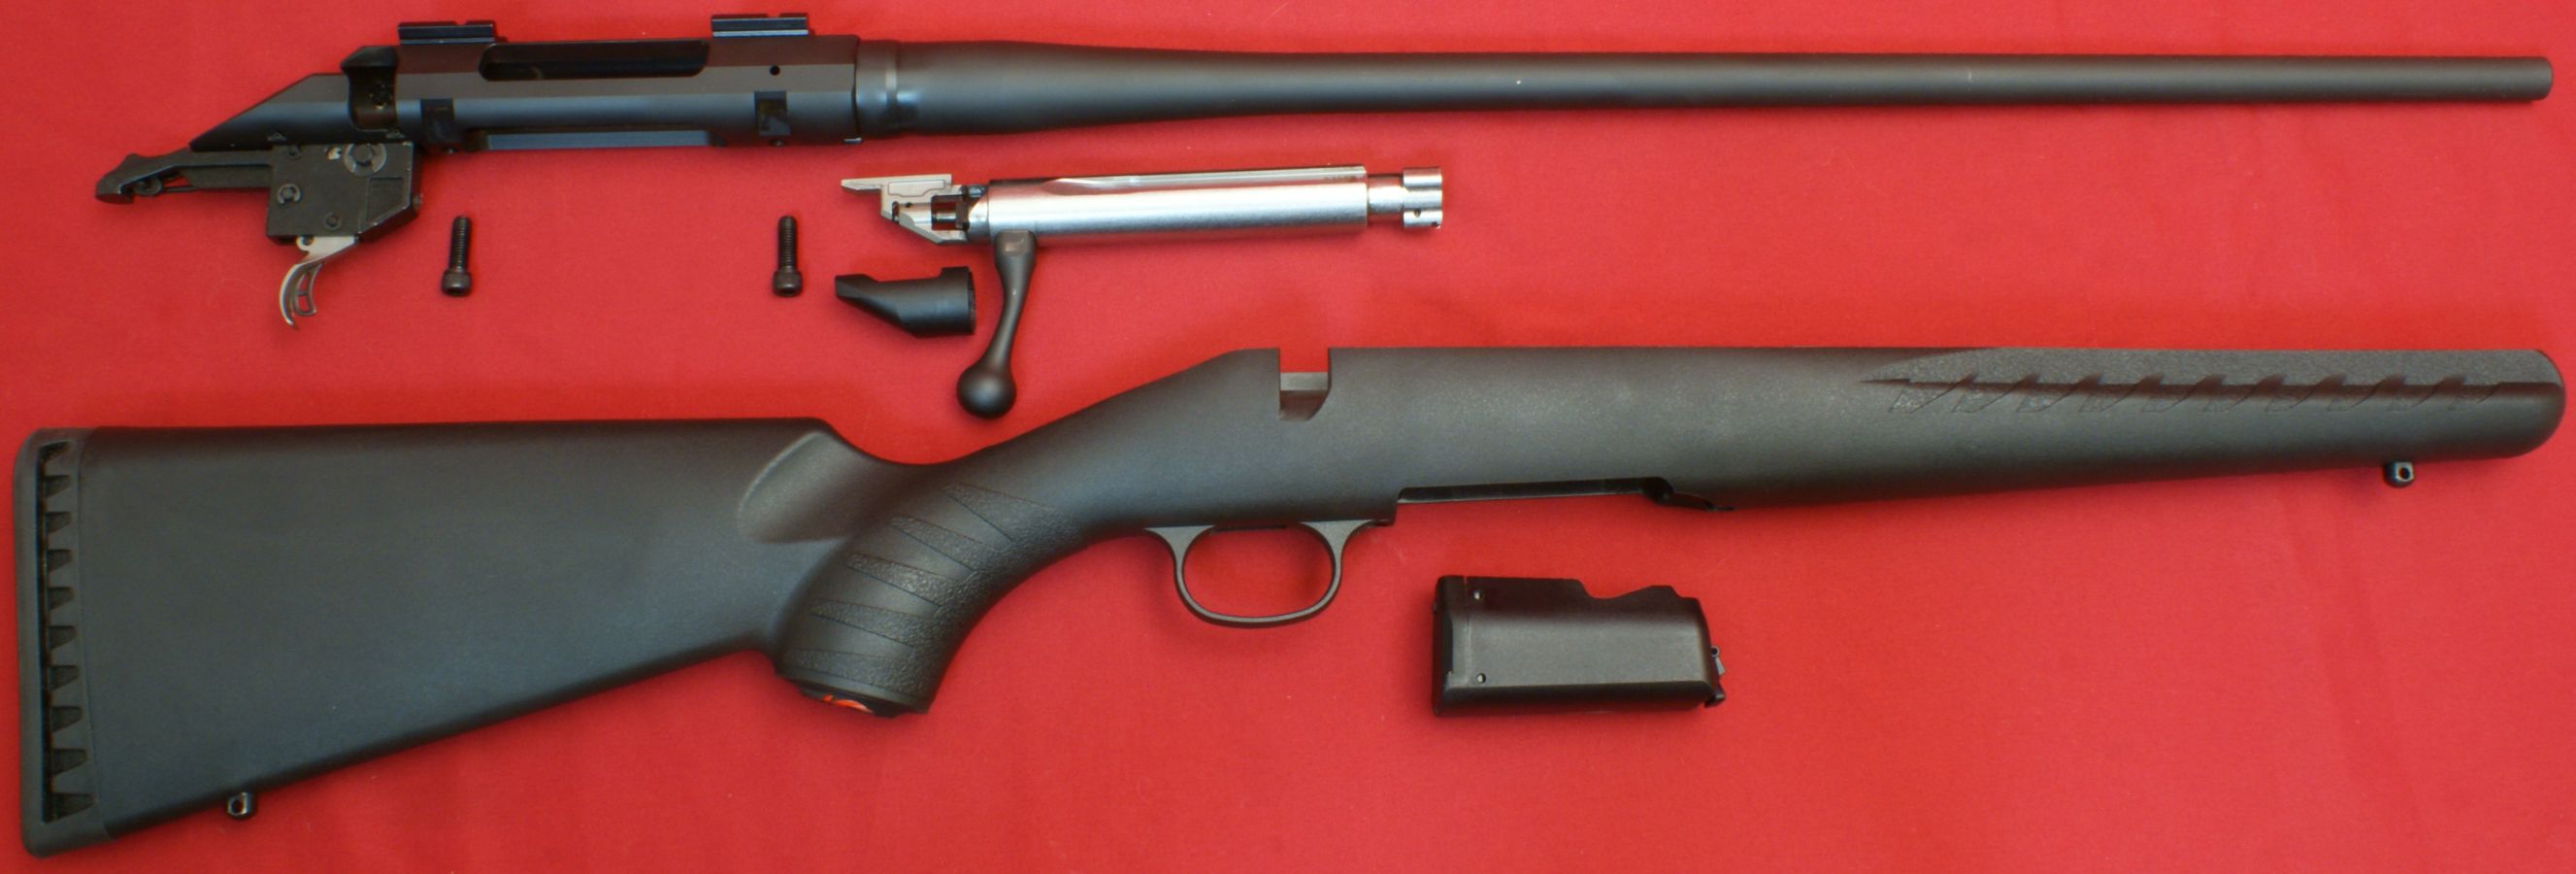
Fully Disassembled
The photo below shows the maximum level you should ever fully disassemble your Ruger American Rifle and I agree that you should not go any further unless you are very familiar with disassembly of firearms to these further levels.
Figure 10
Reassembly
In general, reassembly is the reverse of the steps above. The key step will be tightening the stock screws. Ruger says loosely install the screws then:
Tighten the two screws as follows: Do not tighten one screws all the way and then the other. Instead, alternately tighten each one - a partial turn at a time - so that the screws will be tightened equally until both are snug tightened to 60-80 in-lbs.
Thoughts
Disassembly and reassembly of the Ruger American Rifle is quick and simple just like nearly all bolt action rifles. The instruction manual was easy to follow and I'm glad Ruger provided instructions and torque values for retightening the stock screws.
For more detailed photos and commentary, make sure you check out the other parts of this review and feel free to leave comments on my Reader's Comments page. The following links are provided to help you see other parts of this review.
- Ruger American Rifle Review: Part 1 - Introduction, Specifications and Summary
- Ruger American Rifle Review: Part 2 - What's in the Box
- Ruger American Rifle Review: Part 3 - External and Operational Features
- Ruger American Rifle Review: Part 4 - Disassembly (this page)
- Ruger American Rifle Review: Part 5 - Internal Features
- Ruger American Rifle Review: Part 6 - Range Test
Or
If you would like to be notified about future Gunsumer Reports reviews via Facebook, make sure "You Like This" by clicking the Facebook "Like" button at the bottom or top of this page. If it already says "You Like This" beside the button, clicking it again will uncheck the "Like" status and you will not be notified.
| Share on Facebook | |
© 2010, 2011, 2012, 2013, 2014, 2015, 2016, 2017, 2018, 2019, 2020, 2021, 2022, 2023 & 2024 Gunsumer Reports™, All rights reserved.
FTC Disclosure