|
|
Gunsumer Reports TM Providing Detailed Objective Reviews for Firearms and Firearm Accessories |
New Ruger 22 Charger Review
Part 3 - External & Operational Features
February 28, 2015
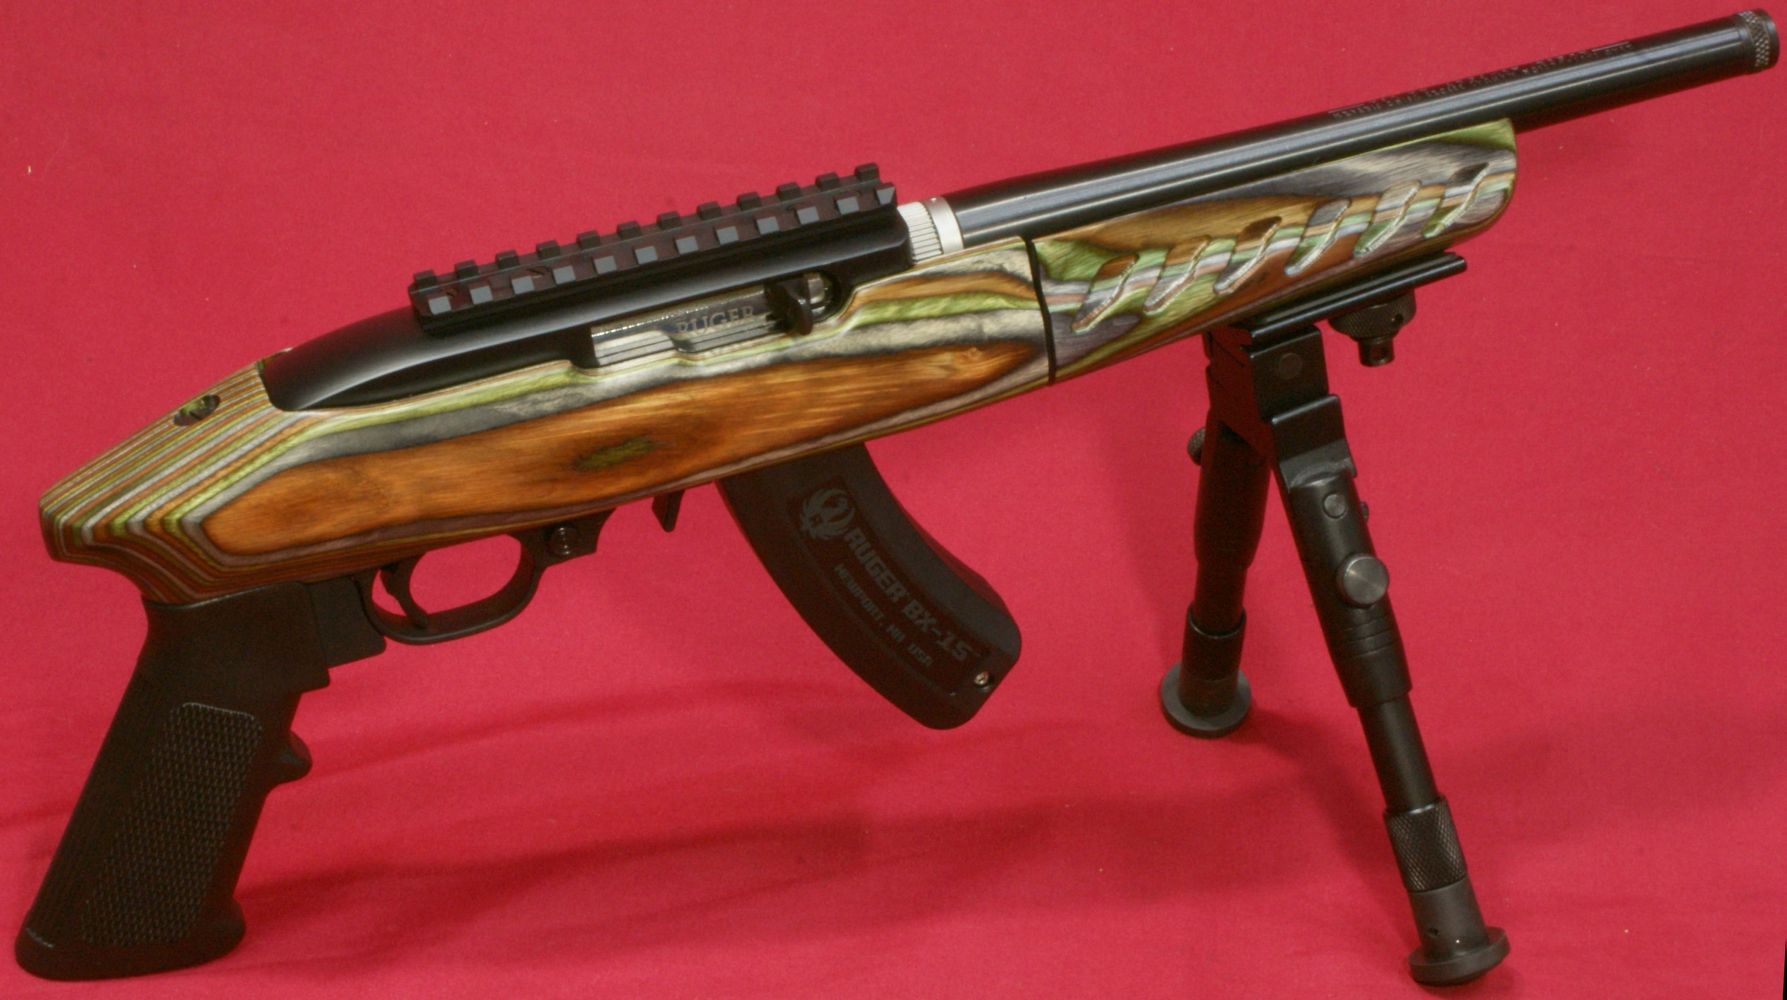
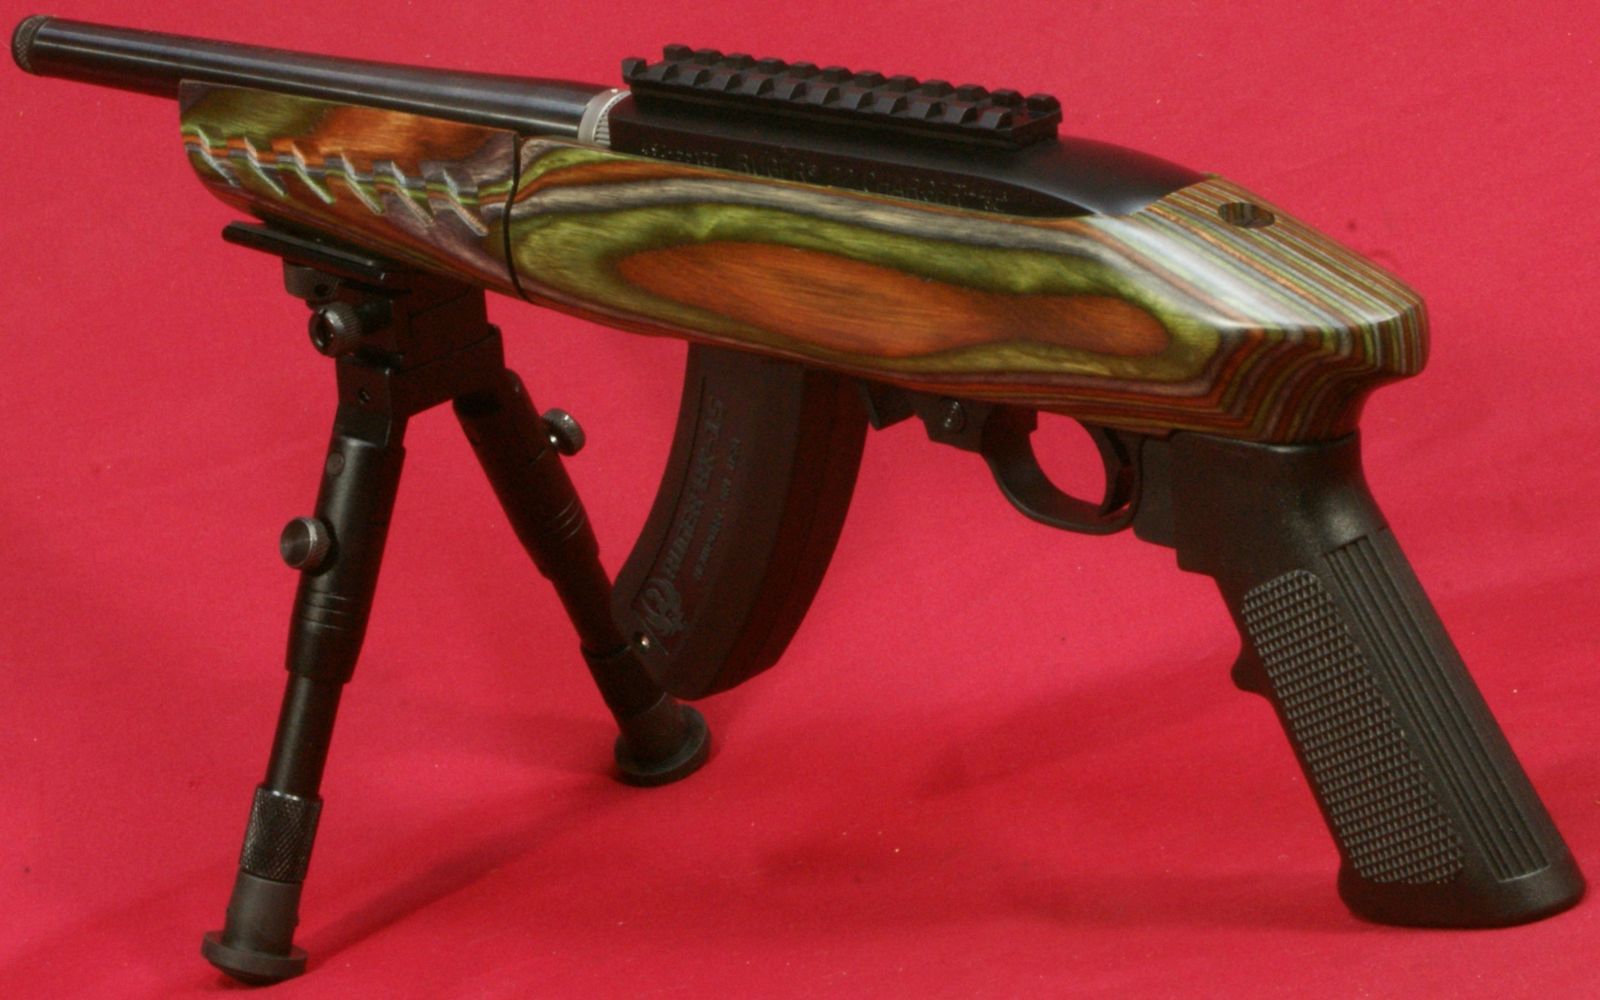
In this part of my new Ruger 22 Charger Review, I take a close look at the external and operational features of the new Ruger 22 Charger Pistol. The new 22 Charger is a unique pistol similar to the original version, yet this new version has an appearance of tactical-ness to it. For some reason I feel the AR style grip, receiver mounted rail and thread protector on the threaded barrel gives it a look which is more similar to tactical firearms. After studying the pistol closely for this review, I came to the opinion that Ruger making a truly tactical version of the Charger would be great next edition to their line of 22 Charger pistols and I hope to see one in the future.
Figure 1
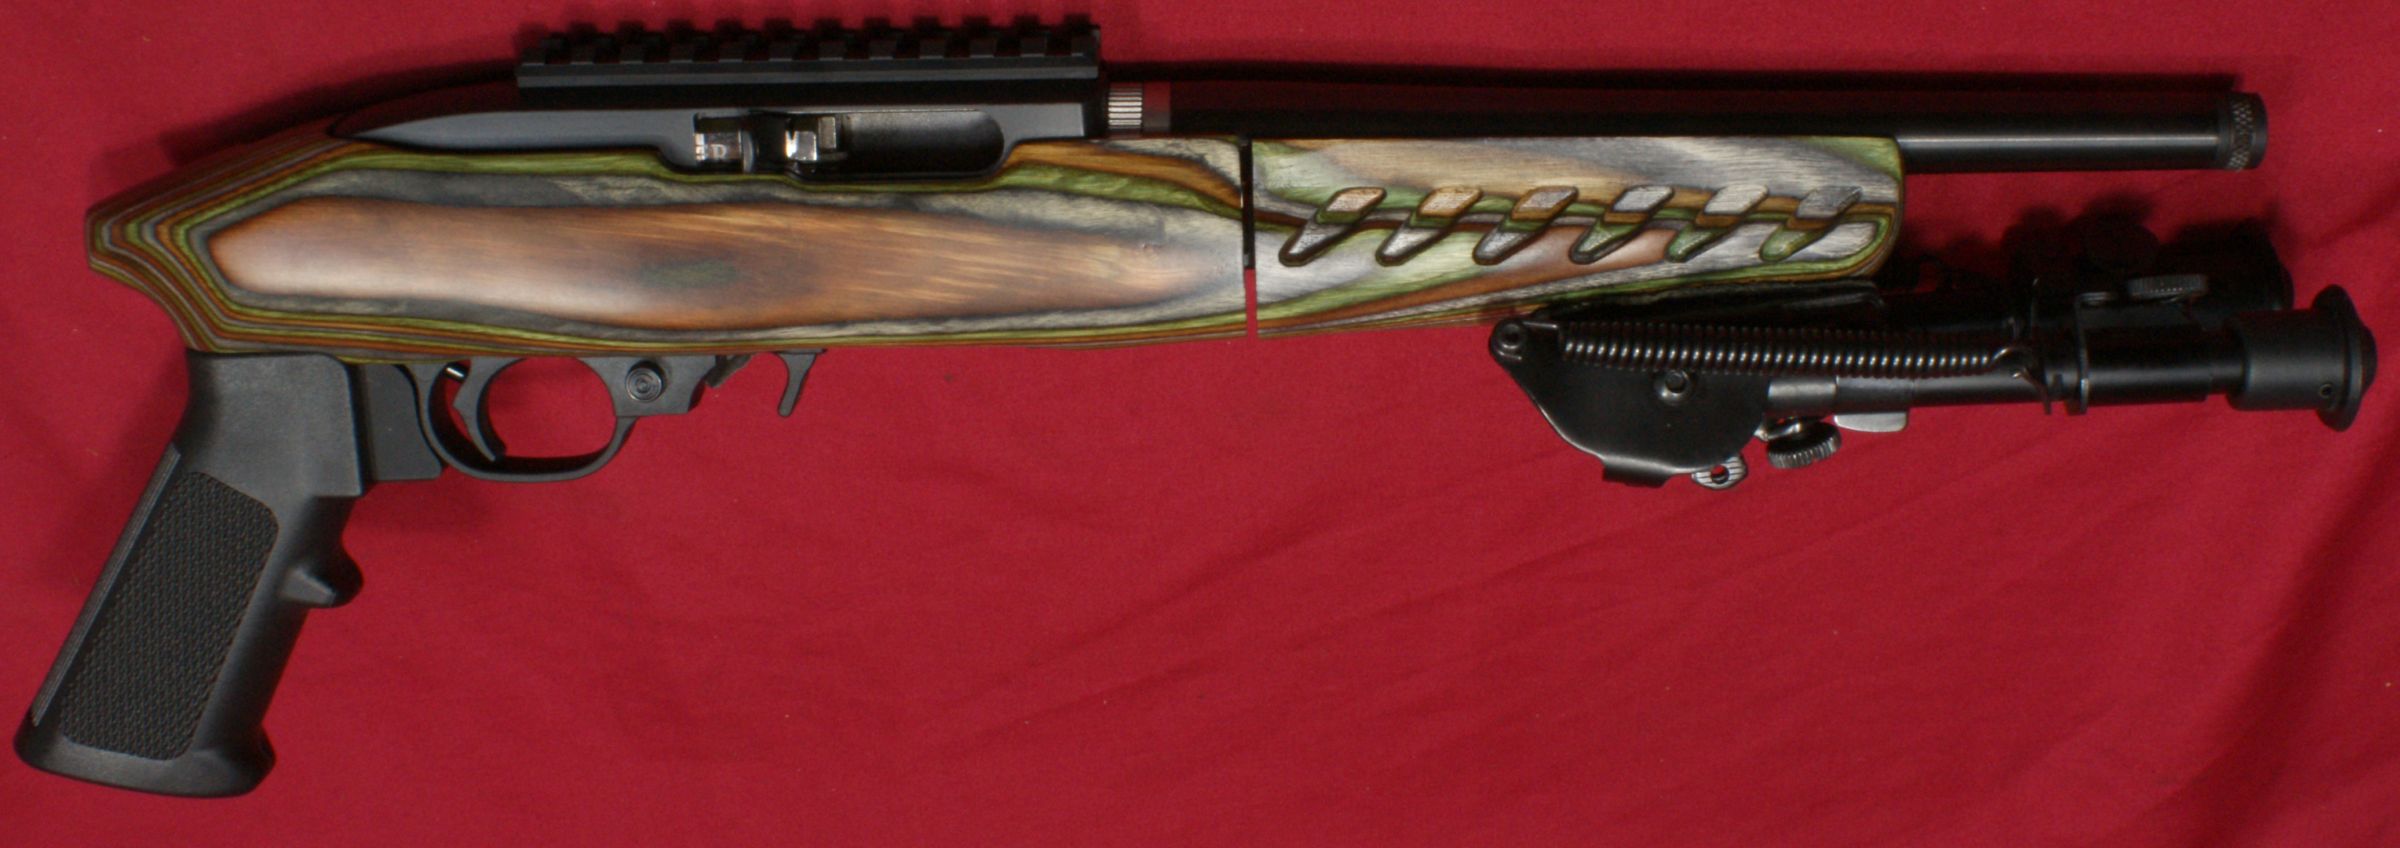
I'm a big fan of the laminated wood stocks and Ruger has done a nice job with the coloring on this Green Mountain Laminate version. If you look closely, you can see that the buttstock and forend were made from the same piece and then cut at the takedown joint.
Figure 2
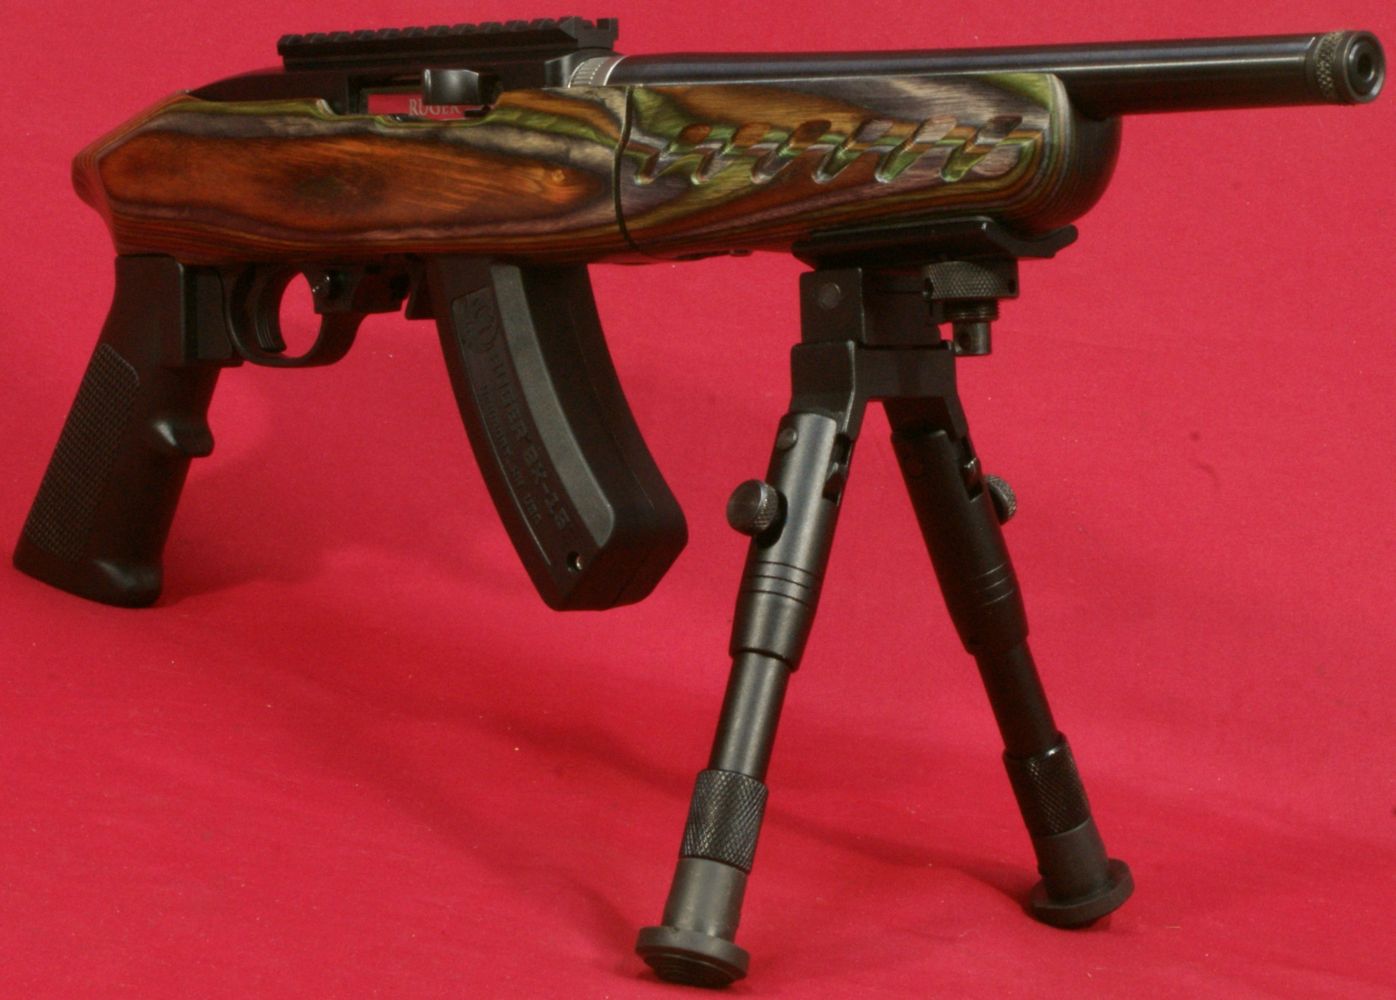
There is no doubt that you can see the reliable Ruger 10/22 foundation in this pistol and Ruger has integrated this feature into what I consider to be a unique shooting platform. I see the primary role of the 22 Charger as being a combination between a bench pistol and a overall fun plinking pistol. It is too large to easily carry on the hip and I would choose a rifle over a pistol when it comes to hunting, thus bench and plinking I feel is its greatest use.
Figure 3
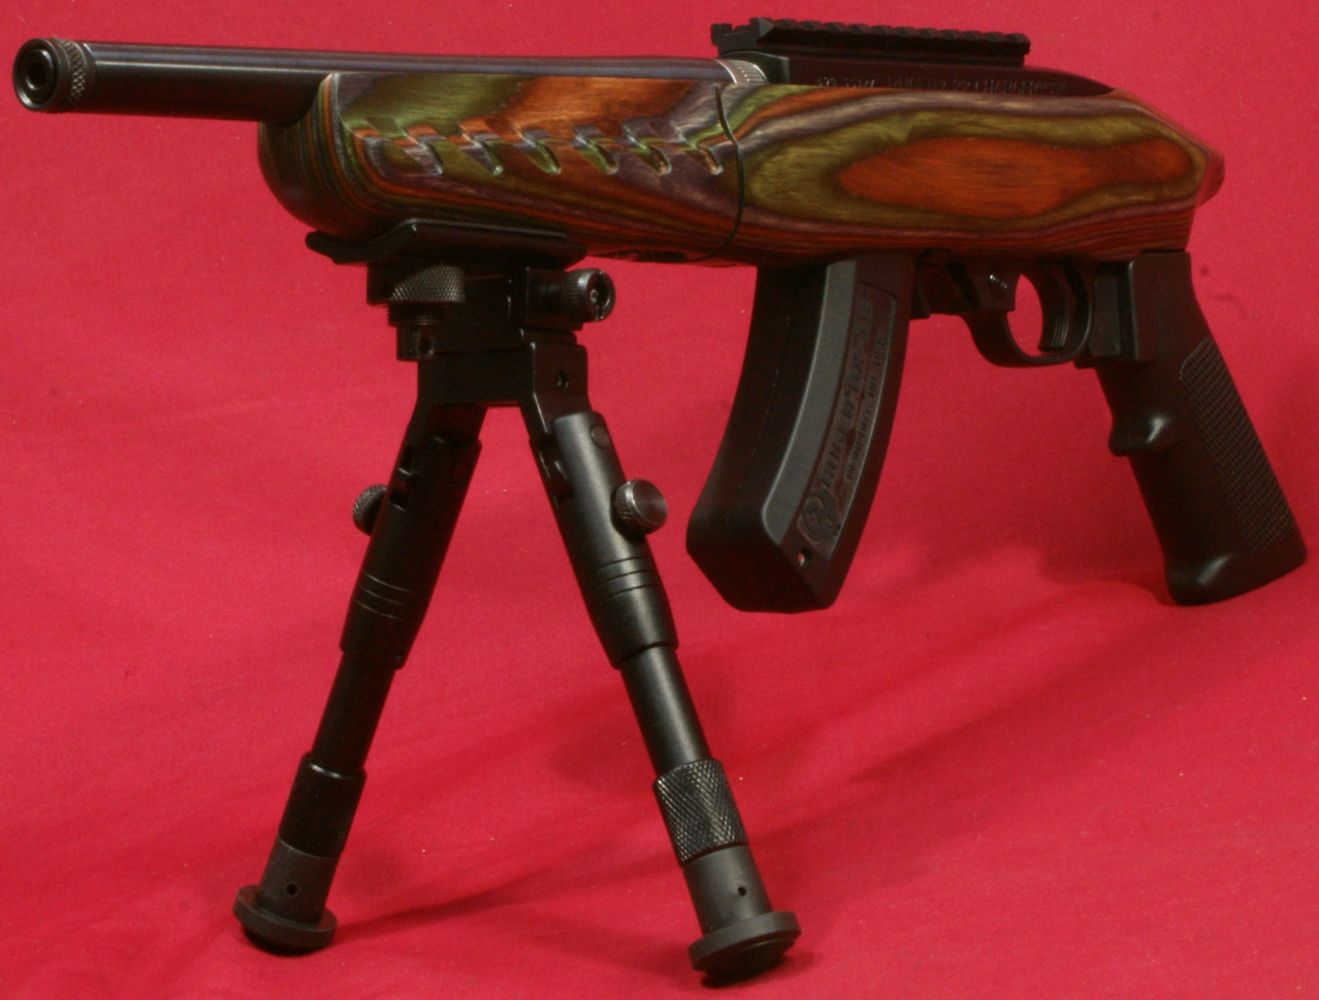
The bipod gives the 22 Charger quick bench capability and the 10/22 platform gives it the potential for various type of magazines up to 50-round drum magazines for versatility and some serious enjoyment.
Figure 4
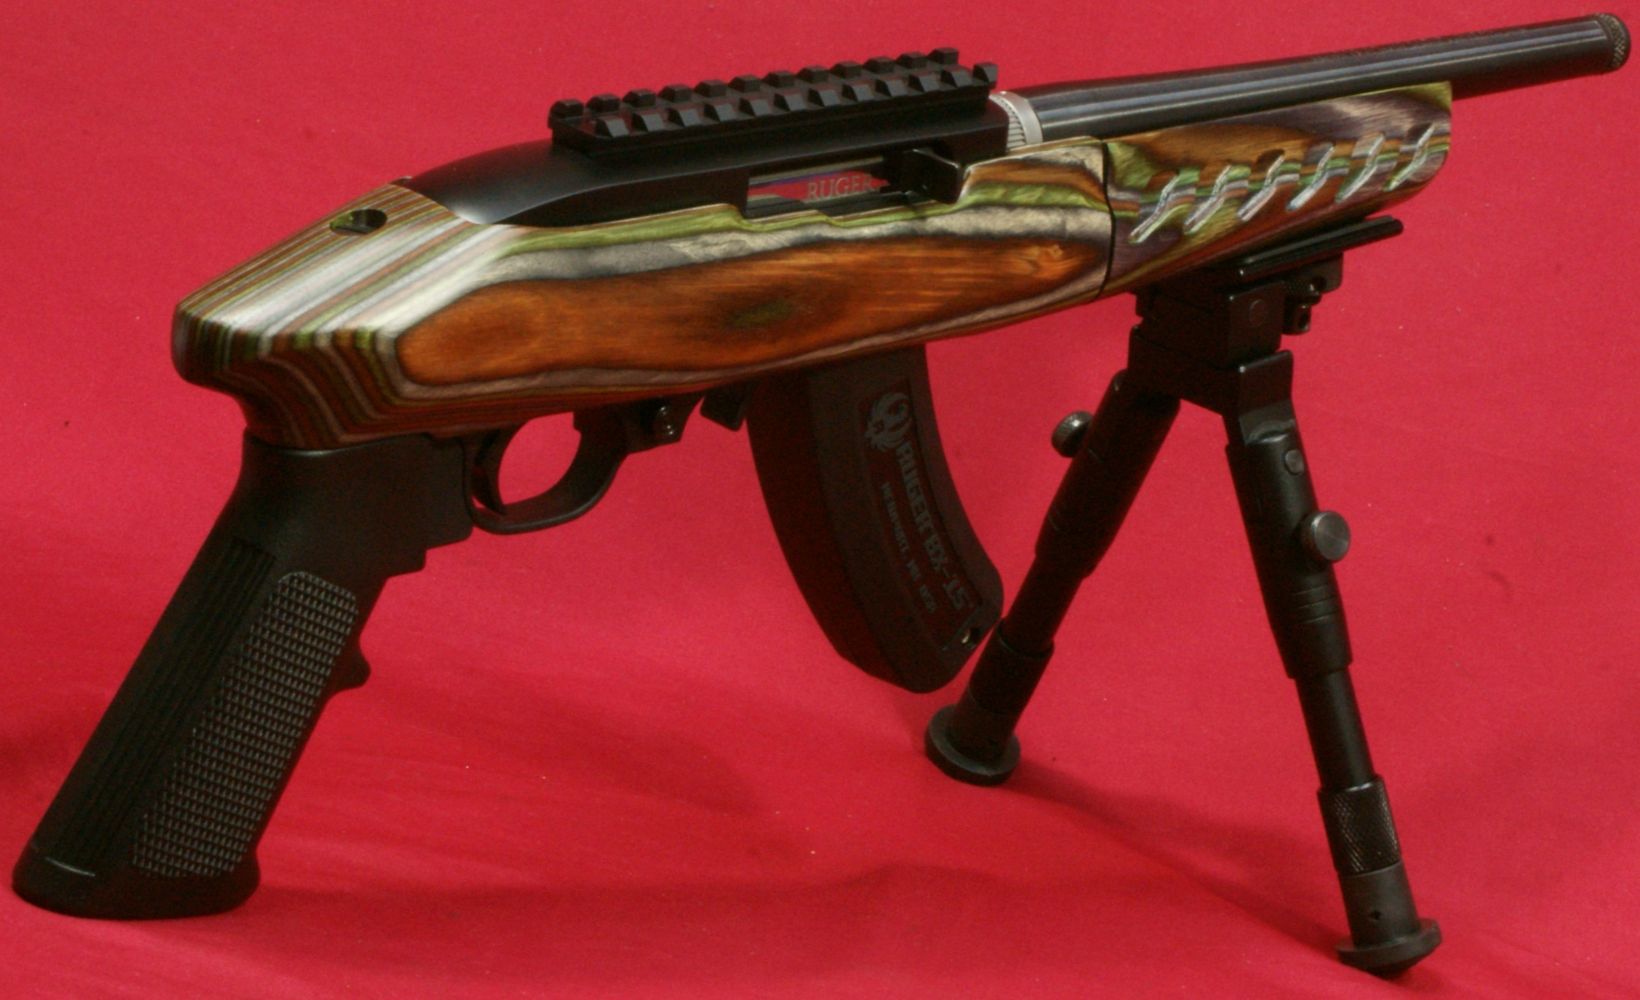
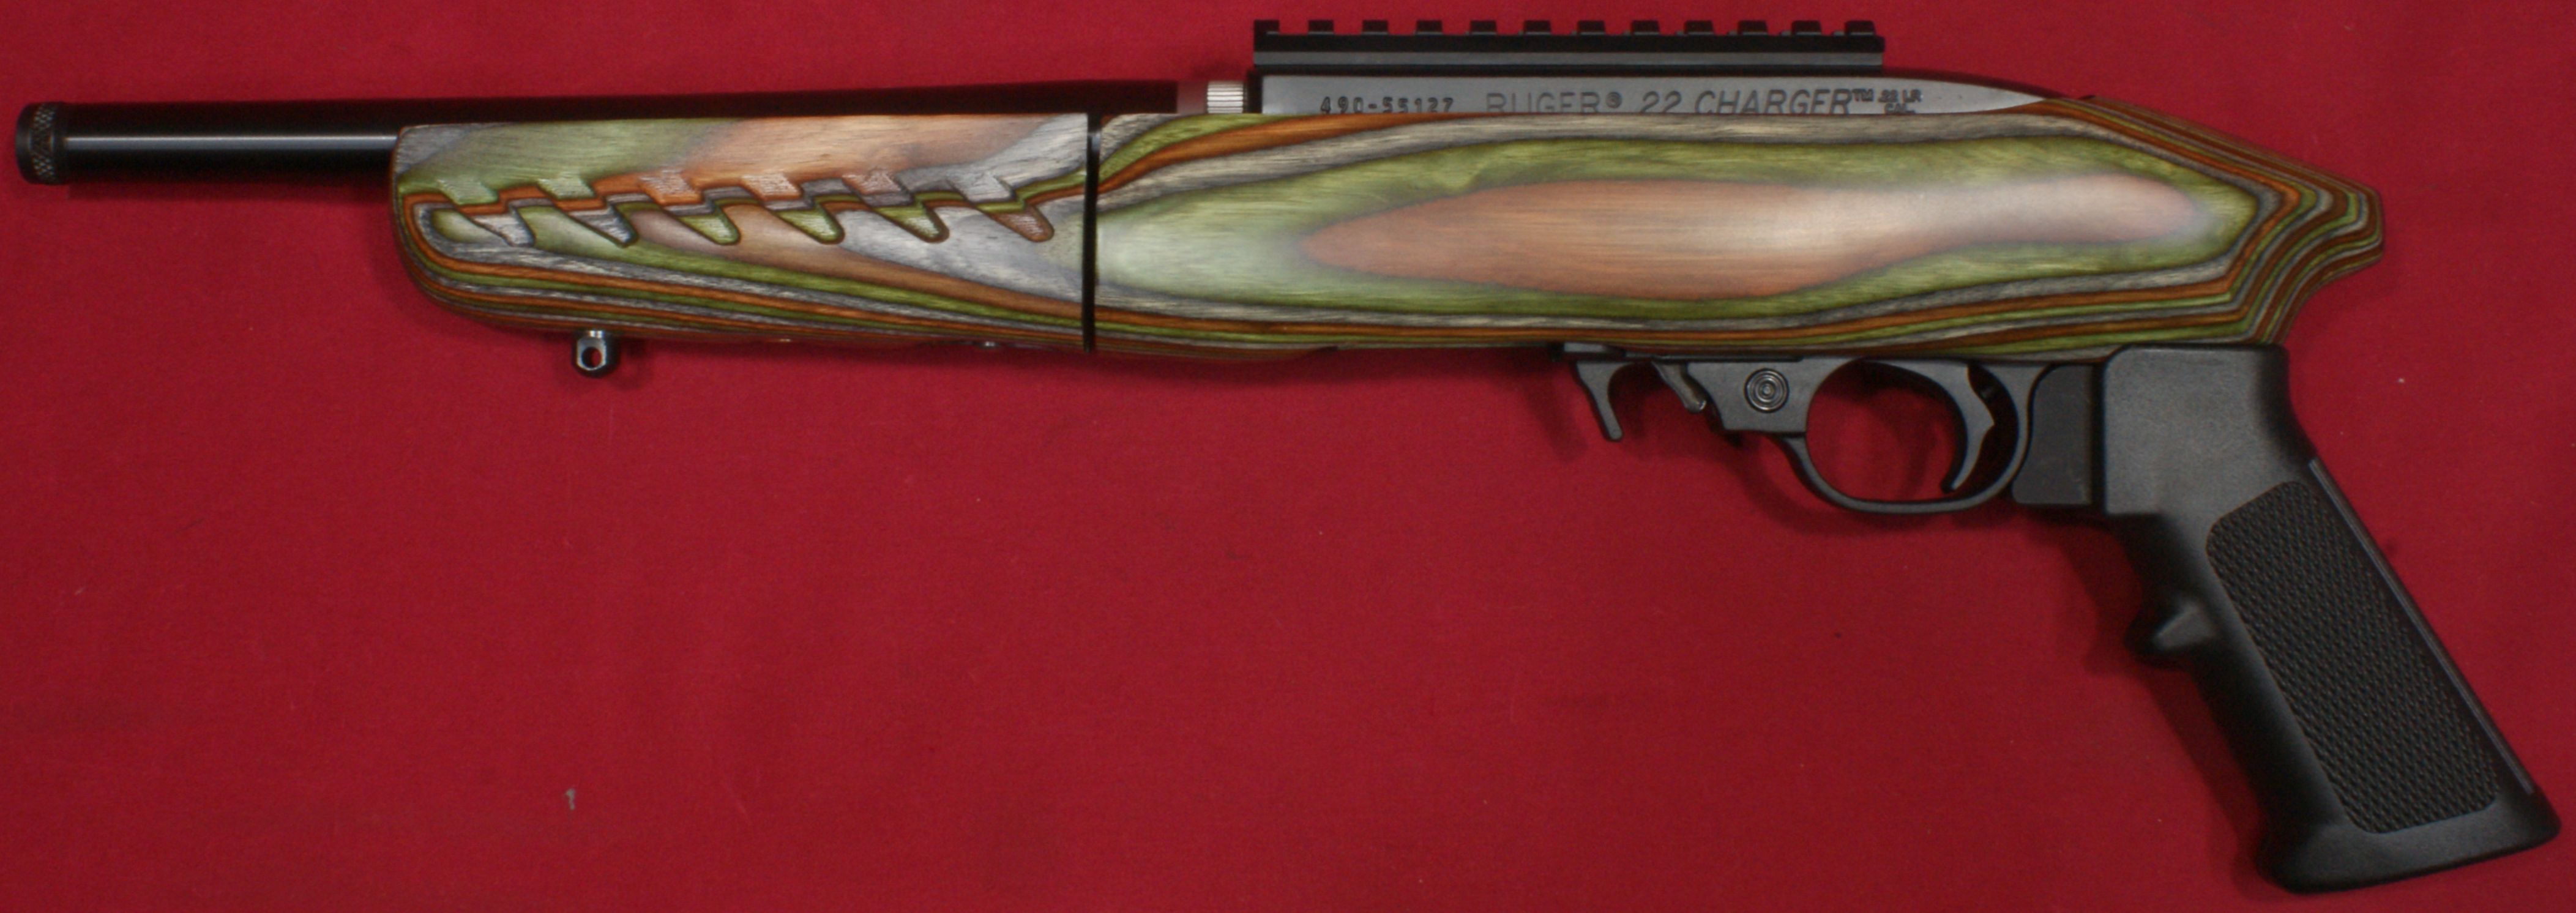
The 22 Charger measures about 18.6" in length parallel to the barrel and 1.93" in width across the buttstock.
Figure 5

The height is about 6.4" from the bottom of the grip to the top of the rail measured perpendicular to the barrel.
Figure 6
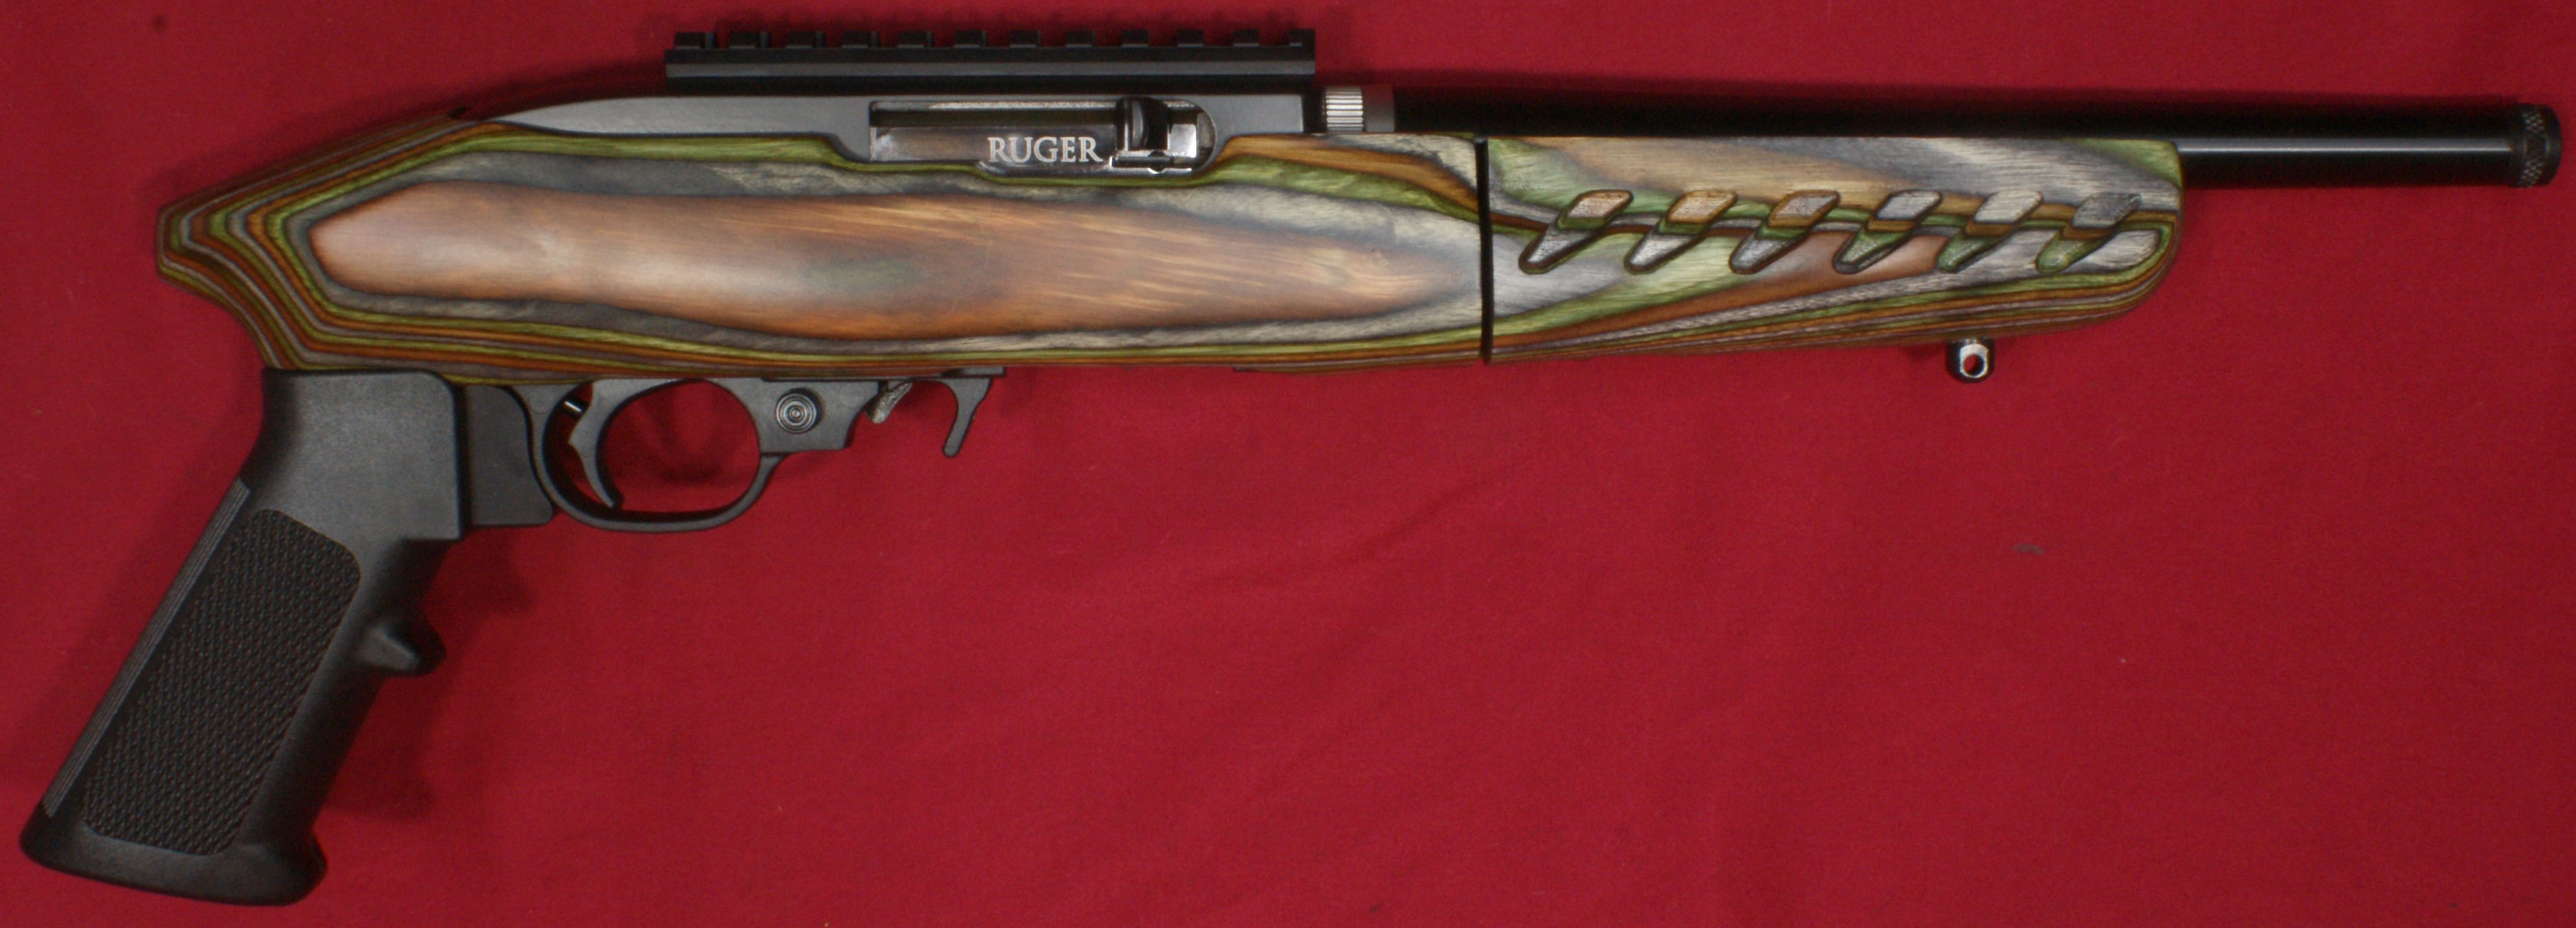
Figure 7

Figure 8
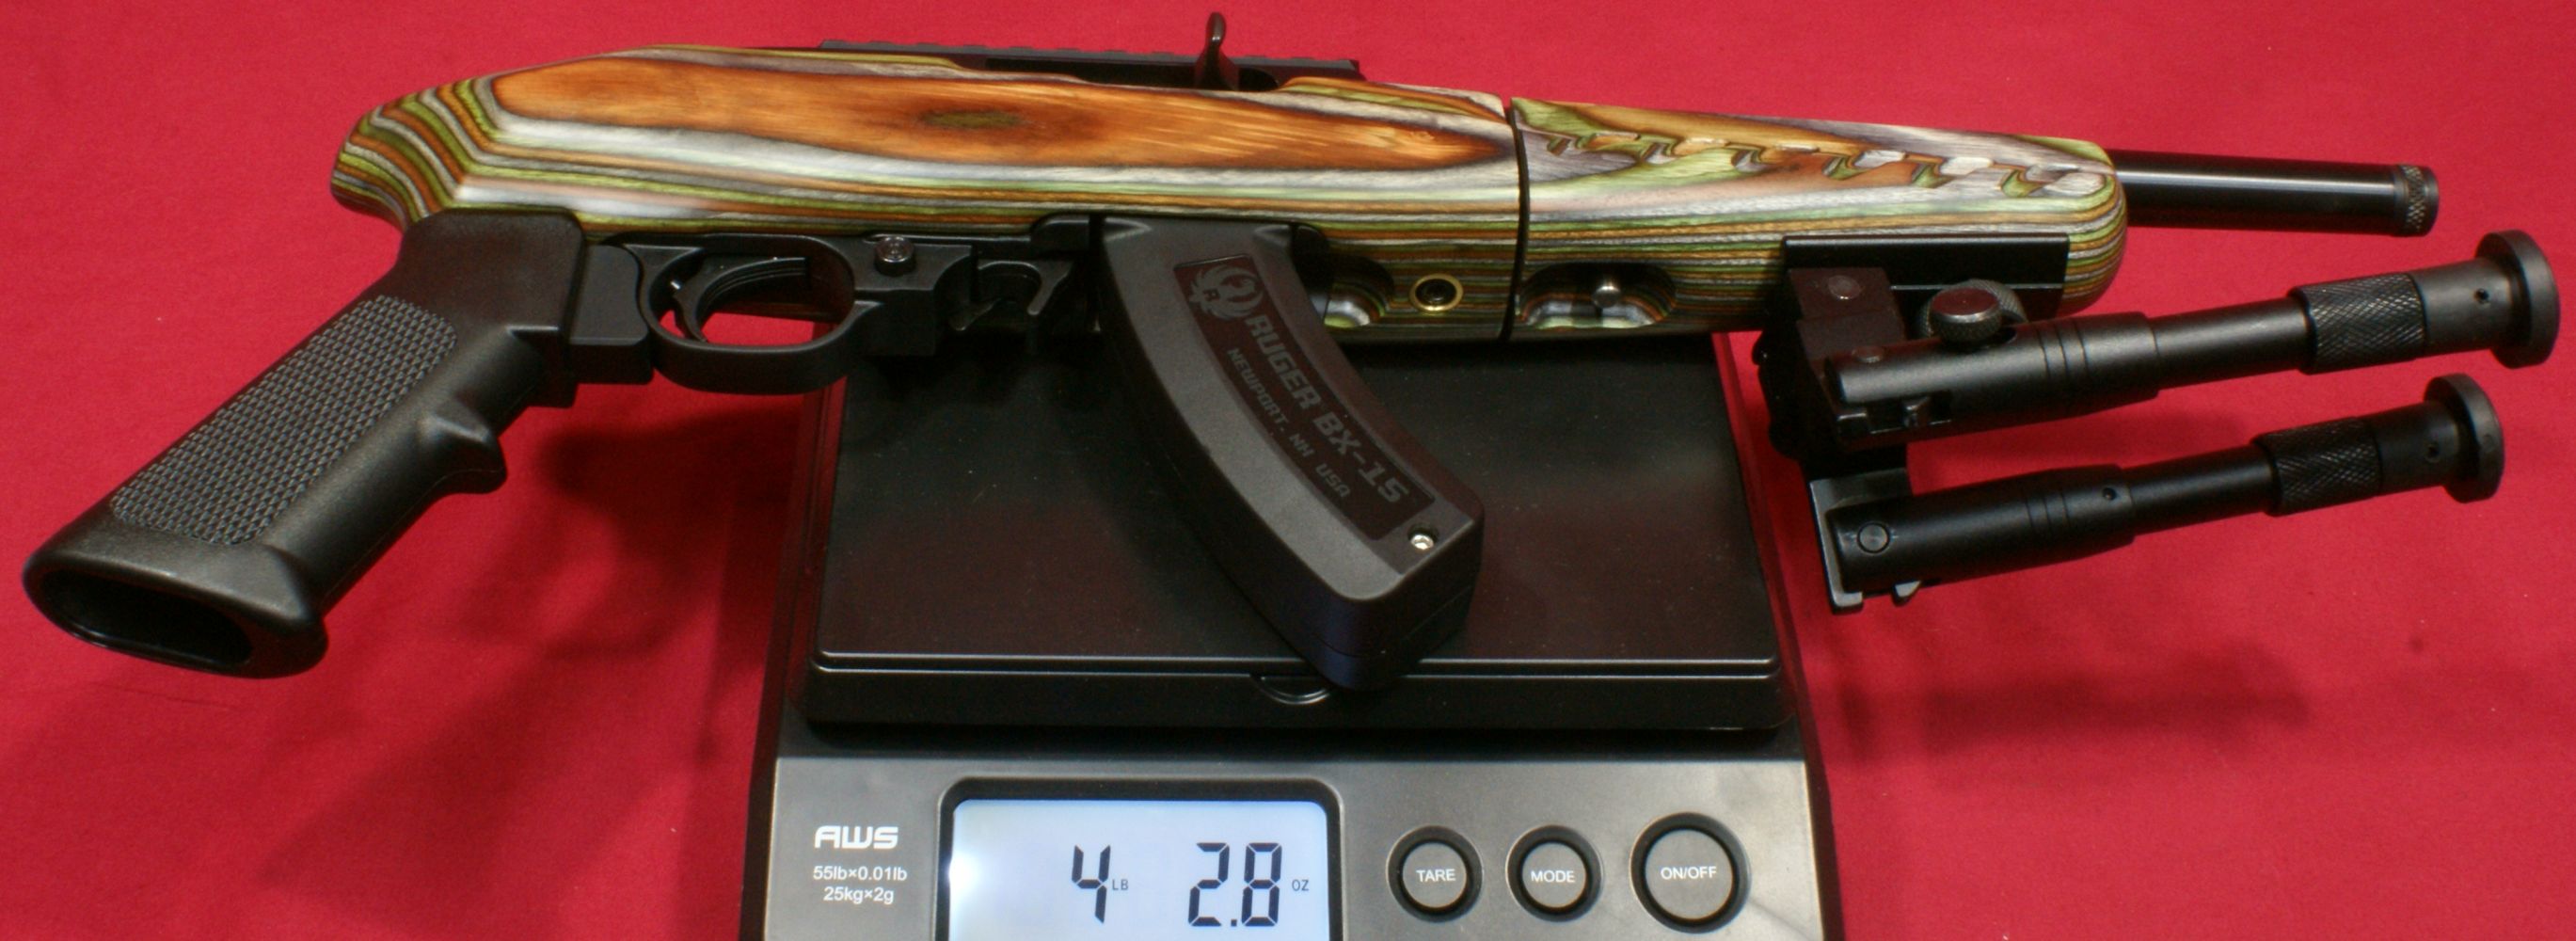
This takedown version weighed in at 3.24 pounds empty, with no optic, magazine or bipod.
Figure 9
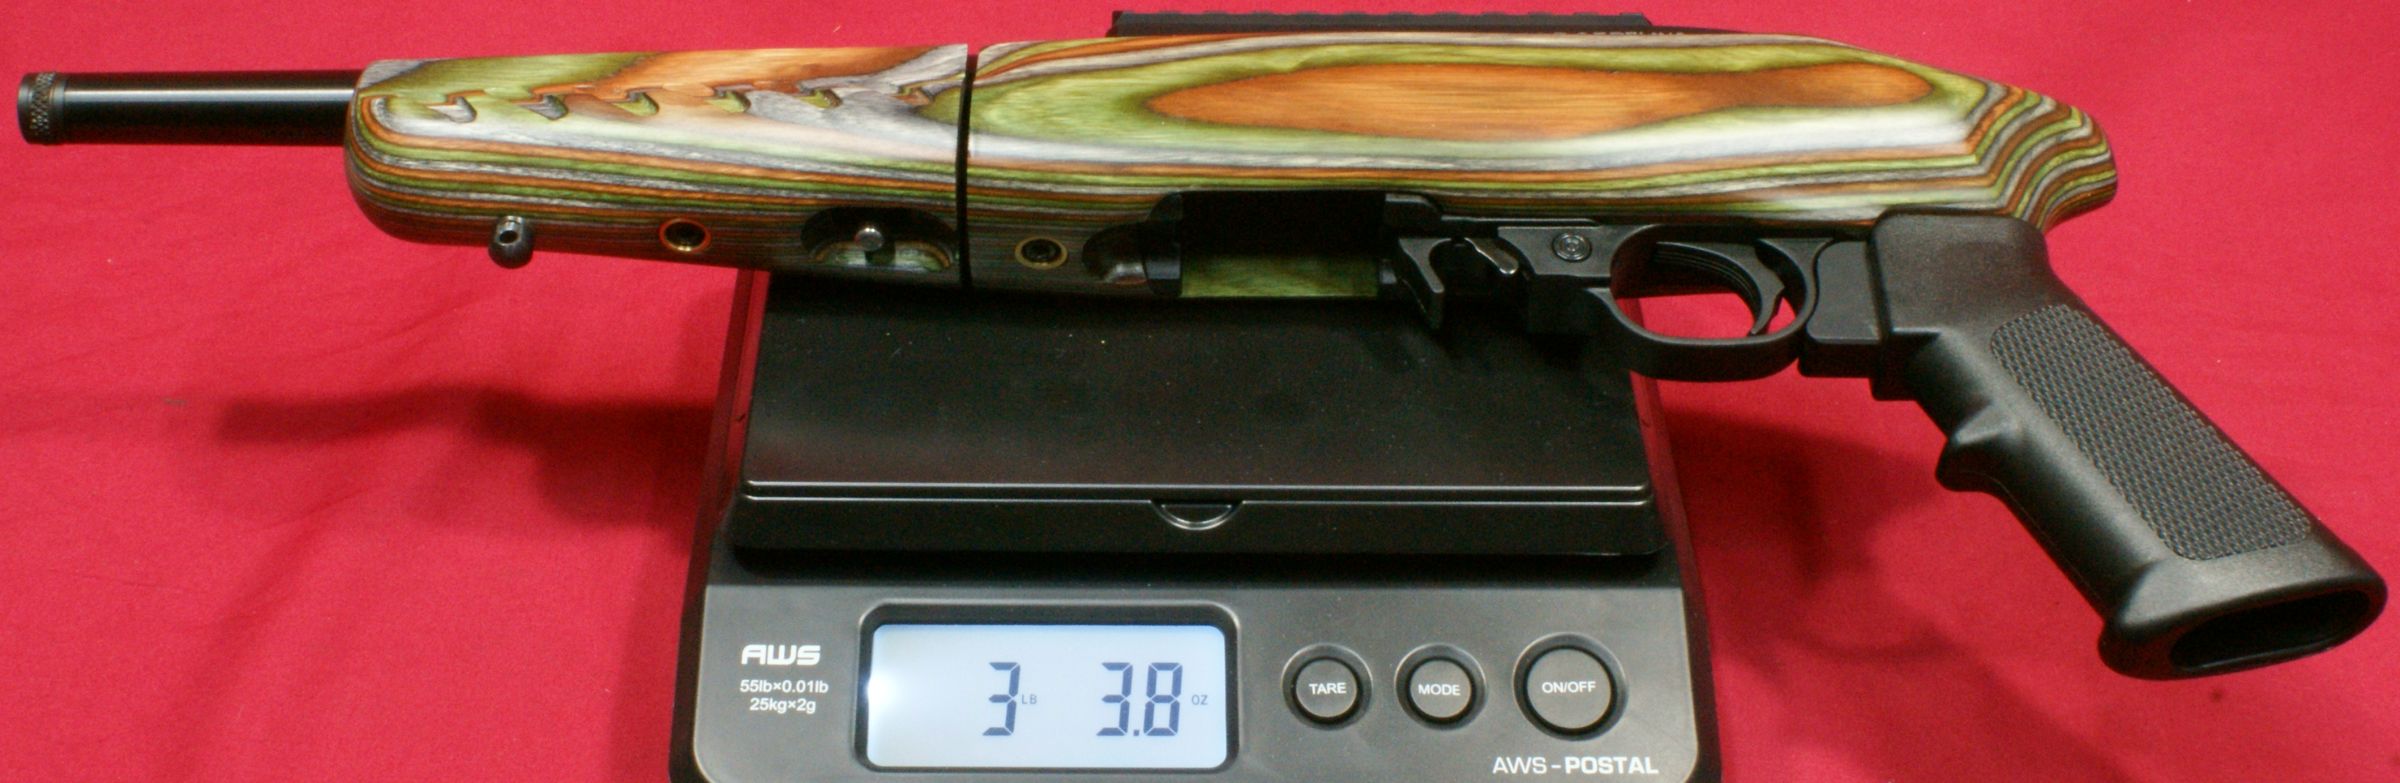
Adding the empty BX-15 magazine and bipod brings the pistols weight to 4.18 pounds. The non-takedown (Standard) version is about 0.1 pounds less.
Figure 10
The barrel comes in a blued finish. Ruger calls it a matte black, but I would say the finish is more between matte and gloss (maybe satin). The end of the barrel has a slight internal chamfer.
Figure 11
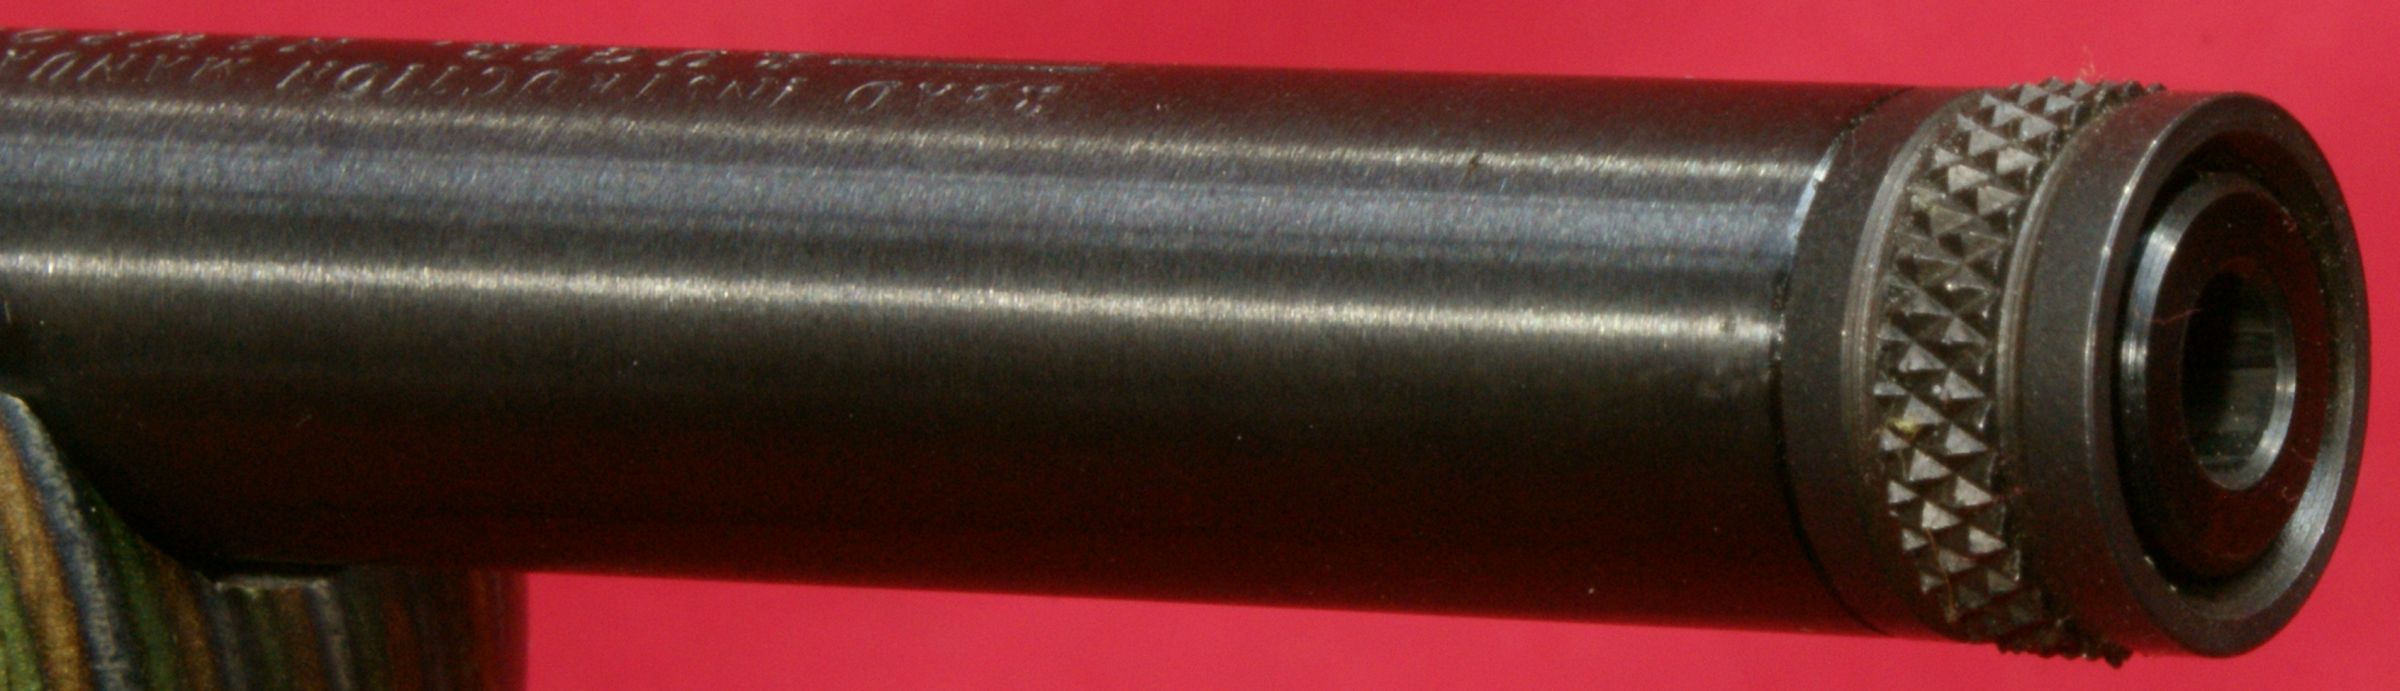
The end of the barrel also includes a threaded portion that is about 0.40" in length and has a 1/2"-28 thread which is standard for .22 caliber firearms. The barrel comes with a 6-groove 1:16" right hand twist which is standard for the Ruger 10/22 rifles.
Figure 12

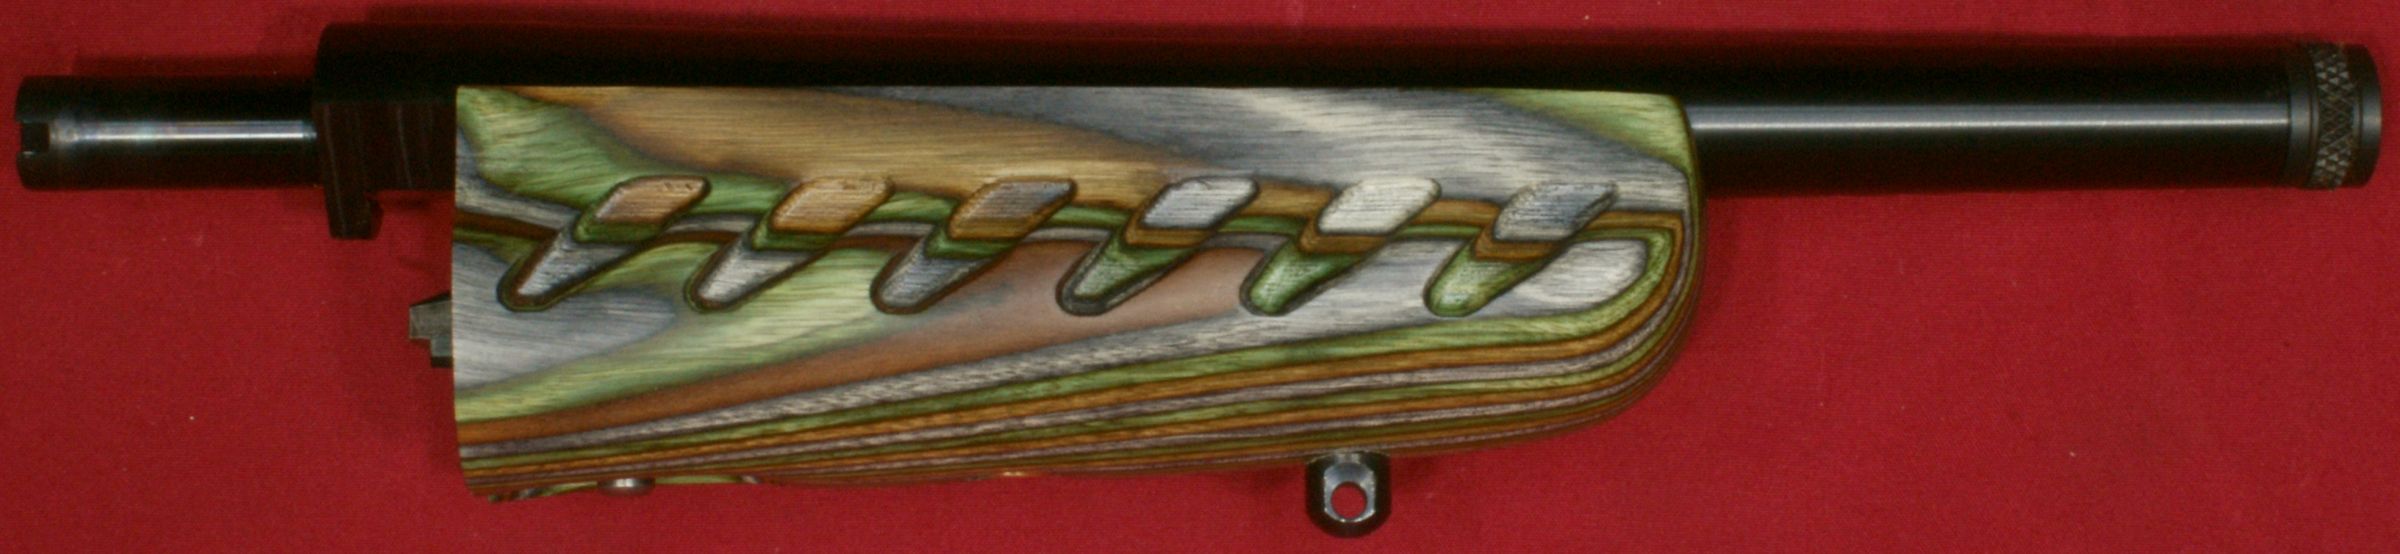
The next several photos show the barrel and forend assembly. The cold hammer forged barrel measured 10.00" in length. The top of the barrel has the standard warning "READ INSTRUCTON MANUAL BEFRE USING FIREARM" along with the Ruger name and manufacturing location "--- RUGER, NEWPORT, NH USA ---."
Figure 13

The forend includes a sling swivel stud.
Figure 14
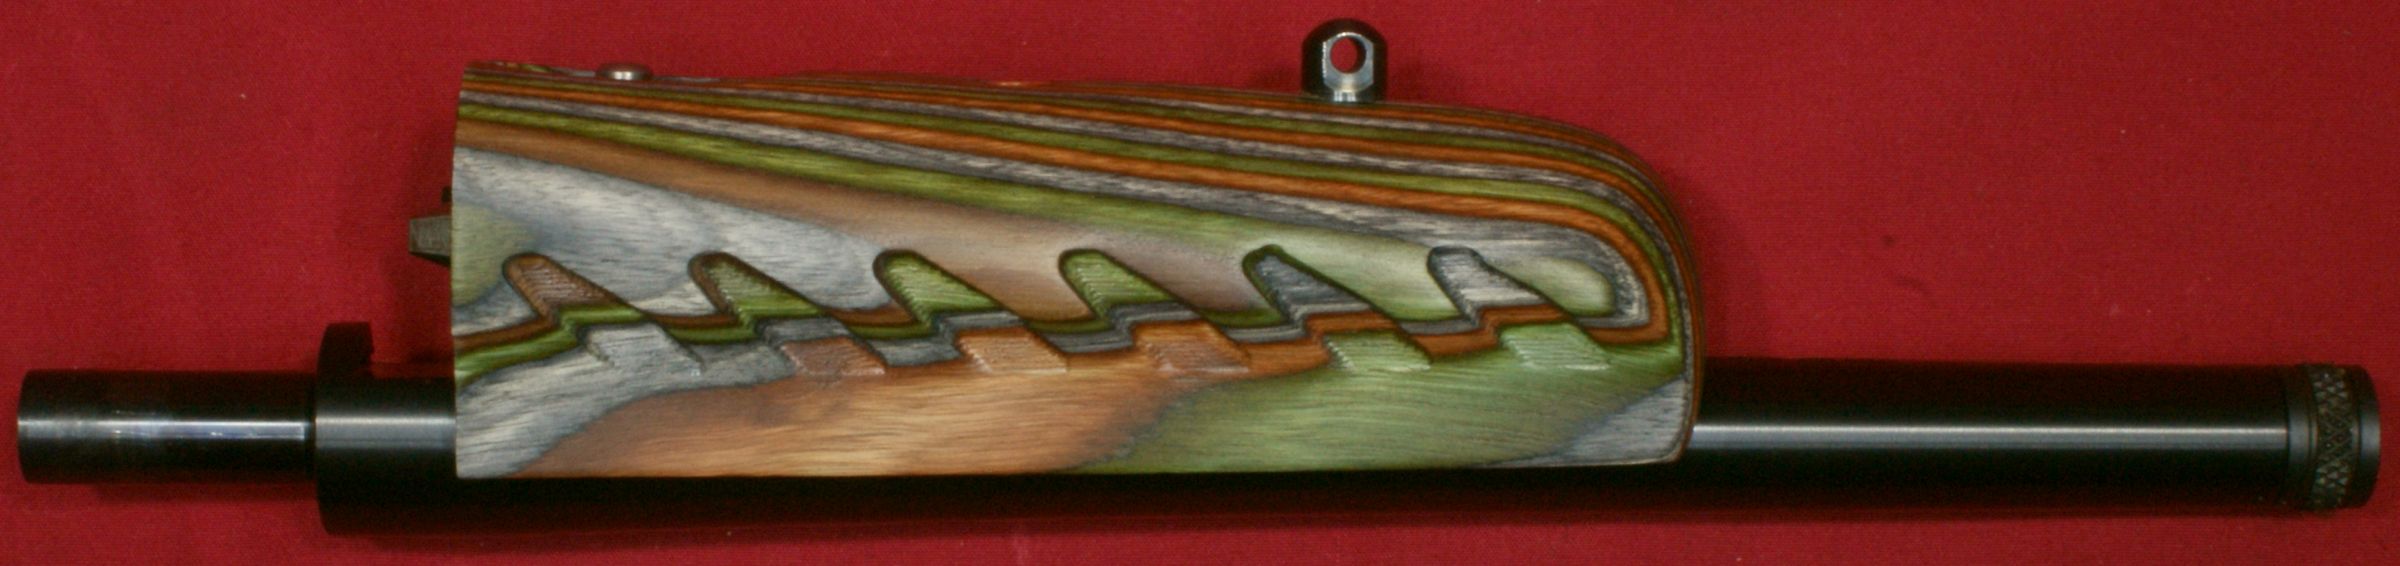
The laminated forend is attached to the barrel assembly with a single screw. The hole in the forend for the screw includes a brass bushing which helps protect the wood and also allows for a the ability to capture the screw when loosened for removing the forend from the barrel assembly. The takedown lever can also be seen on the rear lower portion of the forend. On the lower surface of the barrel were the letters "FOR USE WITH CH". Removing the forend revealed this to read "FOR USE WITH CHARGER PISTOLS ONLY."
Figure 15

The forend includes 6 grooves on each side for a combination of aesthetics and textured surface for gripping. I feel the aesthetics to be the most significant aspect of these two features. On this Takedown model, the barrel is clearly not fully free floated. After making some adjustments, it was floated to the block on the bottom of the barrel (front 5.8" of length). I'm not sure on the Standard (non Takedown) model.
Figure 16
These next photos show the buttstock and receiver assembly. The top of the receiver included a pre-mounted 4.6" 11-slot Picatinny rail which is secured with 4 screws. I checked torque on these screws and it was less than 10 in-lbs on each. I removed the screws and rail and then later reinstalled the rail using purple (low strength) Loctite on the screws and torqued them all to 18 in-lbs. Be extremely careful when torqueing these screws because they are threaded into an aluminum receiver and over torqueing could result in stripped threads in the receiver. You should always check your mount screws on any firearm before you mount your optics.
Figure 17
The receiver assembly sits low in the laminated stock and Ruger has done a nice job integrating the AR style pistol grip attachment into the rear of the stock. The trigger housing includes a cross bolt safety located forward of the trigger along with an extended magazine latch which is standard on current 10/22 platforms. The trigger pull measured 4.3 pounds based on an average of 10 pulls using a Lyman Digital Trigger Pull Scale. The trigger seemed to have a slight amount of creep and then broke crisply.
Figure 18
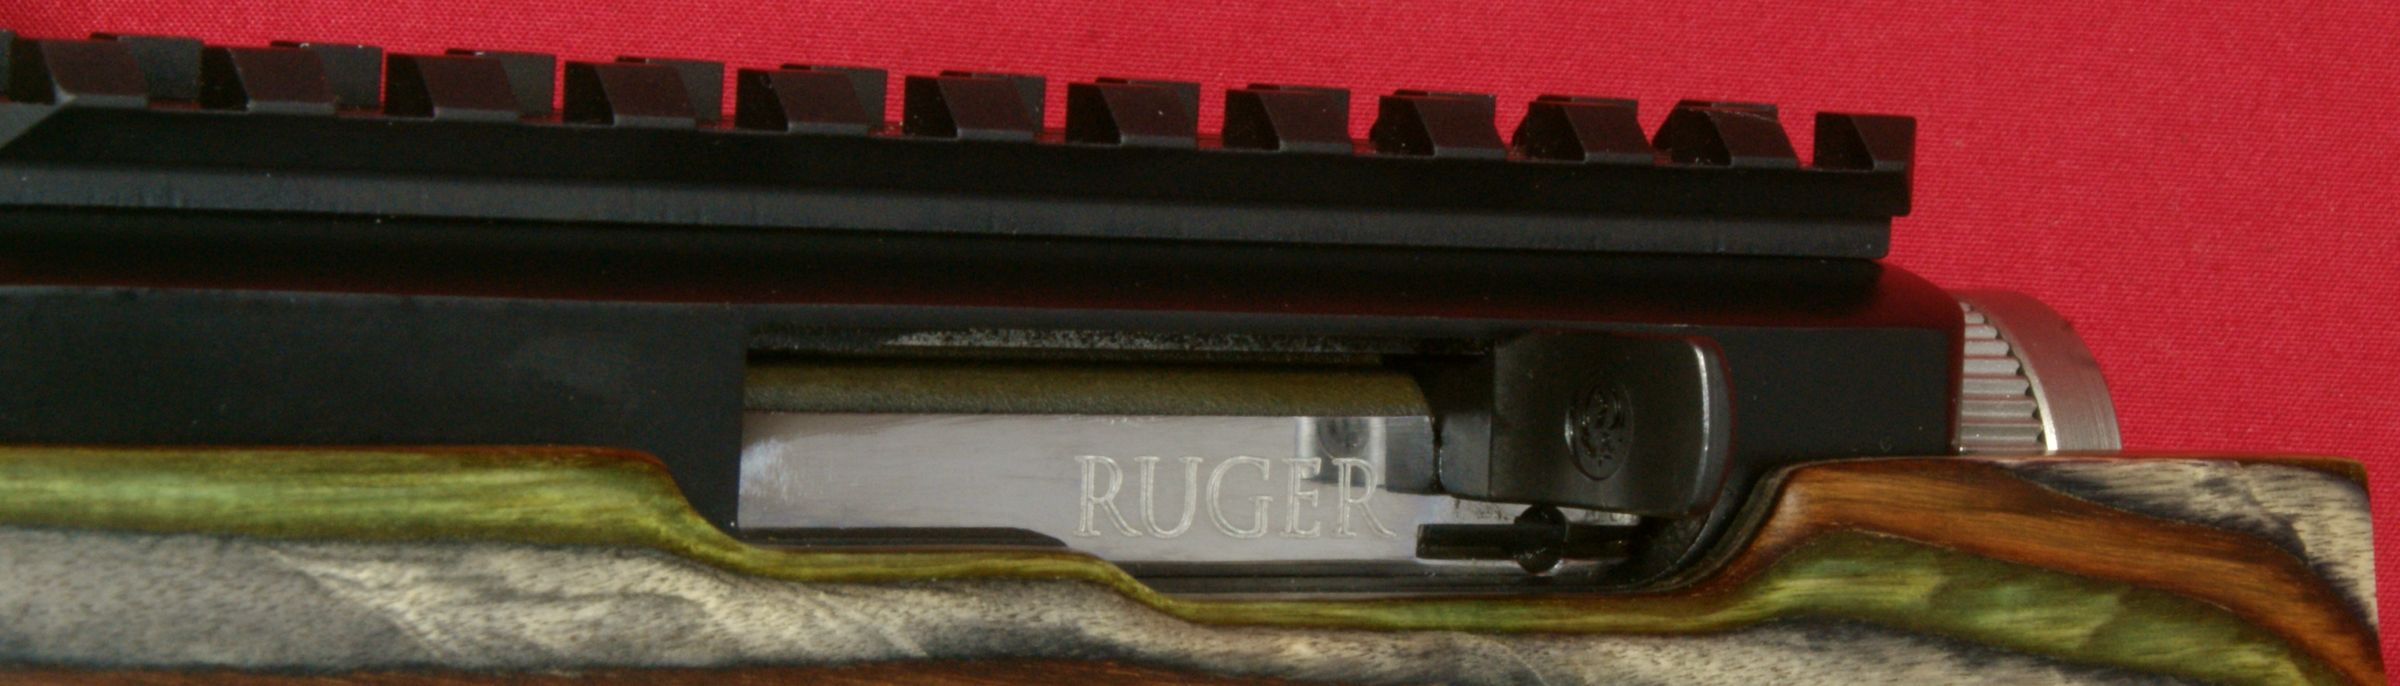
The portion of the stainless steel bolt that is visible had a polished surface with "RUGER" engraved into the surface. The cocking handle also has the Ruger logo molded into the rear surface.
Figure 19
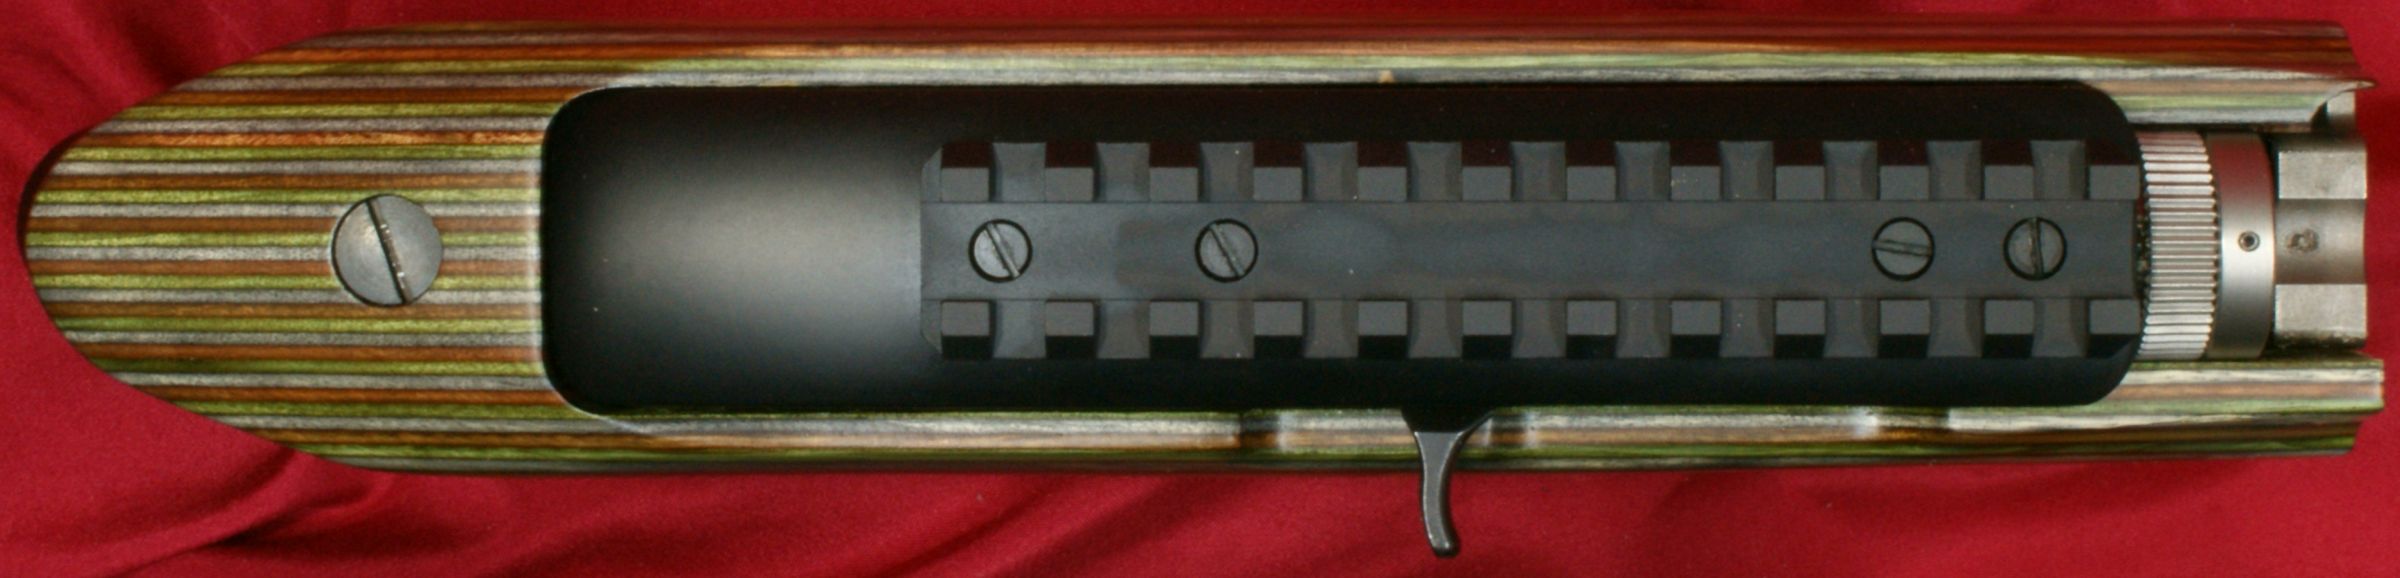
Except for the pistol grip, looking at the bottom of the receiver area looks like nearly any other 10/22. The receiver is held in place with a single bolt forward of the magazine well. The rear of the trigger housing nests under a ledge in the stock which allows this single bolt mounting option. Just like the forend, the hole in the stock for the bolt includes a brass bushing which helps protect the wood and also allows for the ability to capture the screw when loosened for removing the receiver.
Figure 20

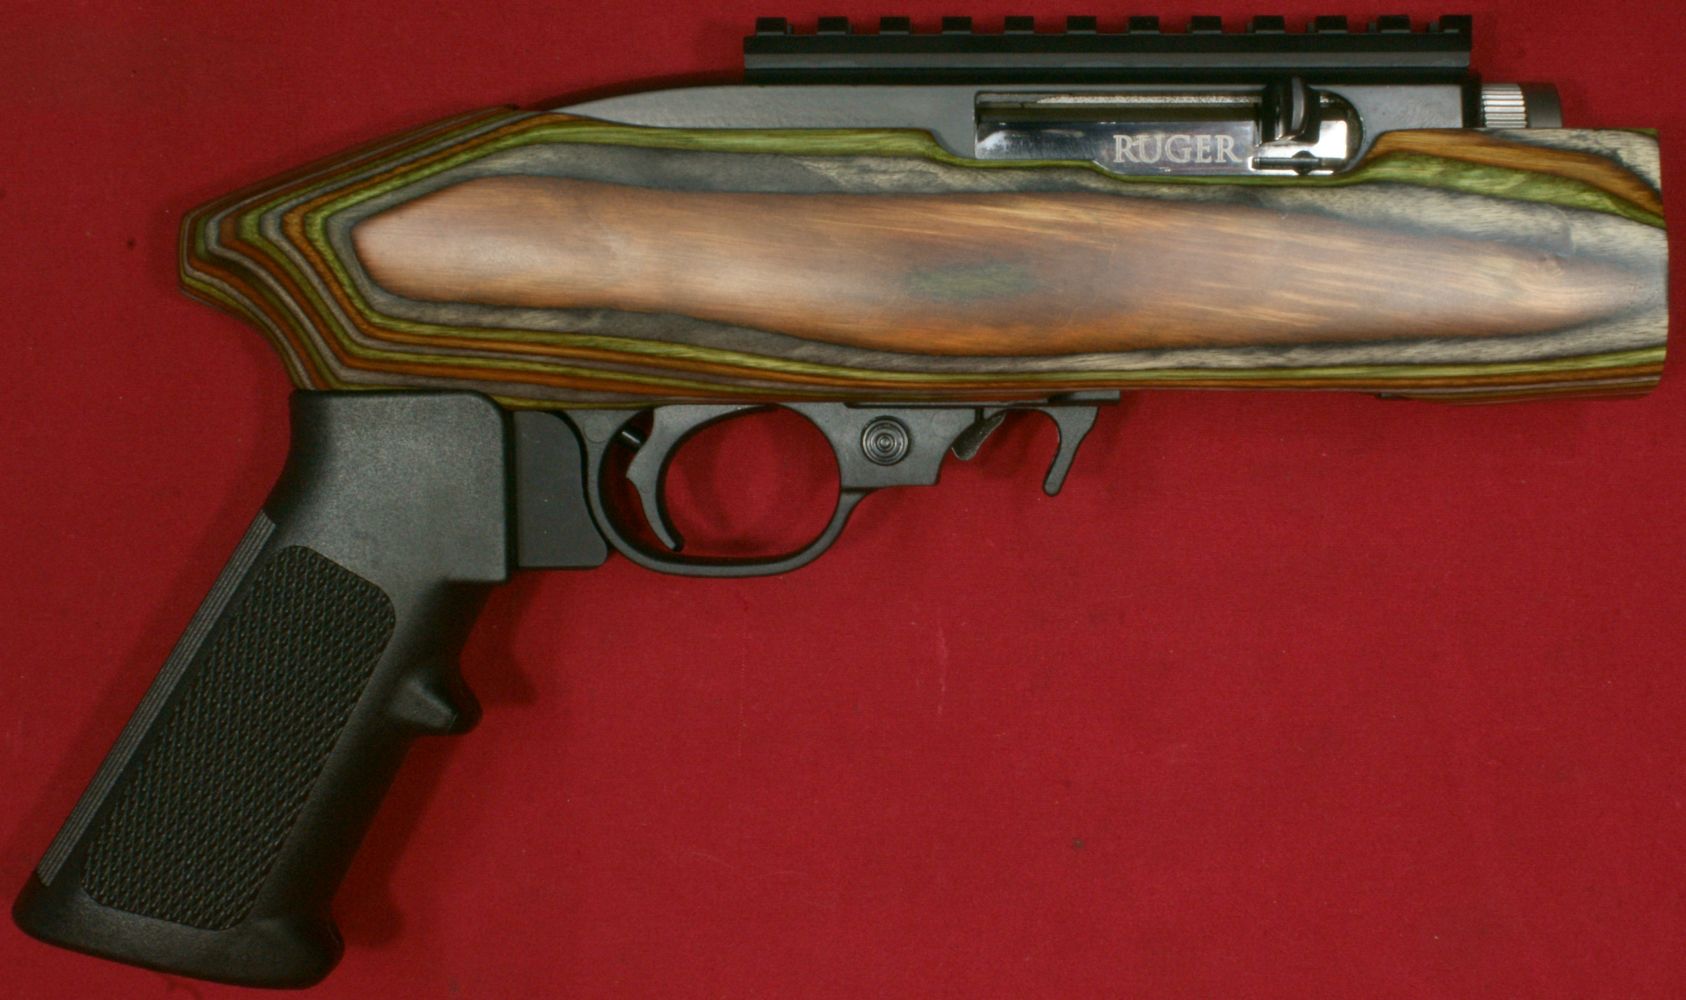
When looking at the left side of the pistol, the aluminum painted receiver has an appearance that it may be mounted lower in the laminated stock than originally intended because the "RUGER®" name and "22 CHARGER™" model seem to sit very low with the bottom of the letters being covered up slightly by the wood. Later I found the stock bolts to be slightly long, so this makes me think the pocket inside the stock may have been formed too low.
Figure 21
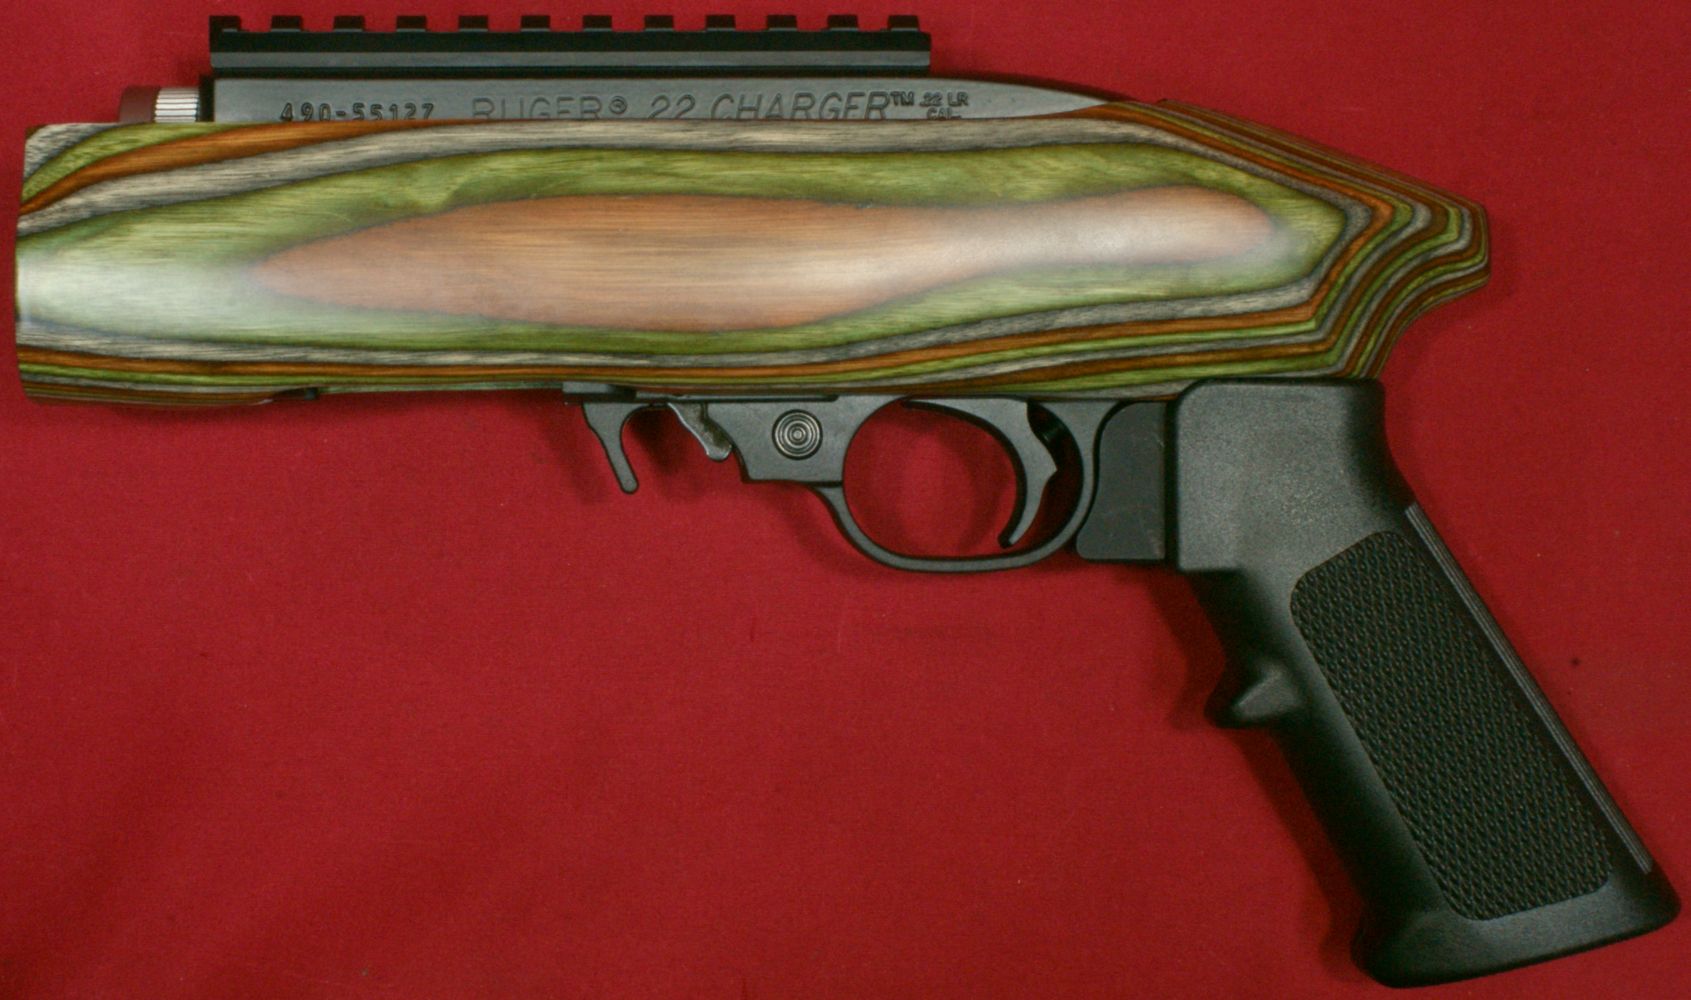
Also on the left side of the receiver is the serial number and caliber "22LR CAL.". Ruger states very clearly in their Instruction Manual that you should use "only the .22 Caliber Long Rifle rimfire cartridge, standard, high velocity, or hyper-velocity manufactured to U.S. industry standards." Ruger also states "Do not use .22 short, .22 Long, .22 Shot, or .22 cartridges loaded with blunt nose, sharp-shouldered, or explosive bullets."
Figure 22

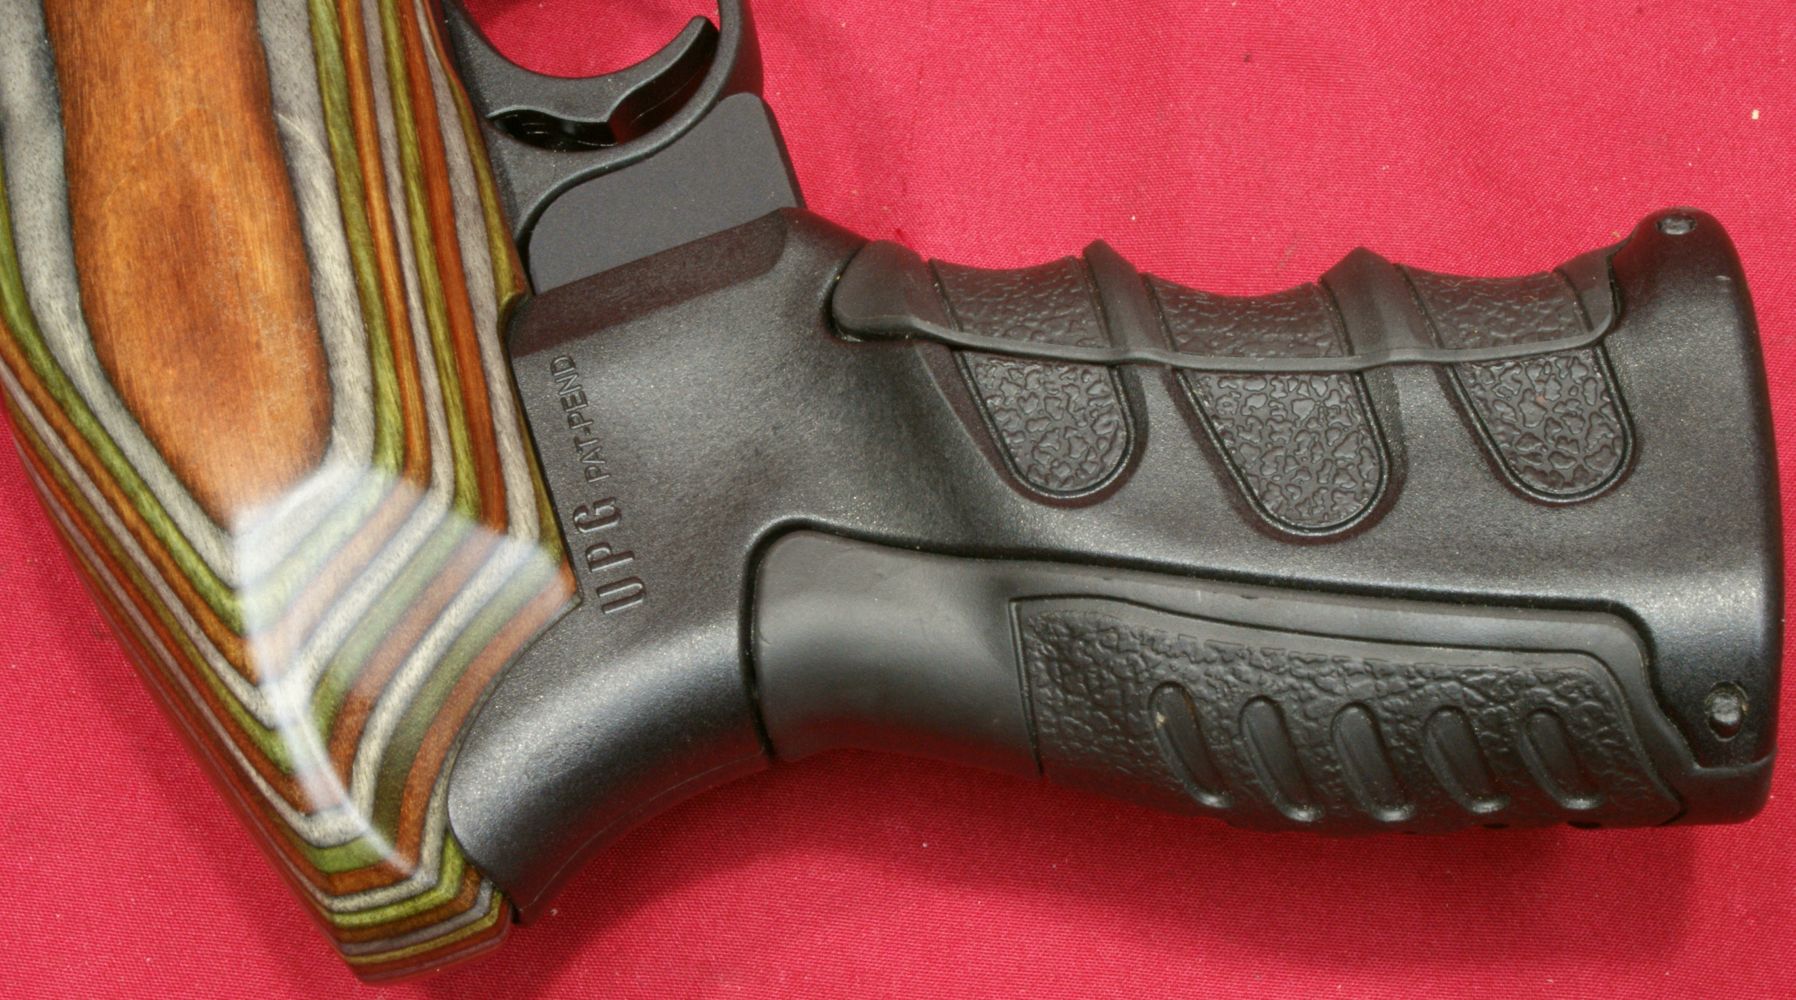
Since the A2 style pistol grip that comes with the Charger doesn't have a beavertail and since this is a popular grip configuration for aftermarket grips, I wanted to see how the shape of the stock would work with various beavertail styled grips. I had several on hand and the best fit was with the CAA Model UPG16 Grip as shown below.
Figure 23
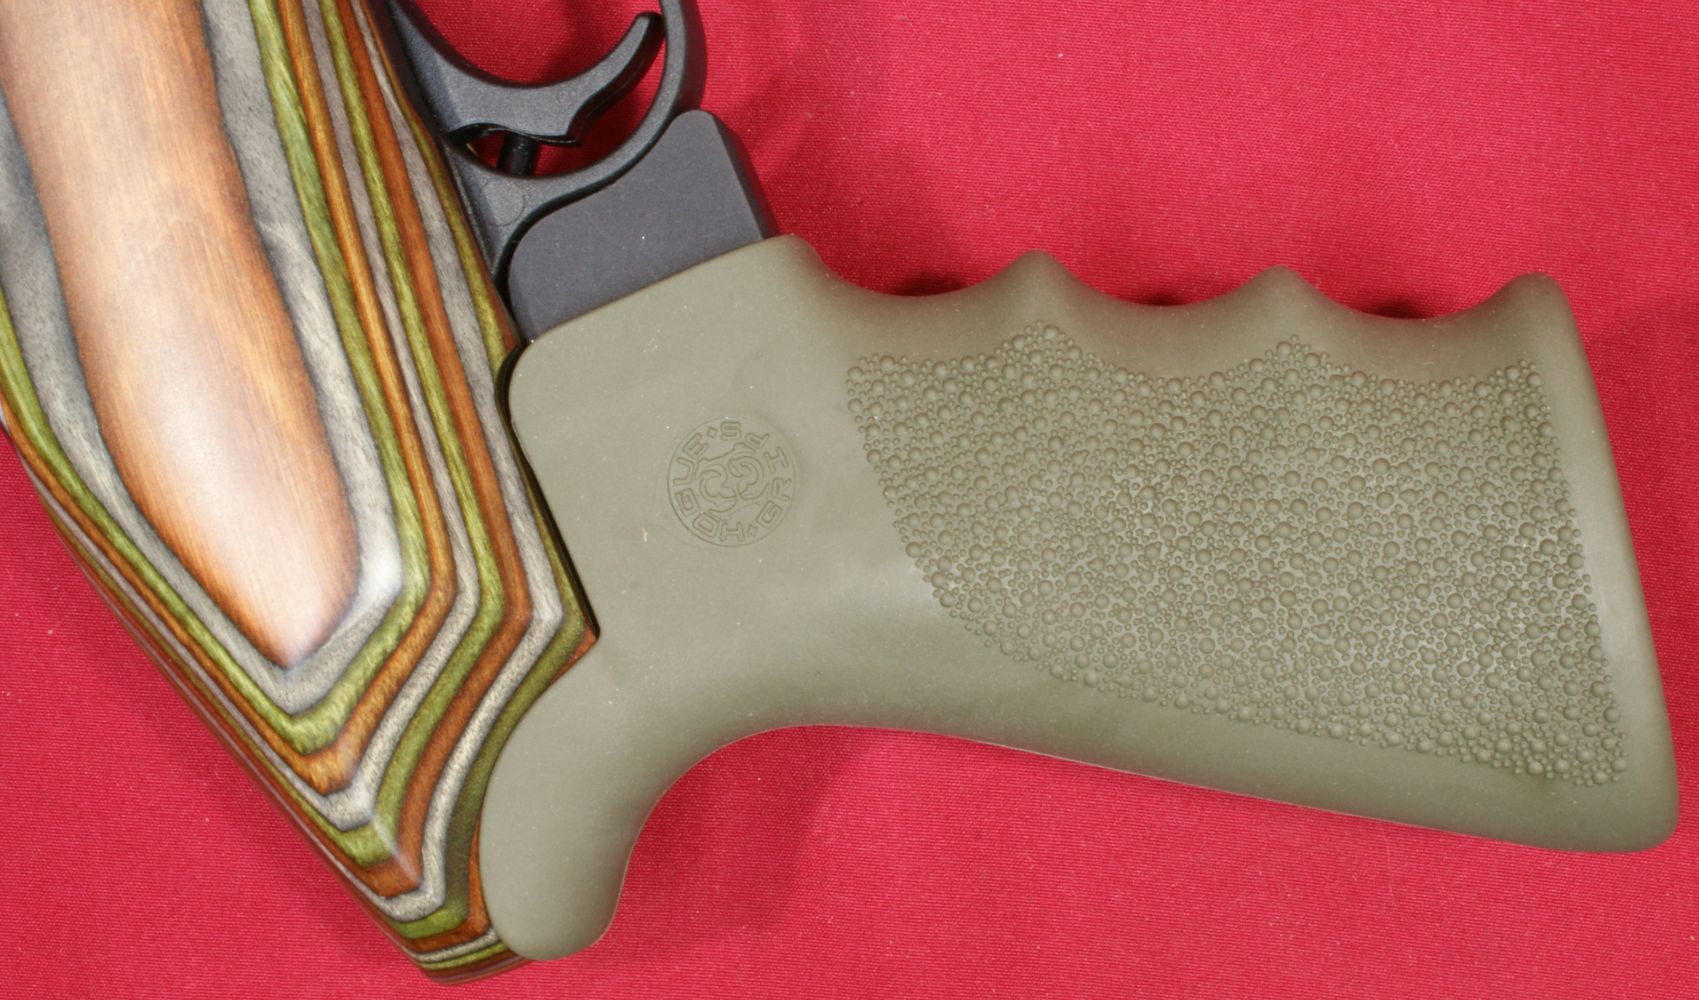
Next I tried the Hogue Monogrip with Finger Groove and Beavertail (SKU 15021) and found the fit to be good, but not as good as the CAA above. I had to cut a small part off the front of the Hogue grip (see grip at link above) to get the grip to seat properly because of the shape of the grip mounting lug on the 22 Charger pistol. This was not a big deal. Also, the back of the beavertail seemed a little long.
Figure 24
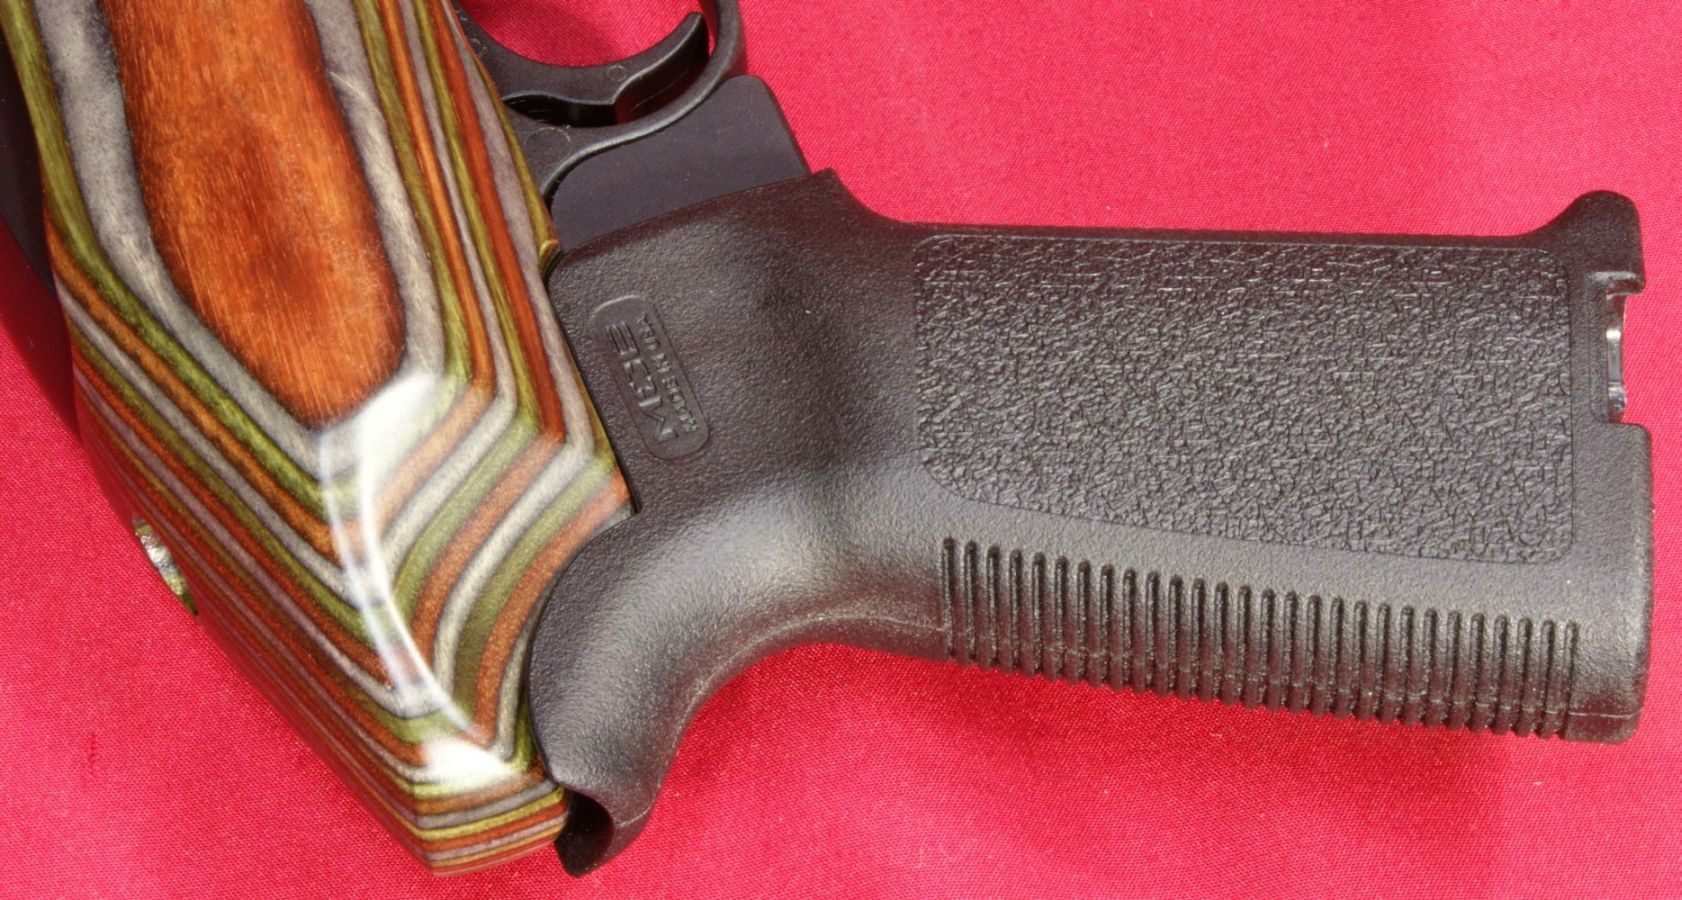
Last I tried 22 Charger with the Magpul MOE Grip (MAG415) and was not pleased with how the beavertail blended with the stock. Although the rest of the fit seemed OK and the grip functioned without issue, I would not recommend installing this grip because the look detracts from the pistols appearance.
Figure 25
The takedown feature is accomplished by components located on both the forend assembly and buttstock assembly. The forend assembly has a plunger which locks this assembly once it is rotated into place.
Figure 26
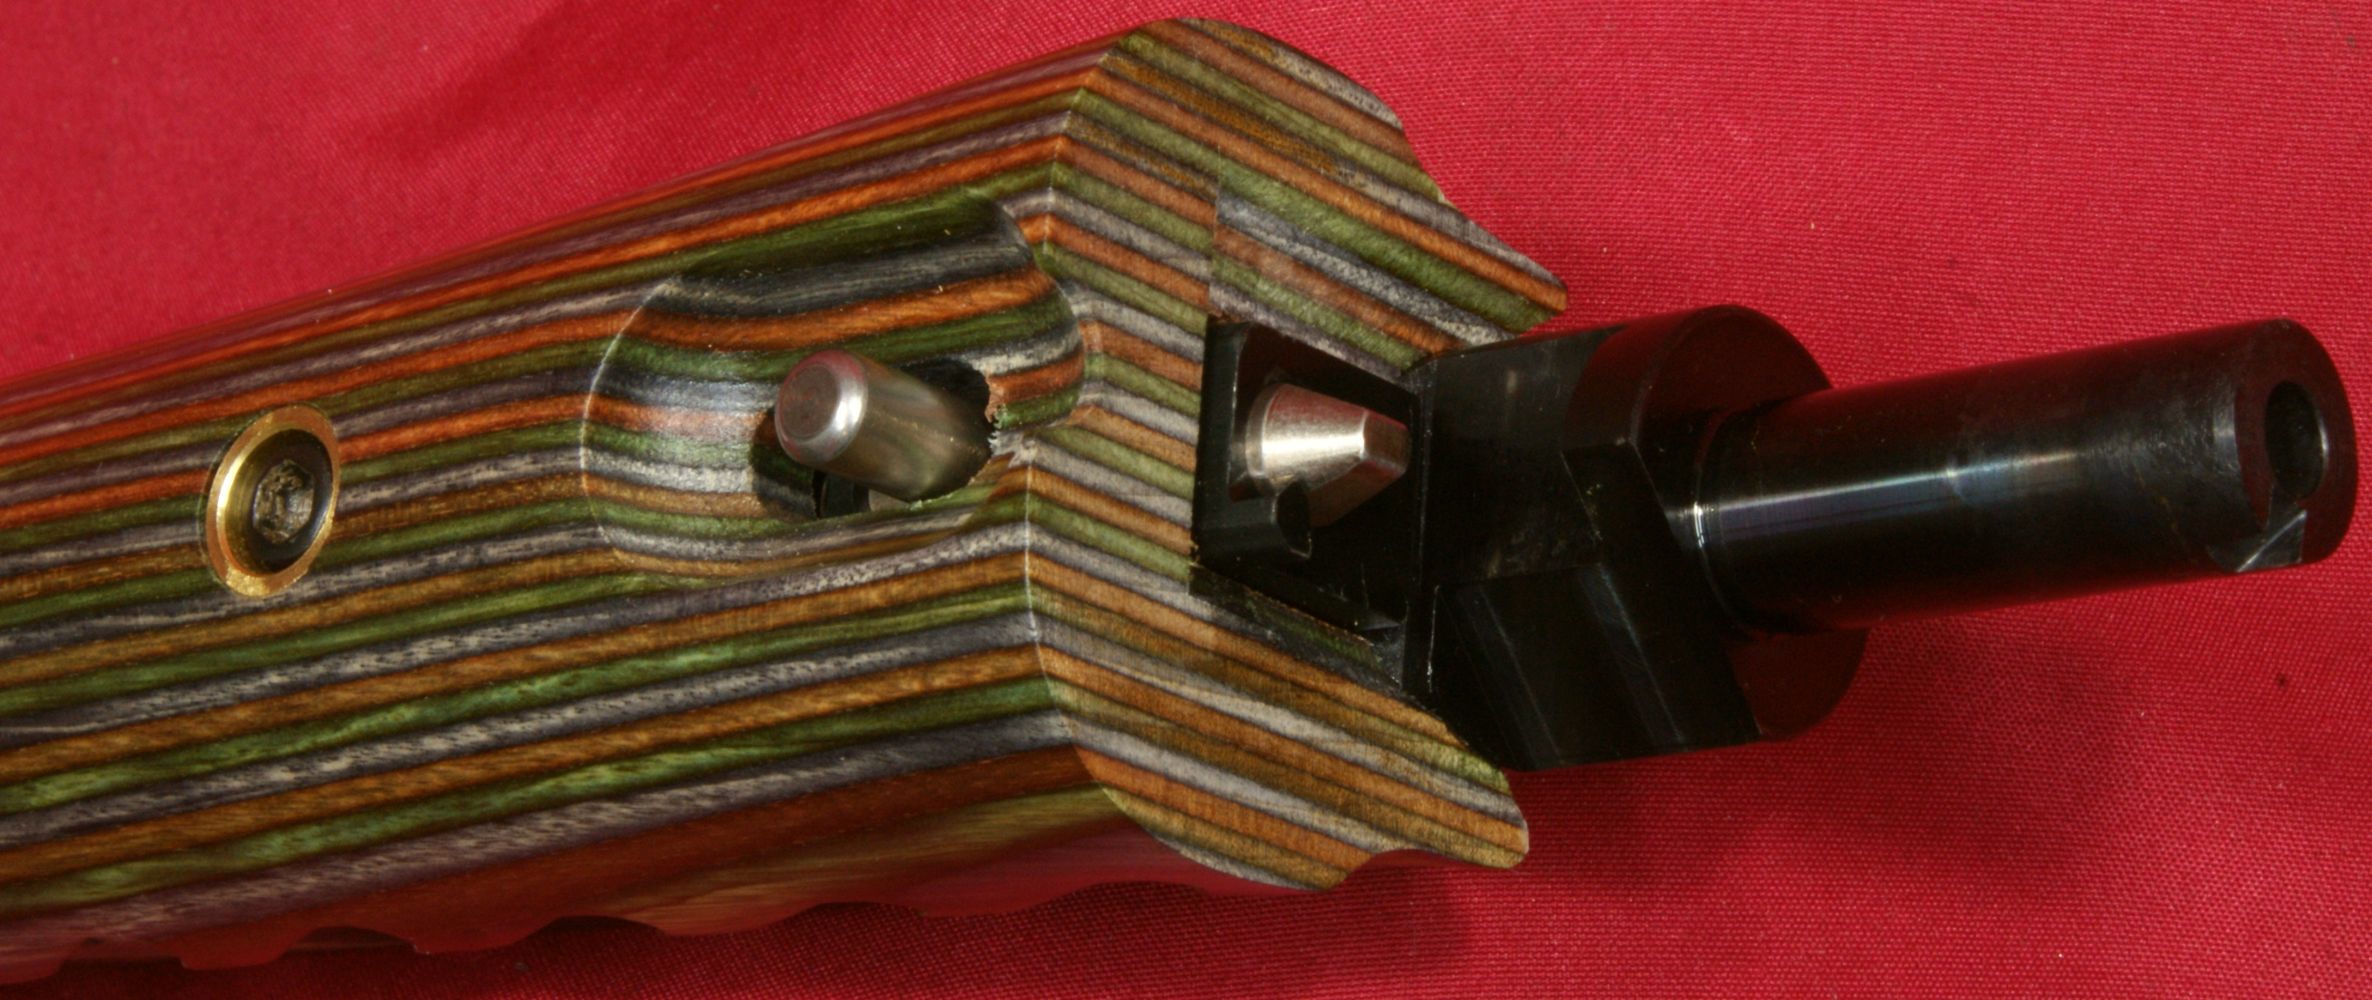
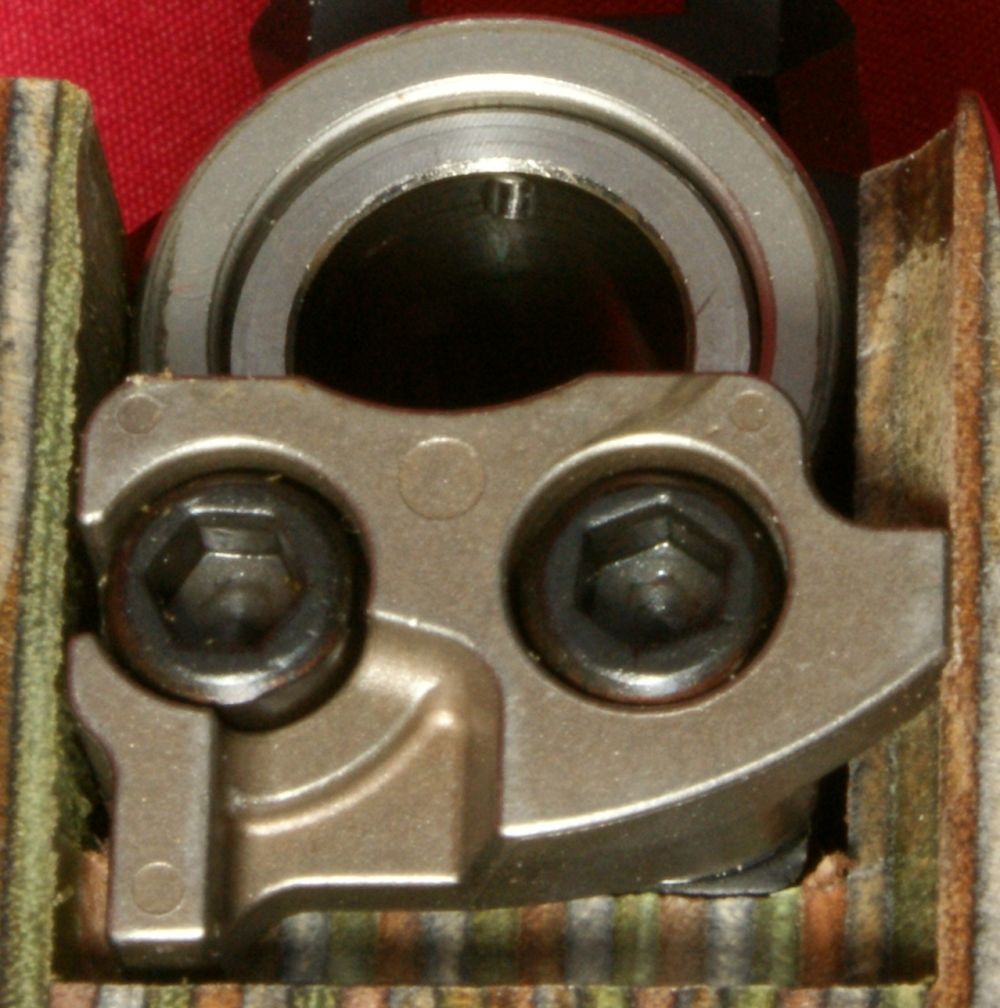
The barrel has a lug (see above) which nests behind a stainless steel lug (clamp) which is bolted on the front of the receiver with two Allen head screws. The receiver has a stainless steel insert installed and the threaded adjusting knob and bushing style spacer are located on the front of this insert.
Figure 27
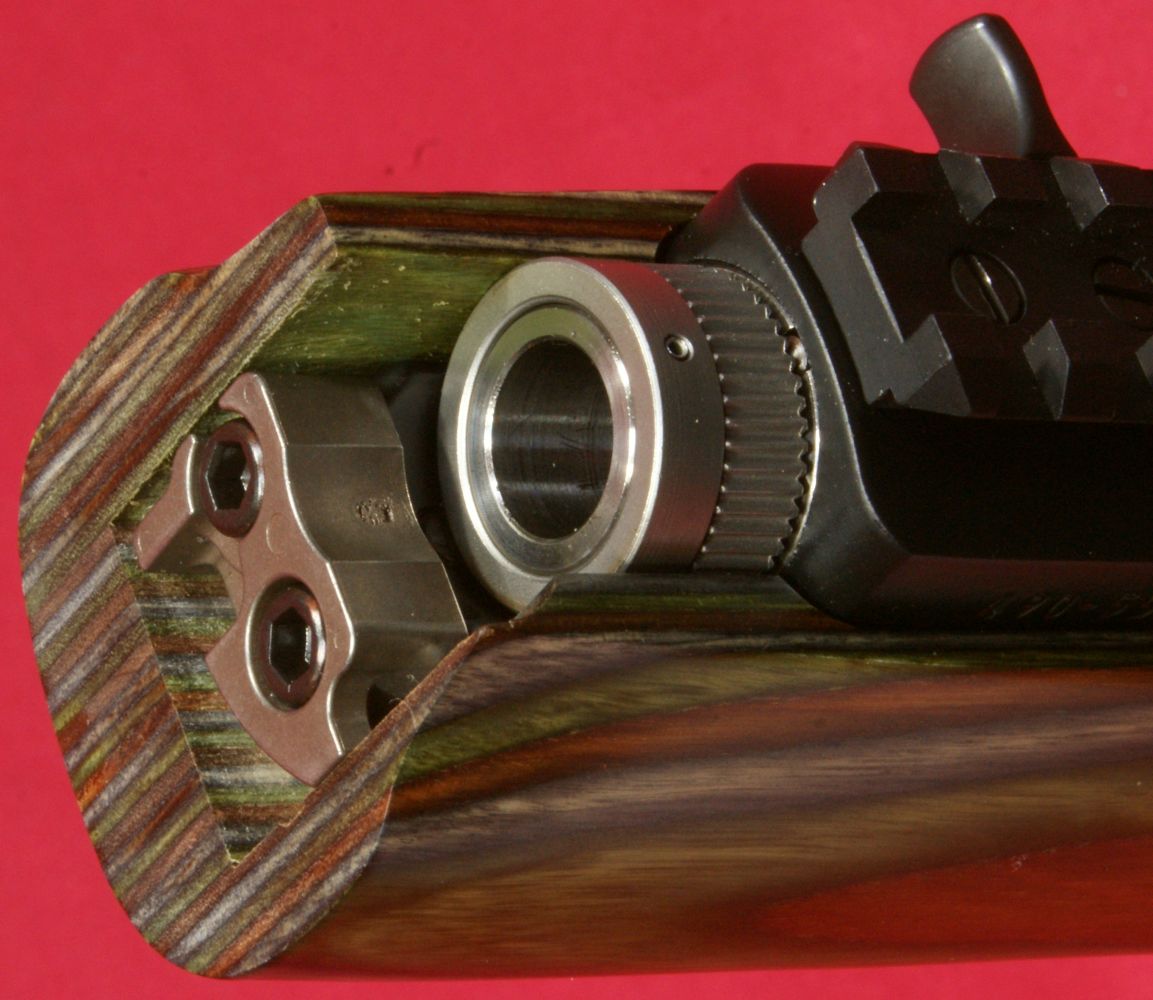
The bushing style spacer is loosely held in place by a roll pin which rides inside an oval slot in the top of the insert. Again, the part held in place with the two Allen head screws is the barrel clamp. You can see the notch in the clamp located below the left screw. This is where the plunger rests to lock the barrel from turning.
Figure 28
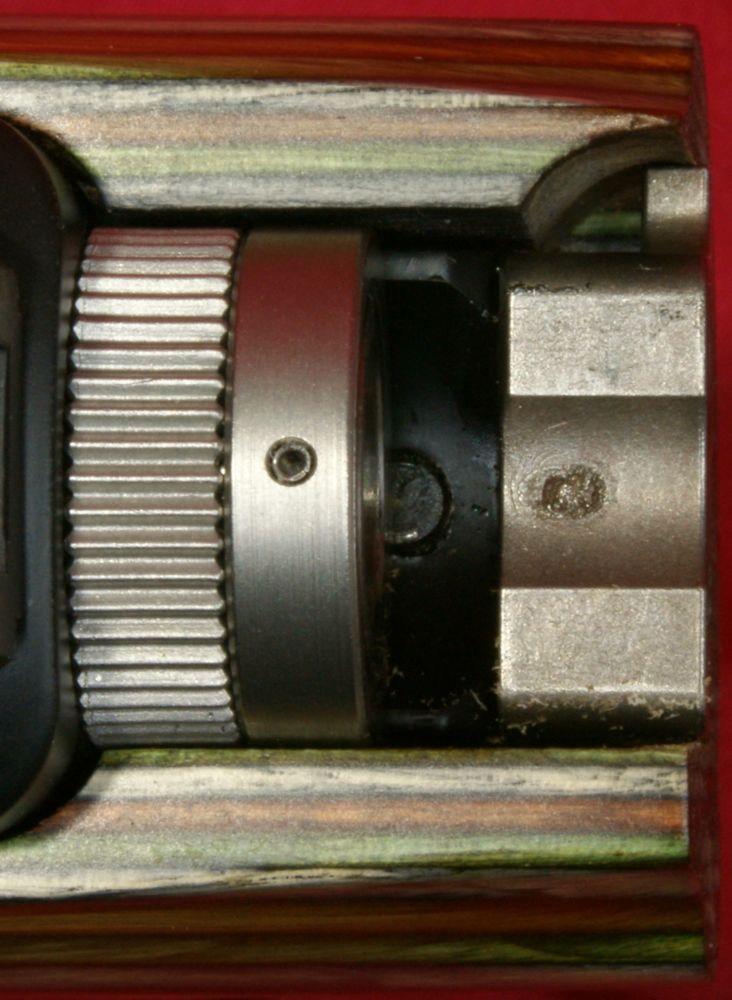
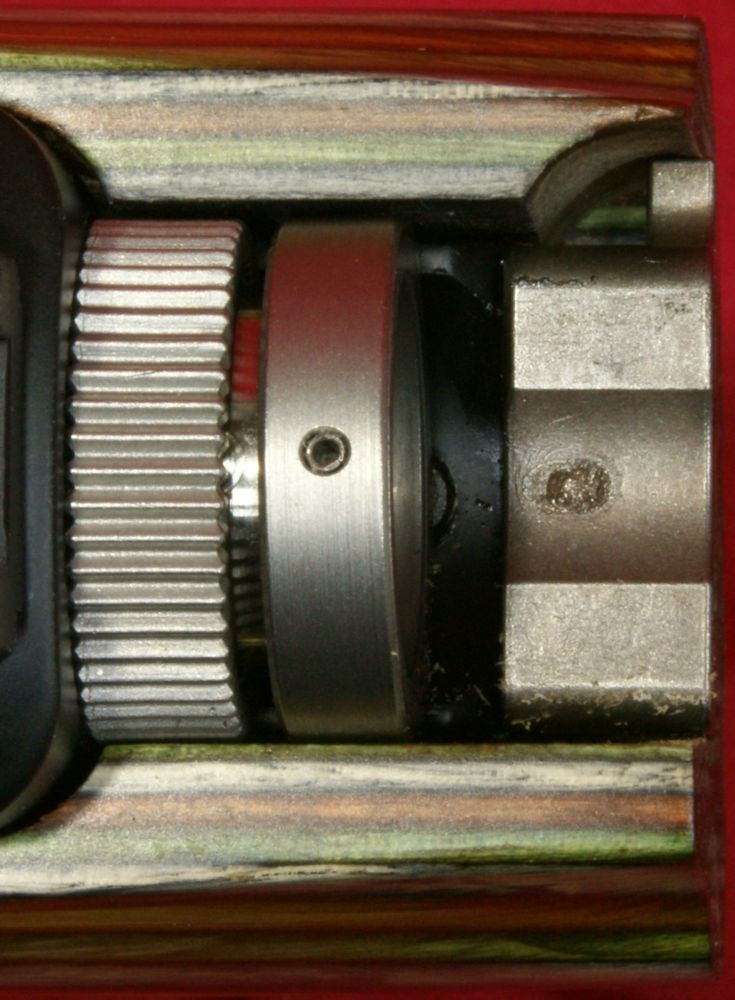
These next three photos show the adjustment knob screwed all the way against the receiver and the spacer against the knob, the adjustment knob against the receiver and the spacer pushed fully forward, and then the adjustment knob screwed fully forward against the spacer. This feature allows the ability to adjust the barrel such that there is a firm (no freeplay) connection between the barrel and the receiver. This is critical to ensure accuracy since the optic is mounted on the receiver. Also notice that there is a spring loaded detent pin in the receiver that makes the adjustment knob move in click intervals.
One thing I noticed on this pistol was that the end of the stock bolt (you can see it in the photo on the left below) was actually pressing up against the bottom of the takedown spacer when the stock bolt was tight. This was preventing the takedown adjustment knob from being rotated. I removed the stock bolt and filed about 1 thread off the end of the bolt and this solved the problem.
Figure 29
Figure 30
Figure 31

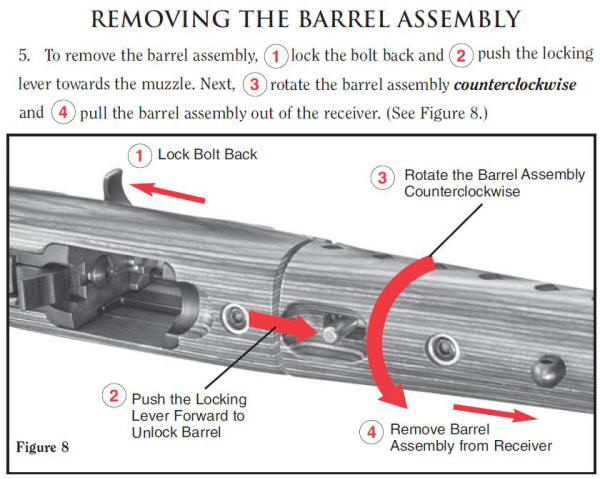
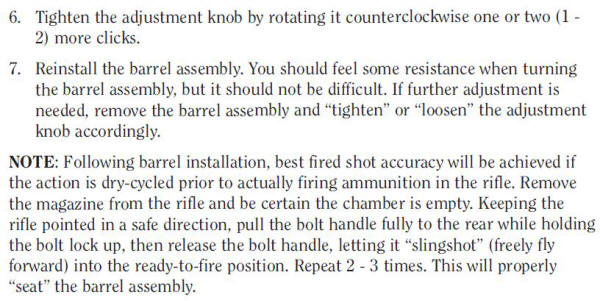
Ruger's Instruction manual covers the details of making this adjustment and these images below were taken from the manual. A key point is that once you make the initial first time installation of the barrel and get the adjustment knob set, further adjustments are not required when removing and reinstalling the barrel assembly.
Figure 32
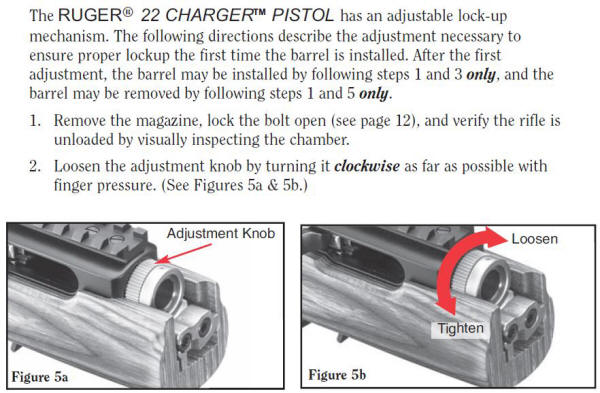
Figure 33
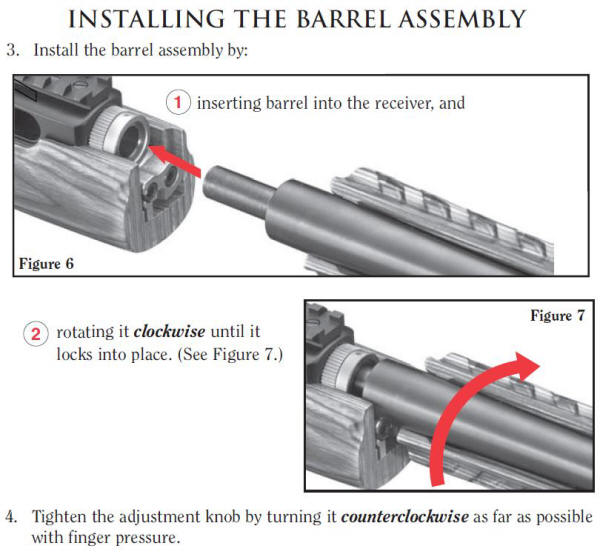
Figure 34
One thing that Ruger recommends is that after barrel installation, you should "dry-cycle" your bolt several times to "seat" the barrel assembly.
Figure 35
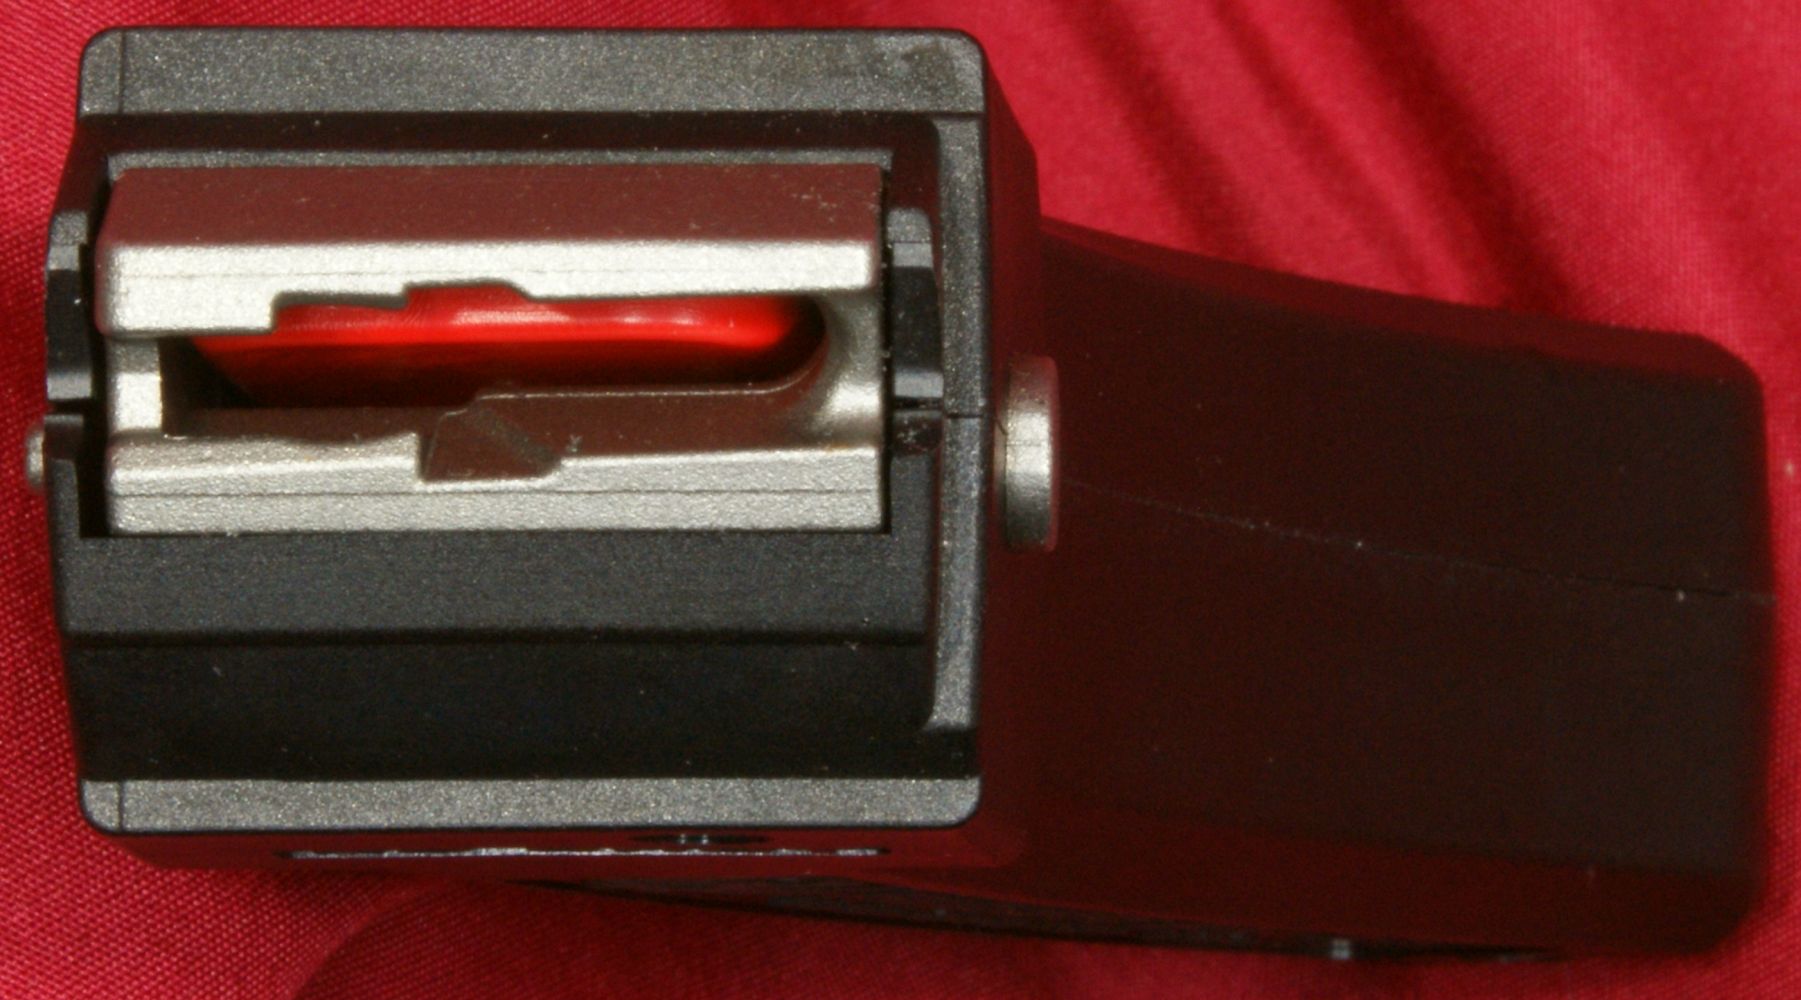
BX-15 Magazine
Ruger has included the BX-15 Magazine with the release of this new version of the 22 Charger Pistol. This magazine has a short profile so that it can be readily used with the bipod. The magazine measures about 5.3" in length and stick down from the bottom of the buttstock about 3.5". The construction of this magazine appears to be the same as Ruger's BX-25 magazine with the only difference being length and capacity.
Figure 36
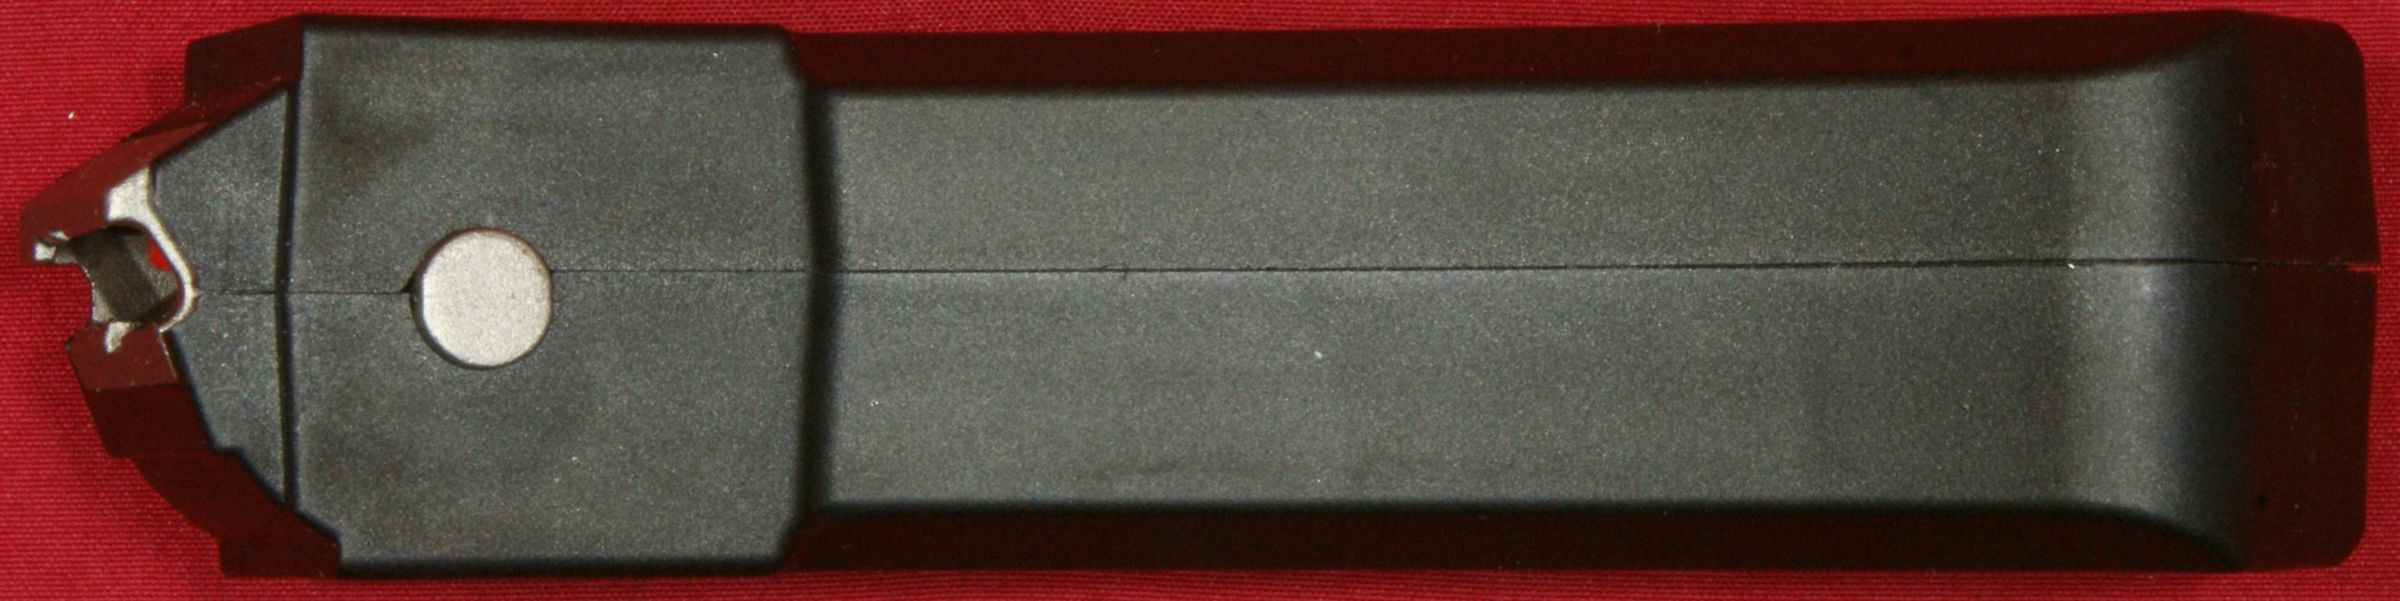
Figure 37

Figure 38
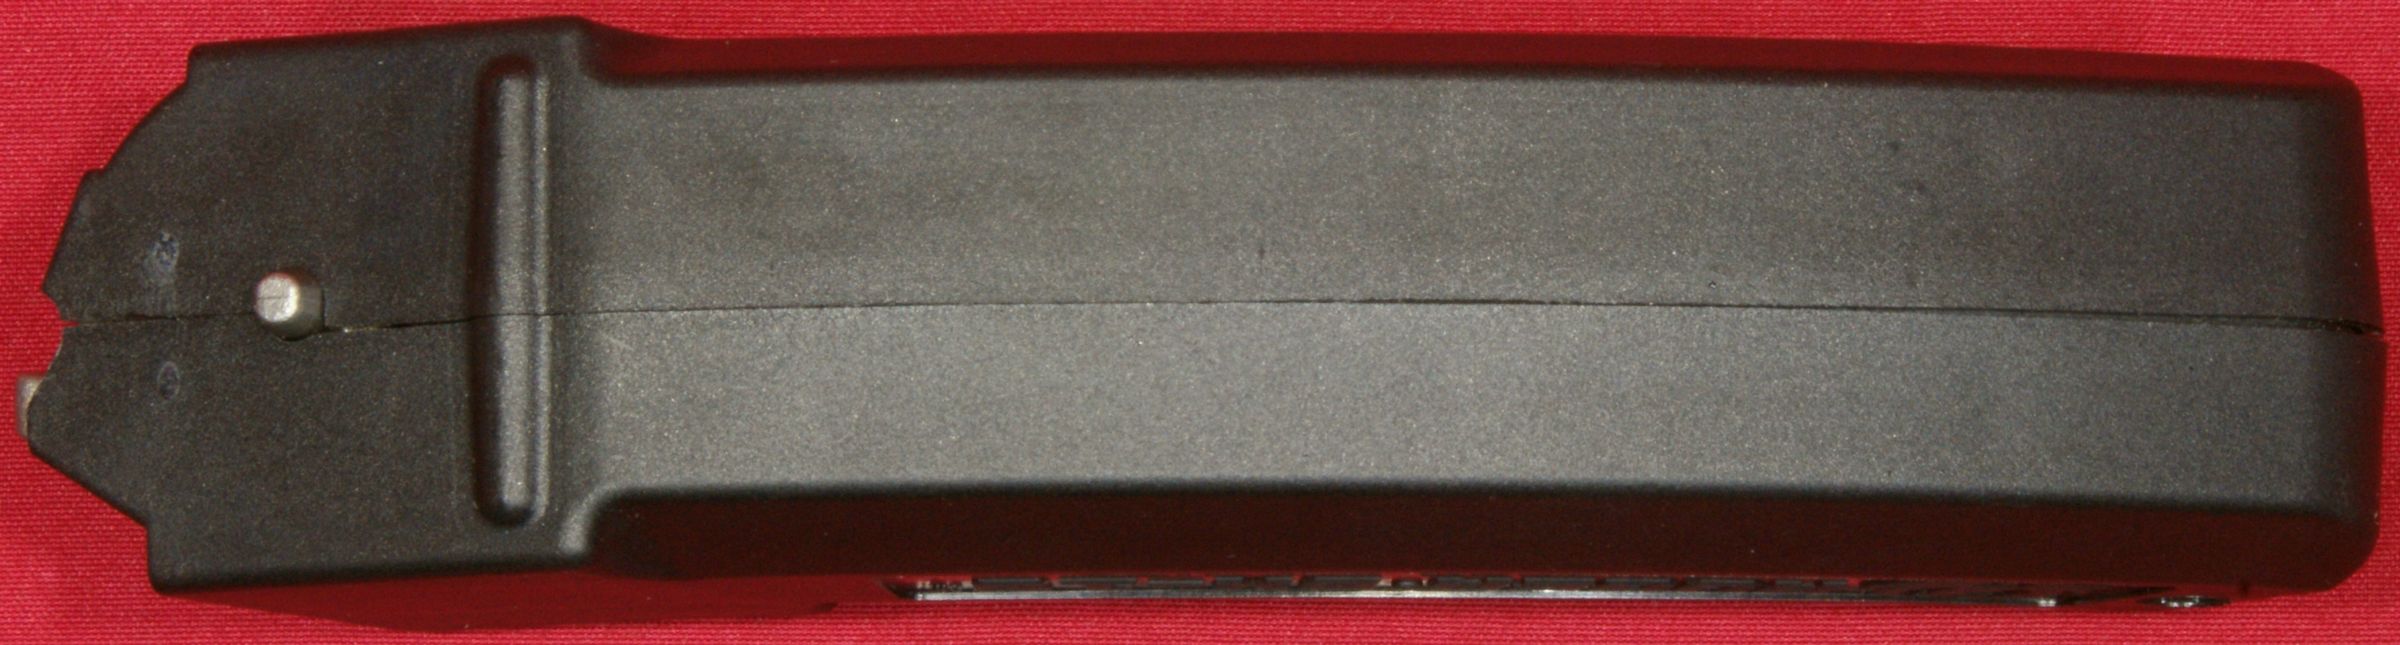
Figure 39
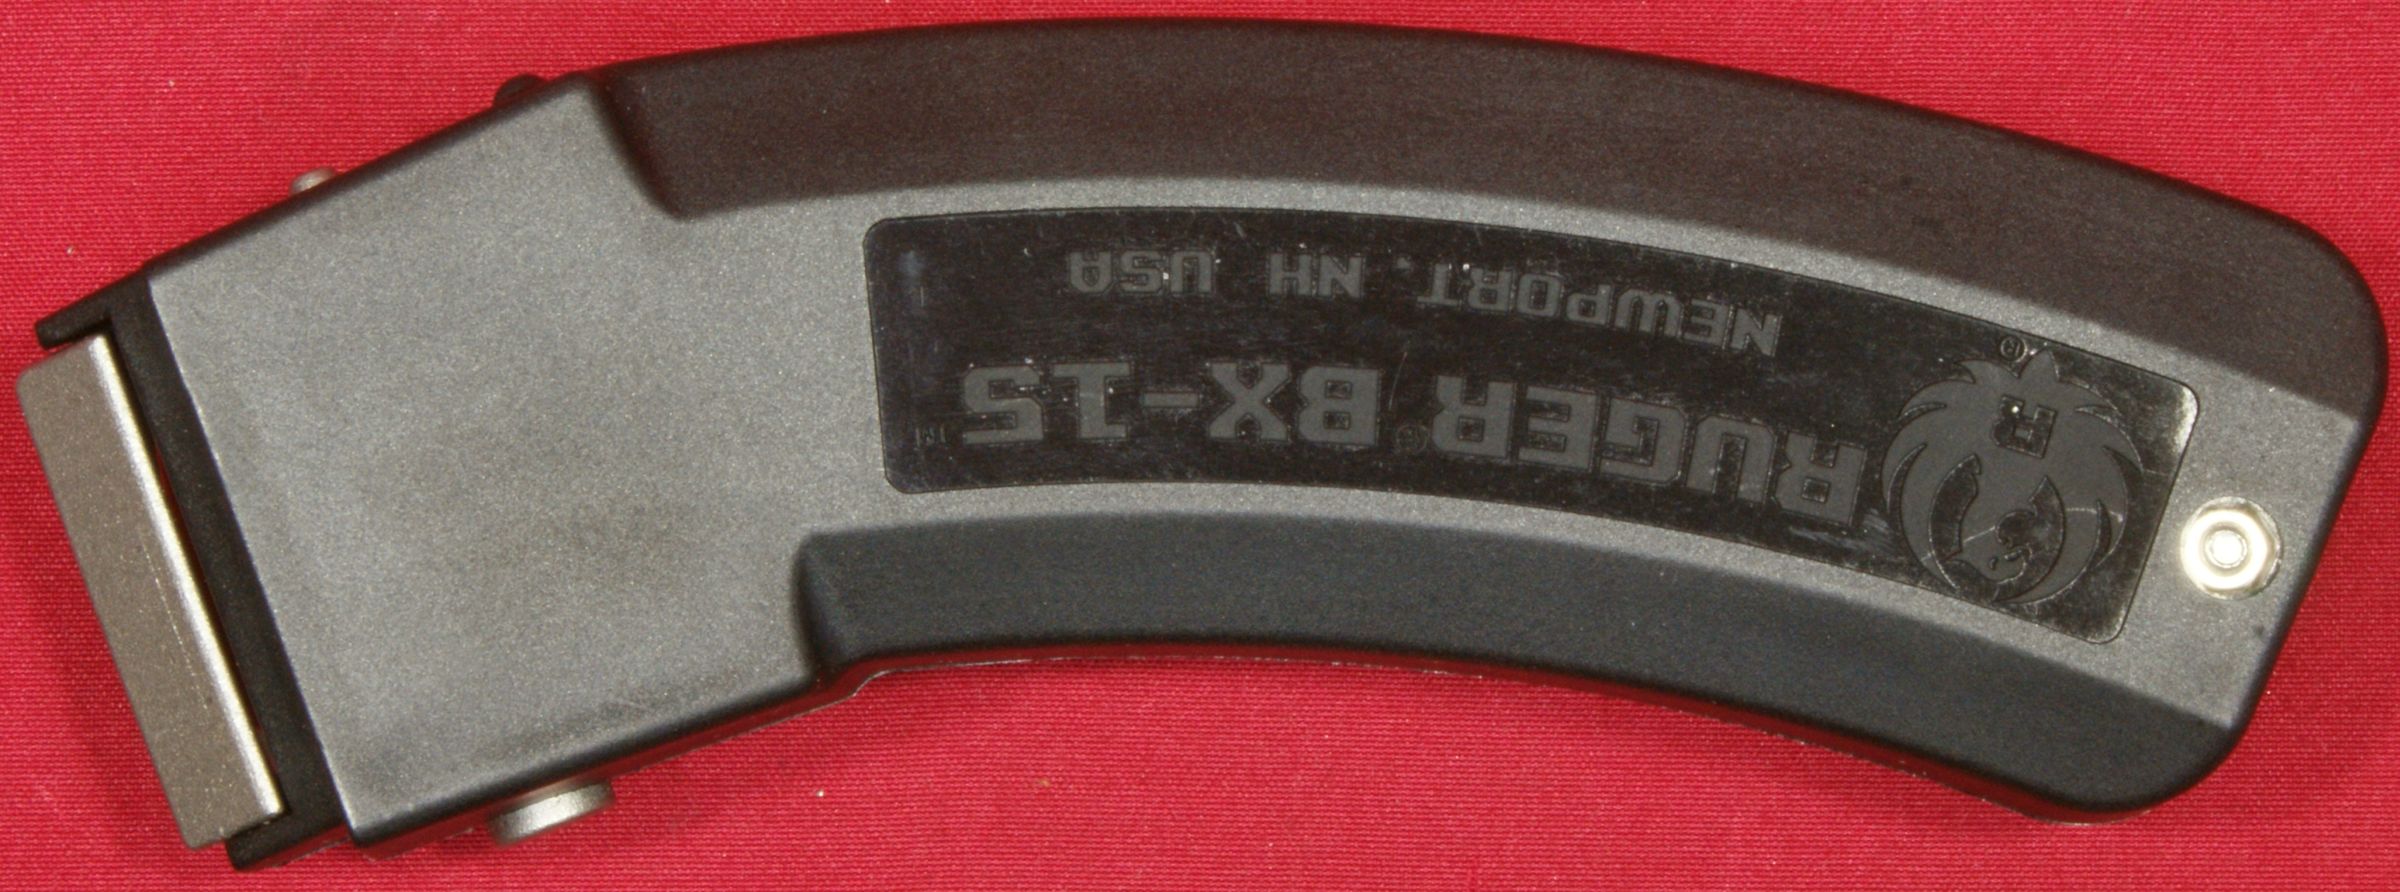
Figure 40
Bipod
The new Ruger 22 Charger Pistol comes with a UTG Model TL-BP28S Adjustable Height Bipod. This next photo shows the instruction manual that came with the pistol for the bipod. This bipod sell for about $28 on Amazon.com.
Figure 41
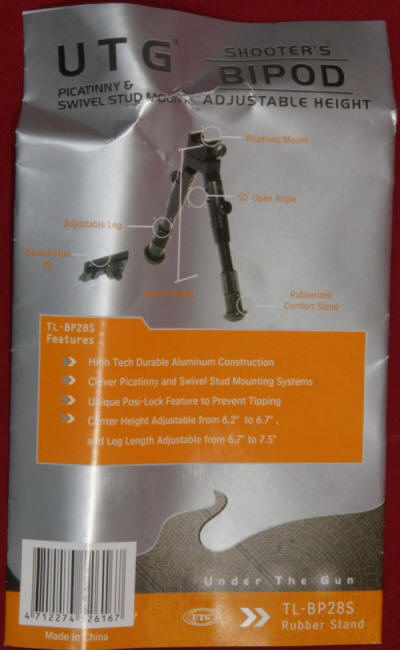
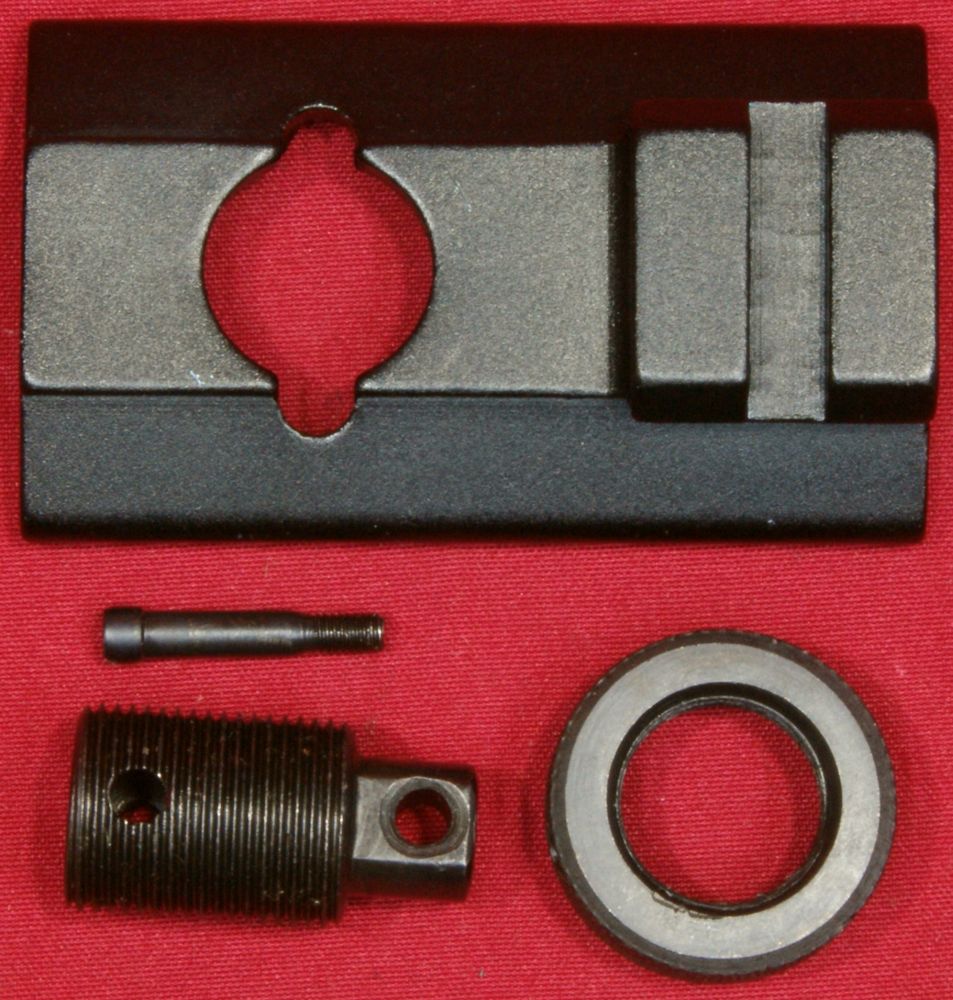
The bipod is a Picatinny rail mounted bipod which comes with an adapter that allows for the bipod to be installed using the sling swivel stud on the 22 Charger Pistol.
Figure 42
Figure 43
The bipod can be adjusted in height from 6.2" to 6.7" measured from the bottom of the feet that would be resting some type of surface to the bottom of the slot for the Picatinny rail. The feet are spring loaded to pop out when you rotate the knurled nuts which lock them in place. I feel the greatest advantage of this adjustability is to allow you to level the pistol if shooting from an angled or uneven surface.
Figure 44
Figure 45


The adapter is mounted by installing the threaded portion of the adapter and then screwing the cross pin through the sling swivel stud. On this pistol, I had to unscrew the sling swivel stud 1/2 turn to be able to insert the cross pin.
Figure 46

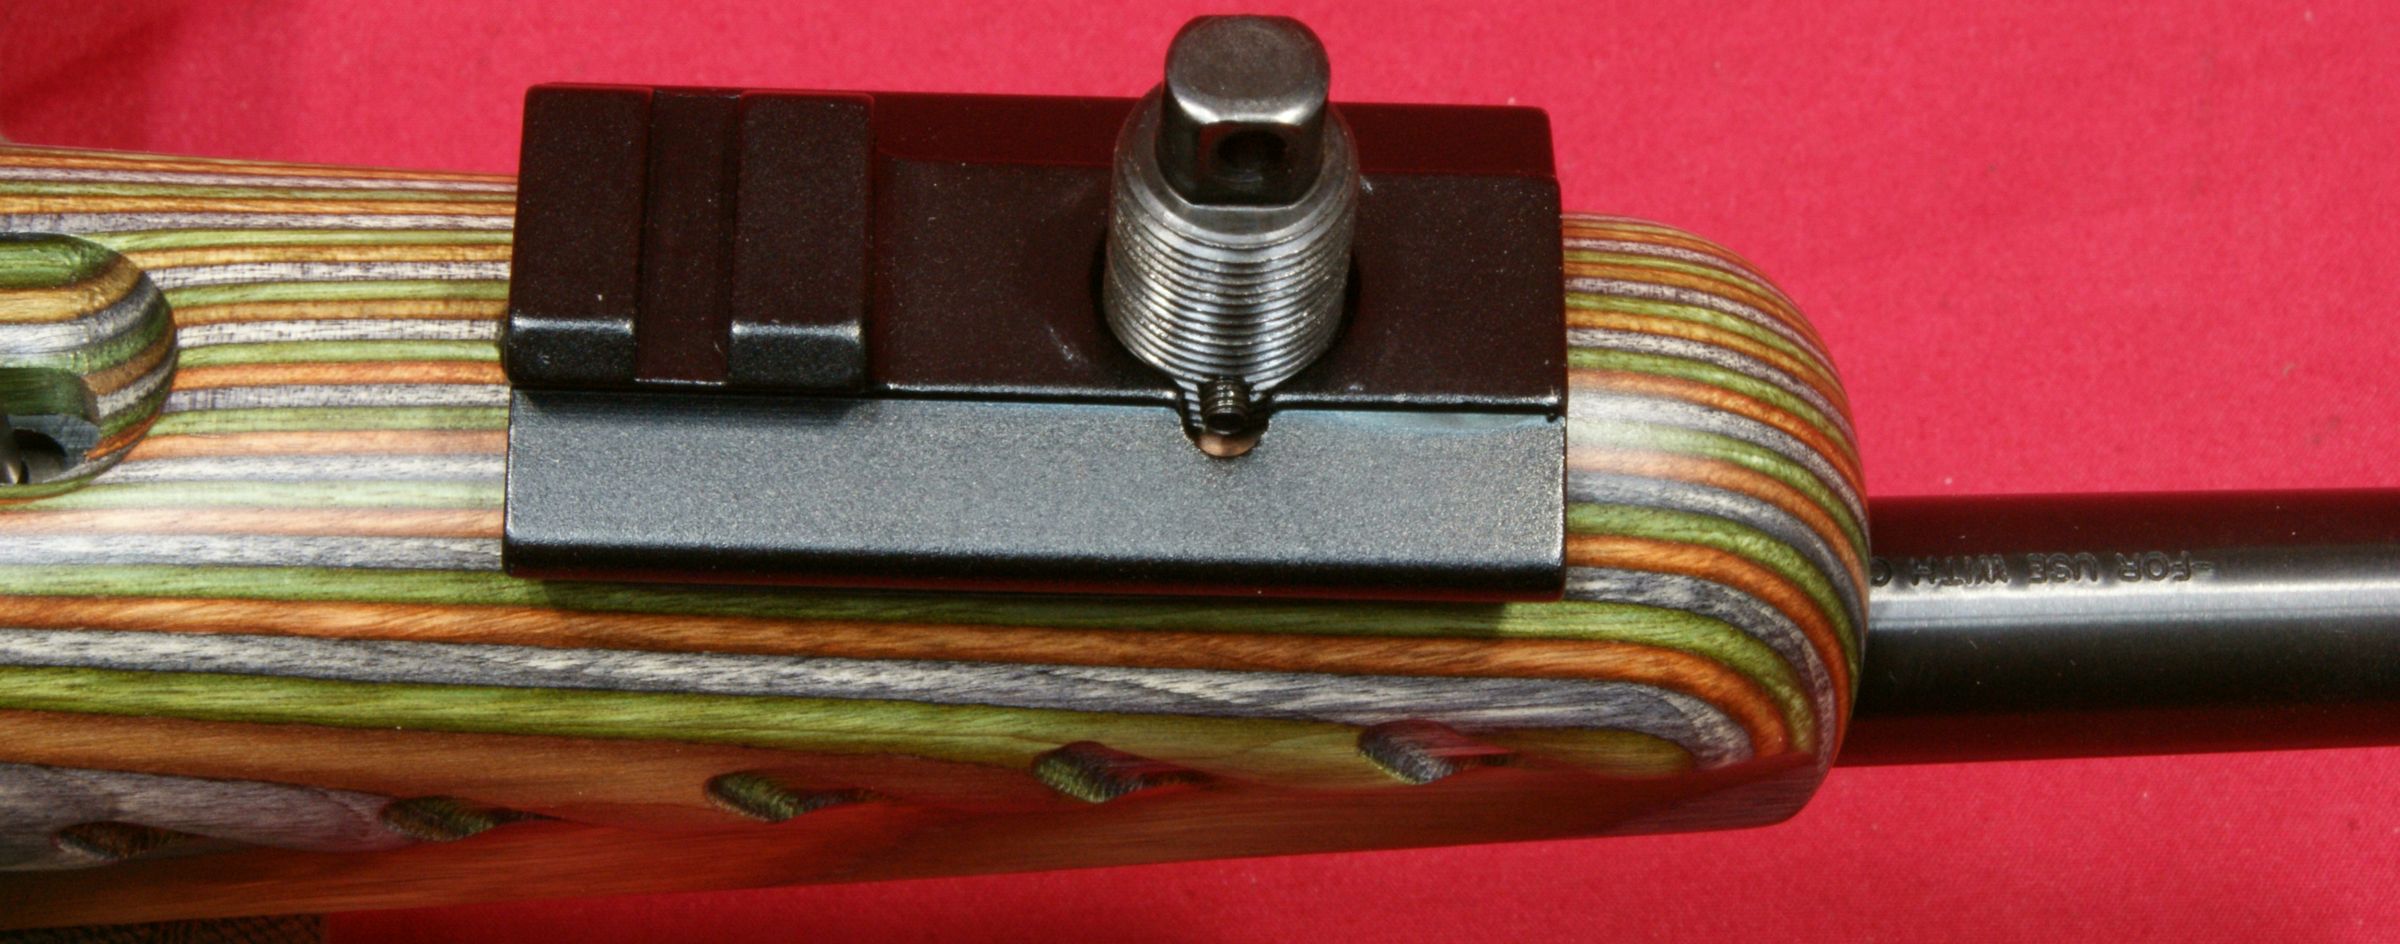
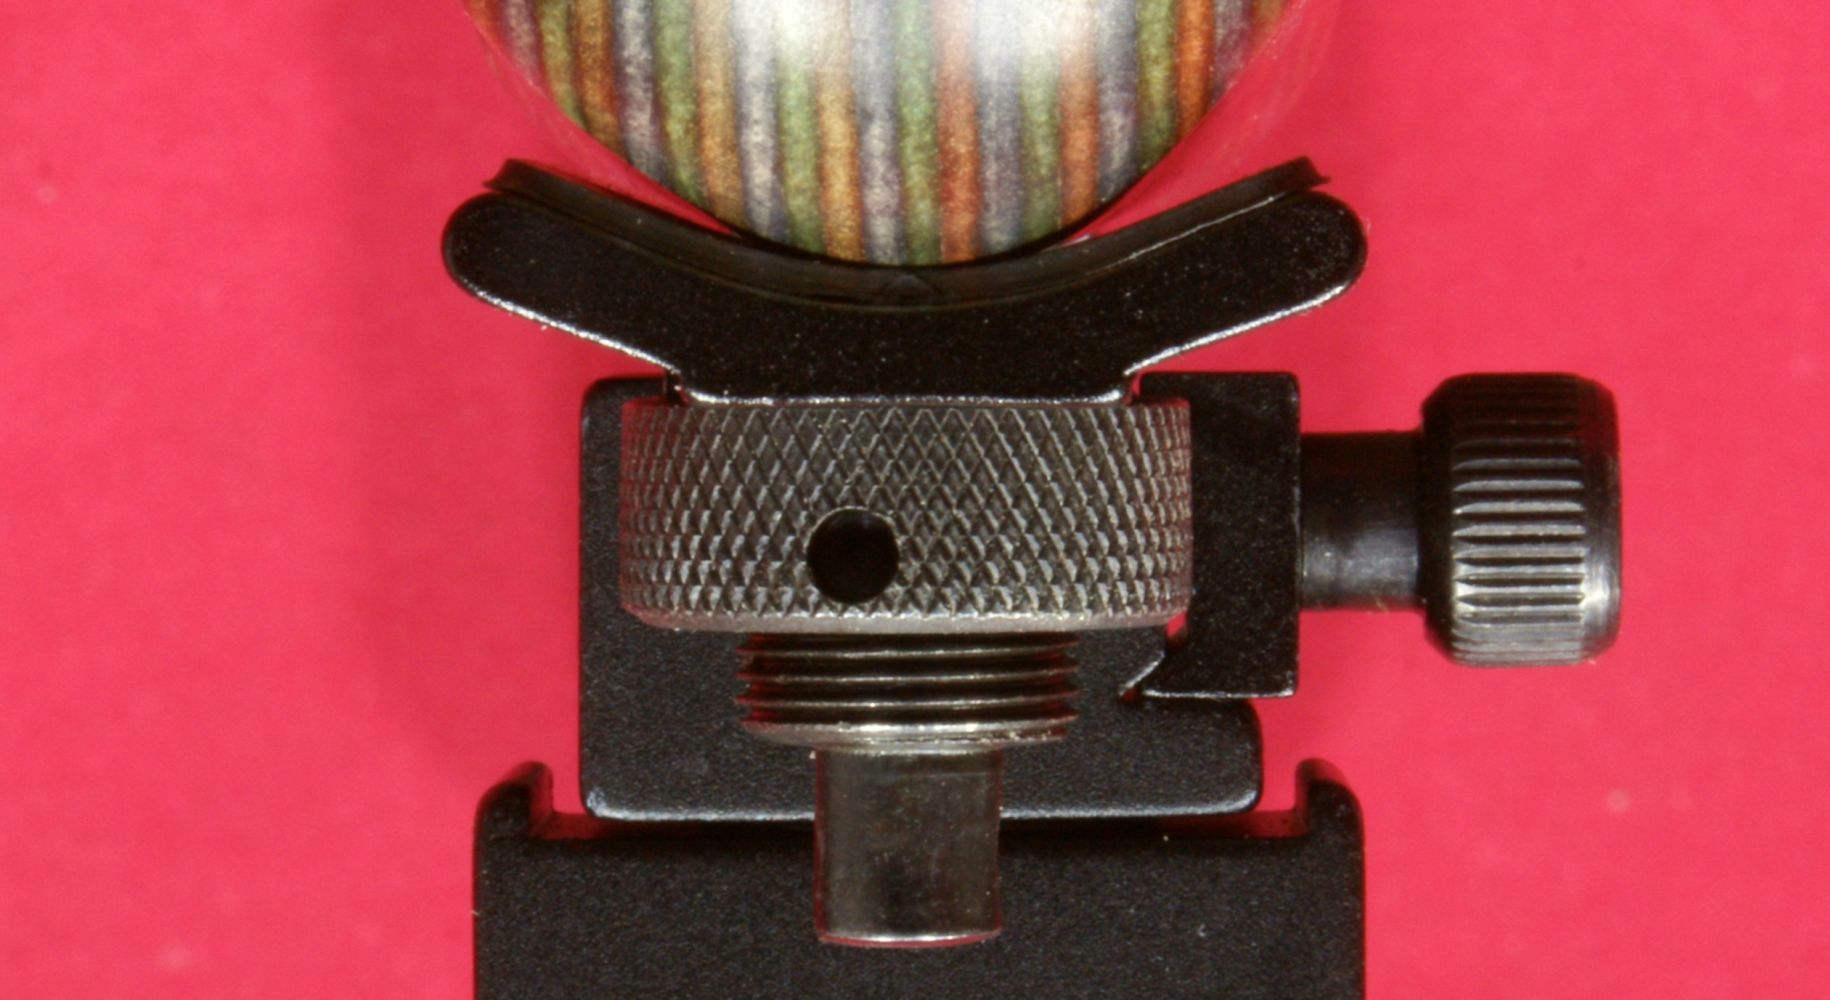
Next you place the rail plate over the threaded adapter. Although it is possible to install the plate going forward, the greatest stability is achieved by installing it rearward as shown and as intended.
Figure 47
Next, install the knurled nut. You will need to make sure the cross pin is positioned so that the nut rides over the ends of the pin.
Figure 48
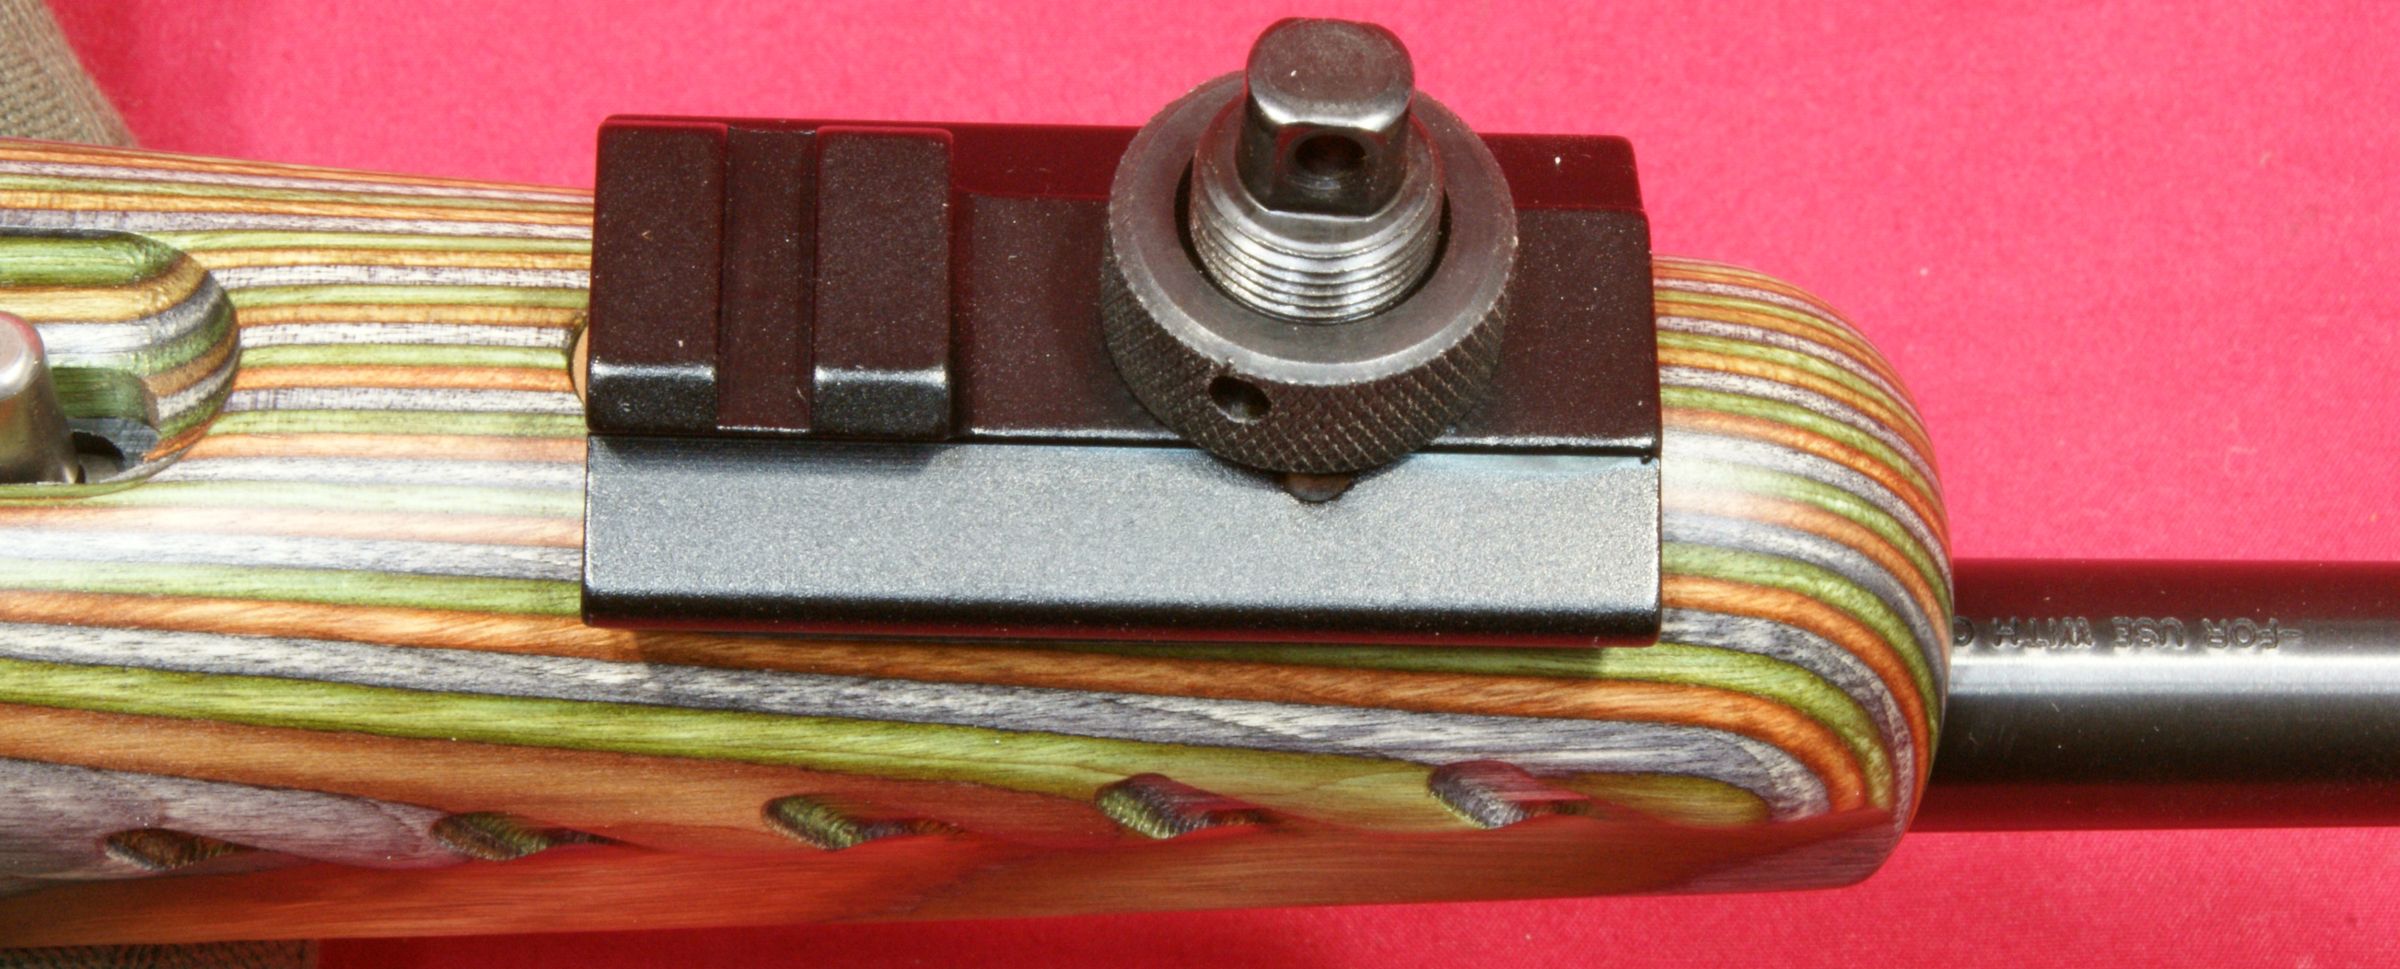
Installation of the adapter plate is simple and then the bipod mounts to the Picatinny rail portion of the plate like any other rail mounted accessory.
Figure 49
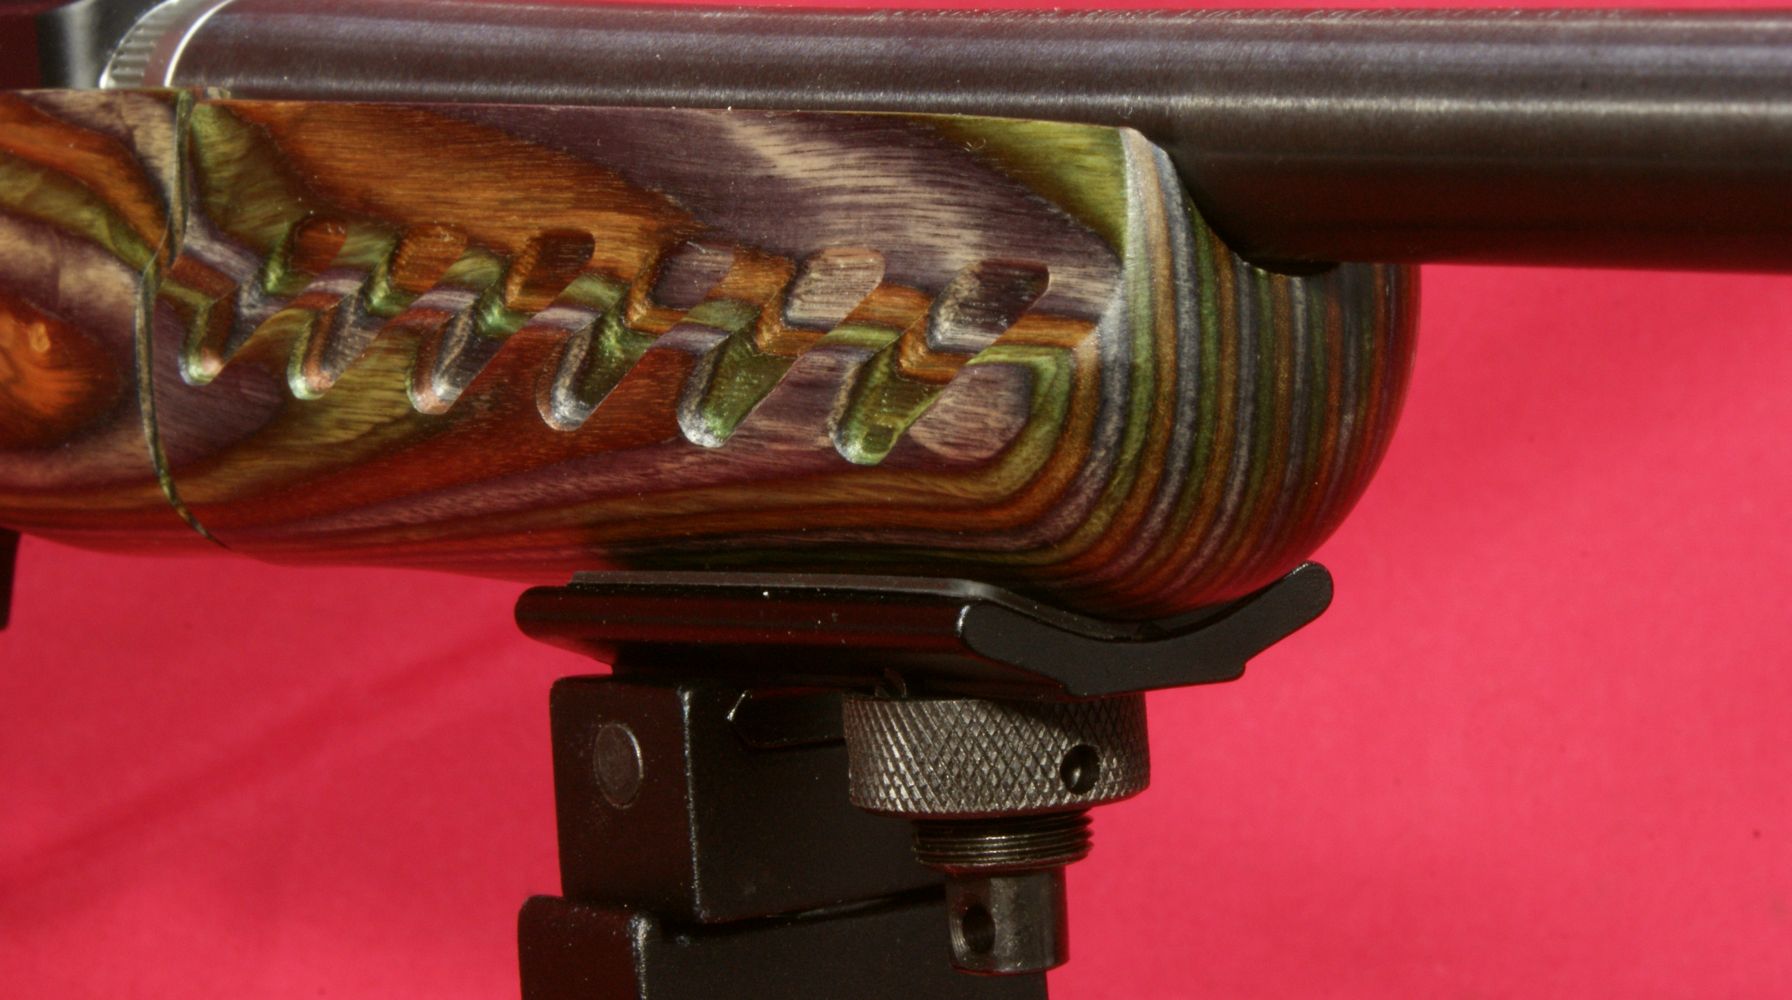
The fit of this adapter plate on the lower surface of the forend is not very good as shown in the photo below. You are able to tighten the knurled nut so that the adapter plate is firm and secure, but I would have expected a better fit.
Figure 50
This next photo shows the bipod installed and folded. For some reason I didn't get the feeling that this bipod was properly thought out because of the fit and the look seems odd. As I studied this, I wondered why Ruger decided to shift away from the Harris style bipod that they used on the original 22 Charger.
Figure 51
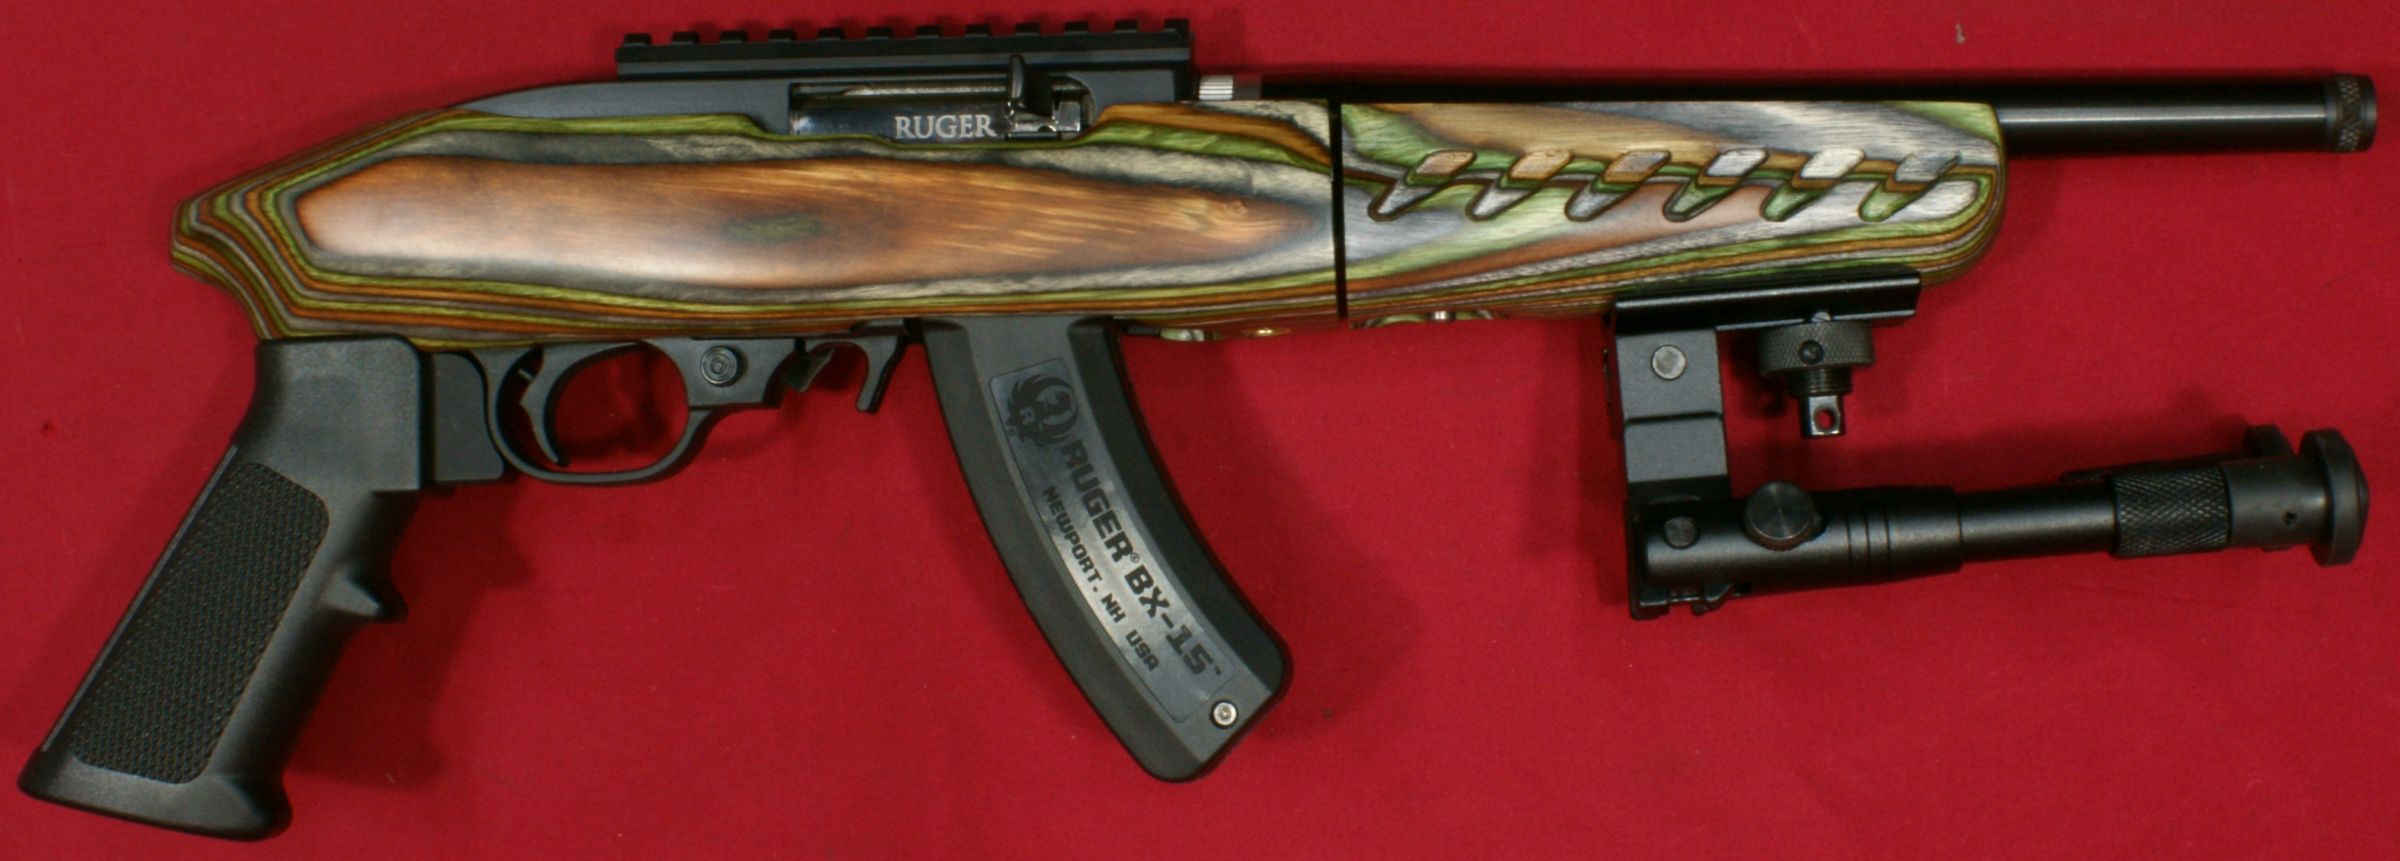
For comparison, I installed the Harris style bipod from my original 22 Charge as shown below. The fit was much better and the pistol had a more sleek appearance, but I feel this installation poses a potential safety issue which Ruger may have recognized. When folded, this style bipod puts your hand too close and potentially slightly ahead of the muzzle depending on your grip when shooting with the bipod folded. If you compare this to the photo above, your hand is farther away and further back from the muzzle with the Picatinny style bipod installed.
Figure 52
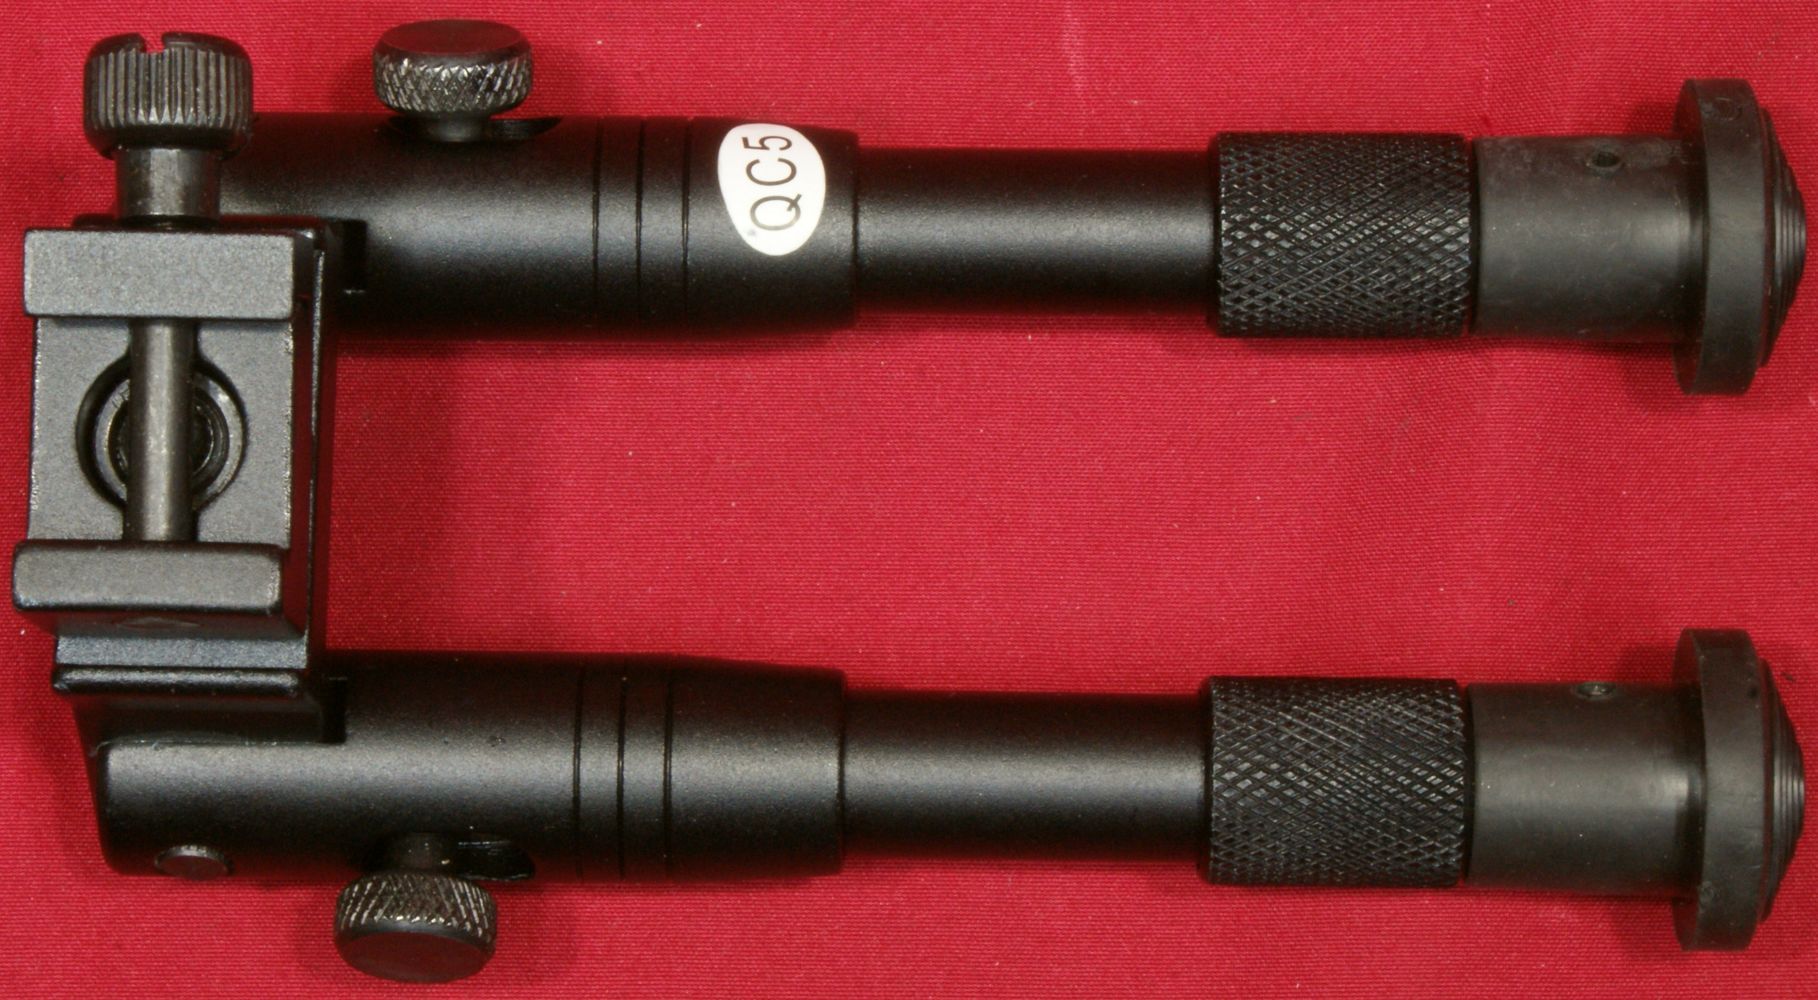
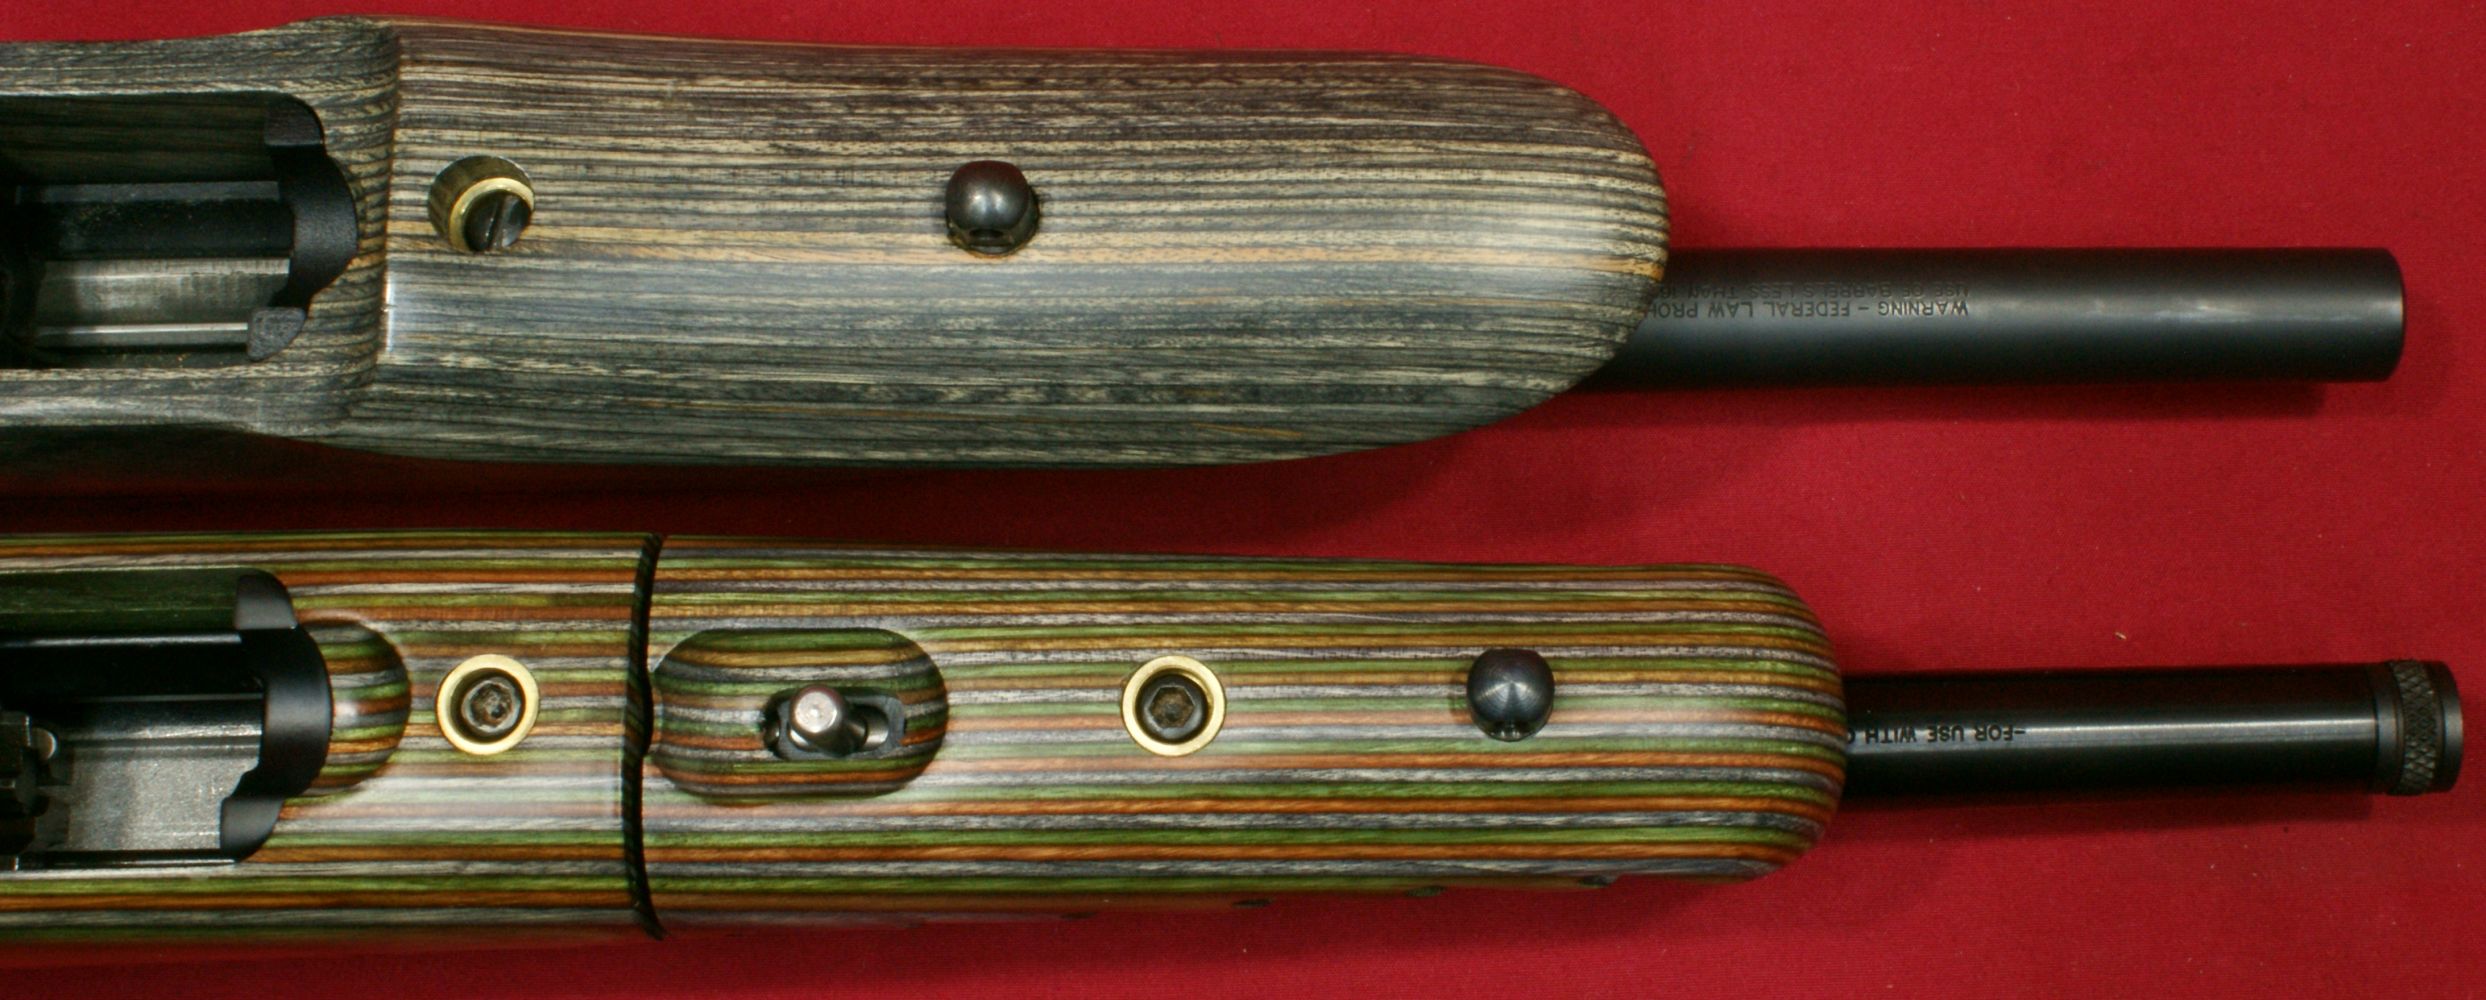
This mounting difference is due to how far back the swivel stud is from the muzzle. This photo shows the original 22 Charger (top) and new Takedown 22 Charger (bottom). Since I don't have a Standard 22 Charger to compare, I studied the photos and it looks like the swivel stud is only slightly rearward than the Takedown version.
Figure 53
Nevertheless, the bipod furnished with the new 22 Charger Pistol works and does give a stable platform for bench shooting.
Figure 54
Thoughts
The new 22 Charger Takedown Pistol seems like a solidly built pistol. I did have to file off the end of the stock bolt so it didn't interfere with the takedown spacer and this may be due to the fact that the receiver sits low in the buttstock. This modification was simple and easy and I don't consider it to be a show stopper. As with all rail mounts, you should always verify torque on the mounting screws to ensure that you will not have loosening in the field. The fit of the bipod was marginal, but it still seems to have a secure feel. Different aftermarket beavertail style pistol grips will have a slightly different fit. My CAA grip fit great, the Hogue grip fit good, and the Magpul MOE did not blend well with the stock. Overall, even with these observations, they would not prevent me from purchasing a Ruger 22 Charger Pistol.
For more detailed photos and commentary, make sure you check out the other parts of this review and feel free to leave comments below. The following links are provided to help you see other parts of this review.
- Ruger 22 Charger Review: Part 1 - Introduction, Specifications and Summary
- Ruger 22 Charger Review: Part 2 - What's in the Box
- Ruger 22 Charger Review: Part 3 - External and Operational Features (this page)
- Ruger 22 Charger Review: Part 4 - Disassembly and Internal Features
- Ruger 22 Charger Review: Part 5 - Range Test
Or
If you would like to be notified about future Gunsumer Reports reviews via Facebook, make sure "You Like This" by clicking the Facebook "Like" button at the bottom or top of this page. If it already says "You Like This" beside the button, clicking it again will uncheck the "Like" status and you will not be notified.
| Share on Facebook | |
© 2010, 2011, 2012, 2013, 2014, 2015, 2016, 2017, 2018, 2019, 2020, 2021, 2022, 2023 & 2024 Gunsumer Reports™, All rights reserved.
FTC Disclosure