|
|
Gunsumer Reports TM Providing Detailed Objective Reviews for Firearms and Firearm Accessories |
Ruger 22/45 Lite Review
Part 4 - Disassembly & Reassembly
September 8, 2012
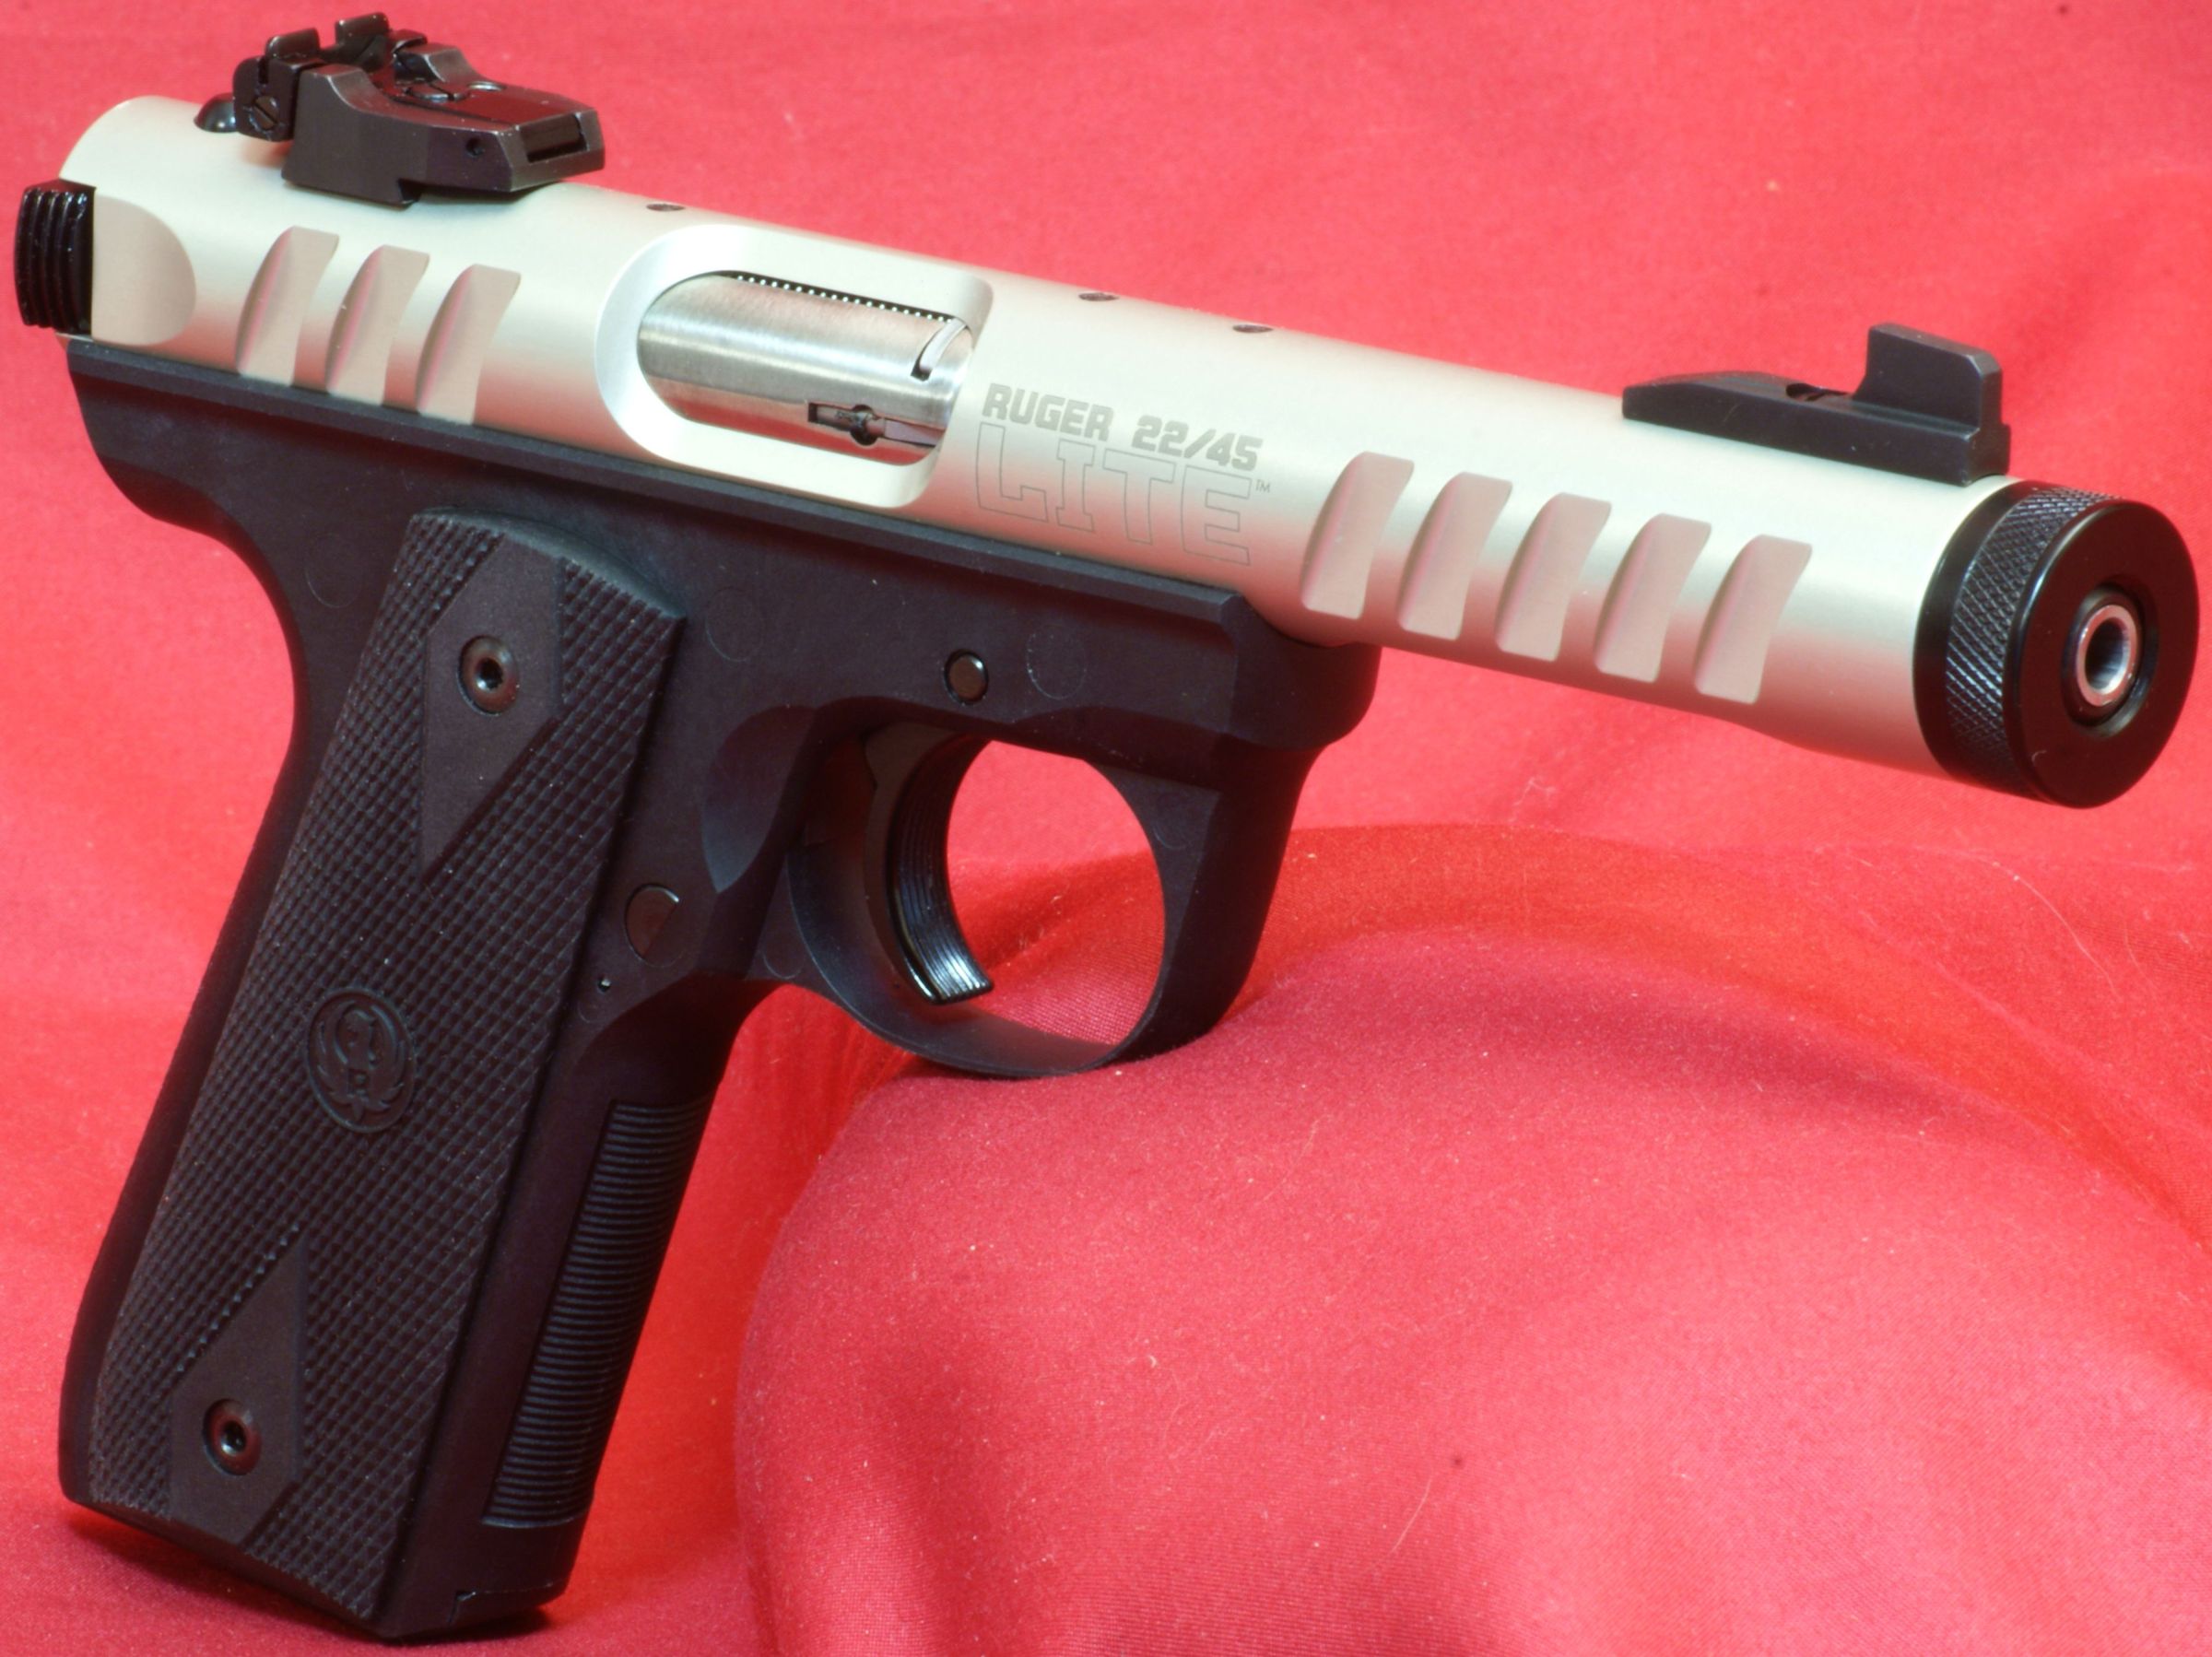
In this part of the review I'm going to show and discuss the disassembly and reassembly of the Ruger 22/45 Lite Pistol. Since the 22/45 Lite is based on the Mark III design, these instructions should be similar for the Ruger Mark III pistols. There are some subtle differences between the 22/45 pistols and the normal Mark III pistols during reassembly and these differences are identified in the Instruction Manual. Ruger also provides videos showing both disassembly and reassembly. Although I show many photos and comment on the details associated with disassembly and reassembly, you should always consider the Instruction Manual as the official source of instructions for your firearm. The manual includes many other safety warning and instructions that you should consider when working with your firearm.
Pistol Disassembly
Step 1 - Safety, De-Cock Hammer & Remove Magazine
- Always make sure the pistol is pointed in a safe direction and the pistol, magazine and chamber are unloaded.
- Insert an empty magazine, disengage safety, point in safe direction and pull the trigger to make sure the hammer has fallen (not cocked). The hammer must be uncocked before you can disassemble the pistol.
- Remove the empty magazine.
Figure 1

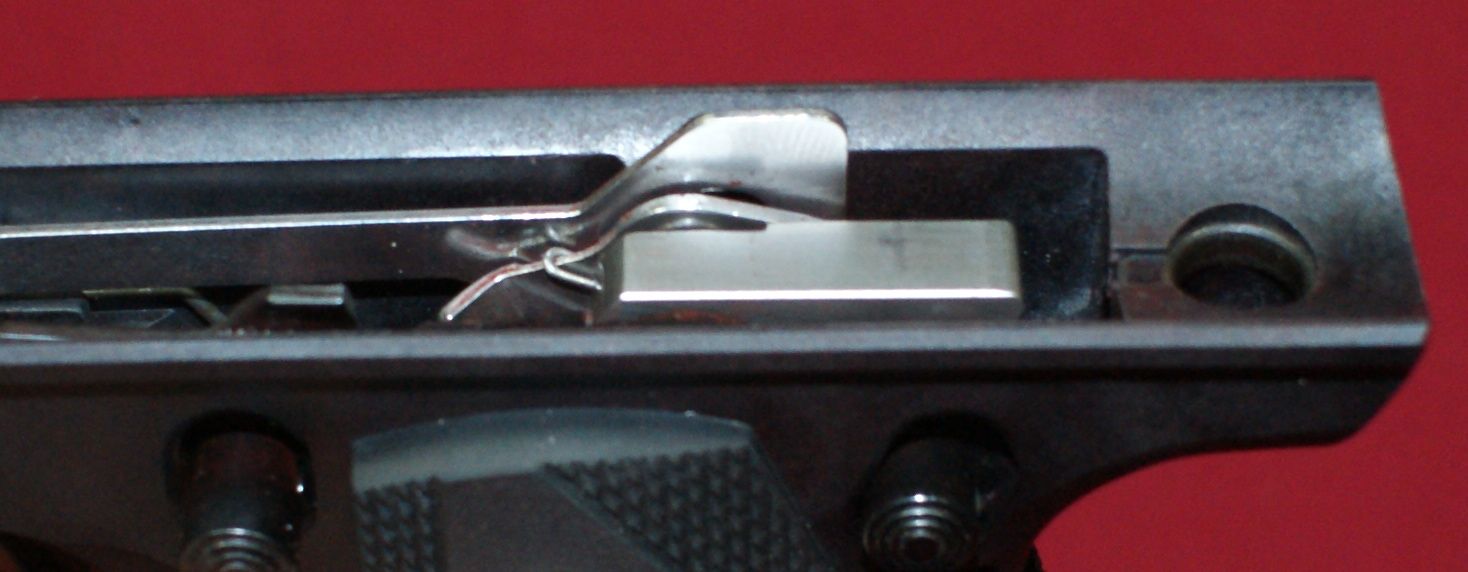
Step 2 - Swing Open Housing Latch
Insert something under the end of the mainspring housing latch and swing it open (to the rear). I was able to do this with my fingernail on this pistol, but some people use a paperclip or other blunt pointed tool.
Figure 2
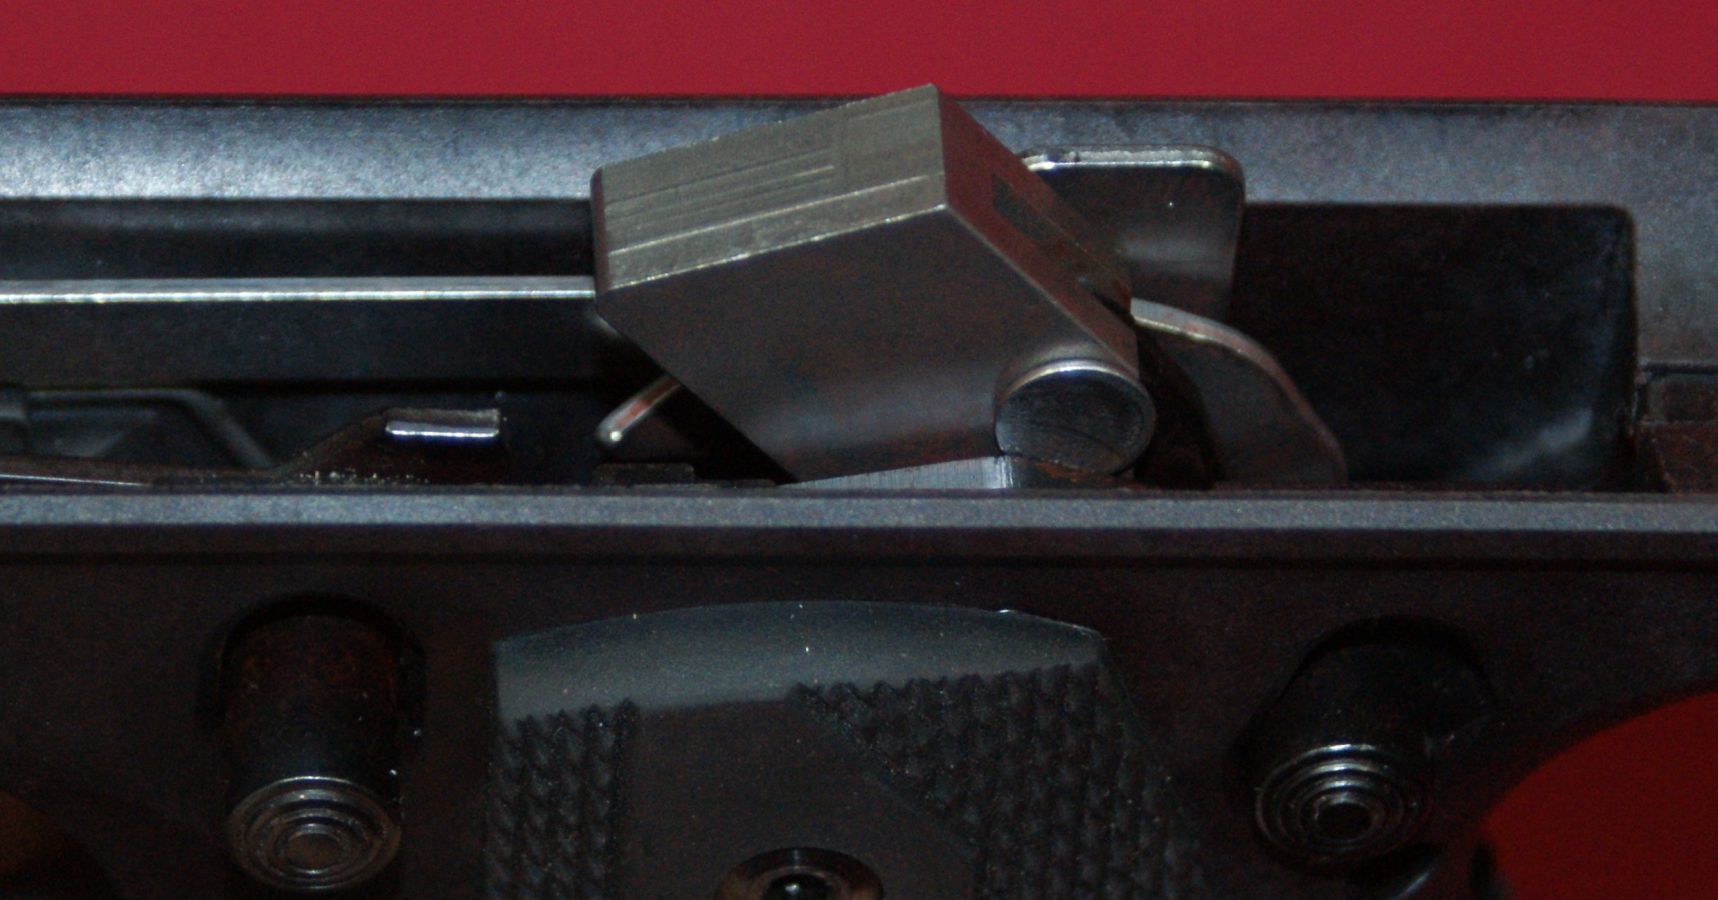
Step 3 - Remove Mainspring Housing
- Swing the entire housing outward on the pivot pin.
- Push/pull downward on the mainspring housing and the bolt stop pin will come out of the receiver and grip frame. On this pistol, I was able to do this by hand, but some people may need to use a plastic hammer and wooden dowel to tap the bolt stop pin down. If you use the hammer method, make sure you don't damage the rear sight.
Figure 3
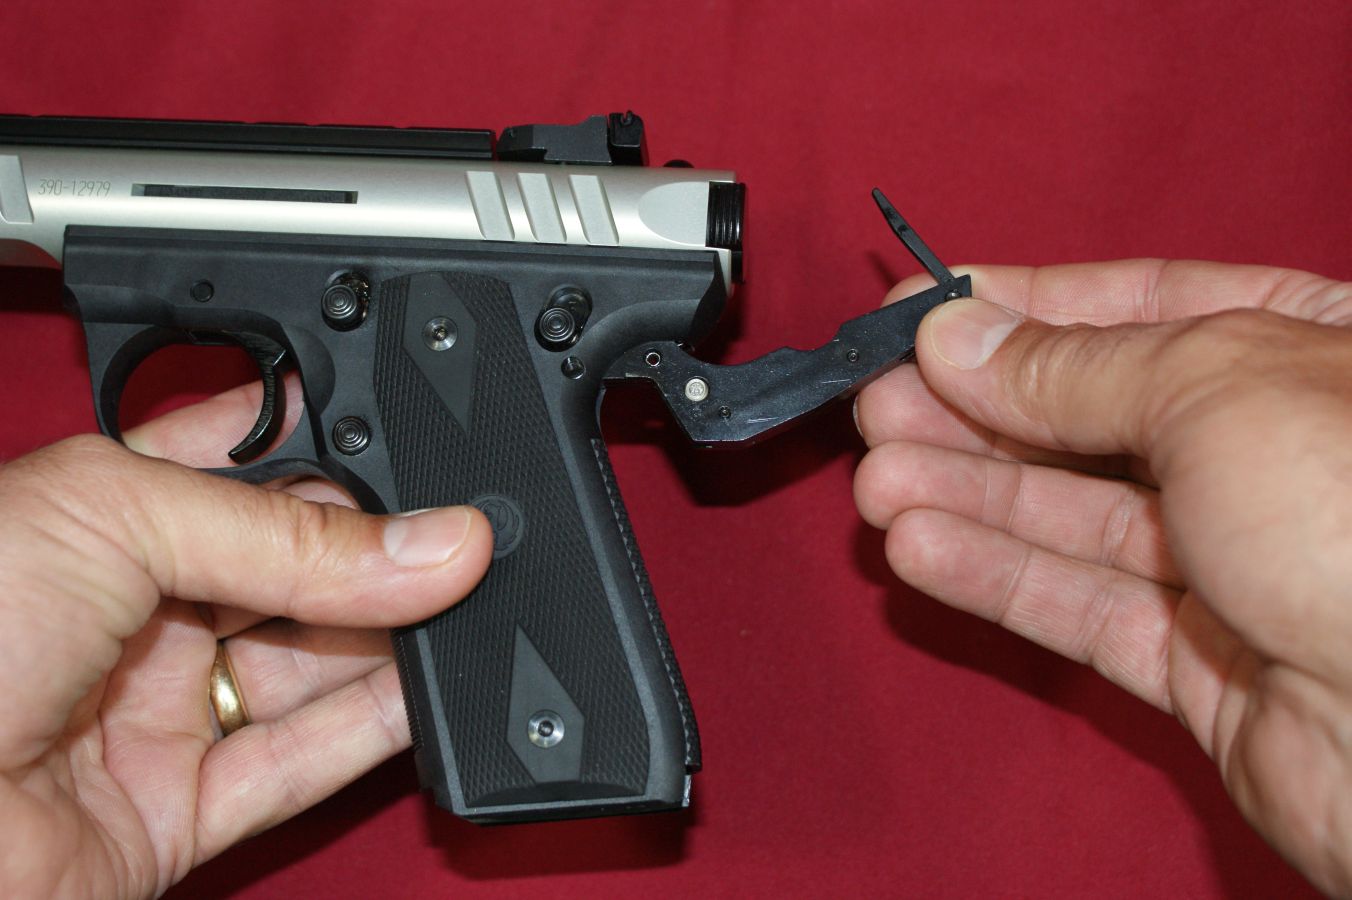
Figure 4
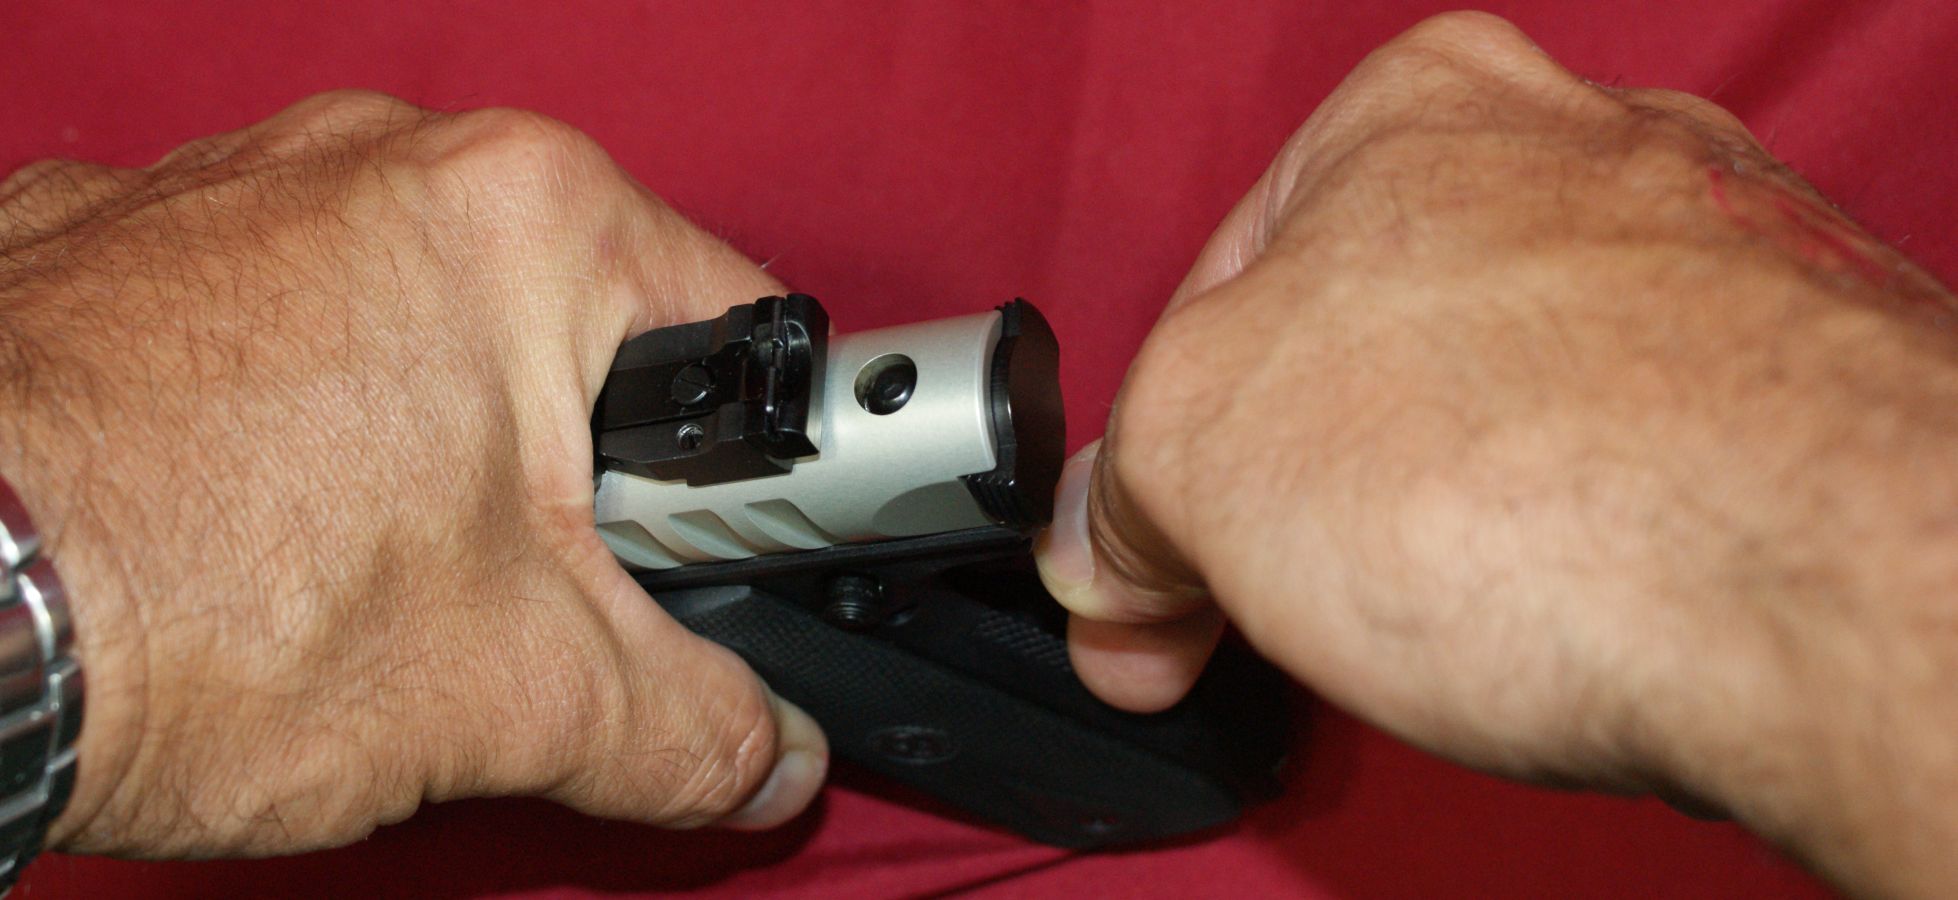
Figure 5
Step 4 - Remove Bolt
What I had to do was slightly different from the instructions. All I needed to do was turn the pistol upward and the bolt pulled out and actually turning it upward was not required. The instructions say insert the magazine, point the pistol upward and pull the trigger and the bolt will drop out of the receiver.
Figure 6
Step 5 - Remove Barrel-Receiver Assembly
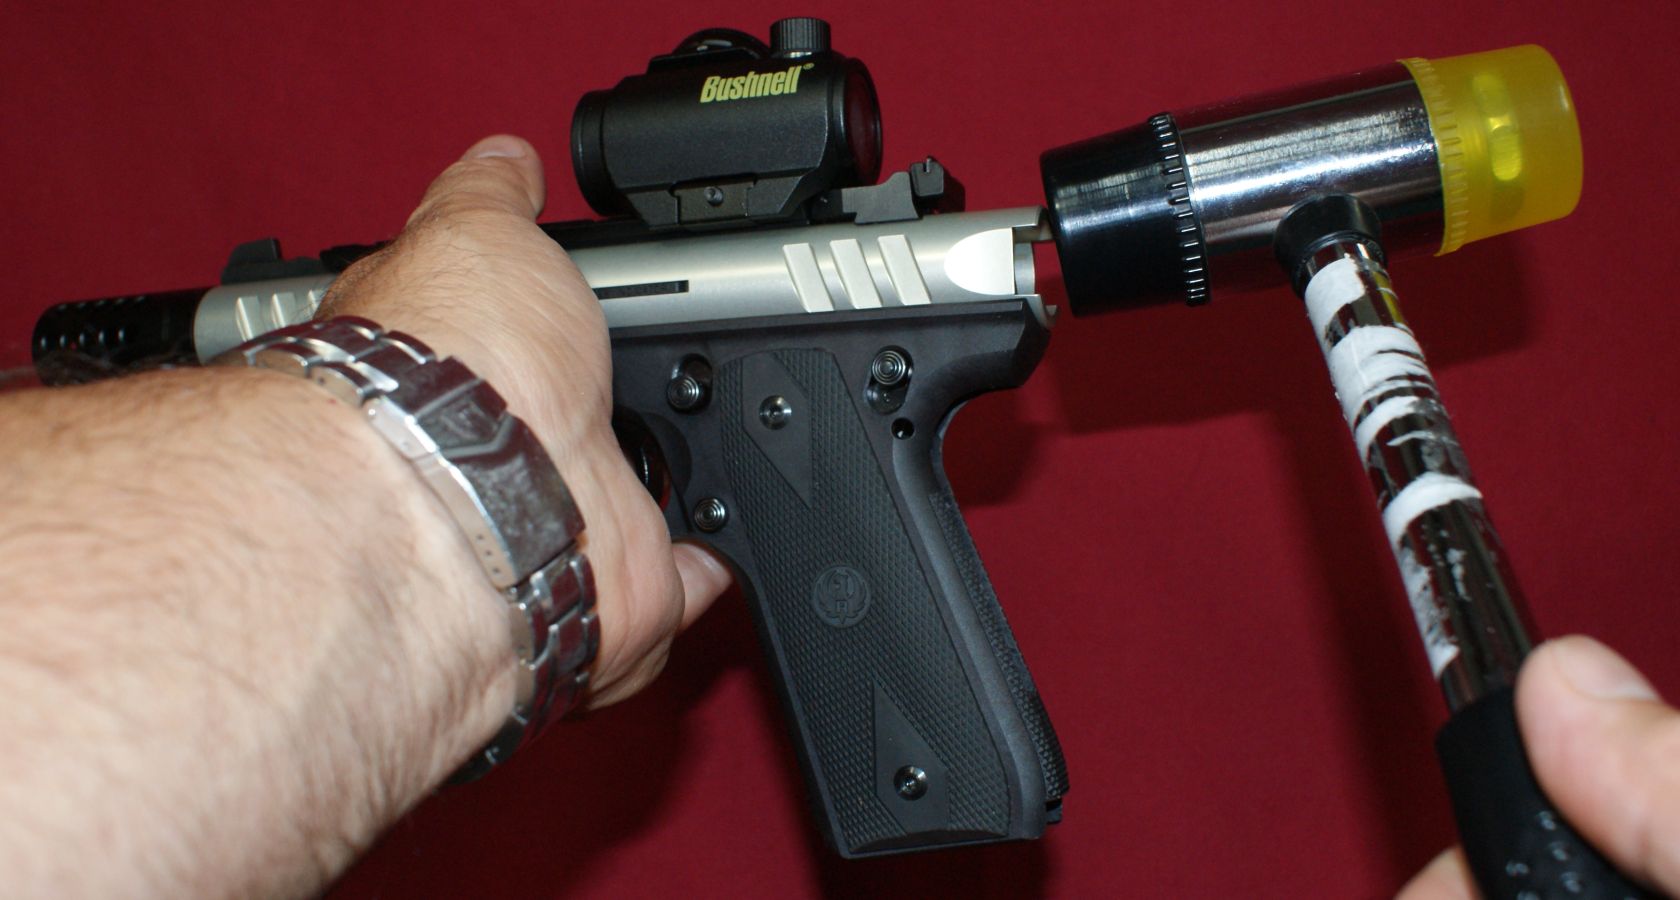
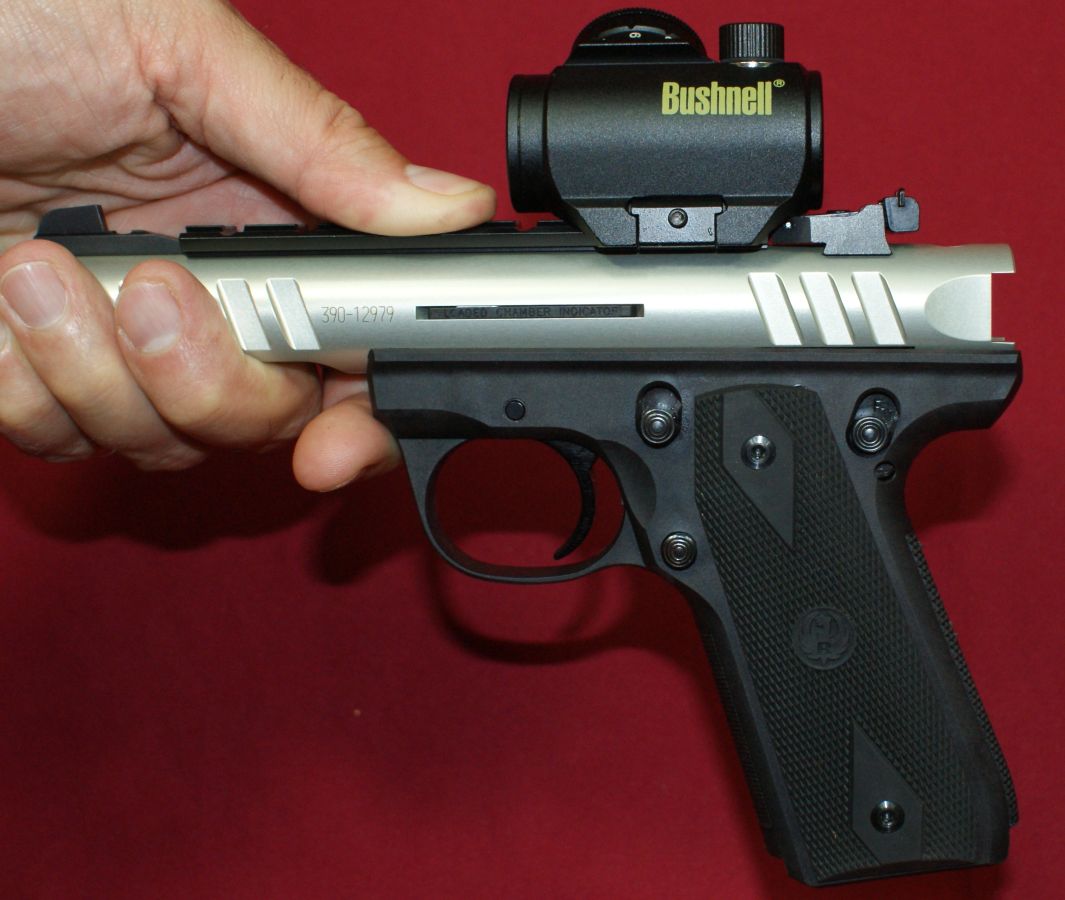
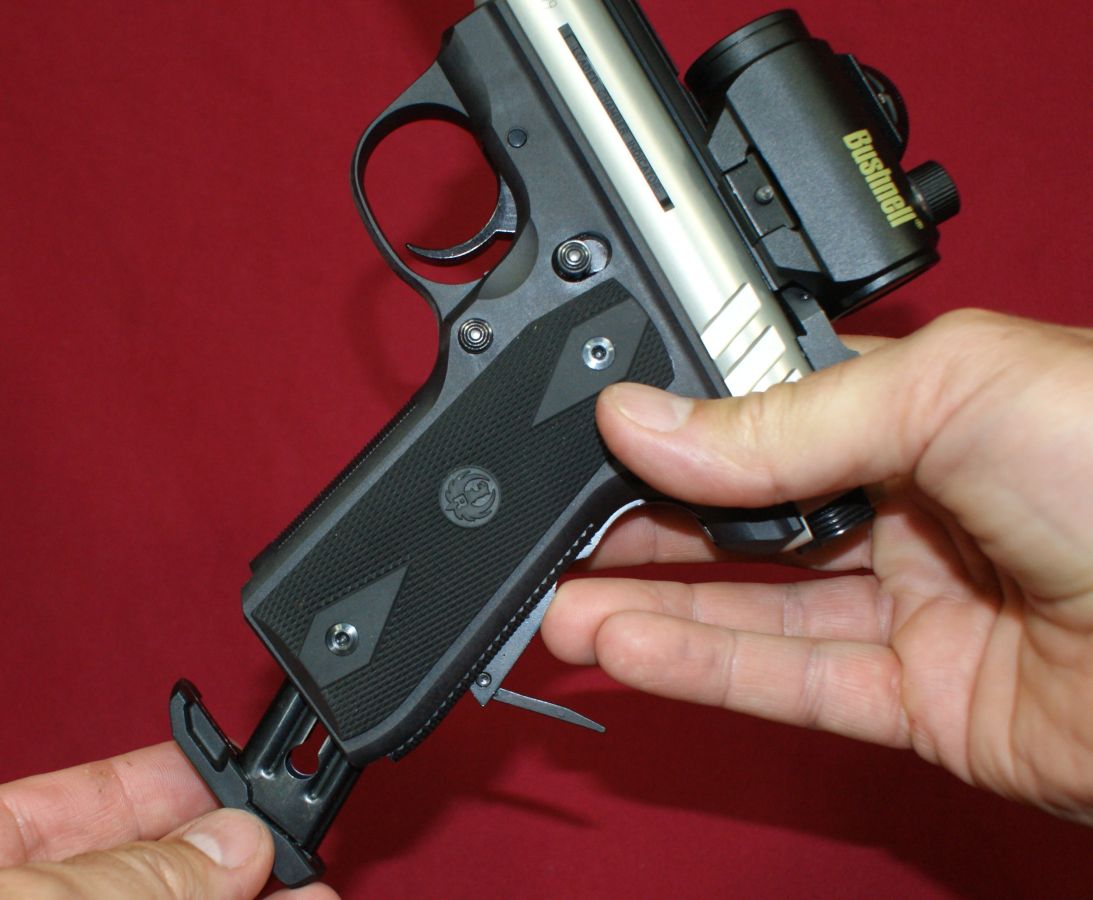
The instruction manual says you can use a plastic hammer to tap in the forward direction on the rear of the barrel-receiver assembly to remove the assembly from the grip frame as shown in the figure below.
Figure 7
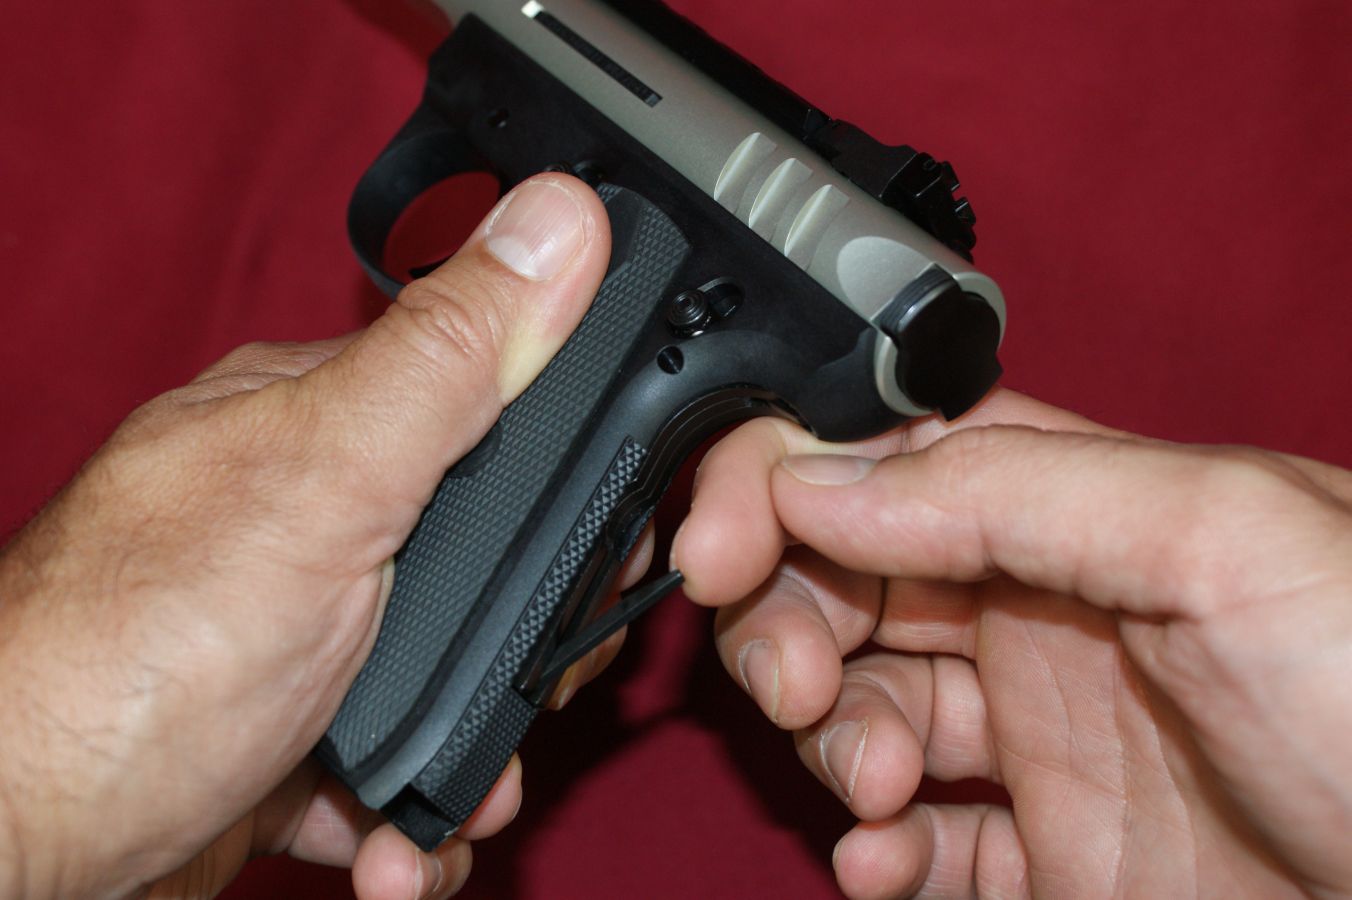
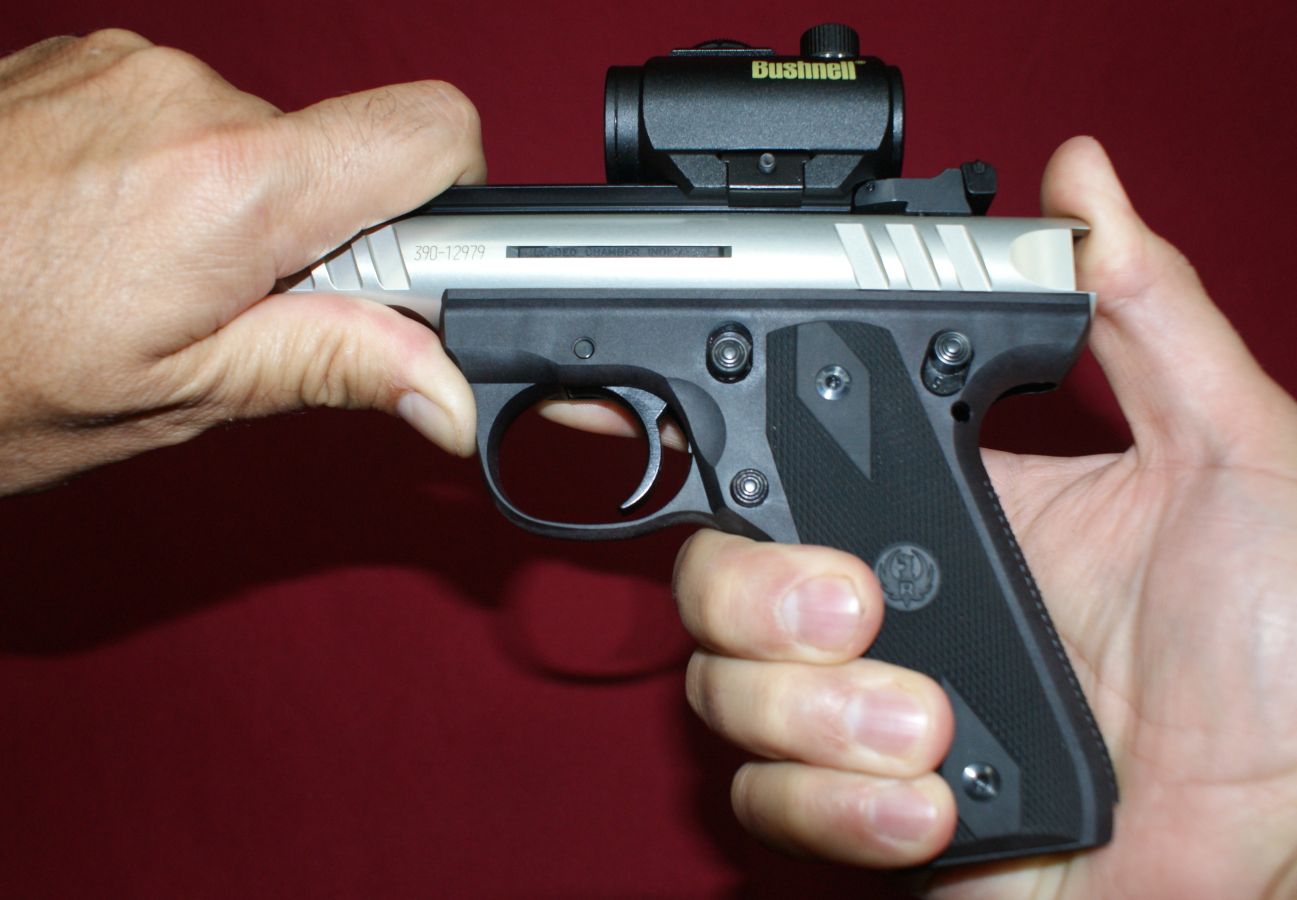
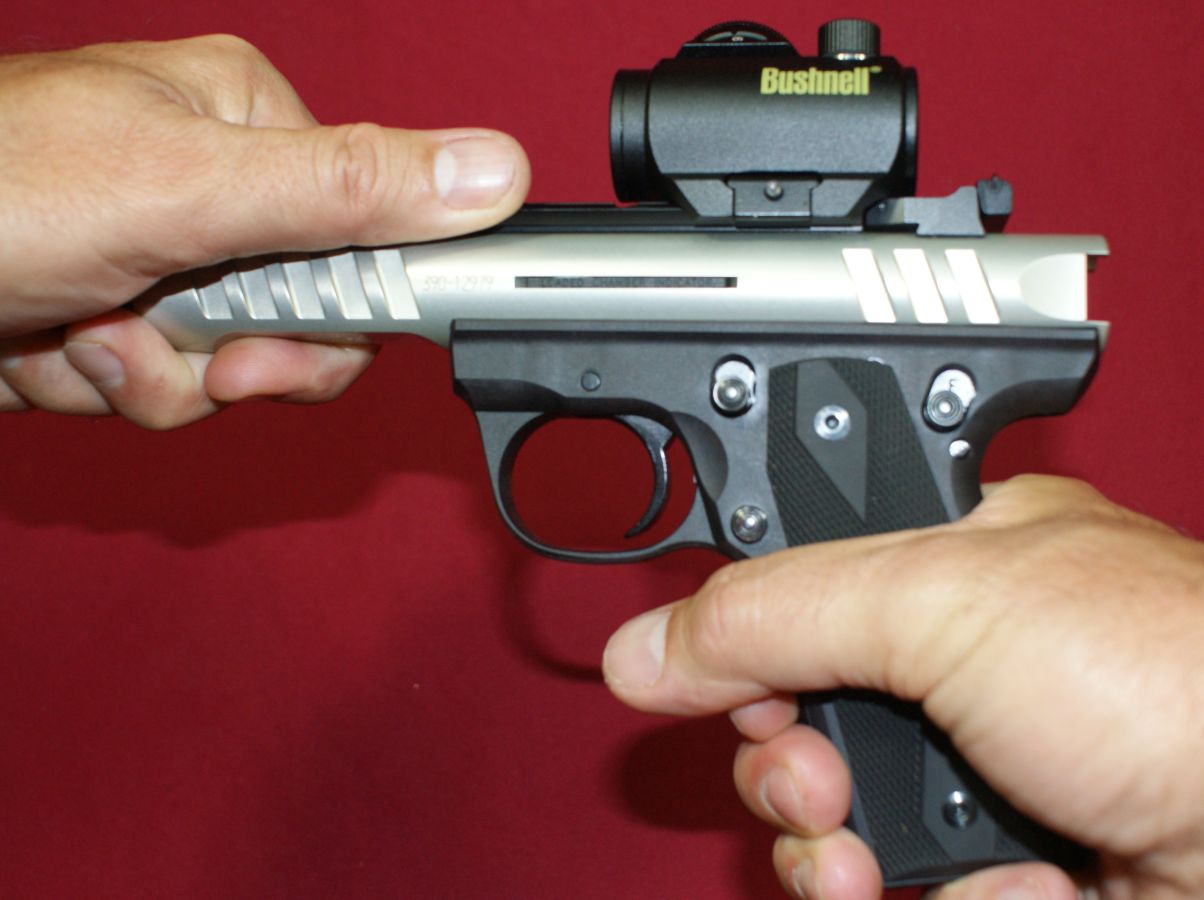
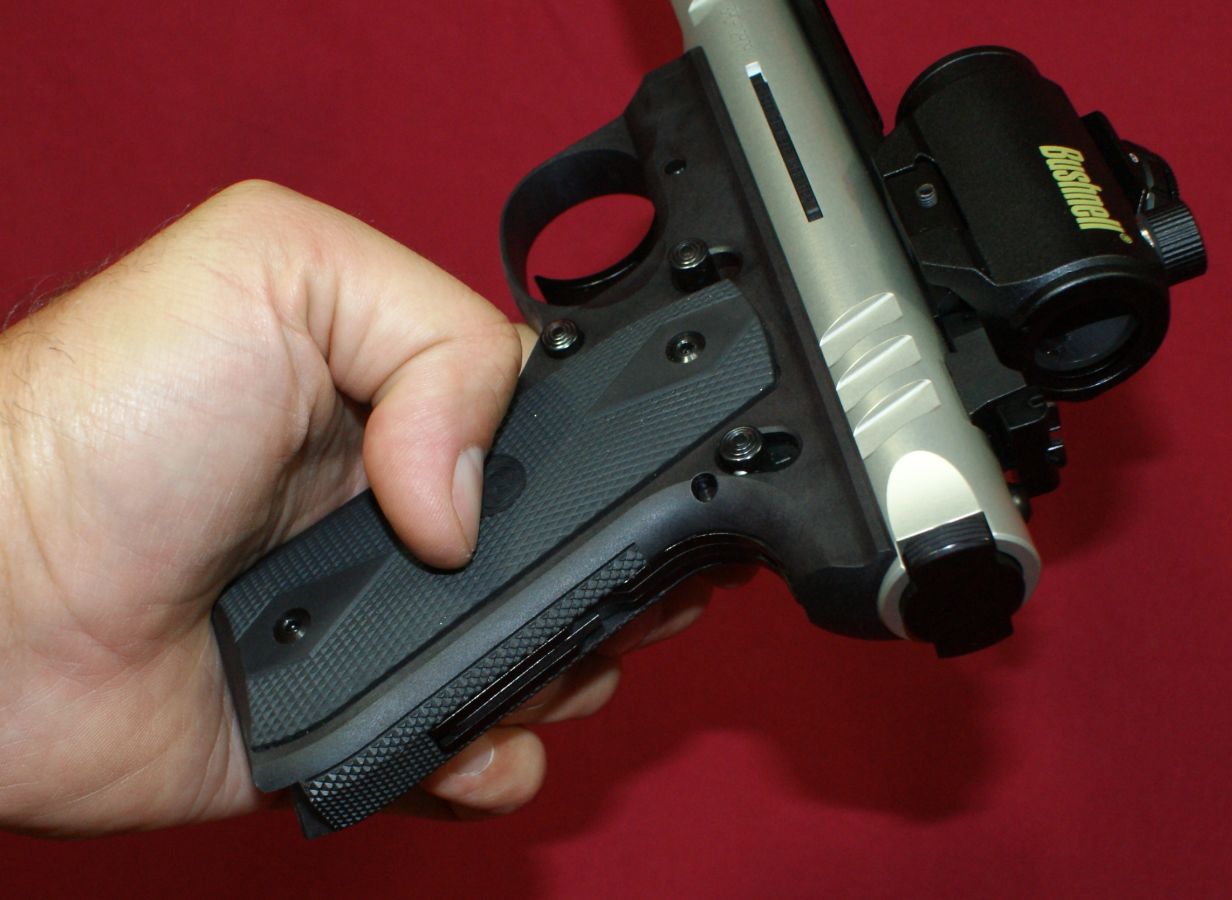
On this pistol, I found that gripping the pistol with two hands as shown below and pushing with both thumbs would disengage barrel-receiver assembly from the grip frame. Once the barrel-receiver assembly moves forward, it can be lifted from the grip frame.
Figure 8
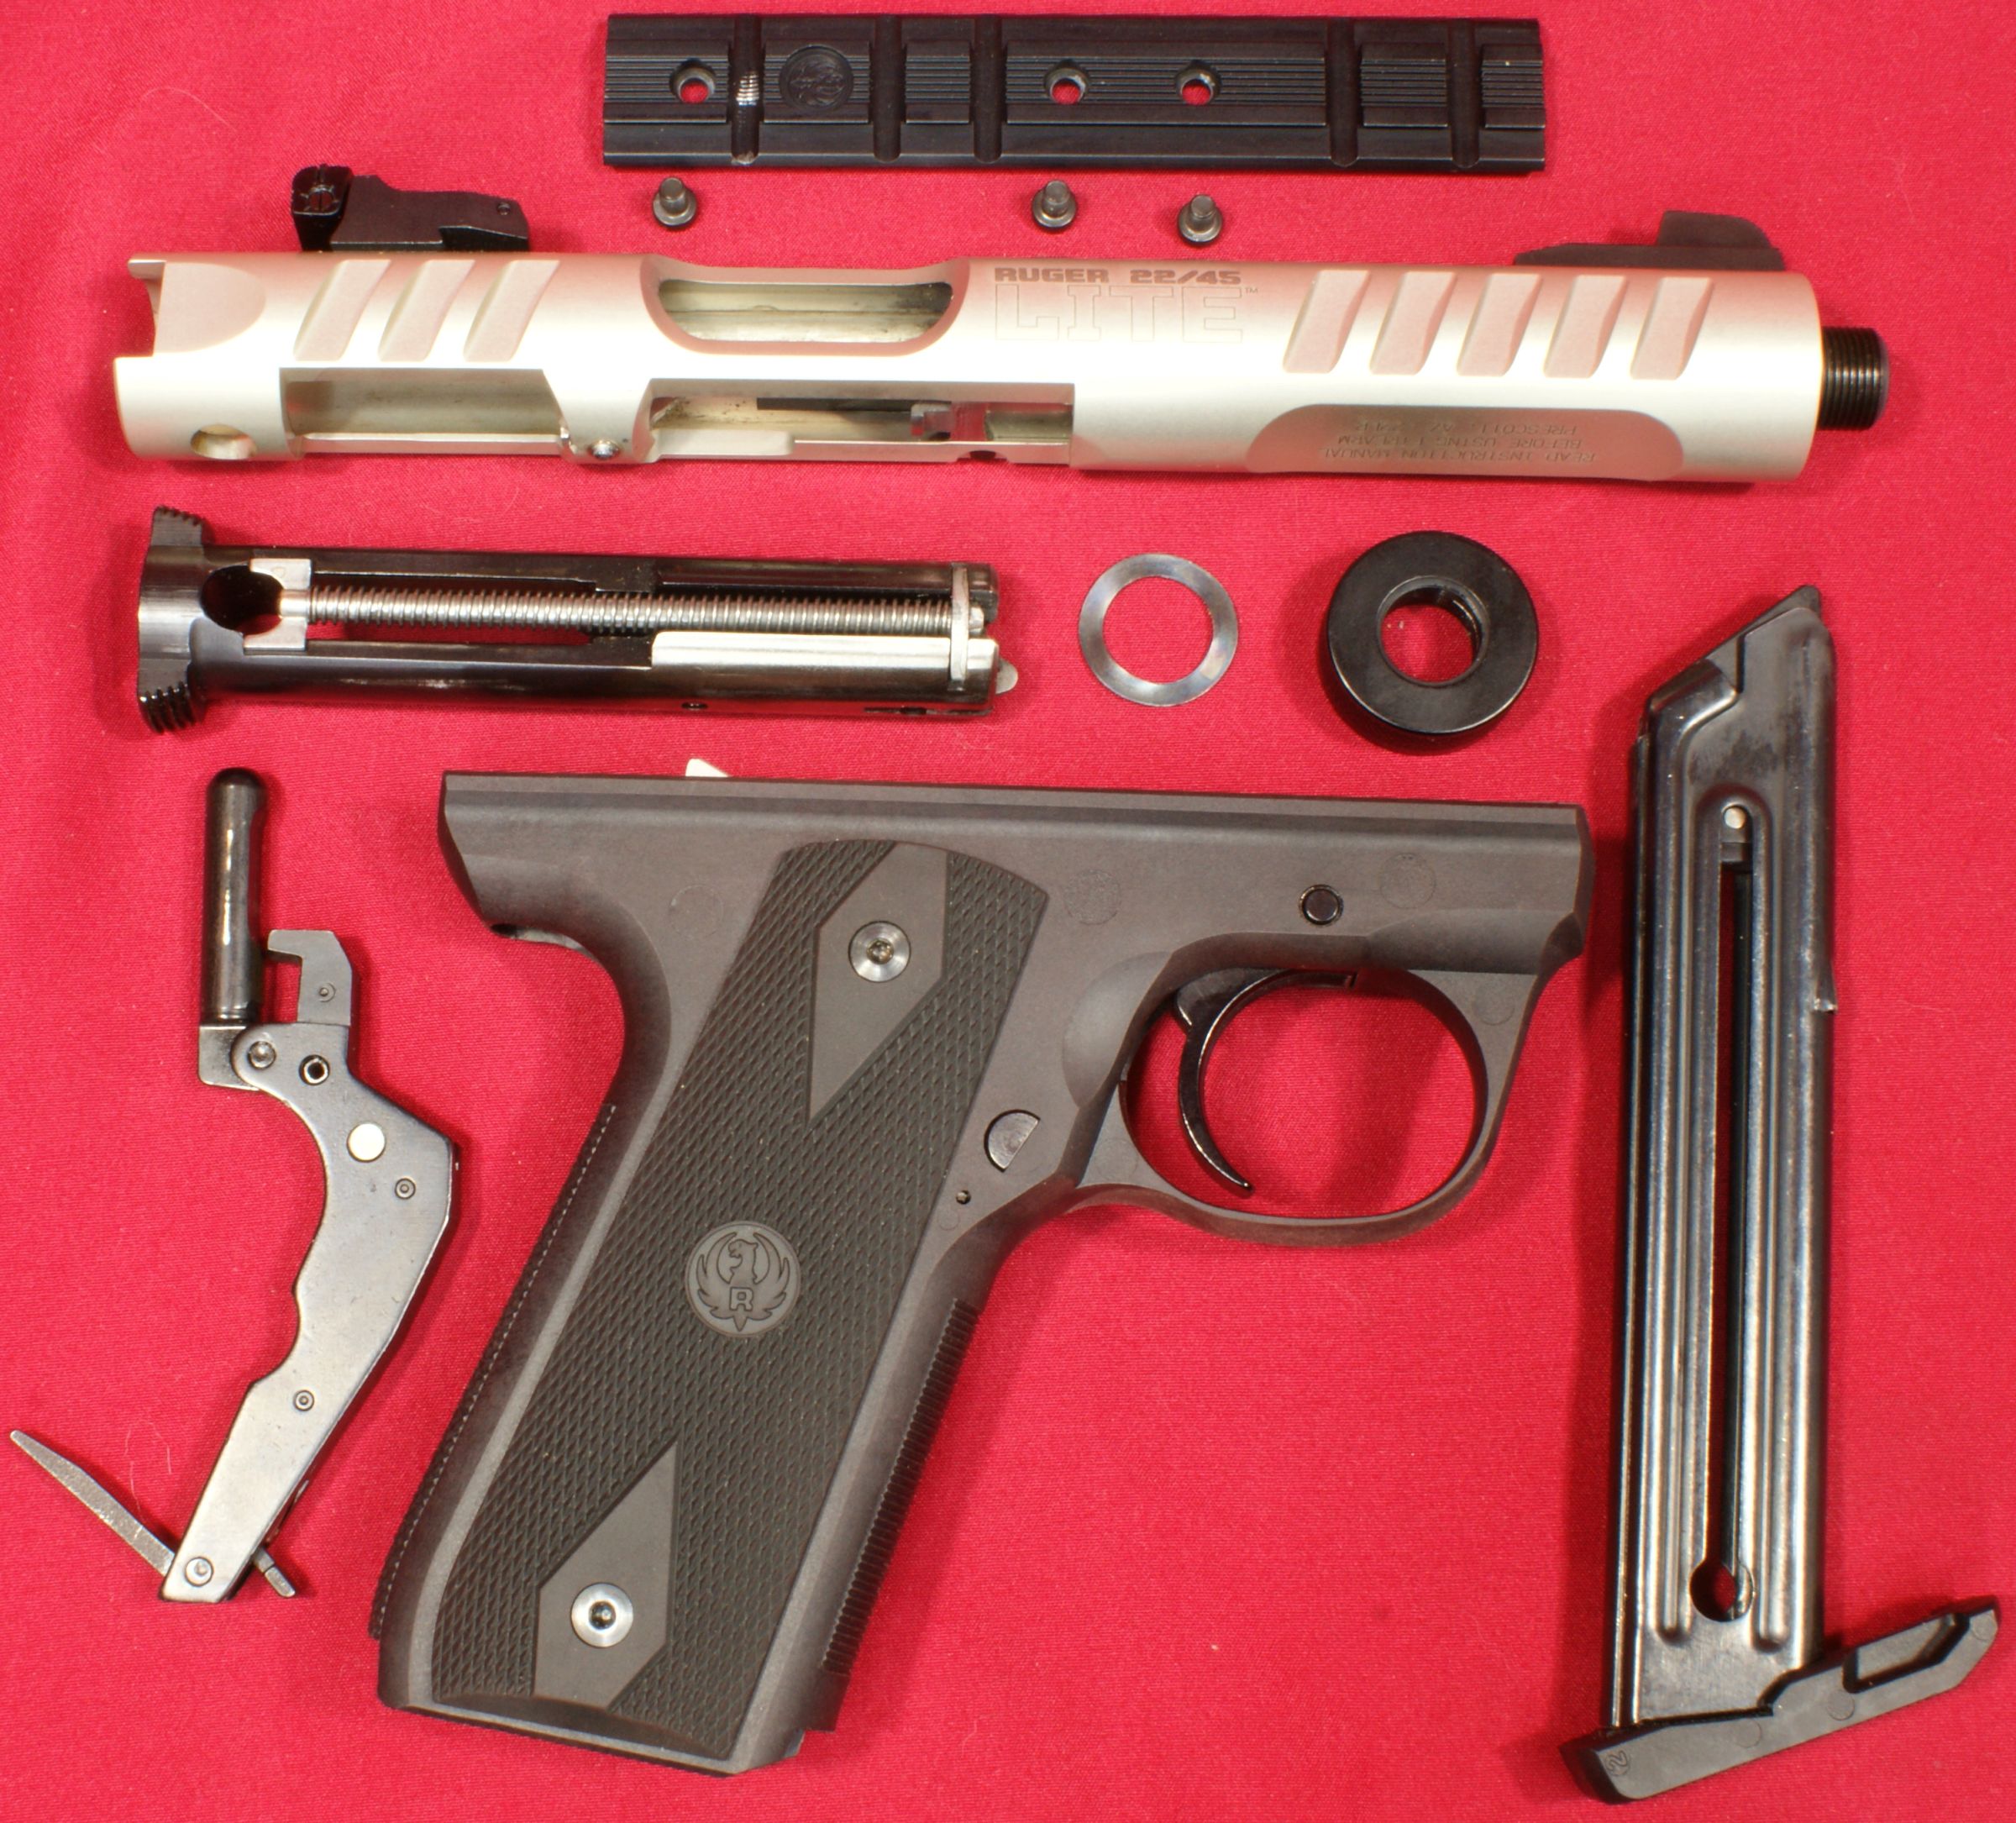
Fully Disassembled
Using a flat head screwdriver, I removed the Weaver-style base adapter and unscrewed the thread protector by hand. The photo below shows the maximum level of disassembly described in the Instruction Manual and the manual actually states that "further disassembly should be undertaken only by the factory."
Figure 9
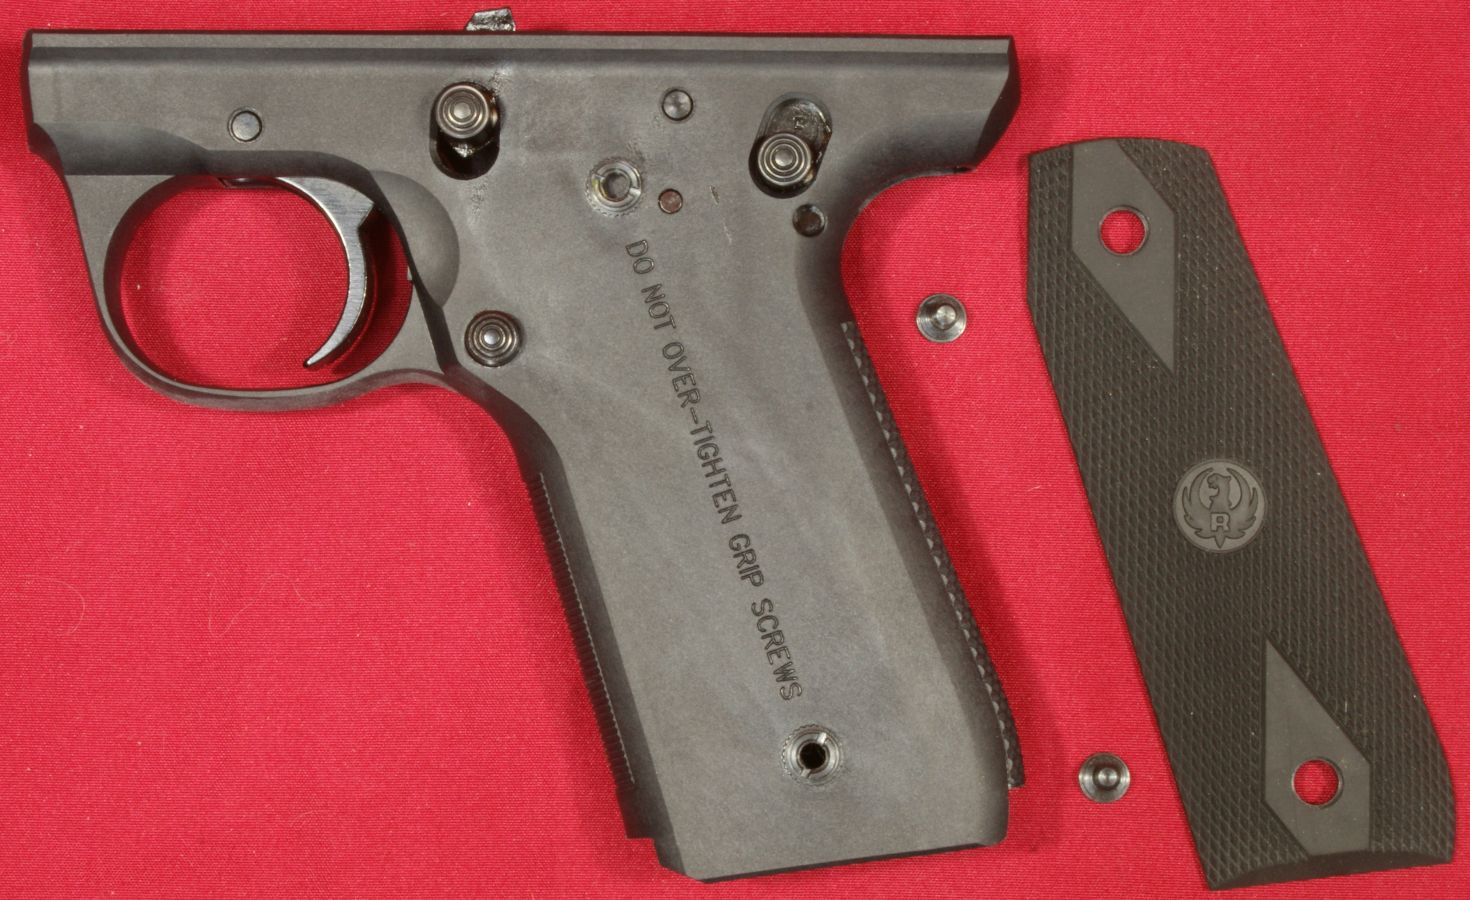
Grip Panel Removal
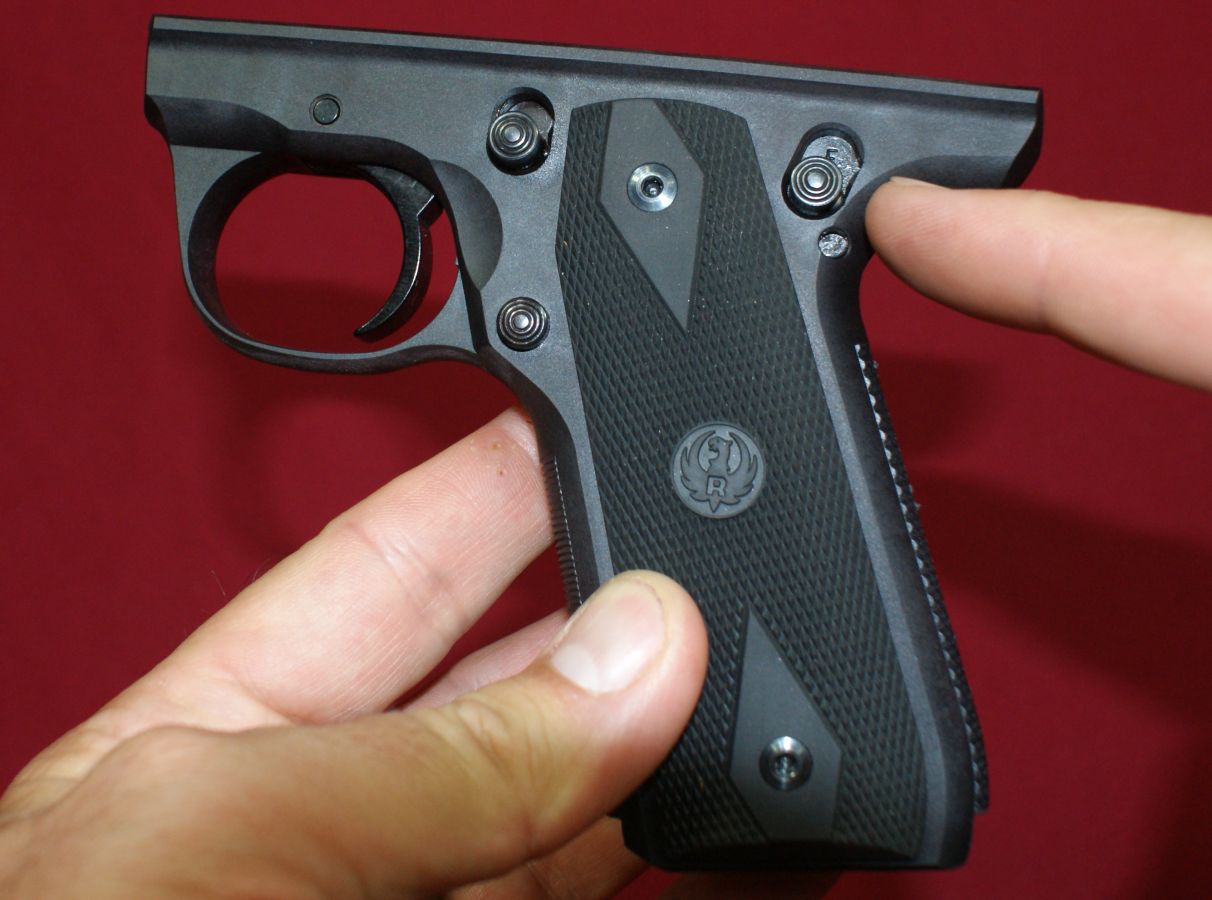
The grip panels are easily removed by using a 3/32" Allen wrench to remove the two screws on each panel. With the two screws removed, the panel will lift off the grip frame.
Figure 10
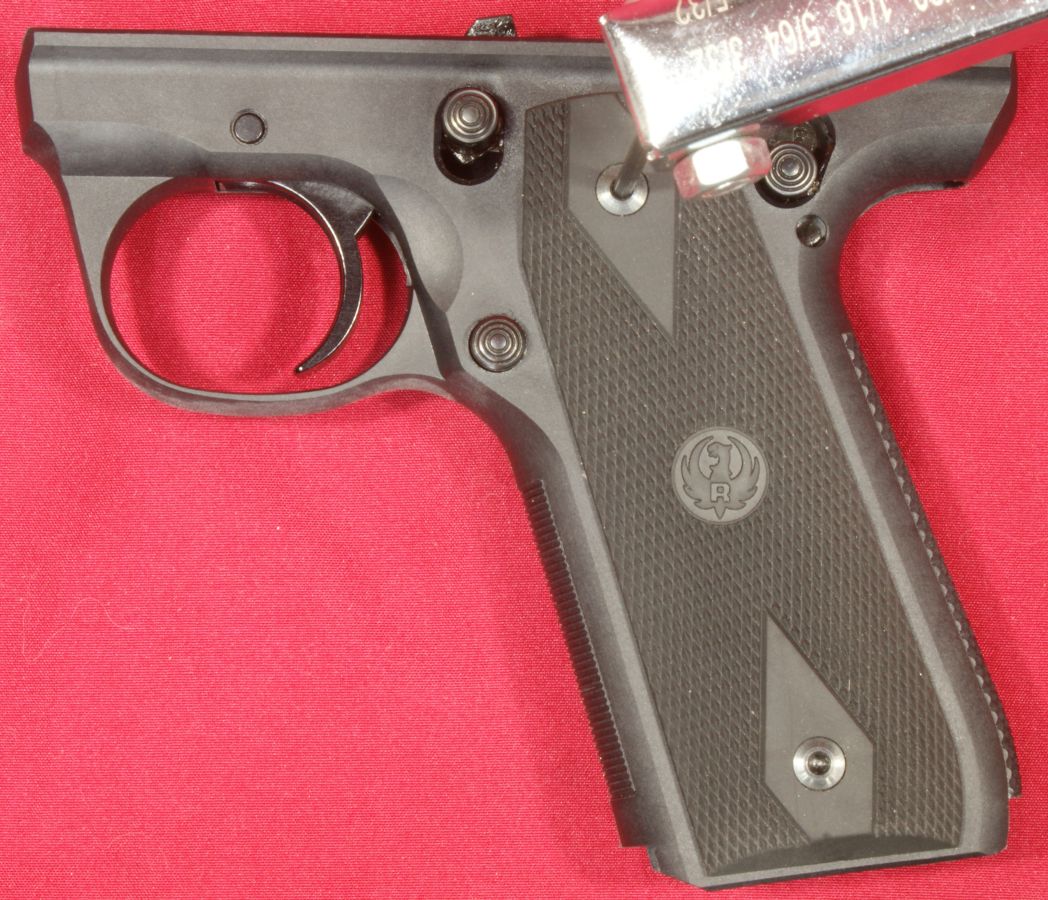
Figure 11
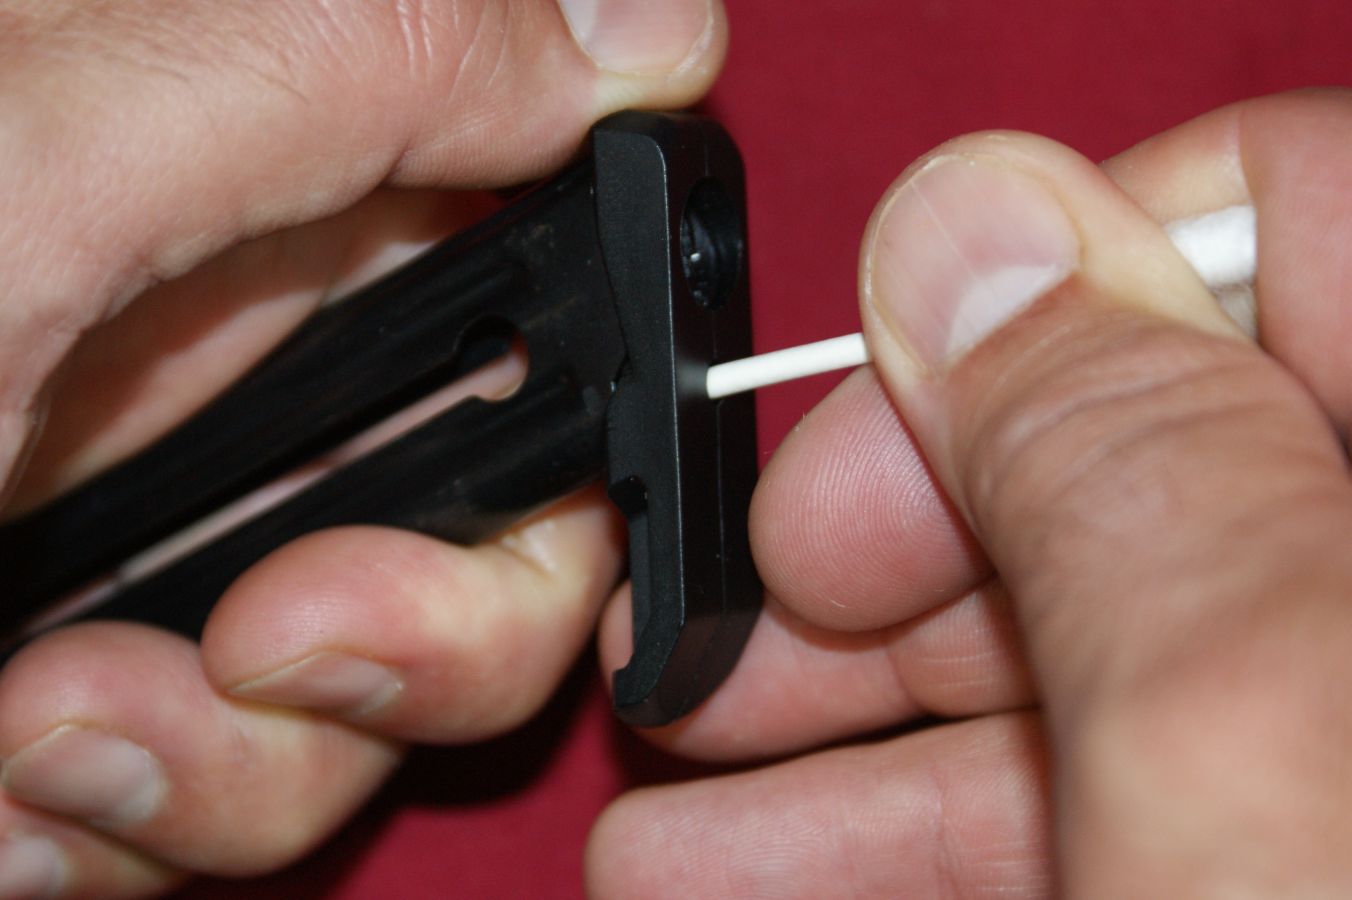
Magazine Disassembly
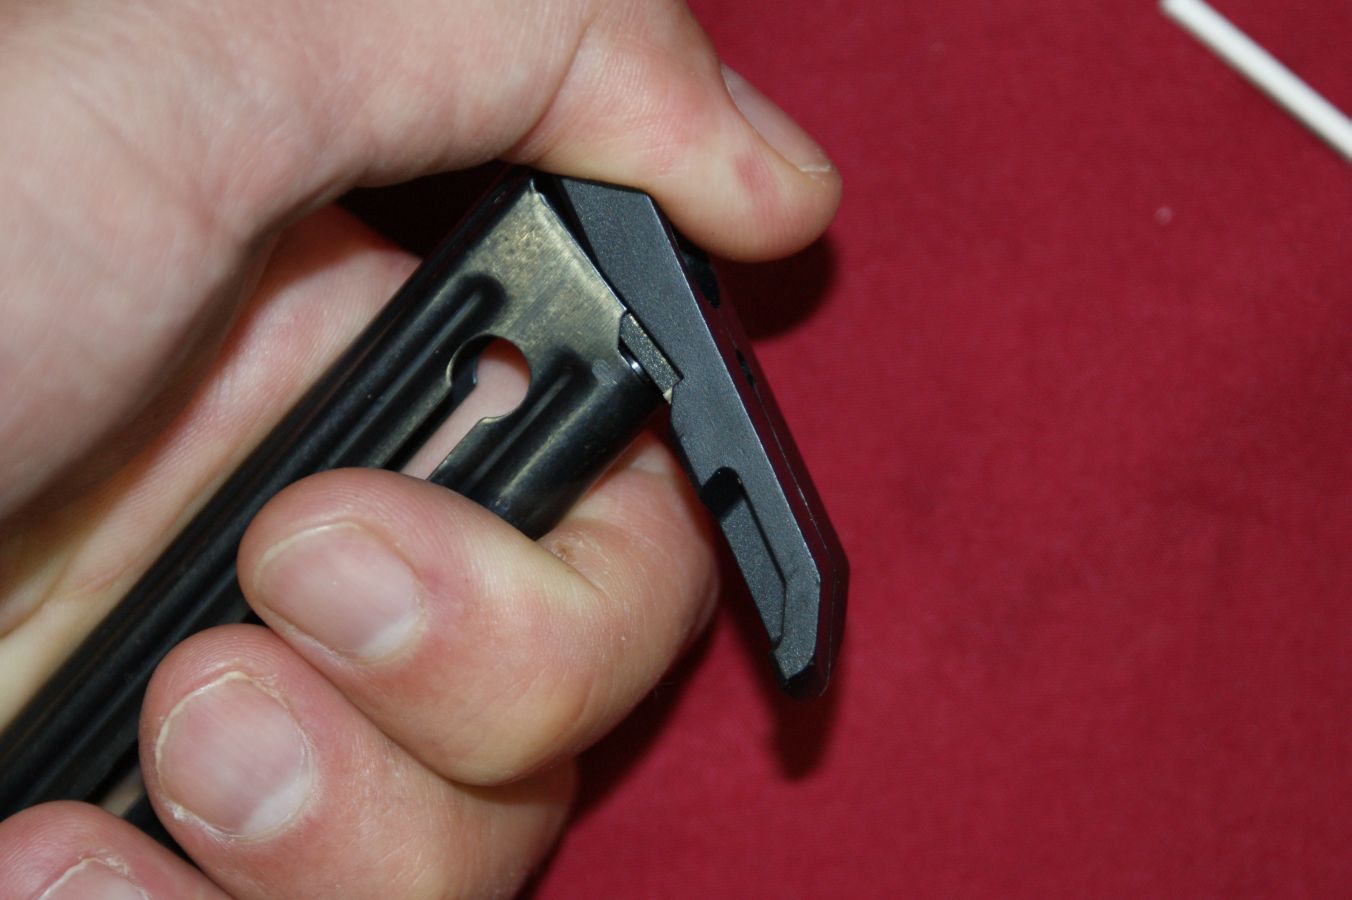
To disassemble the magazine, start by inserting something into the hole in the block on the bottom of the magazine and pressing the retaining plunger in about 1/4". I cut a Q-tip in half because it was handy and inserted the stem as shown in the photo below.
Figure 12
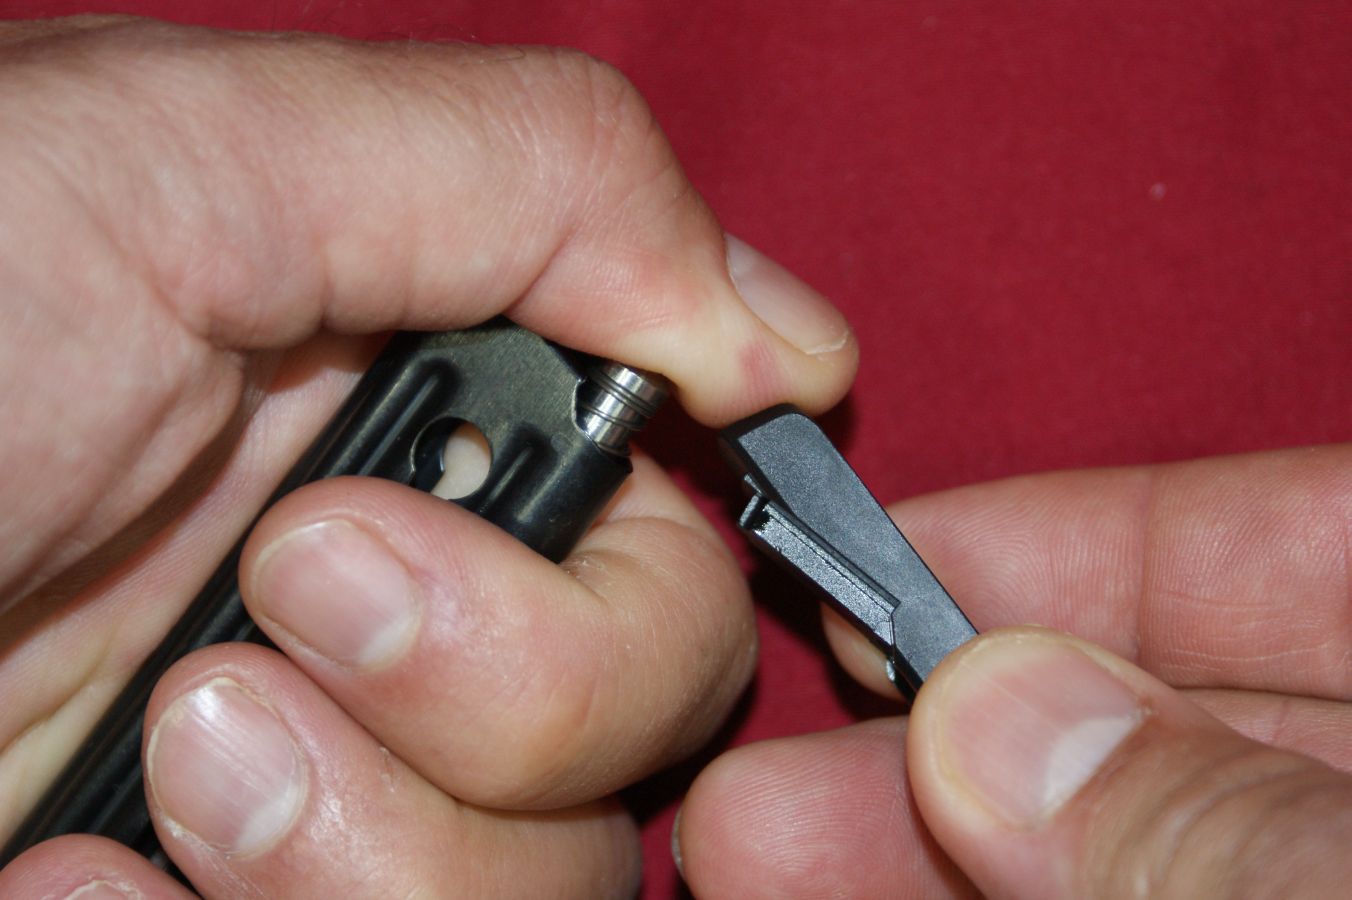
As you are pressing in, slide the block forward on the base of the magazine, but make sure you keep your thumb on the block and the magazine pointed in a safe direction. The retaining plunger is spring loaded and could fly across the room or into someone's face if not careful.
Figure 13
The photo below shows the block removed and my thumb holding the spring loaded plunger in place.
Figure 14
The photo below shows the magazine spring at it's fully uncompressed length. This gives you a good idea that there is considerable force pushing against the plunger and follower. You can then remove the spring and plunger from the magazine body.
Figure 15

Next slide the follower to the bottom of the magazine and the button can be removed through the round hole at the bottom of the slot in the magazine body. With the button removed, the follower will drop out of the bottom of the magazine.
Figure 16
The photo below shows the magazine fully disassembled. Reassembly is basically a reverse of these steps above.
Figure 17

Pistol Reassembly
Normally I don't show the reassembly of a firearm because reassembly is typically just the reverse of disassembly. Fundamentally this is also true for the 22/45 pistols, but there are a couple of nuances that you need to pay close attention to and doing so will make reassembly a breeze.
Step 1 - Safe & Manual Safety to "Fire"
Make sure the pistol and magazine are completely unloaded and place the safety in the down "F" fire position.
Figure 18
Step 2 - Position Hammer & Check Loaded Chamber Indicator Pin
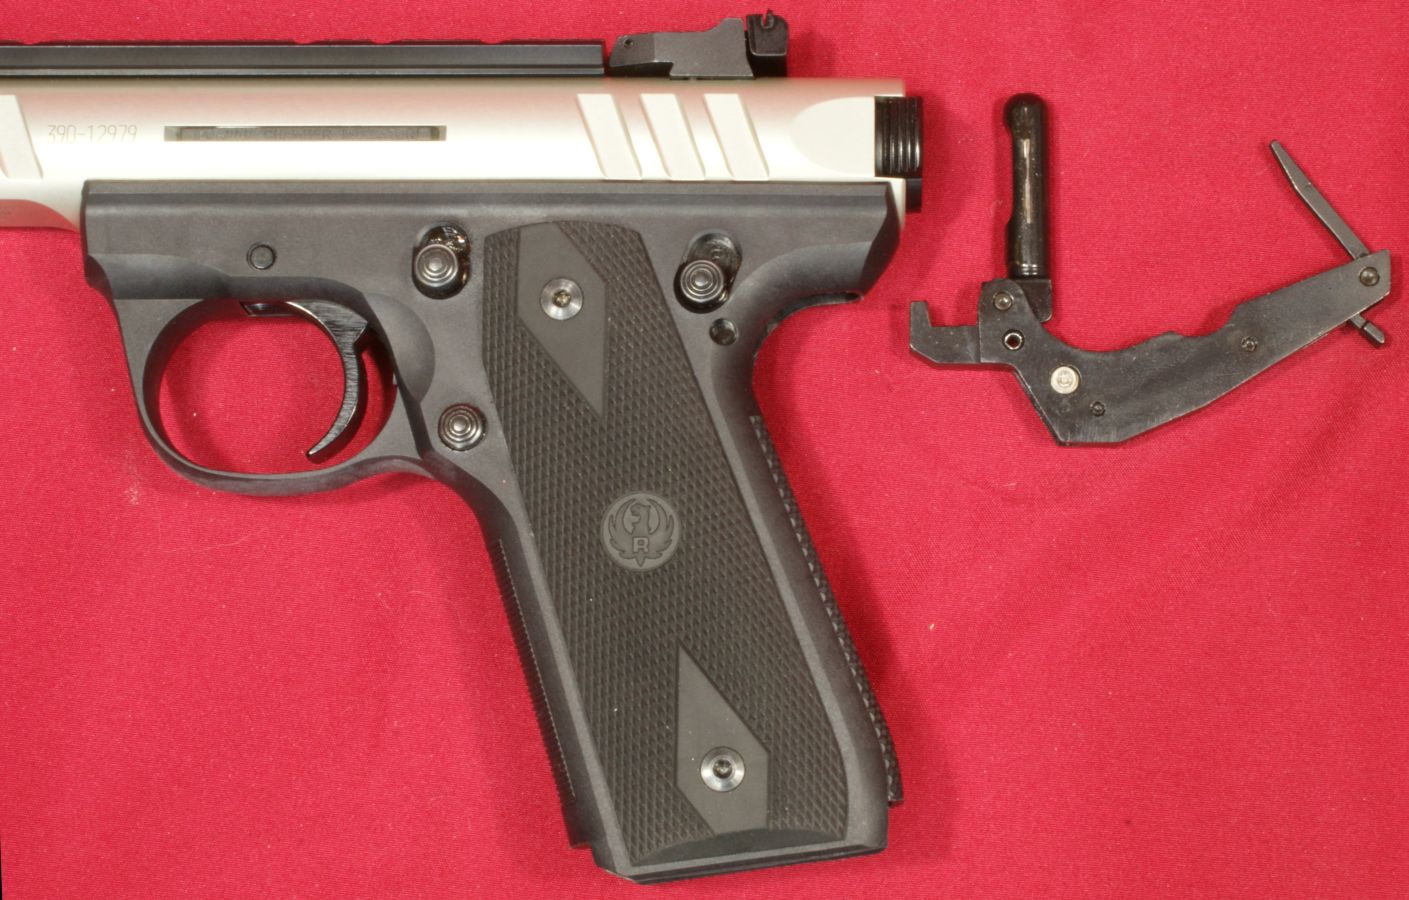
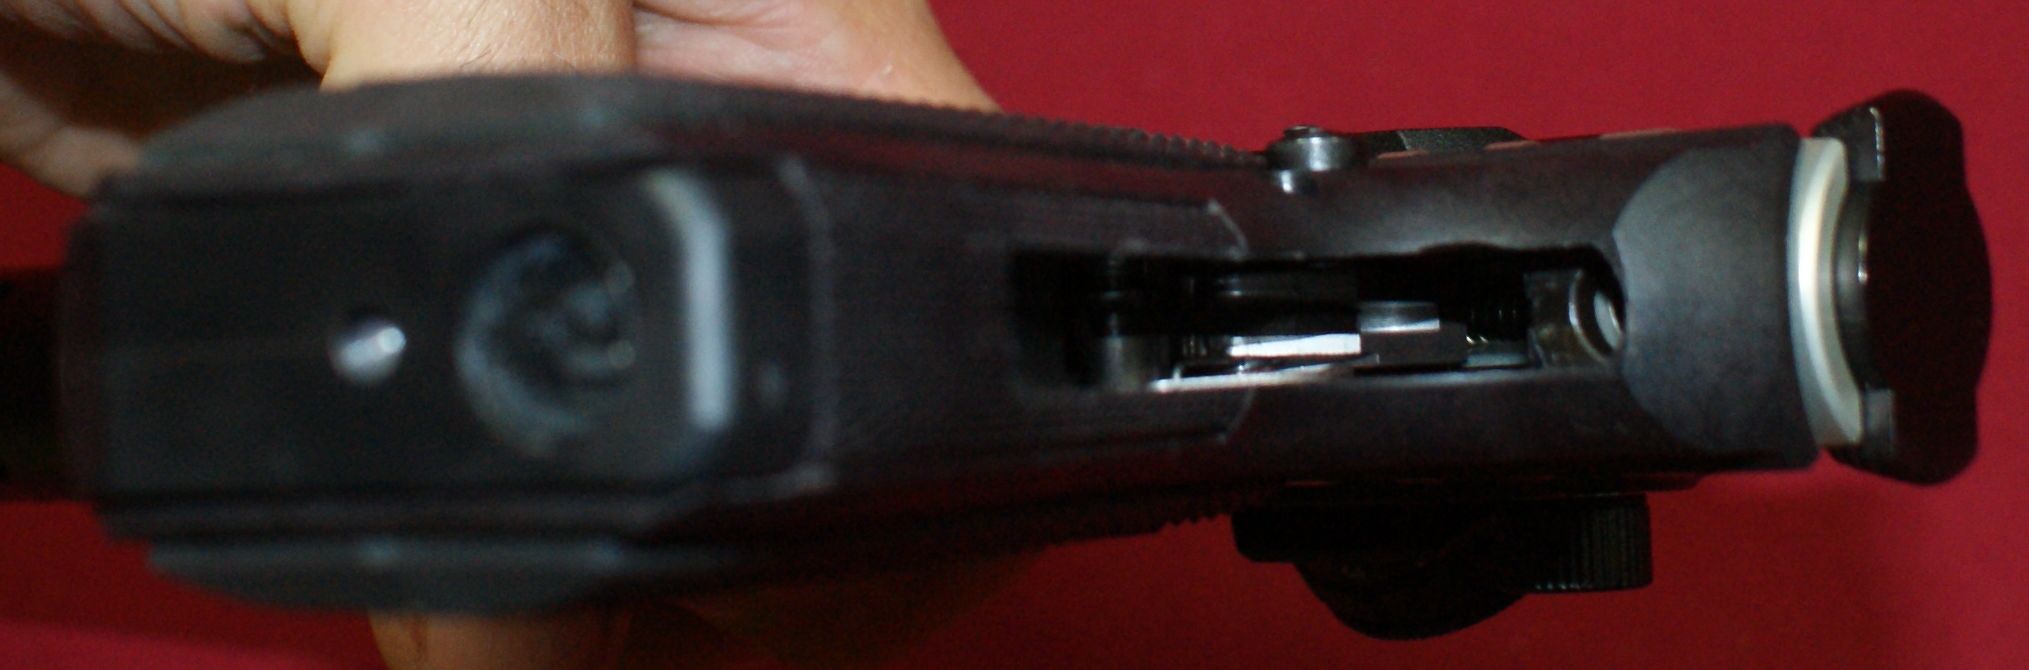
Position the hammer (A) in the horizontal (cocked) position. You will not need to press the trigger. You should not have to apply much force to get the hammer into this position.
Figure 19
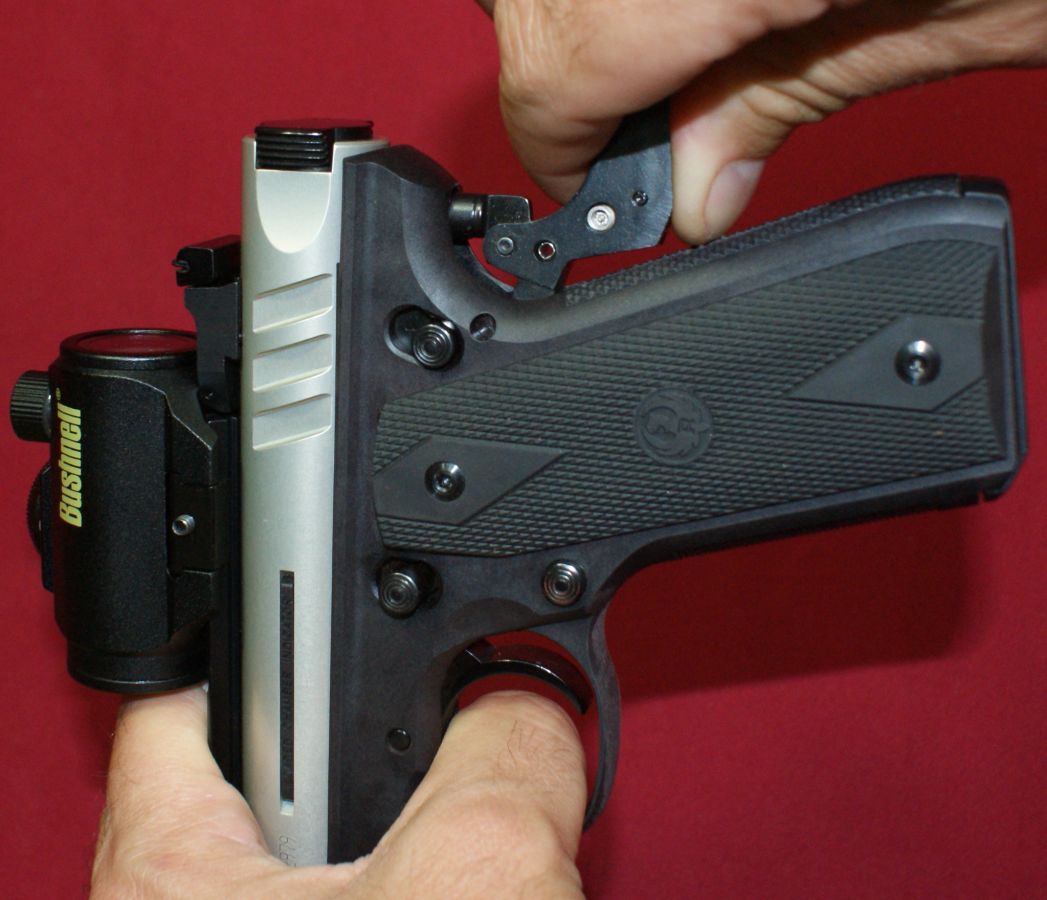
If the hammer will not easily push back to horizontal position, it is most likely too far forward as shown below. If so, insert an empty magazine into the magazine well and this will raise the magazine disconnect allowing you to rotate the hammer. Afterwards, remove the magazine.
Figure 20
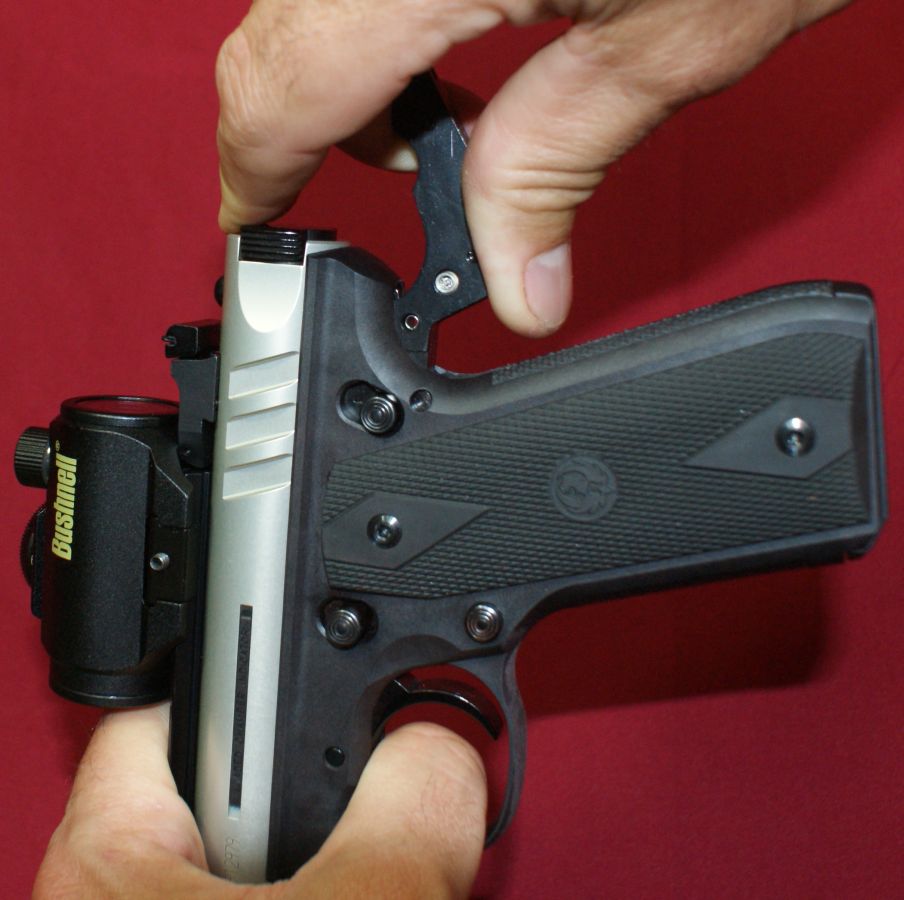
If for some reason it is still hard to rotate the hammer back to a horizontal position, you need to make sure the hammer strut (B) is free to rotate on the back side of the grip frame.
Figure 21
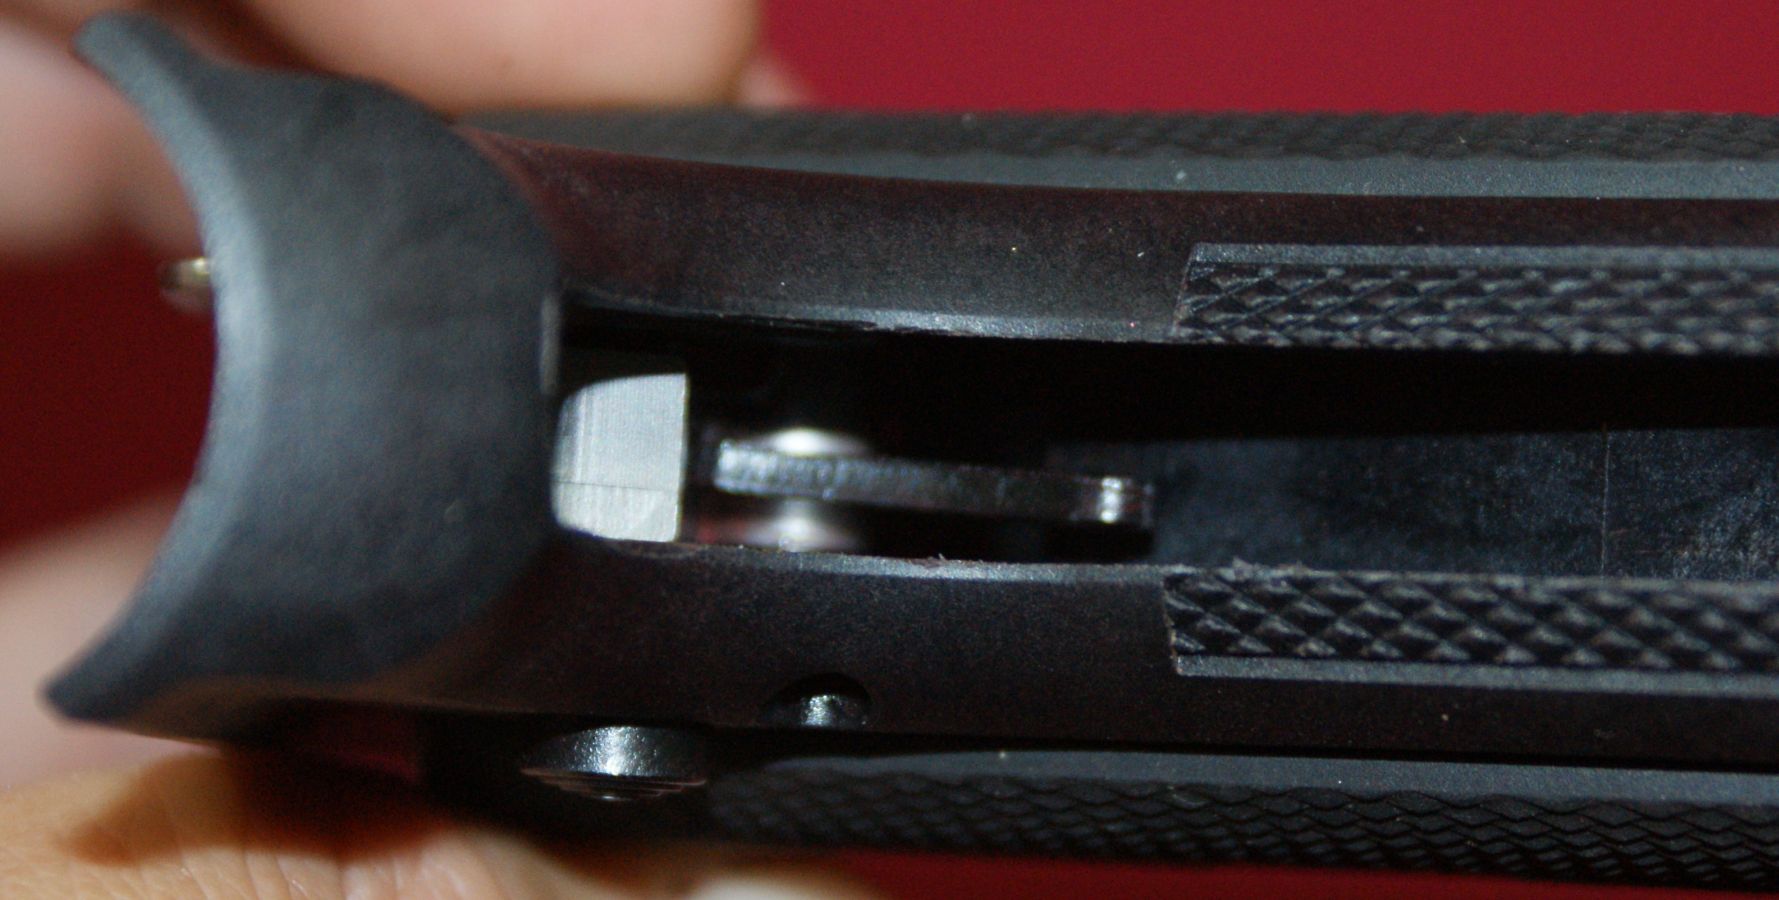
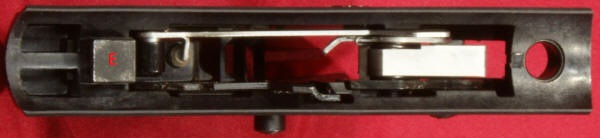
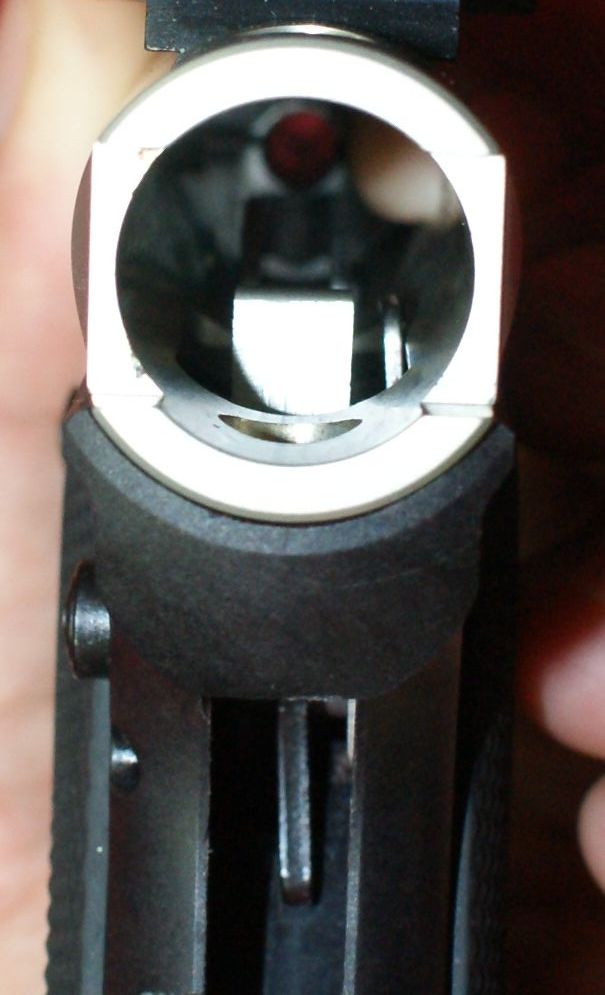
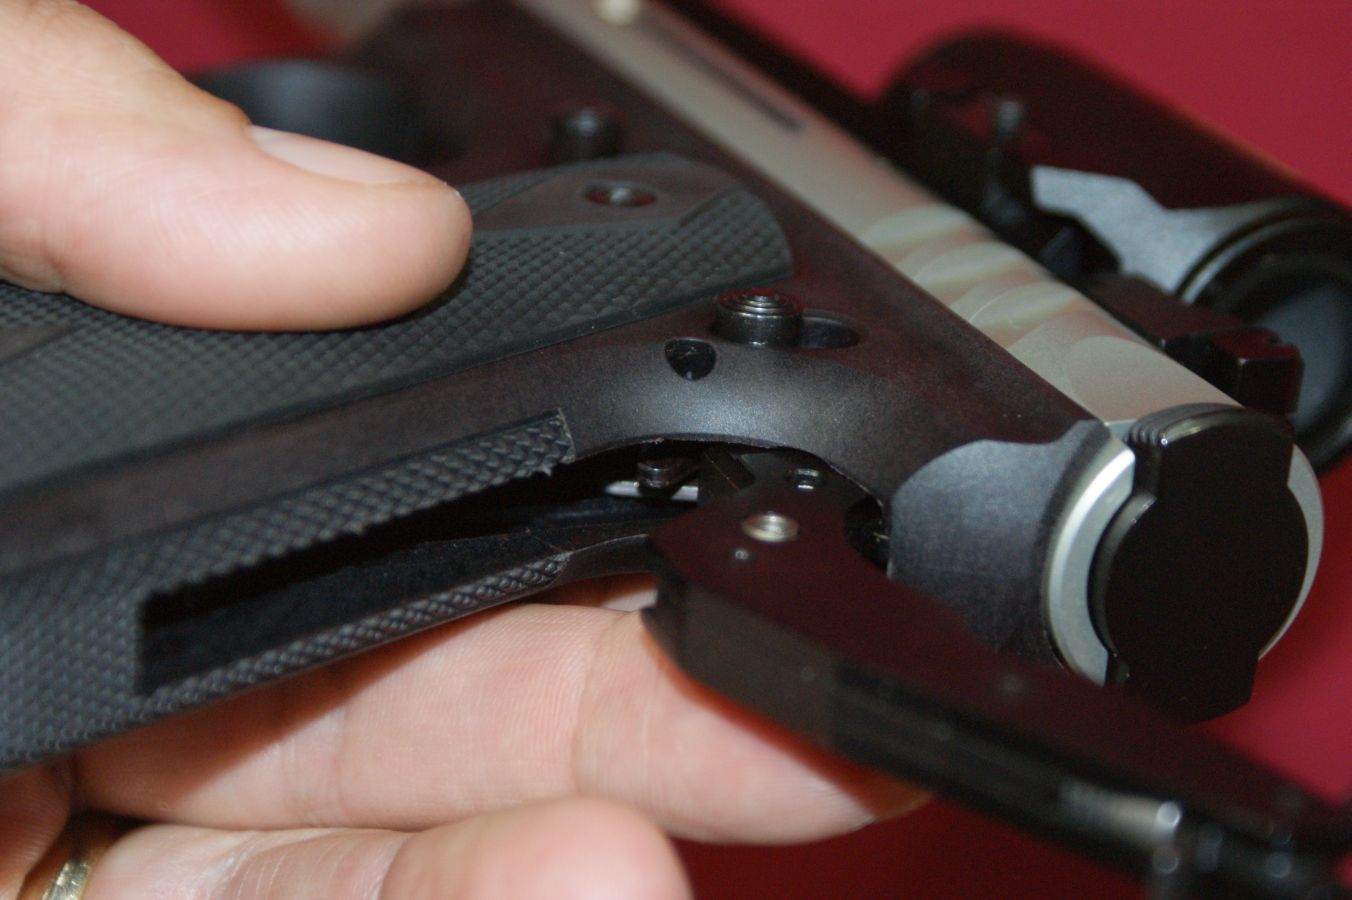
You will also need to check and make sure the loaded chamber indicator pin (C) has not fallen out of the barrel-receiver assembly.
Figure 22
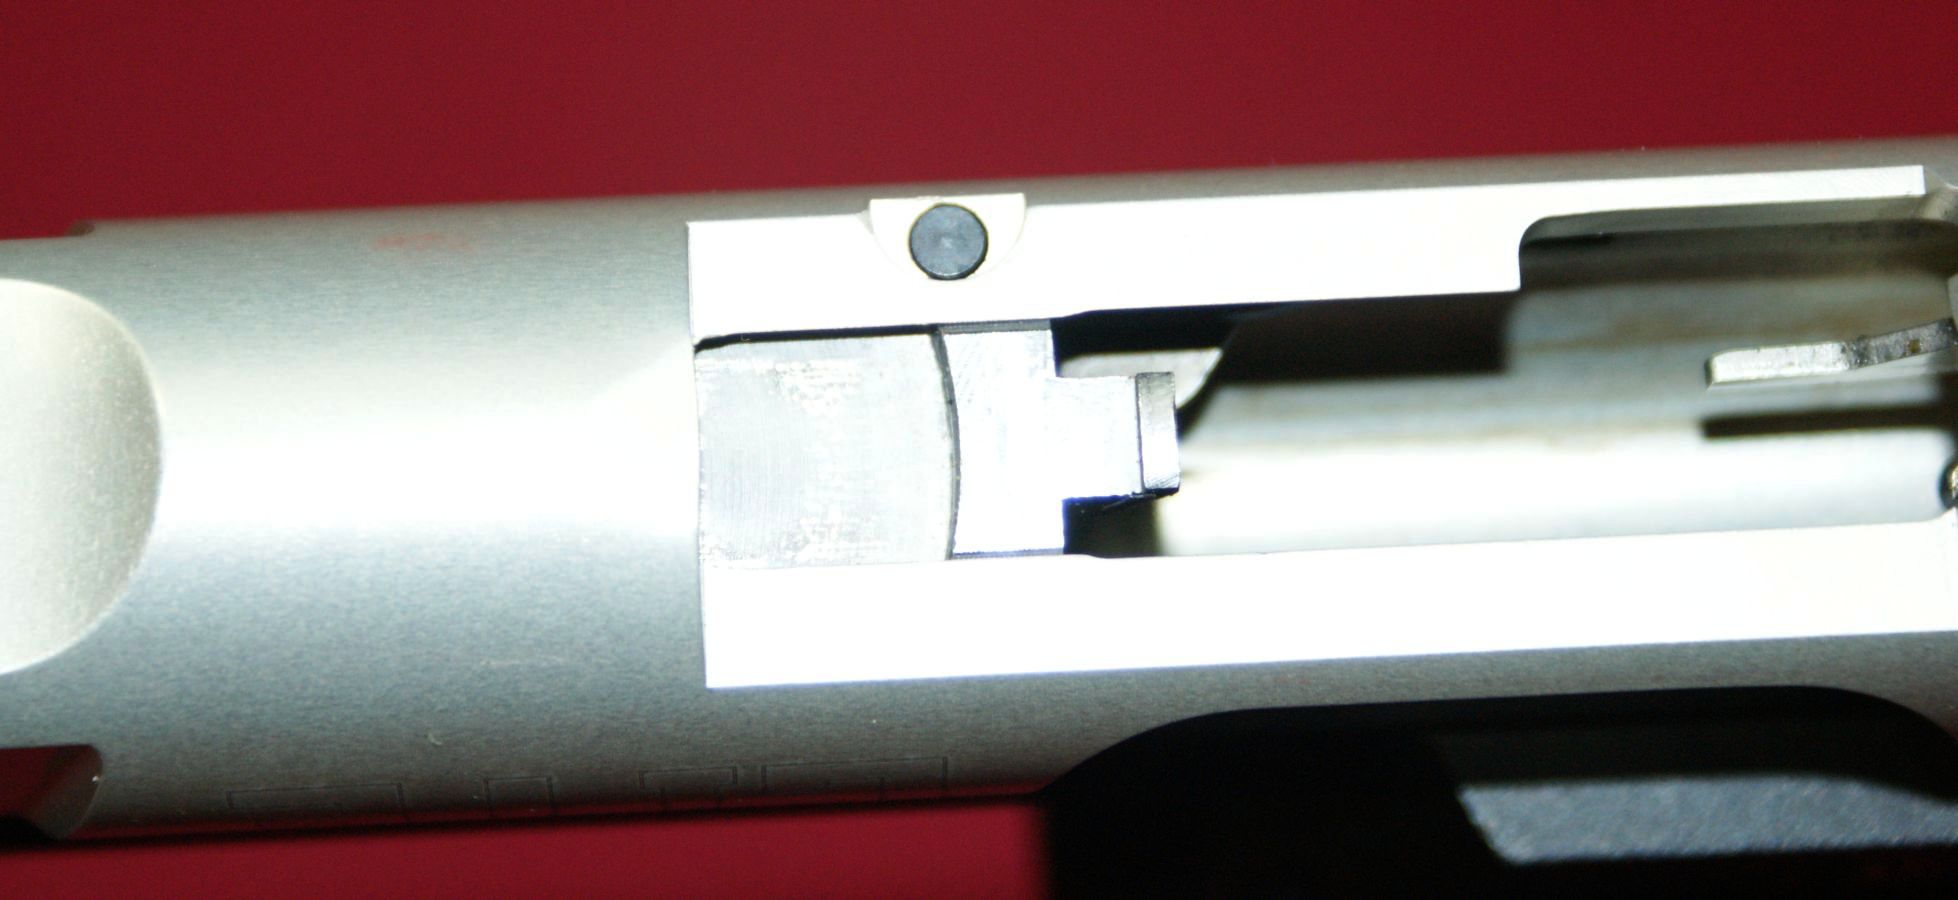
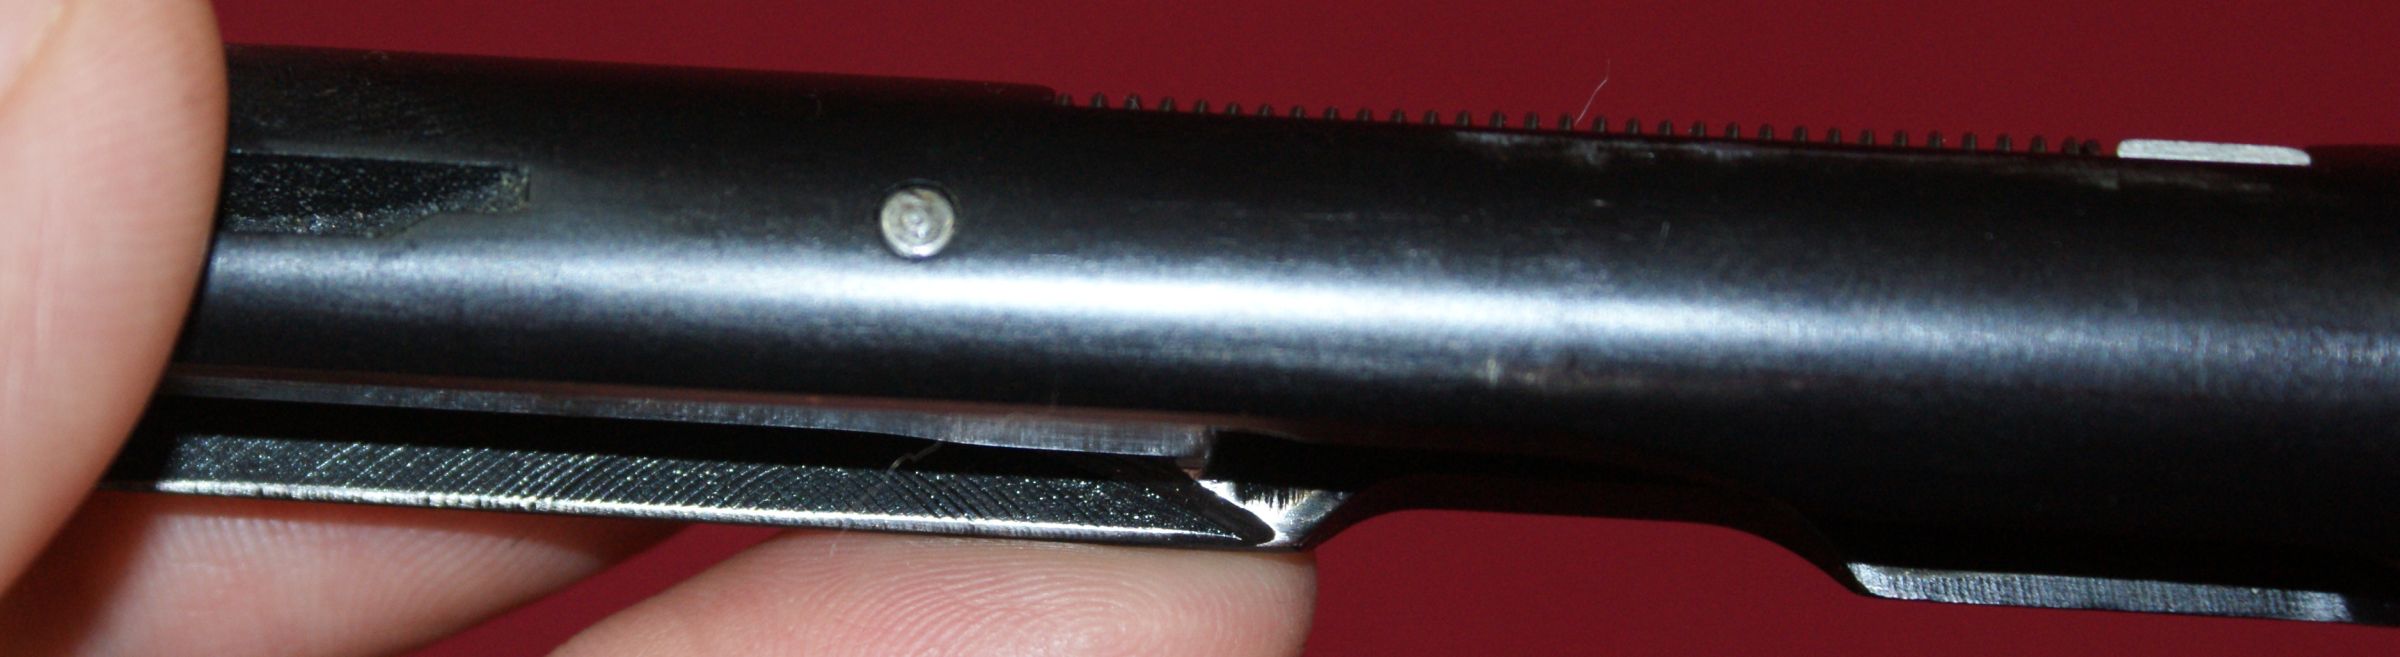
Step 3 - Mate Barrel-Receiver Assembly to Grip Frame
Place the barrel-receiver assembly on top of the grip frame so that the square lug (E below) engages the recess (D above) on the bottom of the barrel-receiver assembly.
Figure 23
When the two parts are correctly together, the barrel-receiver assembly will nest in the top of the grip frame as shown below.
Figure 24
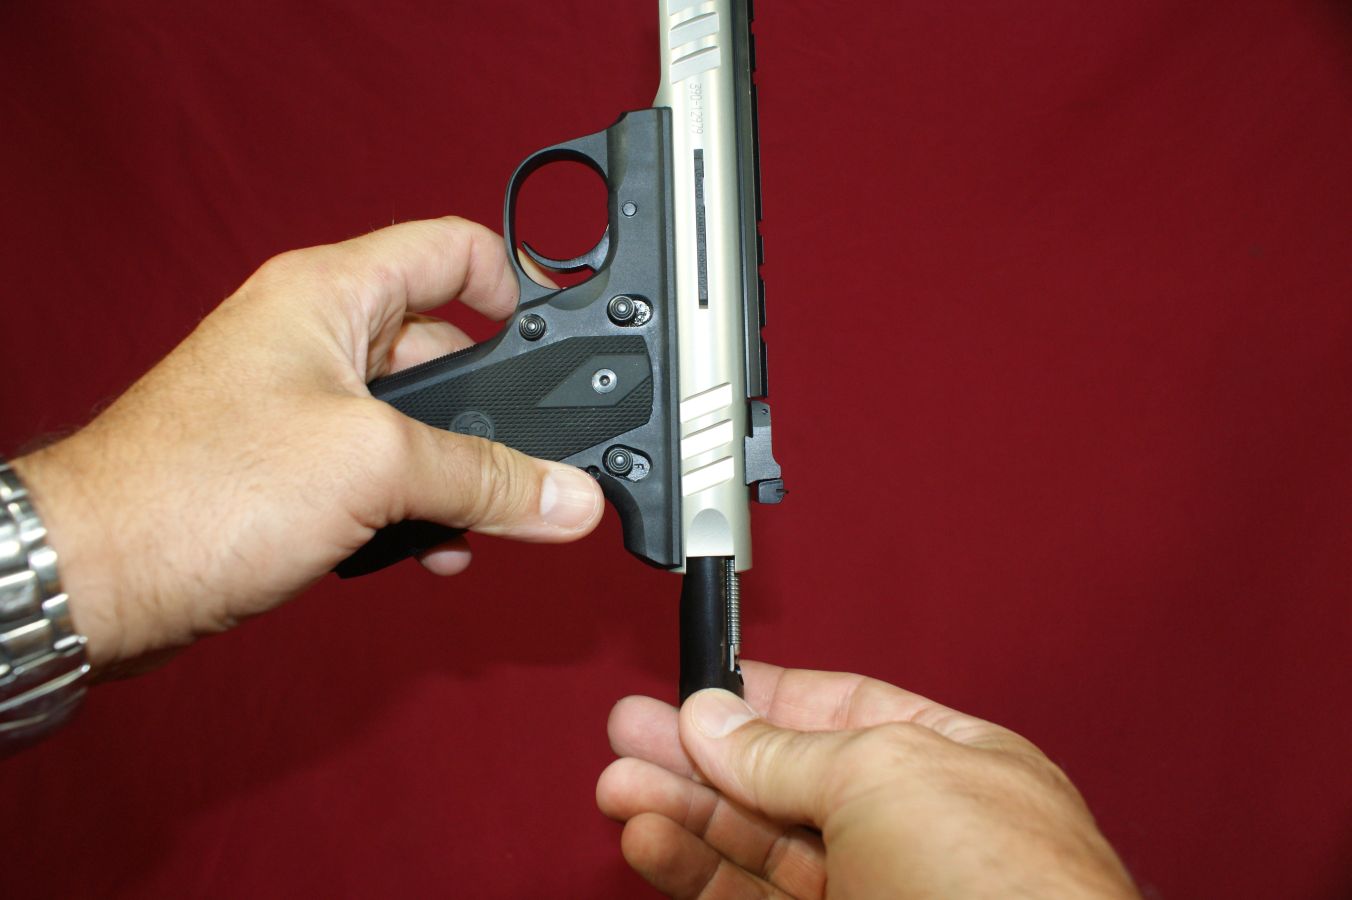
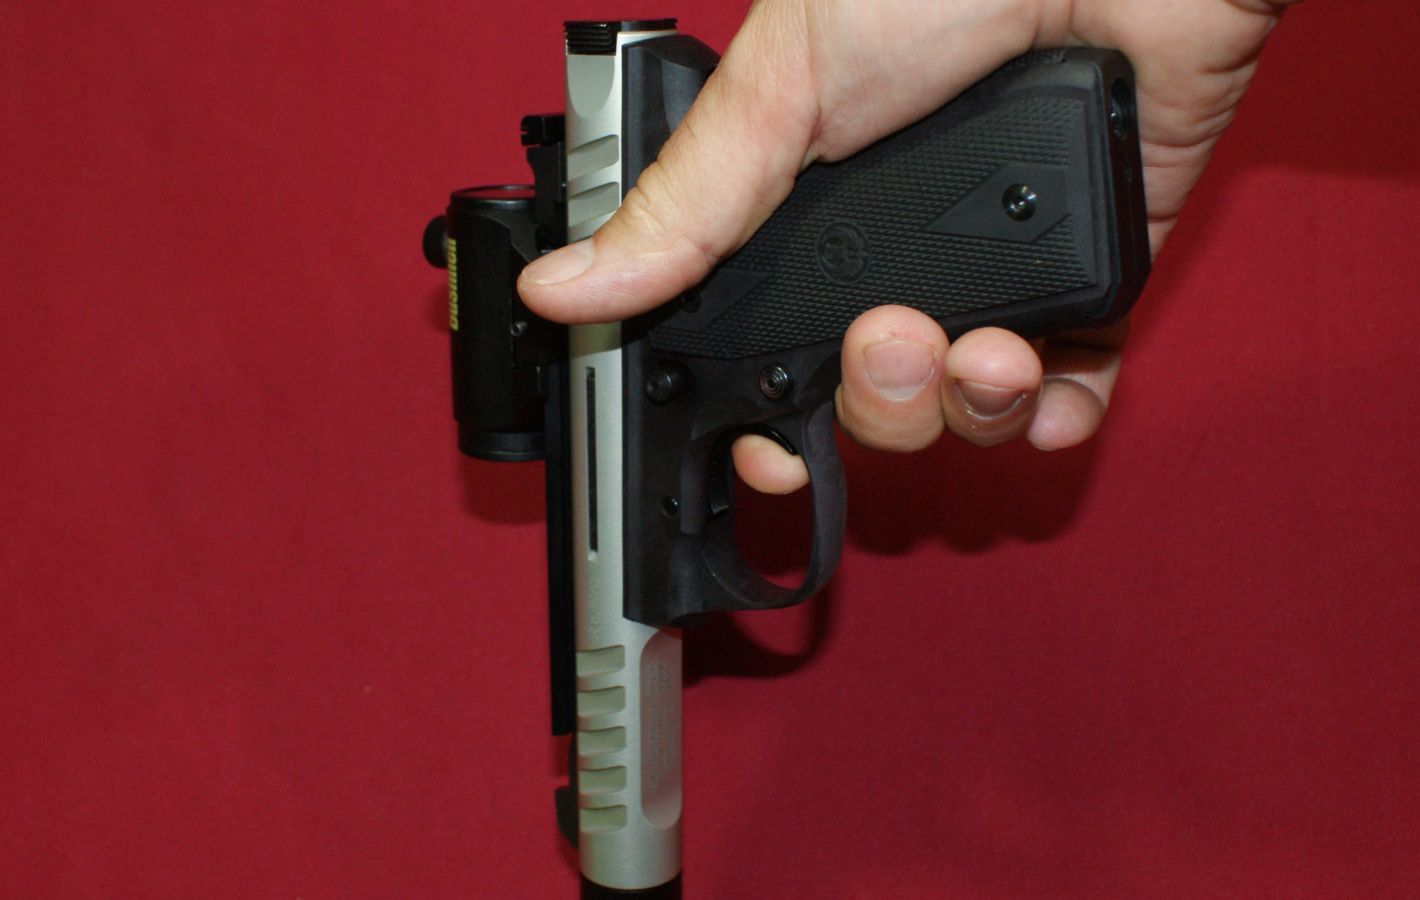
I was able to push the two parts together by holding the parts as shown below and pushing them together. This pistol seemed to "snap" together relatively easy. You can check to make sure the barrel-receiver assembly is far enough back by looking down through the bolt stop pin hole at the rear and making sure the hole in the receiver lines up with the hole in the grip frame. If for some reason you cannot push these parts together by hand, the instruction manual states "place the pistol (muzzle down) on a padded bench and strike the rear of the grip frame immediately below the receiver with a plastic or wooden mallet. Be careful not to damage the grip frame."
Figure 25
Step 4 - Position Hammer in Horizontal (Cocked) Position
Next you need to make sure the hammer is in the horizontal (cocked position). You can do this by inserting an empty magazine, pointing the pistol up and pulling the trigger. Gravity should make the hammer drop in place. If not, you can use your finger through the rear of the receiver to push it in place. This left photo below shows the hammer slightly up and I pressed it down with my finger as shown in the right photo. Now the path is clear for inserting the bolt.
Figure 26
Figure 27

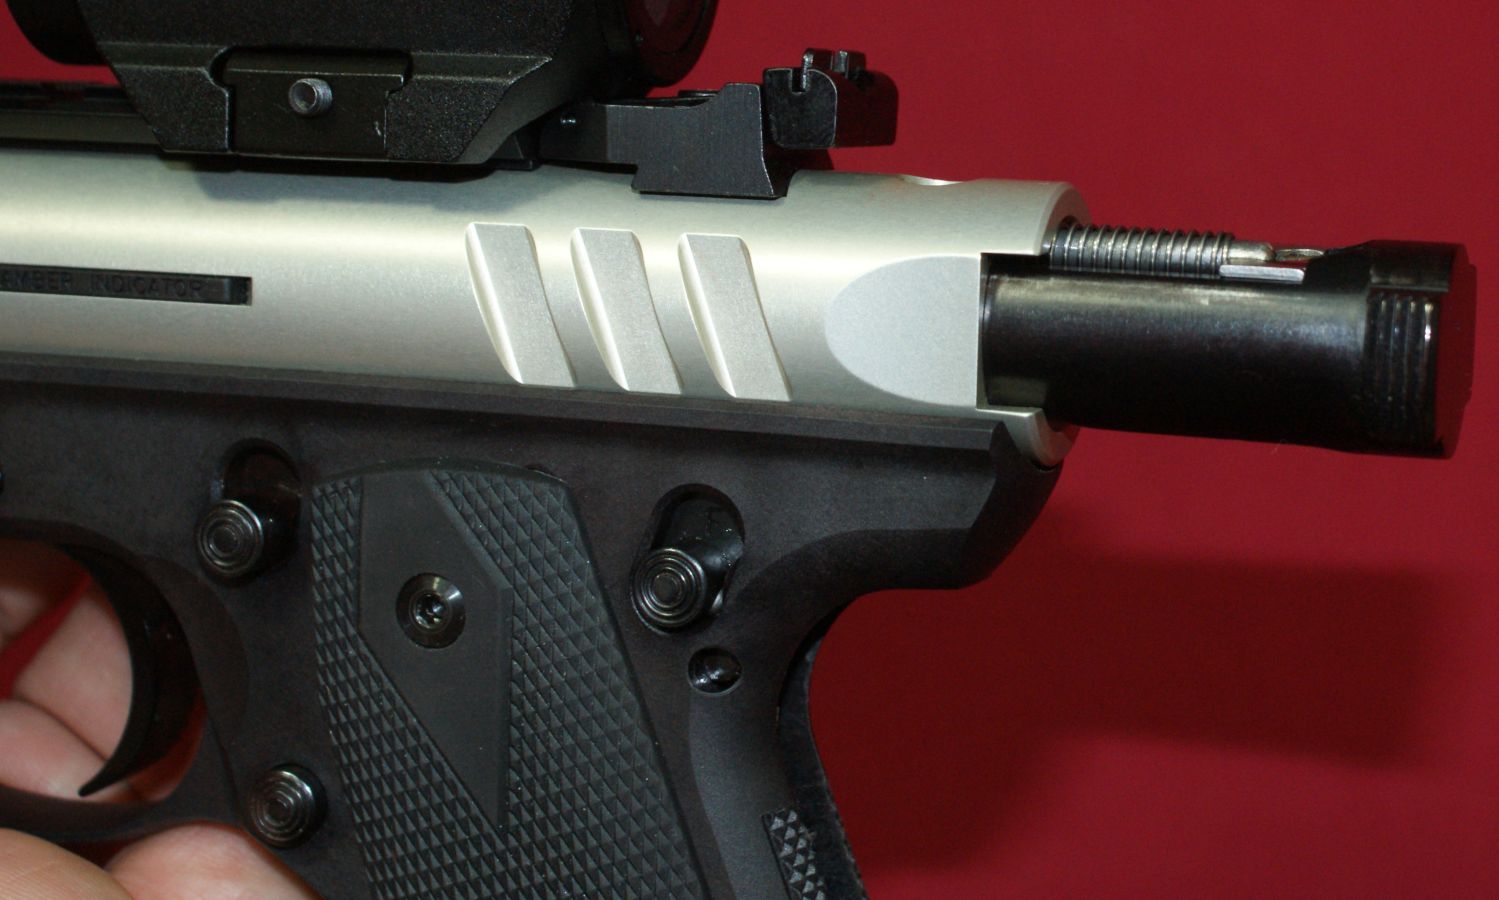
Step 5 - Insert Bolt
First make sure the bolt stop button is in the down position. Next make sure the firing pin stop is still in the bolt. Without the firing pin stop, a dry fire will cause the firing pin to damage the rear end of the chamber.
Figure 28
You can now insert the bolt into the receiver. Make sure the recoil spring is on the top side as shown below. If for some reason the bolt seems to stop half way, try pulling the bolt back out and then pressing down on the rear of the disconnector by putting your finger into the rear of the receiver. On this pistol it seemed like the disconnector would get in the way sometimes.
Figure 29
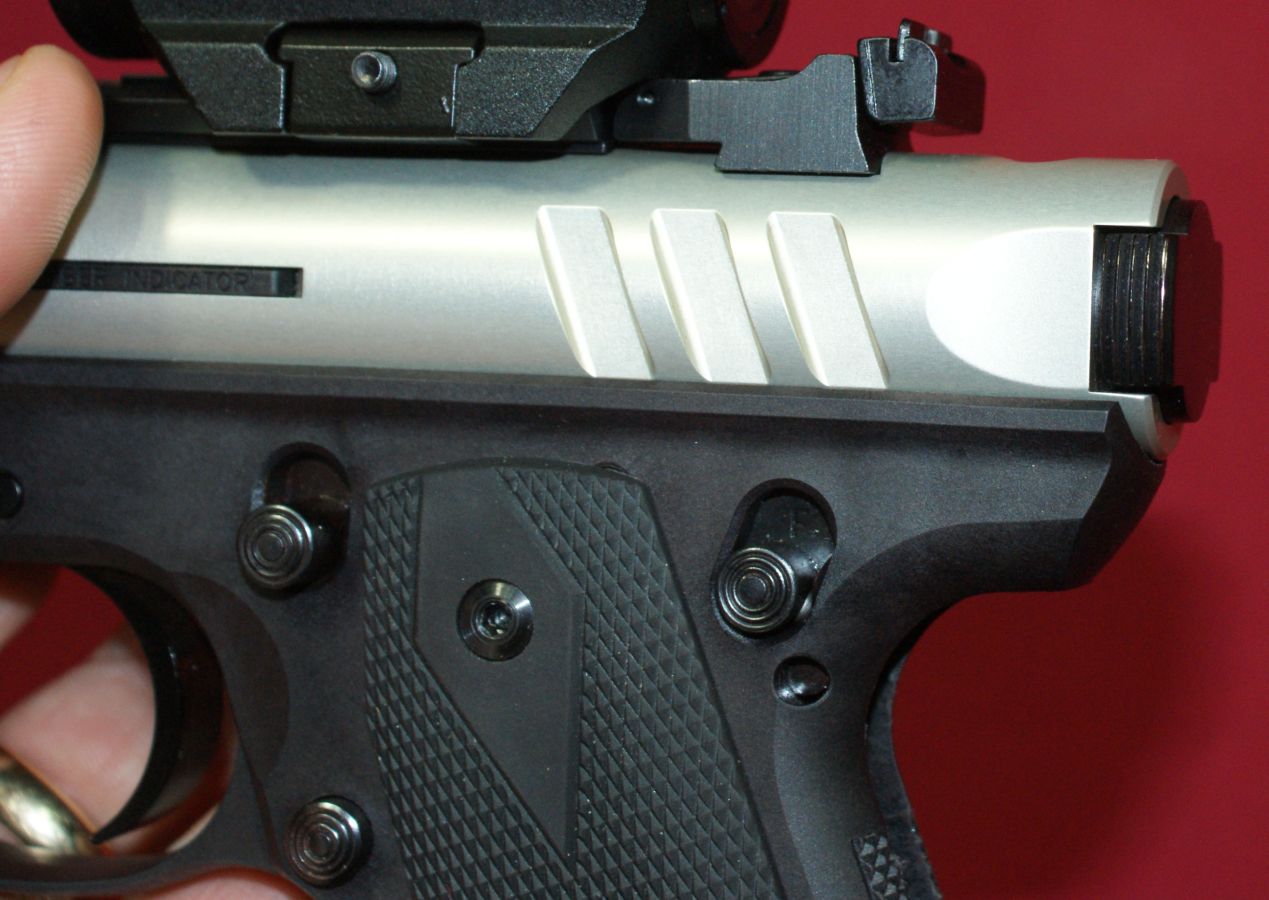
The bolt should be able to be inserted fully into the receiver as shown below.
Figure 30
Step 6 - Insert Bolt Stop Pin
Next insert an empty magazine and point the muzzle towards the ground in a safe direction and pull the trigger. The hammer should fall fully forward.
Figure 31
If it doesn't (like on this pistol), you can push it forward by pushing through the slot in the bottom of the frame as shown below.
Figure 32
With the muzzle pointed towards the ground, insert the bolt stop pin (which is on the mainspring housing assembly) into the receiver and bolt.
Figure 33
You will need to press firmly on the bottom of the pin to make the pin pass through the receiver. When the pin is inserted correctly, the pin will protrude slightly through the top of the receiver as shown below.
Figure 34
Step 7 - Close Mainspring Housing
Now point the pistol up and make sure you can see the tip of the strut as shown below and then rotate the mainspring housing closed while making sure the tip of the strut engages the top of the mainspring housing.
Figure 35
While holding this position, press the trigger and close the mainspring housing as far as it will go without applying too much pressure. You should be able to get the housing into the position shown below. You can then release pressure off the trigger and remove the magazine. With the magazine removed, you can press the mainspring housing fully into the grip frame.
Figure 36
Step 8 - Close Mainspring Housing Latch
You can then flip the mainspring housing latch closed. If the pistol is assembled properly, you should feel some spring pressure as you pushed the housing into the grip frame.
Figure 37
Step 9 - Verify Correct Reassembly
To make sure the pistol is assembled correctly, first try pulling the bolt back. If for some reason you feel too much resistance at the mid point, most likely the hammer strut is not seated in the mainspring housing correctly. The instruction manual states repeat steps 6 through 8. I found that by pointing the muzzle up, opening the latch and swinging the mainspring housing open slightly, I could see the hammer strut and make sure it was in position as I closed the mainspring housing again. If this doesn't work, start over at Step 6.
Once you have the pistol assembled and can pull the bolt back, verify all the safety features work, the bolt stop functions correctly and the hammer drops when the trigger is pulled.
Thoughts
For years I have been hearing people complain about the disassembly and reassembly of the Ruger Mark pistols. Maybe I'm the lucky one, but I feel that this pistol is very easy to disassemble. There are some details you need to watch on reassembly, but overall I still felt reassembly was simple. I'm sure if this pistol had been tighter and if it had required a wooden dowel and mallet to take apart and put back together, I may have a slightly different opinion. The thing that seemed to stand out more was the need to insert the magazine to disengage the magazine disconnect safety. Overall, I wouldn't let anyone sway your opinion on the purchase of this pistol based on any aspects with disassembly and reassembly.
For more detailed photos and commentary, make sure you check out the other parts of this review and feel free to leave comments on my Reader's Comments page. The following links are provided to help you see other parts of this review.
- Ruger 22/45 Lite Review: Part 1 - Introduction, Specifications and Summary
- Ruger 22/45 Lite Review: Part 2 - What's in the Box
- Ruger 22/45 Lite Review: Part 3 - External and Operational Features
- Ruger 22/45 Lite Review: Part 4 - Disassembly and Reassembly (this page)
- Ruger 22/45 Lite Review: Part 5 - Internal Features
- Ruger 22/45 Lite Review: Part 6 - Range Test
Or
If you would like to be notified about future Gunsumer Reports reviews via Facebook, make sure "You Like This" by clicking the Facebook "Like" button at the bottom or top of this page. If it already says "You Like This" beside the button, clicking it again will uncheck the "Like" status and you will not be notified.
| Share on Facebook | |
© 2010, 2011, 2012, 2013, 2014, 2015, 2016, 2017, 2018, 2019, 2020, 2021, 2022, 2023 & 2024 Gunsumer Reports™, All rights reserved.
FTC Disclosure