|
|
Gunsumer Reports TM Providing Detailed Objective Reviews for Firearms and Firearm Accessories |
ATN BinoX-HD 4-16x Binocular Review
Part 3 - Primary
Features
August 22, 2016
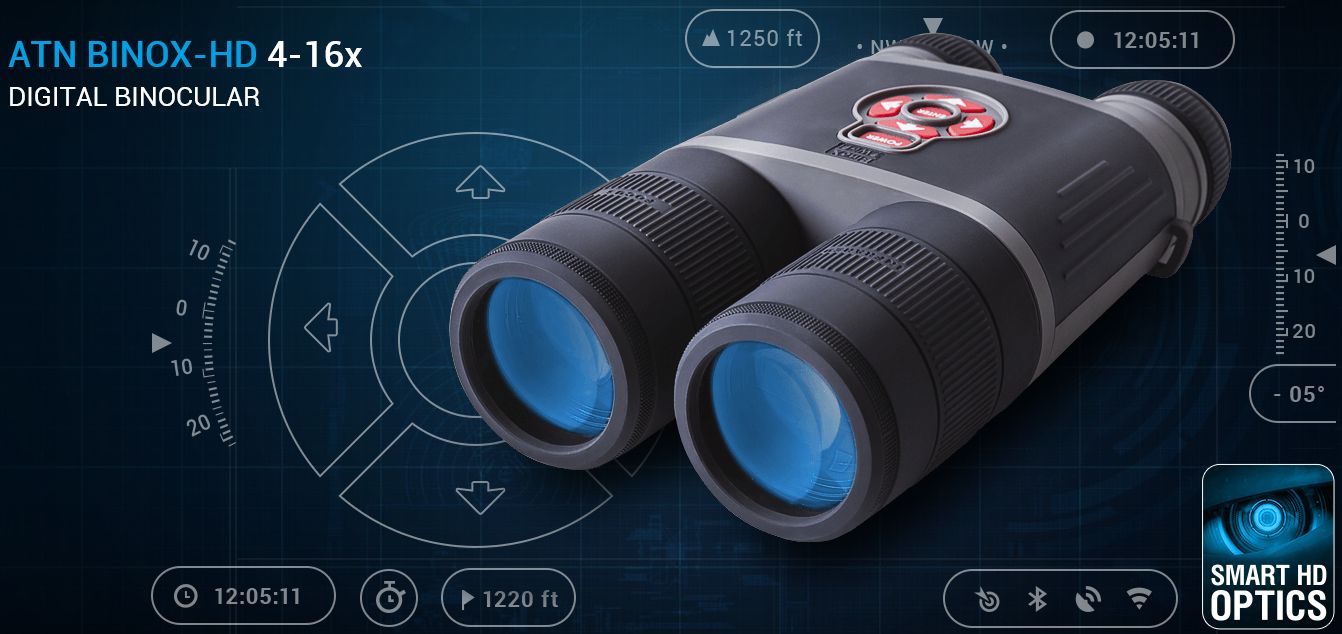
In this part of my ATN BinoX-HD 4-16x Digital Binoculars review, I'm going to go over the primary features of these day/night digital binoculars. Considering how much technology (video, photo, GPS, Wi-Fi, night vision, IR illuminator, etc.) is in the BinoX, covering everything in great detail might be a little too aggressive even for me. Also, considering that ATN has the capability to upgrade their firmware (embedded software) that runs the BinoX, I can only show the features that are current in the latest version of firmware. At the time of this review, I'm using Firmware Version 2.2.03.586 which was available on 8/12/16. Having said all that, again, I'm going to focus this part of my review on those primary features that I consider to be of the highest value to most consumers (or at least me) who are interested in it's night time capability. I have tried to breakdown the features into two categories shown below; primary and secondary. As a note, ATN covers much of this operational information in their online BinoX-HD Manual.
| Primary Features for Night Use | Secondary Features |
|
Although I don't think user updatable firmware is the number one primary feature of the ATN BinoX, I do feel it is very close to the top and I think covering it first is pertinent to understand this review. Firmware is the software that is embedded in an electronic device and it is the software that allows the device to operate and create the user interface. ATN has designed a process into some of their products which allows the user to update the firmware in their devices such as the X-Sight riflescope and BinoX binoculars. These next 8 steps in colored italics were taken from the current version of the BinoX-HD Manual and describe how to update the firmware. I have added my own comments in white. Worth noting is ATN's comment, "In the event of a power failure during an update the device may crash corrupting its system files and will need to be sent back to the ATN factory for service. It is important not to use additional sources of power during firmware update!" Basically, only update your unit when you know you have good batteries installed.
-
Download the ***.bin file and copy to your MicroSD Card – root directory
- Download the file at this site https://www.atncorp.com/firmware
- When you register (highly recommended), ATN will notify you when they release new versions of firmware
- The filename on the MicroSD card must be "binox.bin". Currently the filename download has the version of firmware in the filename (ex. "binoxhd_2_2_03_586.bin") and this version identification must be removed. Perhaps future firmware versions will allow the BinoX to recognize a ".bin" file that has an expanded filename, but my last version required the filename change.
- The firmware file should go into "root directory" of the card, not in any subfolder. Format the card first if it is a new card. I recommend dedicating a card just for this device.
-
Insert the card into the device
- When you insert the card, make sure the exposed metal tabs are facing towards the eyepiece end.
- You may need to use a pen or fingernail to get the card pressed in properly. The card is spring loaded to pop out and when it is properly inserted you will hear a slight click and it will not pop out.
- If you need to pop it back out, push it in further and it will unlatch and pop out.
-
Turn ON the
device In the “Firmware Update” dialog box select “Yes” to start
the update
- Holding the power button down about 4 to 5 seconds will cause the unit to power up.
- You will first see a screen with the ATN Logo and then the screen will change to something that says "Update Firmware?"
- Your choice is Yes or No and the No button is highlighted red meaning it is selected.
- If you don't want to update your firmware, then press the Enter button on top of the unit. If you want to update, then press the left arrow button on top of the unit to highlight Yes and the press the Enter button on top of the unit.
-
When the update counter reaches “100%” the device
will automatically restart
- While updating, the screen will show the % of progress and say "Updating Firmware..."
- It will actually go from 0 to 100% several times during this process.
- When it reaches the final 100%, the unit will reboot.
-
Once the device is powered up it will
enter self configuration mode
- The screen will show something like "Configuring Wi-Fi, Please Wait"
- After completion, it will
automatically restart and will be ready for use
- The device will restart again and when it does, it will re-prompt you with "Update Firmware?" This time you will need to select No and press Enter
- At the completion it will say "Firmware updated successfully!"
- You then hit Enter to acknowledge.
- Motion Sensing
platform will be configured when first turned on
- I believe this is referring to the sensors which track the pitch and roll angle of the BinoX.
- When motion sensing is turned on, you may need to go through a calibration procedure so that the pitch and roll angles are displaying correctly. Calibration is just a matter of spinning the unit around, end-over-end and side-over-side.
Overall, updating the firmware is very simple and hopefully the added information I have provided, along with ATN's instructions, will make updating the firmware an easy task. Once you have completed your update, and when you know that you don't have any data on your MicroSD card, you may want to go ahead and use the BinoX feature to reformat the card to get rid of the firmware update file so that the unit doesn't always prompt you to update it when you power up. Getting rid of that file from the card also ensures that someone doesn't start an update when you have low batteries.
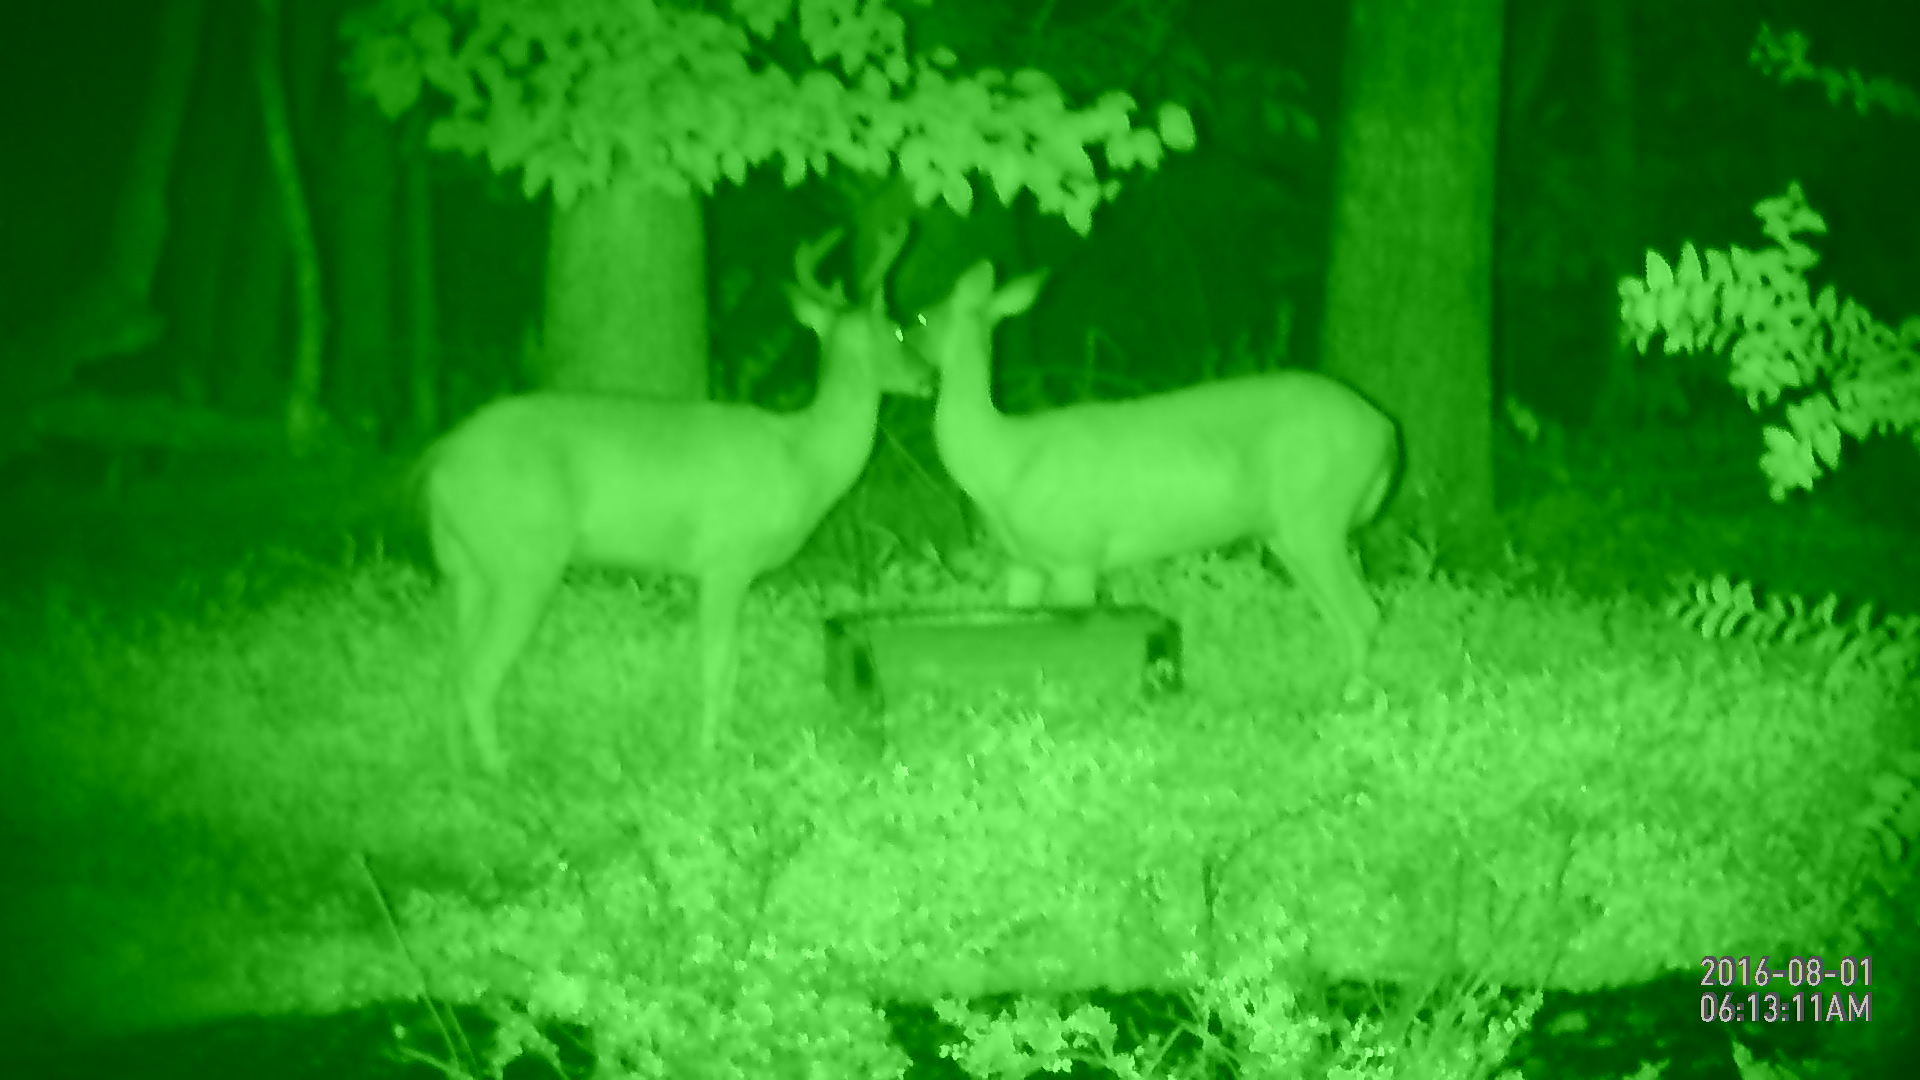
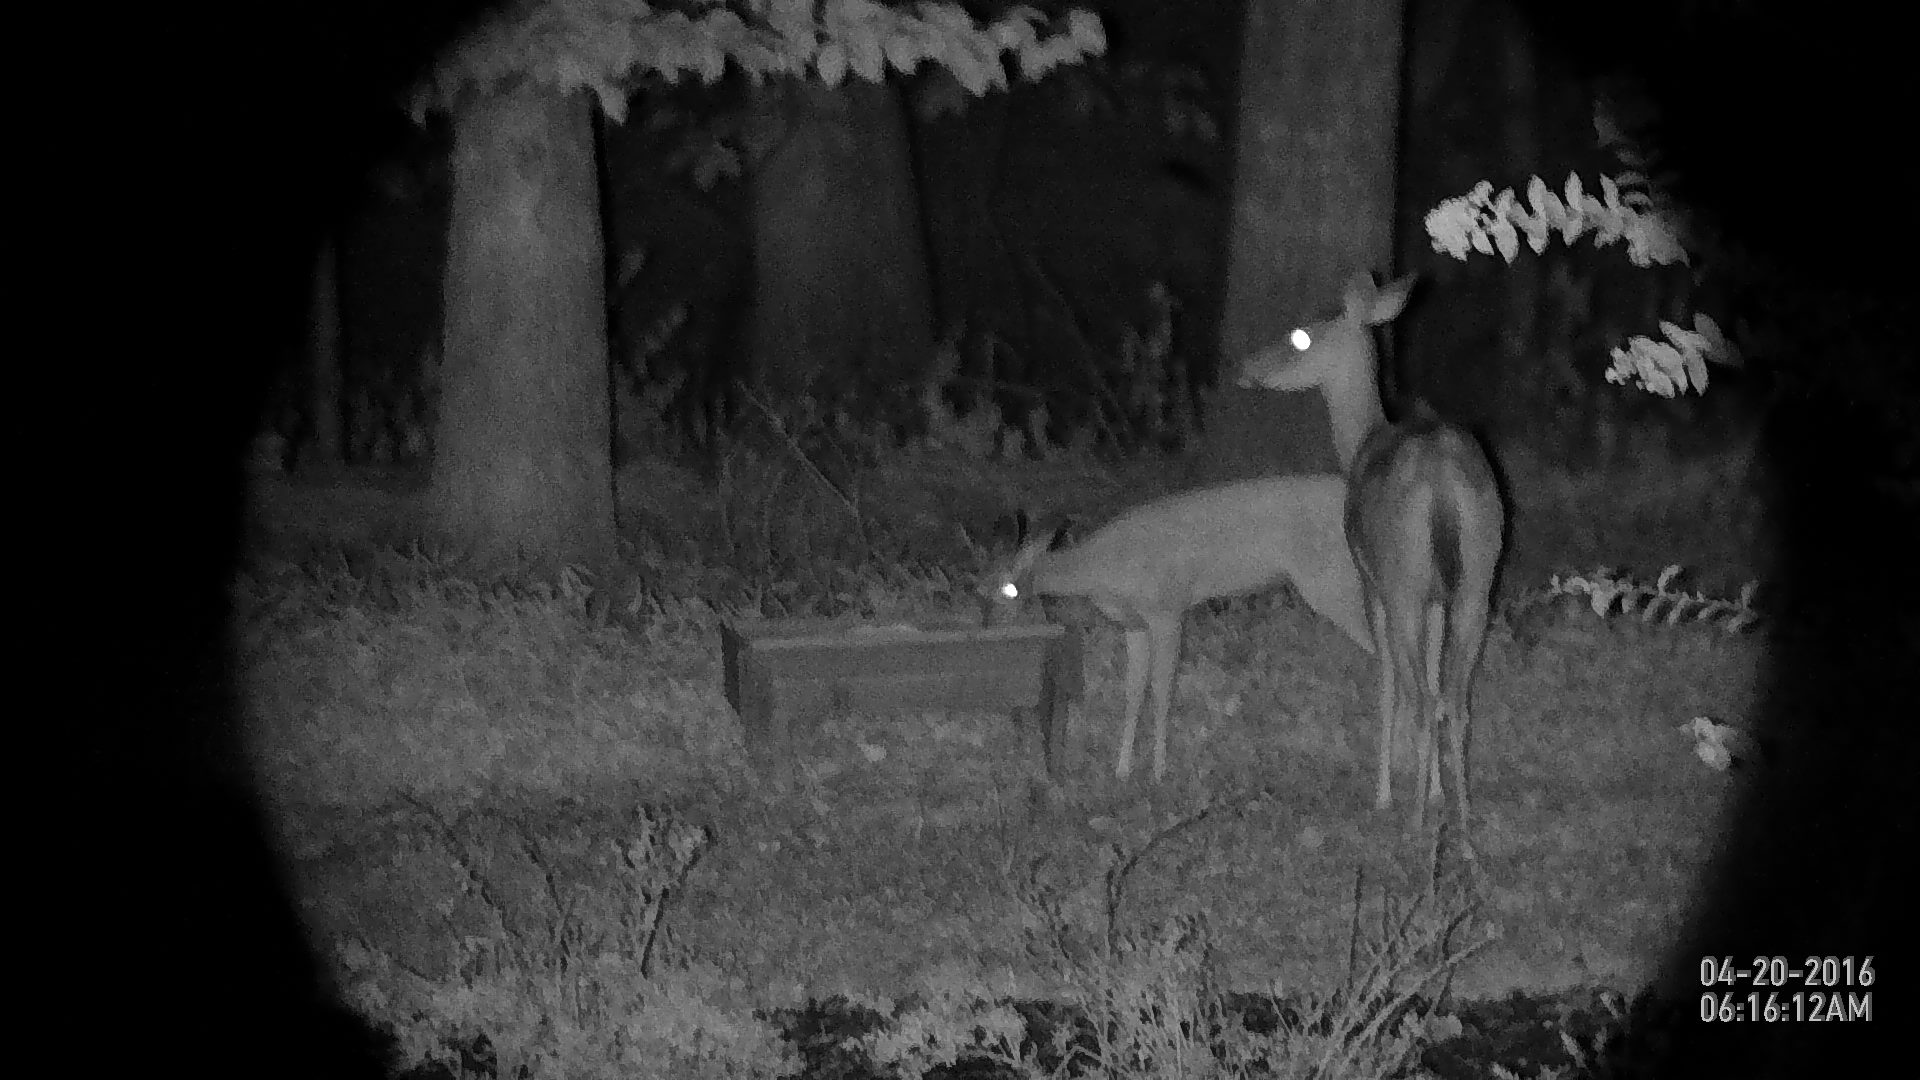
I feel the night vision capability is the number one primary feature of the ATN BinoX HD Digital Day/Night Binoculars. If you are in day time mode, activating night vision mode is just a matter of three quick button pushes (Enter, Right Arrow, Enter) and when you switch into the night vision mode, the IR illuminator is automatically turned on. If you were in night vision mode when the unit was last powered down, it will restart back in the night vision mode again. There are two color themes (or settings) for night vision; white and green. These next two photos were taken using the photo feature in the BinoX and show a couple of deer eating out of my corn feeder located 40 yards from my viewing location. This first photo shows the "white" night vision color theme and in both photos the BinoX is at 4x magnification. There are also three different "Light Sensitivity" setting; Low, Medium and High. Throughout most of my review I have had the light sensitivity set at Medium. I still find it amazing at how visible and clear the image below is considering that it was fully dark outside.
Figure 1

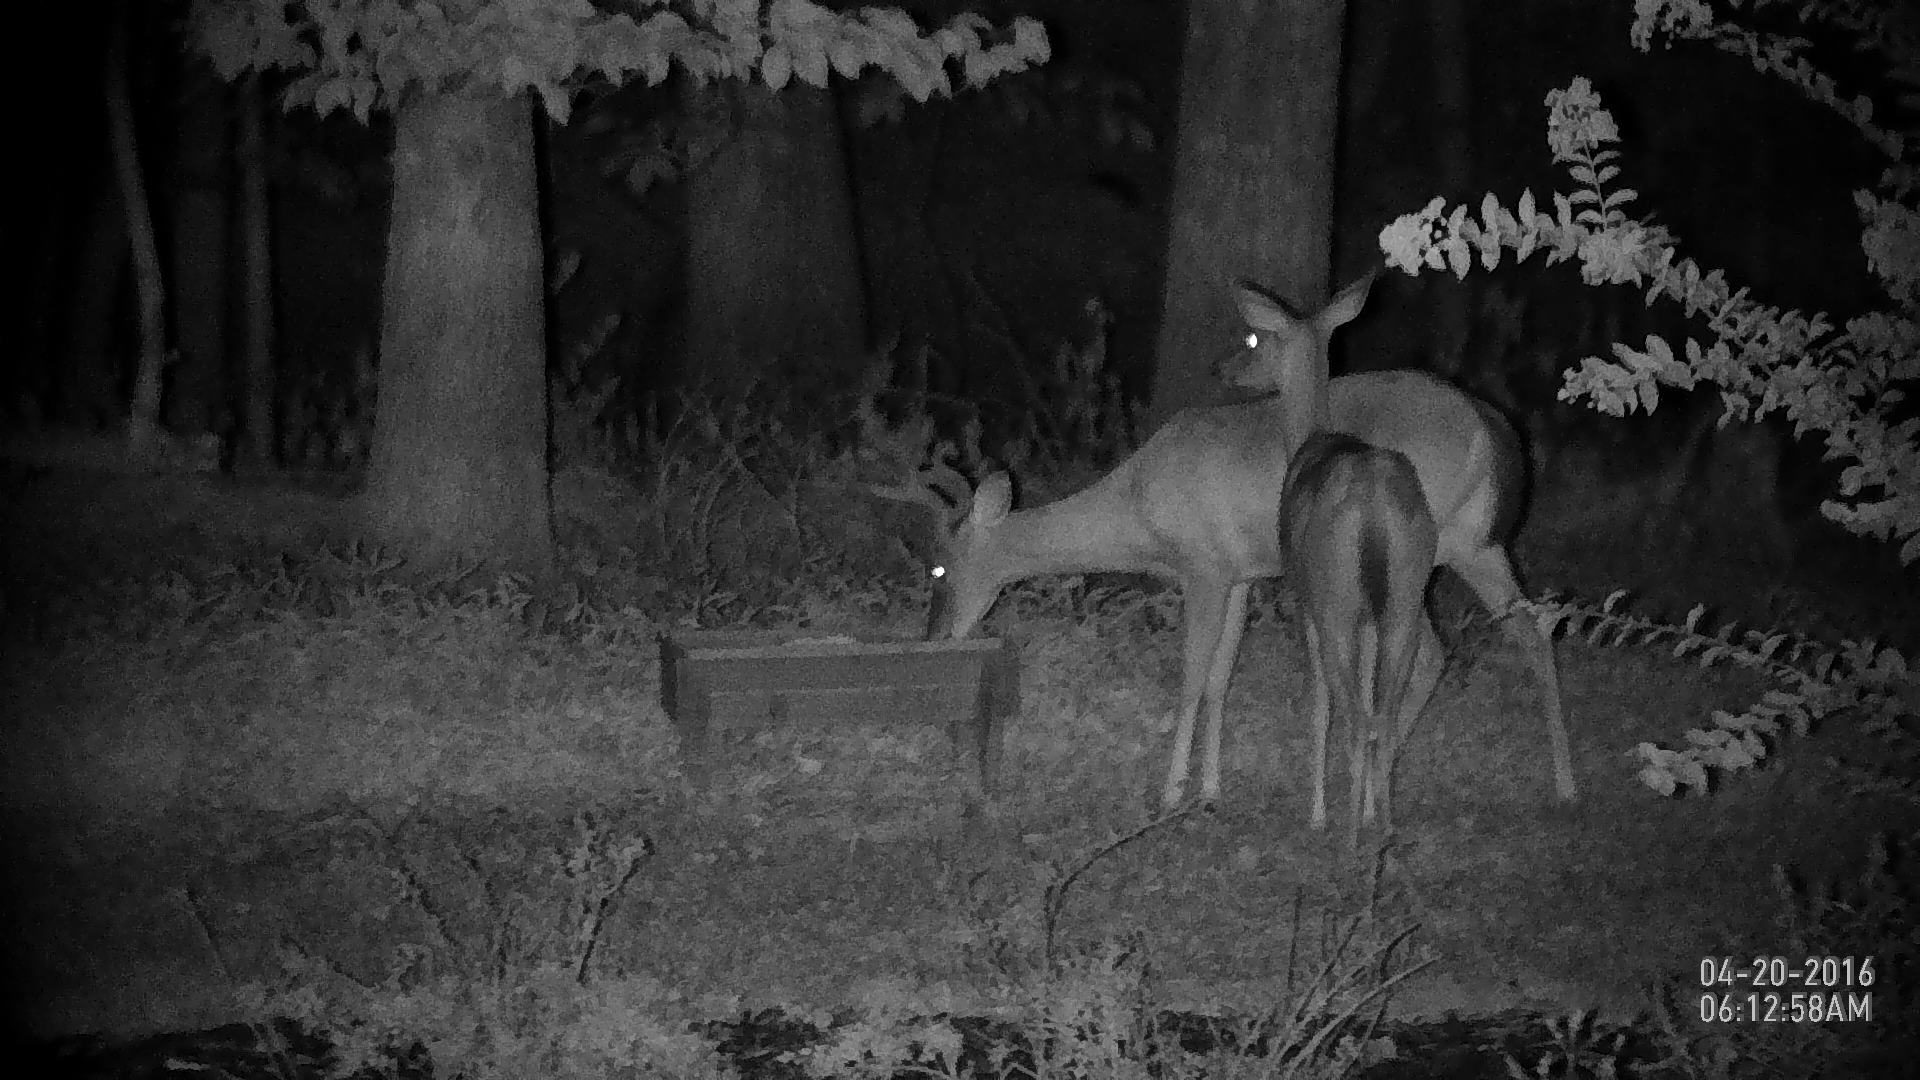
This next photo is of the same two deer at the same 4x power, but in the "green" night vision color theme. When comparing these two photos and also based on my experience looking through the BinoX, it seemed that the "white" color theme seemed to produce the best contrast and crispness of image.
Figure 2
This next video shows these deer at my corn feeder located at about 40 yards from my viewing location and the video is a good example of what to expect with regard to illumination and overall video quality. When at the 4x optical zoom power and taking video, things look pretty good. Since increased zoom power is achieved by digitally zooming, the image quality does start to degrade at higher zoom levels just like you would expect.
Video 1 - Deer at Corn Feeder at Night (40 yards)
I also used the BinoX to get some footage of some beavers on my lake and it gives you a good idea on what to expect at longer distances with different shaped critters.
Video 2 - Beaver Watch
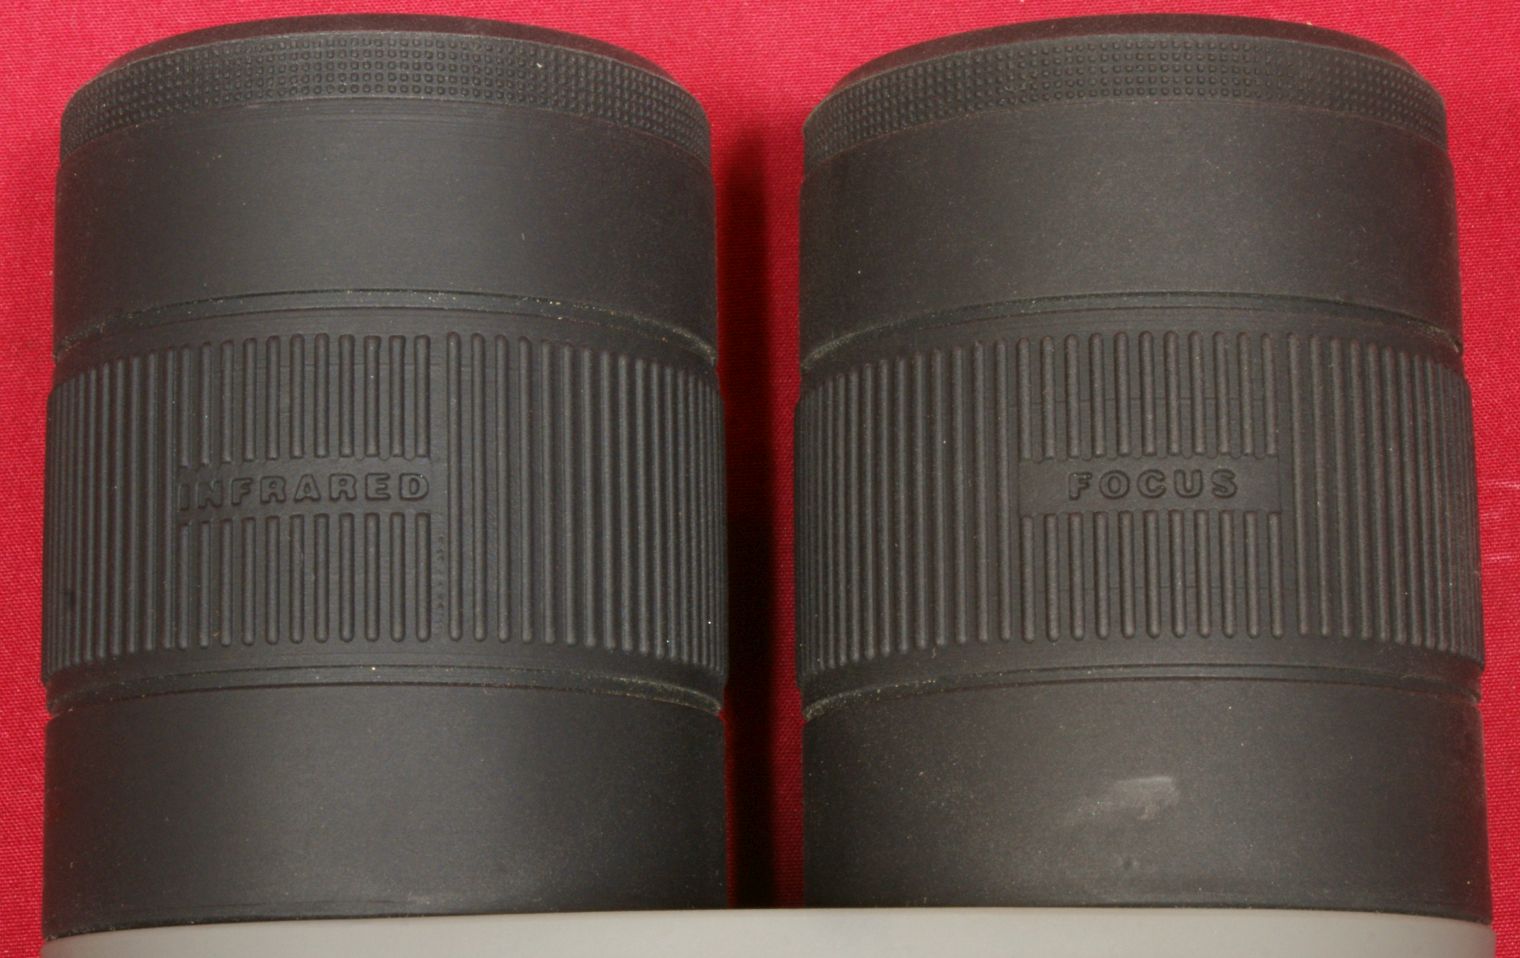
The second most important feature is the integrated IR (infrared) illuminator. The illuminator is integrated into the binoculars which allows you simplicity (single item to take to the field) and a common power source when using batteries. When you turn the night vision On, the illuminator is automatically turned On. The illuminator has six different "Illuminator Brightness" settings; 0, 1, 2, 3, 4 and 5. For most of my review, I have kept the brightness setting at the default 3 brightness level. There is a visible difference in illumination with each of these different settings and illumination is one of those things where you want enough to see your target, but too much illumination wastes battery life so only use what you need. You also have the option to turn the illumination off which is the "0" setting. On bright moonlit nights you will be surprised at how much you can actually see, but looking into the shadows still needs some illumination.
In the photo below you can see that the left objective housing has the word "INFRARED" molded into the textured ring. Rotating this ring gives you the ability to change the beam size from a narrower "spot" beam to a much wider "flood" beam.
Figure 3
When using the BinoX mainly at the 4x power, the beam can be adjusted so that the entire field of view is illuminated as shown below. At 4x, your subjects are typically closer and the flood beam is more than enough to illuminate them.
Figure 4 - 4x Power with IR on Maximum Flood Beam
At higher magnifications, your objects tend to be further away and may require a more focused "spot" beam to help illuminate them. If you remain at 4x magnification, you will see the field of view decrease as you switch to the spot beam as shown below.
Figure 5 - 4x Power with IR on Maximum Spot Beam
As you zoom in on these objects, your viewing angle decreases and eventually the full field of view is illuminated. At 6x, the field of view was fully illuminated again when illuminator was adjusted to a maximum "spot" beam.
Figure 6 - 6x Power with IR on Maximum Spot Beam

Although you cannot see the IR light due to it's wavelength not being visible by the human eye, do not look into the illuminator at the red glowing surface because doing so can still cause eye damage.
The BinoX can be powered by two sources; batteries or an external source connected via the MicroUSB port. The BinoX can hold up to three CR123 internal batteries and can operate with either 1, 2 or all three batteries installed in the unit. Clearly, with three batteries installed you get approximately 3 times the run time. ATN states in their specification that the batteries will last between 6 to 8 hours with lithium ion batteries installed. Since the battery drain rate is a function of which features are running at the same time, I decided to do a test with what I would consider to be the most important feature, night vision. I used the batteries that ATN provided with the BinoX and reset the unit to it's original factory settings and made sure that the Wi-Fi and GPS were off. I then set the unit to the night vision mode which also turned on the IR illuminator. Next I started keeping track of how much run time I was getting. I did this in three different sessions.
- 3.5 hours of continuous running in night vision mode with the IR illuminator on
- 1.0 hours of continuous running in night vision mode with the IR illuminator on
- 0.5+ hour of continuous running in night vision mode with the IR illuminator on
I was able to get a total of just over 5 hours of run time in the night vision mode with the provided batteries which is fairly close to the 6 hours stated by ATN and the 5 hours represents a good amount of run time considering it was also powering the IR illuminator.
I decided to do this same exercise again, but this time I installed a single new Stream CR123A battery. Just as before, I let the BinoX run continues with the IR illuminator turned on and got 1.5 hours of run time before the display inside the eyepieces turned off. The IR illuminator was still operational, but you couldn't see anything through the BinoX.
The BinoX can also be powered by an external power source via the MicroUSB port. This USB power supply mode is potentially one of the greatest features because you can purchase some type of portable phone charging system to use on long hunts or just to save a little money on batteries.
When I reviewed the X-Sight riflescope last year, I purchased an Xtreme 13200mAh Deluxe Power Bank for about $40. The Xtreme had a 1A and 2.1A charging/power port. Both the X-Sight and BinoX seemed to have issues when trying to run the Wi-Fi when plugged into the 2A port on this power bank so I ordered another power bank that had a 2.4A port to see if the additional power would help the situation. I ordered a RAVPower 22000mAh 5.8A Output 3-Port Power Bank which was also $40 on Amazon.com. The 2.4A ports on this power bank seems to be able to provide enough current to the BinoX to resolve the issues I was having when streaming video via Wi-Fi, but I would not recommend this particular power bank because it has some type of iSmart feature that changes power output and eventually would turn off Wi-Fi because it thought the battery was too low. Having said all that, using the power bank is only an issue if you are streaming via Wi-Fi. I'm still looking for the best power bank and will update this section as I try more.
Another thing I did notice was that the IR illuminator will not operate using just the power bank and requires batteries to be installed to operate. I confirmed this with the Wi-Fi turned off so that the power consumption was lower and when the batteries were removed the illuminator would turn off.
For my last battery test, I wanted to determine if running a USB power bank while also using batteries in night vision mode would actually extend total run time. To do this, I installed a single new Streamlight CR123A battery in my BinoX and also plugged in my 2.1A power bank (Xtreme). I let the BinoX run continuously with the IR illuminator turned on for 3 hours of run time (double that of just a single battery alone) and I was convinced that the USB power bank will make a difference in the field. After three hours the BinoX was still going strong. I checked the battery with a simple tester and it seemed to have over half life remaining.
To sum all this up... If you are wanting to hunt all night, start with a fresh set of batteries (always have some backups just in case) and use your USB power bank to minimize the drain on your batteries when possible.
Also note that ATN sells a Power Weapons Kit for $99 which comes with a power bank, cord, rubber seal (for X-Sight) and buttstock pouch. I believe the power bank in the kit is the same one as the Xiaomi 16000mAh Power Bank which provides a 2.1A output.
Wi-Fi Streaming to a Portable Device
I struggled on whether to include this feature as a primary feature on this page or try to cover it on a separate page because of the potential level of detail I could get into going over this feature. Also, since I have owned both the X-Sight riflescope and BinoX binoculars, I am just now starting to take full advantage of this feature and it has not been one of my "personal" primary features in the past. Regardless of how I might use the BinoX, I still feel that it is a primary feature that will appeal to many consumers so I made a stab at an abbreviated review on this page. If I ever cover it in more detail, you will see it in the links to the other parts of my review.
The Wi-Fi feature allows you to interface with an Android or Apple smart device (phone or tablet). Interfacing with your smart device allows you the ability to change menu setting, view streaming video from your BinoX along with the ability to zoom in or out, view photos and videos that are stored on your BinoX, and transfer videos and photos from your BinoX to your smart device.
Before you can use this feature, you must install the "ATN Obsidian" application on your smart device. The latest version of the Android app as of 8/16/16 is Version 2.16 which I installed on my Samsung Galaxy S5 for evaluating the operation of this feature.
These next steps will walk you through the process of connecting your BinoX to your smart device and give you some tips along the way. Keep in mind that any sequence related to button pushes are based on the user interface of the 2.2.03.586 version of firmware and potentially they could change in the future.
-
Locate your device name (SSID) and password on your device which you will need later. You really only need to do this once if you have a good memory with passwords. Press the Enter button and then the left arrow once to go to the wrench symbol which stands for System Settings. Press Enter to access these settings. Using the left or right arrow buttons, navigate to the "Settings" tab. Using the back arrow button, scroll down to highlight "Wi-Fi" and press Enter. In my case, the SSID is "binox_36E3" and the password is "atn_obsidian". You press the left arrow key multiple times until the upper left arrow in the screen is highlighted red and then press Enter to exit these menus. Note that the SSID and password cannot be changed.
-
Turn your BinoX on and turn the Wi-Fi on which is done by pressing the Enter button then the left arrow twice to get you to the Wi-Fi symbol. Press the Enter button to toggle on or off for Wi-Fi. After it is turned on, you can exit the menus. You should also see a Wi-Fi symbol in the upper right of the display screen. When you are streaming Wi-Fi to your smart device, this symbol will blink.
-
Now that Wi-Fi is being broadcasted from you BinoX, you can connect your smart device. First use the Wi-Fi connect feature on your smart device and connect to the "binox_36E3" network (the default name for my unit). Then input the password "atn_obsidian" to connect.
-
Once the smart device is connected via Wi-Fi to your BinoX you can start the ATN Obsidian application which you already installed (I hope). Once the application starts, you should see a box with "BINOX" in the upper half of the screen. Tapping on this box starts the application.
Figure 7

-
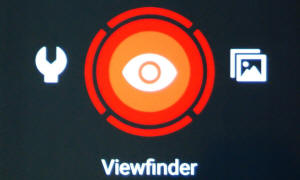
For this version of the application, there are three options; System Menu (wrench icon), Viewfinder (eye icon), and Gallery (landscape photo icon). You can scroll the screen left or right with a swipe of your finger. When the icon you want is in the center, tap the icon to bring up that screen. You can hit your Return button on your smart device to go back to this three icon screen.
Figure 8
When you select the Viewfinder (eye icon), you start the video streaming mode and will see on your smart device the images you see in the BinoX. The below are my observations on how the streaming works and things I learned.
-
Streaming with on full batteries seemed to work best and ATN has done a great job of improving the smart phone experience. Streaming while hooked to a USB power source may have some interesting results. When I streamed with a 2A power source port, the image streamed, but the video being displayed inside the view finder would stop displaying on one (left) or both eyepieces. When i streamed with a 2.4A power source, things got better and the images streamed OK, but don't get any power bank that has the iSmart feature because iSmart will adjust power output and make the BinoX think the battery is low and potentially turn off Wi-Fi.
-
When you are streaming video, you cannot take photos or video with the BinoX. ATN has added into the capability to turn off the streaming using the BinoX (not smart device) so that the BinoX user can turn it off and then take photos or video. If you do this, it looks like the smart device user will need to get out of the streaming mode and then back into the streaming mode.
-
There is some lag in what is being displayed on your smart device versus what is being seen in the BinoX, but it is not too bad.
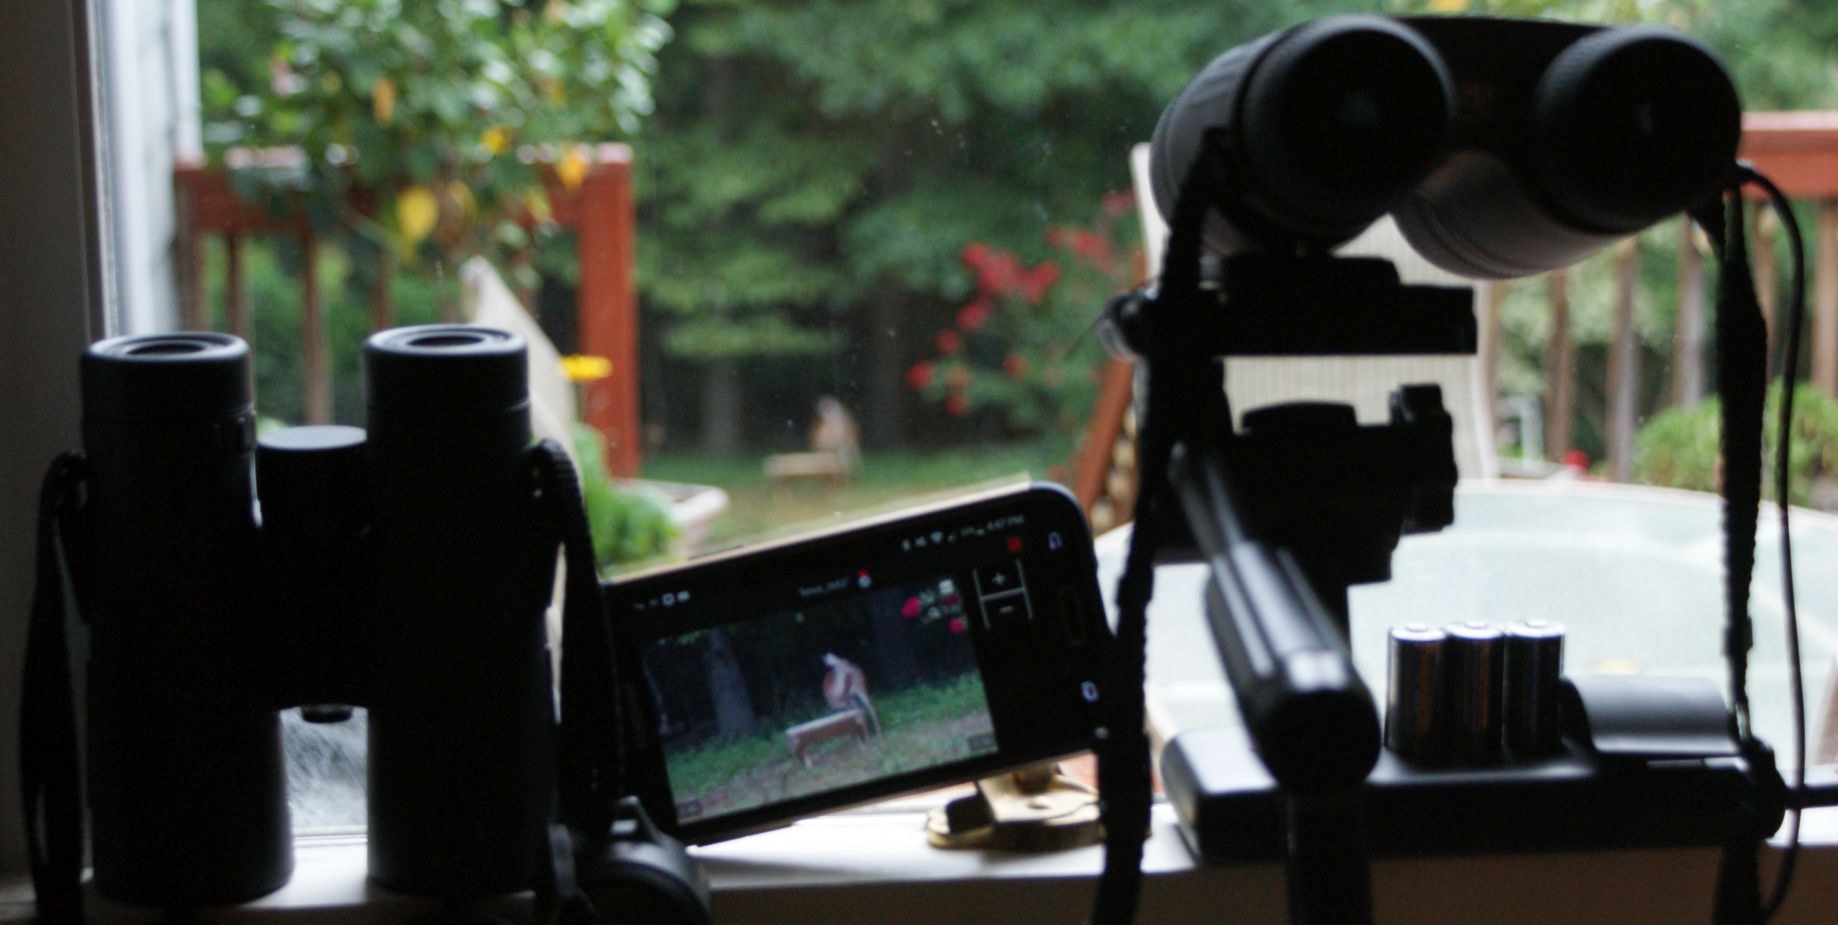
This next photo shows my BinoX looking through a kitchen window at a corn feeder in my back yard. There is a deer at the feeder and you can see the streaming video on my cell phone. Also note that the batteries are removed from the BinoX and it is running on the power bank only. Also notice my good old pair of Steiner binoculars not getting as much use.
Figure 9
The last thing I want to comment on is the Wi-Fi signal strength. I setup my BinoX on a tripod and turned on the Wi-Fi and watched the signal strength on my cell phone as I walked away from the BinoX. I was about 100 yards away when the signal got down to one bar which is far more than enough for most applications. Also, I used the Wi-Fi throughout my house (multiple walls) and didn't have any issues either.
Thoughts
These primary features alone are enough to sell me on the ATN BinoX HD Digital Day/Night binoculars. I'm very pleased with the night vision capability, the IR illuminator seems to have plenty of power to illuminate your items of interest even at longer distances, the photo and video recording capabilities are great for capturing your night time activities, the alternate power sources allow you to save money on batteries and ensure you can have long successful hunts, and the Wi-Fi streaming to your smart device allows you to share with your friends or setup for some type of remote viewing location. If you are planning to use the Wi-Fi feature in the field, you will probably have greatest satisfaction if you stick with batteries for the greatest reliability of streaming your images.
For more detailed photos and commentary, make sure you check out the other parts of this review and feel free to leave comments below. The following links are provided to help you see other parts of this review.
- ATN BinoX Review: Part 1 - Introduction, Specifications and Summary
- ATN BinoX Review: Part 2 - What's in the Box & External Features
- ATN BinoX Review: Part 3 - Primary Features
Or
If you would like to be notified about future Gunsumer Reports reviews via Facebook, make sure "You Like This" by clicking the Facebook "Like" button at the bottom or top of this page. If it already says "You Like This" beside the button, clicking it again will uncheck the "Like" status and you will not be notified.
| Share on Facebook | |
© 2010, 2011, 2012, 2013, 2014, 2015, 2016, 2017, 2018, 2019, 2020, 2021, 2022, 2023 & 2024 Gunsumer Reports™, All rights reserved.
FTC Disclosure