|
|
Gunsumer Reports TM Providing Detailed Objective Reviews for Firearms and Firearm Accessories |
ATI TACSX2 Shotgun Review
Part 5 - Internal Features
February 10, 2015
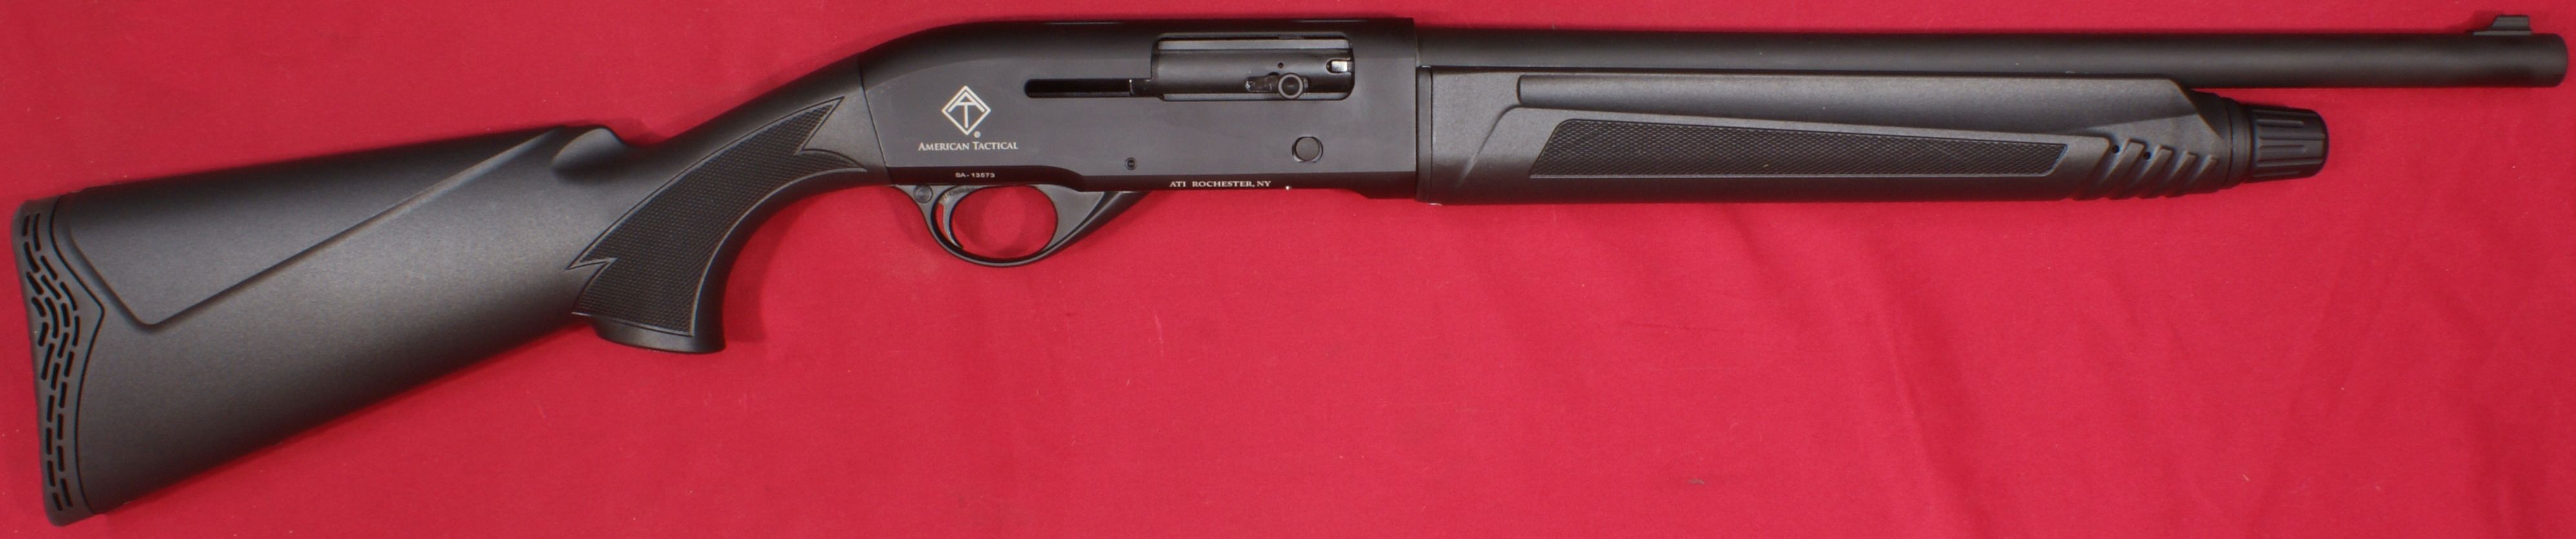
In this part of my ATI TACSX2 Shotgun Review, I try to show some of the more significant internal features of this shotgun. Since I took these photos after range testing, you will see that the shotgun is no longer in the clean new condition as it arrived.
I didn't remove the magazine tube or spring from the receiver because I felt that doing so may cause potential reassembly issues (more later).
Figure 1

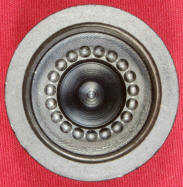
The receiver is made from aluminum and is fairly beefy (a good thing in my opinion). Once I disassembled the shotgun after range testing was complete, I noticed that the locking lug on the bolt may be dragging against the receiver as shown by the wear on the inside of the receiver. Since this wear seems relatively minimal, I'm not sure if this is related to the power of the shells being shot or not (i.e. buckshot versus birdshot). This wear is something I'm going to watch over time to see if it gets worse. During range testing I put about 250 rounds through the shotgun and it was 100% reliable.
Figure 2

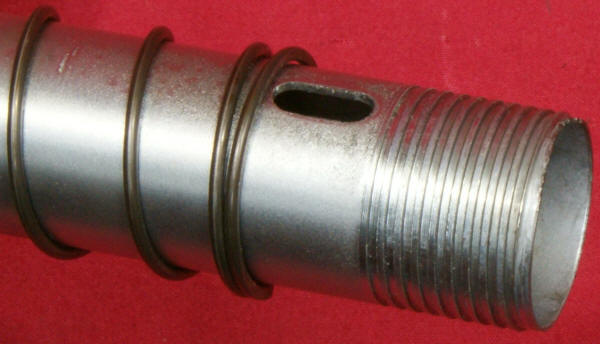
Upon disassembly, I noticed that the edge of the end of the magazine tube looked as if the material had chipped off during the manufacturing process. I don't believe this is related to the operation of the shotgun and it doesn't pose any type of functional issue to the shotgun's operation.
Figure 3
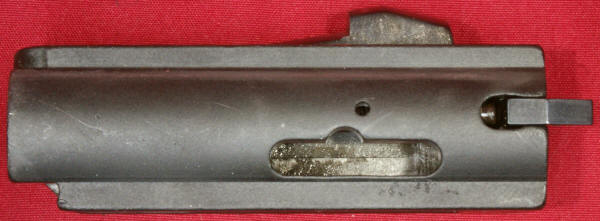
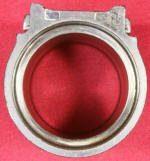
The receiver interfaces with the stock at a flat surface with a round bossed area that inserts into a hole in the stock. The trigger group assembly is what clocks the stock and prevents rotation of the stock. Also notice that the hole in the receiver for the stock bolt is threaded directly into the aluminum receiver. I would have preferred a steel insert into the receiver and this is one of the ways that fabrication costs were reduced to get this semi-auto shotgun's price down.
Figure 4

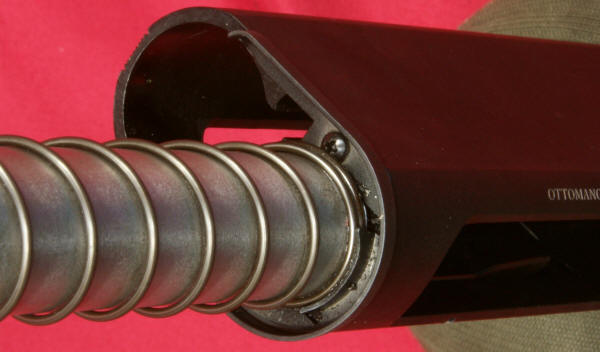
As I mentioned earlier, I didn't remove the magazine tube or action spring because it was difficult to get a screwdriver on the screws that hold the rear forearm retainer in place (shown below). This was one of those situations where I thought I was better off not disassembling further. Also, I generally don't remove the magazine tubes because they are typically installed very tightly into the receiver and it is possible to thoroughly clean the shotgun with the tube in place.
Figure 5
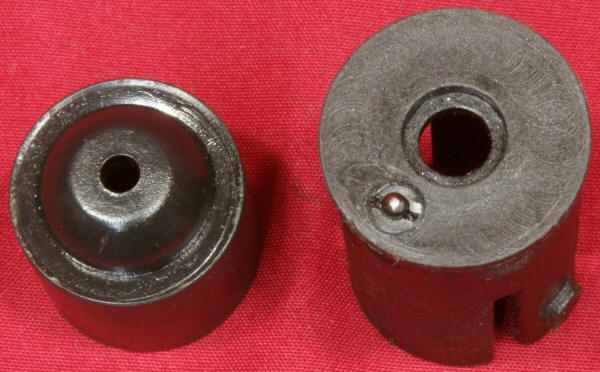
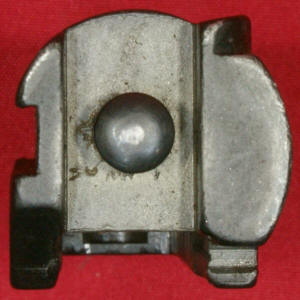
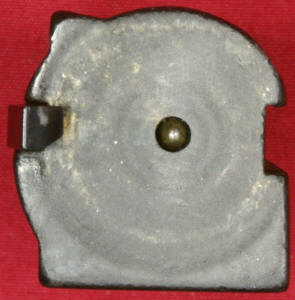
The magazine spring cap and follower are both made from some type of polymer material (most likely glass filled nylon).
Figure 6
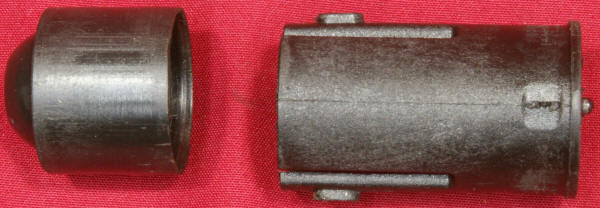
The magazine spring cap includes a spring loaded detent to prevent the magazine tube cap from loosening during use.
Figure 7
The magazine spring measured 28.5" in length uncompressed.
Figure 8

The photo below shows the stock interface to the receiver. The ATI TACSX2 is not compatible with Remington 870 or Mossberg 500 buttstock components.
Figure 9

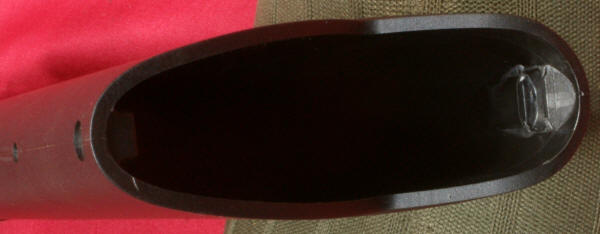
A single buttpad screw at the bottom of the stock holds the pad in place and the top of the buttpad is secured in a notch molded into the interior of the stock. The stock is hollow and has a large cavity that could be used for storing items as long as they are packed to prevent from rattling around.
Figure 10
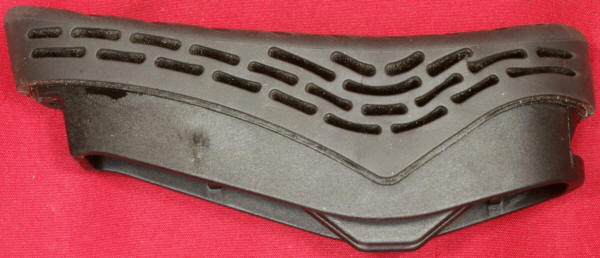
The rubber portion of the buttpad is molded/bonded to a a ridged polymer portion.
Figure 11
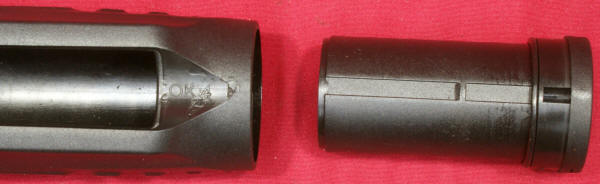
The forearm is actually an assembly of two main pieces.
Figure 12

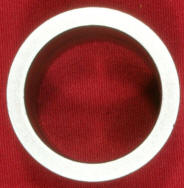
One cylinder shaped piece (on the right in the photo below) slides inside the main body of the forearm and the cylinder shaped piece also includes an O-ring between the two pieces.
Figure 13
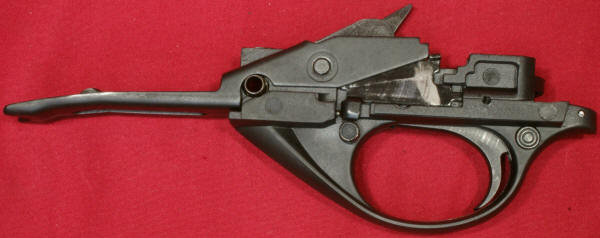
Several photos of the trigger group assembly are shown below for your reference. This assembly is a combination of metallic components installed on a polymer trigger guard body. I typically do not disassemble these components any further for normal cleaning because I like my firearms to work.
Figure 14

Figure 15
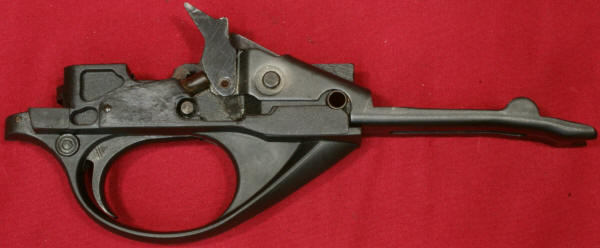
Figure 16
These next two photos show the hammer uncocked. The trigger and hammer interface had positive hammer retention (pulling the trigger moved the hammer down slightly).
Figure 17
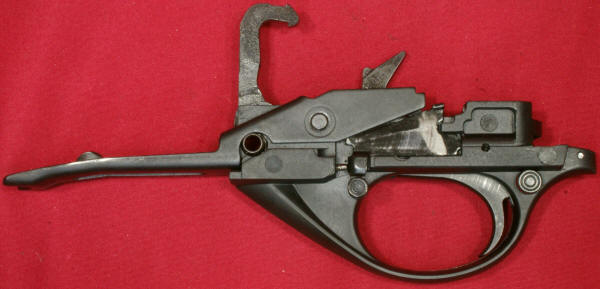
Figure 18

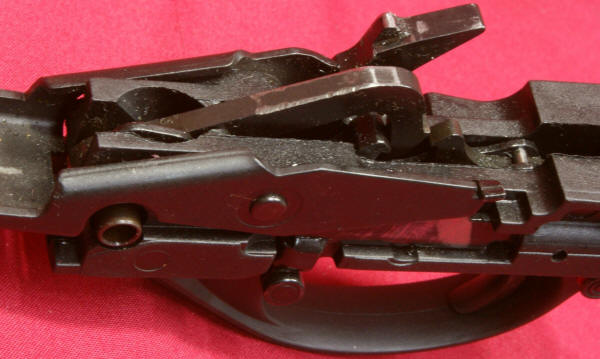
I added this photo for my own reference to show how the front of the hammer appears to be getting some wear on the sides. I will also be watching this item during my future cleanings.
Figure 19
These next photos show the bolt assembly which is a steel part. I was not able to find or identify any markings on the bolt assembly or the barrel which may indicate that the shotgun was proof tested.
Figure 20
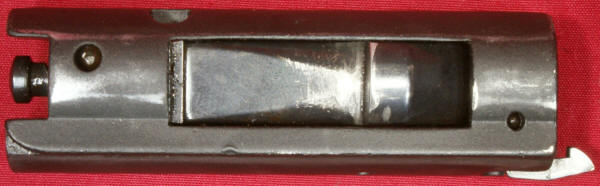
Figure 21
The pins in the bolt assembly appear to be staked in place.
Figure 22
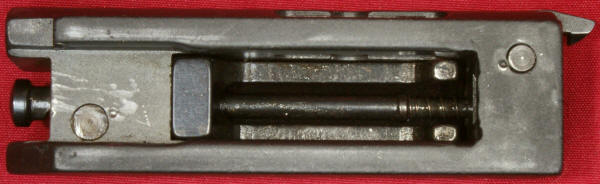
Figure 23
Figure 24
Figure 25
The stainless steel gas piston is shown below. The piston has two steel rings to help seal the gasses.
Figure 26
Figure 27
Figure 28


The trigger group pin is shown below.
Figure 30

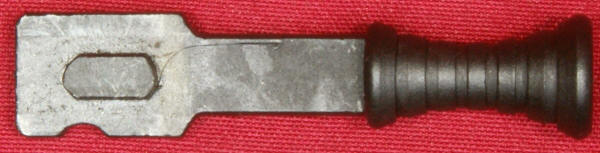
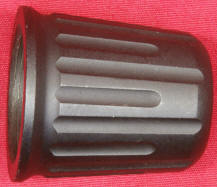
The operation handle is shown below.
Figure 31
The aluminum magazine cap is shown below and is a beefy part. If you wanted to install a forward sling swivel stud, you could easily drill a hole in the center of this part and add a threaded hole or some other type of stud attachment.
Figure 32
Figure 33
Figure 34

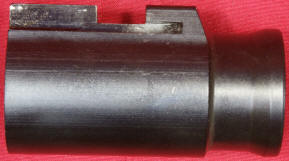
The aluminum action arm sleeve is shown below. There was some wear in the inside of the front lower surface and rear top surface. I believe this wear is due to the action arm pulling the top of the sleeve rearward causing a slight tilting force on the sleeve.
Figure 35
Figure 36
Figure 37

The steel action arm assembly is shown below.
Figure 38

Figure 39

Figure 40

I included this photo for my own reference to see if this part will exhibit wear in the future.
Figure 41

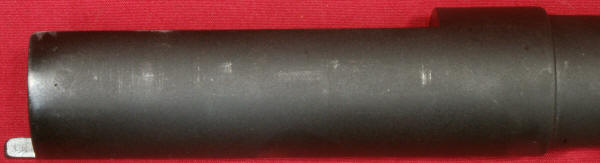
The steel barrel assembly is shown in these next photos.
Figure 42

As mentioned earlier, I wasn't able to identify anything which I though was a proof mark on the barrel or rear barrel extension shown below.
Figure 43
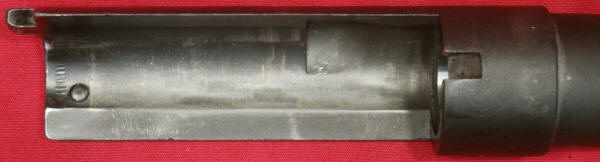
Figure 44
The rear barrel extension appears to be soldered to the barrel and I wasn't able to detect any voids in this joint using a 20x magnifying glass.
Figure 45

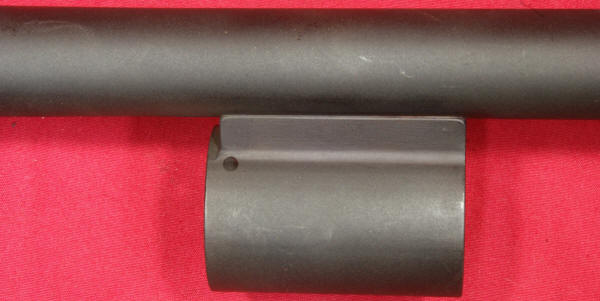
The guide lug solder joint was also void free and the joint looked good all the way around the part.
Figure 46
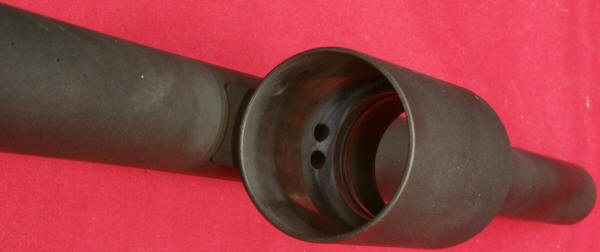
This next photo shows the two gas ports that vent into the lug.
Figure 47
Thoughts
I was not able to identify proof marks on the bolt or barrel and I was also a little surprised at the wear marks on the inside upper surface of the receiver and front of the hammer. Only rounds down range will tell if the wear will become an issue. Since most people wouldn't consider a 18.5" length barreled shotgun one that they would hunt or shoot clay birds with, most likely this shotgun will become a value oriented closet home defense shotgun and wearing the shotgun out would not be an issue.
For more detailed photos and commentary, make sure you check out the other parts of this review and feel free to leave comments on my Reader's Comments page. The following links are provided to help you see other parts of this review.
- ATI TACSX2 Shotgun Review: Part 1 - Introduction, Specifications and Summary
- ATI TACSX2 Shotgun Review: Part 2 - What's in the Box
- ATI TACSX2 Shotgun Review: Part 3 - External and Operational Features
- ATI TACSX2 Shotgun Review: Part 4 - Disassembly
- ATI TACSX2 Shotgun Review: Part 5 - Internal Features
- ATI TACSX2 Shotgun Review: Part 6 - Range Test
Or
If you would like to be notified about future Gunsumer Reports reviews via Facebook, make sure "You Like This" by clicking the Facebook "Like" button at the bottom or top of this page. If it already says "You Like This" beside the button, clicking it again will uncheck the "Like" status and you will not be notified.
| Share on Facebook | |
© 2010, 2011, 2012, 2013, 2014, 2015, 2016, 2017, 2018, 2019, 2020, 2021, 2022, 2023 & 2024 Gunsumer Reports™, All rights reserved.
FTC Disclosure