|
|
Gunsumer Reports TM Providing Detailed Objective Reviews for Firearms and Firearm Accessories |
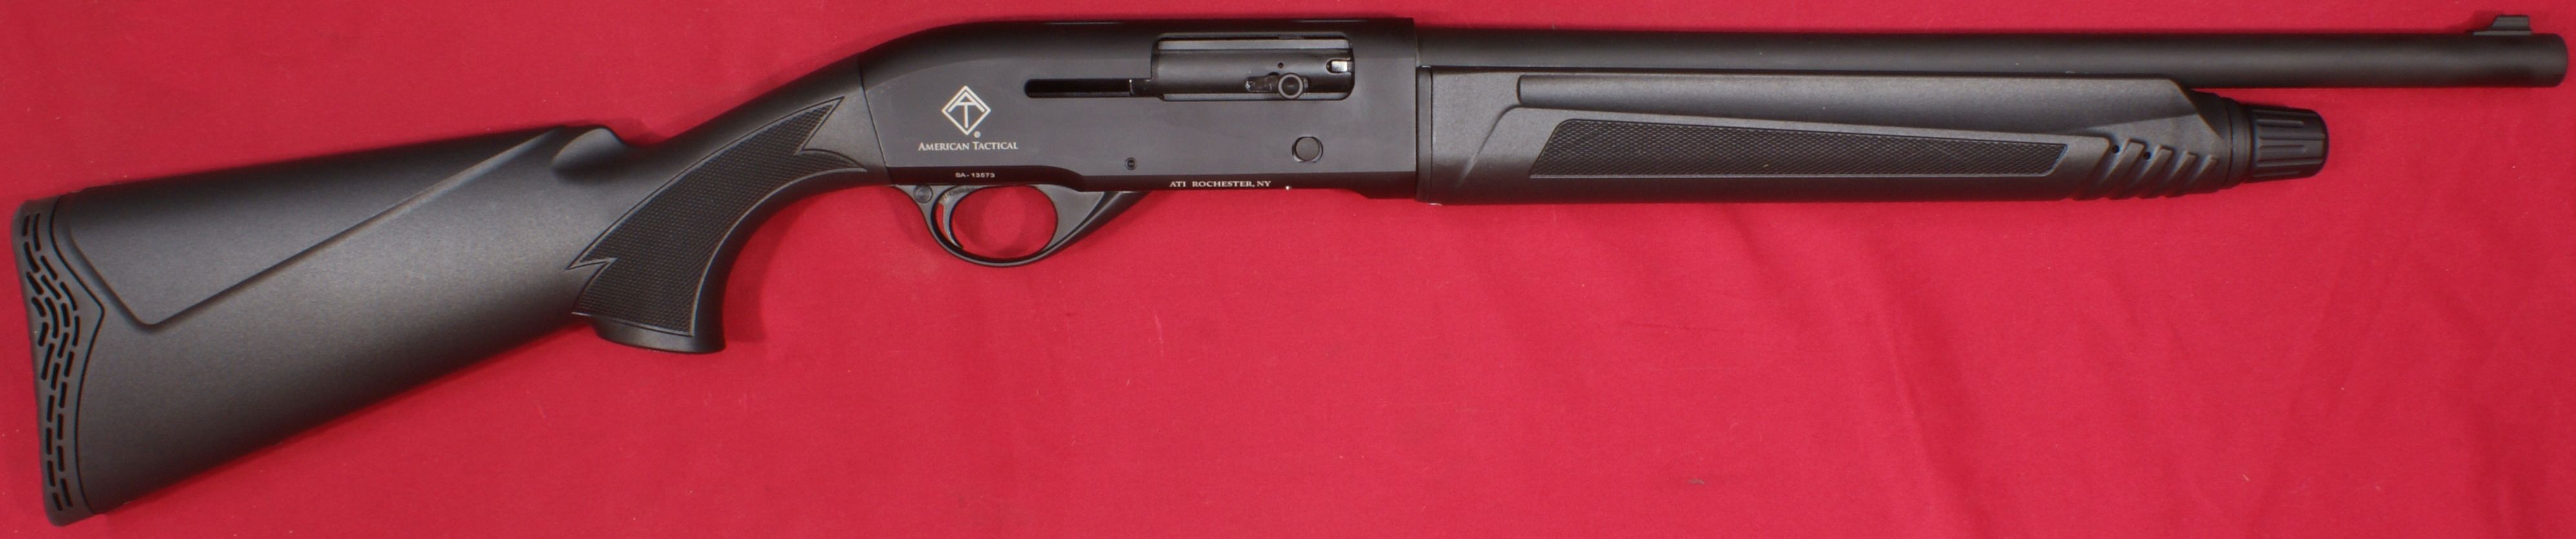
ATI TACSX2 Shotgun Review
Part 4 - Disassembly
February 8,2015
In this part of the review I'm going to show the disassembly of the ATI TACSX2 Shotgun. The TACSX2 Owner's Manual (which is actually only one sheet) is about as simplistic as you can get. I took this below directly from the manual to show the extent of their disassembly instructions.
Figure 1

Although these instructions are pretty basic, they do describe most of the steps for normal disassembly, but for some reason they skipped the part about removing the bolt. In the following, I show these disassembly steps in a little more detail.
Normal Disassembly
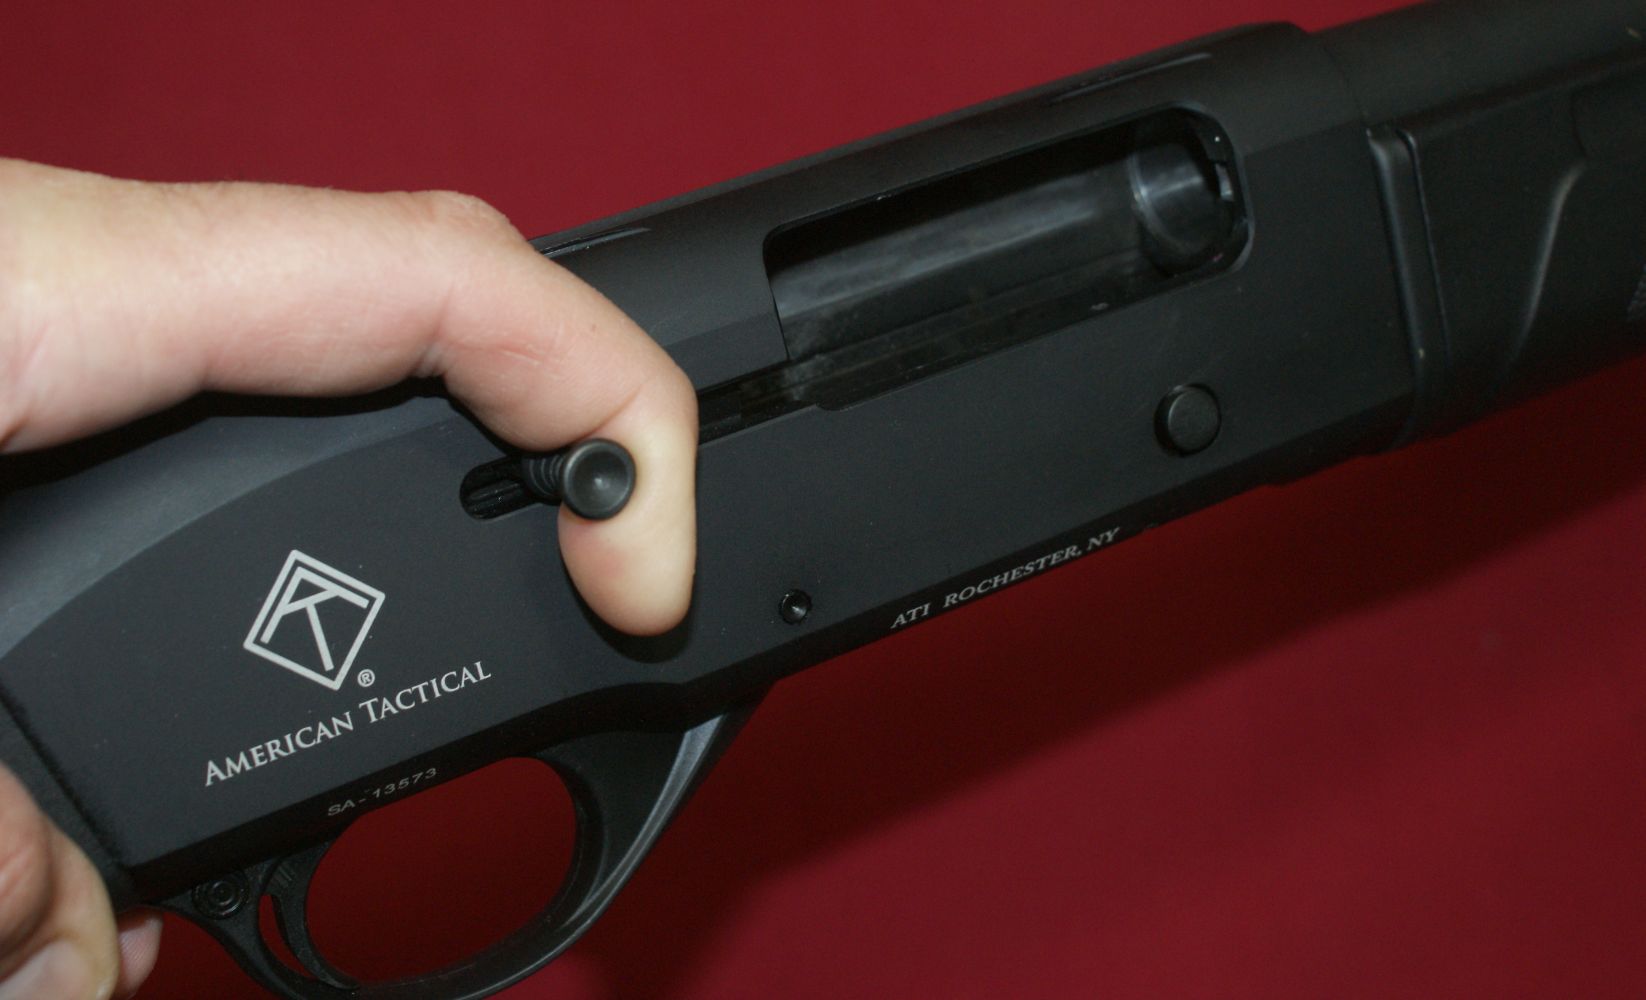
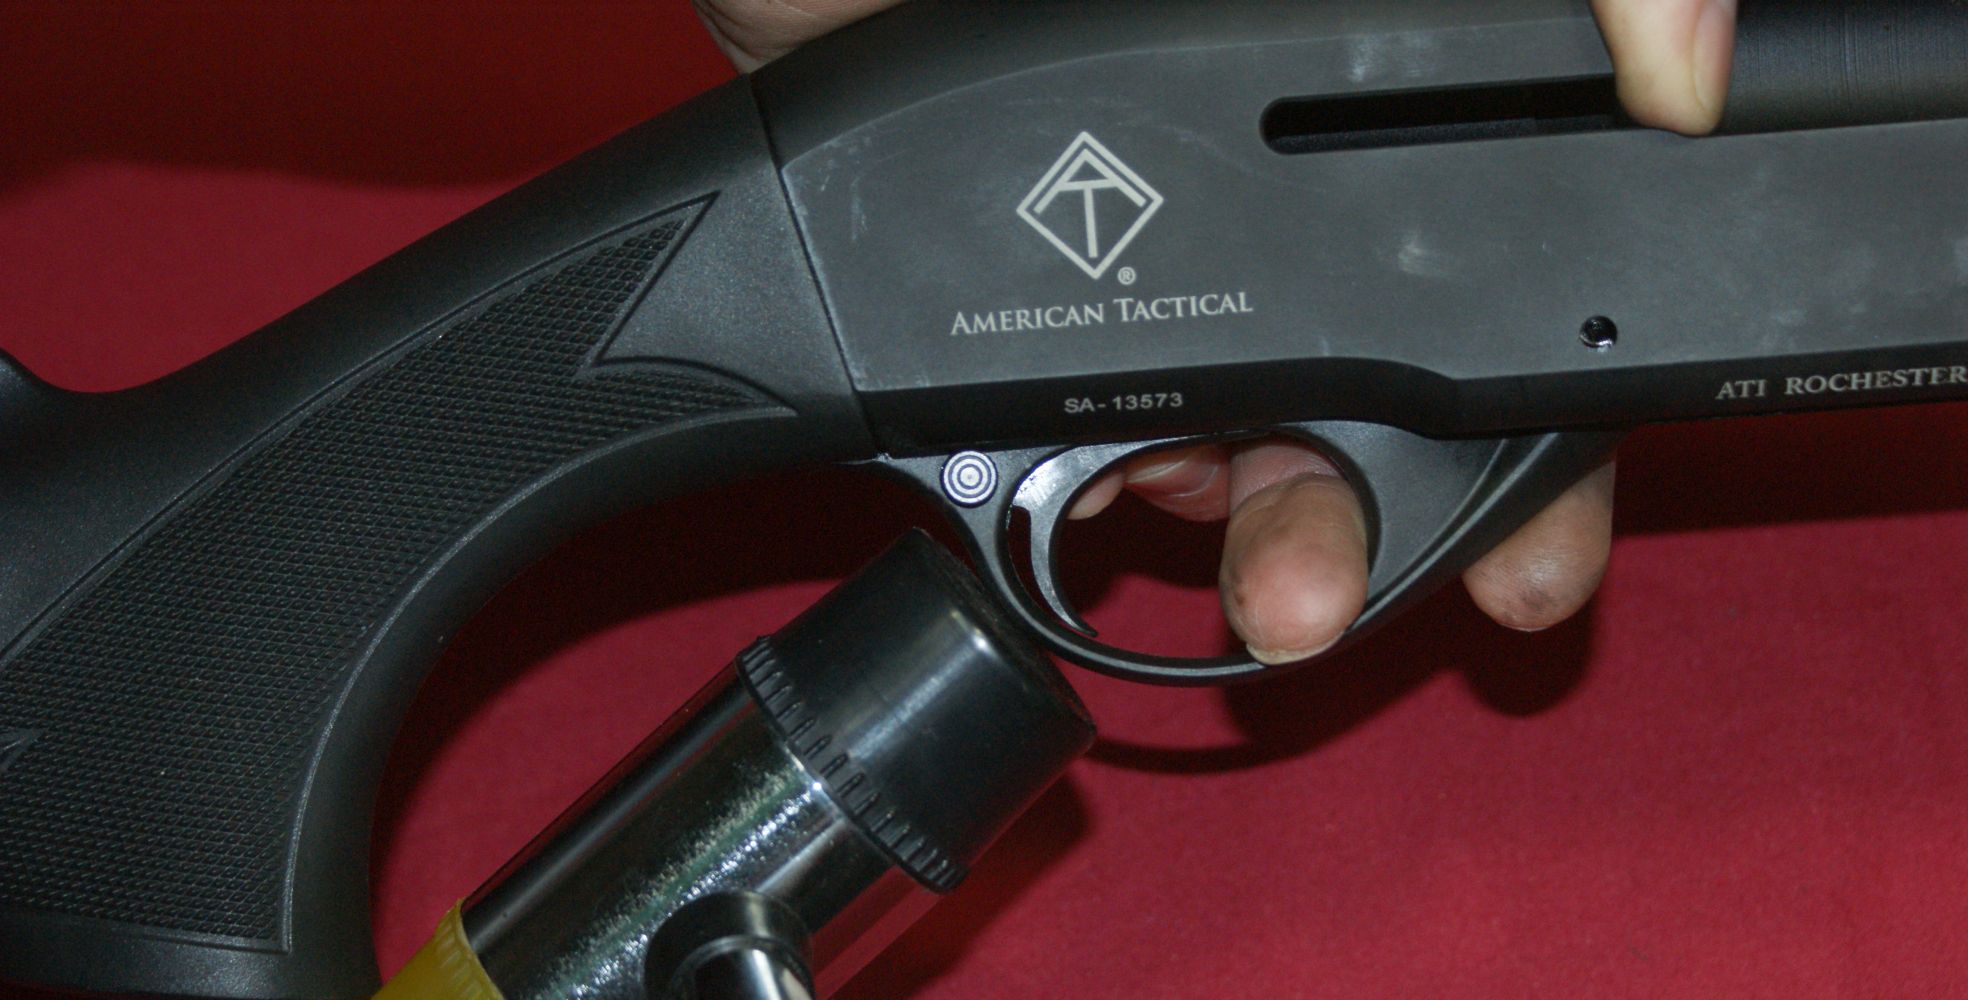
Step 1 - Safety
First you should ensure the shotgun is completely unloaded. Check both the chamber and magazine tube. Once you are sure the shotgun is unloaded, point it in a safe direction and dry fire the shotgun so that the action will lock in the rear position.
Figure 2
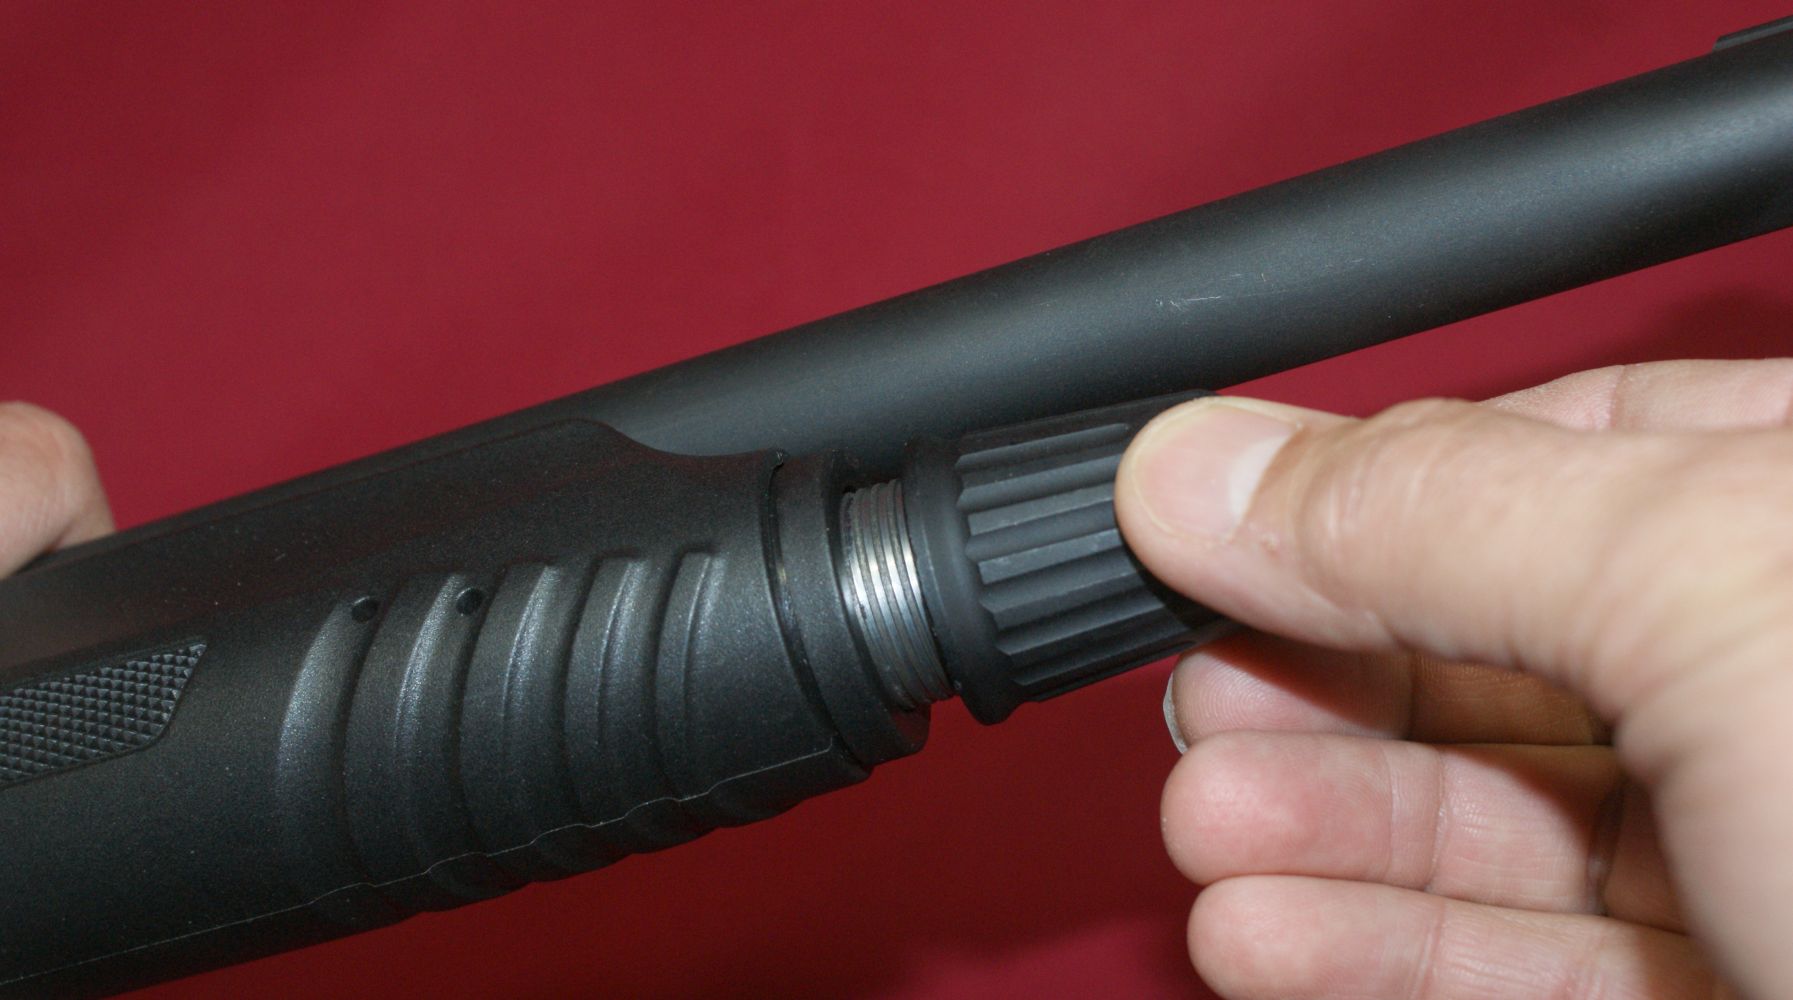
Step 2 - Remove Magazine Tube Cap
Unscrew the magazine cap and remove the cap.
Figure 3
Step 3 - Remove Forearm
With the magazine cap removed, the forearm easily slides forward and off the shotgun.
Figure 4

Step 4 - Remove Barrel
To remove the barrel, I found it necessary to release the action slowly as I pulled the barrel out of the receiver.
Figure 5

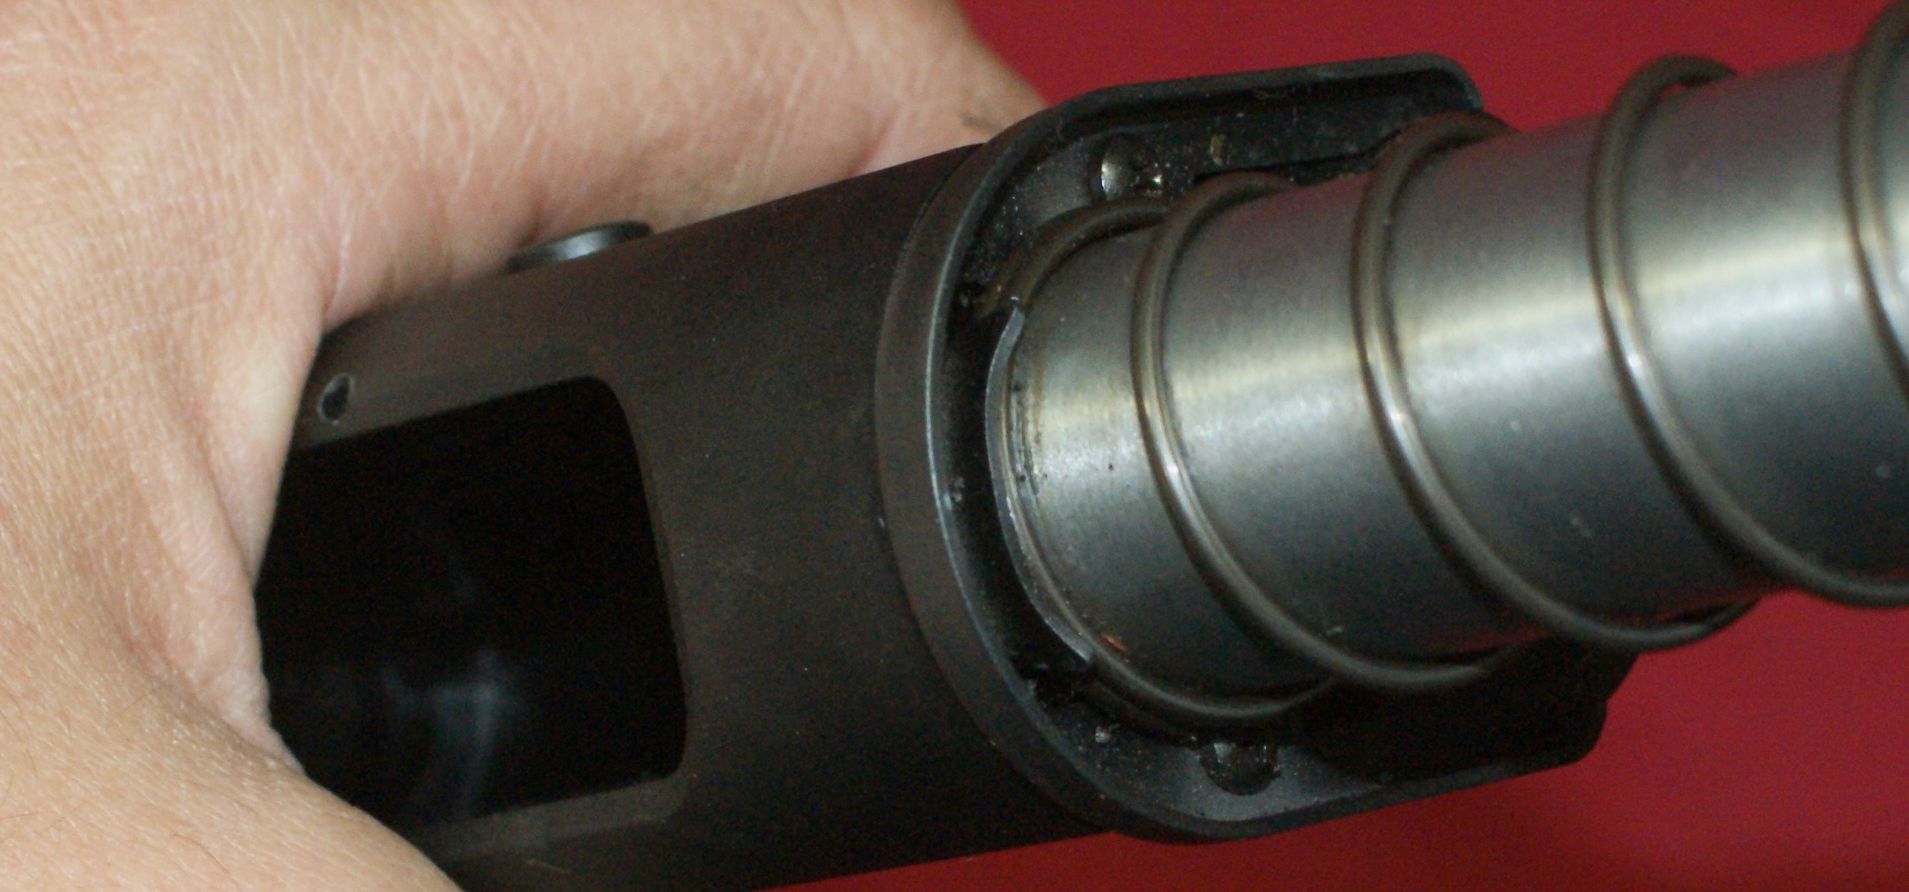
Step 5 - Remove Gas Piston
The gas piston can be removed by sliding it off the end of the magazine tube.
Figure 6

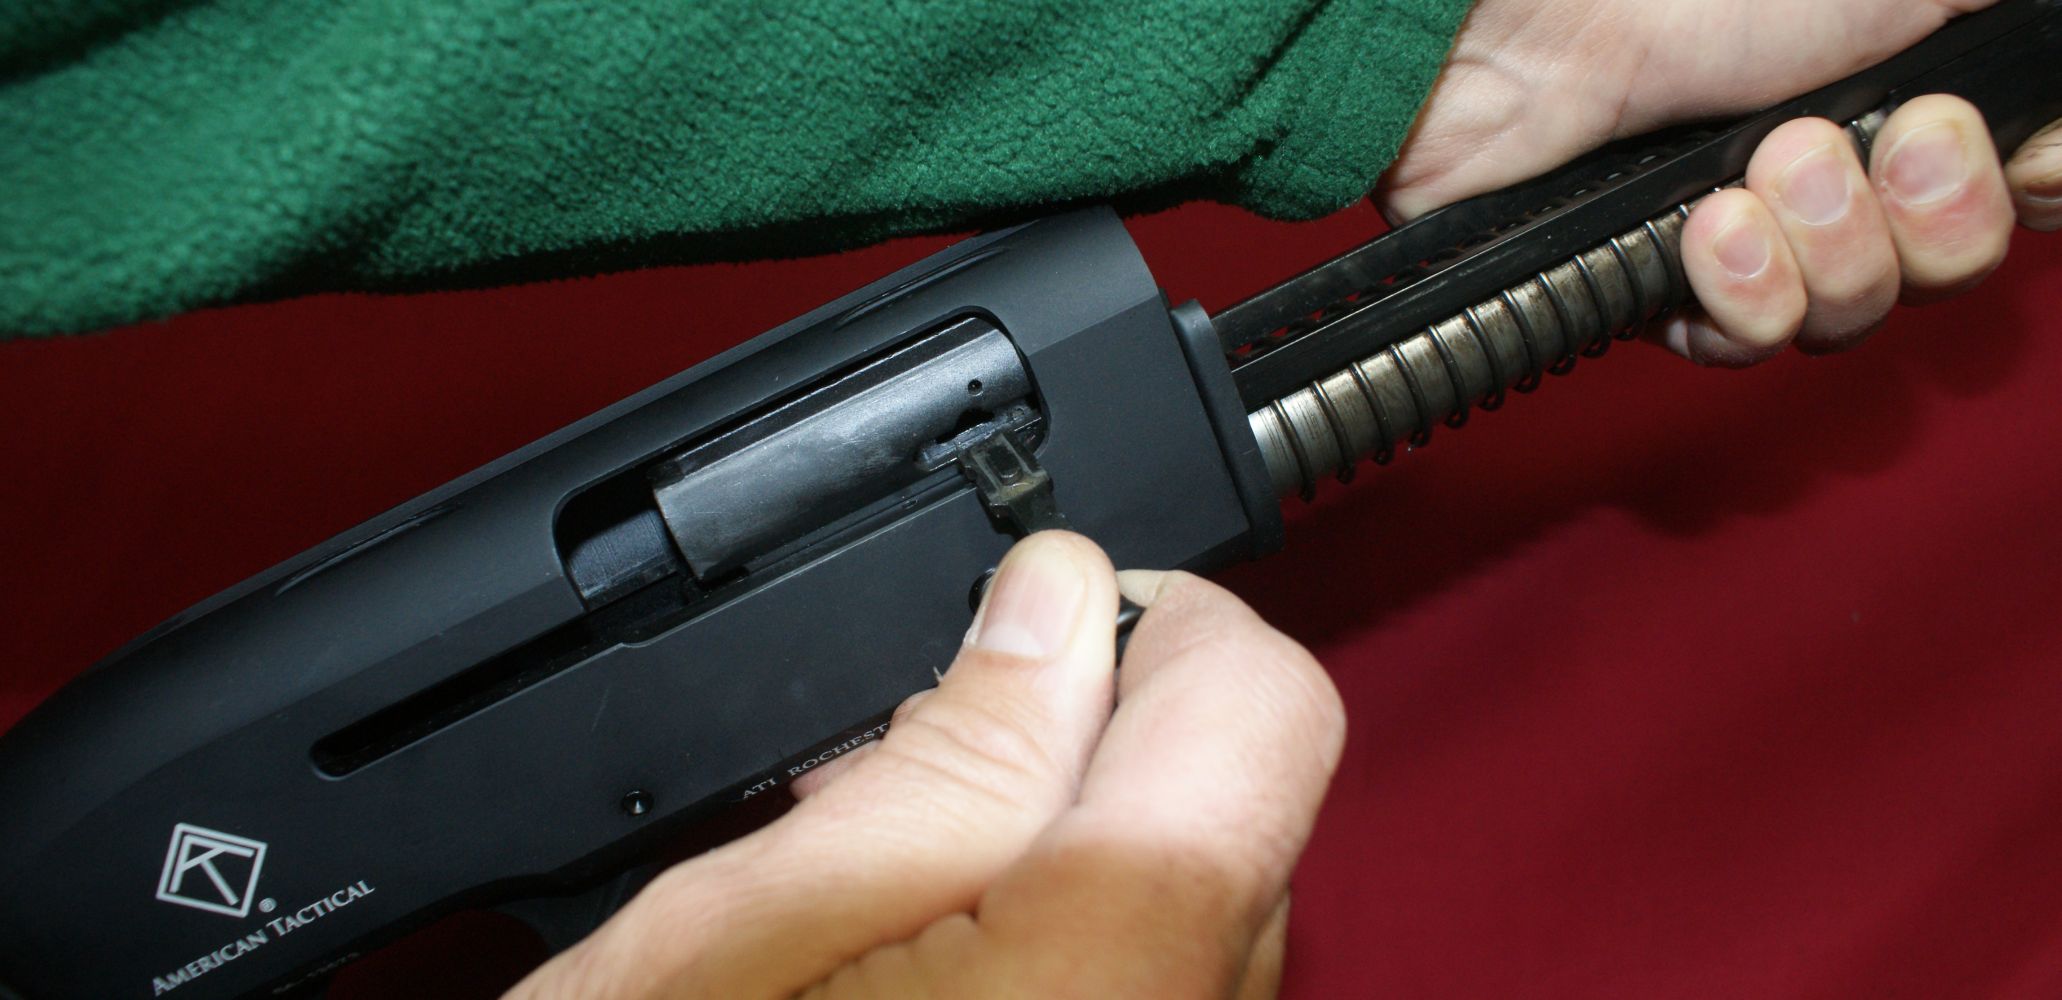
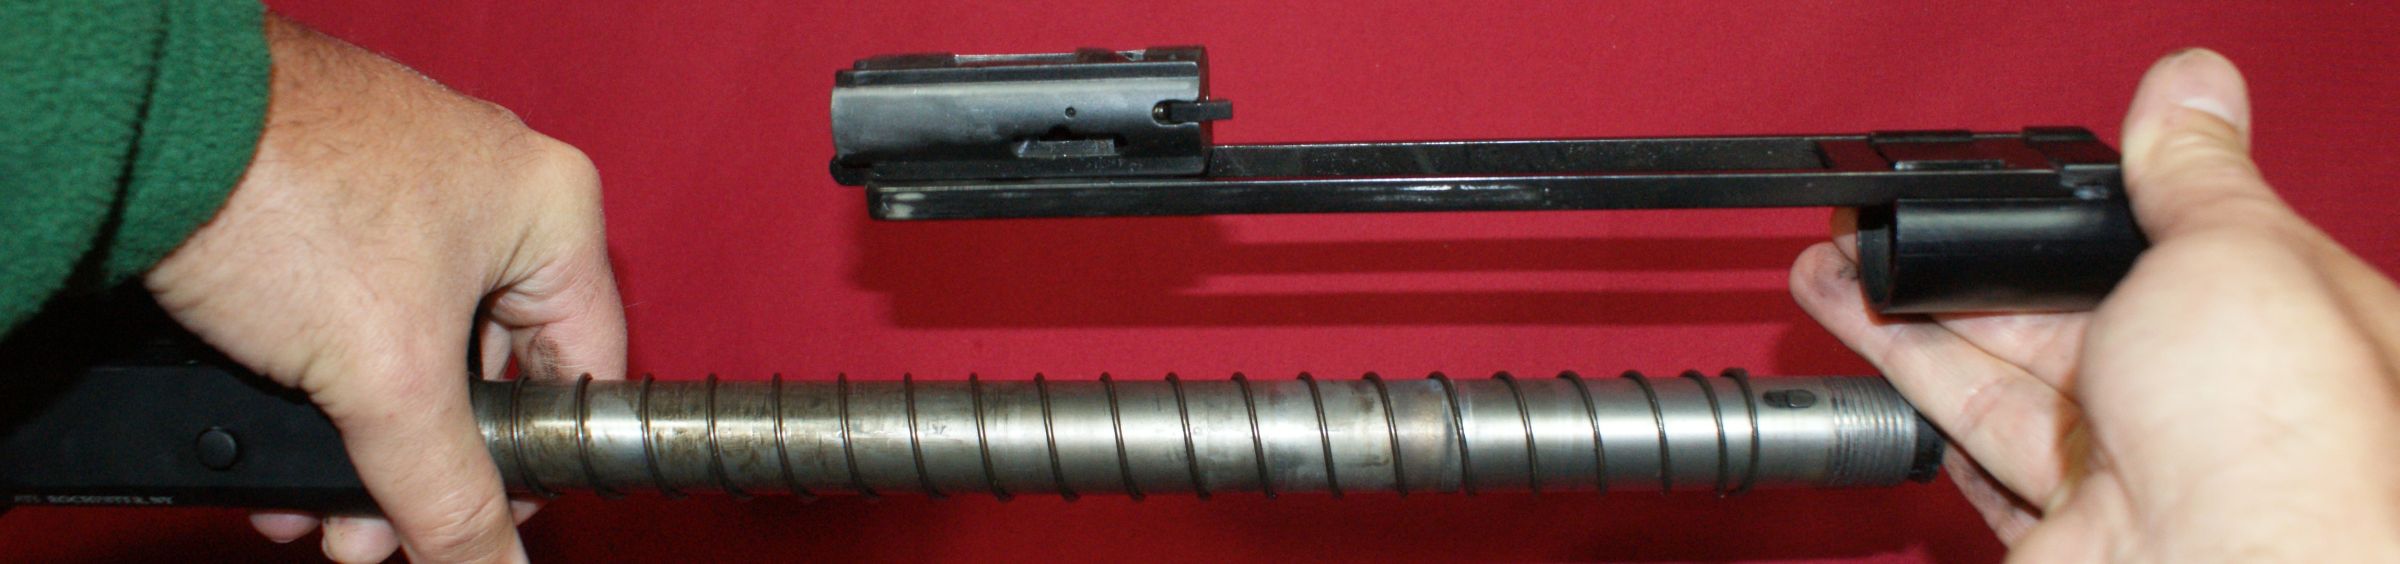
Step 6 - Remove Action Arm and Bolt
To remove the action arm and bolt, you need to center the operating handle in line with the notch in the slot on the bolt. To do this, press rearward on the action arm and you might need to adjust the position of the bolt with your other hand.
Figure 7

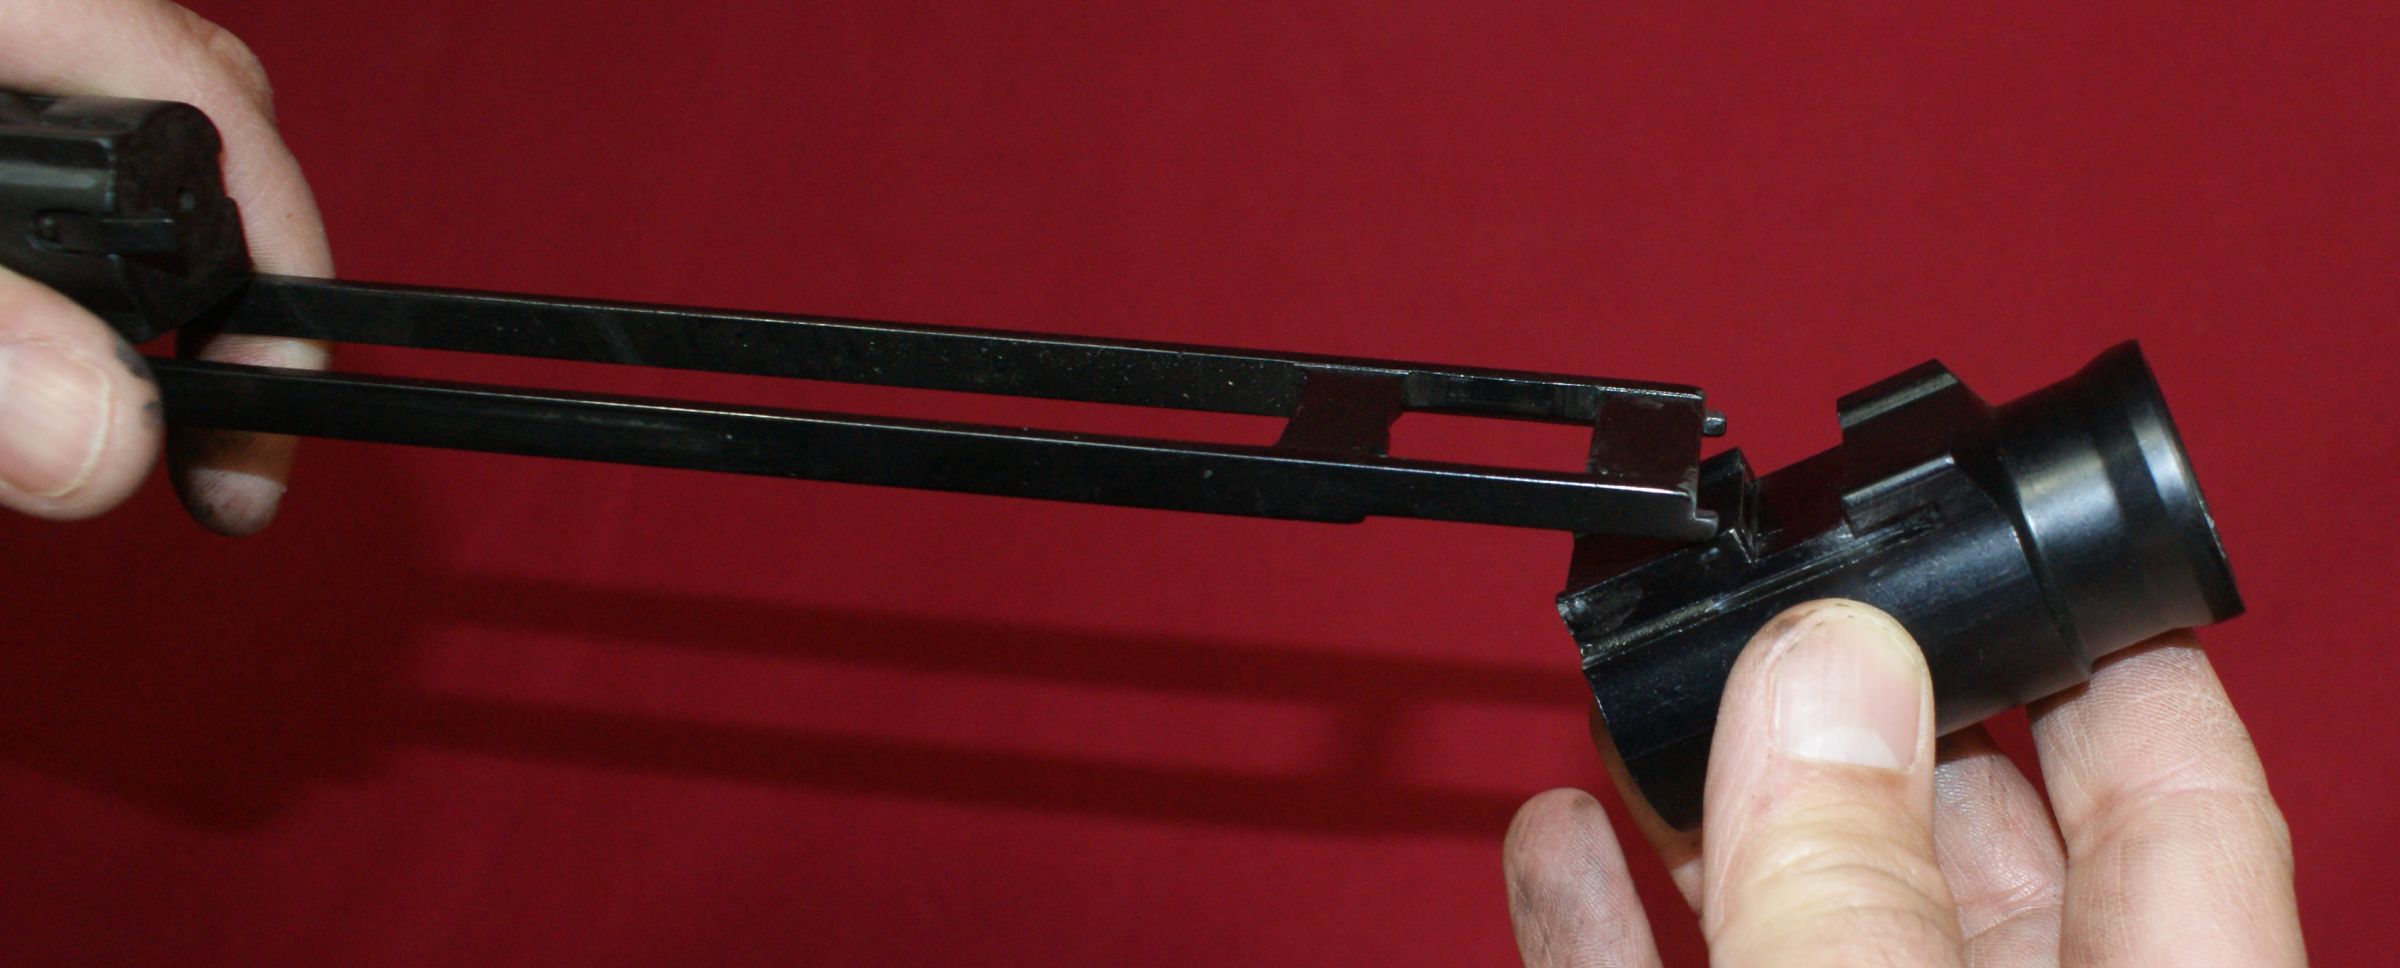
The operating handle can then be pulled from the bolt.
Figure 8
With the operating handle removed, the action arm and bolt can slide forward out of the receiver eventually off the magazine tube.
Figure 9

Figure 10
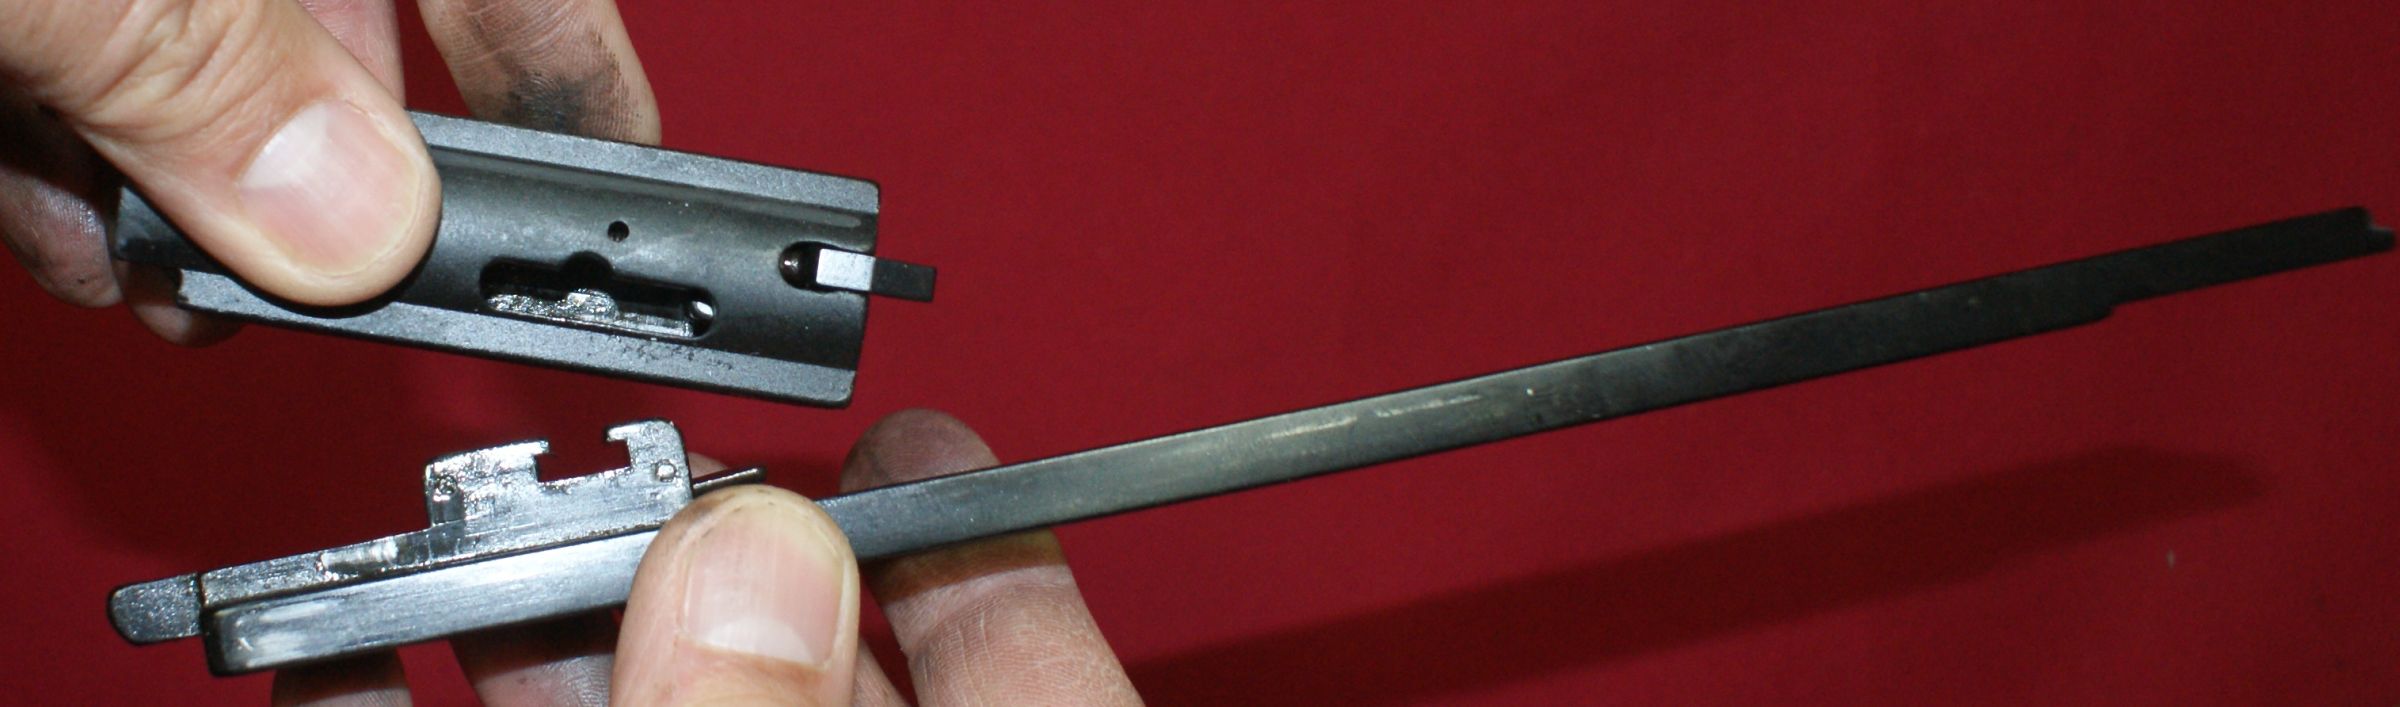
The action arm sleeve can be removed from the action arm by tilting the front of the sleeve up and pulling the action arm out of the slot.
Figure 11
The bolt can be removed from the action arm by lifting at the rear of the bolt and tilting it slightly as you pull the bolt off the action arm.
Figure 12
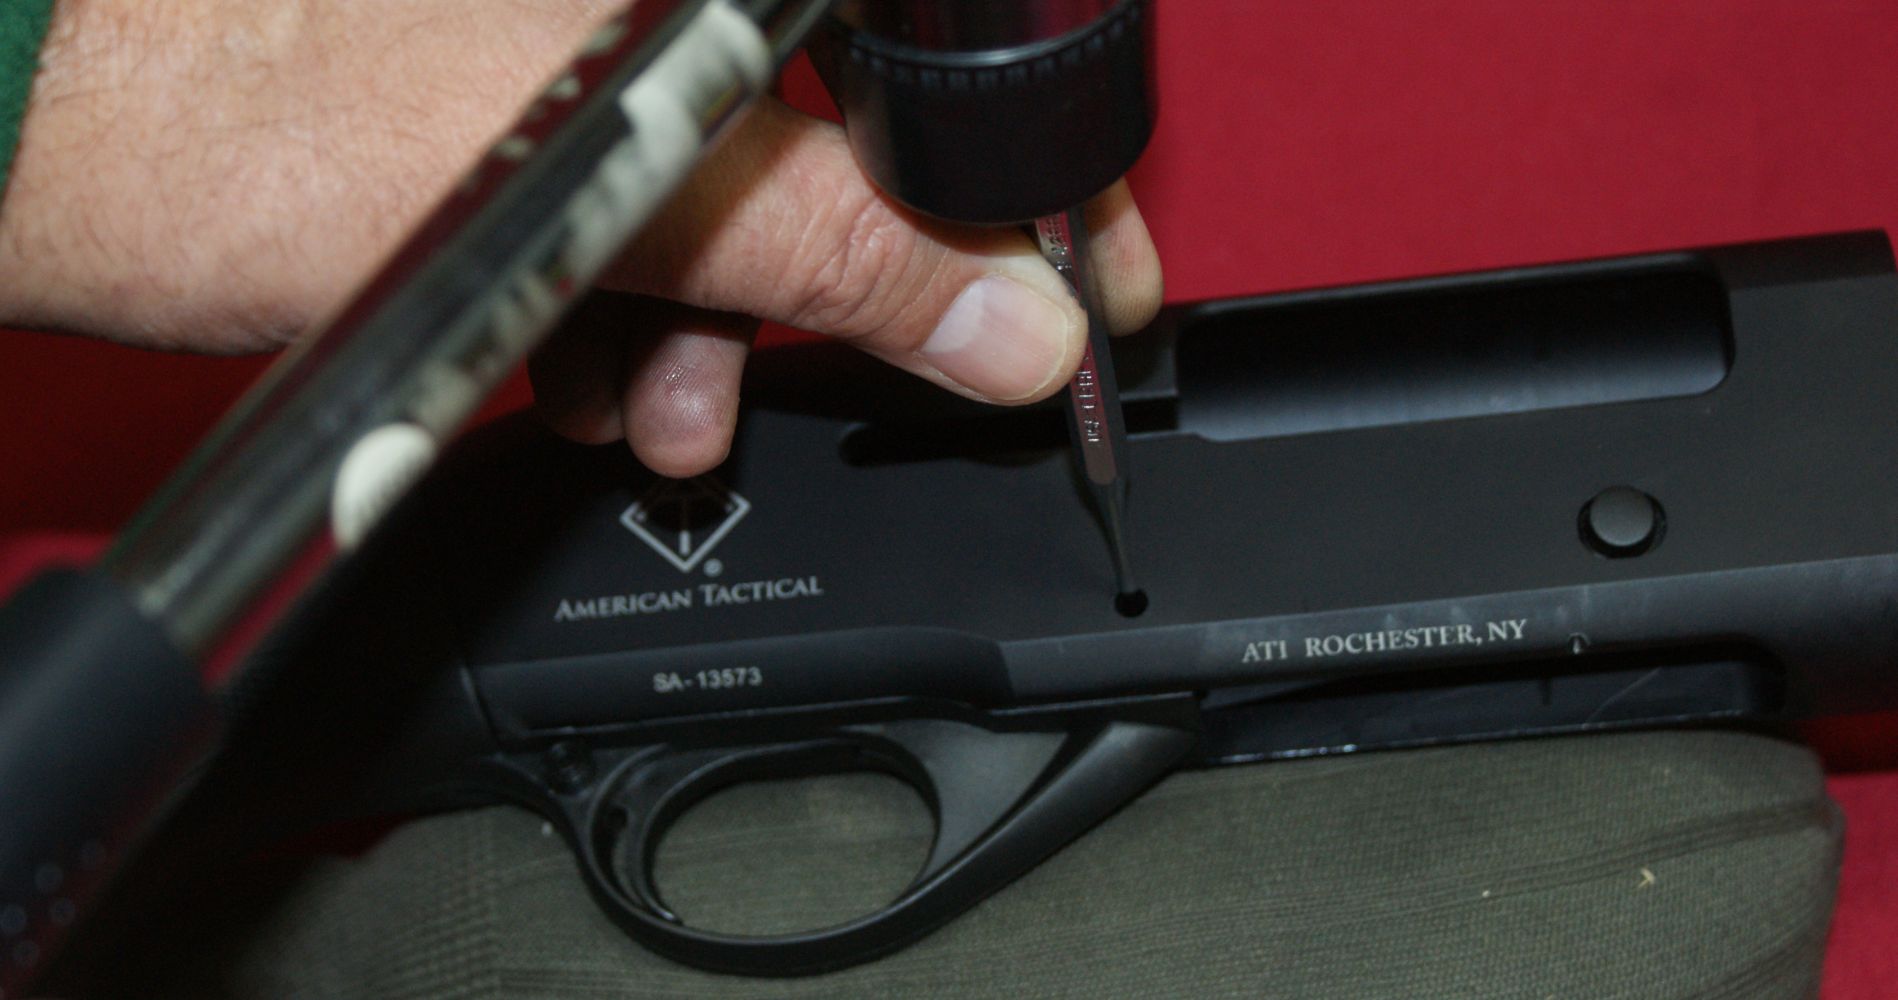
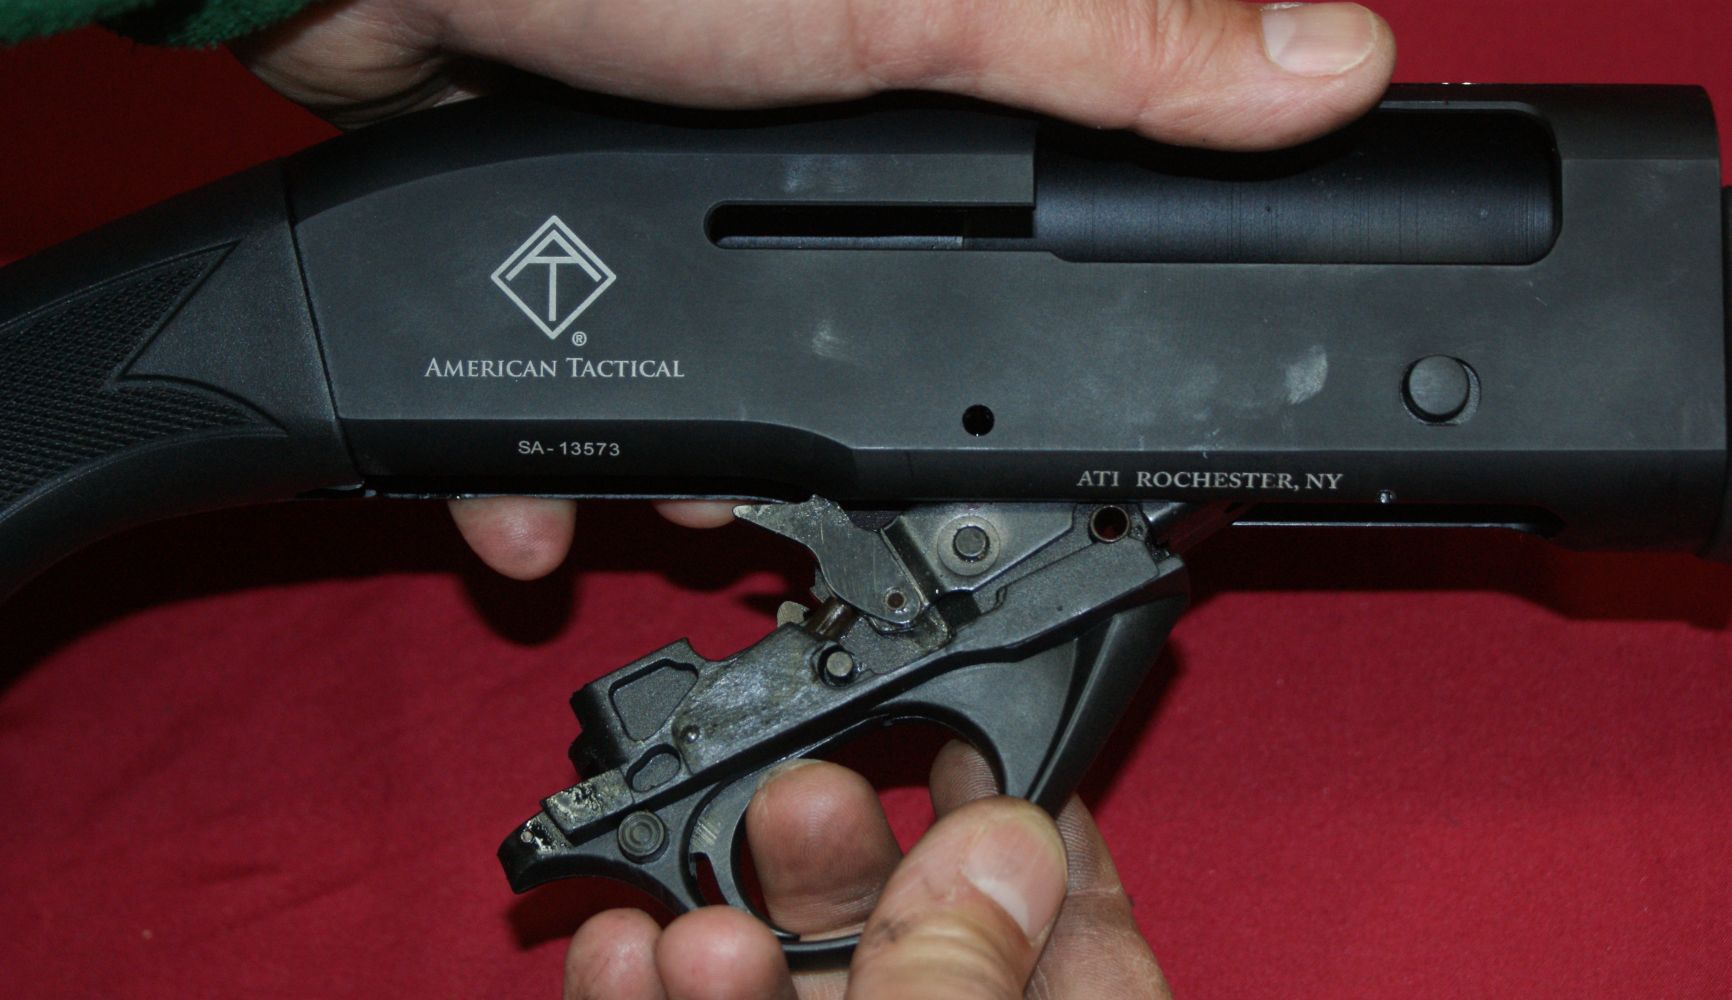
Step 7 - Remove Trigger Group Assembly
Place something soft under the receiver and tap the trigger group retaining pin out of the receiver as shown below.
Figure 13
Next, tap in the forward direction on the back of the trigger guard.
Figure 14
Once the trigger guard assembly starts to move forward, you can use your hand to rotate the assembly out of the receiver.
Figure 15
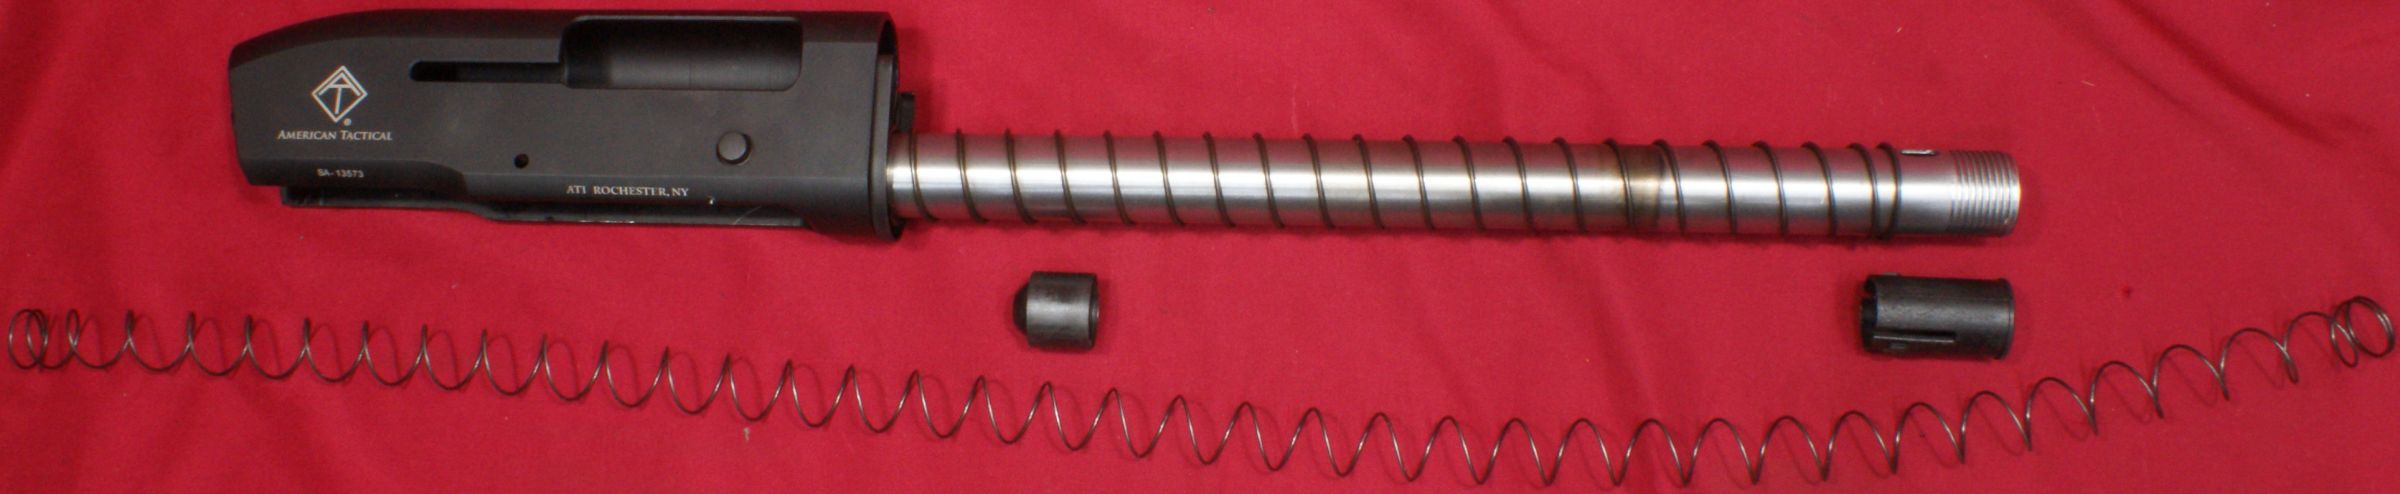
Normal Disassembly Complete
The photo below shows disassembly to a level for normal cleaning. Overall, it was pretty easy and is similar to many other shotguns.
Figure 16

Note, the reason I didn't remove the action spring is because the spring was held in place by the plate that holds the rear of the forearm. With the spring in place, I wasn't able to easily get at the head of one of the screws shown below. Since cleaning the exterior of the magazine tube is easily performed by pushing the spring out of the way, I decided not removing the spring wasn't an issue.
Figure 17
Further Disassembly
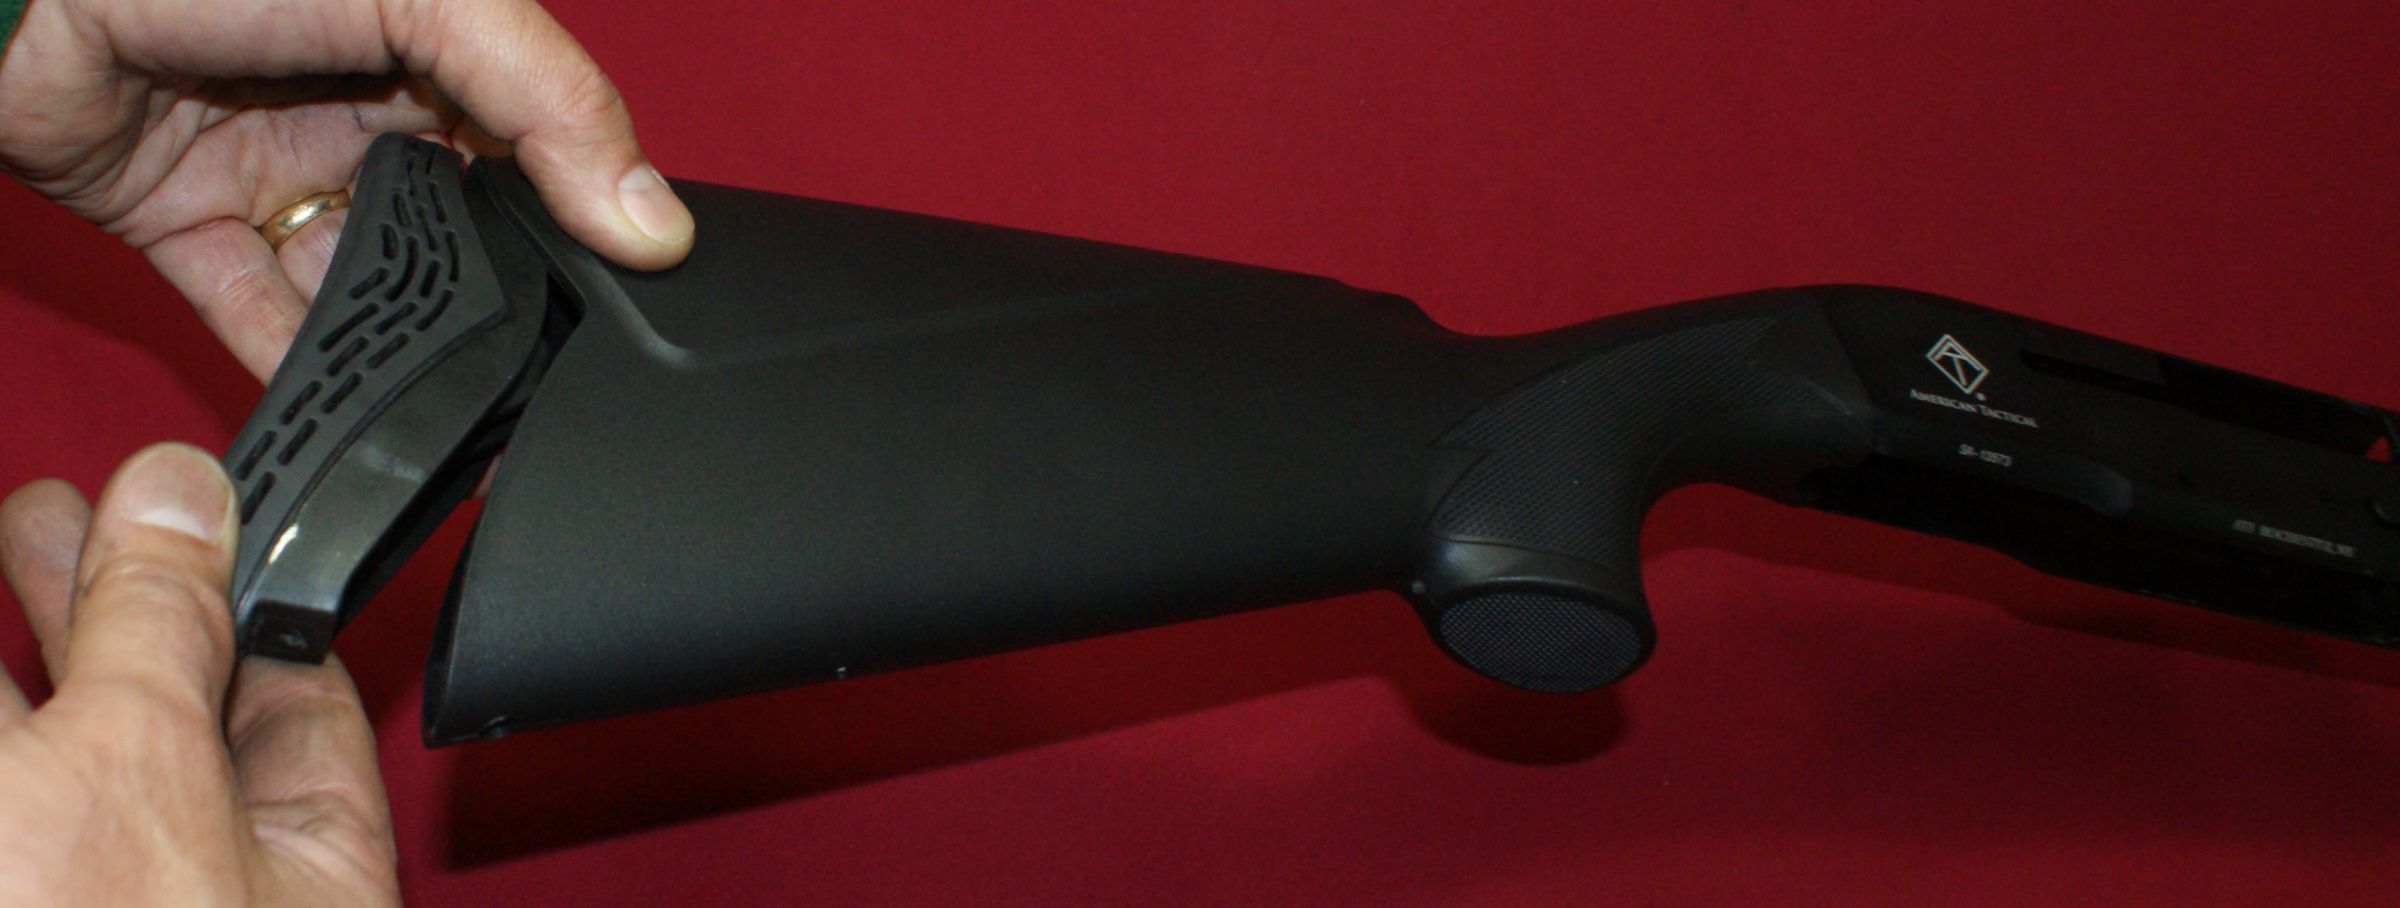
There is no need to remove the stock for normal cleaning, but I decided to remove it anyway to take a closer look at the components. To remove the stock, first remove the screw that holds the buttpad in place.
Figure 18

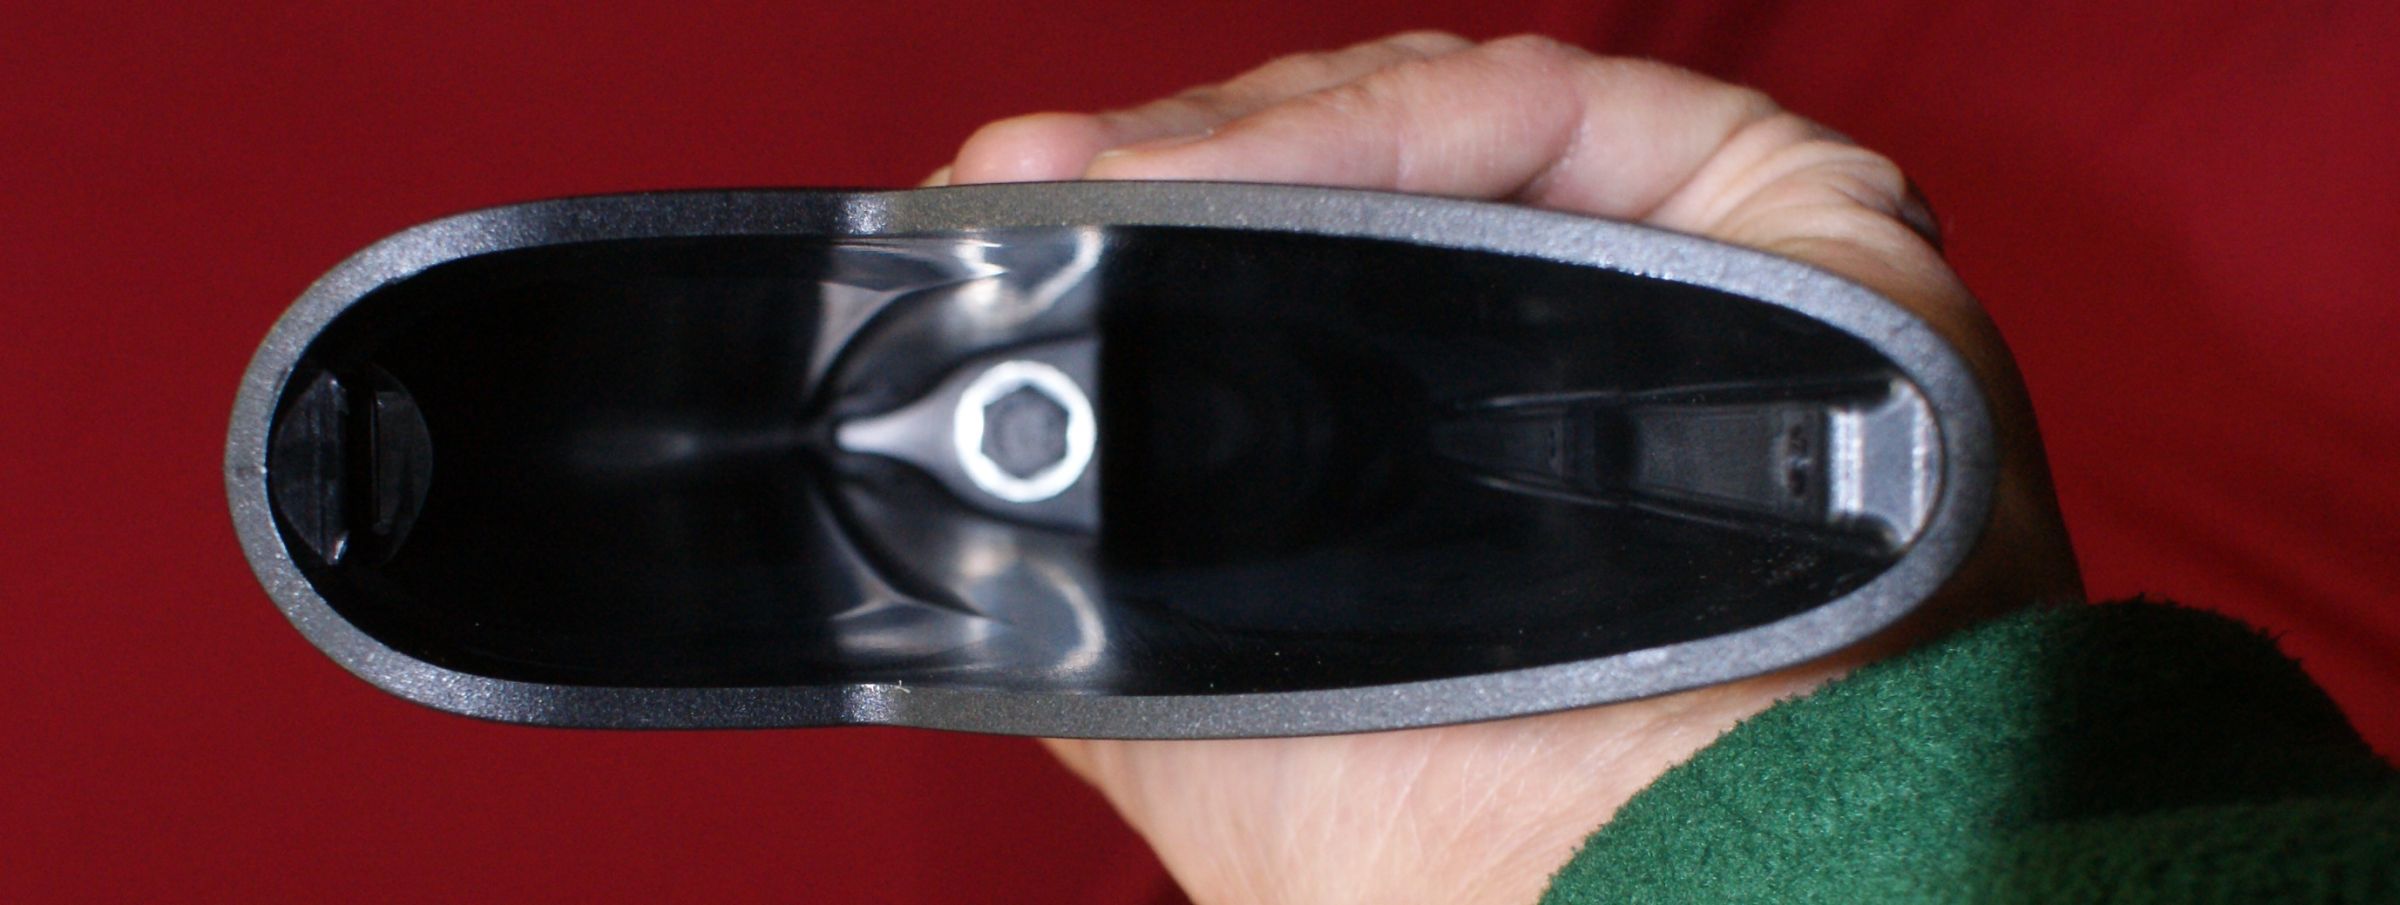
With the buttpad screw removed, you can rotate the buttpad off the stock by pulling at the bottom of the buttpad.
Figure 19
Looking down the stock, you can see the stock bolt and washer. Using a 13mm socket and extension, I was able to remove the bolt. Actually, the bolt didn't feel like it required much torque to loosen, so you may want to keep an eye out for loosening of the stock.
Figure 20
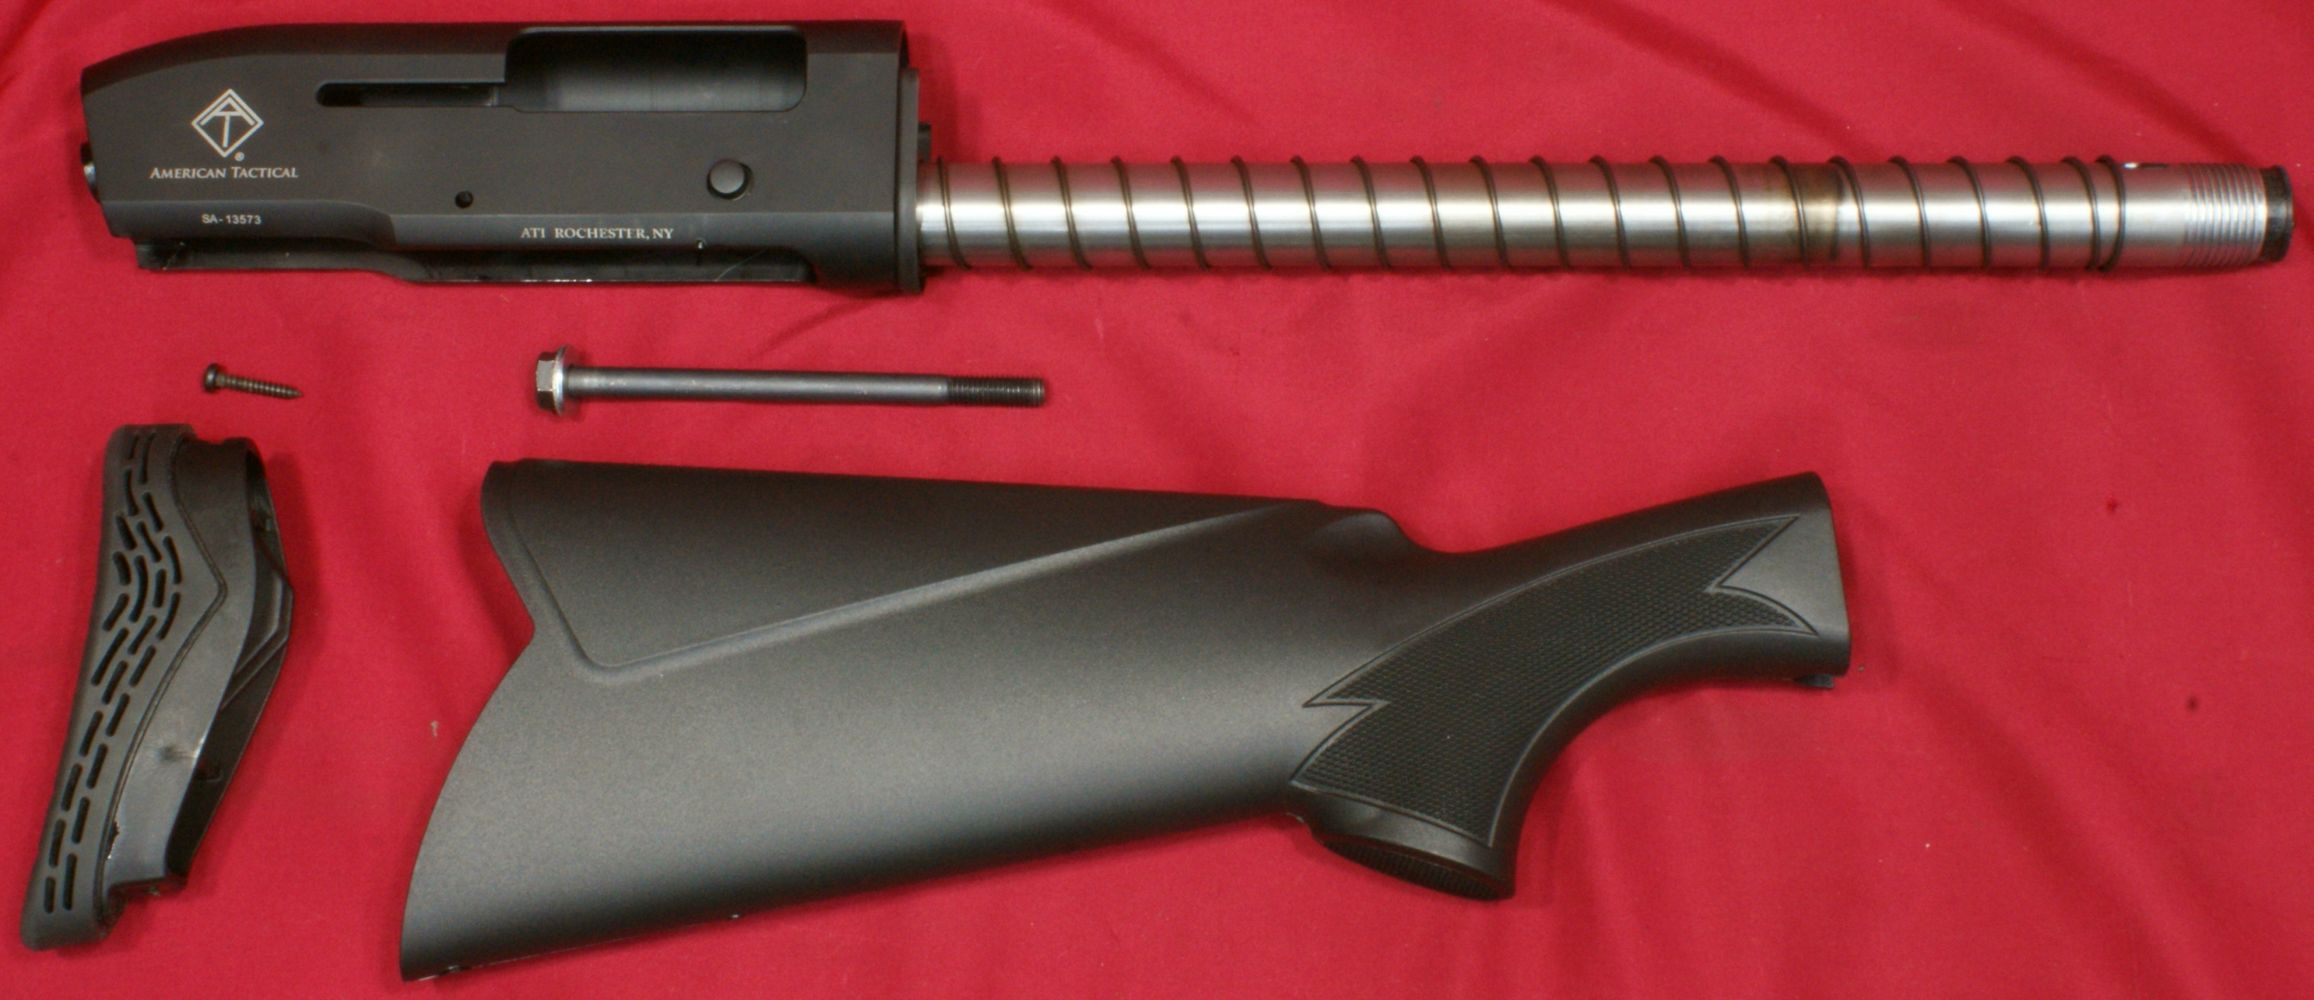
This next photo shows the stock removed.
Figure 21
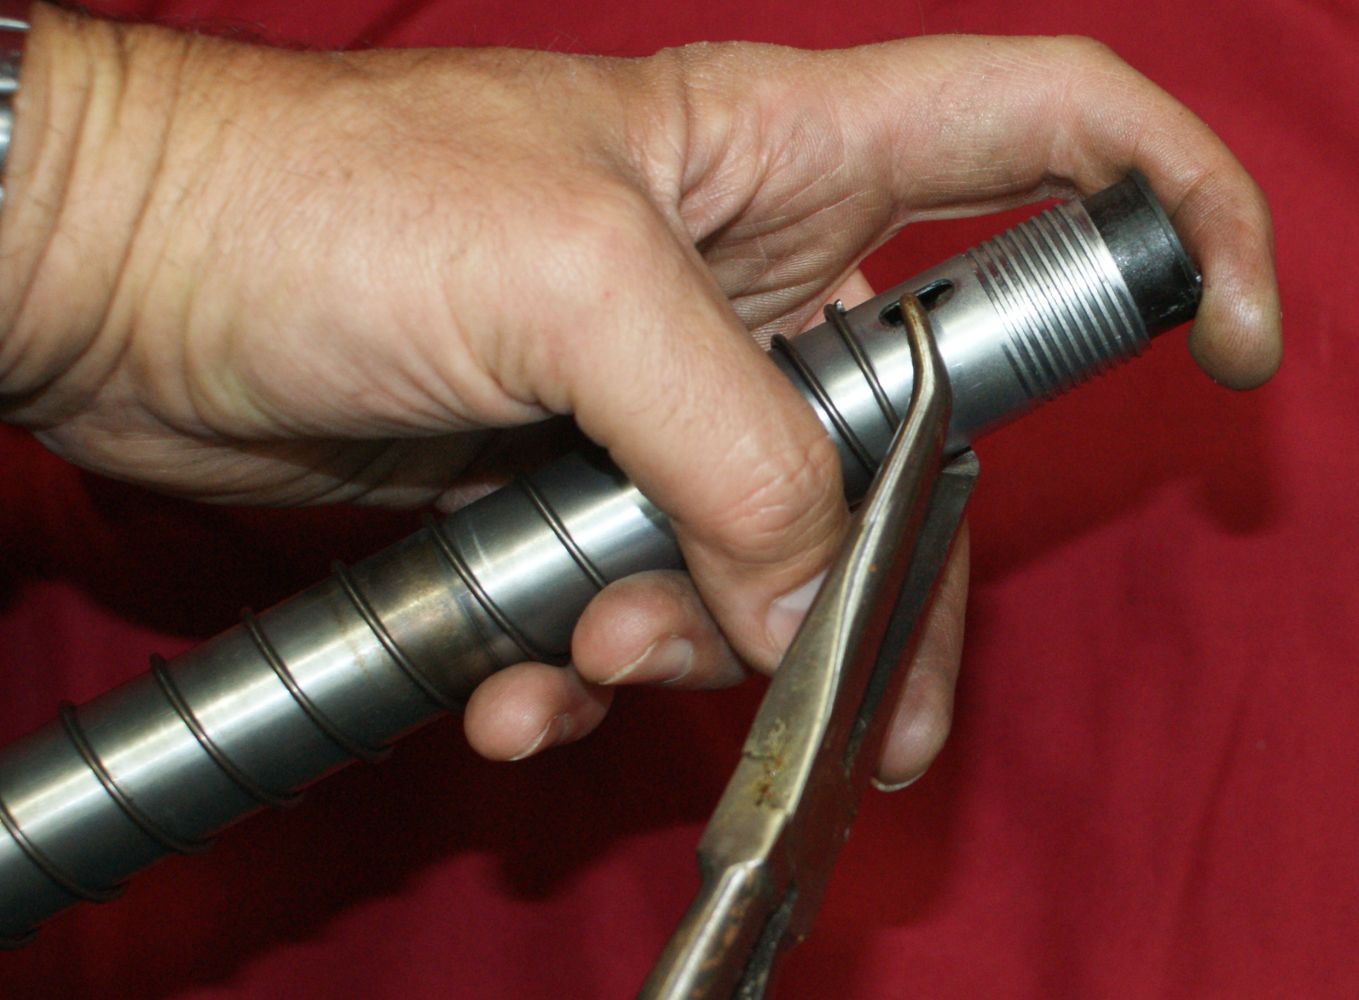
Next I wanted to remove the magazine cap, spring and follower. Luckily I have a set of pliers that curl around at the end to allow me to apply pressure on both tabs of the magazine cap at the same time. Make sure that you keep a finger on the cap because the cap is under a significant amount of spring force due to the magazine spring. With the tabs pressed in, the cap will want to move forward and quickly out of the magazine tube.
Figure 22
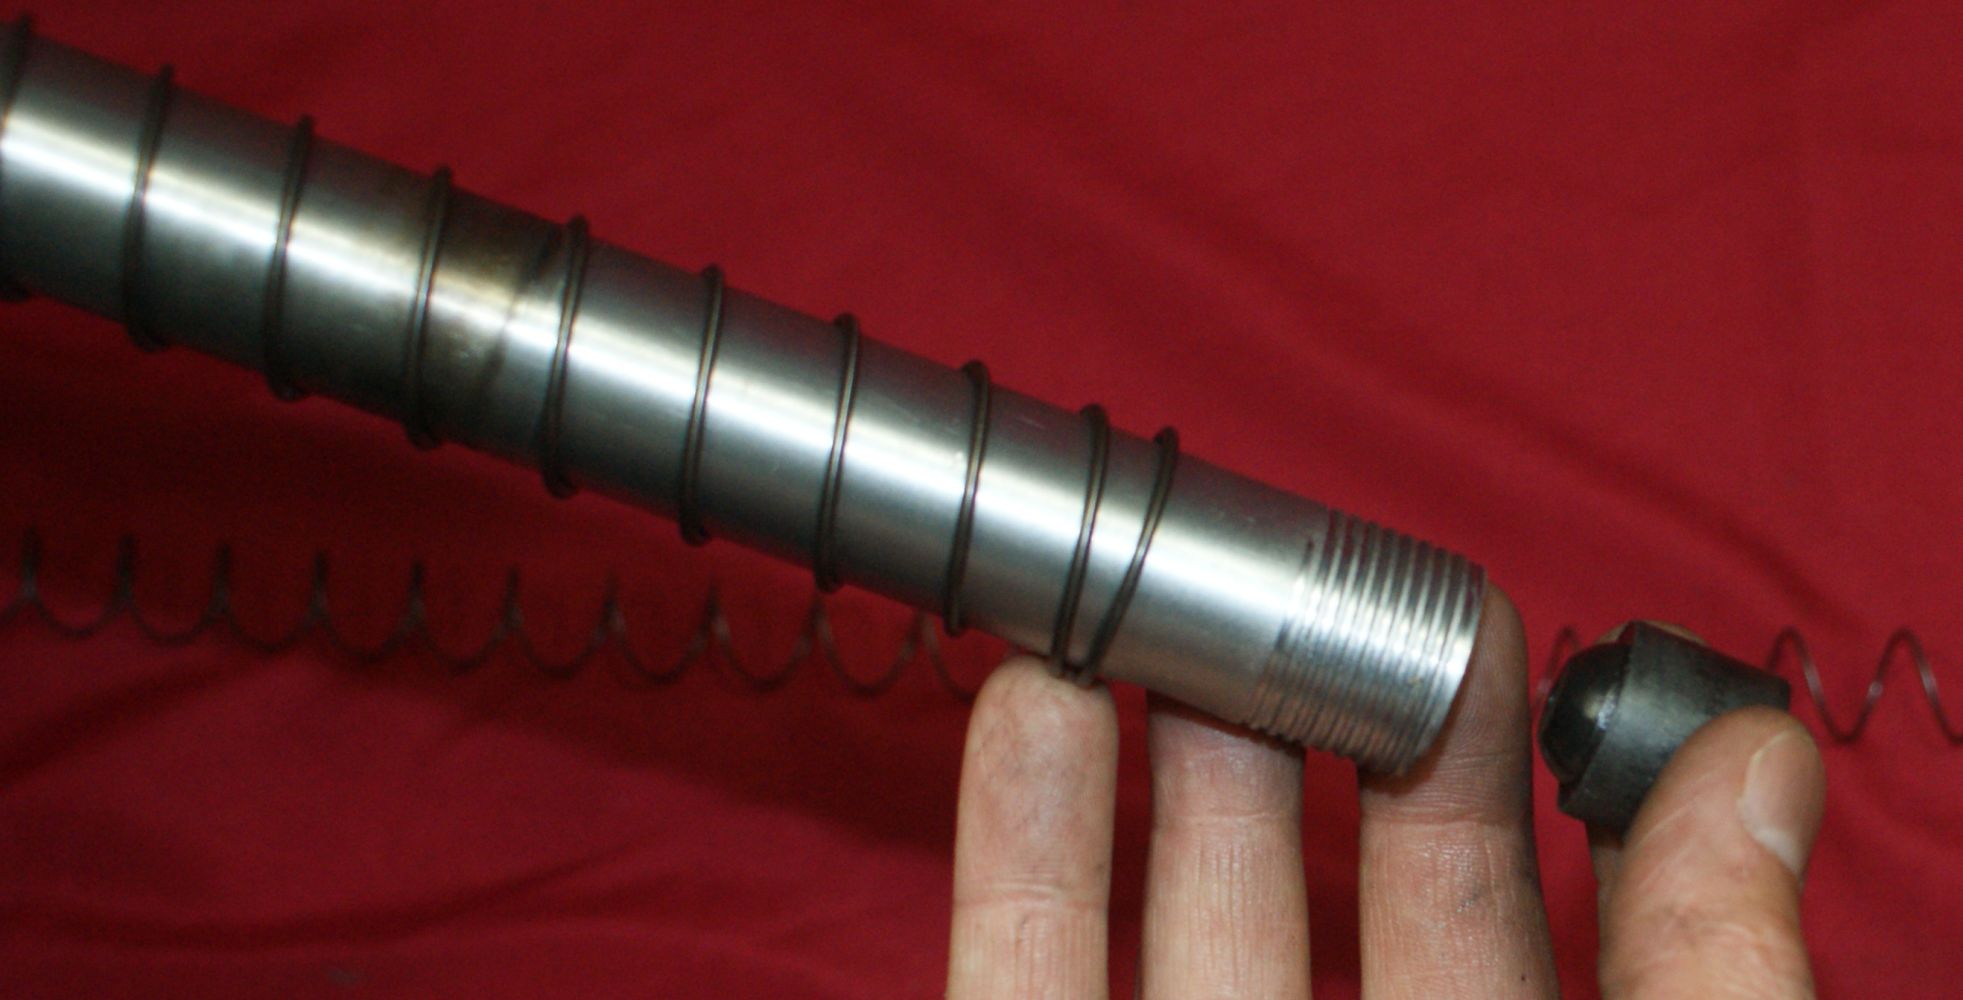
You can see how much compression is required of the spring to get the cap located properly on the magazine tube.
Figure 23

With the spring removed, you can tilt the magazine tube and give the follower a slight tap at the receiver end of the magazine tube and the follower will slide out of the tube.
Figure 24
This next photo shows the magazine cap, spring and follower removed.
Figure 25
Thoughts
Although I feel the ATI instructions on disassembly were lacking, disassembly of this shotgun does not require you to be a rocket scientist and most people could probably disassemble it even without instructions.
For more detailed photos and commentary, make sure you check out the other parts of this review and feel free to leave comments on my Reader's Comments page. The following links are provided to help you see other parts of this review.
- ATI TACSX2 Shotgun Review: Part 1 - Introduction, Specifications and Summary
- ATI TACSX2 Shotgun Review: Part 2 - What's in the Box
- ATI TACSX2 Shotgun Review: Part 3 - External and Operational Features
- ATI TACSX2 Shotgun Review: Part 4 - Disassembly
- ATI TACSX2 Shotgun Review: Part 5 - Internal Features
- ATI TACSX2 Shotgun Review: Part 6 - Range Test
Or
If you would like to be notified about future Gunsumer Reports reviews via Facebook, make sure "You Like This" by clicking the Facebook "Like" button at the bottom or top of this page. If it already says "You Like This" beside the button, clicking it again will uncheck the "Like" status and you will not be notified.
| Share on Facebook | |
© 2010, 2011, 2012, 2013, 2014, 2015, 2016, 2017, 2018, 2019, 2020, 2021, 2022, 2023 & 2024 Gunsumer Reports™, All rights reserved.
FTC Disclosure