|
|
Gunsumer Reports TM Providing Detailed Objective Reviews for Firearms and Firearm Accessories |
UTAS UTS-15 Review
Part 4 - Disassembly
October 16, 2013
In this part of my UTAS UTS-15 Shotgun Review, I cover the basic disassembly of the UTAS UTS-15 Pump Shotgun. UTAS does a great job of showing the full disassembly of the shotgun in their Owner's Manual that comes with the shotgun, but I'm going to limit disassembly in this review to that which I feel most consumers would actually do to their shotgun. Also keep in mind that even though I show many detailed photos and provide comments on disassembly, you should always consider the manufacturer's Owner's Manual as the official source for disassembling any firearm.
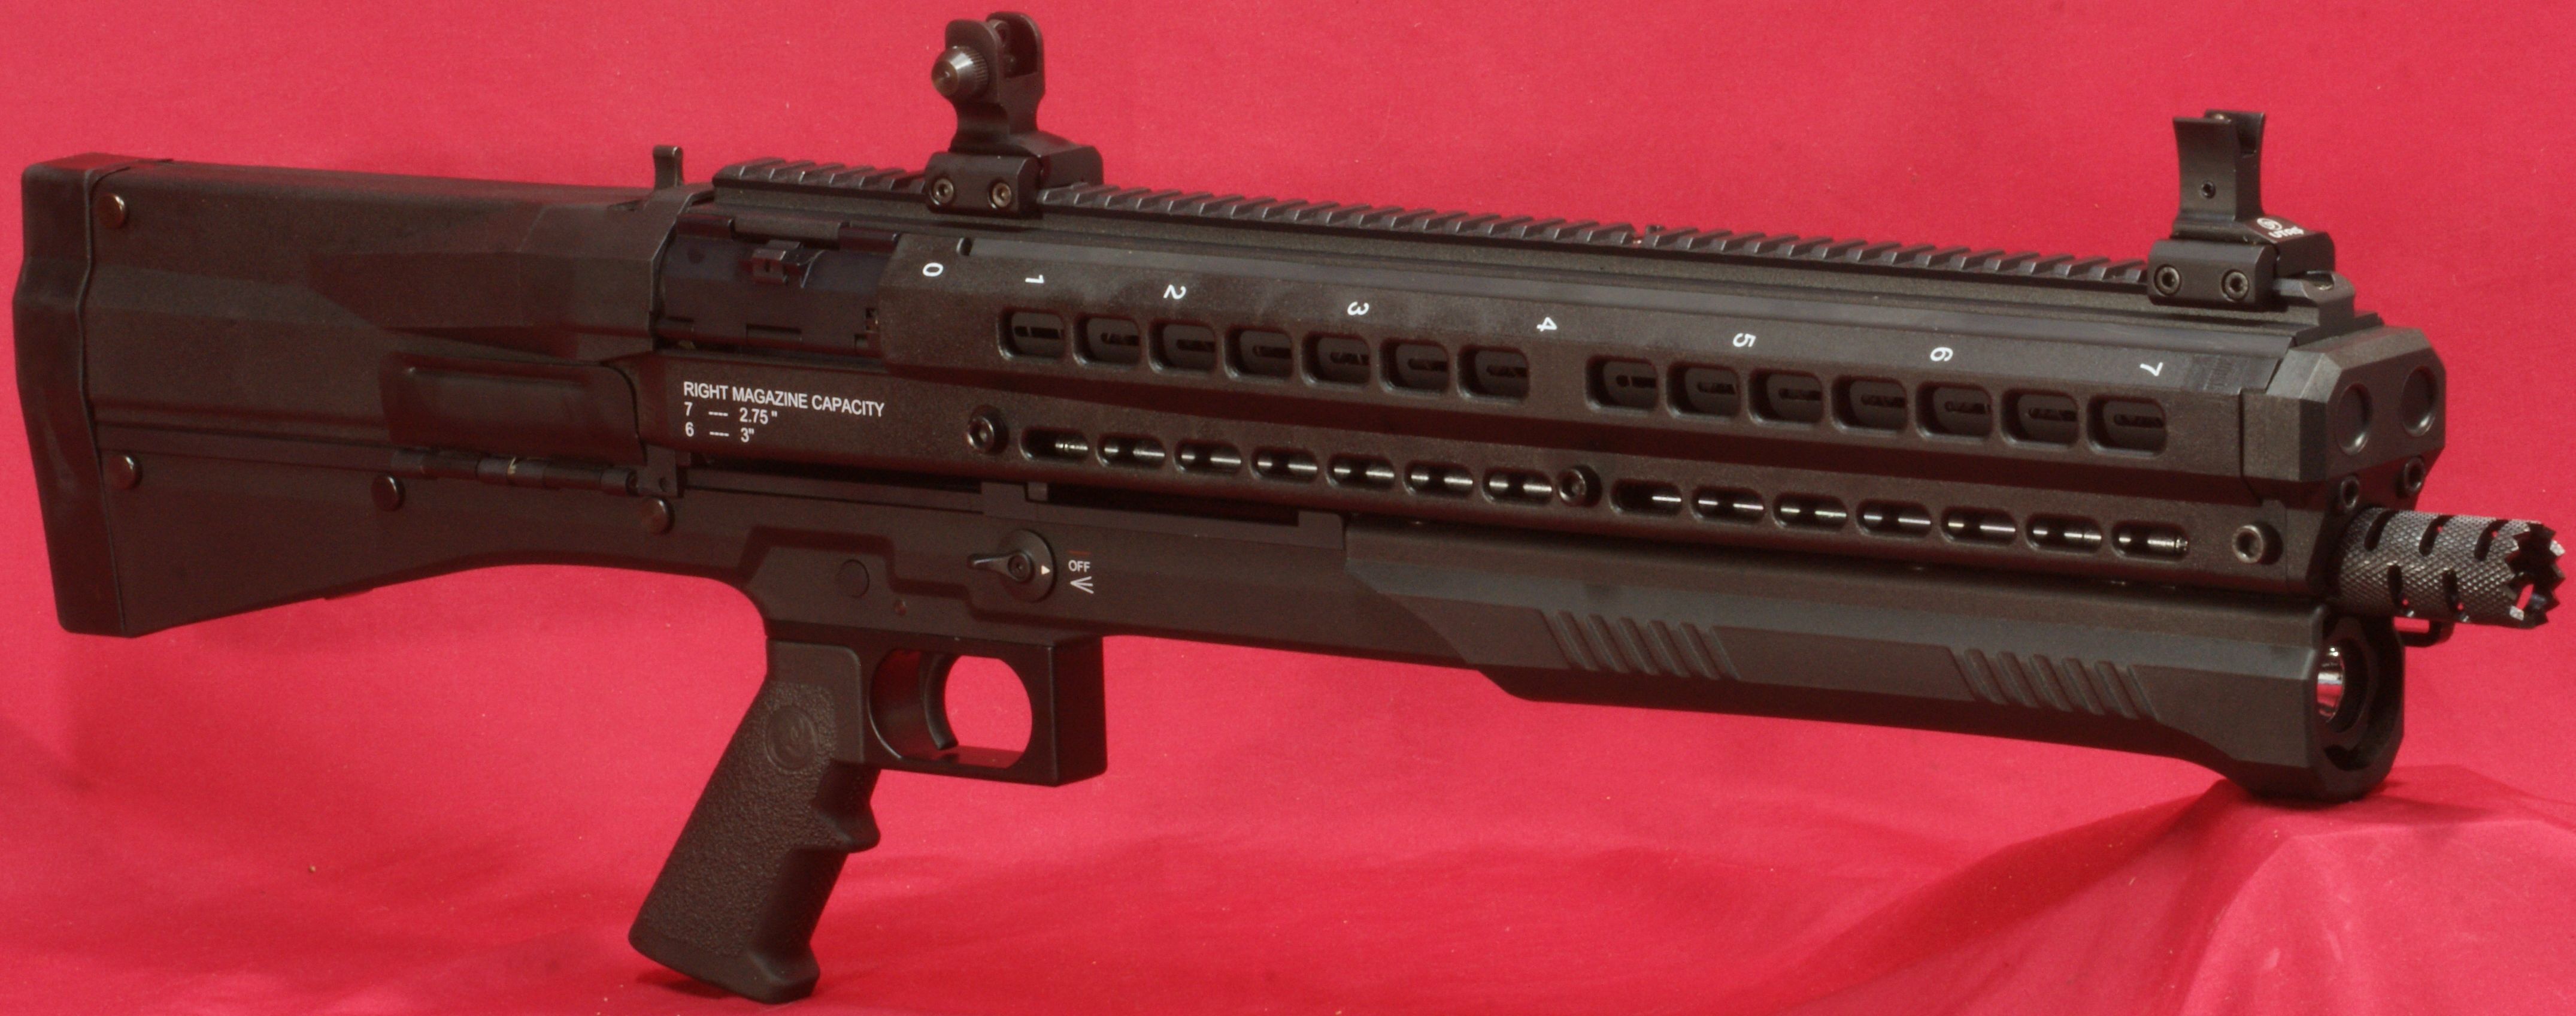
Field Stripping
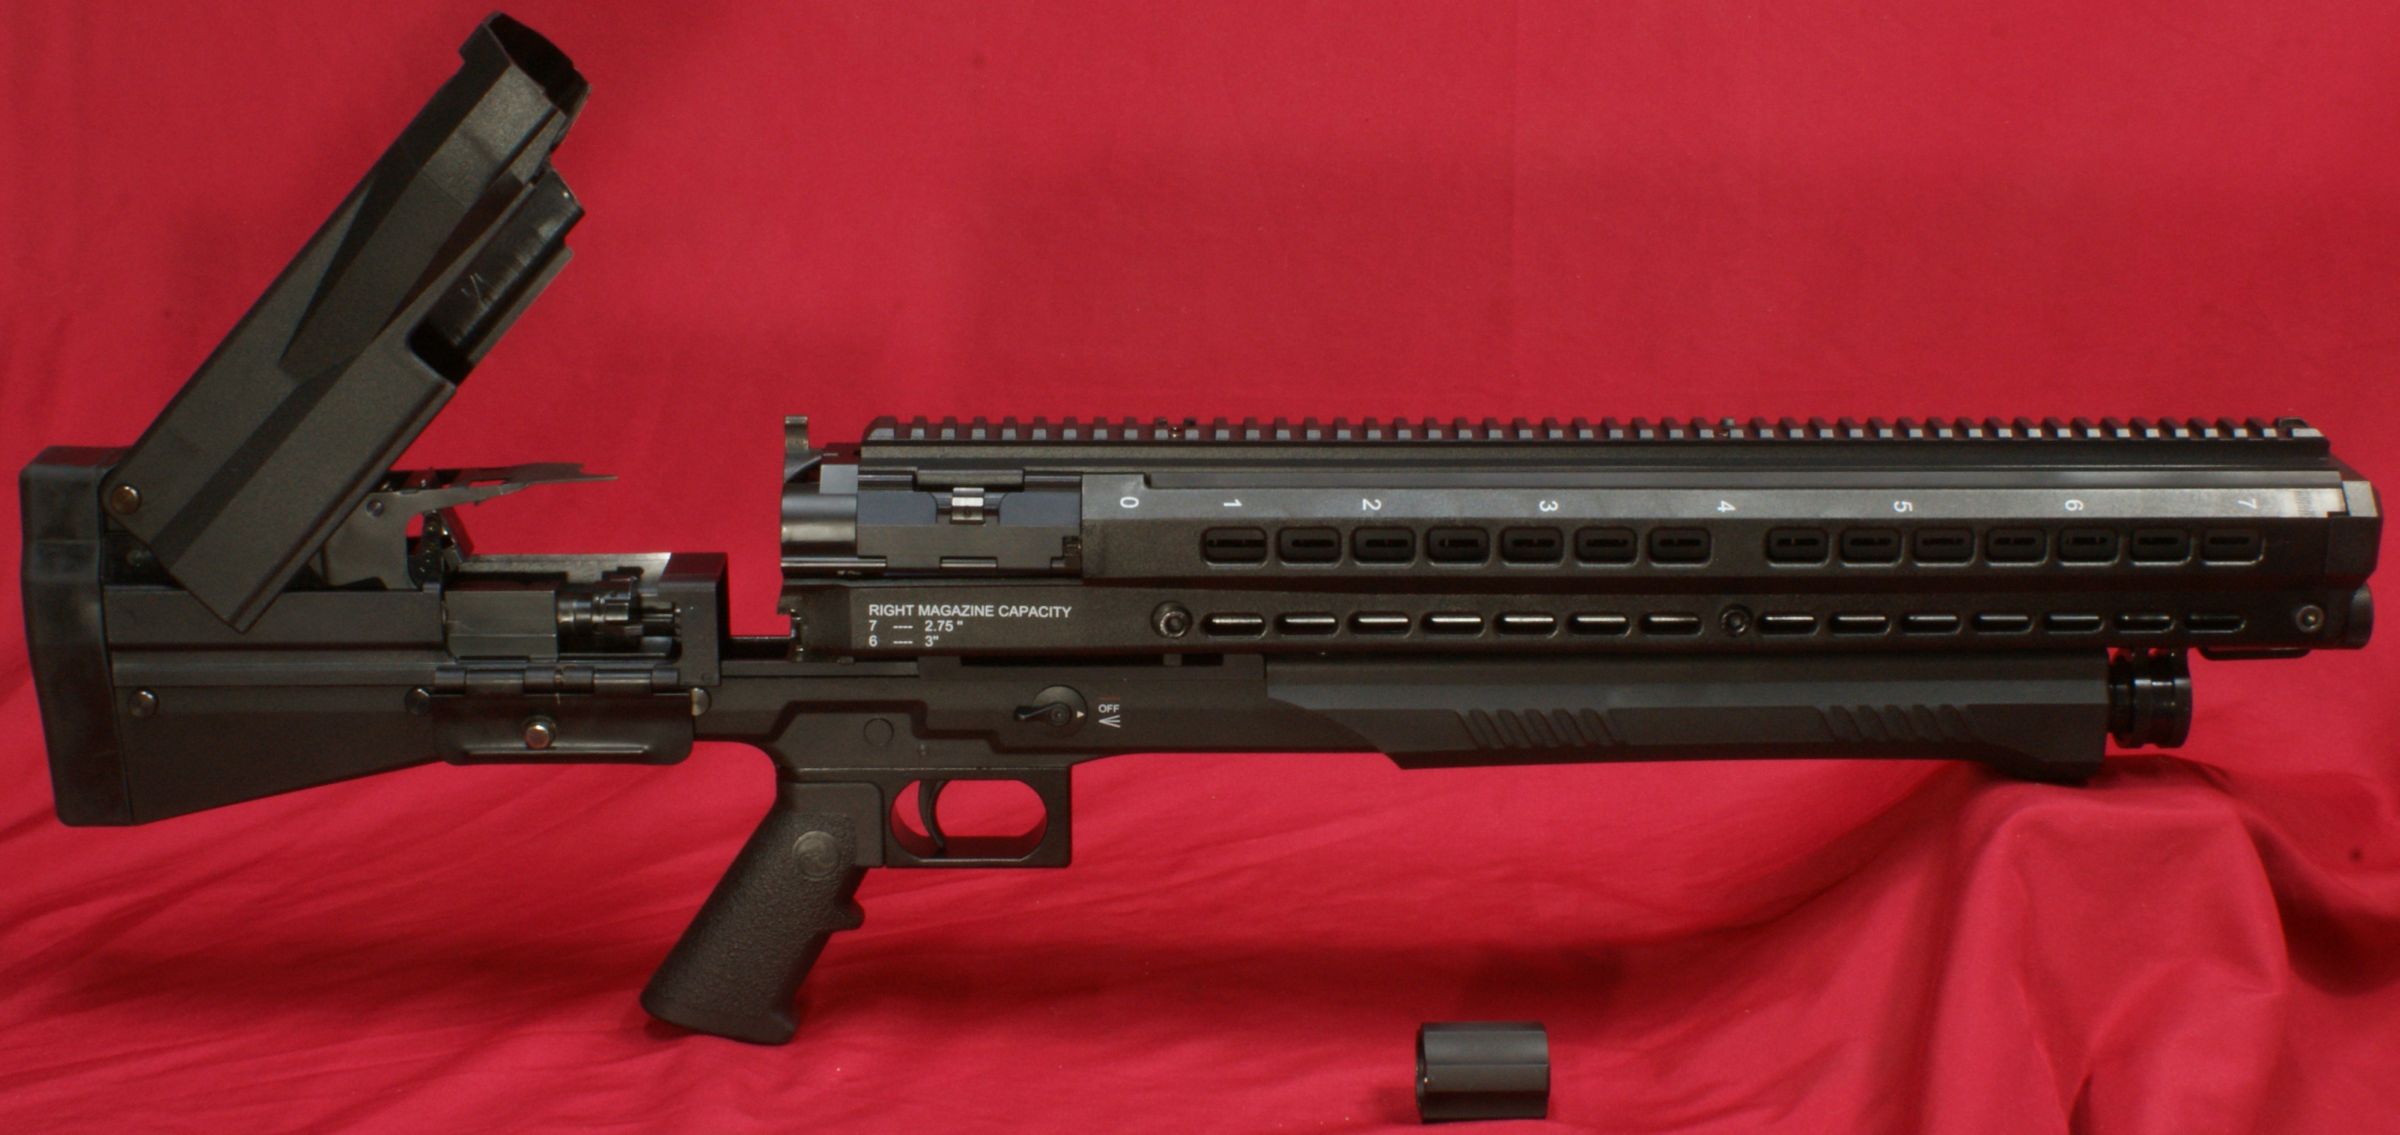
Before you begin to disassemble any firearm, first make sure that it is completely unloaded and on safety. In the case of the UTS-15, you can press the action release and pull the action back and look inside the chamber, along with opening the loading port door or lifting the upper stock to ensure that no rounds are in the magazine tubes.
Figure 1
With the upper stock raised and the action in it's mid position, you remove the takedown nut.
Figure 2
The takedown nut has a spring loaded detent pin that helps to lock the nut in place during operation.
Figure 3
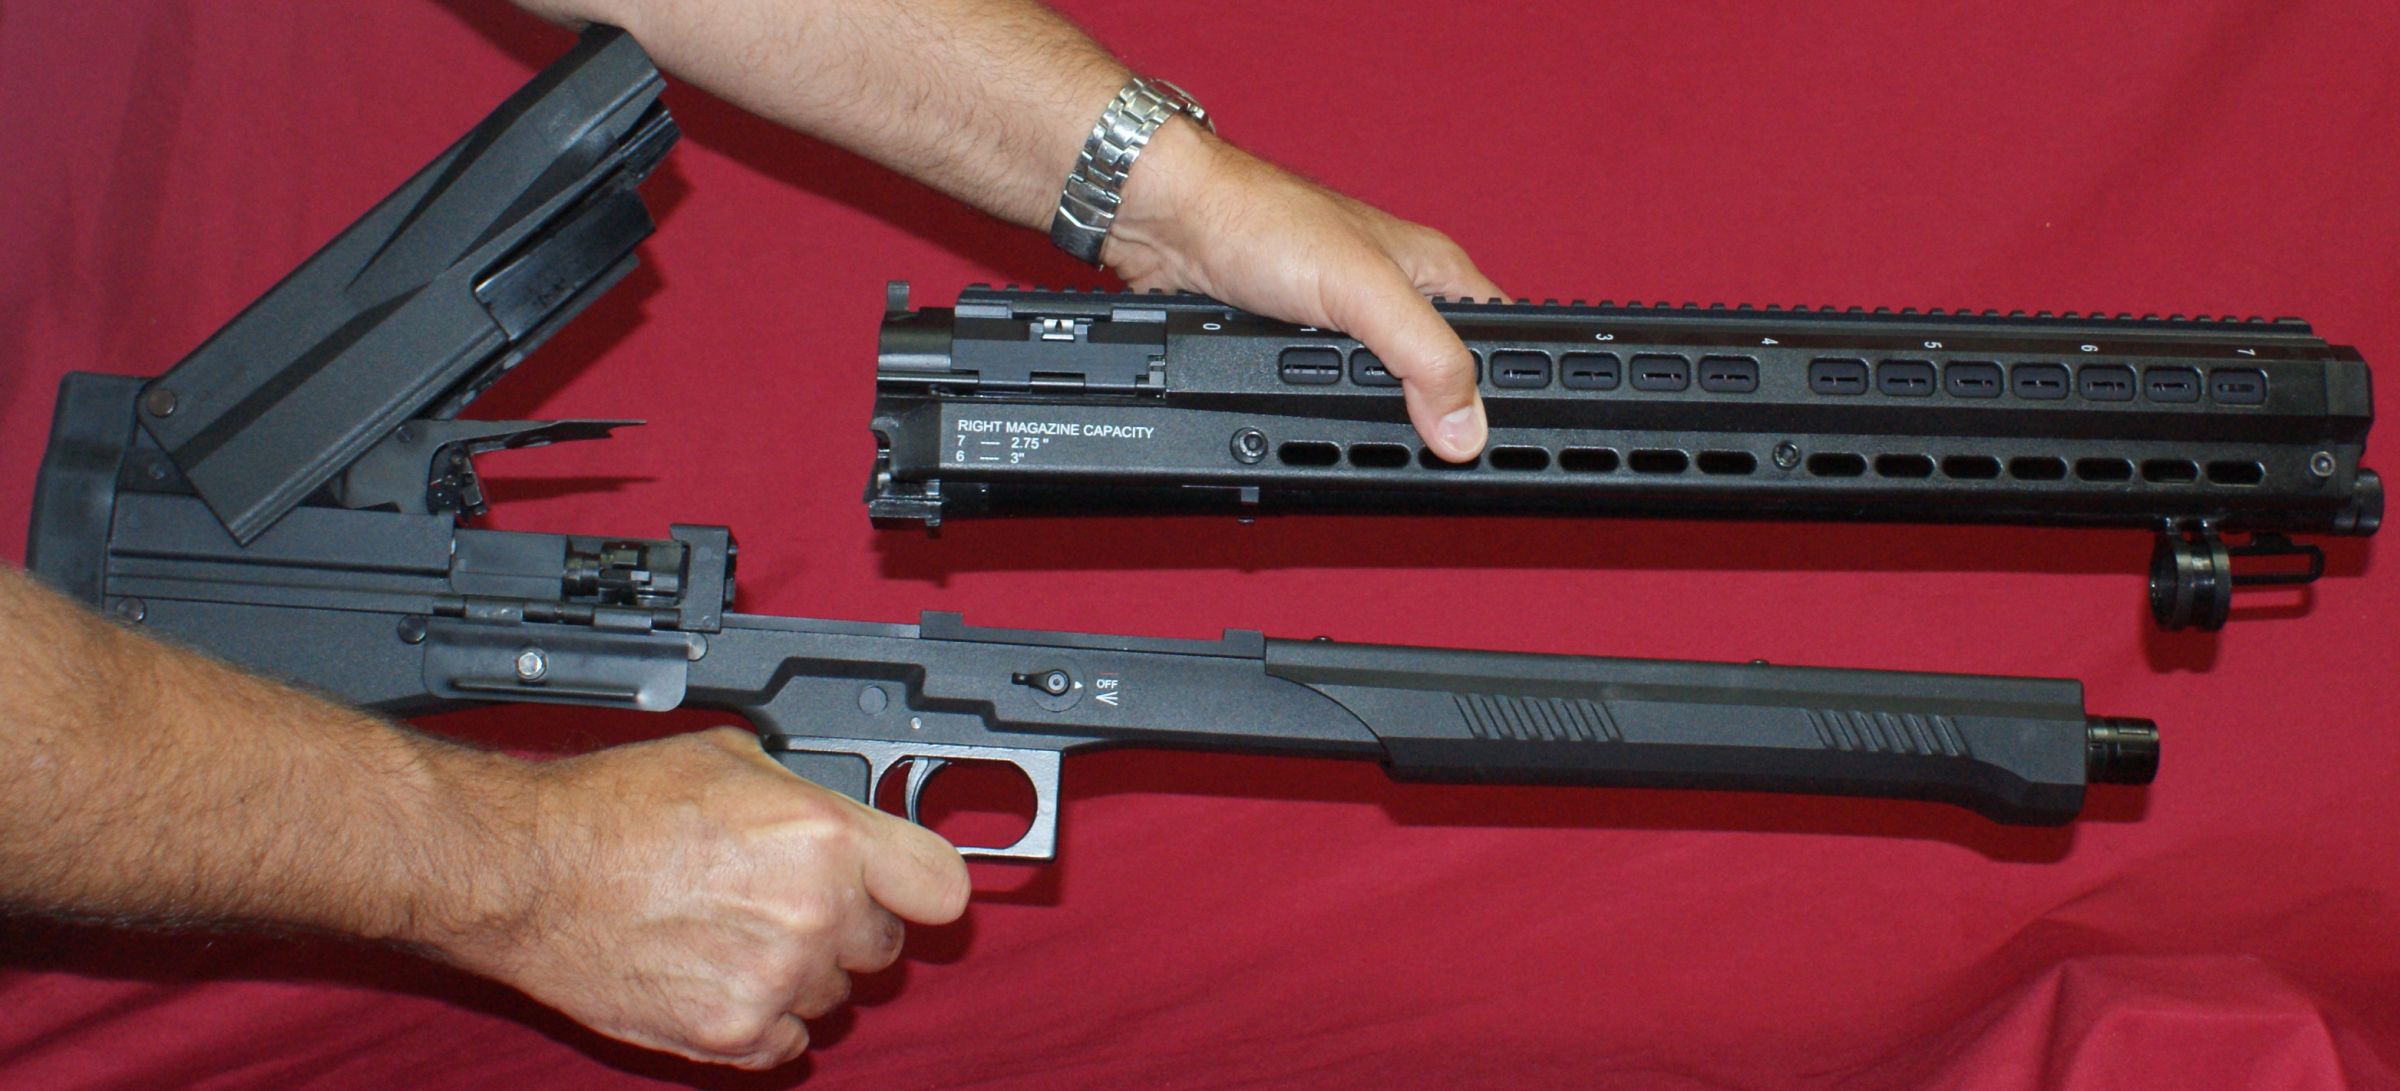
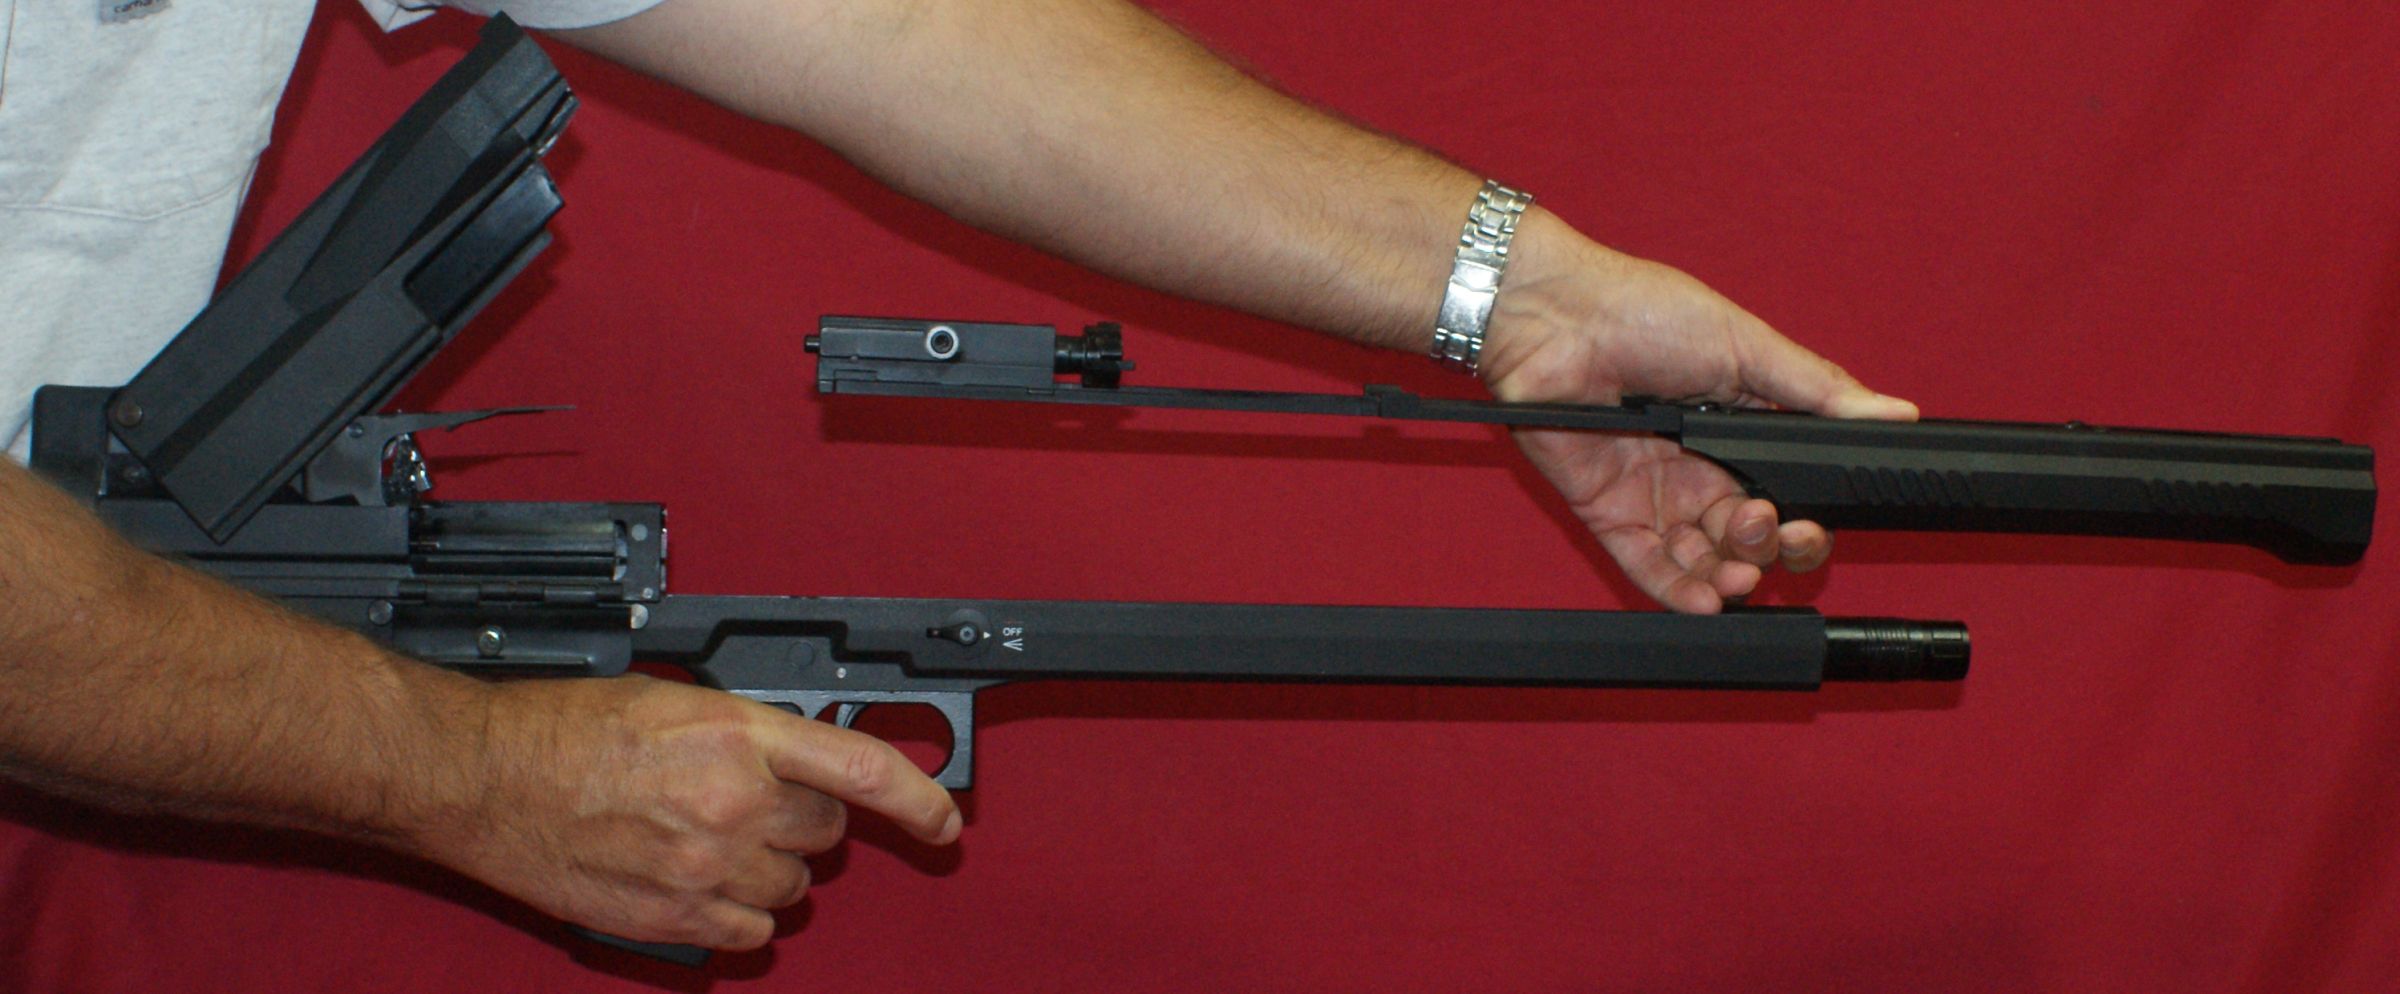
You can then slide the barrel assembly forward so that it disengages from the forward side of the receiver.
Figure 4
You can then start to lift the rear of the barrel assembly slightly and slide the barrel assembly off the front of the forend.
Figure 5
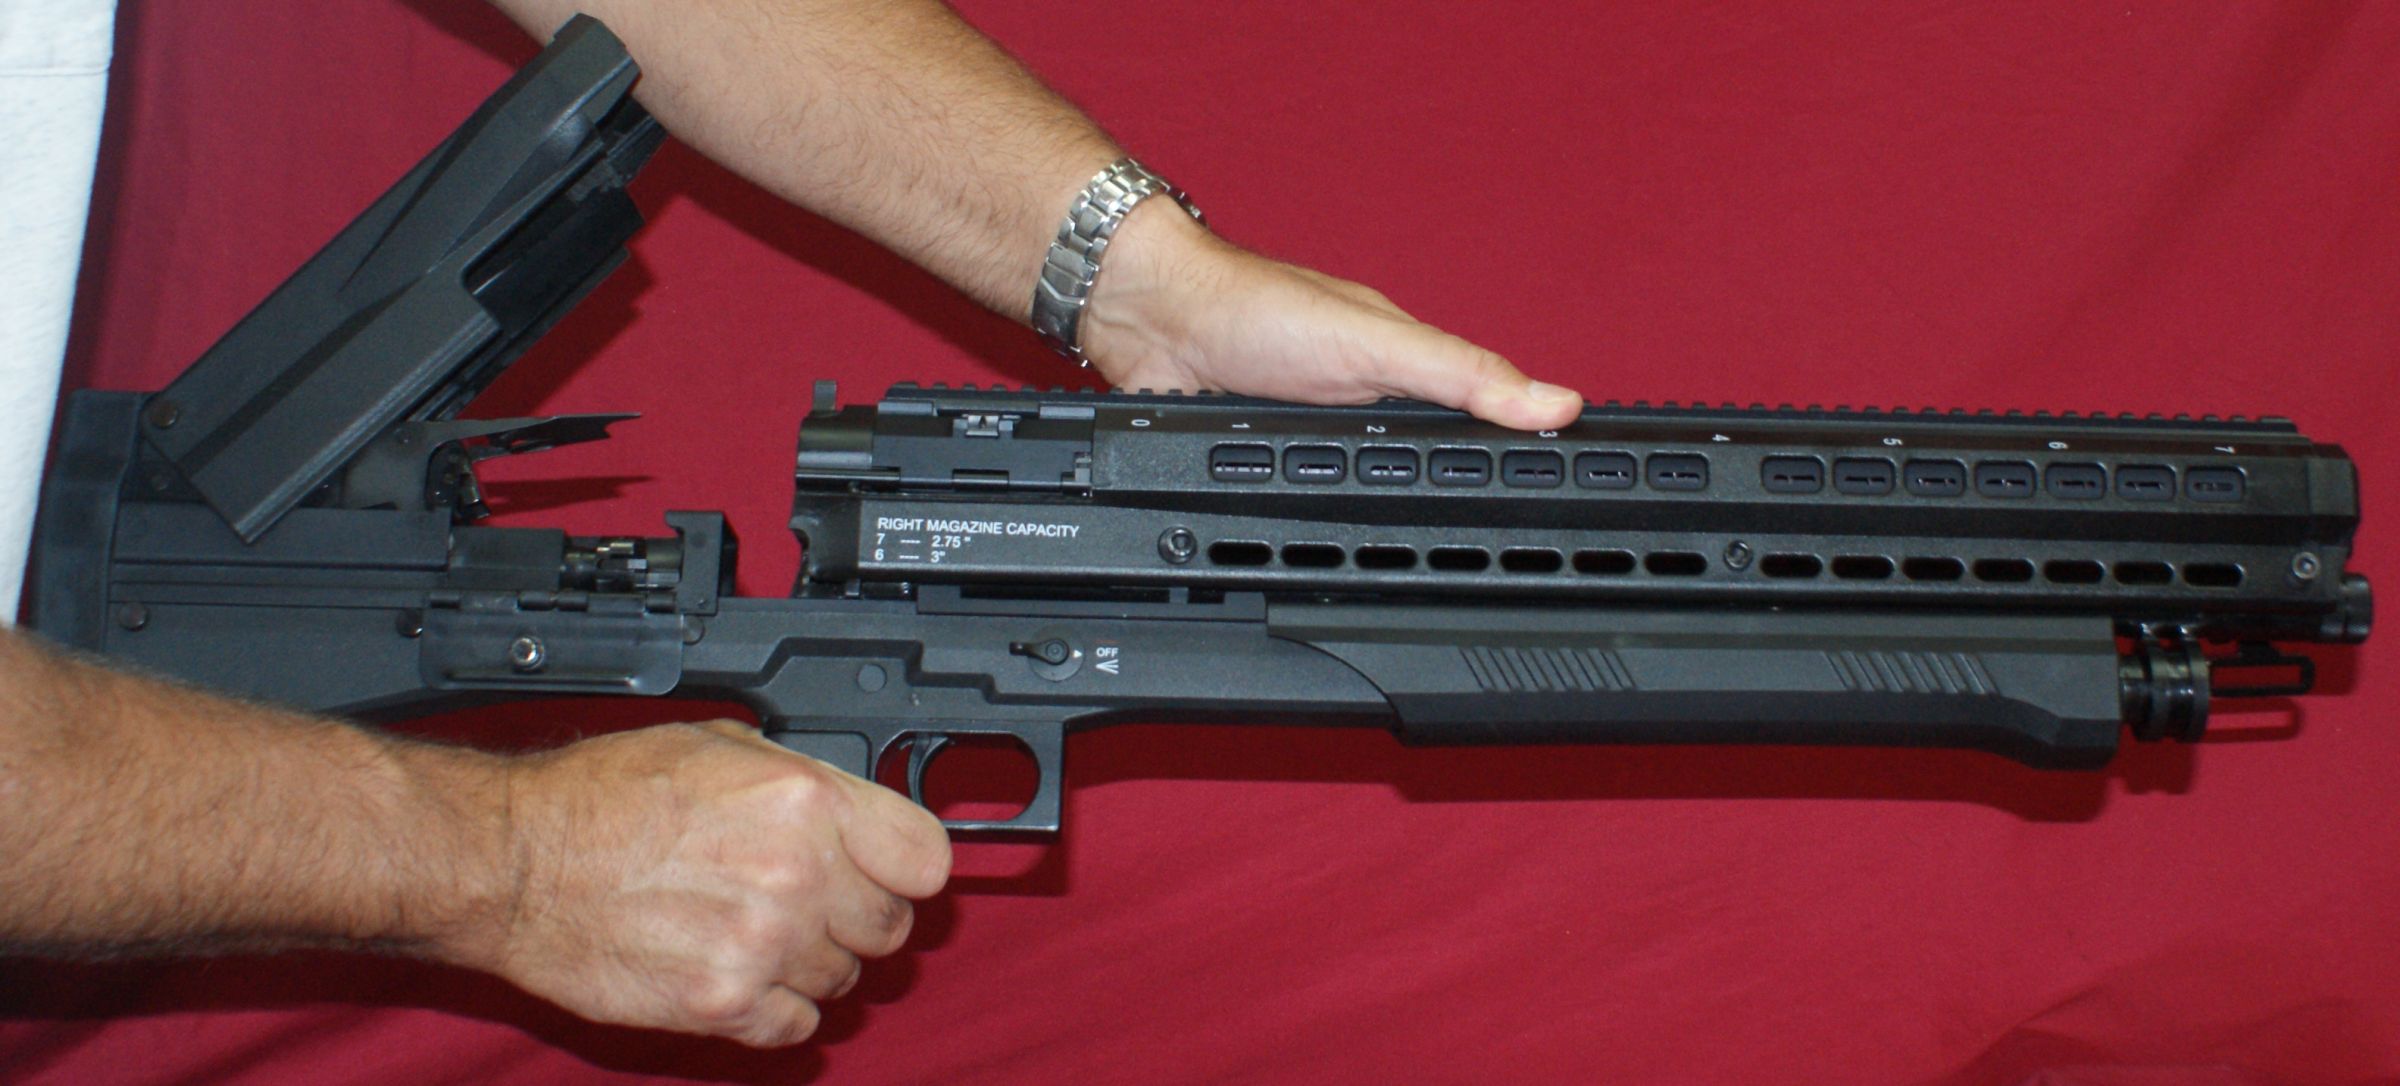
Figure 6
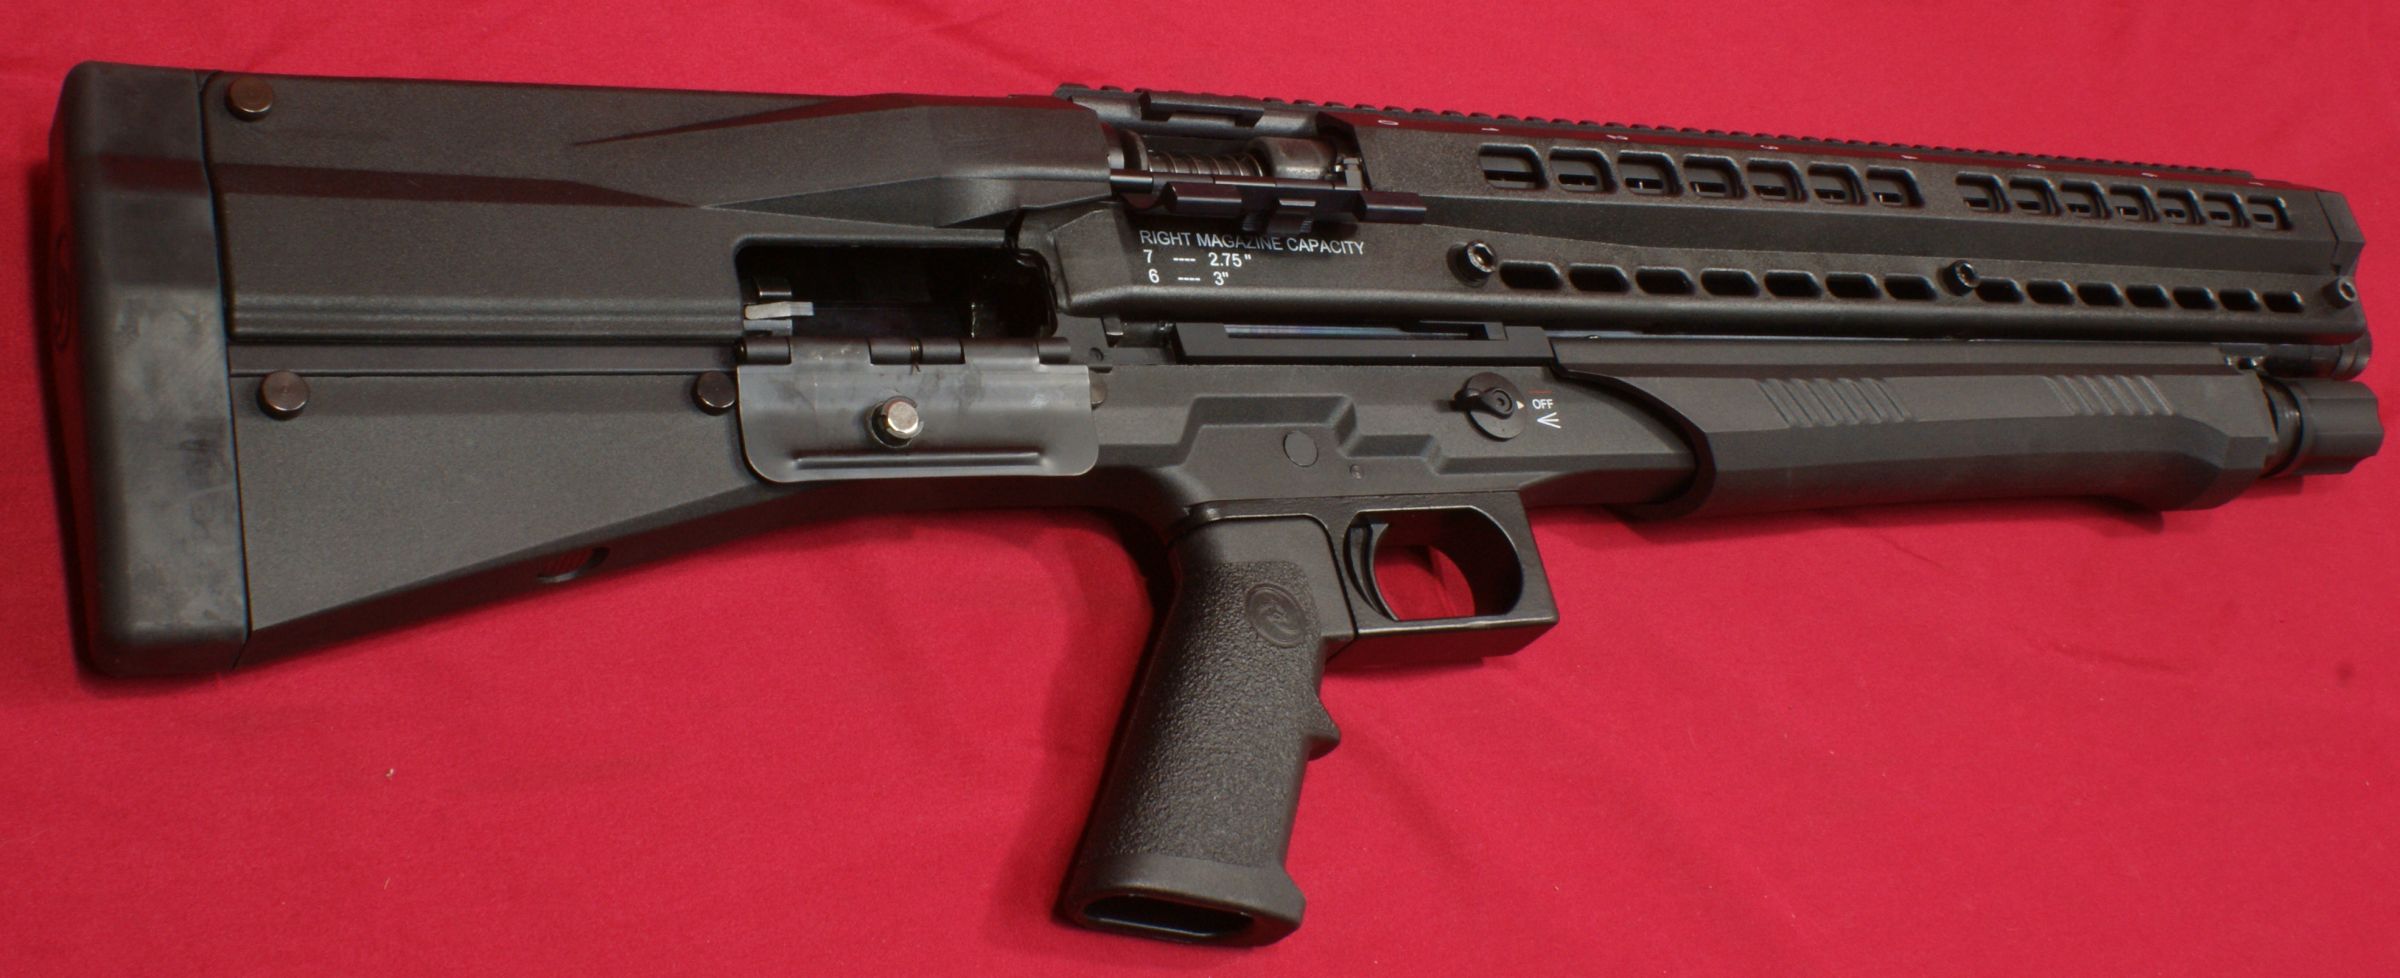
With the barrel assembly removed, the forend and bolt carriage assembly can slide off the stock.
Figure 7
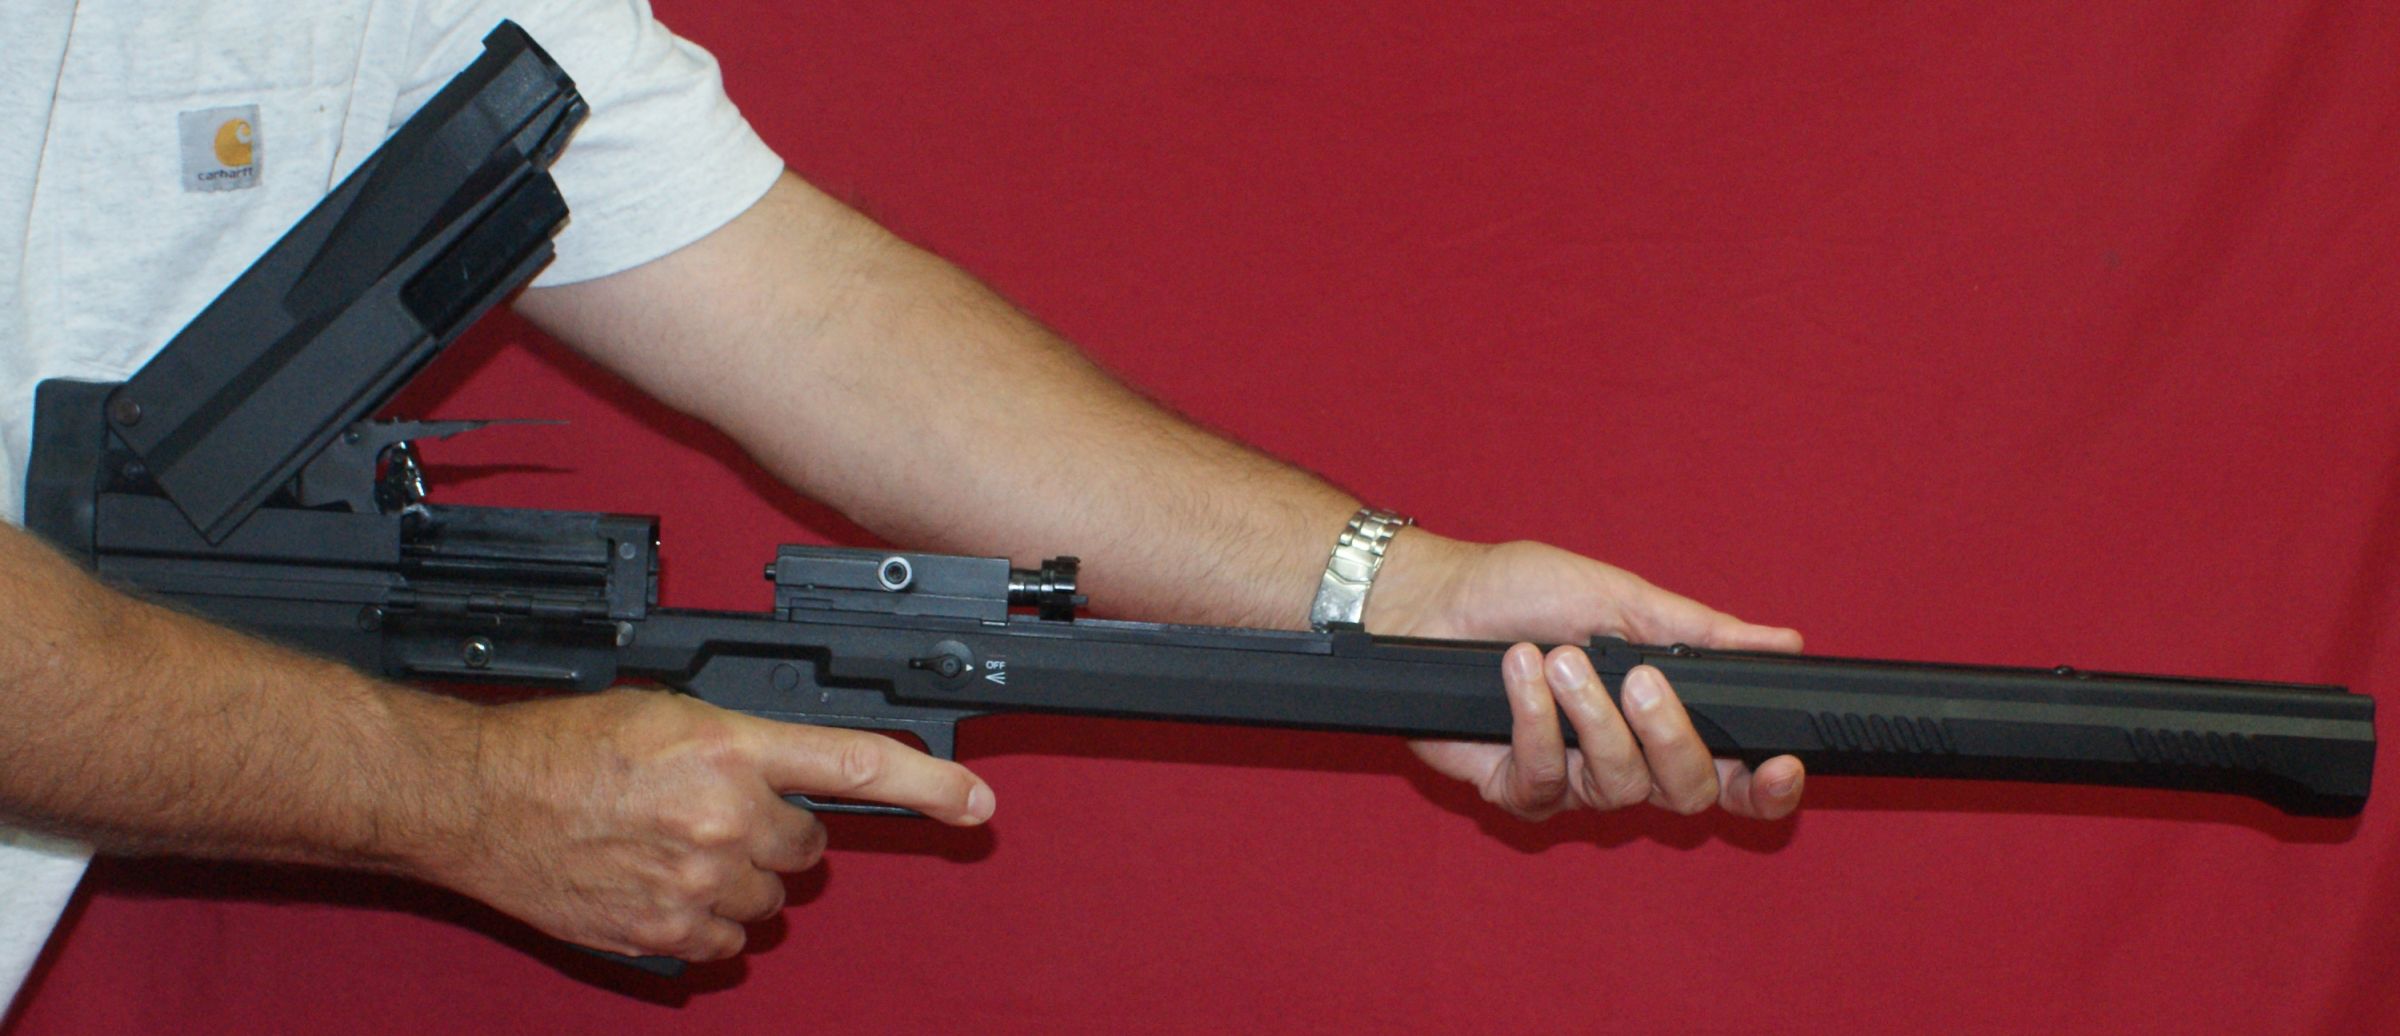
Figure 8
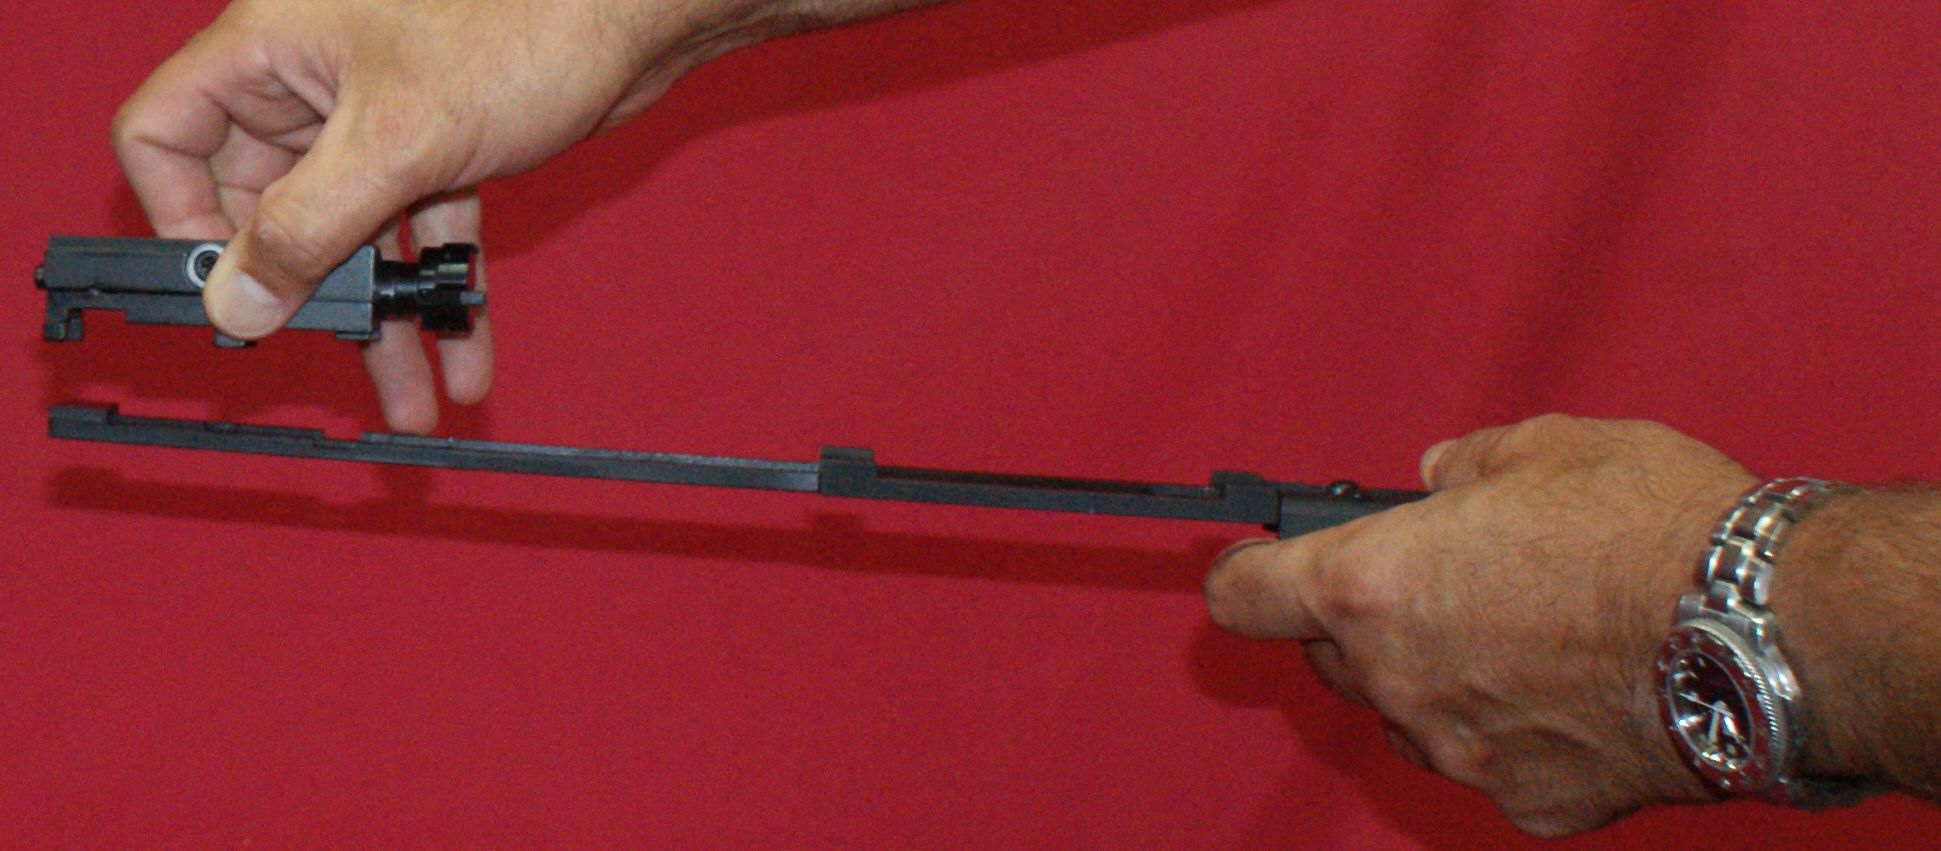
The bolt assembly can then be lifted from the bolt carriage.
Figure 9
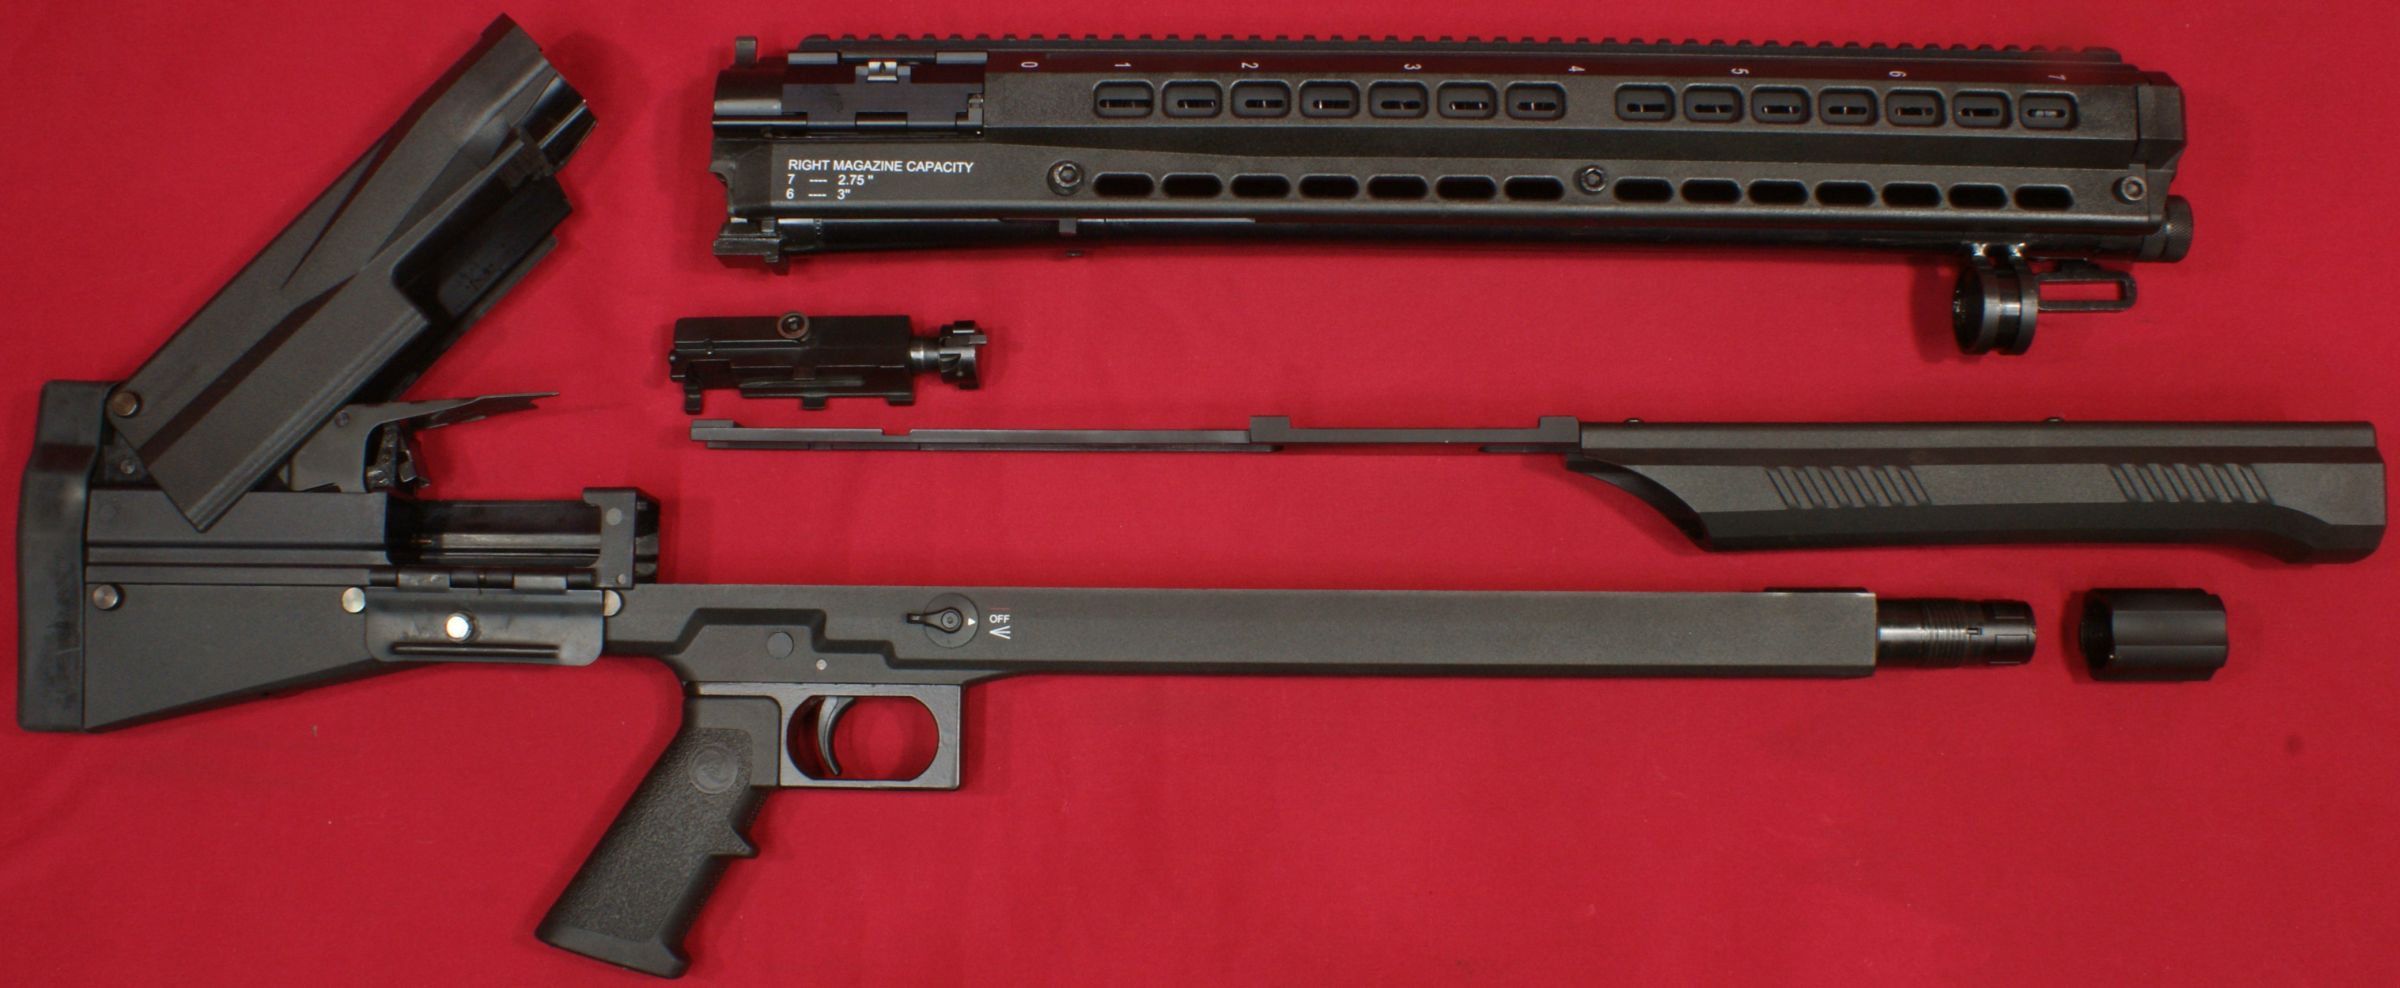
That is all the disassembly required for normal field stripping and cleaning. The UTS-15 can be disassembled to this level in less than 30 seconds after you have done it once or twice and reassembly is also fast and easy.
Figure 10
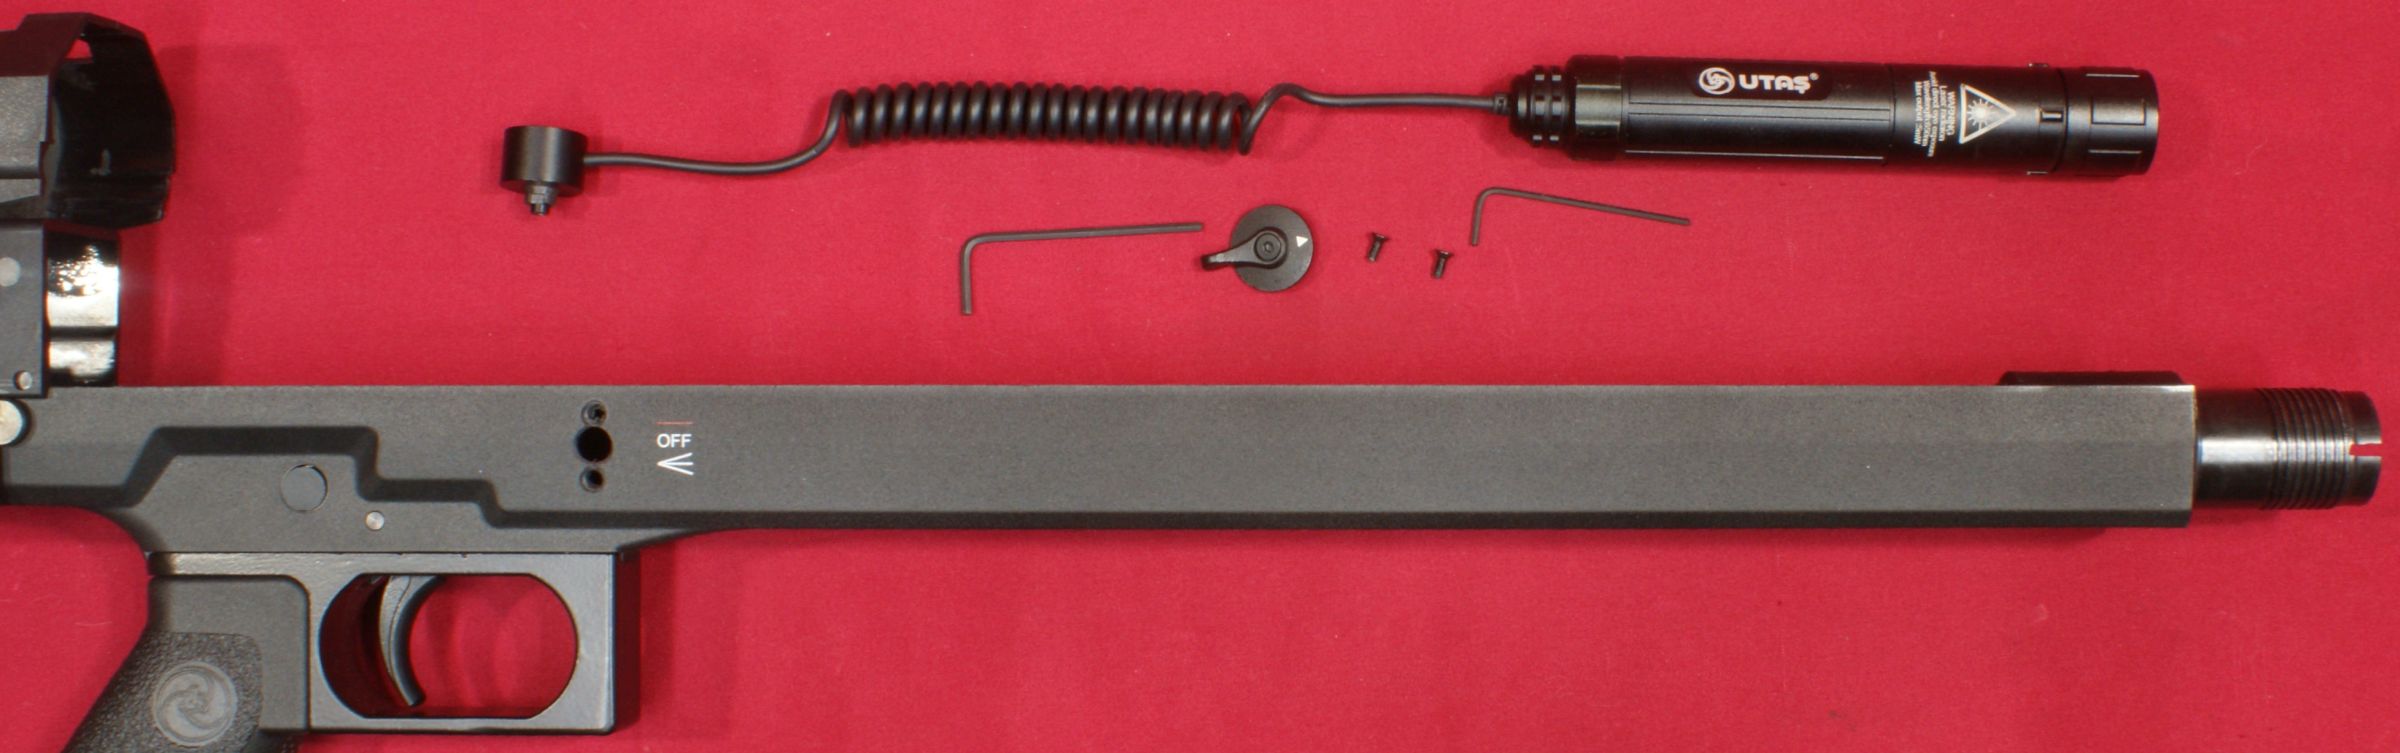
Laser/Light Removal
If you purchased a shotgun with the laser/light already installed, there is probably no reason you would need to remove the light/laser unit. If you purchased the unit as an accessory to be added to your shotgun, this will give you an idea on the ease of installation (when doing the steps below in reverse).
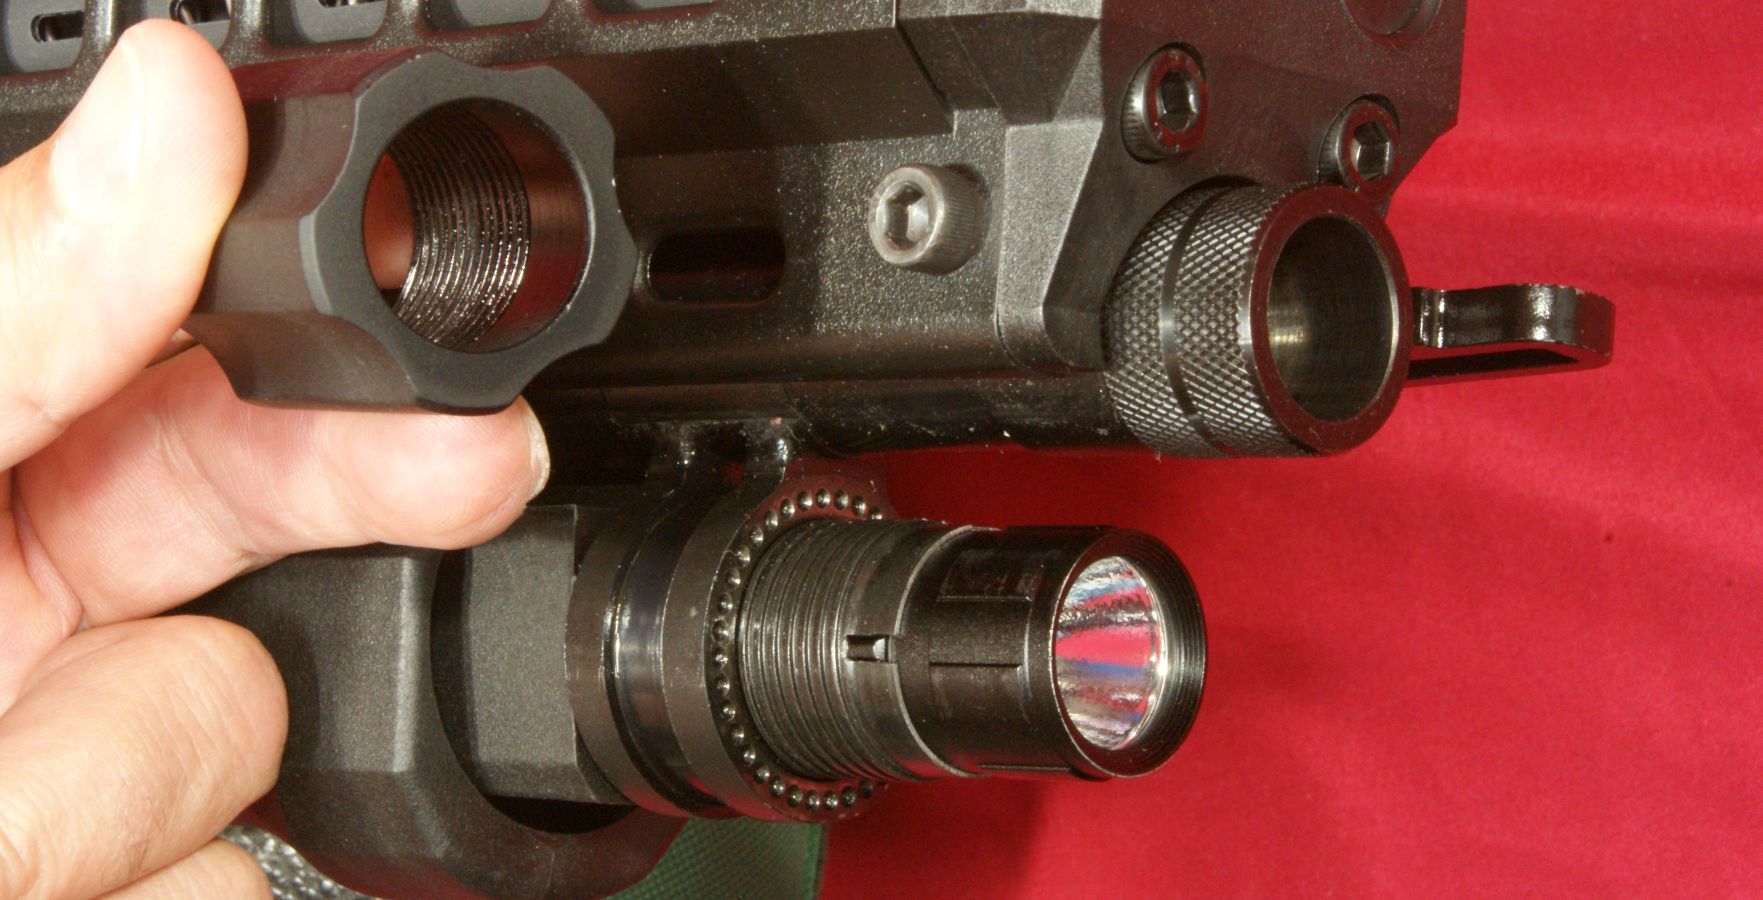
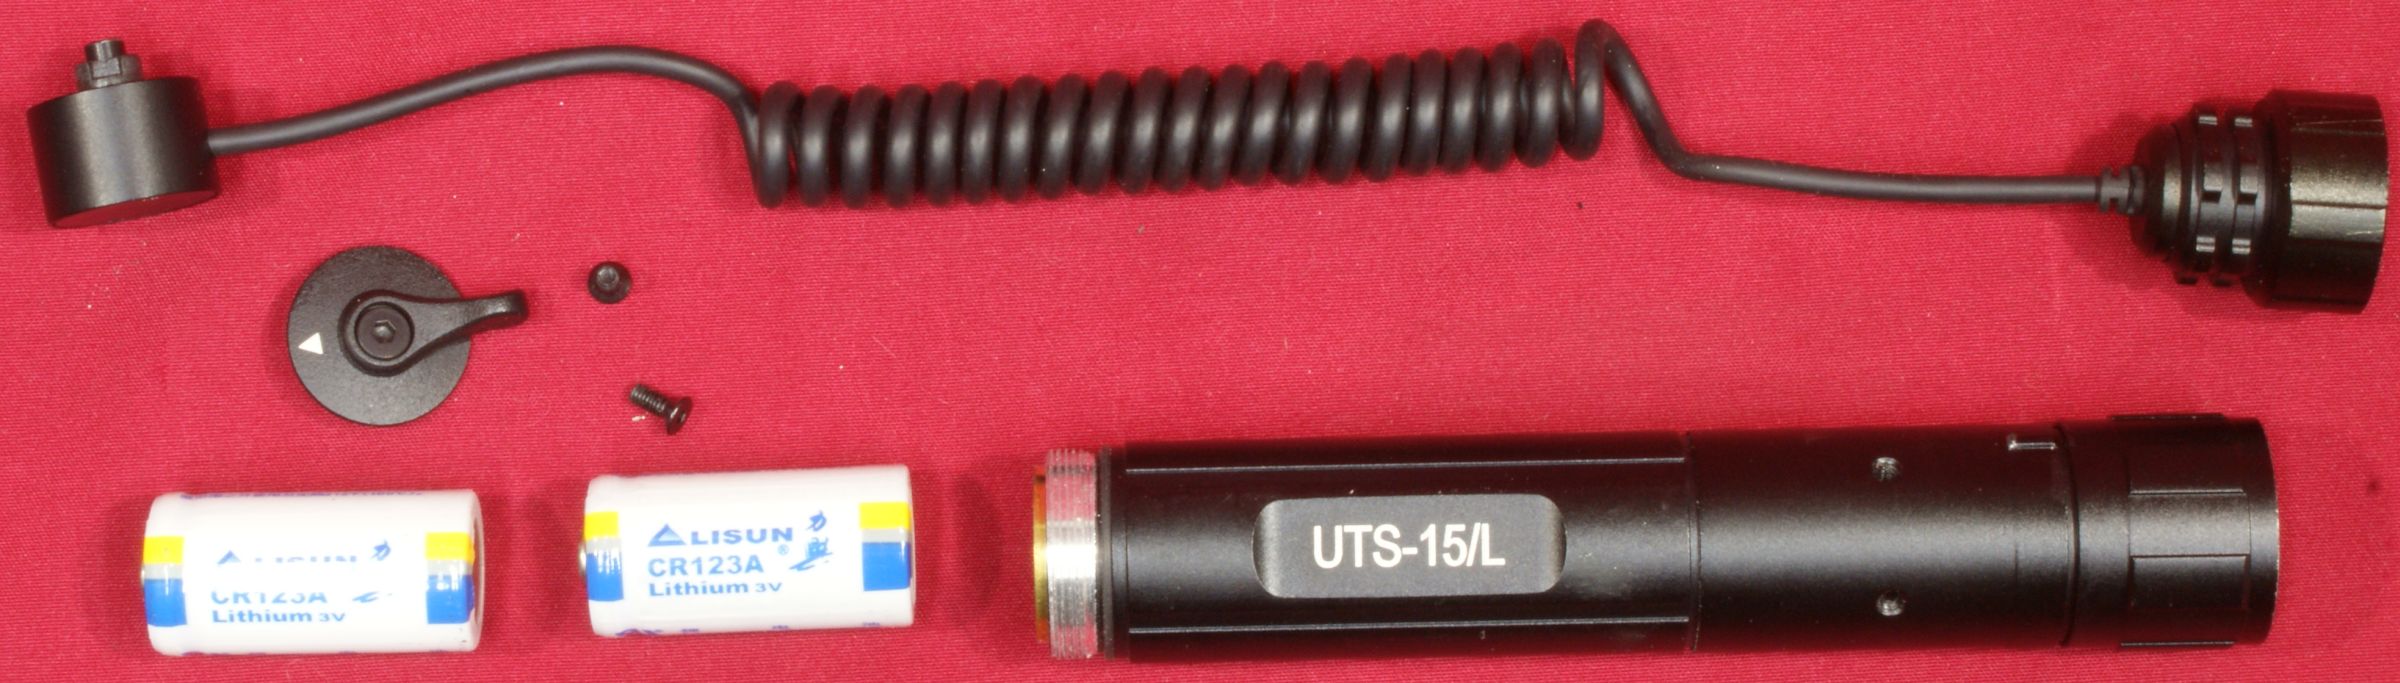
The laser/light unit is mounted inside the forend as shown below. If you need to change batteries, the cord allows you to pull the unit forward out of the forend so you can remove the tail cap off the unit. The light runs on two CR123A batteries.
Figure 11

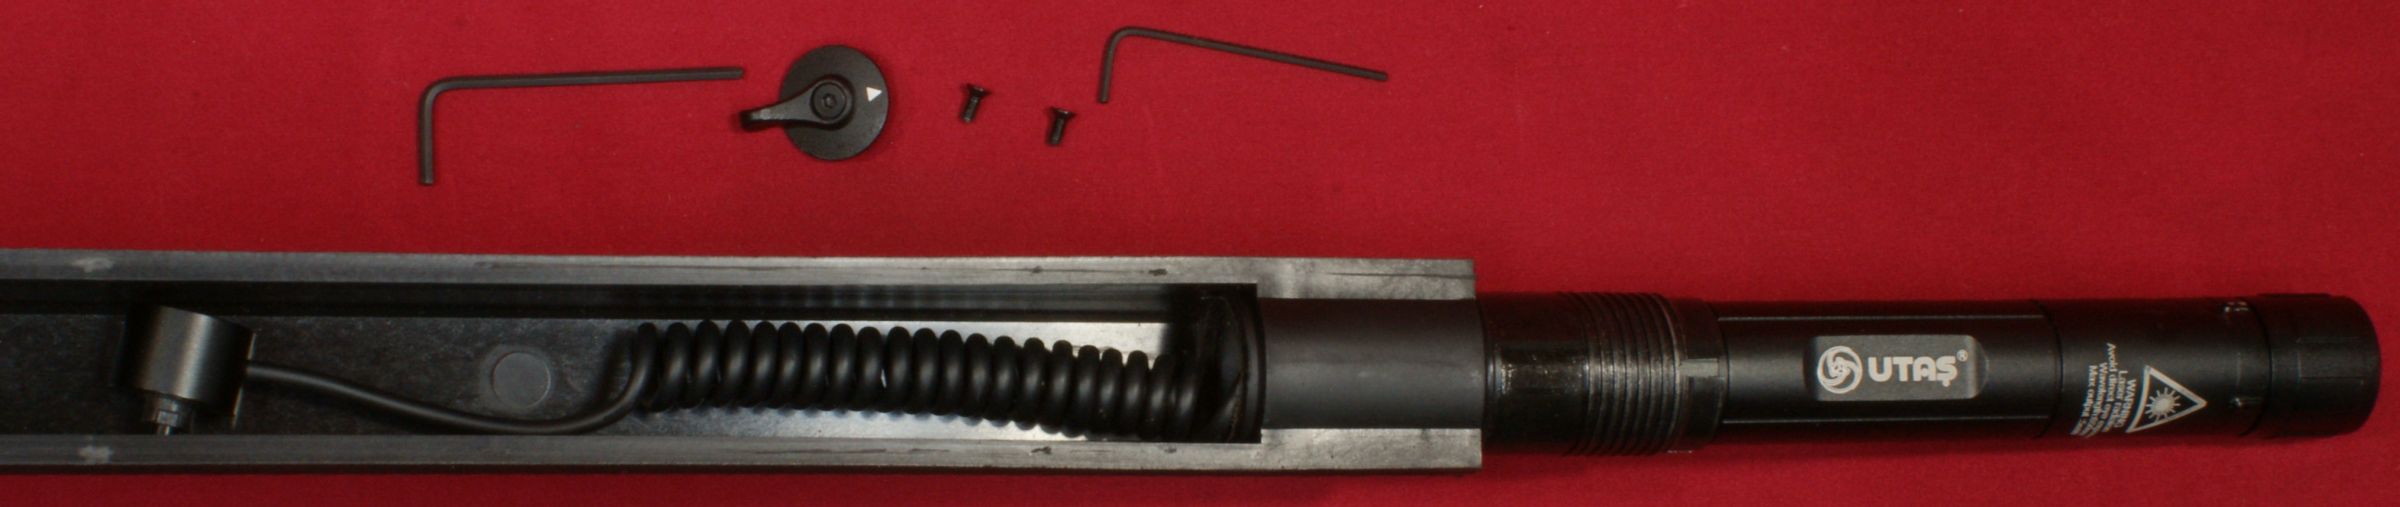
The switch is mounted to the right side of the stock above the trigger guard.
Figure 12
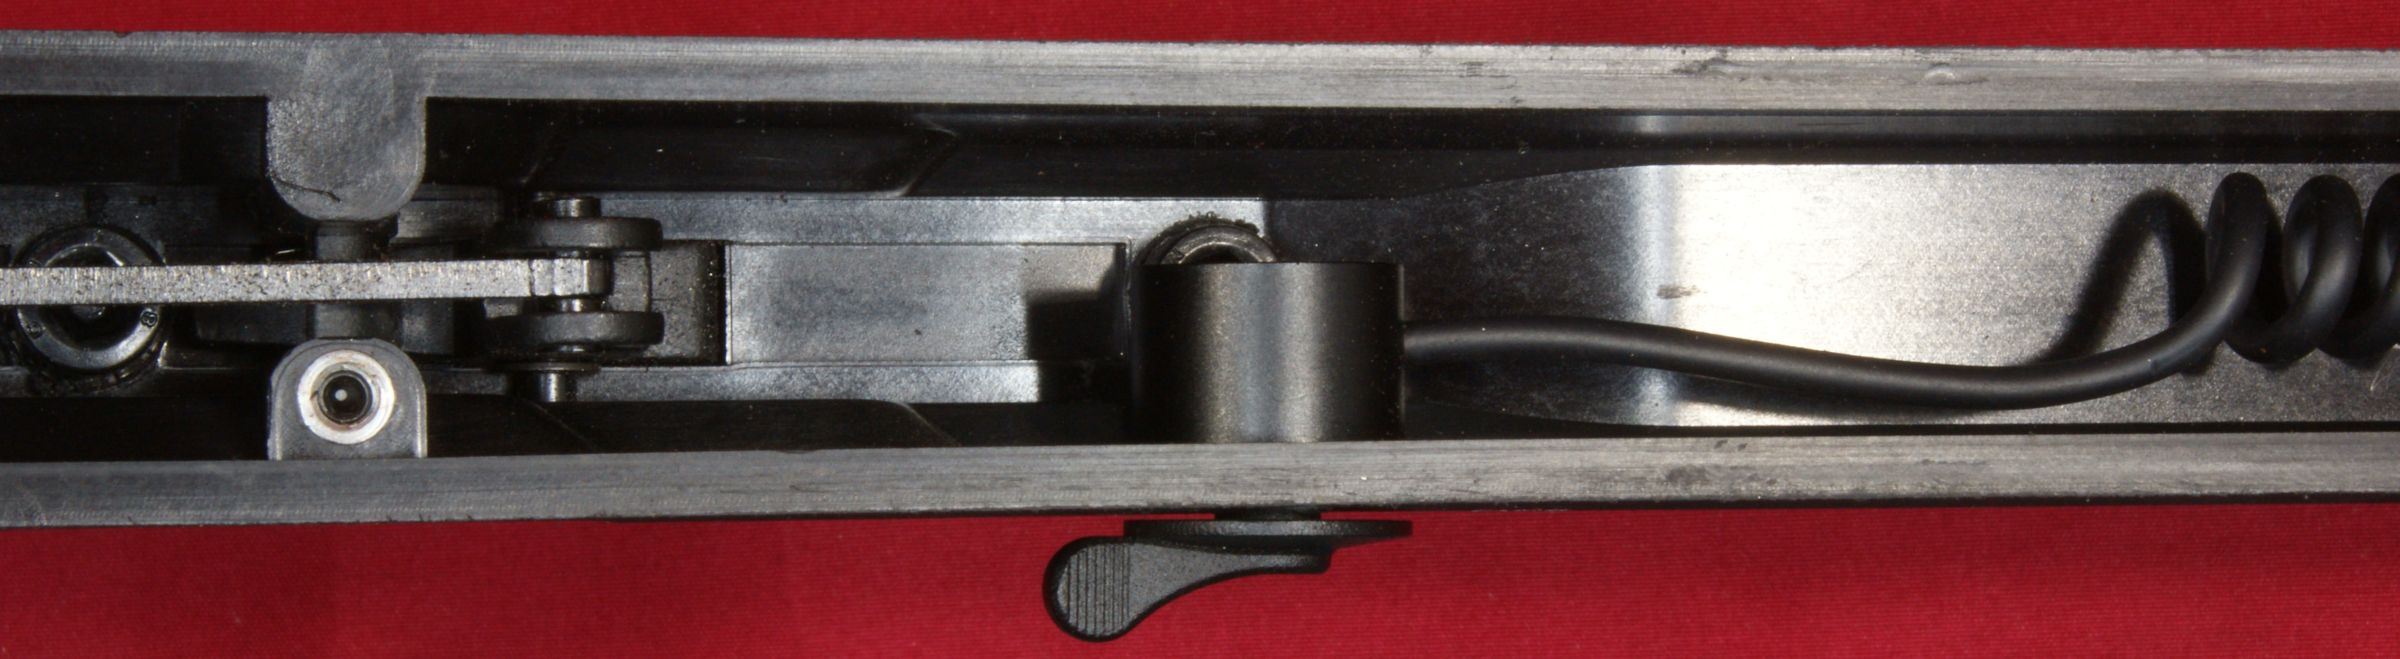
Figure 13
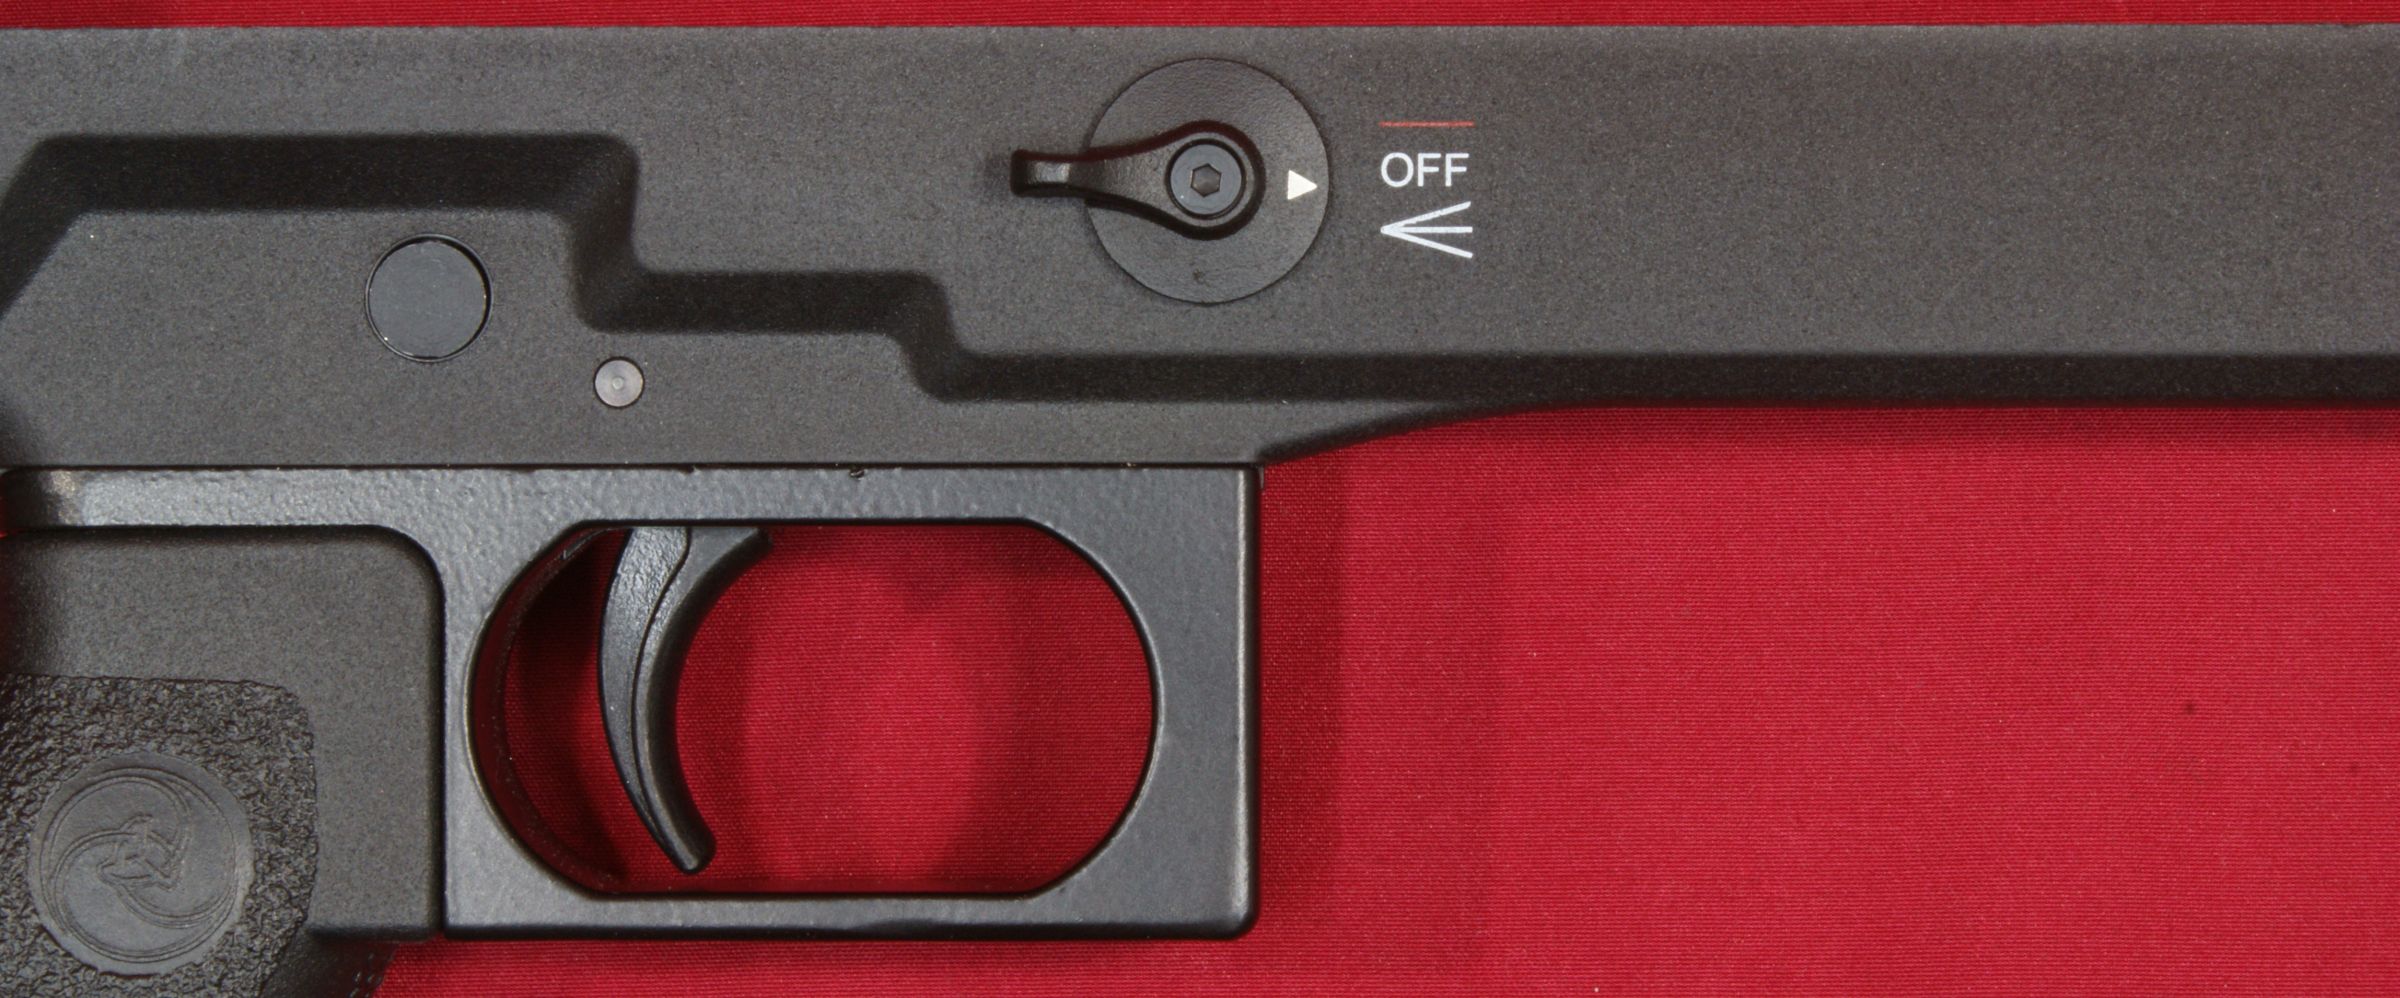
The first step is to remove the toggle portion of the switch which is held into place with an Allen screw.
Figure 14
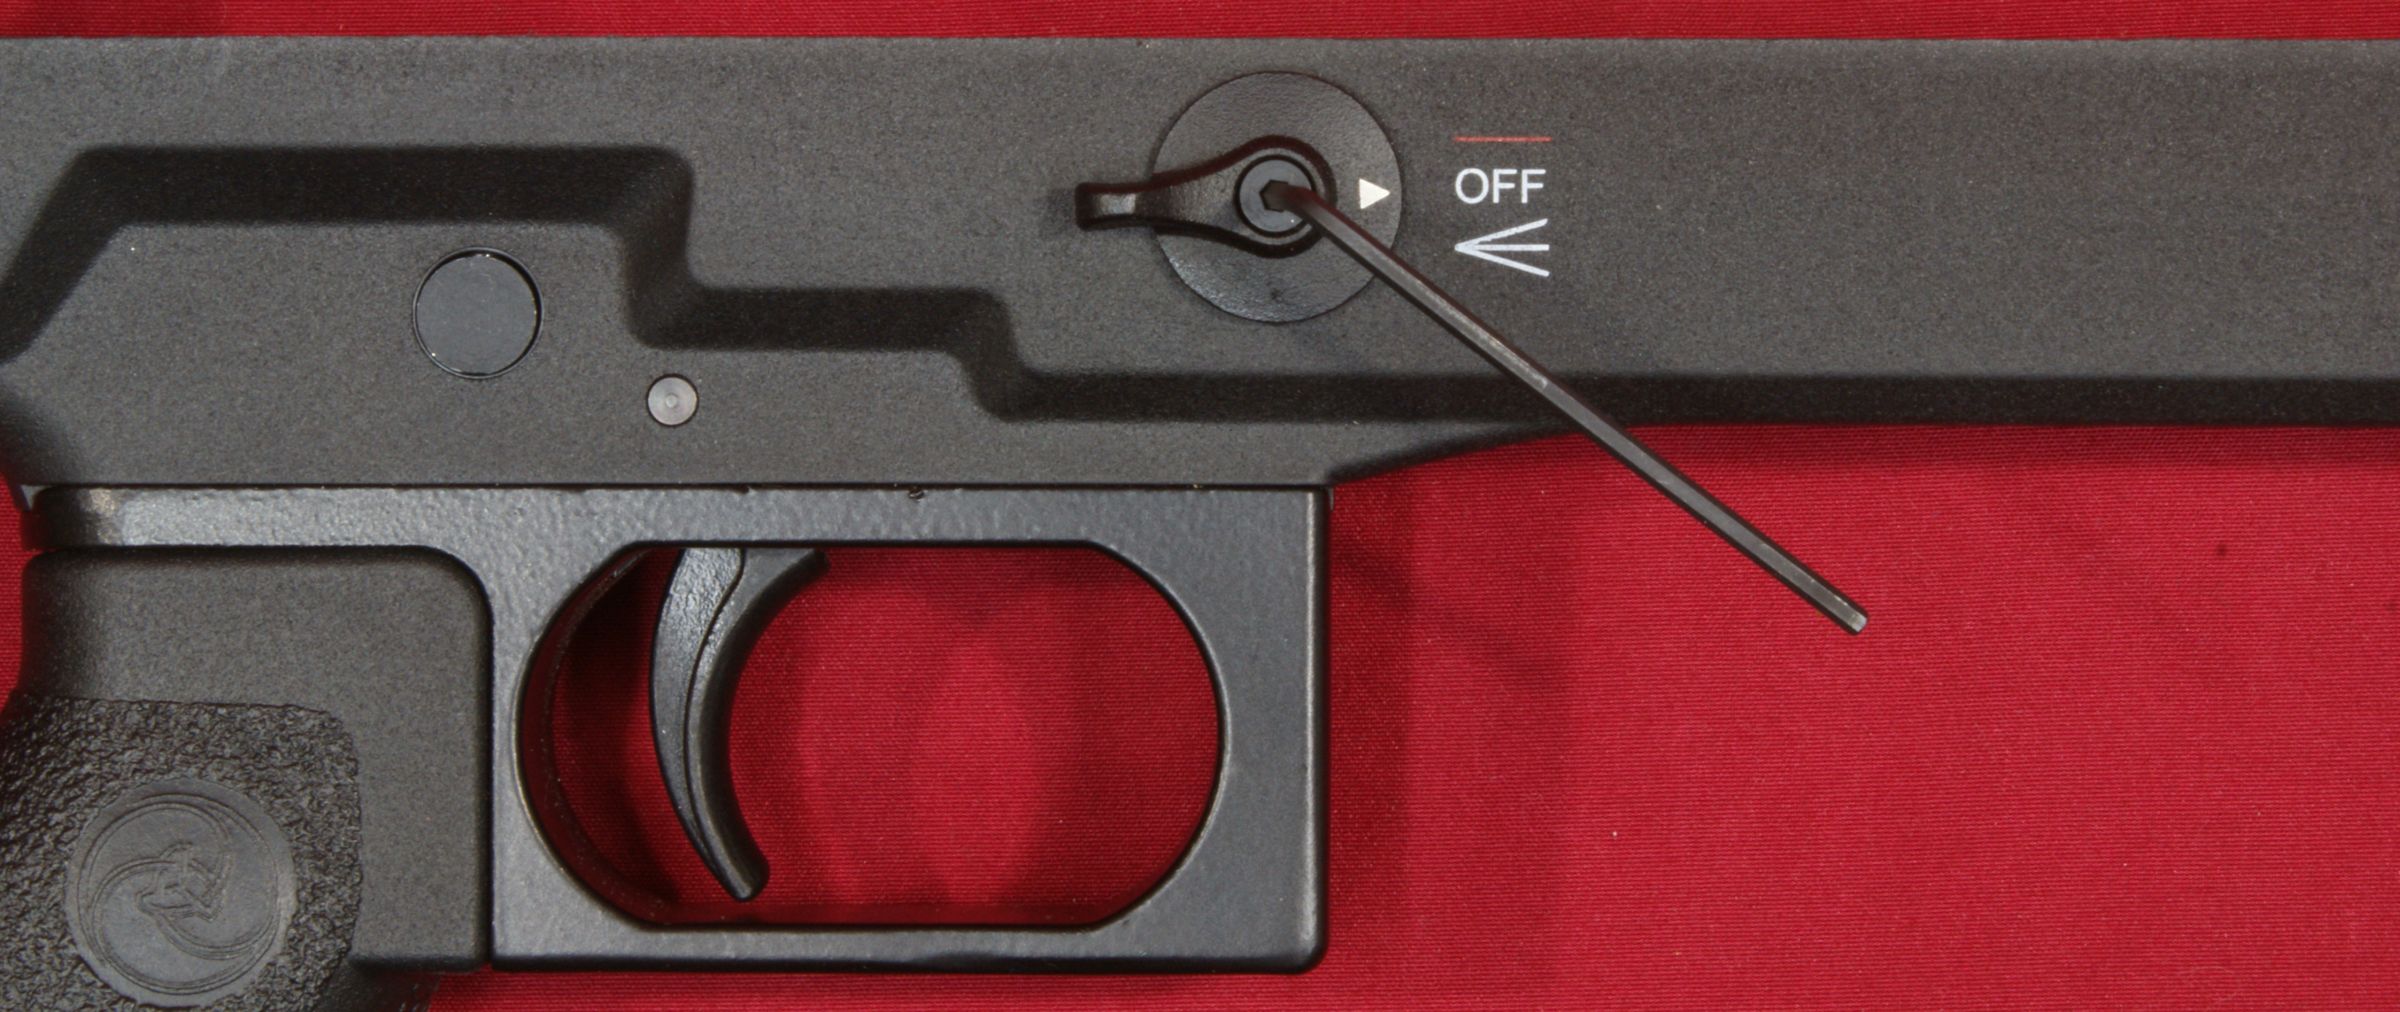
Under the toggle are two screws that hold the body of the switch mounted to the stock. Using another Allen wrench, remove the two screws.
Figure 15
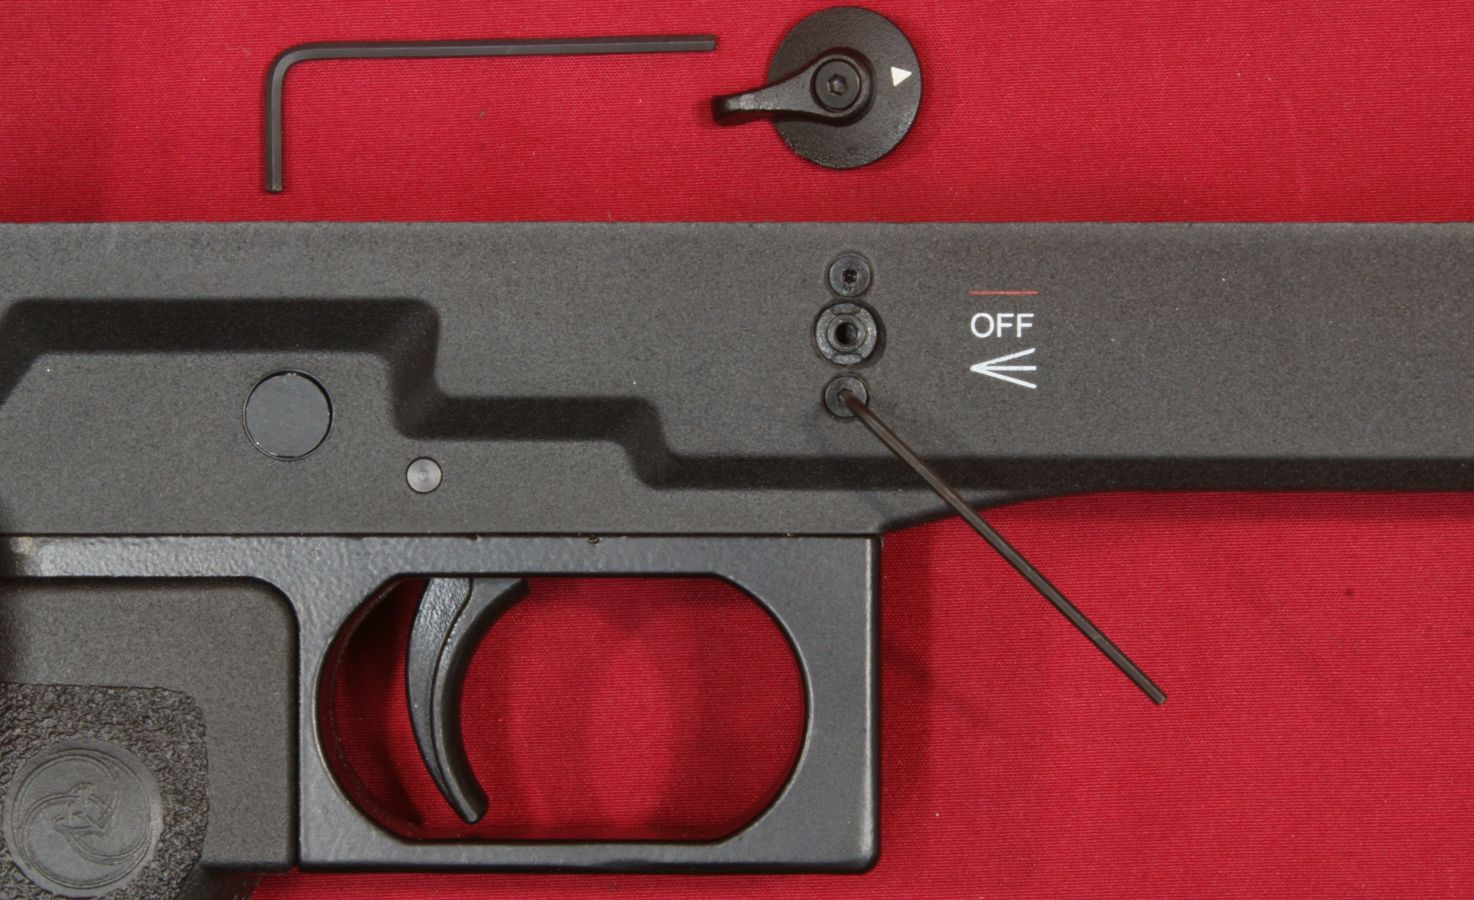
The switch body easily comes out of the stock.
Figure 16
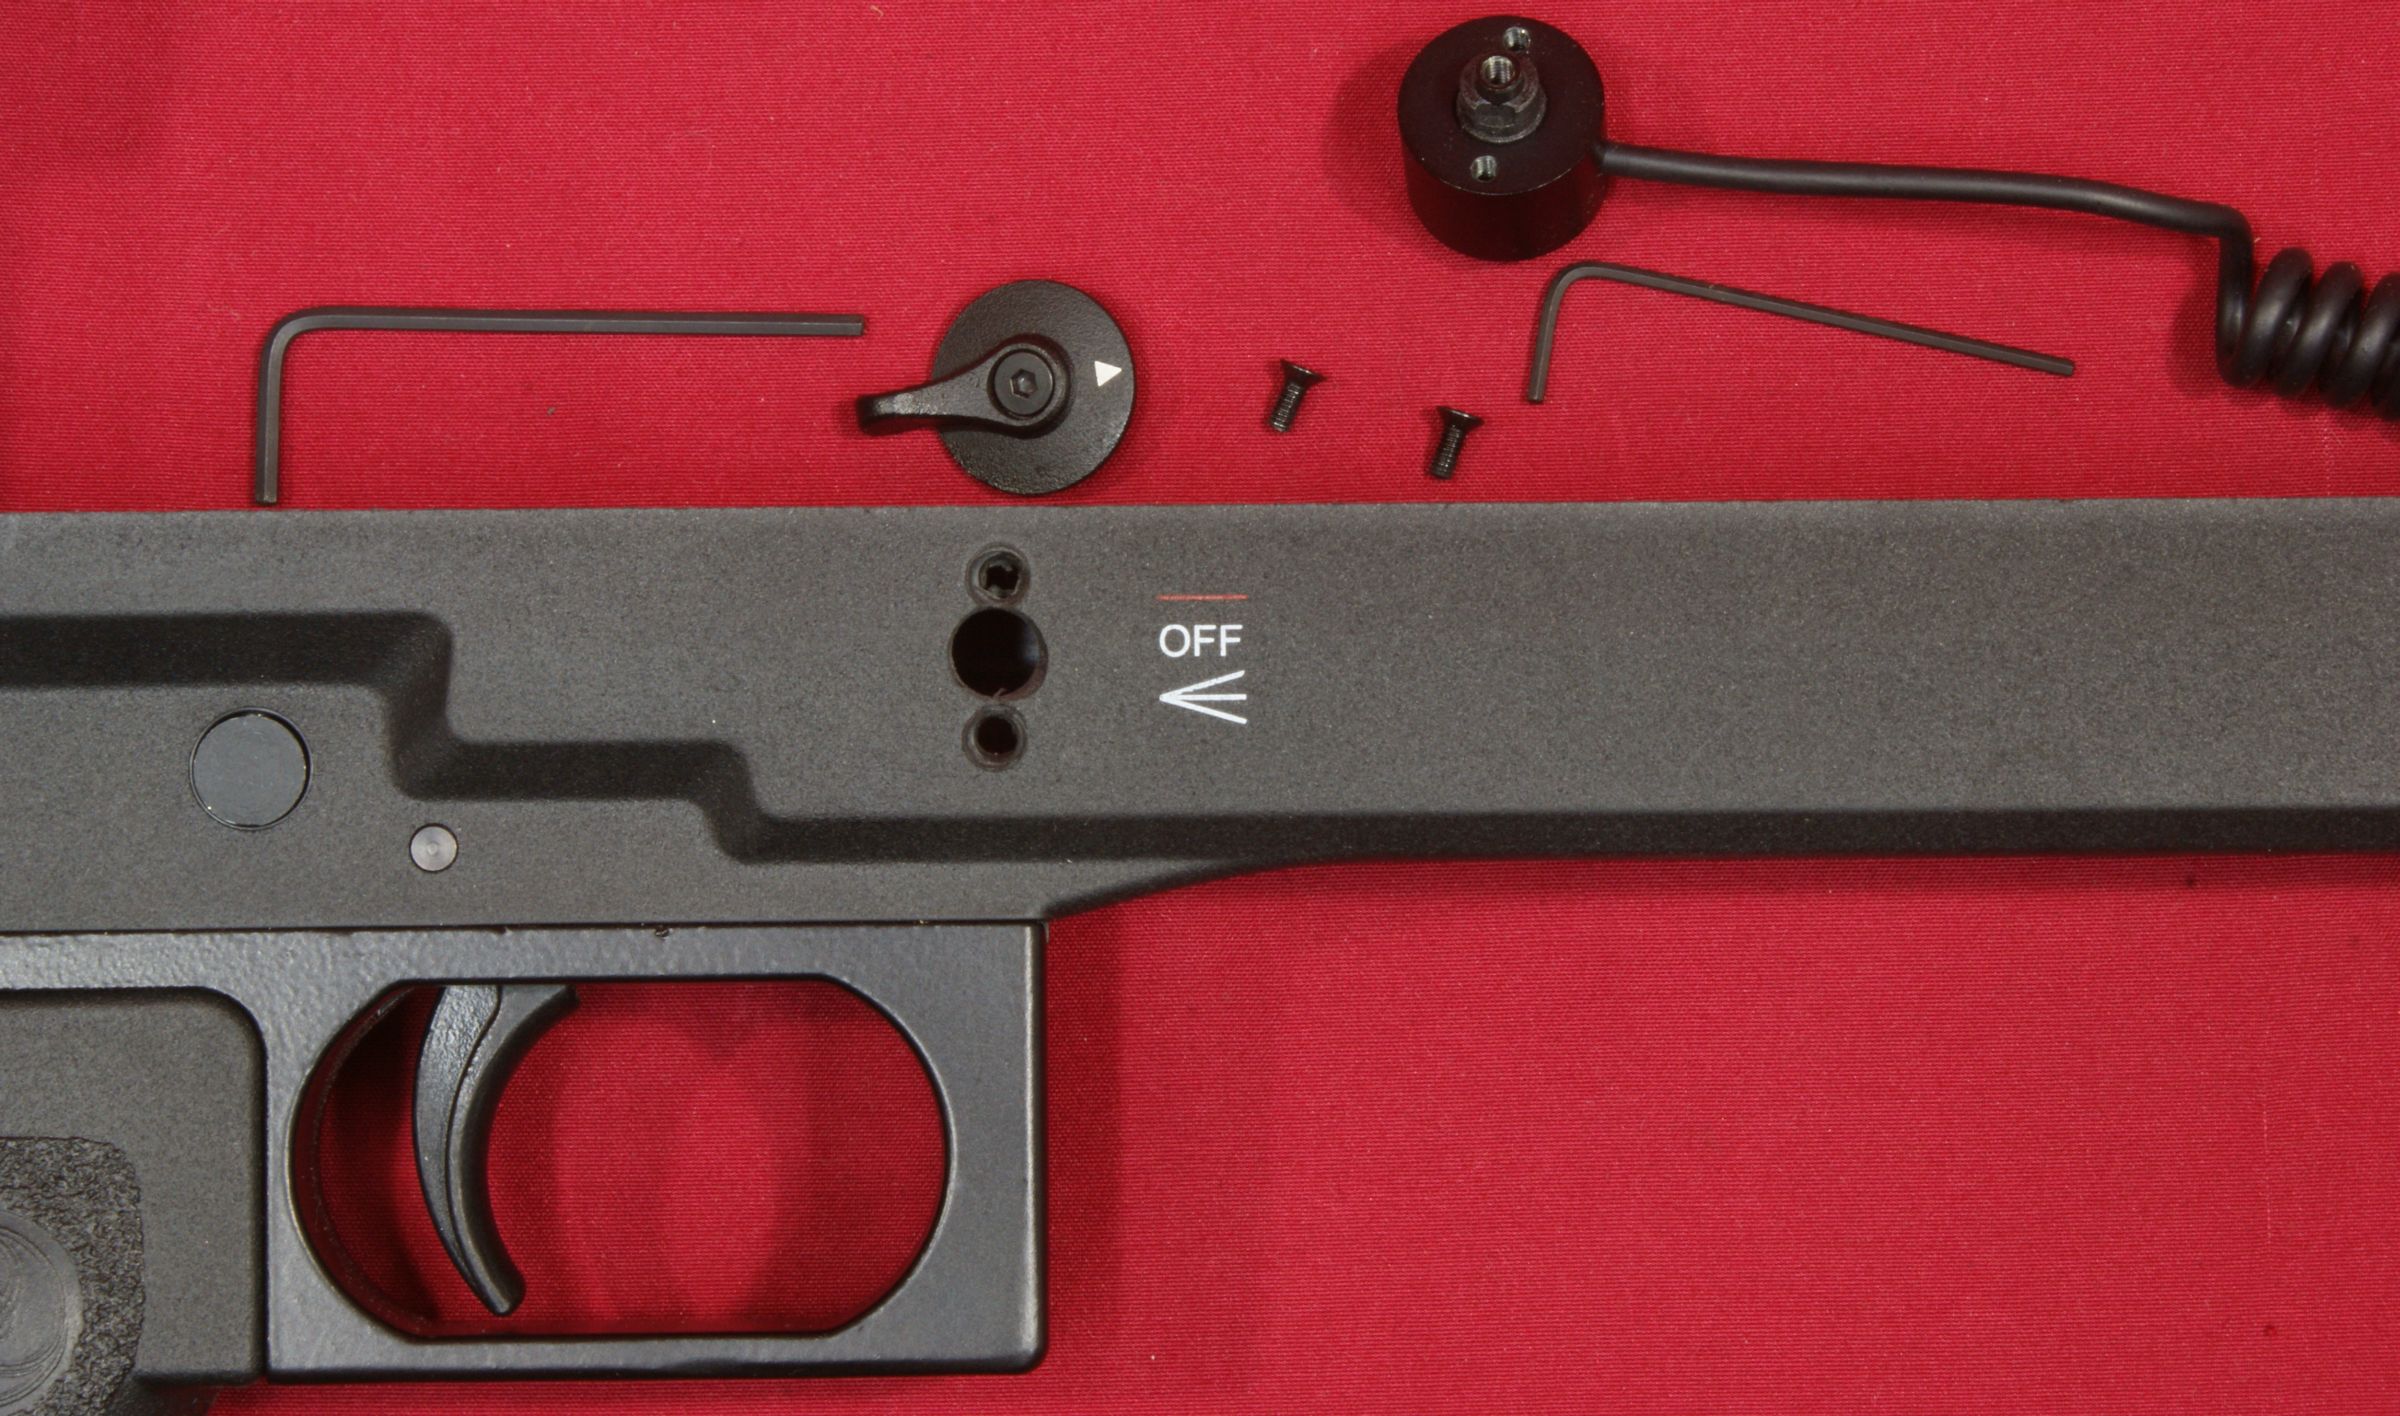
Figure 17
You can then pull the light assembly forward out of the forend.
Figure 18
The light disassembles by removing the tail cap. Notice that the two holes in the light below which are circled in white are the windage and elevation adjustment screws for the laser.
Figure 19
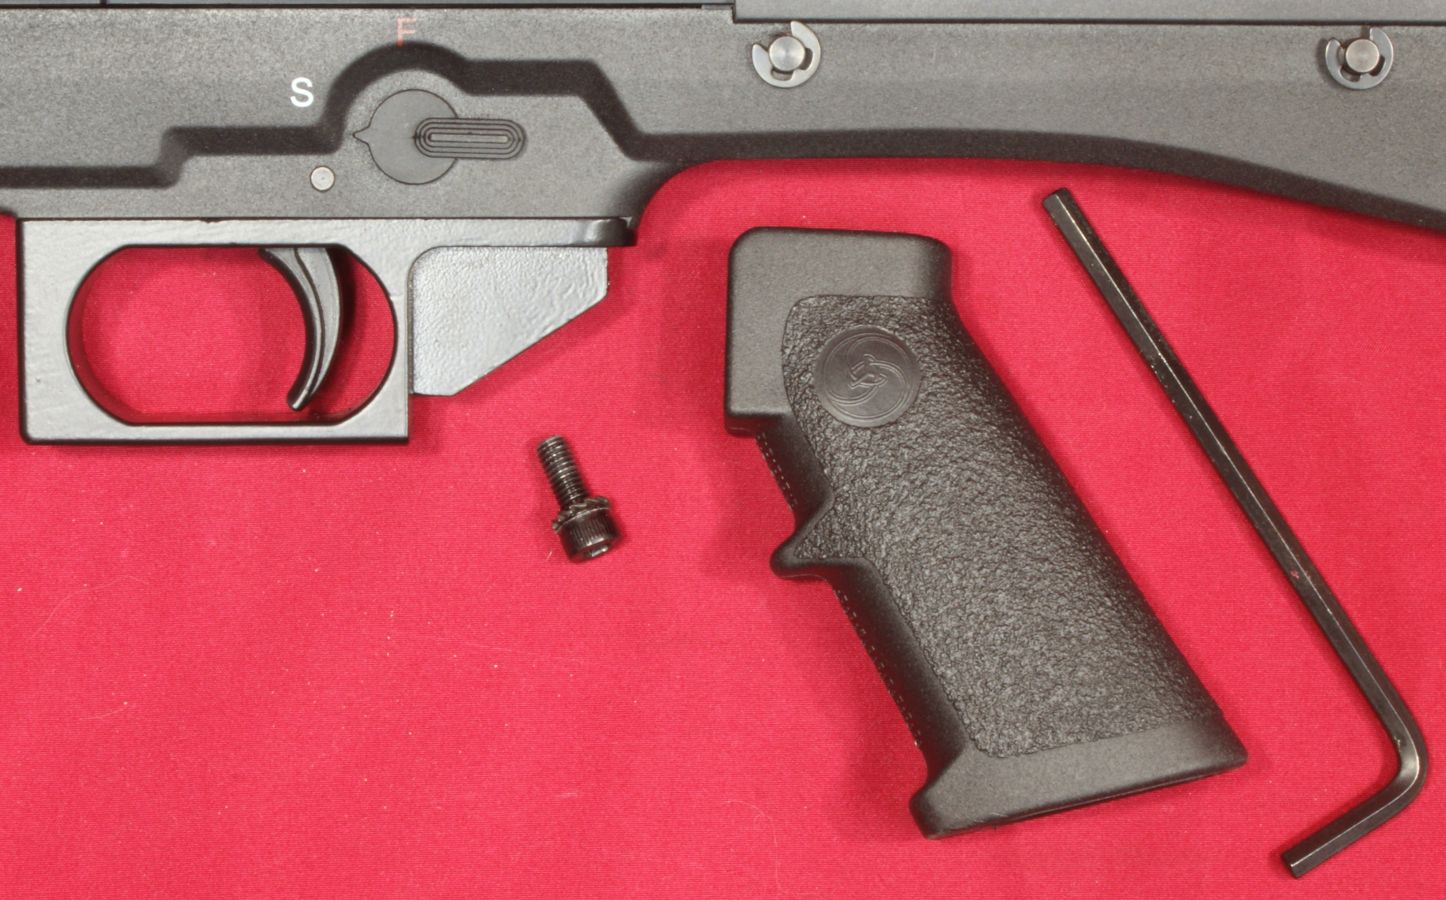
Pistol Grip Removal
Pistol grip removal is just like you would find on any AR style rifle. You remove a single bolt and the A2 style grip pulls off the receiver.
Figure 20
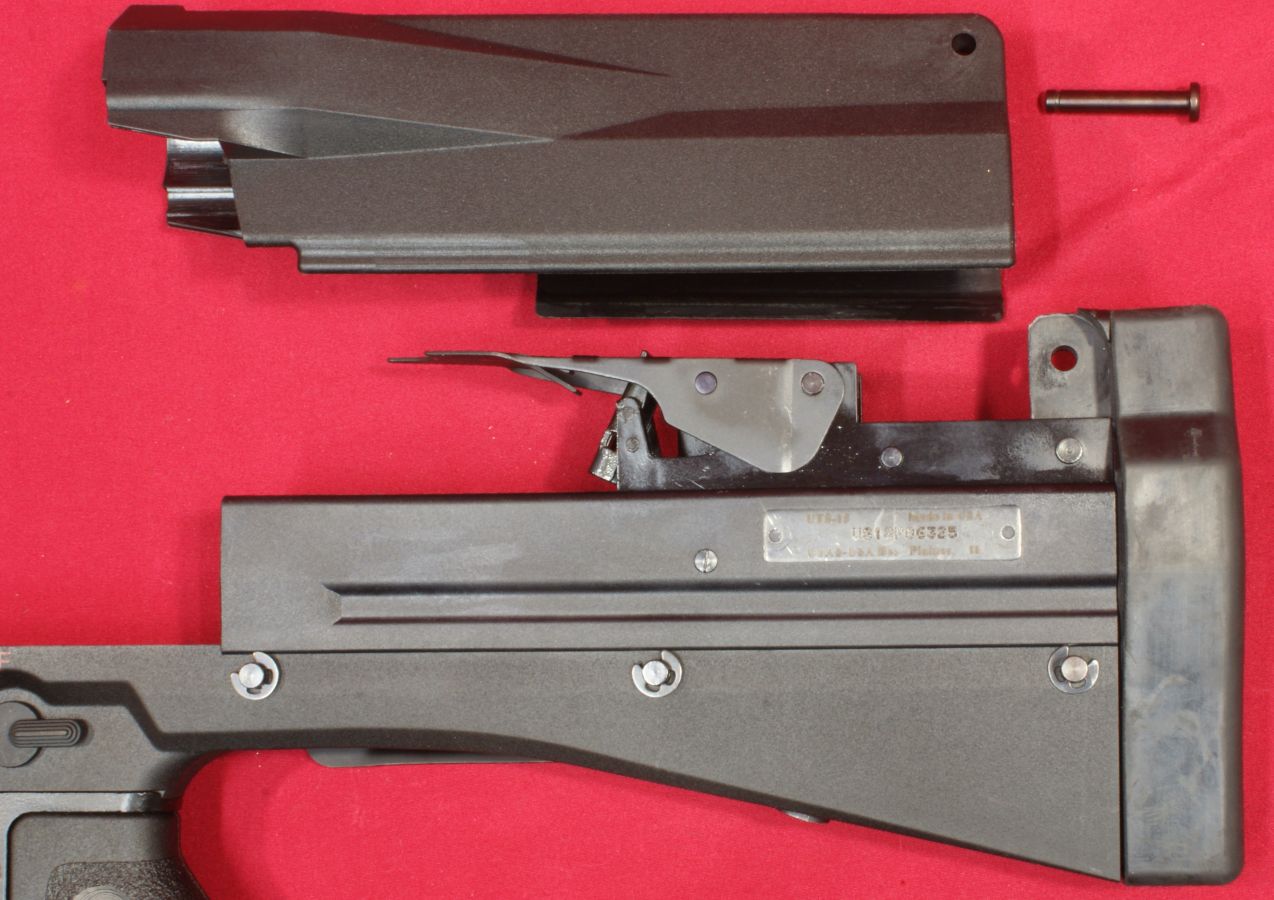
Upper Stock and Recoil Pad Removal
I removed the upper stock and recoil pad so I could get a better look into the inner workings of the UTS-15. I don't see any real reason that you would need to remove these items for yourself, but I decided to go ahead and show the steps below anyway.
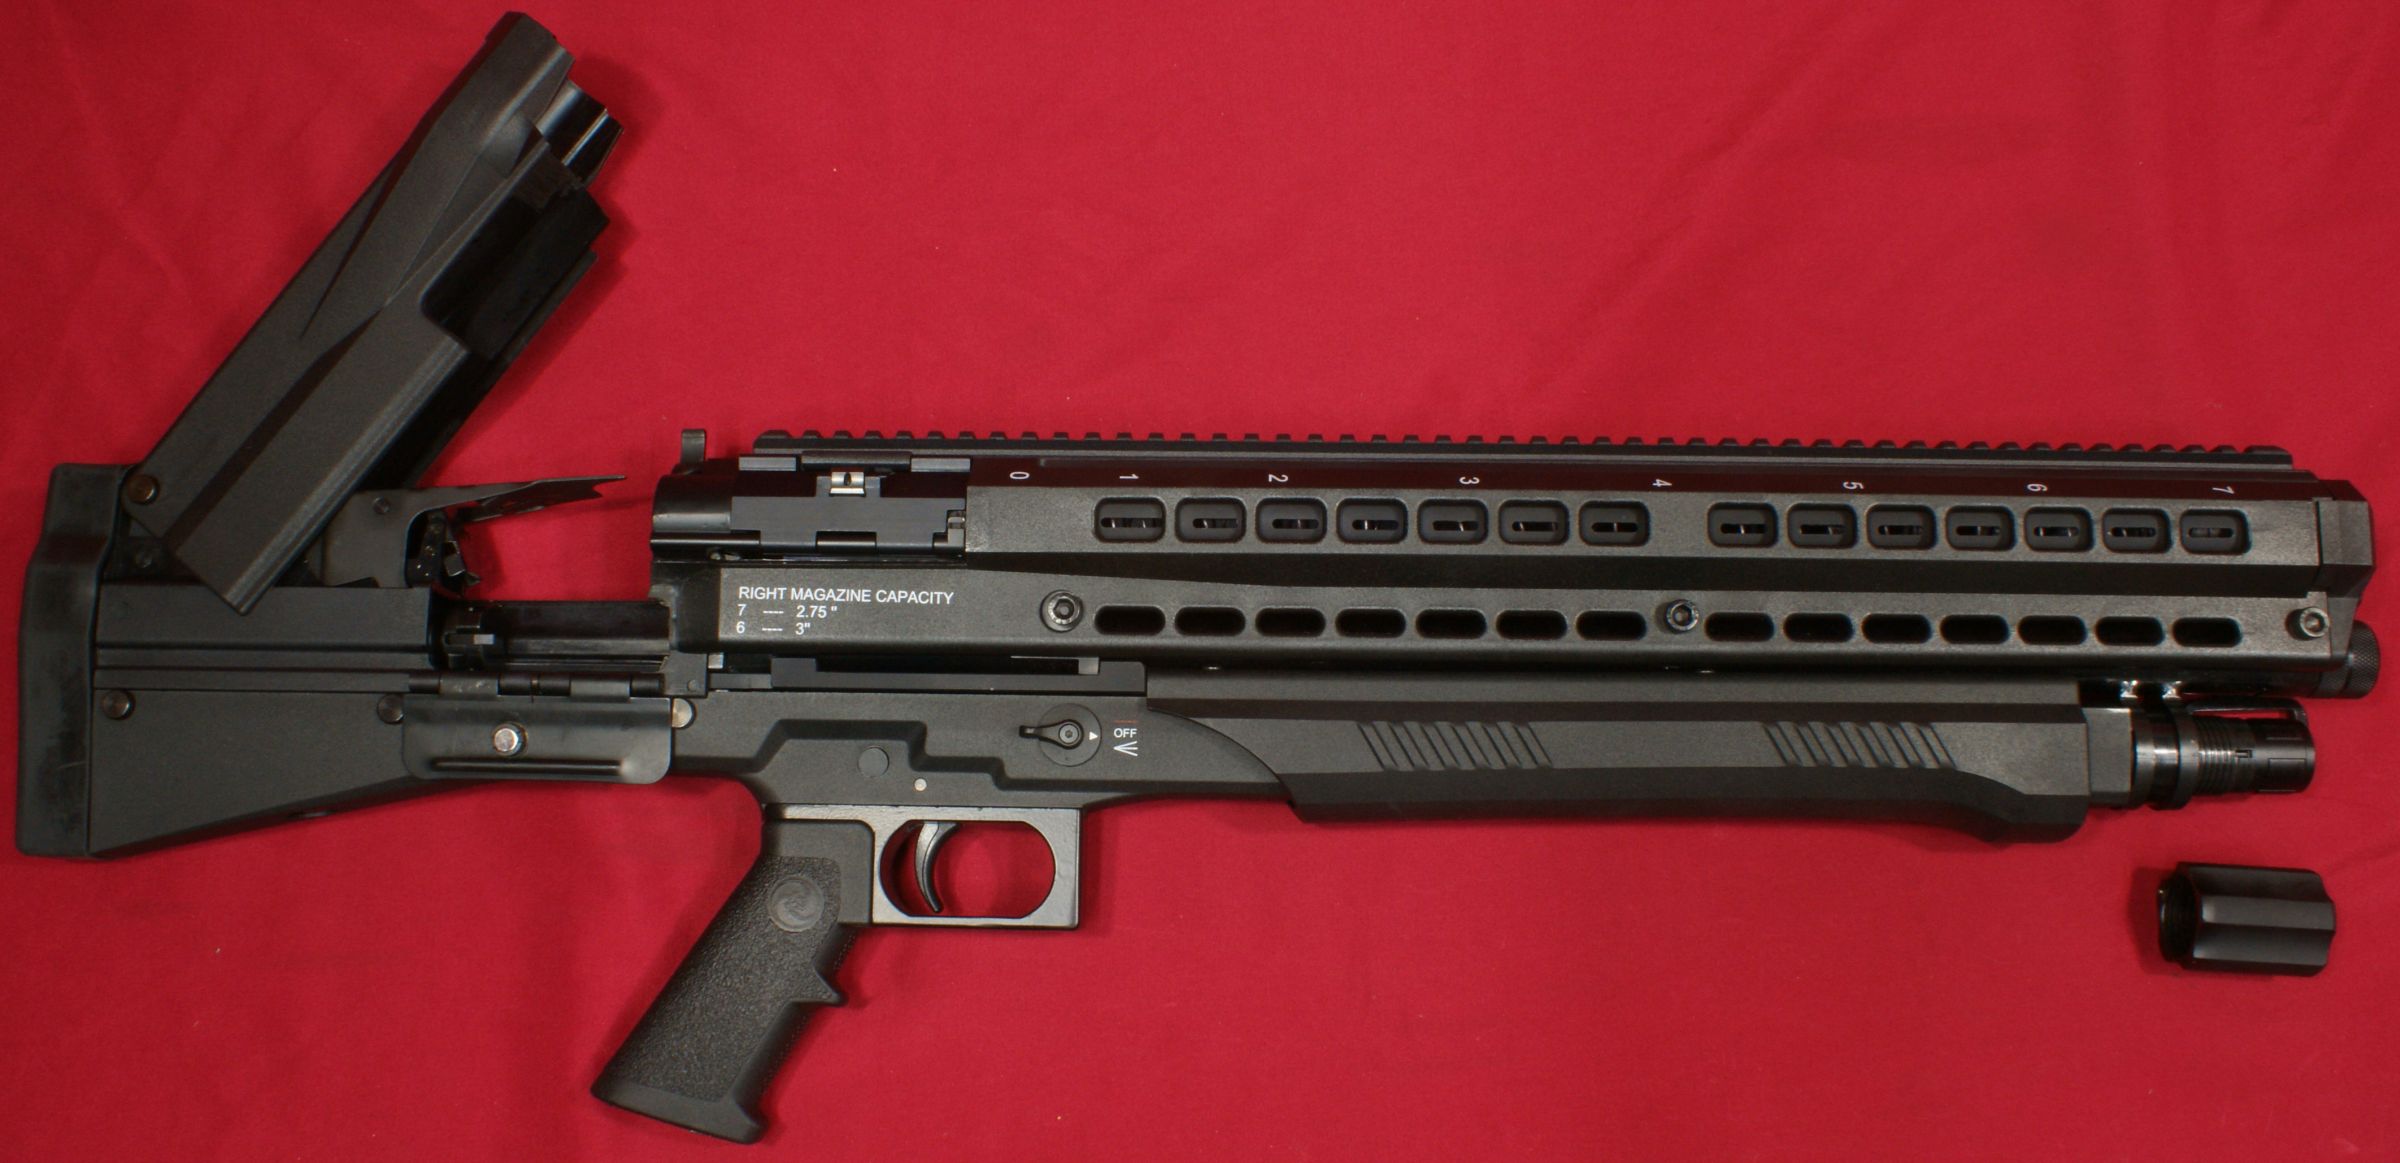
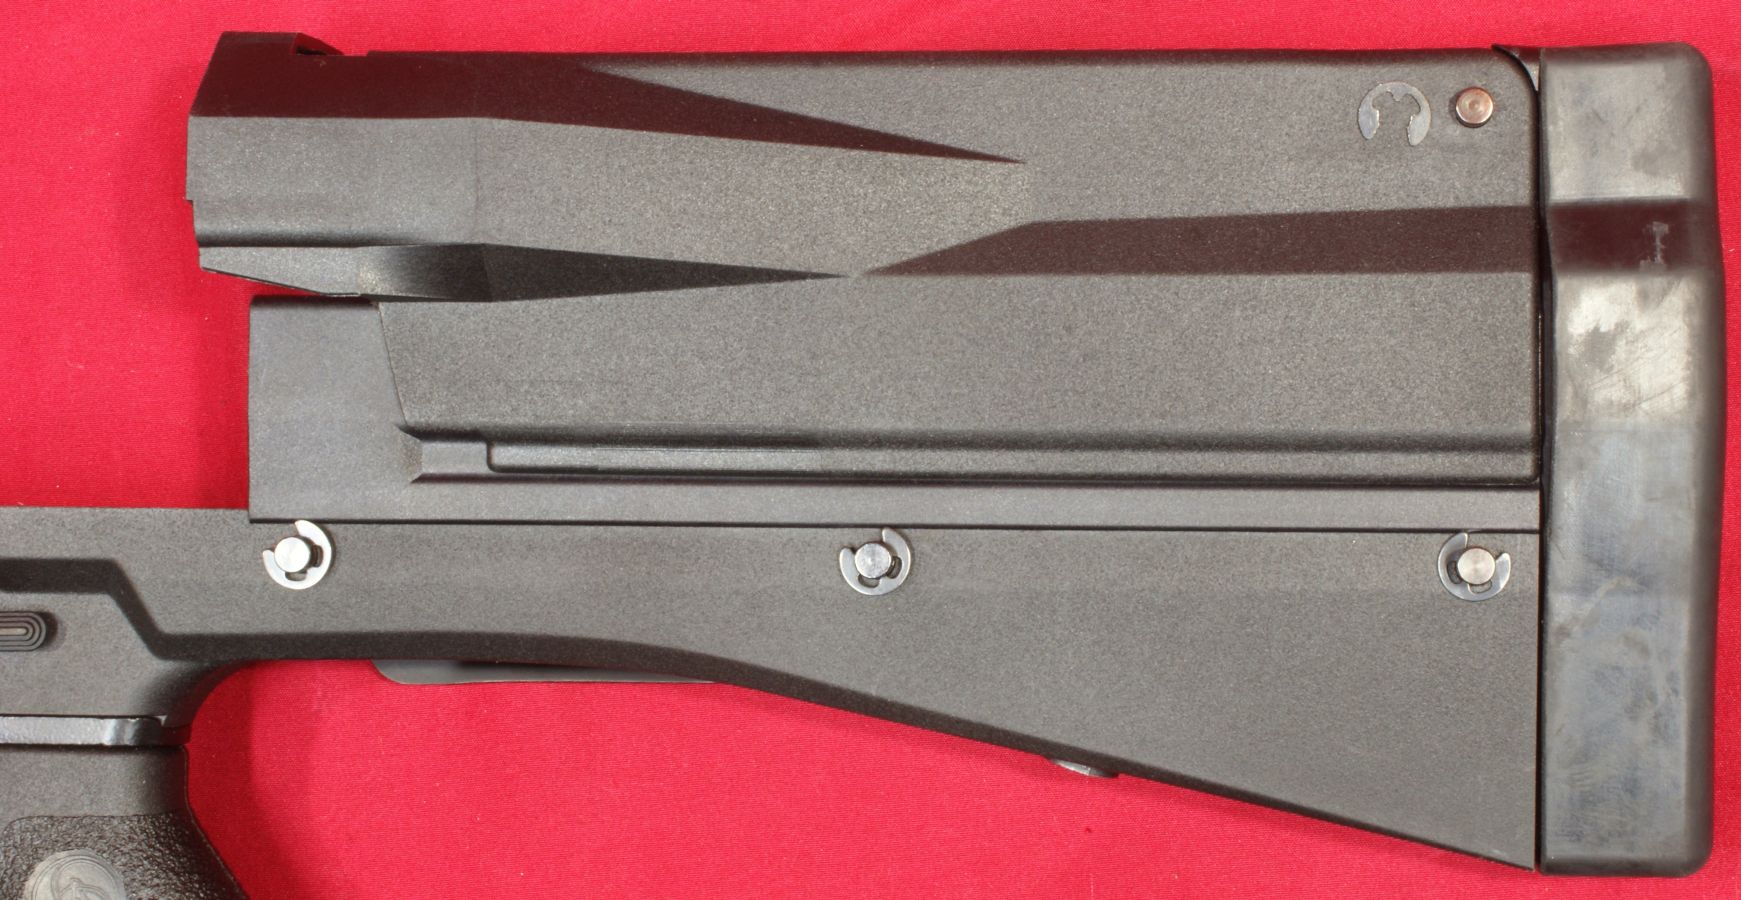
To remove the upper stock, first remove the spring clip from the pivot pin for the upper stock.
Figure 21
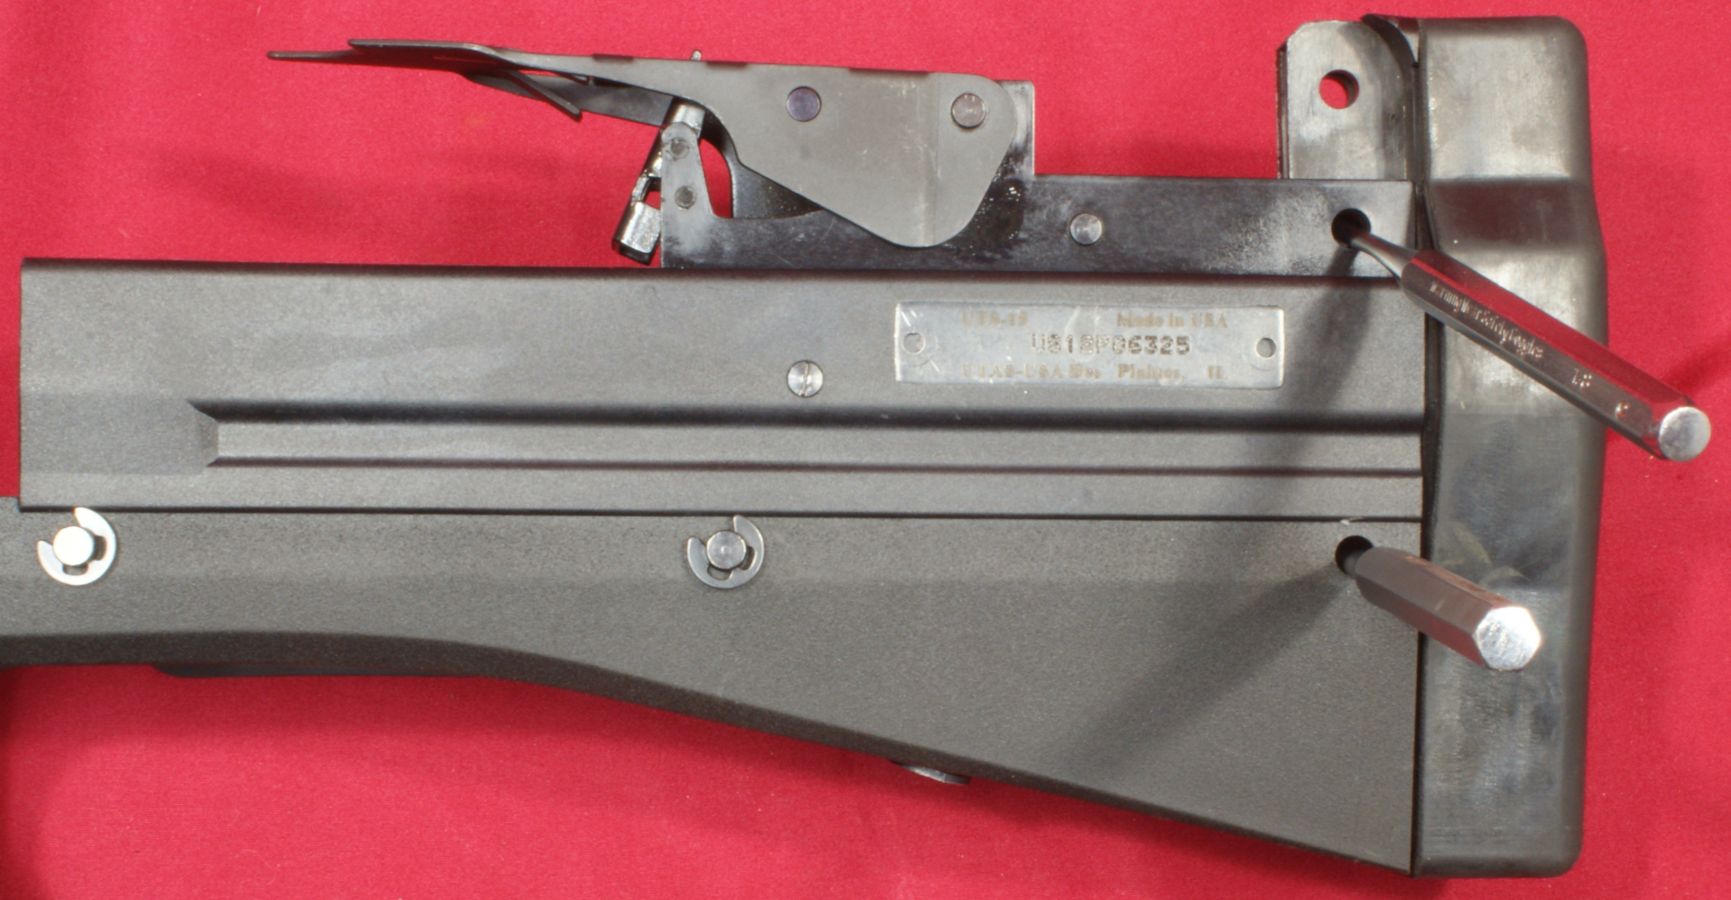
You can then use a punch to push out the pivot pin.
Figure 22

Removing the upper stock gives you a better view into the shotgun, but the upper stock must be in place for the shotgun to function properly because the upper stock acts as a guide for the shells feeding into the loading ramp area.
Figure 23
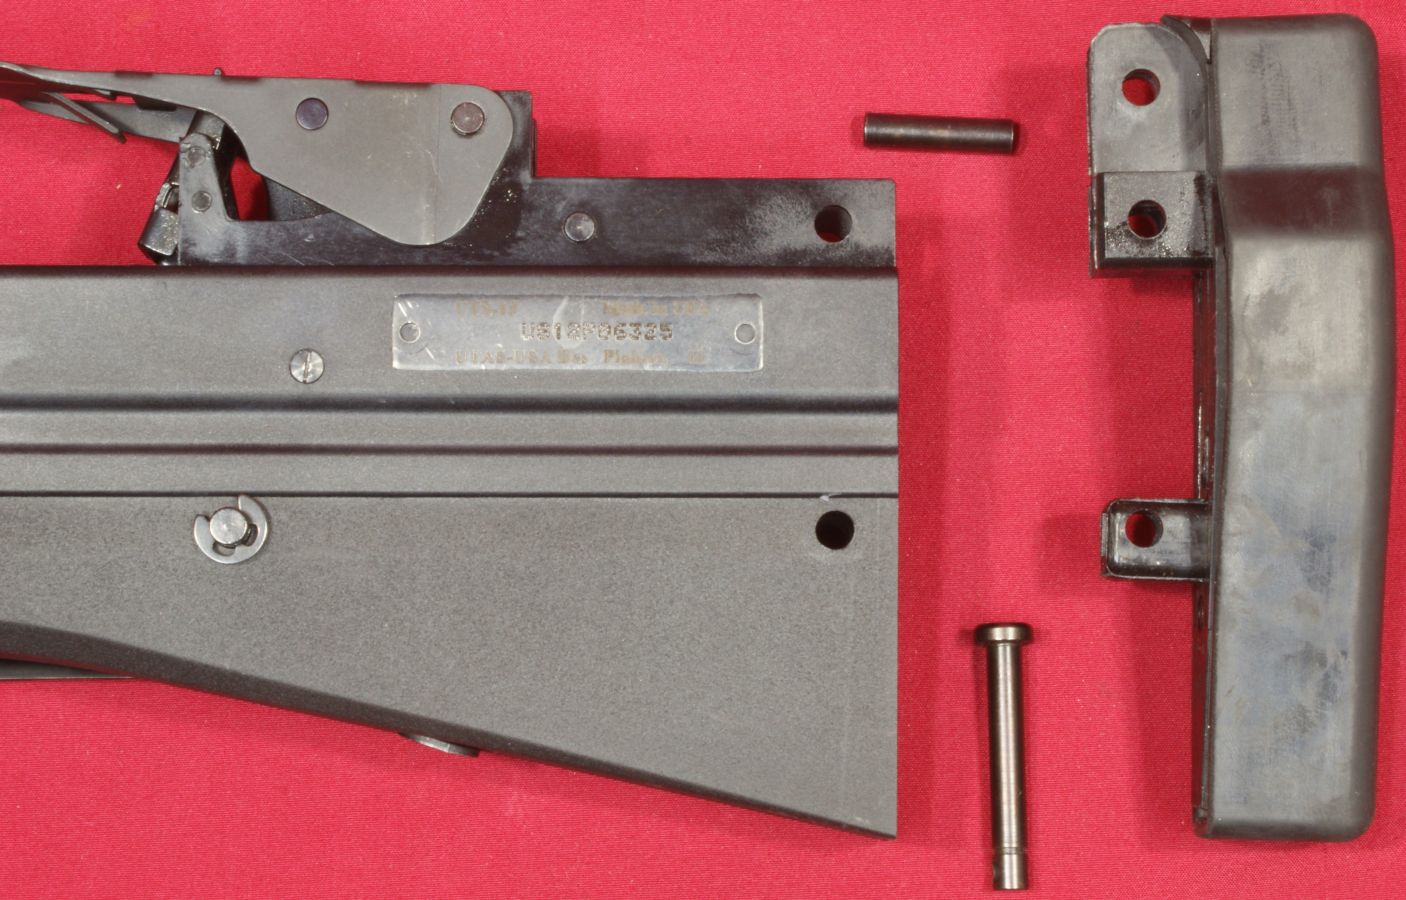
To remove the recoil pad, first remove the spring clip from the lower pin. Then you can push the two pins out of the stock.
Figure 24
Again, I don't see any normal reason to remove the recoil pad, but if you need to, removal is simple and easy.
Figure 25
Thoughts
Although someone may be slightly intimidated by the non-traditional look of the UTAS UTS-15 shotgun, disassembly for field stripping is as fast and easy as many traditional shotguns on the market today.
For more detailed photos and commentary, make sure you check out the other parts of this review and feel free to leave comments on my Reader's Comments page. The following links are provided to help you see other parts of this review.
- UTAS UTS-15 Review: Part 1 - Introduction, Specifications and Summary
- UTAS UTS-15 Review: Part 2 - What's in the Box
- UTAS UTS-15 Review: Part 3 - External and Operational Features
- UTAS UTS-15 Review: Part 4 - Disassembly (this page)
- UTAS UTS-15 Review: Part 5 - Internal Features
- UTAS UTS-15 Review: Part 6 - Range Test
Or
If you would like to be notified about future Gunsumer Reports reviews via Facebook, make sure "You Like This" by clicking the Facebook "Like" button at the bottom or top of this page. If it already says "You Like This" beside the button, clicking it again will uncheck the "Like" status and you will not be notified.
| Share on Facebook | |
© 2010, 2011, 2012, 2013, 2014, 2015, 2016, 2017, 2018, 2019, 2020, 2021, 2022, 2023 & 2024 Gunsumer Reports™, All rights reserved.
FTC Disclosure