|
|
Gunsumer Reports TM Providing Detailed Objective Reviews for Firearms and Firearm Accessories |
Thompson/Center Arms Dimension Rifle Review
Part 6 - Range Testing LOC™ Bridge
Scope Mount Base
November 21, 2012

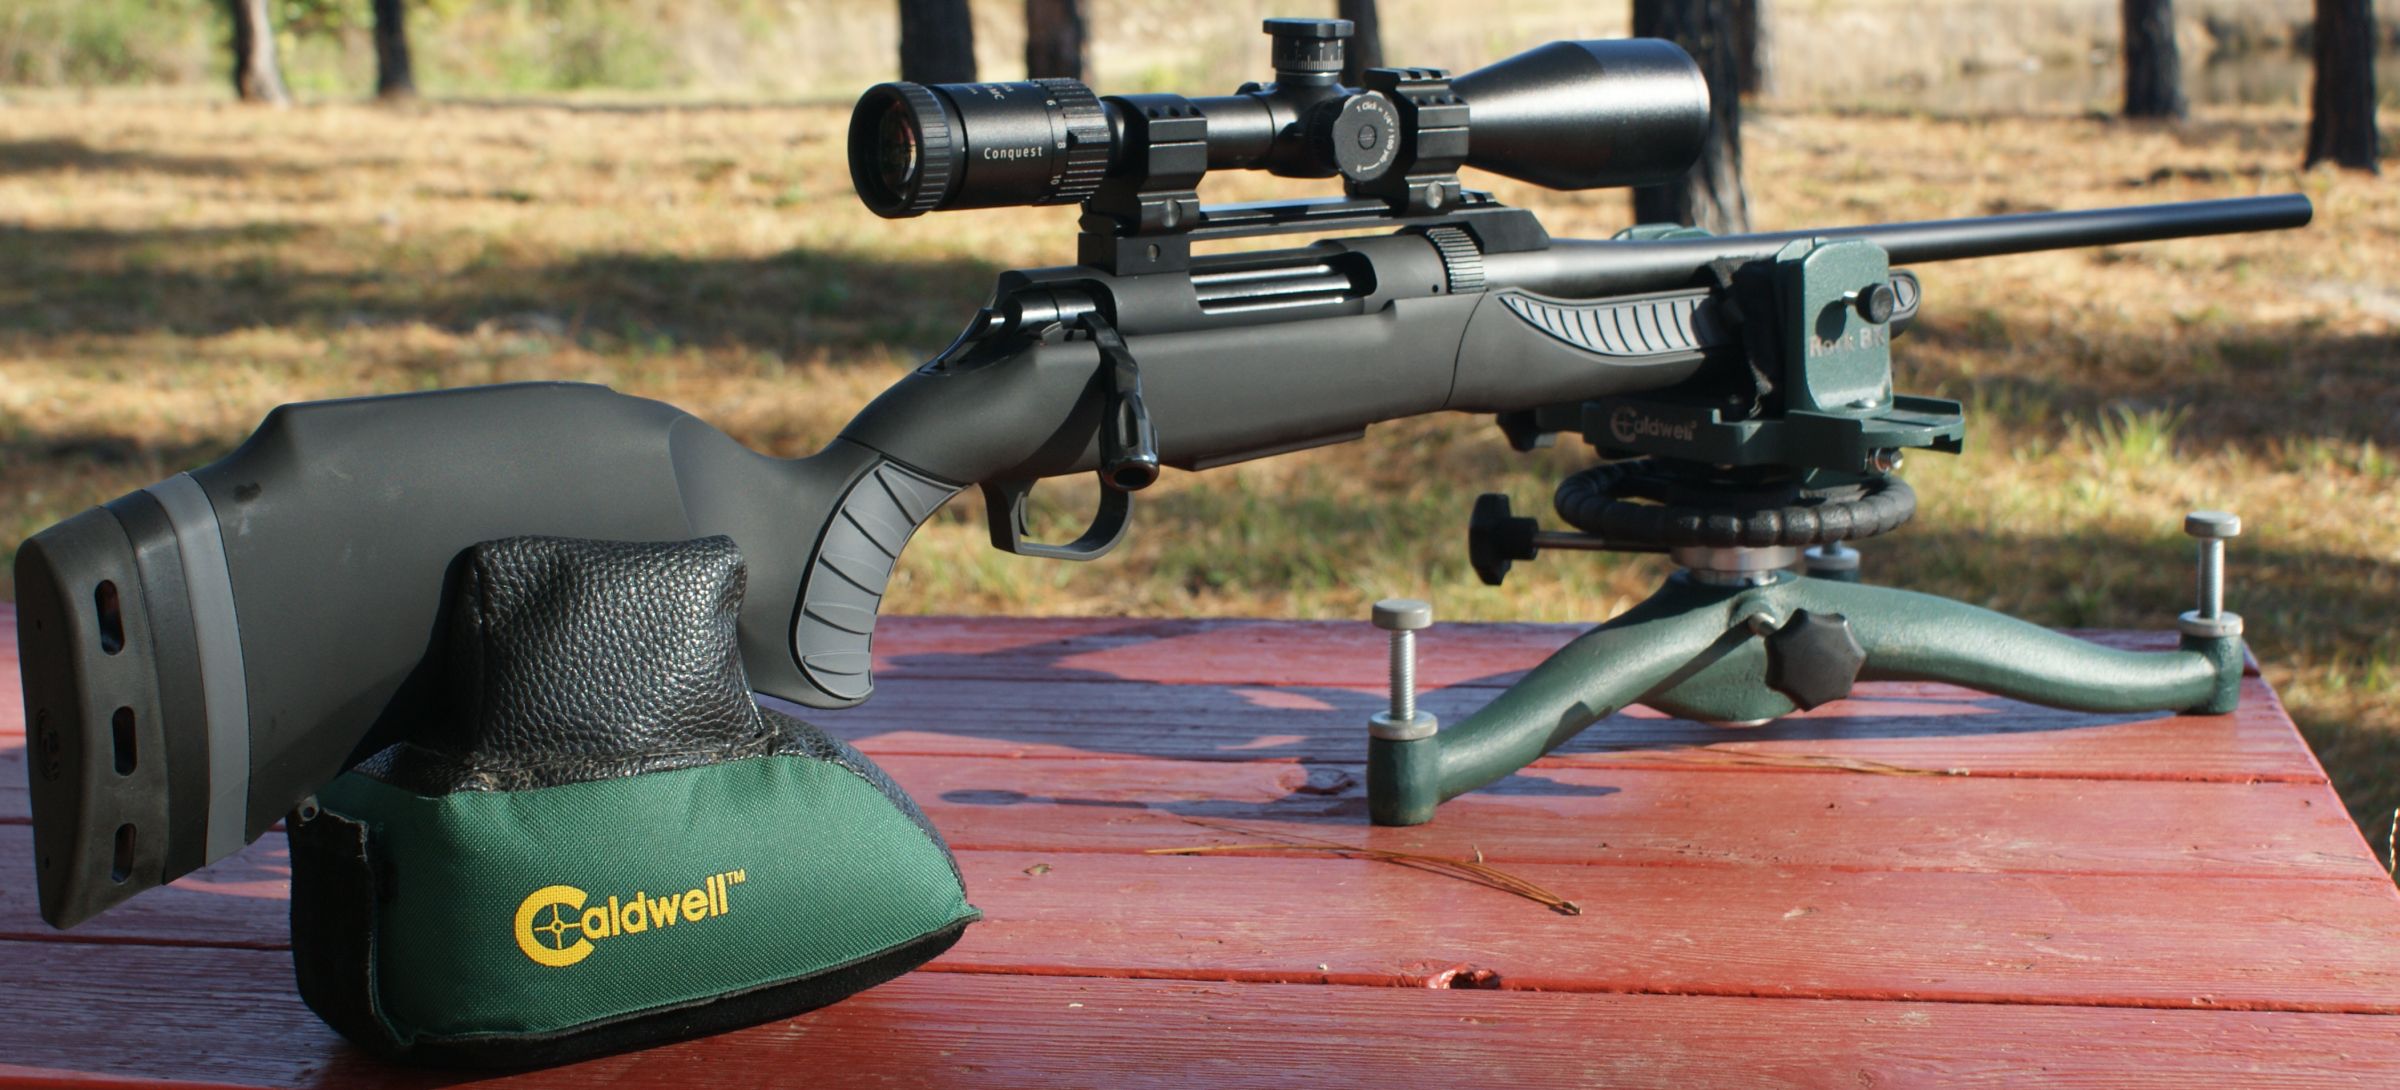
There were several aspects of the Thompson/Center Dimension Rifle that I wanted to checkout during my range testing. The first was a simple evaluation of the LOC™ Bridge Scope Mount Base. To do this, I installed the bridge mount on the rifle configured in the .223 Remington caliber. I decided to use the .223 Remington caliber to evaluate the bridge mount mainly because I had a good supply of Hornady 223 REM 55 GR HP STEEL MATCH™ ammunition on hand. The photo below shows my Zeiss Conquest 4.5-14x50 Scope installed on the Dimension Rifle using the LOC™ Bridge Scope Mount Base.
Figure 1
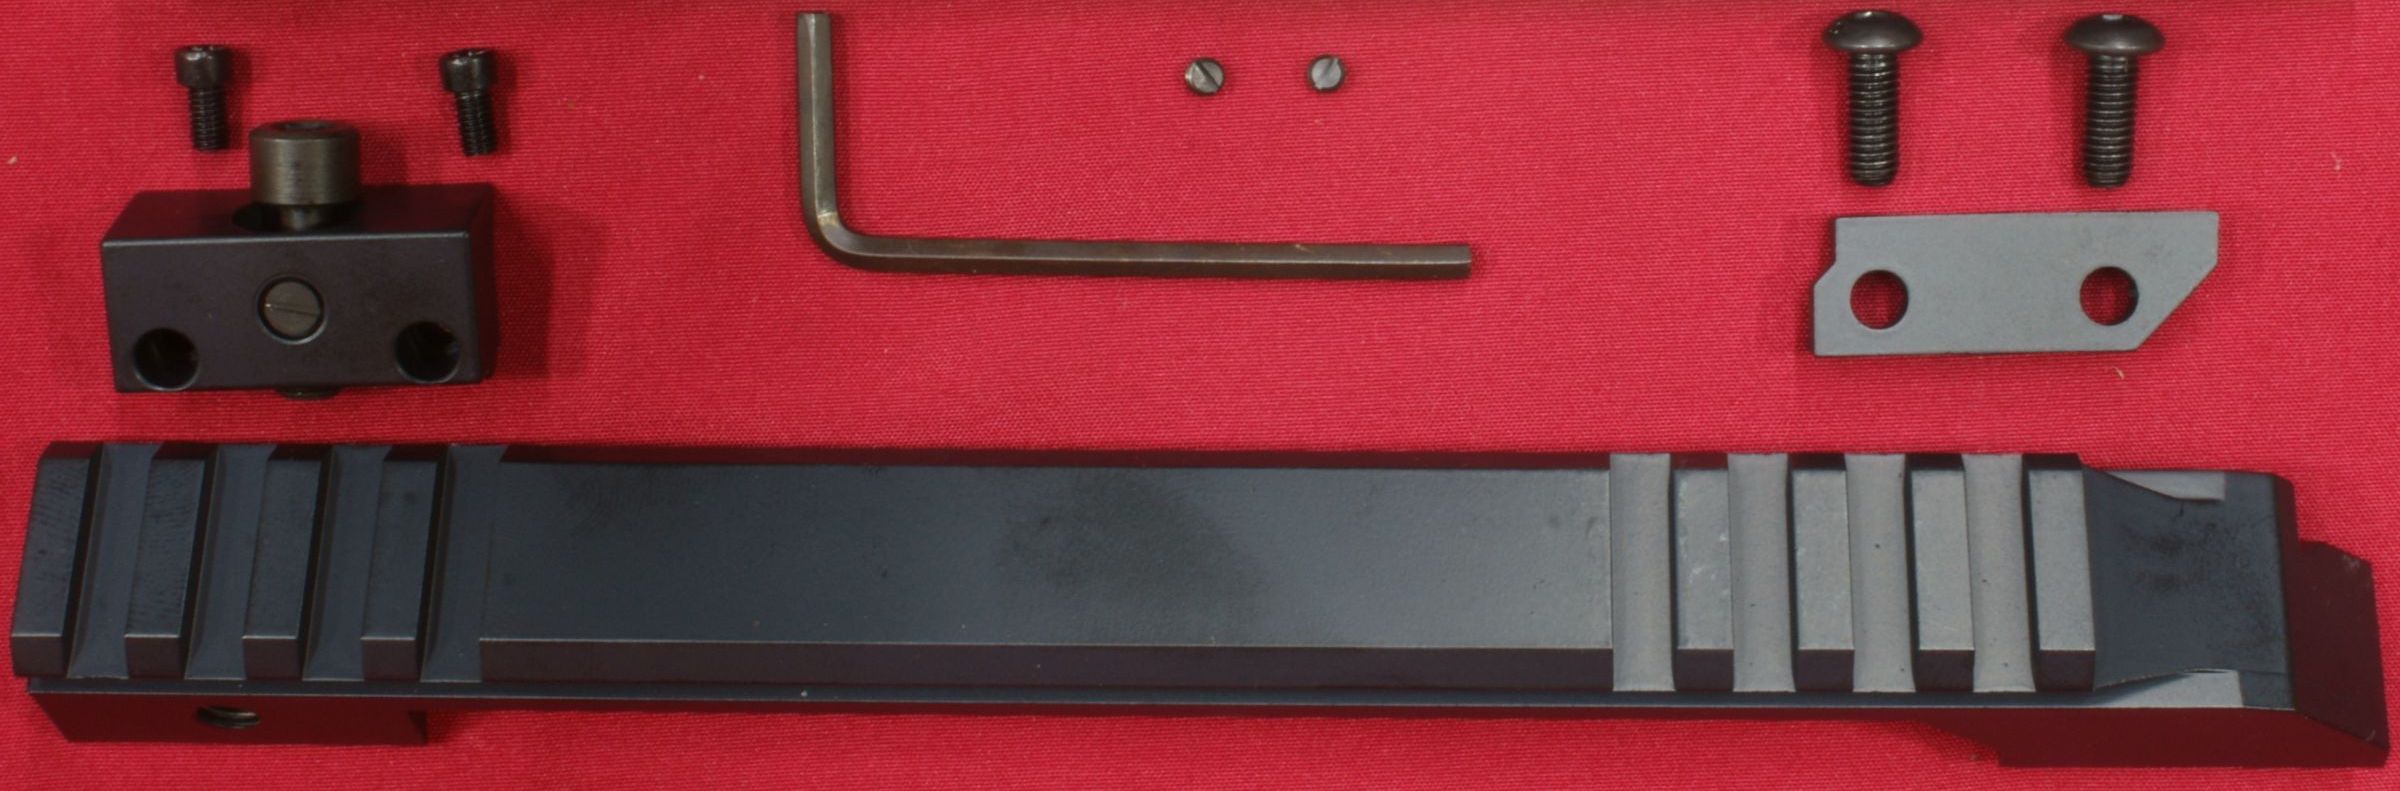
The bridge mount comes with the parts shown below and a set of instructions which you can see by going to this link. Installation is fairly simple.
Figure 2
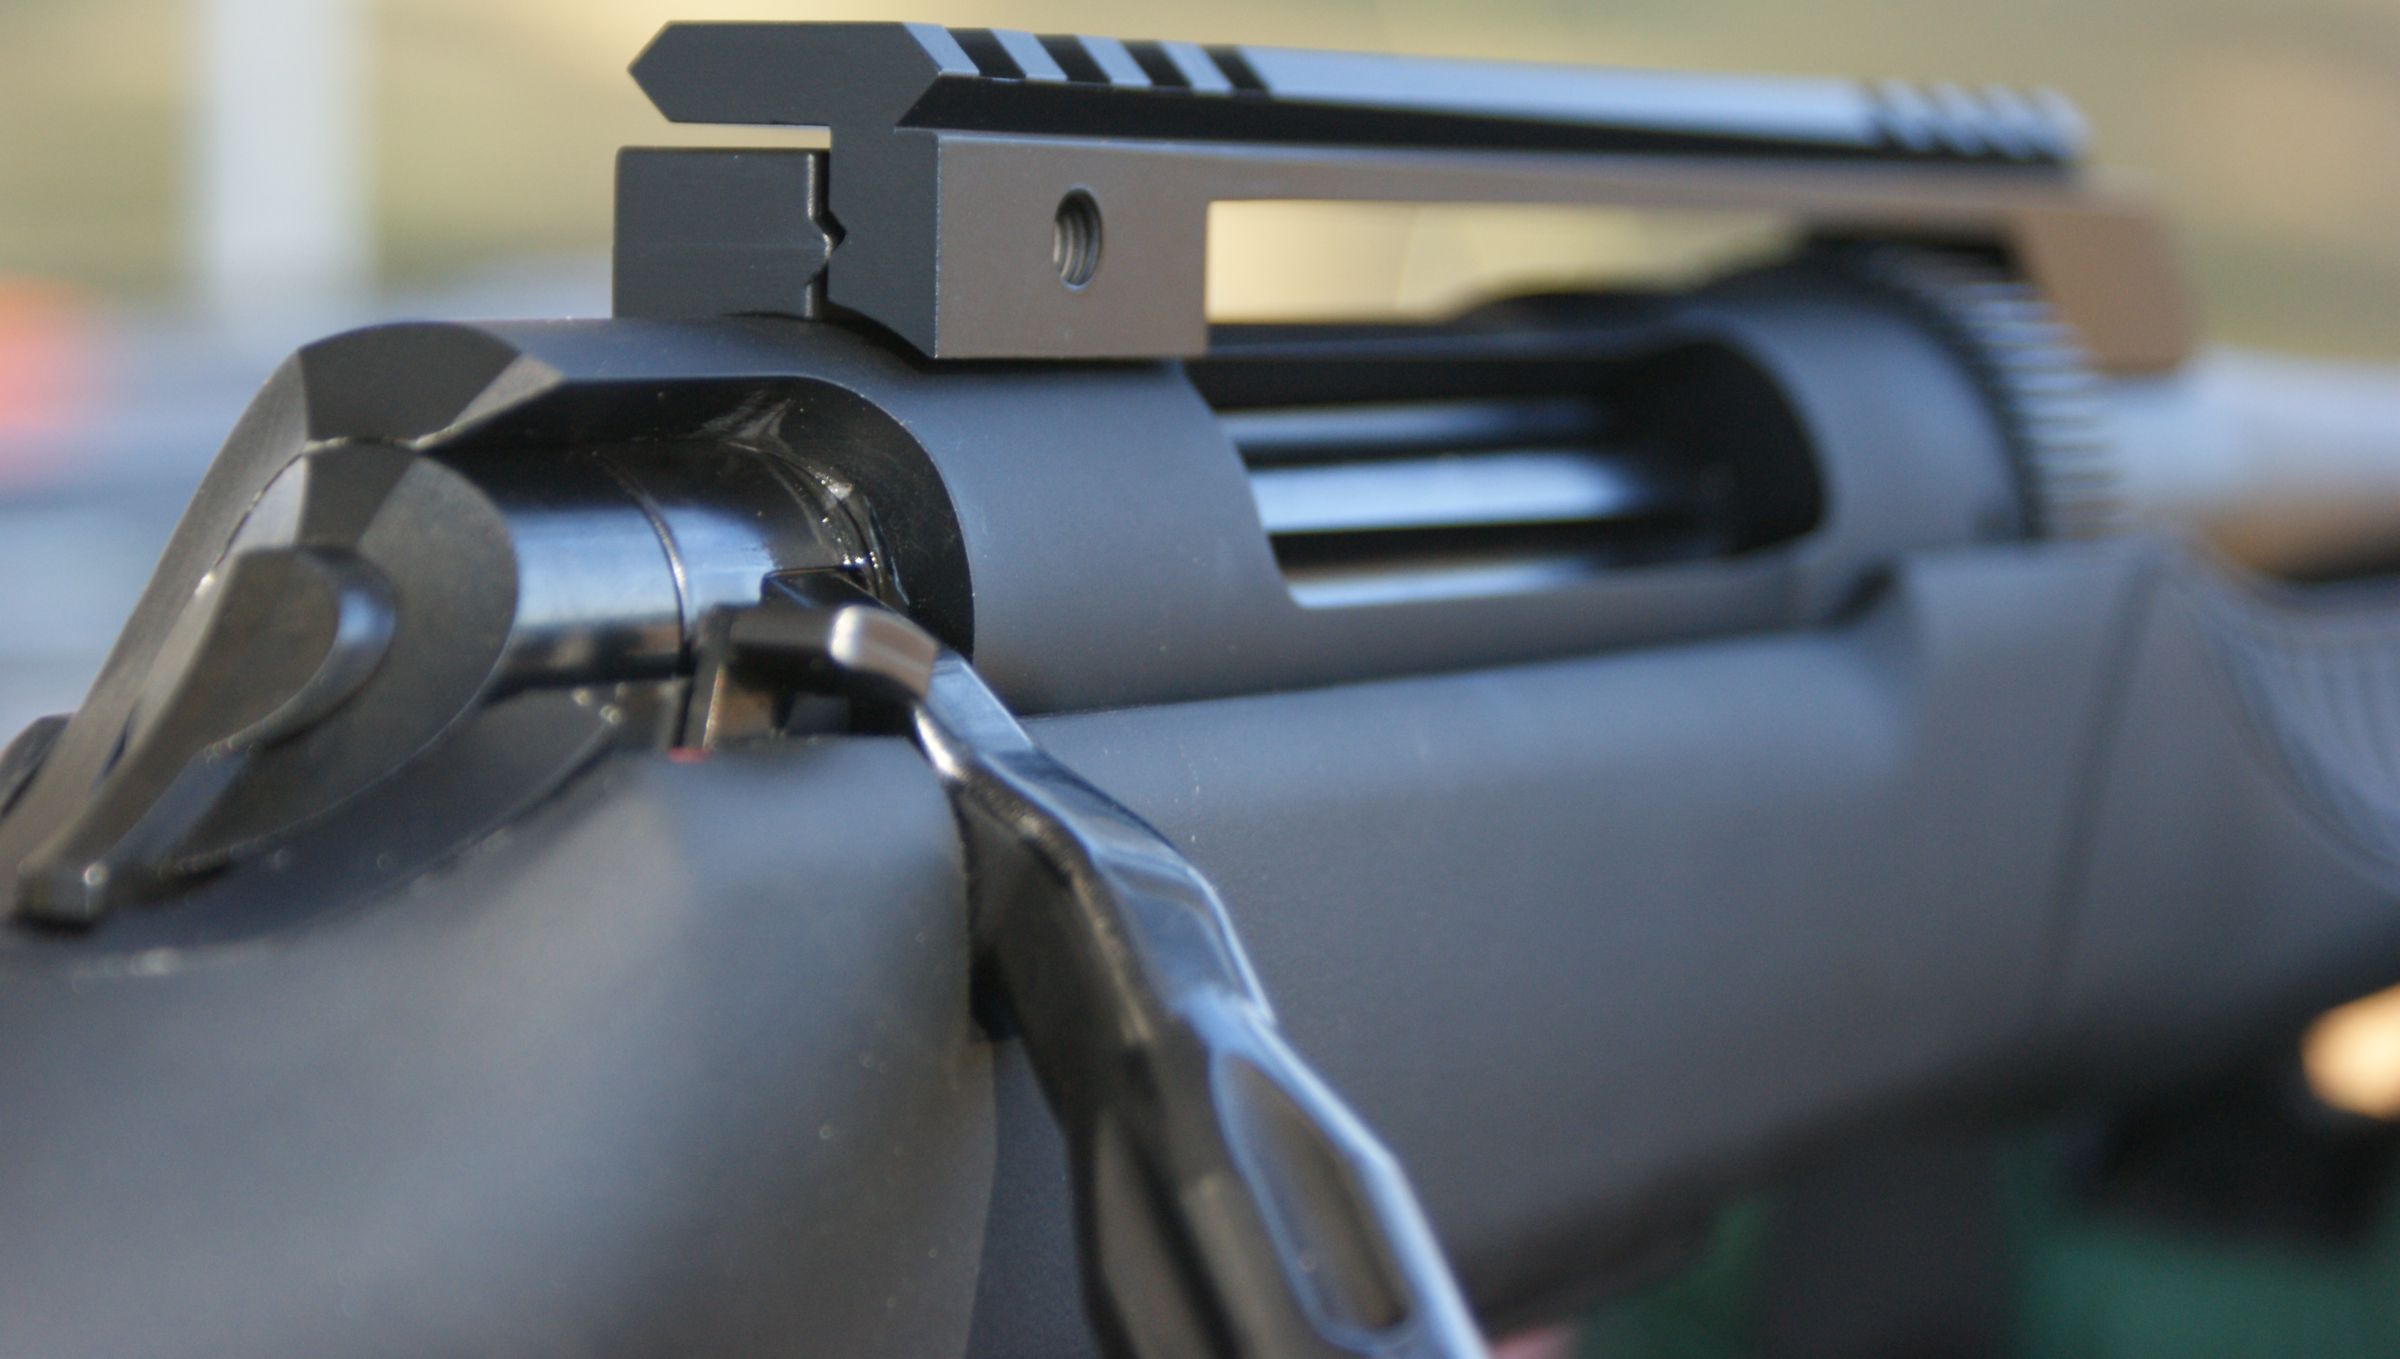
When you install the bridge mount, you attach the forward portion of the mount to the barrel. This leaves the rear of the mount beside the rear adapter mounted on your receiver. Notice in the photo that there is some vertical offset between the V-notch on the mount and adapter.
Figure 3
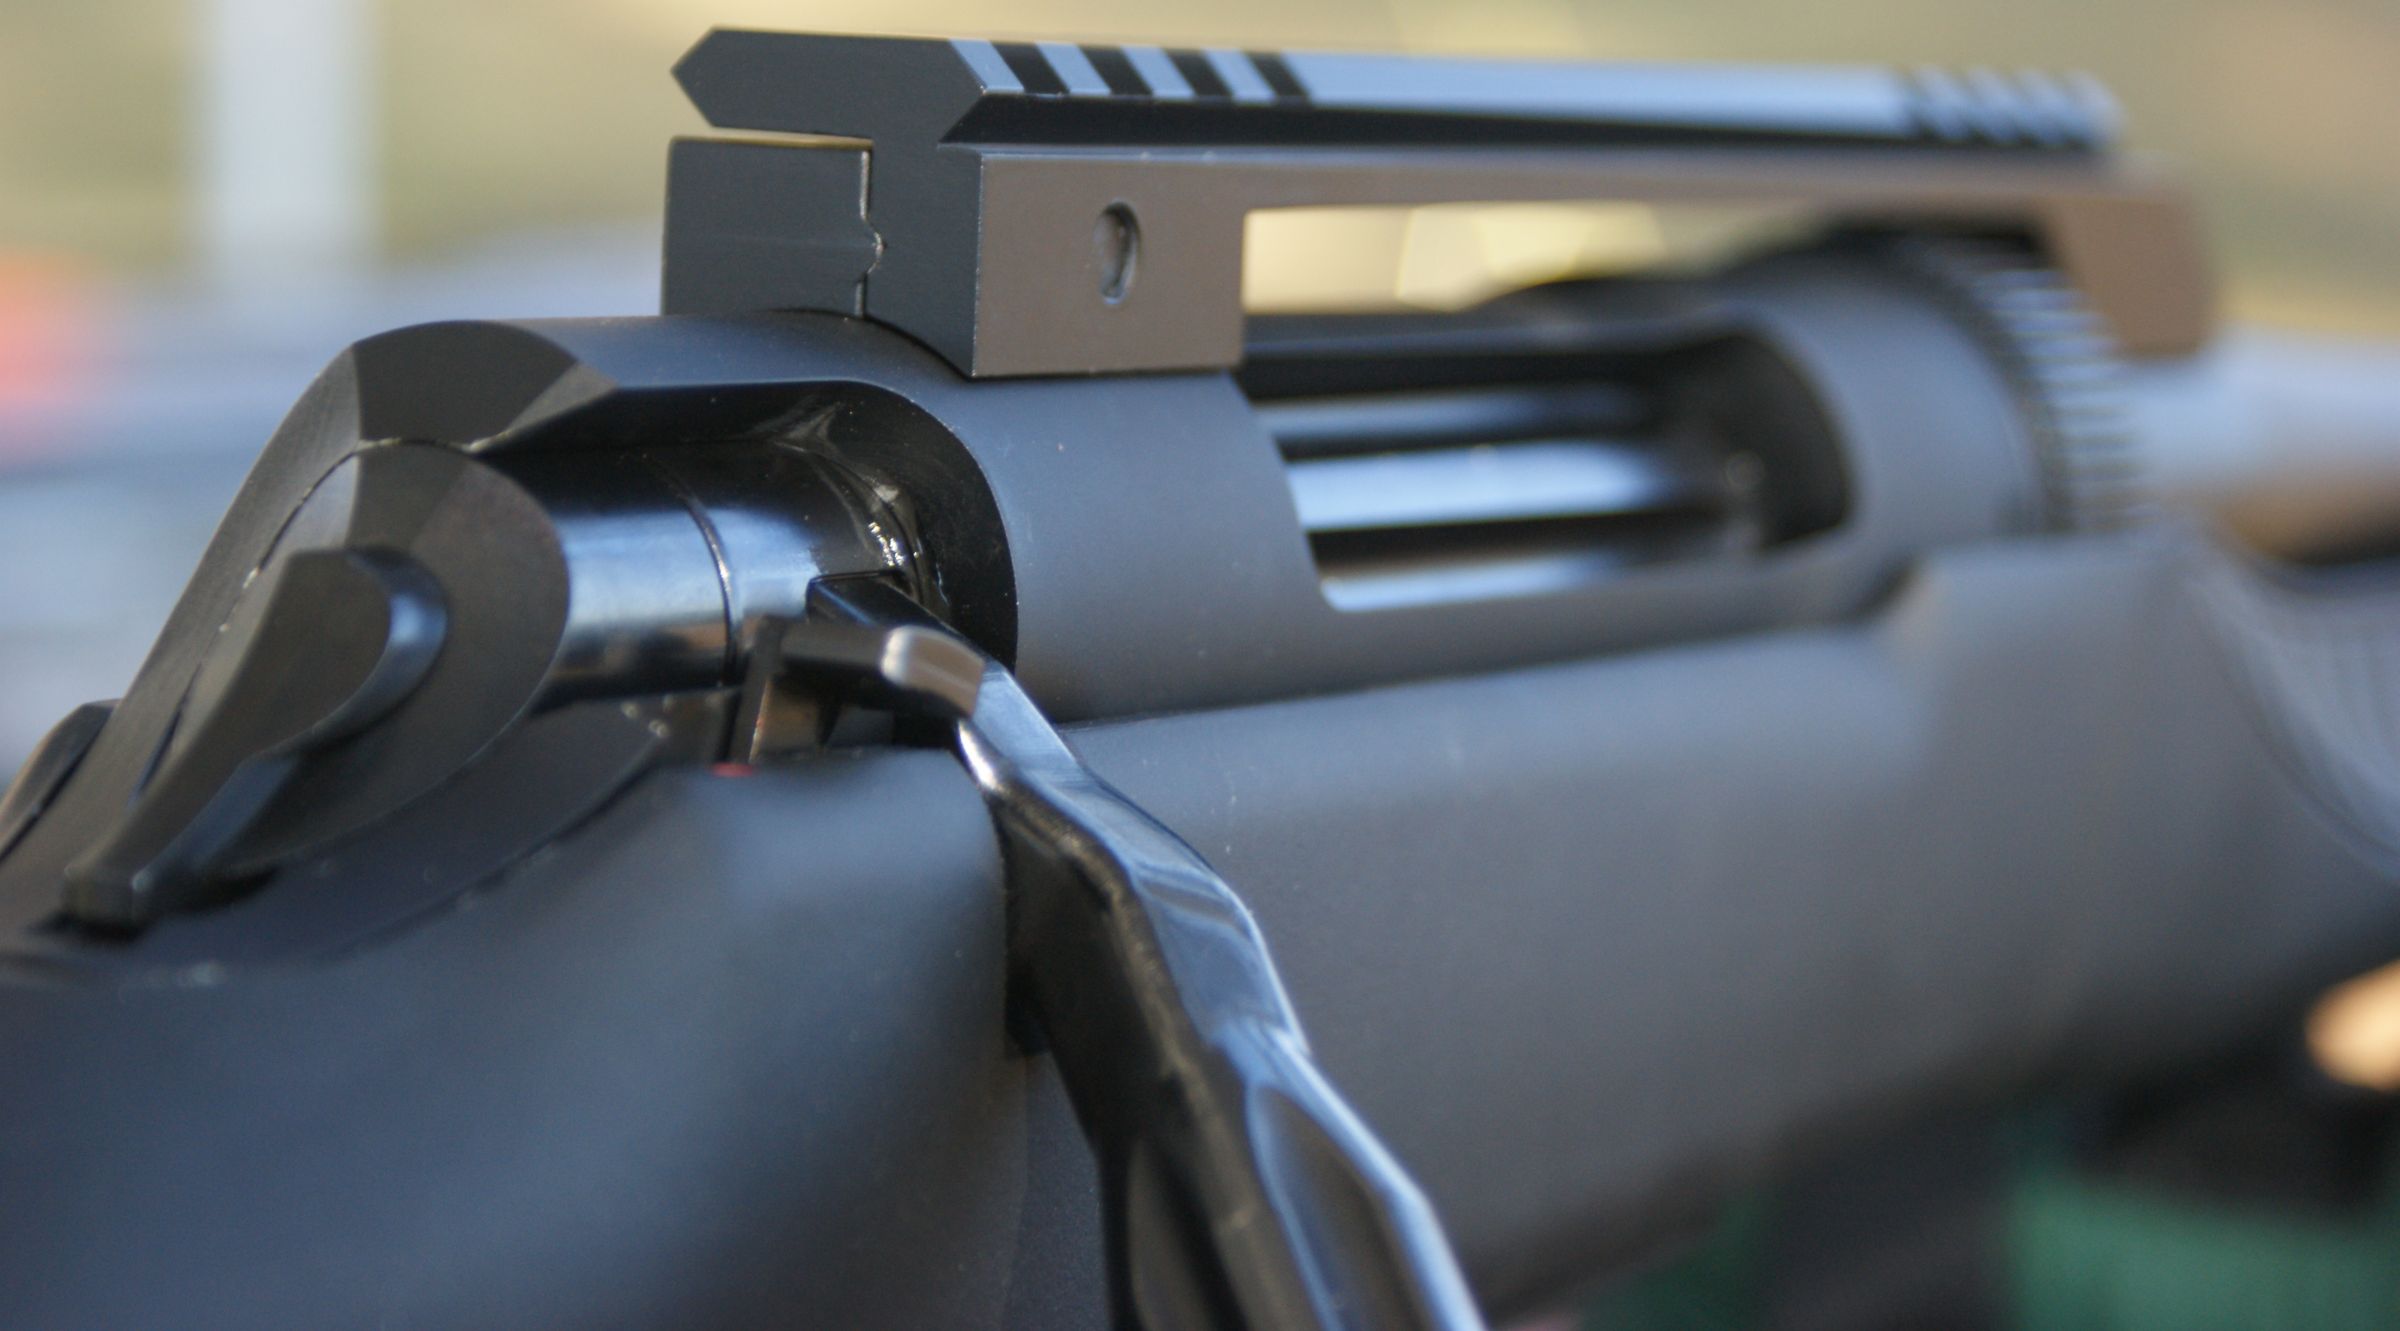
By pressing lightly on the rear of the bridge mount, I was able to get the horizontal attachment screw started and the mount centered in the V-notch as I tightened the horizontal screw. After seeing this, I will be honest and say I was a little skeptical about the repeatability of maintaining a zero with this mounting arrangement.
Figure 4
These next two photos give you a good look at a bridge mount installation. I used a set of Burris Medium Height XTR Xtreme Tactical Rings along with a forward Picatinny rail cap. I feel that I could have used a set of low height rings and achieved a slightly lower scope installation. T/C actually sells a set of 1" Low Sporter Rings for use with the bridge mount.
Figure
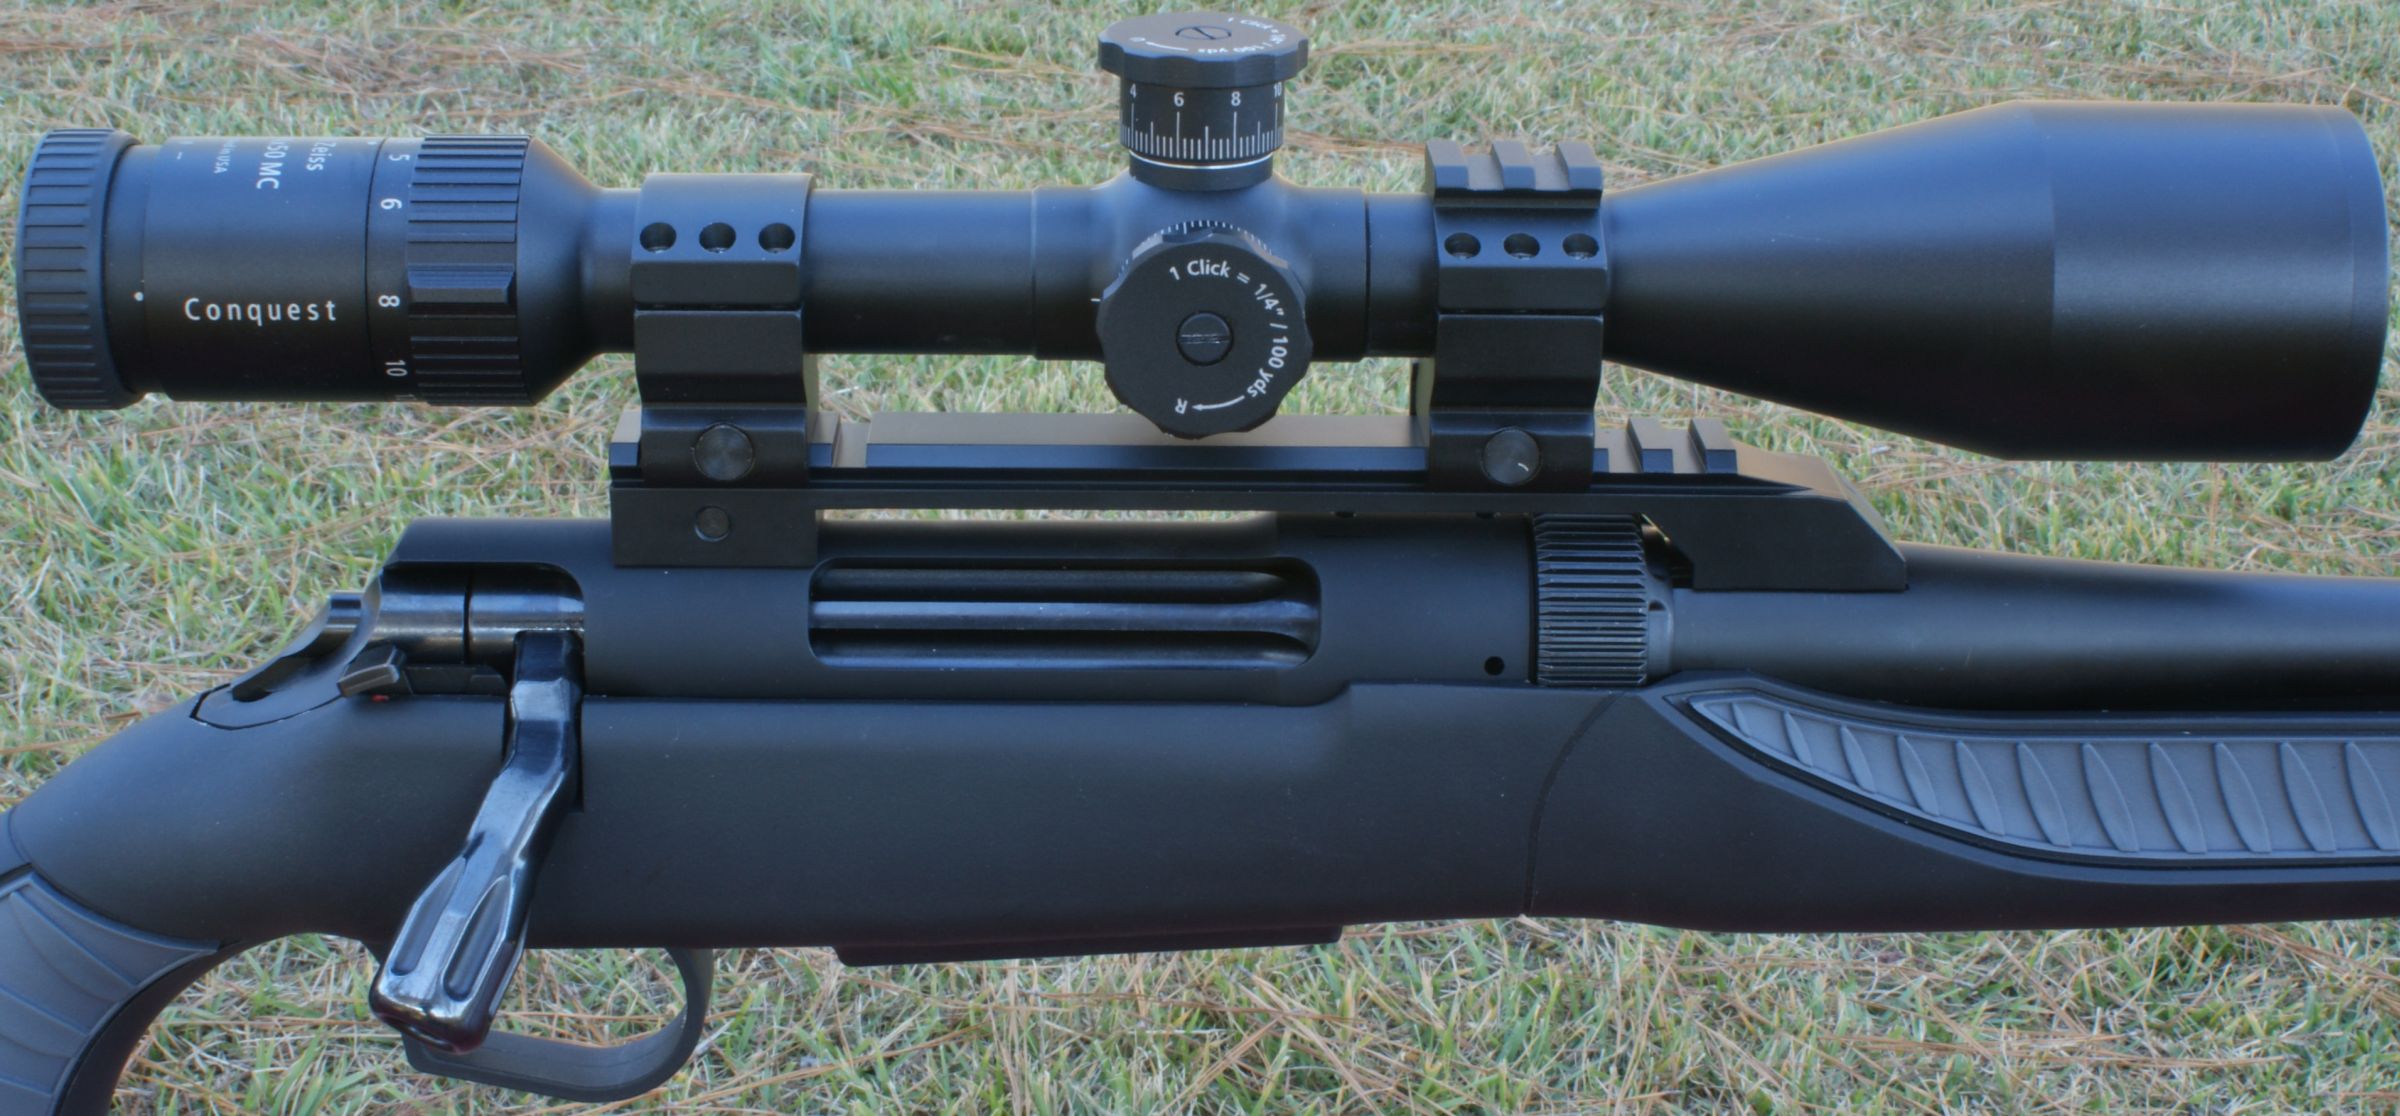
Figure 6

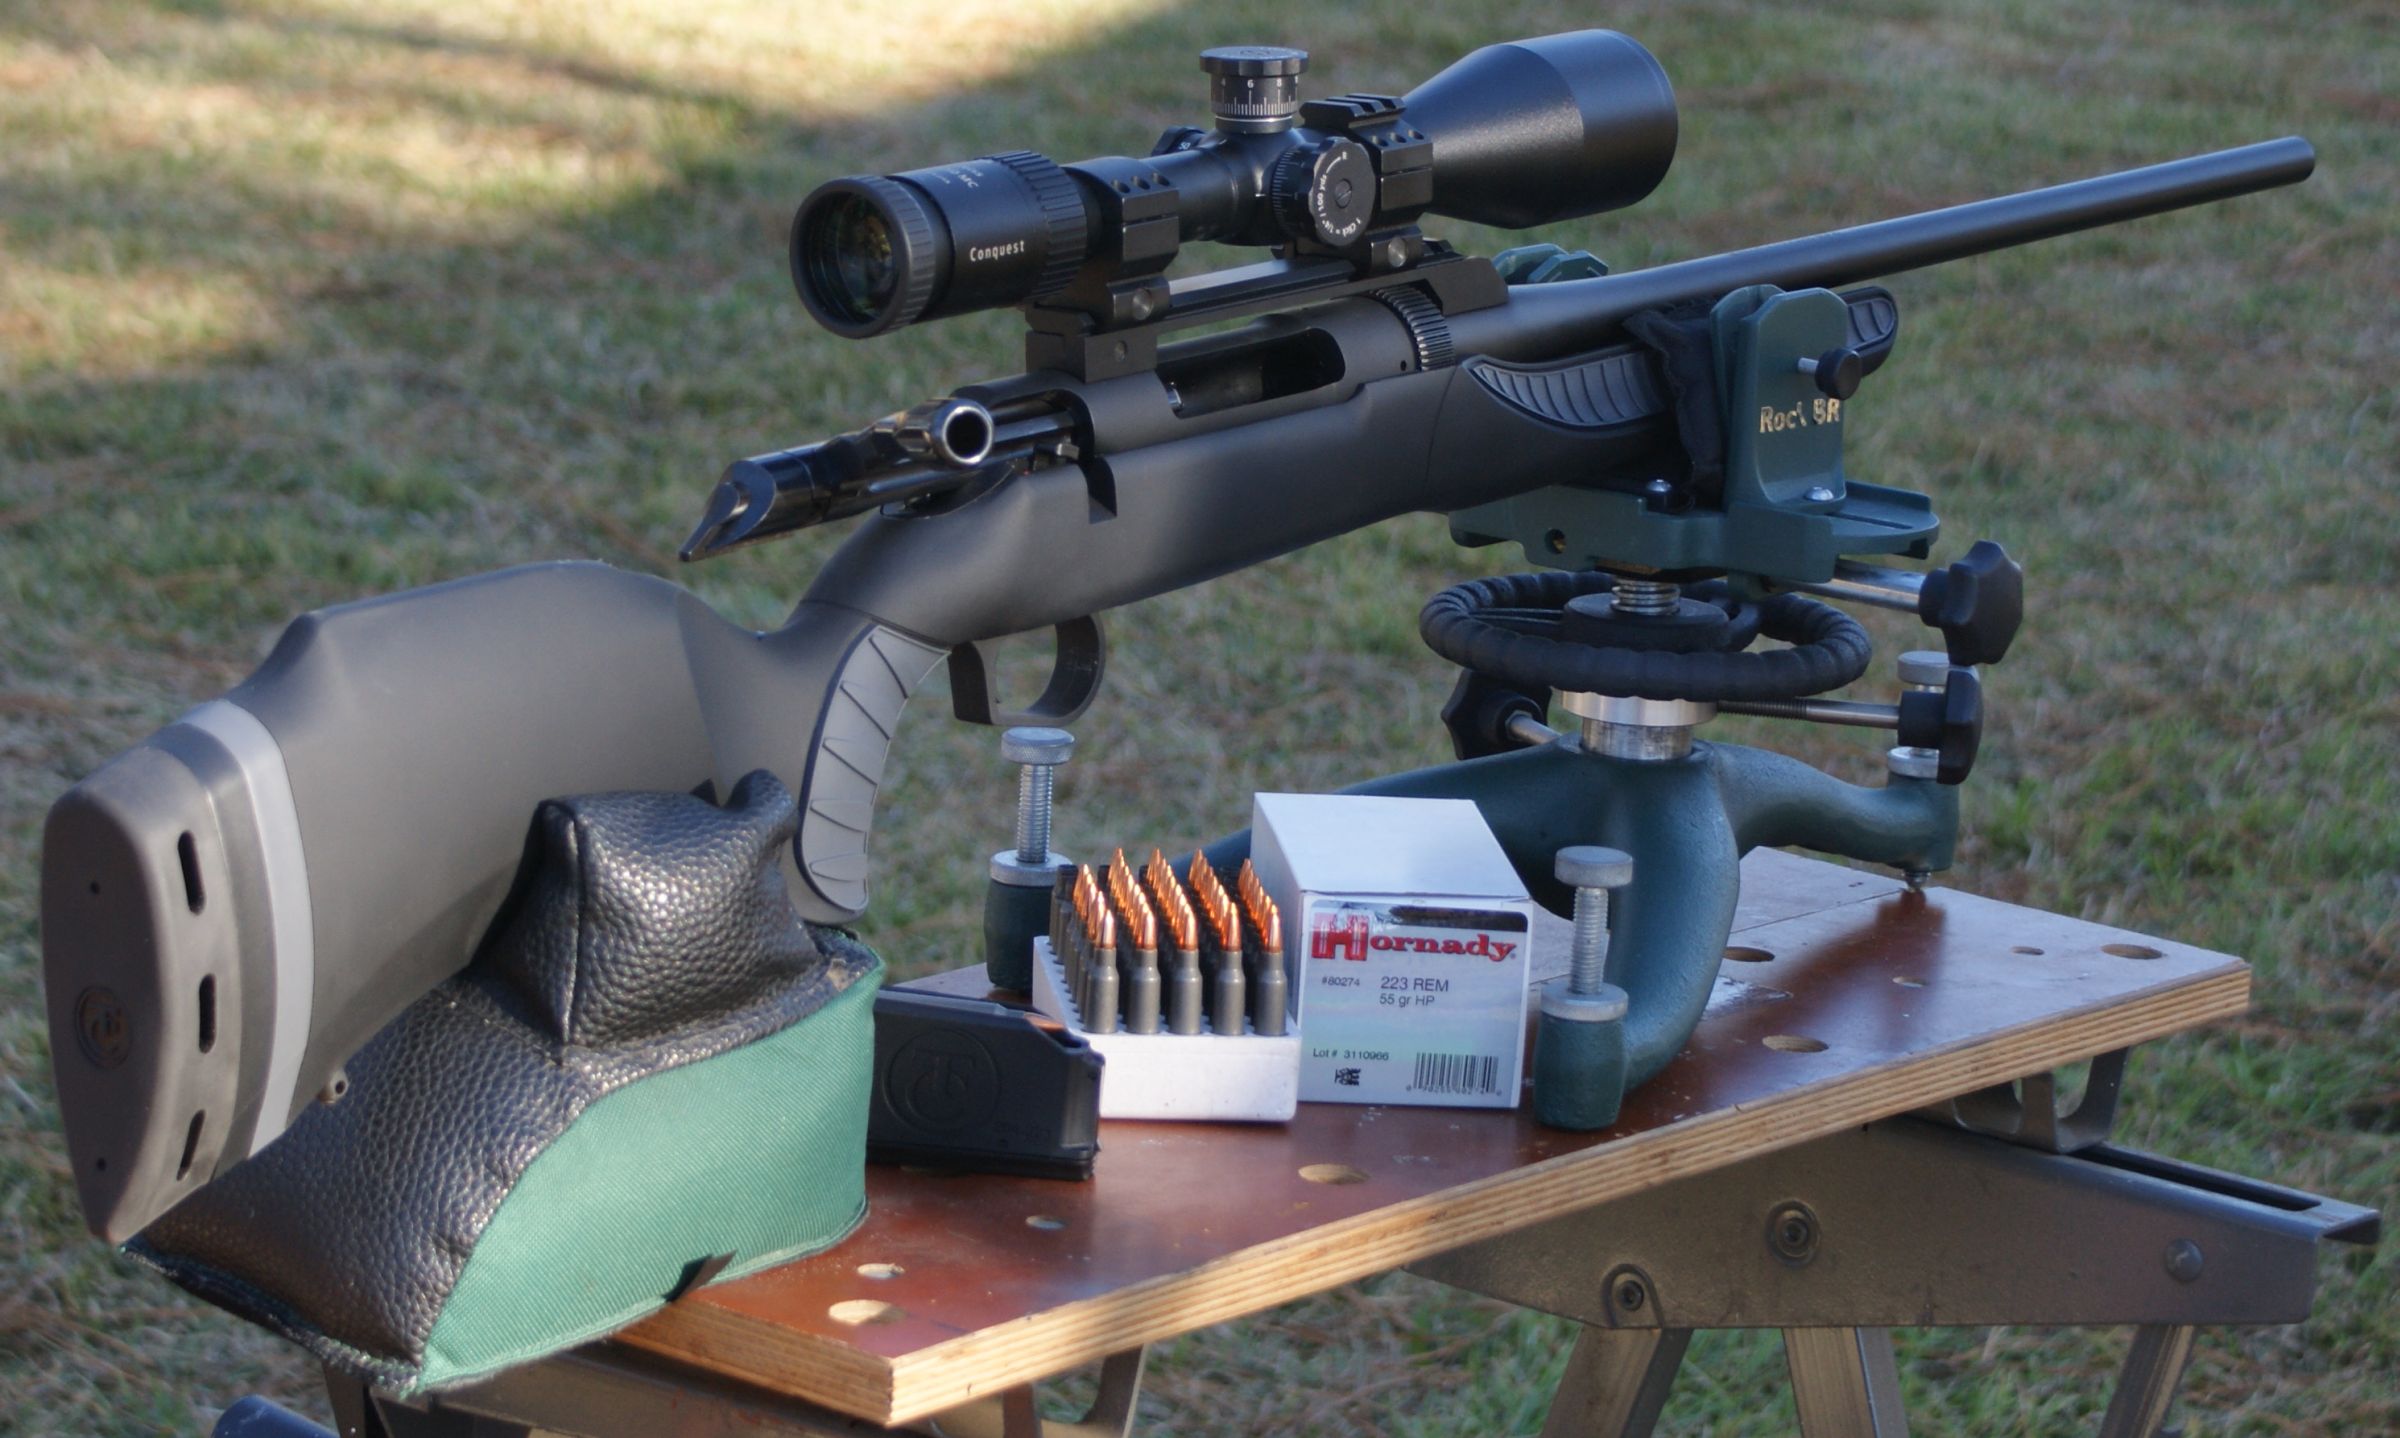
For my range testing, I setup on my Workmate portable bench and used a Caldwell Rock BR front rest and Caldwell Medium Height Rear Bag. Surprisingly, the Workmate actually makes a small, but sturdy shooting platform. At some point I will build my permanent shooting bench in hopes to achieve some slightly better groups, but until then, stomping the legs of the Workmate into the ground works pretty well.
Figure 7
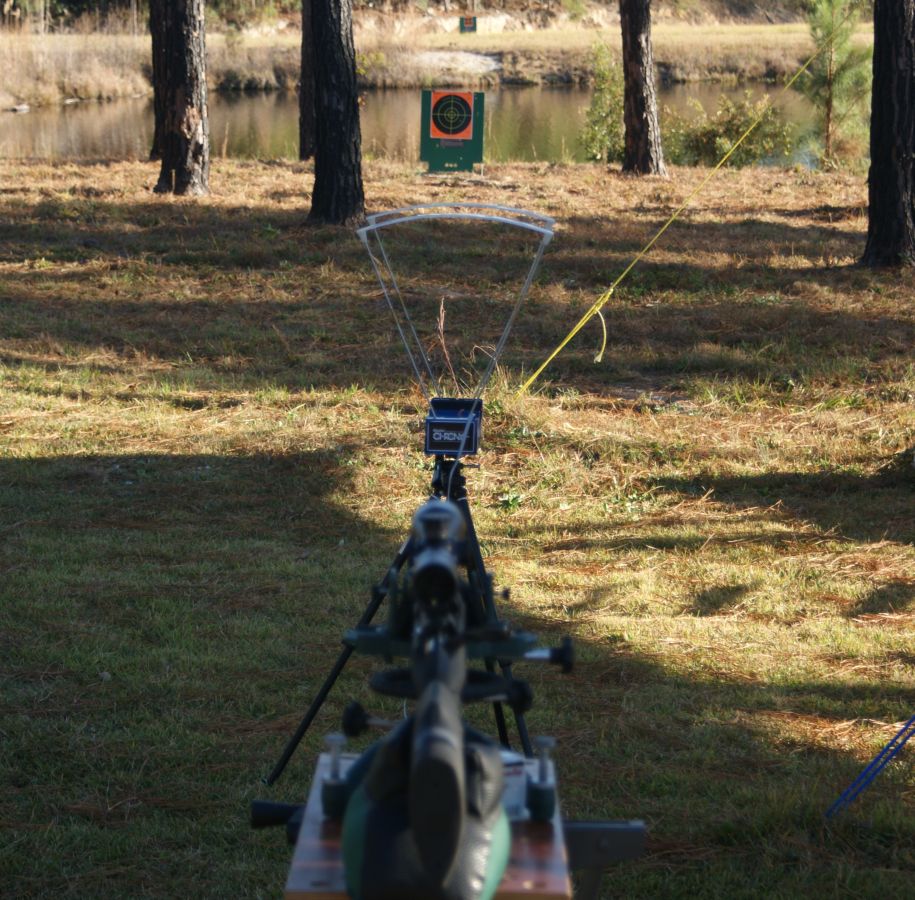
I started out initially bore sighting the scope and then getting a basic zero at a distance of 25 yards. After feeling good about this short range zero, I moved to shooting at the 100 yard targets and continued to tweak my zero. Also during this time, I got some chronograph data on the Hornady ammunition during this initial effort.
Figure 8
Once I had a basic zero on the rifle, I removed and reinstalled the barrel/mount/scope assembly between each of the 4 groups shown below to see if there would by any zero shifts in the groups. When shooting groups A and B, I was very impressed with how well the rifle was able to keep the zero. When I reassembled the rifle prior to shooting Group C, I actually changed the sequence of assembly and I believe the 3" shift to the right is a result of this change in reassembly. The difference during assembly was that I torqued the rear bridge mount prior to installing the receiver in the stock. For Group D, I used the same assembly steps as Groups A & B and achieved nearly the same point of impact. The average of these four groups was 0.97" with my smallest group being 0.26".
Figure 9
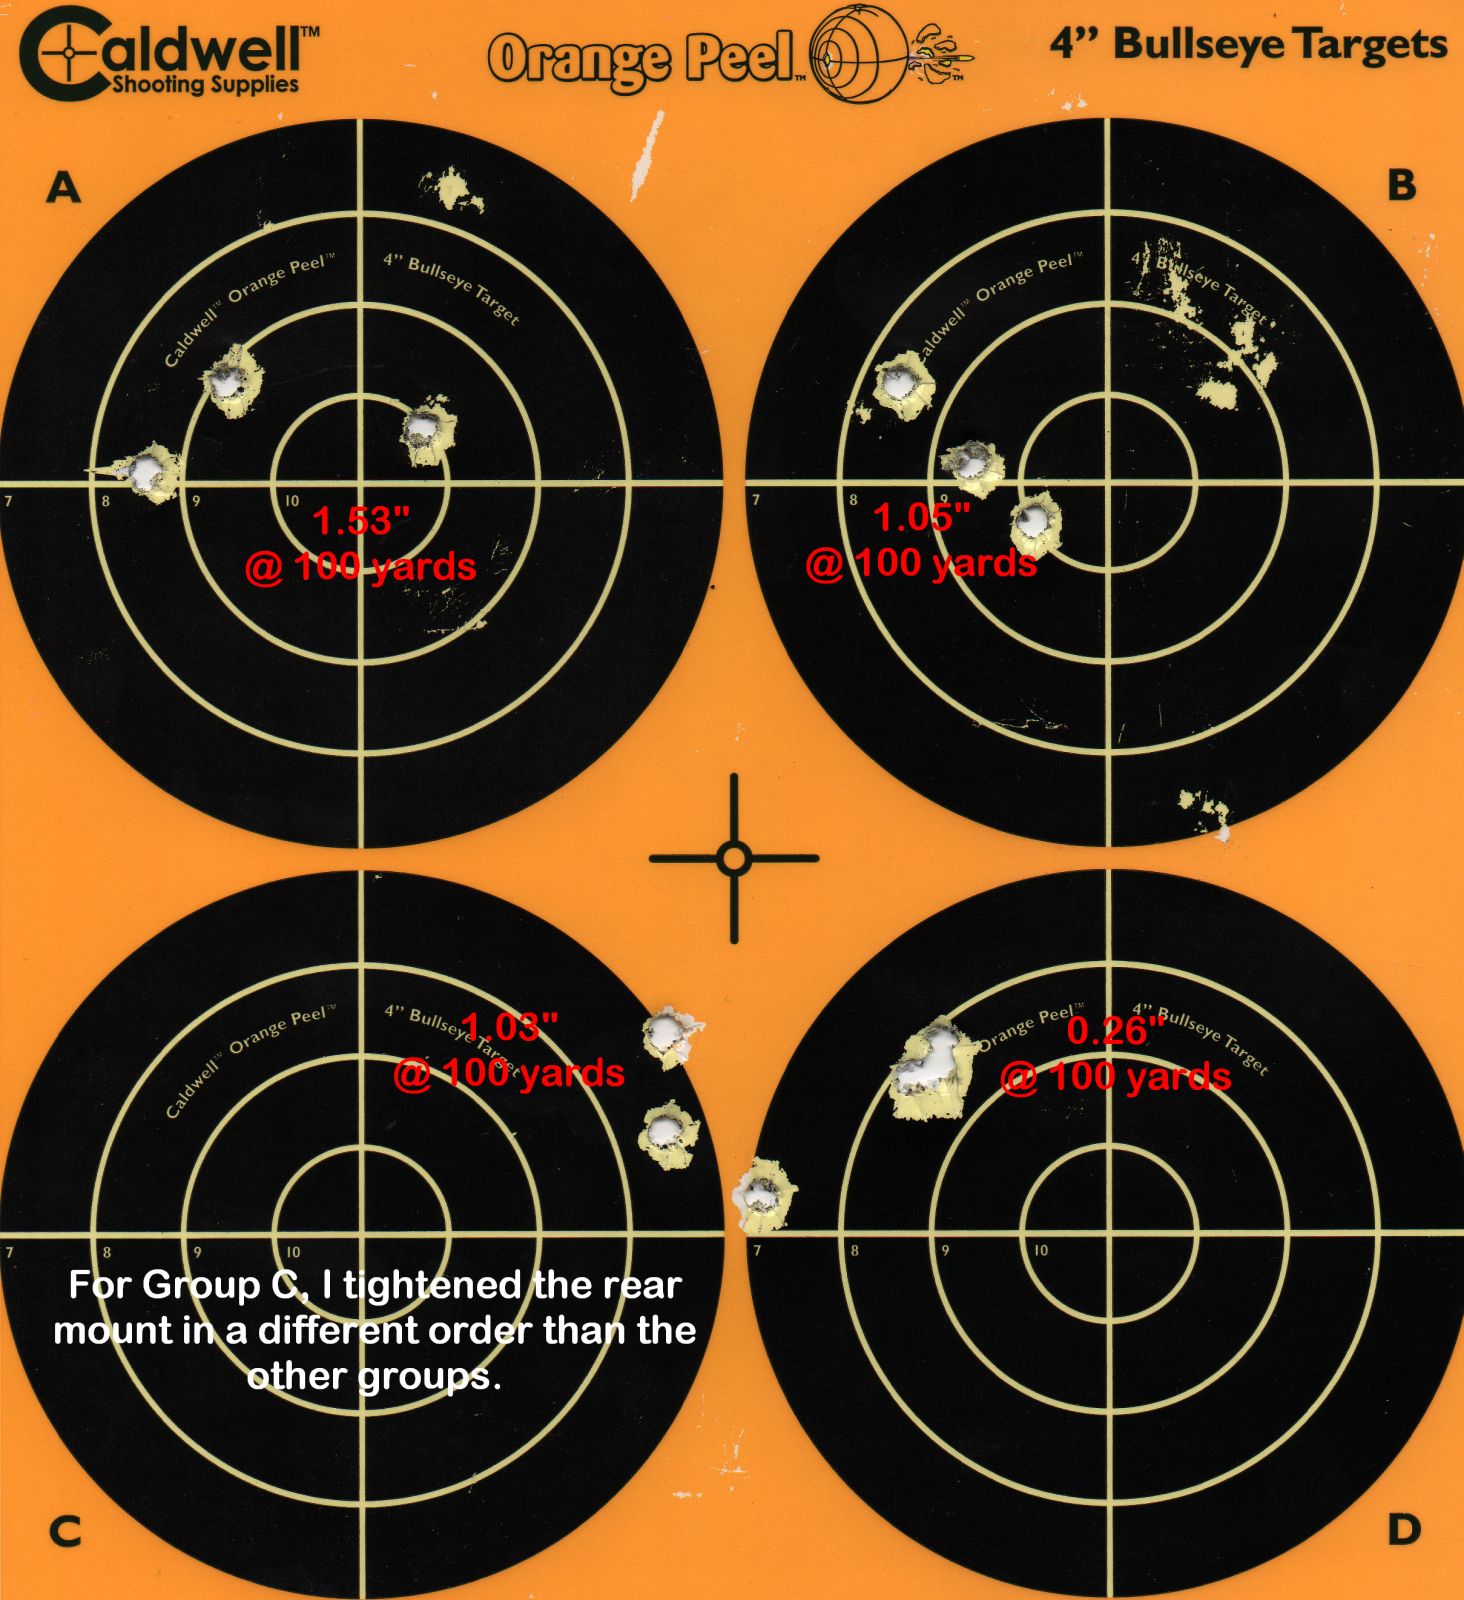
| Ammunition | Velocity (ft/sec) | 3-Shot Group Size (in) | |||
| Average | Std. Dev. | Max | Min | Avg | |
| Hornady 223 REM 55 GR HP STEEL MATCH™ | 3080 | 26 | 1.53 | 0.26 | 0.97 |
| Velocity based on 10 shots with chronograph located 10 feet in front of muzzle. | |||||
Thoughts
Thompson/Center states that there Dimension rifles are 1 MOA capable and I believe that these groups above are proof that the .223 Remington configuration I received meets this requirement. I shot several other groups with the same ammunition and my maximum and minimum group sizes happened to fall on the target shown above. In general, most of my groups were just over one inch, but I feel that is a result of the shooter (me) and not the rifle. I was impressed with how well the scope was able to hold zero using the LOC™ Bridge Scope Mount Base. There was less than 1 MOA shift in group centers for three of my four groups shown. I did have one group that did not match the other three, but in this case I intentionally decided to see if changing the order of assembly would cause a shift in impact. It did shift the point of impact, so I feel the key to using this bridge mount successfully will rely on the user always following the same steps during reassembly. If you plan to use the bridge mount, I suggest you spend some time studying the repeatability of your shots when removing and reinstalling your barrel and scope assembly using the bridge mount.
For more detailed photos and commentary, make sure you check out the other parts of this review and feel free to leave comments on my Reader's Comments page. The following links are provided to help you see other parts of this review.
- Thompson/Center Dimension Rifle Review: Part 1 - Introduction, Specifications and Summary
- Thompson/Center Dimension Rifle Review: Part 2 - What's in the Box
- Thompson/Center Dimension Rifle Review: Part 3 - External and Operational Features
- Thompson/Center Dimension Rifle Review: Part 4 - Disassembly and Changing Calibers
- Thompson/Center Dimension Rifle Review: Part 5 - Internal Features
- Thompson/Center Dimension Rifle Review: Part 6 - Range Testing LOC™ Bridge Scope Mount Base (this page)
- Thompson/Center Dimension Rifle Review: Part 7 - Range Test
Or
If you would like to be notified about future Gunsumer Reports reviews via Facebook, make sure "You Like This" by clicking the Facebook "Like" button at the bottom or top of this page. If it already says "You Like This" beside the button, clicking it again will uncheck the "Like" status and you will not be notified.
| Share on Facebook | |
© 2010, 2011, 2012, 2013, 2014, 2015, 2016, 2017, 2018, 2019, 2020, 2021, 2022, 2023 & 2024 Gunsumer Reports™, All rights reserved.
FTC Disclosure