|
|
Gunsumer Reports TM Providing Detailed Objective Reviews for Firearms and Firearm Accessories |
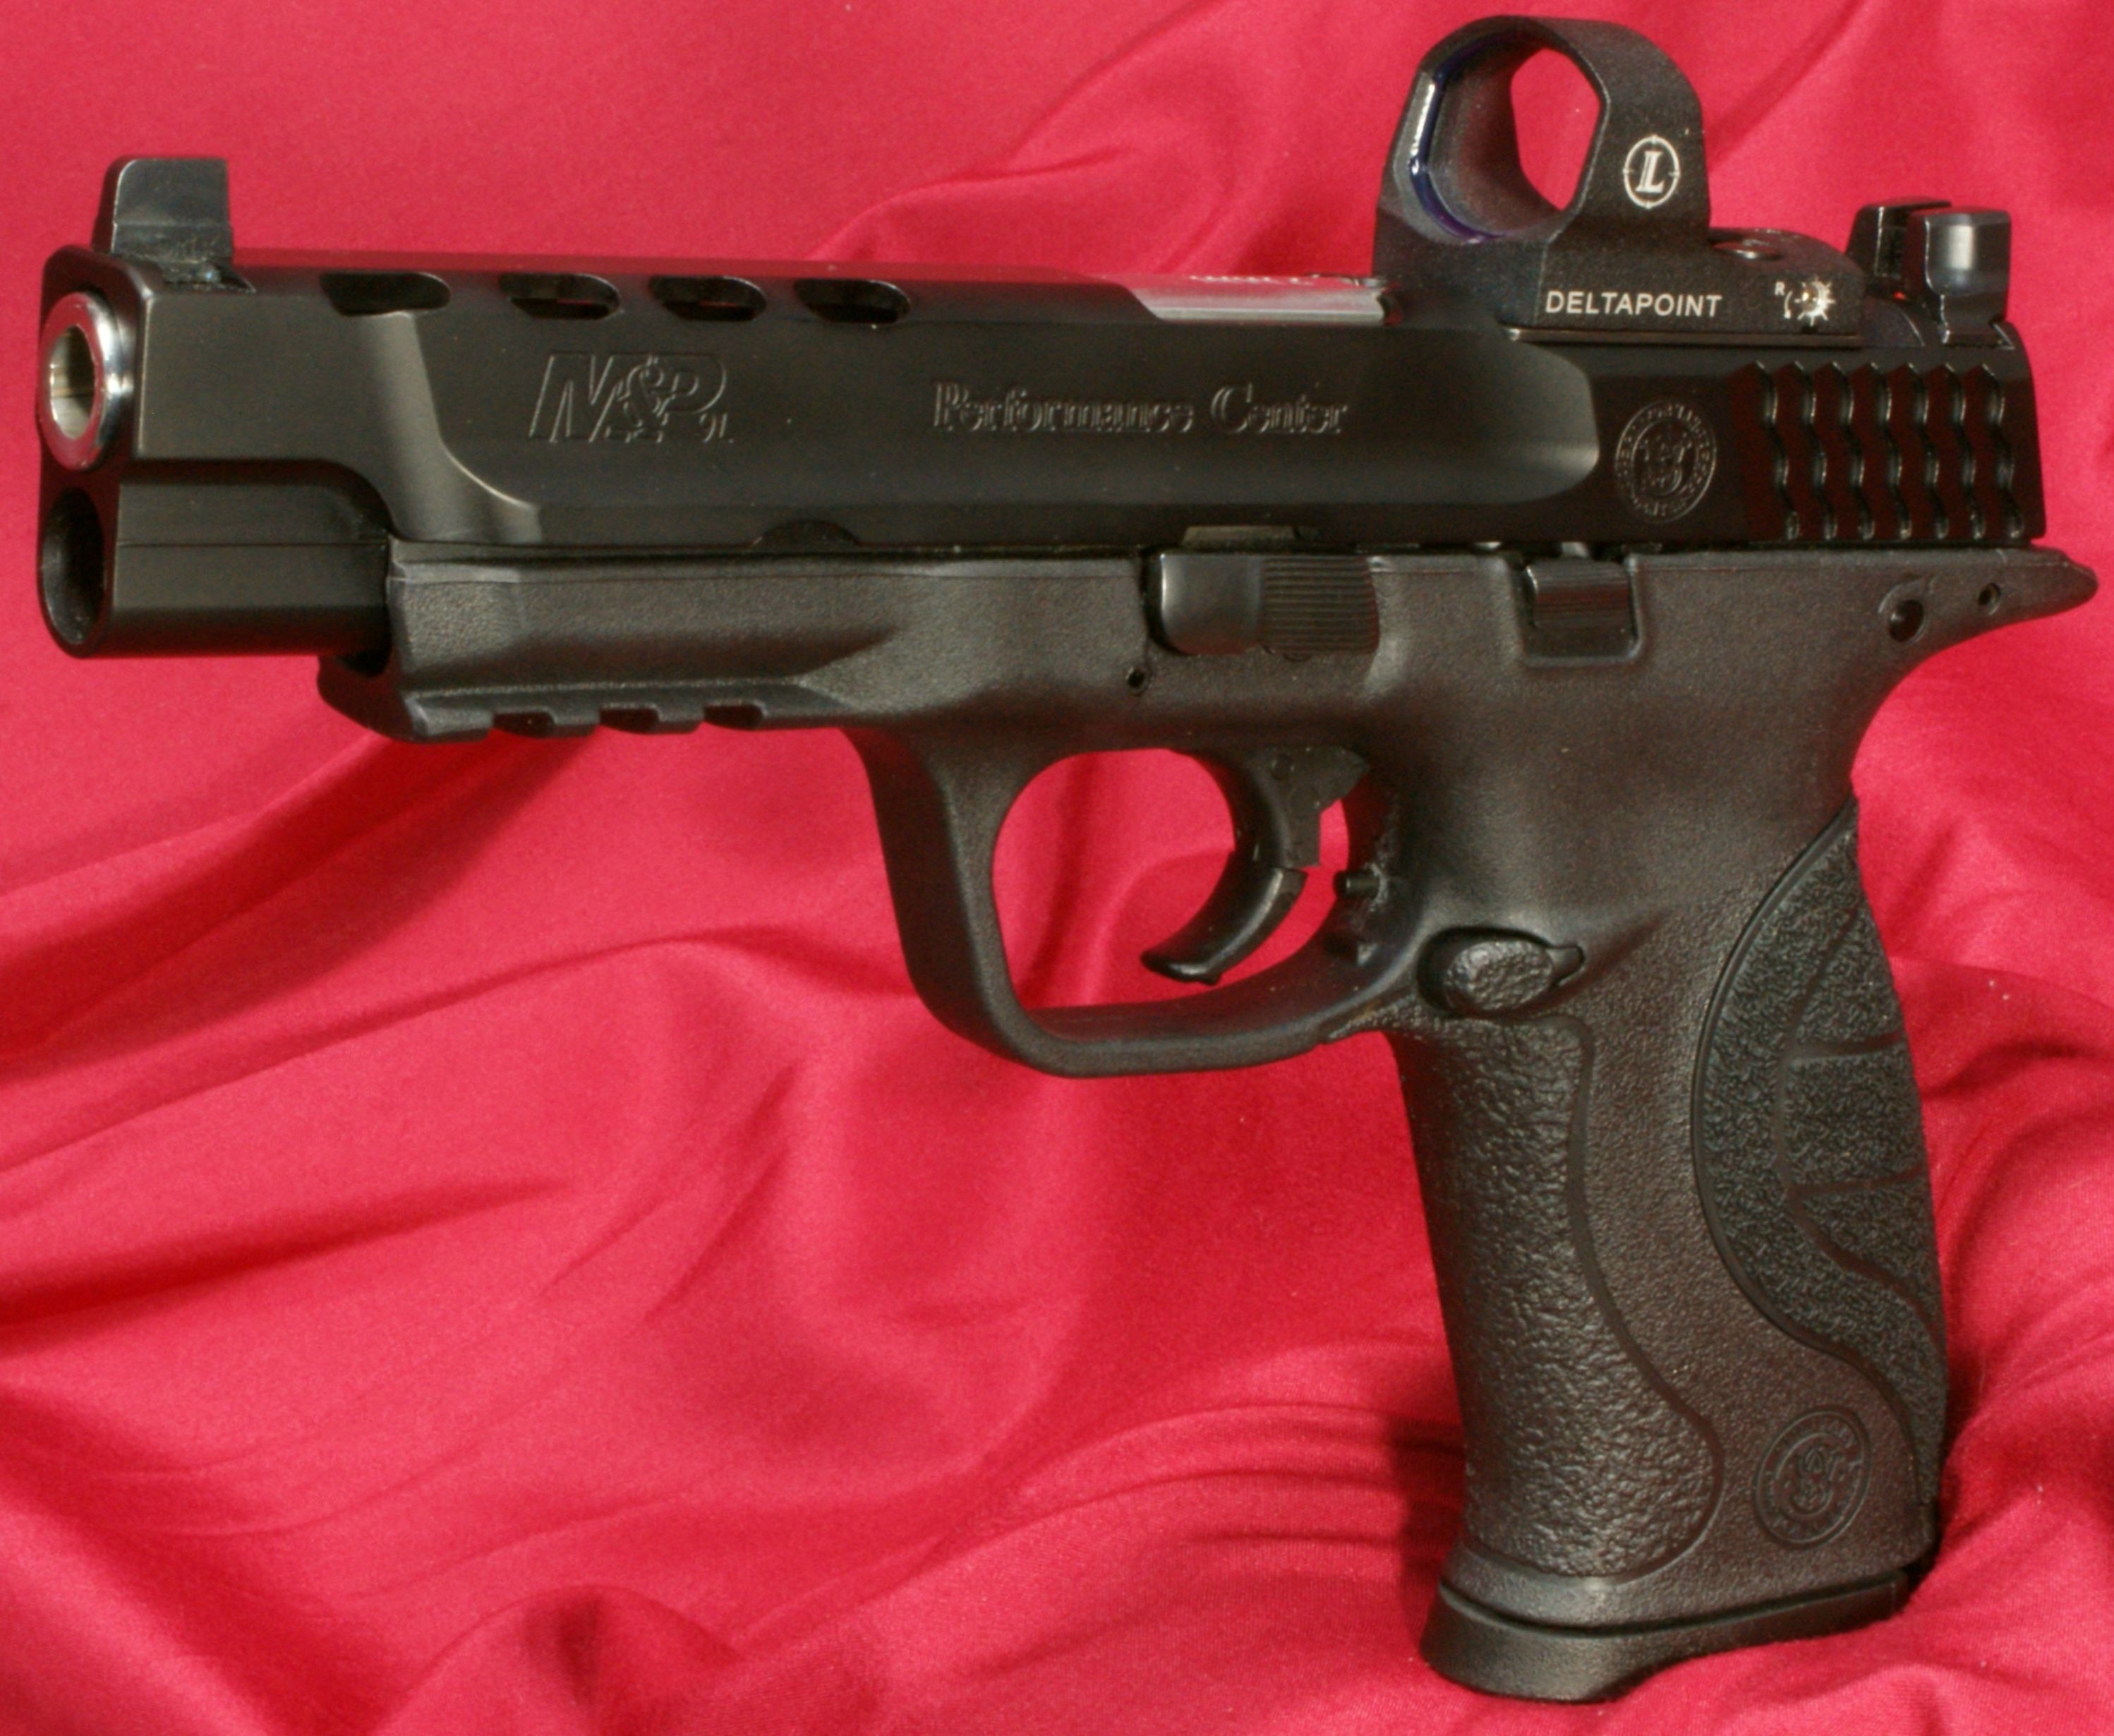
Smith & Wesson M&P®9
Performance Center® Ported Pistol Review
Part 4 - Disassembly & Internal Features
June 5, 2015
In this part of my Smith & Wesson M&P9 Performance Center Ported Pistol Review, I take a close look at disassembly of this pistol along with giving you a look at some of the internal features. Even though I show disassembly, you should always consider the manufacturer's Instruction Manual as the official source for information when working with your firearms. Their instruction manual will include many more safety related comments that are crucial to safe handling of their firearms.
Disassembly
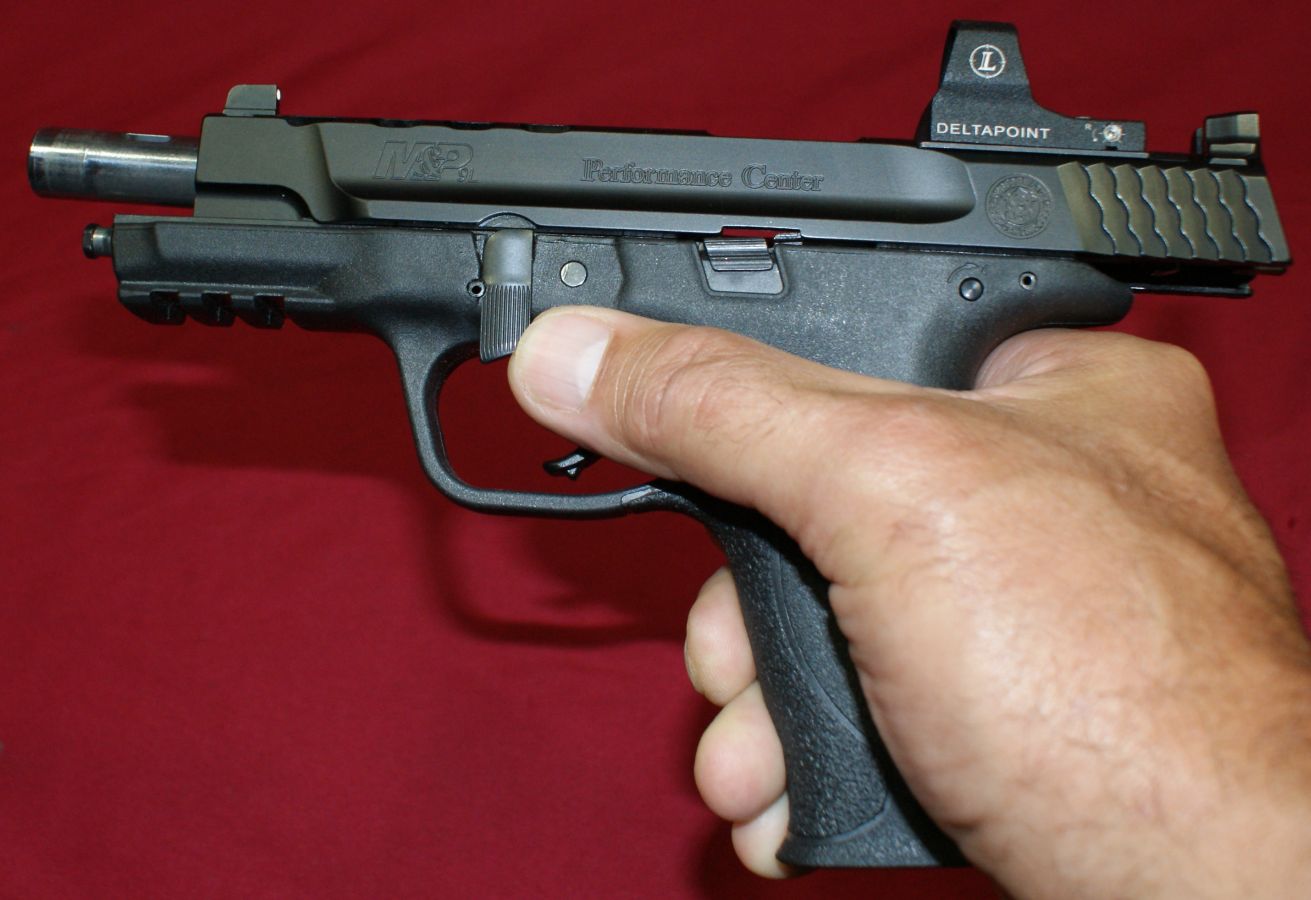
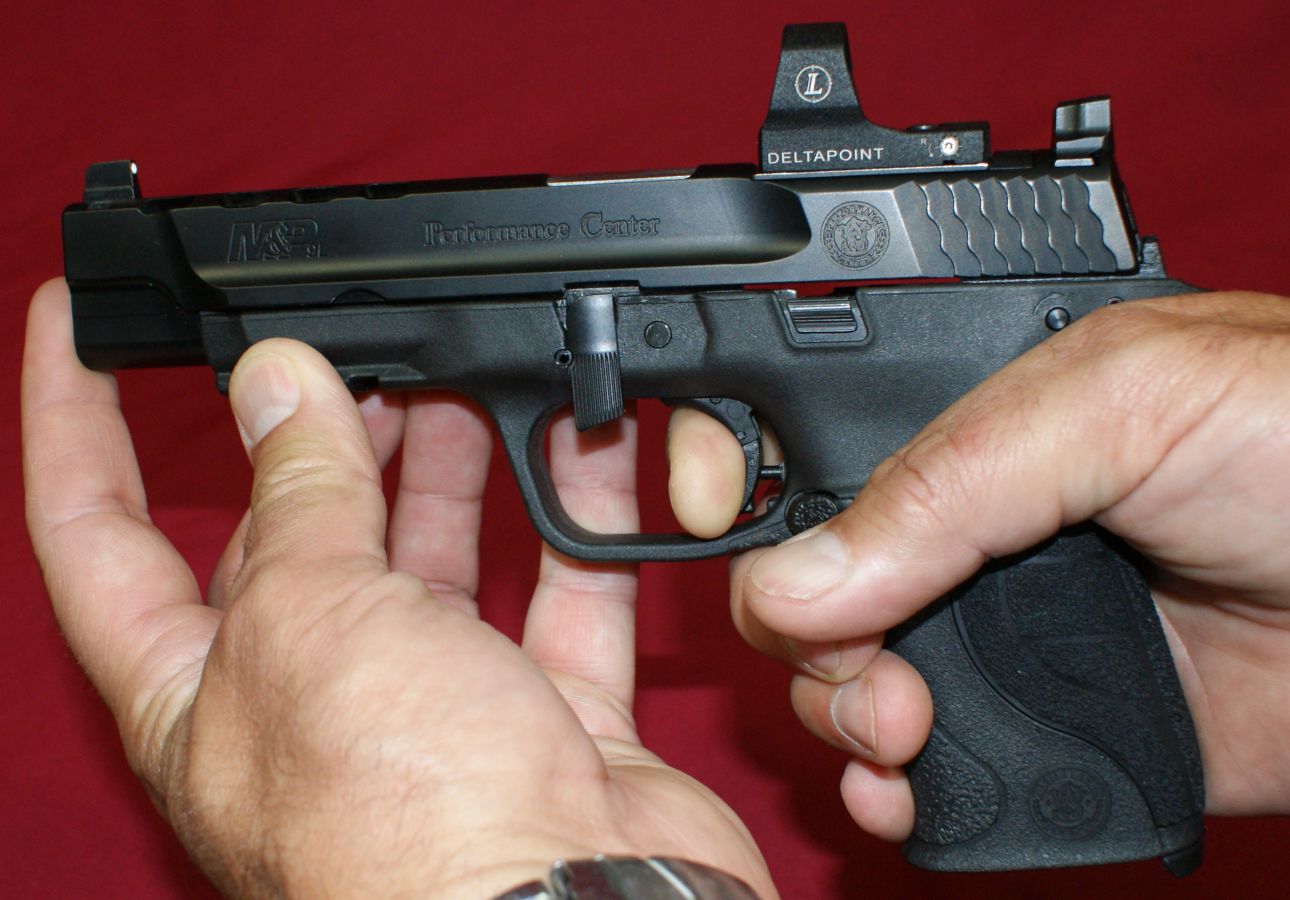
Step 1 - Safety, Remove Magazine, Lock Slide Open
The first step is always to ensure the firearm is unloaded with no cartridge in the chamber and the magazine is removed. After that, you will lock the slide to the rear.
Figure 1

Step 2 - Rotate Takedown Lever
With the slide lock open, rotate the takedown lever to the position shown below.
Figure 2
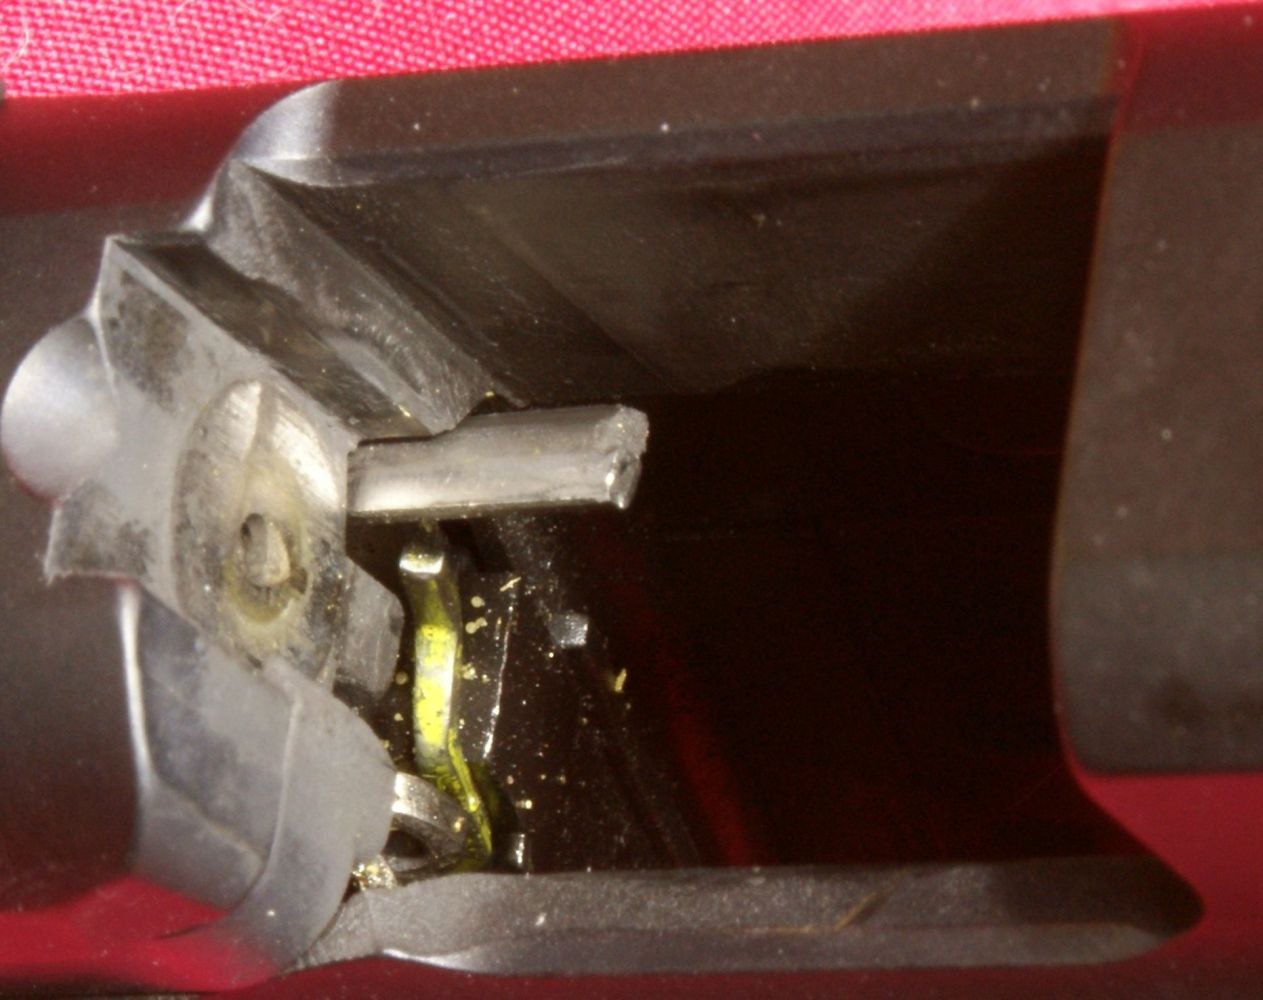
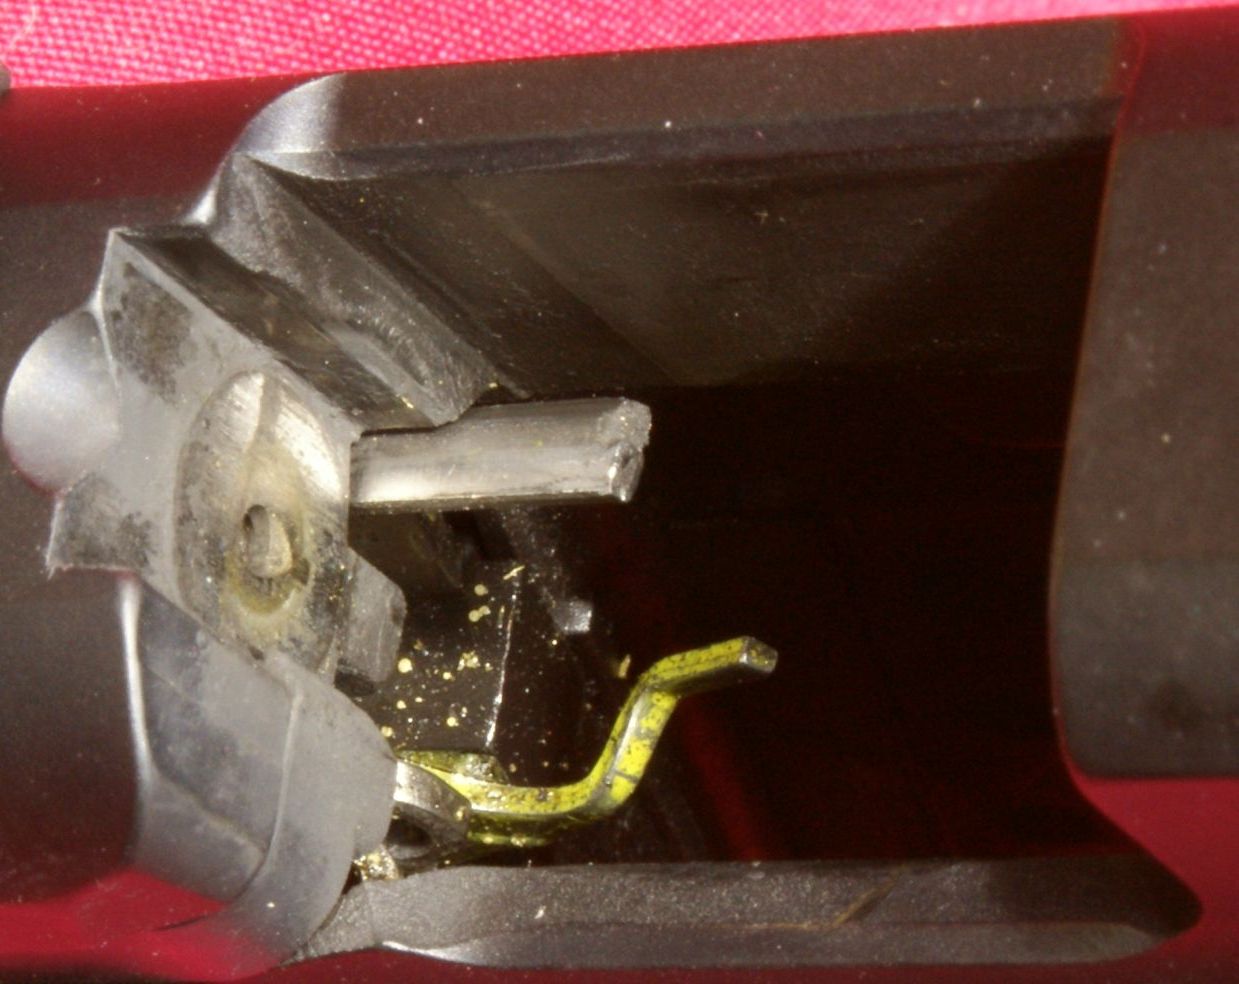
Step 3 - Lower Sear
There are actually two different ways to lower the sear. The instruction manual states one method in which you push the sear deactivation lever forward and down into the magazine well. The sear deactivation lever is the yellow bent bar shown below. The manual also states you can use the palmswell grip pin as a tool to flip this deactivation lever down. I used a small screw driver that I had handy. With this lever in the down position, the sear will drop below the striker mating surface so that the sear is out of the way for removing the slide.
Figure 3
Figure 4
Another way to do this is ignore the sear deactivation lever and lower the slide. With the slide lowered, you can pull the trigger (always make sure the pistol is unloaded and pointed in a safe direction). Pulling the trigger will allow the sear to release the striker and the slide assembly will shift forward. Make sure you have your finger positioned to prevent the slide from potentially shifting forward and sliding off the frame and hitting the floor if the pistil was pointed in a down direction.
Figure 5
Step 4 - Remove Slide Assembly
The slide assembly can now be pushed forward off the frame assembly.
Figure 6
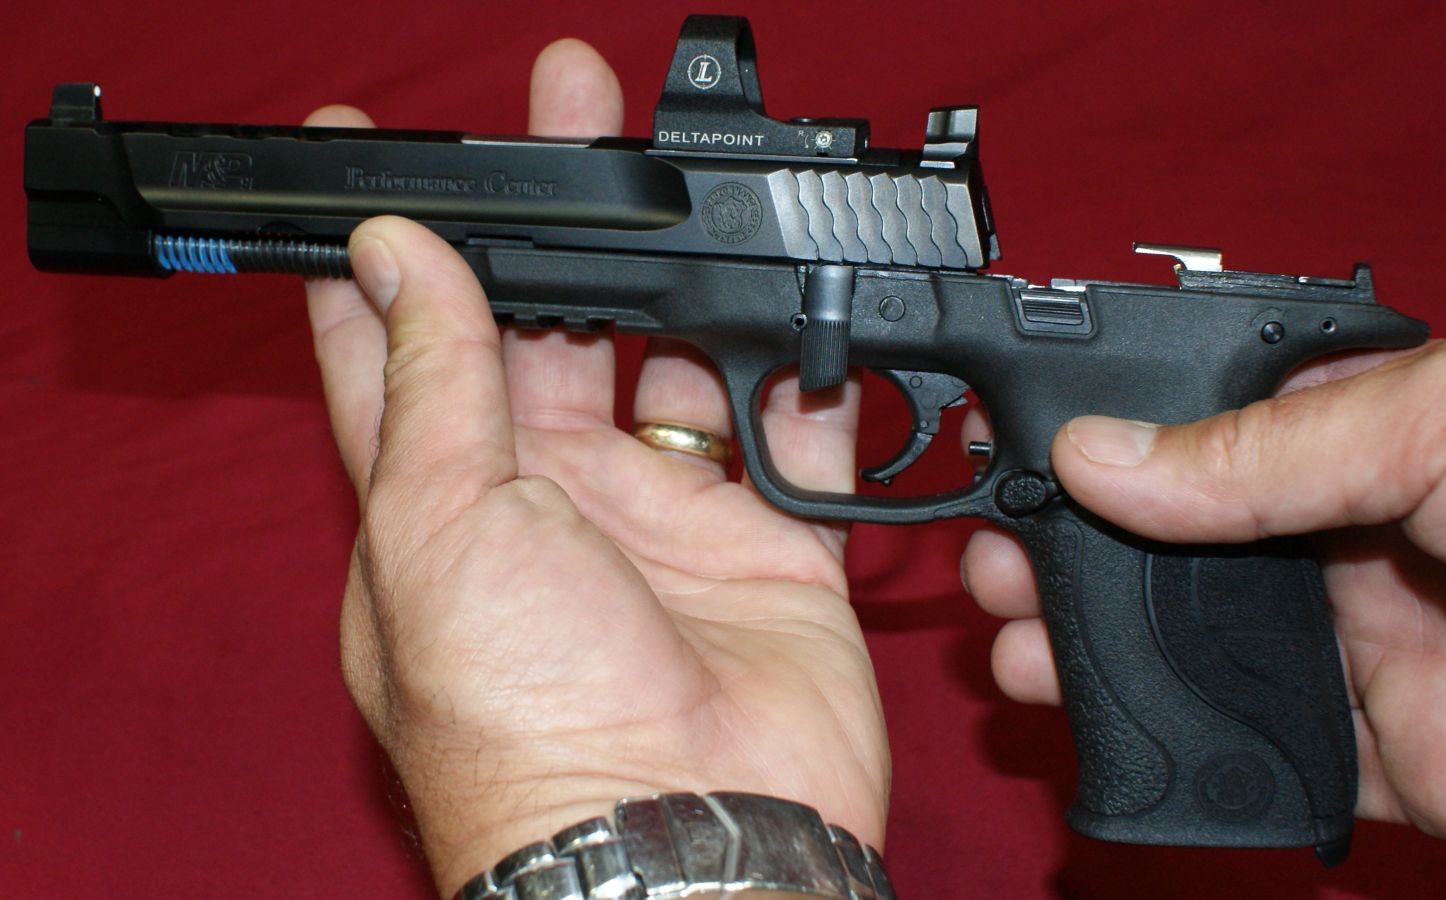
Figure 7
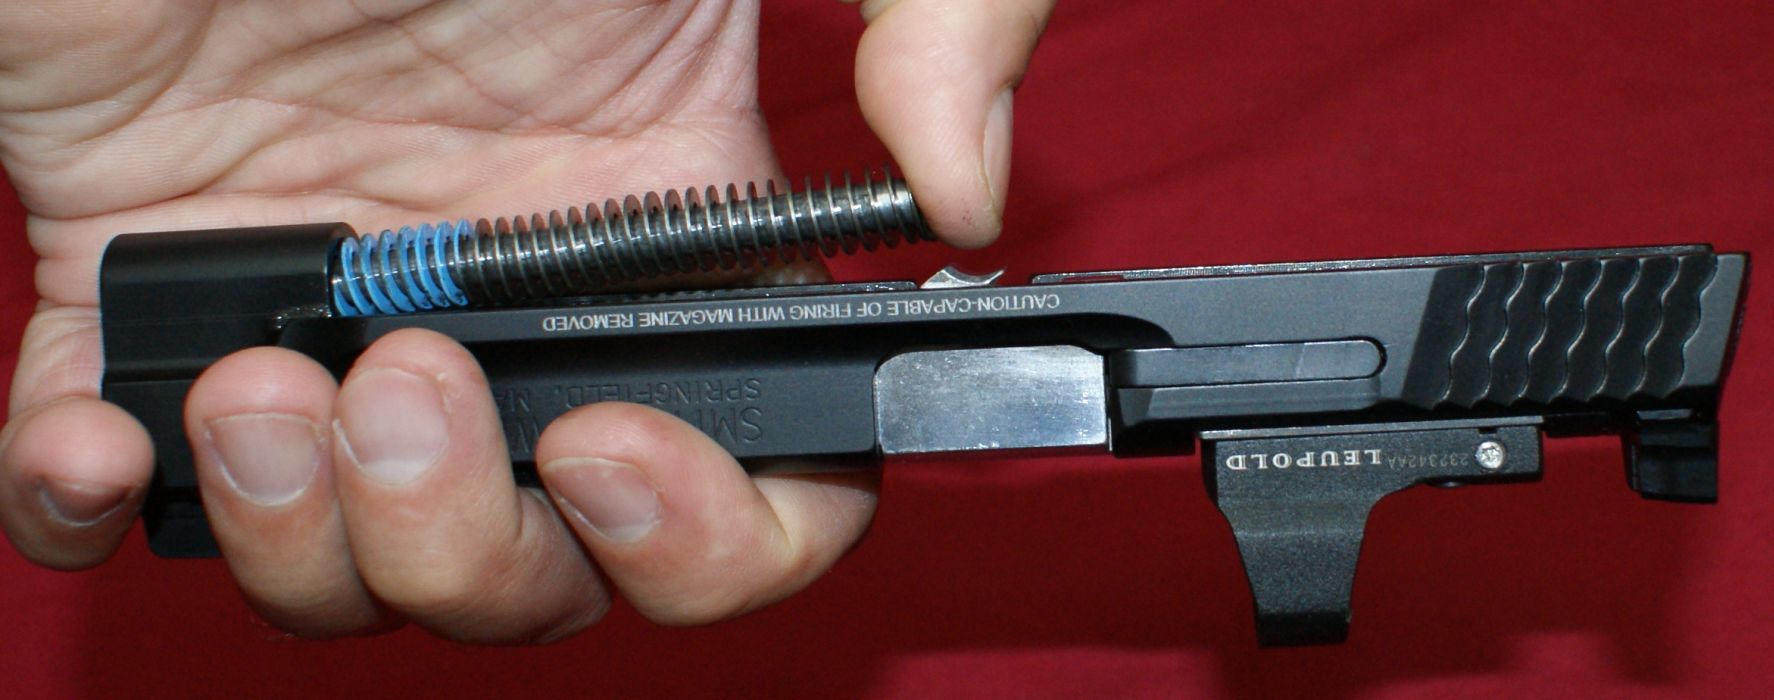
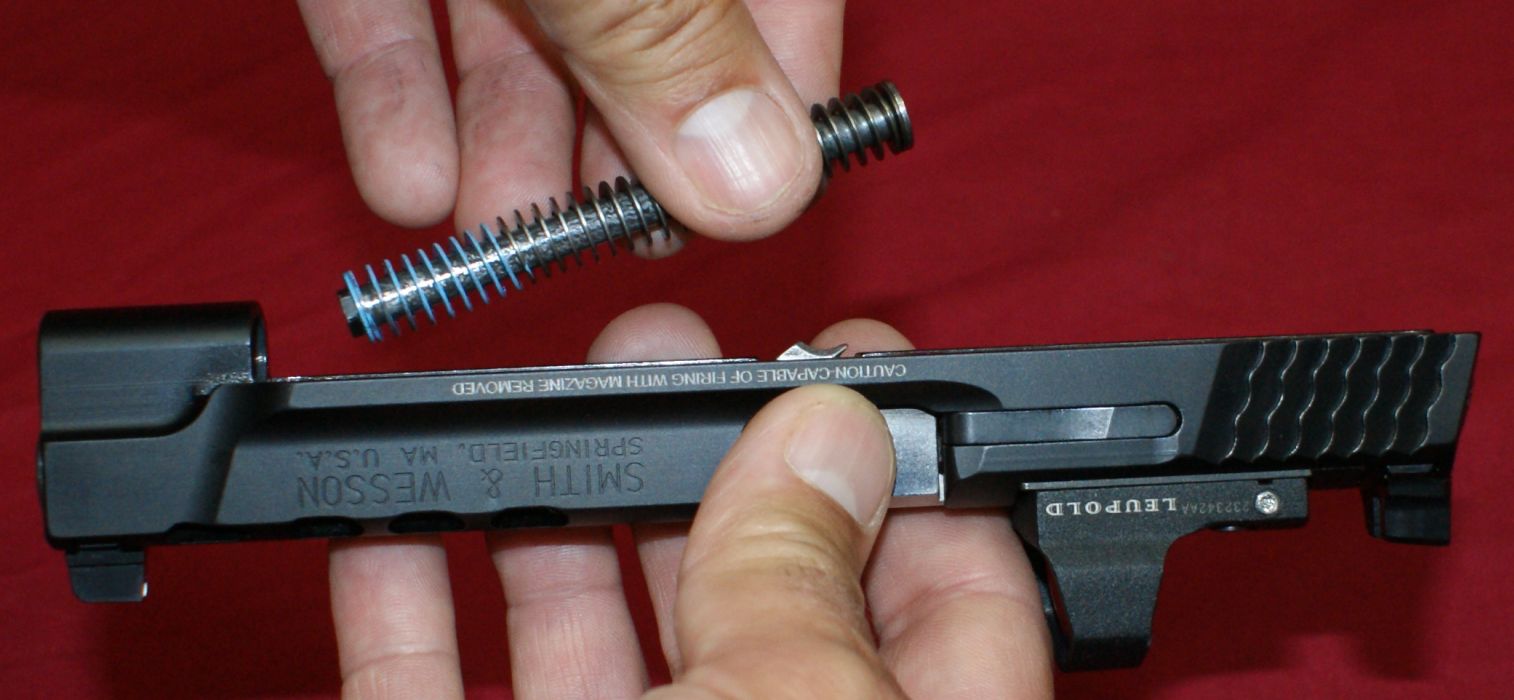
Step 5 - Remove Recoil Spring & Guide Rod Assembly
Apply pressure forward and up at the rear of the guide rod assembly and you can then rotate the assembly out of the seat in the barrel.
Figure 8
The guide rod assembly can then be lifted out of the front area of the slide.
Figure 9
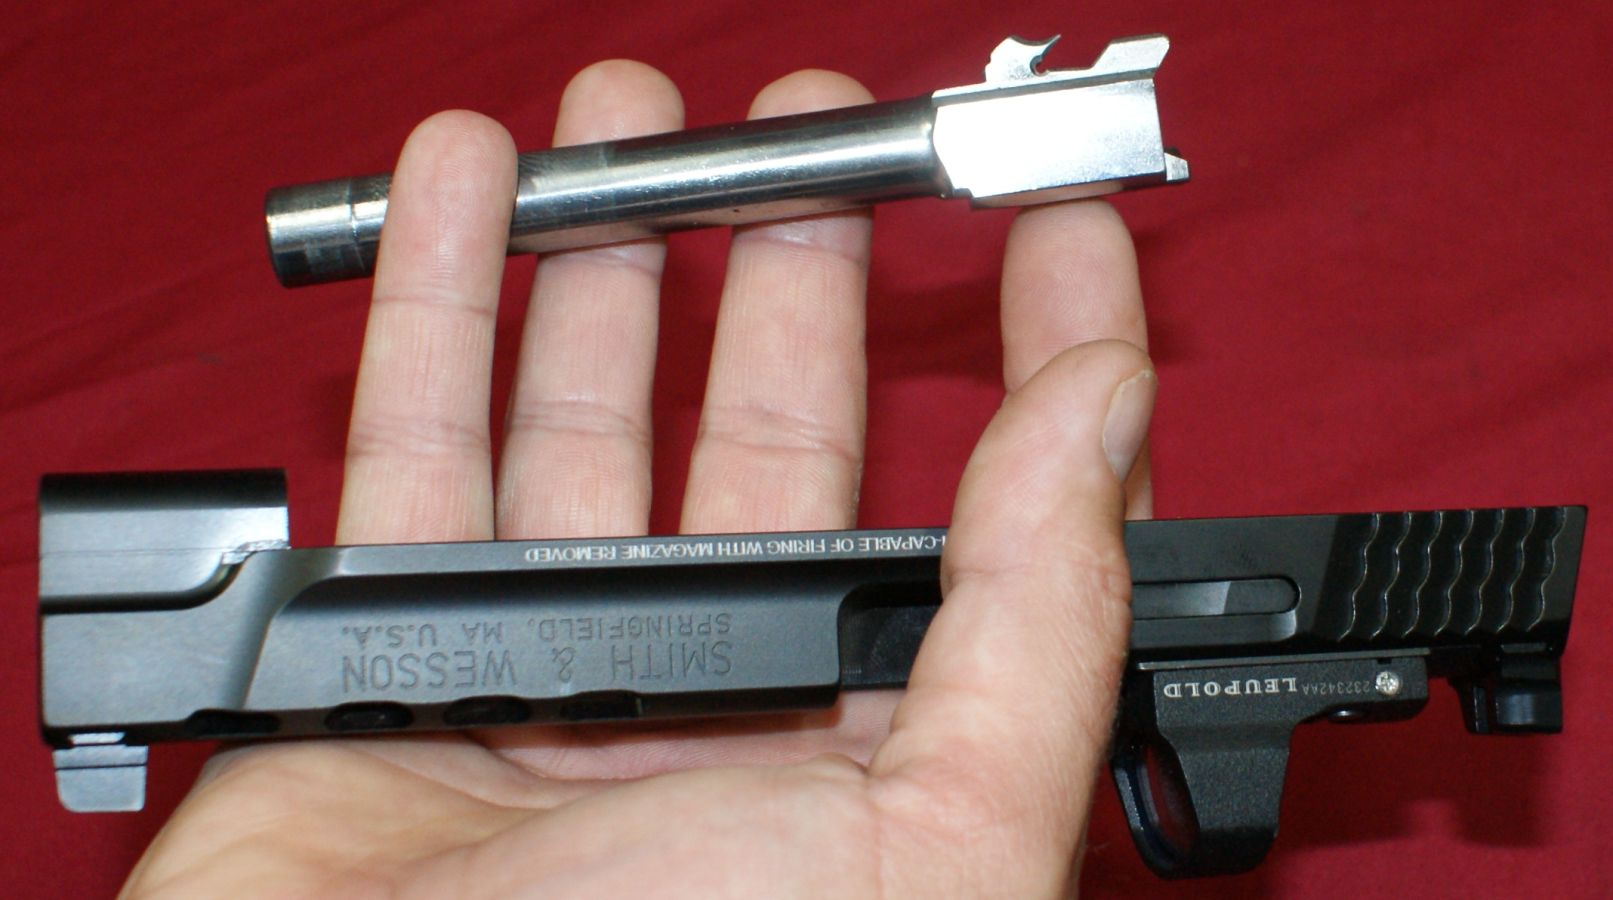
Step 6 - Remove Barrel
The barrel can be removed by lifting slightly, pushing forward slightly and then lifting it out of the frame.
Figure 10
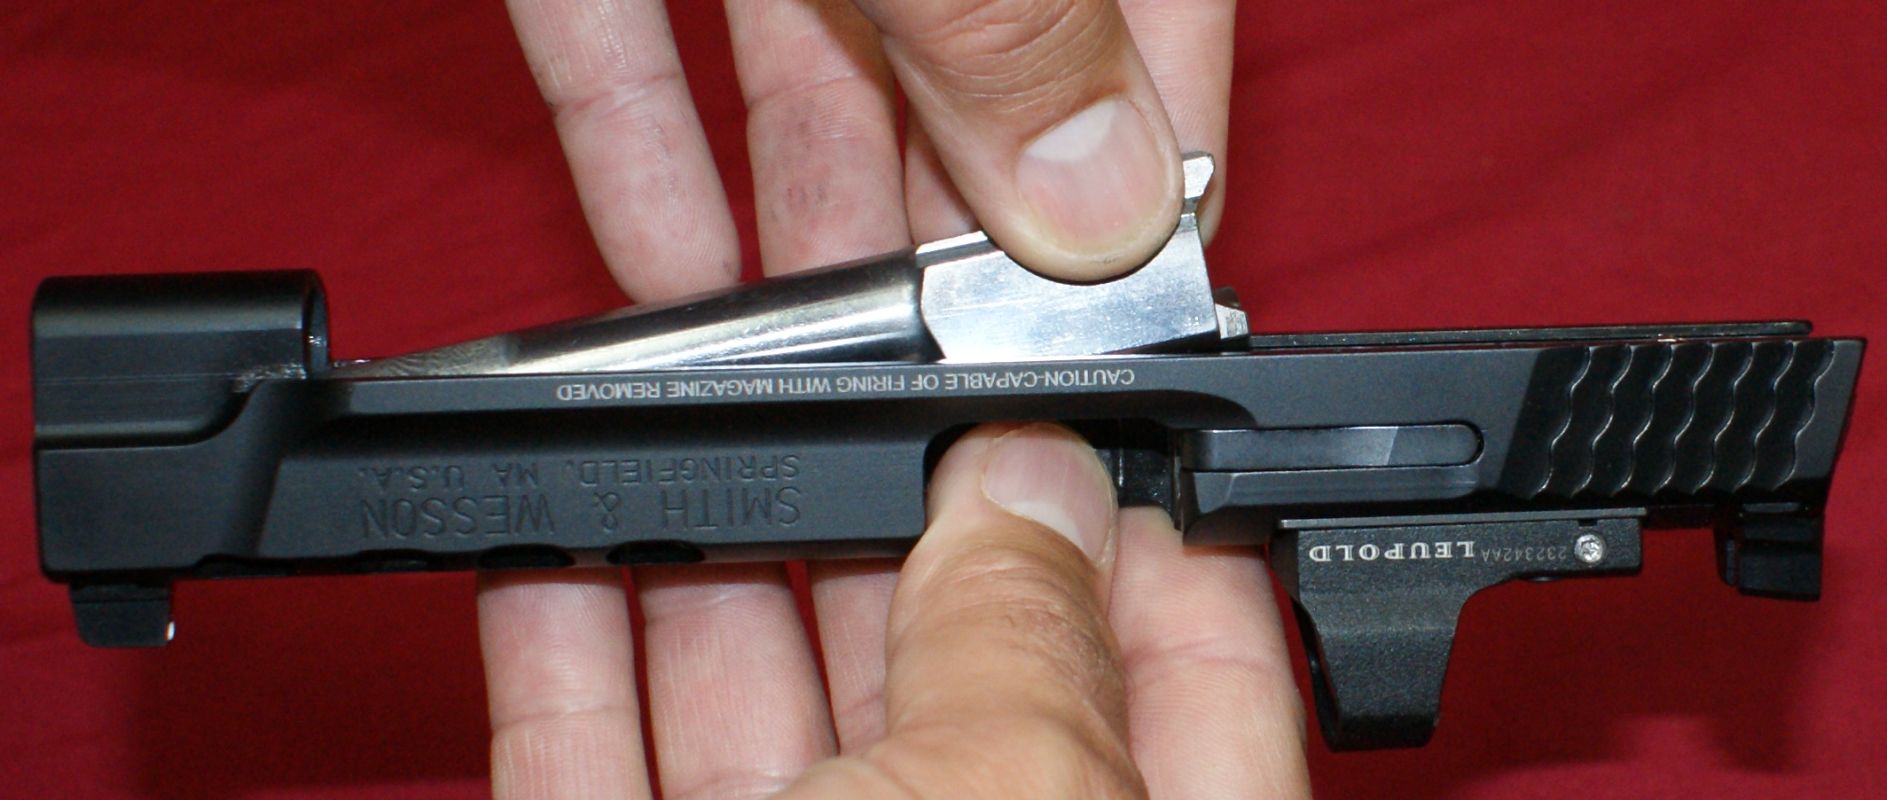
The motion described above is to allow the upper lug on the barrel (circled in yellow below) to barely clear the breech face when removing.
Figure 11
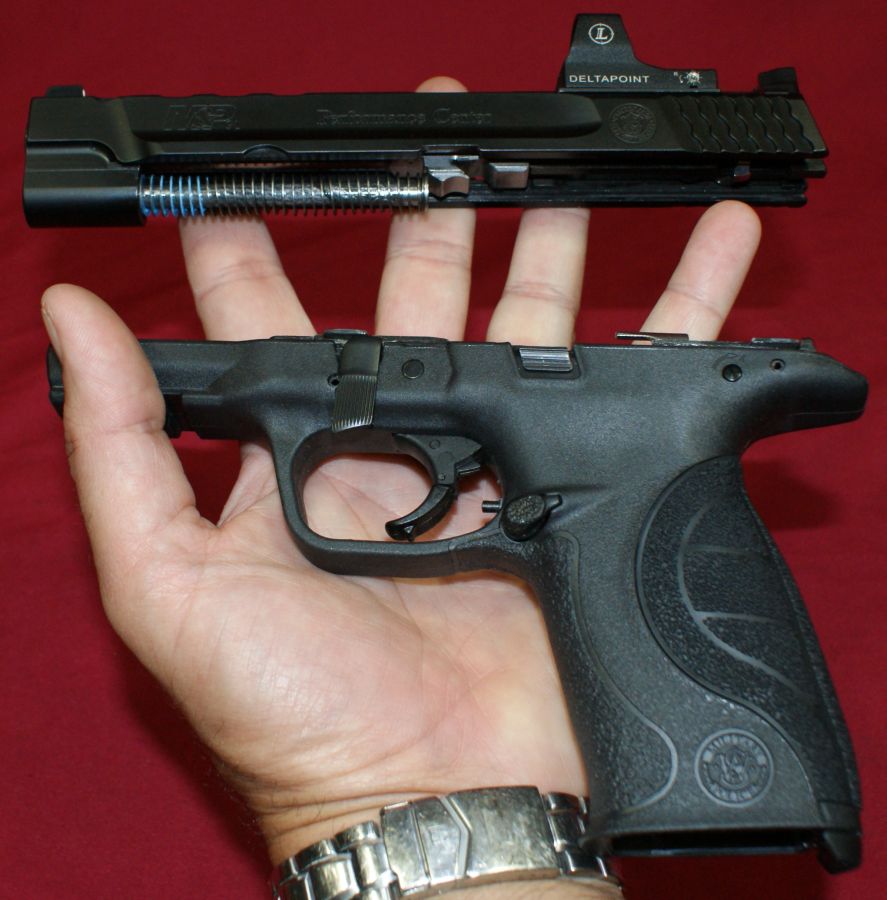
Fully Disassembled for Normal Cleaning
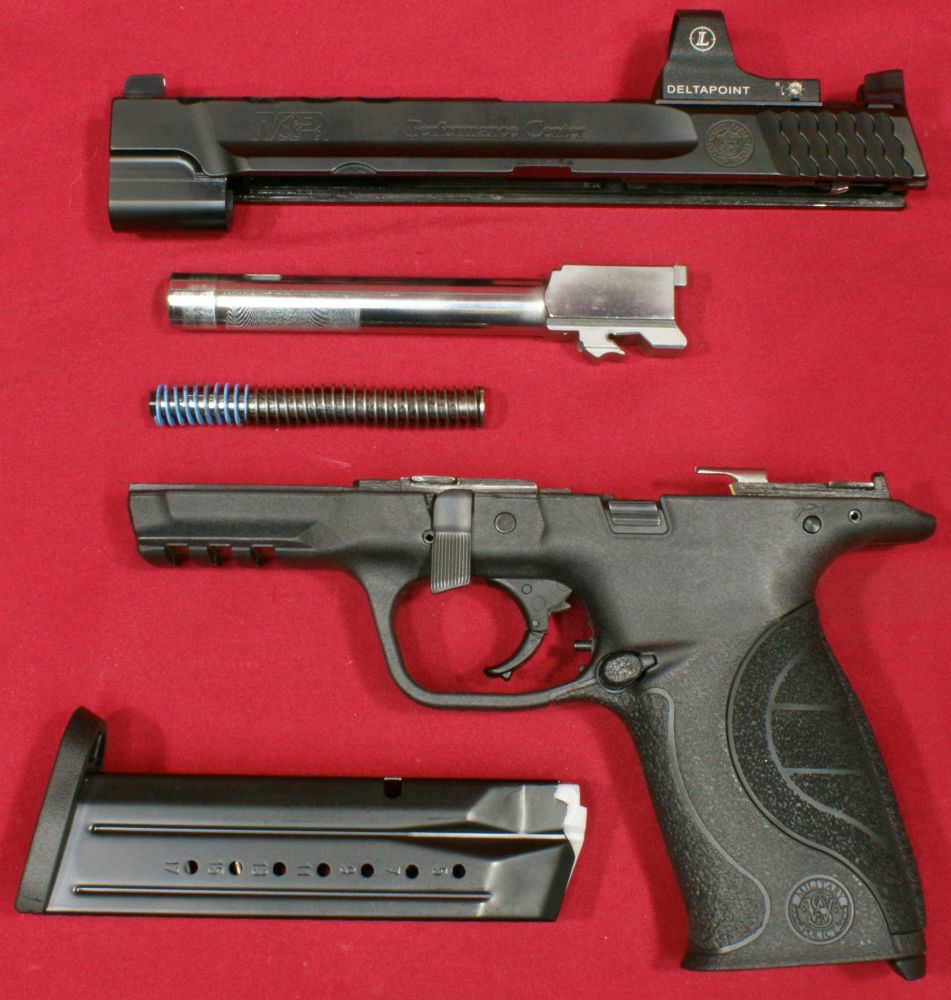
The photo below shows the disassembled parts at a level which allows you to clean this pistol. Actually I timed my disassembly effort and was able to have it to this level in about 15 seconds and reassembled in another 30 seconds. Disassembly and reassembly is extremely easy. It is possible to disassemble this pistol much further than this, but I don't consider further disassembly to be in the scope of this review. There are many good videos online for further disassembly and I suggest taking a look at them if you want to disassemble the pistol further.
Figure 12
Internal Features
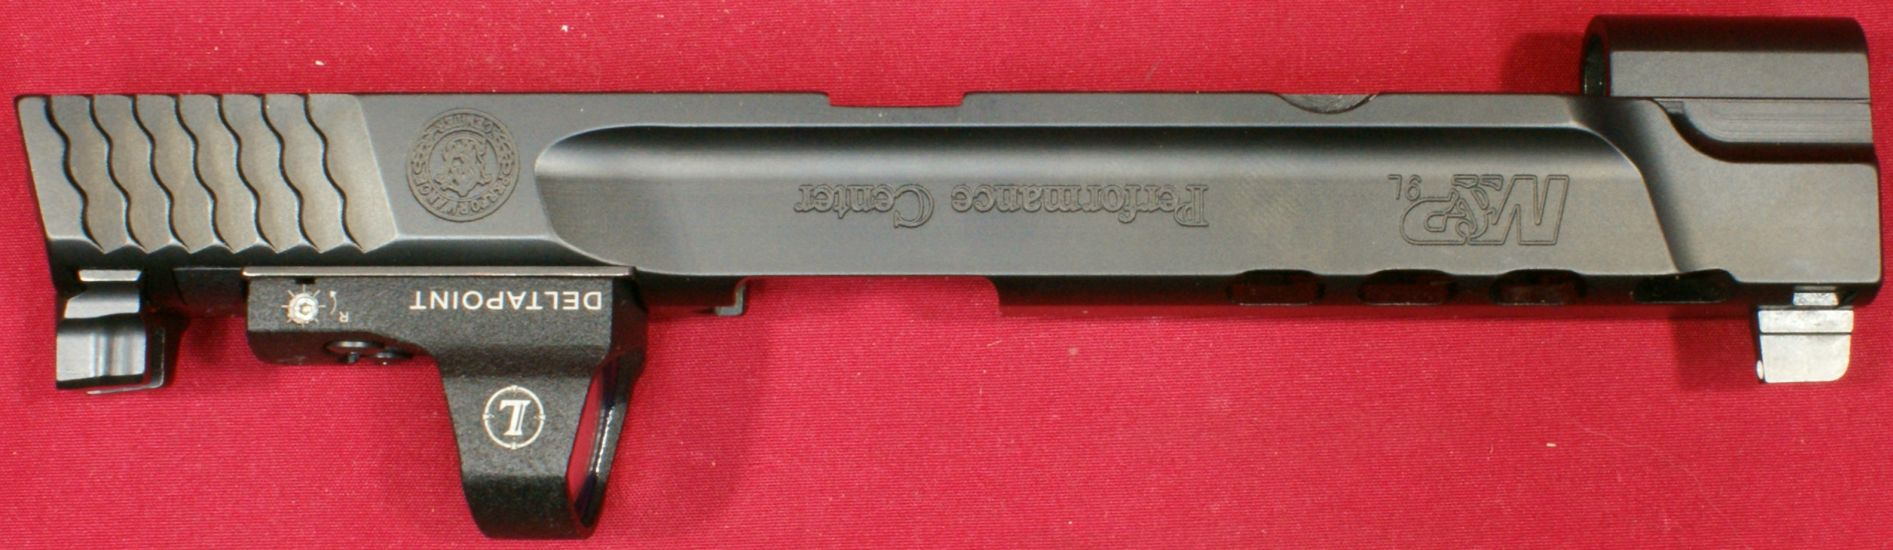
The slide assembly is shown below. The slide is made from stainless steel with a black Melonite finish. The black finish provides a no-glare look and the stainless steel provides great corrosion resistance.
Figure 13
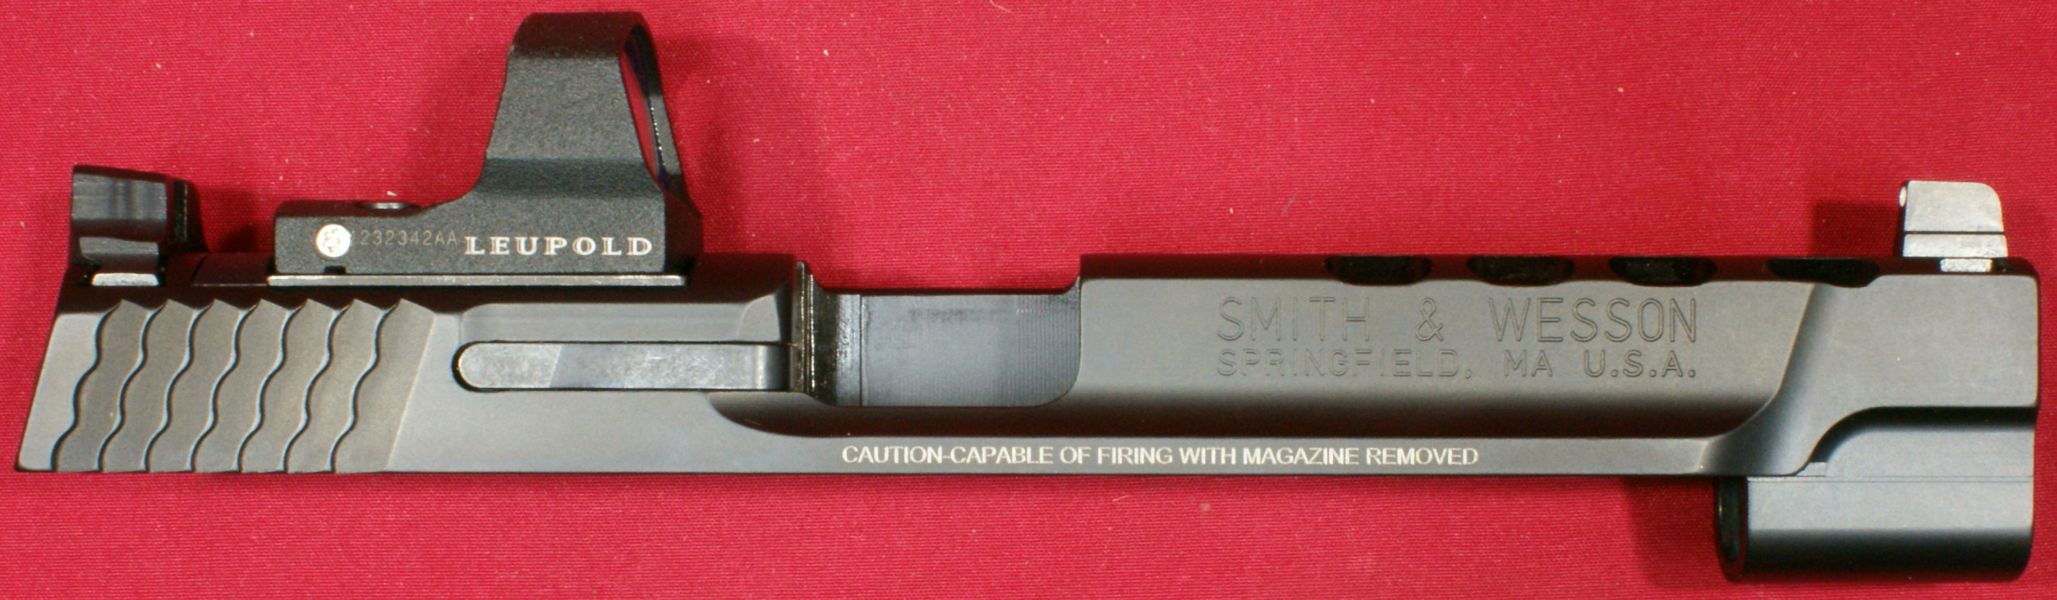
Figure 14

Figure 15
The striker and striker block are both made from some type of stainless steel. The striker block has a well rounded edge and polished finish. Since I don't have a standard M&P9 I cannot compare parts, but most likely the extra large radius on the edge of the block along with the polished surface may be some of the Performance Center trigger pull enhancements.
Figure 16
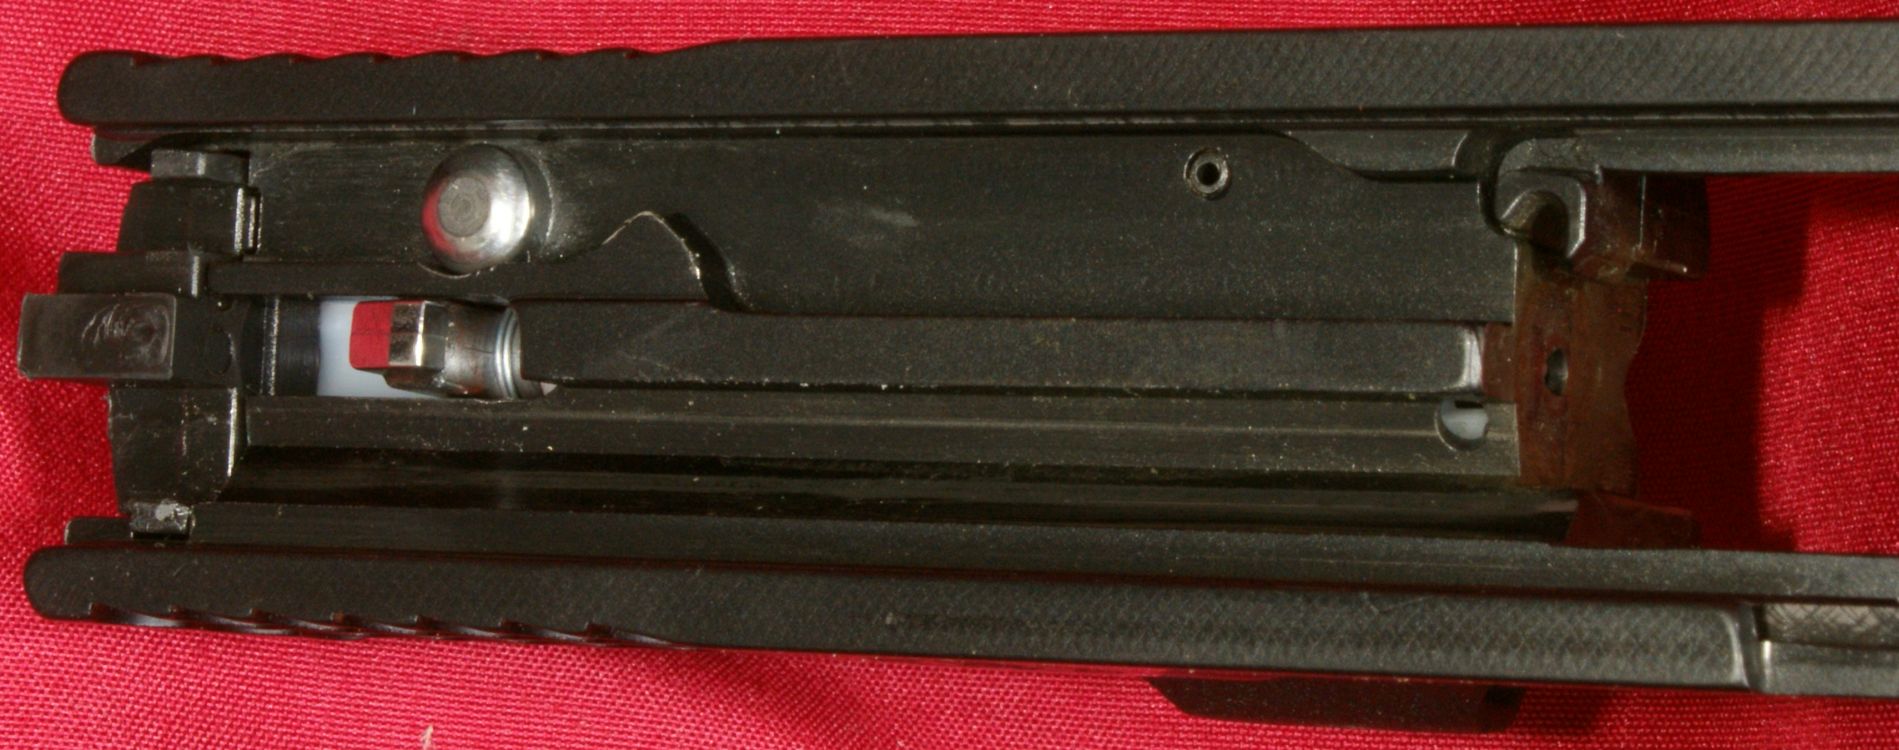
You may have to look closely in these photos at the striker surfaces, but I was a little surprised that the Performance Center didn't clean up the mold line better on the rear striker surfaces which contact the sear.
Figure 17
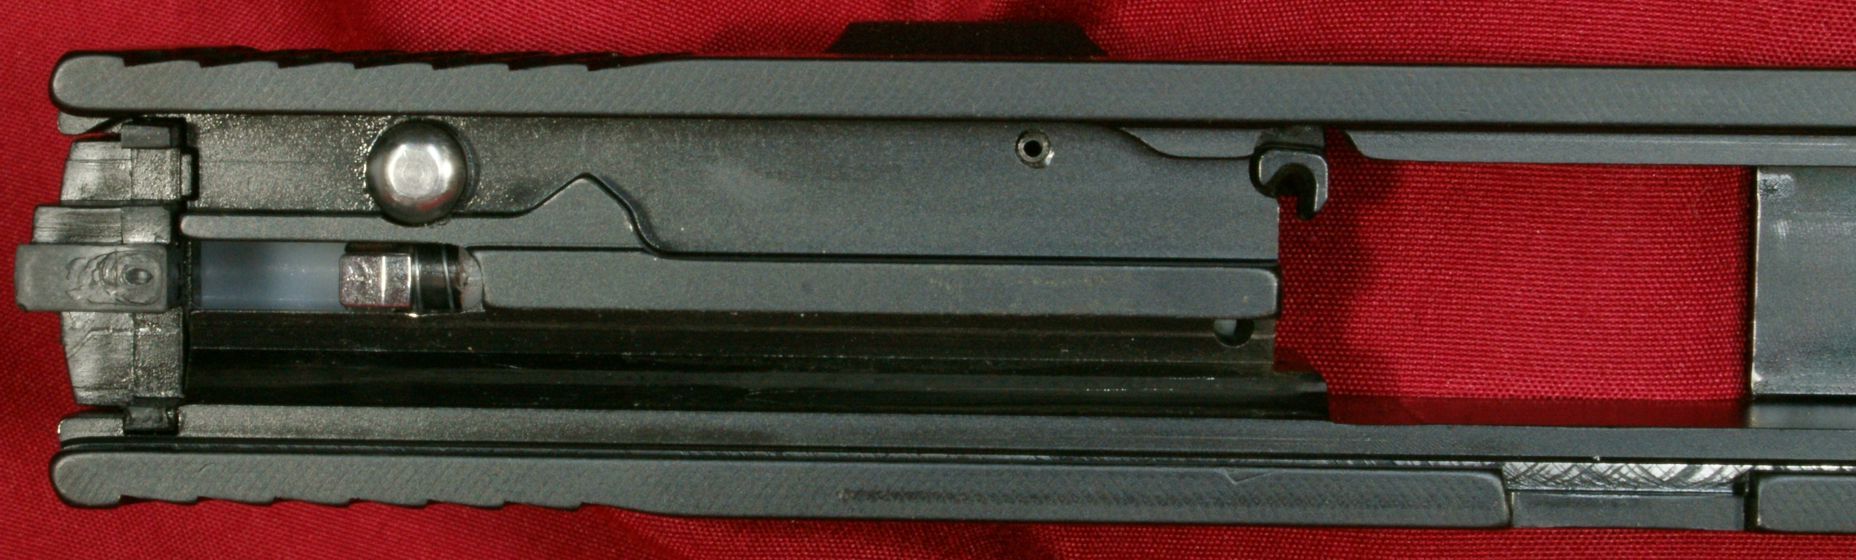
Figure 18
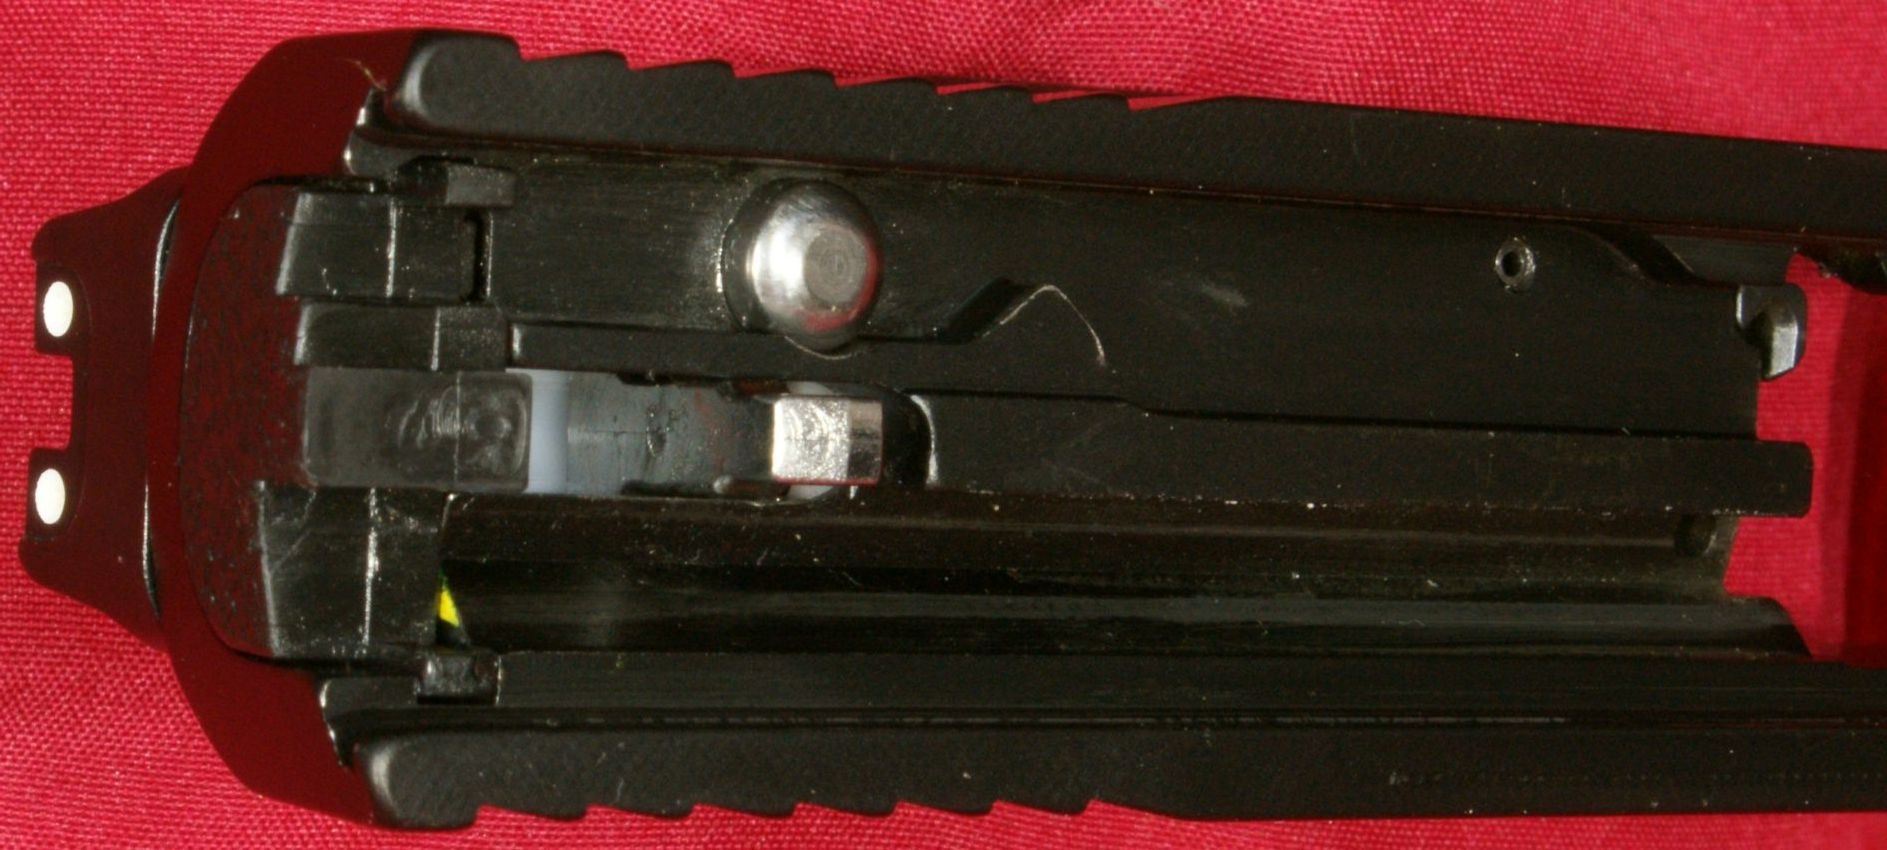
I thought it was interesting to see the four machined recesses in the top of the slide. Honestly, I'm not sure of the exact purpose, so if you know, please comment below. My guess on the purpose is to keep up with which version of slide this may be during a manufacturing process.
Figure 19
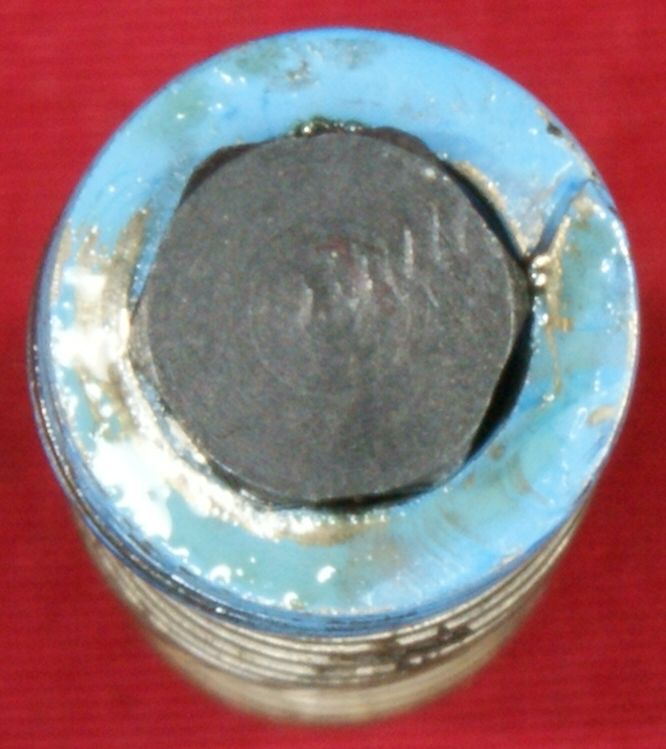
The recoil spring and guide rod assembly is shown below. The blue portion of the spring helps you to quickly recognize which direction should go forward. The forward end has a hex screw which is used to retain the spring and the screw is threaded into the end of the stainless steel guide rod.
Figure 20
Figure 21
Figure 22


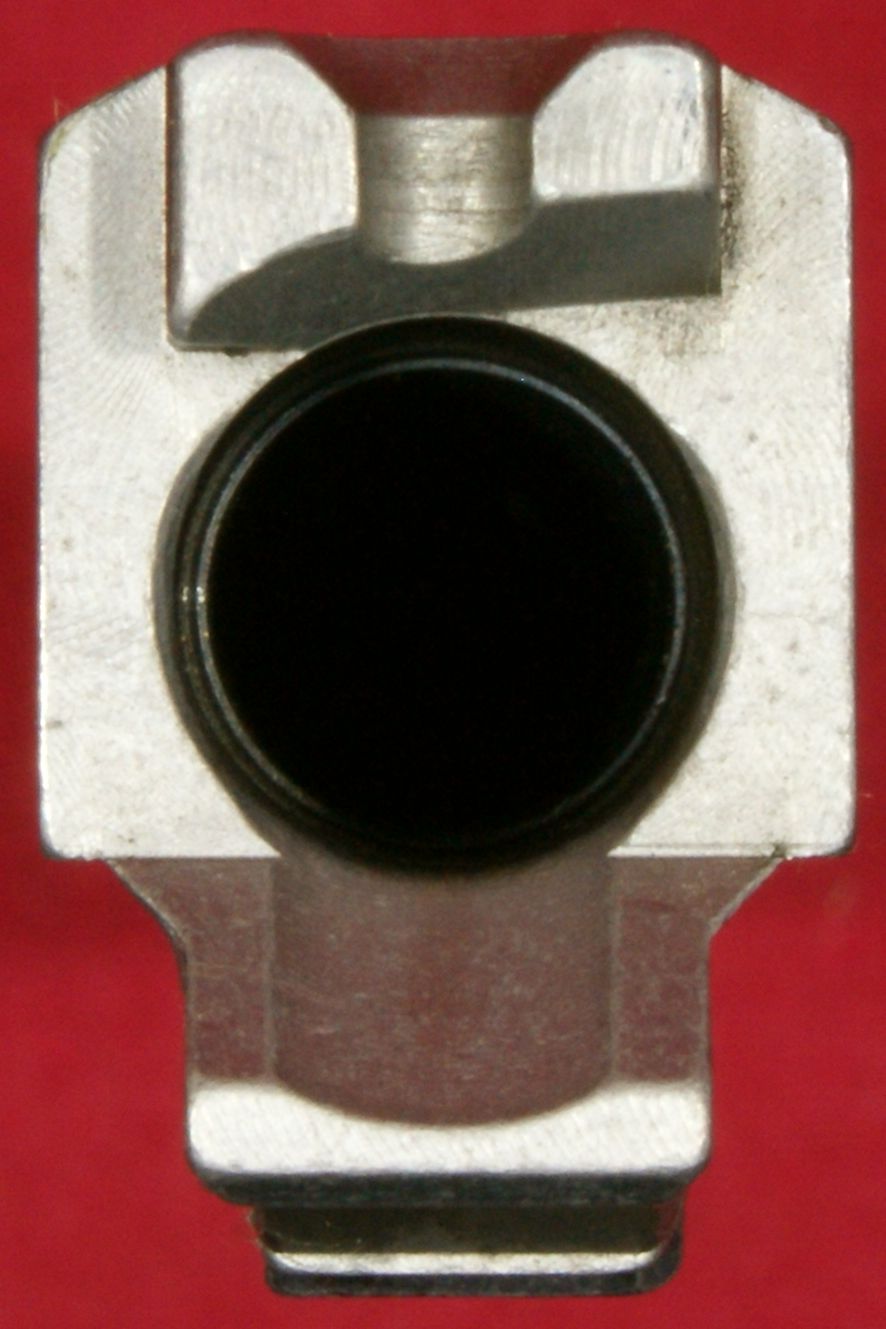
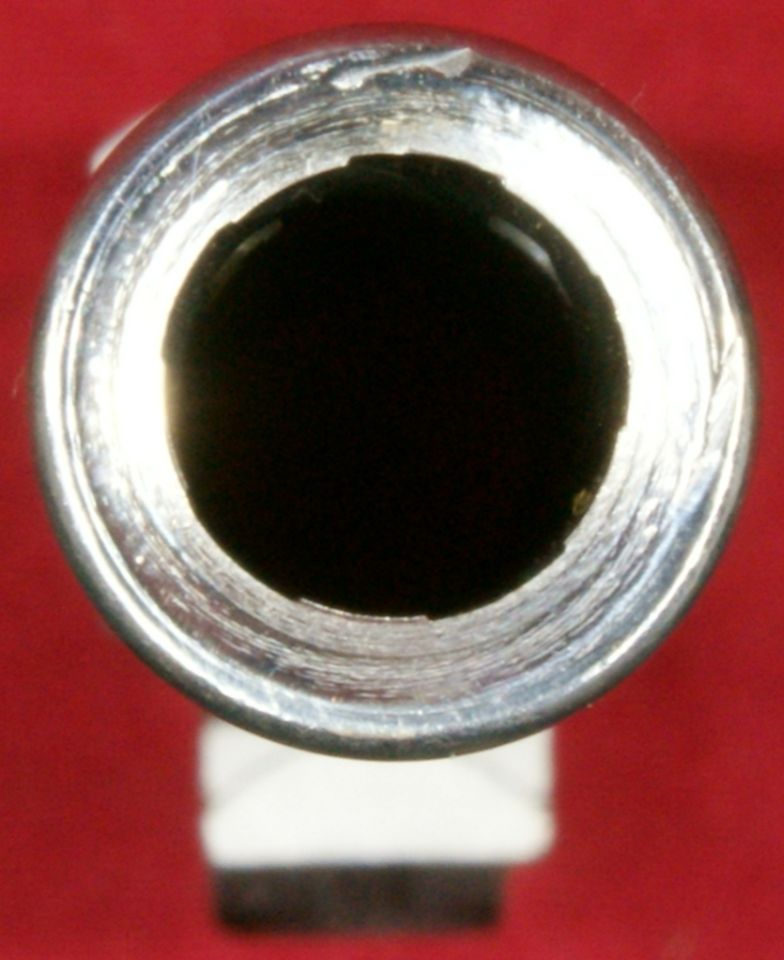
The stainless steel barrel is shown in these next photos.
Figure 23

Figure 24

The bottom of the chamber area has a small dimple which I believe is a mark indicating they checked the hardness of the barrel. Other than that mark, I was not able to find any type of proof marks on the barrel. Also, on this barrel, there was a weird pattern on the bottom of the barrel below the ports. This pattern had a feel of very very slight surface roughness.
Figure 25

Figure 26

It looked like at some point the top of my barrel may have been dinged slightly.
Figure 27
Figure 28
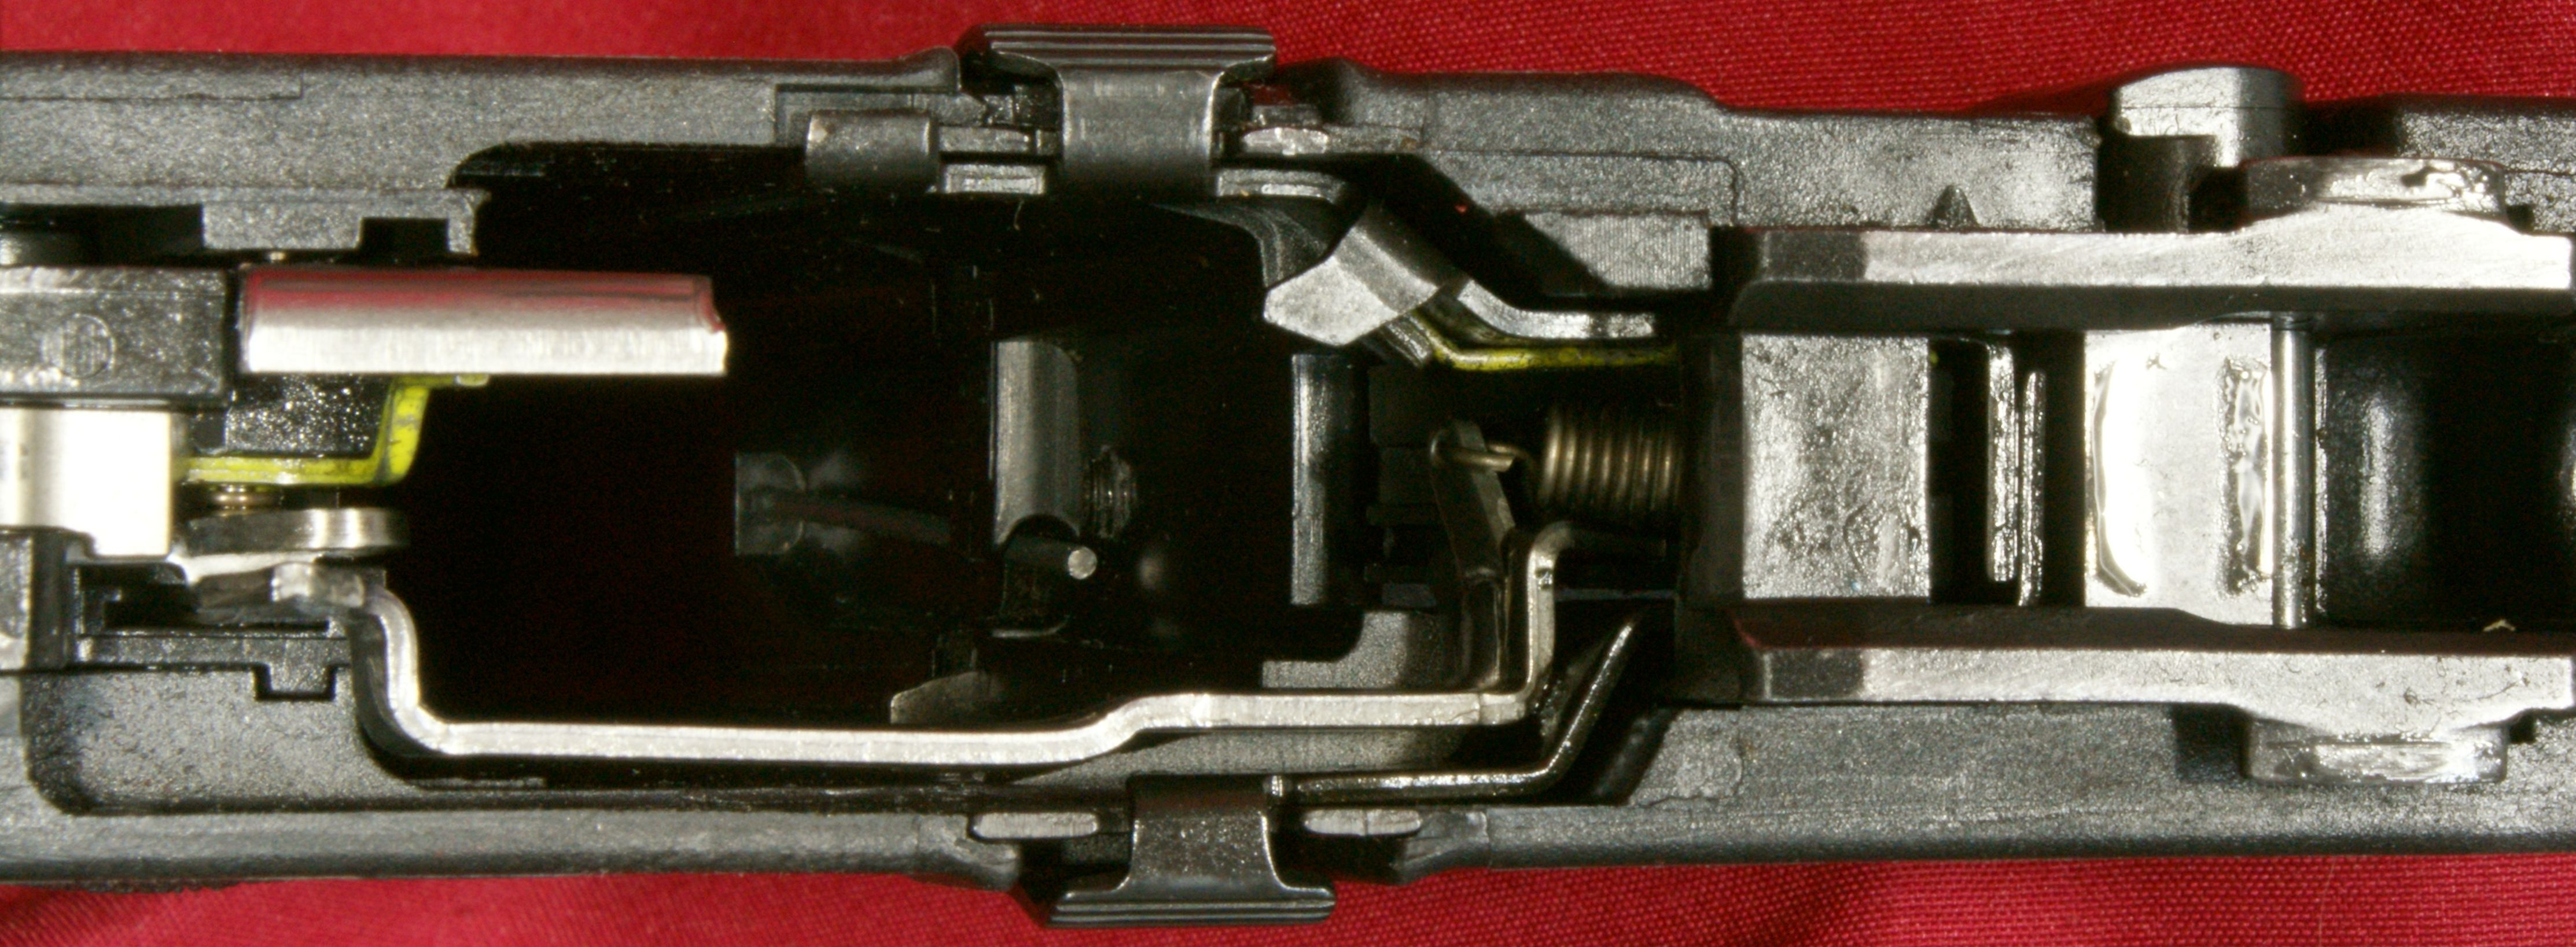
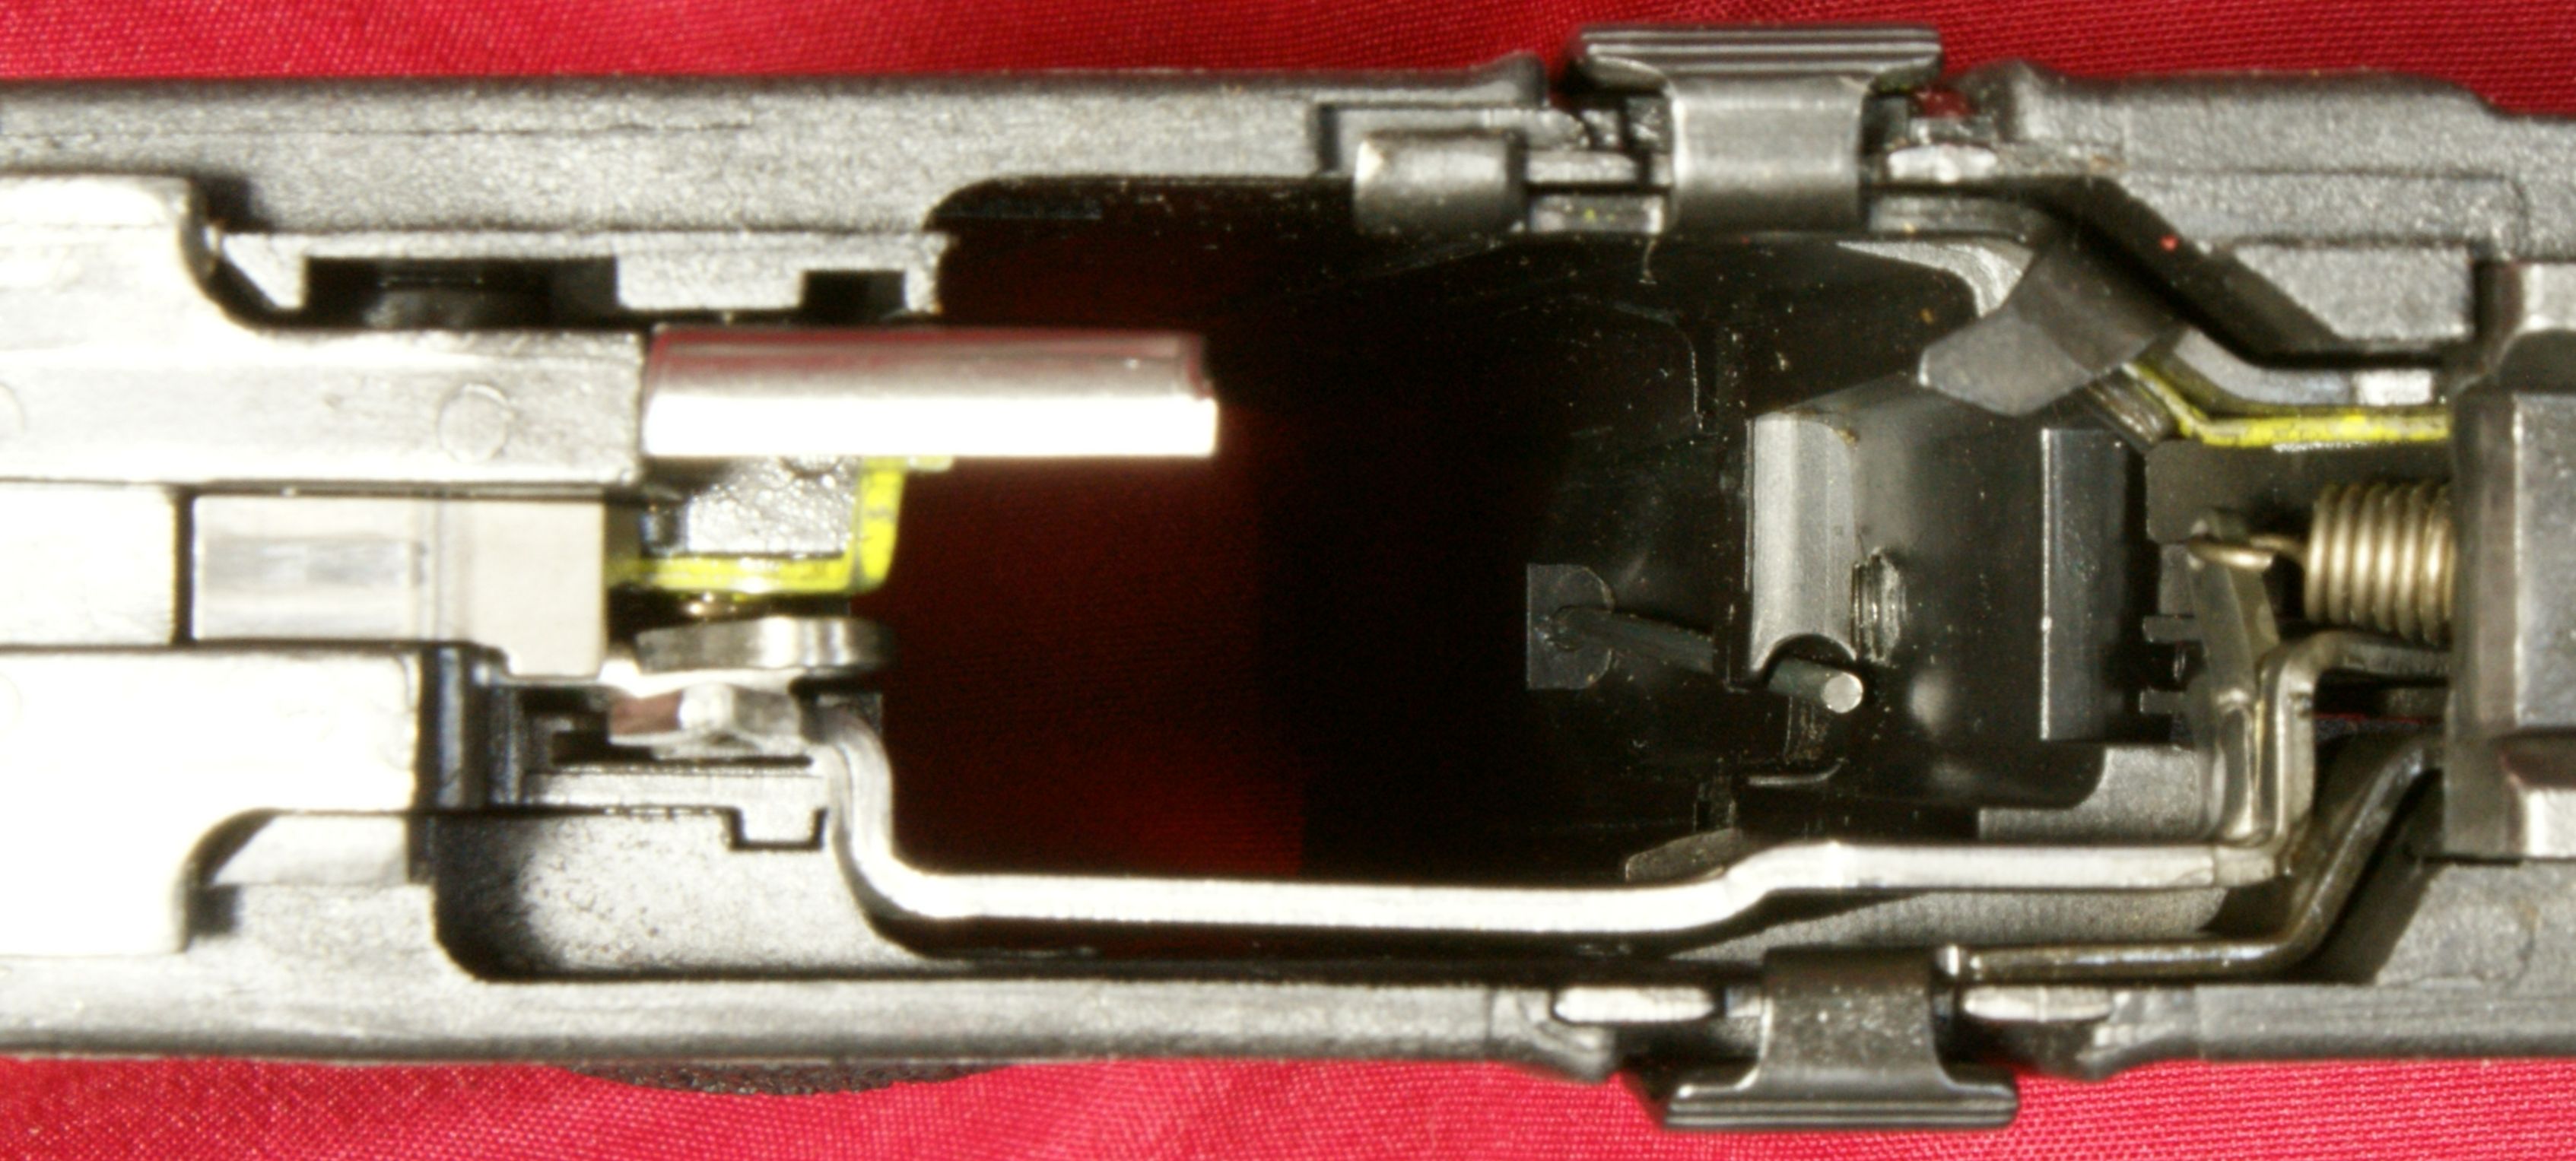
These next photos give you a good look inside the grip frame of the pistol. Remember that clicking on these photos will bring up high resolution images.
Figure 29
Figure 30
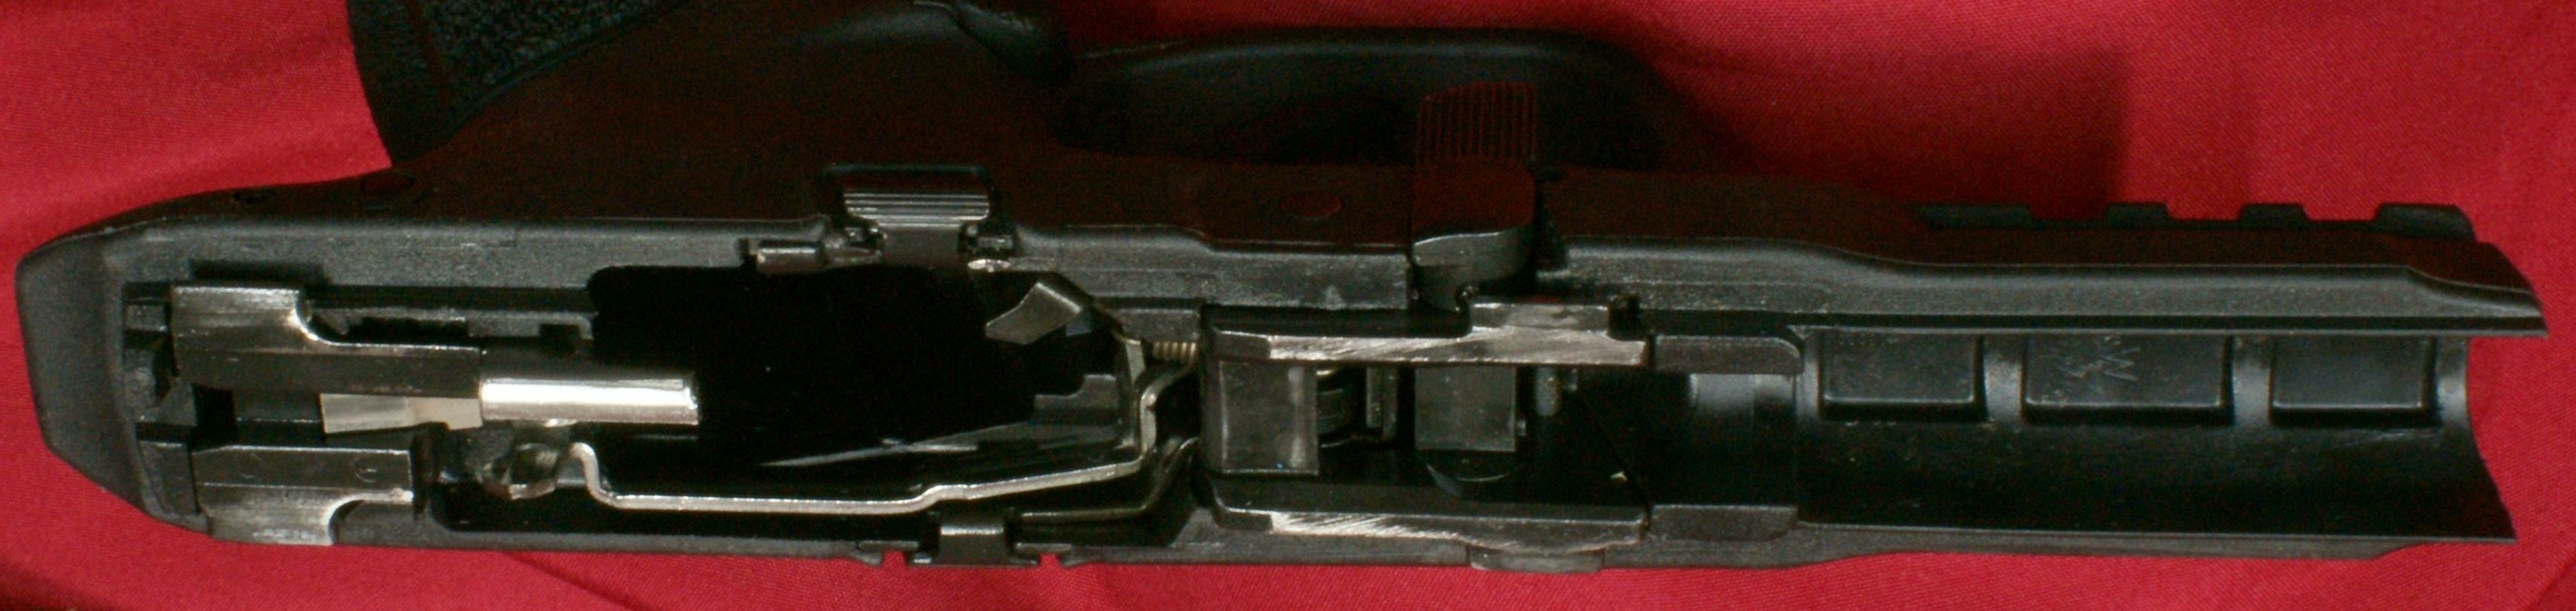
Figure 31

Figure 32
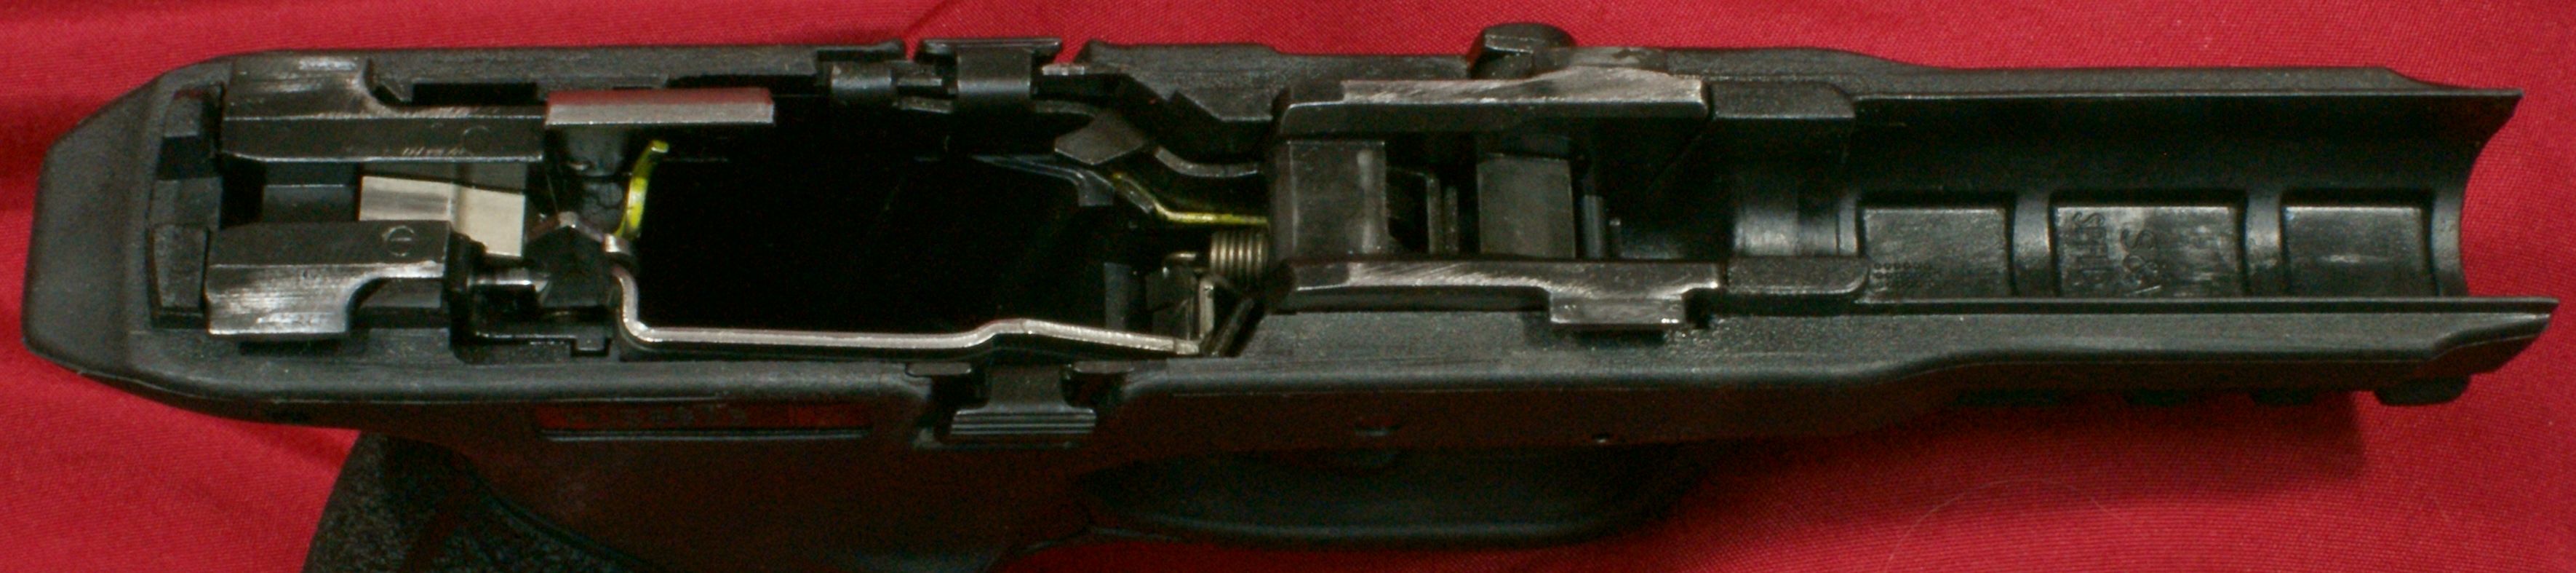
Figure 33
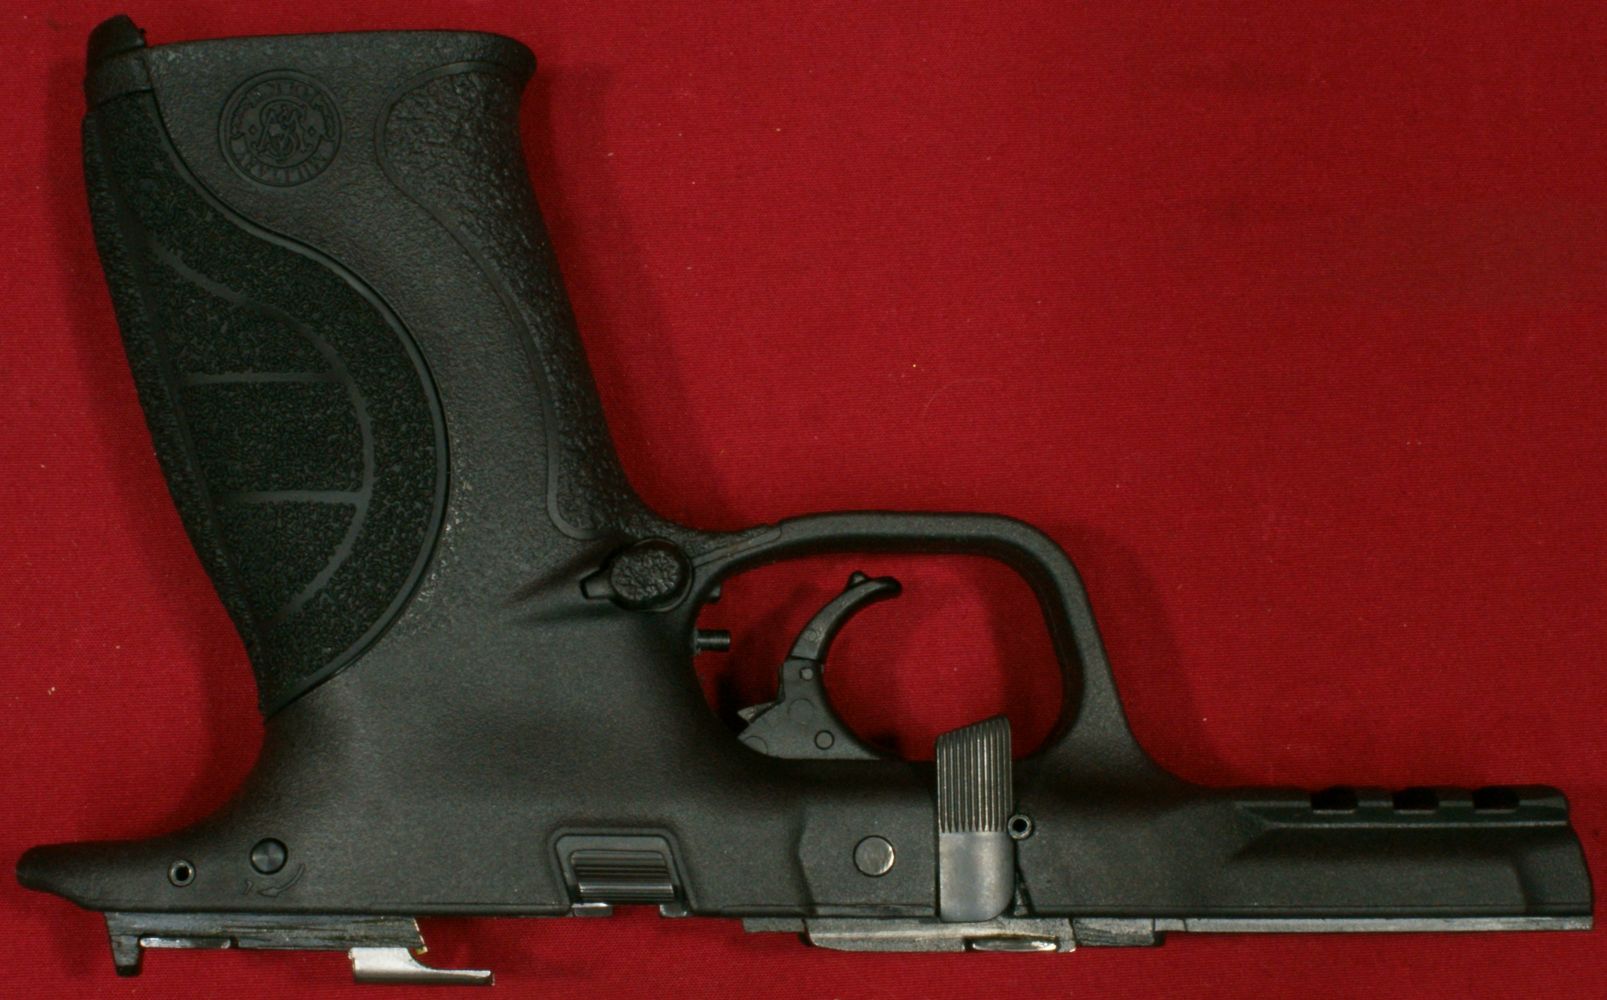
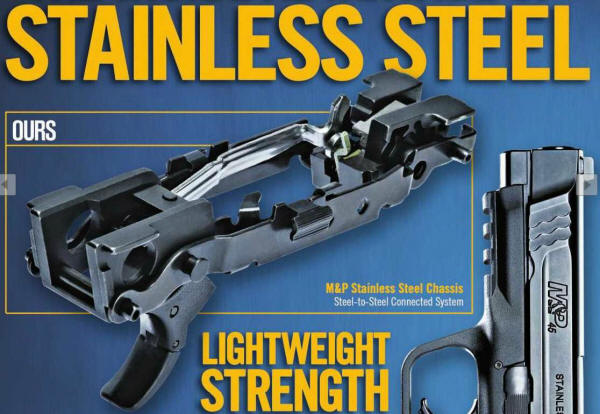
Inside the polymer frame is a stainless steel chassis system that house the critical components. You can click on the photo below to take you to the S&W brochure titled "Fine Tuned Machines Inside Out" which provides some good information on the internal features and this graphic on the chassis system gives you a better look at the system which is inside the grip frame.
Figure 34
At the rear is a stainless steel sear housing block. Although I believe many of the parts in this pistol are MIM (Metal Injection Molded) parts, I don't think the Performance Center sear is one of them. It had a distinct machine look on all the surface visible and no molding artifacts.
Figure 35
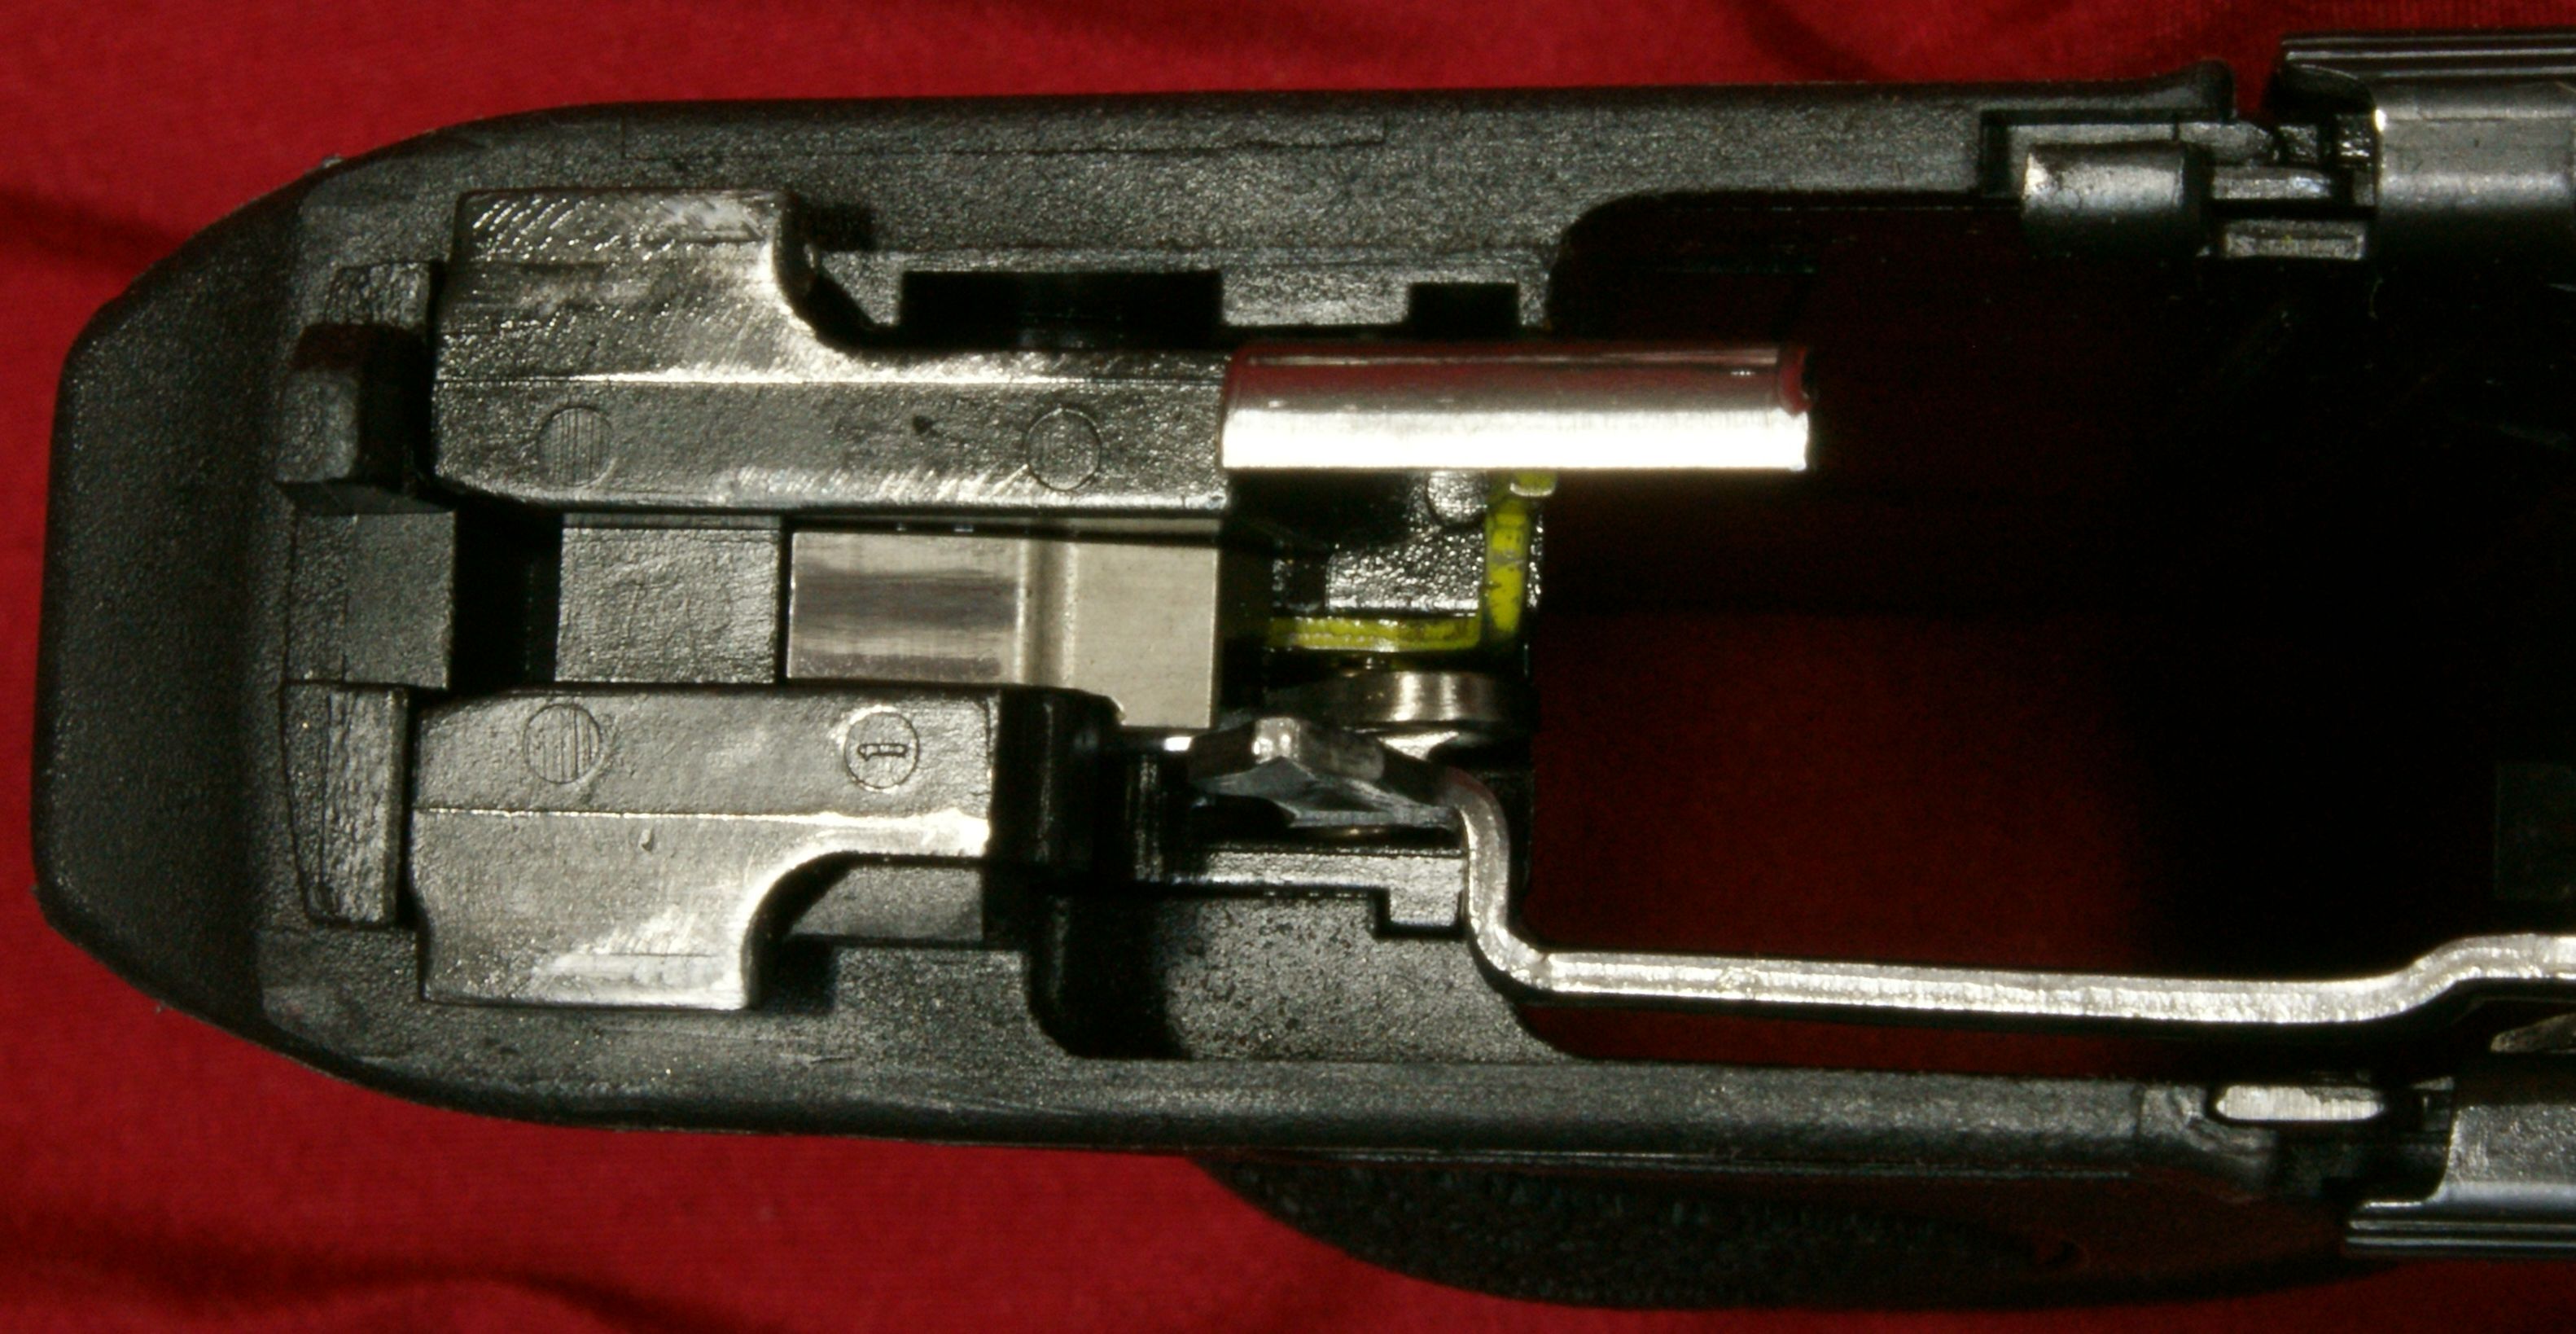
At the font is the stainless steel locking block. Both blocks have the black Melonite finish. Molded into the Zytel grip frame are stainless steel bars on each side that connect the locking block and sear housing block. In this photo you can also see the ejector (A), sear deactivation lever (B), slide stop (C), magazine catch (D) and trigger bar (E)
Figure 36
The ambidextrous safety can be swapped to the other side by
pushing the spring rod rearward out of the slot which allows you
to push the safety button out to swap orientation.
Figure 37
Thoughts
Basic disassembly for cleaning is extremely easy and only takes about 15 seconds. Reassembly is also easy and only takes about 30 seconds. The stainless steel chassis system is a clever design which ensures metal to metal connections between the locking block and sear housing block.
For more detailed photos and commentary, make sure you check out the other parts of this review and feel free to leave comments below. The following links are provided to help you see other parts of this review.
- S&W M&P®9 Performance Center® Ported Pistol Review: Part 1 - Introduction, Specifications and Summary
- S&W M&P®9 Performance Center® Ported Pistol Review: Part 2 - What's in the Box
- S&W M&P®9 Performance Center® Ported Pistol Review: Part 3 - External & Operational Features
- S&W M&P®9 Performance Center® Ported Pistol Review: Part 4 - Disassembly & Internal Features
- S&W M&P®9 Performance Center® Ported Pistol Review: Part 5 - Range Test
Or
If you would like to be notified about future Gunsumer Reports reviews via Facebook, make sure "You Like This" by clicking the Facebook "Like" button at the bottom or top of this page. If it already says "You Like This" beside the button, clicking it again will uncheck the "Like" status and you will not be notified.
| Share on Facebook | |
© 2010, 2011, 2012, 2013, 2014, 2015, 2016, 2017, 2018, 2019, 2020, 2021, 2022, 2023 & 2024 Gunsumer Reports™, All rights reserved.
FTC Disclosure