|
|
Gunsumer Reports TM Providing Detailed Objective Reviews for Firearms and Firearm Accessories |
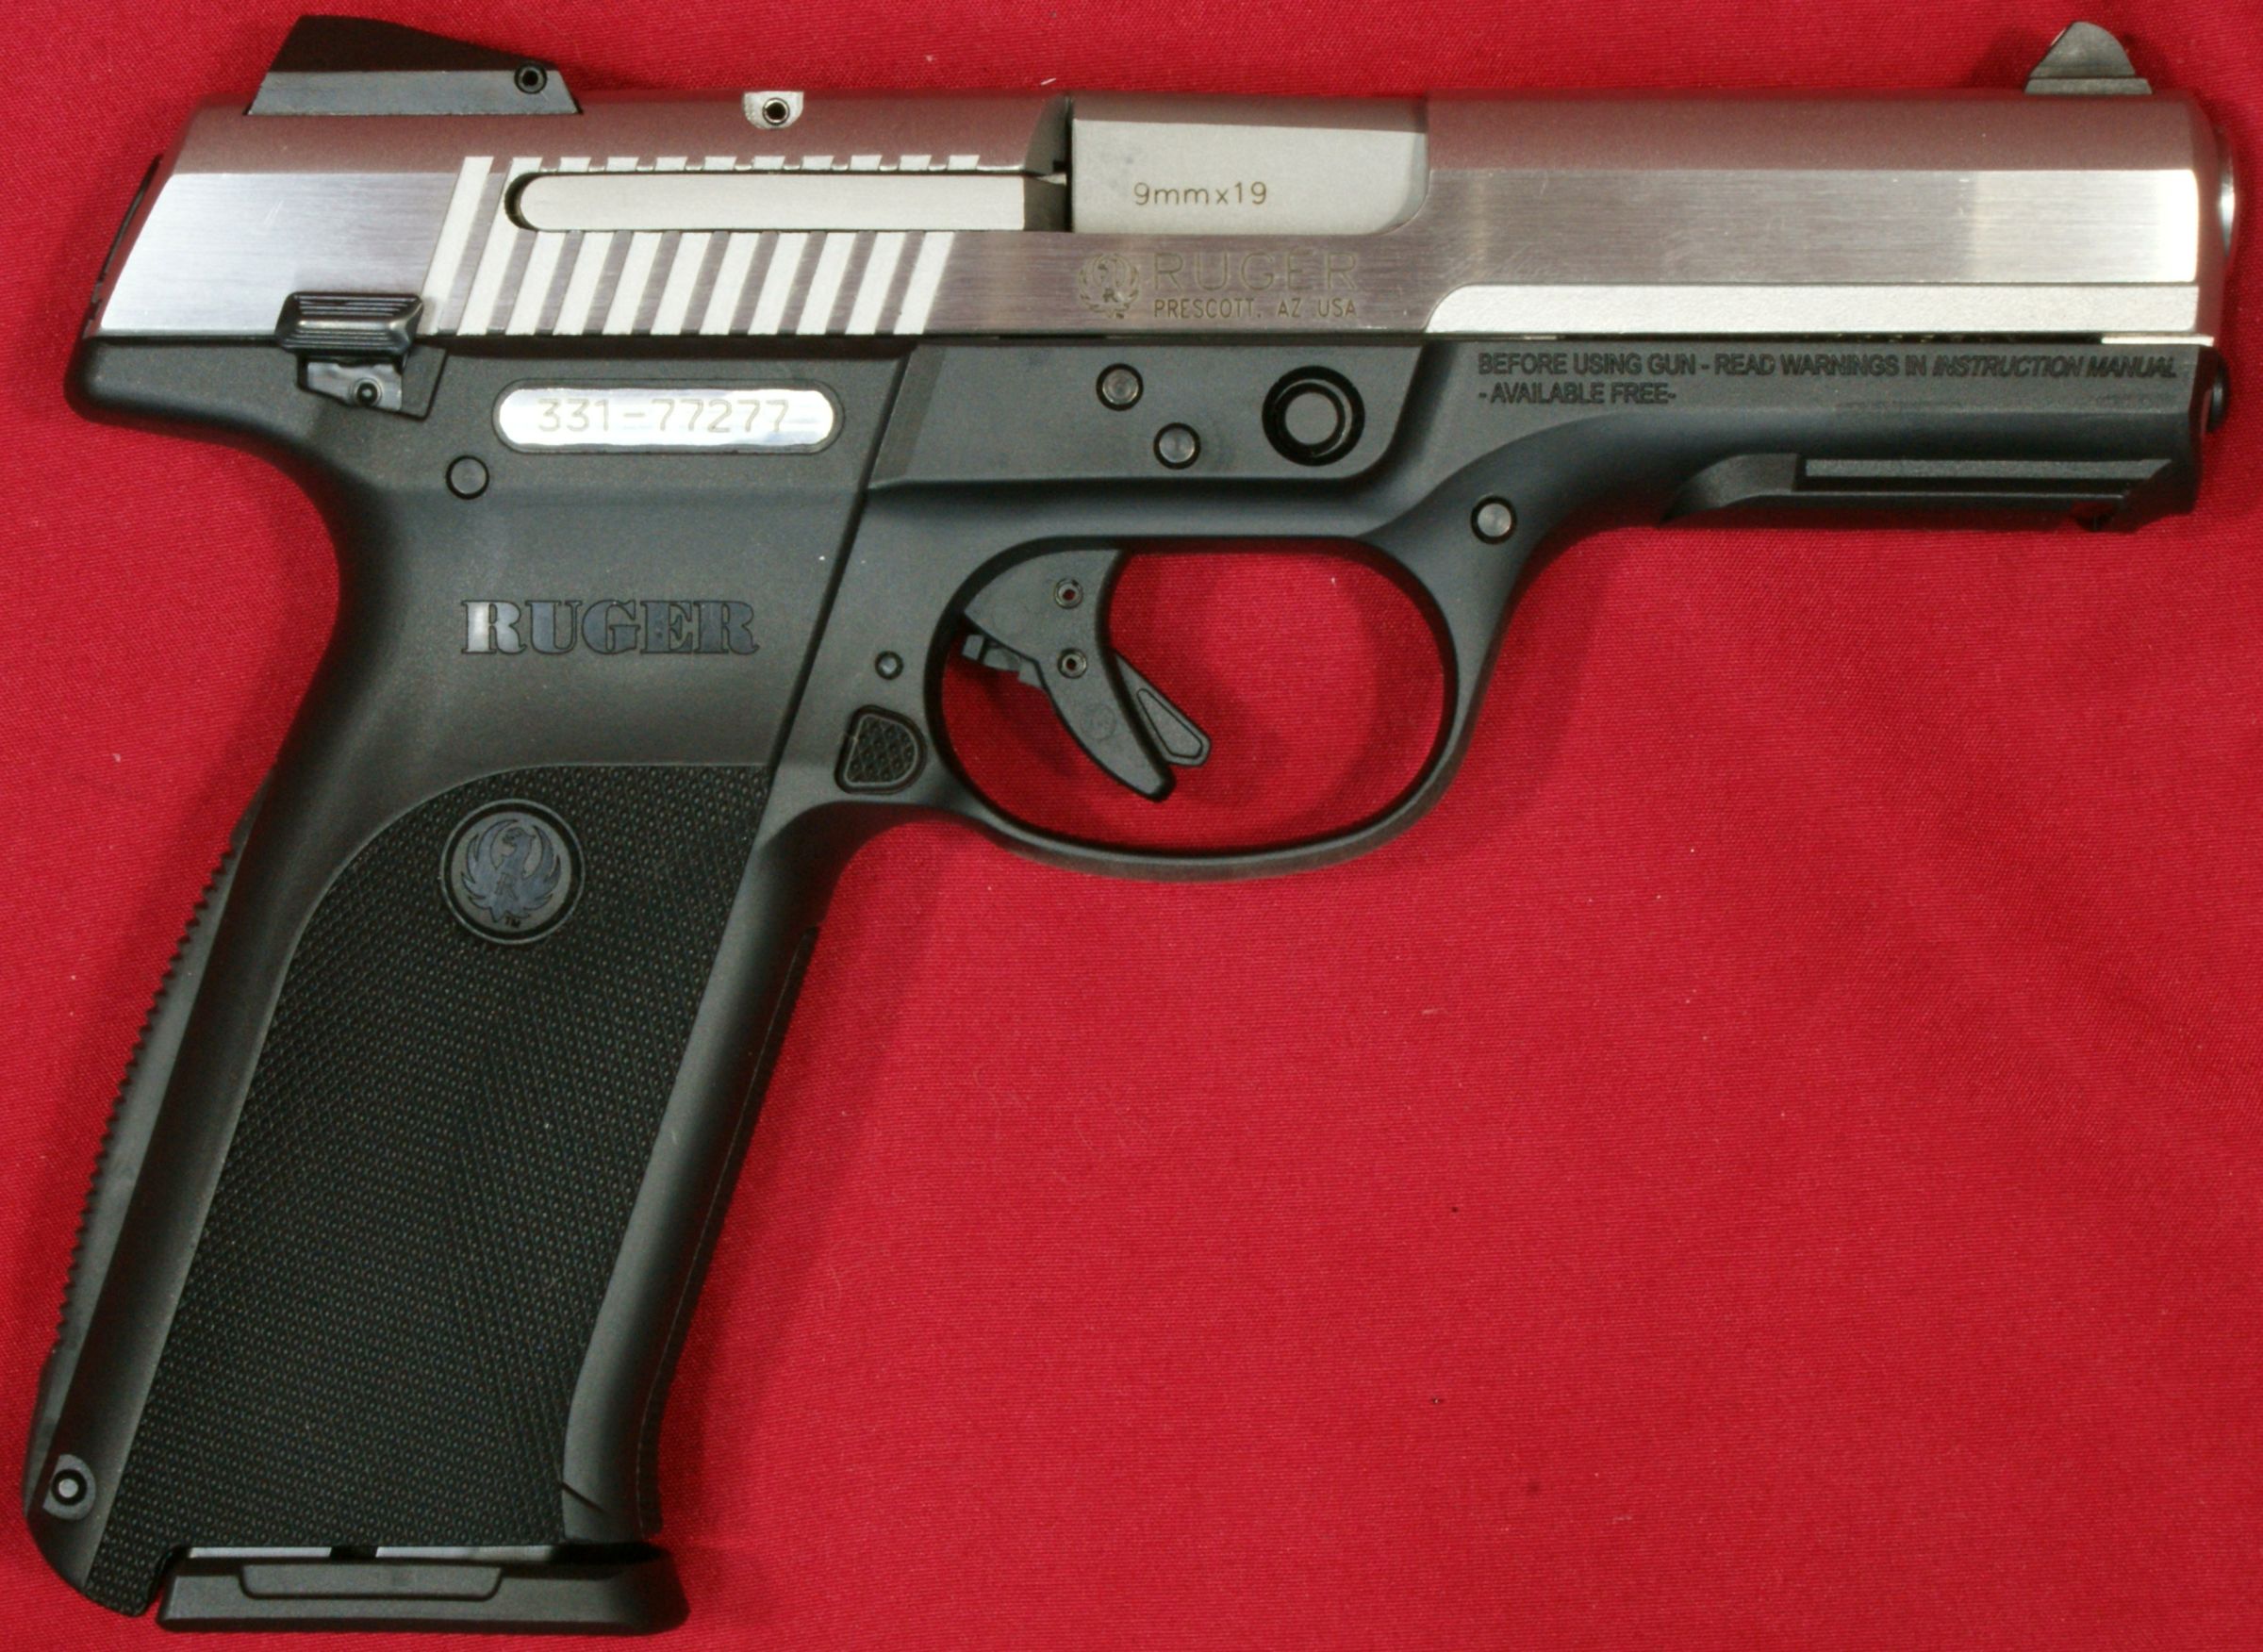
Ruger SR9 Pistol Review
Part 4 - Disassembly
January 26, 2013
In this part of the review, I'm going to cover disassembly of the Ruger SR9 Pistol. Since I covered this information in detail on my Ruger SR9c, and since the Instruction Manual is the same for both, I have cheated a little and copied my SR9c information to this part of my SR9 review and tweaked it some to be specific for this particular SR9 pistol. Don't worry that you are going to miss some details because in Part 5 I show all the internal features of the SR9 pistol.
For disassembly, I stick with the steps outlined in the Instruction Manual (starting page 23). You should always consider the instruction manual as the official source for disassembling or working with your firearms. I think Ruger did a nice job explaining disassembly in the manual so make sure you take a look. Ruger also has some good videos at their website that cover disassembly, cleaning and reassembly.
Step 1 - Remove Magazine
Remove the magazine and make sure the trigger is in the forward position. Most likely, the trigger will always be in the forward position, but make sure just in case.
Step 2 - Lock Slide Back
Pull the slide to the rear and lock it in the open position by pressing up on the slide stop. If you have not already done so, this would be a good time to make sure the chamber is empty. Throughout this review, clicking on a photo will bring up a higher resolution photo showing greater detail.
Figure 1

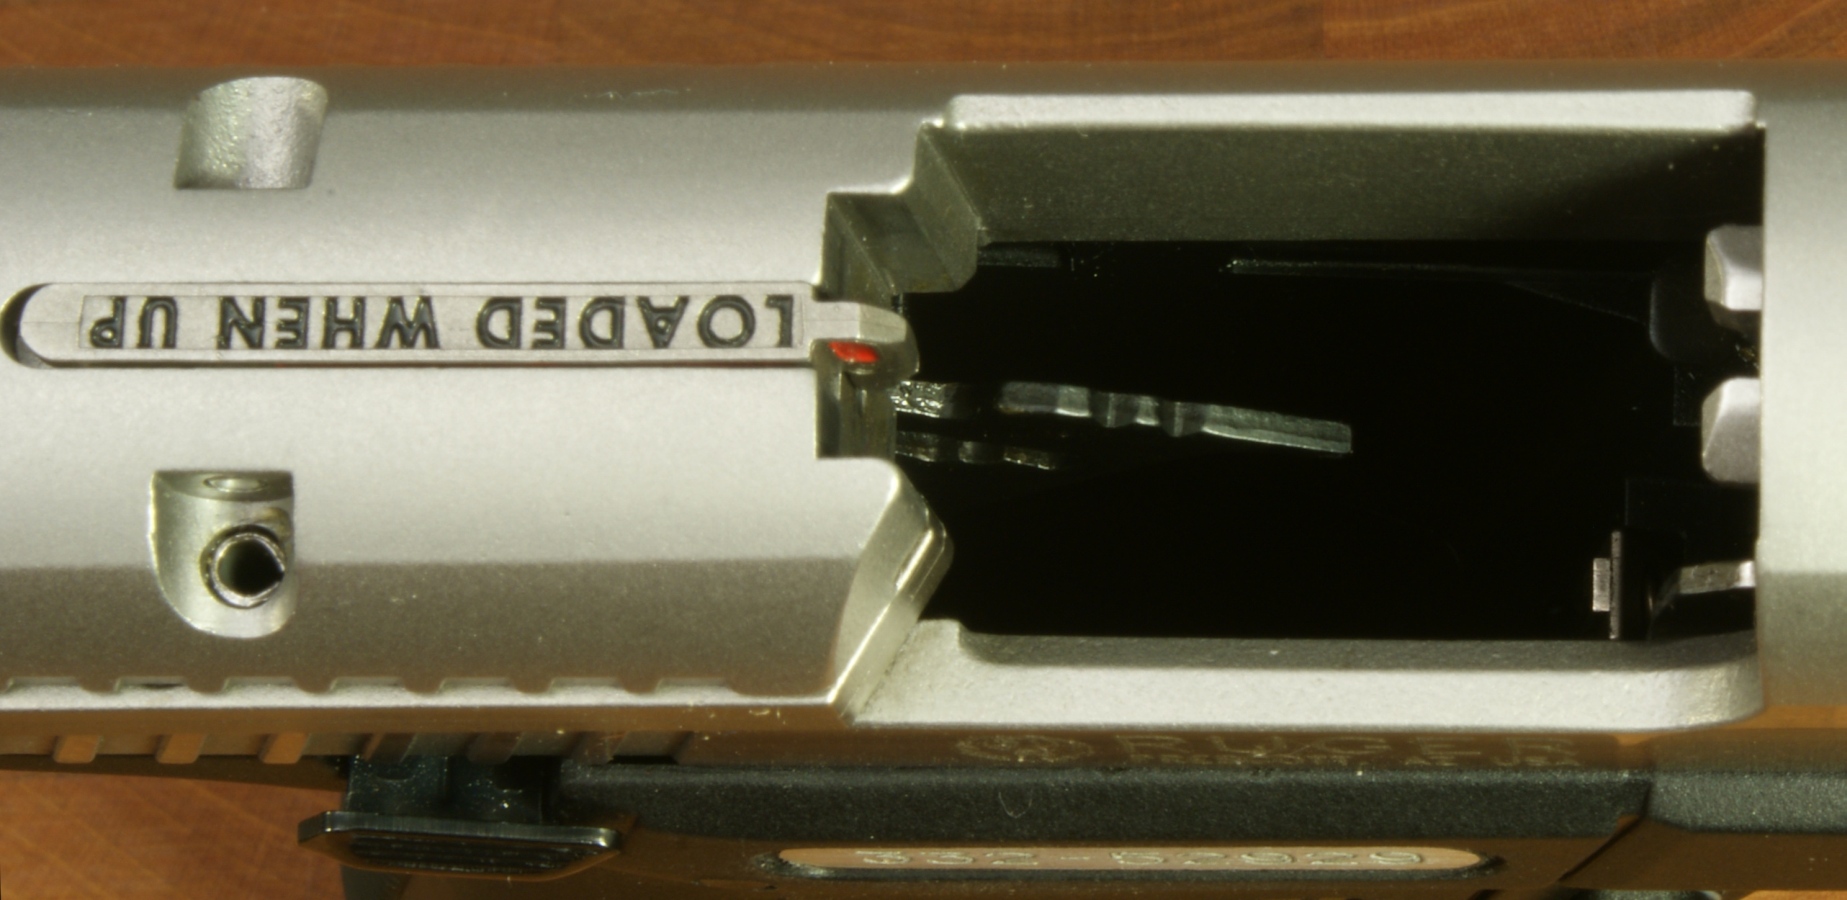
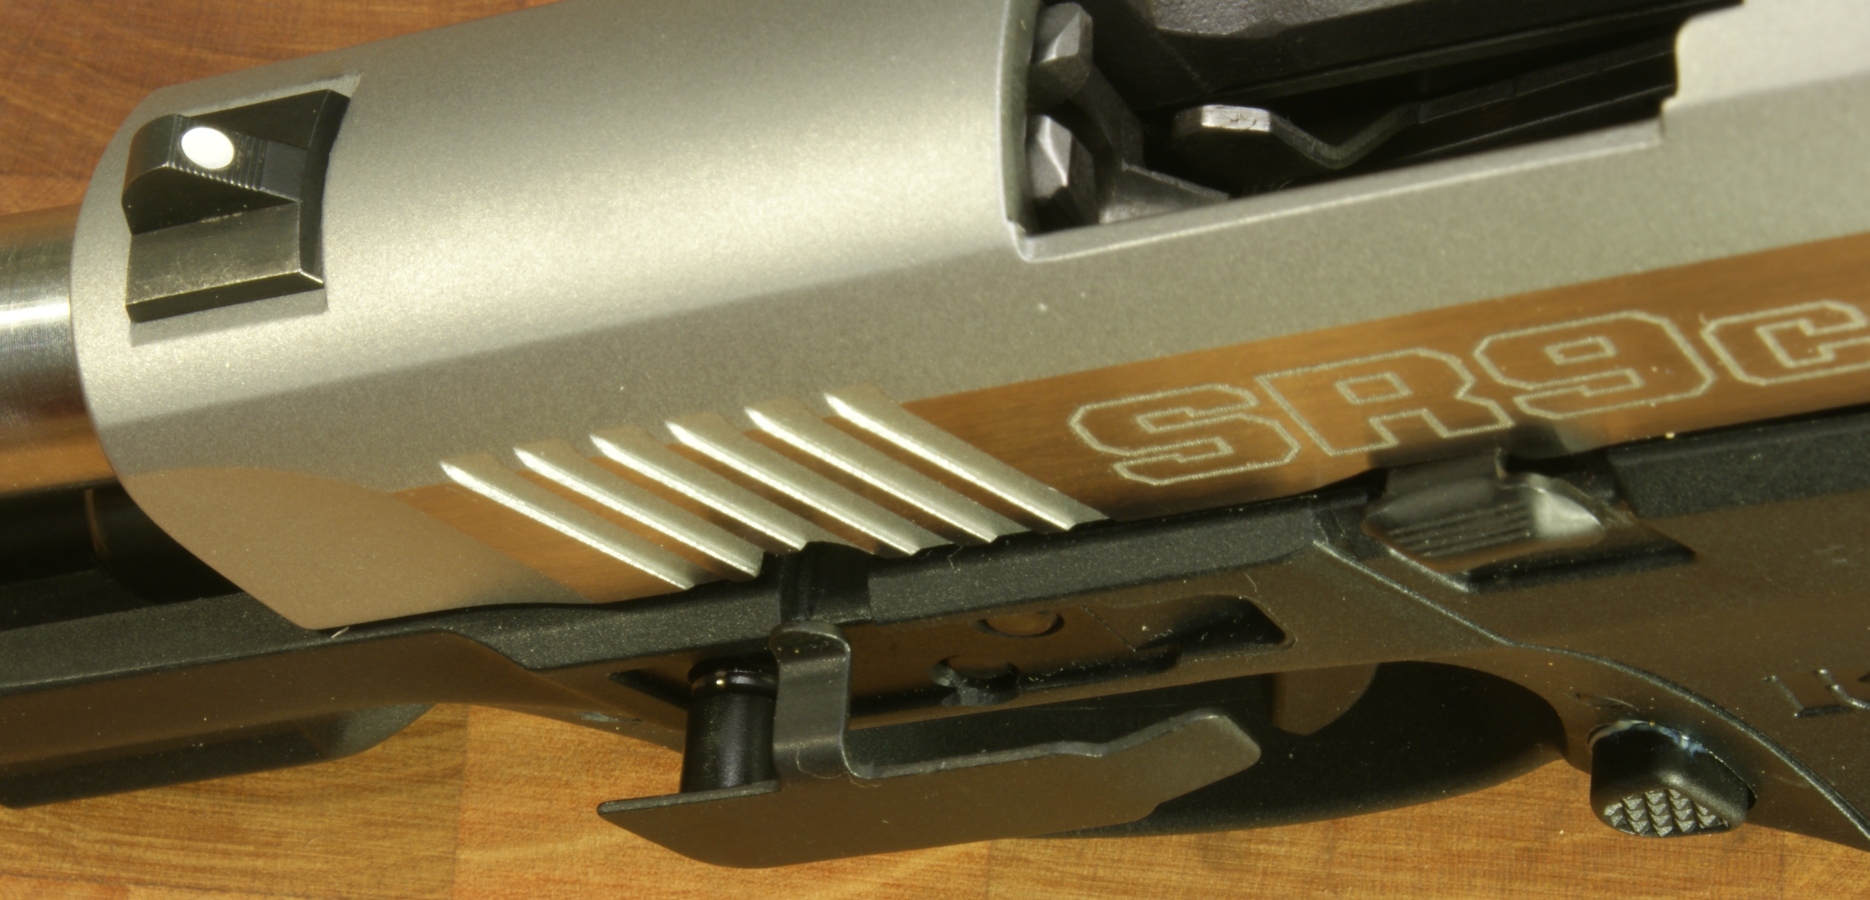
Step 3 - Press Ejector Down
While keeping pressure up on the slide stop to prevent the slide from moving forward, press the ejector down until it stops. The next two photos show the ejector in the up and down positions.
Figure 2
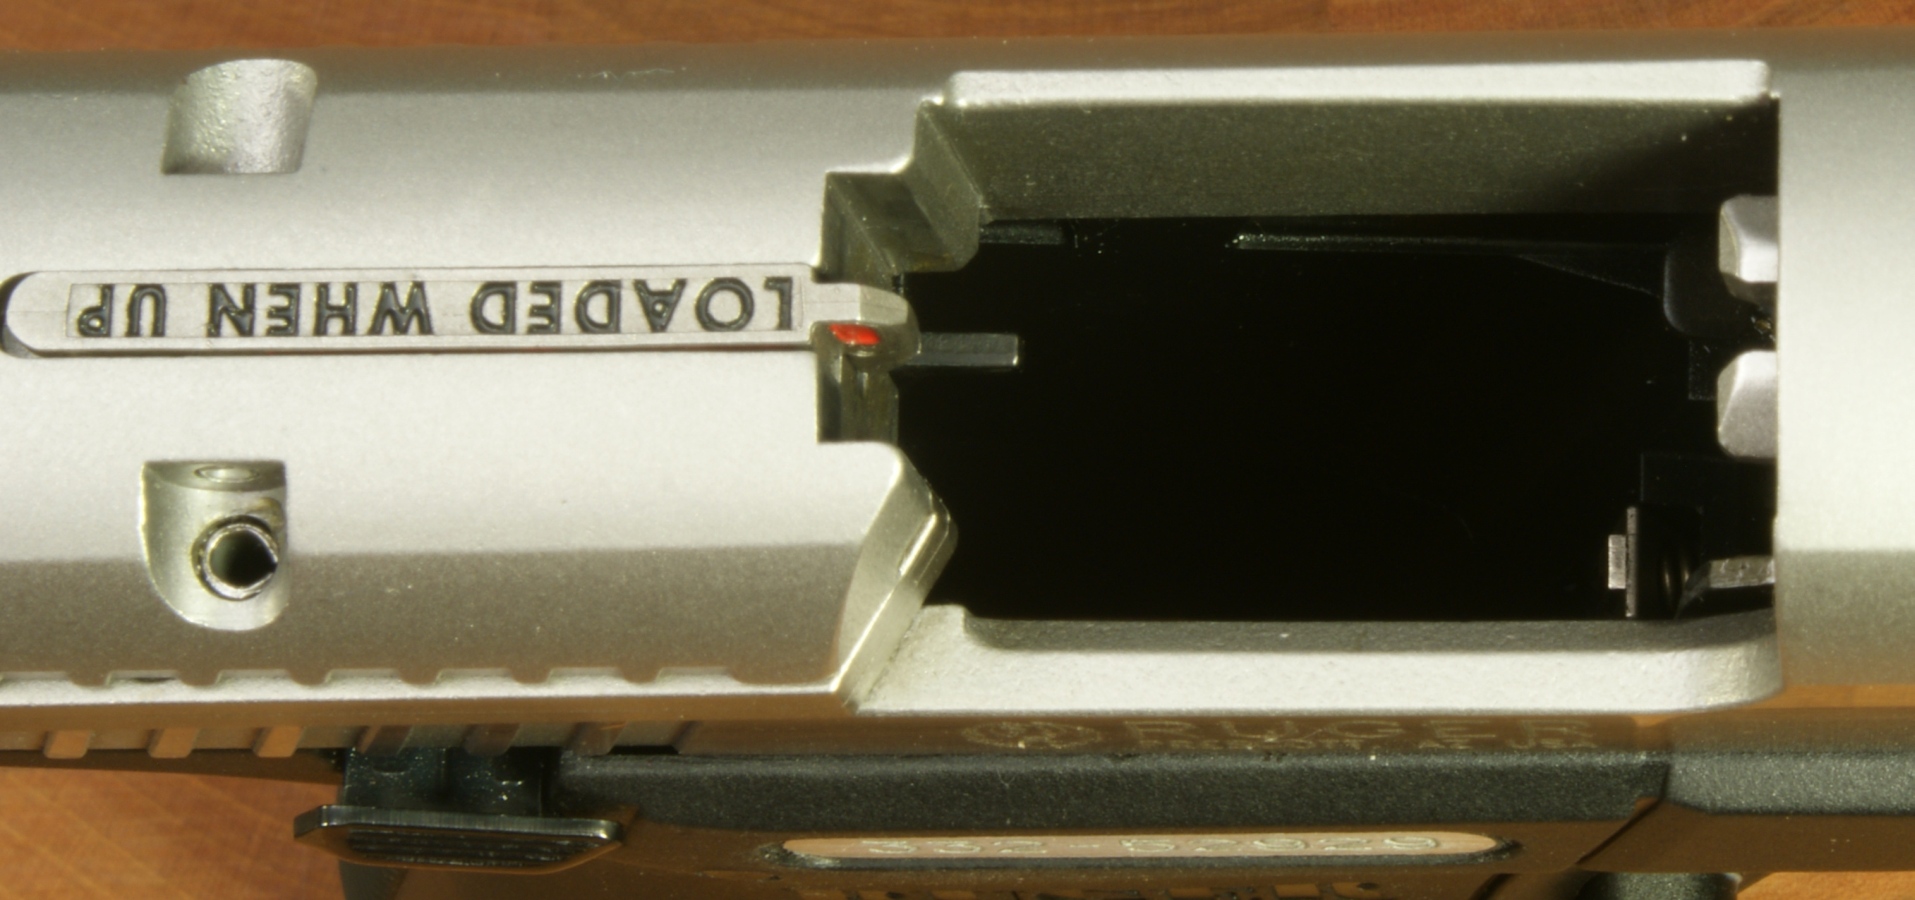
Figure 3
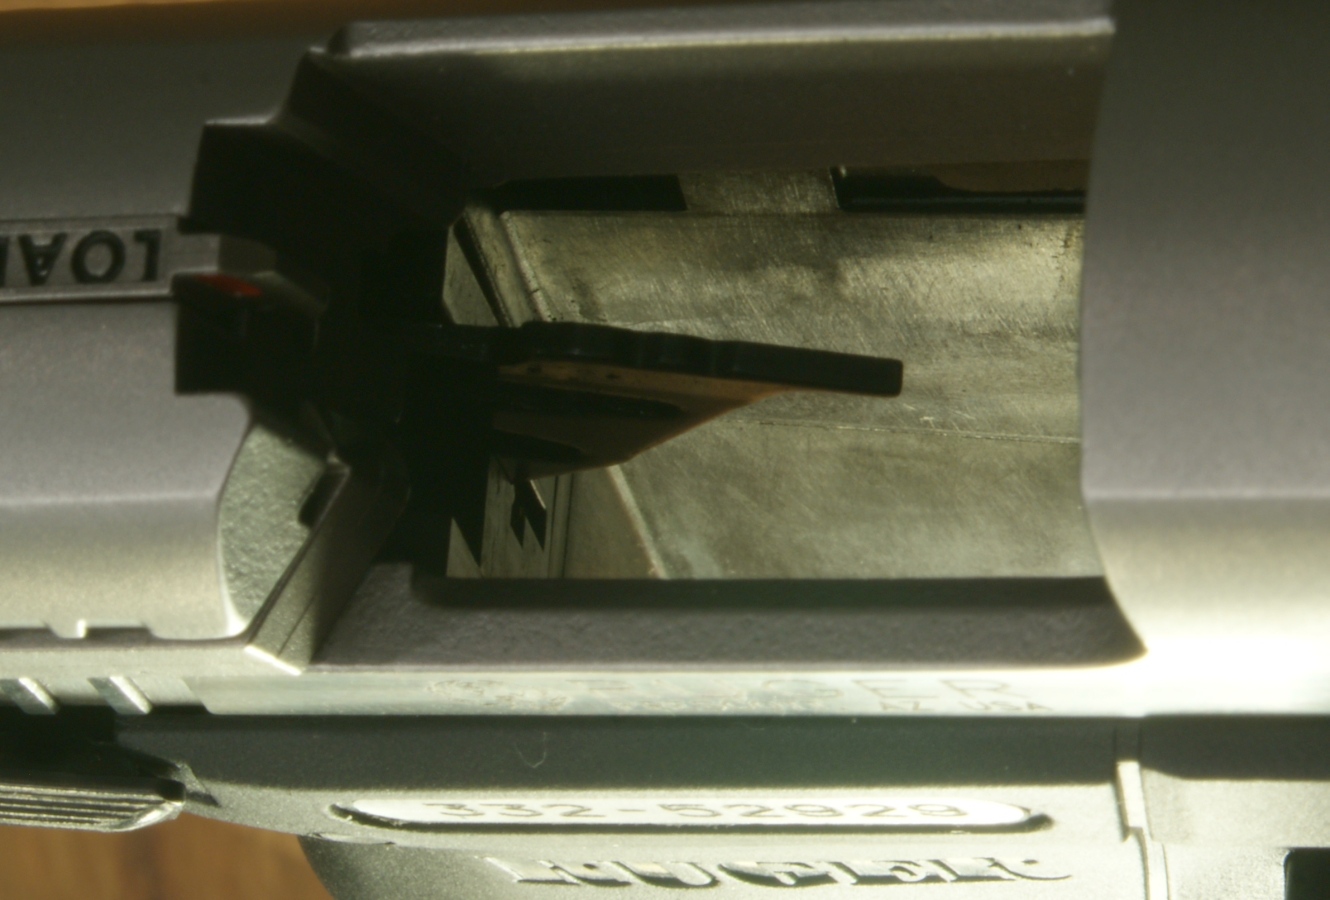
During reassembly, the ejector is pushed up by inserting a magazine. You can also lift the ejector up with your finger.
Figure 4
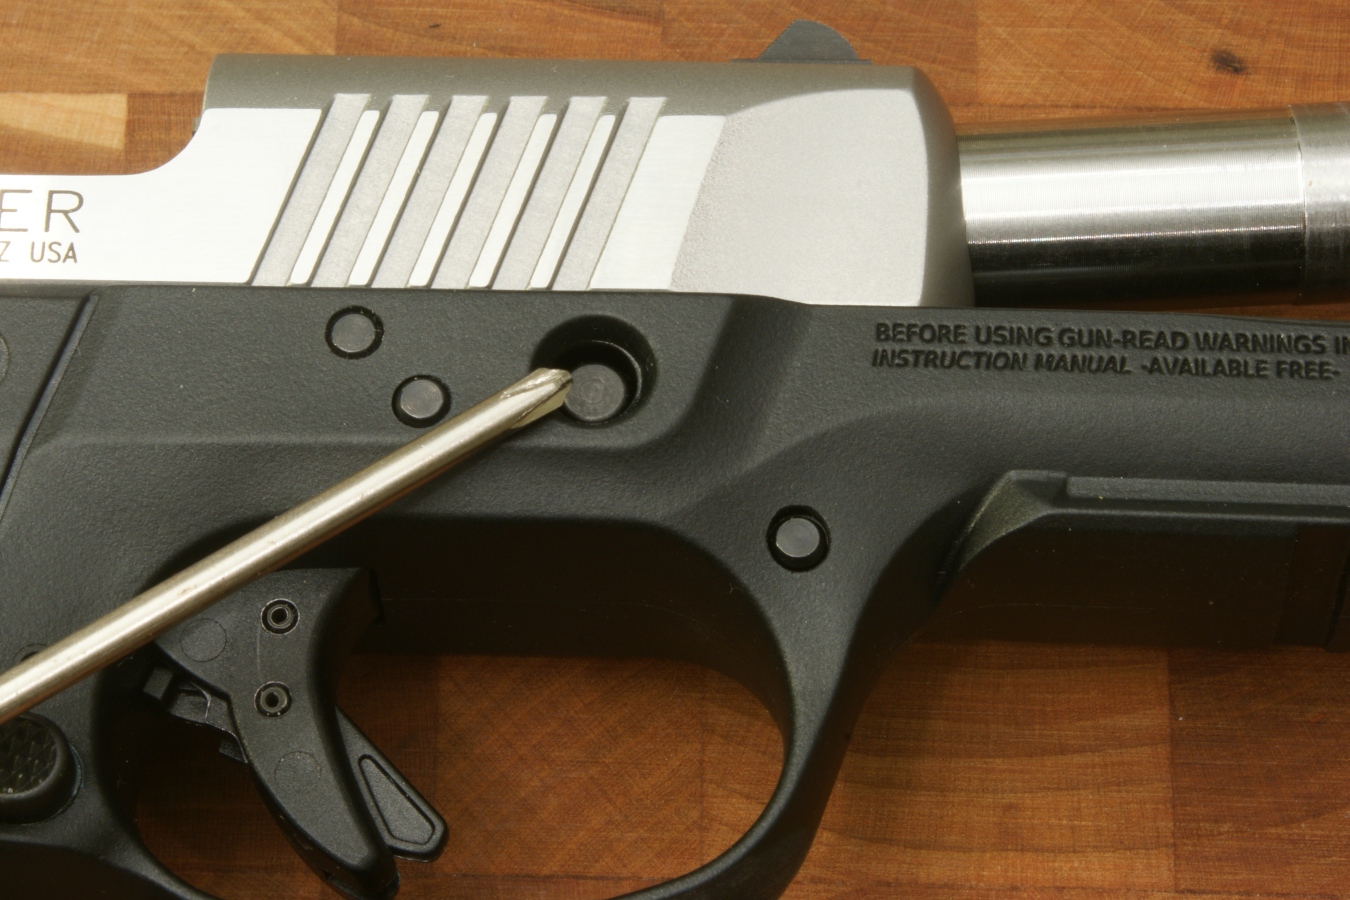
Step 4 - Remove Takedown Pin
On the right side of the pistol, press in on the end of the takedown pin. I was able to press it in with my fingers on the SR9, but needed a pushing device for the SR9c.
Figure 5
Once the head of the pin is exposed on the left side of the pistol, you can pull the pin from the pistol. I was able to easily pull the takedown pin out of the pistol.
Figure 6
This photo shows the pistol with the pin removed.
Figure 7
Step 5 - Remove Slide Assembly
Holding the slide in the rear position, push down on the slide stop and ease the slide forward until there is no more spring force.
Figure 8
You can then push the slide forward and remove the slide assembly from the frame.
Figure 9
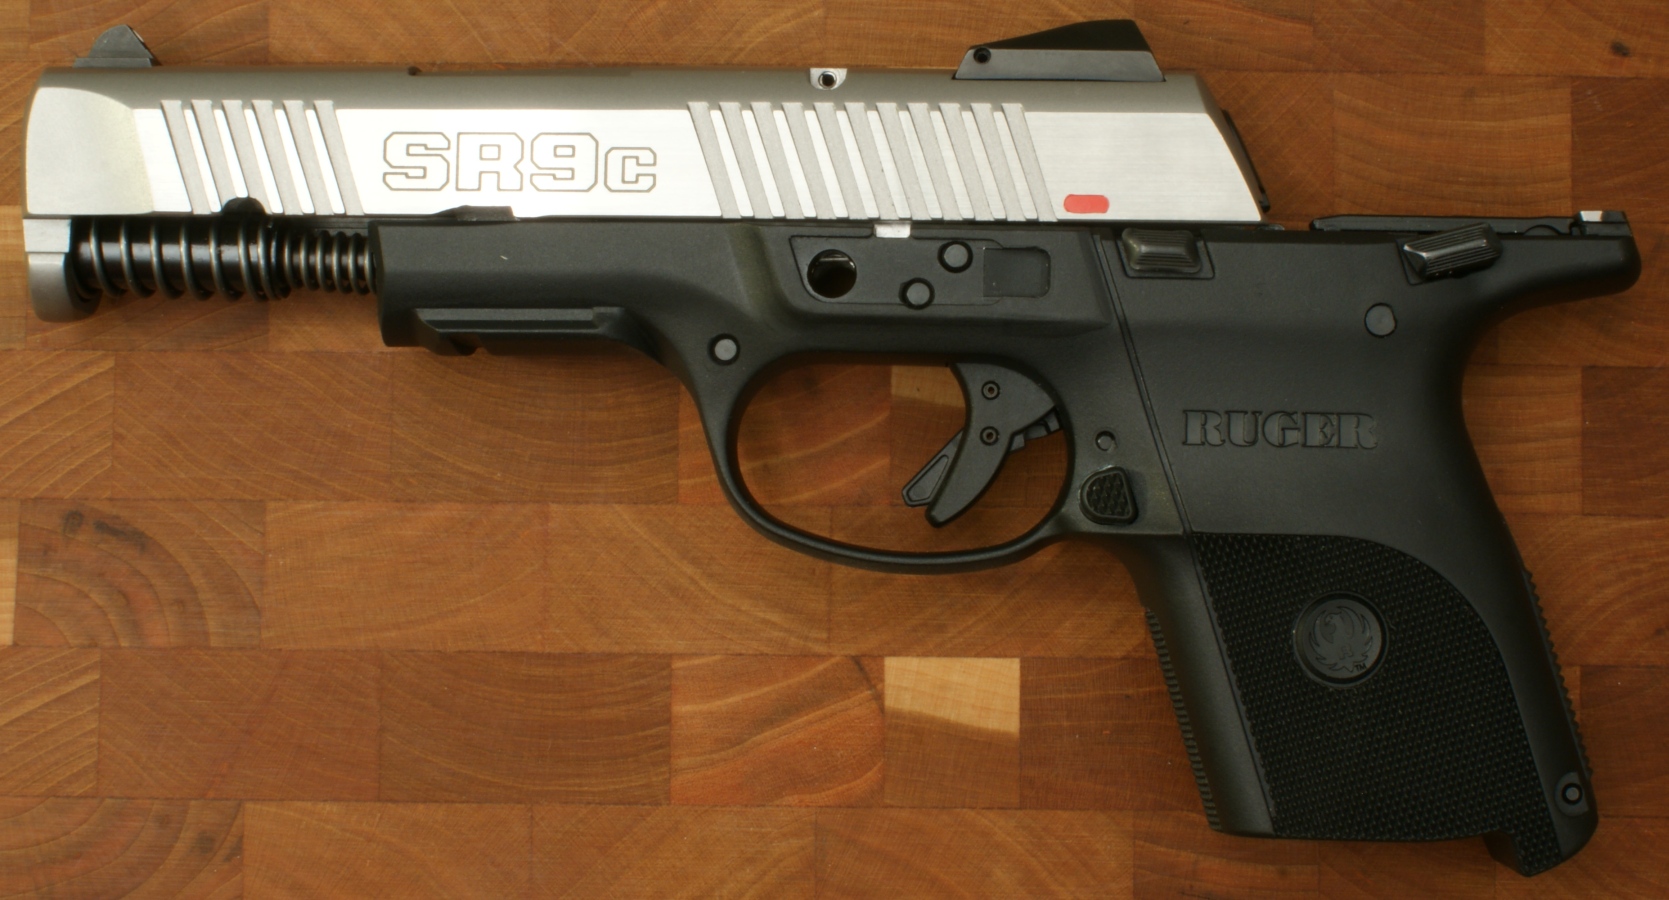
Figure 10

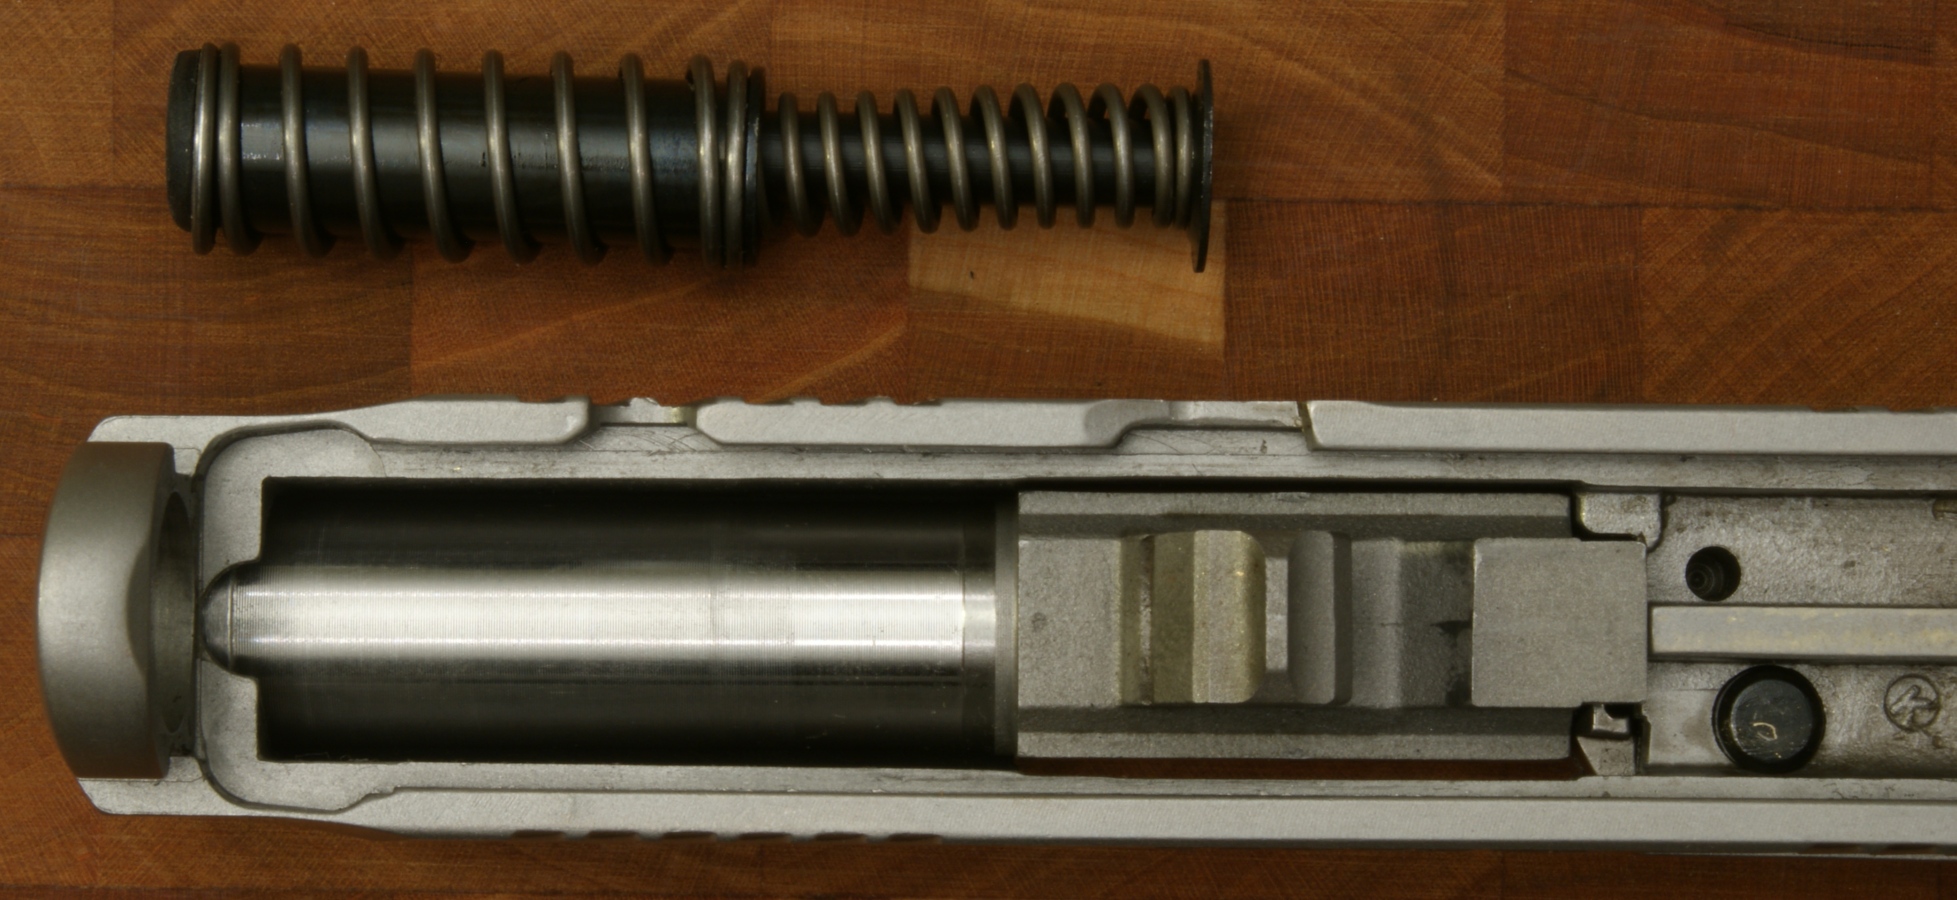
Step 6 - Remove Recoil Spring
With the slide assembly held upside down, slightly depress the recoil spring to disengage it from its seat against the barrel. The recoil spring can then be lifted forward and up to remove it from the slide.
Figure 11

Figure 12

Figure 13
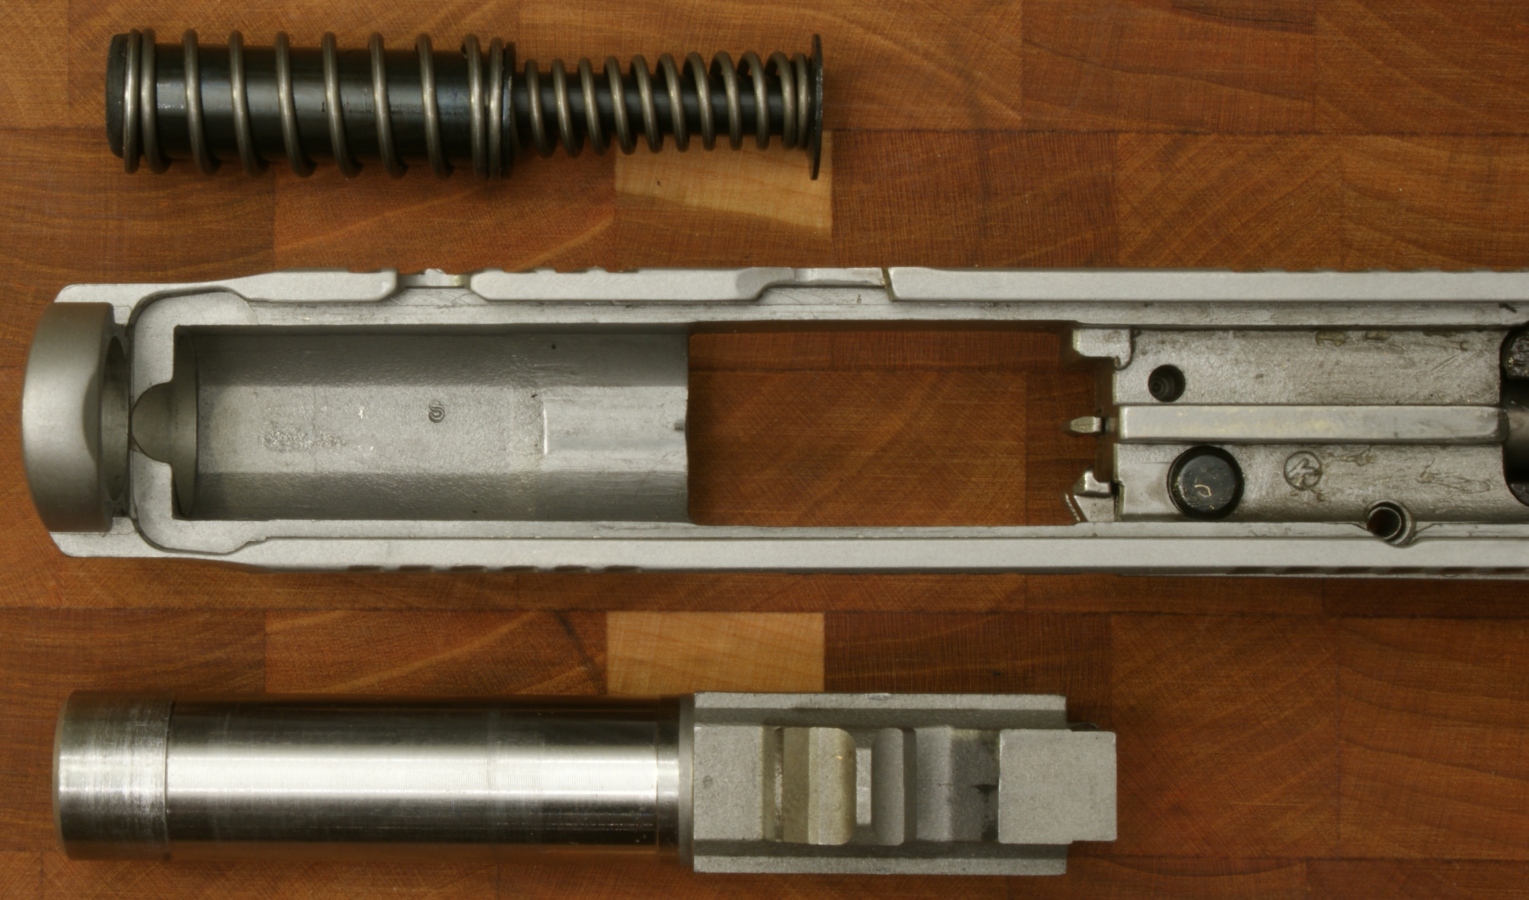
Step 7 - Remove Barrel
Move the barrel slightly forward to disengage it from the slide and lift the barrel up and out of the slide.
Figure 14
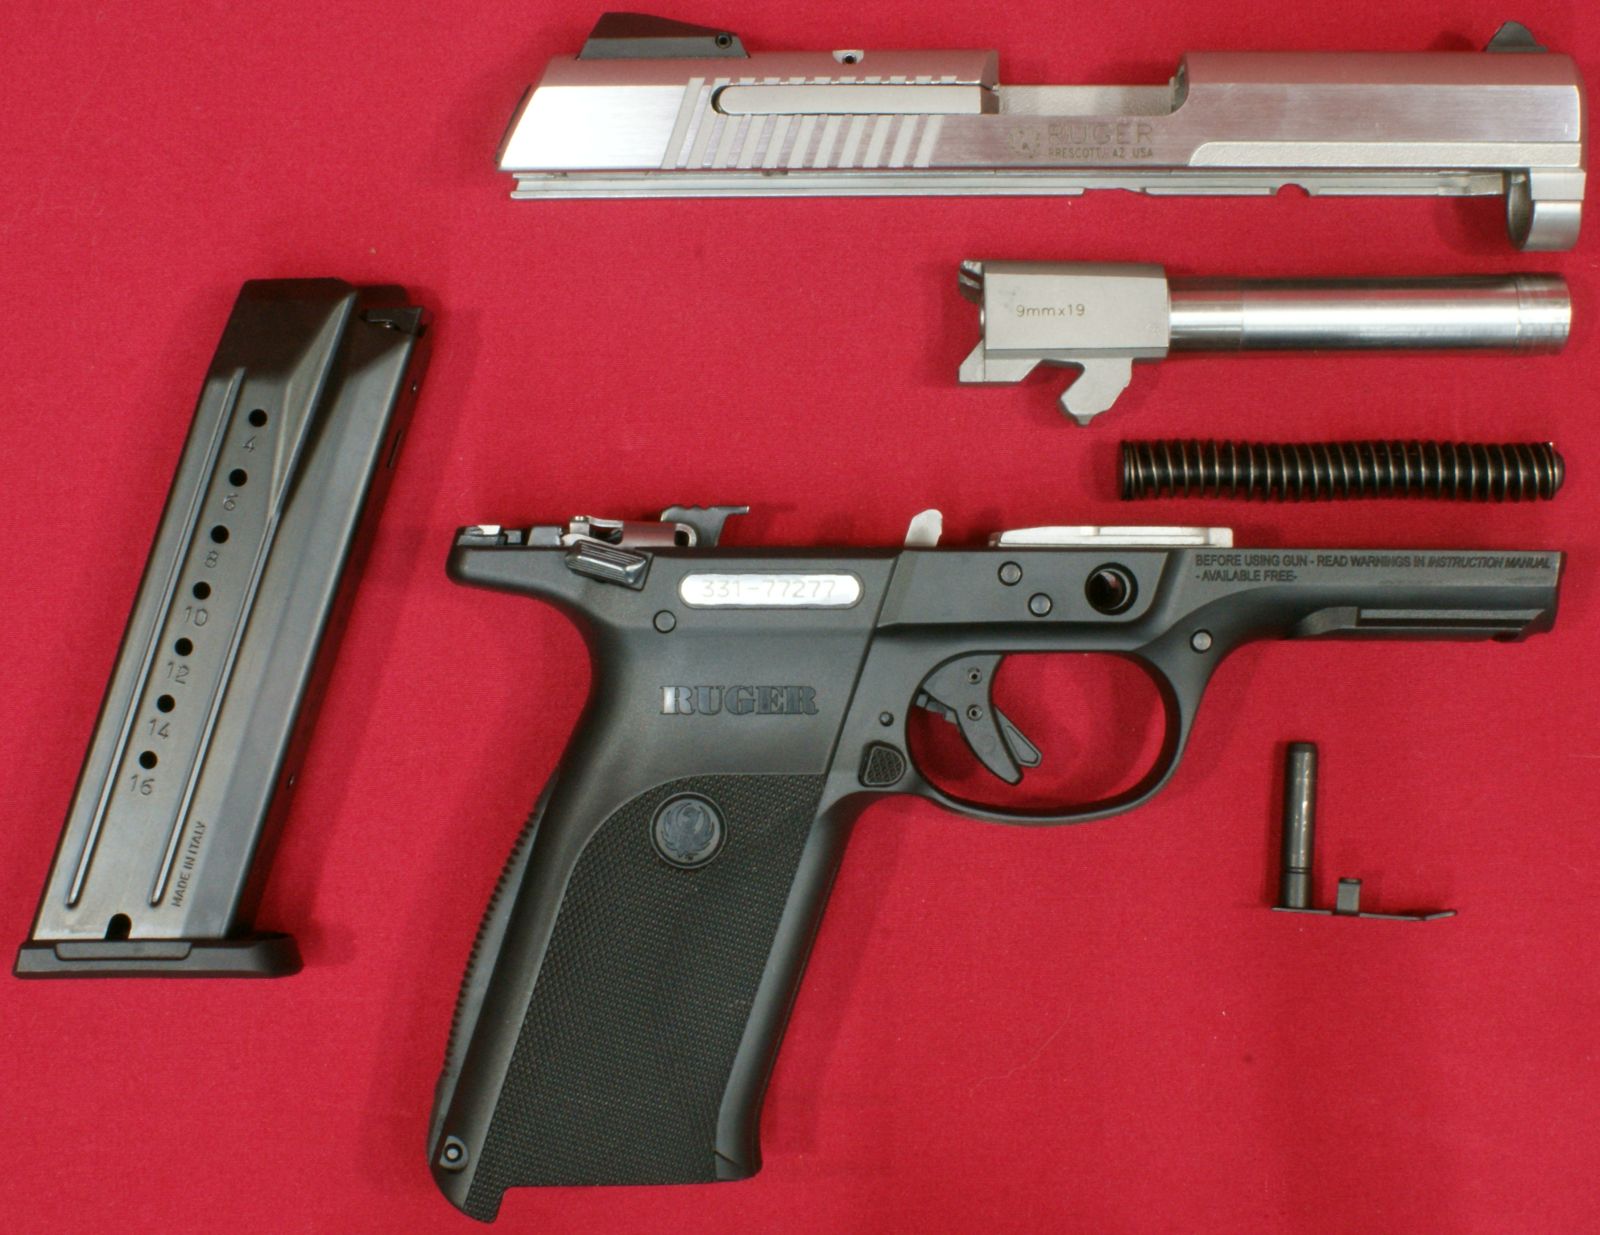
SR9c & SR9 Fully Field Stripped
The photo below shows the Ruger SR9c fully field stripped. According to Ruger's Instruction Manual, "there is normally no need for further disassembly of the pistol."
Figure 15 - SR9c
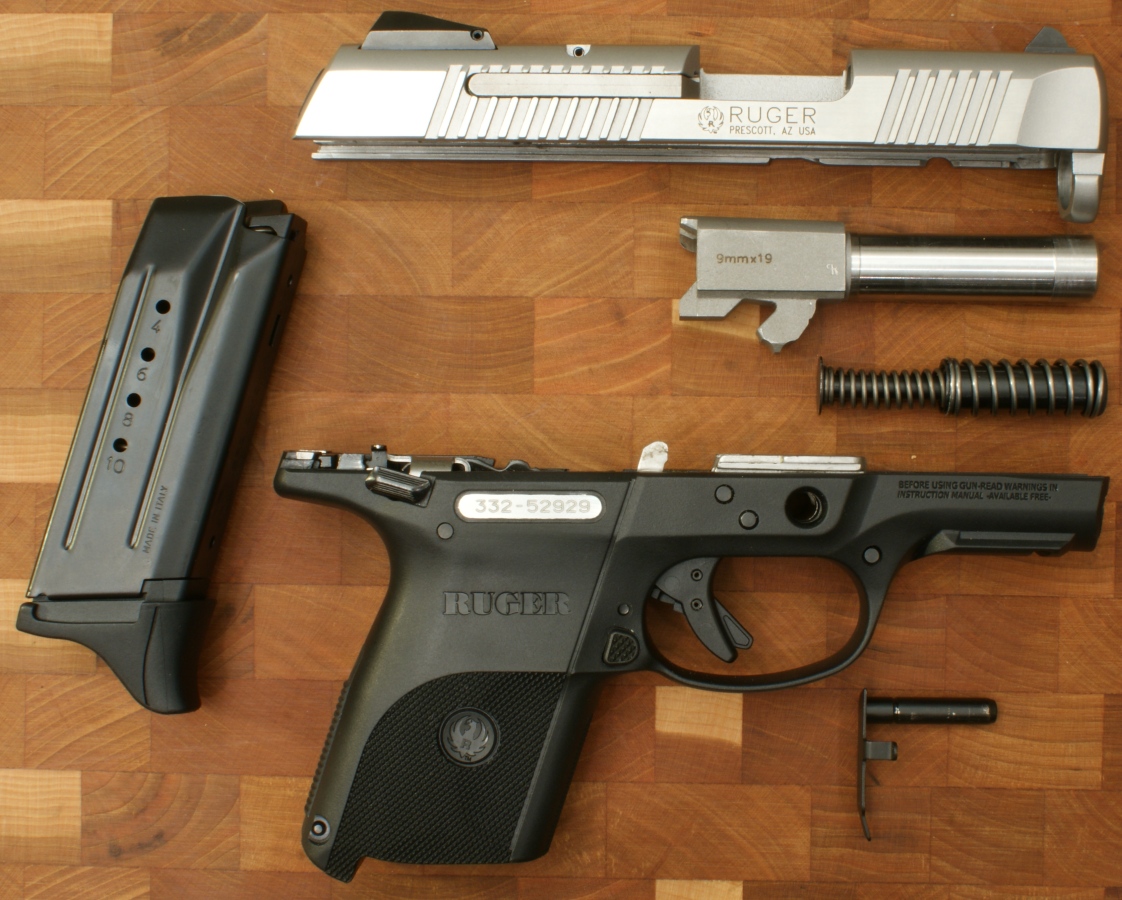
Figure 16 - SR9
Additional Disassembly
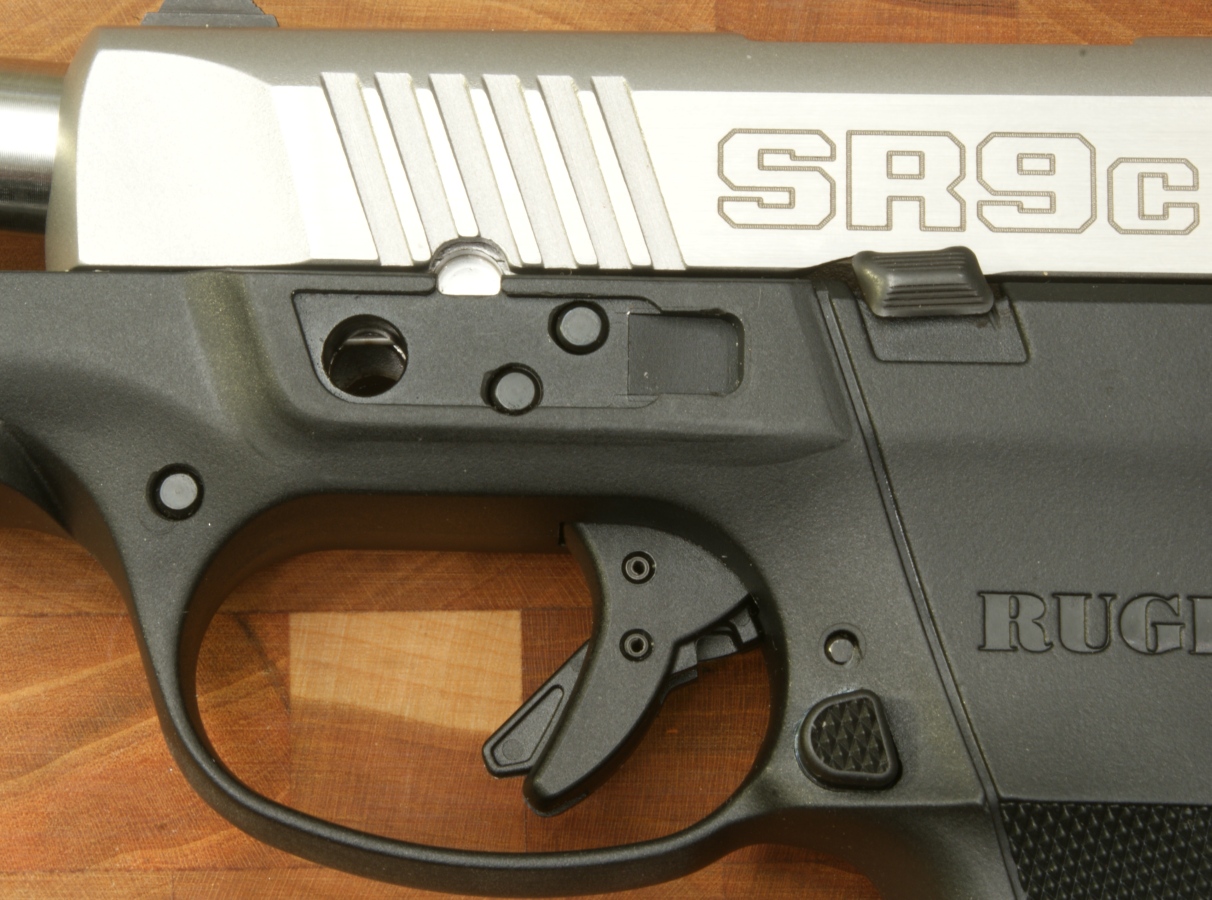
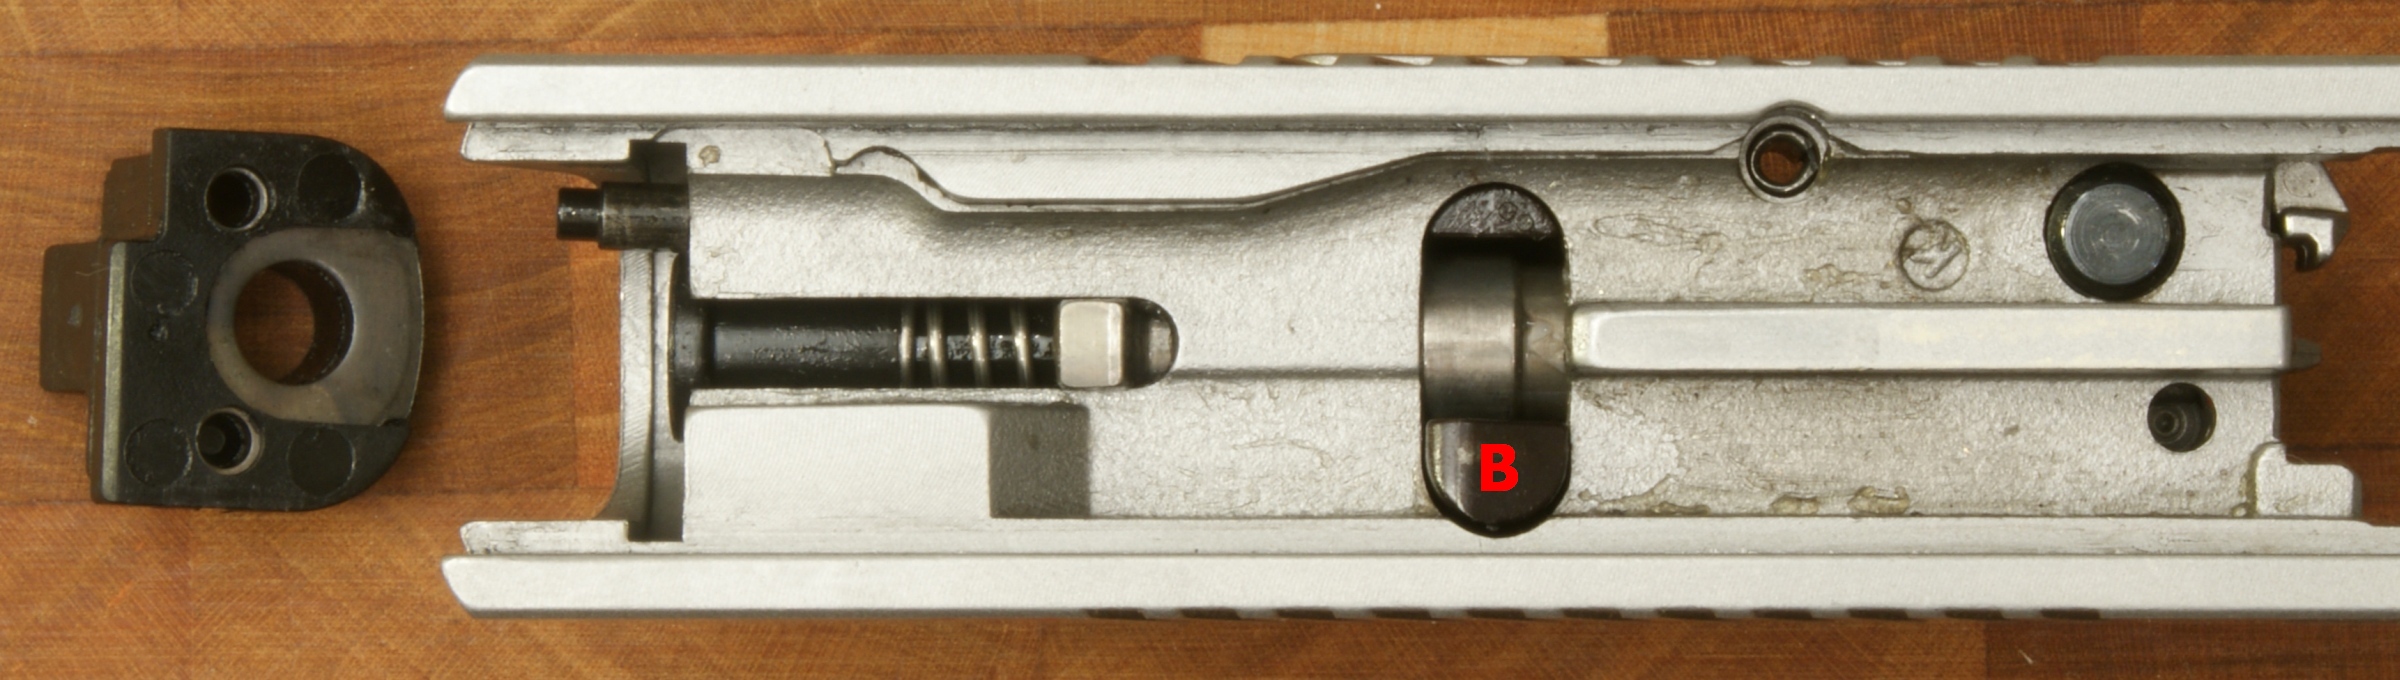
If at some point you would like to thoroughly clean your striker assembly and striker cavity in your slide, you can remove the striker assembly by following these steps. There are three key components you should be aware of when doing this; A - Striker Blocker, B - Magazine Disconnect, and C - Striker Key.
Figure 17
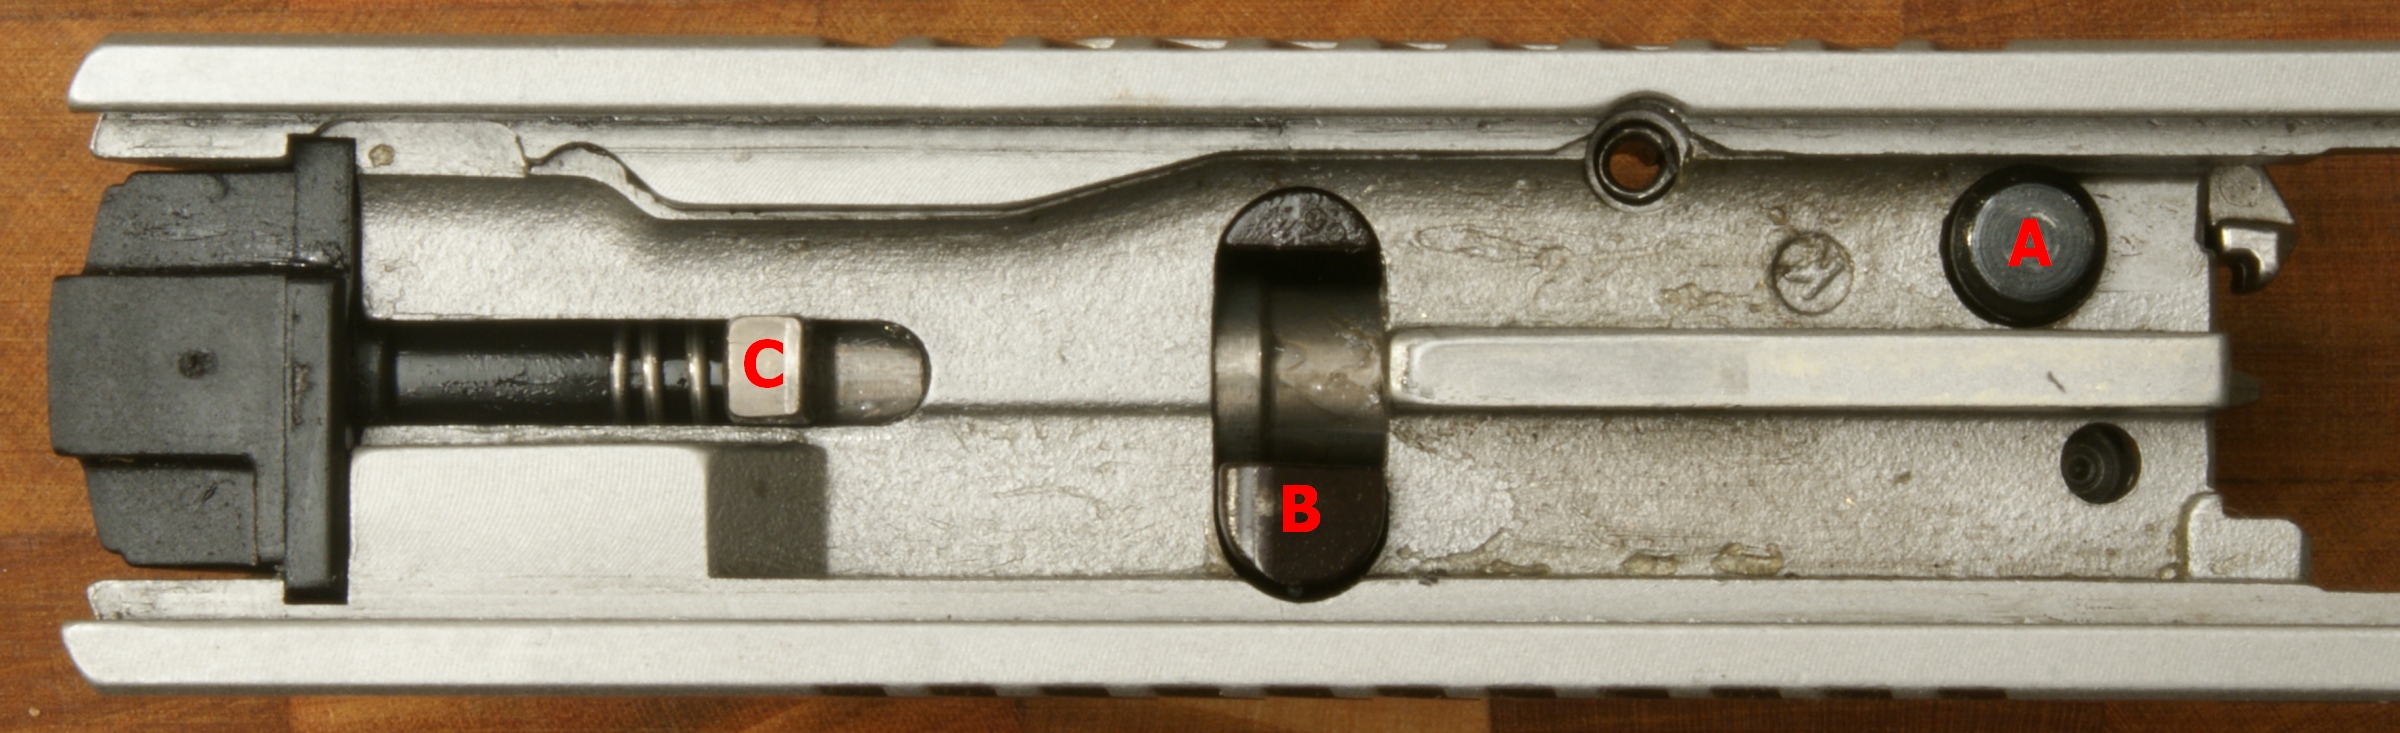
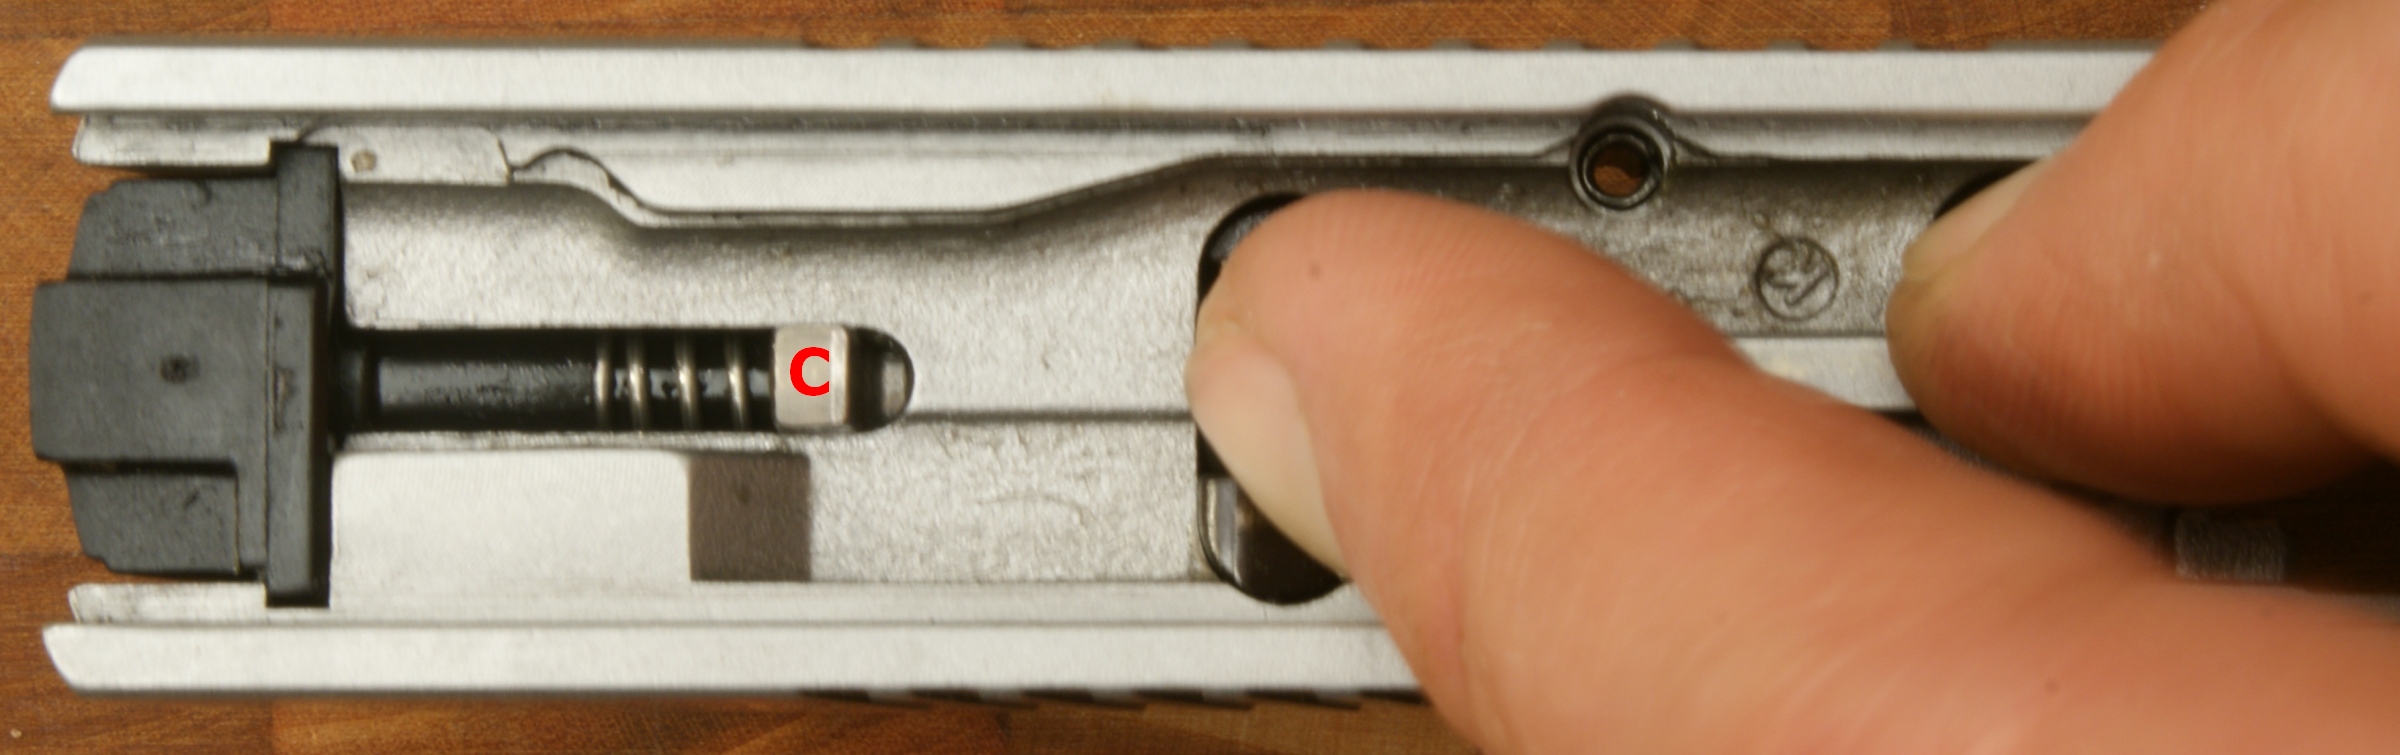
First you press the Striker Blocker (A) and Magazine Disconnect (B) at the same time to allow the Striker Key (C) to move forward to the position shown below.
Figure 18
Now you can remove the Striker Cover (black nylon piece at the end of the slide). Using a small punch, press down on the Striker Cover Plunger and push the Striker Cover out of the slots at the rear of the slide.
Figure 19
Figure 20
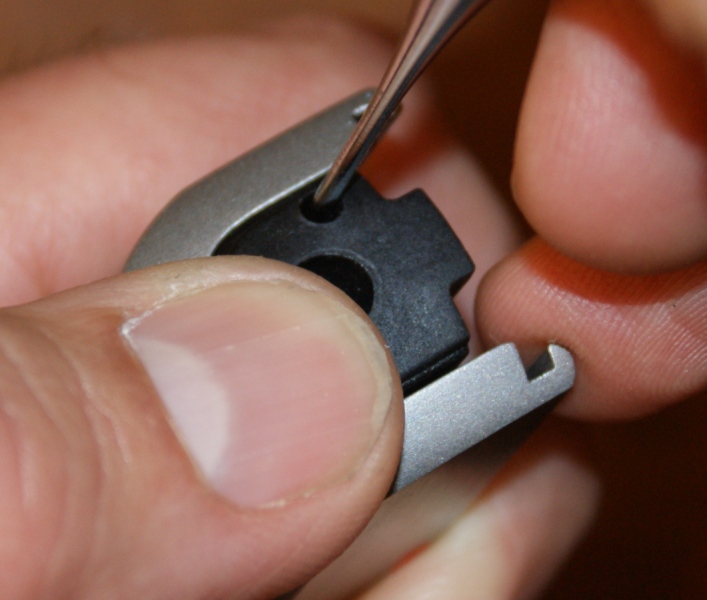

Figure 21
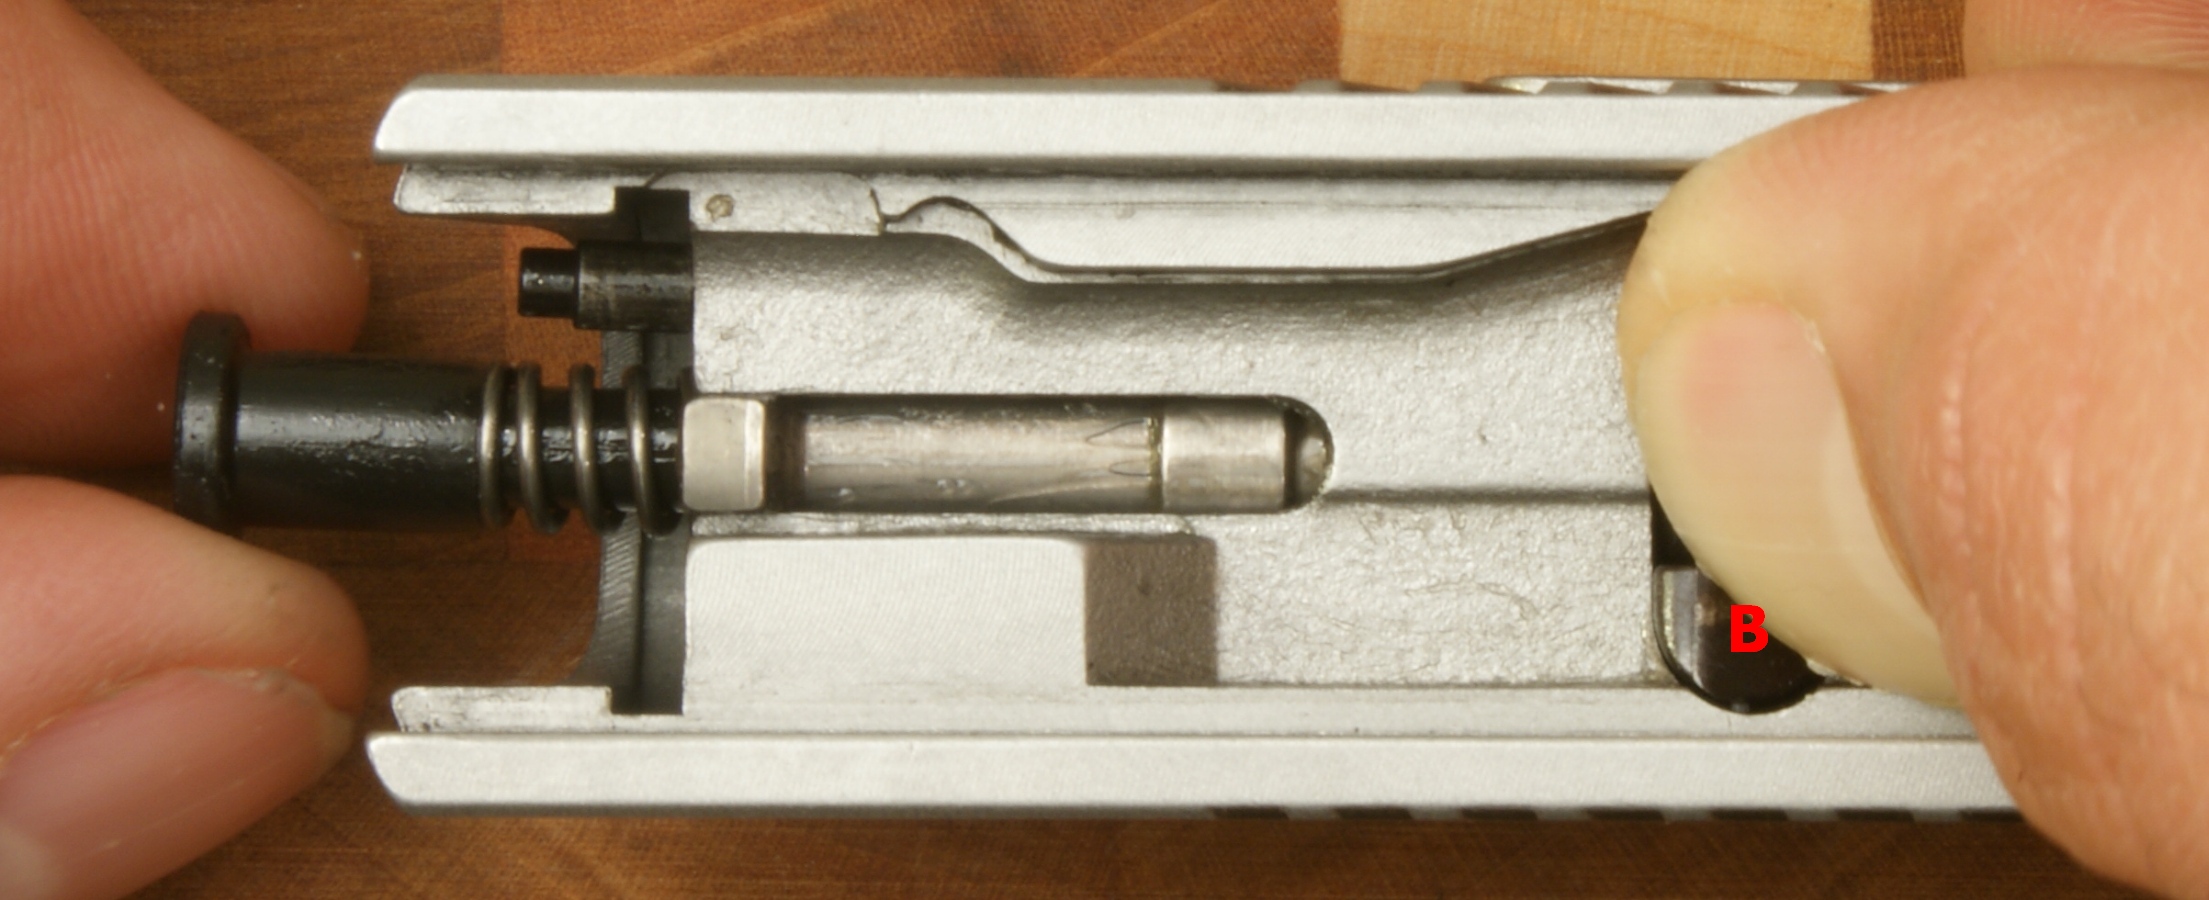
Next, press down on the Magazine Disconnect (B) and you can remove the Striker Assembly from the slide. As a note, the right lip of the magazine presses the Magazine Disconnect up when the slide is forward. If a magazine is not installed, the disconnect is down which blocks the travel of the striker and will not let the striker impact the cartridge, even though the pistol seems to fire when you pull the trigger.
Figure 22
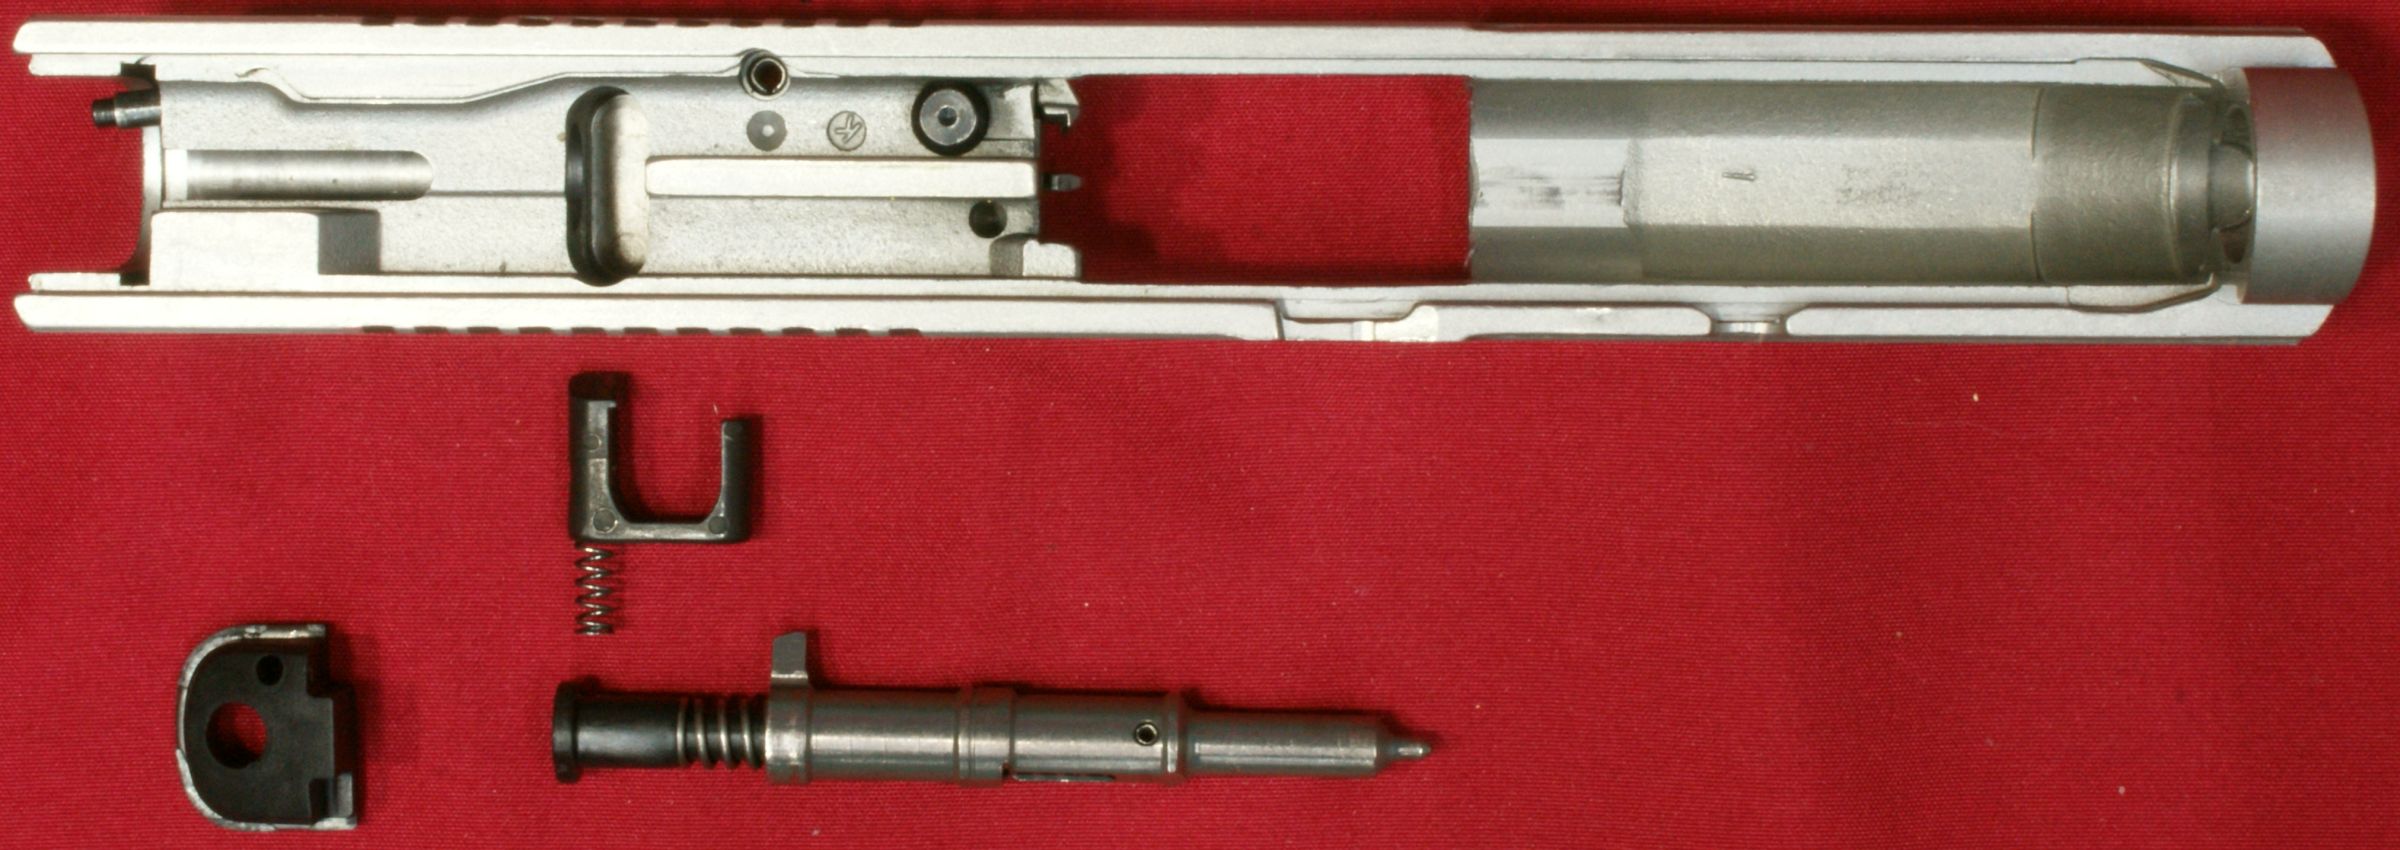
You can then remove the Magazine Disconnect by pulling it out of the slot in the slide. These pieces are shown below for both the SR9c and SR9.
Figure 23 - SR9c
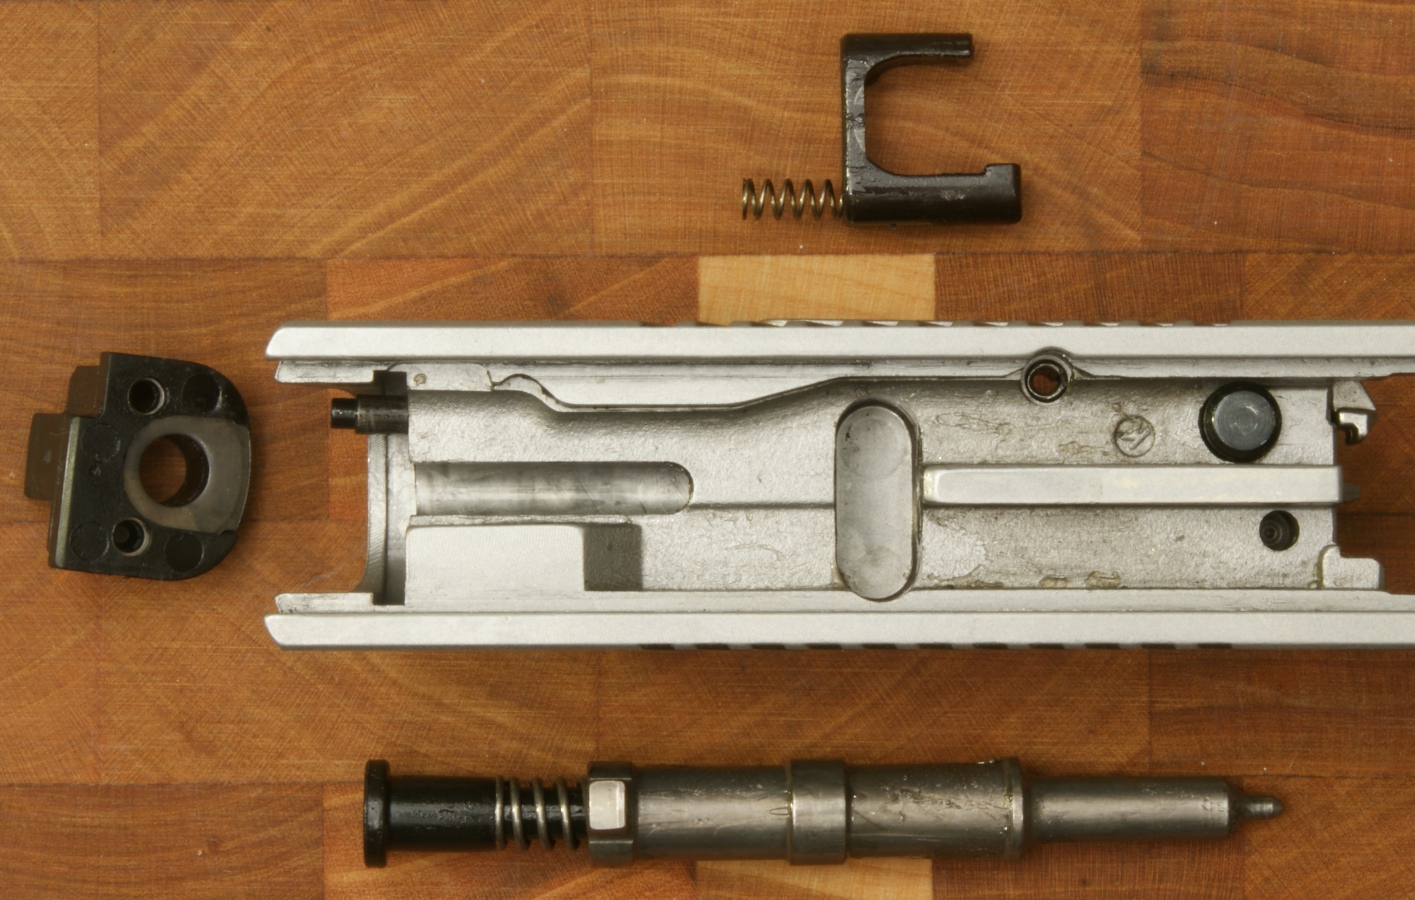
Figure 24 - SR9
Thoughts
Disassembly and reassembly of the Ruger SR9 is a very quick and simple task so there should be no excuses for not keeping your pistol clean. The process of disassembly is similar to many pistols and the only trick is to remember to push the ejector to its down position.
For more detailed photos and commentary, make sure you check out the other parts of this review and feel free to leave comments on my Reader's Comments page. The following links are provided to help you see other parts of this review.
- Ruger SR9 Pistol Review: Part 1 - Introduction, Specifications and Summary
- Ruger SR9 Pistol Review: Part 2 - What's in the Box
- Ruger SR9 Pistol Review: Part 3 - External and Operational Features
- Ruger SR9 Pistol Review: Part 4 - Disassembly (this page)
- Ruger SR9 Pistol Review: Part 5 - Internal Features
- Ruger SR9 Pistol Review: Part 6 - Range Test
Or
If you would like to be notified about future Gunsumer Reports reviews via Facebook, make sure "You Like This" by clicking the Facebook "Like" button at the bottom or top of this page. If it already says "You Like This" beside the button, clicking it again will uncheck the "Like" status and you will not be notified.
| Share on Facebook | |
© 2010, 2011, 2012, 2013, 2014, 2015, 2016, 2017, 2018, 2019, 2020, 2021, 2022, 2023 & 2024 Gunsumer Reports™, All rights reserved.
FTC Disclosure