|
|
Gunsumer Reports TM Providing Detailed Objective Reviews for Firearms and Firearm Accessories |
Nightforce Direct Mounts Review
February 22, 2013
At the end of 2011, I reviewed the Remington Model 700 SPS Tactical AAC-SD Rifle in .308 Win and used a set of Remington 700 Integral Mounts to install my Bushnell Elite Tactical 4.5-30x50mm Scope. Over this last year, this rifle has proven to be very accurate and it has become my shooting platform to begin my education into long range shooting. The other day, my shooting partner and I were trying to kill a little time between deer hunting sessions and we set up a 6" gong at about 300 yards and thought we would build confidence in our shooting abilities by hitting some steel. He decided to shoot first with his Remington Model 700 Sendero in 300 Win Mag using the same Remington 700 Integral Mounts and a Nightforce 5.5-22x50mm Scope. When he squeezed off his first shot, we were actually both amazed that he missed the target. He squeezed off another with the same result and that was when his investigation started. Since I was sure that I was going to make this shot look like child's play, I setup with my SPS Tactical and squeezed a shot off. We did see the gong shake, but it wasn't a solid hit on the plate and clearly not the result I was expecting, so I squeezed off another round and to my surprise, I hit nothing. That was when I started my investigation.
We setup a target at 100 yards and found that our zeros had shifted slightly and the error was being magnified at the 300 yards. He noticed that his scope was shifting in his rings and I noticed the same thing but not to the same extent. We checked the torque on the caps and his may have been slightly loose, but mine seemed to be tight. After re-zeroing, we successfully made our 300 yard shots, but we both knew that our investigations were not over. Once we returned from the hunting trip, we pulled off our scopes and found that our mounts were working loose. His forward mount was so loose it would rattle and mine had no measurable torque, yet were still slightly snug. Some lessons you have to learn first hand, ours was to always use some type of thread locking compound on the mount screws. I think we both were a little hesitant on using Loctite because we weren't sure that the value Remington Mounts would be our long term solution. The reason I'm giving you all this detail is because this is what led up to us wanting to upgrade our mounts to a high quality mount.
We both liked the idea of an integral mount and ring, and we also wanted to find a mount in a one-piece configuration with some amount of elevation bias already built into the mount. Another detail we wanted was more than two cap screws in the caps. Considering we both had what I would consider as heavier scopes, I think additional clamping force was needed. After doing some research we decided that the Nightforce Direct Mounts looked to be exactly what we were wanting on our rifles. Since his rifle is a long action and mine is a short action, we ended up getting one of each and this review covers both mounts. Since Nightforce is in the business to make quality optics and accessories, these mounts don't come cheap. They seem to run in a price range from about $185 to $233 online, so make sure you shop around when you make your purchase.
If you visit the Nightforce website, you will see that Nightforce currently lists four different mounts, but they actually offer six different mounts (listed below) which cover three different heights (low, medium and high) for both short action (SA) and long action (LA). Once they update their website with the new 2013 products, all the mounts will be shown. After getting some feedback from Nightforce on which was the best mount for our configurations, we both settled on the new .885" Low Direct Mounts.
- A220 Rem 700 SA .885" Low 20 MOA 30mm
- A103 Rem 700 SA 1.0” Med. 20 MOA 30mm
- A106 Rem 700 SA 1.125” High 20 MOA 30mm
- A219 Rem 700 LA .885" Low 20 MOA 30mm
- A102 Rem 700 LA 1.0” Med. 20 MOA 30mm
- A105 Rem 700 LA 1.125” High 20 MOA 30mm
During my reviews I like to compare my results
to the manufacturer's claims where possible so the following text in
colored italics was taken directly from the
Nightforce website
on 2/7/13 and gives the key features of the
Nightforce Direct Mounts. The
![]() ,
,
![]() and
and
![]() are my way to keep up with details that I have covered in this
review with either photos, commentary or both.
are my way to keep up with details that I have covered in this
review with either photos, commentary or both.
-
This Nightforce system combines a high
quality CNC machined 7075-T6 hard anodized aluminum base with an
integrated ring design.

-
Built to mount directly to your Remington
700 short or long actions, the 20 MOA taper maximizes internal
adjustment.
-
The Direct Mount ensures true alignment and maximum
strength for precision shooting.
-
Like all Nightforce mounts, it
incorporates an integral recoil lug which prevents any movement
of the base or stress on the screws attaching the Direct Mount
to the receiver.
-
It is the ultimate in a weight-saving one-piece
design.
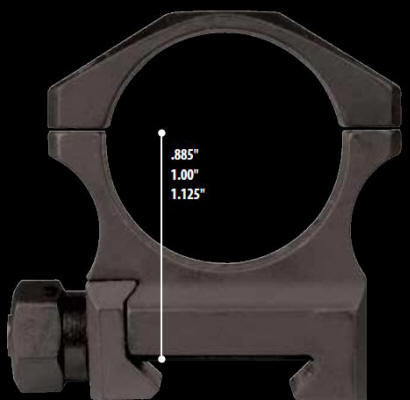
When deciding on which mount height to use, we would have clearly gotten the wrong mounts if we had not gotten Nightforce's recommendation. Our original Remington mounts were "high" mounts, so this led us to believe that we would be looking at a similar high mount from Nightforce. After further study, it appears that Nightforce lists the heights of the Direct Mounts in terms of an equivalent height to their Steel Rings as shown below and this height is referenced to the part of the mount that rests on the top of a standard Mil-STD-1913 rail. Nightforce confirmed that they reference their mounts this way to maintain continuity with their other mounting systems.
Figure 1 - Steel Ring Sizes
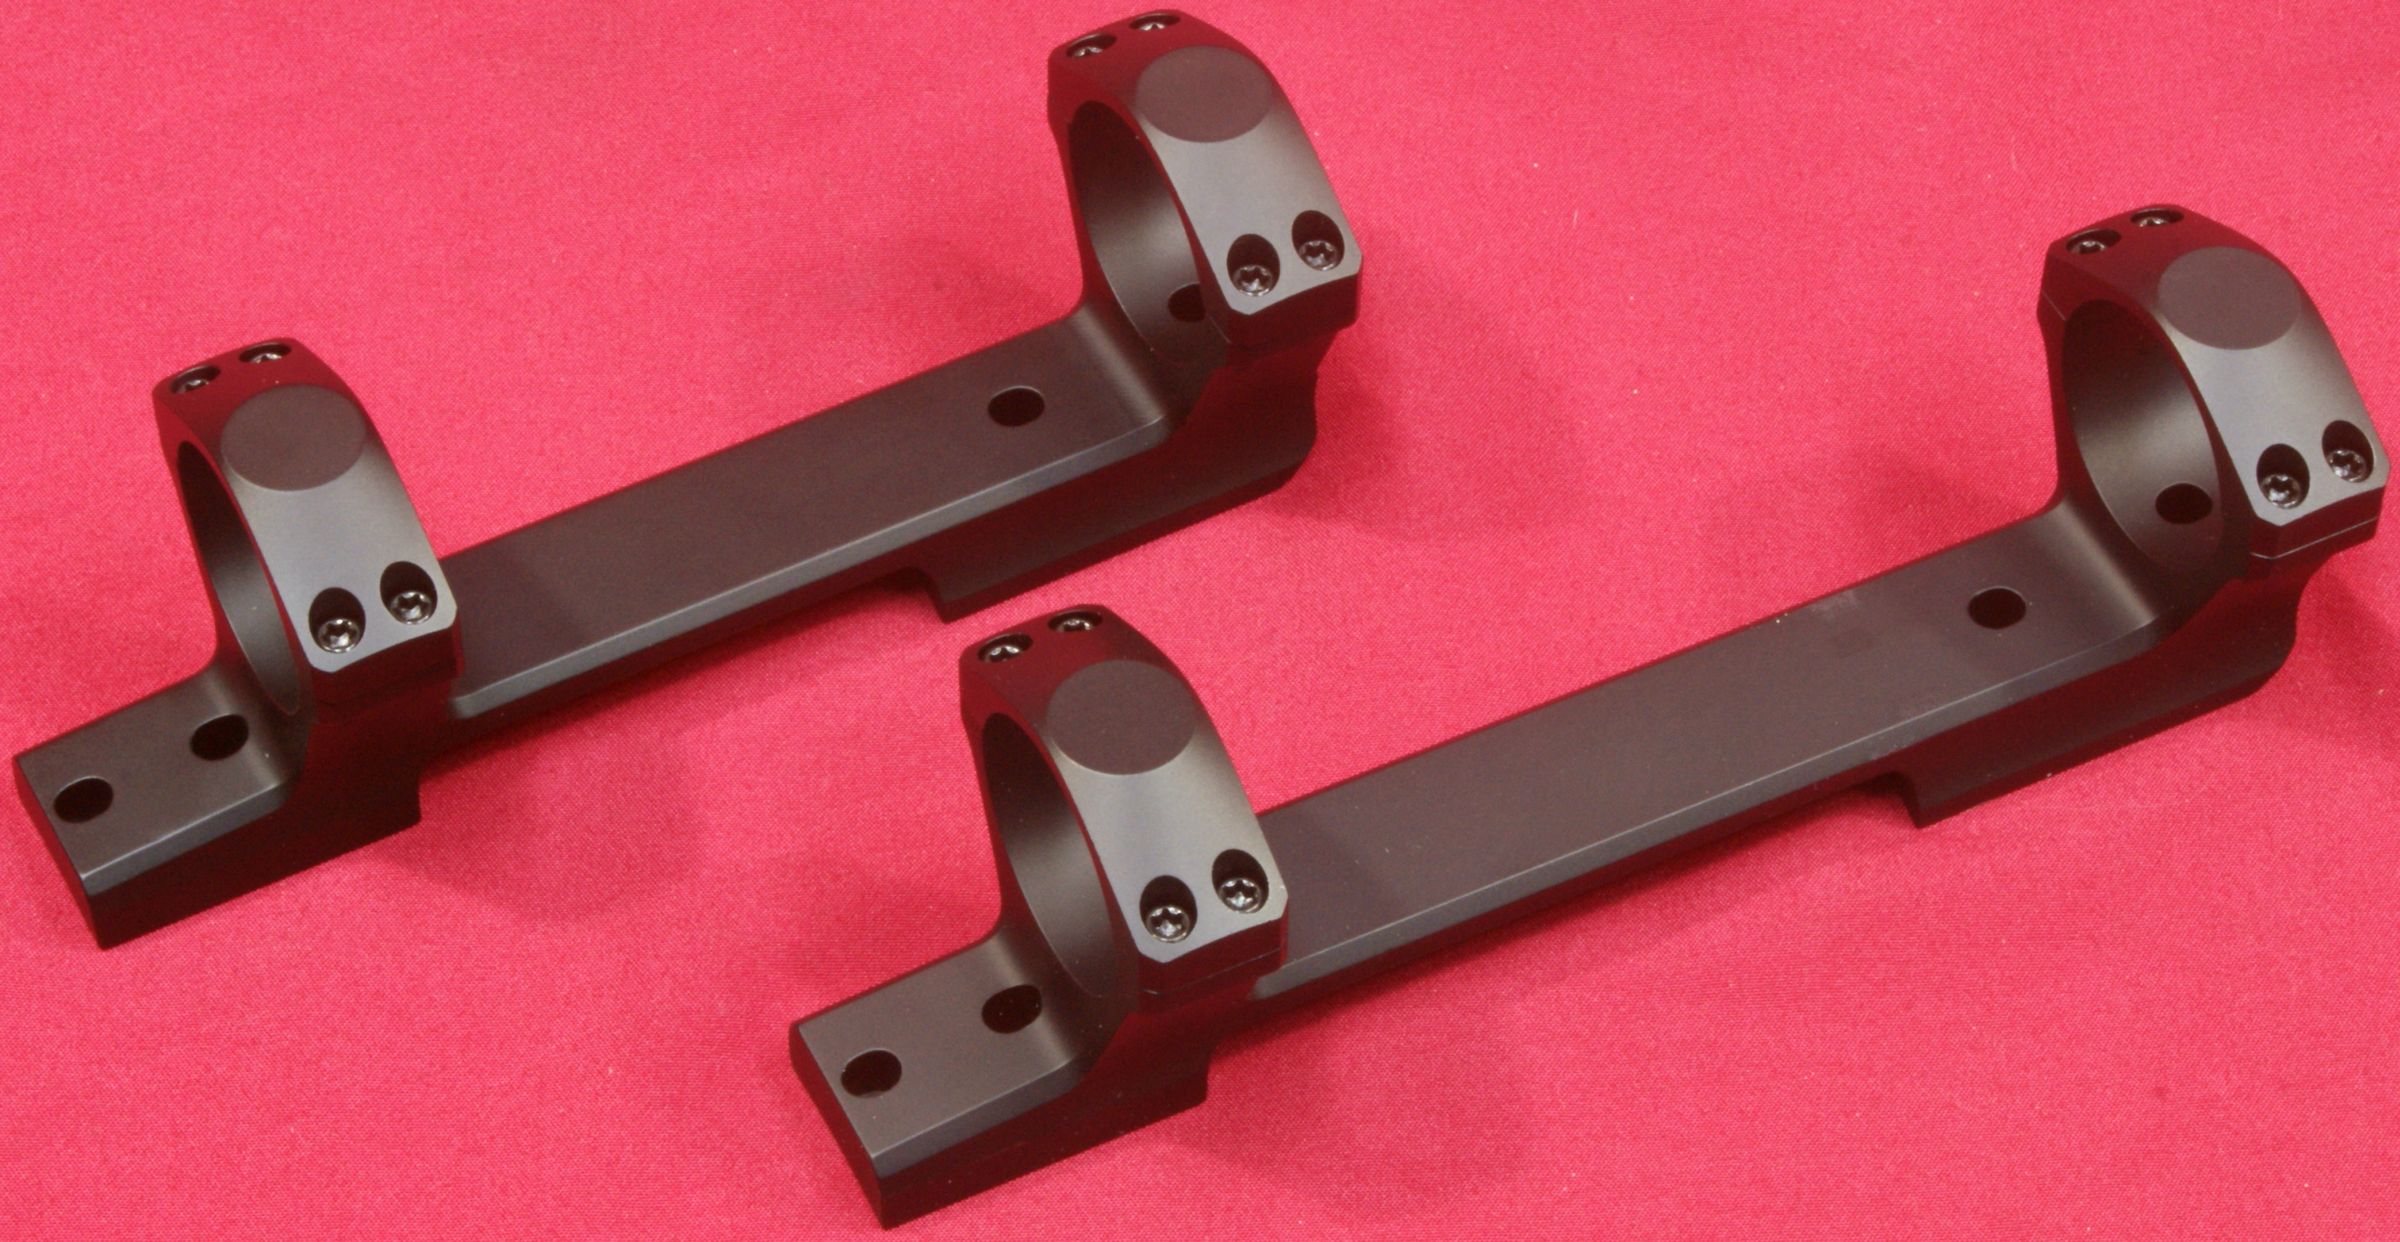
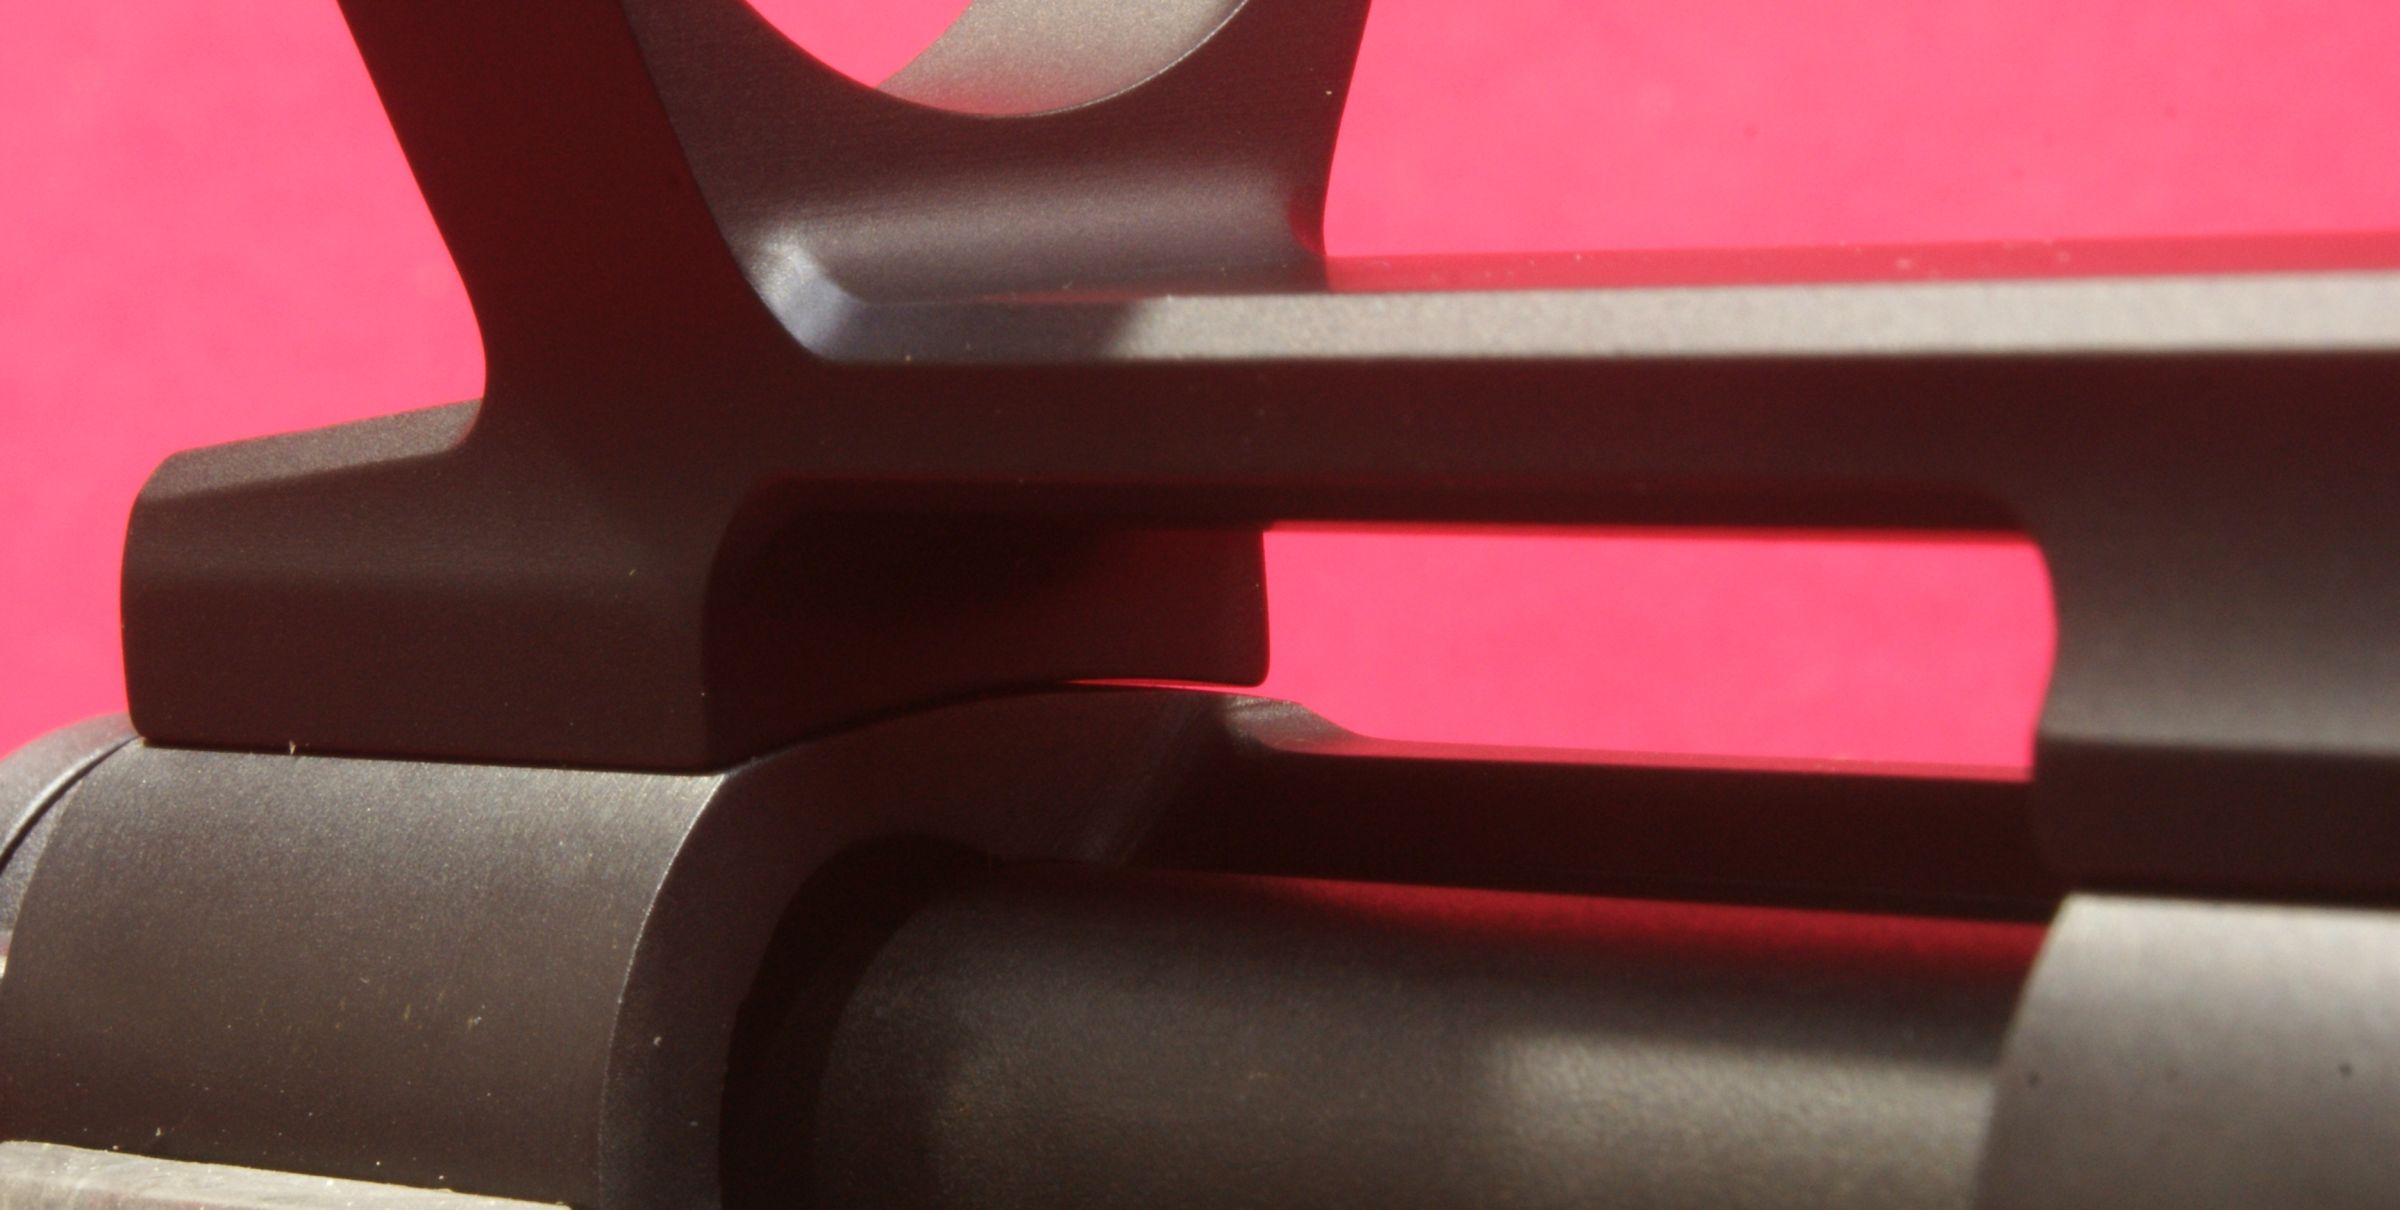
As you can see below, 0.885" is not directly related to the thickness of the forward end of the mount which measured about 0.594" on each mount. If you add half the thickness of a 30mm tube to this 0.594" value, you get 1.185" (0.591"+0.594") which is also not related to the 0.885" height. If you subtract the 0.885" from 1.185" you get 0.300". I don't have one of the Nightforce bases, but I would guess that the base has a height of about 0.30".
Figure 2

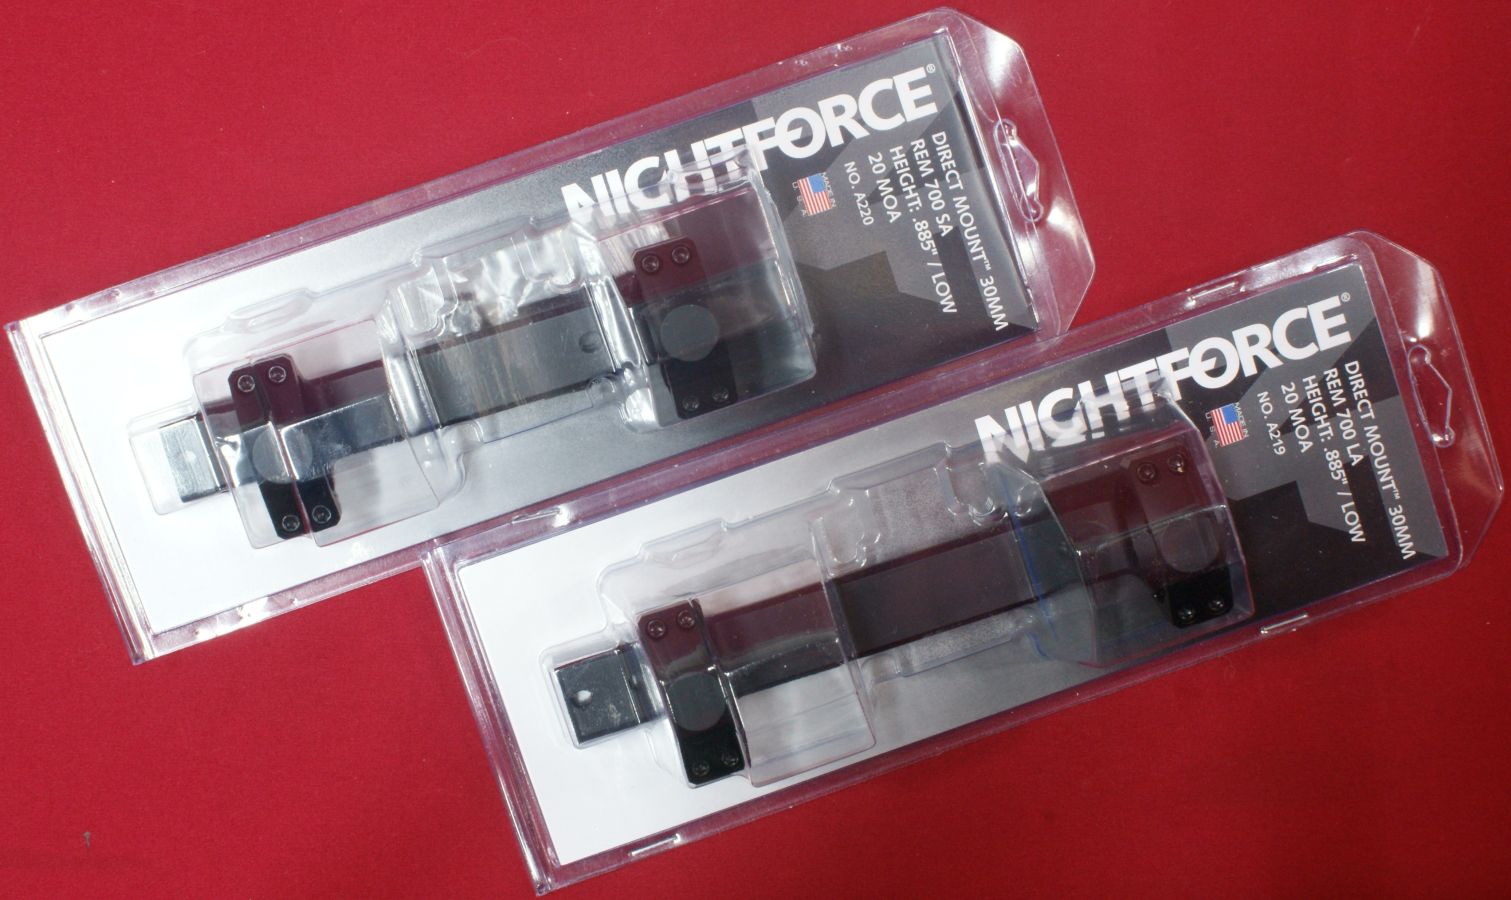
What's In The Box
The Nightforce Direct Mounts came packaged as shown below.
Figure 3
The photo below shows the mounts pulled out of the packaging and gives a better idea of the package contents.
Figure 4
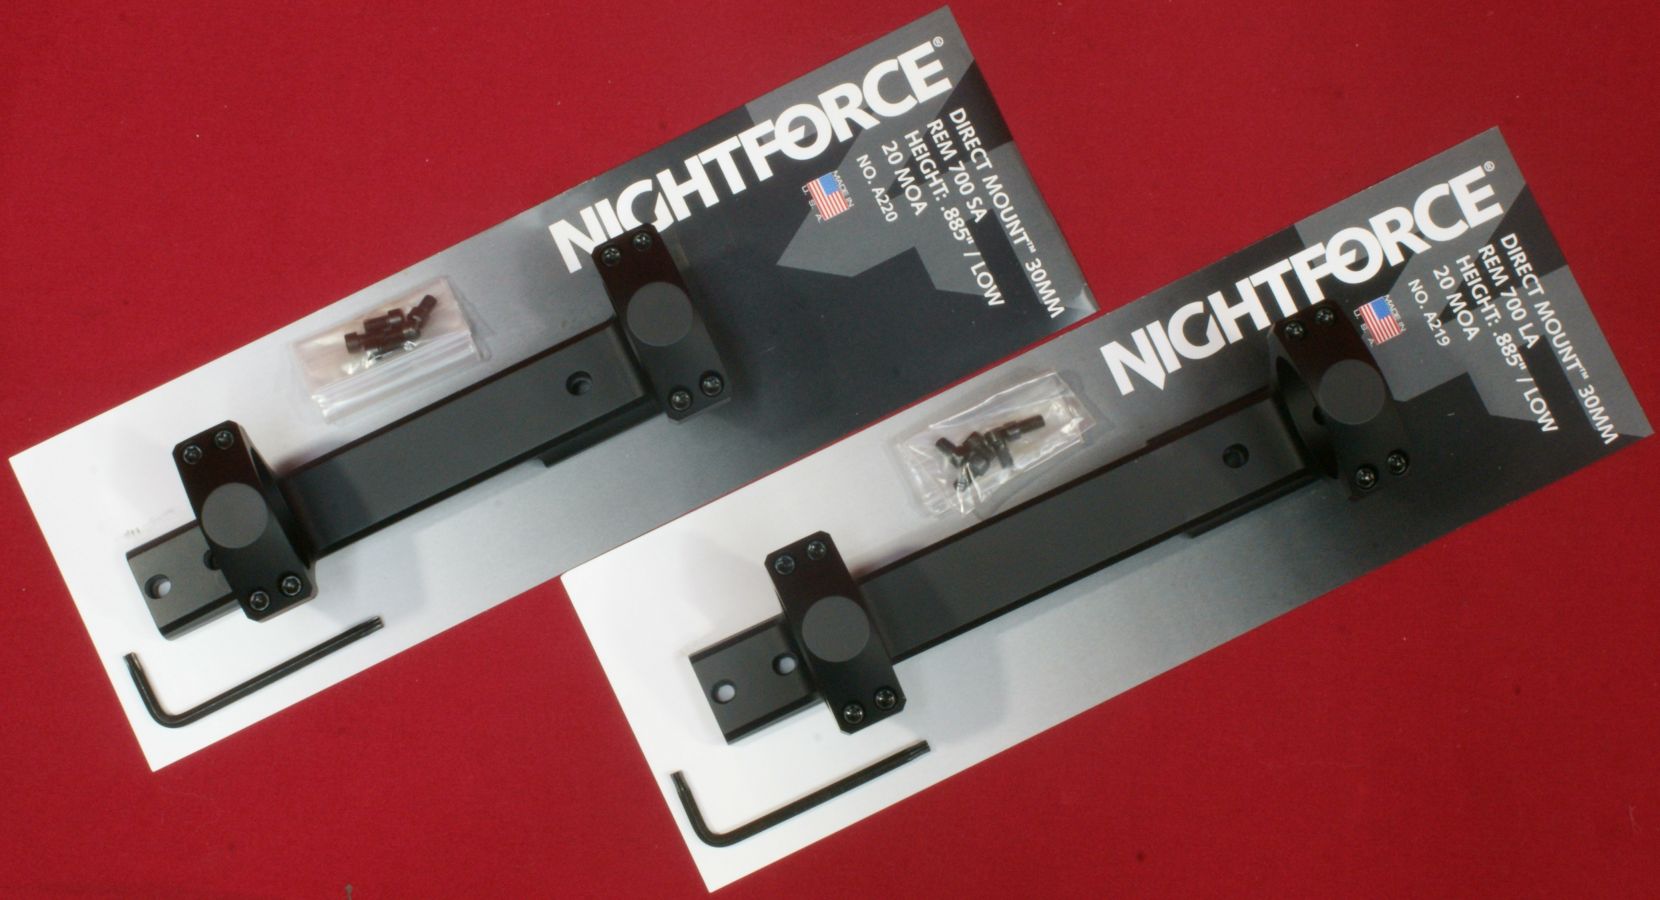
Clicking on this next photo (or any other in this review) will bring up a high resolution photo showing the details. The key piece of information on the back of the card is the warning "Do not exceed recommended torque setting of 25 in-lbs for base and cap screws".
Figure 5

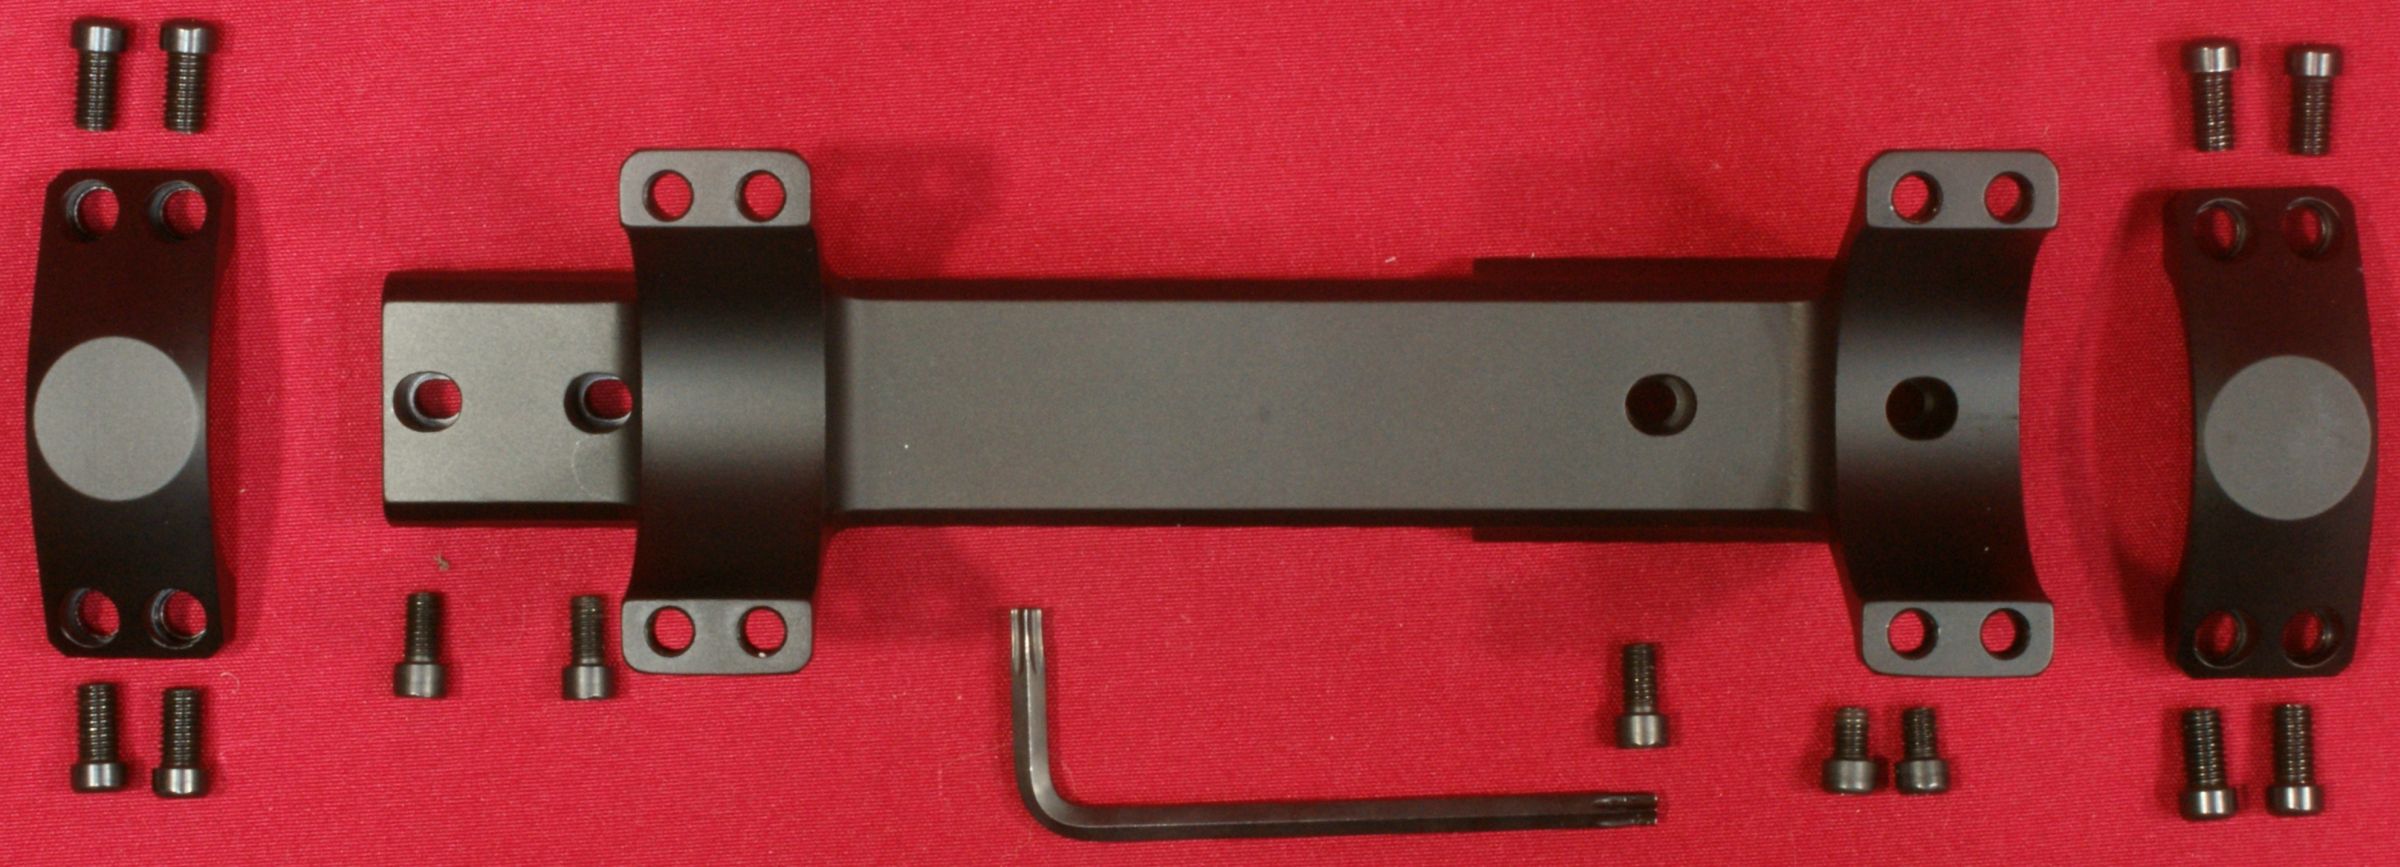
The photo below shows all the components that come with the Nightforce Direct Mounts. Basically you get the mounting hardware, all screws (plus an additional short screw for the forward most mount hole) and a Torx wrench.
Figure 6
Mount Features
The mounts and caps are machined from 7075-T6 aluminum alloy and have a hard coat black anodized surface. If you take the time to study the photos, you will notice that these mounts are full of details such as chamfers and tapers to reduce weight and provide a smooth look and feel. There are some significant benefits from this one-piece integral design such as strength, fewer parts to work loose and better ring alignment since it is machined as a single part.
Figure 7
The 0.885" Short Action mount weighed it at 4.6 ounces and the 0.885" Long Action weighed in at 4.9 ounces. The difference in weight appears to be just the added length in the mount between the rings over the ejection port.
Figure 8
Figure 9


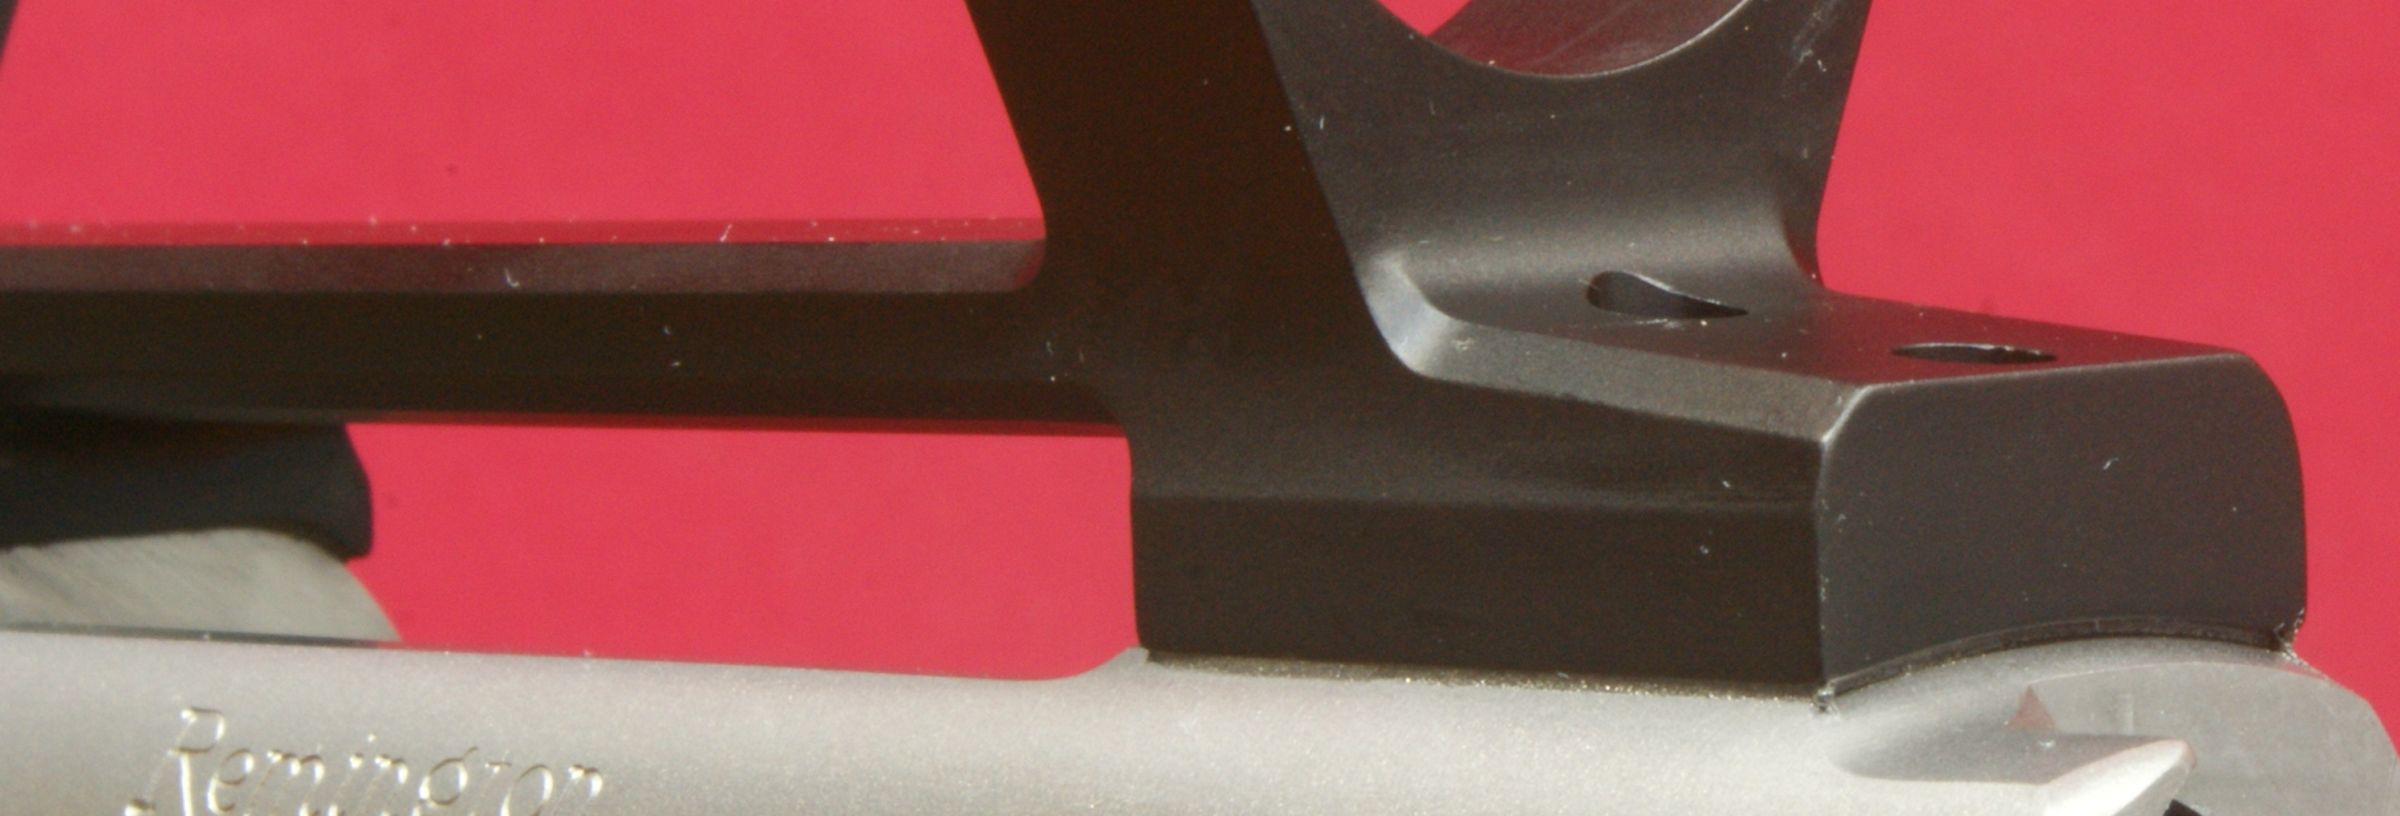
The mount comes with an integral recoil lug that reacts the axial forces on the scope directly into the receiver via the lug and not the mount screws. This feature reduces cyclic stresses on the mount screws which helps to ensure that the mount screws do not loosen over time. The curvatures on the bottom of the mount are machined to match the curvatures on the receiver.
Figure 10
The mounting holes in the bottom of the base are slotted along the axis of the base to allow you the ability to slide the recoil lug against the receiver. The reality is that all parts are made with manufacturing tolerances and these slots are one way to allow adjustability in the event tolerances stack up against you when trying to get your recoil lug to make contact with the receiver. Another feature to point out is that each cap is secured with four #8 cap screws. This allows you to develop a significant clamping force due to the higher allowable torque with #8 screws than #6 screws and you have twice the cap screws per cap than some other mounts.
Figure 11

The other feature that I could not clearly show with a photo is that the mount comes with 20 MOA of bias built into the mount. Basically, this means that the scope points slightly down allowing you another 20 MOA of "up" adjustment for dialing in elevation corrections for longer shots.
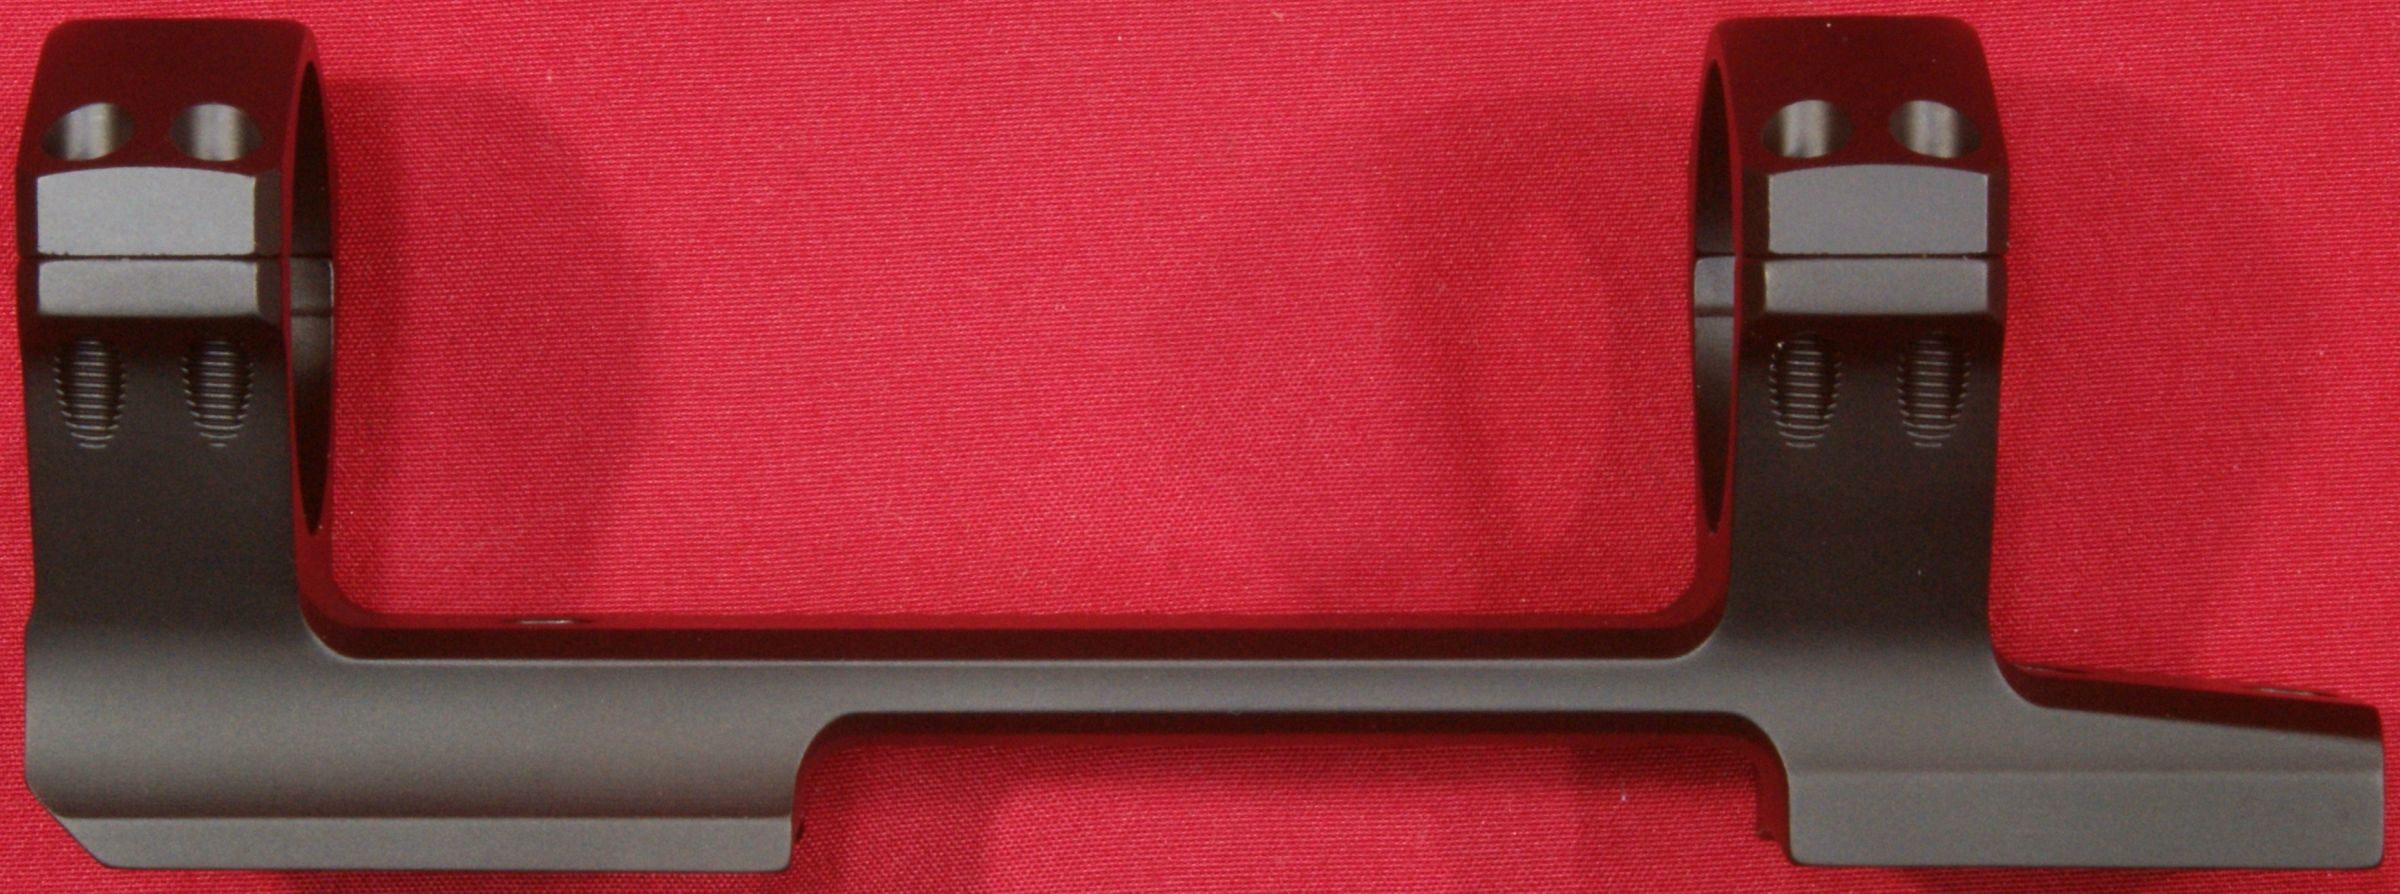
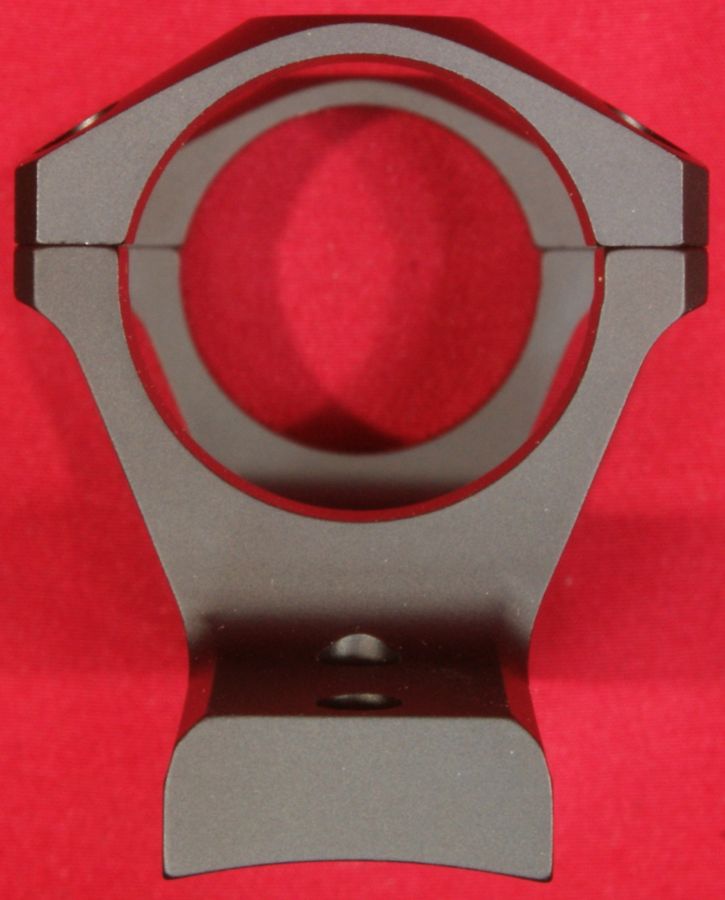
0.885" Low Short Action 20 MOA 30mm Direct Mount
This next set of photos gives you a good look at the 0.885" Low Short Action Direct Mount.
Figure 12

Figure 13
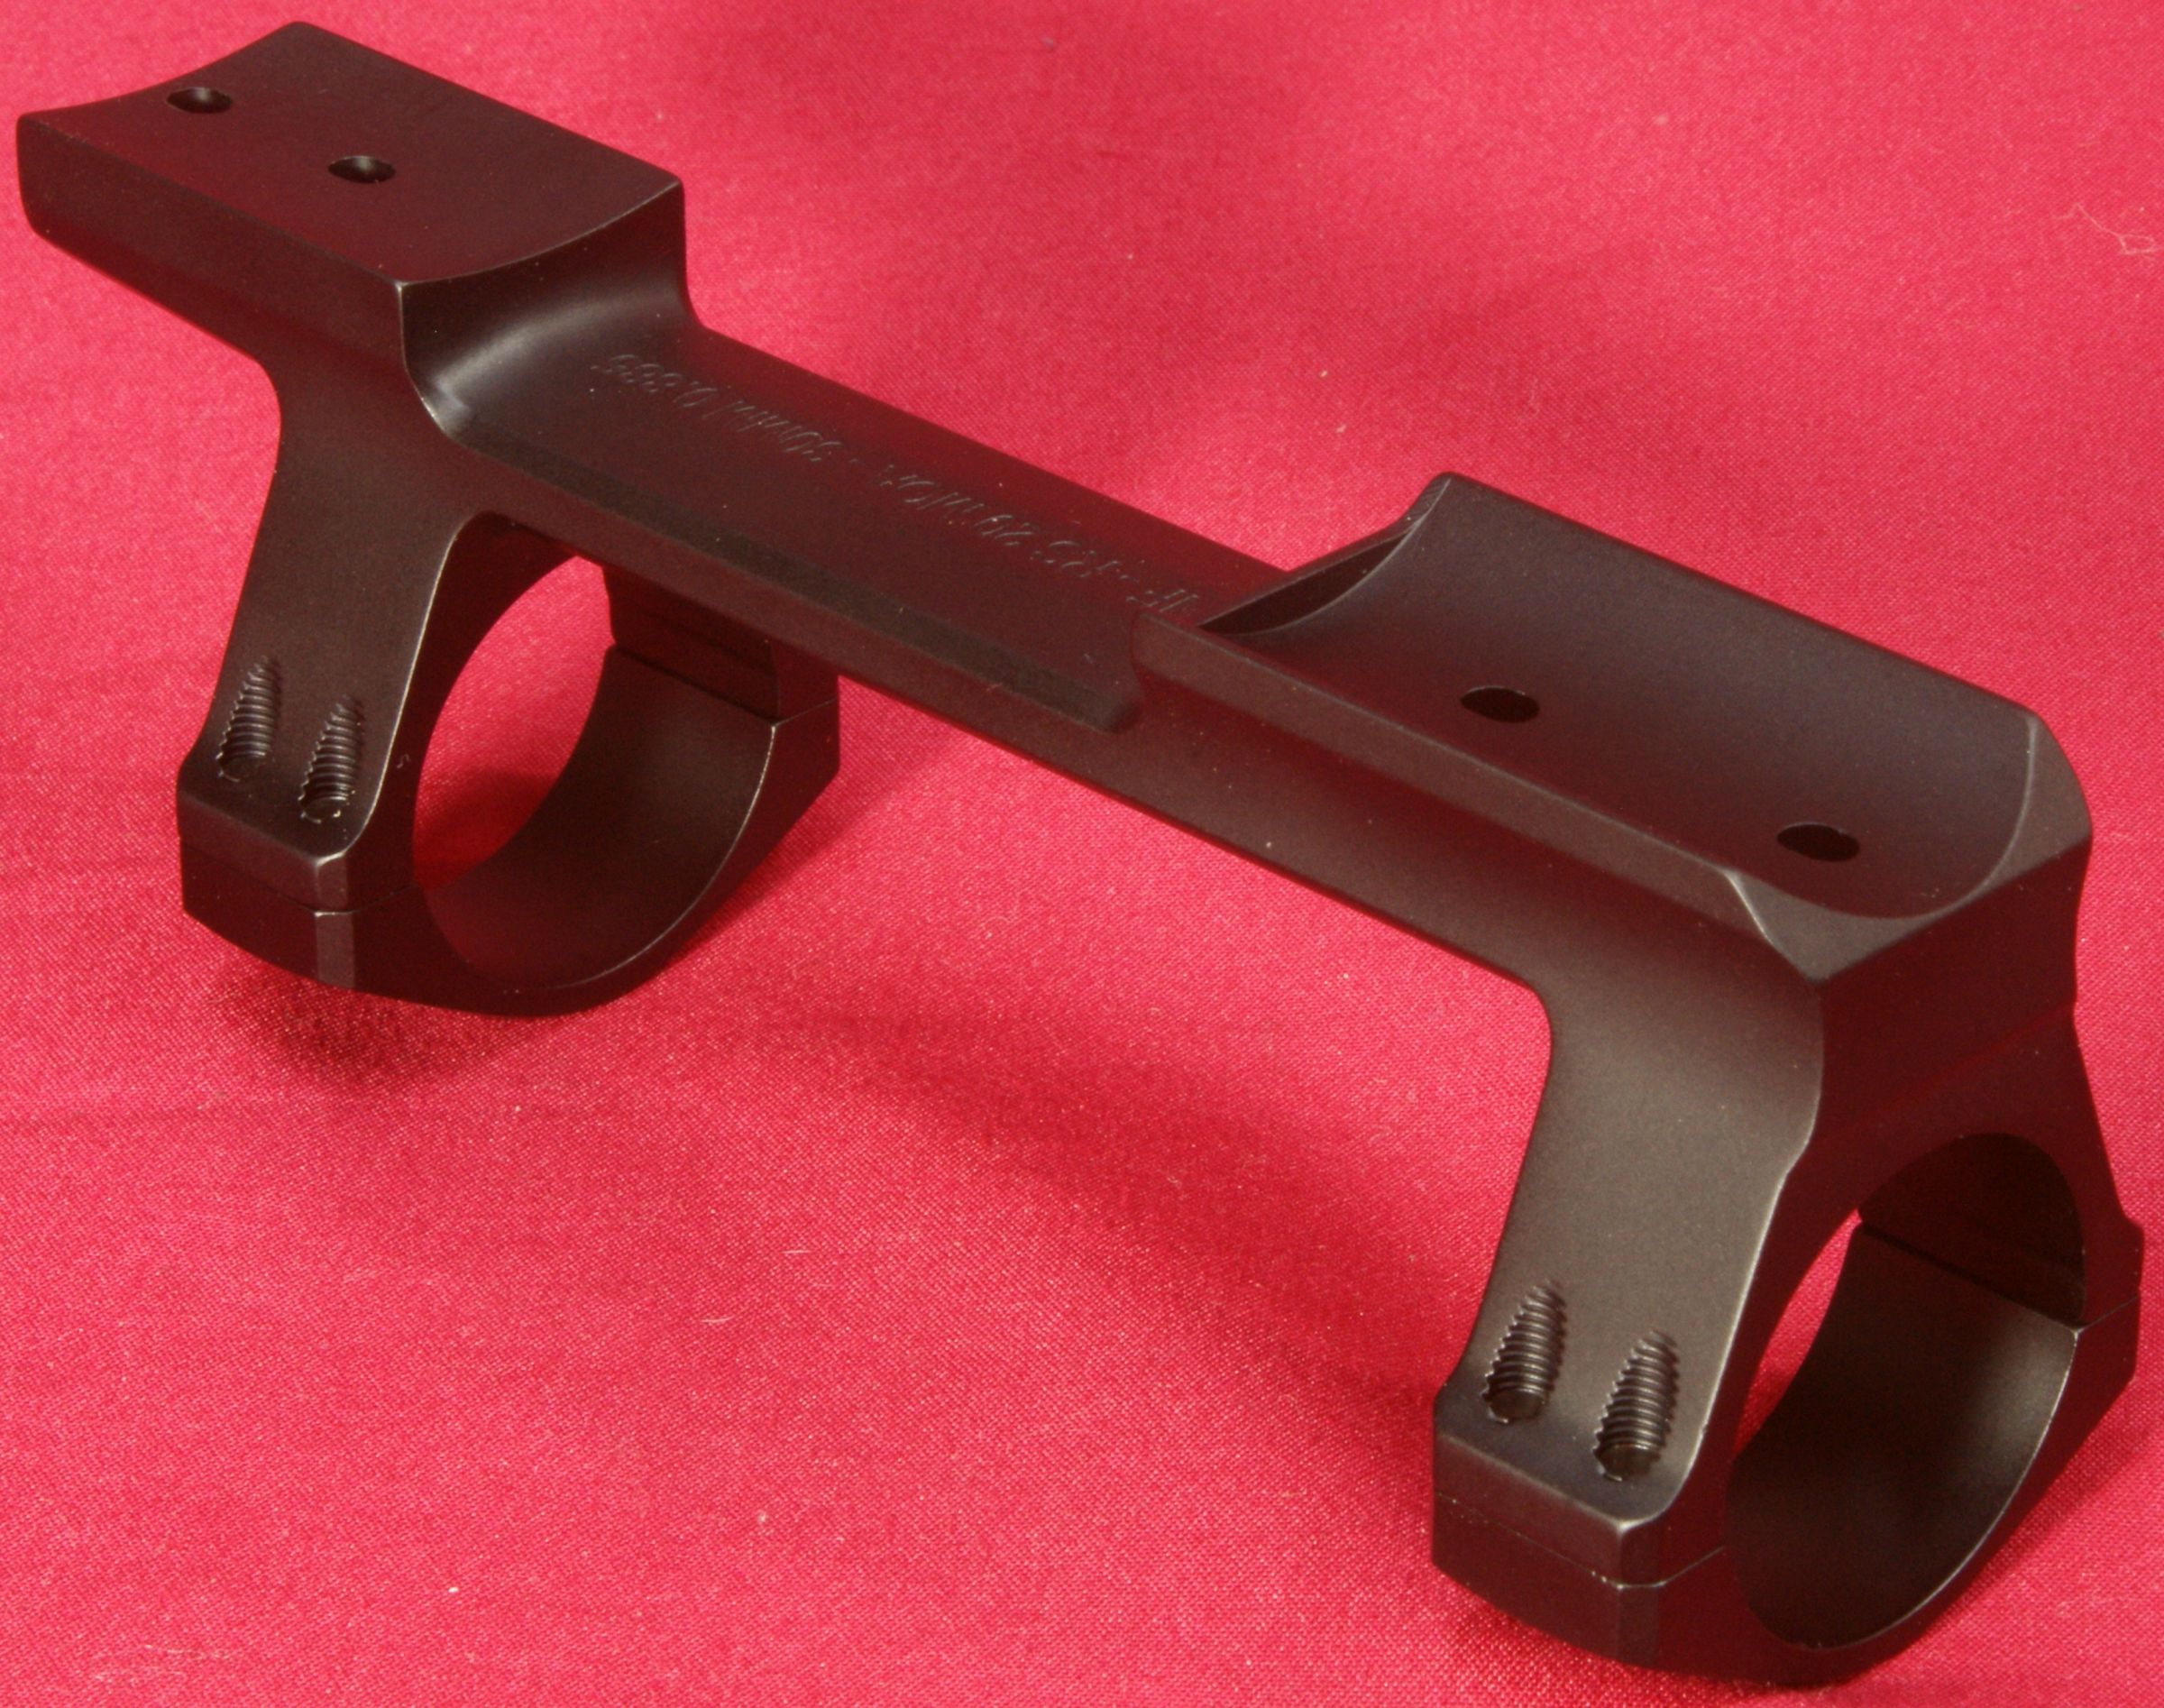
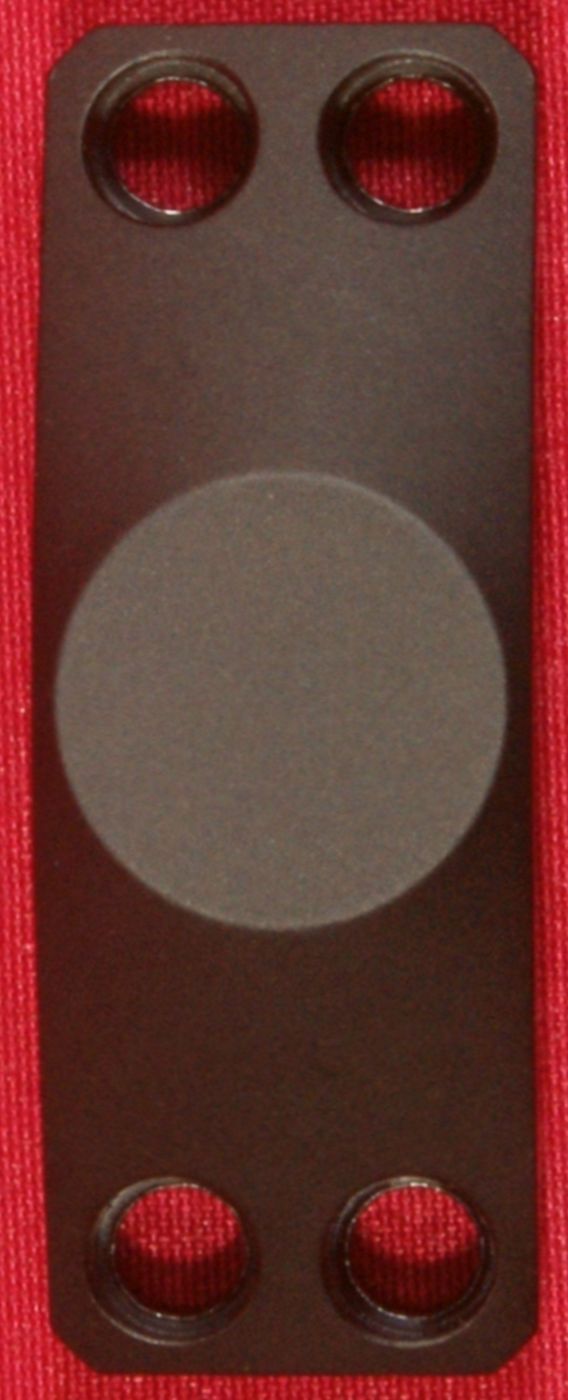
Figure 14 - Caps Installed
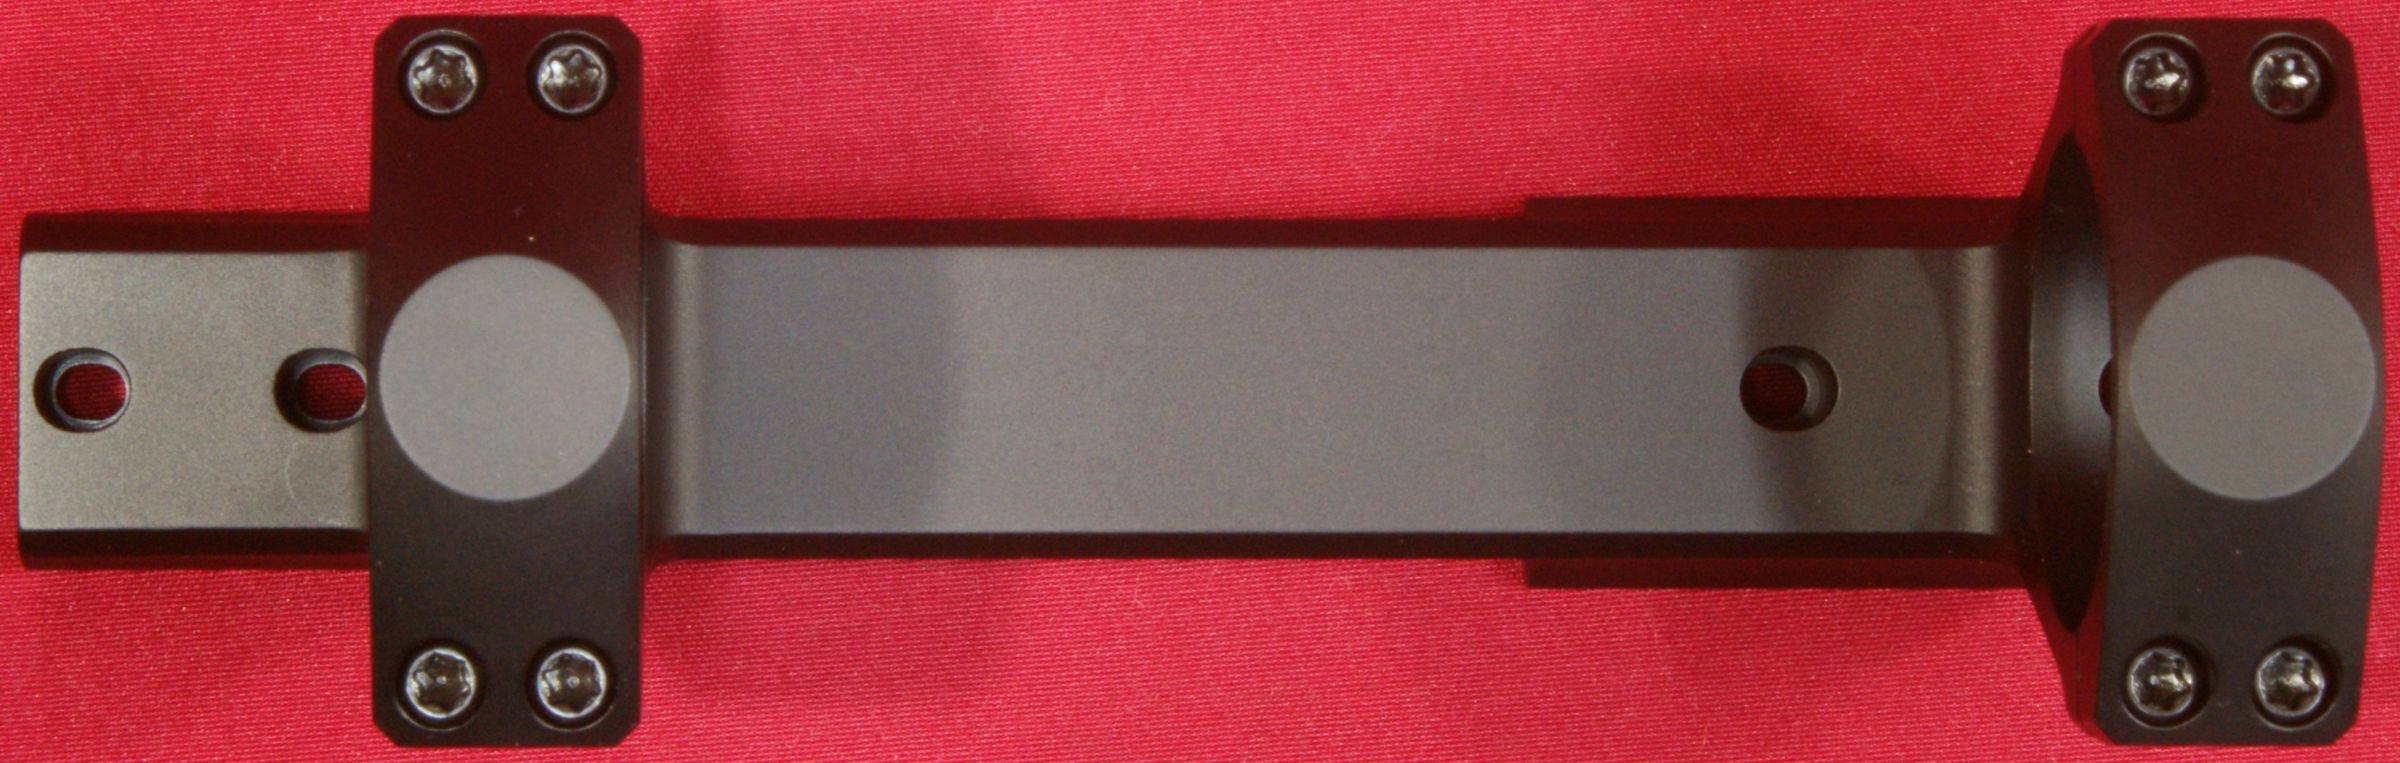
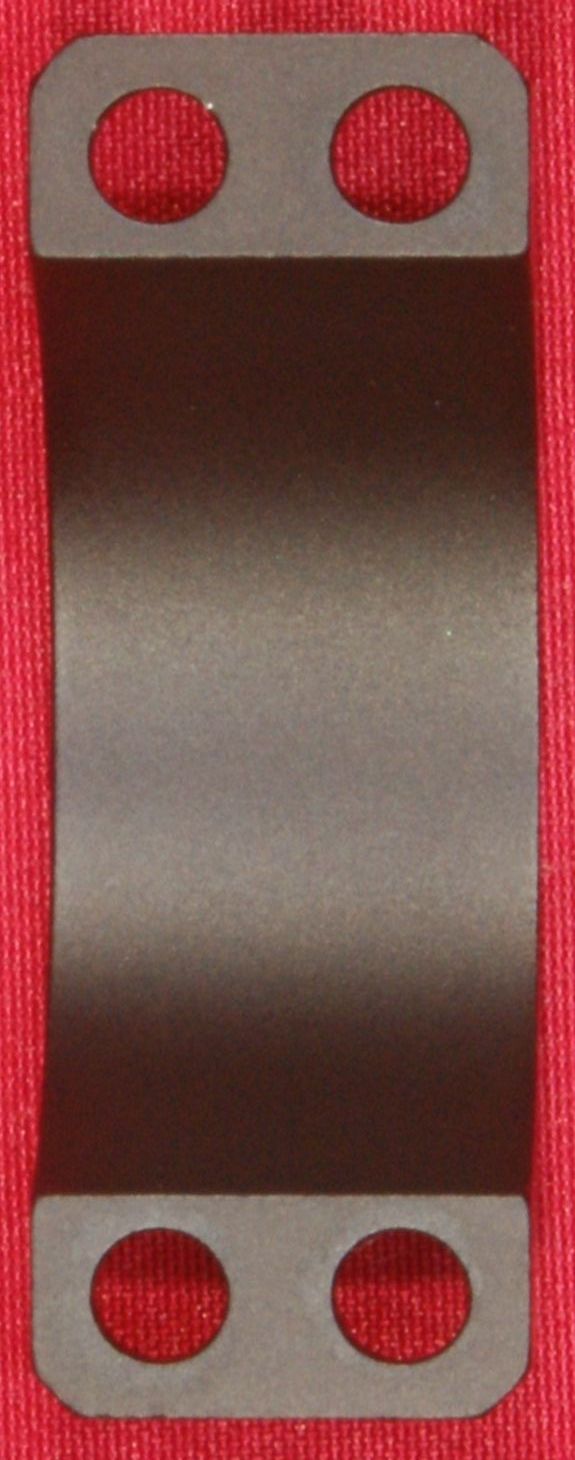
Figure 15 - Caps Removed

The cutout for the ejection port will accommodate both a right hand and left hand rifle.
Figure 16

Figure 17
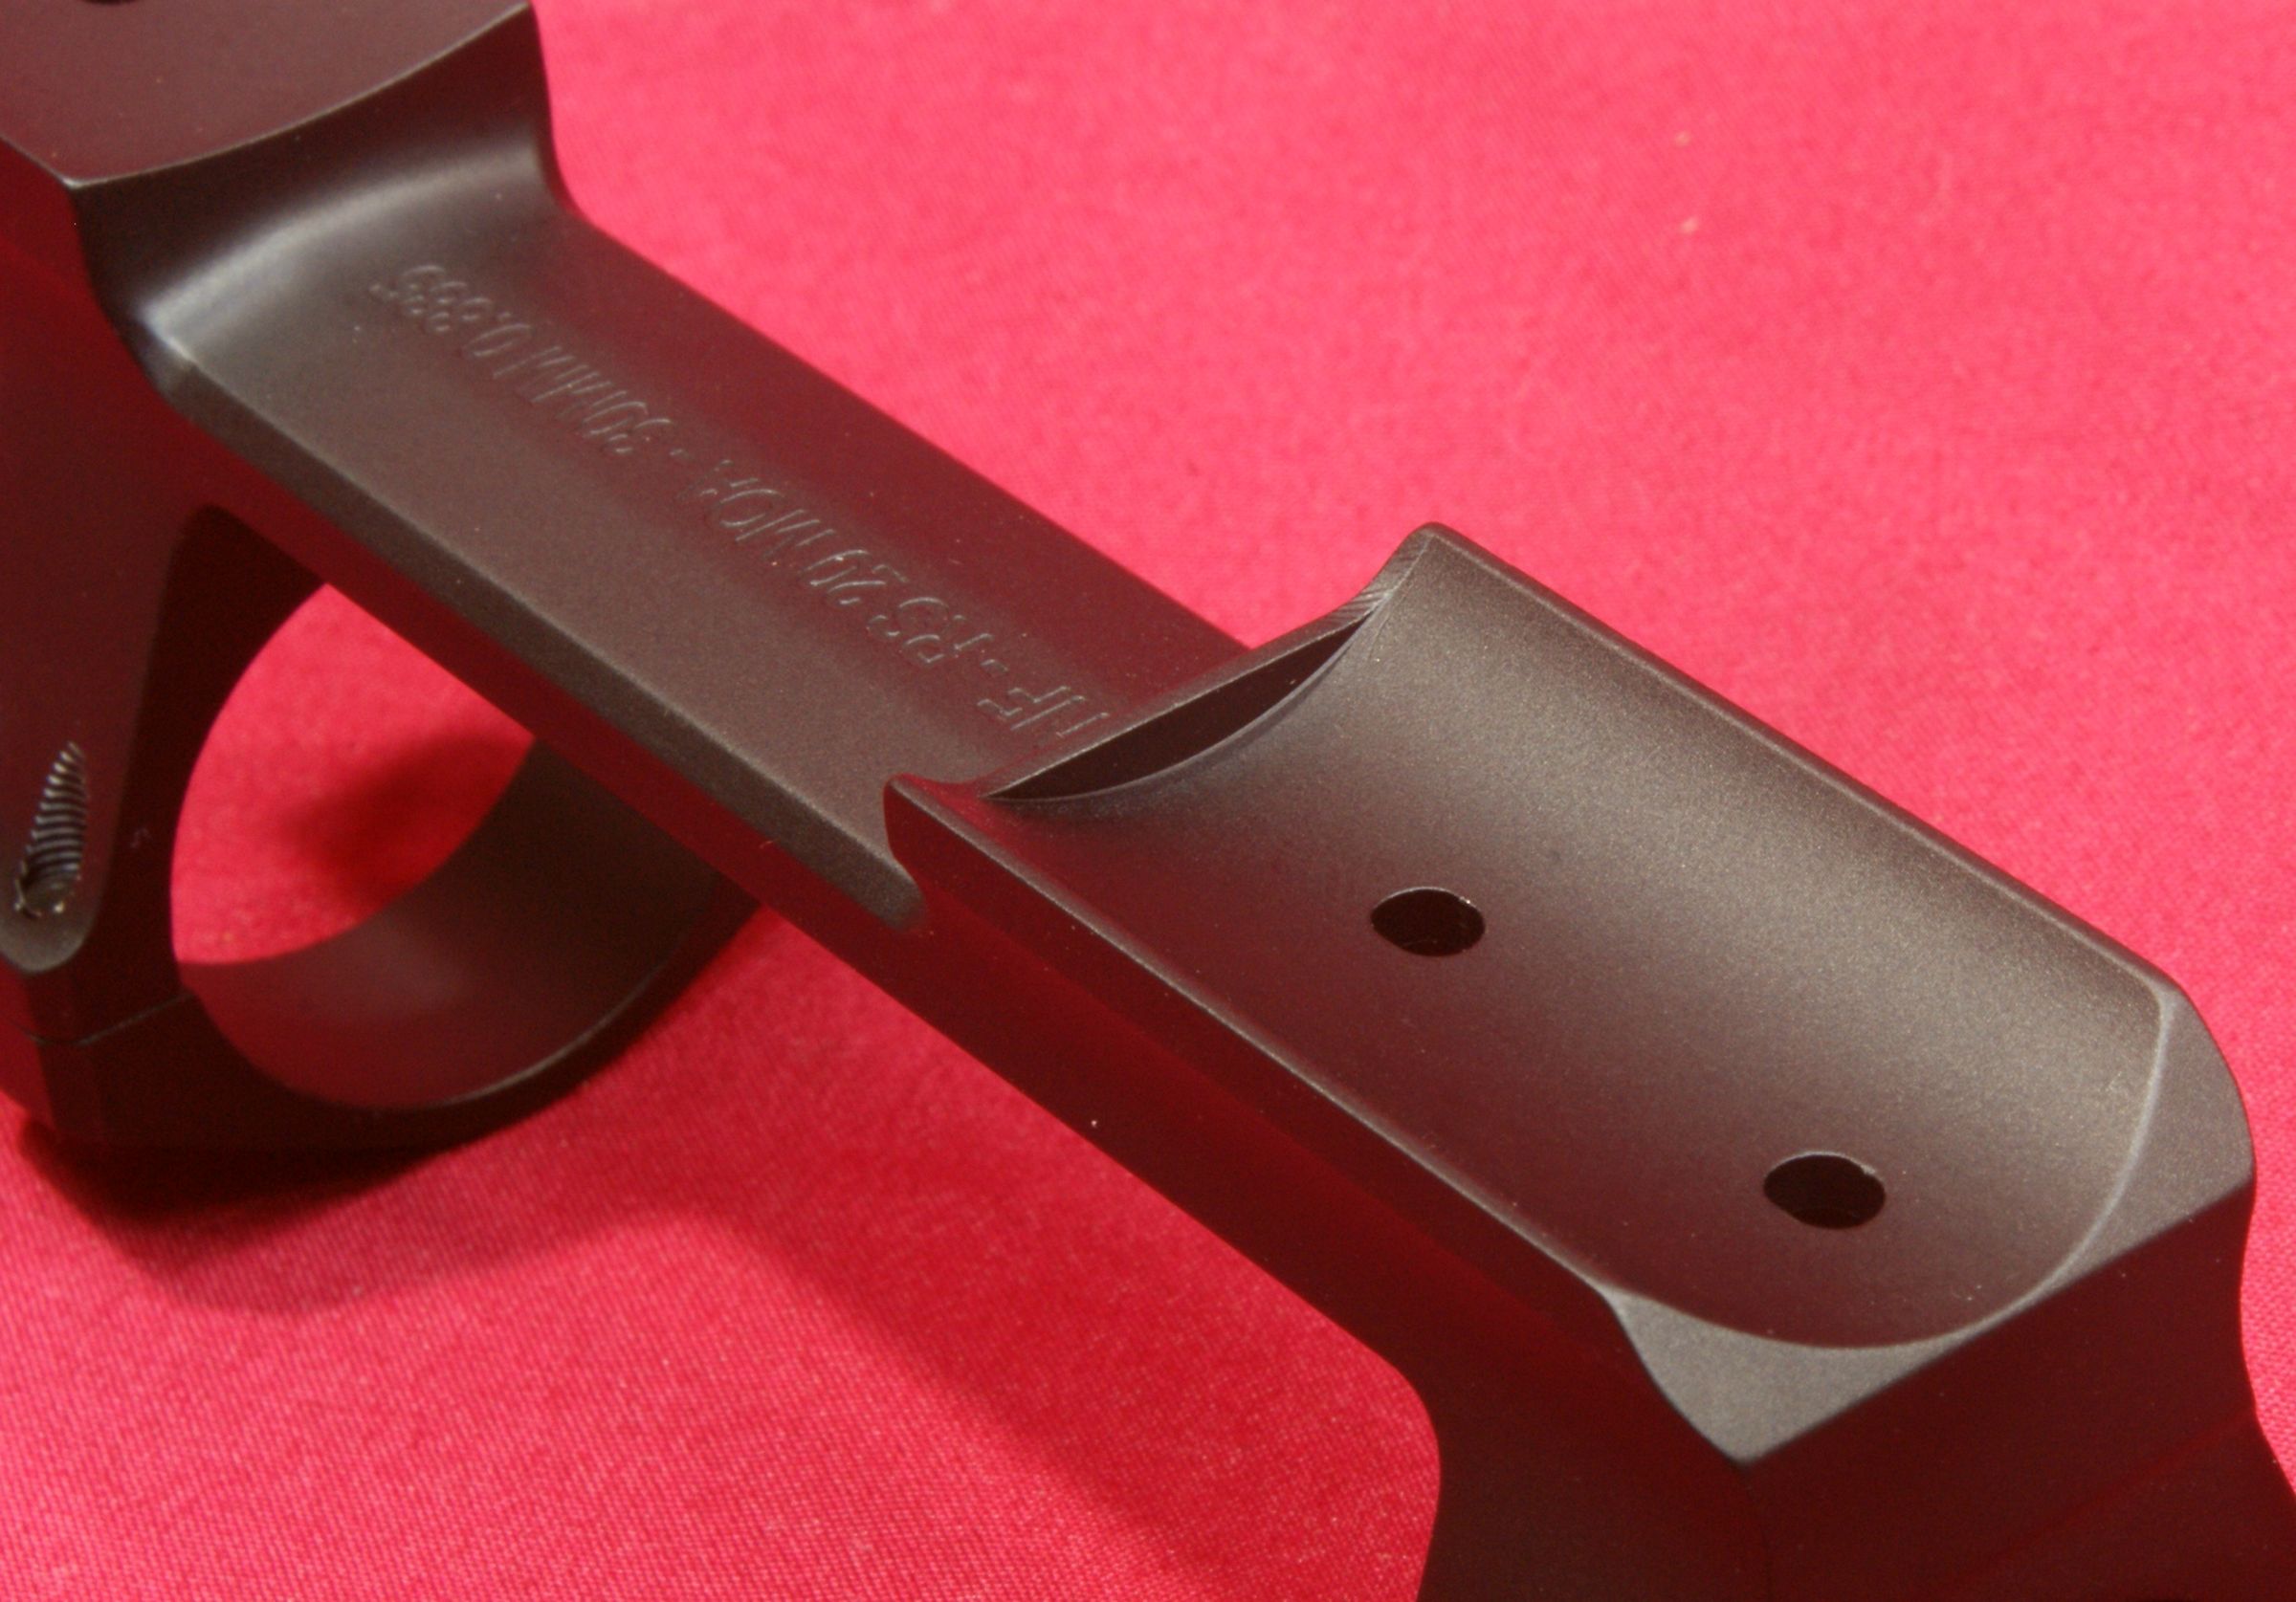
The bottom of the mount has "NF - RS 20MOA - 30MM 0.885" machined into the mount. I believe that the "RS" portion refers to Remington Short Action.
Figure 18

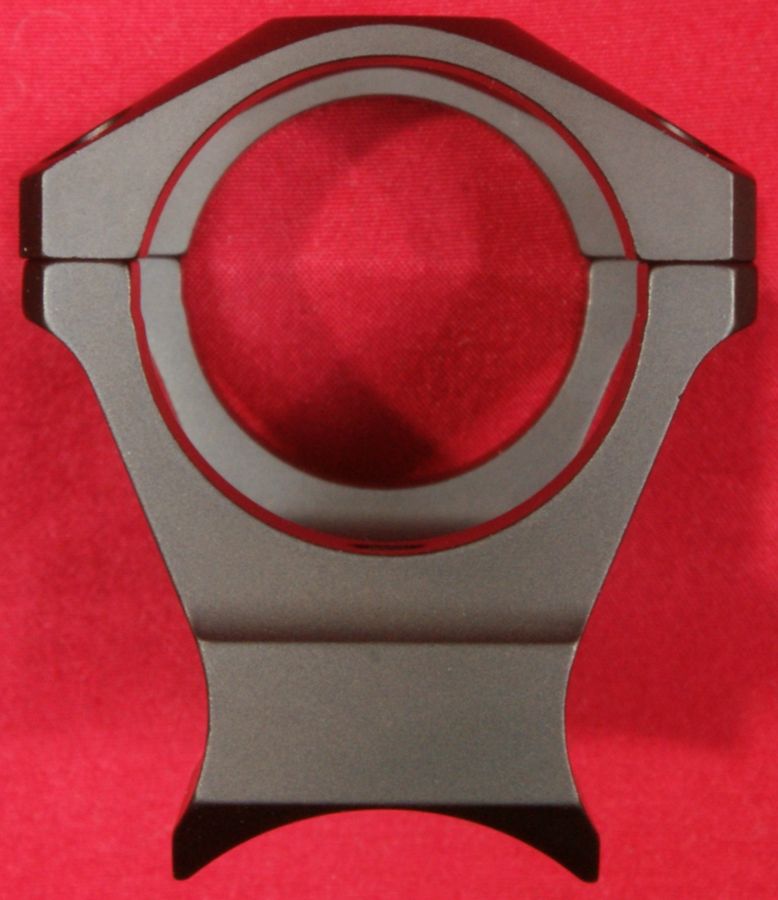
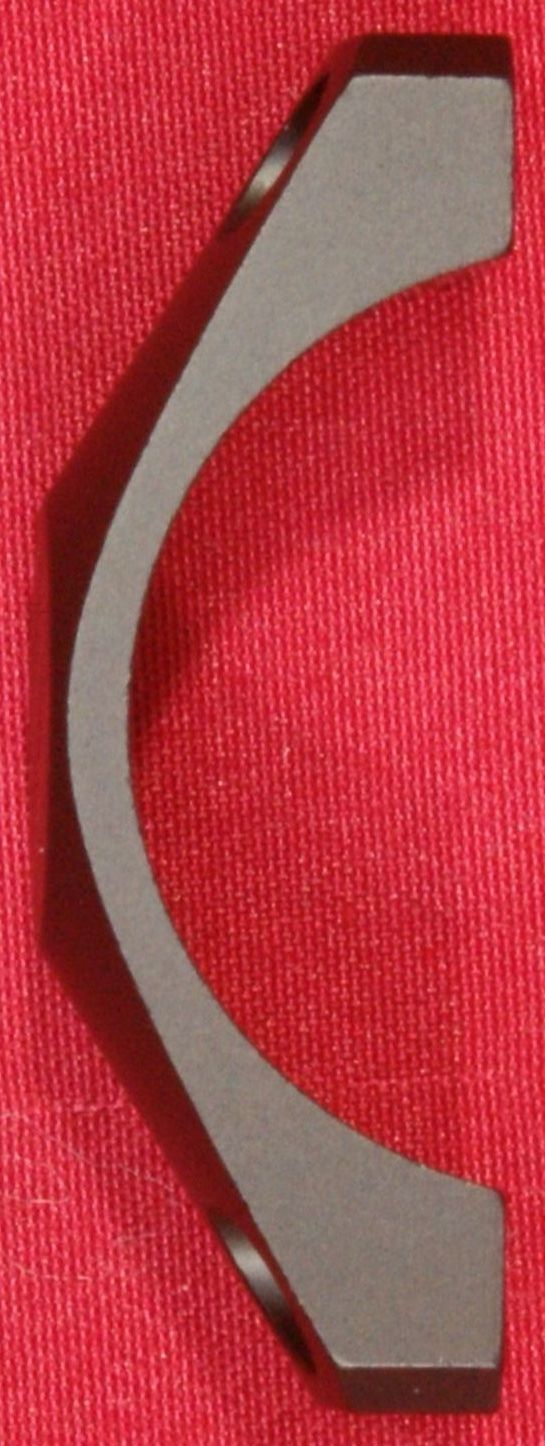
One thing to notice is that the split between the lower mount and cap is not through the center of the 30mm diameter circle. The split is above the center of the scope and the sides of the lower mount are undercut slightly so that the scope can drop into the lower mount. Nightforce says they also do this because the split being slightly off-center offers a more consistent clamping force around the scope tube as well as reducing the “crush” zone for an optic.
Figure 19
Figure 20

0.885" Long Action 20 MOA 30mm Direct Mount
These photos show the long action version of the same mount and allow you to see first hand the details of this long action mount.
Figure 21
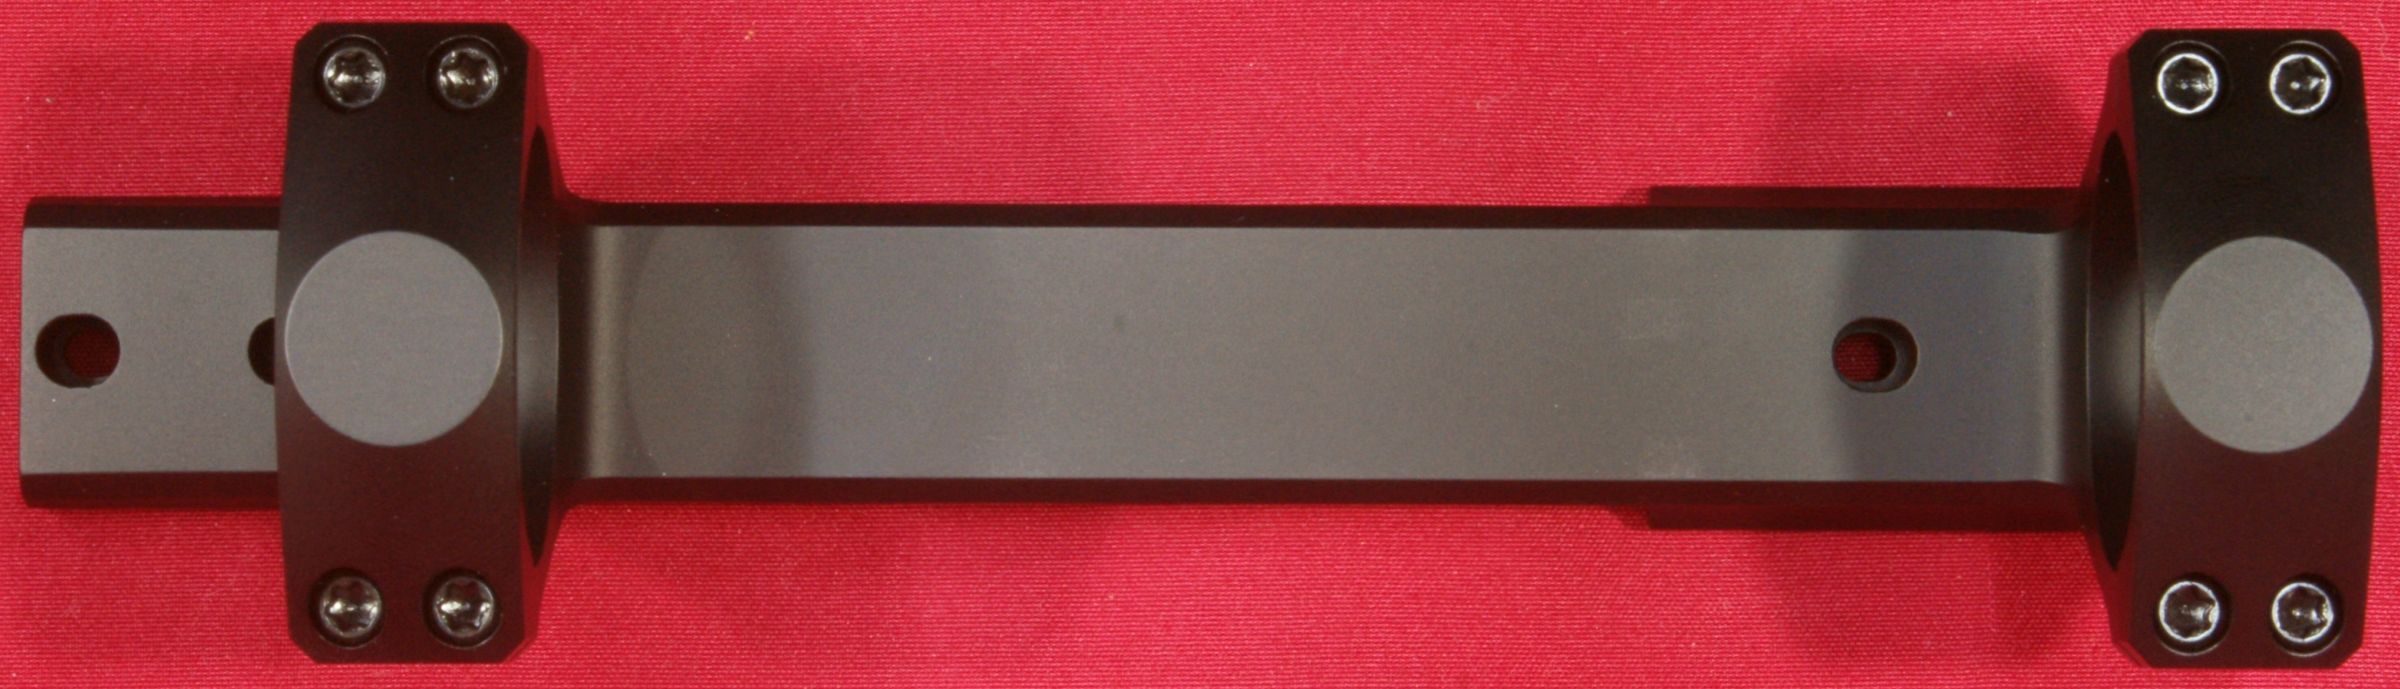
Figure 22
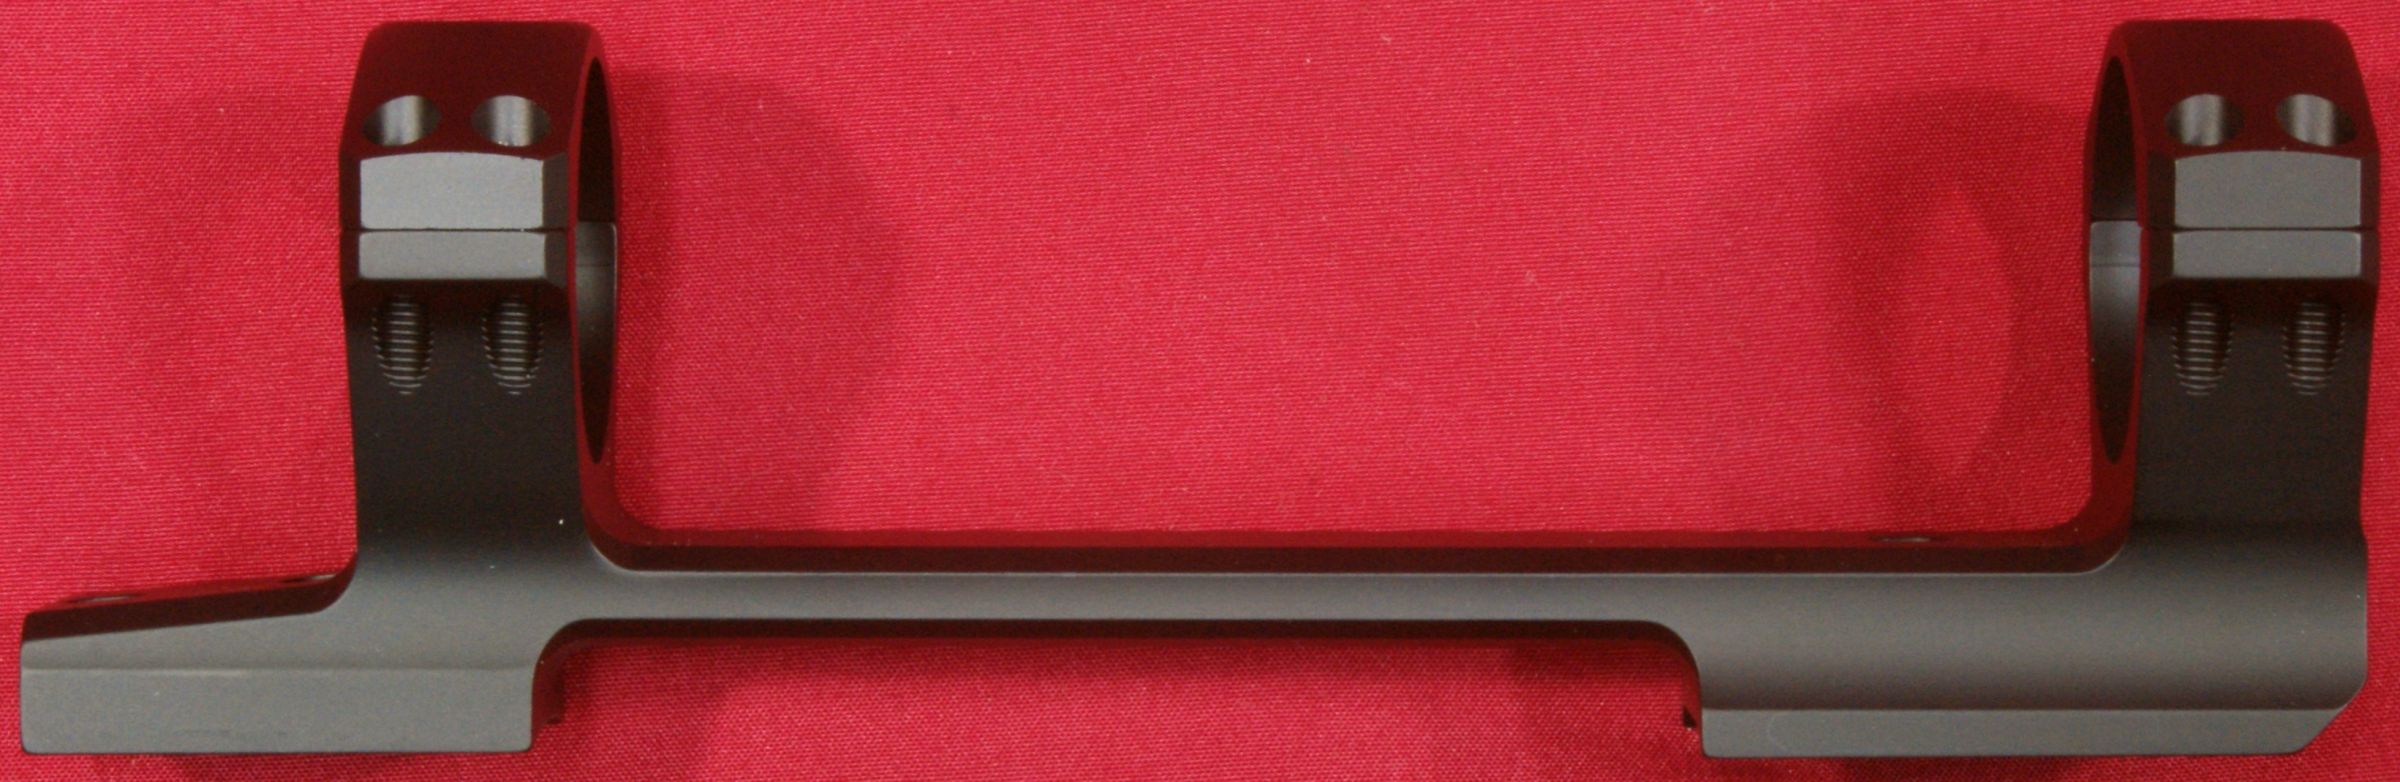
Figure 23

Figure 24

Figure 25
Figure 26

Nightforce Direct Mount Caps
The caps are also made from 7075-T6 aluminum alloy and have a conical shape on the top which gives a unique look. I'm not sure if it is absolutely required on Nightforce mounts, but I always kept the caps so that I could install them in the same orientation as they were when I received the mounts. After getting some feedback from Nightforce on this review, they stated that it is not required to keep the ring caps with the particular ring as packaged.
Figure 27
Figure 28
Figure 29
Installation
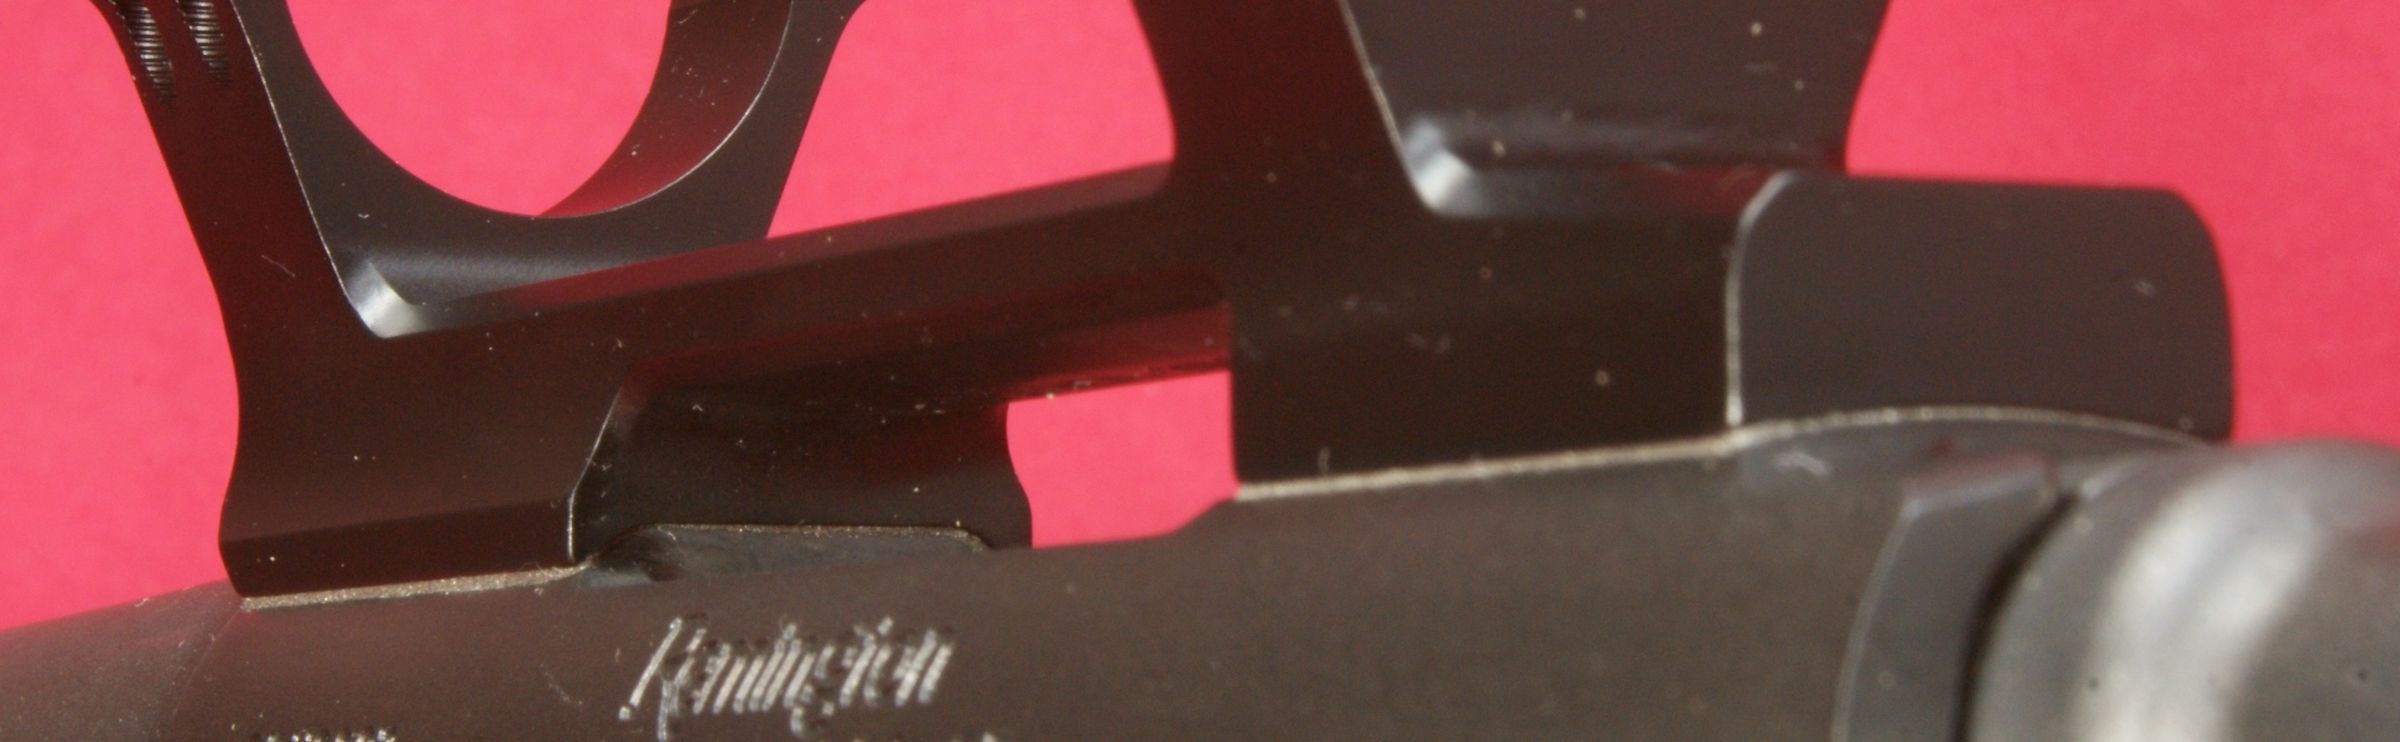
I started out with an initial fit check of the Short Action Direct Mount on my Remington Model 700 SPS Tactical Rifle. I quickly determined that the rear mount was not making good contact with the receiver rear bridge when one of the front screws was installed hand tight.
Figure 30
The photo below shows how I was able to get an 0.004" feeler gauge blade under one side of the rear portion of the mount. Again, this was with one front screw installed hand tight. In this case, I was not able to get the tip of a 0.002" blade (thinnest I had) under either side of the front or right side of the rear mount.
Figure 31

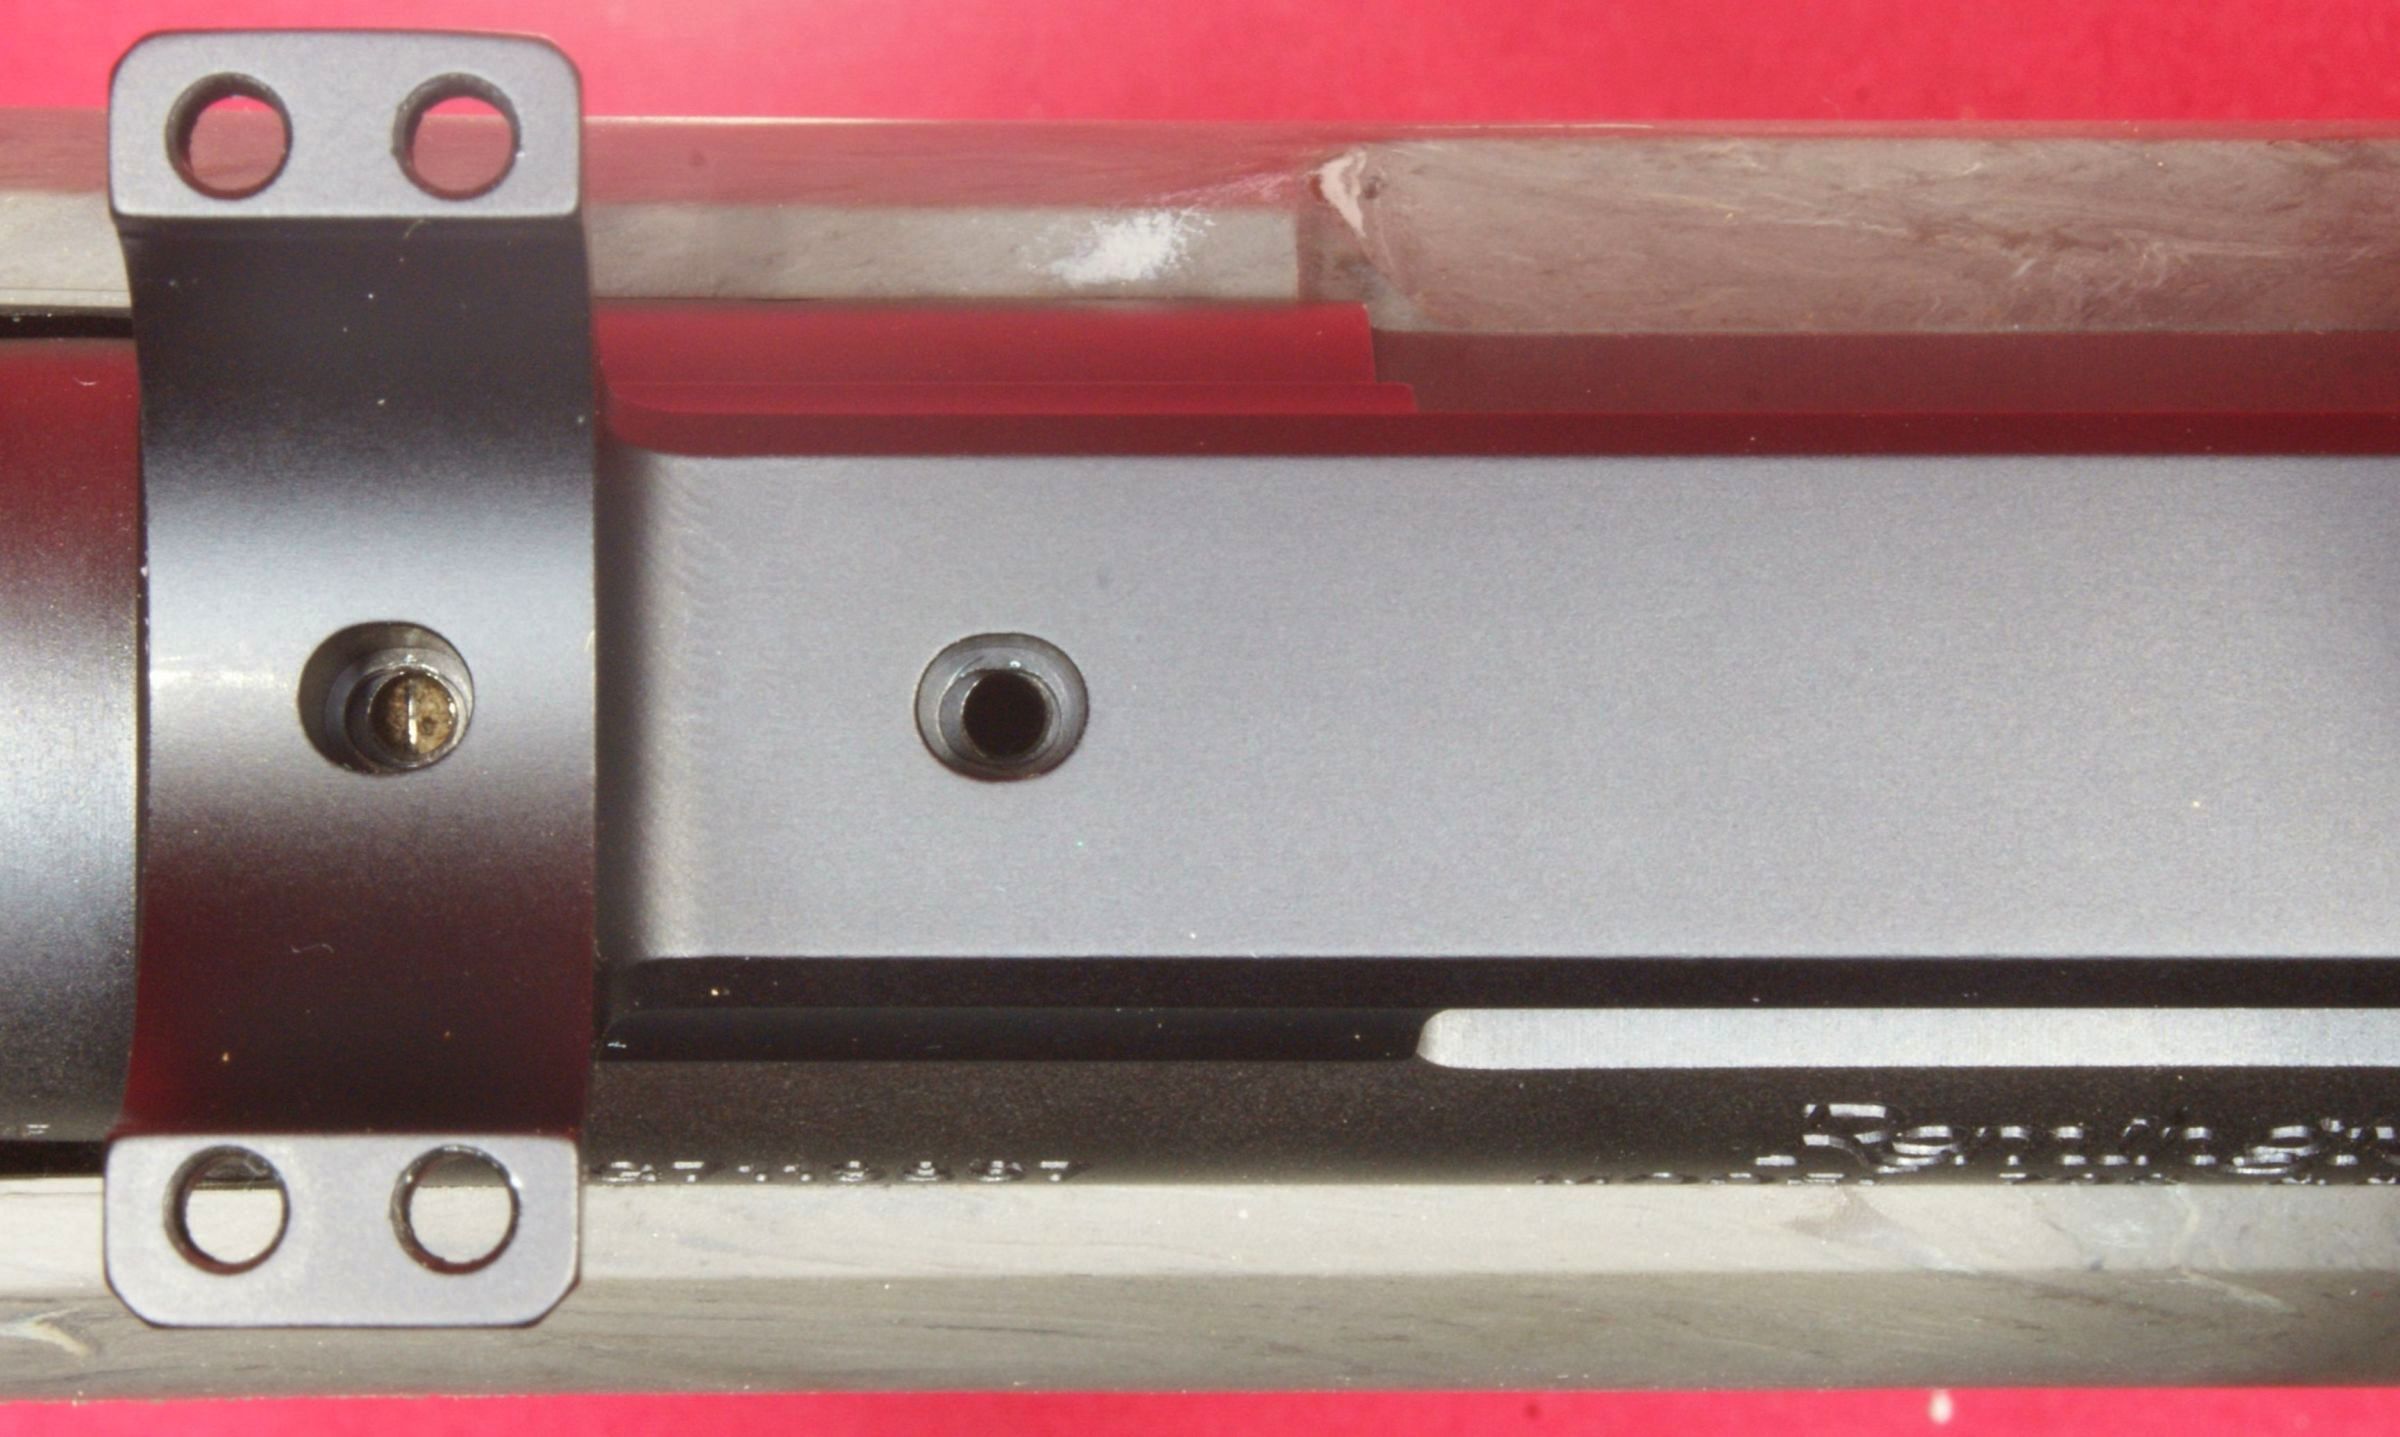
Next I swapped to having a single screw installed on the rear mount and the Nightforce Direct Mount seemed to match the contour of the the receiver. I was not able to get the 0.002" feeler gauge blade under any side of the mount, although, I did have an issue with the alignment of the mount screws. The photo below shows the two forward mount screws did not line up perfectly with the receiver holes. It was possible to get the screws installed, but doing so put a slight lateral preload into the mount and also caused gaps under the front right side of the mount. After about two hours of studying and trying to figure out the problem, I came to the conclusion that the holes in the receiver were not drilled perfectly inline with the curvature axis of the receiver which produced the offset shown below. The reasons I came to the conclusion that it was the receiver and not the mount were based on two things. First, everything I measured on the mount gave me the impression that the holes were inline with the curvature on the bottom of the mount. Second, when I looked at the original rings that I had lapped to try and achieve a good fit, the lapped marks gave an indication that front and rear mounts were not perfectly in line.
Nightforce, having optic and mount experts on staff, was able to give me further insight into the alignment issue. The reason people started using 8-40 screws on custom rifles wasn’t for strength as many believe, but instead to true the screw holes to the centerline of the action. Based on my observations, this made perfect sense.
Figure 32
Since the misalignment was so small, my solution was to take a round file and remove the material on the side of the hole that was preventing me from installing the screw without having to push the forward end of the receiver slightly to the right side. I also had to take a few thousandths off the diameter of the screw heads with a Dremel sanding wheel. With these slight modifications, the mount rested evenly on top of the receiver and I was able to get all screws installed. I performed a bore sight check with my scope and the bore axis of the rifle seemed to be very close to the center travel on my scopes windage adjustment. Since I wanted to do everything to ensure a completely stress free installation of the Nightforce Direct Mount, I still decided to go ahead and bed my mount to try and achieve as close to 100% surface contact as possible.
When we fit checked the Long Action Direct Mount on the Remington Model 700 Sendero chambered in 300 Win Mag, we also found there to be slight gaps under various areas of the mount so we decided to bed this mount also. The takeaway from these two fit checks should be that if you are wanting the best possible fit of your mount to your receiver, then bedding is needed to account for variations in manufacturing tolerances. Both the receiver and mount represent complex machined parts and slight variations in tolerances will exist. If for some reason the tolerances stack against you, then the fit will show an obvious need for bedding. If for some reason the tolerances stack in your favor, then the fit may look very good and bedding may not be required. Since measuring gaps is difficult to do under the center of the mounts, I would still recommend bedding.
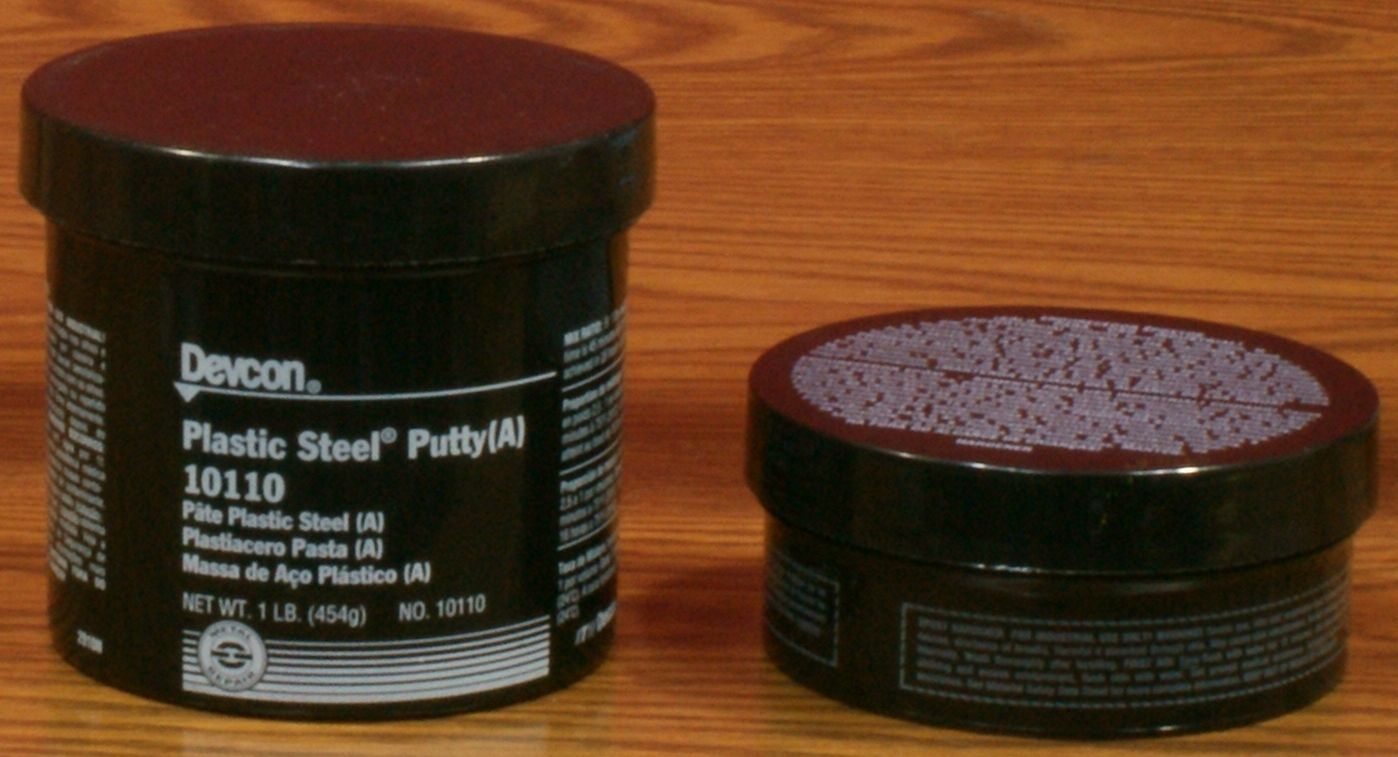
For bedding compound, we used some Devcon Plastic Steel that my buddy had on hand from a previous stock bedding project. This review doesn't cover the bedding process in detail, but there are several good sources on Youtube for watching the bedding process.
Figure 33
These next photos show the mounts bedded on top of the receivers. We were both very pleased with our bedding efforts and feel that the combination of the one-piece Nightforce Direct Mounts and the bedded installations should gives us a rock solid installation for our scopes.
Figure 34 - Bedded Short Action Direct Mount
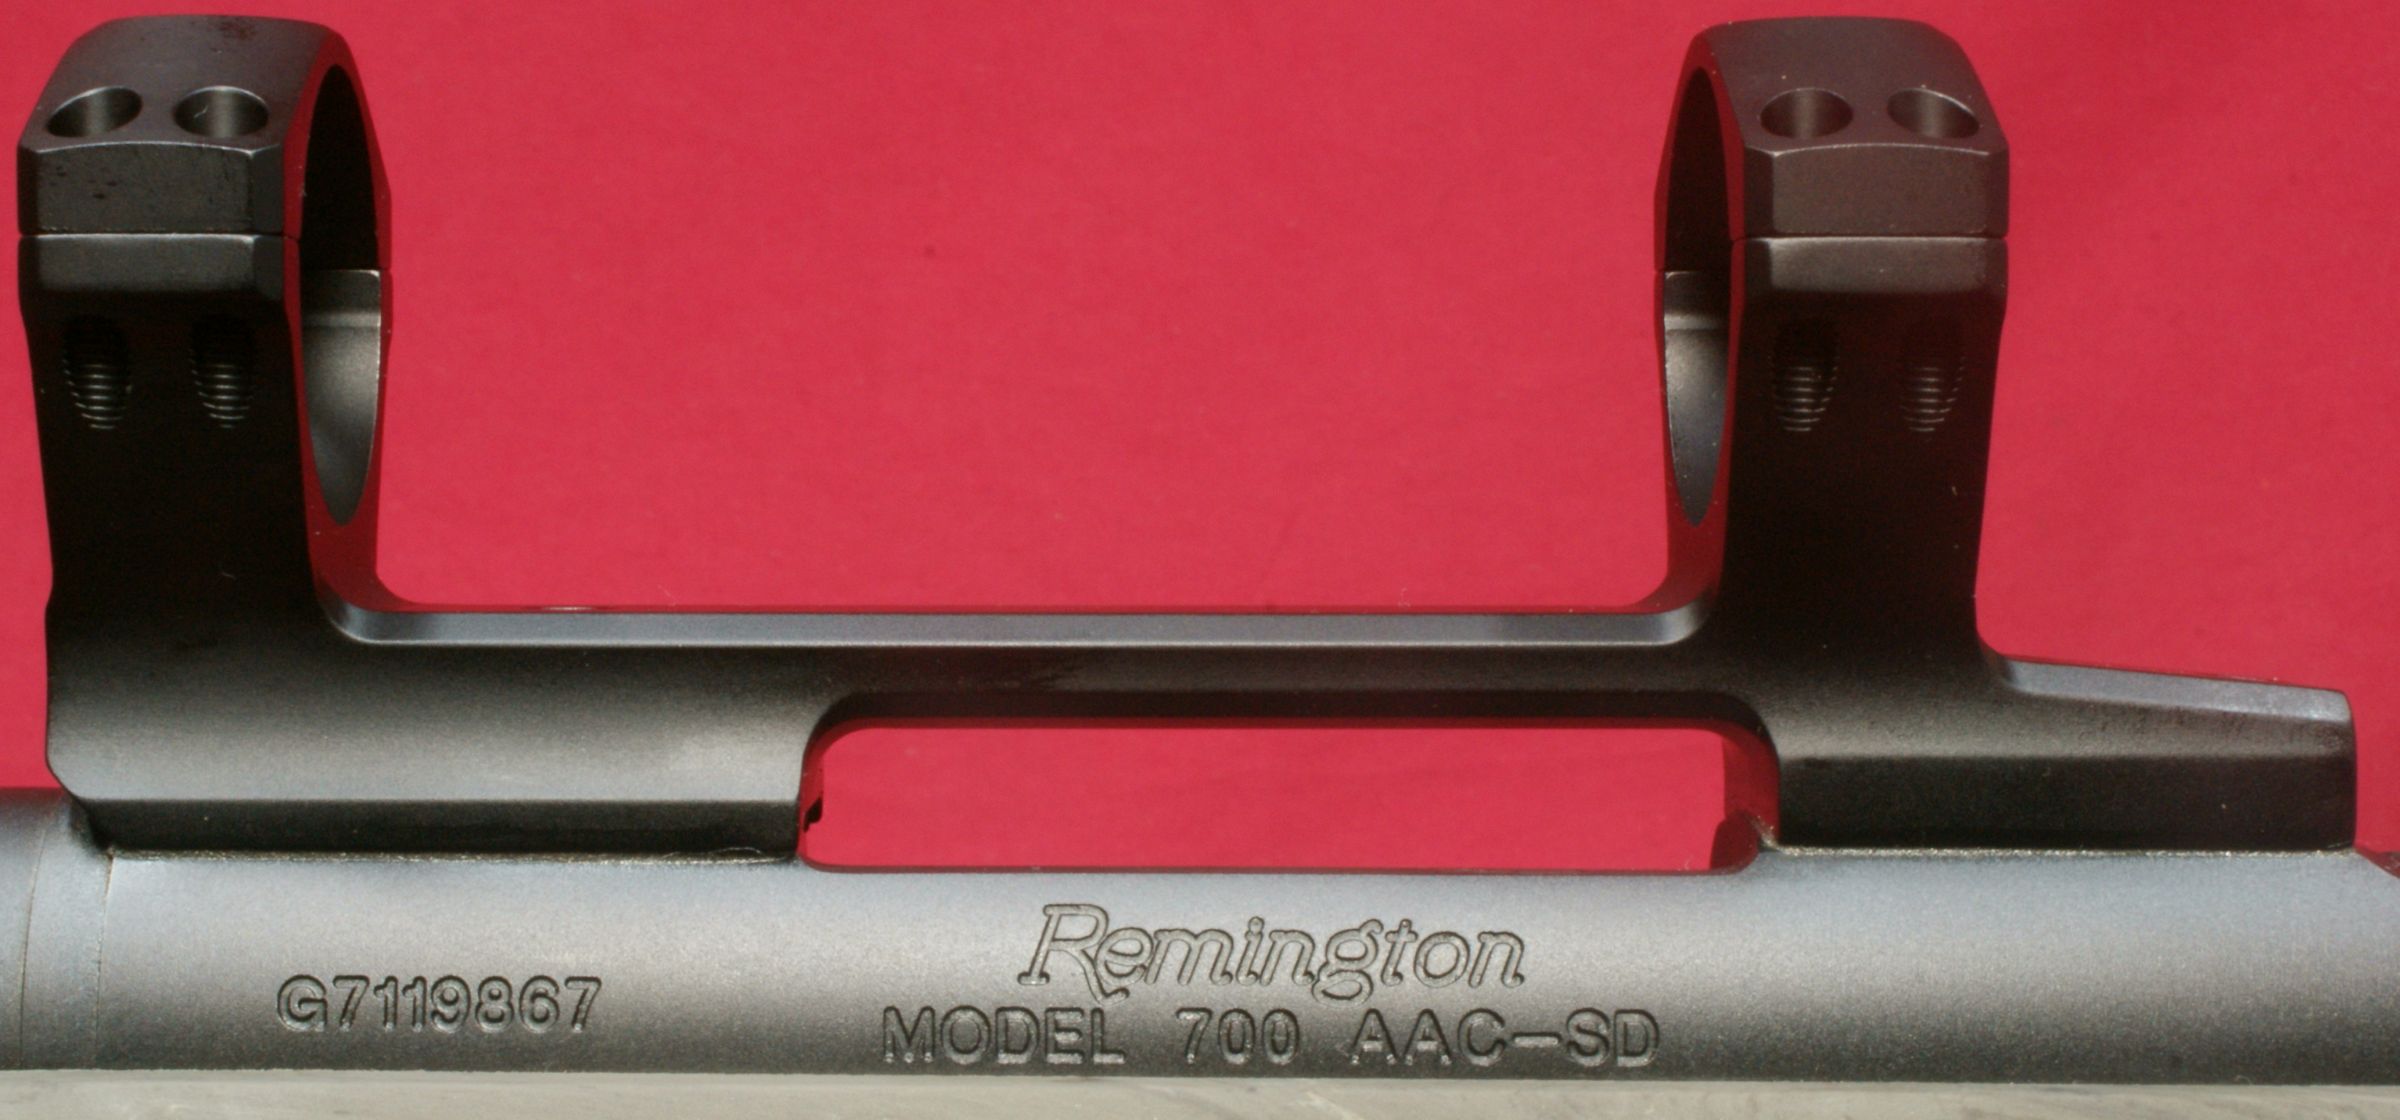
Figure 35 - Bedded Short Action Direct Mount
You can see below that some of the bedding compound squeezed out under the recoil lug which is a good indication that the mount is making solid contact with the receiver.
Figure 36 - Bedded Short Action Direct Mount
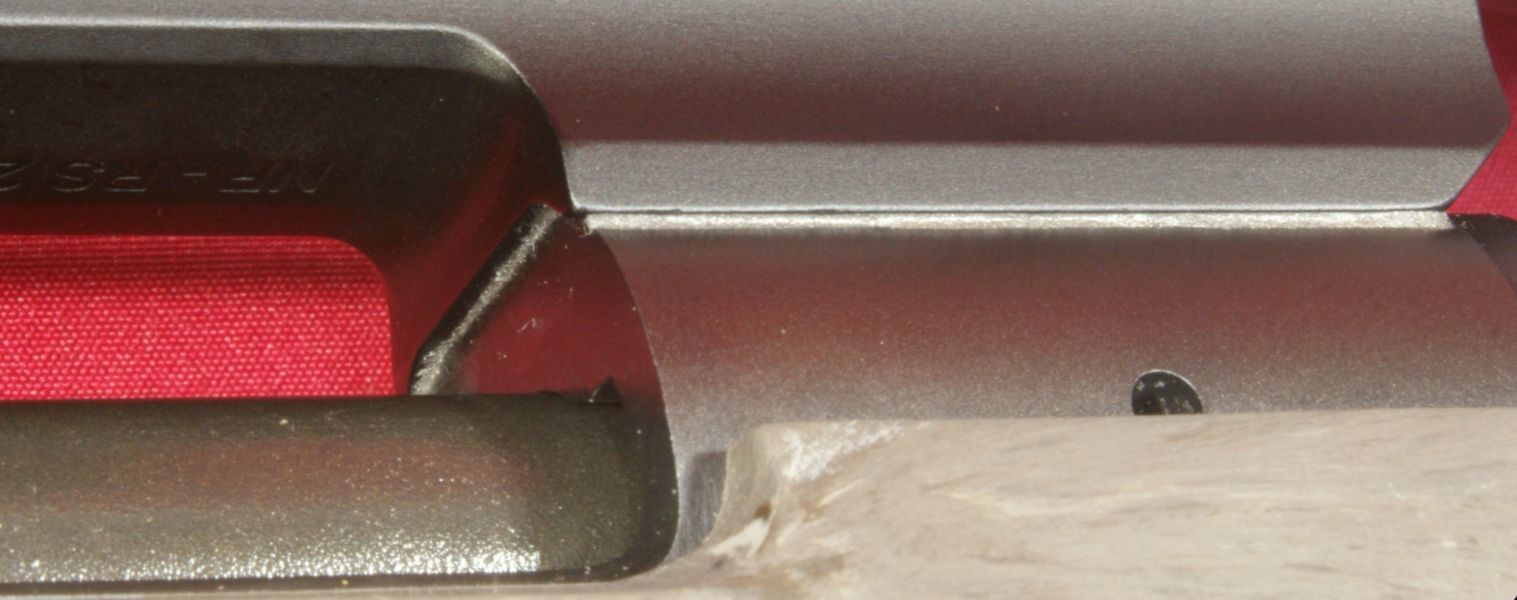
Figure 37 - Bedded Long Action Direct Mount
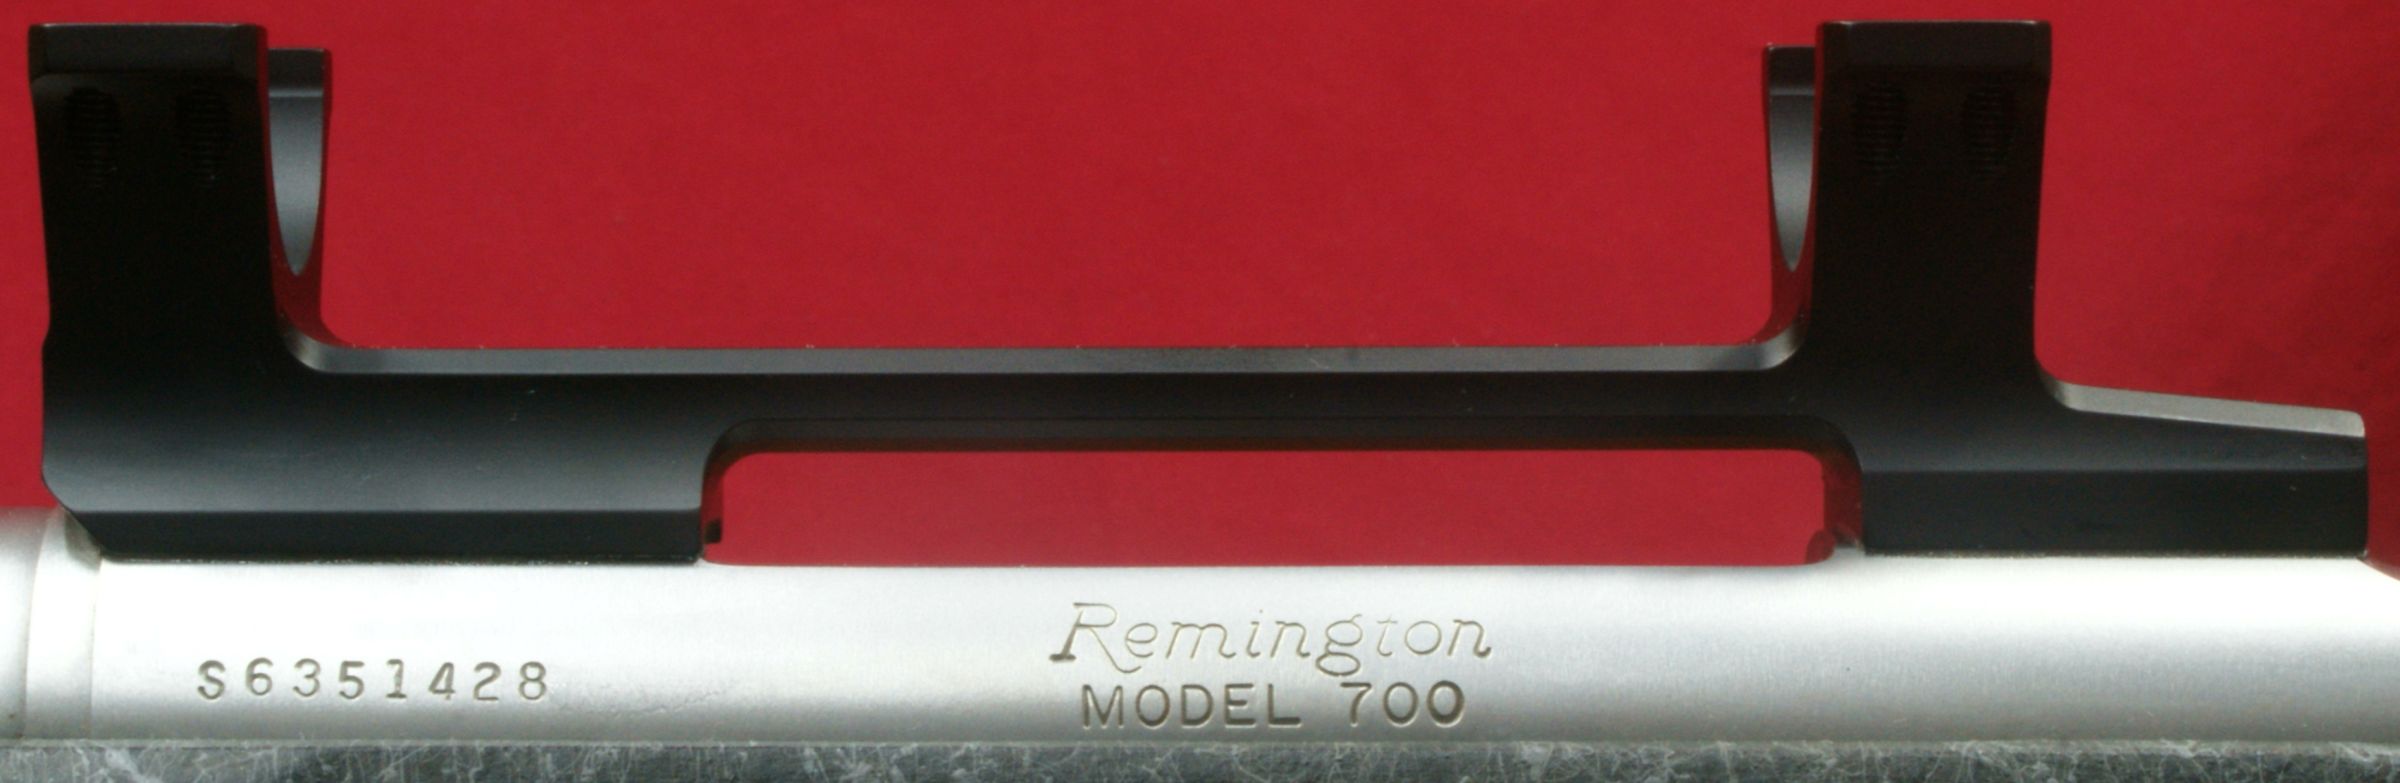
Figure 38 - Bedded Long Action Direct Mount
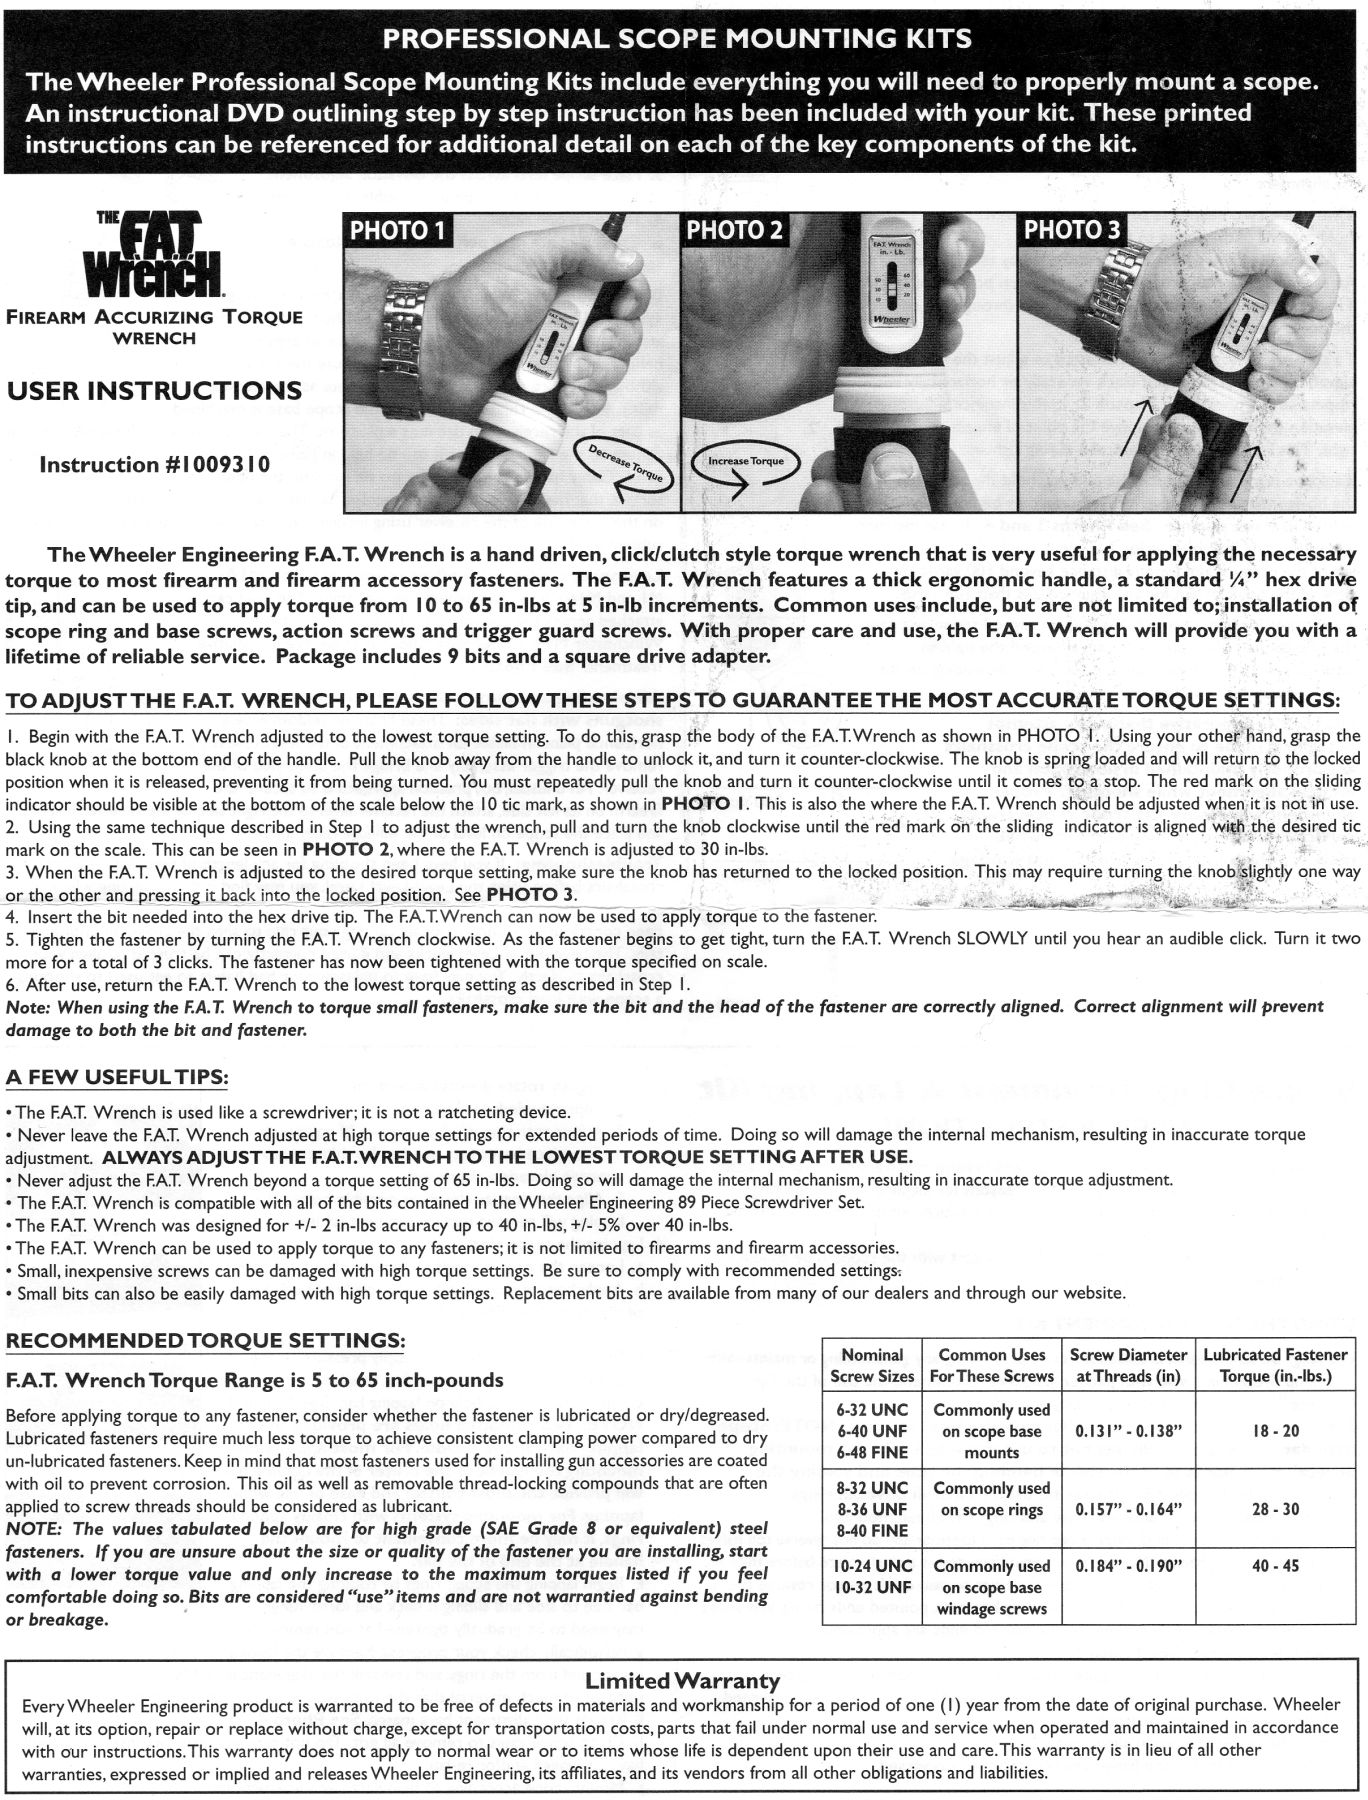
Once the bedding compound cured (~24 hours later), we removed our mount screws, cleaned the inside of the holes and screw threads with Acetone, installed some generic purple Loctite on the screw threads and torqued the mount fasteners to 20 in-lbs. Although the Nightforce package indicates that 25 in-lbs of torque on these screws might be OK by their statement "Do not exceed recommend torque setting of 25 in-lbs for base and cap screws", I didn't feel these #6 screws should be tightened over 20 in-lbs based on the Wheeler Engineering recommended torque values for various screws, especially the forward screw that has less thread engagement than the other screws. So, I tightened each base screw to 20 in-lbs of torque.
Figure 39
We decided to forgo lapping the rings because of Nightforce's statement on their FAQ page which states "We do not recommend lapping our rings. Nightforce Optics rings are manufactured to strict tolerances and specifications and even the thickness of our anodizing is taken into account." Since we bedded our mounts, this ensured that we didn't deform the mount on installation and the rings should still be inline as manufactured. Nightforce indicated that they precision hone the mounting surfaces, and lapping would only dig through the anodized finish and get into the softer aluminum underneath.
Next, we loosely installed our scopes, adjusted the scope for eye relief and aligned the reticles to be level with the shelf on the inside of the receiver using the Wheeler Engineering leveling device. Since I struggle trusting leveling gadgets, and because it is hard to beat a good eye, I double checked the reticle level/plumb-ness by looking through the front and rear of the scope.
Figure 40

Once we were happy with the reticle alignment, we added some generic purple Loctite to each screw and started snugging the cap screws while making an effort to keep the same amount of gap between the cap and lower mount on each side of the mount. Once all screws were snug, we tightened the screws by increasing torque gradually across all screws evenly until we reached a torque of 25 in-lbs which was the maximum recommended by Nightforce and close enough to the range of 28-30 in-lbs recommended by Wheeler Engineering.
Figure 41

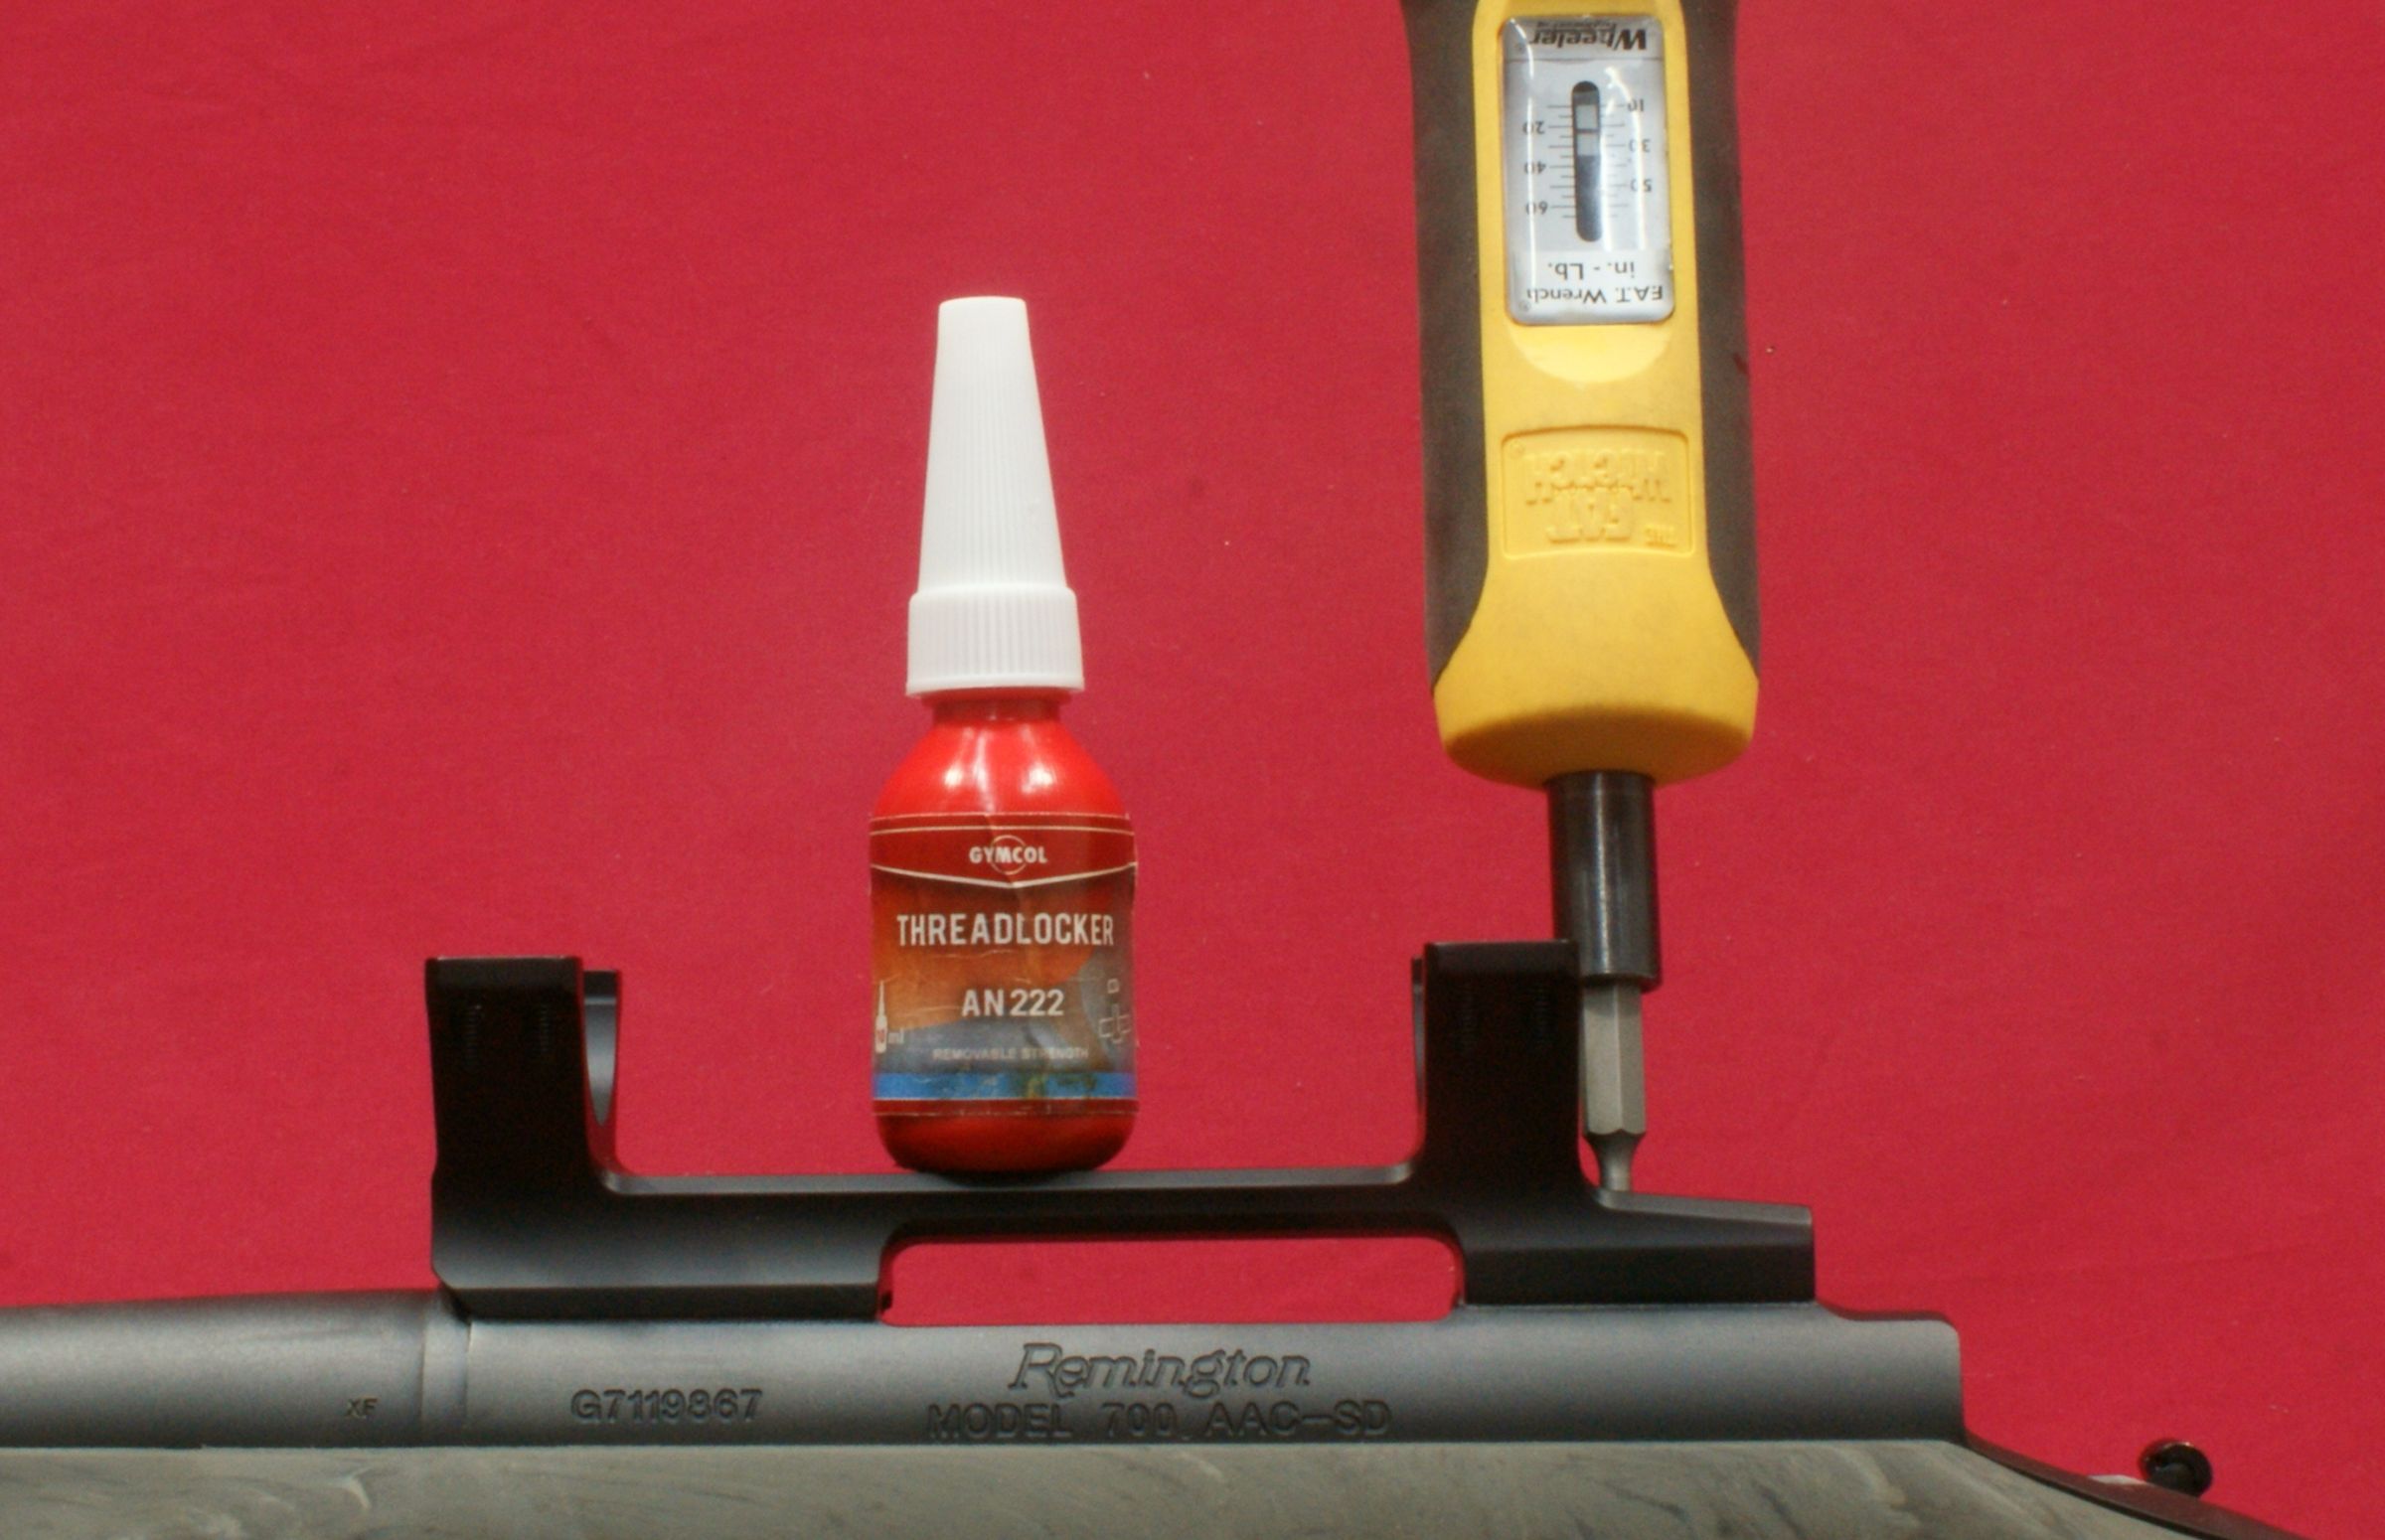
Installed Configurations
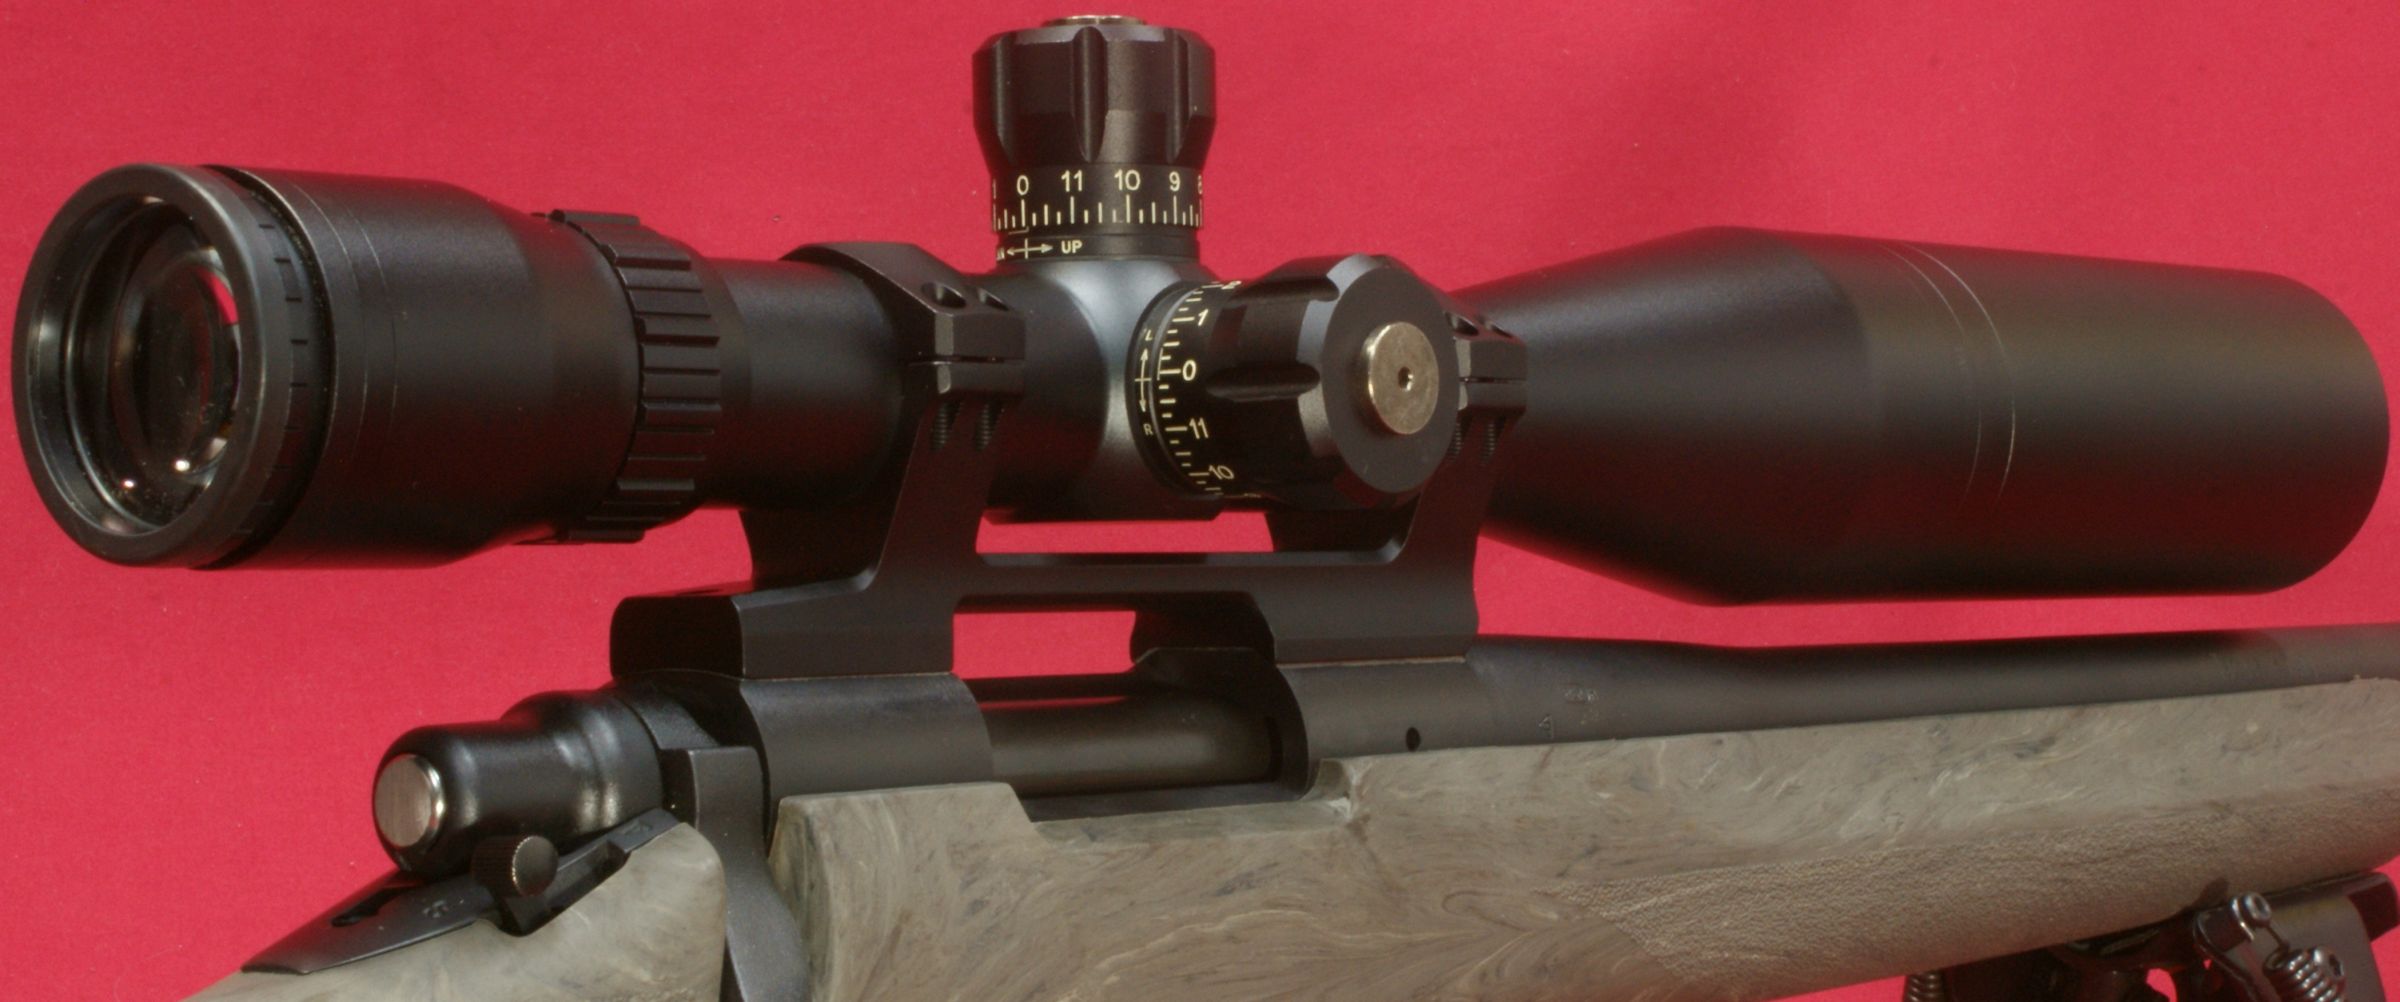
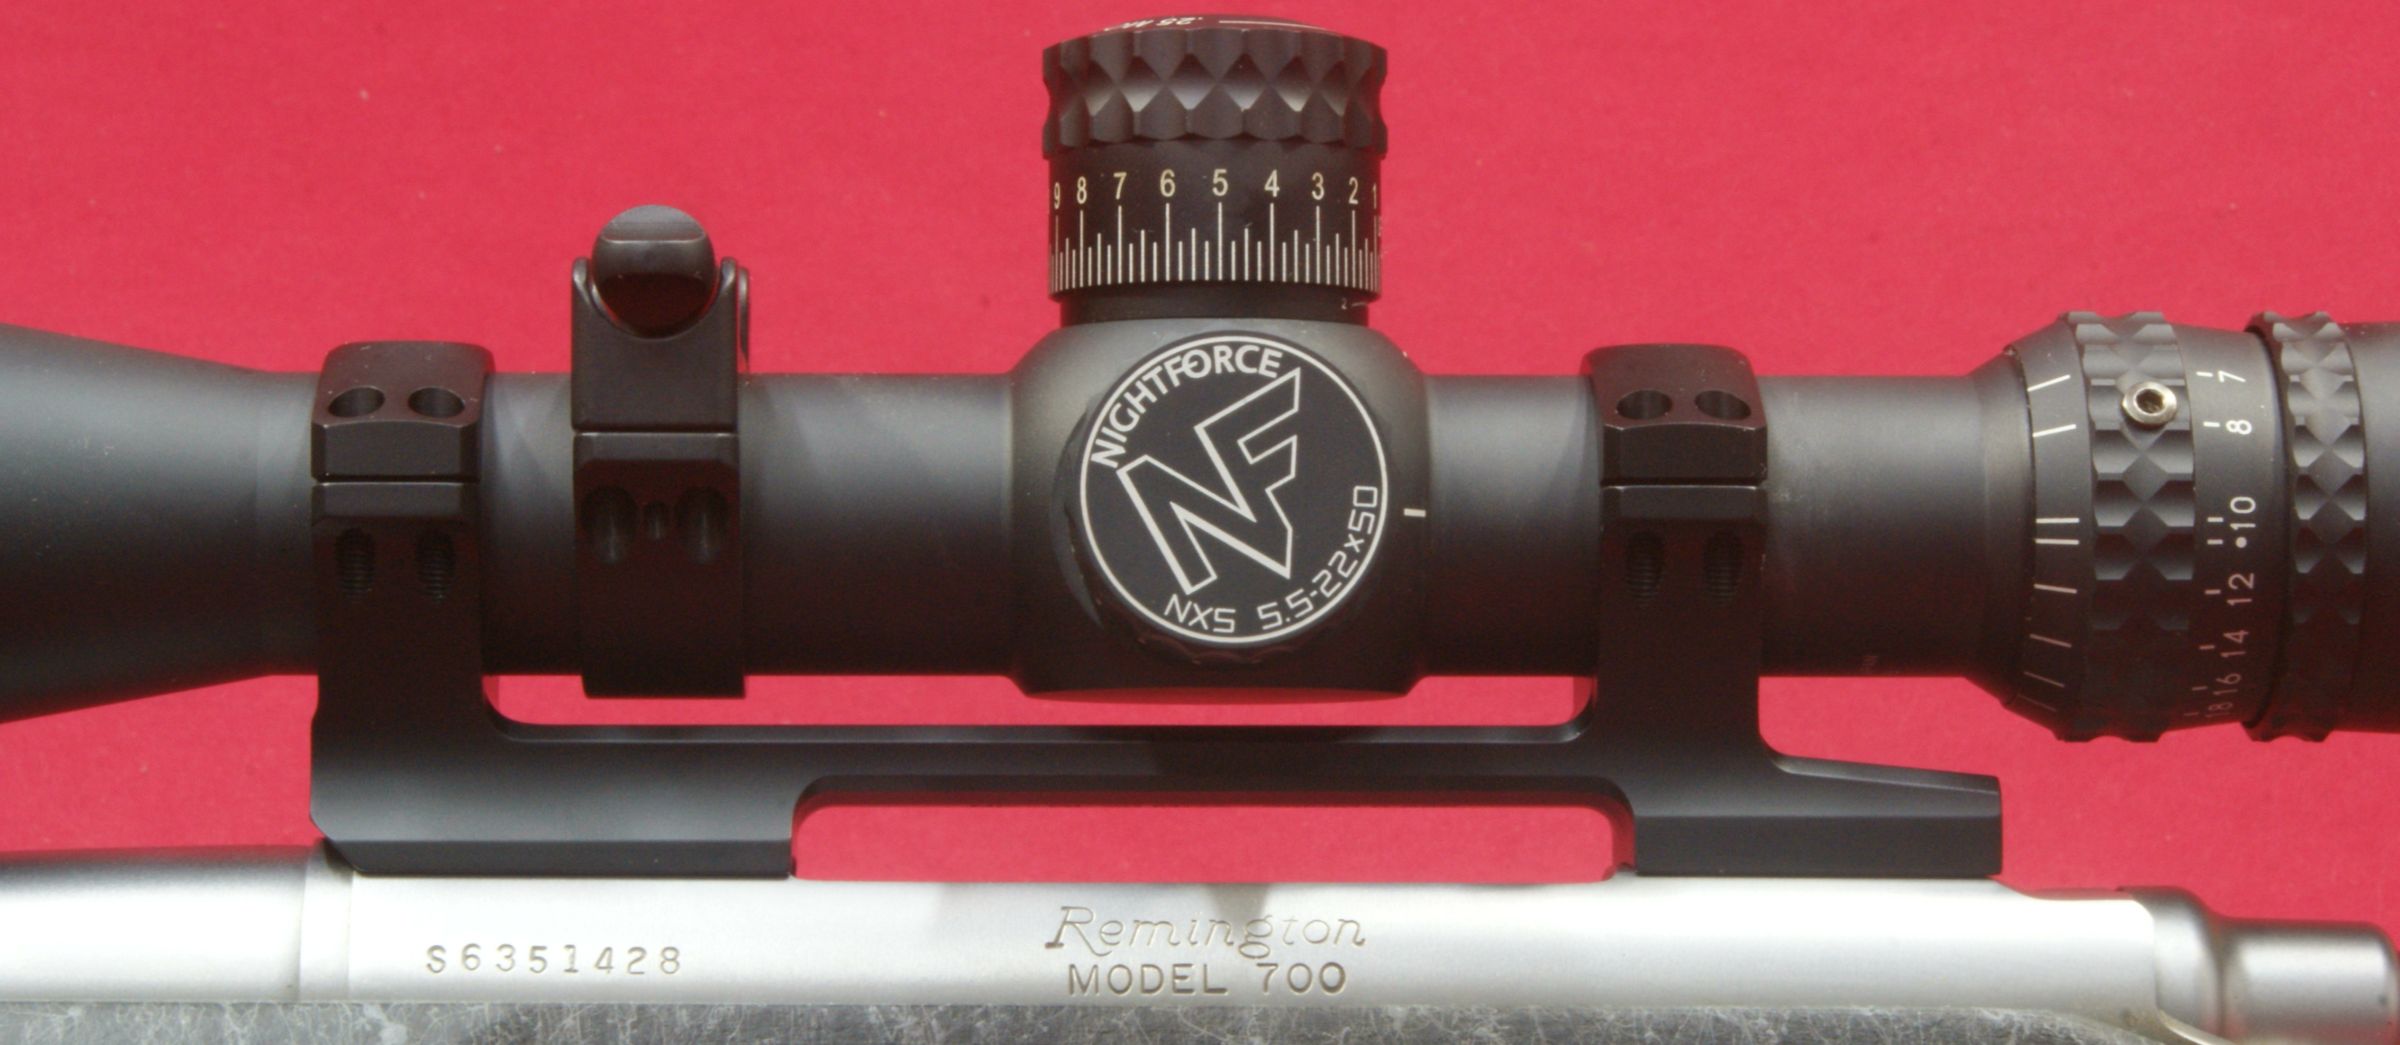
These next photos show the Nightforce 0.885" Low Direct Mounts installed on our Remington 700 short and long action rifles. The Nightforce mounts make an attractive scope installation that seems to convey the look of a solid foundation for these quality scopes. Based on my measurements, the sight height to use in your ballistics programs for the scope above the bore would be 1.8635".
Figure 42
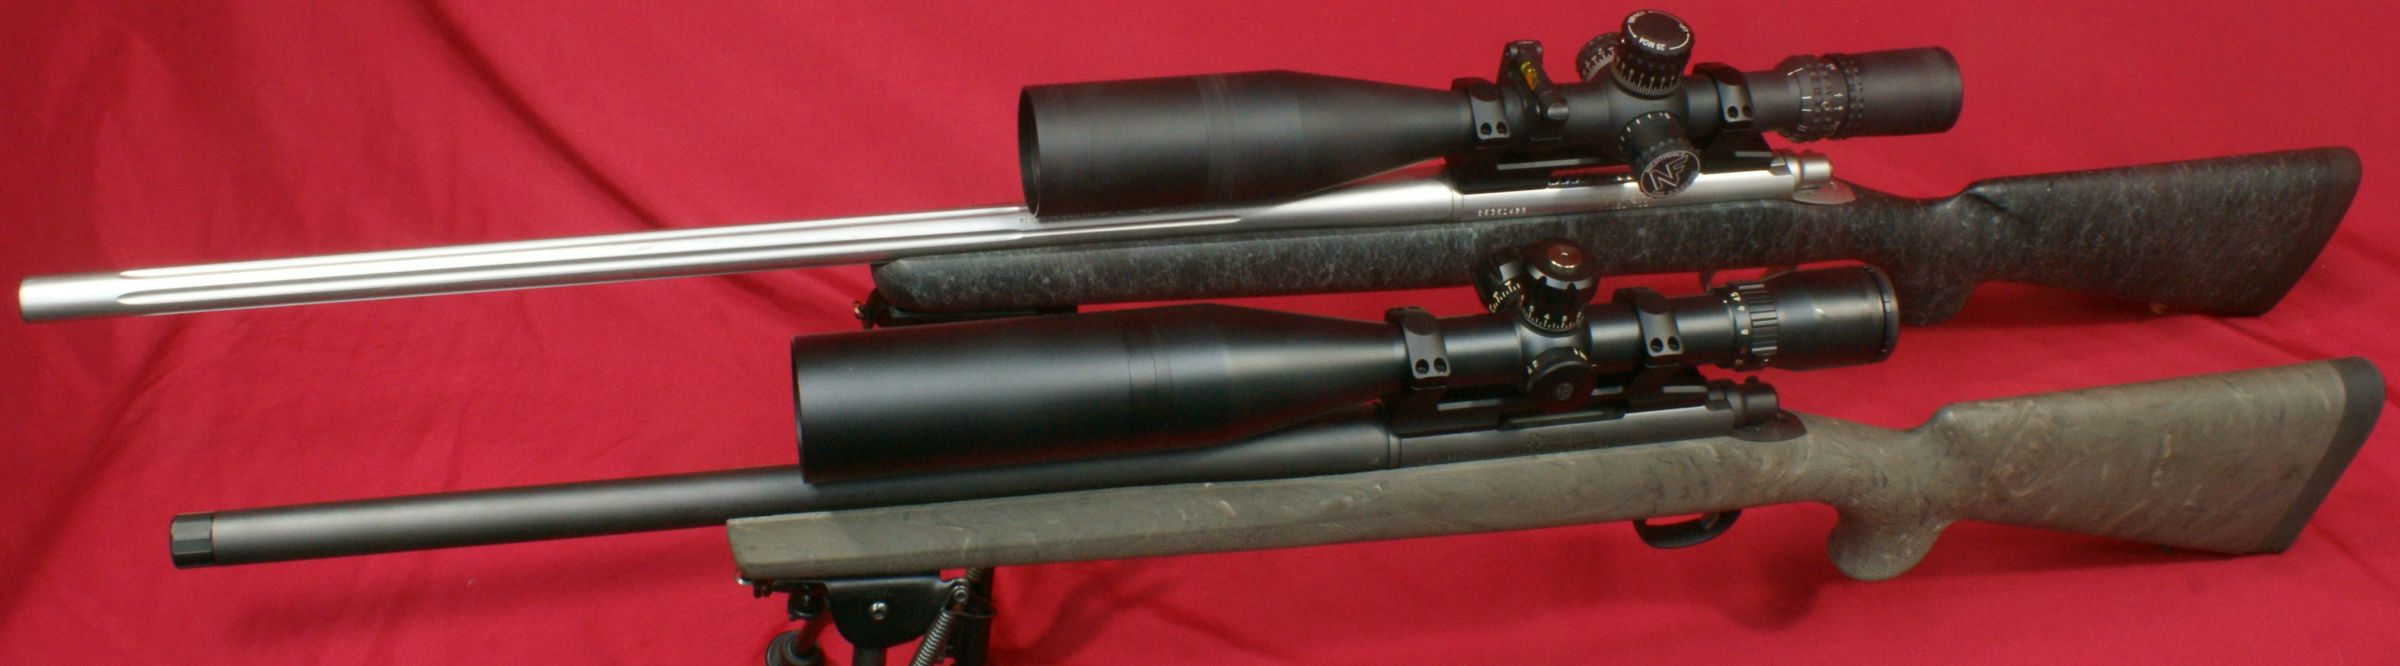
Figure 43
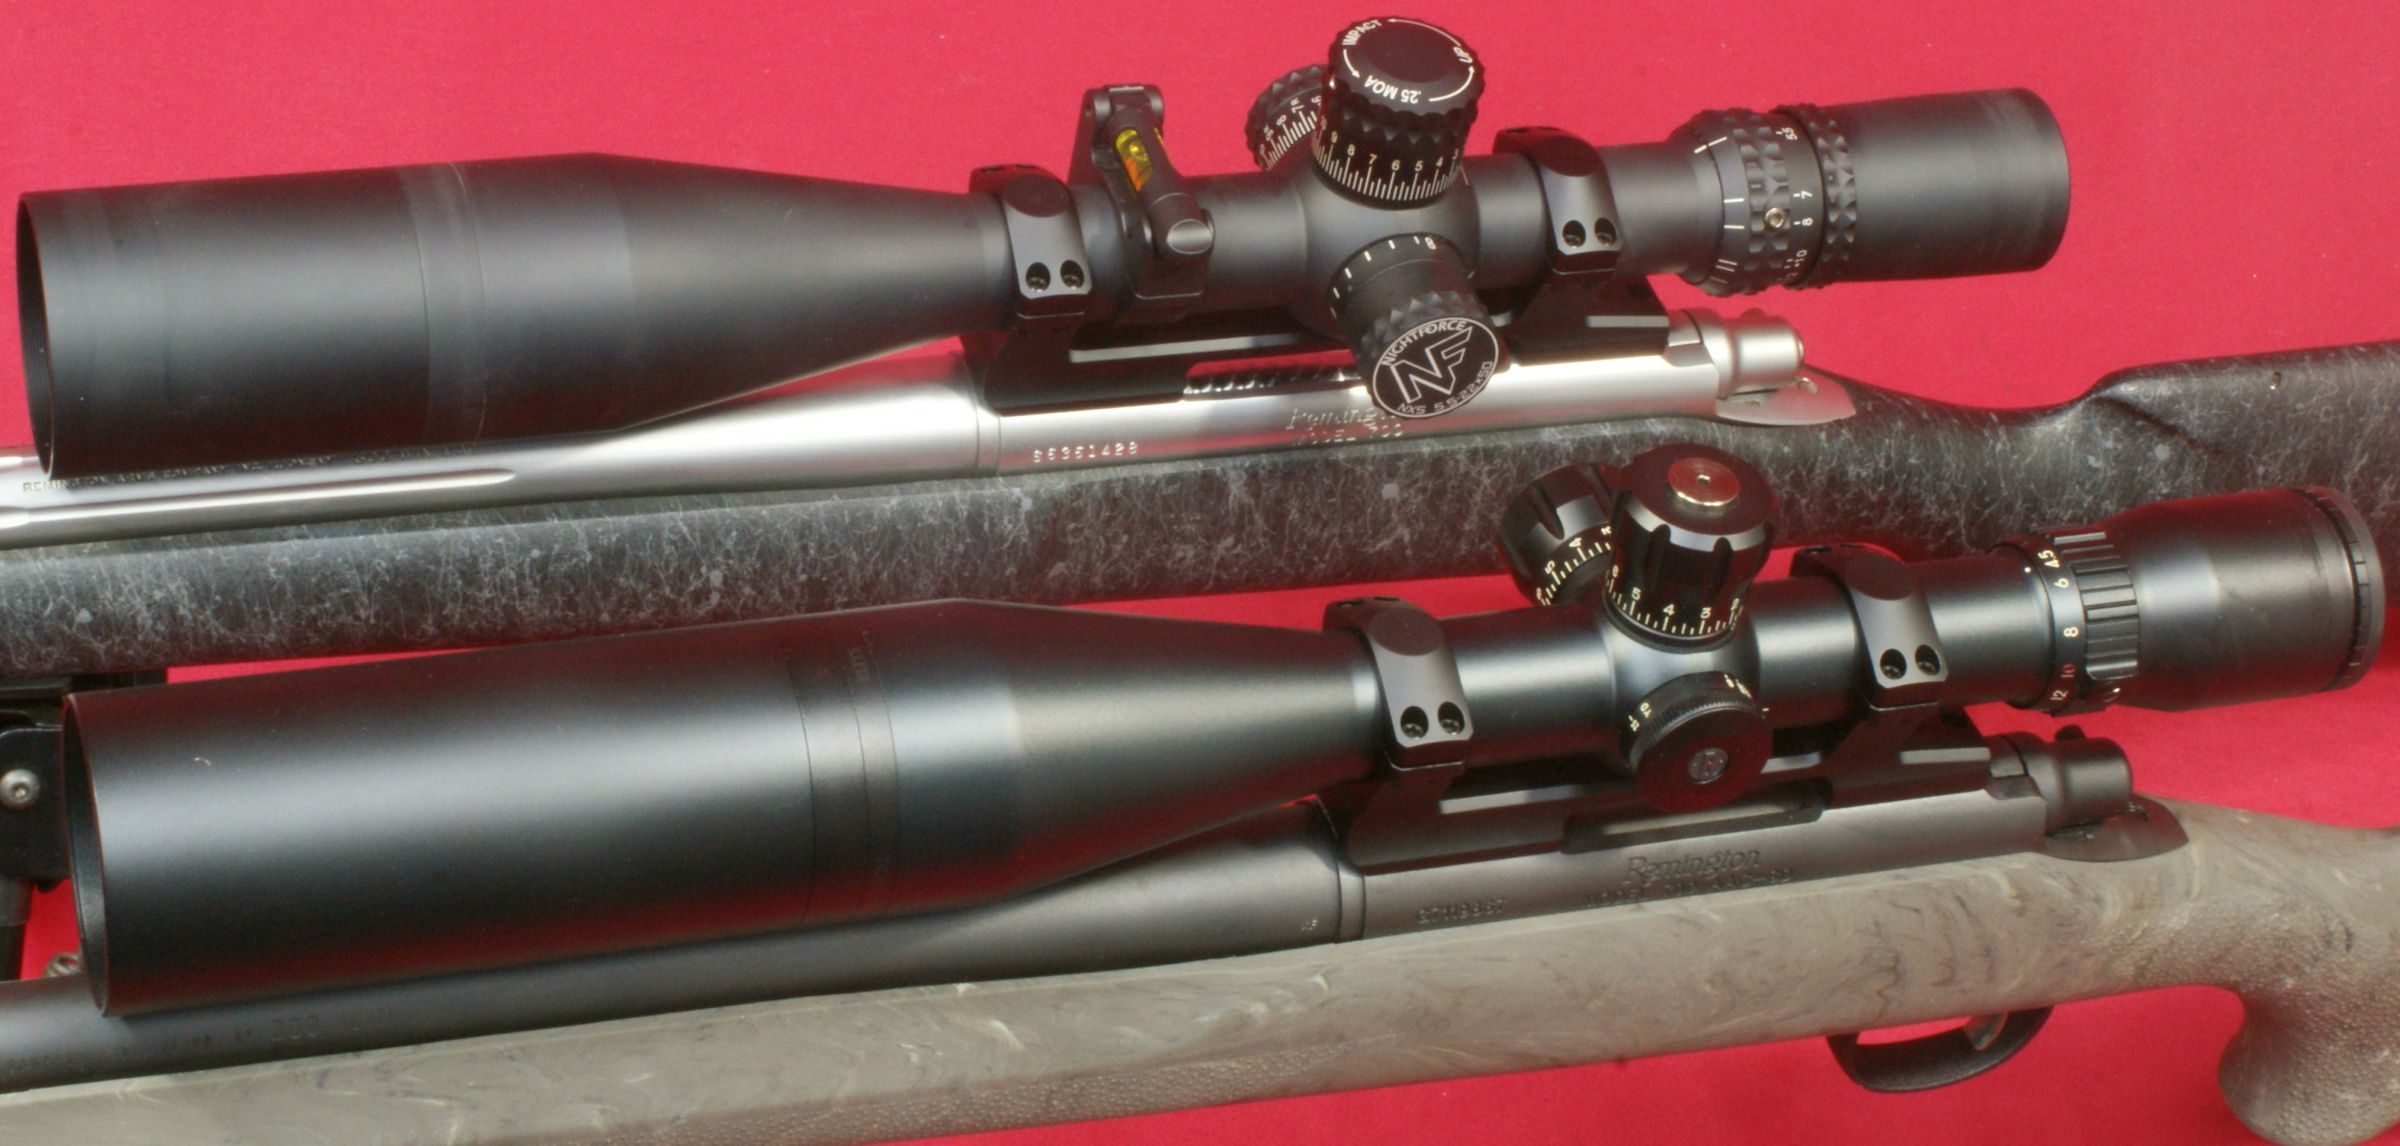
Figure 44
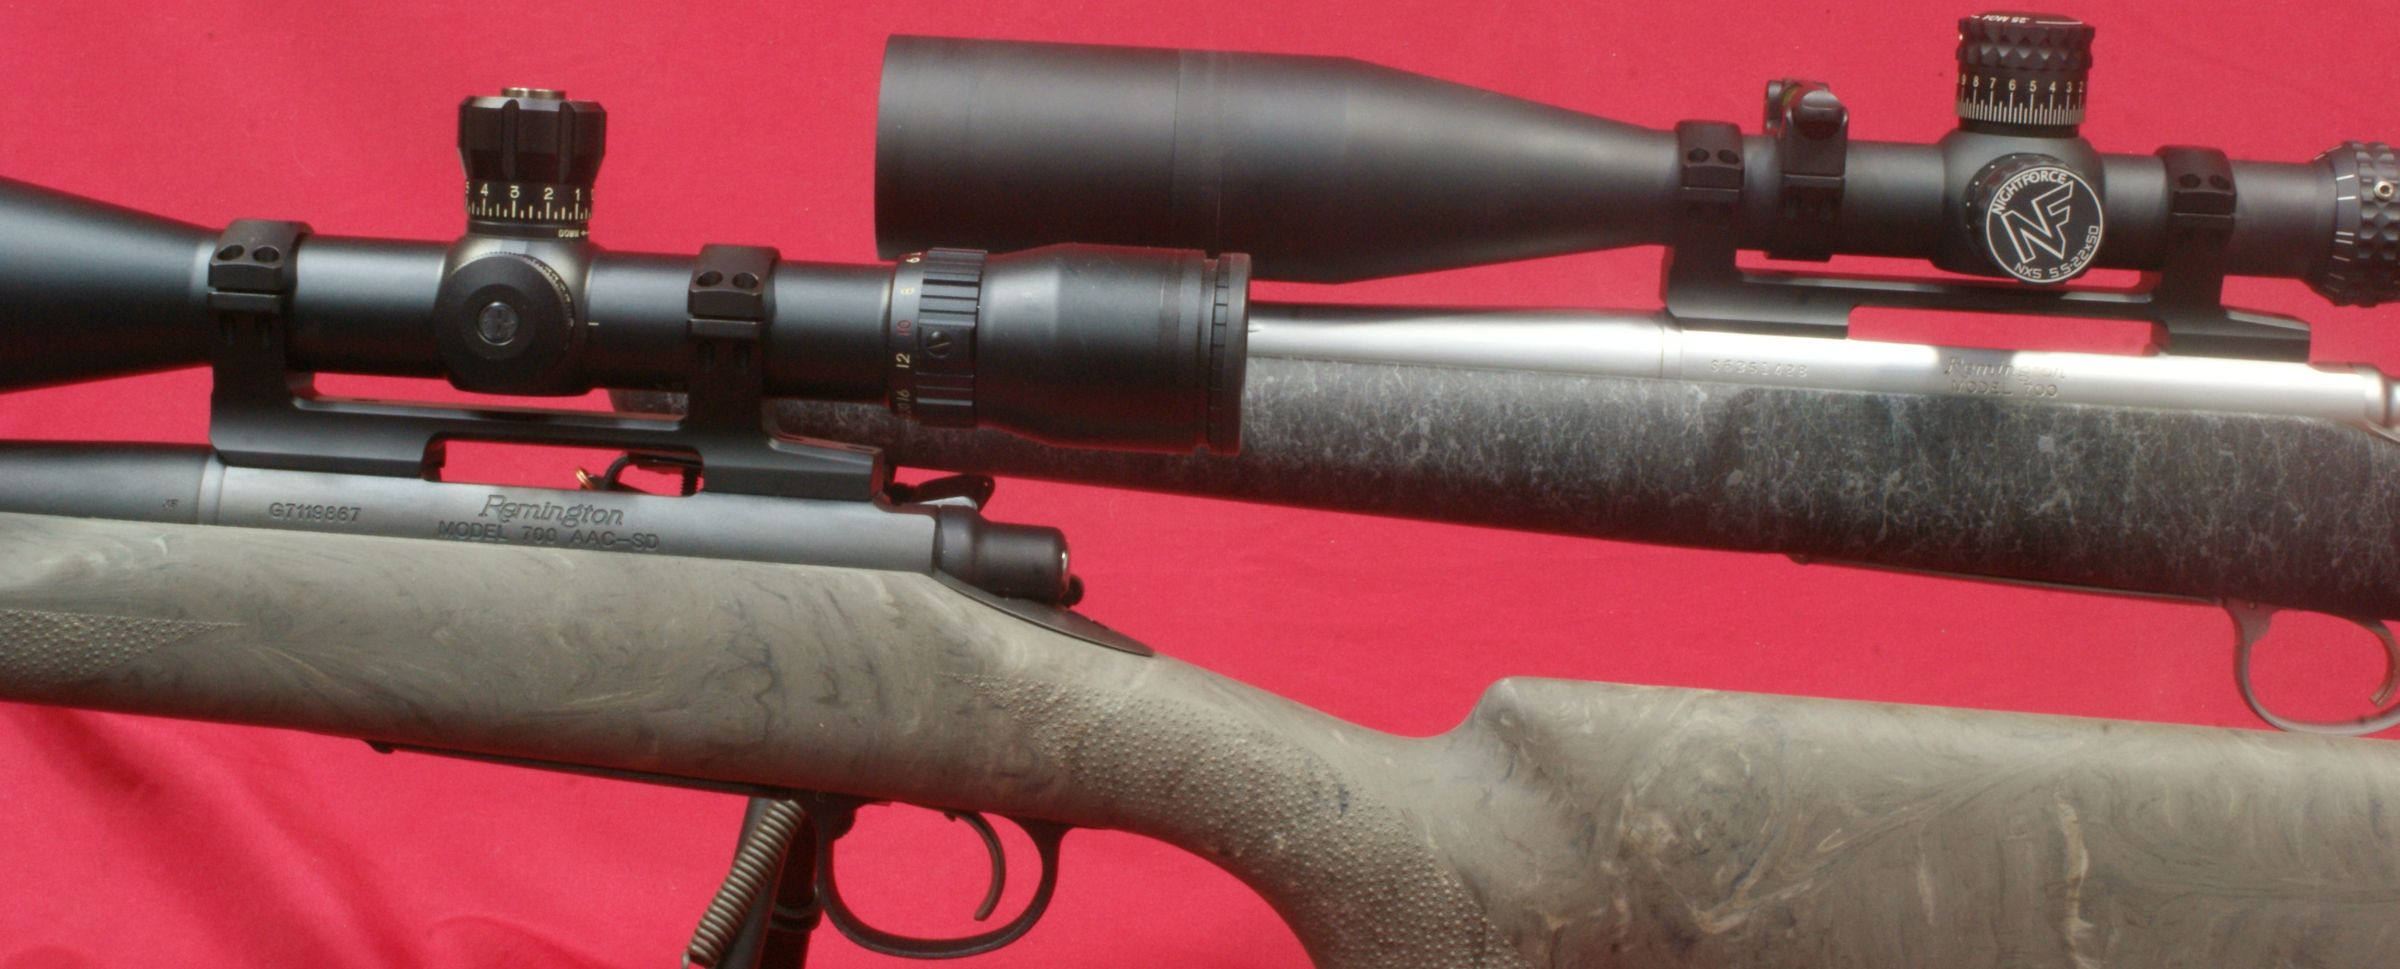
0.885" Low Short Action 20 MOA 30mm Direct Mount Installed
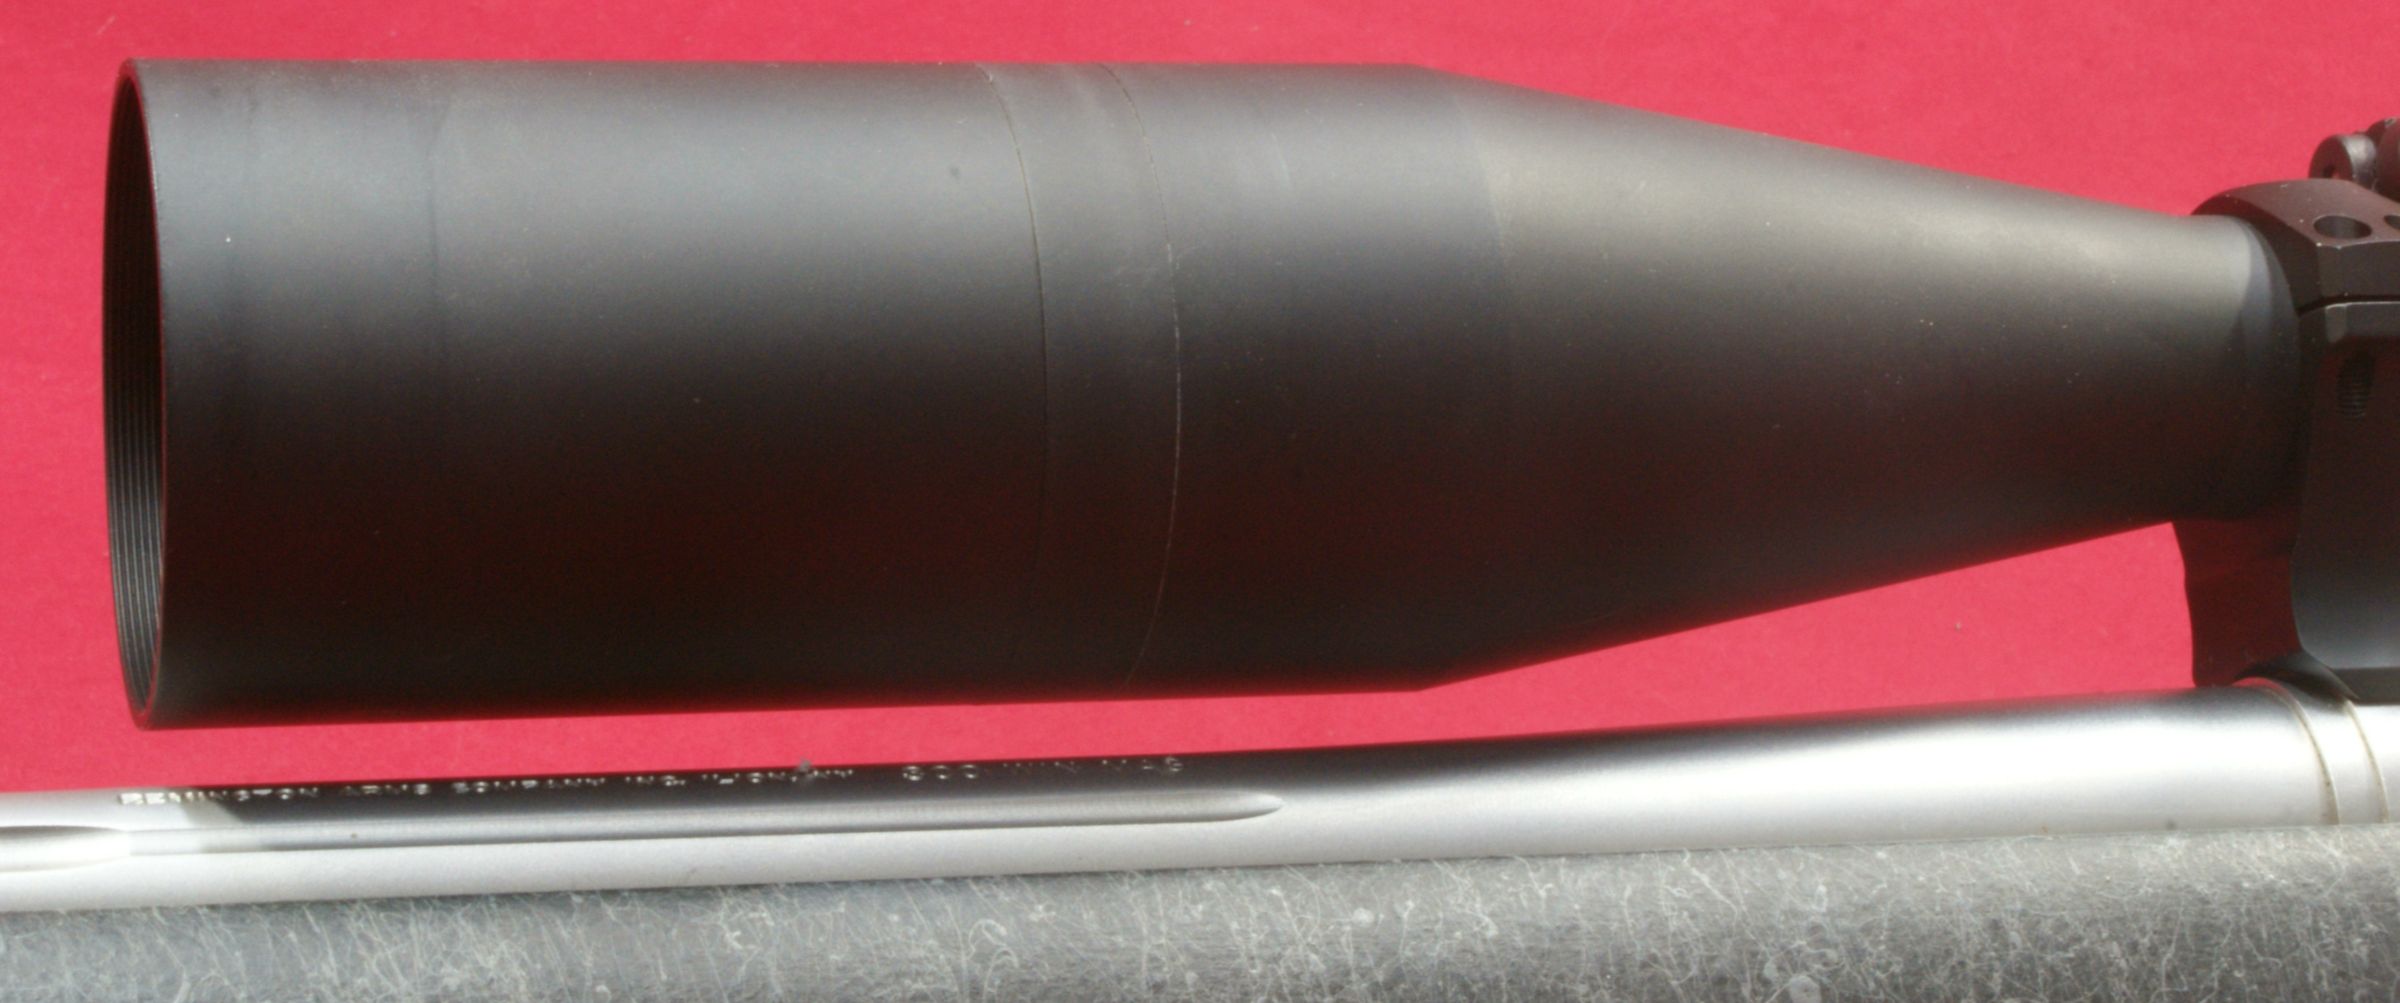
The photos below show details of the Short Action Nightforce Direct Mount on my Remington 700 SPS Tactical Rifle. Looking at the gap between the sun shade and the barrel makes me wonder why someone would want the higher mounts and I'm really glad we contacted Nightforce for their recommendation. Nightforce gave me some feedback on this review and stated, "Many people tend to vastly overestimate the ring height that is required for their optic with the larger objectives. With the Remington heavy barrels, you can actually use the low height rings for Nightforce riflescopes with both a 50mm and 56mm objectives, even though you may have trouble mounting your lens caps with the 56mm." Based on my experience and this installation, I agree with Nightforce.
Figure 45
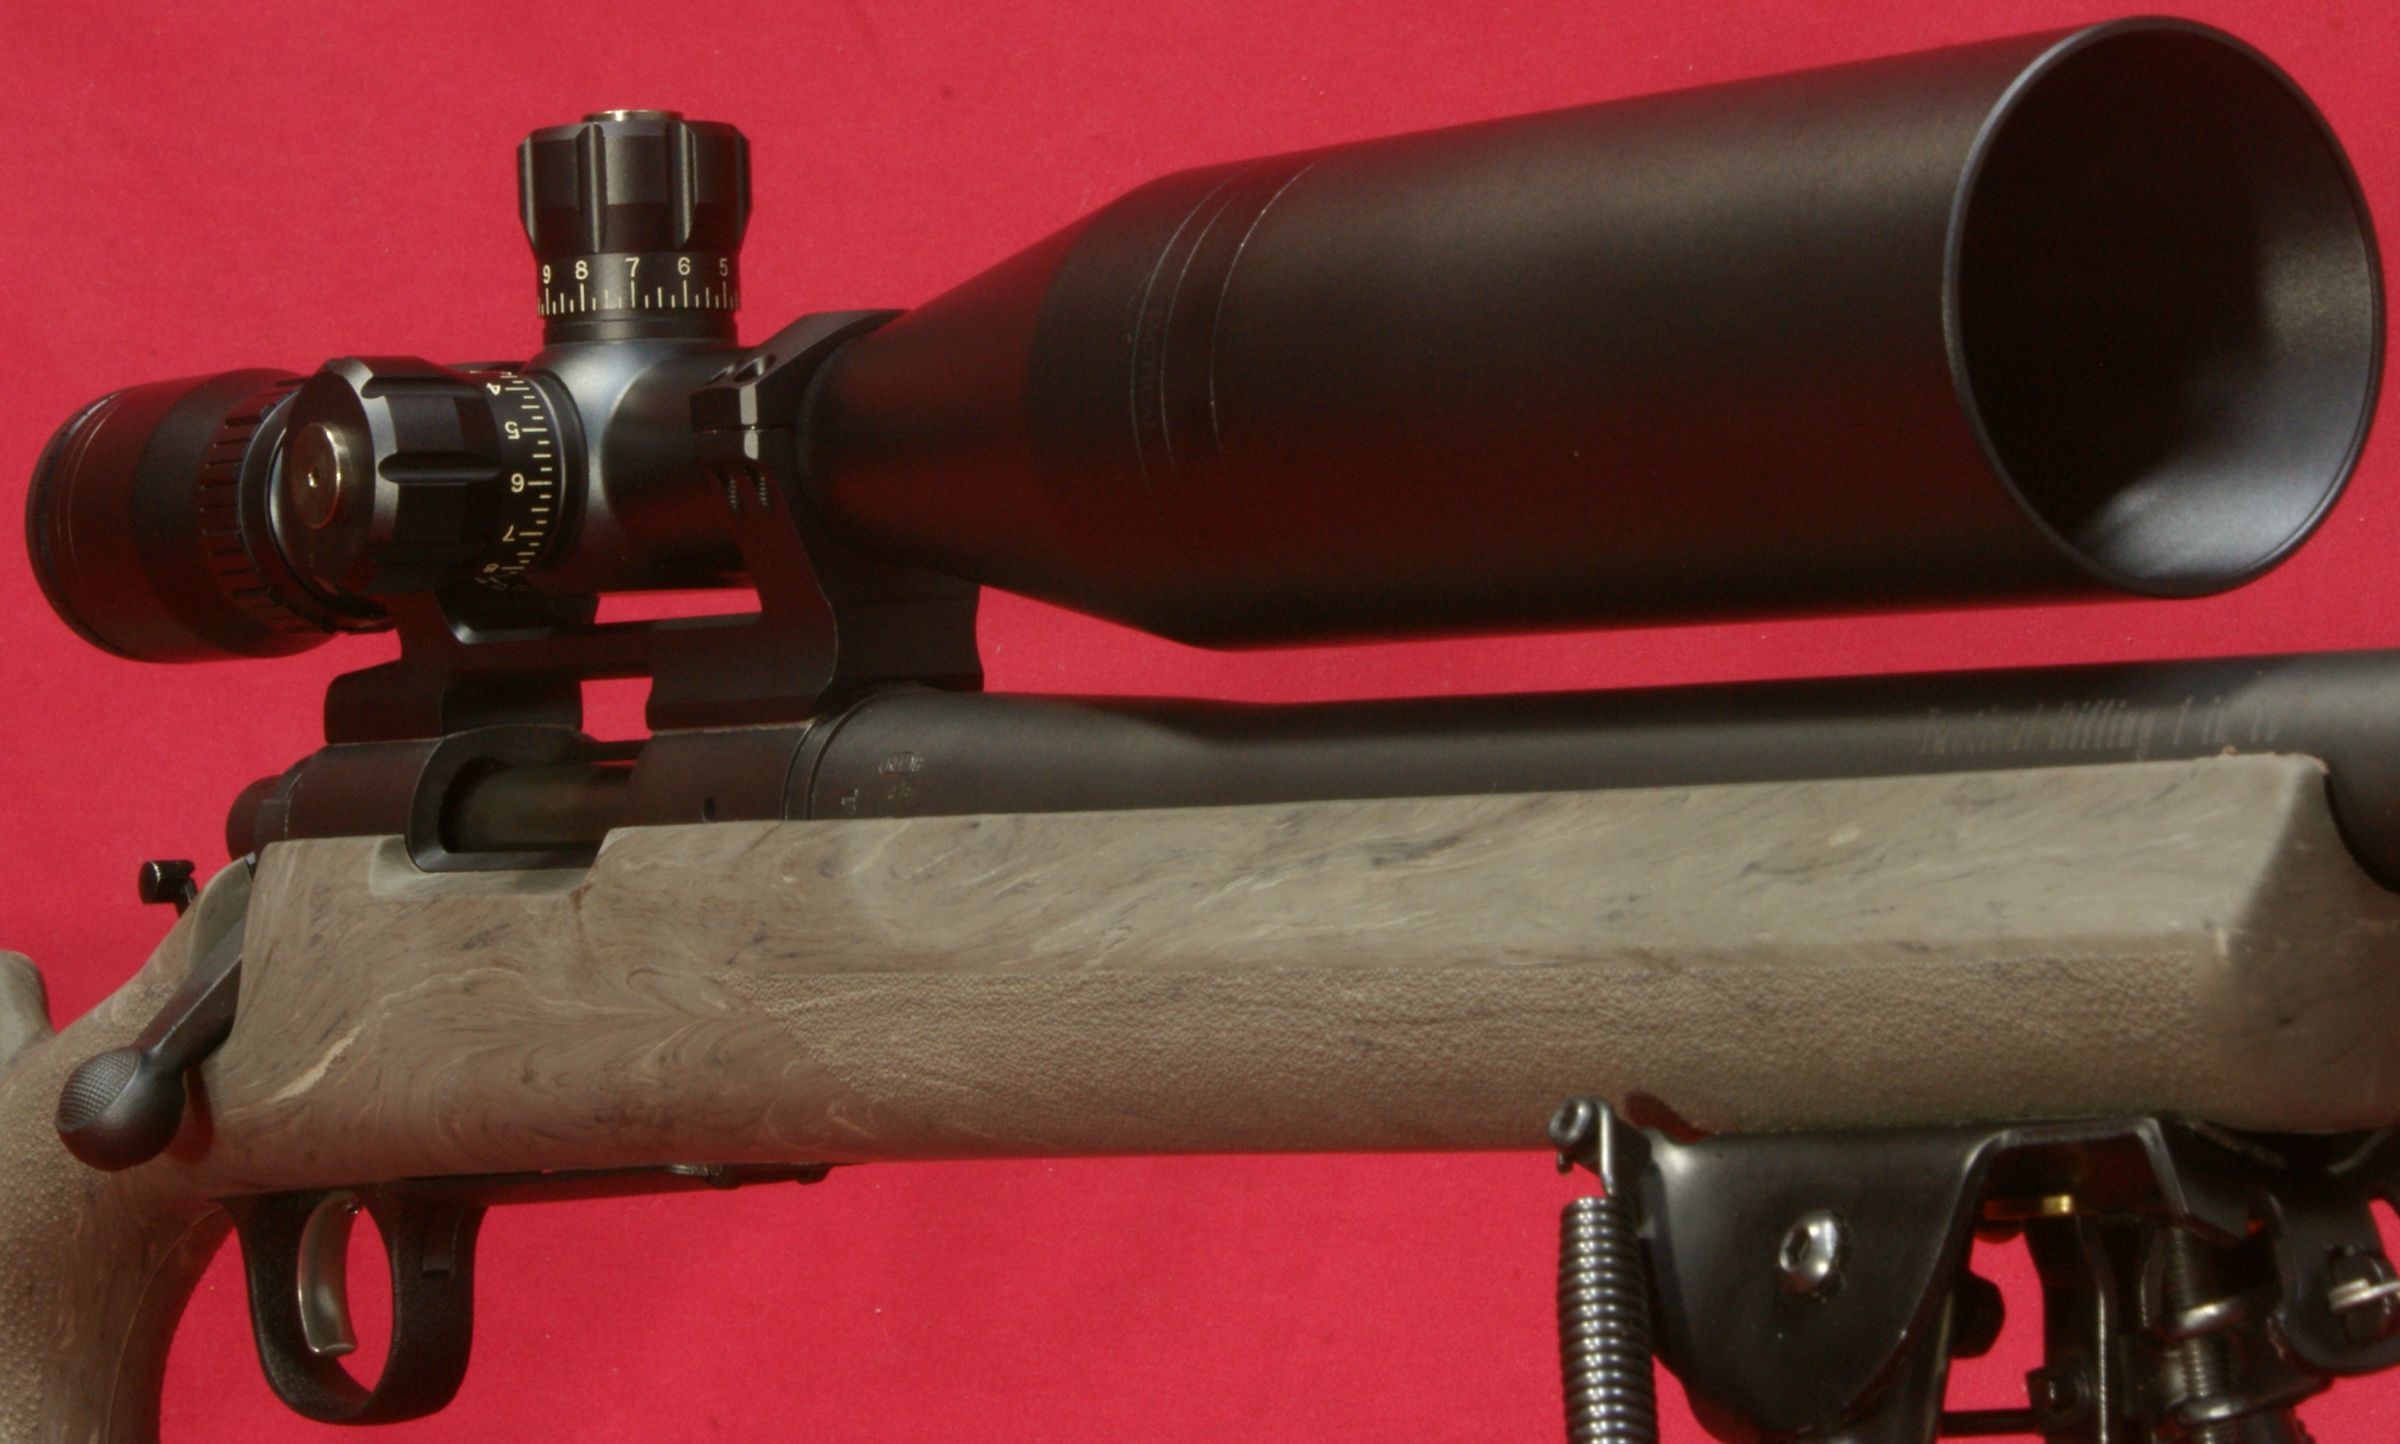
Figure 46

Figure 47
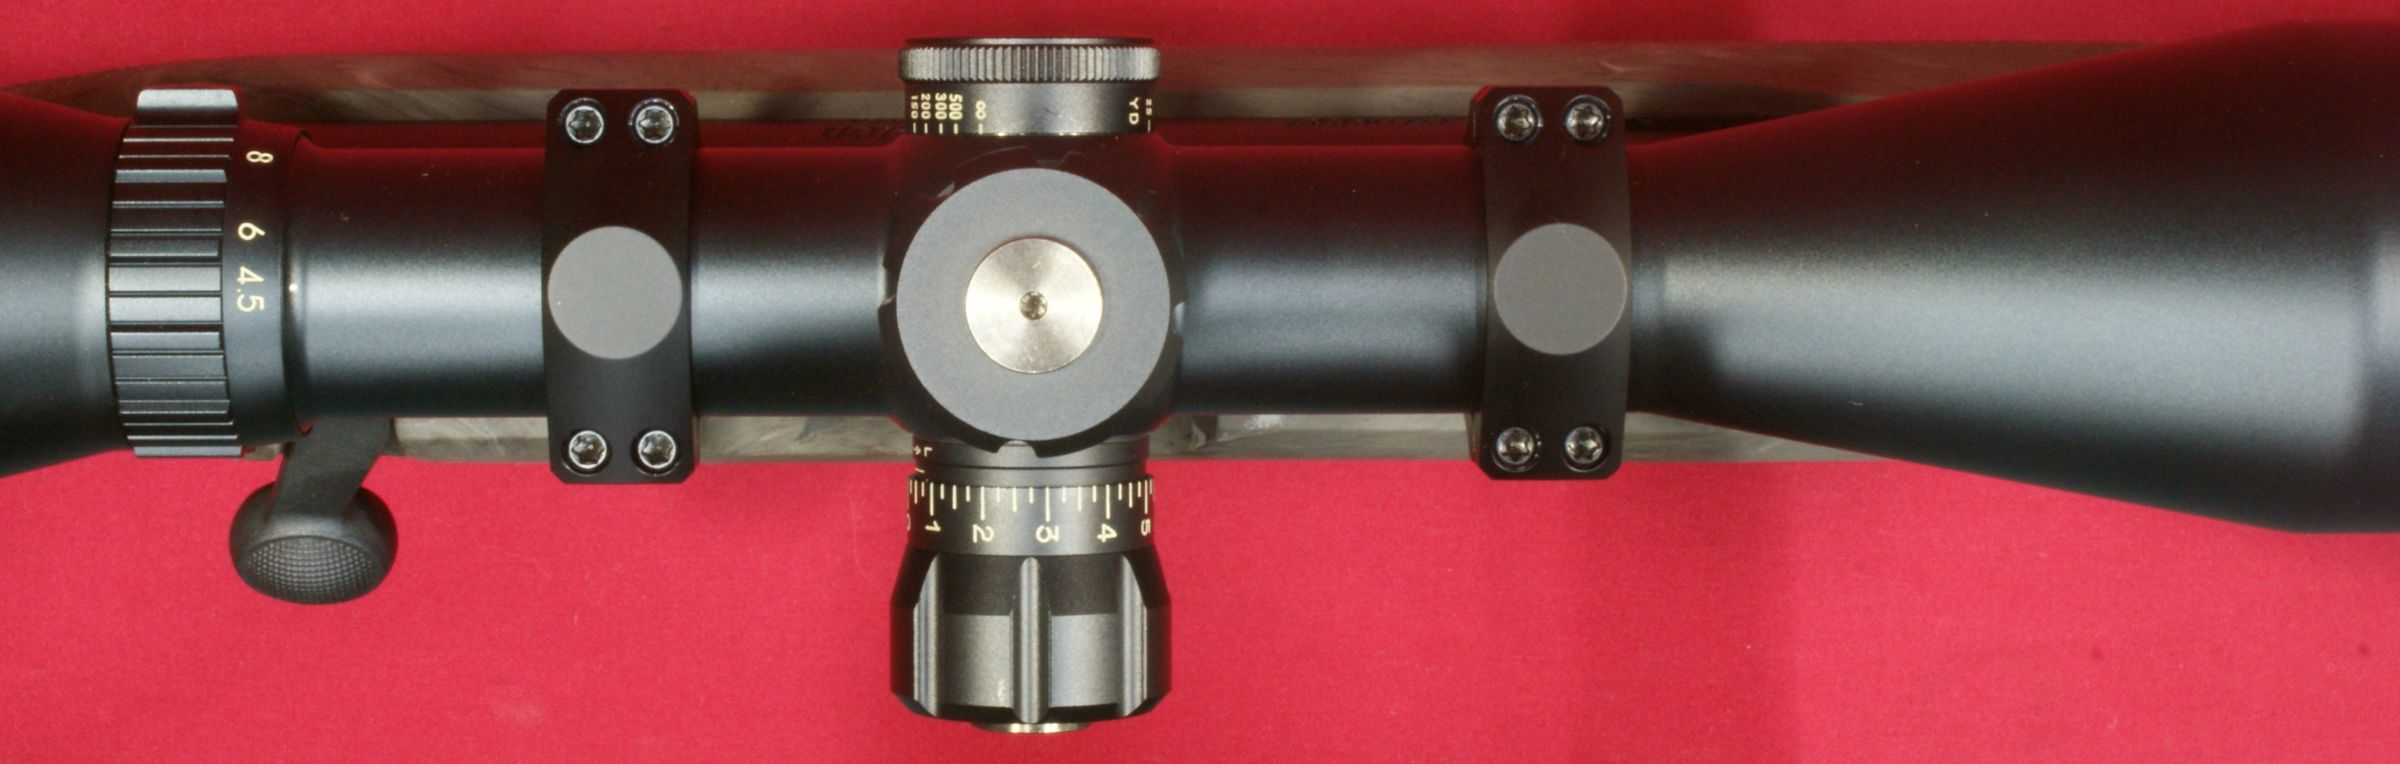
Figure 48
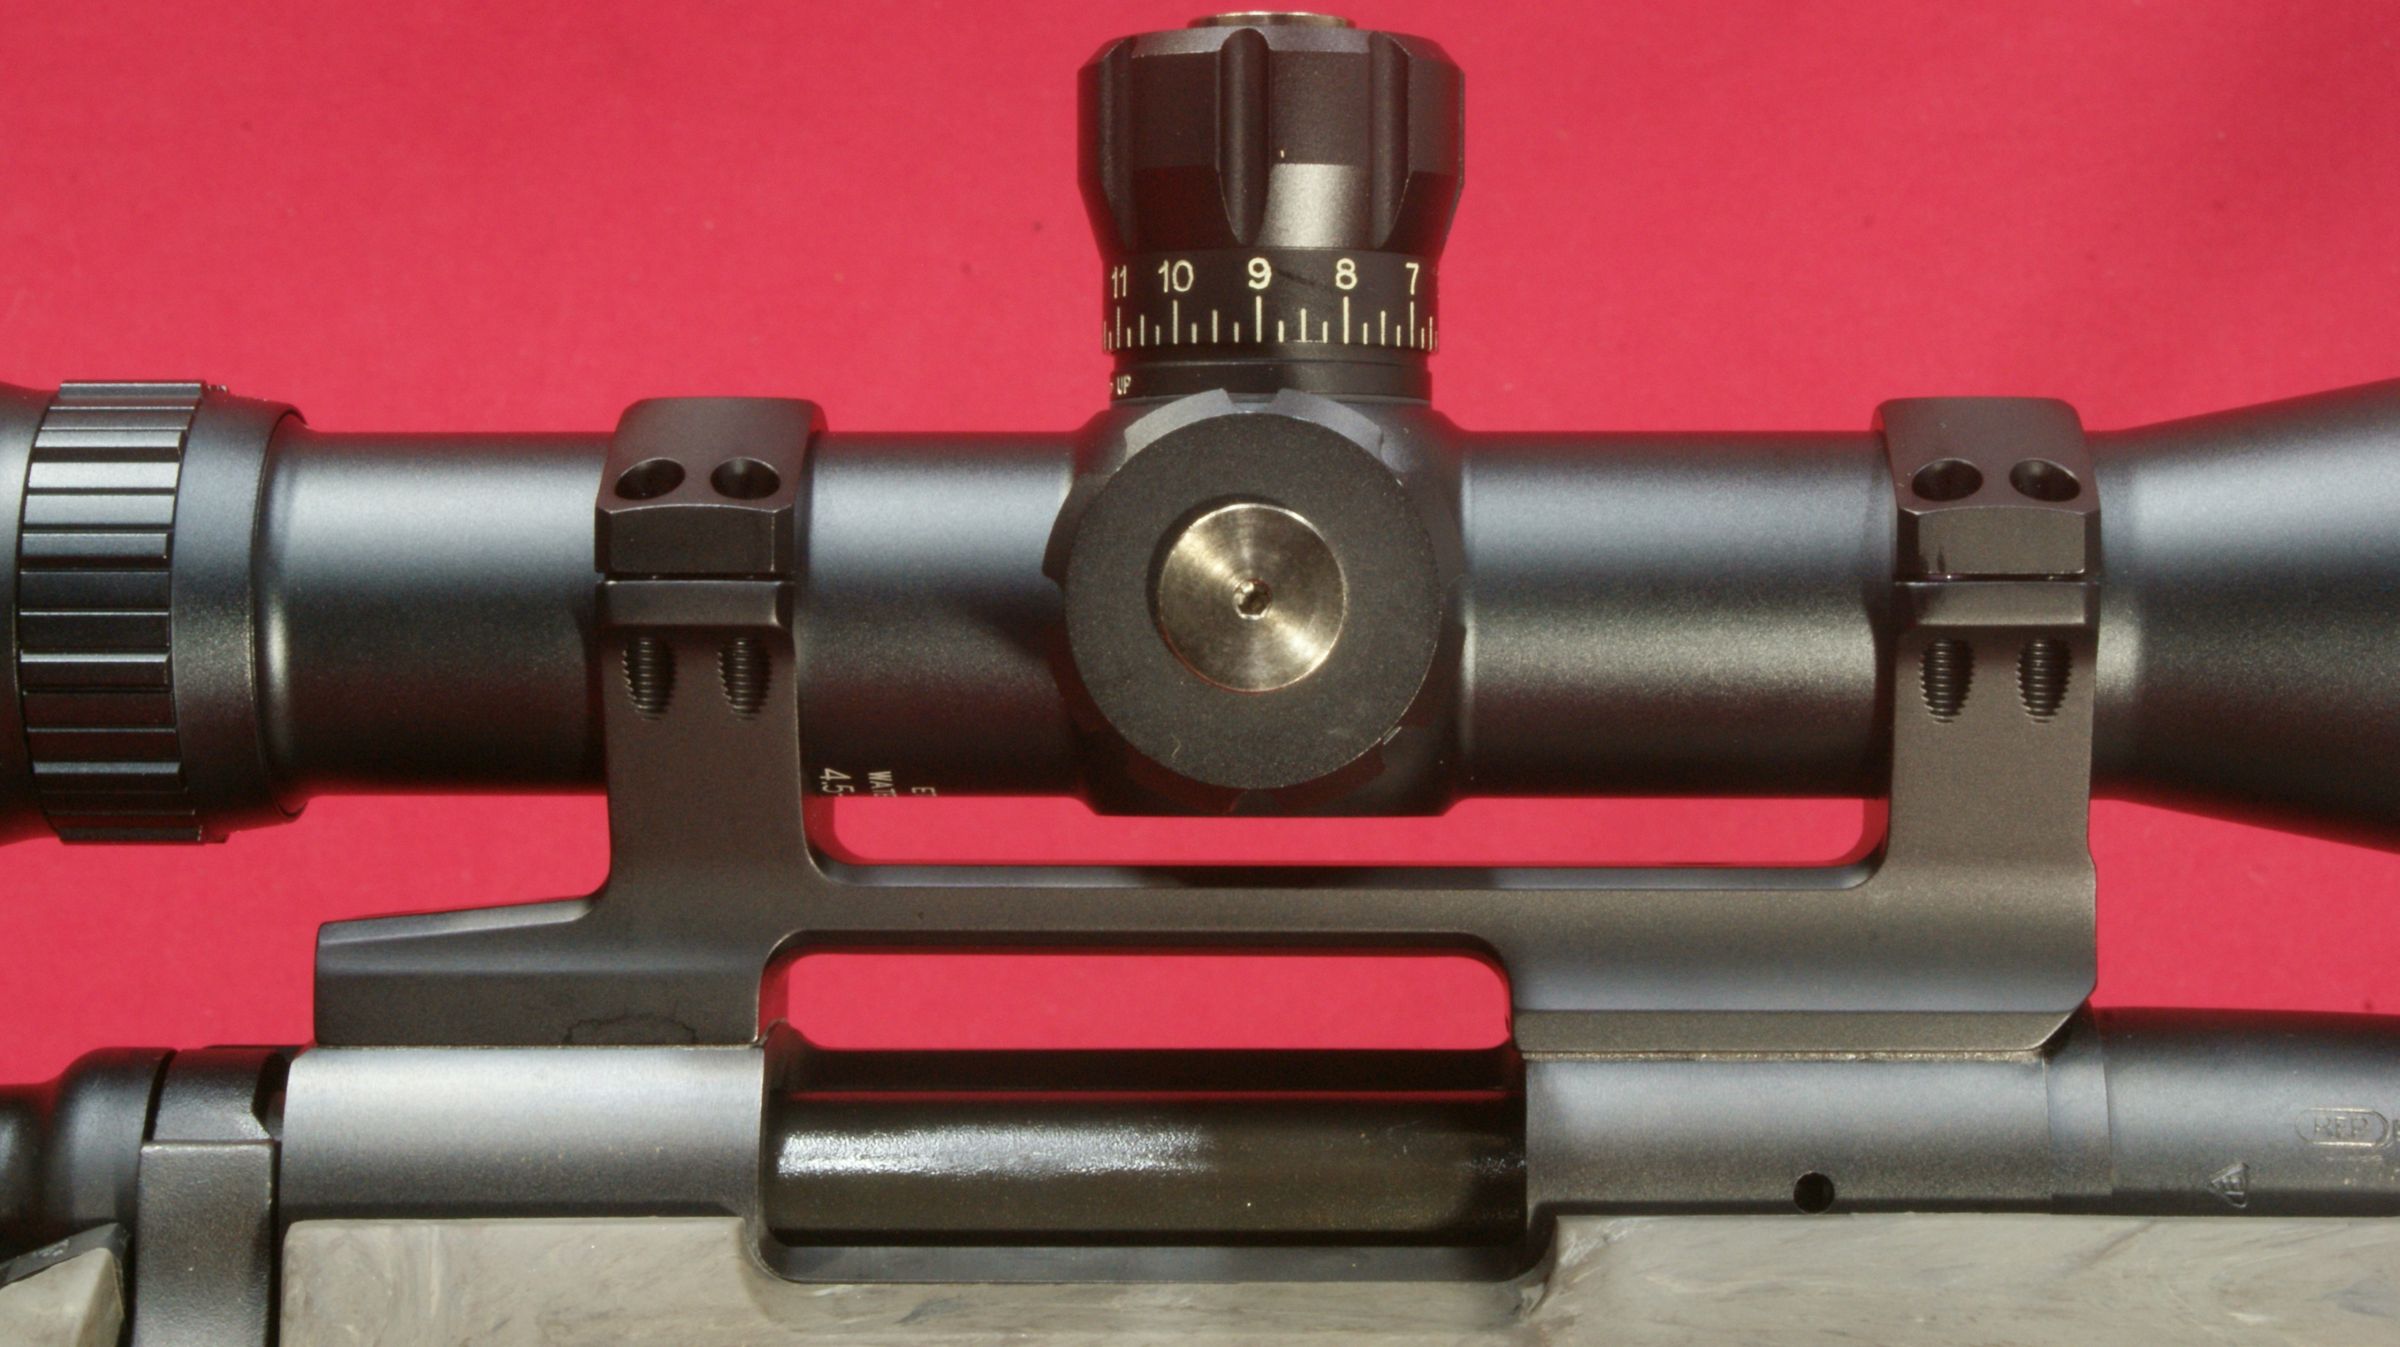
Figure 49
The gap between the 50mm objective end of the scope and the barrel on this rifle measured 0.224".
Figure 50
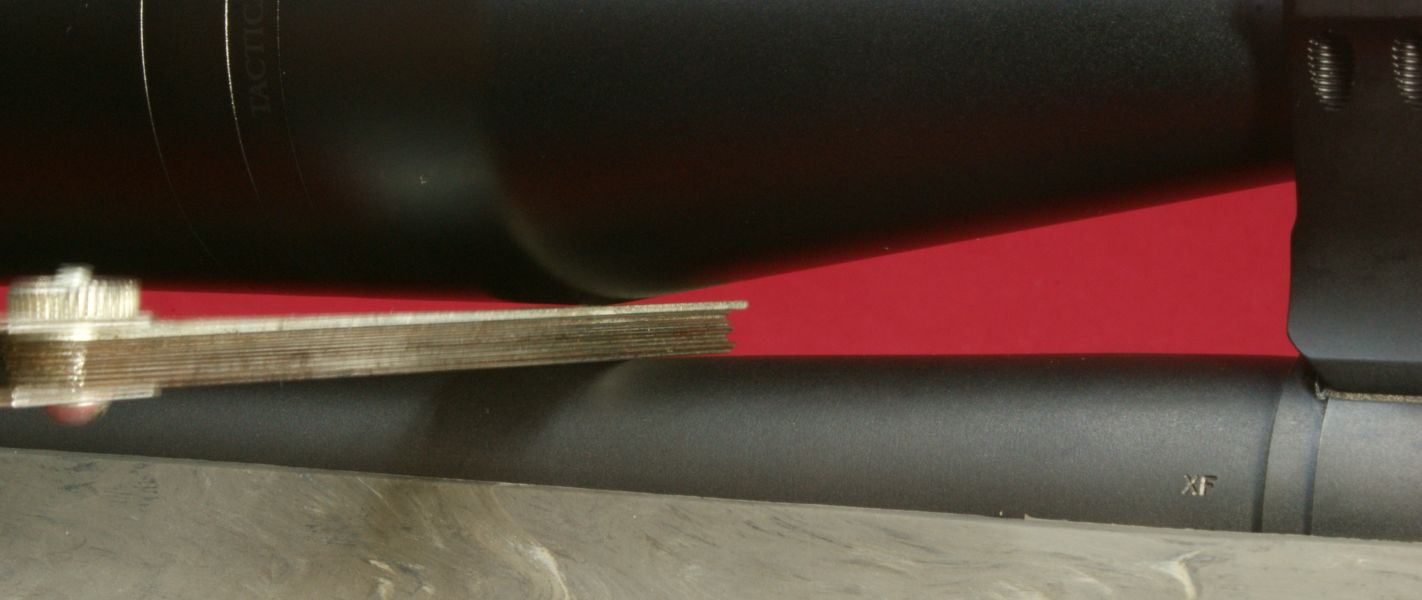
Figure 51
0.885" Long Action 20 MOA 30mm Direct Mount Installed
The photos below show the details of the Long Action Nightforce Direct Mount on a Remington 700 Sendero Rifle. Actually, these photos were taking during a pre-installation effort and you may notice the mount is not bedded to the receiver yet. Again, the 0.885" high mounts work with a 50mm objective diameter and there is still plenty of room for various style scope covers.
Figure 52

Figure 53
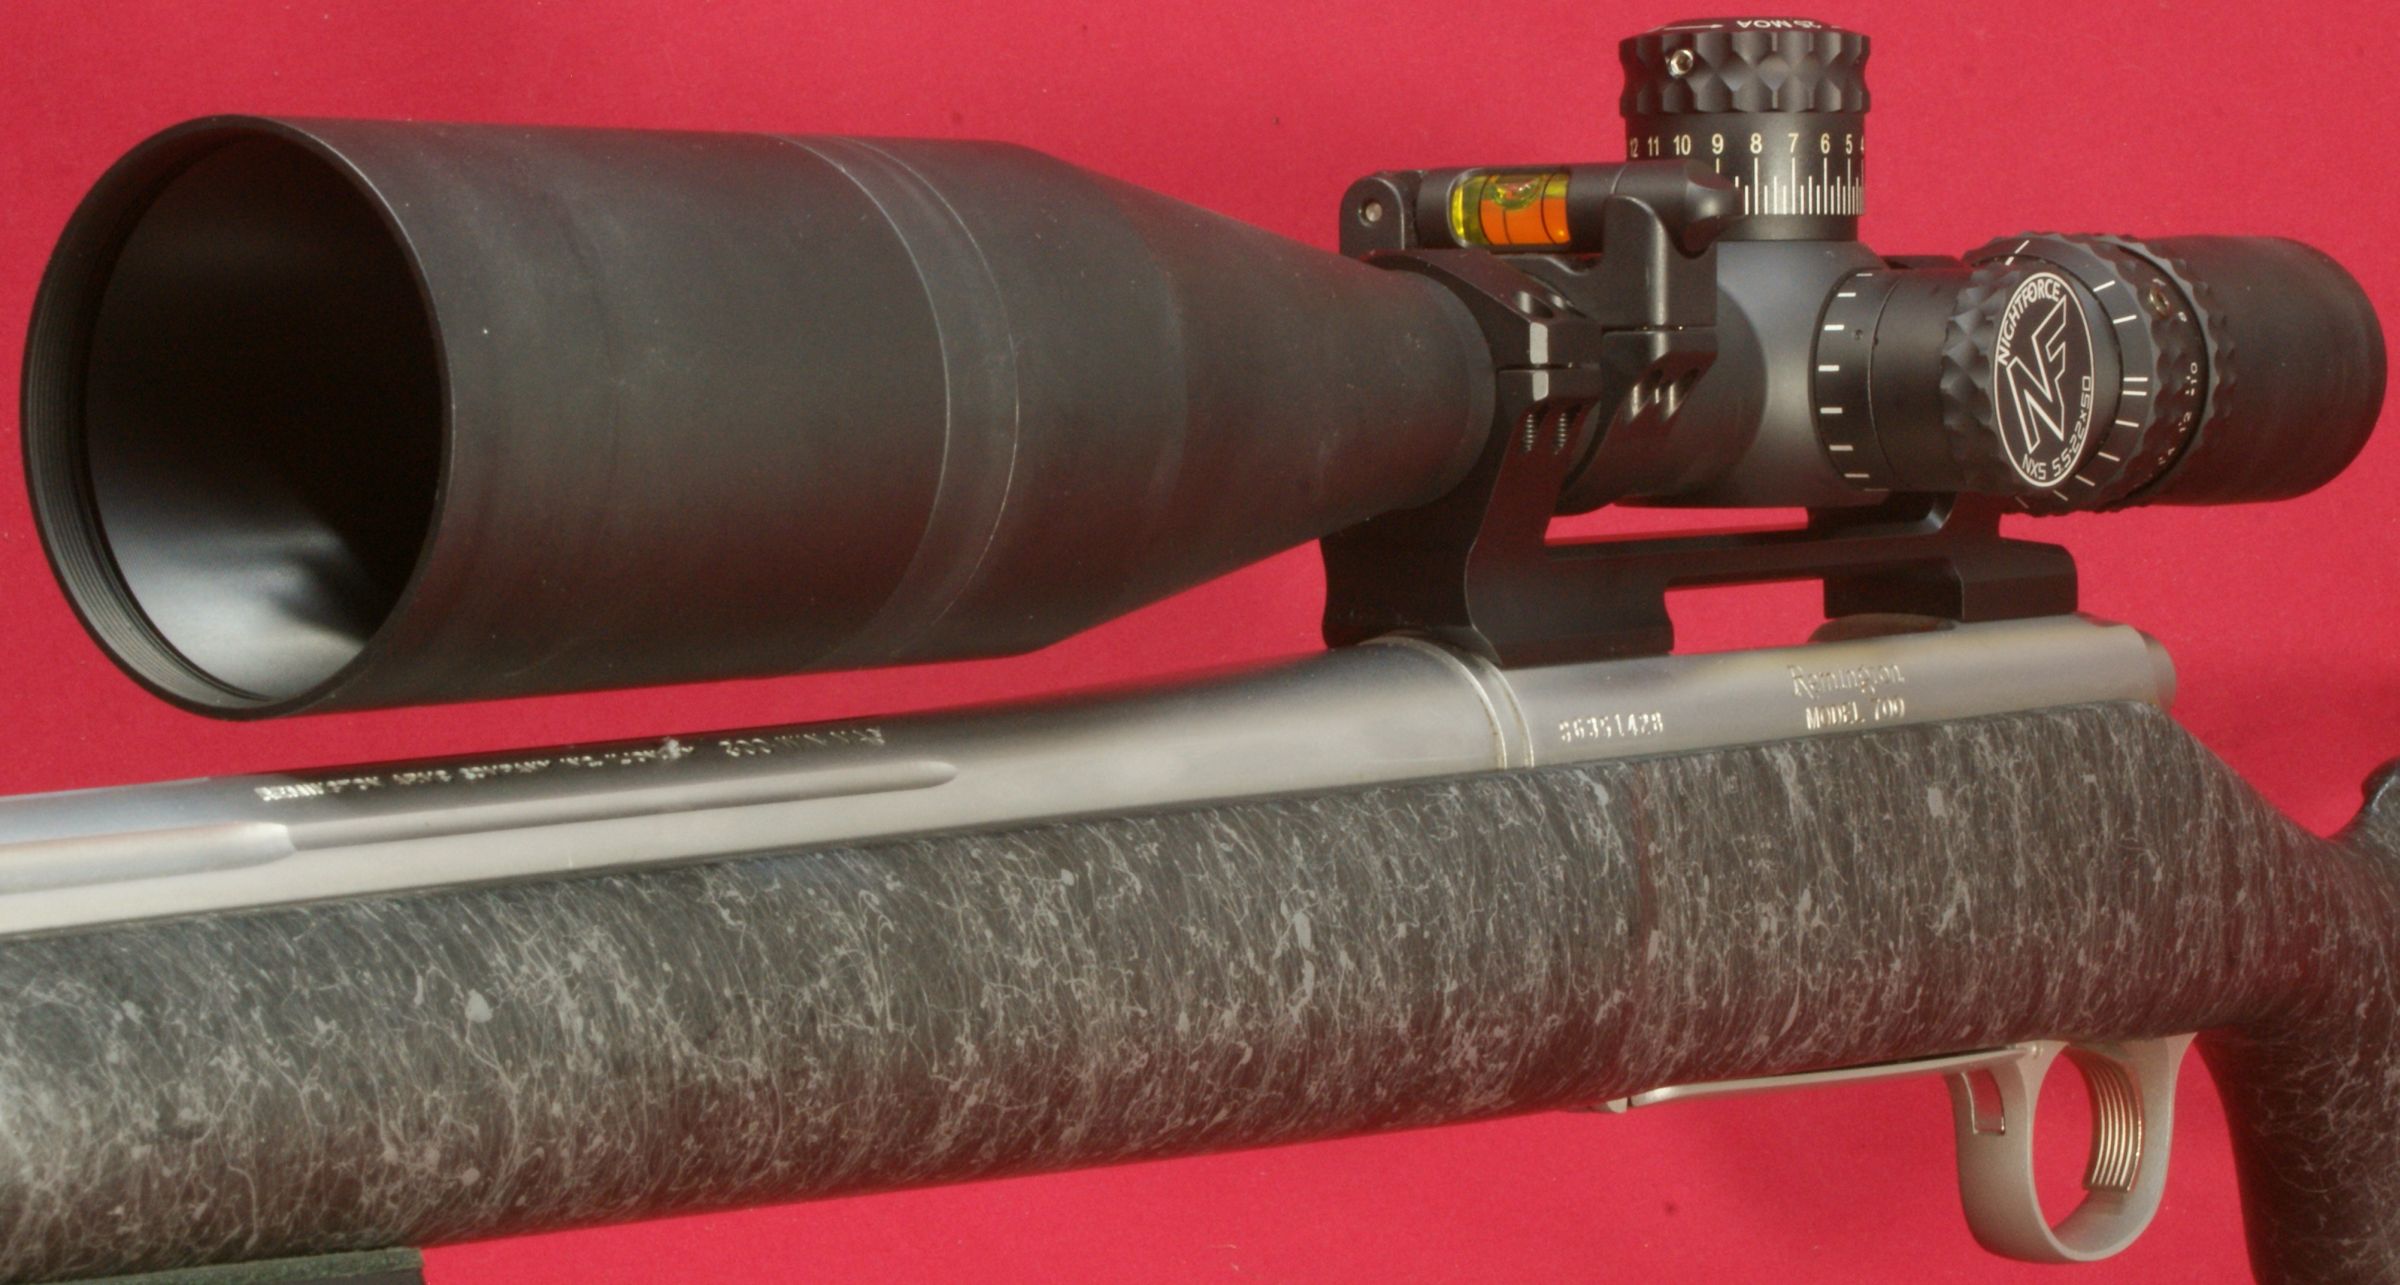
Figure 54
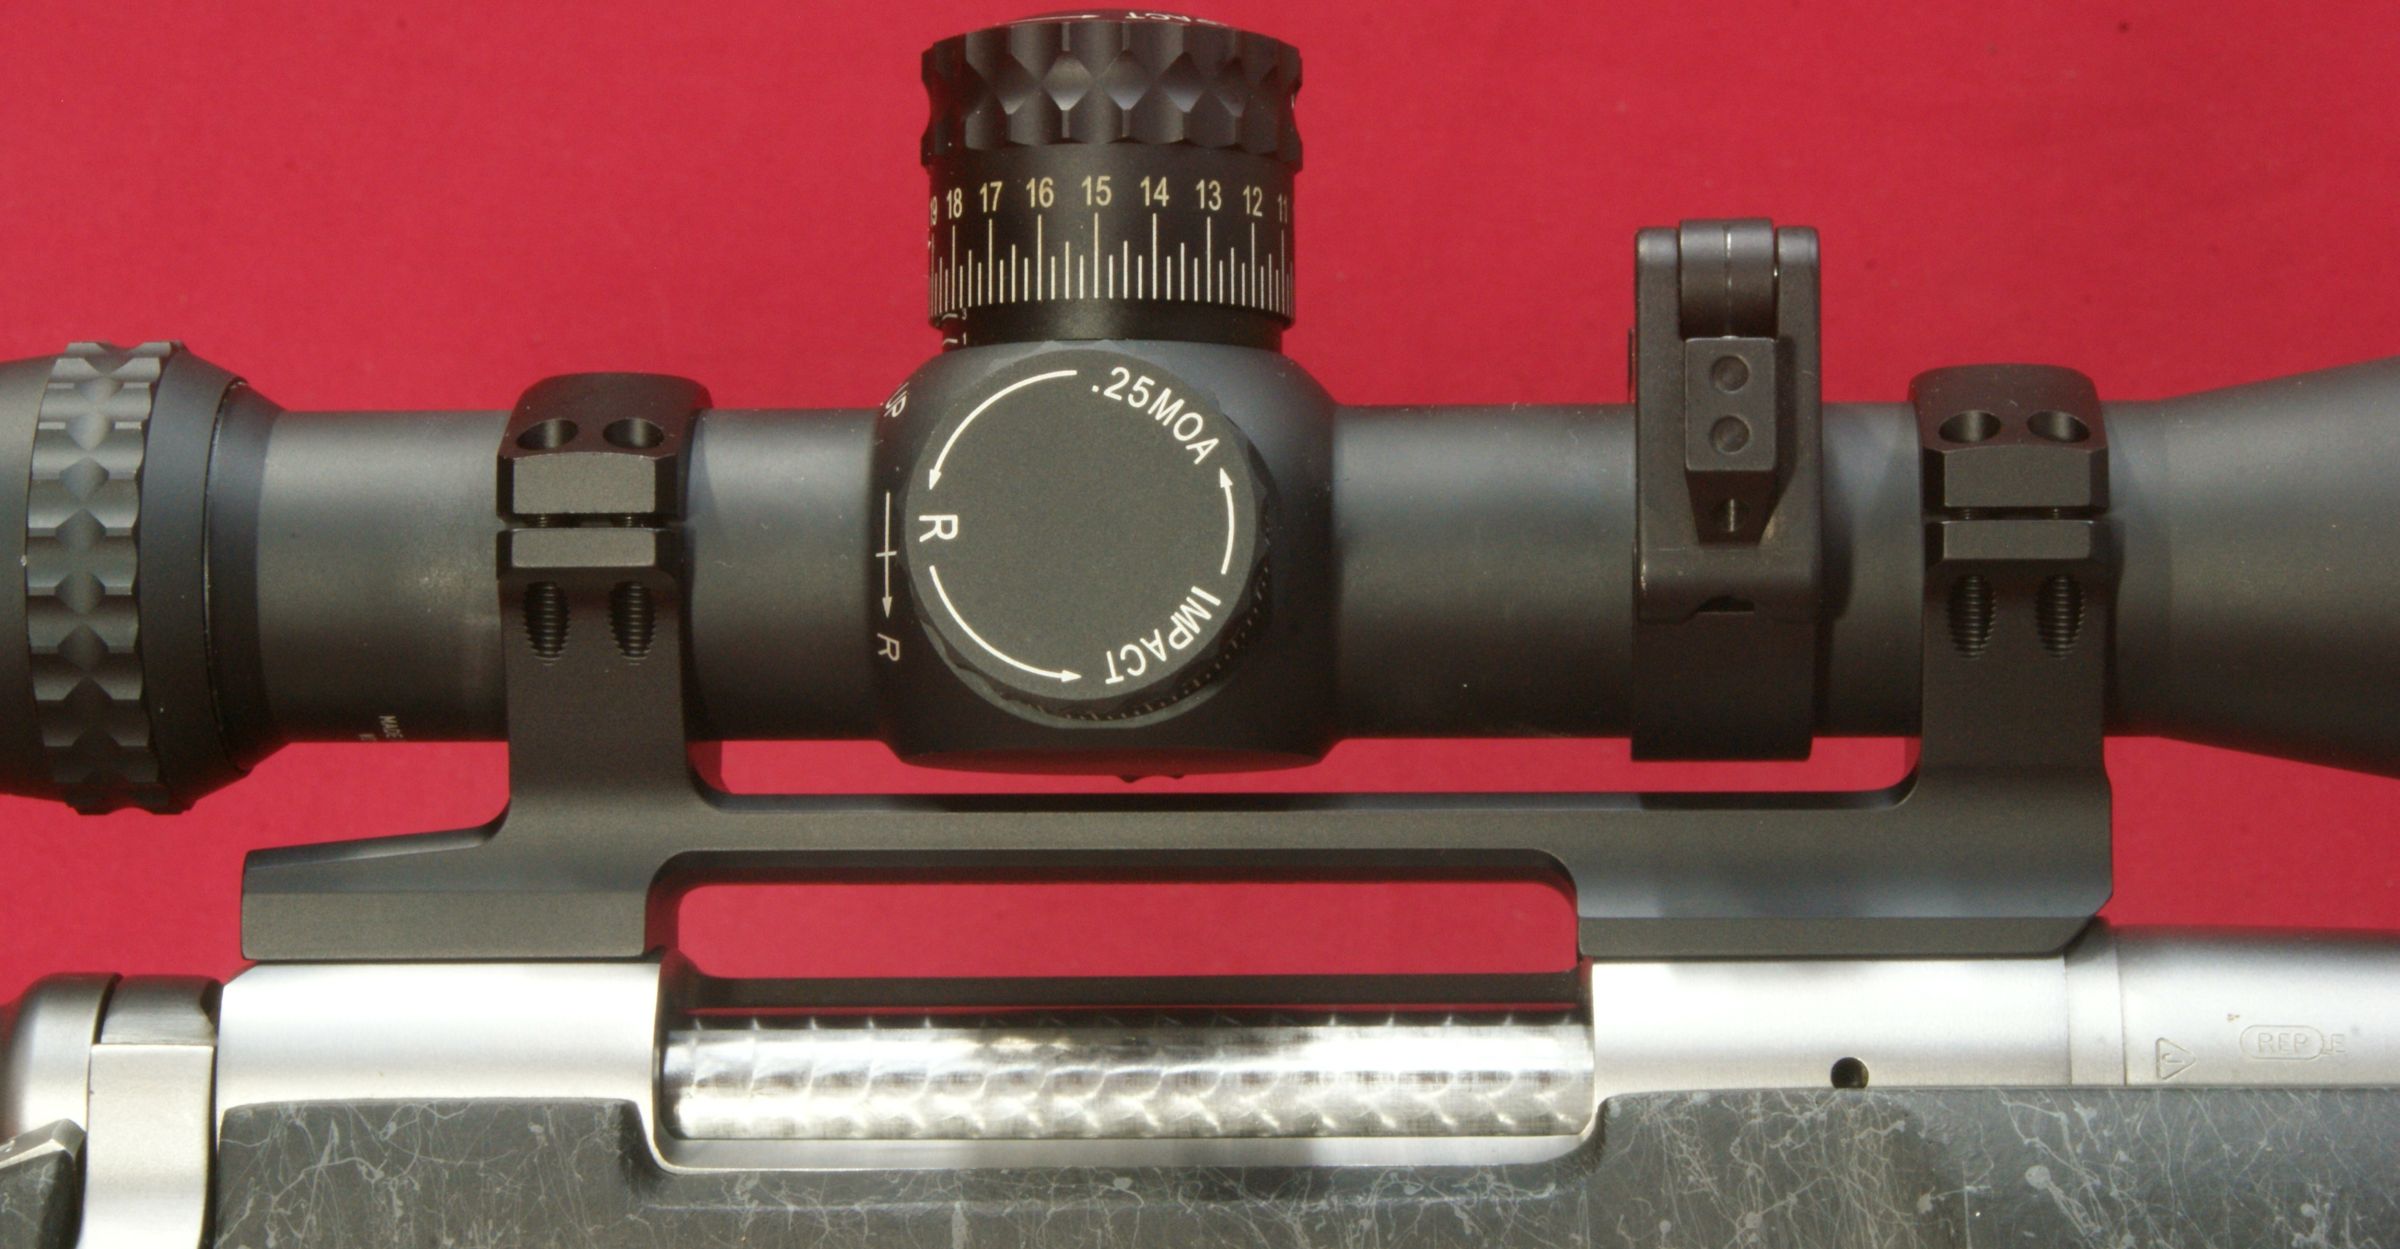
Figure 55
The gap between the 50mm objective end of the scope and the barrel on this rifle measured 0.198".
Figure 56
Range Test
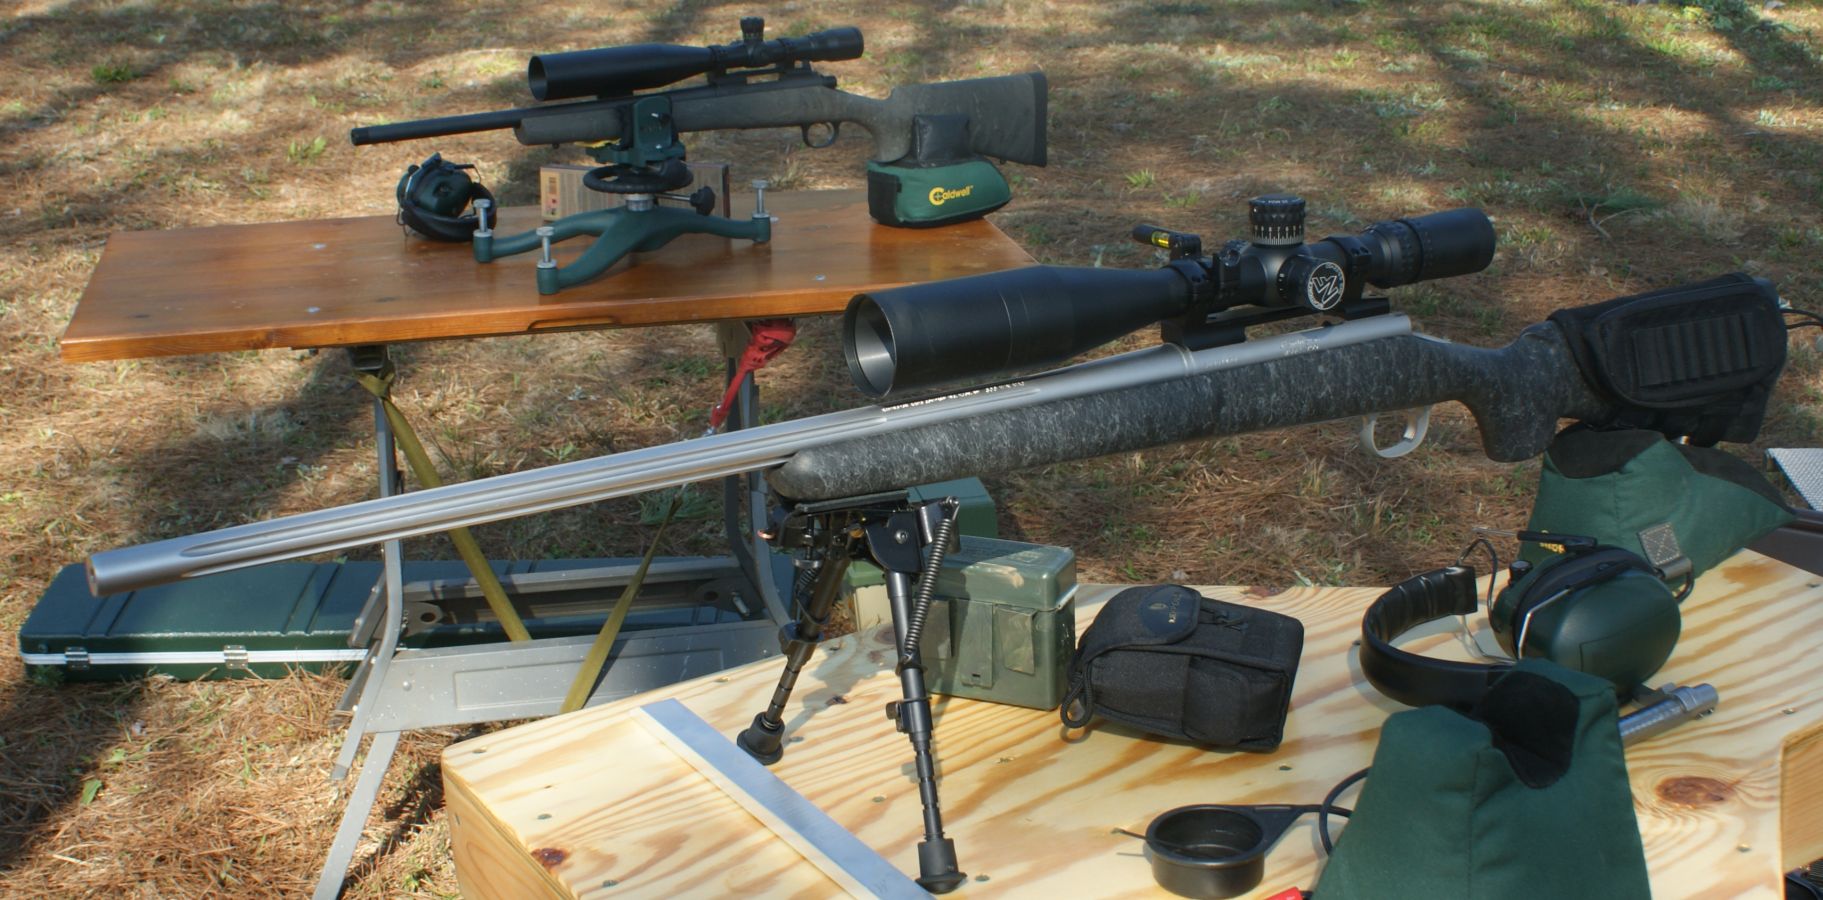
For range testing, we setup on our portable benches as shown below.
Figure 57
The first order of business was to do an initial bore sighting. Then we both zeroed our scopes at 100 yards.
Figure 58

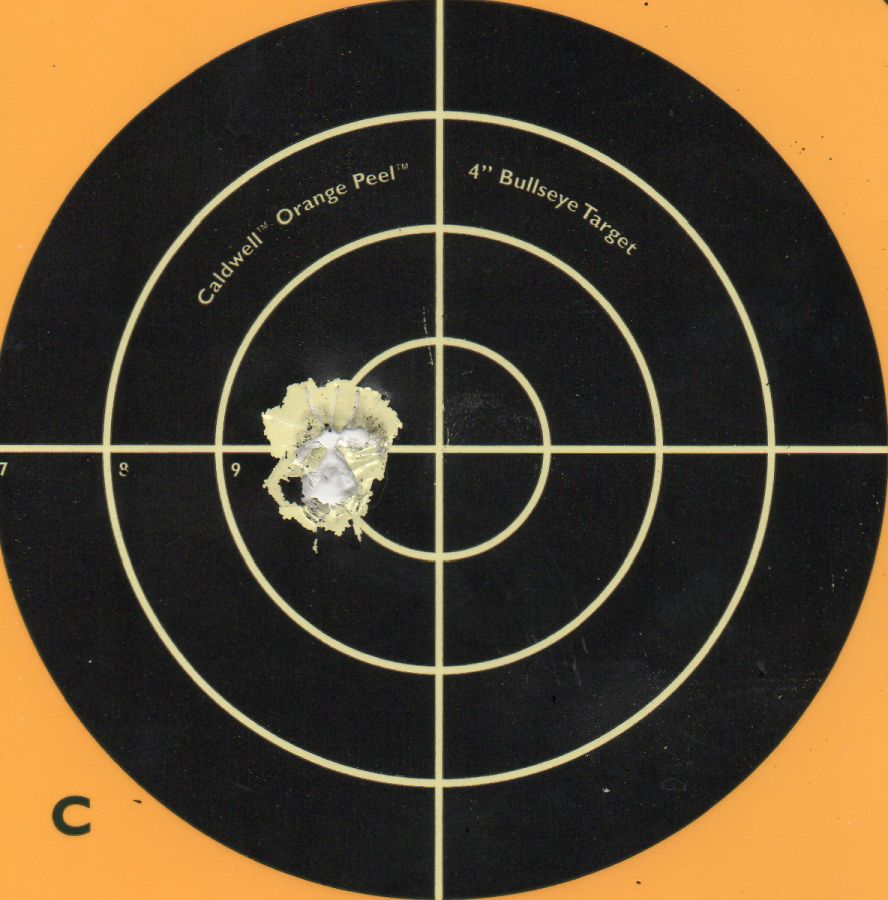
In the process of zeroing, I shot three different 3-shot groups that measured 0.85", 0.94" and an all time best of 0.24" shown below. My buddy also did some fine shooting and then we got distracted with other targets of interest down the lake and started having some real fun.
Figure 59 - 0.24" 3-Shot Group @ 100 Yards with Remington 700 SPS
Tactical
Later in the afternoon, we setup on the dam for some long shots down the lake.
Figure 60

We had a 6" round plate setup at 300 yards and an IDPA Torso at 430 yards. We contacted steel on all shots. I'm sure you're thinking "you should have hit a Torso target at that distance", and I would have to agree. We were actually aiming at a smaller dot on the torso for skill and the larger area gave us an idea on how to correct our shots.
Figure 61

After we were through shooting, we took a close look at our Nightforce Direct Mounts and they looked solid, just like you would expect.
Bottom Line:
After studying and installing two Night Force Direct Mounts on two different rifles, I'm extremely pleased with the quality, sturdiness and final mount installation achieved. There is no doubt in my mind that we will not have to worry about mounts working loose or scopes shifting in rings as was the case with our last set of mounts. The recoil lug and four #8 screws per cap should take care of those potential problems.
I feel that Nightforce should provide some type of description or photo explaining how the height is referenced for these mounts. Since these mounts are not rail mounted, I'm not sure it makes sense to reference heights based on rail mounted rings, if you are not familiar with Nightforce mounts.
Because of variations in manufacturing tolerances, if you are going to invest in mounts of this cost and quality, then you should count on bedding the mounts to achieve the maximum benefit possible.
Lastly, I'm looking forward to my next range session and I expect nothing but solid results. If I'm going to make excuses for poor marksmanship, I can no longer use mounts as the culprit.
Update 3/18/13:
I added the range test section above and we were completely satisfied and thrilled with our Nightforce Direct Mounts. They were just as rock-solid after shooting as when they were installed. Although one range session may not be enough to cause a set of mounts to work loose, I don't expect to ever have a problem with these Nightforce Direct Mounts bedded to our receivers. Overall, I think I would sum up my feelings on the Nightforce Direct Mounts by saying "Great Job Nightforce".
Or
If you would like to be notified about future Gunsumer Reports reviews via Facebook, make sure "You Like This" by clicking the Facebook "Like" button at the bottom or top of this page. If it already says "You Like This" beside the button, clicking it again will uncheck the "Like" status and you will not be notified.
| Share on Facebook | |
© 2010, 2011, 2012, 2013, 2014, 2015, 2016, 2017, 2018, 2019, 2020, 2021, 2022, 2023 & 2024 Gunsumer Reports™, All rights reserved.
FTC Disclosure