|
|
Gunsumer Reports TM Providing Detailed Objective Reviews for Firearms and Firearm Accessories |
Laser Genetics ND3x50 Subzero Laser
Designator Review
June 6,
2011
It's not every day a product comes along that provides a solution which is completely "out of the box". From my view, this is what happened a couple of years ago when Laser Genetics introduced their first Laser Designators for civilian use. Basically a Laser Designator is a green laser light source that can produce a very concentrated beam that is adjustable from a high intensity spot to a wider area to illuminate larger/closer objects. (Believe me, I have greatly simplified the description of how it works.) In mid 2010, Laser Genetics introduced their ND3x40 and ND3x50 Laser Designators with the hunter in mind and with the intent of mounting these on rifle scopes. It was about that time when my interests really started ramping up for one of these products. For those who enjoy night hunts, a good night scope will set you back quite a few dollars. Using the Laser Genetics Designator which allows you to use your current scope and add some type of long distance illuminating capability seemed very appealing. I started following the Laser Genetics products closely and the single thing holding me back from getting one was the concern that I would be hunting during the winter months and most night hunting would be below 40° F. It seems that the standard versions of the Laser Designators would start to see degradation of the light as temperatures dropped. Earlier this year, Laser Genetics introduced a new version of their Laser Designators called the Subzero. This new version allows the unit to operate at temperatures down to 0° F without any loss in power. This new Subzero version took away my concerns on the unit's ability to function when I would be normally be hunting.
I was beyond excited when I received my Laser Genetics ND3x50 Subzero Laser Designator. One of the first things you will notice at the Laser Genetics website for this product is a retail price of $599.95 plus shipping and handling. After doing a quick search on the internet, I was able to find it for about $460 plus S&H. For this price, the ND3x50 Subzero is clearly not your normal flashlight. Each time I considered the price, I had to step back and consider the comparable product which in my opinion is a night vision device that mounts in front of your normal scope. To get a comparable quality night vision product you will start at about $1800. Clearly the projected visible light from a Laser Designator is not the same as night vision, but $460 is also not the same as $1800.
After you get over sticker shock and start
looking at the Laser Genetics website, I think you will agree that
the company has done a nice job marketing their products. Since I
try to look at the manufacturer's claims and specifications as a basis
for my review point, the following text in
colored italics was taken directly from the
Laser Genetics website
on 5/23/11 and gives an Overview, Features and Specifications for the
Laser Genetics ND3x50 Subzero Laser Designator. The
![]() ,
,
![]() and
and
![]() are my way to keep up with details that I have covered in this
review with either photos, commentary or both. I may also add
commentary after these marks as necessary to explain some items if
needed.
are my way to keep up with details that I have covered in this
review with either photos, commentary or both. I may also add
commentary after these marks as necessary to explain some items if
needed.
Overview
-
Now target acquisition and illumination
at night can be achieved even in the coldest of temperatures.

-
The new incredibly bright ND-3x50
Subzero™ Long Distance Laser Designator is the most powerful
Laser Genetics product yet.
-
Equipped with an innovative unique
circuitry system that enables the DPSS 532nm green laser to
operate at temperatures down to 0˚ Fahrenheit, without loss of
power.
 I believe the intensity of the laser does
decrease with temperature, but the laser is still usable and
loss of power statement may refer to the batteries no longer working.
I believe the intensity of the laser does
decrease with temperature, but the laser is still usable and
loss of power statement may refer to the batteries no longer working. -
The patented Rotary Optical Collimator uses a system of 9
fully multi-coated lenses that allowing full adjustment and
control of the beam diameter and intensity to focus light where
you need it most.
- Rotating the collimator to minimum, it creates a bright intense beam of green laser light visible up to 5 miles.
-
Rotating the collimator to a more open setting it
provides plenty of illumination to light a trail at night
or
“paint a target” at up to 500 yards.
I believe you would have a more closed
setting to paint a target at 500 yards.
-
For the most extreme and cold weather conditions, with
temperatures of 40 degrees and below, we recommend using this
ND-3x50 Subzero™.
Specifications
-
Precision machined from high tech aluminum
-
Black matte anodized finish
-
Fully O-Ring sealed for dust and water
-
Fully Multi-Coated optical lens system
- Nitrogen charged for anti-fog
-
1” Tube adapts to multiple mounting systems
-
Dimensions: 10”L X 2.35” Dia. X 1.0” Dia.
-
Tube Weight: 13.68 OZ.
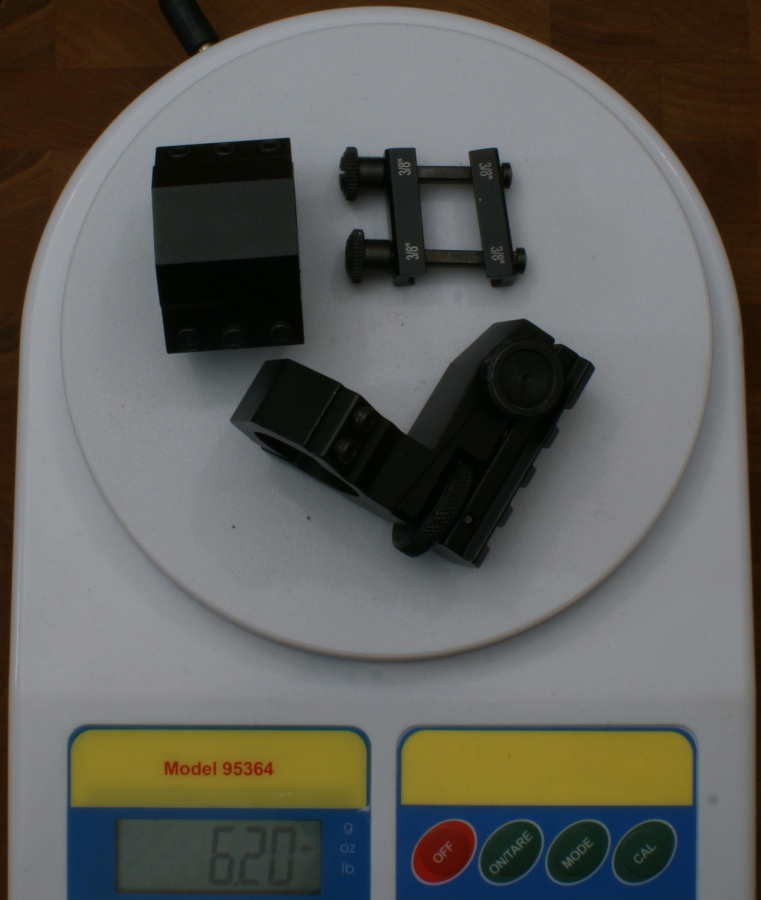
 Laser designator weighed in at 16.40
ounces and the mounts at 6.20 ounces for a total minimum
installed weight of 22.60 ounces.
Laser designator weighed in at 16.40
ounces and the mounts at 6.20 ounces for a total minimum
installed weight of 22.60 ounces. -
Power Supply: Two (2) CR123A Batteries (Incl.)
- Output Power: 40mW
-
Rotary optical beam collimator - allows quick adjustment of beam
diameter and intensity
- 532nm (Green) Laser light frequency - easiest light for the human eye to see (See Chart)
- Amplified coherent light - most efficient light for long distance illumination
- Range: Up to 5 Miles
-
1 Year warranty
- FDA Safety Class: 2M Laser Product
-
Beam Diameter Size Range (measured at 1 foot): 50
to 320
mm ±10
mm I found the larger diameter to be
132.5 mm in the high intensity area, not 320 mm
-
Battery Life: Up to 7 hours of continuous use
during my test, the batter life was 8.2
hours
- Battery Life: Up to 3 hours continuous use at 0°F
Included Accessories
-
1"
Weaver-Style Ring
-
1" Scope Mount Adjustable Elevation and Windage
-
Tripod Mount
-
Pressure Switch
-
Cleaning Kit
-
2 CR123A Lithium Batteries
-
Padded Case
What's In The Box
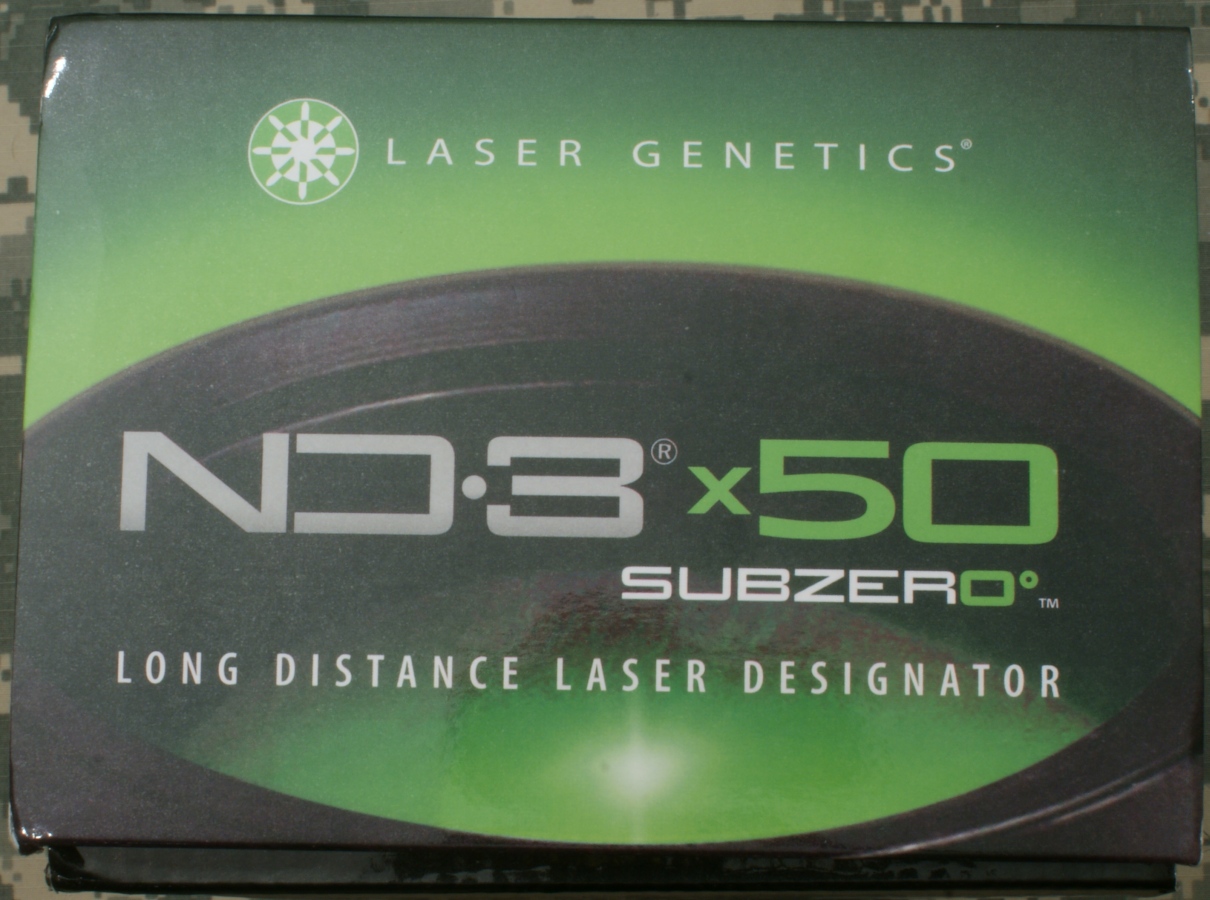
When the Laser Genetics ND3x50 Subzero Laser Designator arrived it was boxed as shown below. Again, Laser Genetics have done a very nice job marketing their product. The following four photos show all the information on the box. You can click on a photo (or any other in this review) to bring up a high resolution photo showing more detail.
Figure 1
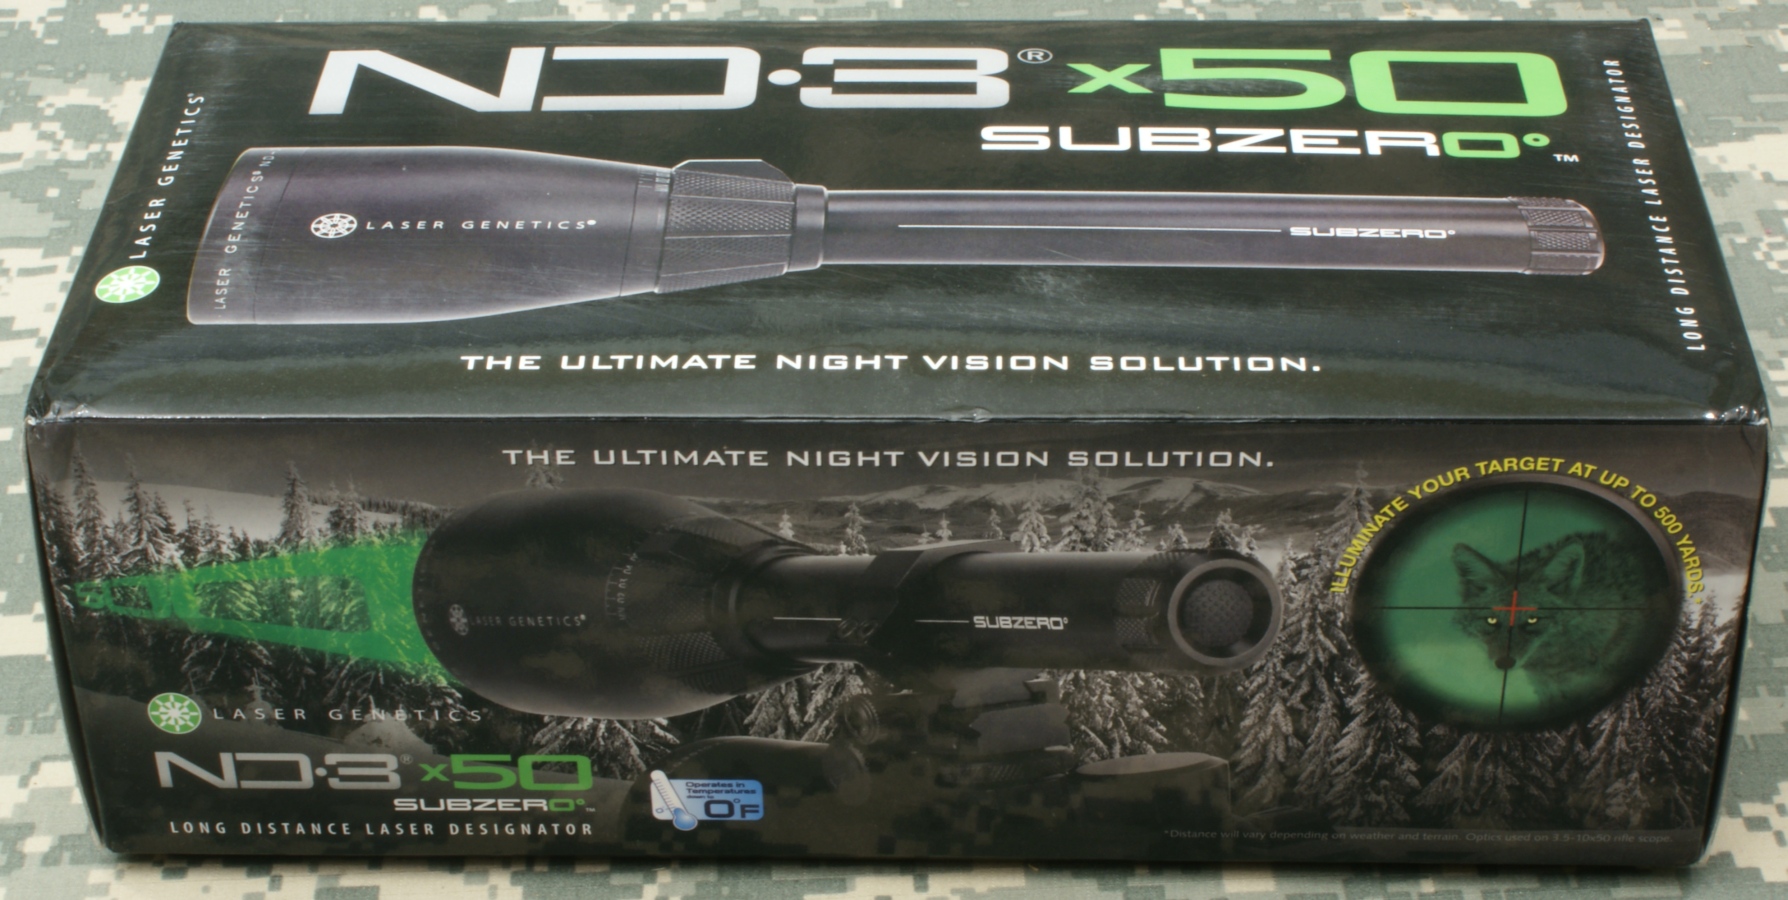
Figure 2
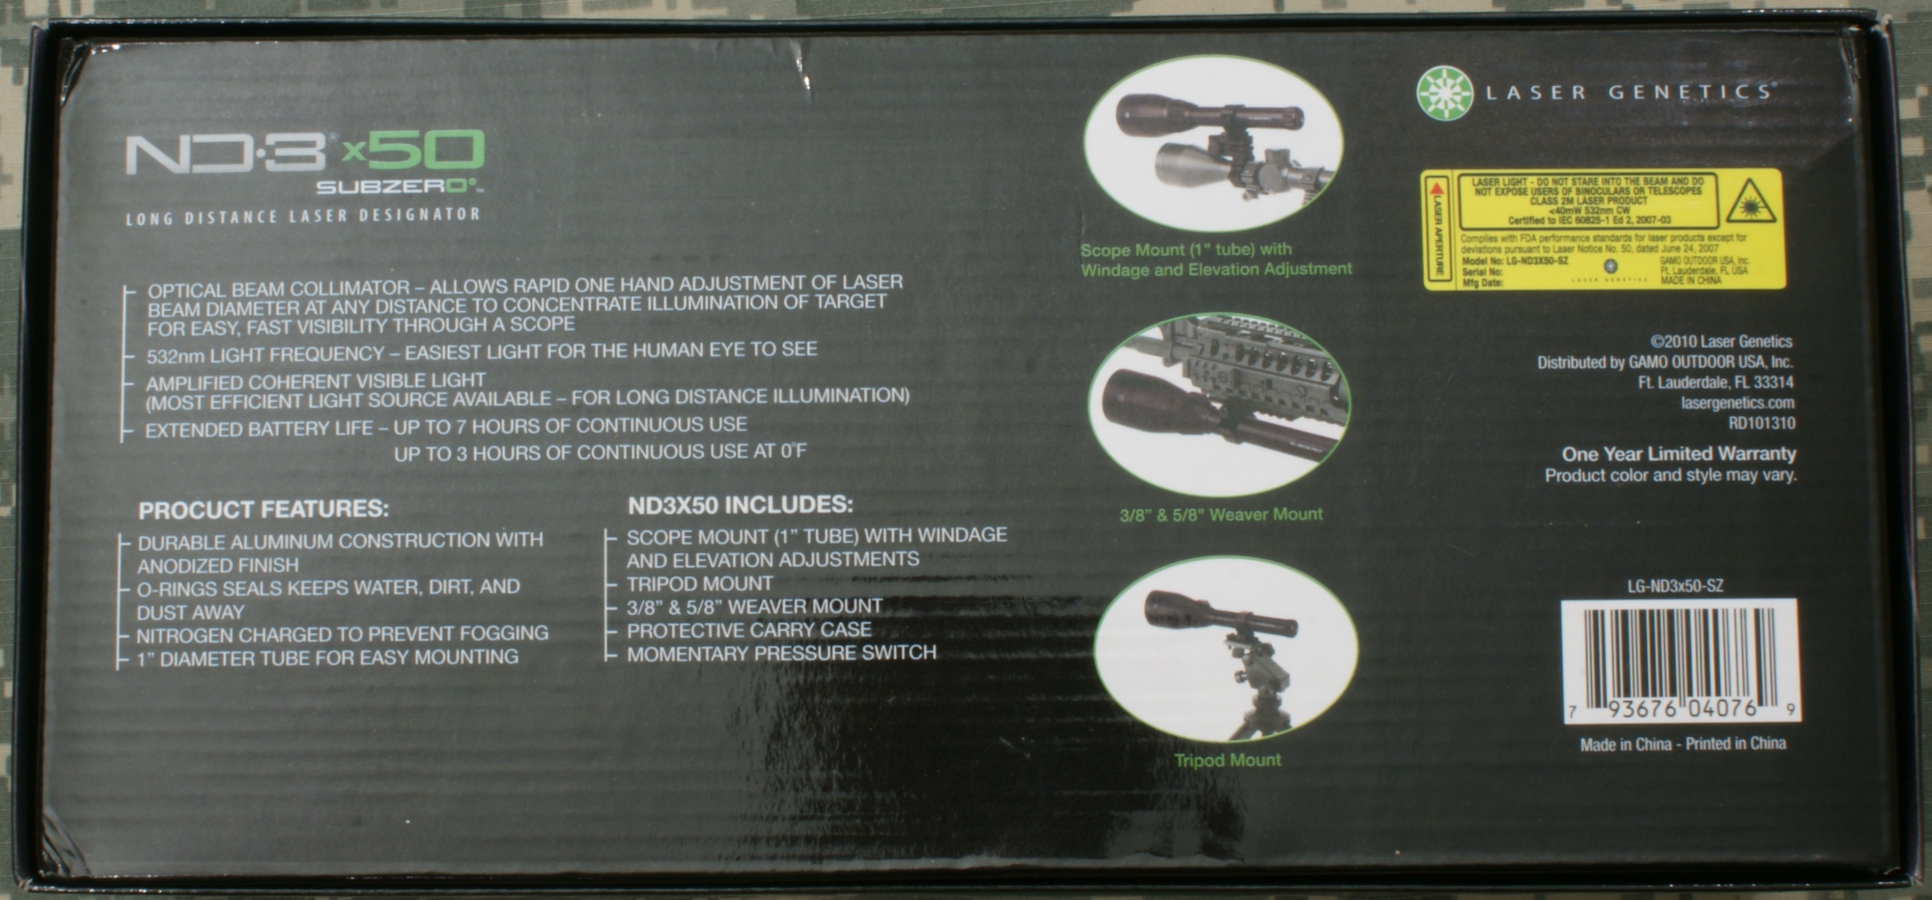
Figure 3

Figure 4
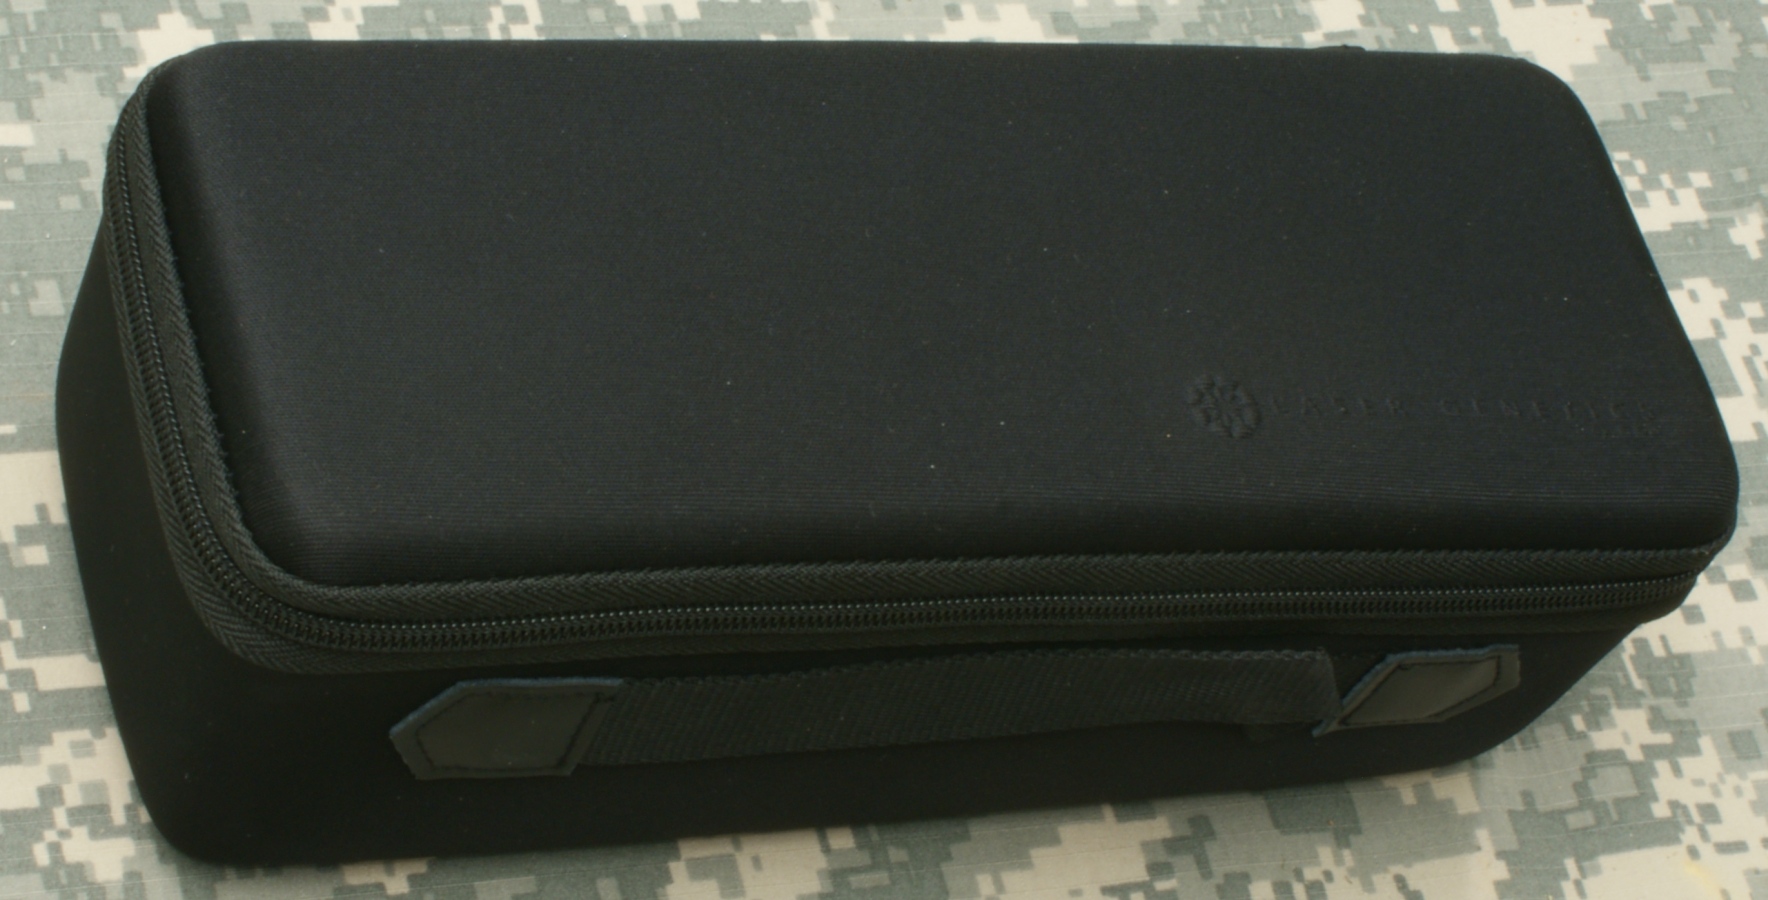
After I removed the lid, I was impressed by the nice case that is provided with the product.
Figure 5
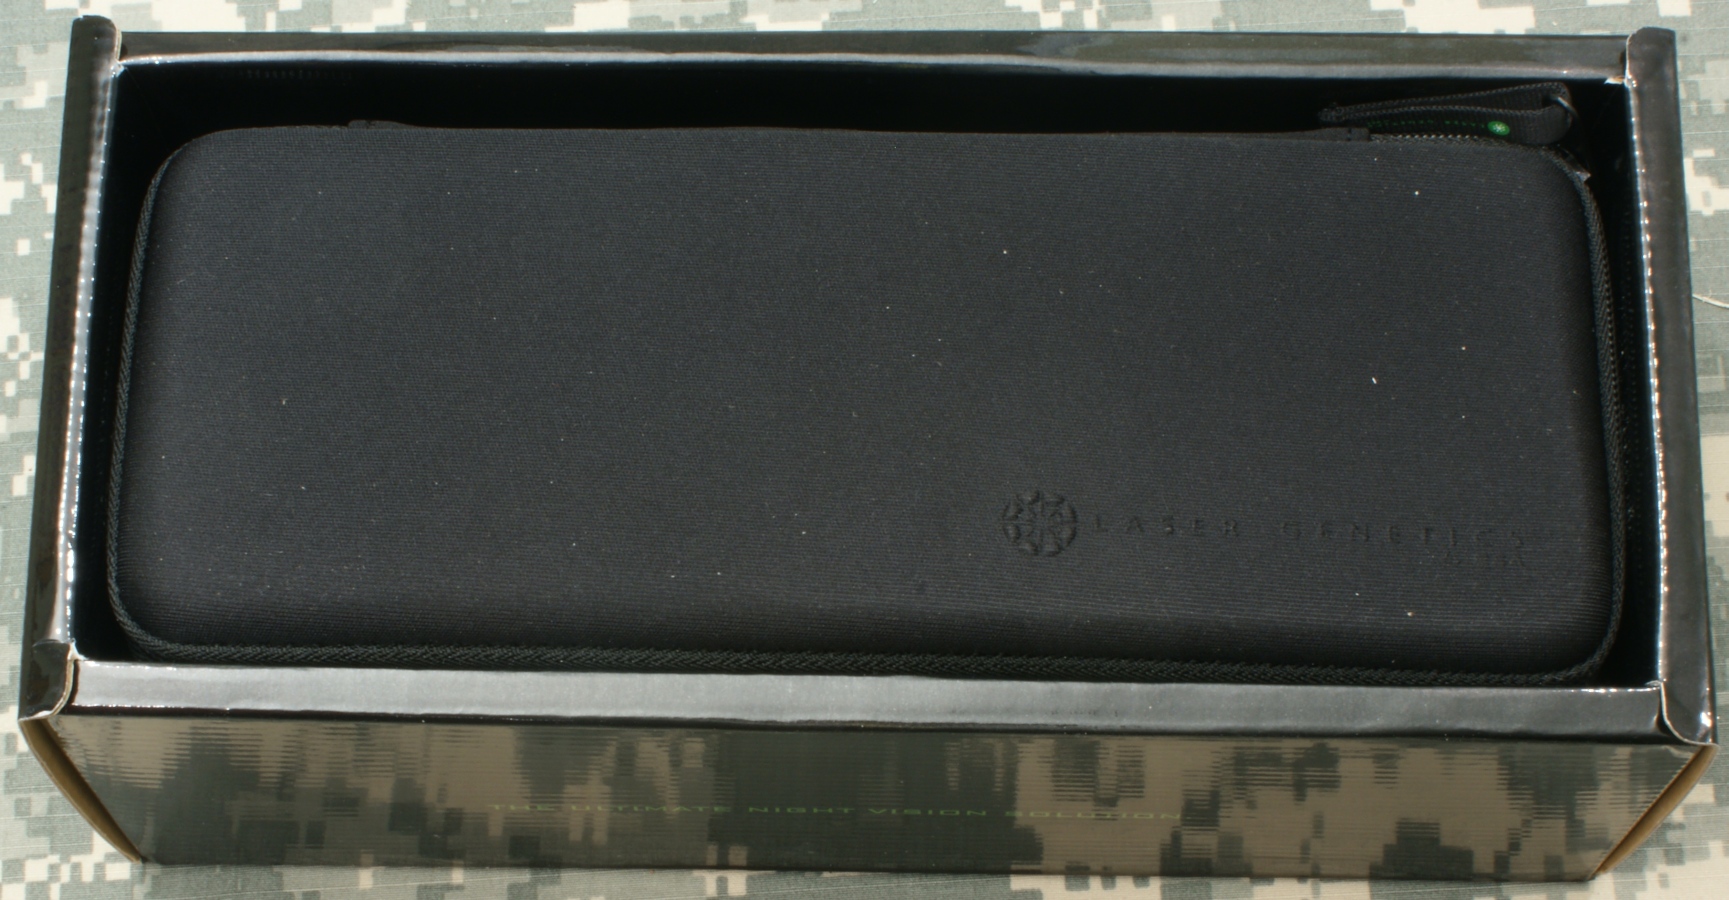
I was pleased to see they included a case because if you are using this on your favorite hunting rifle, it may be off the rifle for day hunting more time than on the rifle for night hunting. For the price of this investment, you are definitely going to want to protect it.
Figure 6
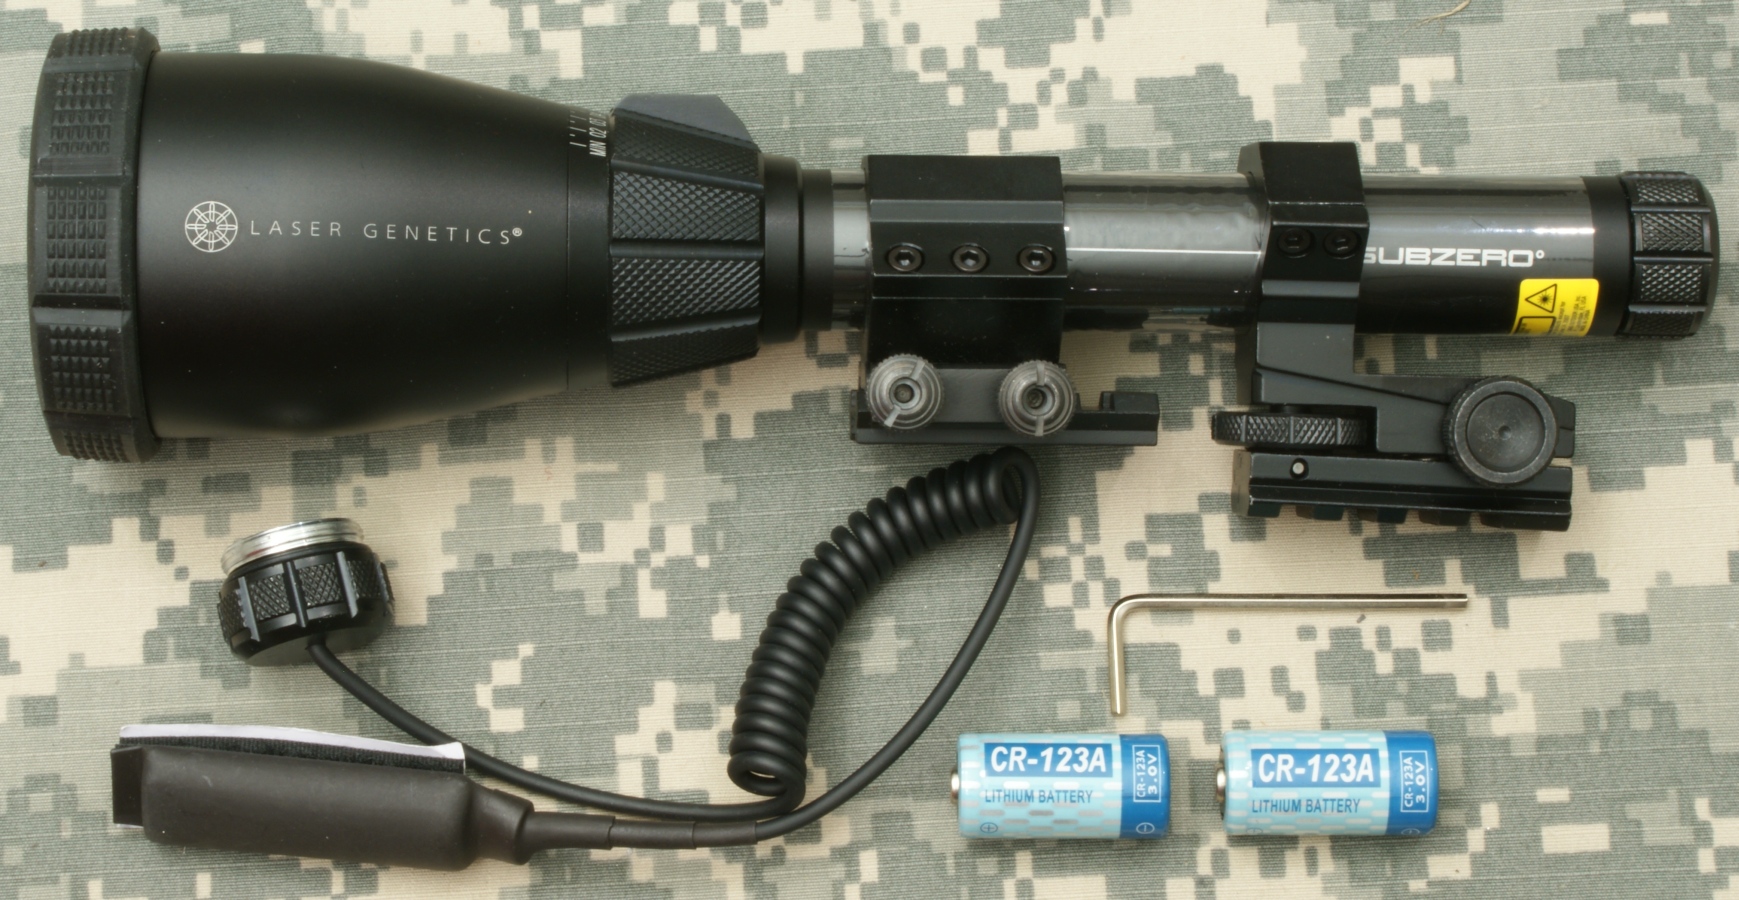
The contents were packed in the case as shown below.
Figure 7
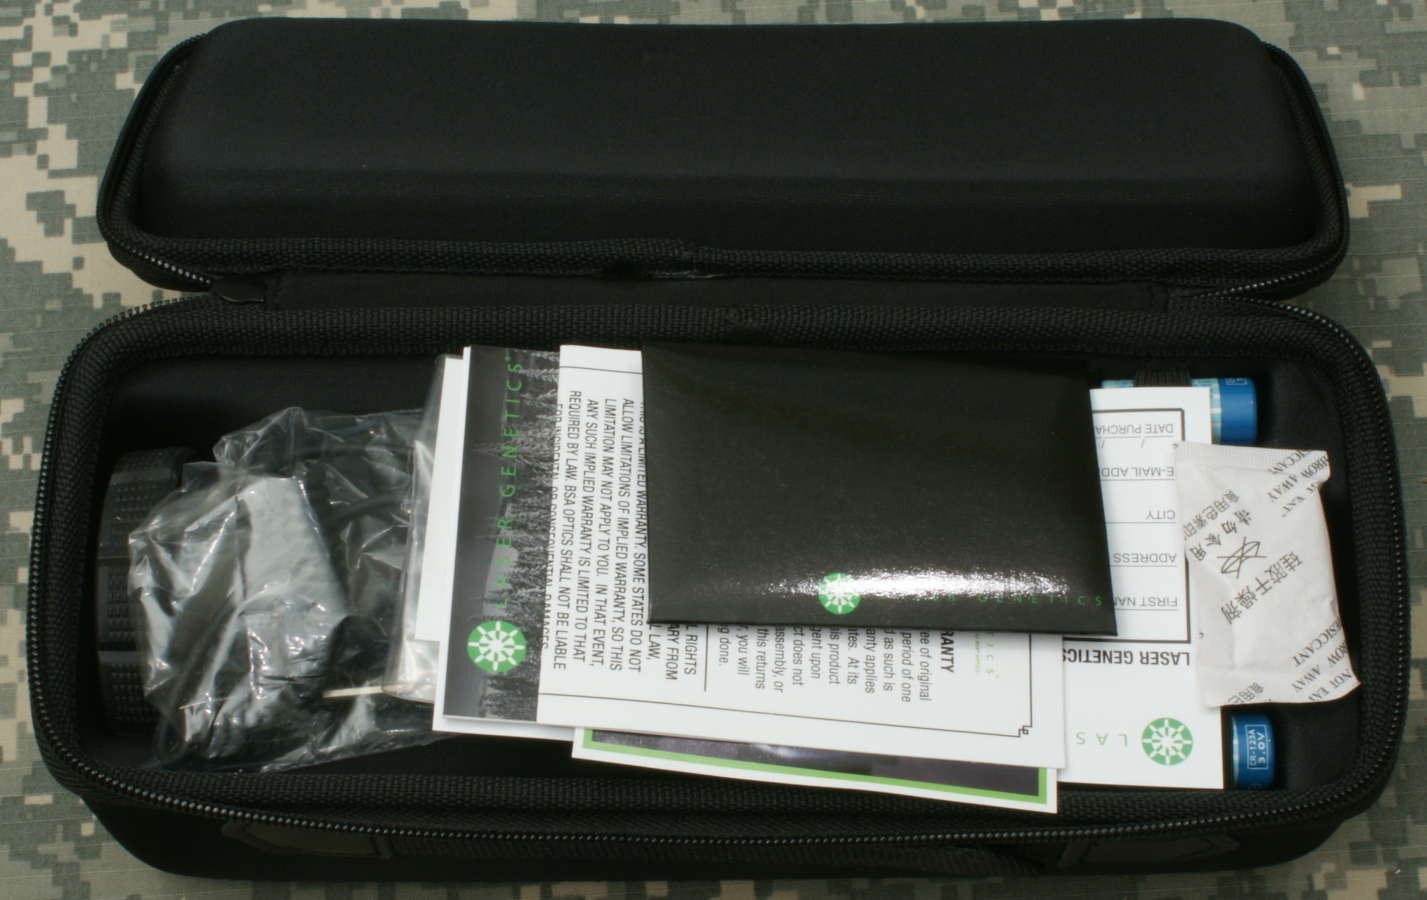
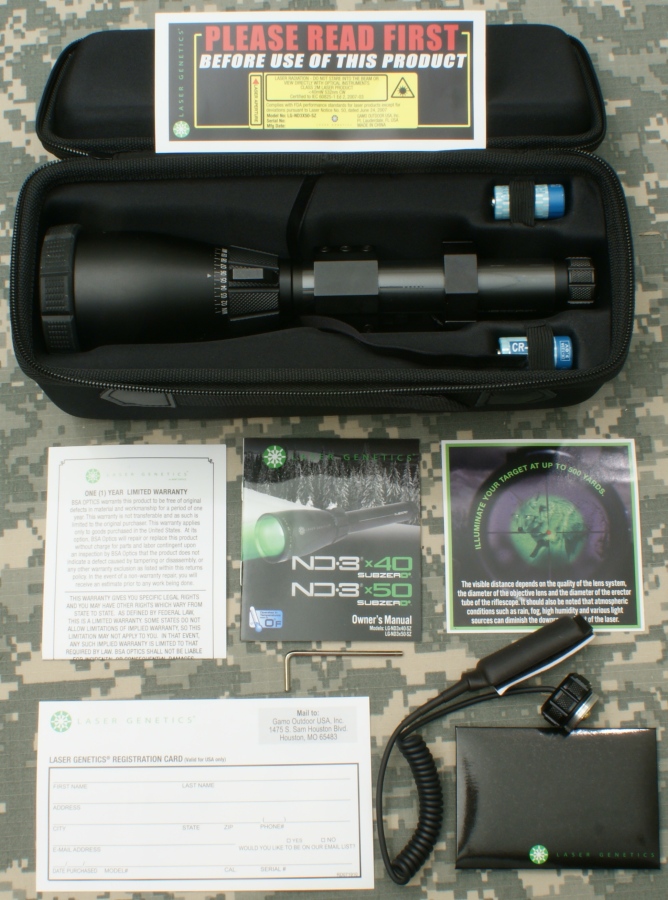
The contents of the case were as follows:
- Laser Designator
- Lens Cap
- Two CR123A Batteries
- Warning Card for use of Lasers
- One (1) Year Limited Warranty Card
- Owners Manual
- Card explaining factors that could reduce the visible distance of the device
- Registration Card
- Hex wrench
- Momentary Pressure Switch
- Lens Cleaning Cloth
- Adjustable Mount (attached to Designator)
- Weaver Mount (attached to Designator)
- Tripod Mount (attached to Weaver Mount attached to Designator)
Figure 8
When I pulled the Designator out of the box, you can see that the mounts were all attached to the body of the Designator.
Figure 9
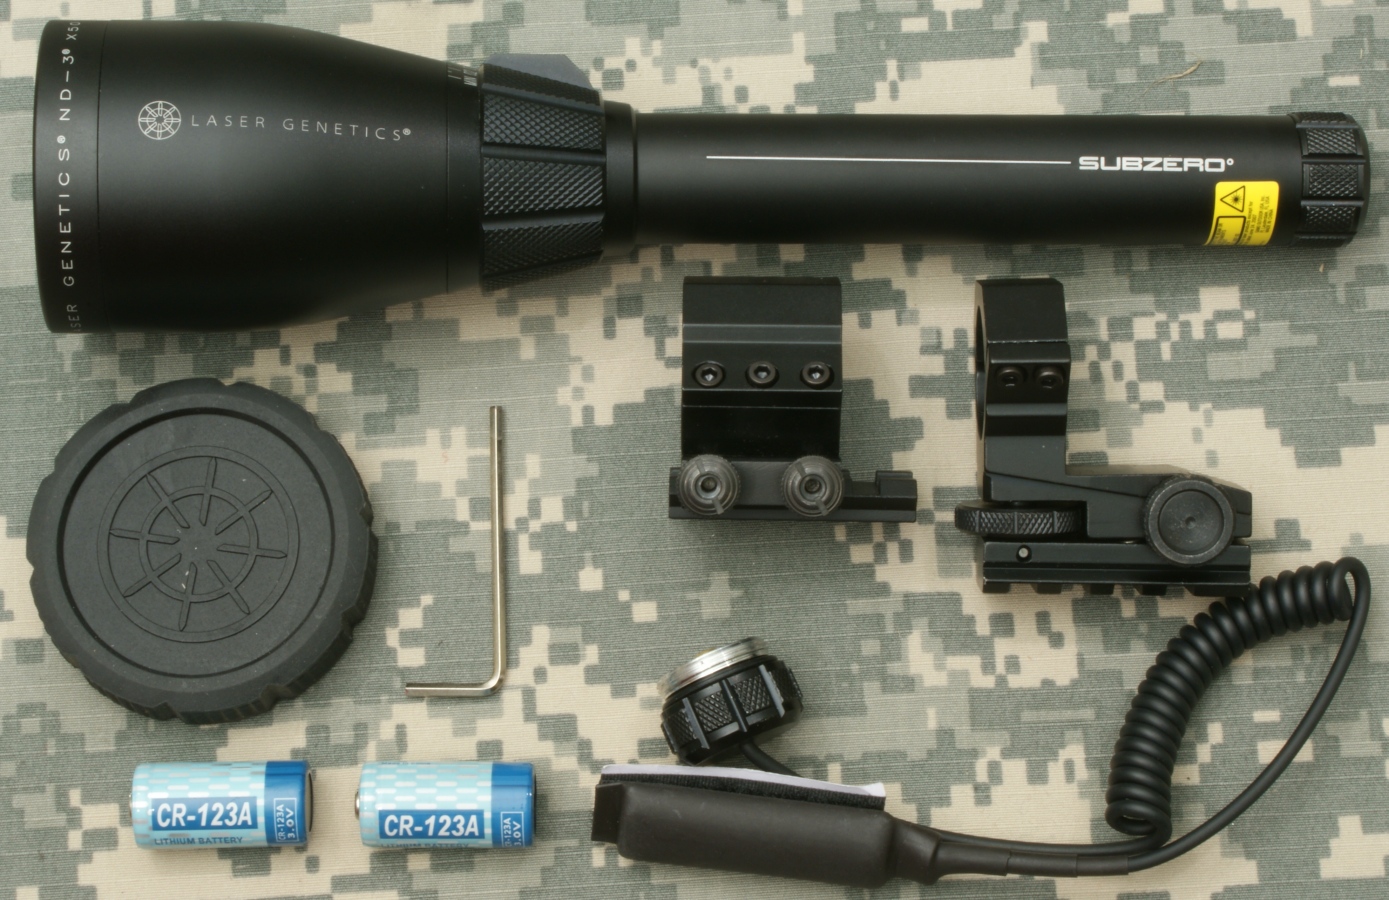
I included the photo below to show the mounts removed. At this point I was dying to install the batteries and go try it out. I did and was very impressed. There is a lot more information on actual testing later in the review.
Figure 10
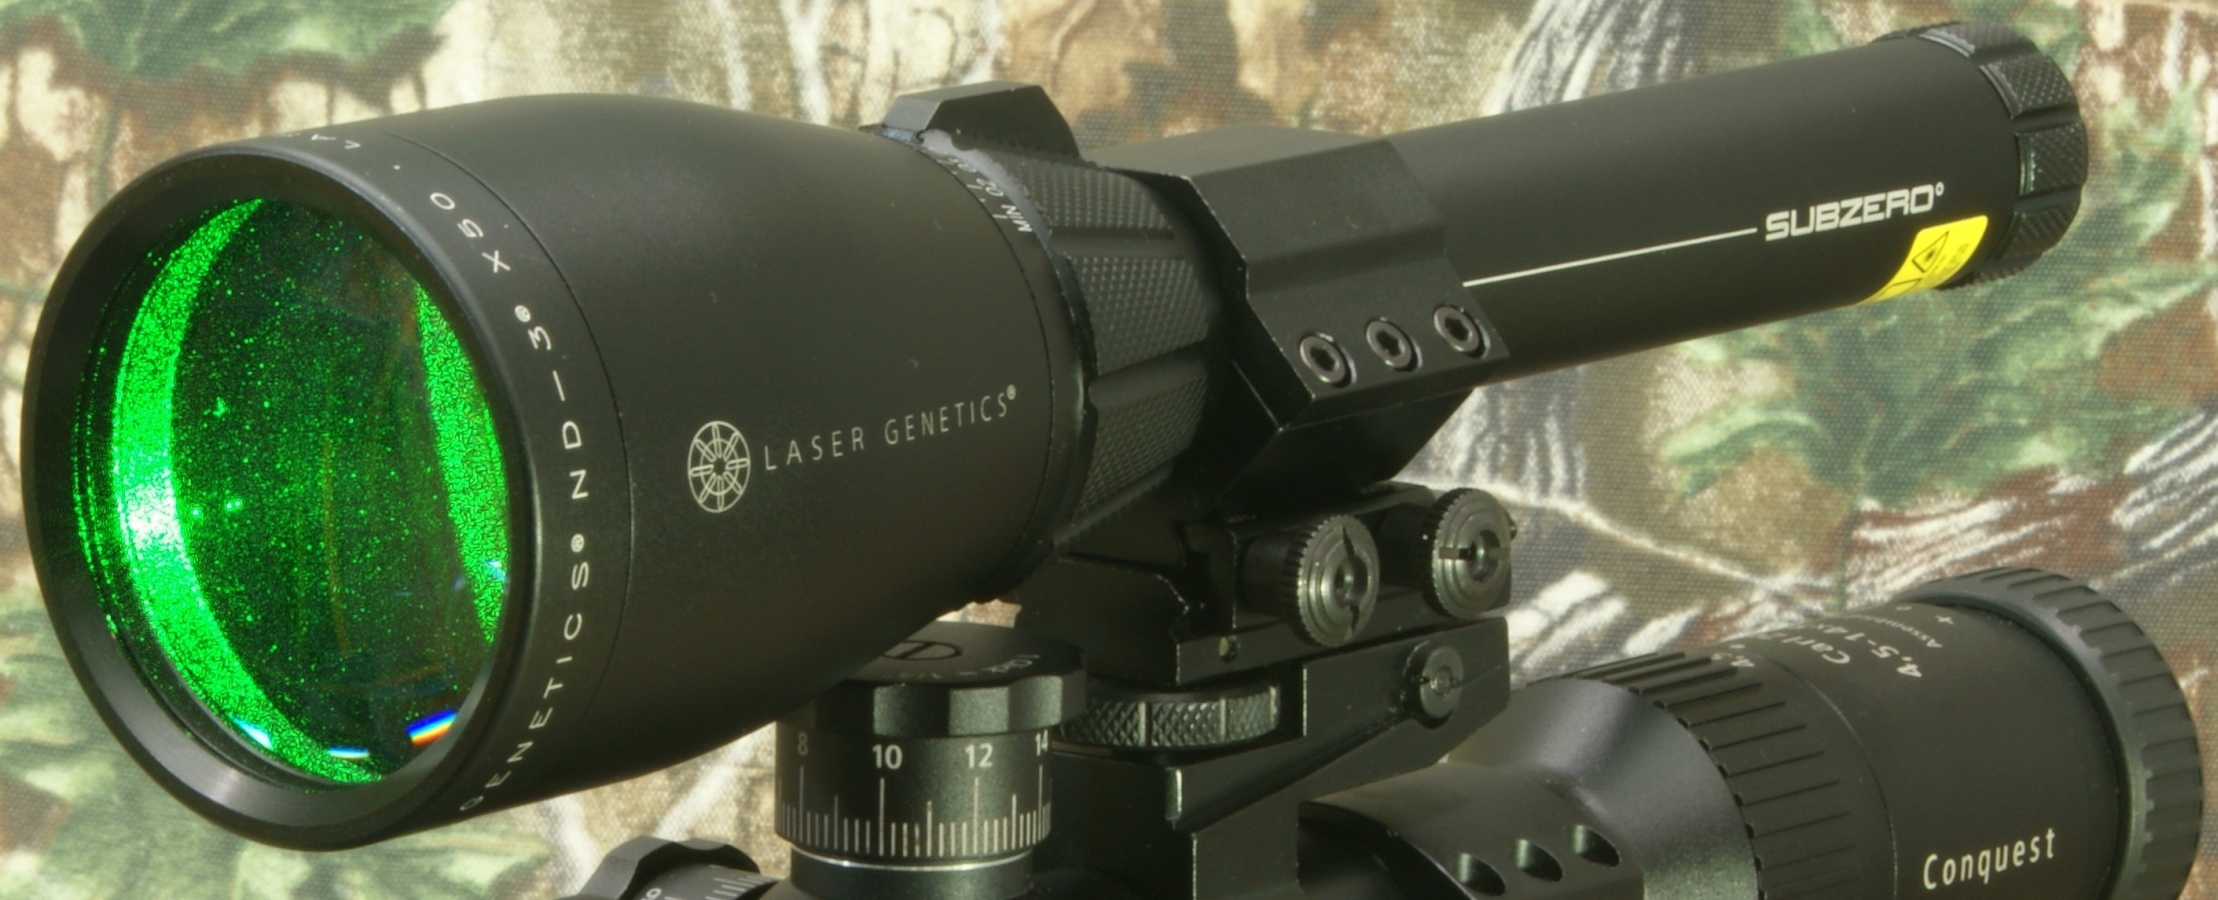
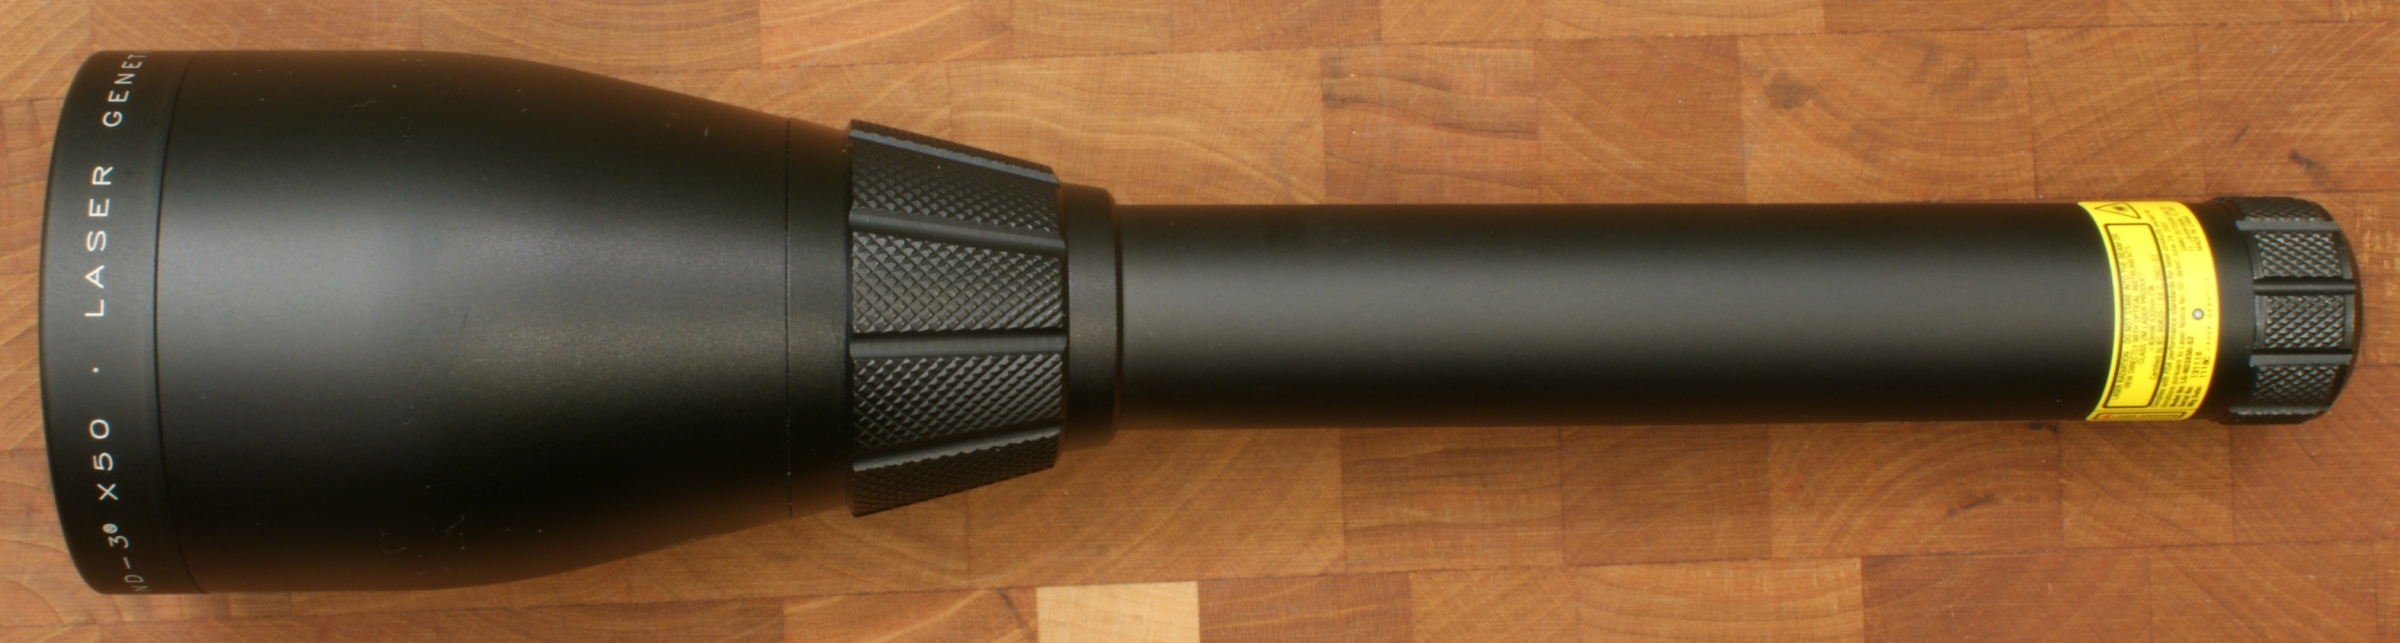
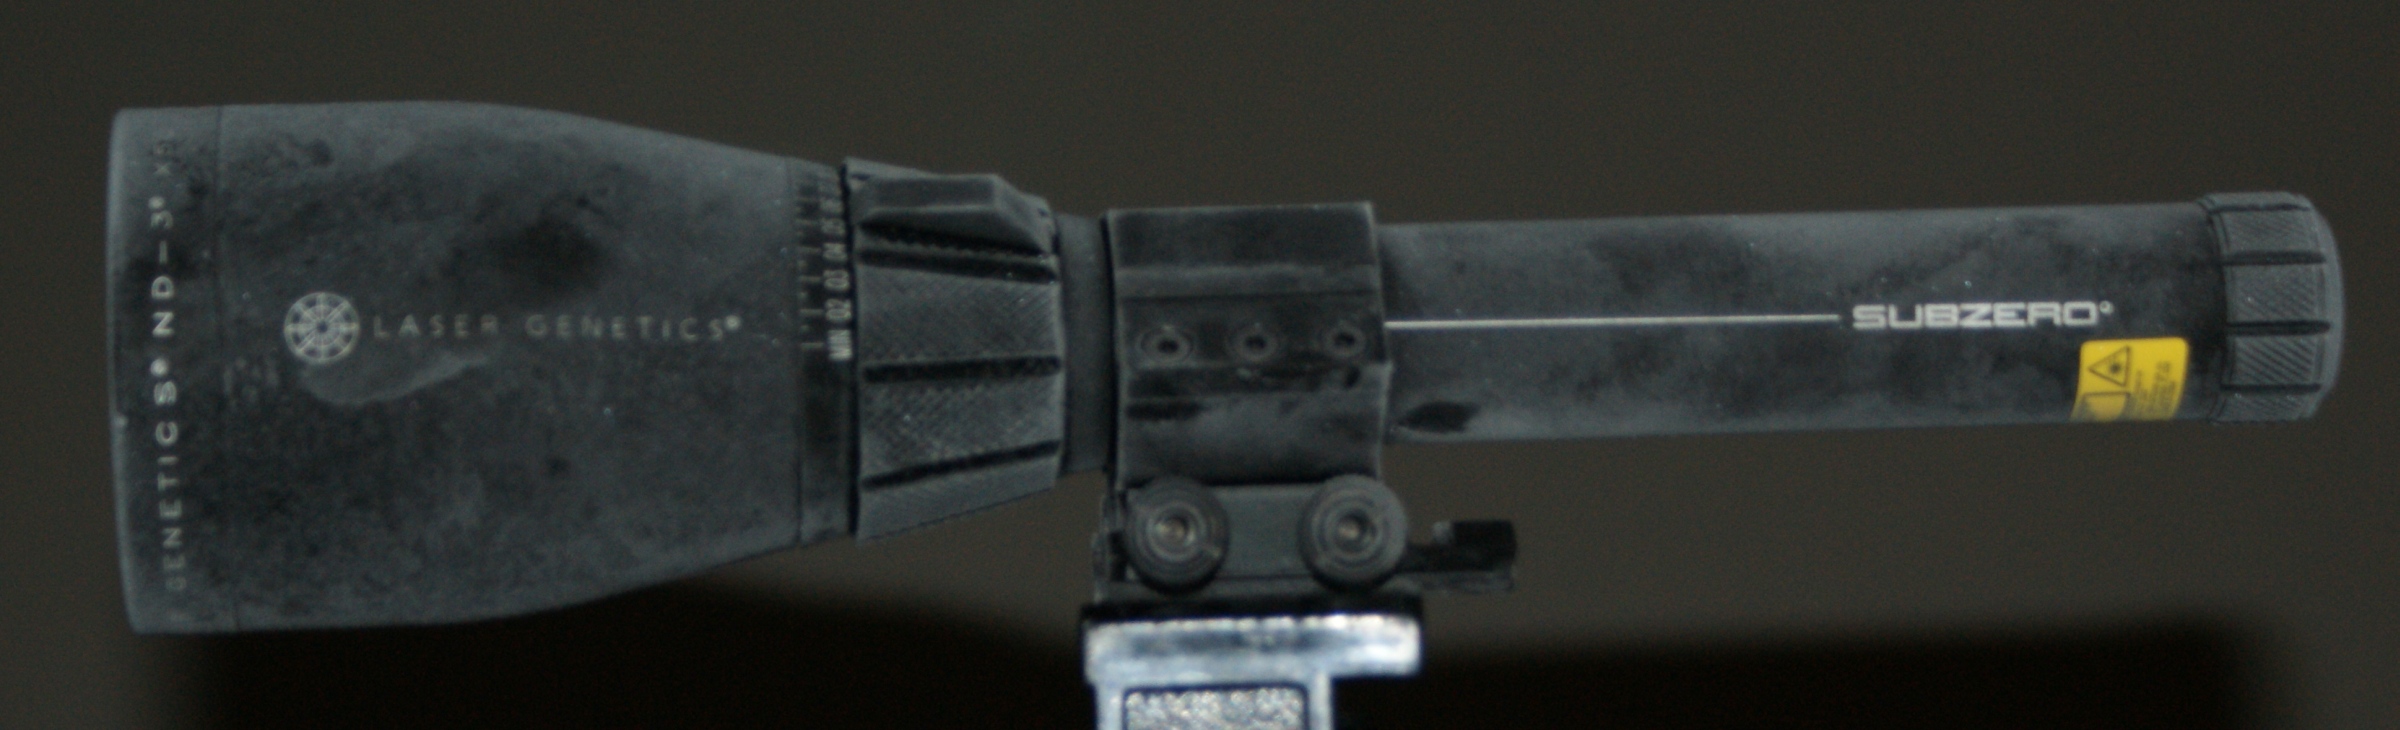
ND3x50 Subzero Laser Designator
Tube body of the Designator is 1" in diameter, the total length of the Designator is 10.0" and the lens end is 2.36" in diameter. The Designator is machined from some type of aluminum alloy and has a nice black anodized finish.
Figure 11
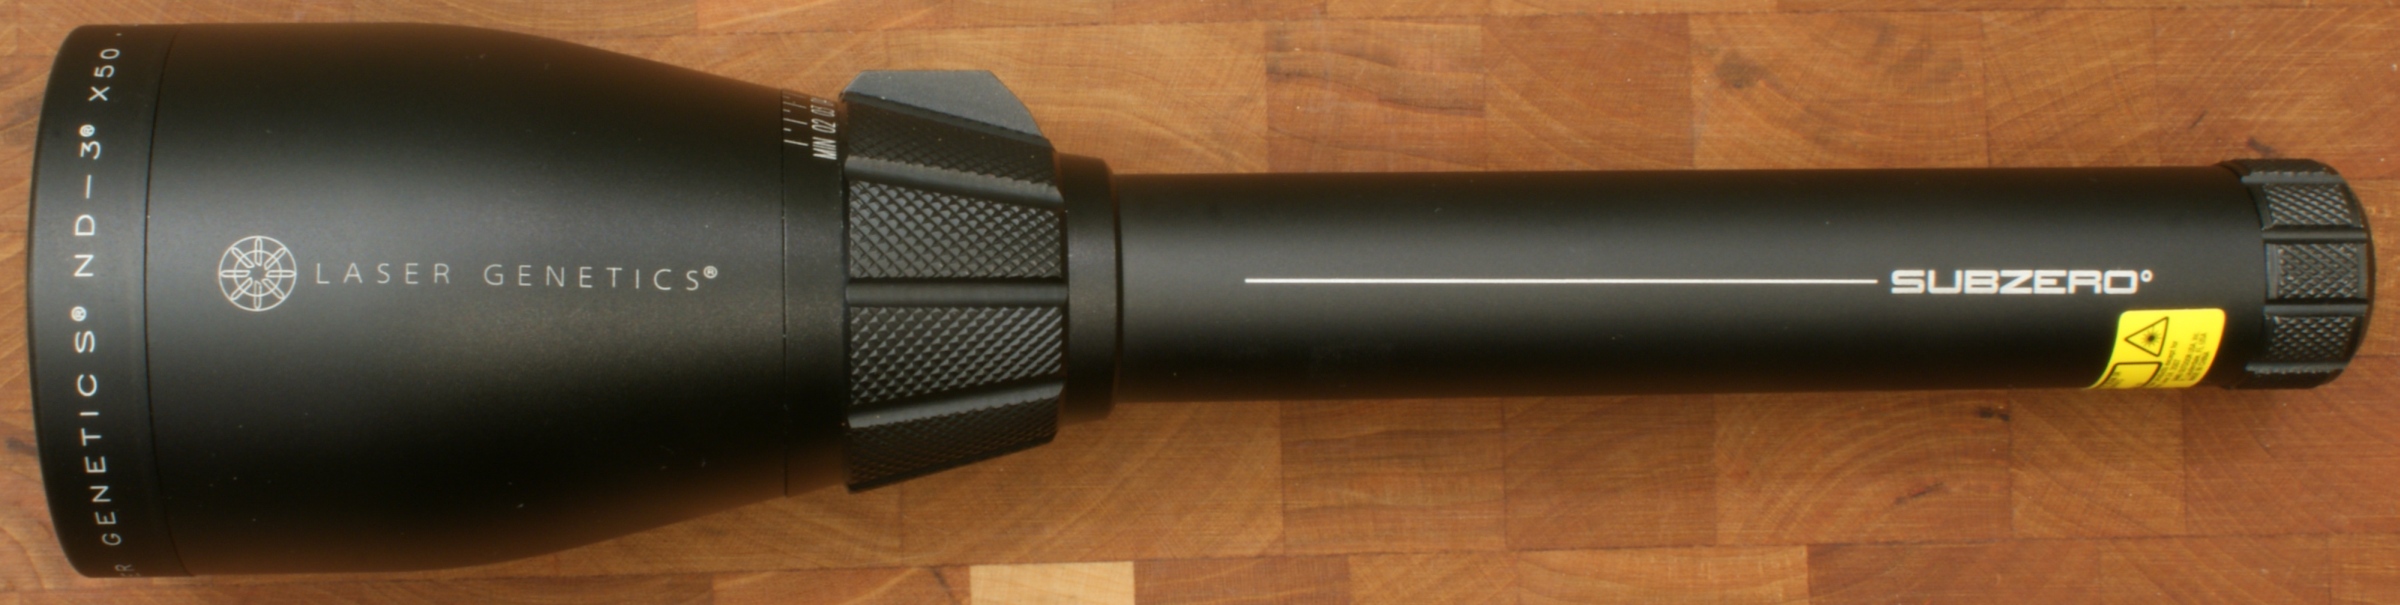
Figure 12
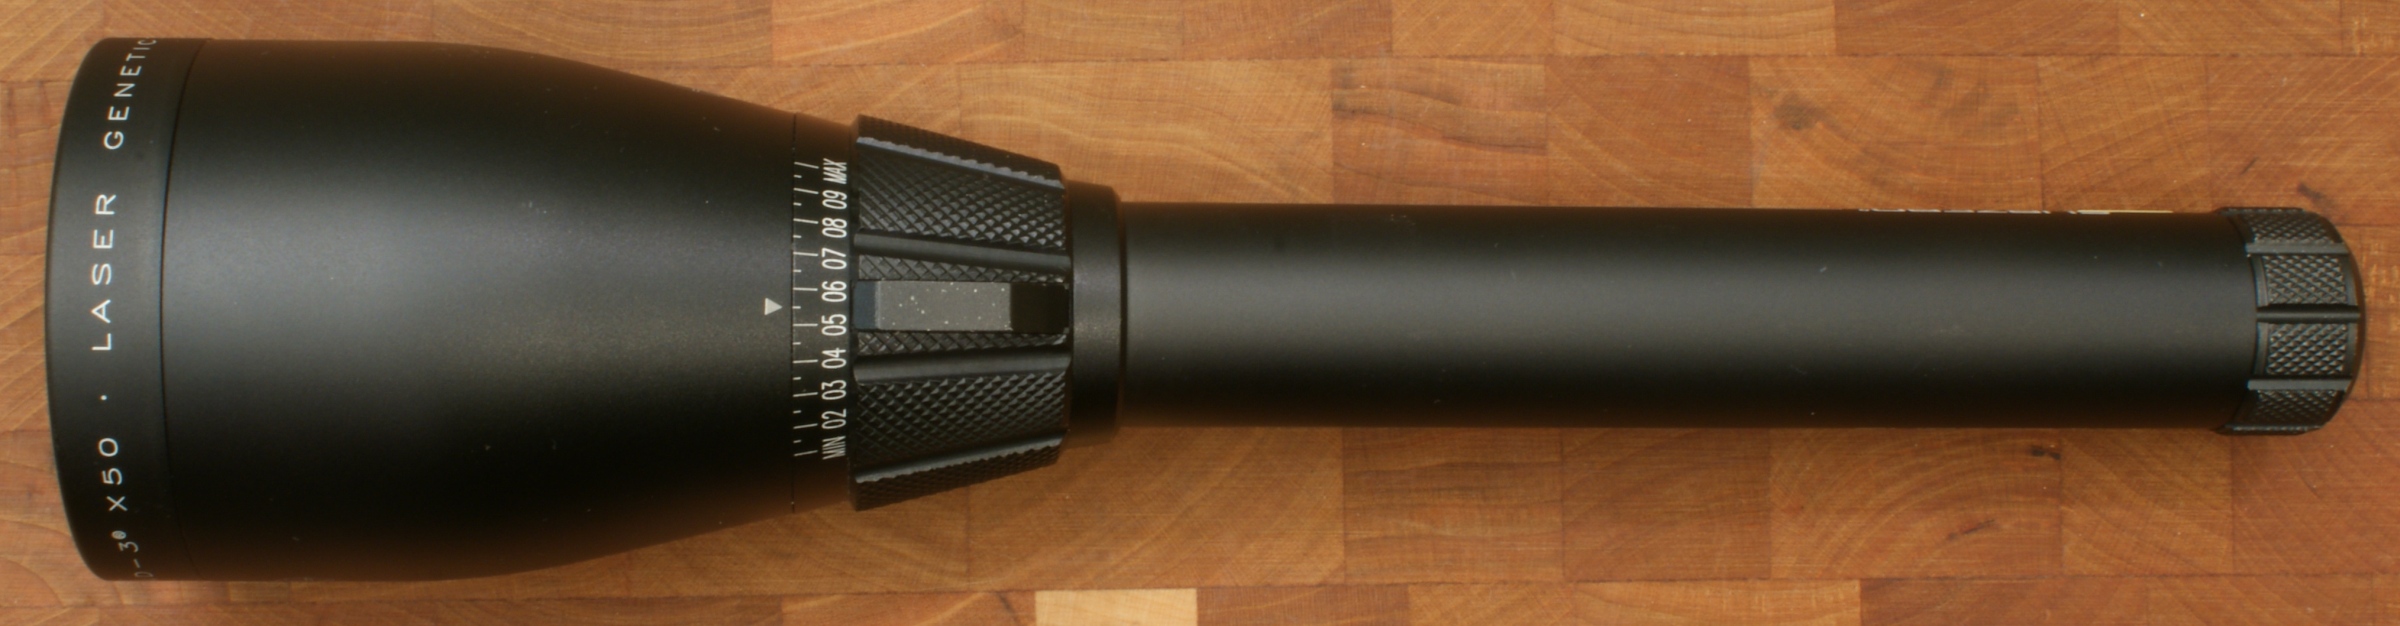
Figure 13
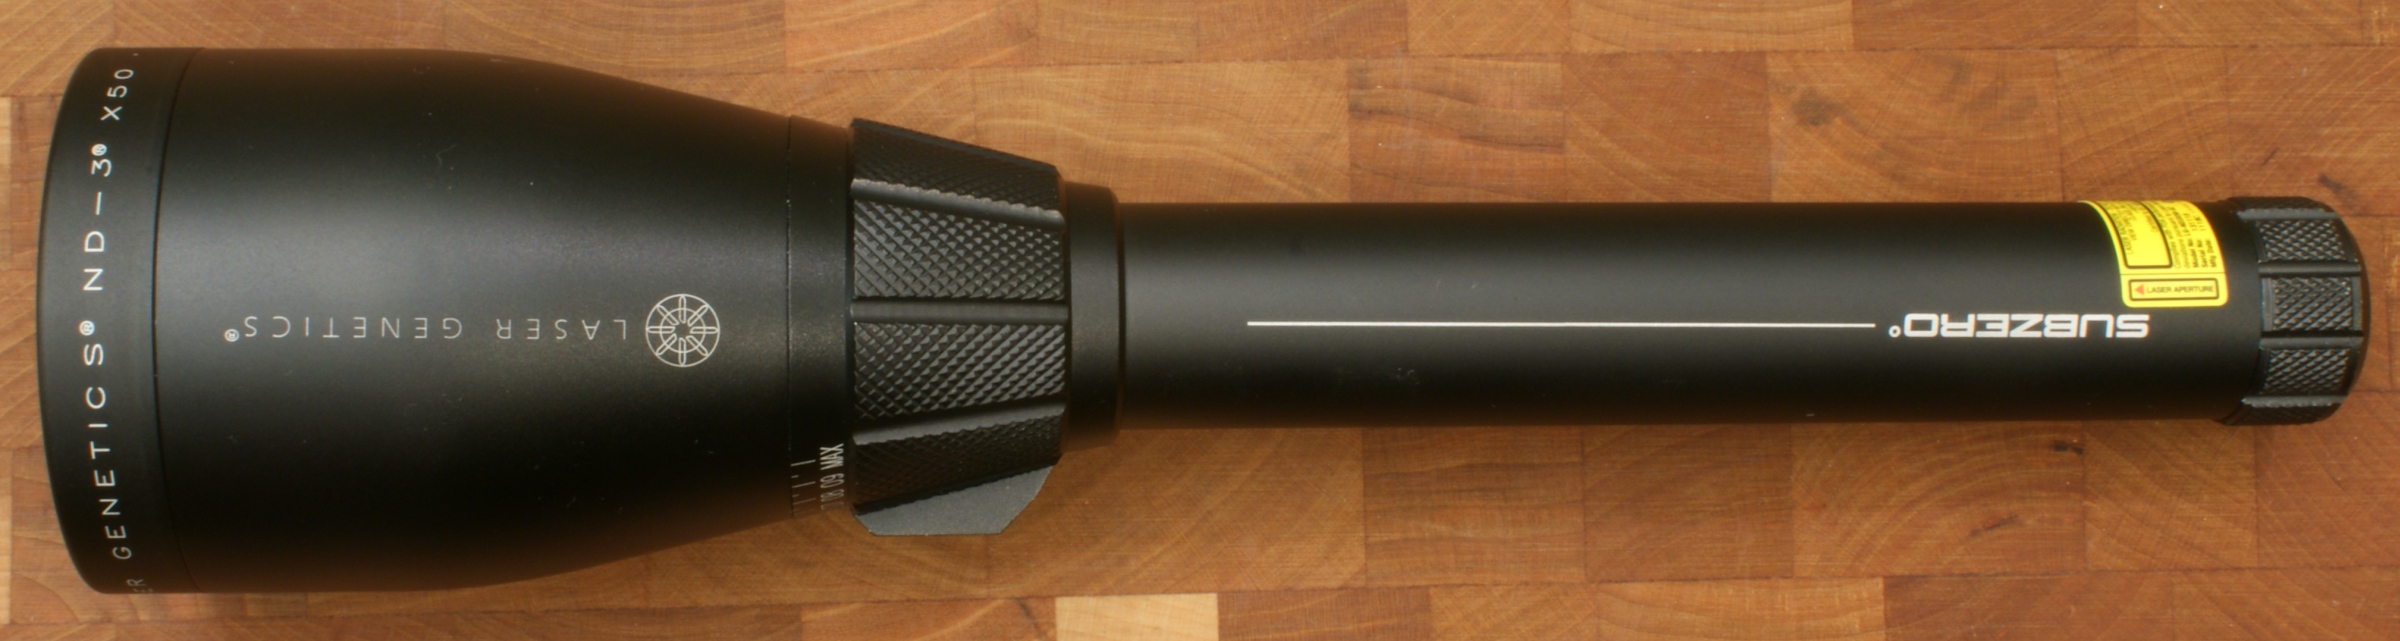
Figure 14
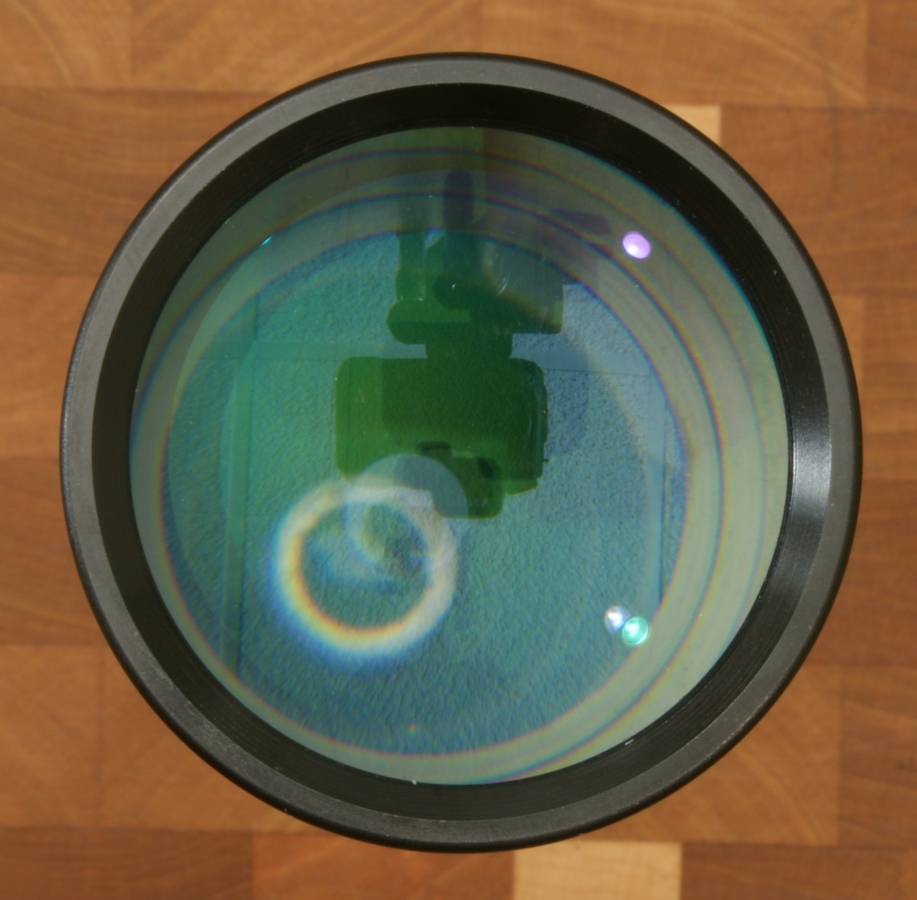
The lens appears clear with some type of coating (spec states fully multi-coated lenses). The tail cap has a positive click for on/off.
Figure 15
Figure 16
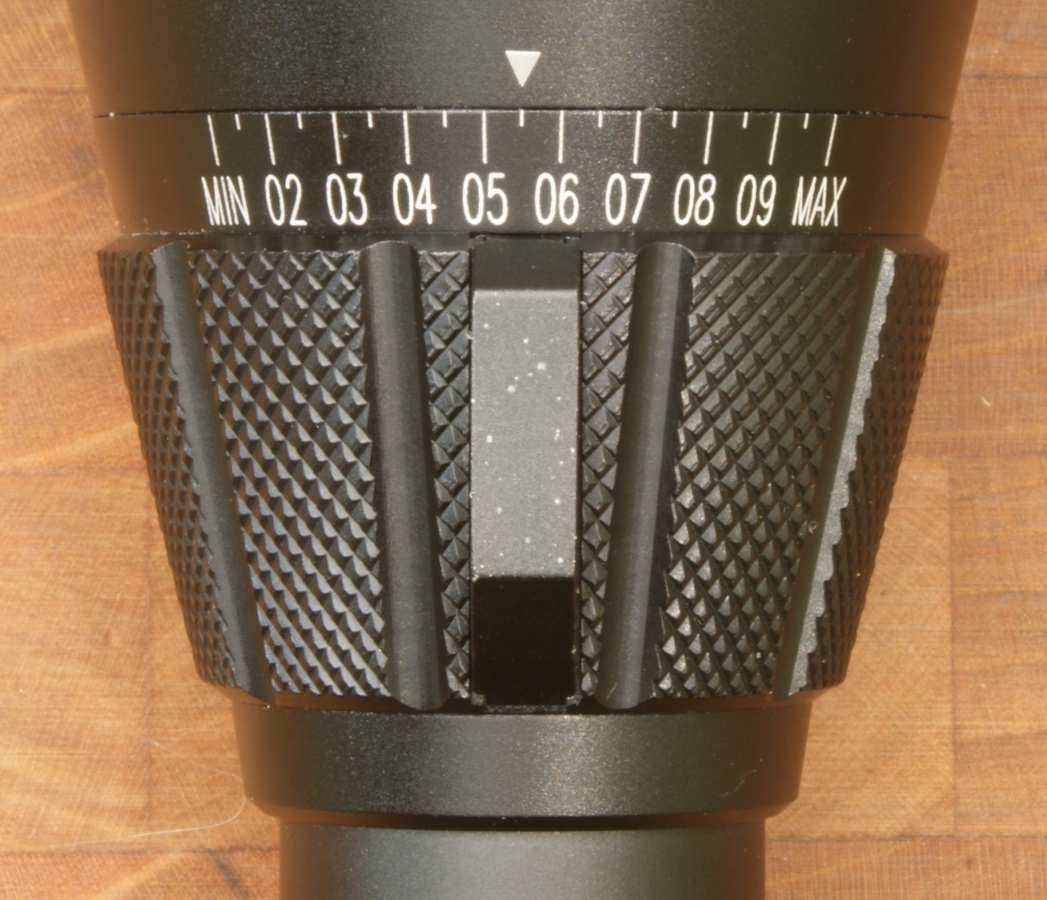
The beam width is adjusted by the "rotary beam optical collimator" shown below. Basically a collimator is a device that works to narrow and align a beam. The collimator ring was firm to rotate, similar to changing the power on a scope.
Figure 17
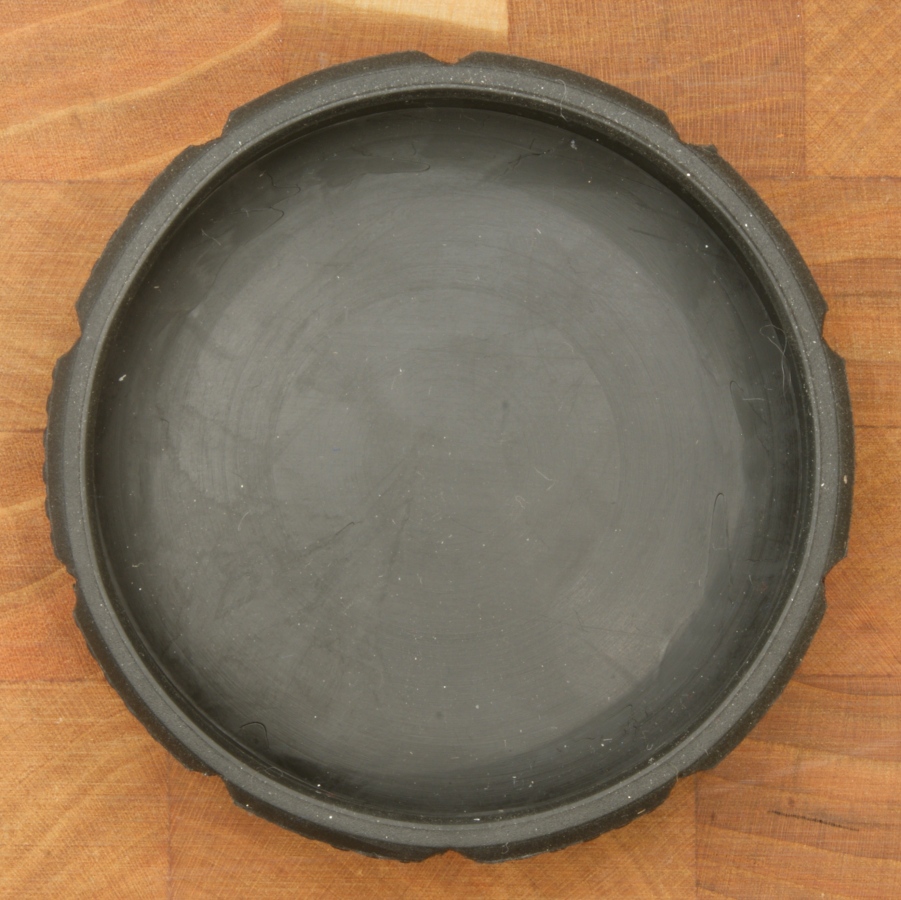
Lens Cap
The Lens Cap is made from some type of rubber material.
Figure 18
Figure 19
Figure 20


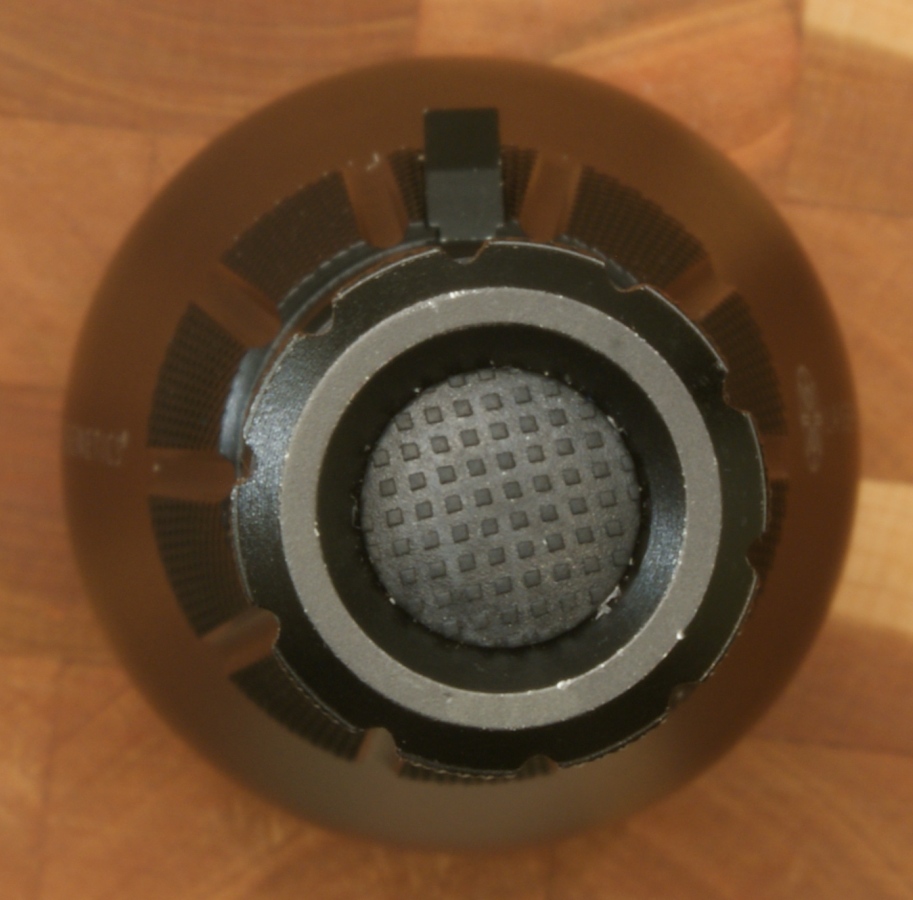
Tail Cap Switch
The Tail Cap Switch has an O-ring to seal the battery cavity and marking for the positive direction of the batteries.
Figure 21
Figure 22
Figure 23
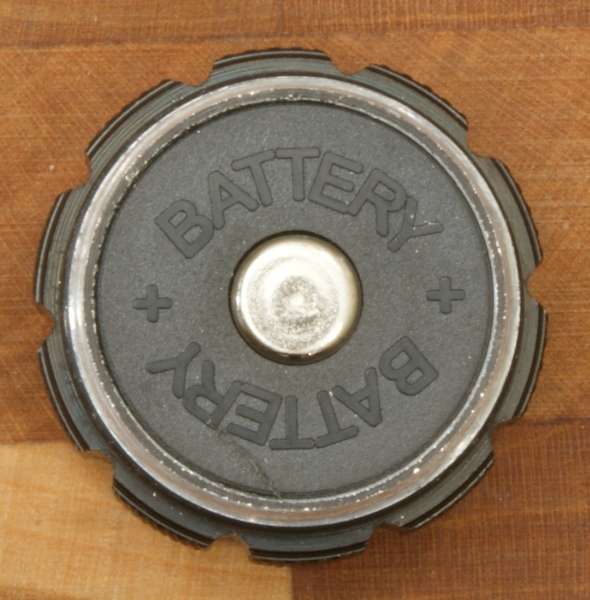
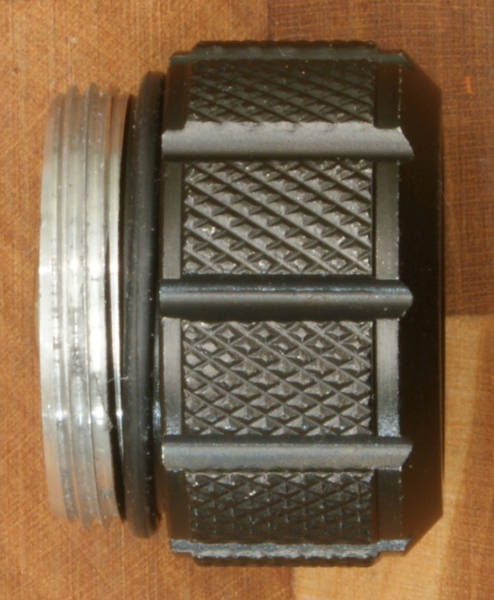
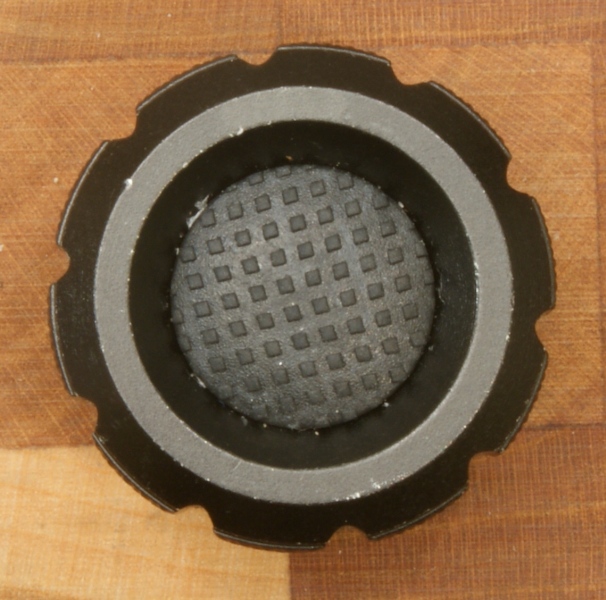
Figure 24
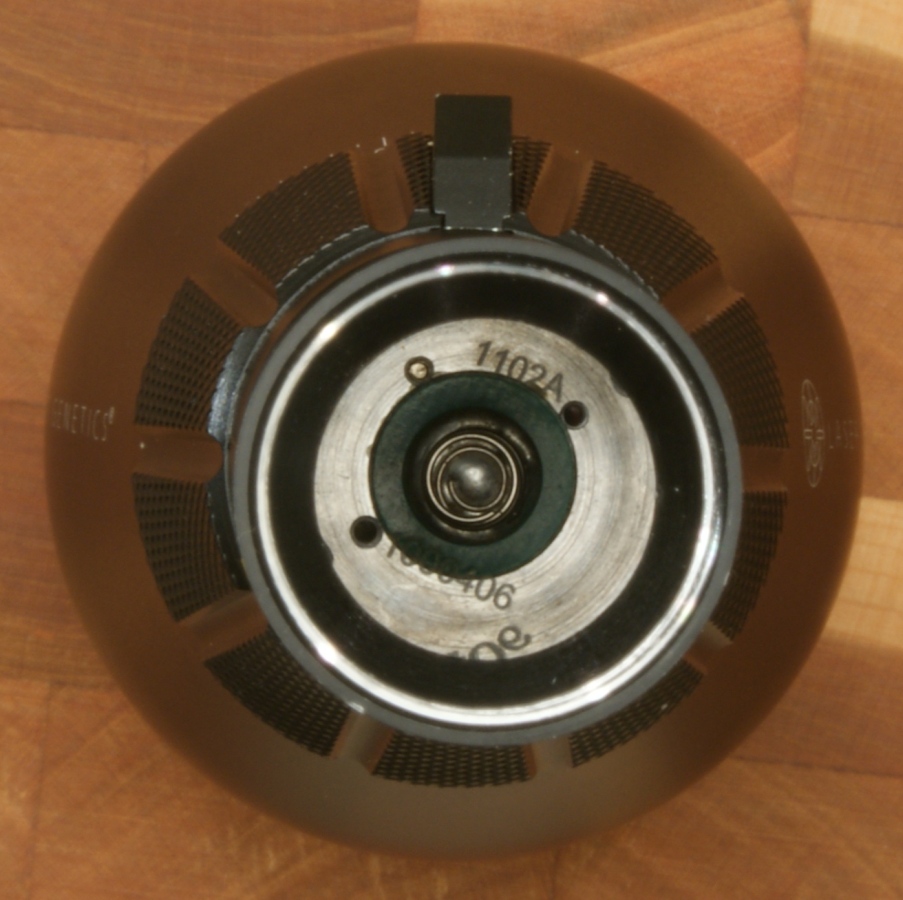
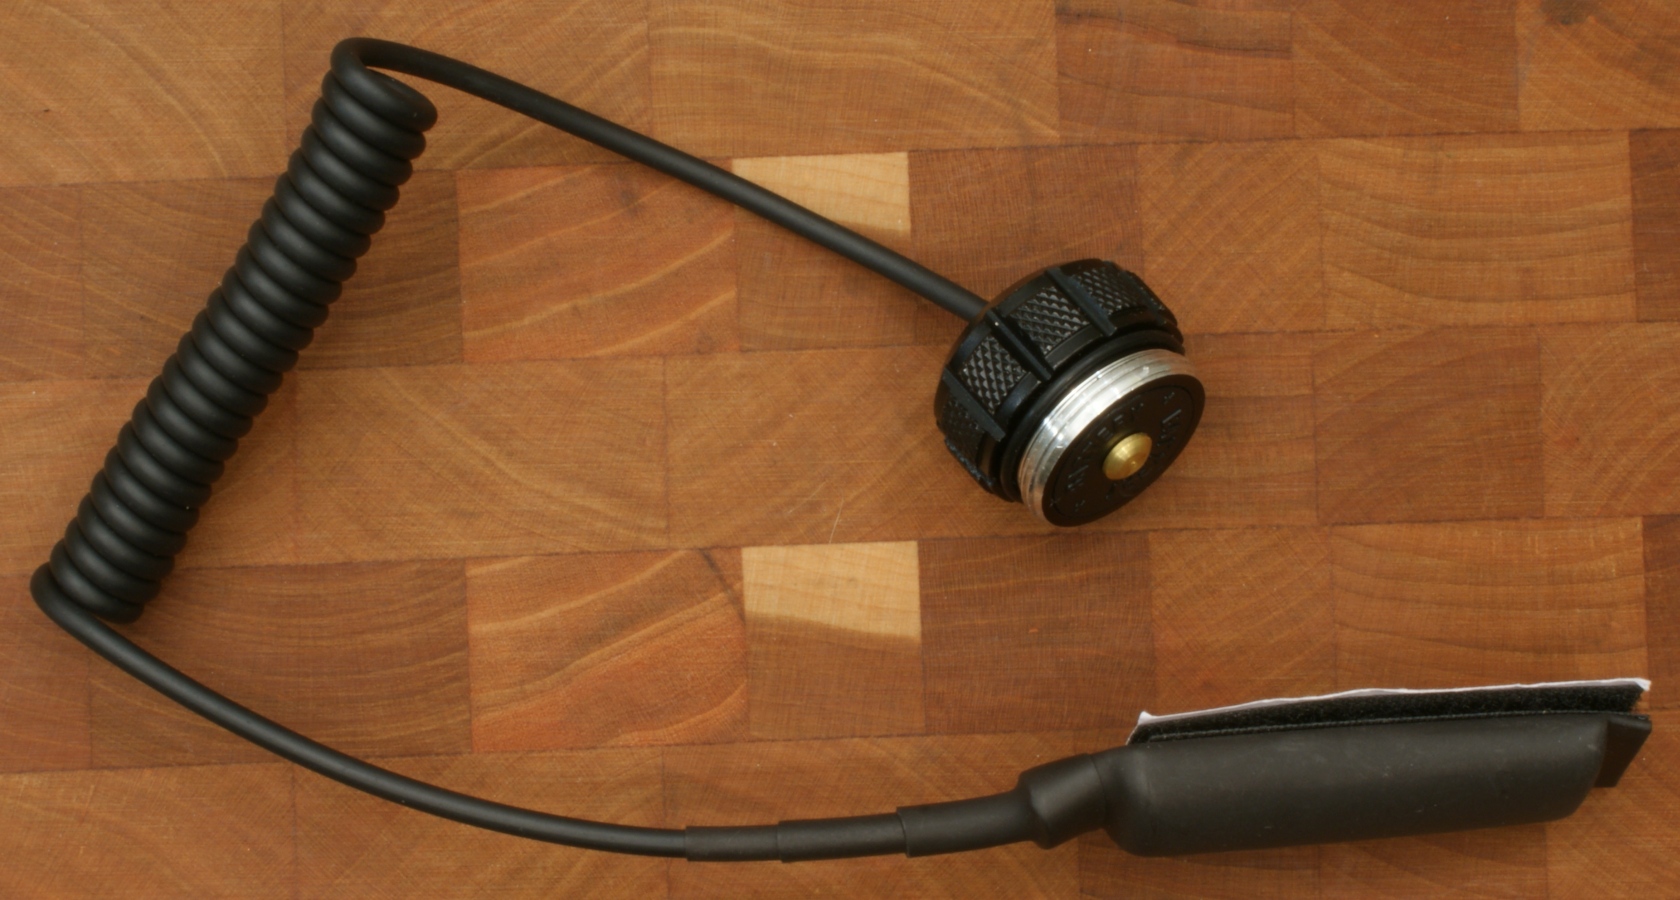
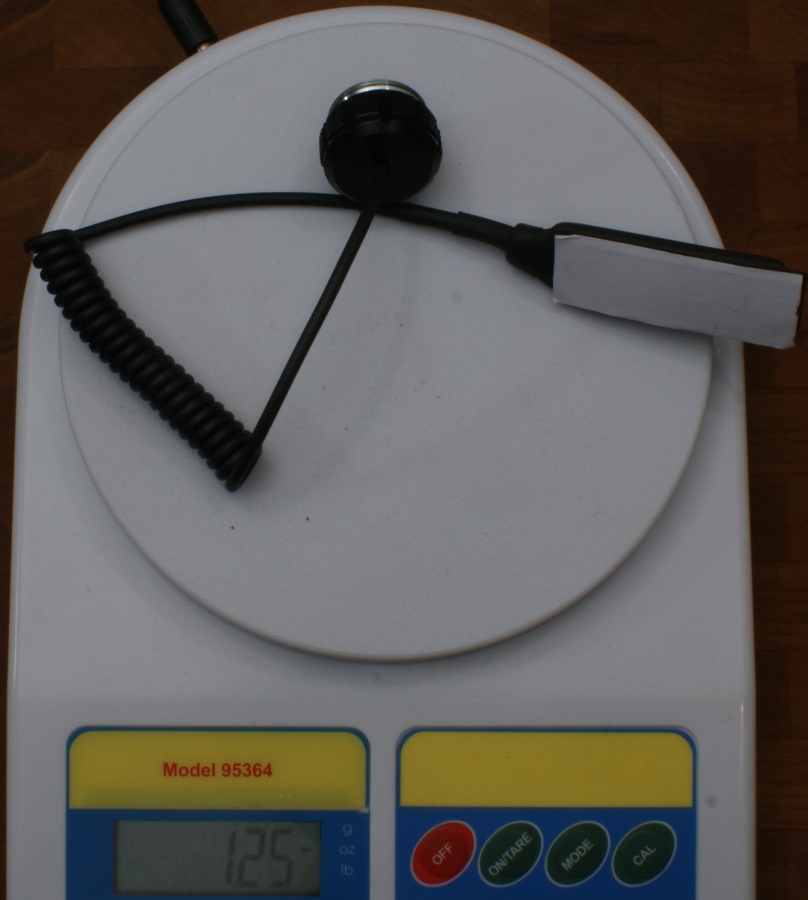
Pressure Mounted Switch
The Pressure Mounted Switch has an O-ring similar to the tail cap and can change in length from 13" to about 28". The pressure pad feels like it has 4 different pressure contact points and comes with a Velcro pad ready to stick on your rifle.
Figure 25
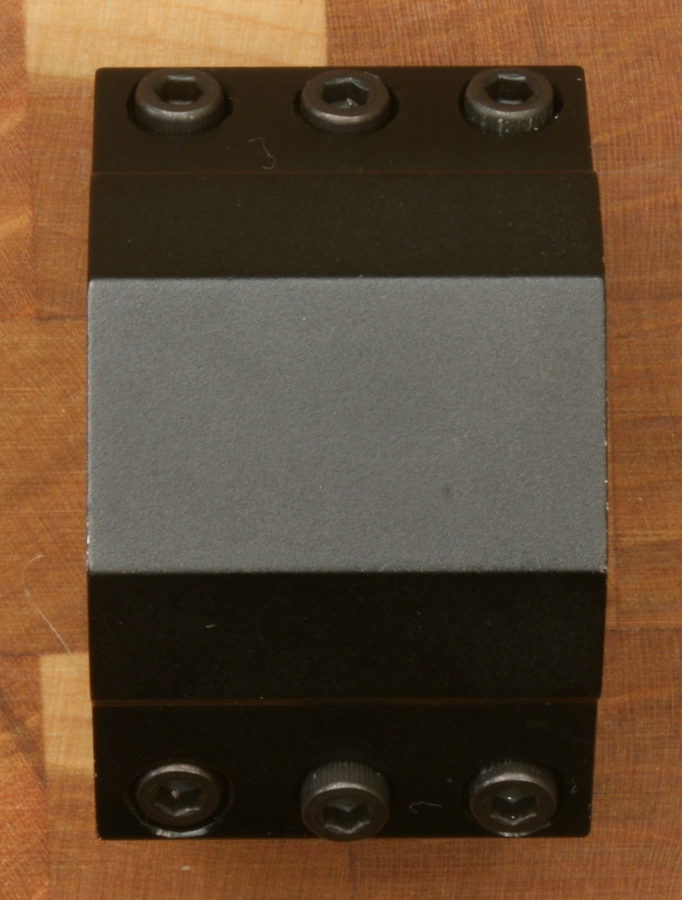
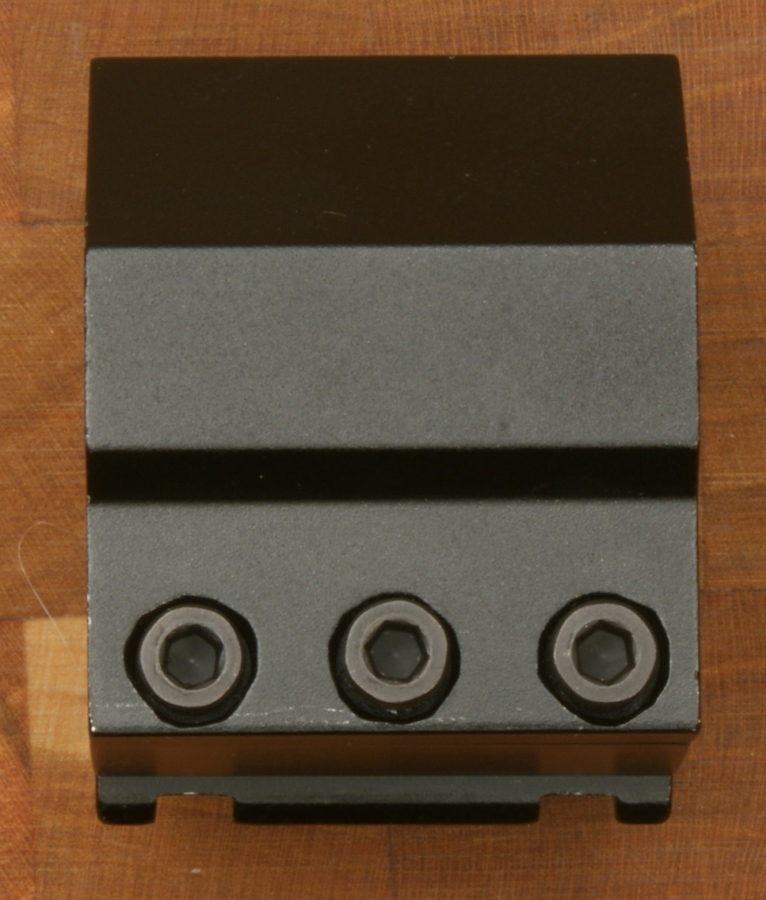
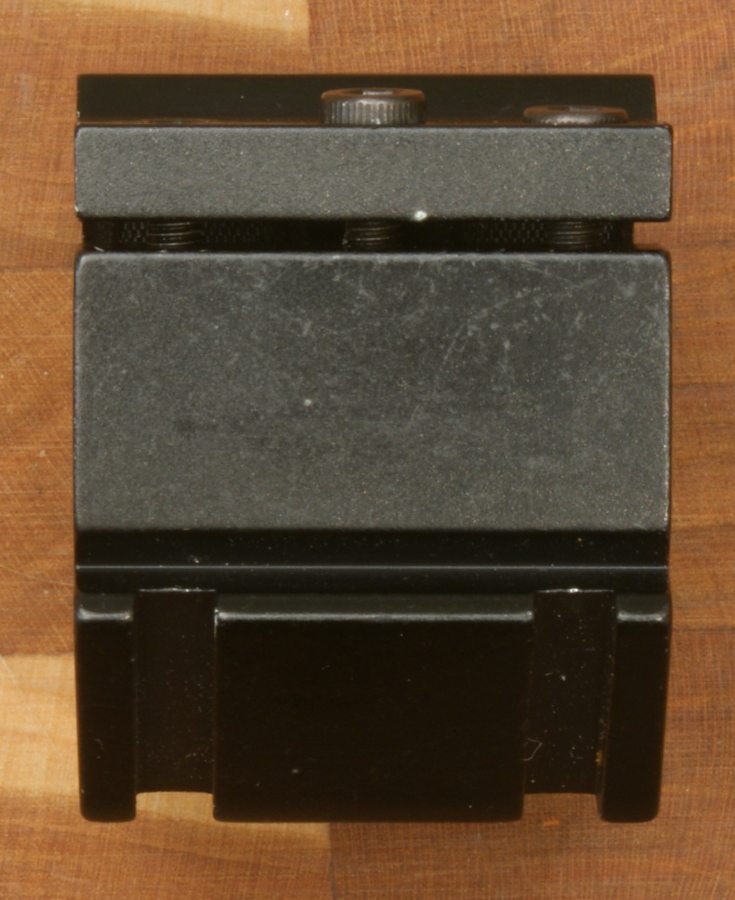
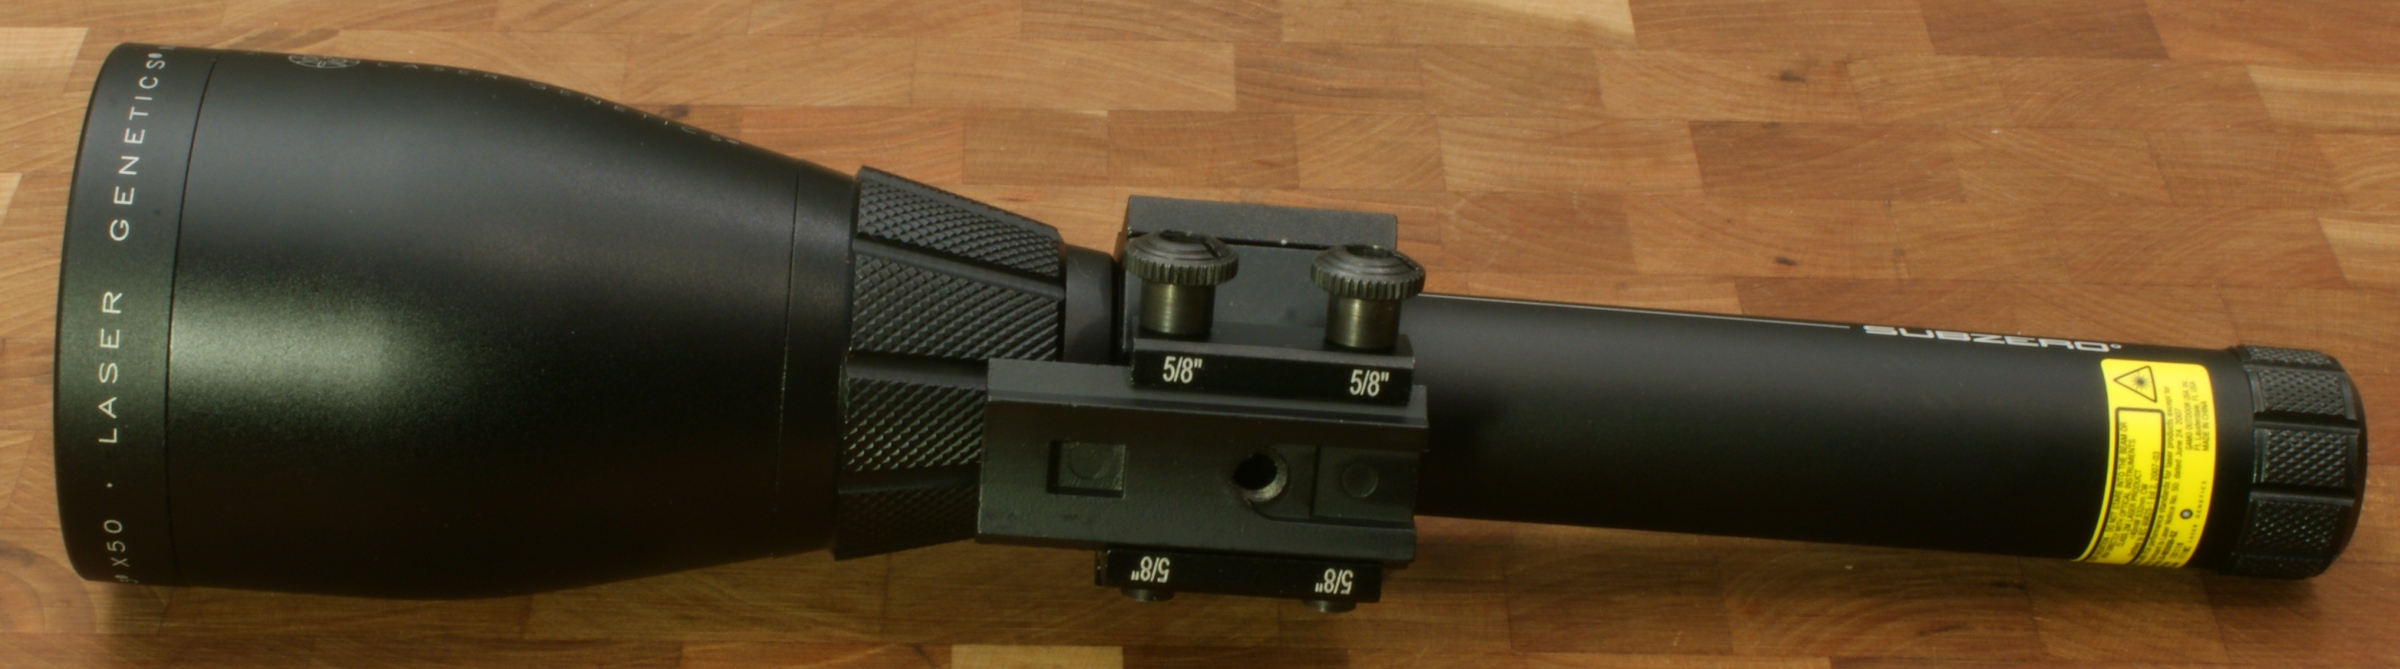
Weaver-Style Mount
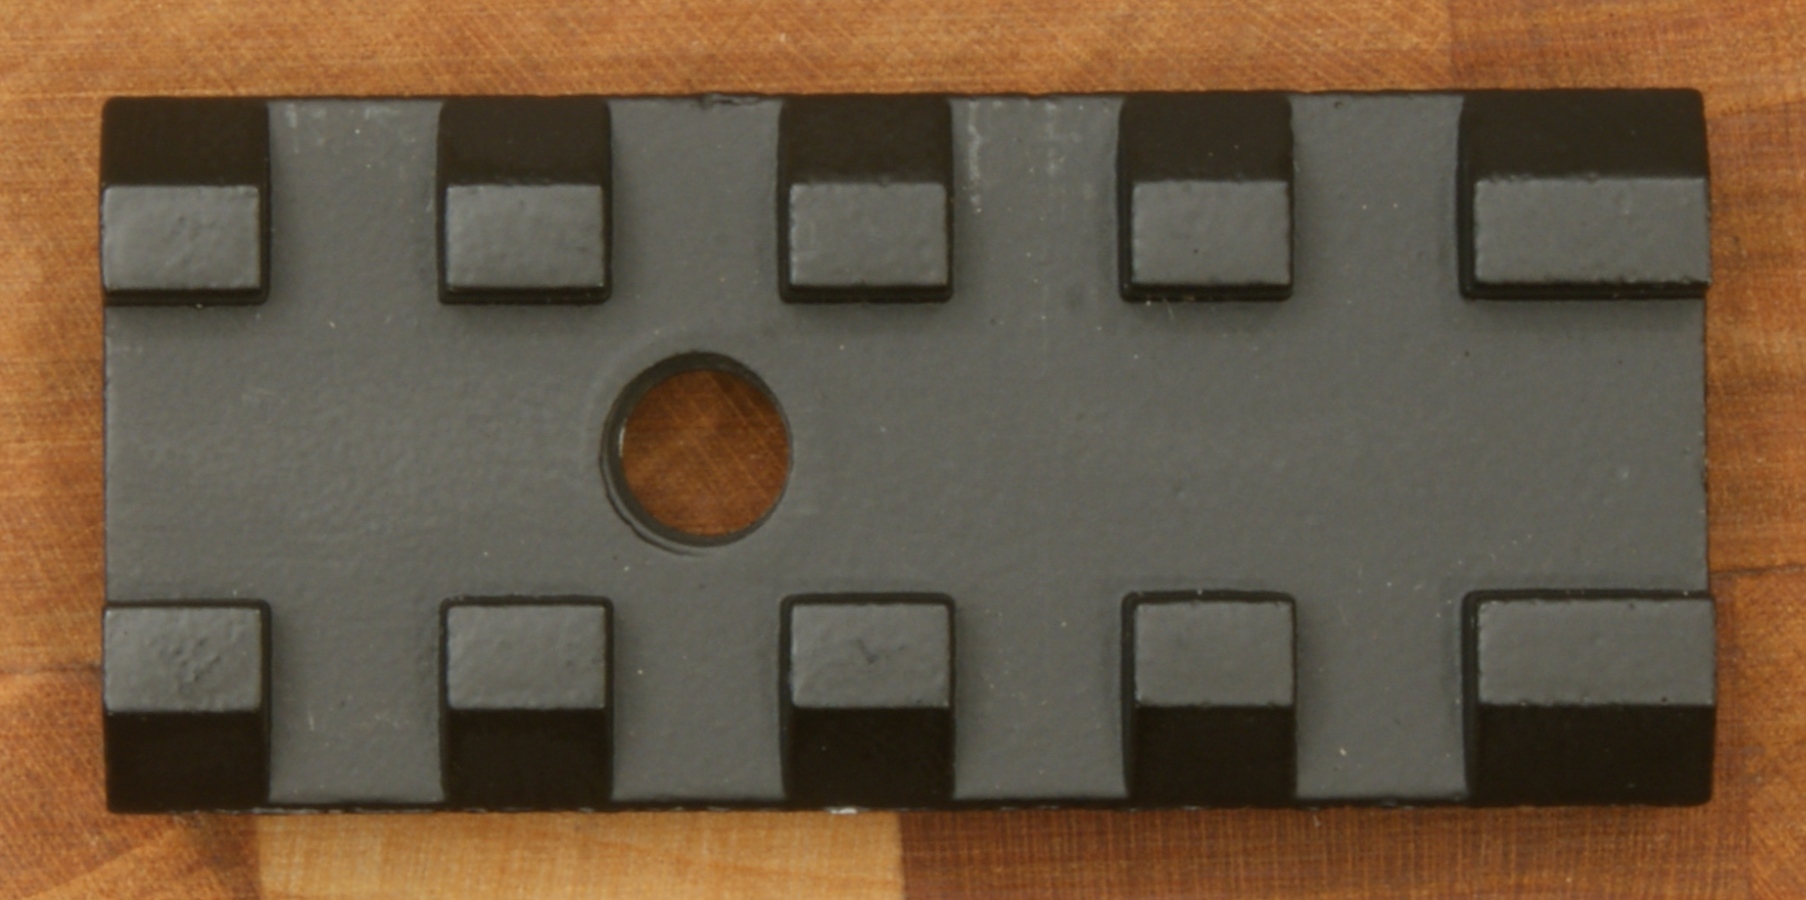
This mount is actually made up of two basic components, the ring portion (Weaver-Style Mount) and clap portion. The ring portion is made from aluminum alloy and includes 6 cap screws and anti-slip tape on the inside of the rings. Although the specifications state an anodized finish, the mounts appear to be closer to some type of painted finish.
Figure 26
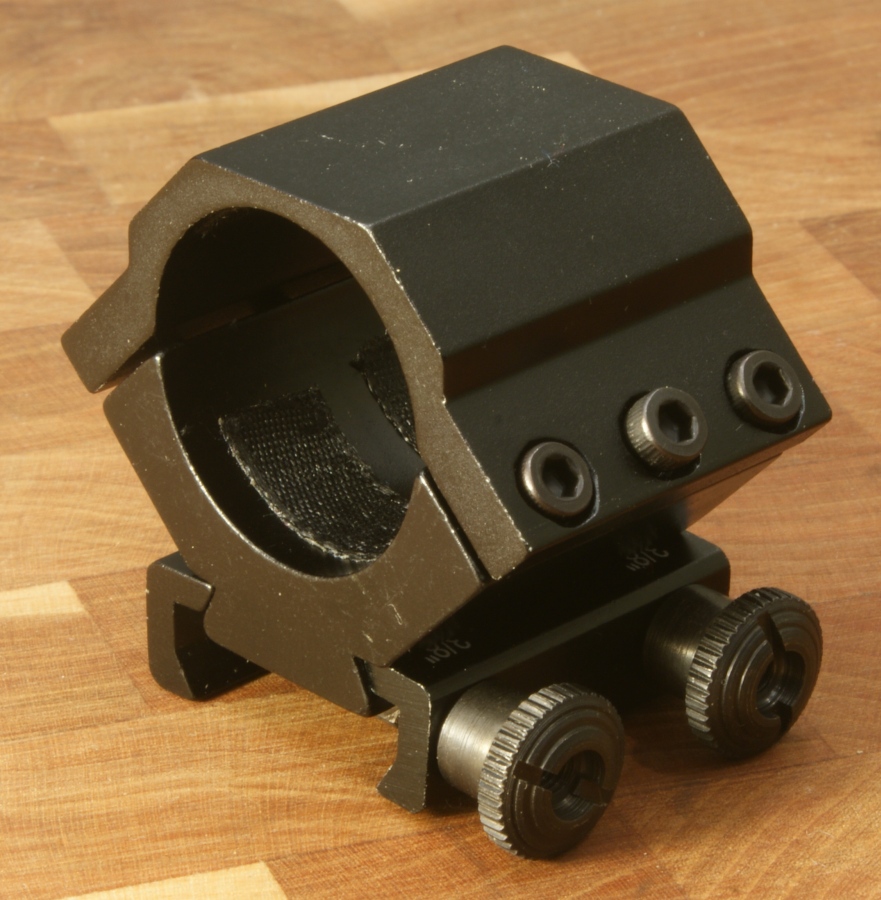
Figure 27
Figure 28
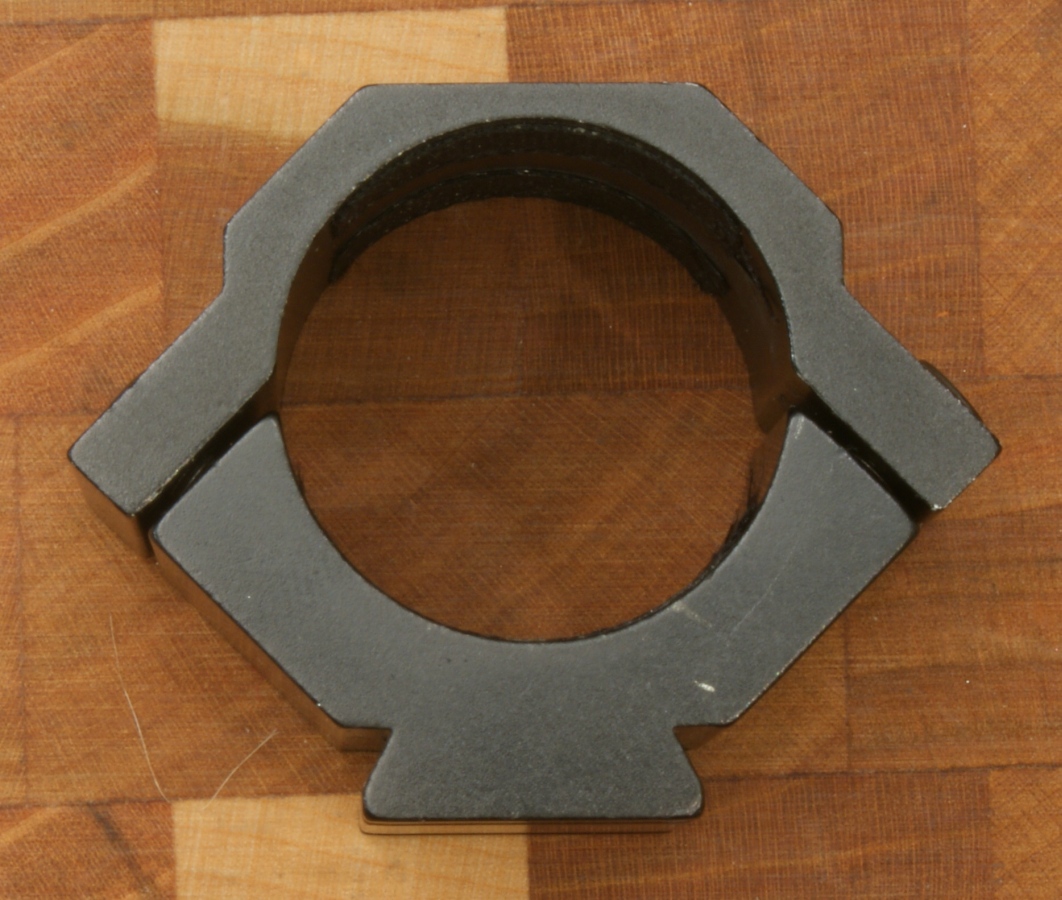
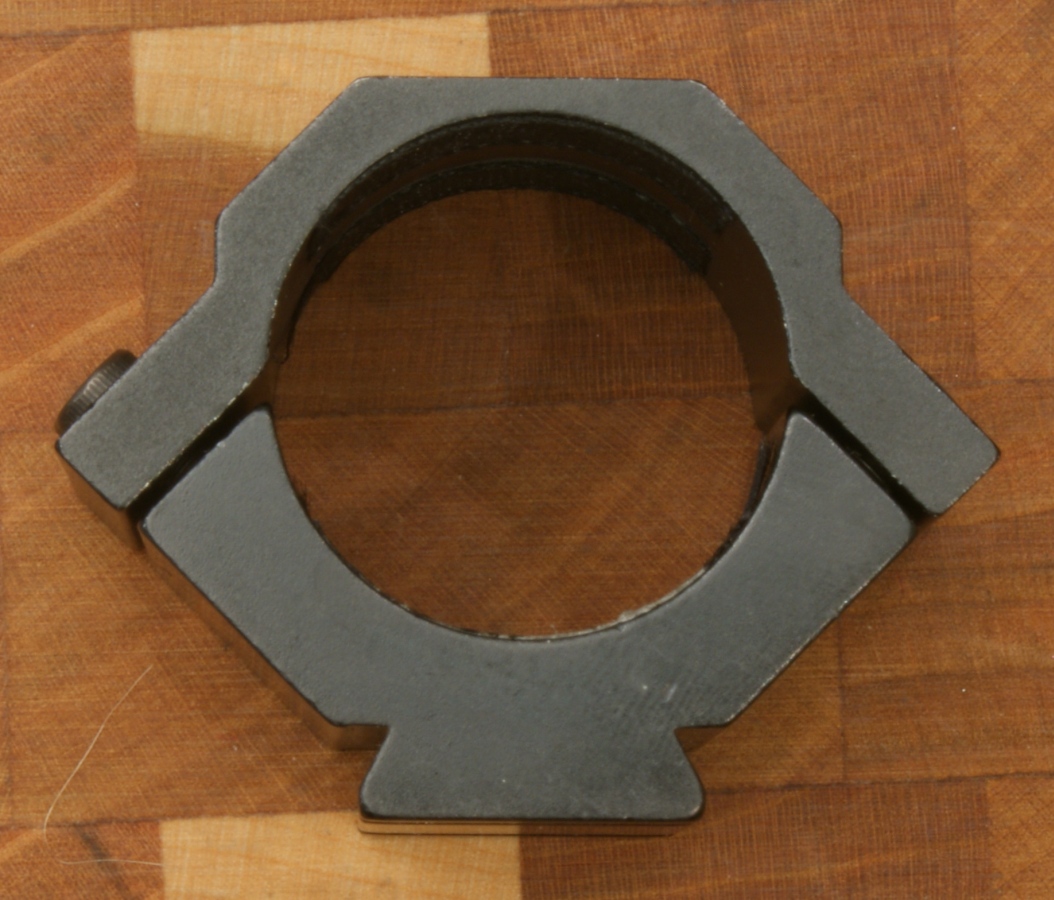
I only show 4 of the six sides below. The other two sides are symmetric to the center two figures below.
Figure 29 - Top
Figure 30
Figure 31 Figure 32
- Bottom

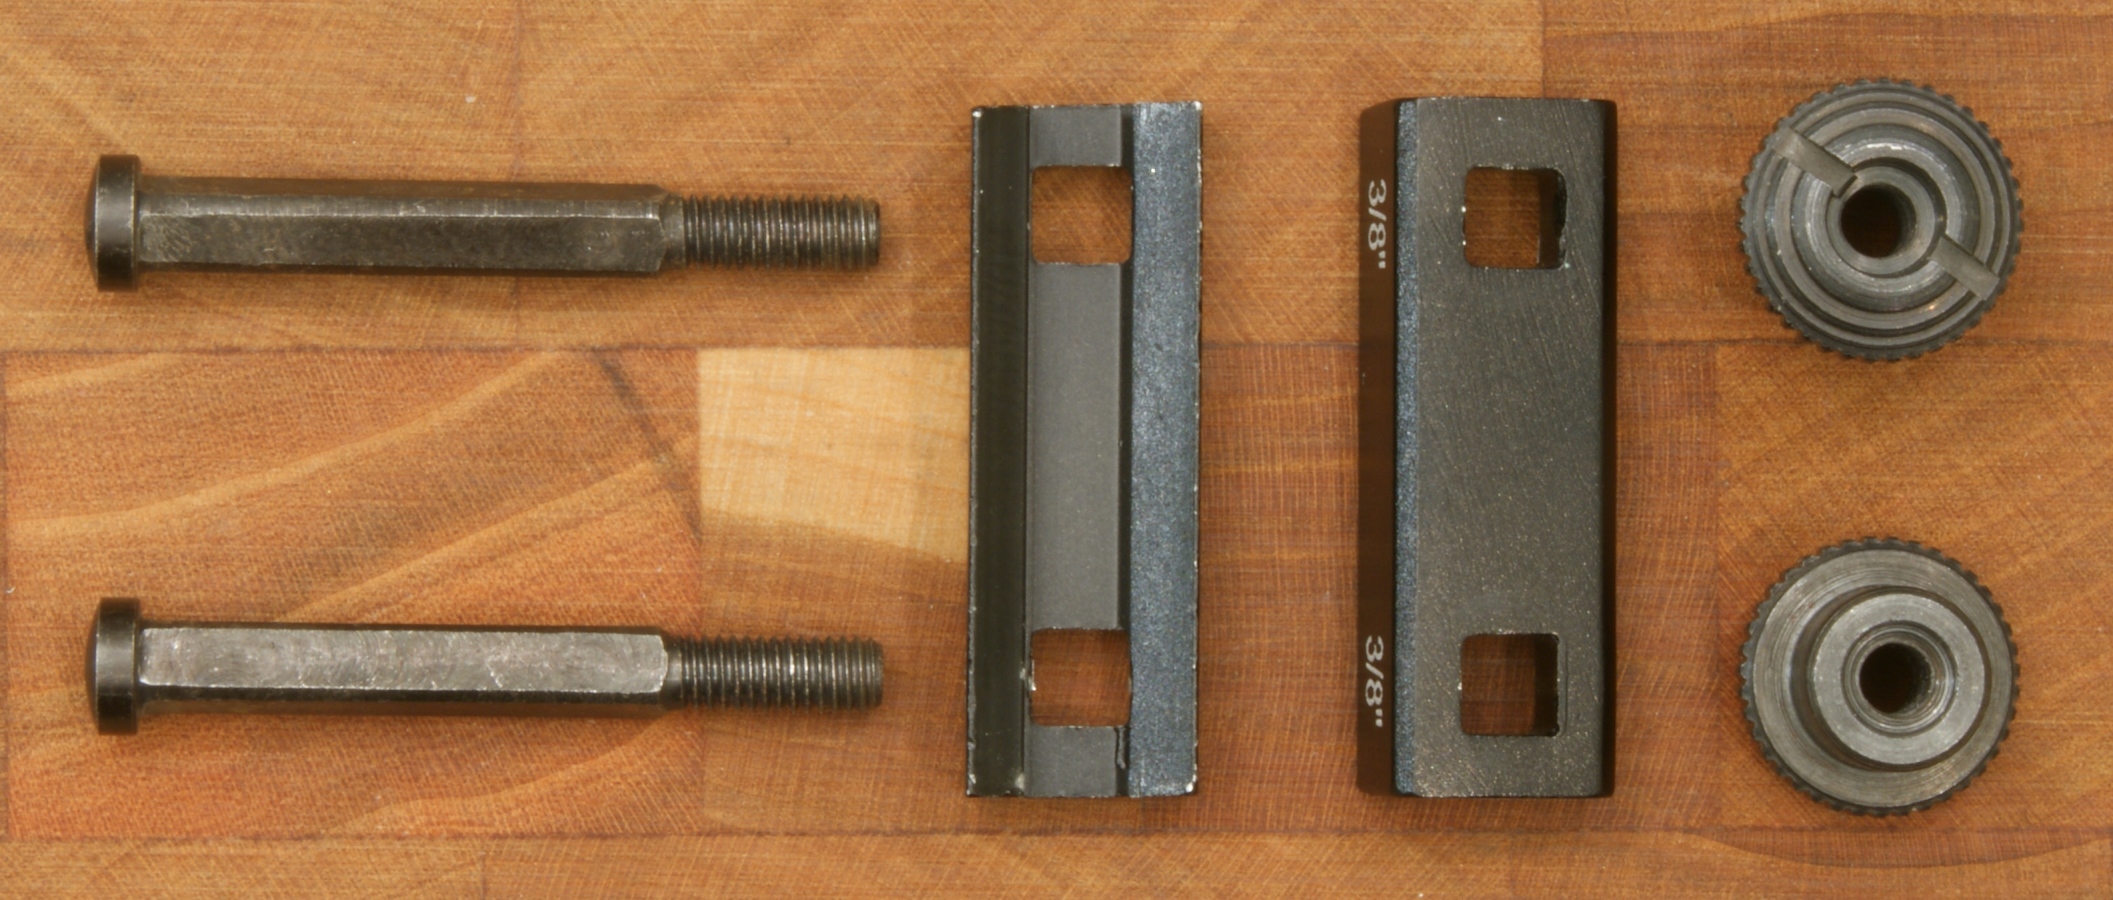
This adapter is a little confusing. Although it states 3/8" on one side and 5/8" on the other, there is not a case where the 3/8" fits any of the mount components. The 3/8" side is used to attach to the Weaver-Style mount while the other side is used to interface with a Picatinny rail. The clamp bars are made from aluminum and the screws and thumb nuts from steel.
Figure 33
Figure 34
Figure 35
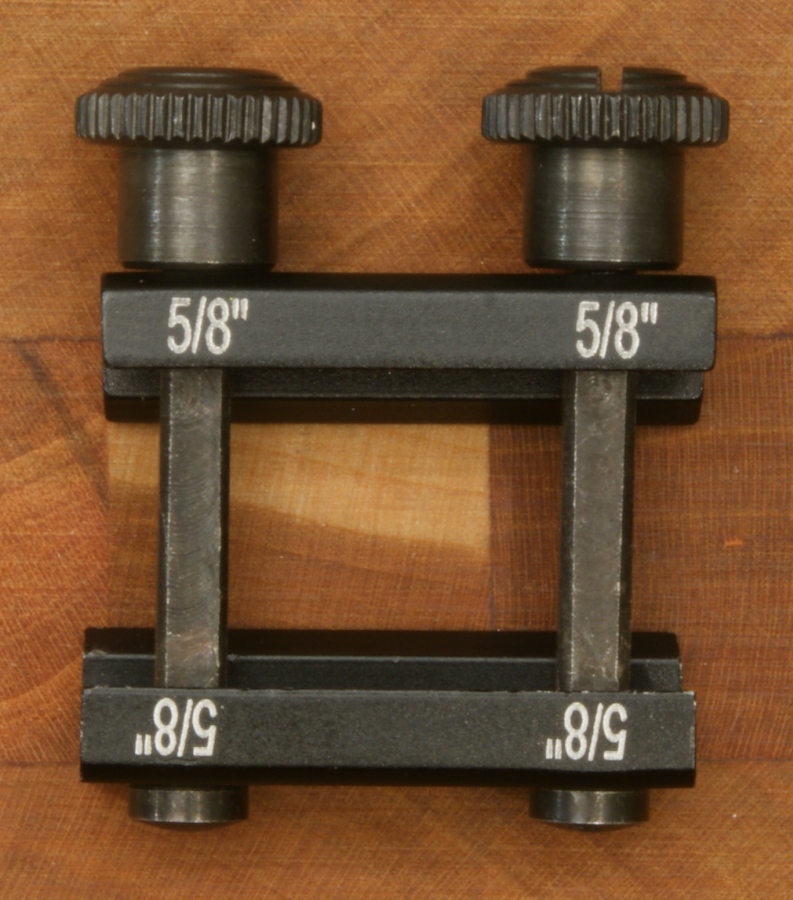
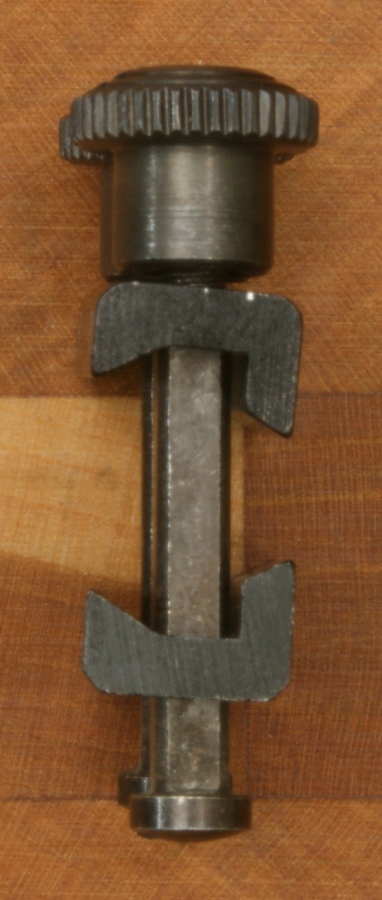
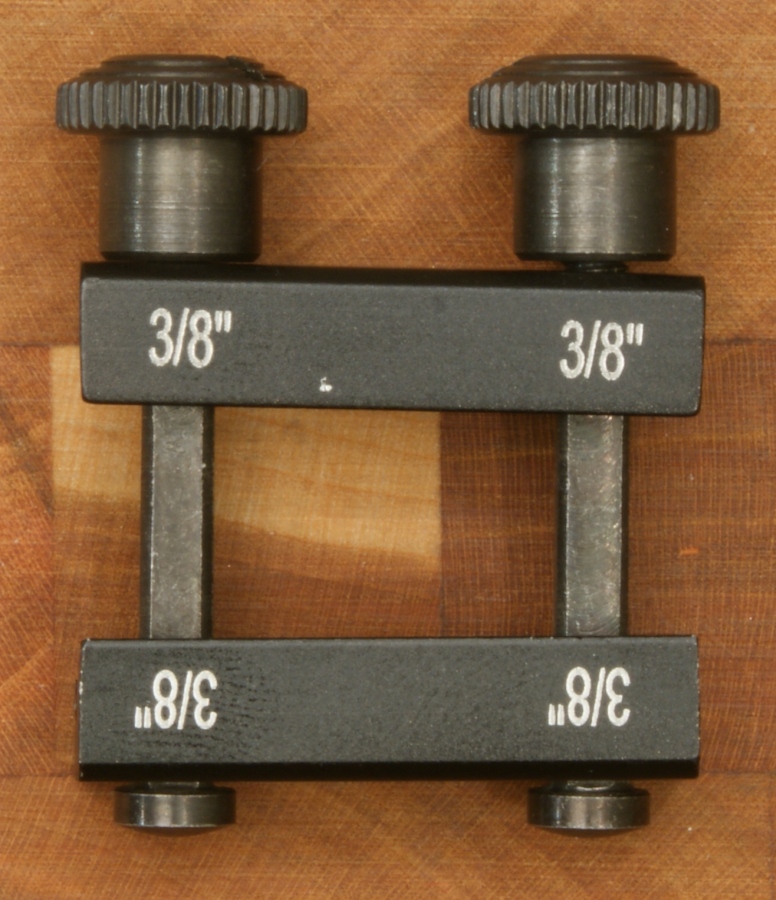
Figure 36
Tripod Mount
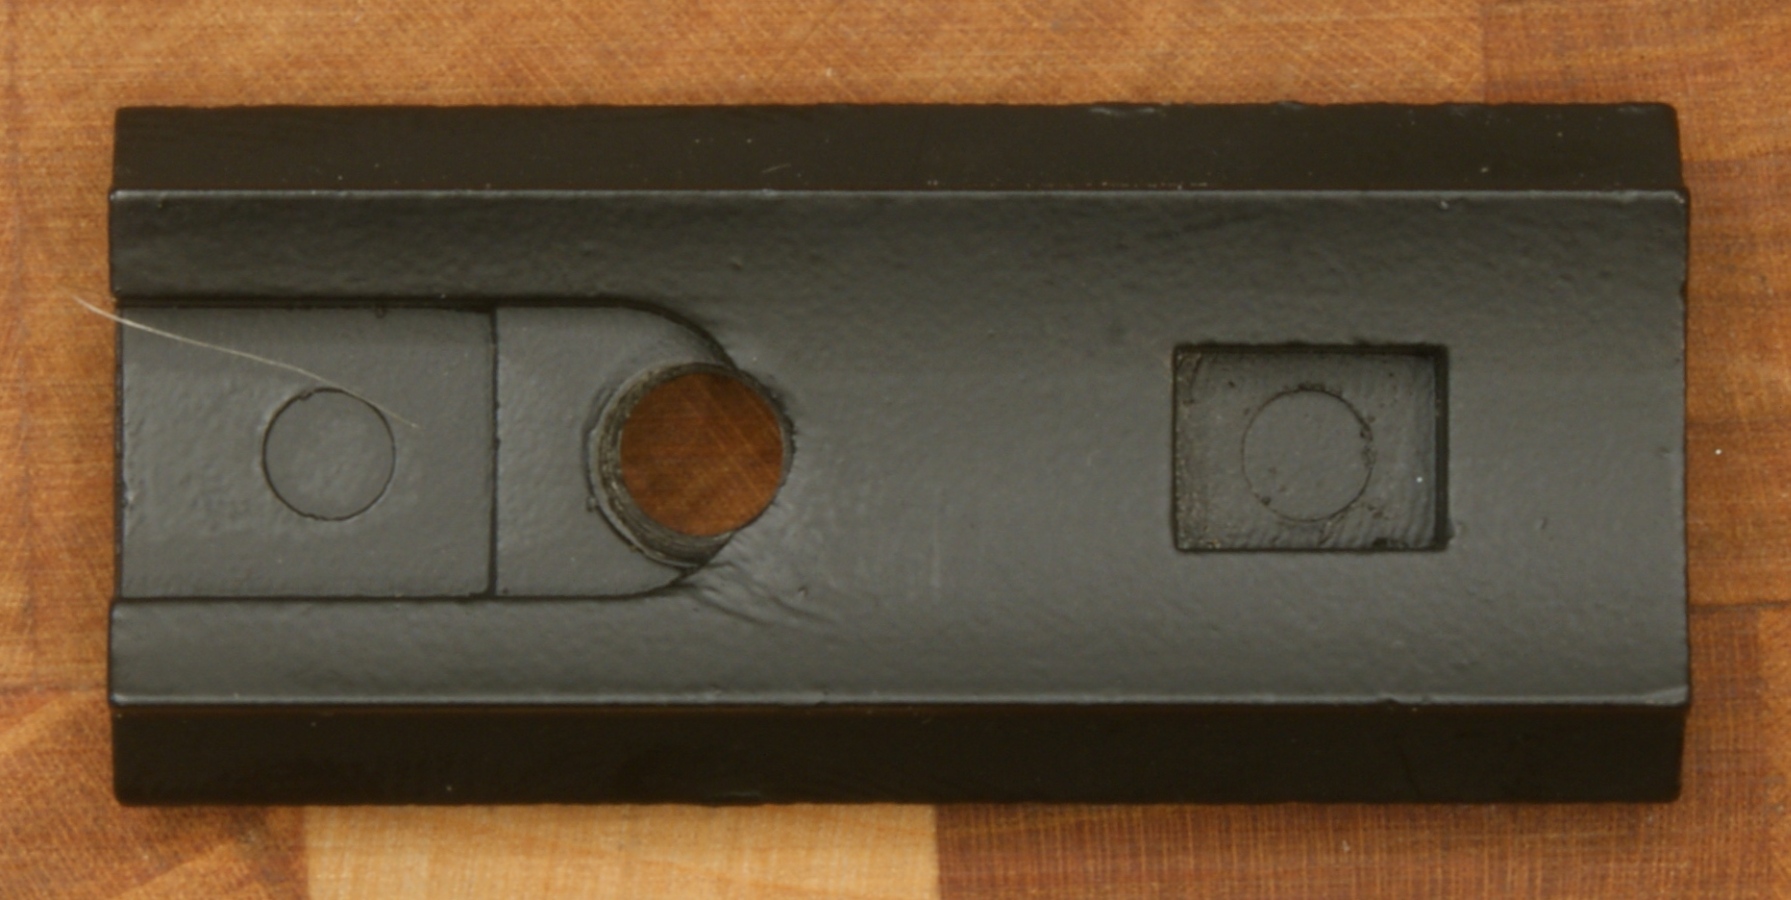
The Tripod Mount is a one piece aluminum Picatinny rail measuring 1.86" in length. For some reason the lower portion of the rail has some curvature which is not needed for mounting on a tripod. This curvature indicates that this part may be an adaptation of a current product to meet this Tripod Mount purpose.
Figure 37
Figure 38
Figure 39
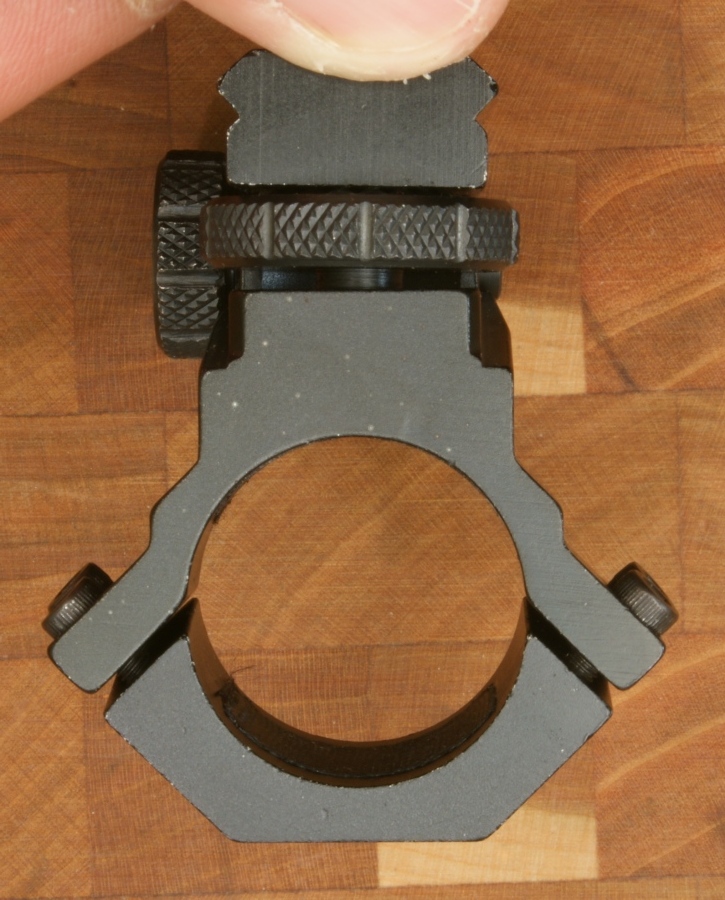
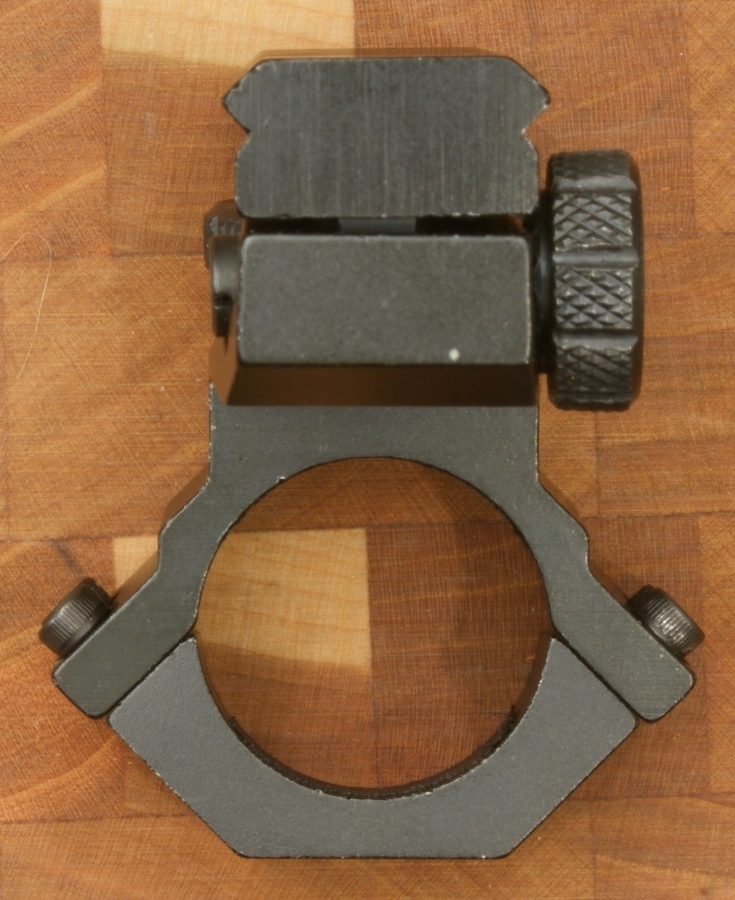
Adjustable Scope Mount
The Adjustable Scope Mount is used to provide elevation and windage corrections for the Laser Designator so that the center of the laser beam lines up with the center of the cross hairs on your scope. The lower ring portion of the mount attaches around a 1" tube scope body. The upper Picatinny rail is used to mount the Laser Designator the same way as the Tripod Mount.
Figure 40
Figure 41
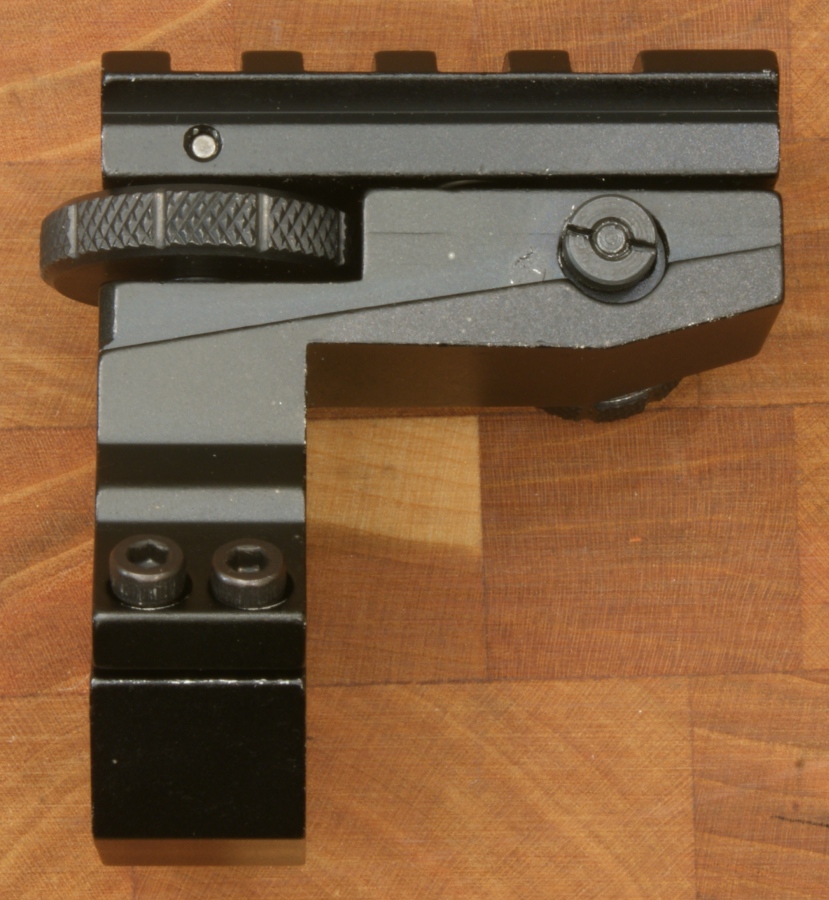
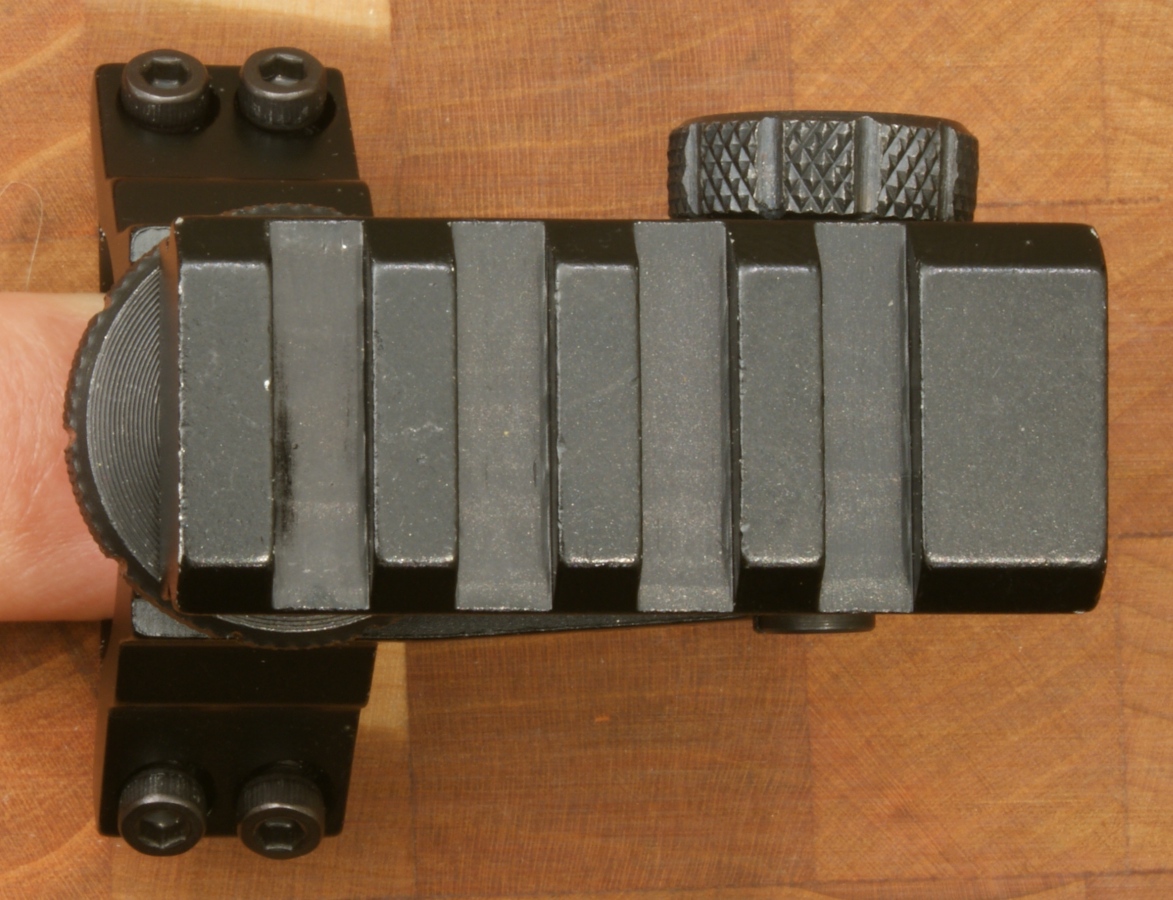
Elevation is adjusted by the thumb nut over the ring portion of the mount while windage is adjusted by the thumb nut on the side of the mount.
Figure 42
Figure 43
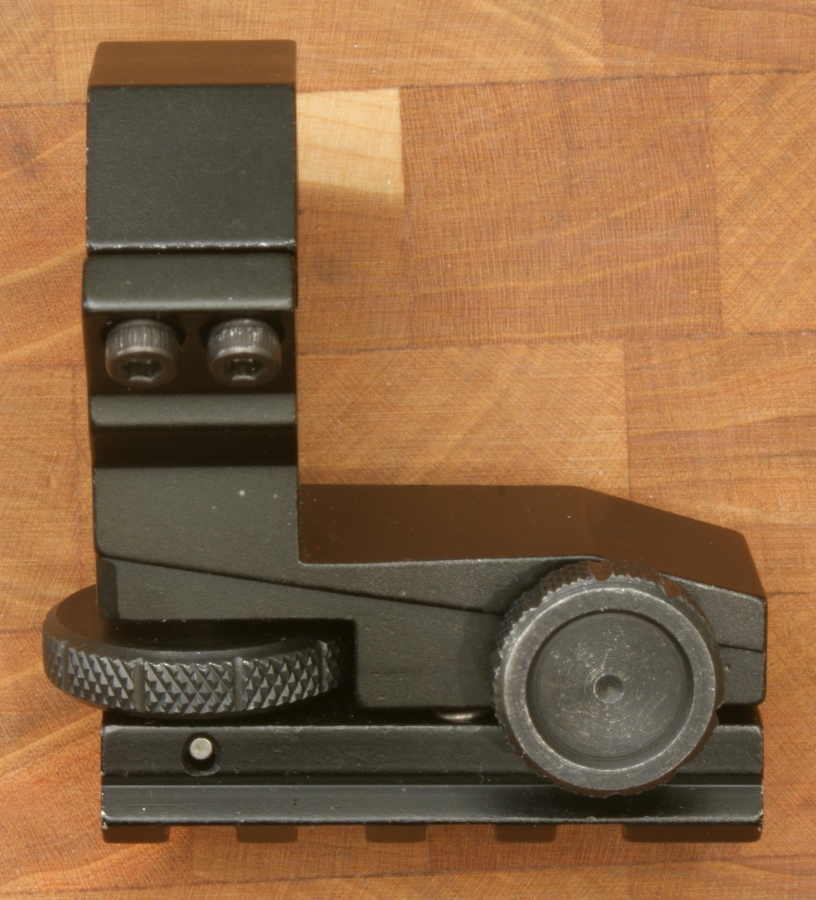
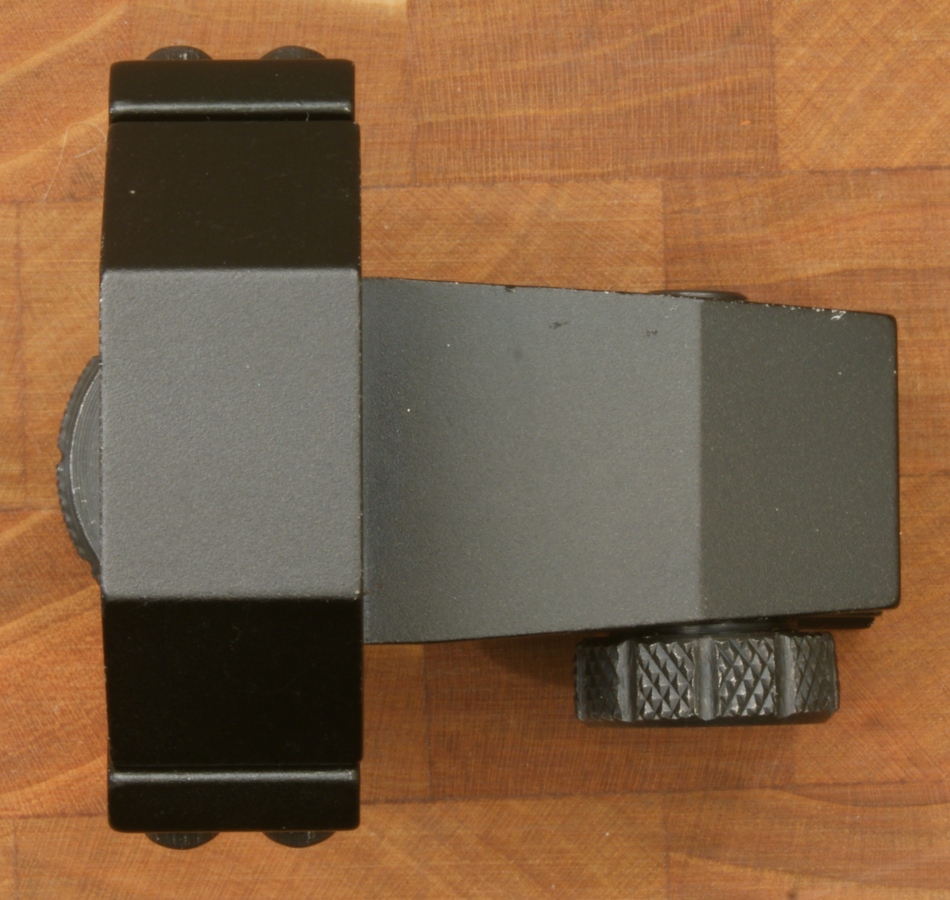
Figure 44
Figure 45
Weights
The weight of the ND3x50 Subzero Laser Designator with push button tail cap and batteries installed was 16.40 ounces. The specifications state a "Tube Weight" of 13.68 ounces. Even if I subtract the weight of the two batteries (1.10 ounces), the actual weight is 15.30 ounces. I believe the 13.68 ounces specification weight is either in error or they are describing the tube as something other than the actual Designator. The mounting hardware weighed in at 6.20 ounces. This would give a minimum installed weight on a rifle of 22.60 ounces (1.41 pounds).
Figure 46
Figure 47

If you choose to install the pressure mounted switch, you will add about 0.7 ounces to the installation. 0.7 ounces is the difference between the weight of the two switches.
Figure 48
Figure 49

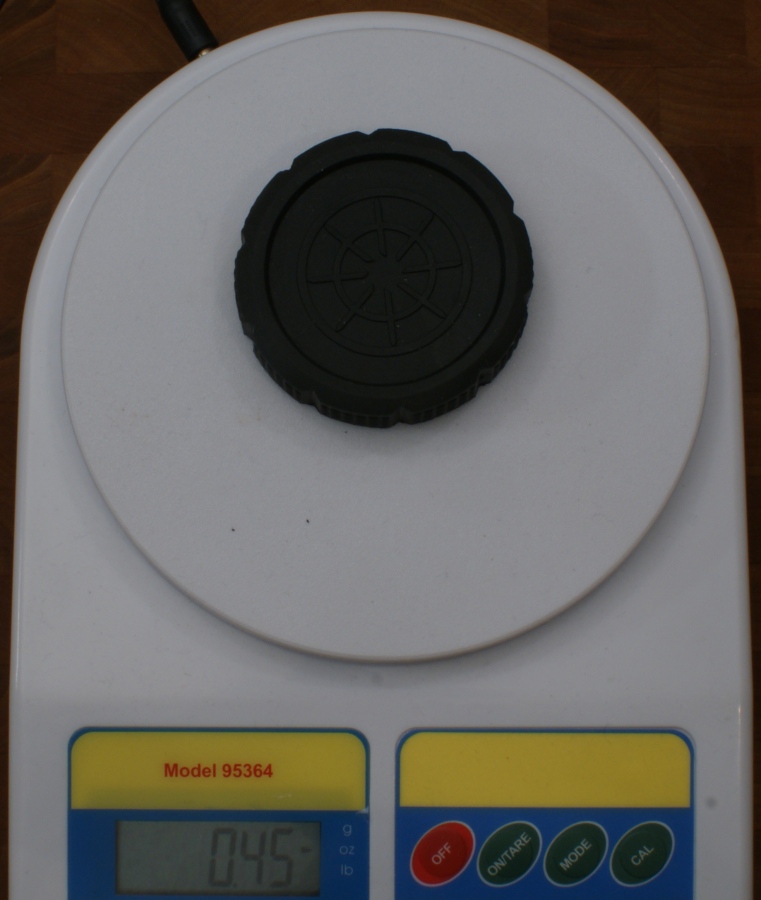
The lens cap weighed in at 0.45 ounces.
Figure 50
Tripod Installation
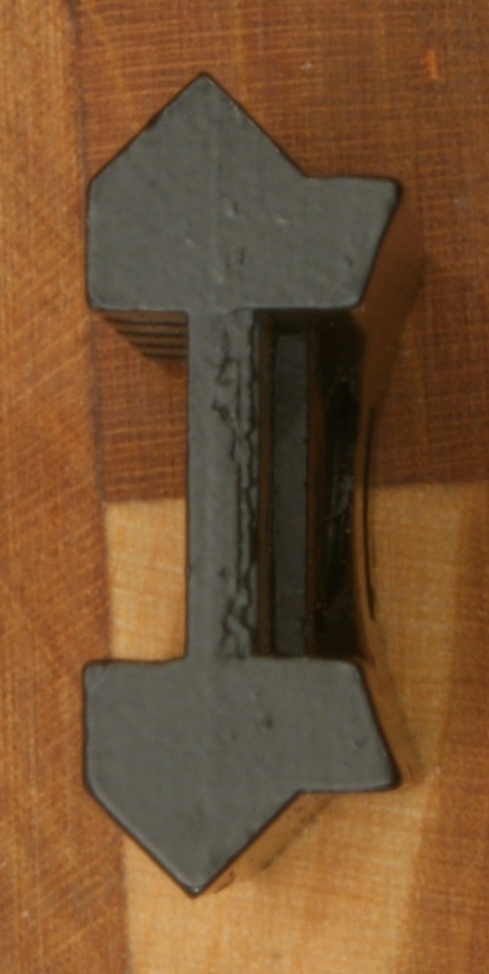
Before you can mount the Laser Designator on anything, you must first install the Weaver-Style mount on the Designator. Since the best place to install a single mount is always through the center of gravity (CG), I performed a quick check. The CG is shown below with the Designator balancing on a short beam.
Figure 51
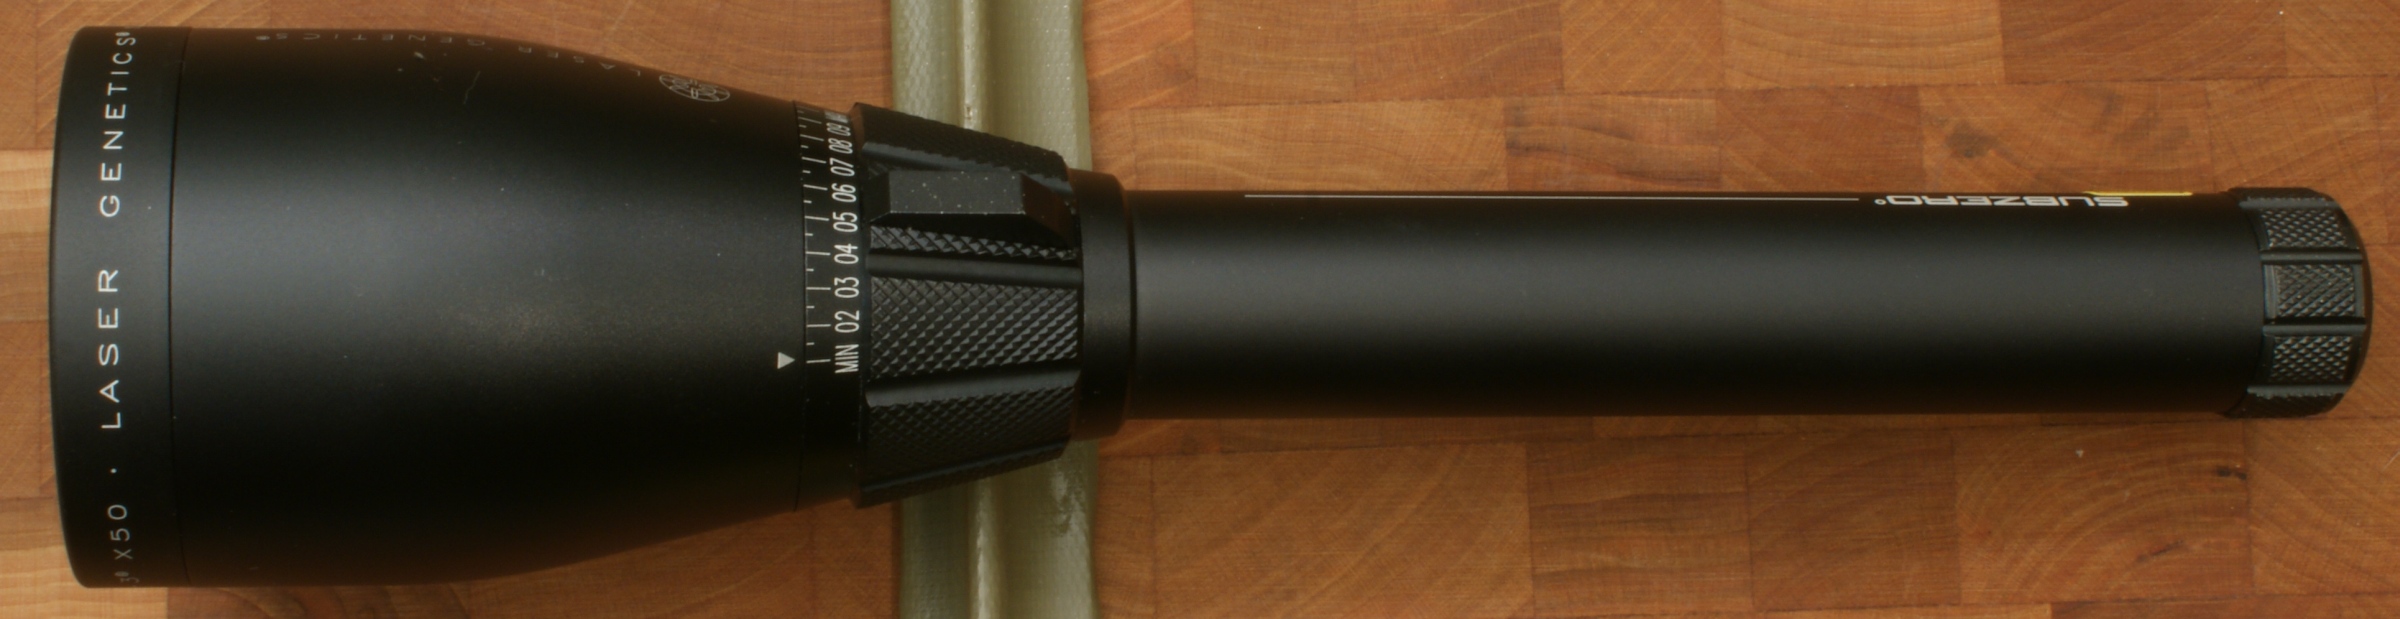
Since I can not install the mount on the collimator ring, I installed it as close as possible. This minimizes the extra forces exerted on the mounts.
Figure 52

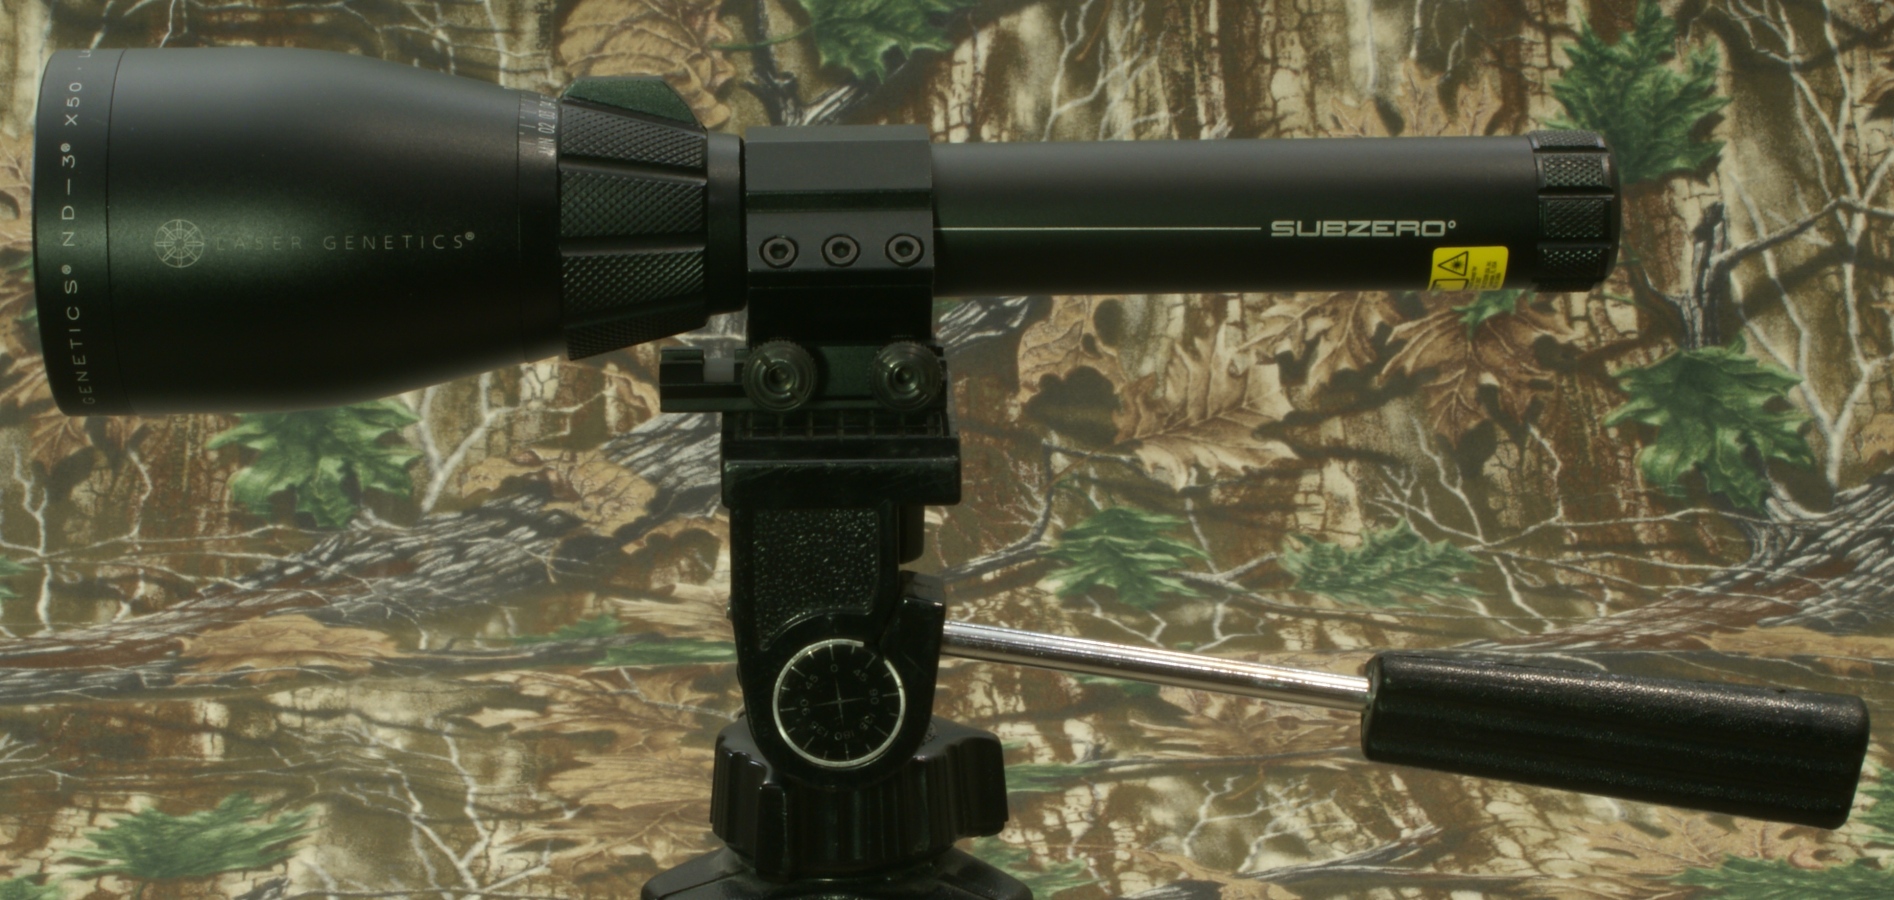
I installed the Tripod Mount to the bottom of the Weaver-Style mount just like you would with any Picatinny rail device.
Figure 53
Next I screwed the tripod mounting screw up into the hole in the Tripod Mount. All was good, but I believe the curvature on the bottom of the Tripod Mount (see Figure 38) causes the threaded hole to be slightly higher than normal which creates a minimum number of threads to engage the Tripod Mount.
Figure 54
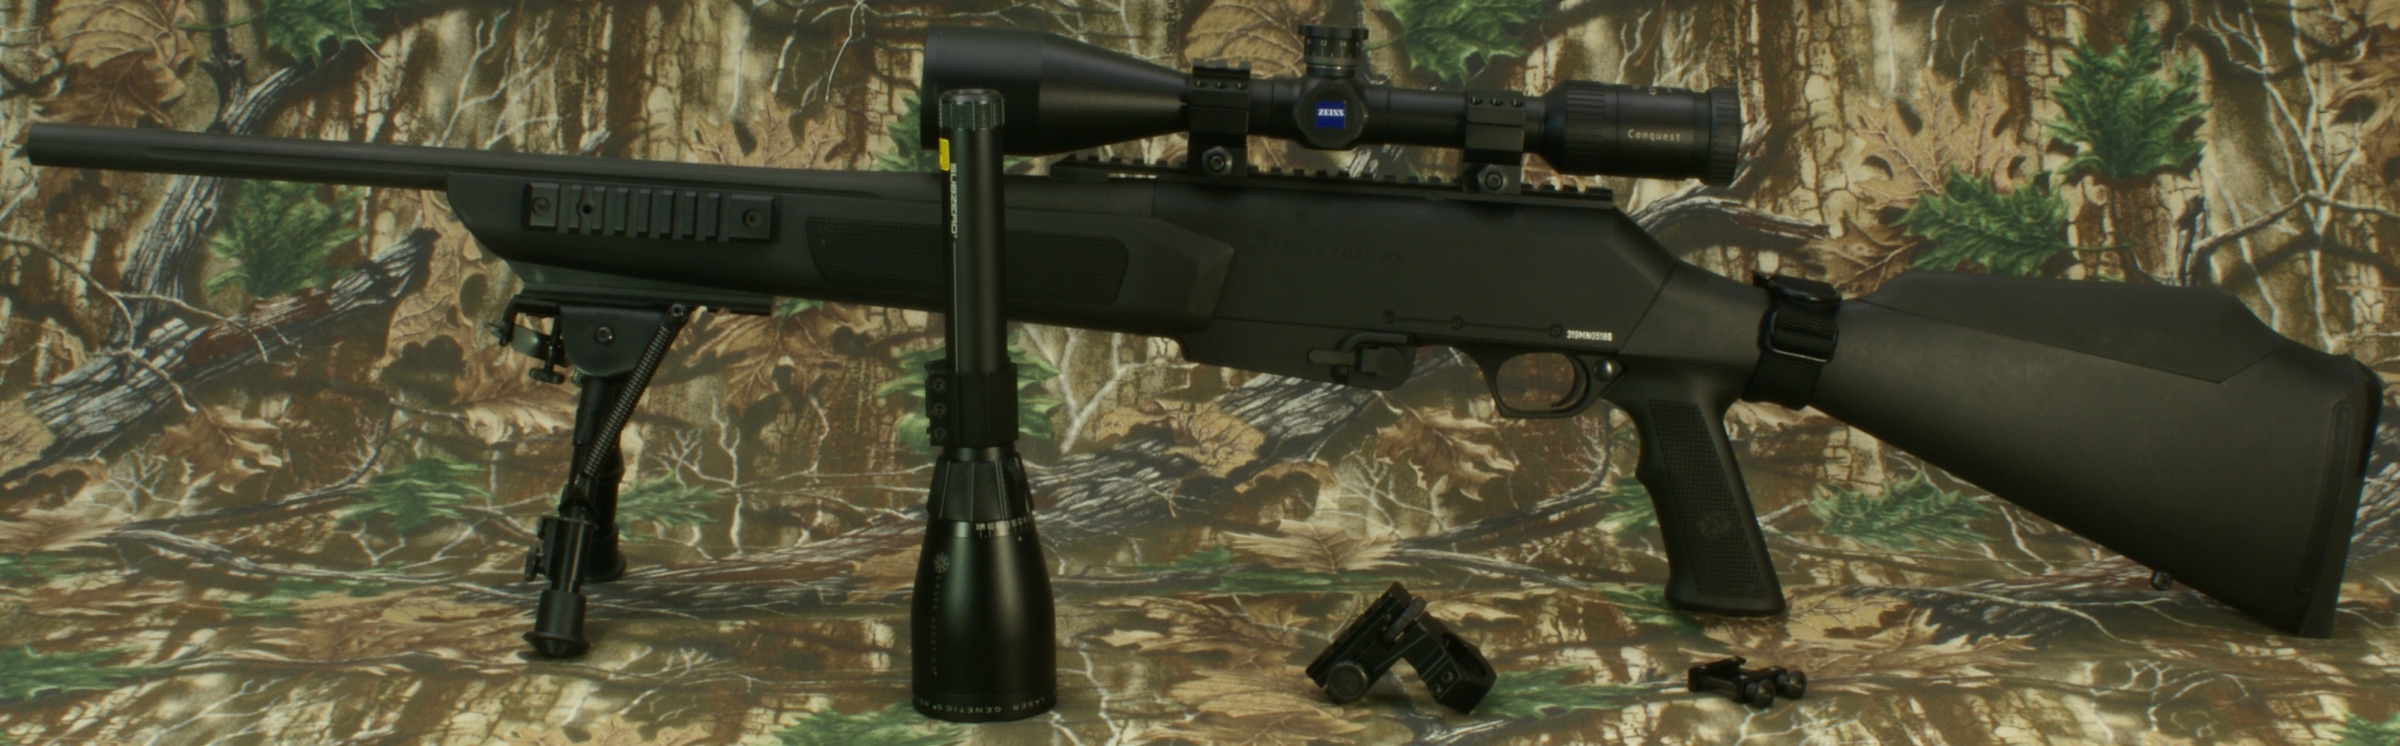
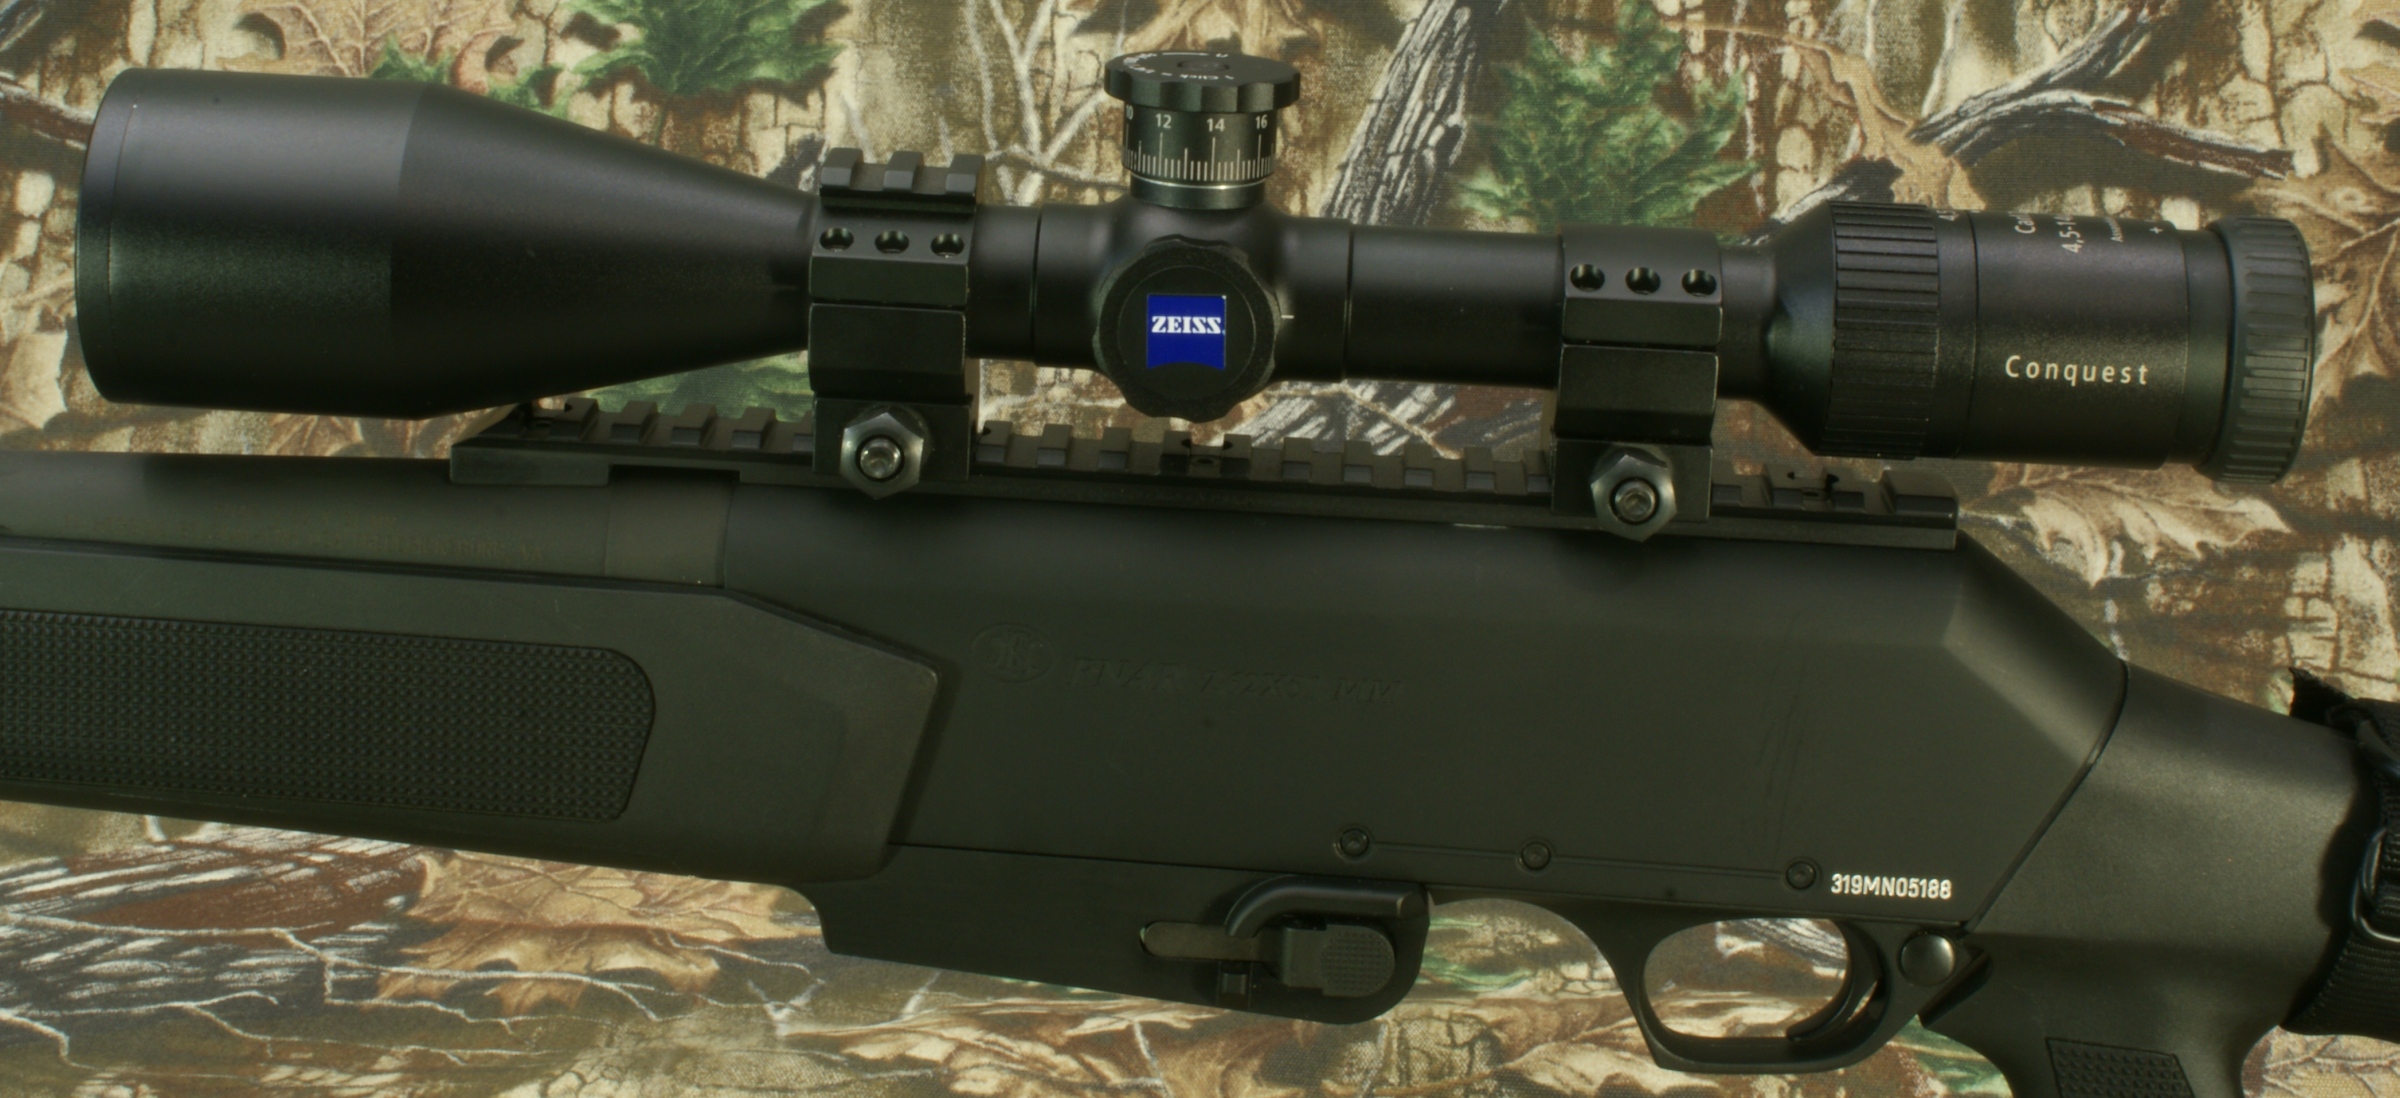
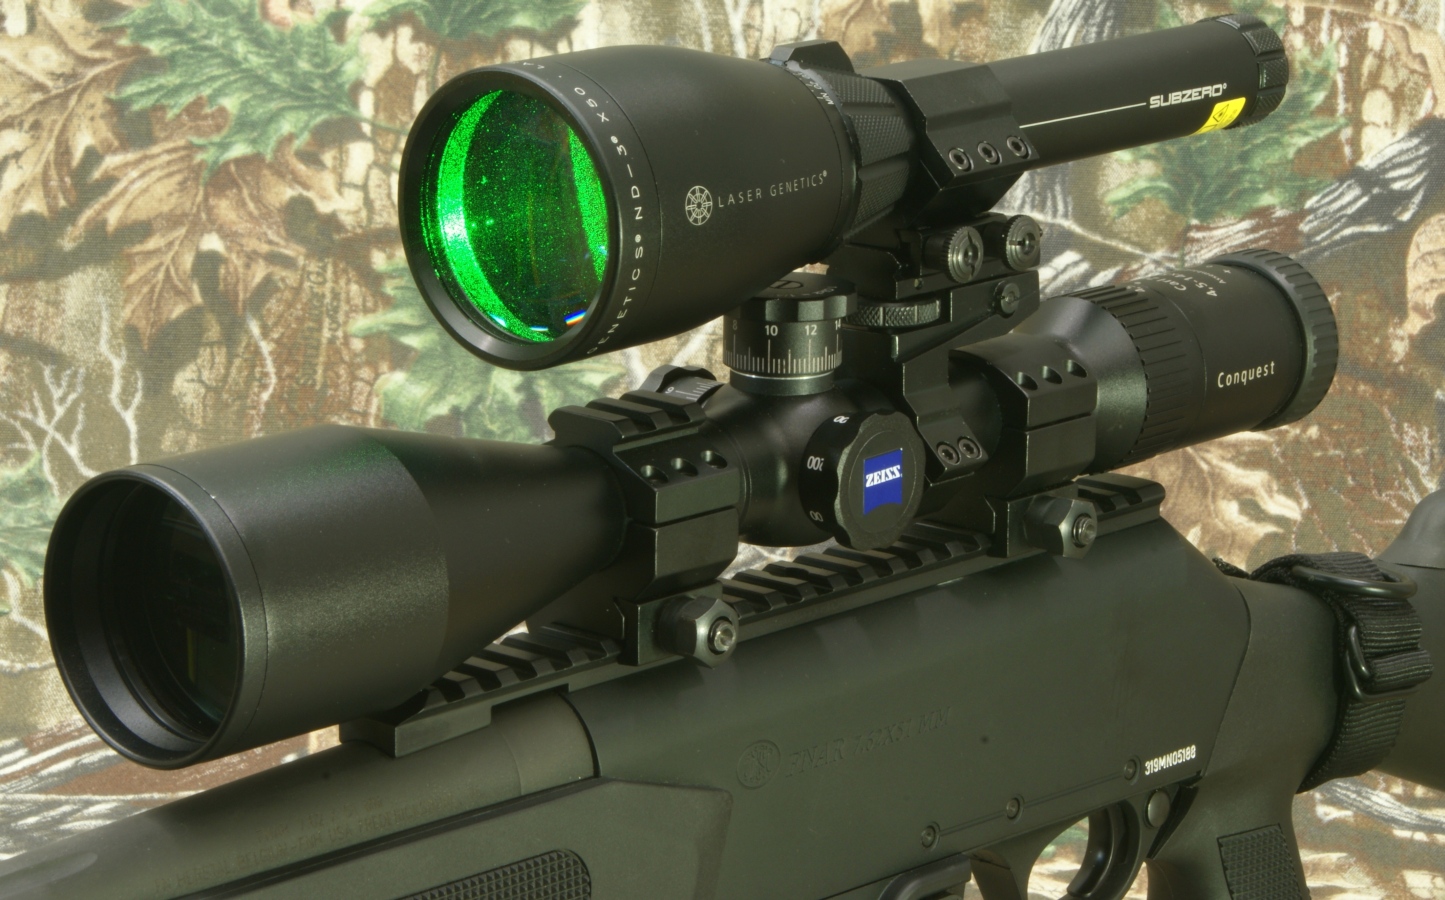
Scope Installation
I decided to install the Laser Genetics ND3x50 Subzero Laser Designator on my FNAR rifle which has a Zeiss Conquest 4.5-14x50mm scope. One of the first things you will encounter when installing the mounts on your scope is that your scope must have a 1" tube. If your scope is not a 1" tube scope, you will have to work out a slightly different mounting arrangement. I think it would be good if Laser Genetics would provide a different mounting configuration or parts to allow the Designator to be installed on both 1" and 30mm tube scopes.
Figure 55
Once you have decided which rifle/scope to install the Laser Designator on, you will have to figure out the best location on the scope. Some of the factors that impact where you install the Designator will be free tube length forward and rear of the turret housing and the width of your rings. Also, you may have to consider turret height and objective lens diameter. In my case, I was not able to install the Adjustable Scope Mount forward of my turret housing due to the minimum free space because of my wider style rings. A forward location would have been my preferred location so that I didn't block the view of my elevation turret, but this was not possible. Fortunately there was clear space behind the turret housing.
Figure 56
Knowing that the lens diameter of the Designator would need to be forward of the elevation turret for clearance, I installed the Adjustable Scope Mount as close to the turret housing area as possible.
Figure 57
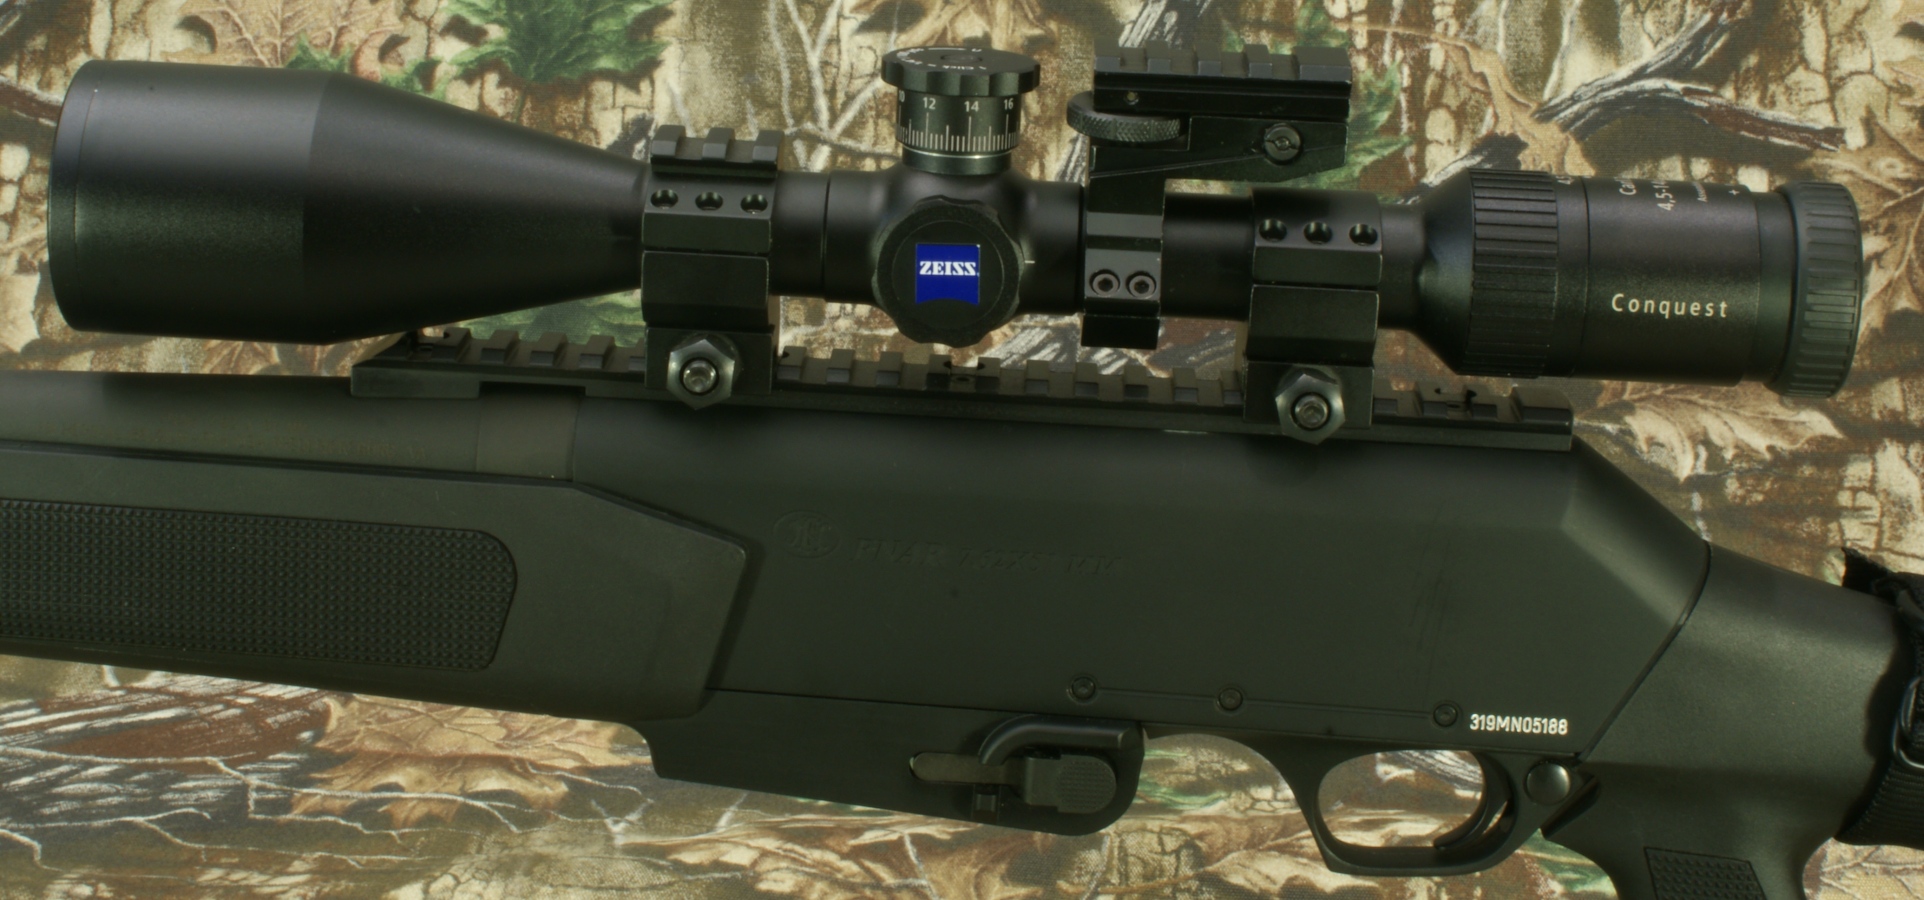
Next I placed the Laser Designator (with Weaver-Style Mount installed) on the Adjustable Mount in the forward most position on the rail as shown below. Luckily there was clearance between the turret and Designator. If this would have been an issue, I would have loosened the Weaver-Style Mount and move the Designator further forward in the mount.
Figure 58
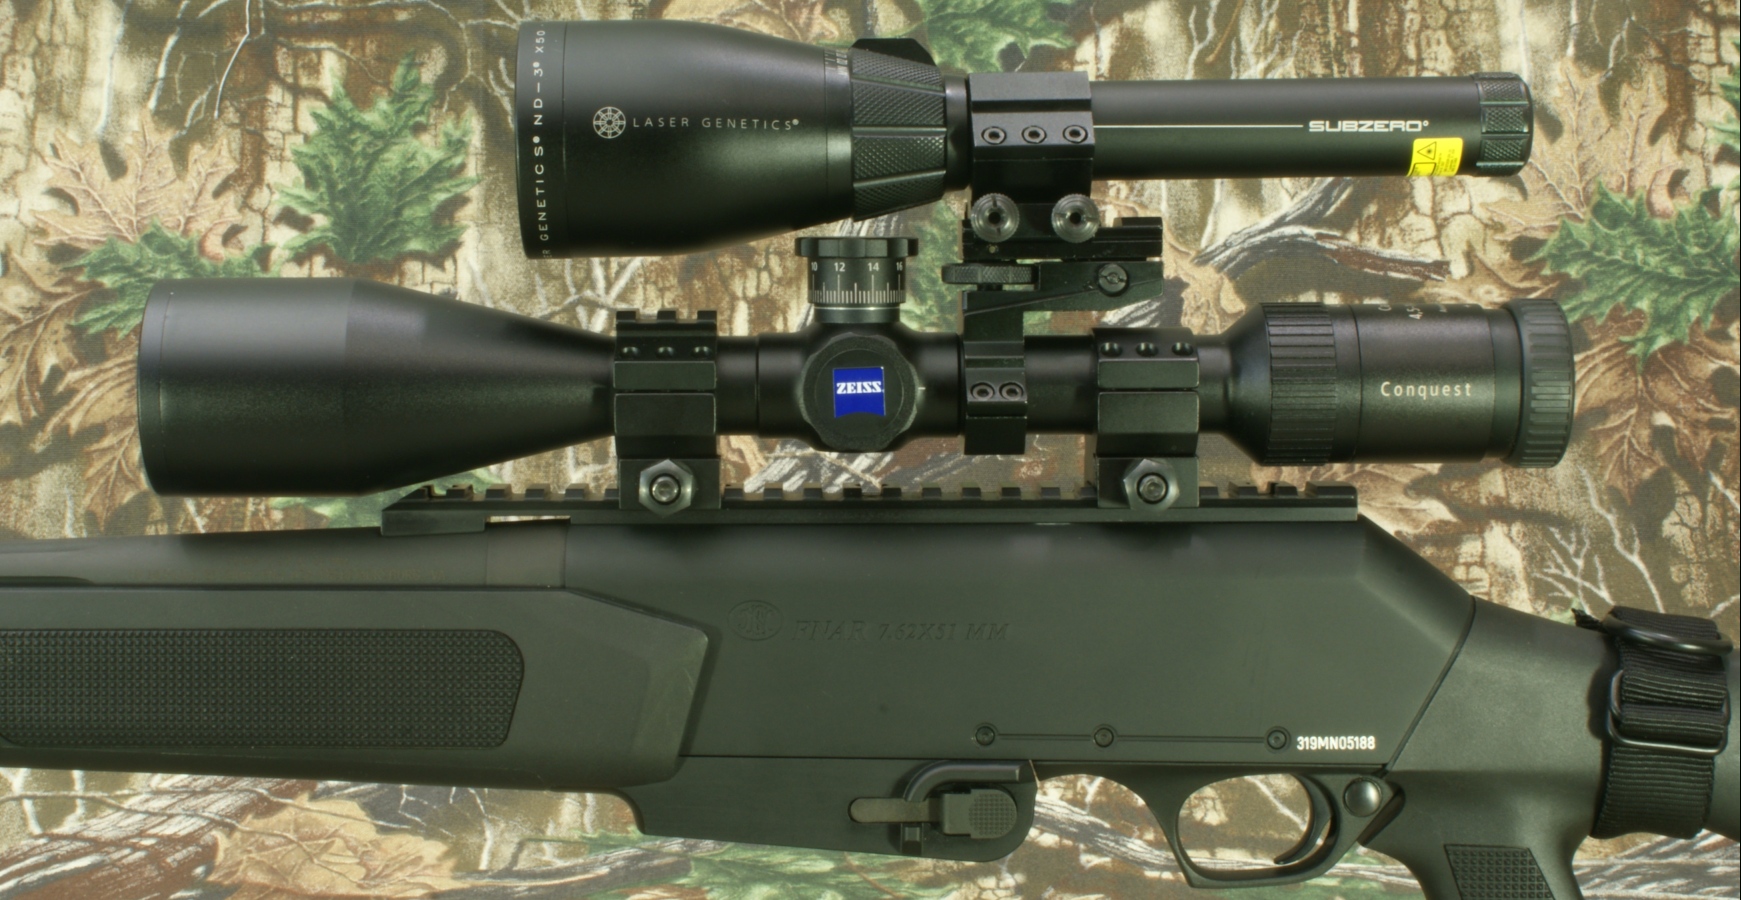
The next photo shows an overall view of the setup. I would have preferred the Laser Designator mounted forward of the turret housing, but overall I was pleased with the installation.
Figure 59

After installing the Laser Designator, I tested the sturdiness of the mount by pushing side to side and twisting the Laser Designator. Overall it was firmly mounted, but there was some free play in the adjustable portion of the mount. As a note, this installation is opposite of that shown in the instruction manual but matches the images at the Laser Genetics website. In the instruction manual, the adjustable mount is shown on the Designator.
Figure 60
Beam Diameter
I placed the Laser Designator 12" from the wall (measured from the lens surface) and then measured the projected beam diameters at the minimum and maximum collimator settings. The high intensity (primary) beam measures 50mm and 132.5 mm. This 132.5 mm at the widest (maximum) setting was much less than the 320 mm stated in the specifications. The beam does have a much lower intensity band around the high intensity area. At the widest setting, this lower intensity band did measure about 320 mm in diameter, but I feel this additional area of illumination is of little real value. This low intensity band is visible at the one foot distance as shown in the photos below but quickly fades as the distance increases.
Figure 61 - Min
Figure 62 - Max

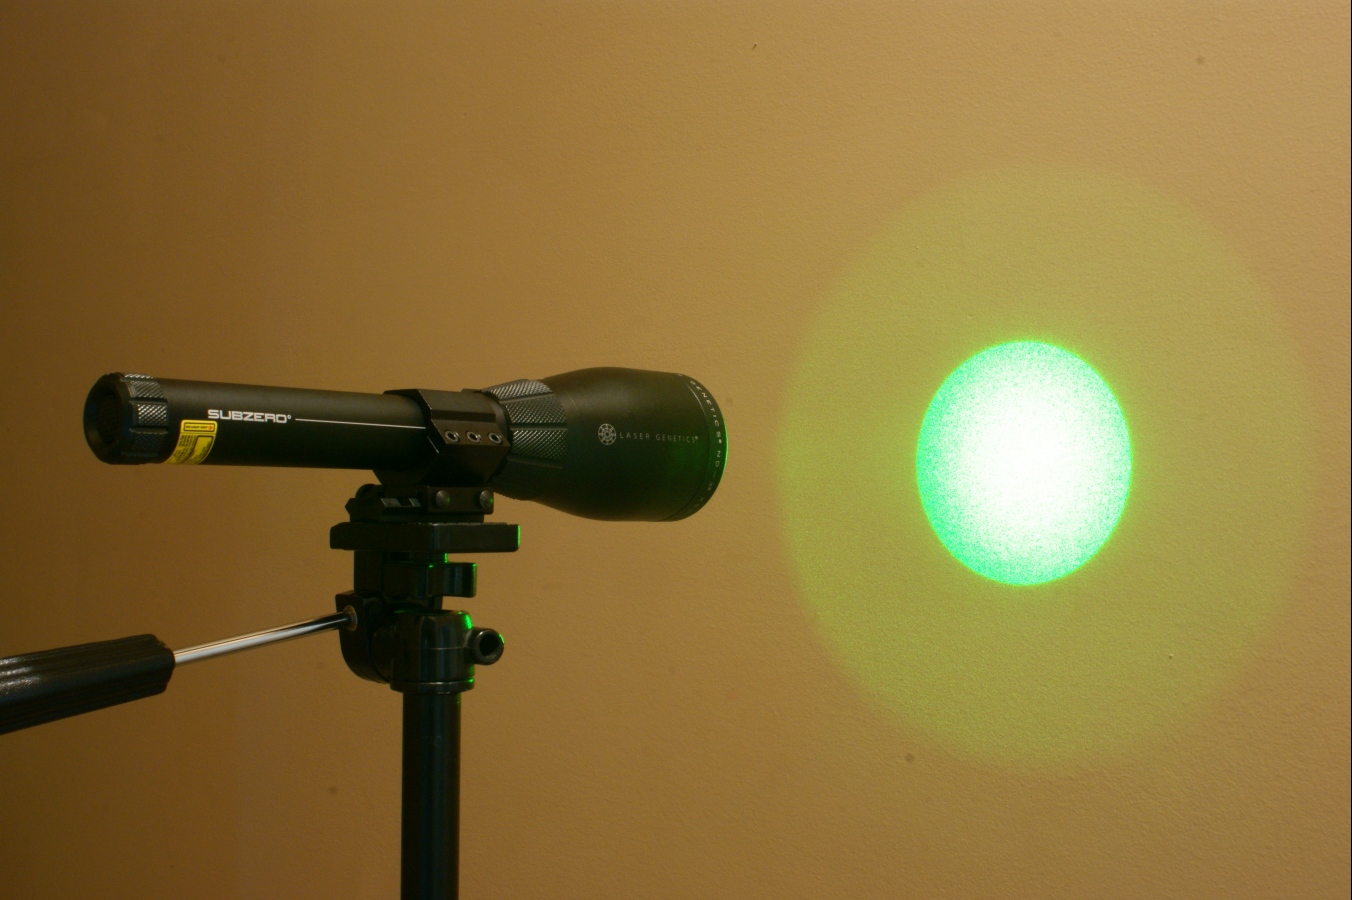
Figure 63 - Min
Figure 64 - Max

Next I decided to get an idea on the beam diameter at different distances to get a feel for the illuminated field of view. I took the measurements in the table below. First you will notice that the minimum beam size is nearly constant (50 mm) at close ranges. When I backed away at 25 feet I was able to measure a slight increase in minimum beam diameter and then even more at 50 feet. The maximum beam diameter increased proportionally with each additional foot of distance (i.e. at 3' the beam size was 3 times that of 1'). Keep in mind that as the beam diameter increases with distance, you have the same amount of light that must cover a larger area. For example, the difference in beam density at 1 foot compared to that at 3 feet with the maximum beam setting is about 1:5 meaning that there is 5 times more area to cover with the same amount of light. Since the area calculation is πD2/2 and the diameter (D) is a squared term, the coverage area increases greatly as the distance changes.
Table 1
| Distance (ft) |
Min Size (mm) |
D-Min (Min-50) (mm) |
Max Size (mm) |
D-Max (Max-Min) (mm) |
Factor (D-Min/Distance) (mm/ft) |
Factor (D-Max/Distance) (mm/ft) |
| 1 | 50 | 0 | 132 | 82 | - | 82 |
| 2 | 50 | 0 | 215 | 165 | - | 82.5 |
| 3 | 50 | 0 | 297 | 247 | - | 82.3 |
| 7 | 50 | 0 | 628 | 578 | - | 82.6 |
| 25 | 52 | 2 | - | - | 0.08 | - |
| 50 | 62 | 12 | - | - | 0.24 | - |
Since the collimator is infinitely adjustable between the minimum and maximum setting, you are able to adjust the field of view and beam intensity to your needs. This adjustability is one of the great features of the Designator.
Low Temperature Check
To evaluate how the ND3x50 Subzero Laser Designator performed at low temperatures, I placed the Designator in the freezer for about 4 hours. When I removed it from the freezer, moisture in the air immediately started to condense and freeze on the surface. The surface temperature measured 4° F. Unfortunately since it is early summer, this was the best I can do for a low temperature check since I don't have access to a walk-in freezer.
Figure 65
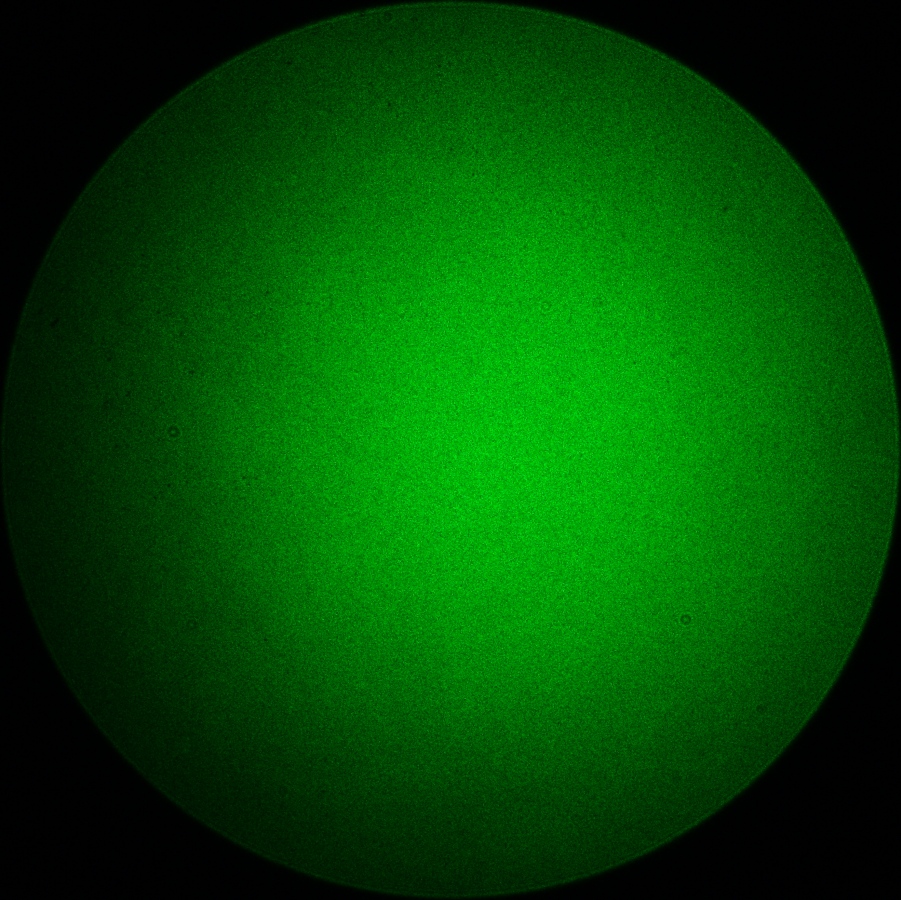
My intent for this check was to try to measure a reduction in beam intensity at lower temperatures. To do this I used the light meter in my digital camera to provide an indication if there were a reduction in light intensity. I set up the camera so that it would automatically vary the shutter speed only to give the same exposure. The photo below was my initial baseline photo prior to putting the Designator in the freezer. In this case, the temperature was 77° F and the shutter speed was 1/5 second.
Figure 66 : 77° F, 1/5 Second
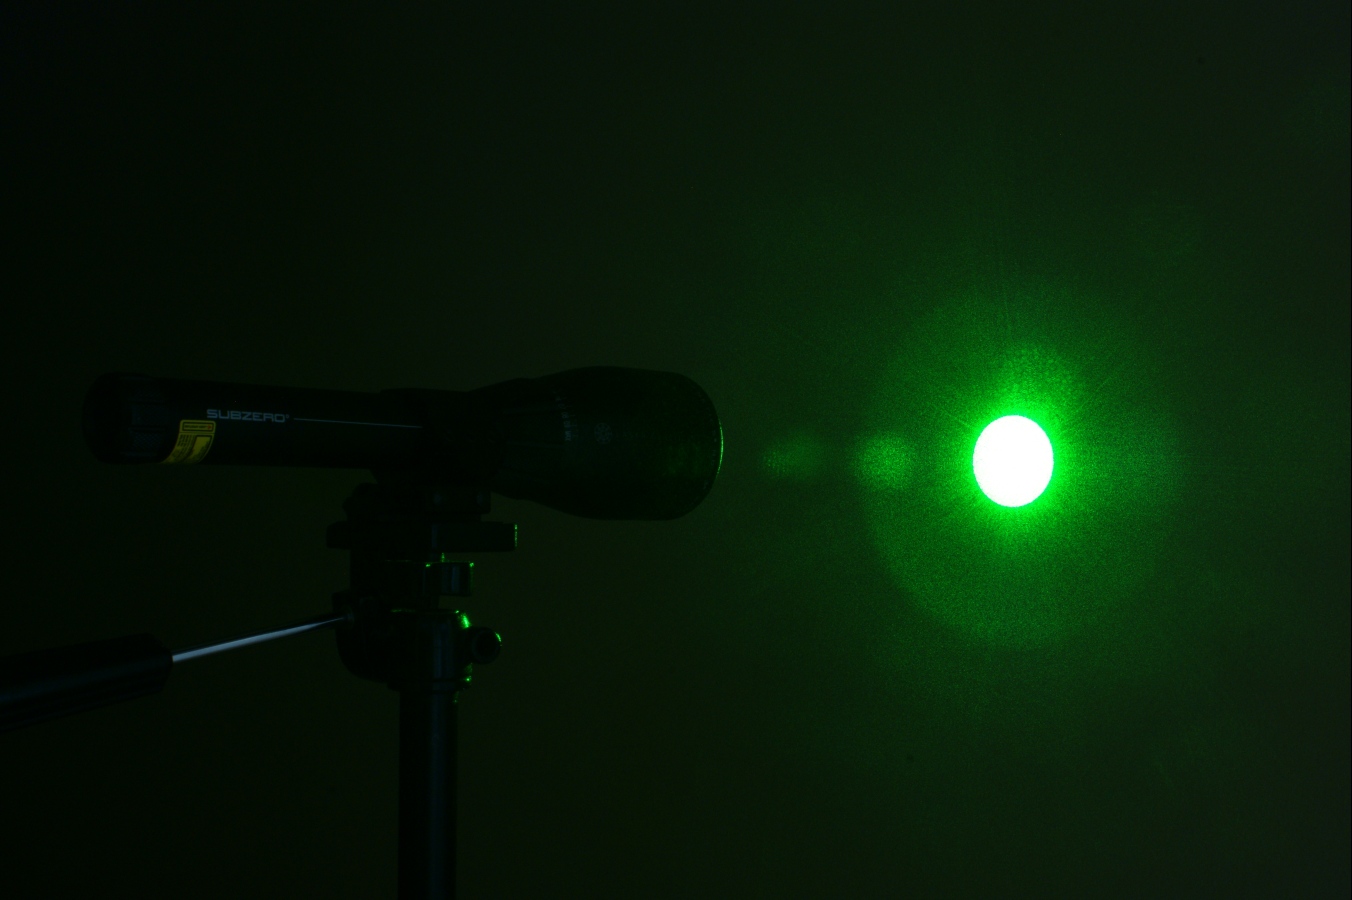
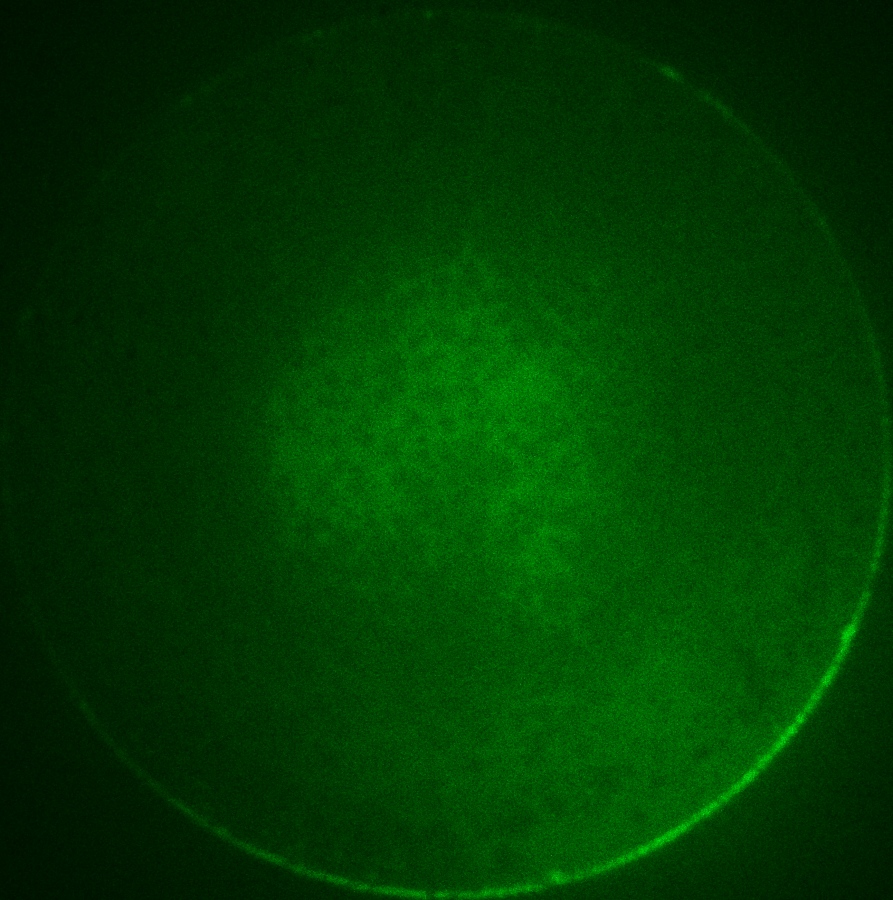
This next photo shows my first measurement once I was able to get the Designator out of the freezer and set up on the tripod. The external temperature of the Designator was 24° F and the exposure time took 1.6 seconds. The majority of darkness was due to the lens frosting, but there was some reduced intensity of the beam. As a note, the Designator did work when I removed it from the freezer while the temperature was 4° F.
Figure 67 : 24° F, 1.6 Second
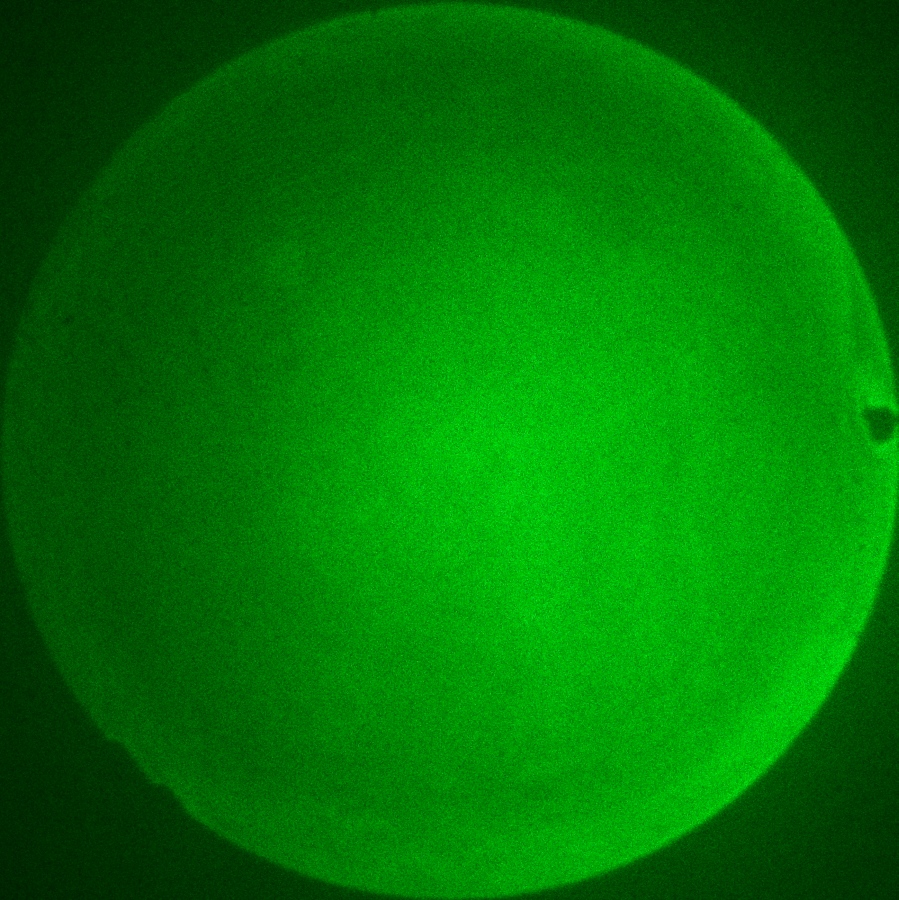
This photo shows the lens after I made an attempt to remove the frost with the lens cloth. I was able to remove the thick frosty areas, but the moisture in the air continued to condense on the lens. The surface of the Designator measured 38° F and the exposure time was 0.8 seconds.
Figure 68 : 38° F, 0.8 Second
The next three photos show temperatures and exposure times all the way up to the original exposure time of 1/5 second. As the amount of moisture condensing on the lens decreased, there was less light dispersion outside of the high intensity area of the beam.
Figure 69 : 45° F, 1/2 Second
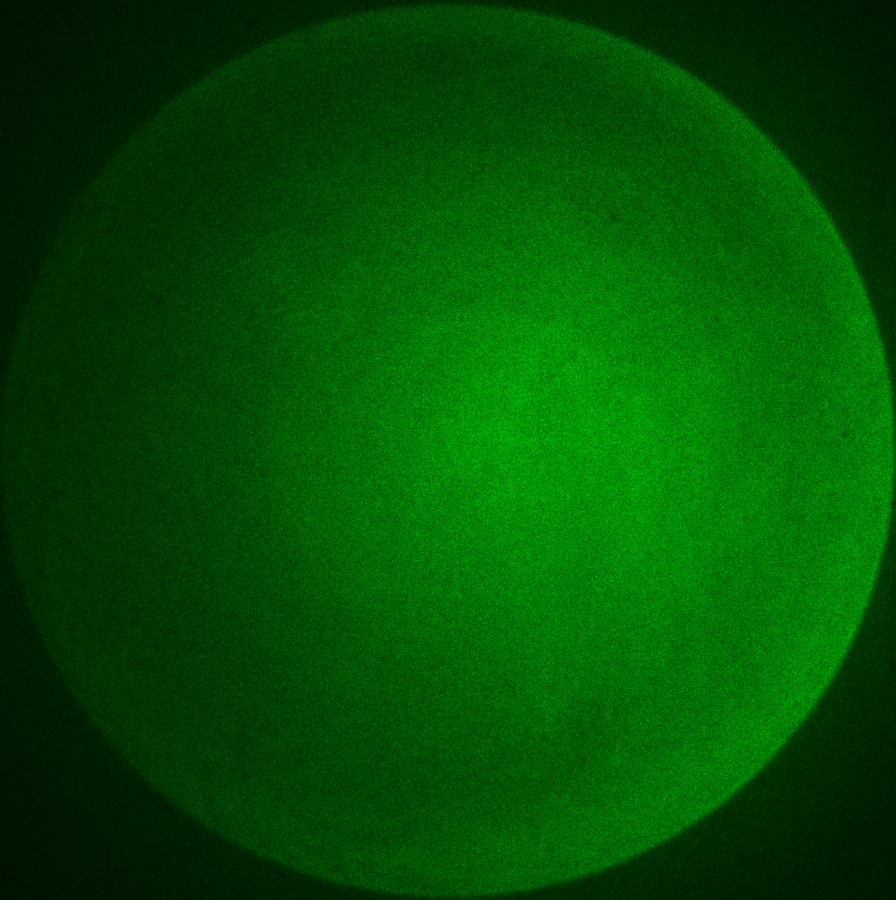
Figure 70 : 59° F, 1/3 Second
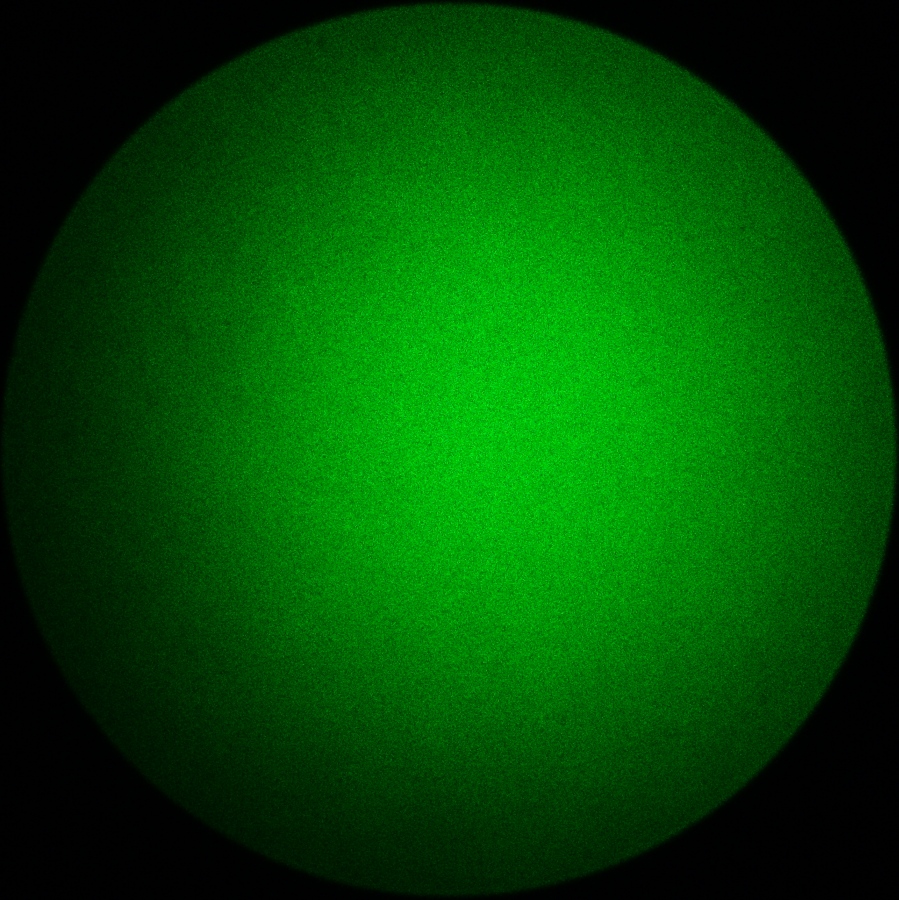
Figure 71 : 66° F, 1/5 Second

What does all this mean? To truly evaluate this Subzero version of the ND3x50 Laser Designators, you need to be doing it under real conditions. The air temperature and Designator temperature need to be the same so that you don't get any frosting or condensation build up on the lens which reduces/diffuses the light beam. I do think there was some loss of intensity of light and could believe it would be as much as 50%. This statement is based on the exposure time difference between 66° F (1/5 sec) and 59° F (1/3 sec) which had no condensation issues. Although I don't have first hand data with the original Designators, I do believe the low temperature capabilities of this model to be much greater than what I have read on the internet about the non-Subzero versions of the Laser Designators.
Front Yard Evaluation
I installed the Laser Genetics ND3x50 Subzero Laser Designator on my FNAR rifle as previously shown in this review and headed out to my front yard at night to take some photos through the scope at various distances.
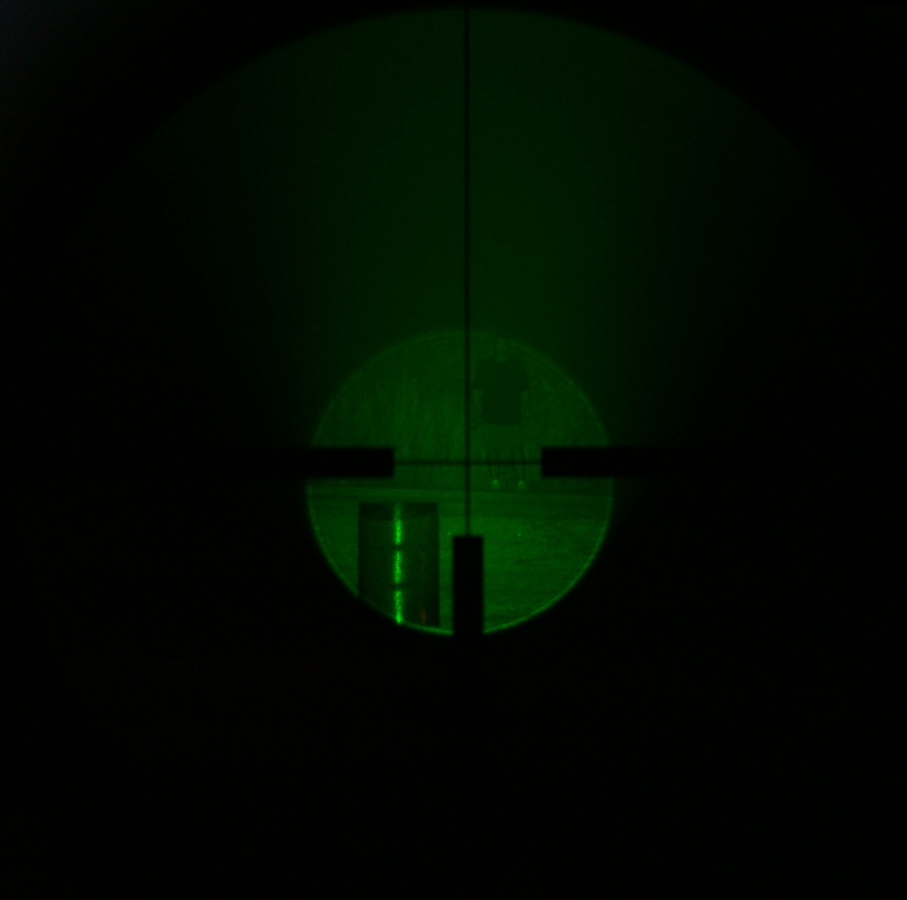
This first photo is at 36 yards with my scope on 14x power and the collimator adjusted to fill the field of view of the scope.
Figure 72 - 36 yards

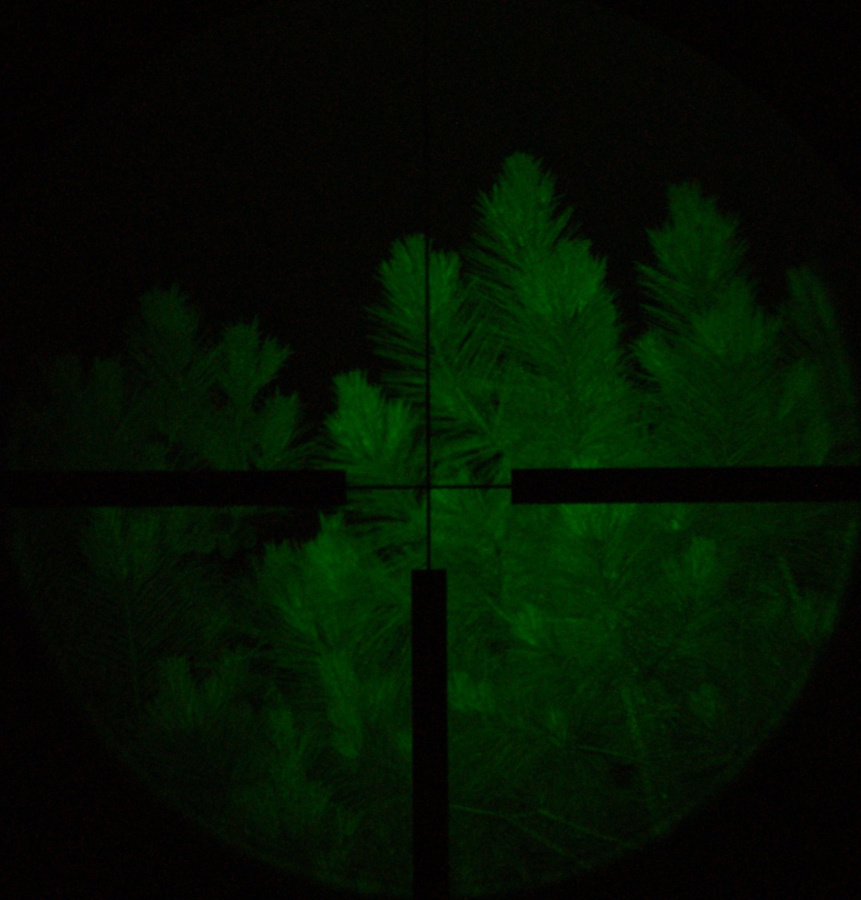
This second photo is at 85 yards and is looking at the tree tops. Again, the scope is at 14x and the collimator is adjusted to fill the field of view. In this photo you can clearly see the pine needles.
Figure 73 - 85 yards
This third photo is at 181 yards with the scope at 14x. I have adjusted the collimator so that the beam is smaller than my field of view to give a higher intensity illuminated area on the target. The target area is a tree top and you can see small branches within the photo. Since auto focus didn't work with my setup, this photo is slightly out of focus so the clarity is less than what I could see looking through the lens.
Figure 74 - 181 yards
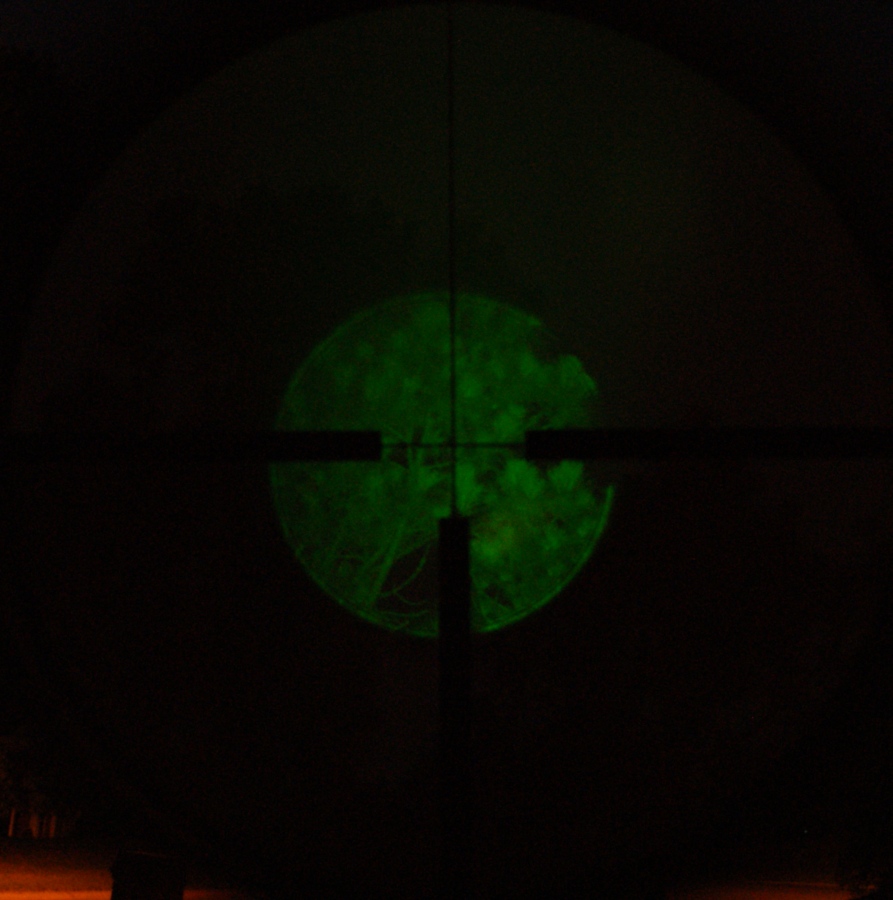
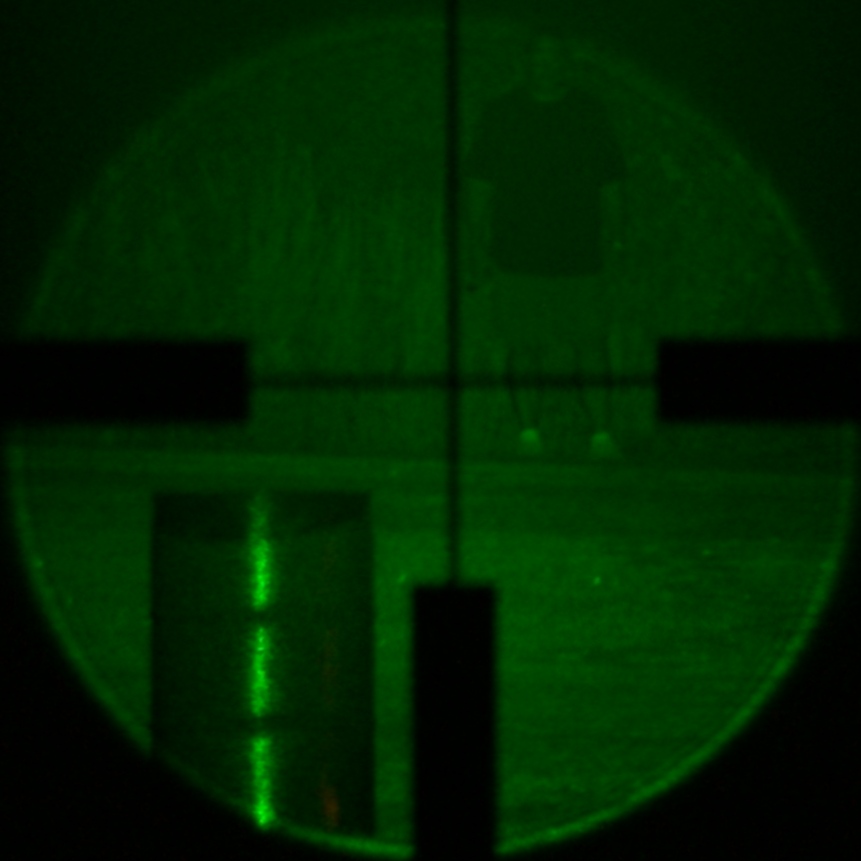
Since I couldn't get the range needed to evaluate greater distances, I headed to a local park that had a large open area. This next photo shows the illumination at the target for 240 yards to the barrel and 396 yards to me standing on the edge of the field. The collimator was adjusted to 1.5 (nearly at the minimum setting of 1) and the scope at 14x. At ~400 yards, the illuminated diameter viewed through the scope is about 1/3 that of the scope field of view diameter.
Figure 75 - 240 yards to barrel and 396 yards
to me
This next photo is a blow up of the illuminated area from the photo above.
Figure 76
These next two photos were taken to show how much light is at the target area at ~400 yards. I took the camera and tripod down range and setup about 20 feet in front of the illuminated area (you can see the shadow of the tripod on the far left). In these photos, I adjusted the exposure settings on the camera to match as close as possible the brightness of the illuminated area.
Figure 77

Figure 78
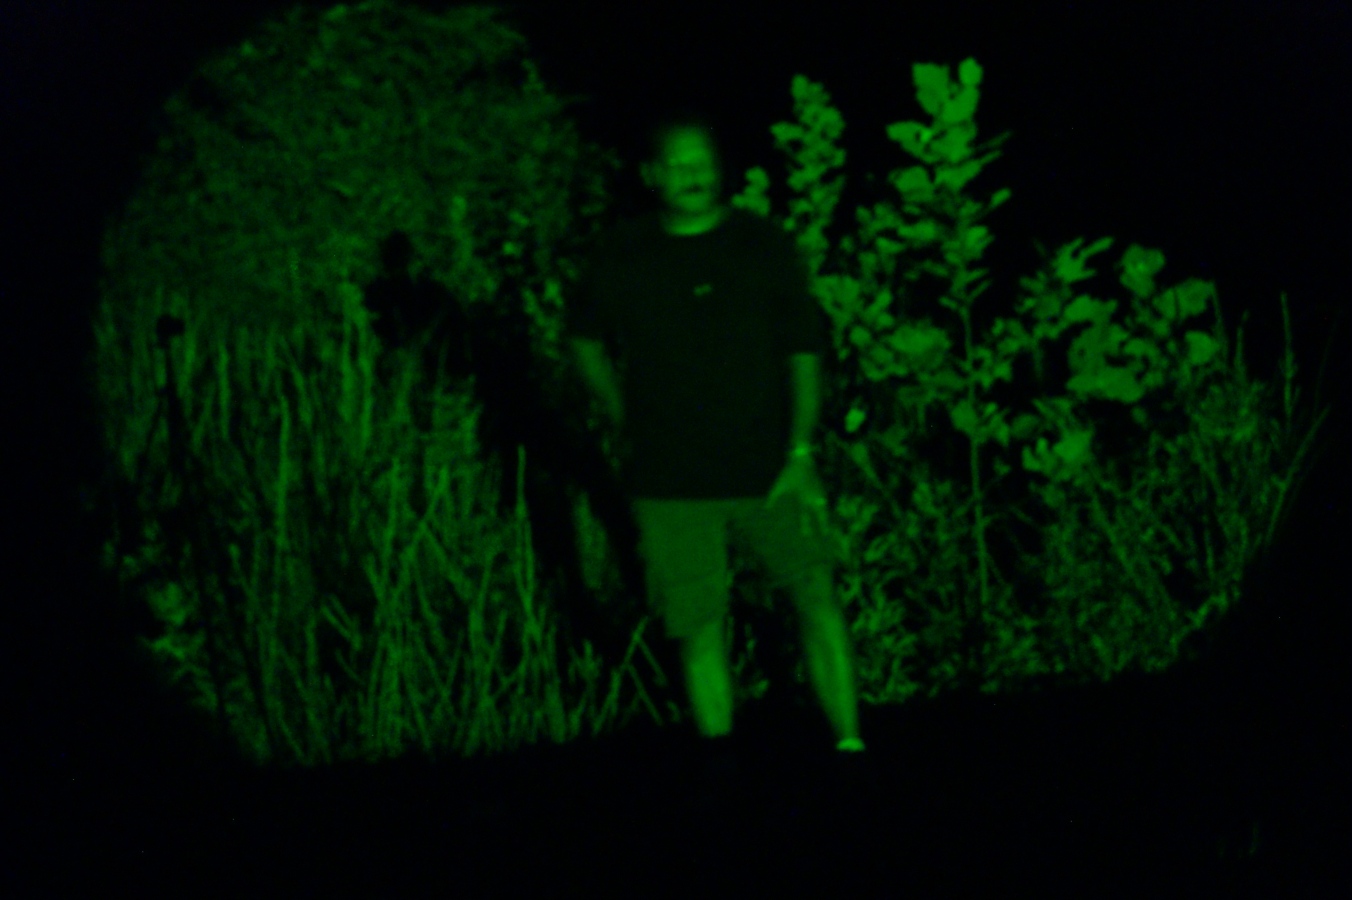
A couple of things are clear from this evaluation. First, by adjusting the beam diameter, you can put the amount of light on your target needed to illuminate it for shooting at 400 yards. Since the collimator still was not set to it's minimum, I feel the advertised 500 yard range seems realistic. Next, just because you get enough light on your subject, it doesn't mean you can clearly see the target. For longer distances, you are going to want a high power scope.
Field Evaluation
All these photos and technical evaluations don't mean much compared to the true test of Laser Genetics ND3x50 Subzero Laser Designator which will come out in the field while putting it to it's intended use which is night time target acquisition and illumination at long distances (even in a cold climate). Unfortunately the seasonal timing so far has not allowed me to do this yet (I typically hunt more in the colder months), but it is still part of the plan. Everything I have seen so far seems very promising and I will update this portion of the review once I get some field data. Part of this evaluation will be trying to determine for myself if this product spooks game. From my Front Yard Evaluation, I'm already convinced that the ND3x50 Laser Designator can provide the illumination needed to make the shot.
Update 9/5/13:
Since I performed the initial review, I have started hunting in a state where and they don’t allow any night hunting except for raccoons and opossums which are not on my hit list. The limited evaluations I have done have given me mixed feelings on spooking game. I have had moments where the Laser Designator clearly spooked game and others where they (deer) did see the light, but just stood there and looked around which is sometimes the nature of deer at night with regular lights. I think the success of this device hinges on how skittish the game would be that your are hunting and how concentrated of a beam shines into their eyes. I feel that good night/thermal vision is the way to go for those who can afford it.
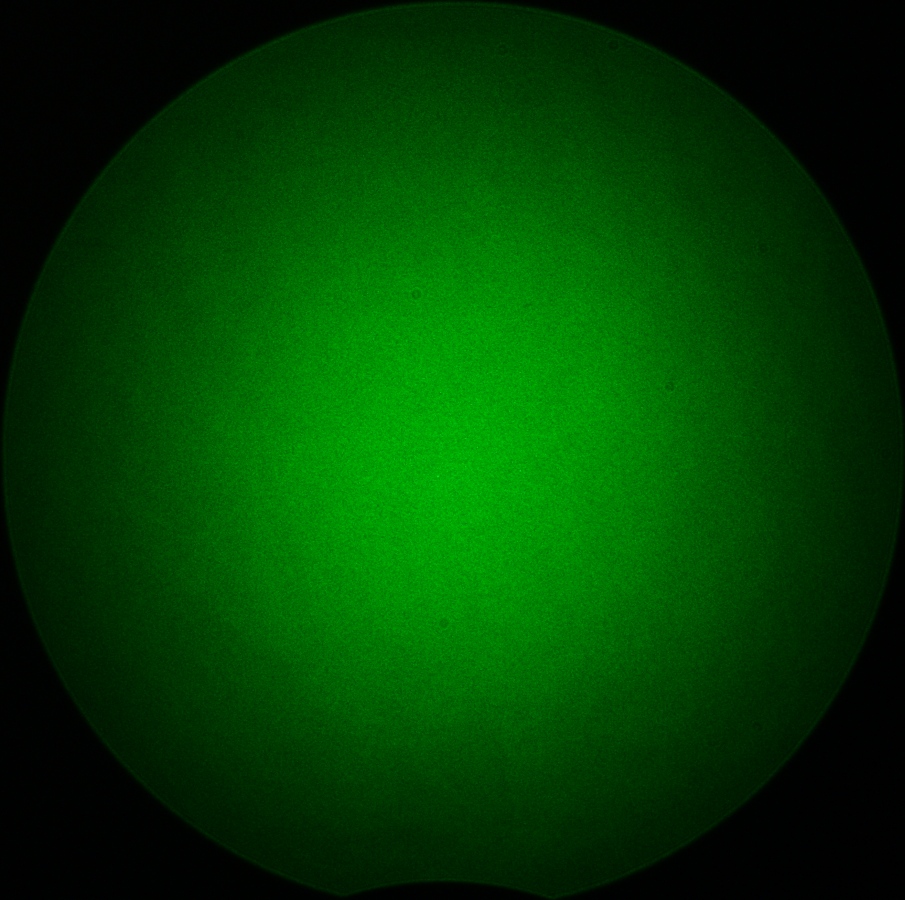
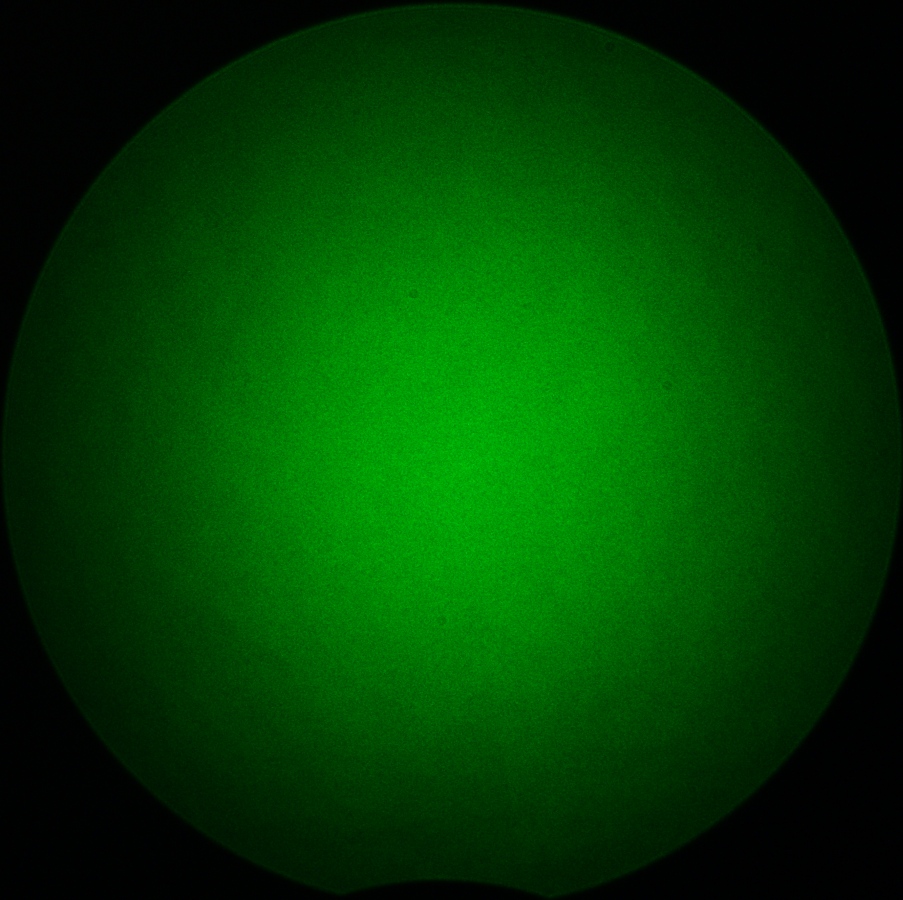
Battery Life
For the battery life test, I placed a new set of Rayovac Lithium Photo 123A batteries into the Designator and turned the Designator on inside my house. The surface temperature of the Designator ranged from 77° F to 85° F throughout this test. The specifications state that the battery life is up to 7 hours of continuous use and up to 3 hours of continuous use at 0° F. After 8.2 hours, the Designator turned off. The two photos below show illumination level at the beginning of the test and 8 hours later. There appears to be no loss in intensity of the laser with time.
Figure 79 - Time 0
Figure 80 - Time 8 Hours
Warranty
The warranty seems like your basic one year non-transferable warranty against original defects in material and workmanship. A copy of your original sales receipt is required so save the box and put it inside.
Bottom Line
I have been studying the Laser Genetics ND3x50 Subzero Laser Designator now for over a month and really like the product. Every time I have a guest over, I always pull it out to get their impressions which has always been positive. The laser is extremely bright and when installed on a rifle scope and adjusted towards a low collimator setting, you are able to illuminate targets at extremely long distances. The mounting hardware included with the Designator is all 1" diameter and I would like to see Laser Genetics include the ability to mount the Designator on a 30 mm tube scope. The product weight is greater than advertised and some of the beam diameter specification data could be clarified better. The greater weight is something to consider, but I don't see the beam diameter difference as a significant item. During my temperature testing, I was able to prove that the laser will operate at extremely cold temperatures, but I feel there is a reduction in light intensity. I will not be able to truly evaluate this low temperature capability until the cold weather returns in the fall.
9/5/13 Update: Worked like a champ in cold weather.
If having a projected beam of light is not an issue for your night time adventure, I feel that the quality of image and light you are able to put on your target by using a good scope and Laser Designator is on par with night vision gear costing many times more than the price of the Laser Designator.
Or
If you would like to be notified about future Gunsumer Reports reviews via Facebook, make sure "You Like This" by clicking the Facebook "Like" button at the bottom or top of this page. If it already says "You Like This" beside the button, clicking it again will uncheck the "Like" status and you will not be notified.
| Share on Facebook | |
© 2010, 2011, 2012, 2013, 2014, 2015, 2016, 2017, 2018, 2019, 2020, 2021, 2022, 2023 & 2024 Gunsumer Reports™, All rights reserved.
FTC Disclosure