|
|
Gunsumer Reports TM Providing Detailed Objective Reviews for Firearms and Firearm Accessories |
H&R Pardner Pump Protector Shotgun Review
Part 4 - Disassembly
December 23, 2012

In this part of my H&R Pardner Pump Protector Shotgun review, I cover disassembly of the shotgun. Although I may show many photos, along with detailed instructions, you should always consider the manufacturer's Instruction/Owner's Manual as the official source when handling and disassembling your shotgun.
Disassembly for Normal Cleaning
Step 1 - Safe Direction
Make sure your shotgun is always pointed in a safe direction.
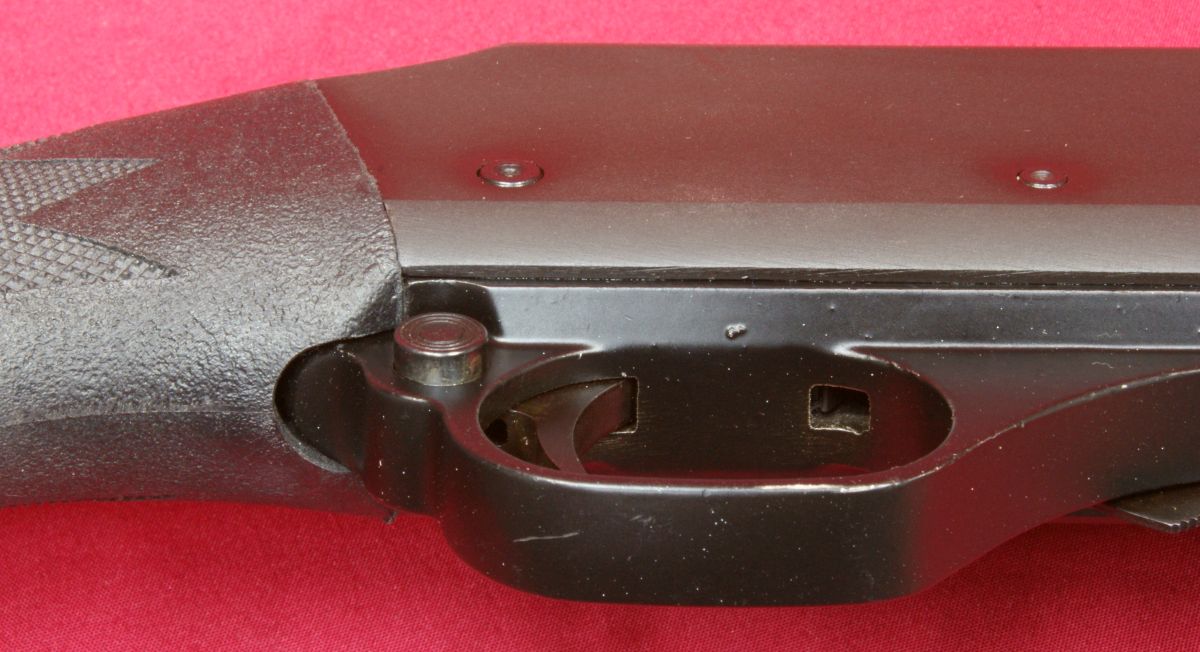
Step 2 - Safety
Place the cross bolt safety to the "safe" position as shown below (pushed to the right side with no red showing).
Figure 1
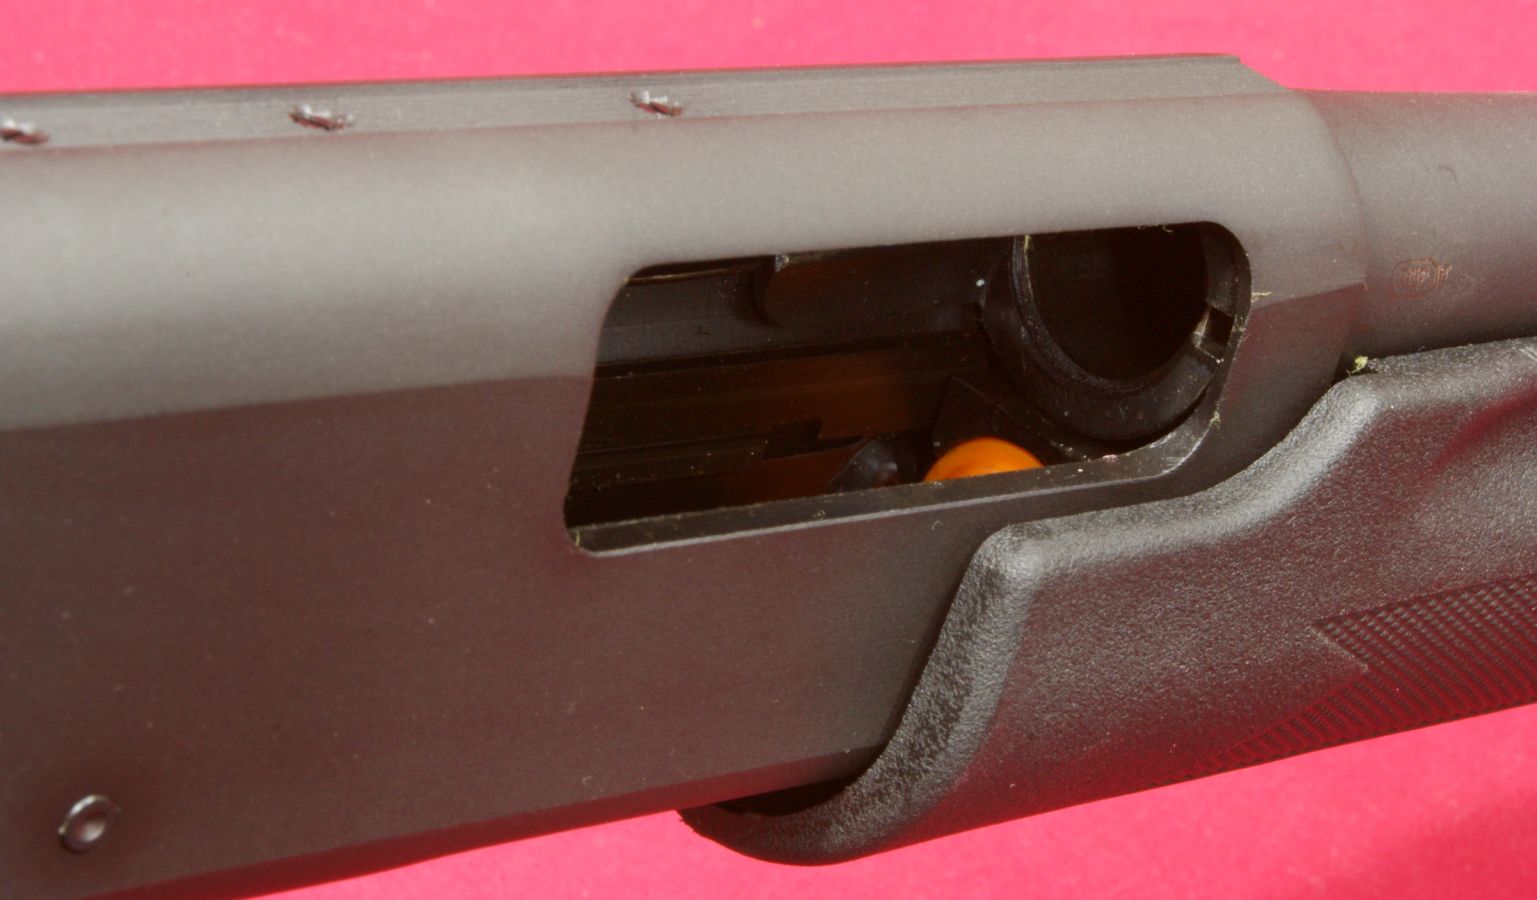
Step 3 - Verify Unloaded
Fully open the bolt and inspect the chamber and magazine tube to ensure the shotgun is completely unloaded.
Figure 2
Step 4 - Action to Mid Position
Slide the action (bolt) forward to approximately the mid position.
Figure 3

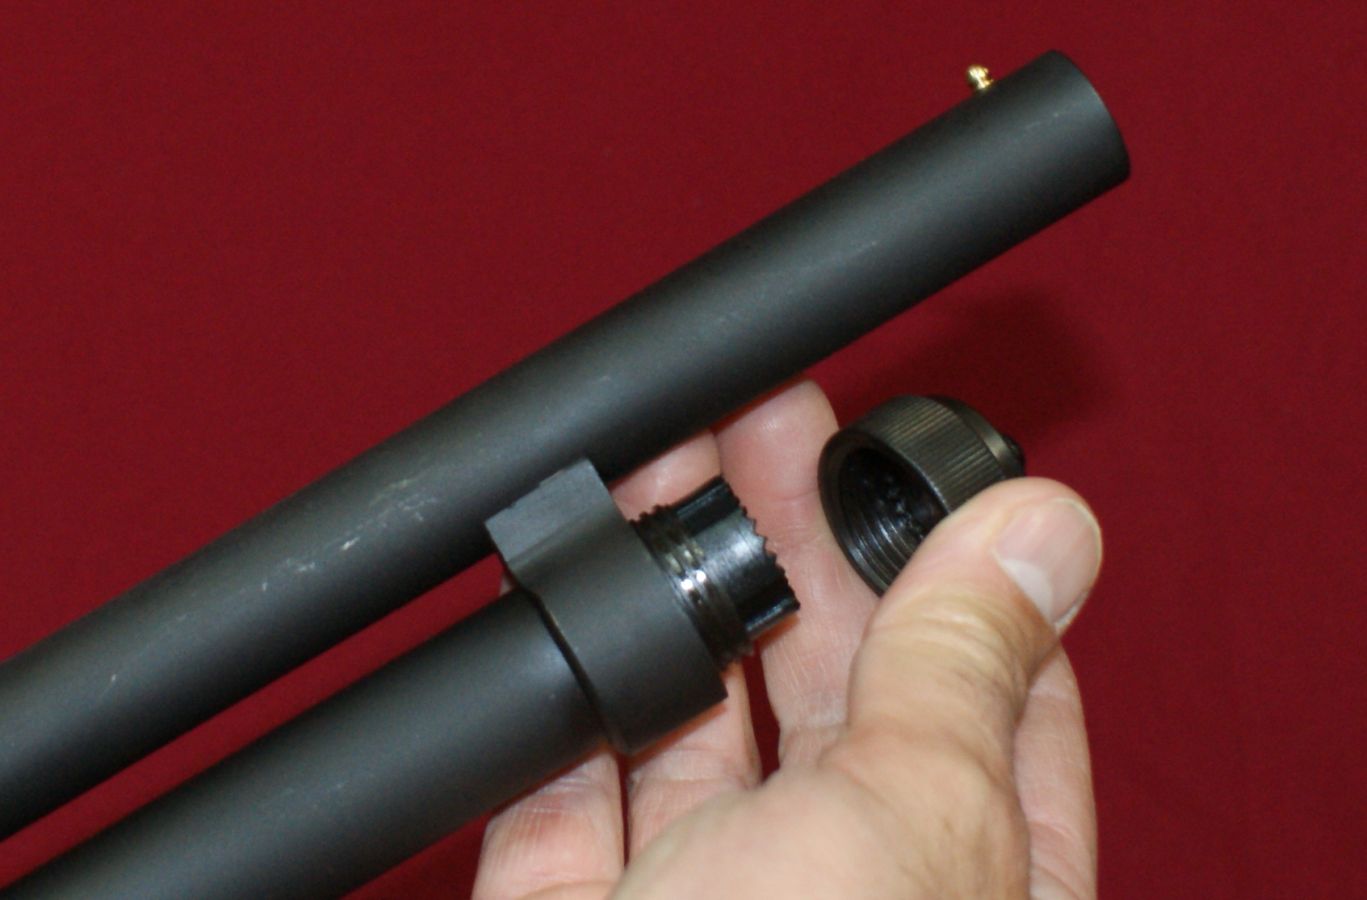
Step 5 - Remove Magazine Cap
Remove the magazine cap by rotating it counterclockwise until it comes off the end of the magazine tube.
Figure 4
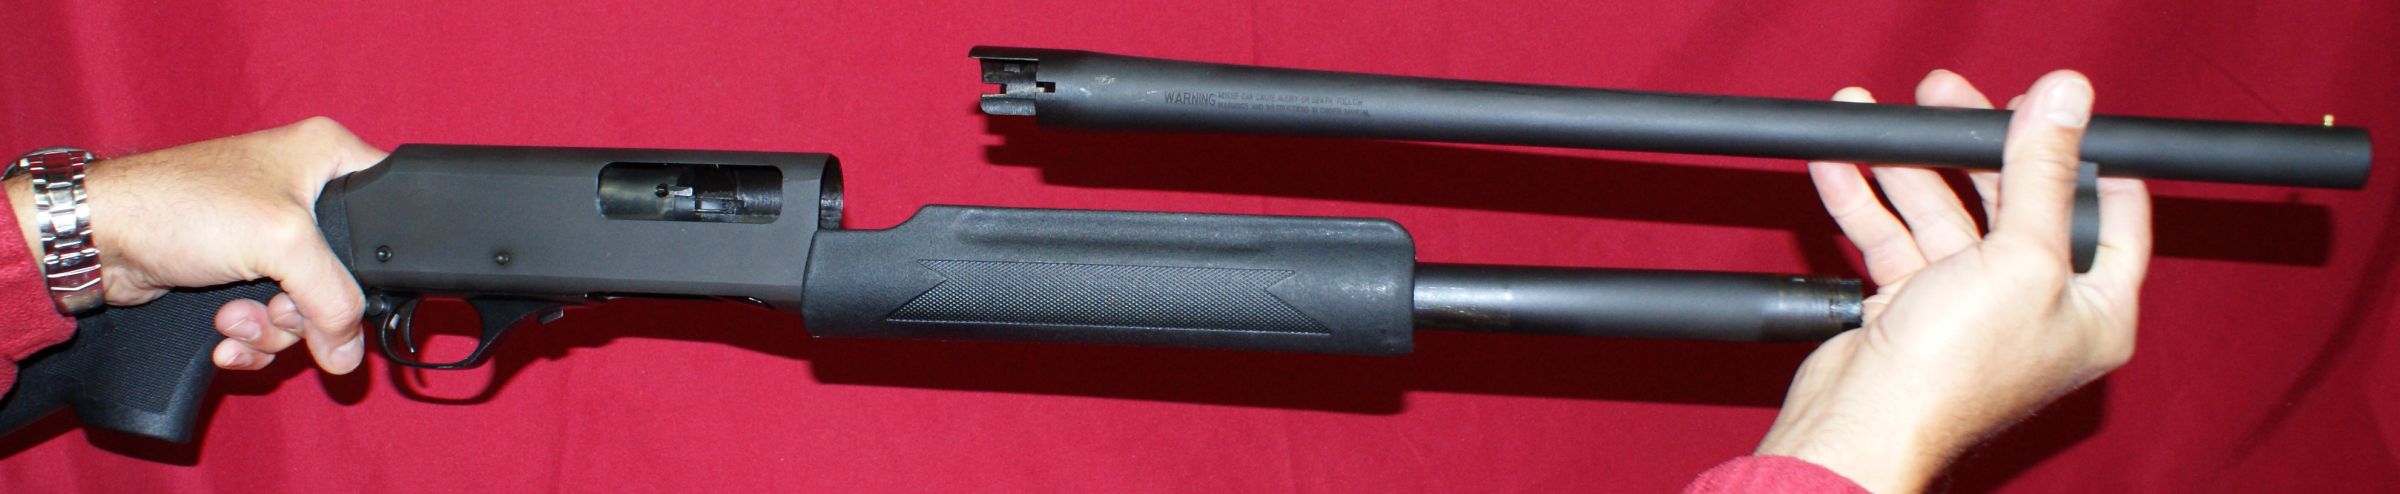
Step 6 - Remove Barrel
Hold the barrel above the barrel ring and pull the barrel from the receiver. This typically does not take much force and since this was a well lubricated new shotgun, the barrel came out easily.
Figure 5

Figure 6
Step 7 - Remove Trigger Assembly Pins
Using a punch, tap out the front and rear trigger assembly pins. After I got the front pin started, I was able to remove it with my fingers by pulling on the opposite side. The rear pin required me to tap the pin fully out of the receiver.
Figure 7
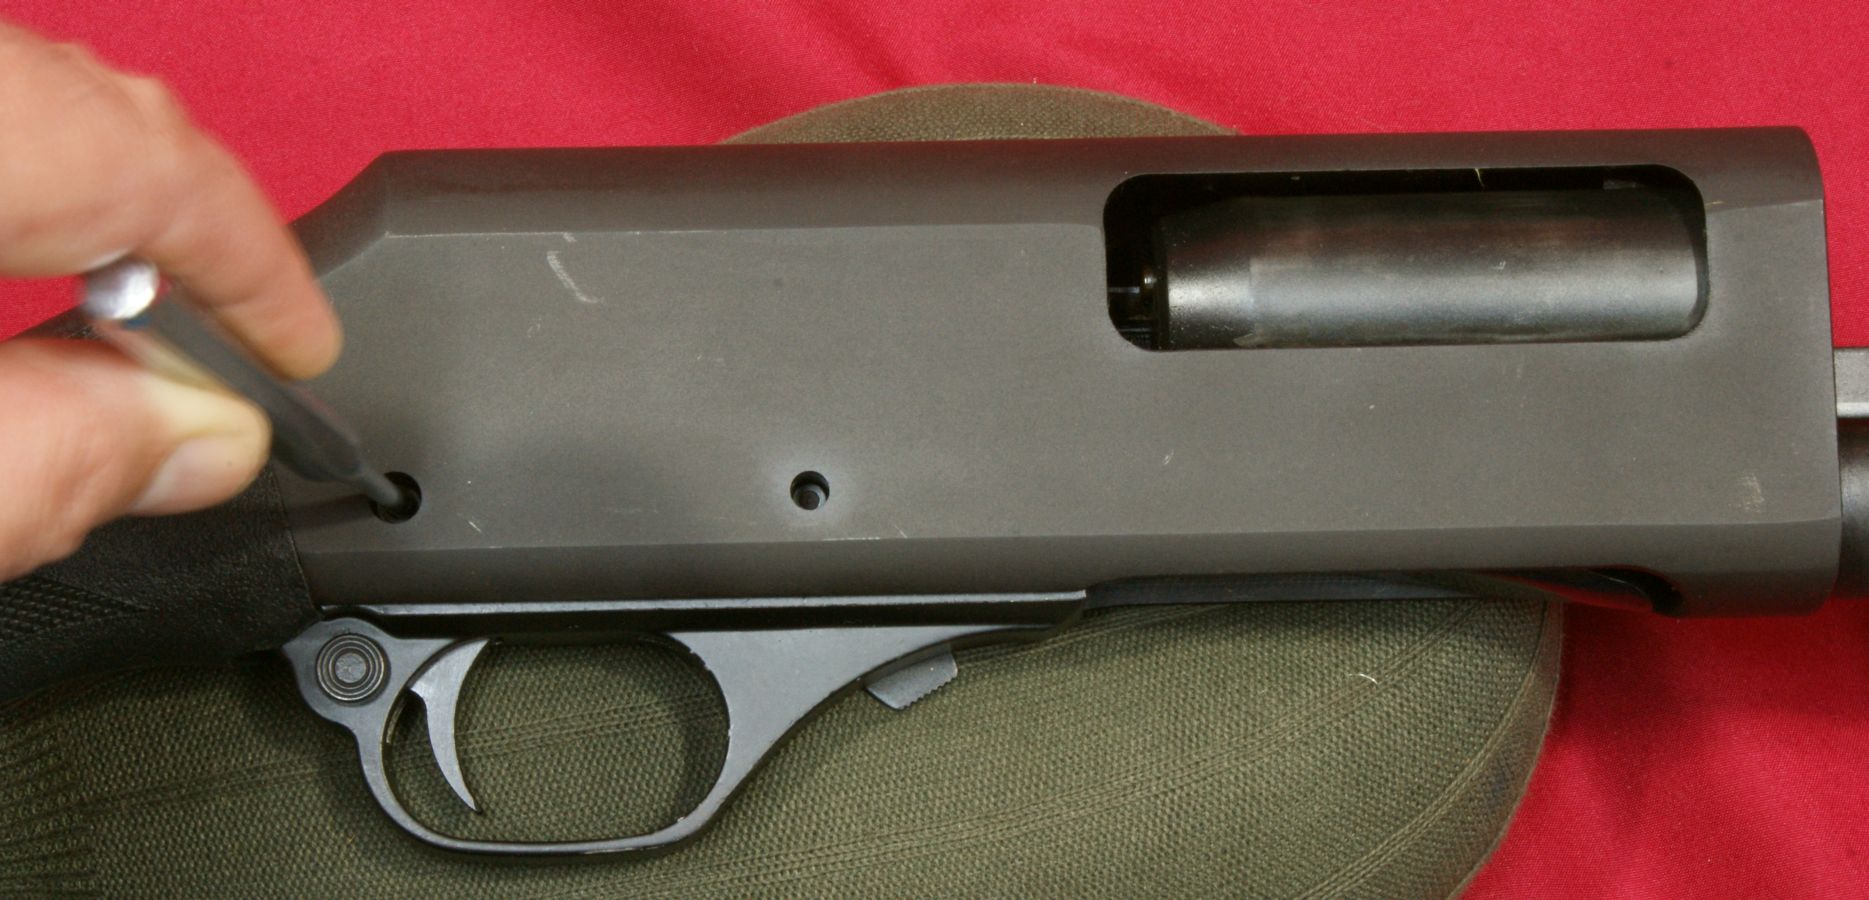
Figure 8
Step 8 - Remove Trigger Assembly
Remove the trigger assembly by pulling the assembly down and out of the receiver.
Figure 9

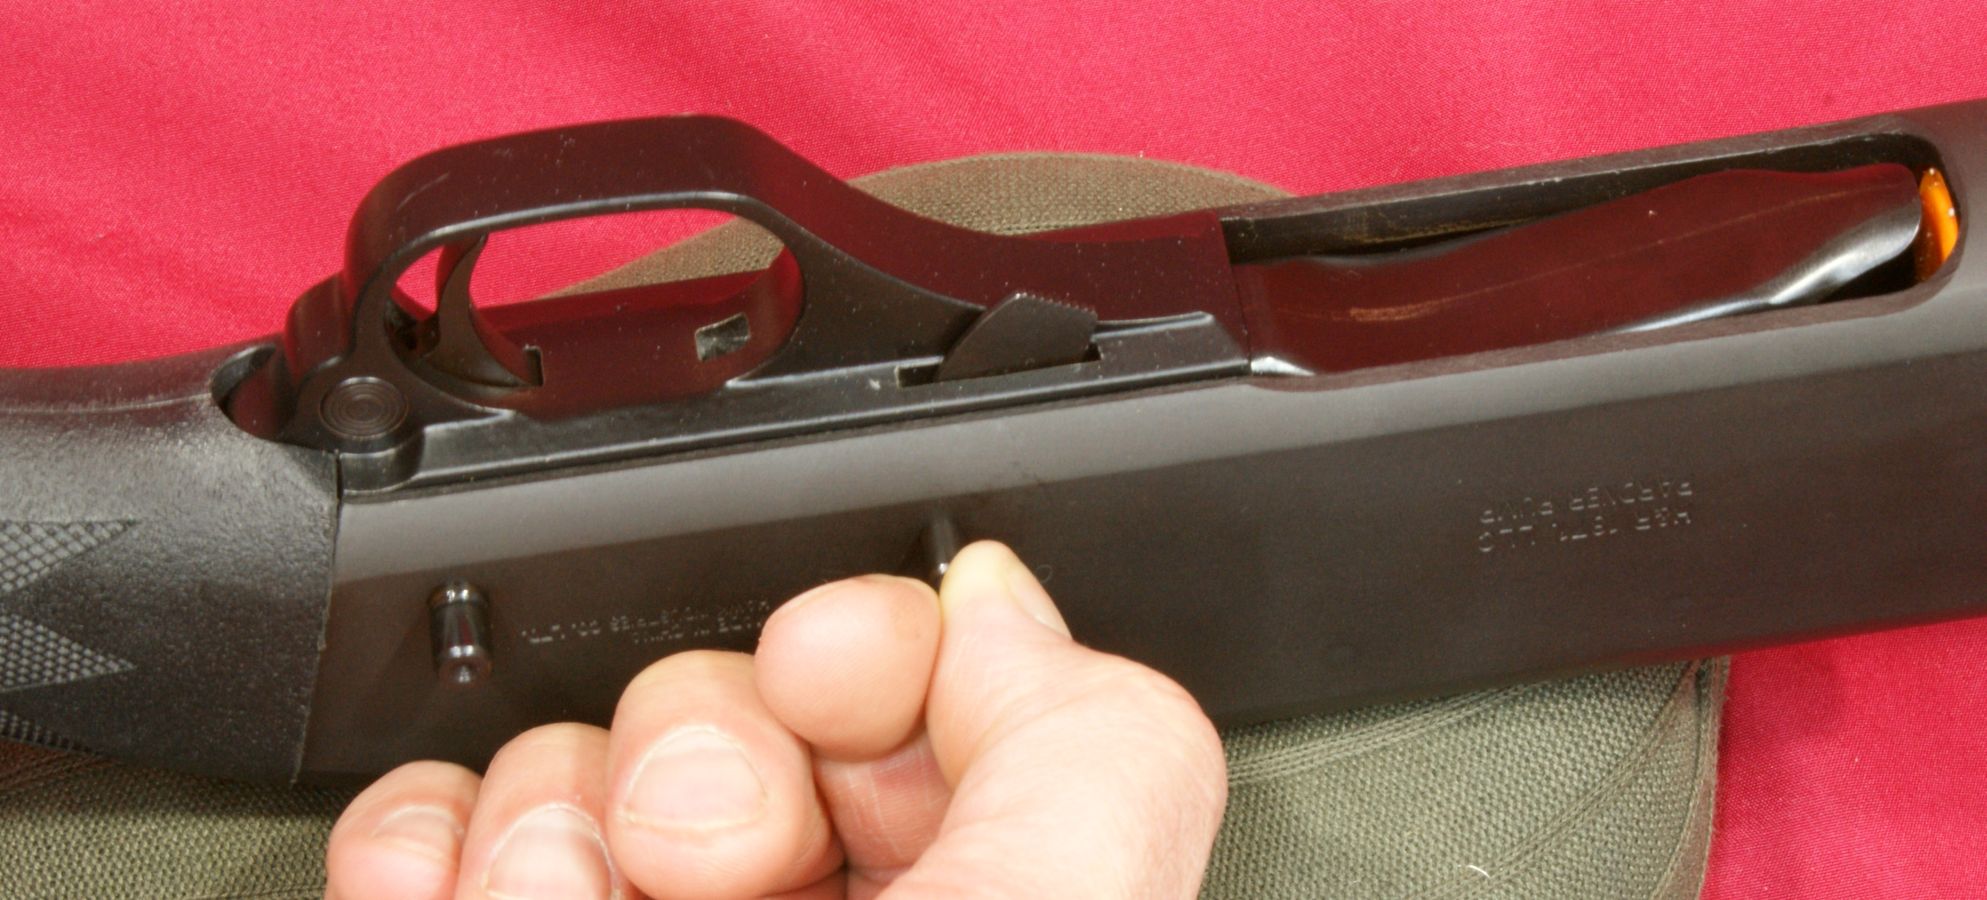
Step 9 - Remove Bolt Assembly From Receiver
To remove the bolt assembly, you must first press the magazine feed latch located on the left side of the receiver and shown below.
Figure 10
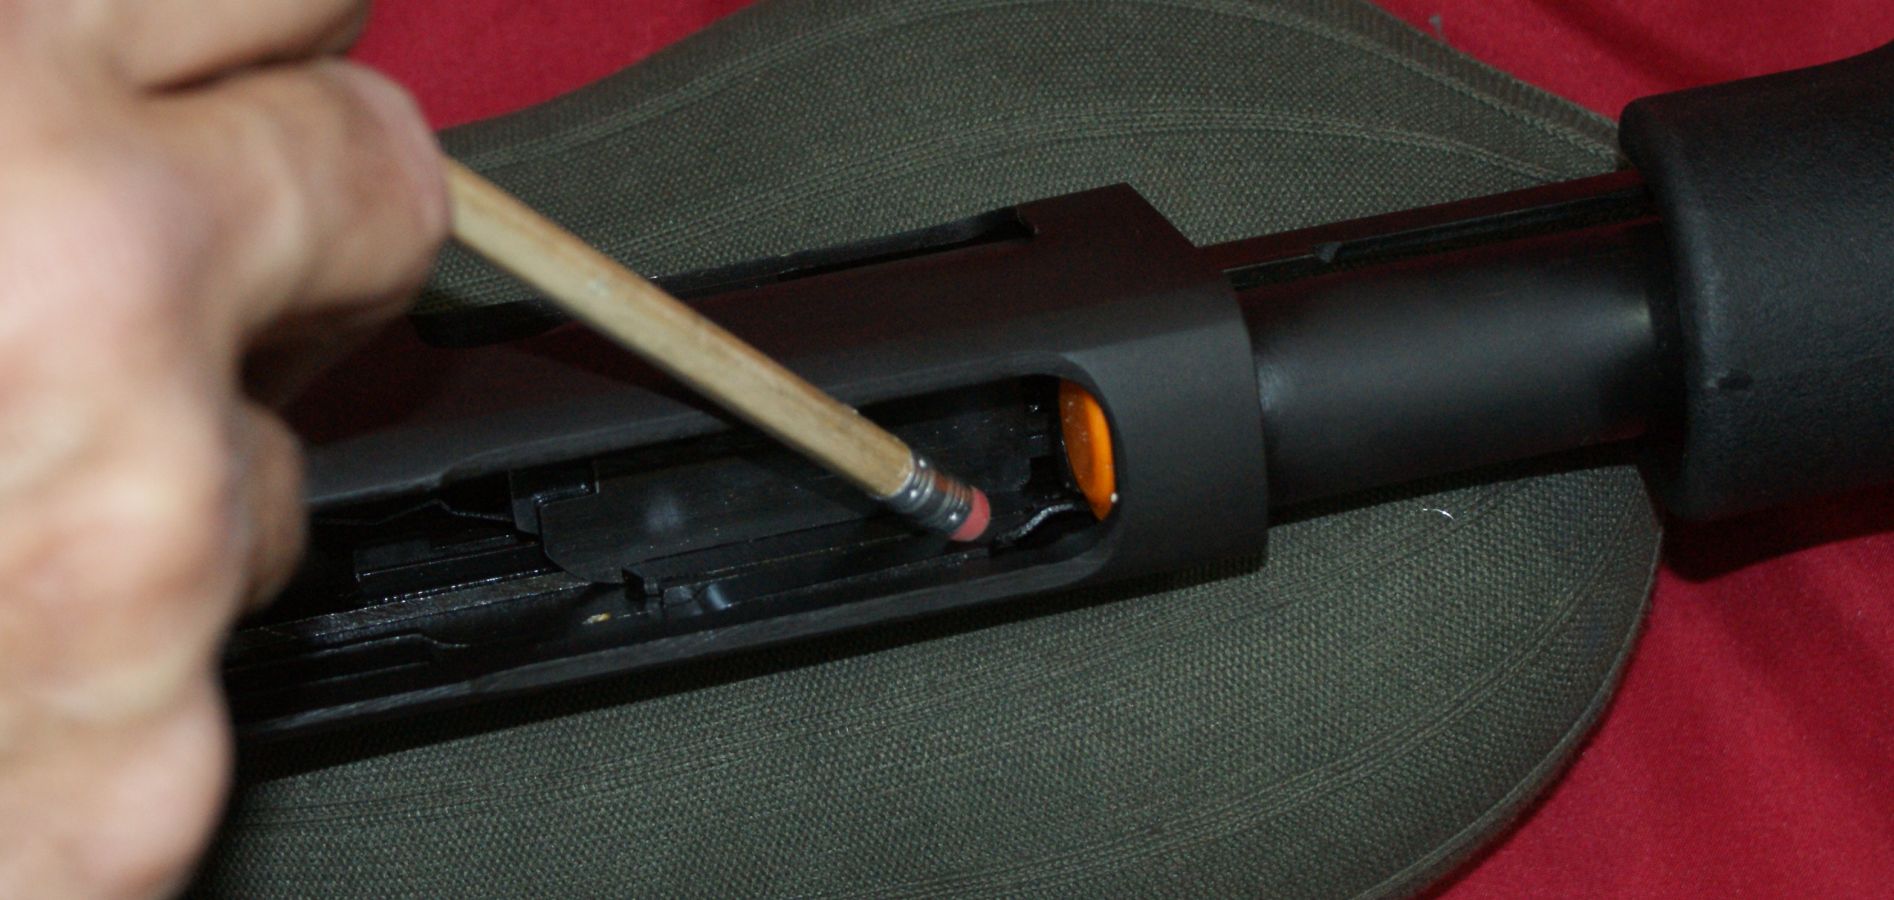
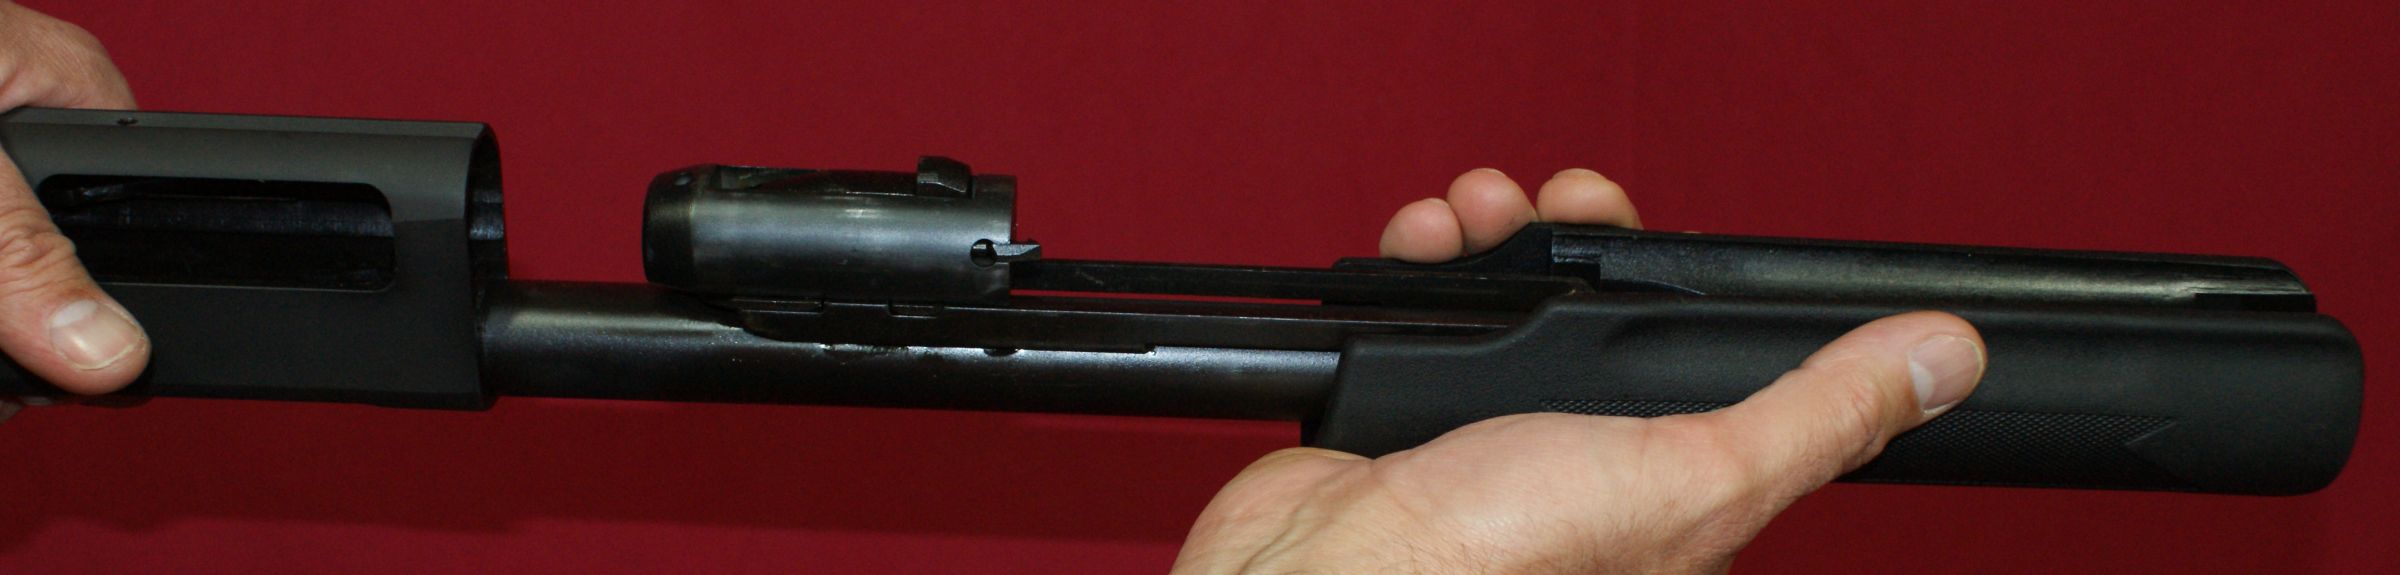
While the latch is pressed, move the forearm forward and the bolt will start coming out of the receiver.
Figure 11
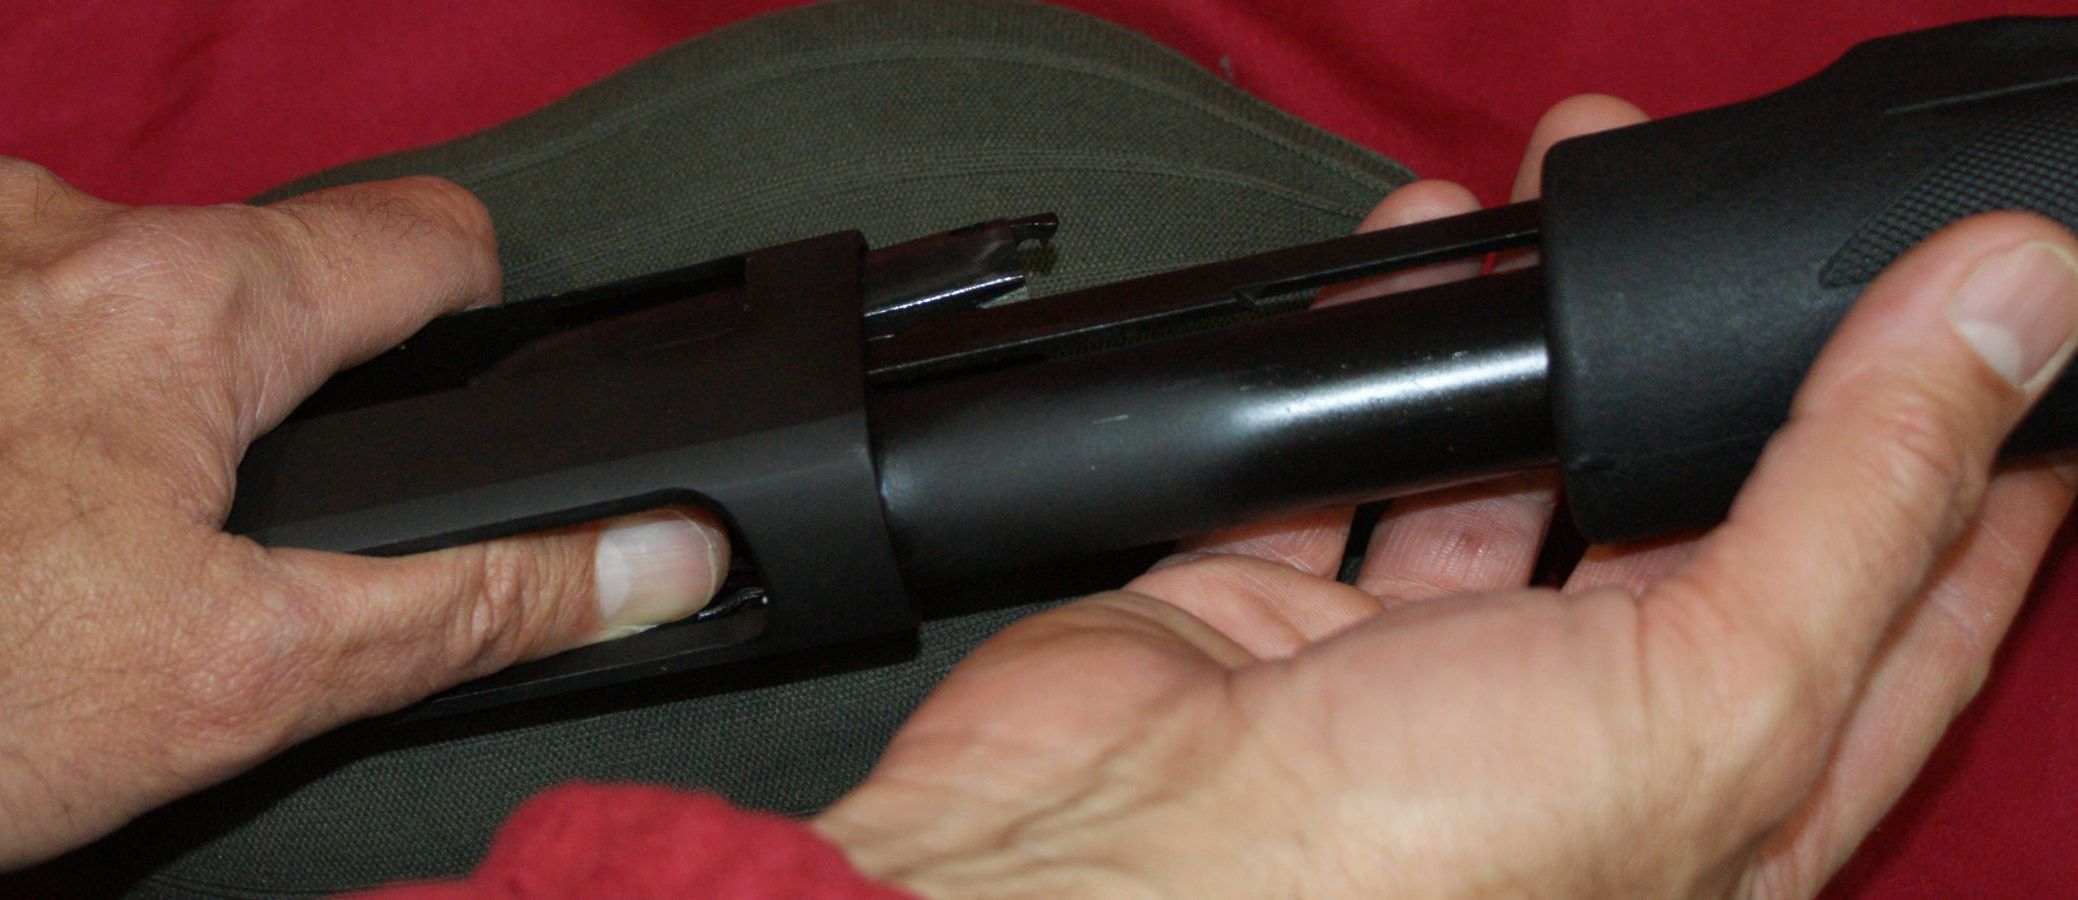
Rotate the shotgun so the bolt is on top of the magazine tube to prevent it from falling off the action bars due to gravity.
Figure 12

The forearm, action bars and bolt assembly can be taken off the magazine tube by sliding them forward.
Figure 13
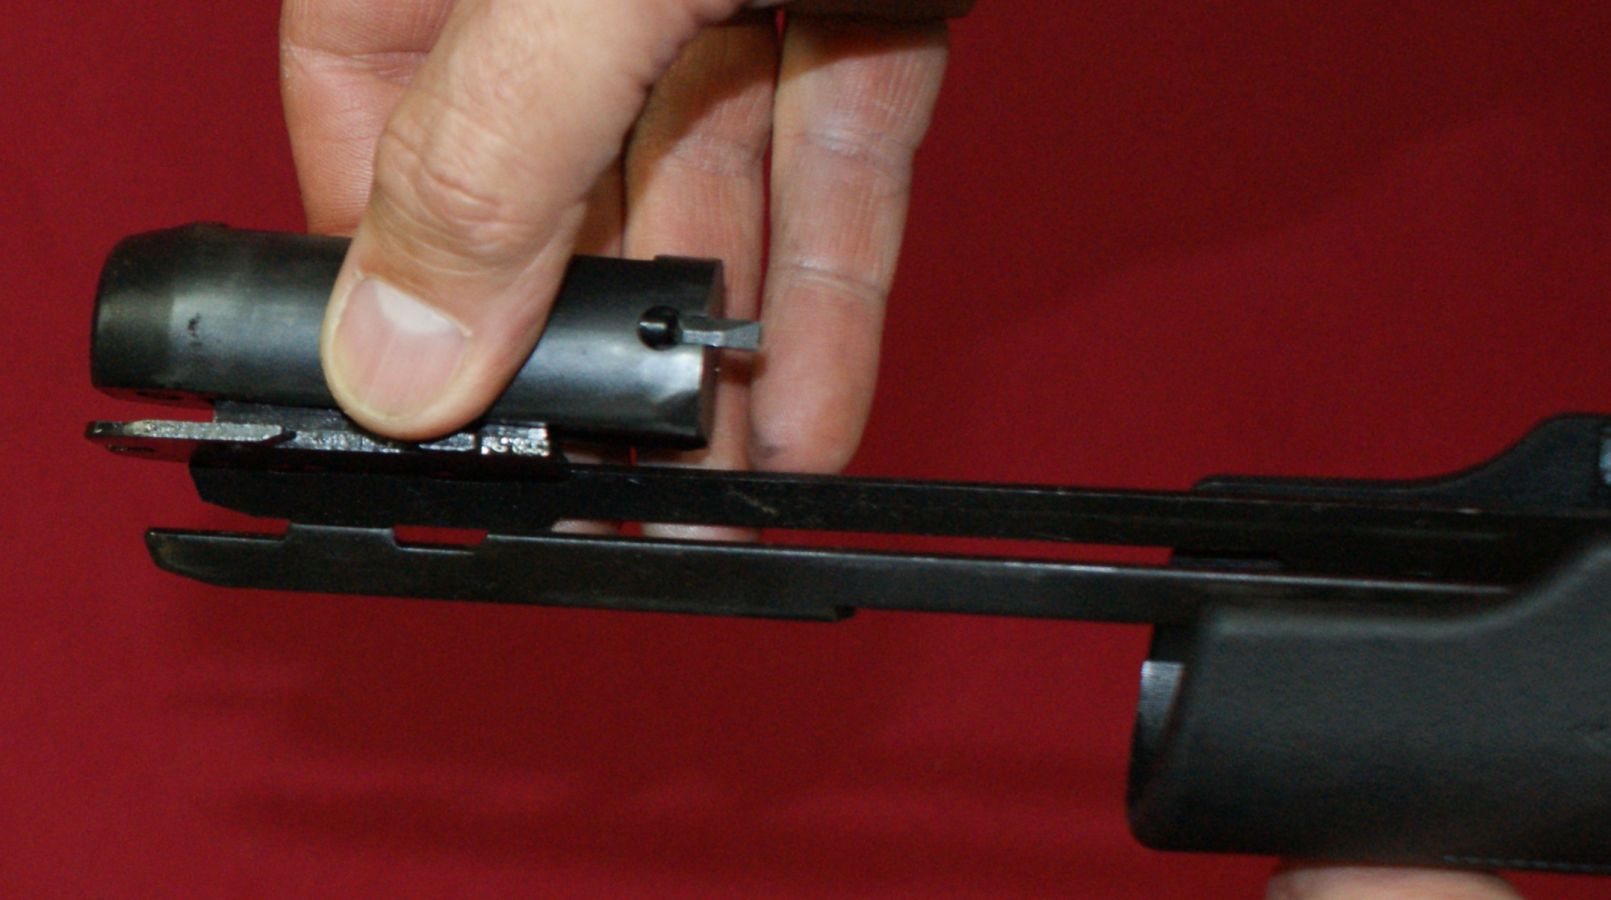
Step 10 - Remove Bolt Assembly From Action Bars
The bolt assembly can be lifted from the action bars and it will fall off if you are not careful.
Figure 14
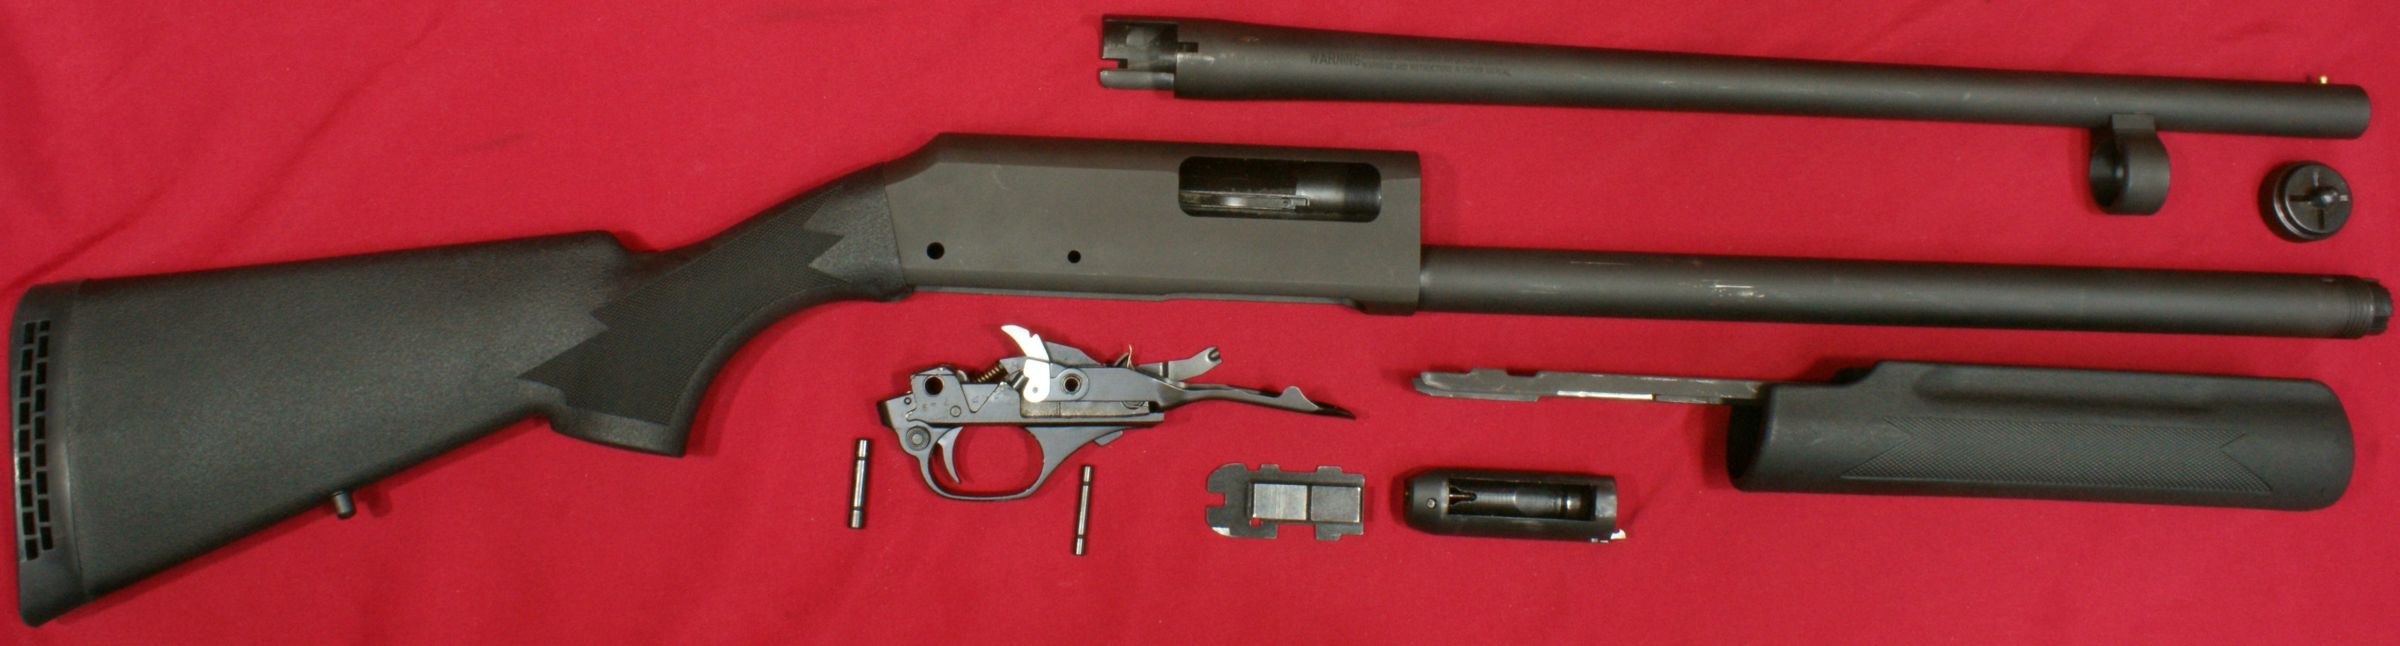
The photo below shows the shotgun disassembled for cleaning. At this point you can perform a normal cleaning of your shotgun. The Owner's Manual does a good job of outlining how to clean these components.
Figure 15
Additional Disassembly
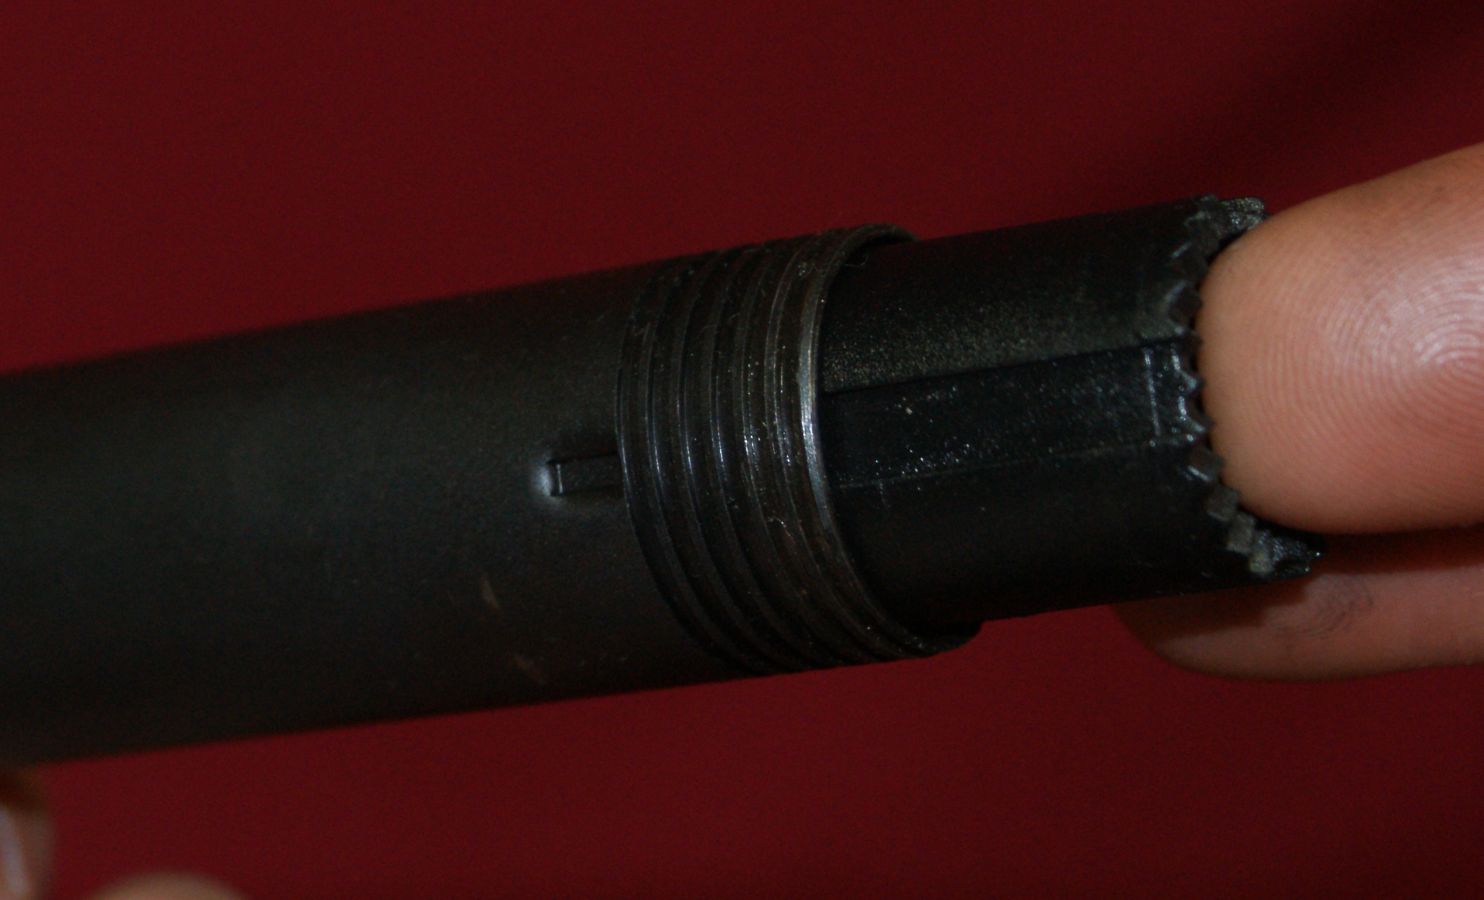
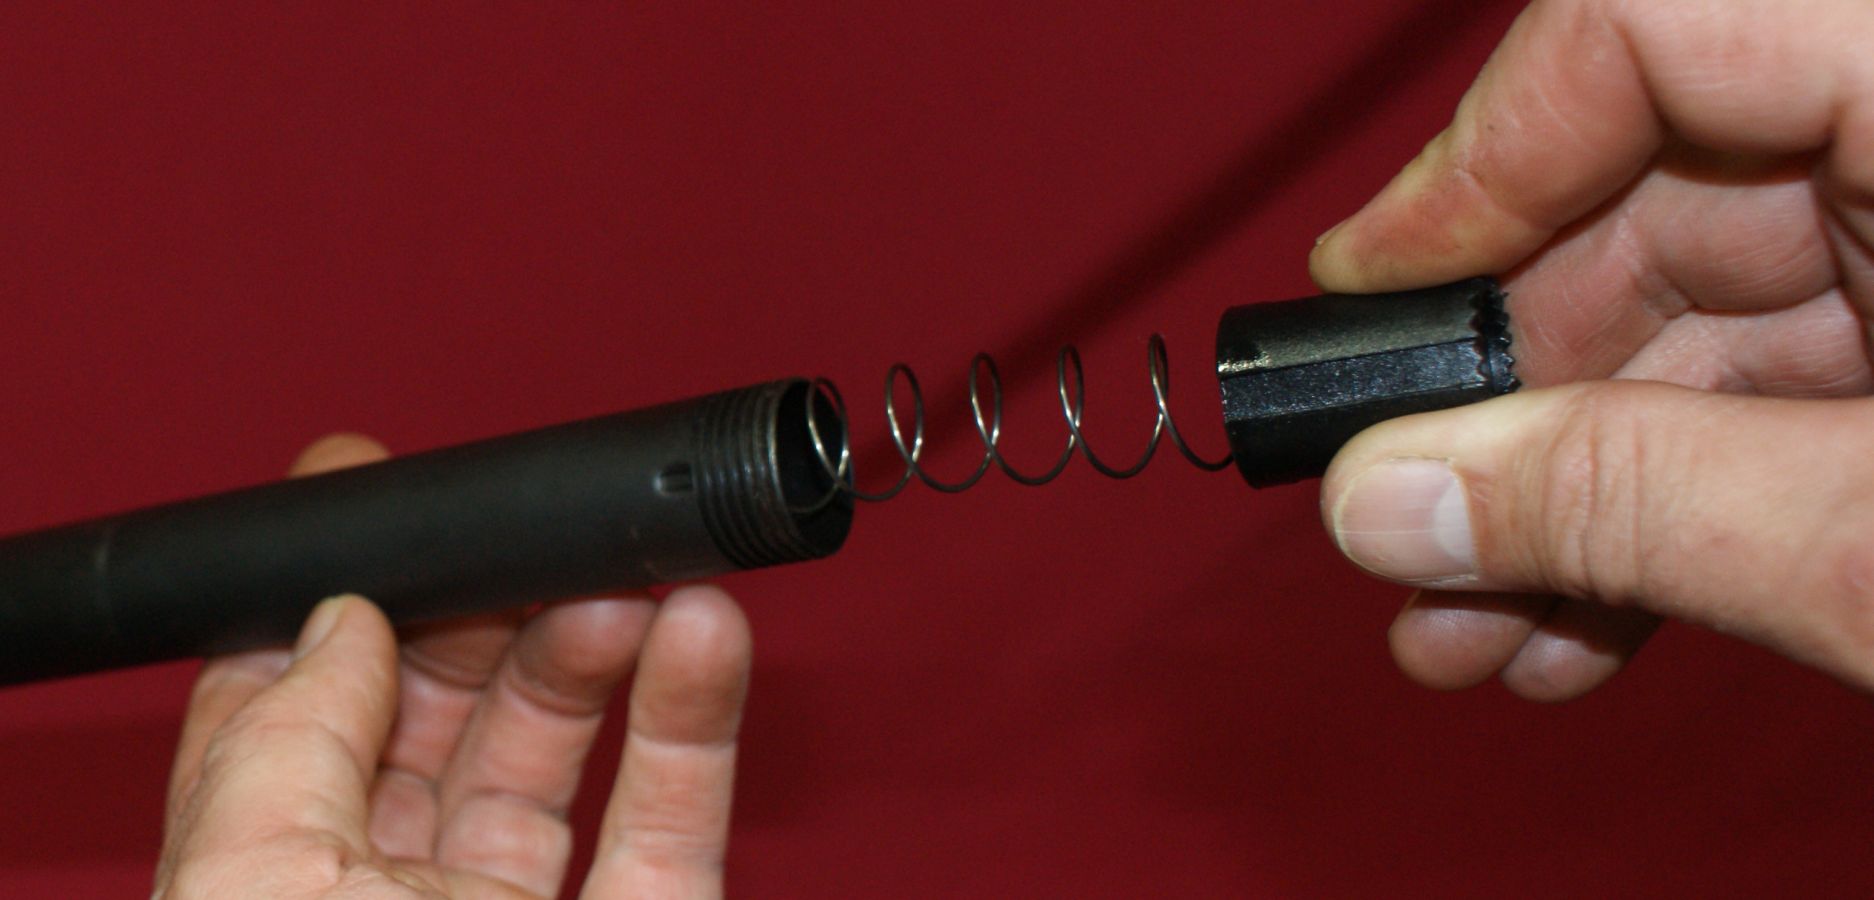
Removing Magazine Spring and Follower
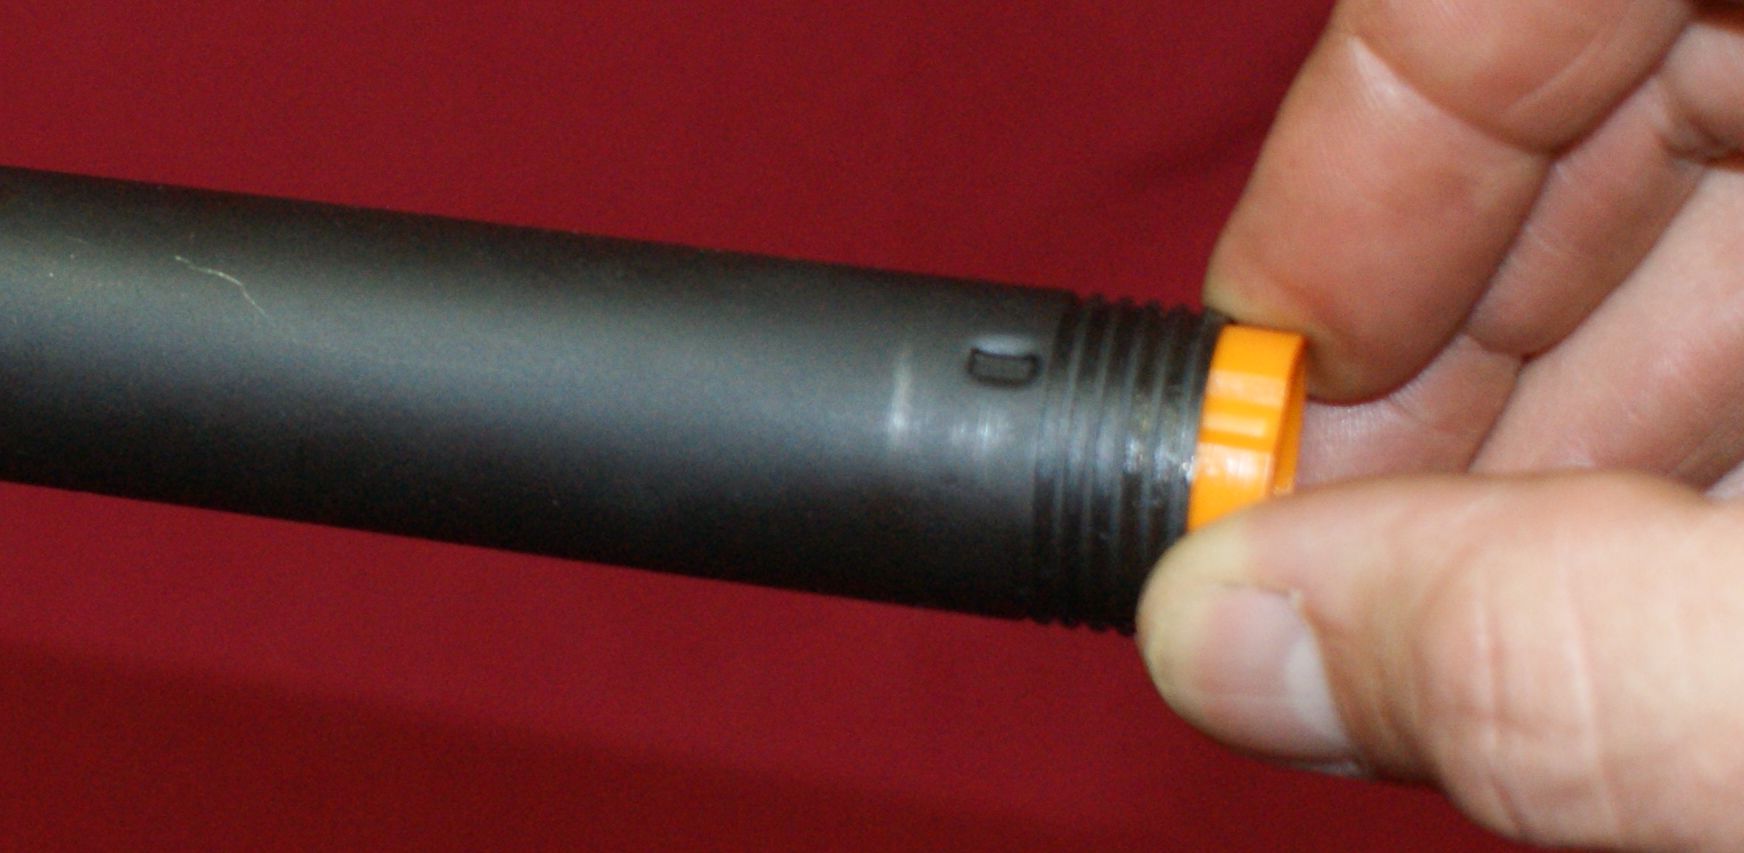
You first remove the magazine retainer. To do this, press the retainer into the magazine tube about 1" and rotate the retainer 1/4 turn and allow the retainer to be pushed out of the tube by the magazine spring. In the photo below you can see how the slots in the retainer must be lined up with the dimples on the magazine tube.
Figure 16
Be careful because the magazine spring is under compression which could potentially cause the spring and retainer to suddenly shoot out of the magazine tube.
Figure 17
To remove the magazine follower, tilt the magazine tube down until the follower falls to the end of the tube. You must then line up the slots in the follower with the dimples on the tube to get the follower out of the tube.
Figure 18
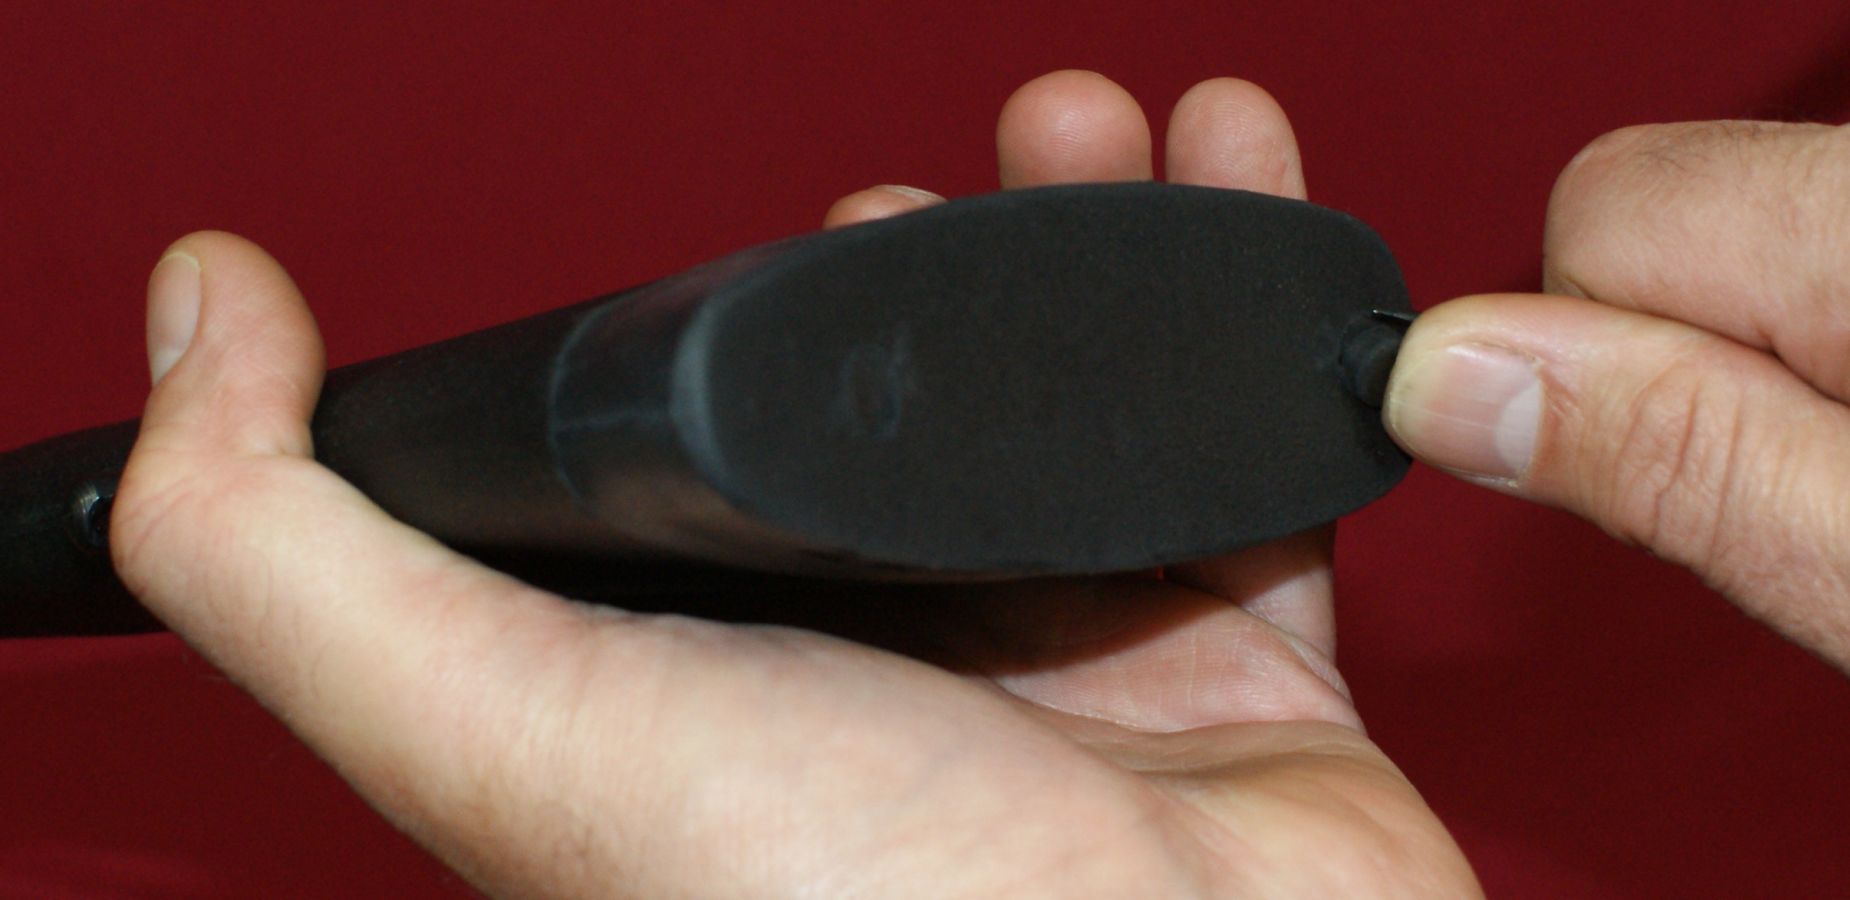
Removing Buttstock
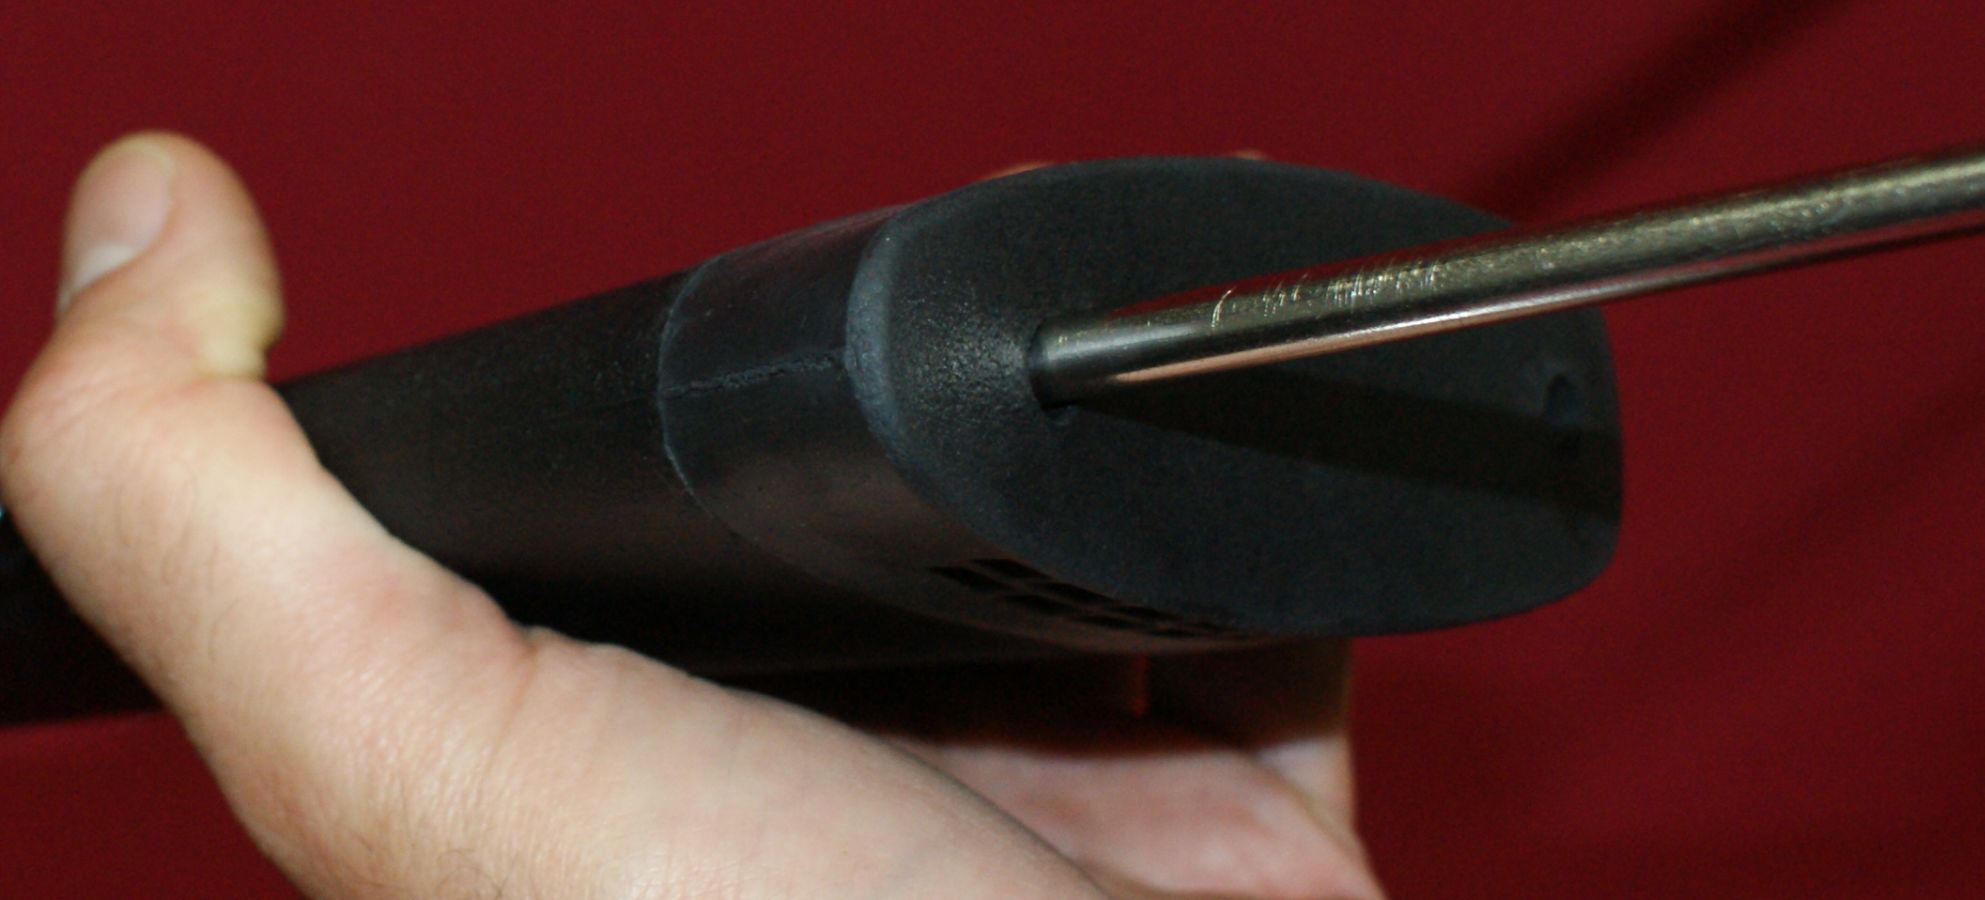
The buttpad has two rubber plugs in the holes used to access the buttpad attachment bolts. I used a small screwdriver to help pry out the plugs.
Figure 19
The two buttpad bolts can be removed using a Phillips screwdriver.
Figure 20
With the two bolts lose, you can pull the buttpad off the end of the stock.
Figure 21
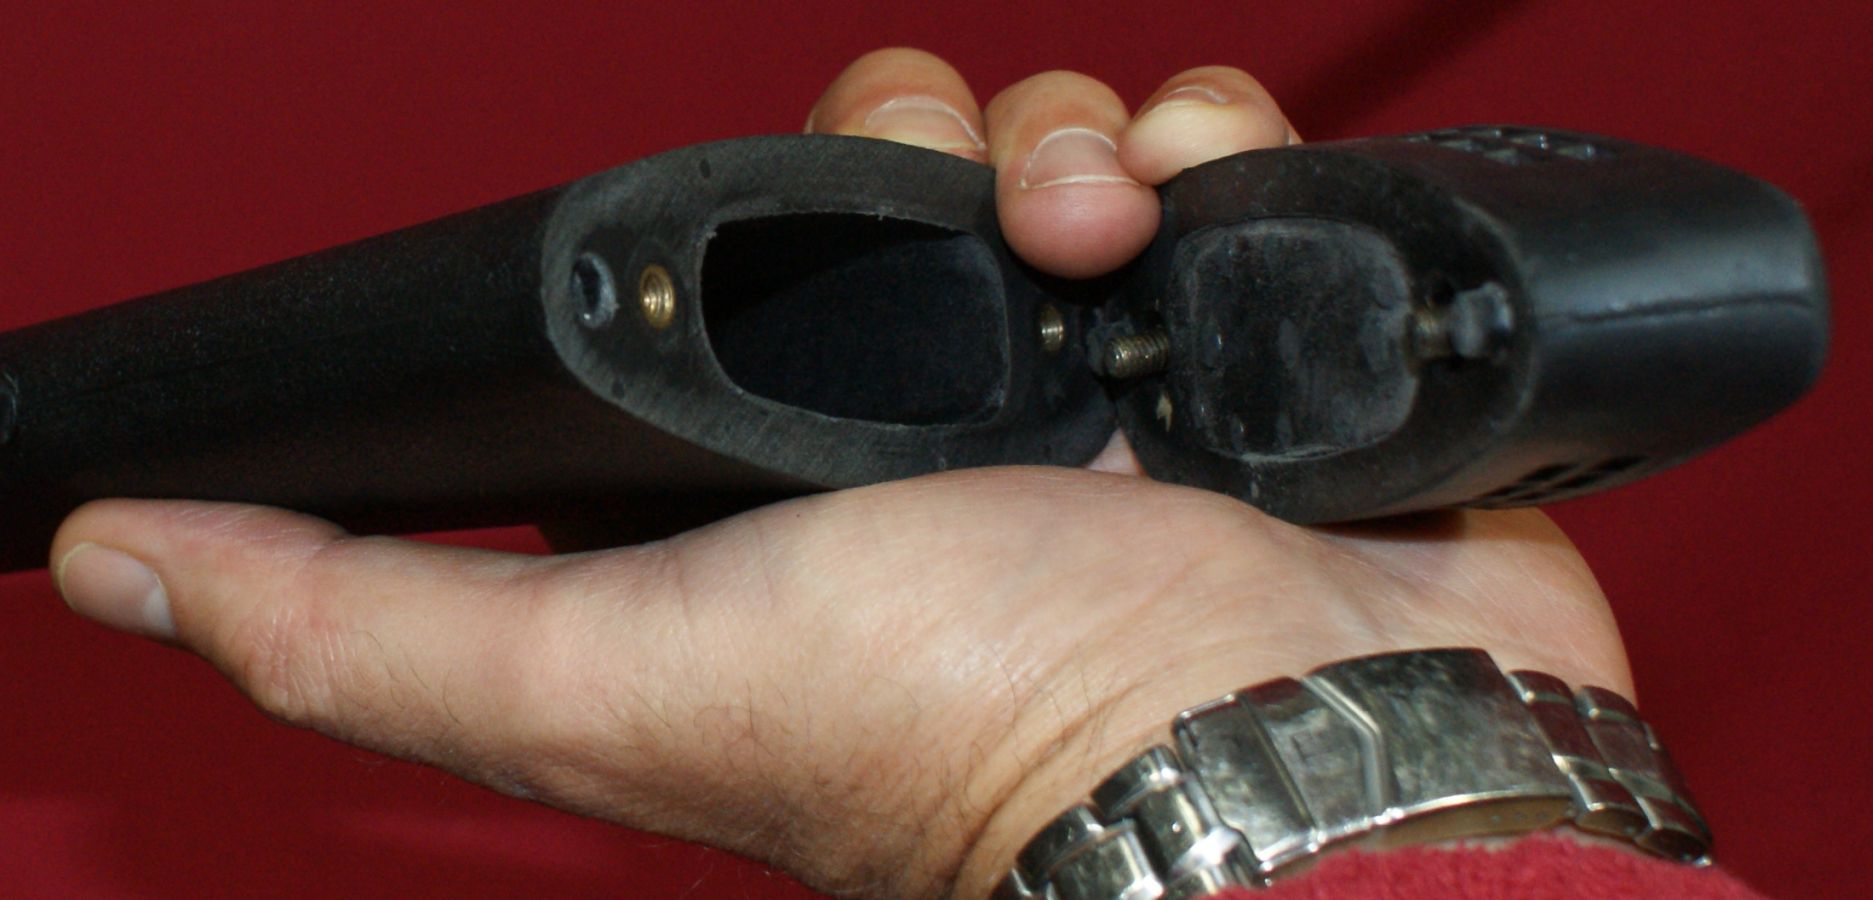
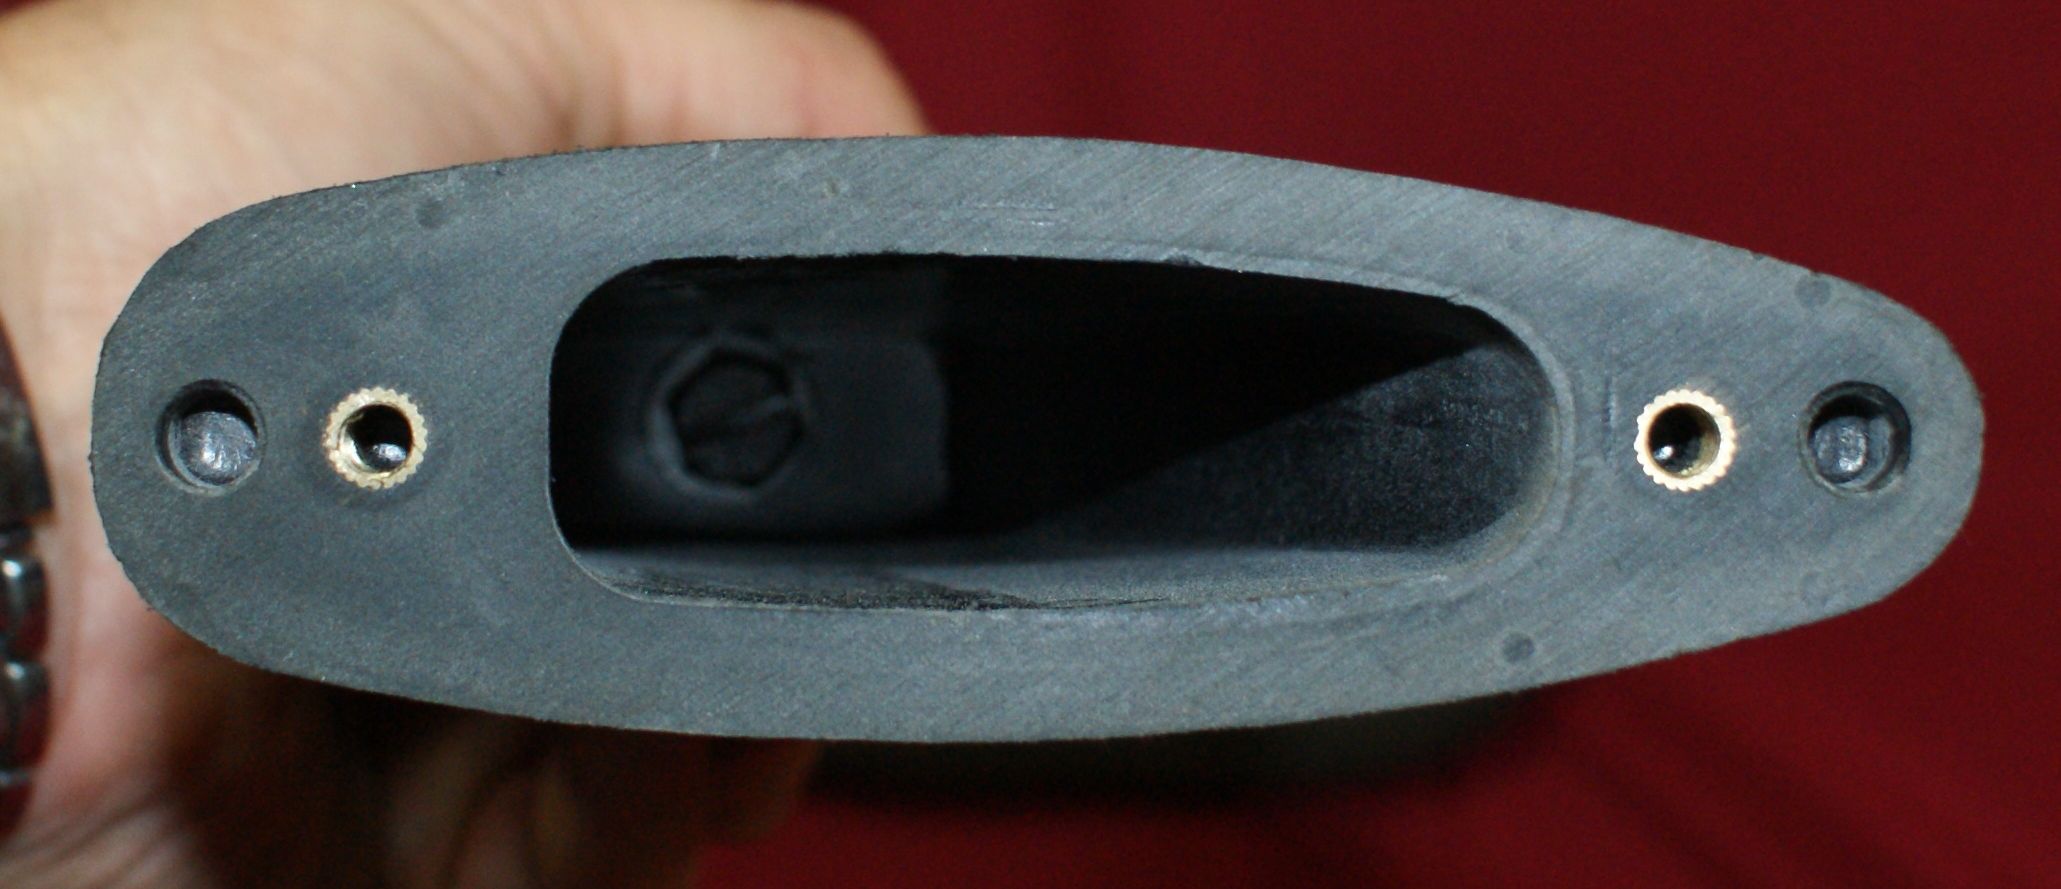
Notice that the buttpad is attached with bolts that screw into threaded inserts in the stock, not the normal screw style attachment. Also, notice the thickness of the walls on the stock. This thickness gives the stock a good solid feel, but at the cost of a little weight. Inside the stock is a pocket which allows you to access the stock bolt.
Figure 22
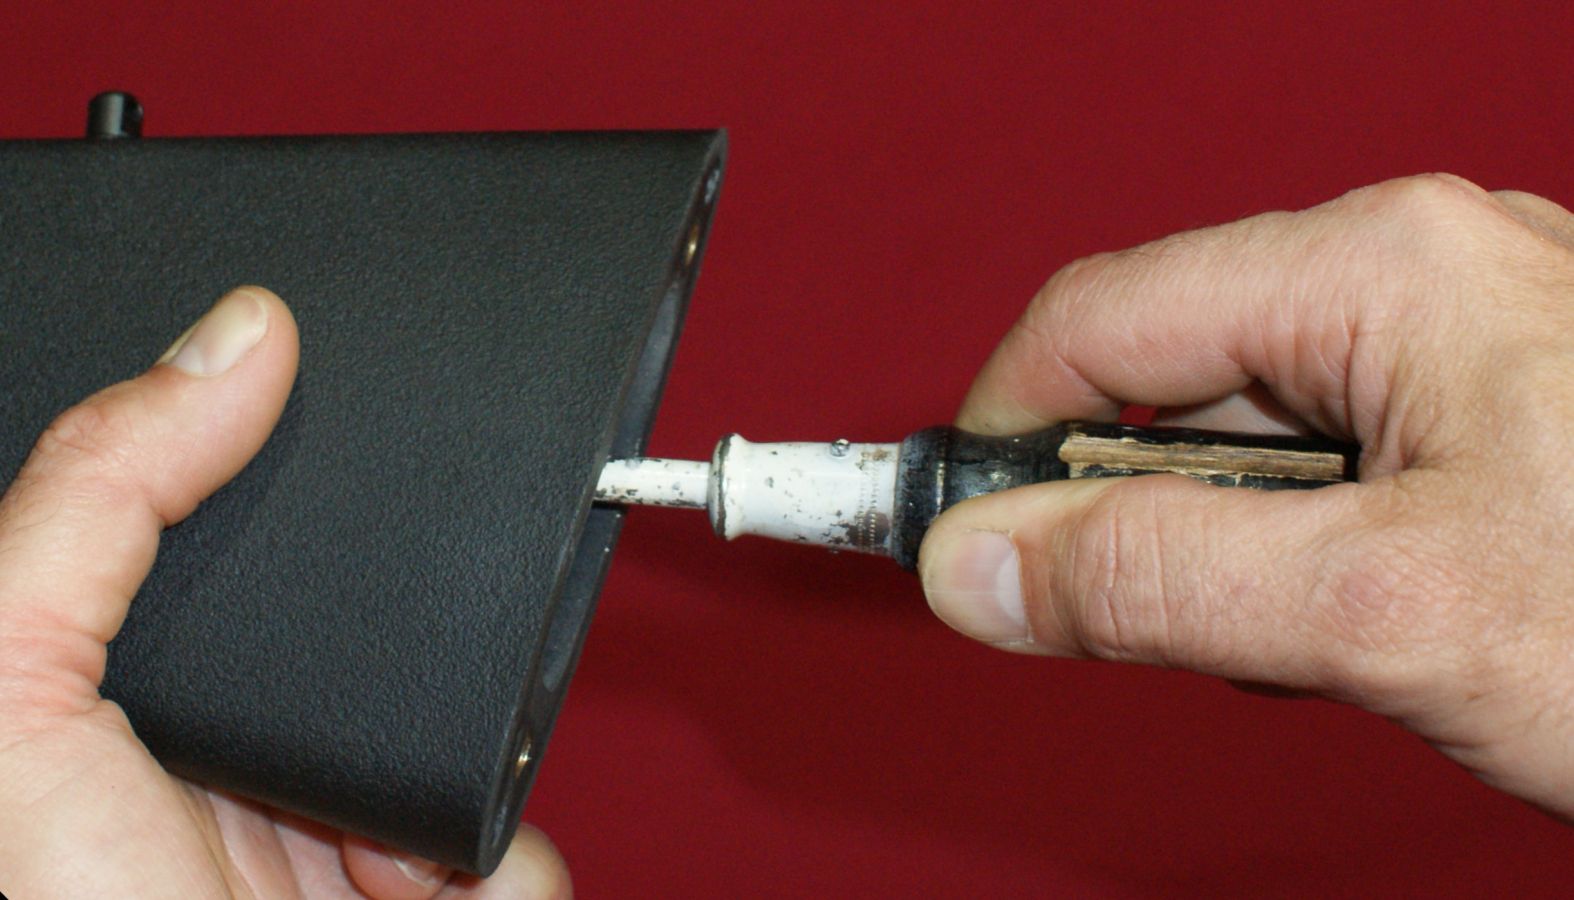
Using a regular screwdriver, I was able to loosen the stock bolt. With the stock bolt removed, the stock will come off the receiver without any force.
Figure 23
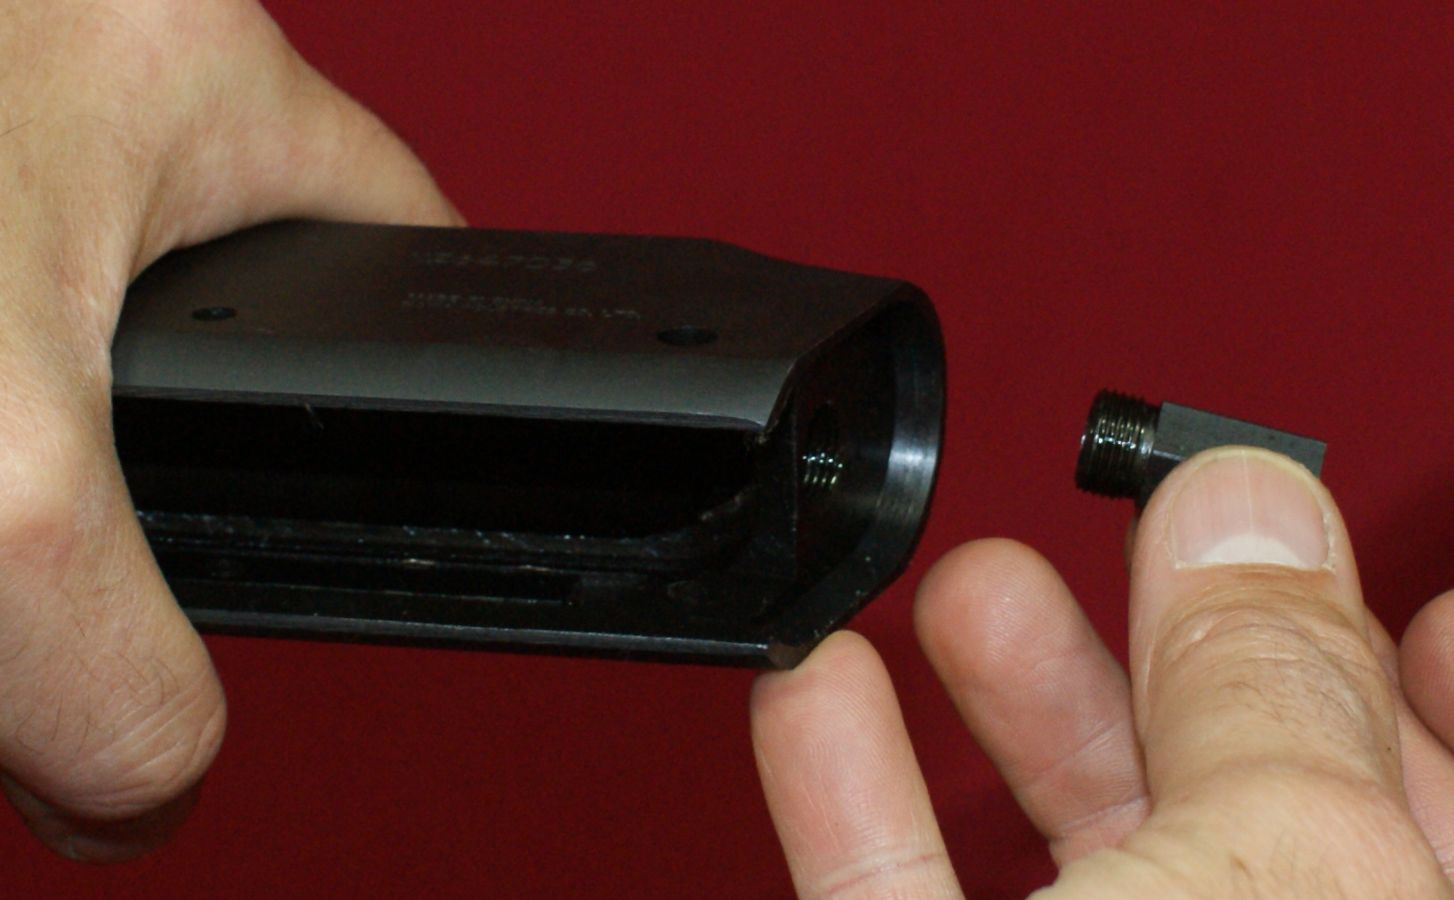
The receiver had a receiver stud (thread adapter) that screws into the receiver. I was able to remove the stud without any tools.
Figure 24
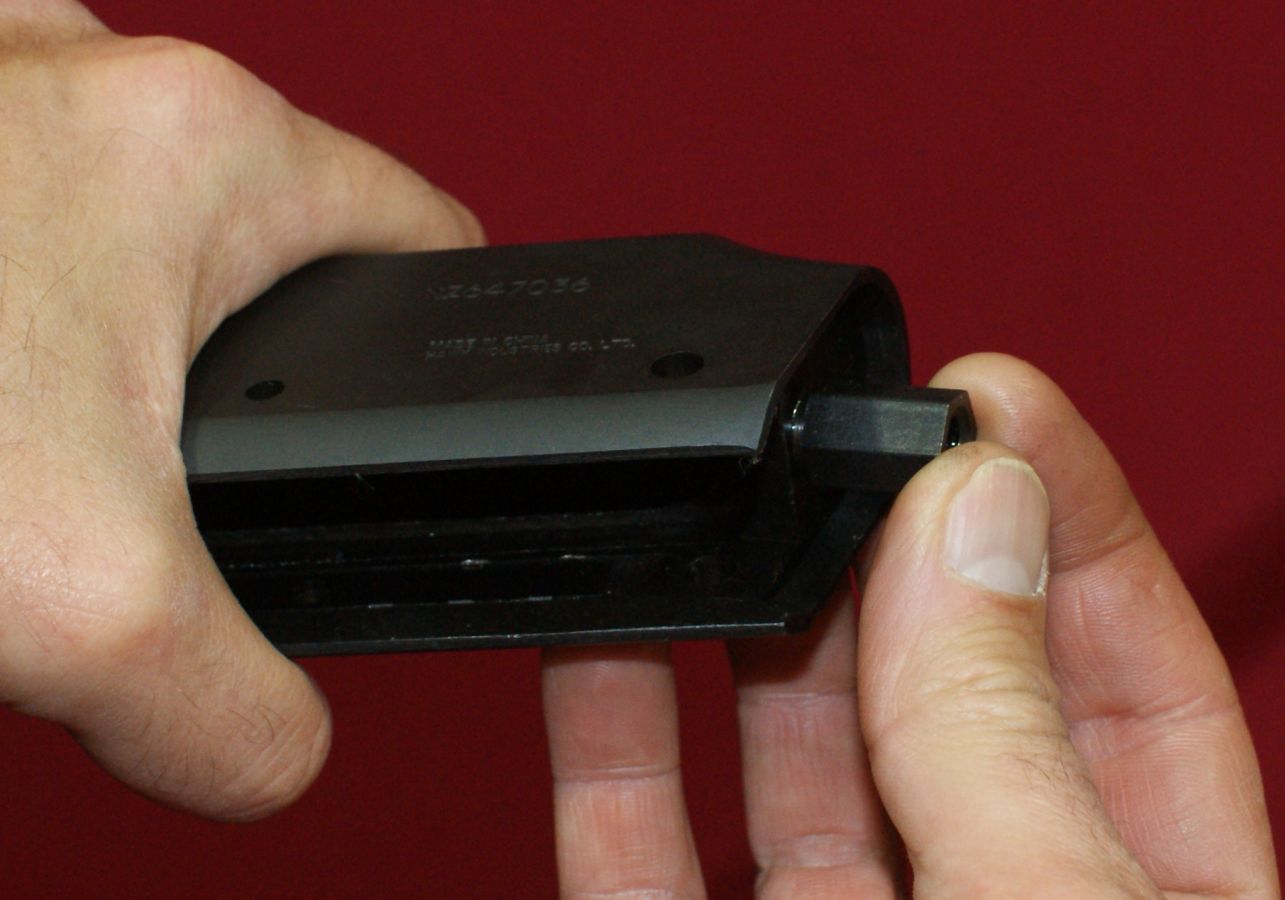
Figure 25
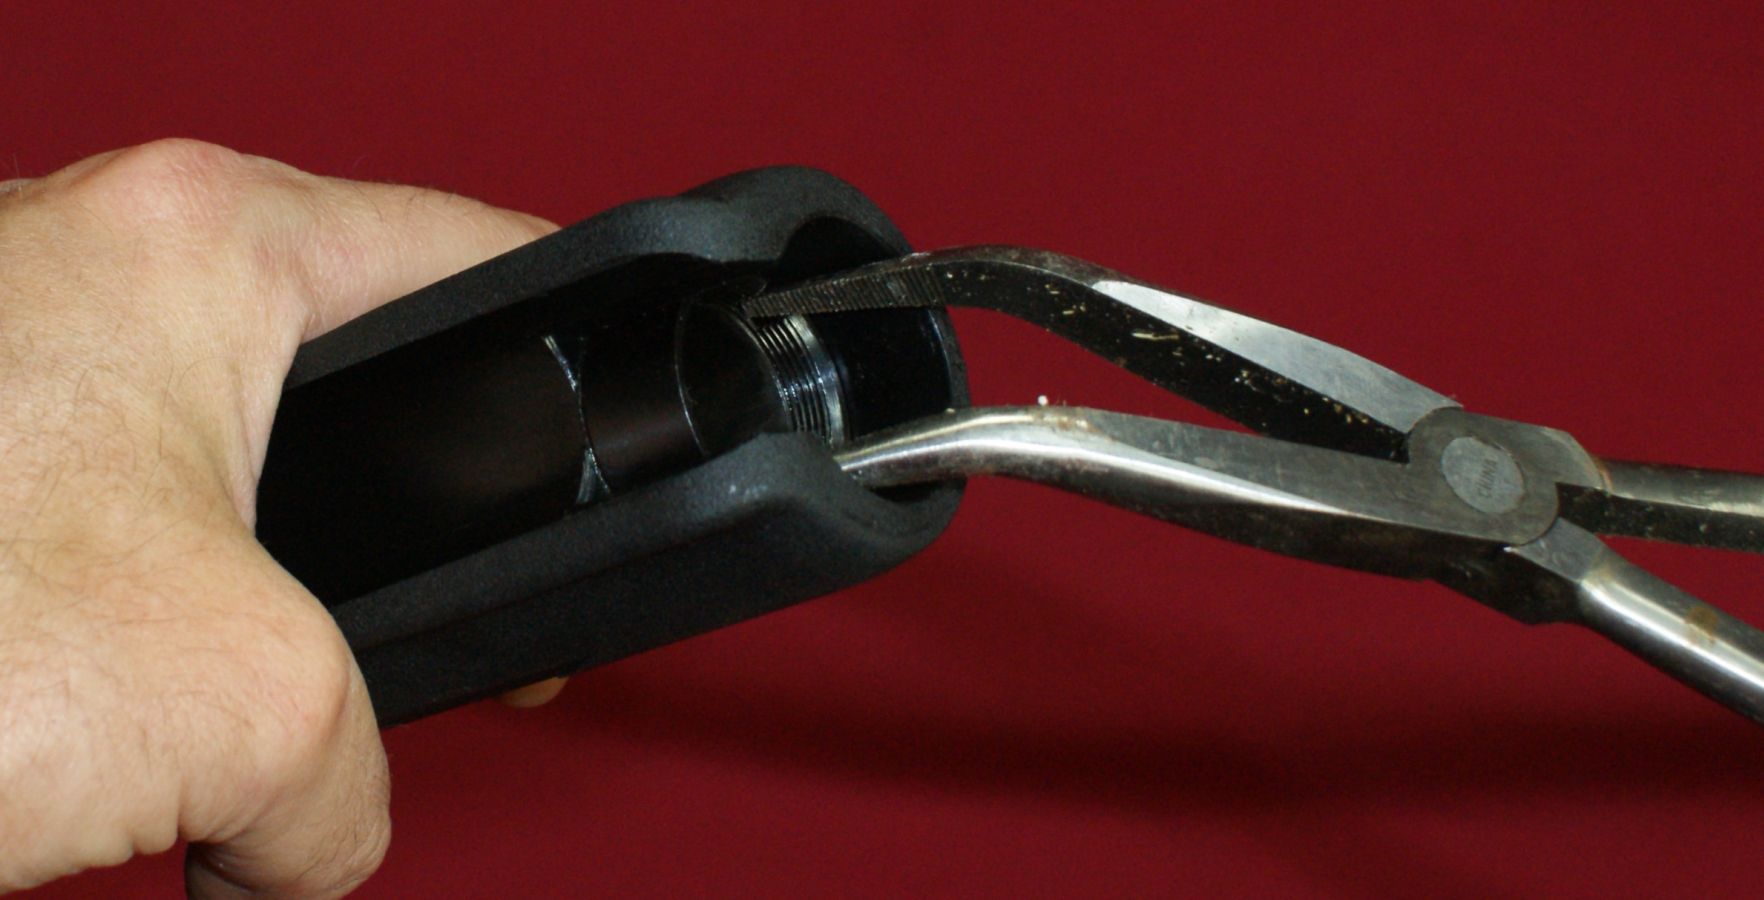
Removing Action Bar Assembly from Forearm
To remove the action bar assembly from the forearm, you must first remove the forearm tube nut. I like to do this by using a pair of needle nose pliers. I hold the pliers open with the nose tips in each slot on the sides of the nut. This allows me to loosen the nut and then I can typically remove the nut the rest of the way without using the pliers.
Figure 26
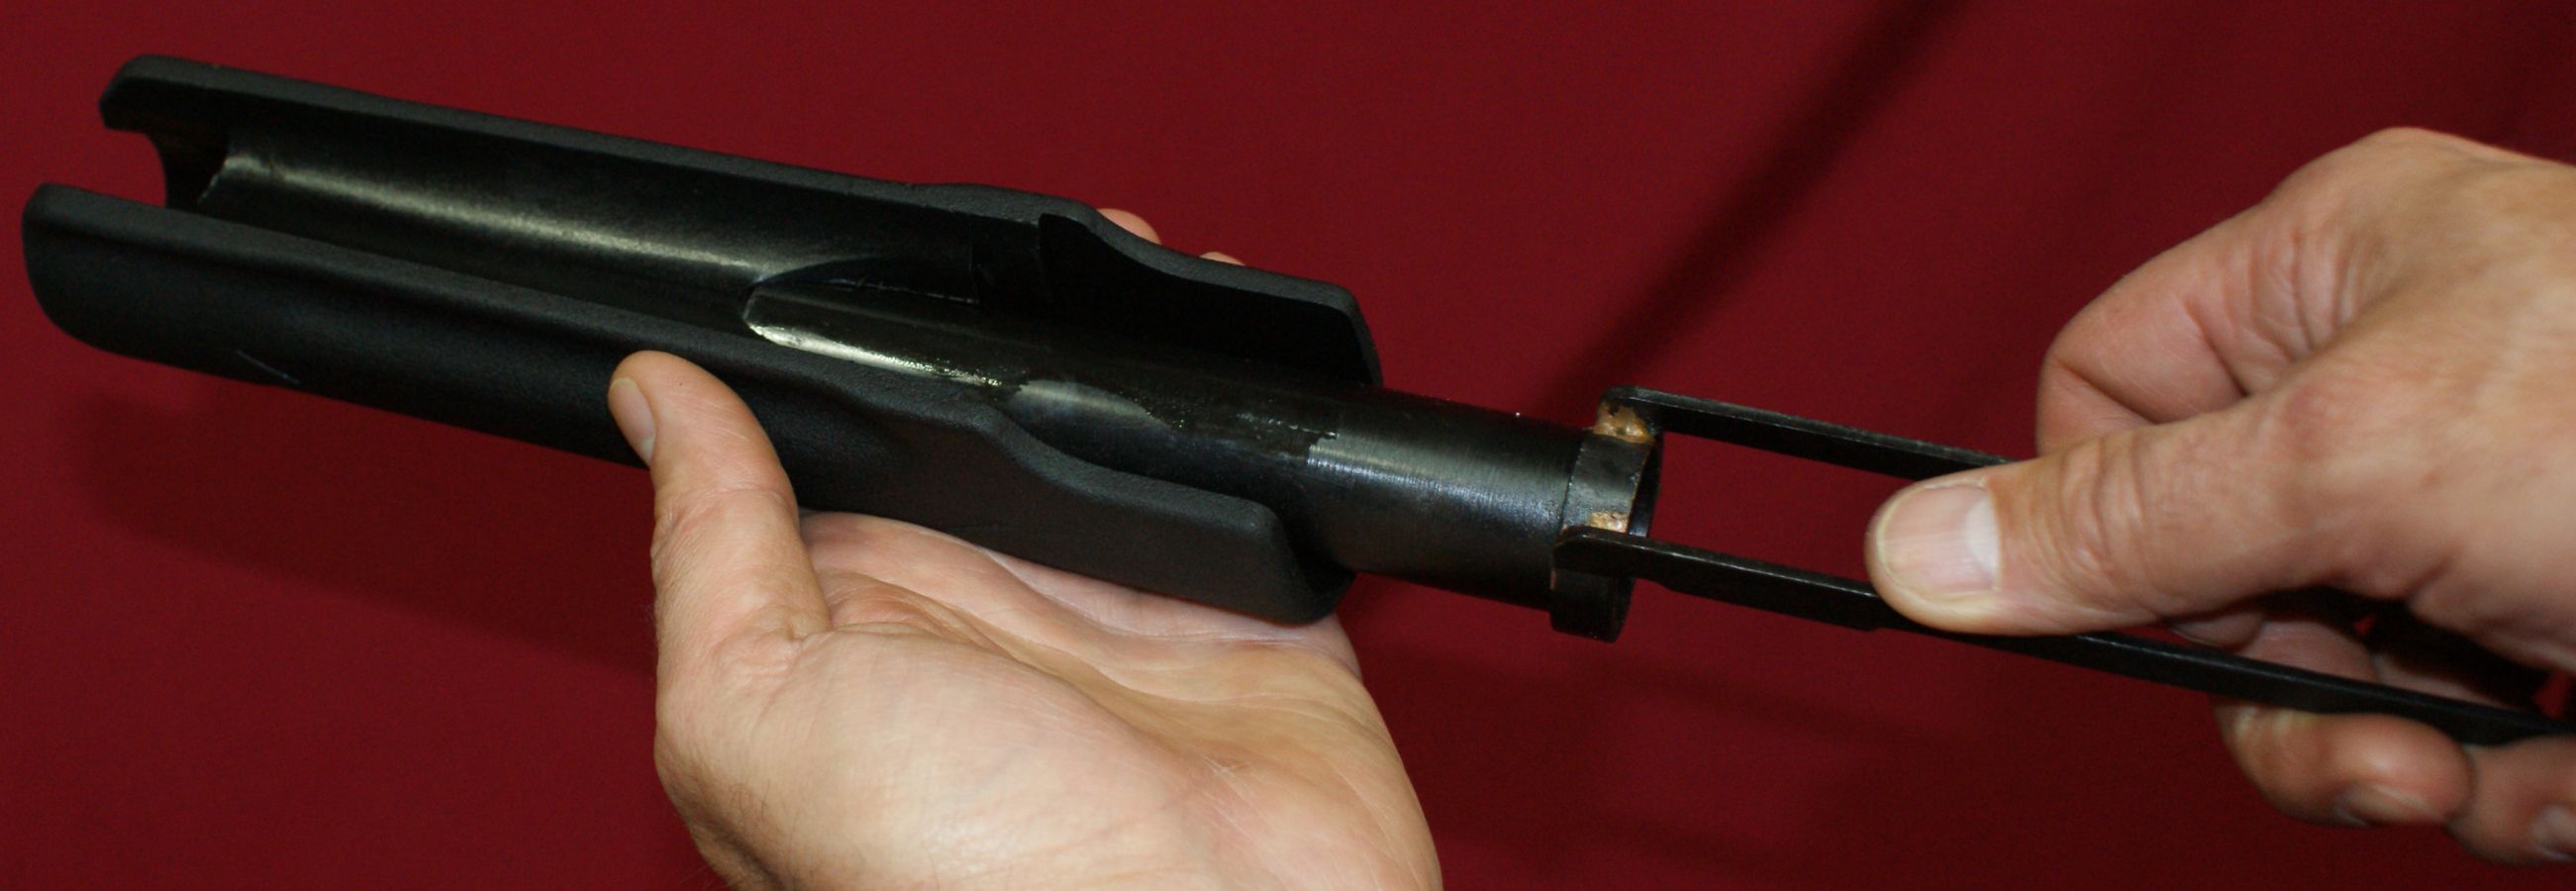
With the nut removed, the action bar assembly can be pulled from the forearm. The forearm to action bar tube was a snug fit on this shotgun and required a little force to separate these two pieces.
Figure 27
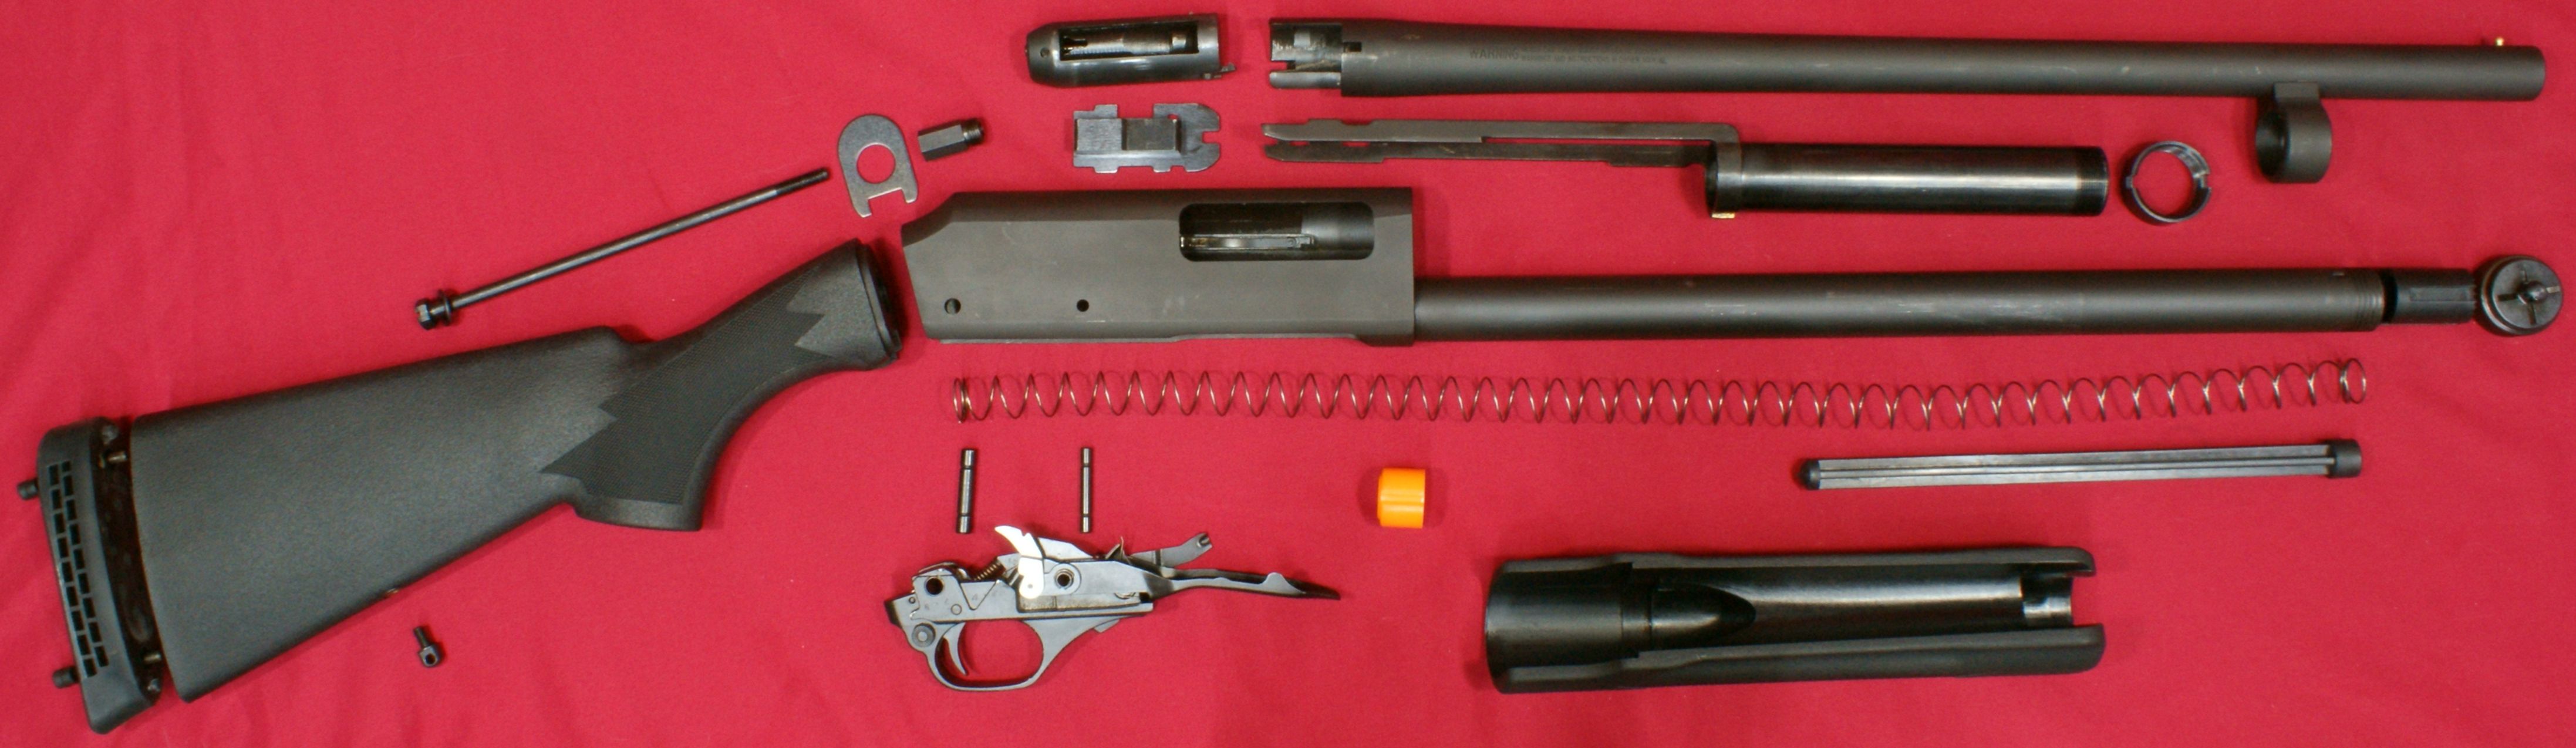
Completely Disassembled
Removal of the forearm and stock is not typically required for normal cleaning, but I did this so you could get a good look at all the shotgun components. In the next part of the review I show detailed photos of each of these components.
Figure 28
Thoughts
Disassembly was very simple on the Pardner Pump Shotgun, which is typical of most pump shotguns. If you are familiar with a Remington 870, then you will be an instant pro disassembling this shotgun.
For more detailed photos and commentary, make sure you check out the other parts of this review and feel free to leave comments on my Reader's Comments page. The following links are provided to help you see other parts of this review.
- H&R Pardner Pump Protector Shotgun Review: Part 1 - Introduction, Specifications and Summary
- H&R Pardner Pump Protector Shotgun Review: Part 2 - What's in the Box
- H&R Pardner Pump Protector Shotgun Review: Part 3 - External and Operational Features
- H&R Pardner Pump Protector Shotgun Review: Part 4 - Disassembly (this page)
- H&R Pardner Pump Protector Shotgun Review: Part 5 - Internal Features
- H&R Pardner Pump Protector Shotgun Review: Part 6 - Range Test
Or
If you would like to be notified about future Gunsumer Reports reviews via Facebook, make sure "You Like This" by clicking the Facebook "Like" button at the bottom or top of this page. If it already says "You Like This" beside the button, clicking it again will uncheck the "Like" status and you will not be notified.
| Share on Facebook | |
© 2010, 2011, 2012, 2013, 2014, 2015, 2016, 2017, 2018, 2019, 2020, 2021, 2022, 2023 & 2024 Gunsumer Reports™, All rights reserved.
FTC Disclosure