|
|
Gunsumer Reports TM Providing Detailed Objective Reviews for Firearms and Firearm Accessories |
Chiappa Rhino Review Model 60DS 6"
.357 Magnum
Part 3 - Detailed Features
October 13, 2011

These next photos give you an overall look at the Chiappa Rhino Revolver from each side and also some isometric views. I feel that peoples' opinions on the look of the Rhino will generally fall into two groups, those who love it, and those who don't. At this point I must be honest and say that I'm loving the look of this revolver so be fair warned of my potential bias. I think it is the combination of its beefy ventilated ribbed barrel shroud, upper and lower rails, fiber optic adjustable sights, hexagon cylinder and grip that gives this revolver a quality futuristic look. My guess is that we will see one of these in a block buster movie in the near future because of this unique look.
Figure 1

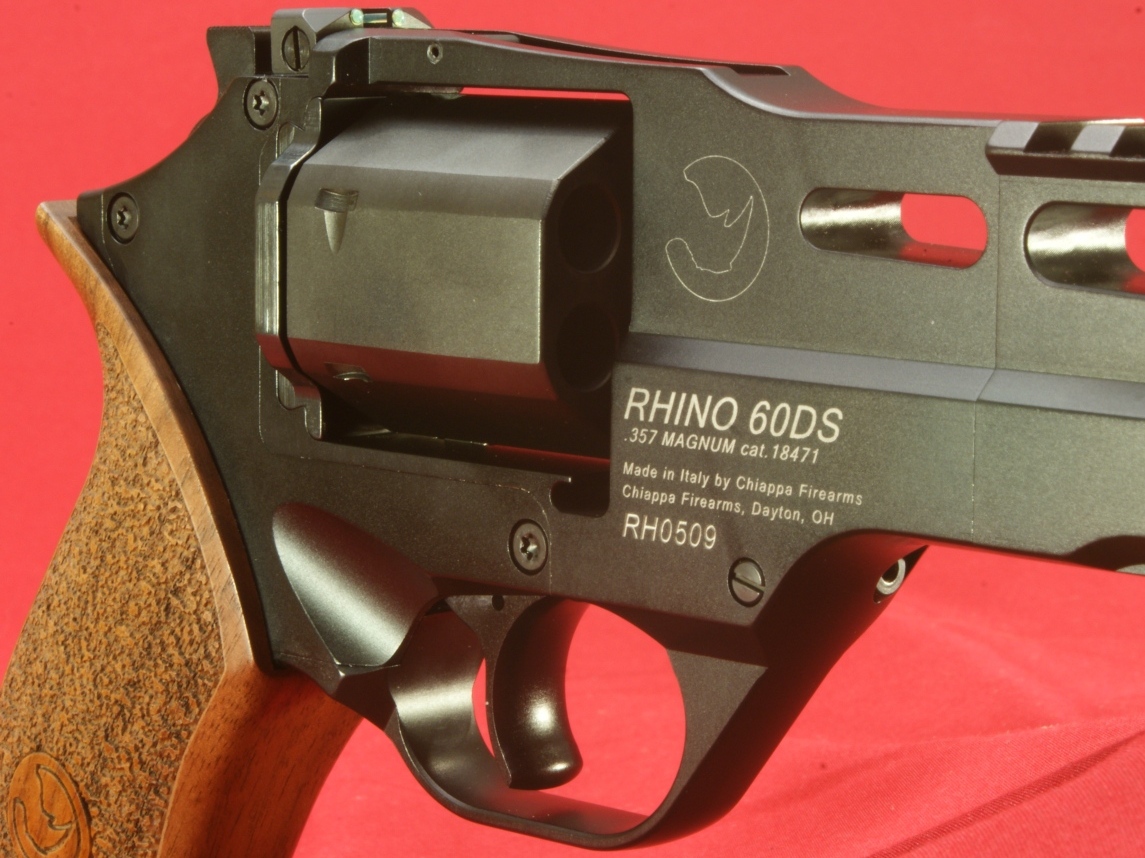
The Model 60DS 6" Barrel version (Item Number 340-073) is about 10.6" long, 5.5" tall and 1.42" wide. The right side of the Rhino is marked with the Rhino logo and the lettering "RHINO 60DS, .357 MAGNUM cat. 18471, Made in Italy by Chiappa Firearms, Chiappa Firearms, Dayton, OH" plus the serial number of the revolver. Keep in mind that throughout the review you can click on a photo to see a high resolution image.
Figure 2

The frame and barrel shroud of the Rhino are CNC machined from Ergal which is actually a trade name for 7075 Aluminum Alloy. This aluminum alloy is in the -T651 condition which gives it a high strength to weight ratio and is commonly used in the aircraft industry.
Figure 3
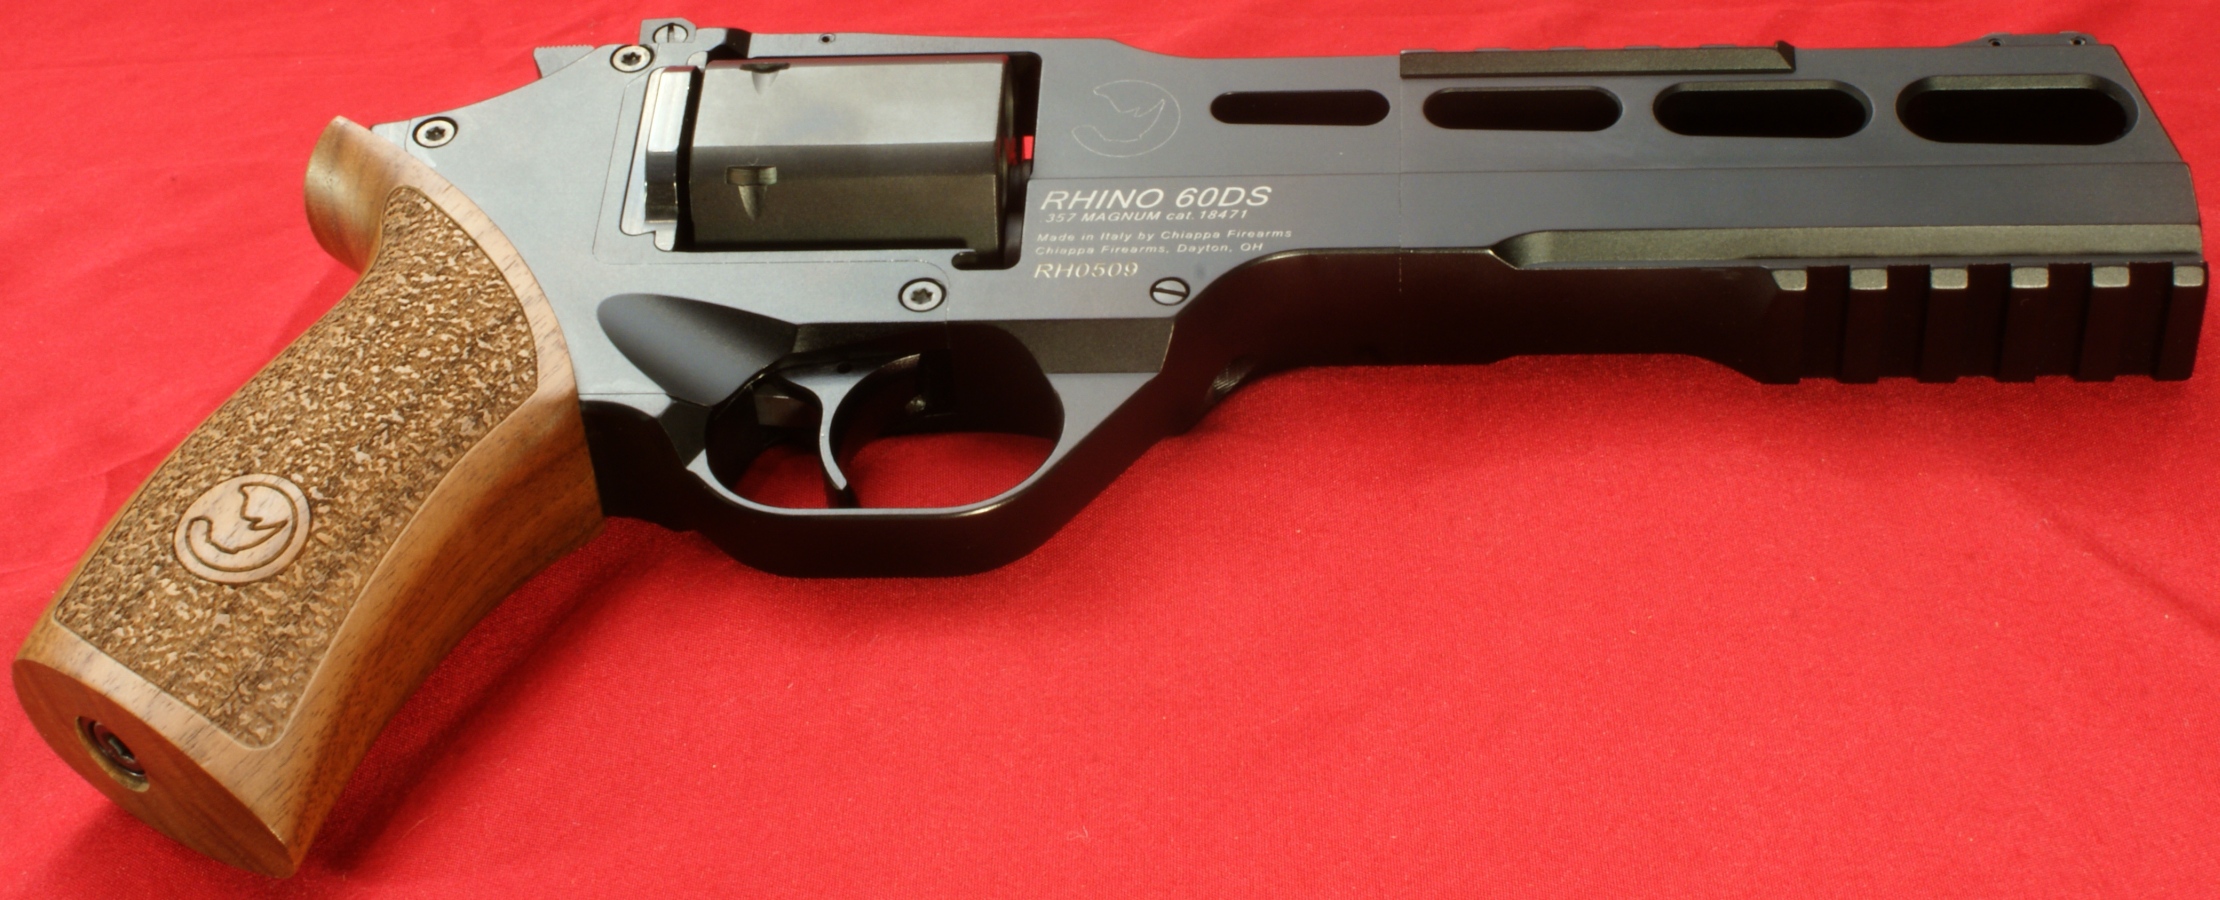
Figure 4

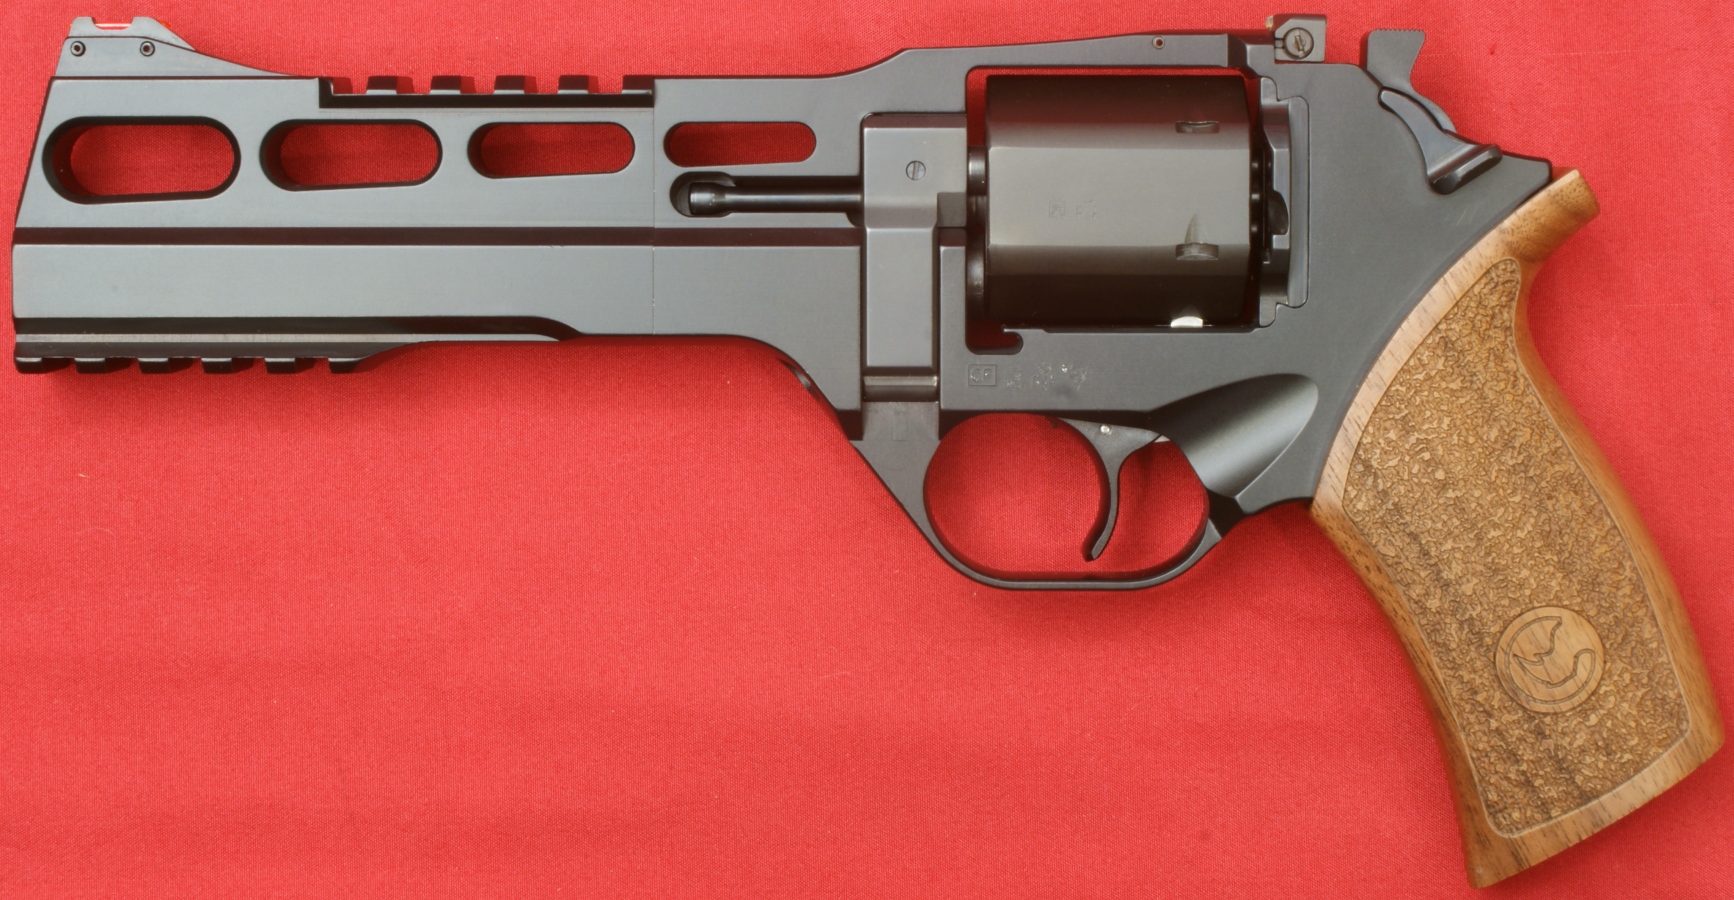
There are no markings on the bottom or left side of the revolver other than the proof marks located above the trigger area which will be discussed later in the review. Chiappa's ribbed barrel extension incorporates a nice tapered look with the oval-ish machined cutouts. The cutouts also provide some weight reduction for the revolver. Also you should notice in the photo below that the trigger is located at the approximate mid point below the cylinder. This is actually forward of most standard revolvers and I believe it is this forward trigger and low barrel position that makes it necessary to pay attention to your grip style when shooting the a Rhino. Chiappa has provided some illustrations here on the proper grip style so that you don't harm yourself due to the close proximity to your fingers to the cylinder and barrel interface area when firing the revolver.
Figure 5
The next couple of photos give you a good look at two of key differences of the Rhino Revolver from the rest. The first is the low (6 o'clock) barrel position and the second is the hexagon shaped cylinder. These two features coupled with the ribbed barrel shroud needed to maintain the front sight height along with the unique grip appearance are the key features driving the overall look of this revolver.
Figure 6
Because of the lower barrel position, there are several differences between the Rhino and most standard revolvers and I will try to point them out during this and the next part of the review.
Figure 7

Throughout this review I will try to refer to items based on the names provided in the parts list and identified in the exploded view. Both this exploded view and the parts list are available in the Rhino User's Manual, but they are for the 2" barrel length version Rhinos. There are some differences for the 4", 5" and 6" model revolvers that are not shown in these illustrations.
Figure 8
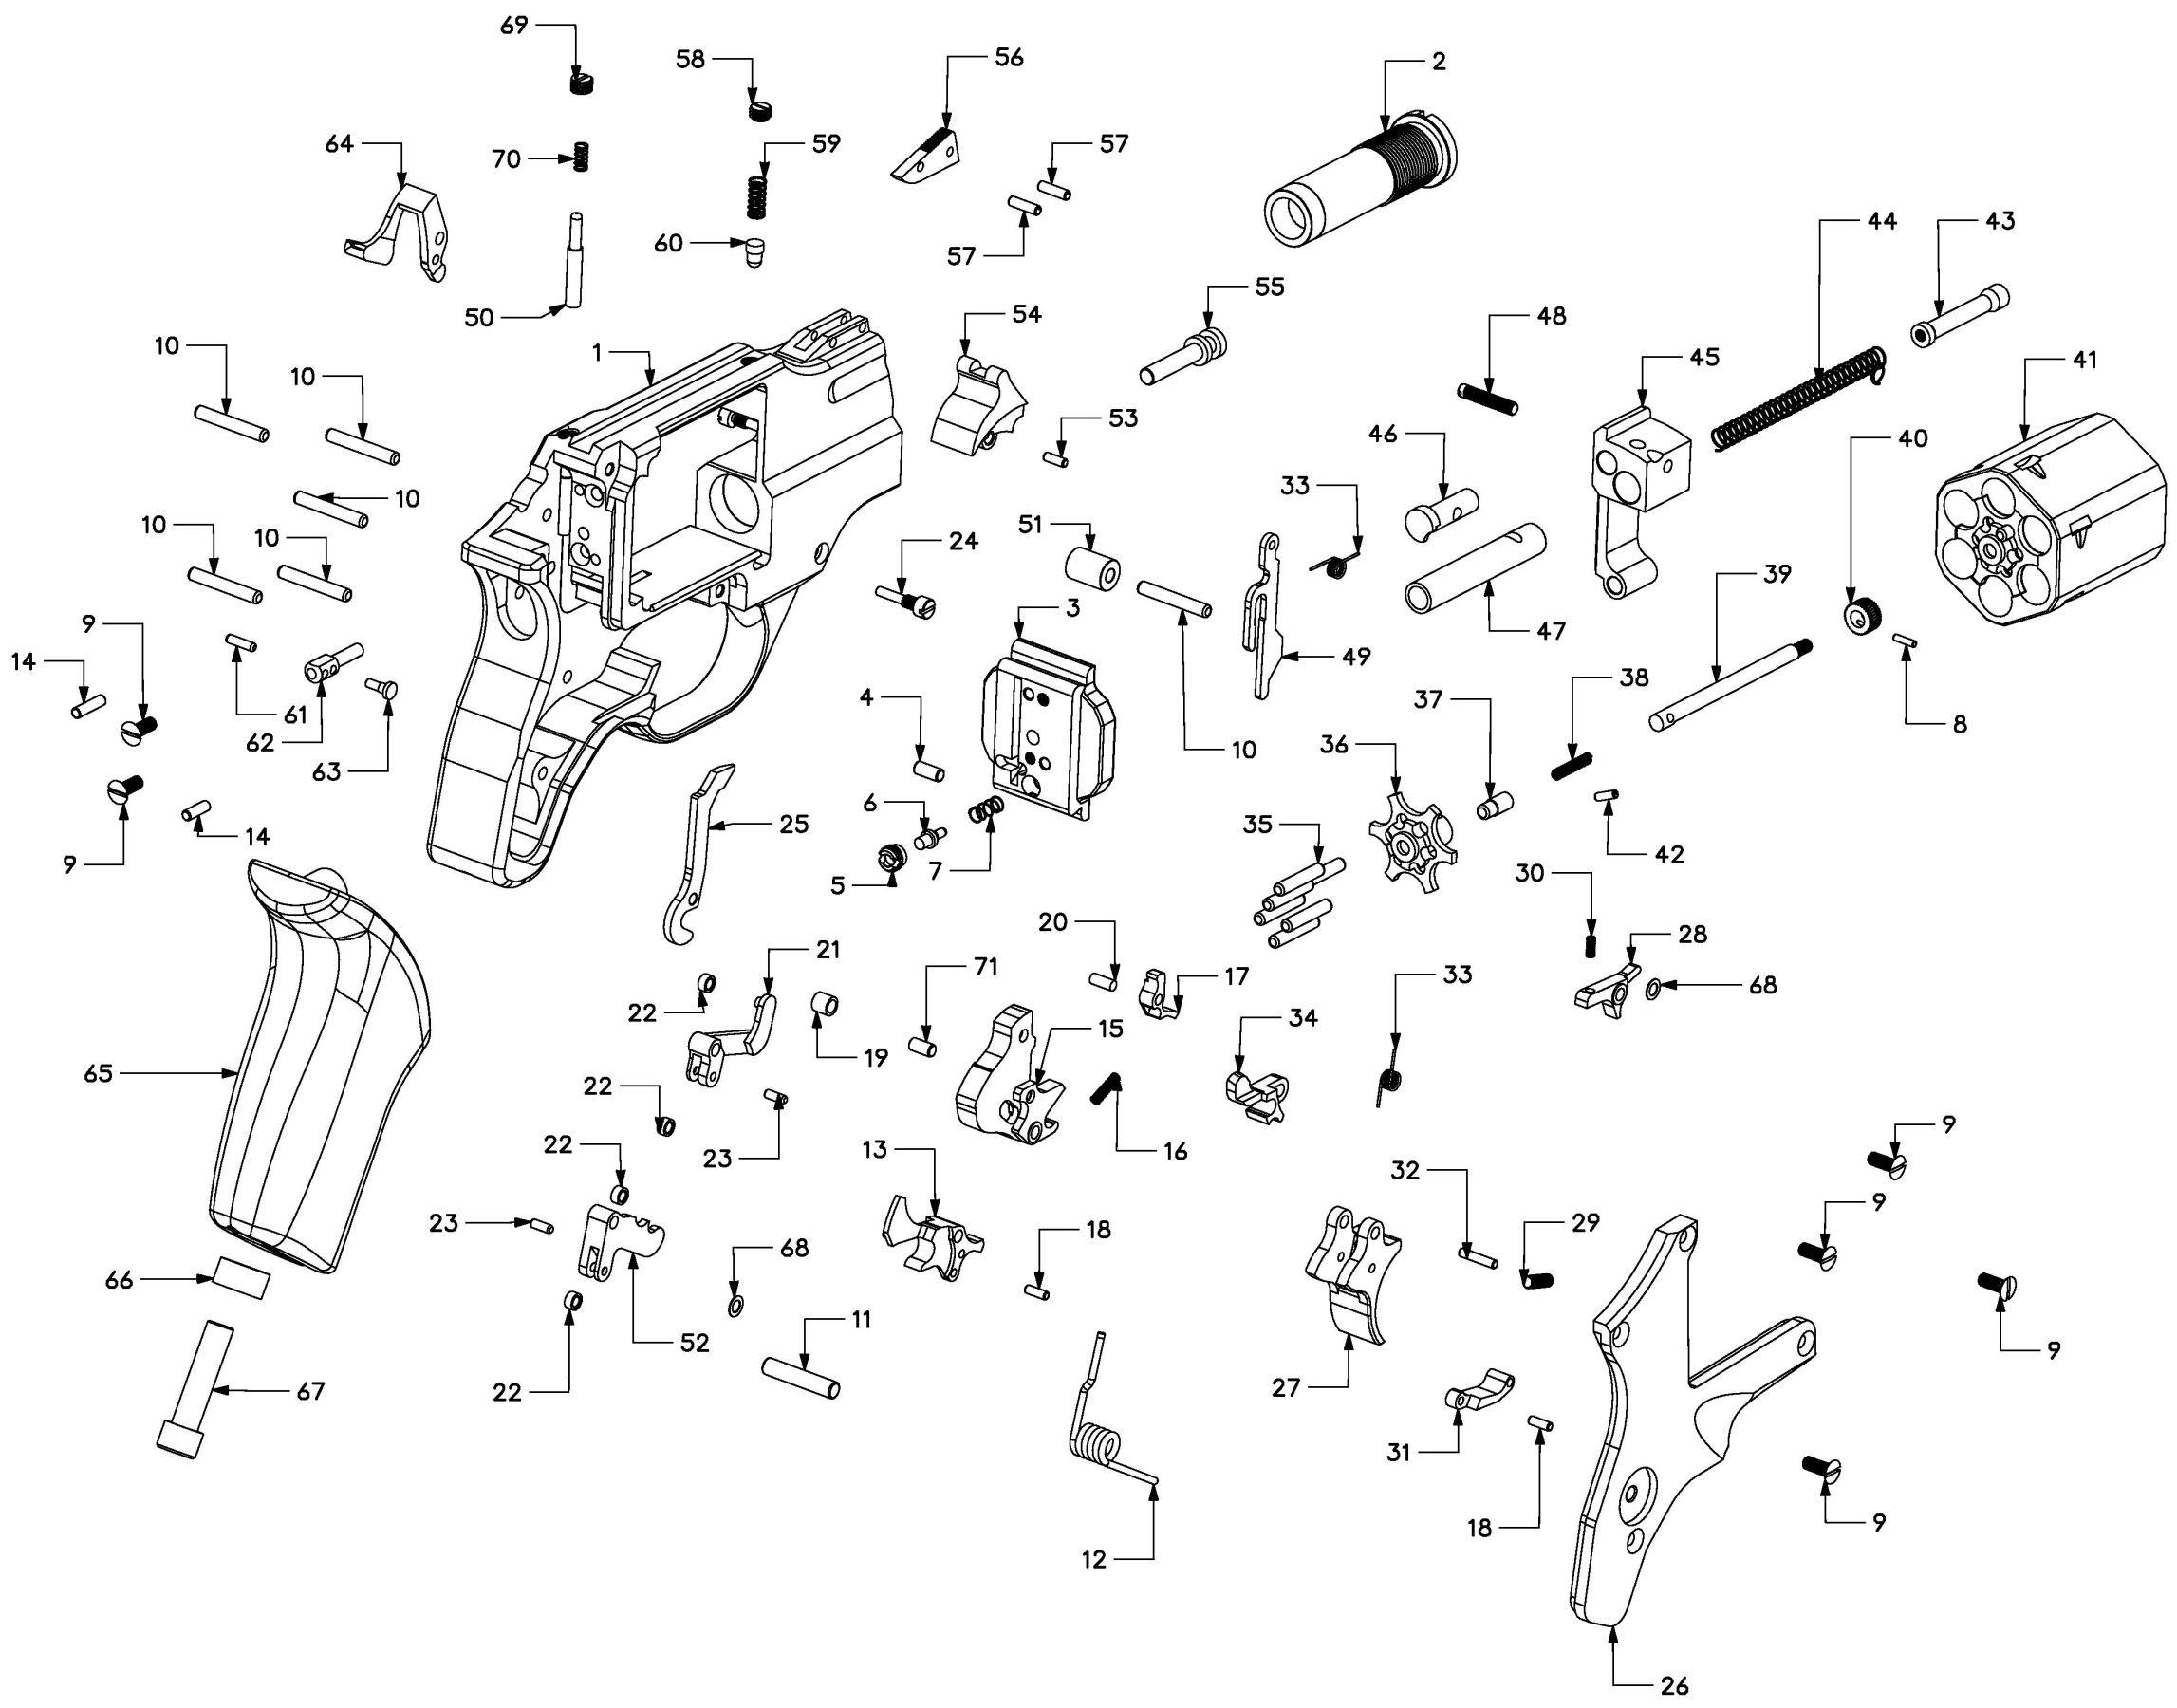
| No. | Description | No. | Description | |
| 1 | Frame Rhino 20/200 | 37 | Extractor plunger | |
| 2 | Barrel Rhino 20/200 cal. .357 Mag | 38 | Extractor plunger spring | |
| 3 | Breech shield | 39 | Extractor rod | |
| 4 | Pin 3x6,8 | 40 | Cylinder insert | |
| 5 | Firing pin grub screw | 41 | Cylinder | |
| 6 | Firing pin | 42 | Spring pin 2x6 | |
| 7 | Firing pin spring | 43 | Extractor rod head | |
| 8 | Pin 1,5x5,8 | 44 | Ejector spring | |
| 9 | Screw, M3x8, TORX | 45 | Cylinder arm | |
| 10 | Pin 3x19,8 (Rhino 20DS and 200DS only) | 46 | Cylinder hook | |
| 11 | Pin 4x19,8 | 47 | Cylinder rotation axle | |
| 12 | Main spring | 48 | Swing axle pin | |
| 13 | Interlink lever | 49 | Cocking lever (Rhino 20DS and 200DS only) | |
| 14 | Pin 2,5x7,8 | 50 | Single action flag (Rhino 20DS and 200DS only) | |
| 15 | Inner hammer | 51 | Cocking lever link sleeve 20DS and 200DS only) | |
| 16 | Hammer sear spring | 52 | Hammer spring lever | |
| 17 | Hammer sear | 53 | Pin 2x9,8 | |
| 18 | Pin 2x5,8 | 54 | External hammer for Rhino 20DS and 200DS | |
| 19 | Hammer sleeve | 55 | Cylinder arm rotating pin | |
| 20 | Pin 2,5x6 | 56 | Front sight | |
| 21 | Return lever | 57 | Spring pin 2x8 | |
| 22 | Roller | 58 | Notched grub screw M5x4 | |
| 23 | Pin 2x5,5 | 59 | Cylinder stop spring | |
| 24 | Cylinder arm screw | 60 | Cylinder unhook pin | |
| 25 | Lifting lever | 61 | Pin 2x7,8 | |
| 26 | Lock plate | 62 | Cylinder release plunger | |
| 27 | Trigger | 63 | Cylinder release plunger pin | |
| 28 | Single Action Lever 20DS and 200DS only) | 64 | Cylinder opening lever | |
| 29 | Screw, M3x8, Allen key head | 65 | Wooden grip medium for except 20D and 20DS | |
| 30 | Single Action Lever Spring 20DS and 200DS only) | 66 | Grip screw washer | |
| 31 | Connecting rod | 67 | Allen key screw M5x15 | |
| 32 | Pin 2x10 | 68 | Sleeve 0,2 Rhino 20DS and 200DS | |
| 33 | Trigger spring | 69 | Flag grub screw Rhino 20DS and 200DS | |
| 34 | Cylinder stop lever | 70 | Flag spring (Rhino 20DS and 200DS only) | |
| 35 | Pin 3x15,8 | 71 | Pin d. 3x6 | |
| 36 | Extractor |
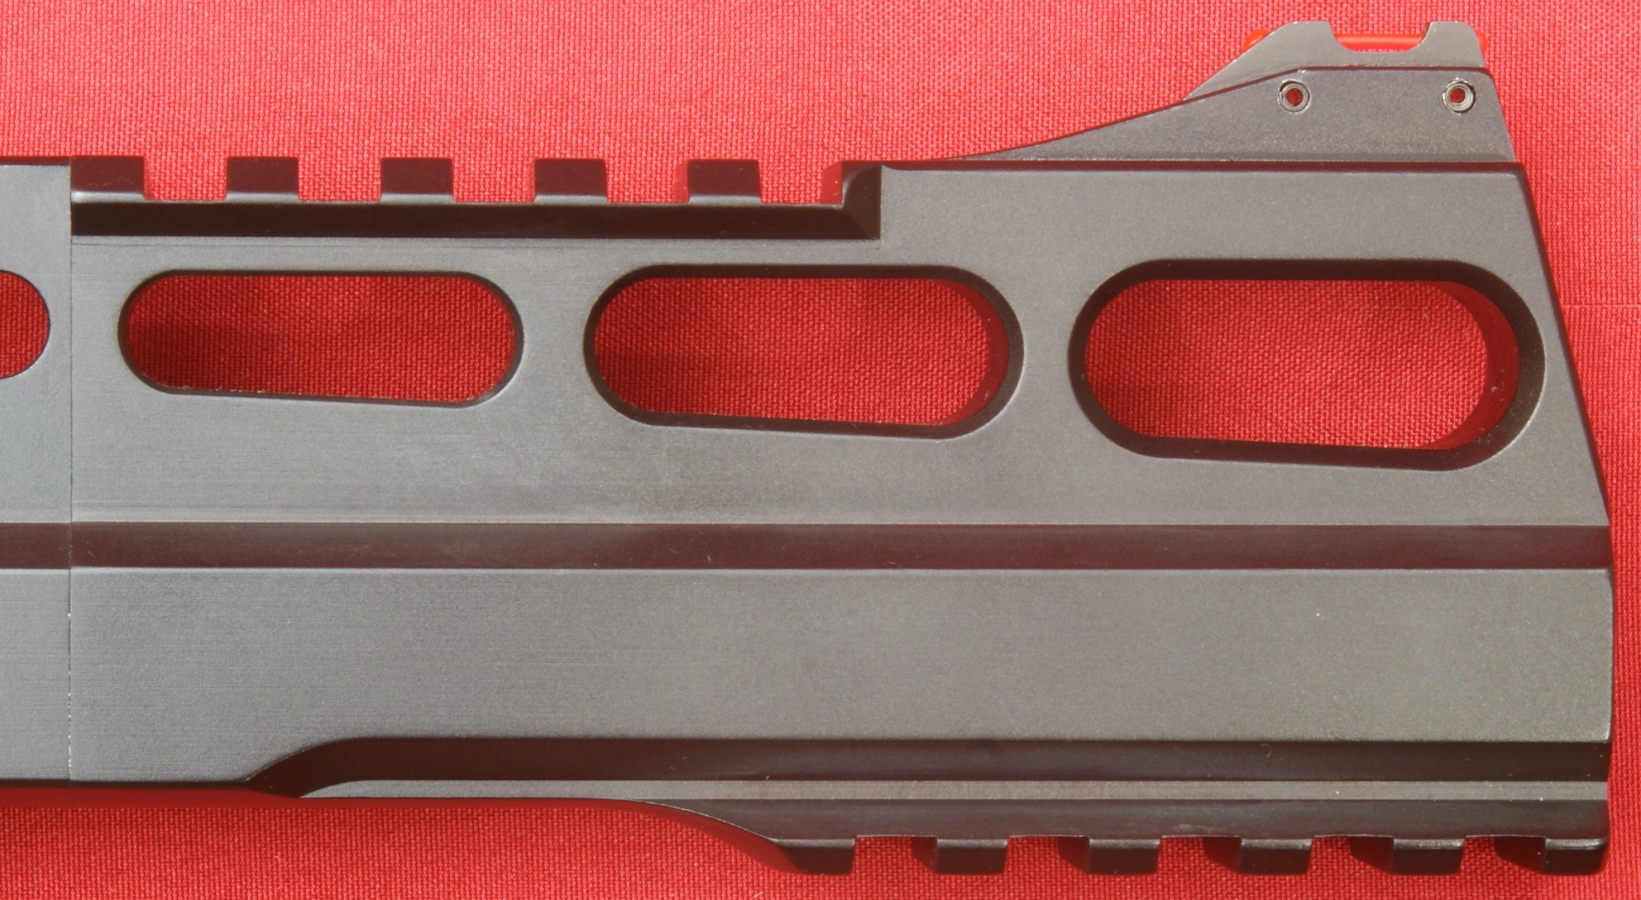
The barrel is made from a European equivalent to 4140 high carbon tool steel and is actually a barrel liner that is housed in the aluminum alloy frame and barrel shroud. You can see the thin line just behind the upper rail that shows the interface of the frame to the shroud. Although I don't have an exploded diagram of this exact version of Rhino, I believe the barrel is threaded on both the frame end and the shroud end. At the shroud end, there appears to be a barrel nut/bushing that secures the shroud tightly against the frame. I also believe there is some type of alignment pin between the frame and shroud that maintains the shroud position.
Figure 9

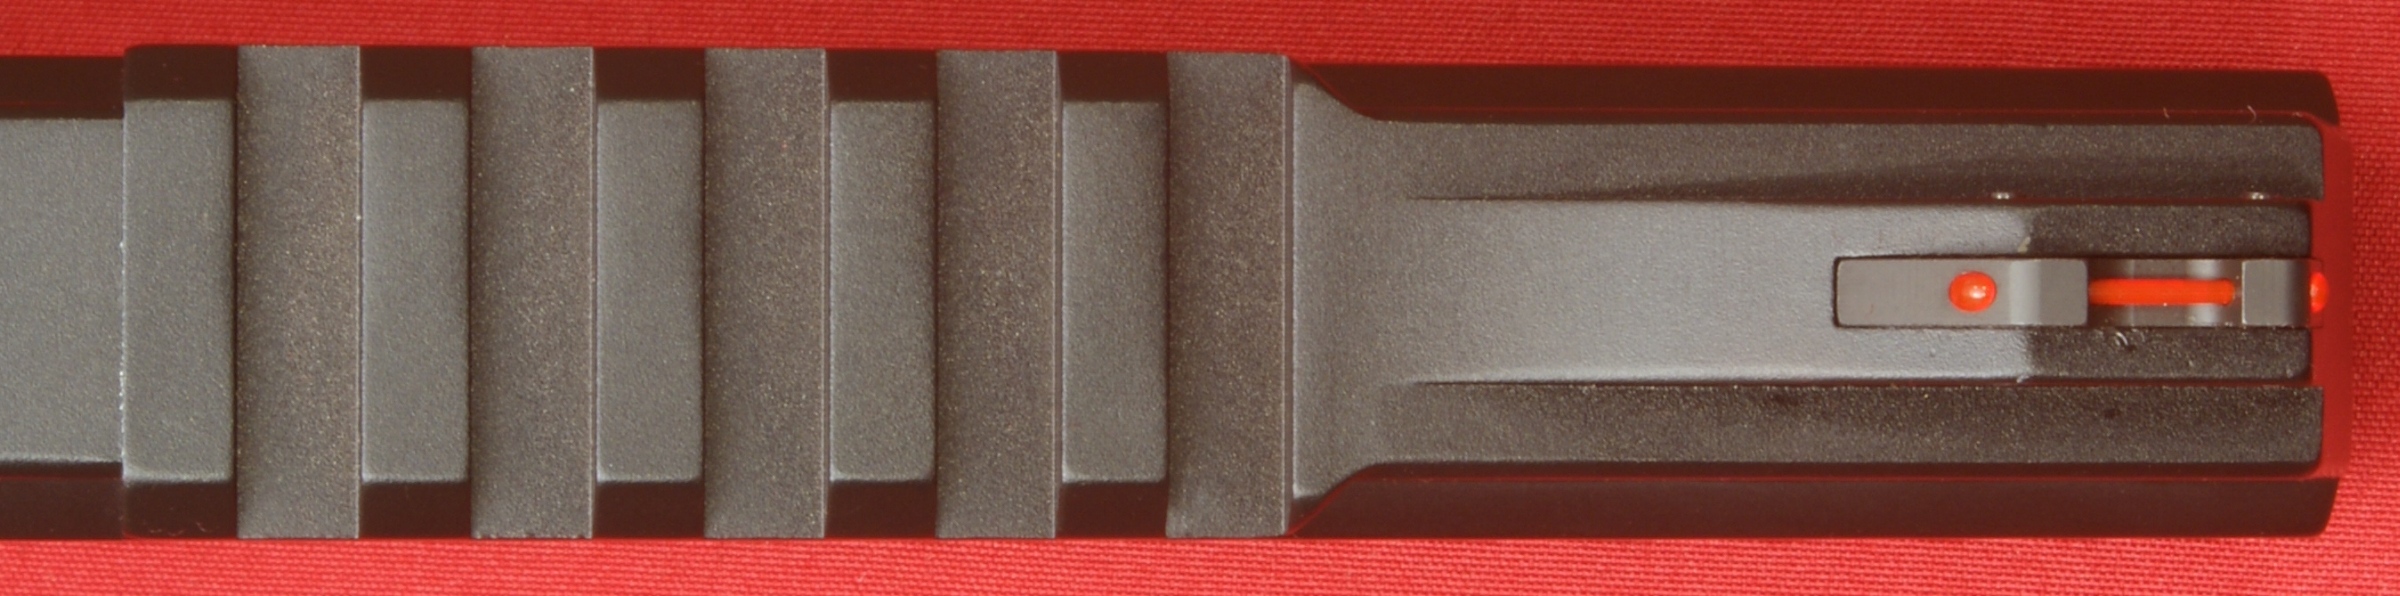
The top of the barrel shroud has a 5 slot Picatinny rail that is about 2" in length. You can also see that the front blade sight is pined into the shroud with two roll pins and the front sight contains a highly visible red fiber optic sight.
Figure 10
The shroud on the 60DS 6" barrel model measures 4" in length. The shroud contains three large vented (cutout) areas and measured 2.24" from the top of the sight to the bottom of the lower rail.
Figure 11
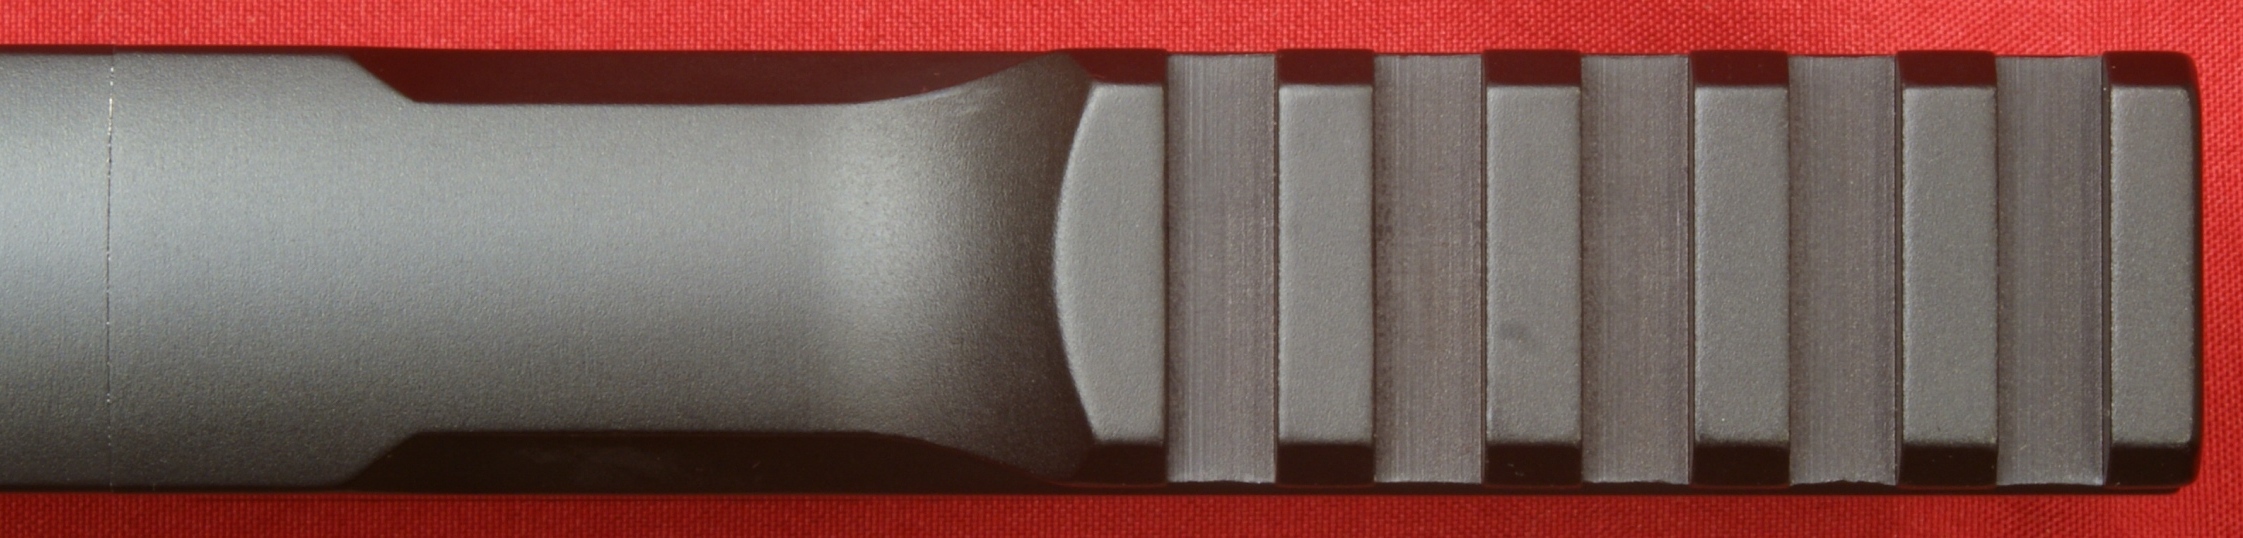
The bottom of the shroud contains another 5 slot Picatinny rail that measures about 2.18" in length. Although you could use the lower rail for a light or laser, it may be more practical for use with a short bipod for bench shooting or hunting at longer distances. If you do install a light or laser, you may want to consider something with a pressure switch since you will not be able to reach that area with a normal two handed grip.
Figure 12
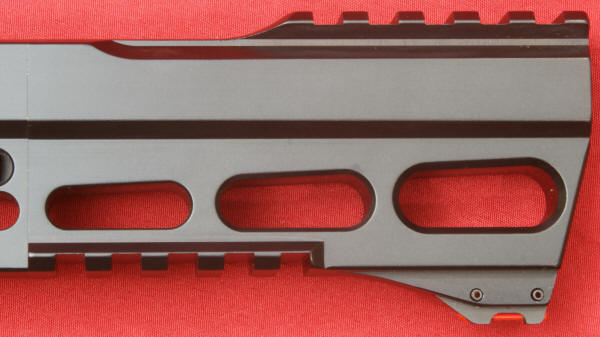
The left side of the barrel shroud is the mirror image of the right and the shroud contains no visible markings of any kind.
Figure 13
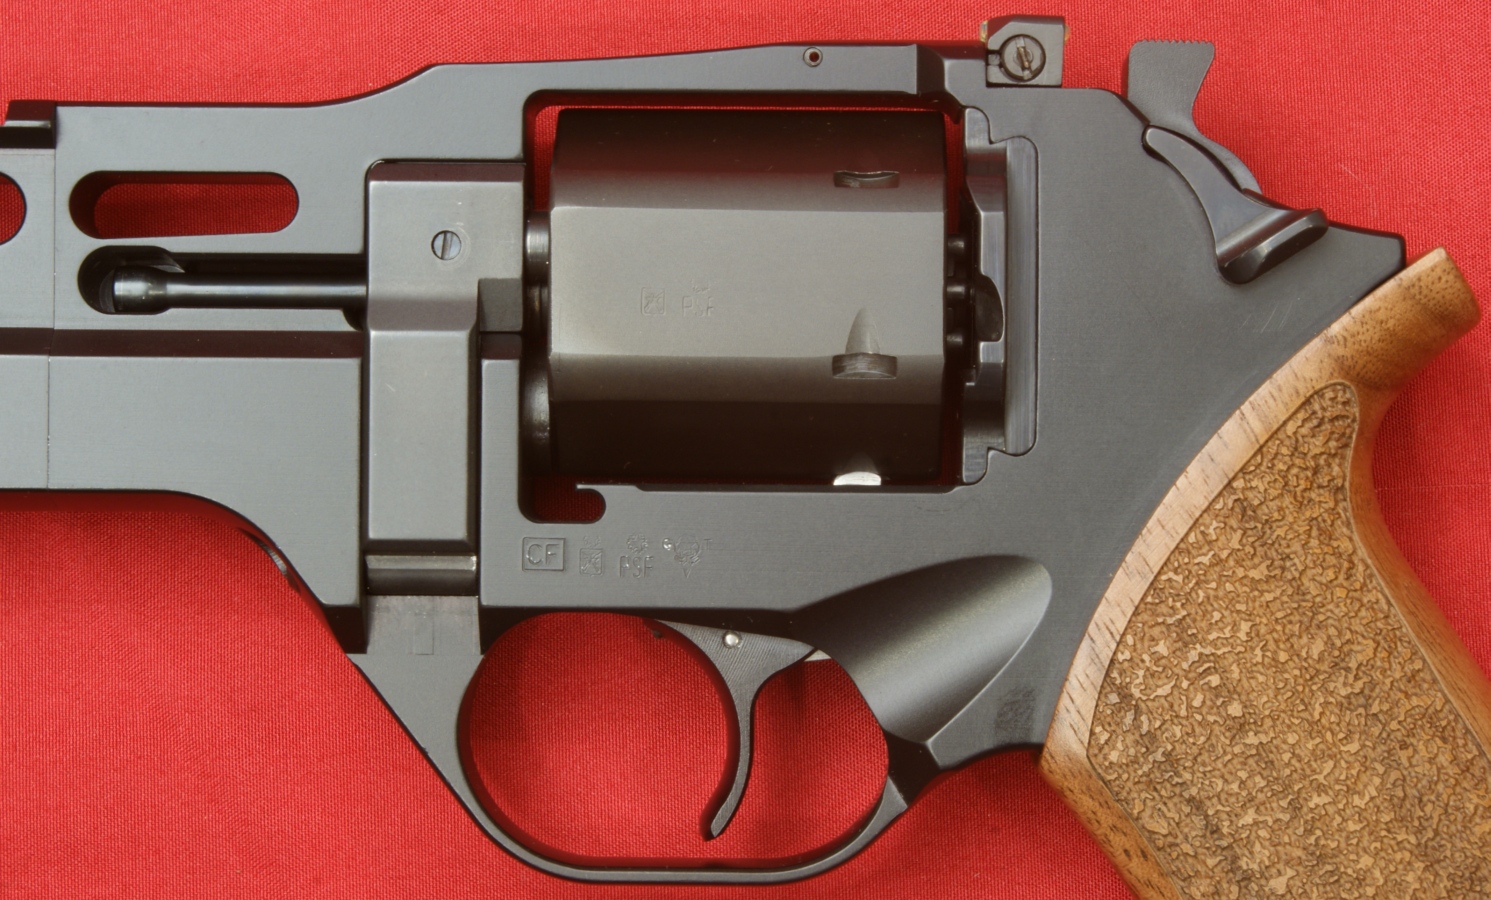
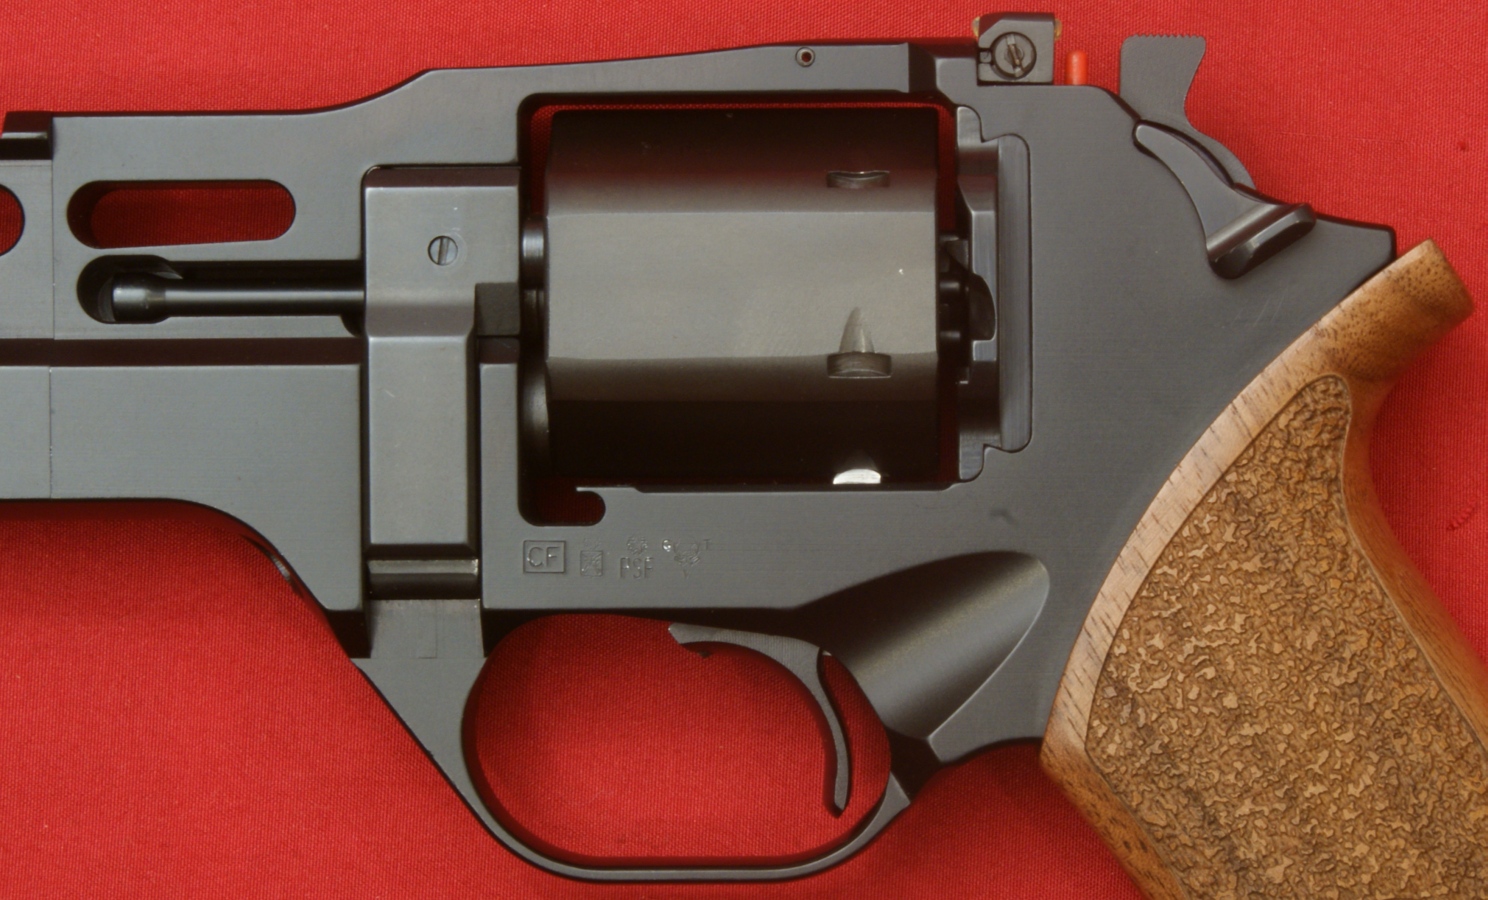
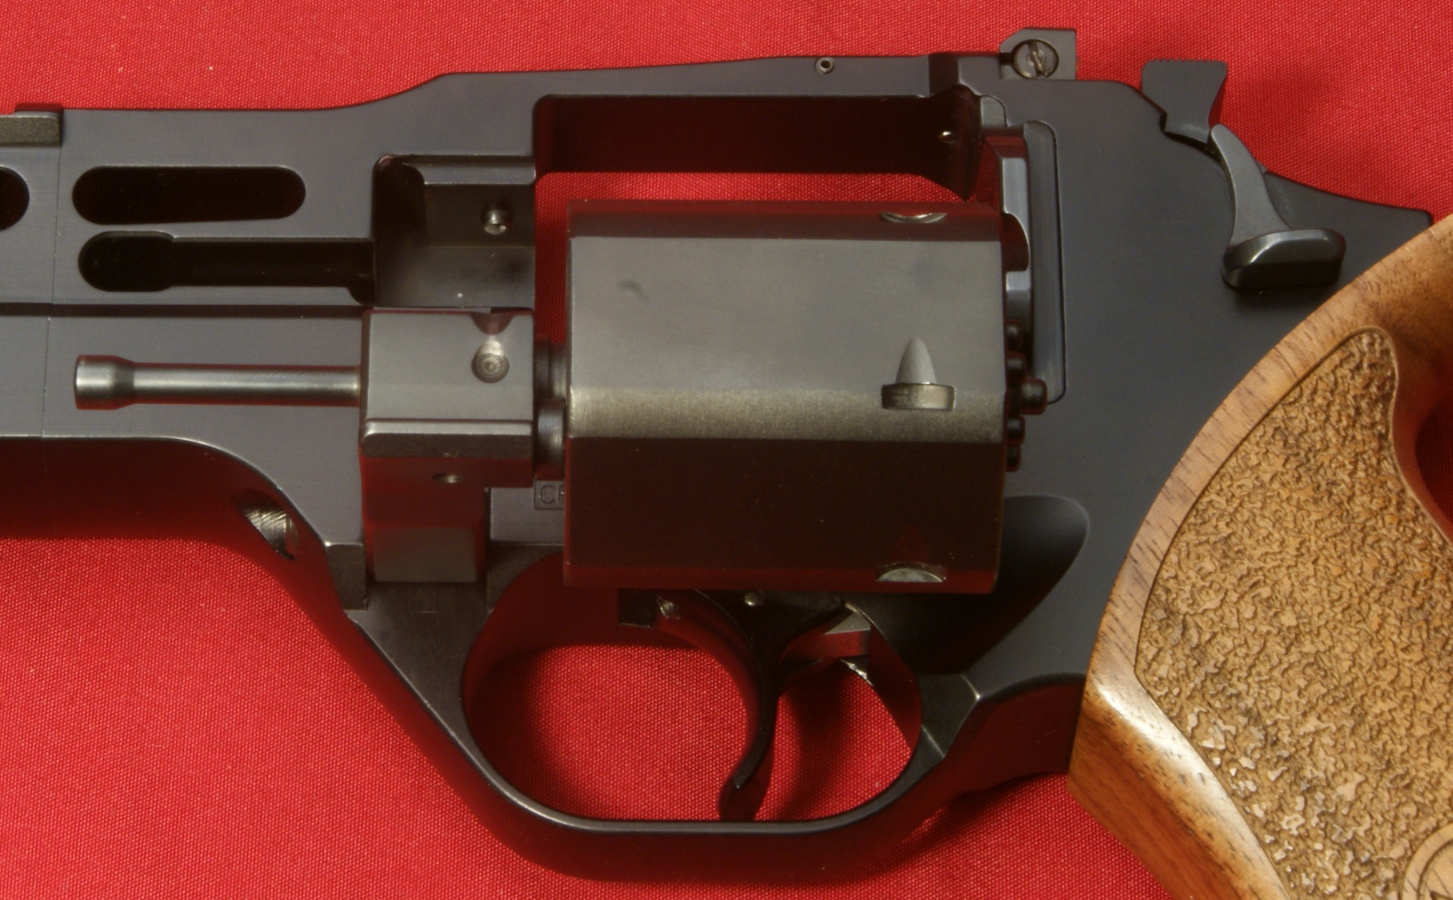
When I look at the frame of the Rhino, a couple of key features stand out. First feature is there is a cutout in the frame in front of the 12 o'clock cylinder position that reminds me that the barrel is not on top. The next feature is the flat hexagonal cylinder and the another feature is the extremely wide trigger. This hex shaped cylinder reduces the cylinder profile from 1.53" to 1.41". The width of the trigger is basically the same width as the trigger guard which measures 0.47" wide. This added width reduces the pressure you feel on your finger when pulling the trigger which in turn gives the impression of a lighter trigger pull. The trigger pull on this Rhino Revolver averaged 10.2 pounds in the double action mode and 4.2 pounds in the single action mode during 10 pulls each with a Lyman Trigger Pull Gauge.
Figure 14
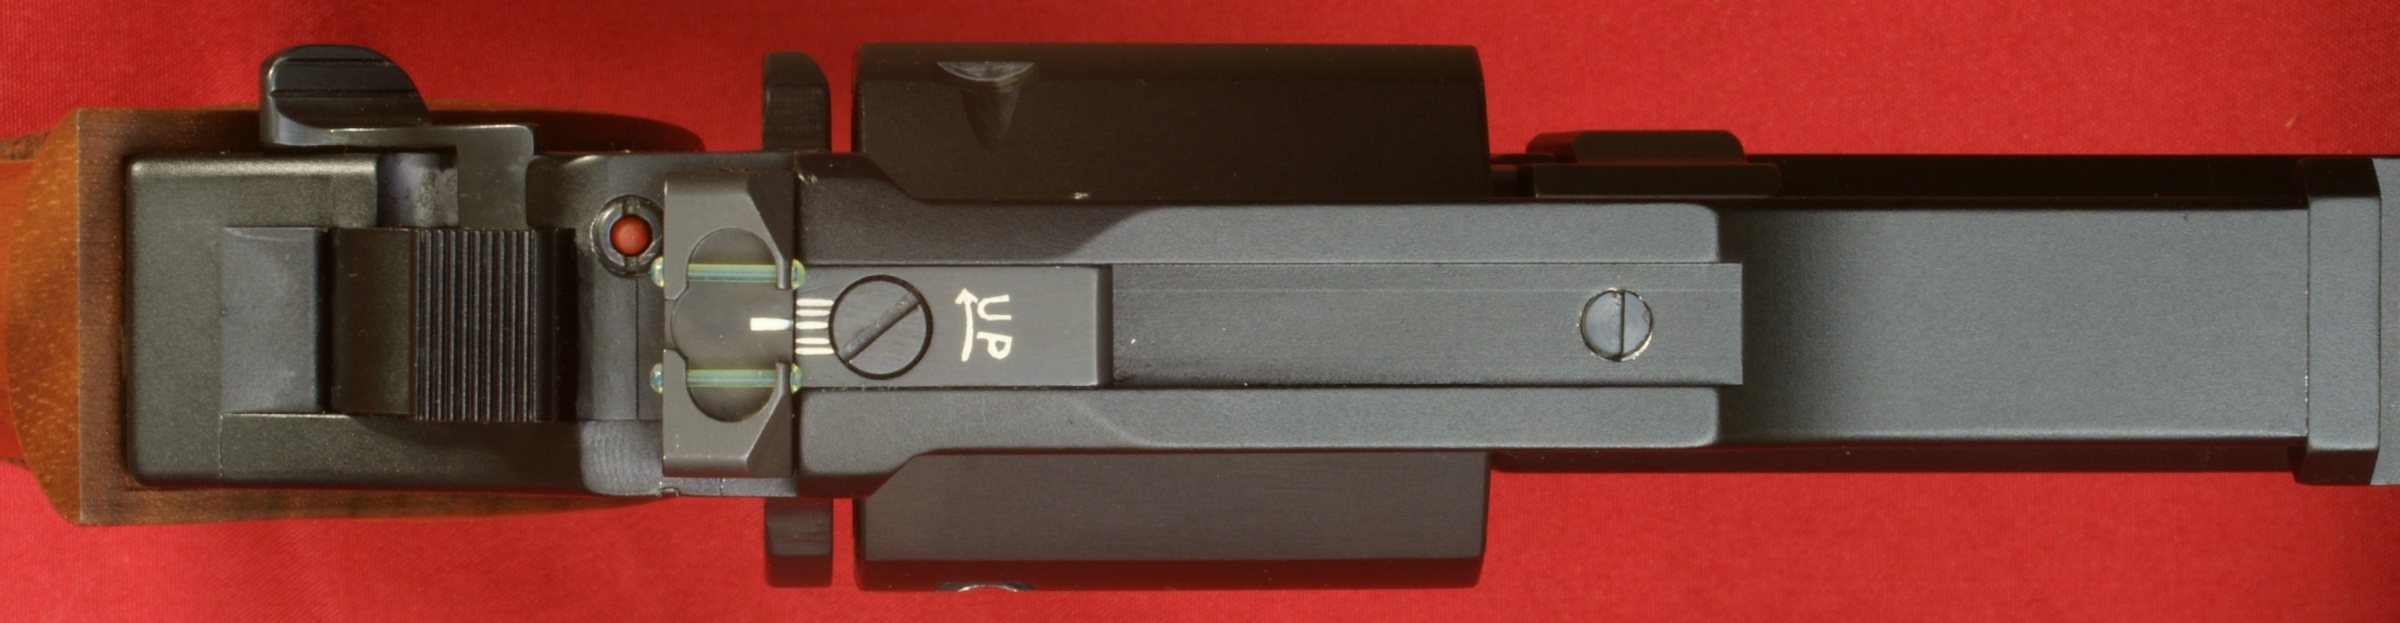
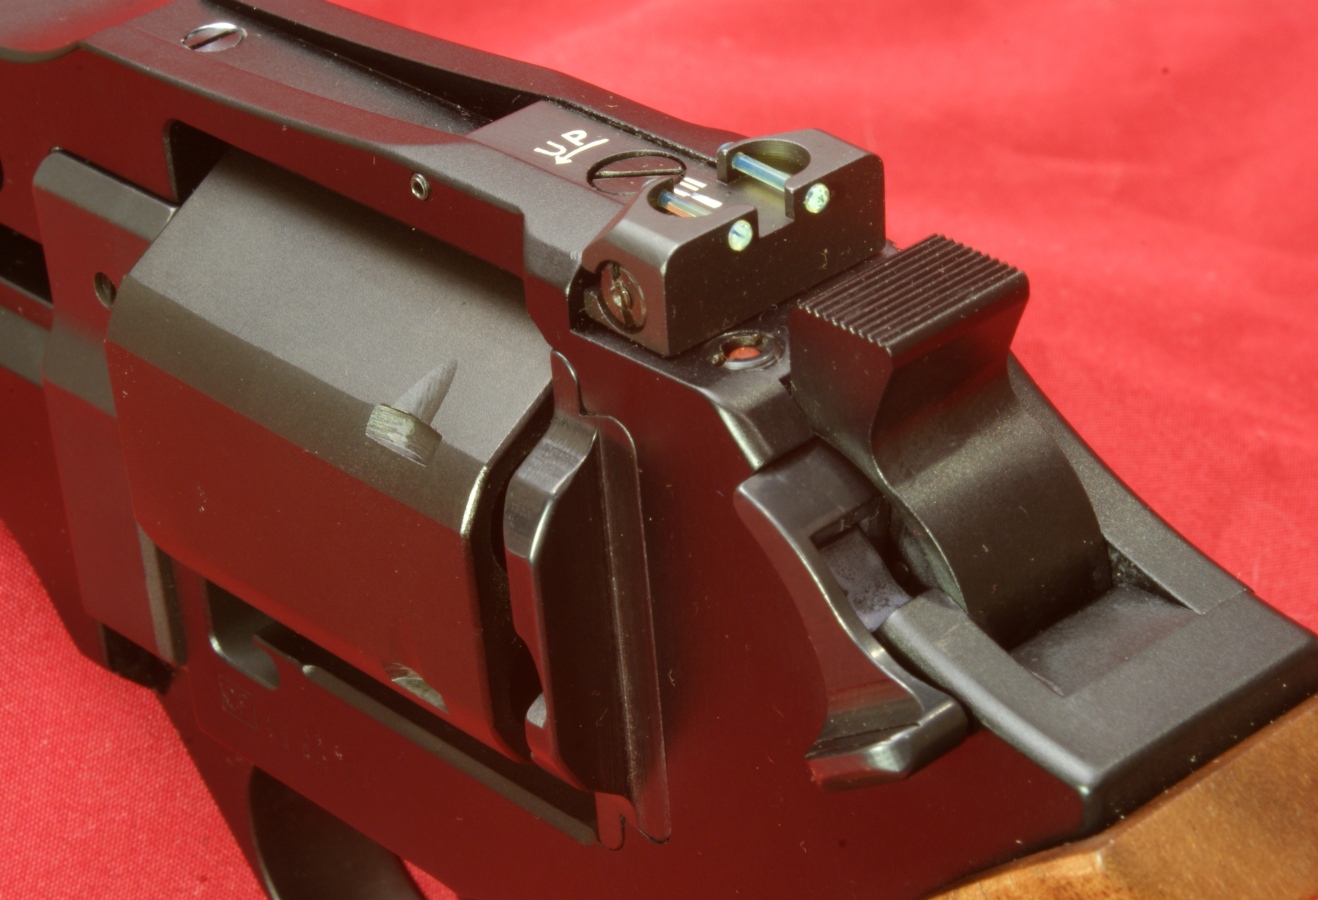
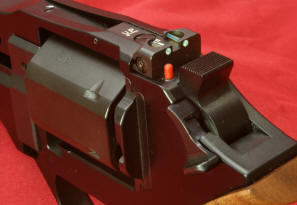
On the top of the frame in front of the cylinder you see a screw head that holds the cylinder unhook spring and pin in place. On the top rear side of the frame you see the windage and elevation adjustable rear high visibility green fiber optic sight. Just behind the rear sight you can see the top of the red single action flag (more details and better photos further below).
Figure 15
Also just behind the rear sight you have what Chiappa calls the External Hammer. I think it is better to refer to it as the cocking lever because the hammer is actually inside the revolver (Inner Hammer). On the right side of the frame is the aluminum alloy lock plate that covers and the inner workings of the revolver. Also notice the steel breech shield that is nested into the frame on the back side of the cylinder. This is real attention to detail on Chiappa's part and has the potential to make this a very durable long lasting firearm. There is also a good chance that this feature reduced the billet size (cost) need to machine the frame because the added width (material) needed to cover the cylinder is provided by this separate breech part and not the frame itself.
Figure 16

Both the right and left sides of the frame contain a scalloped area behind the trigger which adds to the unique look of the Rhino and also provides some clearance between your index finger and frame when pulling the trigger. On the left side of the frame you can see the extractor rod head and the cylinder arm along with the cylinder opening lever. There are no clearly visible marks on the left side of the frame other than proof marks.
Figure 17
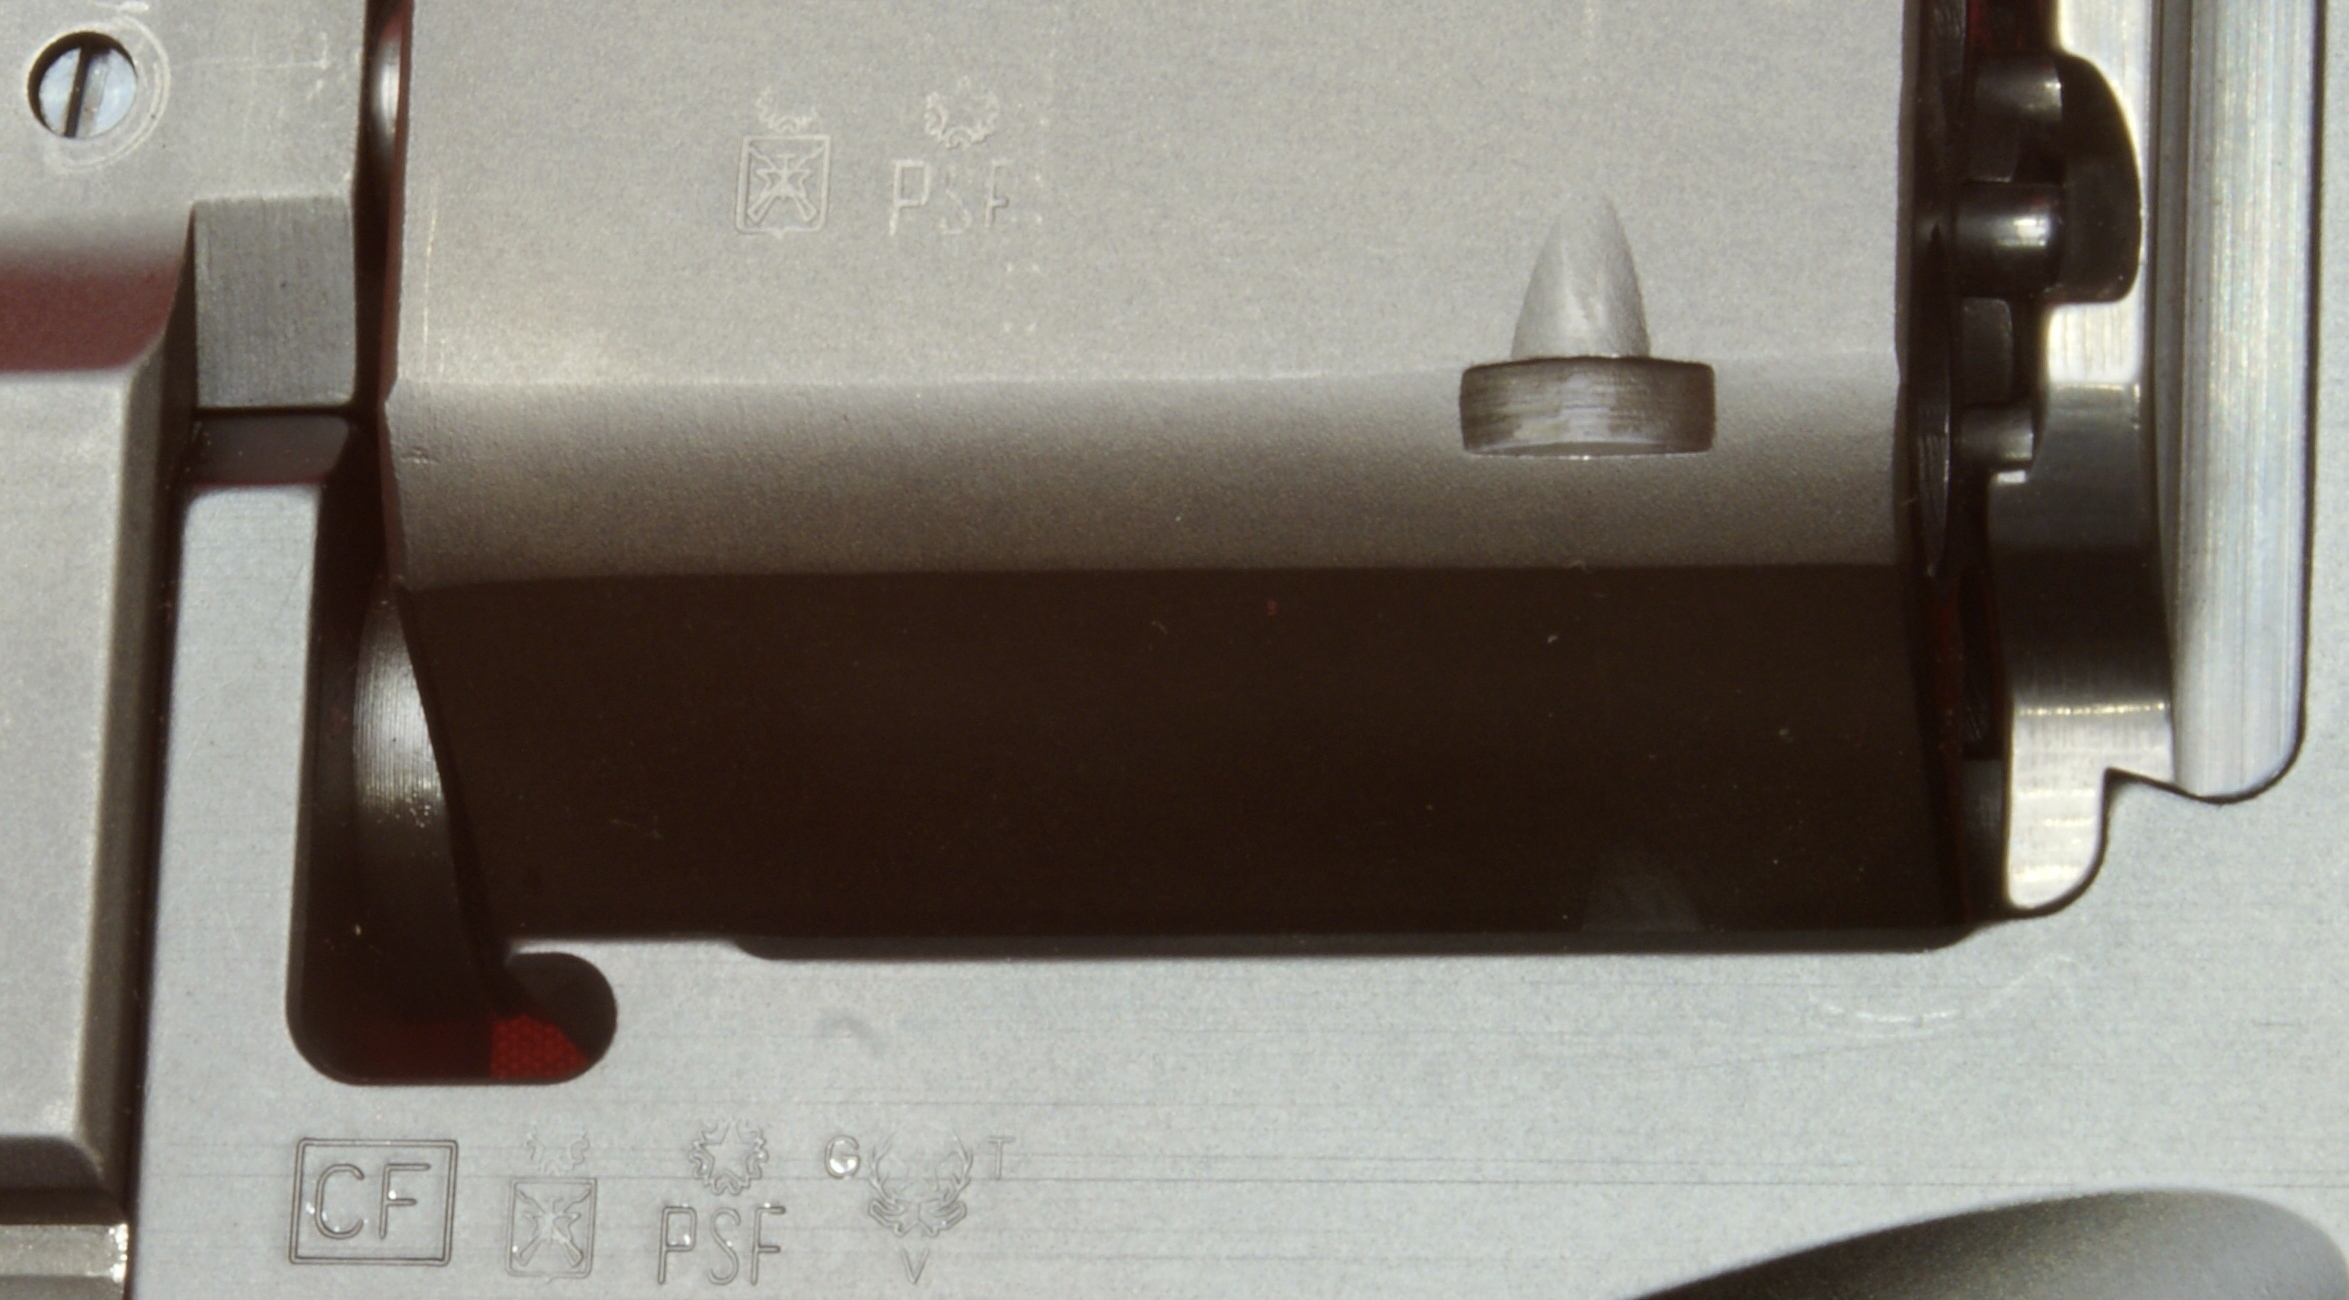
There are two stamped marks on the cylinder and four on the frame as shown below. The two marks which are common with the cylinder and frame are the proof marks. On the cylinder and the center two marks of the frame, the mark on the left is the Gardone provisional proof for all guns and the mark on the right is the Gardone definitive proof for guns with smokeless powder. The "CF" on the frame surrounded by the square is the Italian date code for 2010 (ref). The far right proof mark on the frame confirms that the catalog number (I think serial number) on the firearm is that which has been assigned to it (ref).
Figure 18
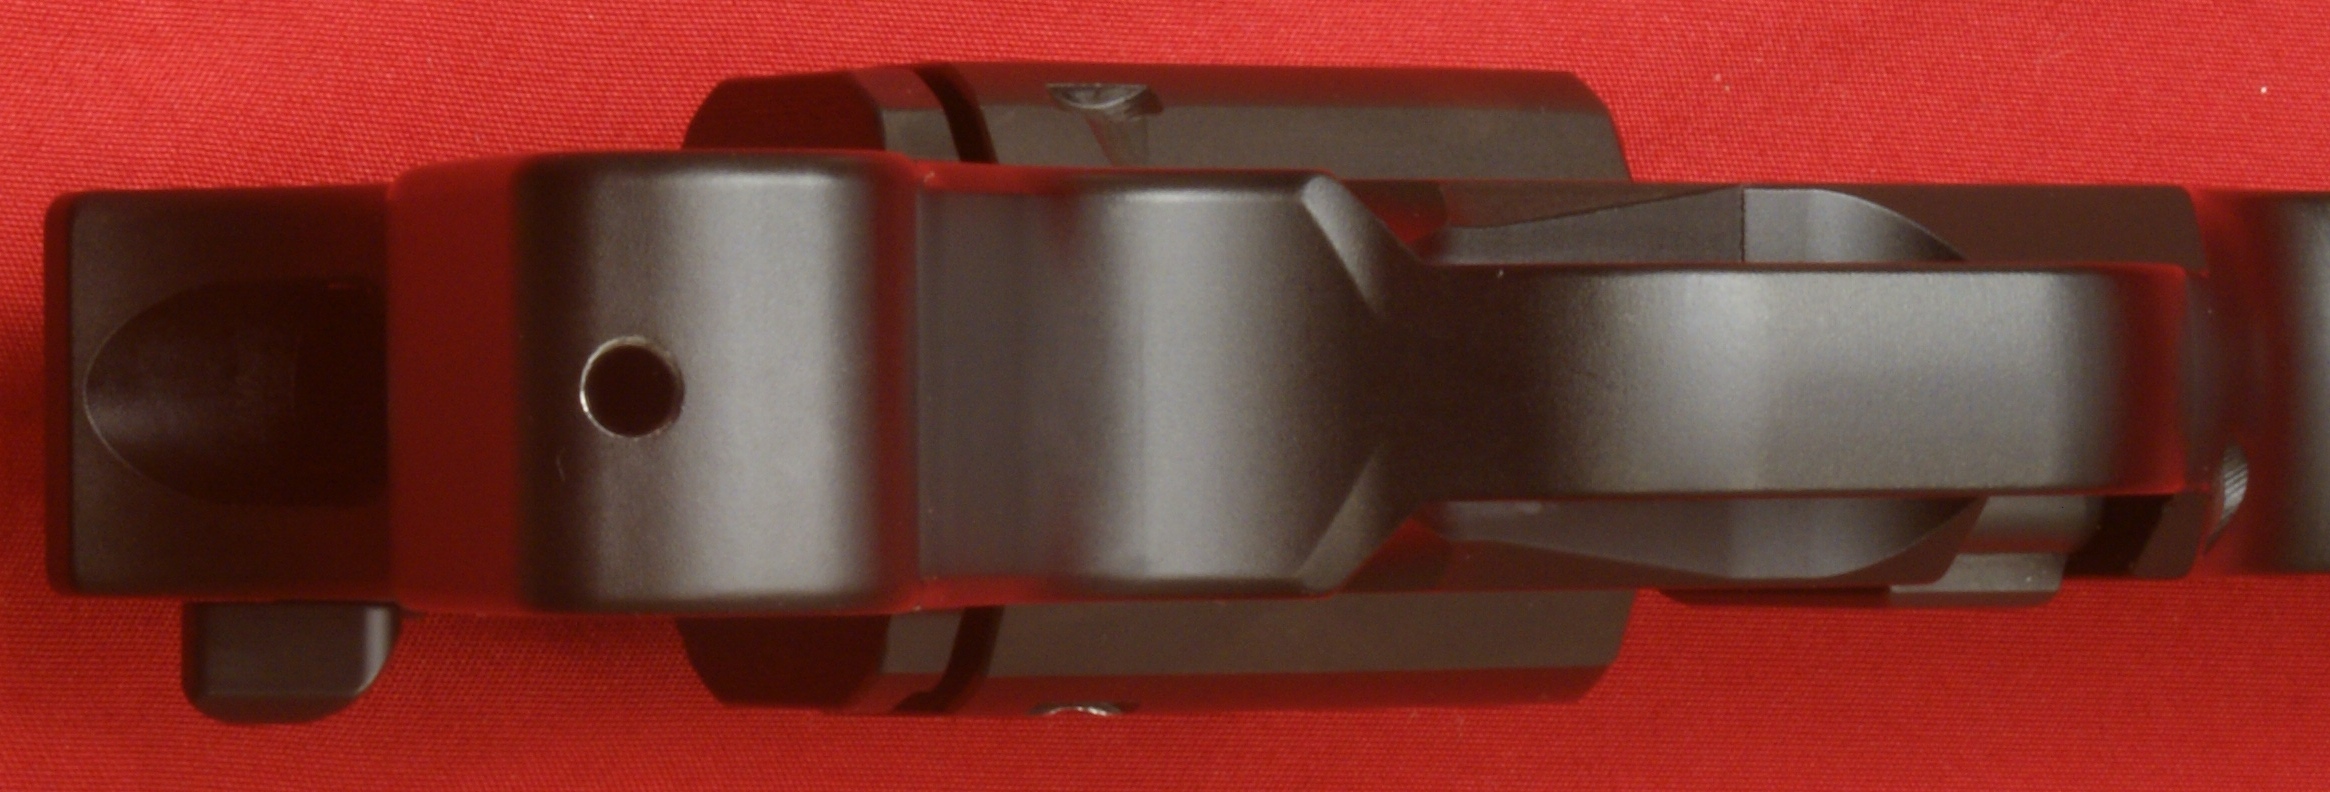
In these next two photos, you can see the external hammer (cocking lever) in both the uncocked (left) and cocked (right) position. These are actually the same position because once the internal hammer is cocked, the external hammer is spring actuated back to the up position. Also notice the red pin (single action flag) that is sticking up in the right photo which indicates the internal hammer is cocked and the revolver will fire in single action mode. These photos also give you a good view of the cylinder opening lever. Notice that is is fully up when the cylinder is in the closed and locked position.
Figure 19 - Double Action
Figure 20 - Single Action
You can also see the different positions of trigger for the double action and single action modes. As I mentioned above, the trigger pull for this revolver averaged 10.2 pounds in double action and 4.2 pounds in single action. I felt that the single action trigger was nice and crisp and the double action trigger was acceptable and comparable to other revolvers. The added trigger width did give the impression of a lighter double action trigger pull because of the increased surface are in contact with your finger.
Figure 21 - Double Action
Figure 22 - Single Action

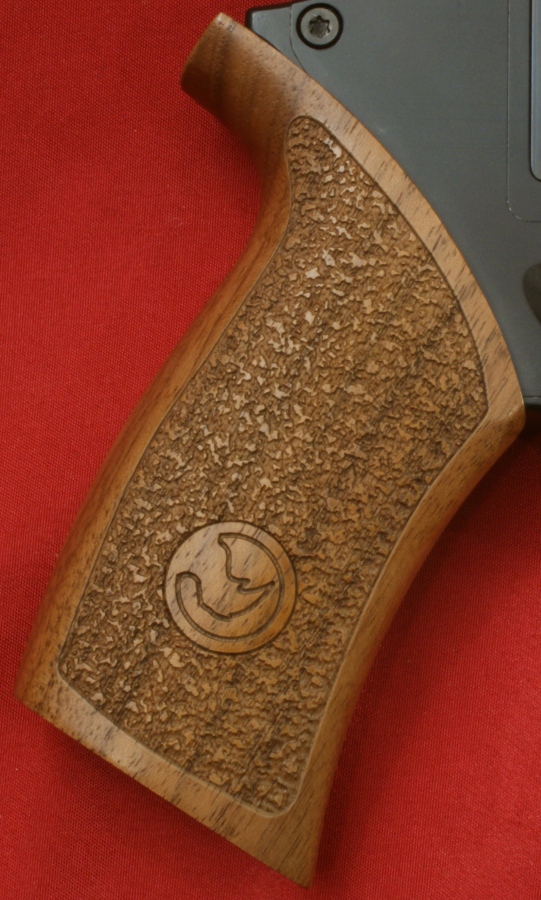
I was extremely surprised with the comfort of the grip of the Rhino. My hand measures 8.75" around at a location just below my knuckles and 8.0" from the base of my palm to the tip of my center finger. You can take a look at this chart to better understand these measurements. Basically I have a medium width hand and long fingers. This allowed me to easily keep my grip on the revolver and move my thumb up to cock the external hammer.
The Rhino comes with a medium size walnut grip as the standard grip on the 4", 5" and 6" standard models. The girth of this medium grip measured 5" at the midpoint. The grip has the Rhino symbol and a stippled pattern on each side to add some texture to the grip. Other grips are available from the Chiappa Firearms Store.
Figure 23
Figure 24
Figure 25
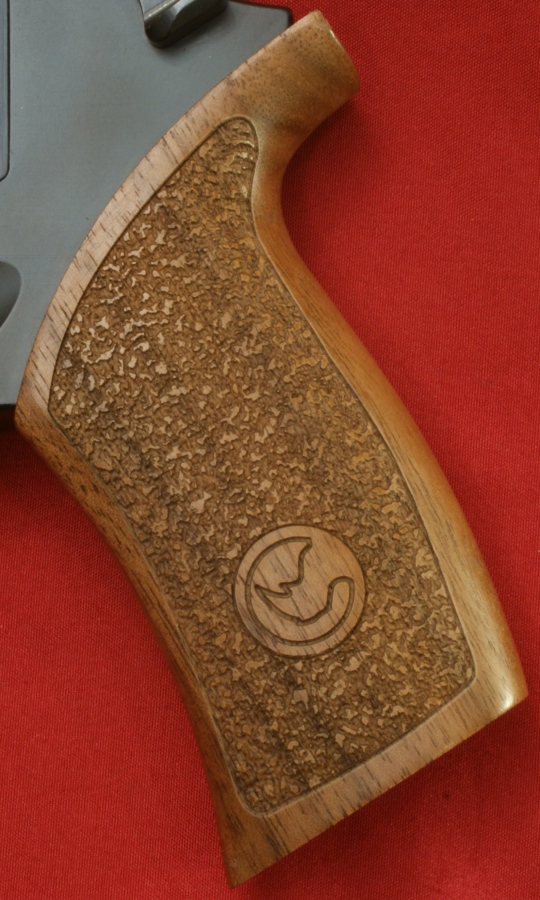
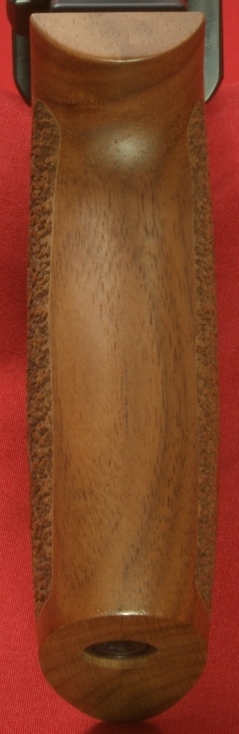
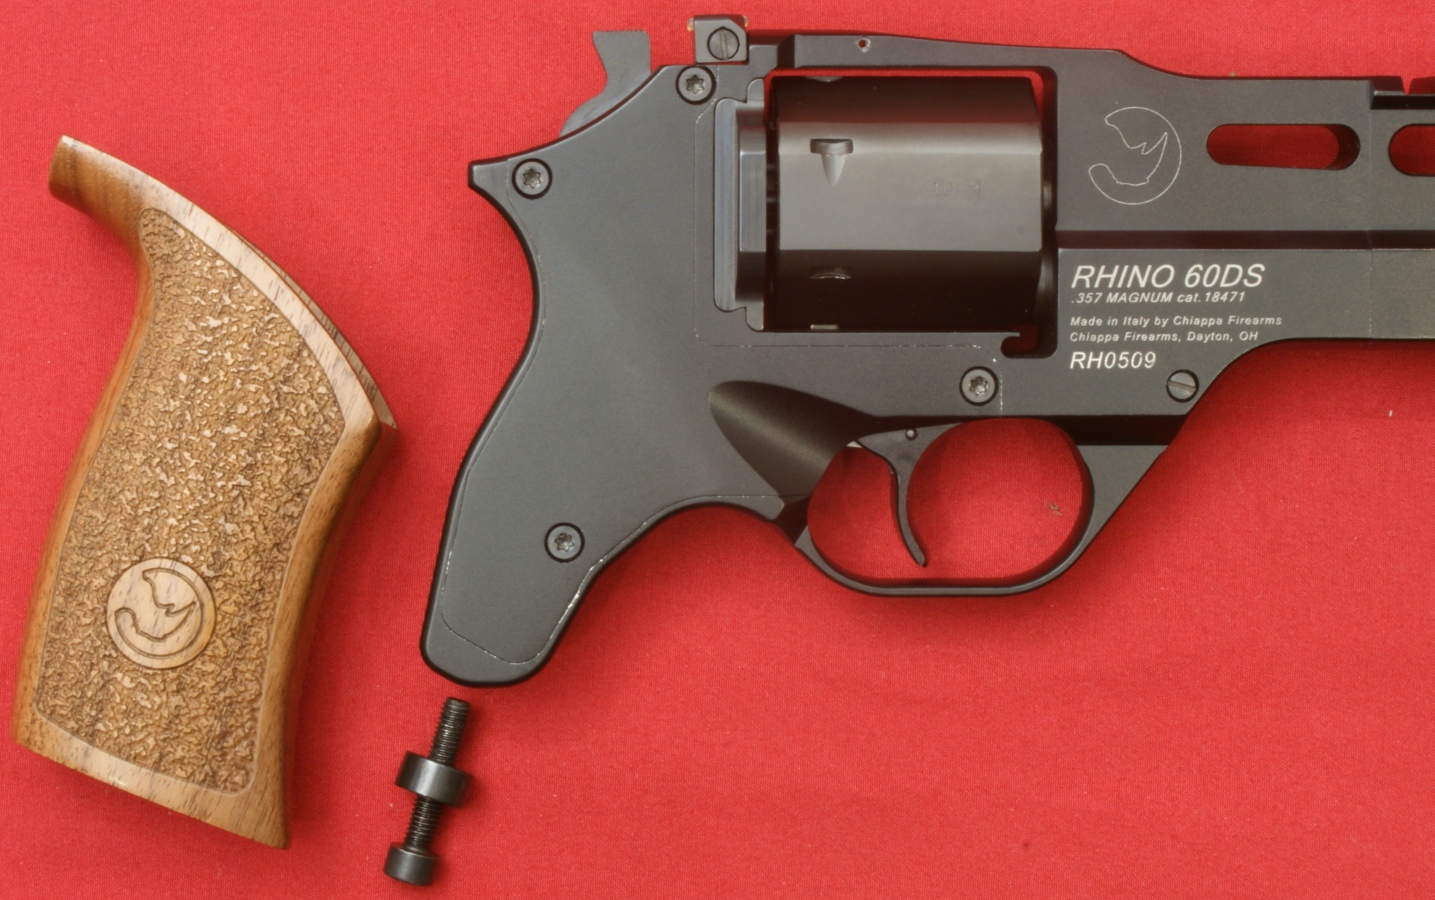
The grip is held in place by a single Allan head screw (M5x15). Both the front and rear surfaces of the grip are completely smooth.
Figure 26
Figure 27
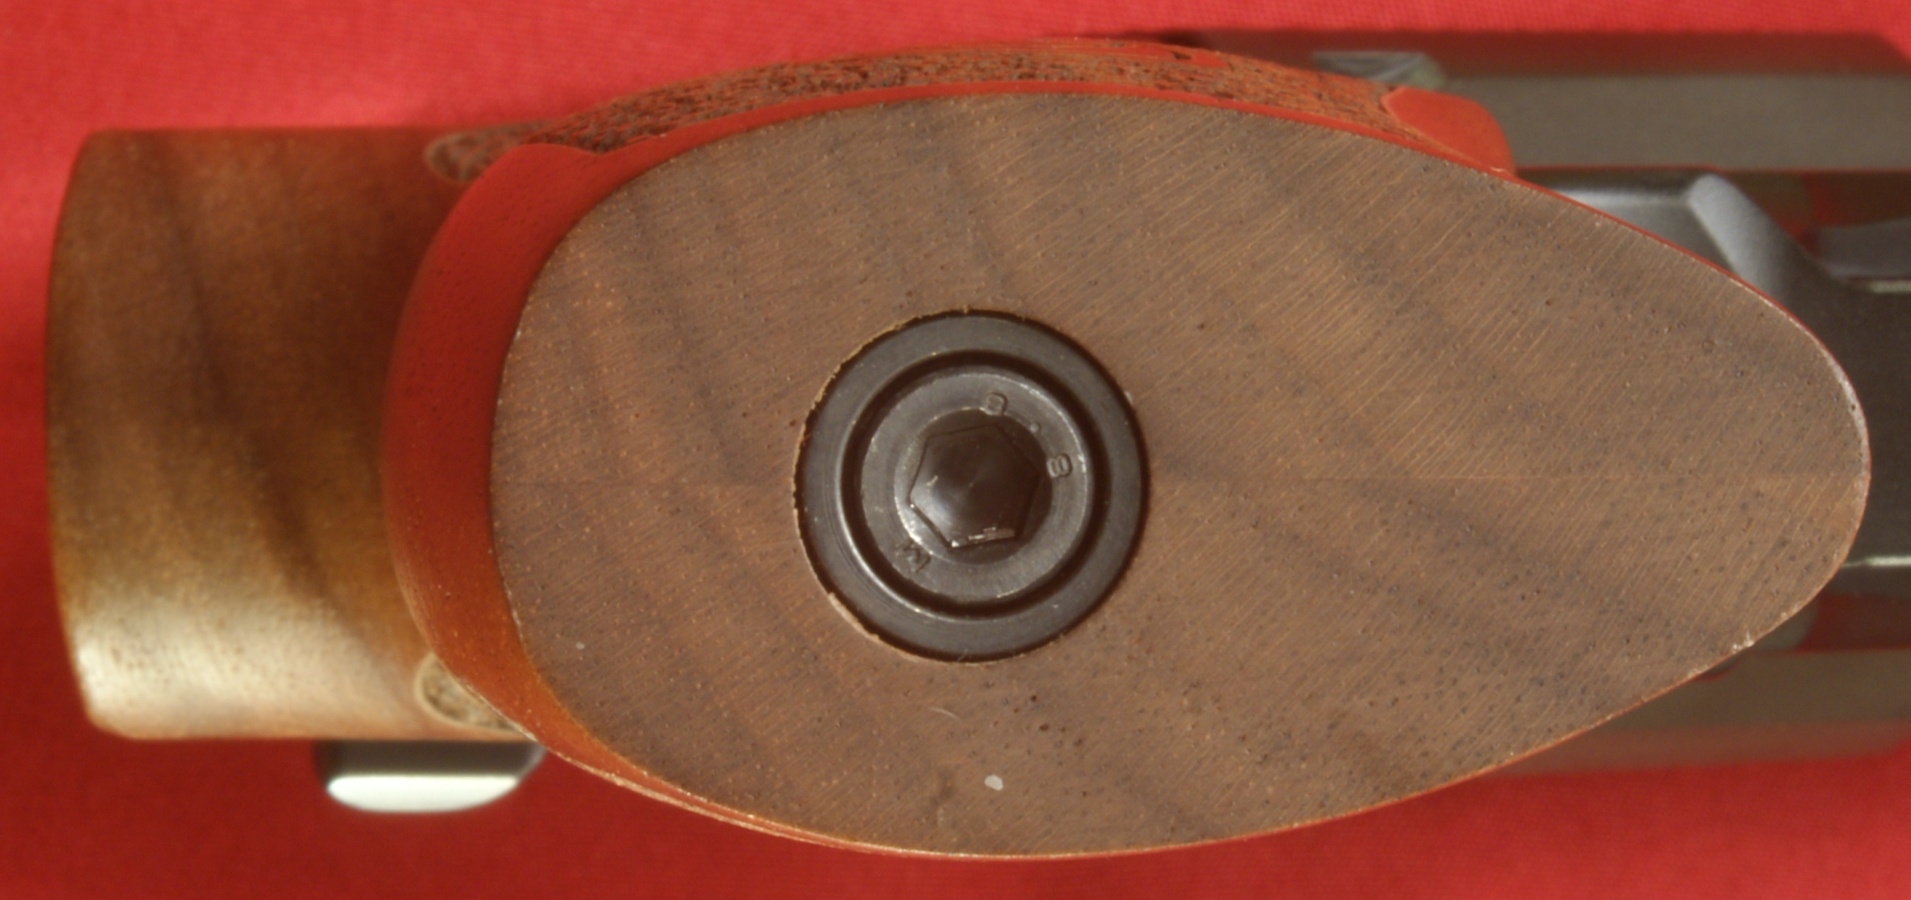
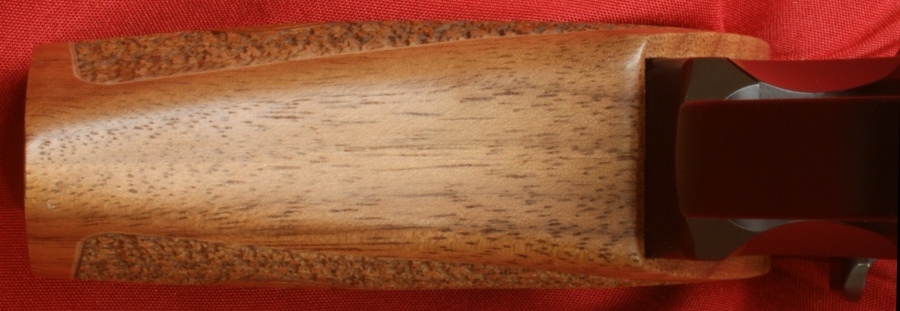
With the Allan head screw removed, the grip slides off the bottom of the frame. The screw that holds the grip in place has a steel bushing to help distribute the tightening forces to the wood and to reduce the wear on the wood due to a rotation of the screw.
Figure 28
On the left side of the frame is a hole under the grip that can be used for lubrication along with the hole in the back of the frame. On the right side of the frame you can now see all 4 lock plate screws. I checked these screws and they were not installed with any type of thread locking compound and I could easily remove each of them. I did check to see how snug the lock plate was in the frame and it was a very snug fit.
Figure 29
Figure 30
Figure 31
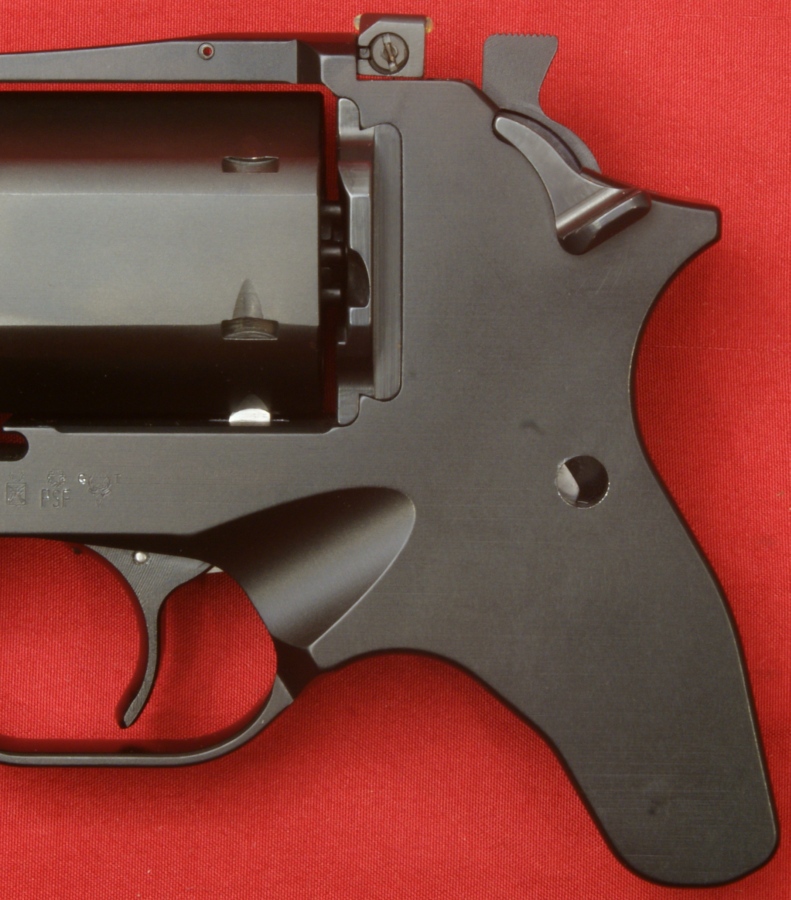
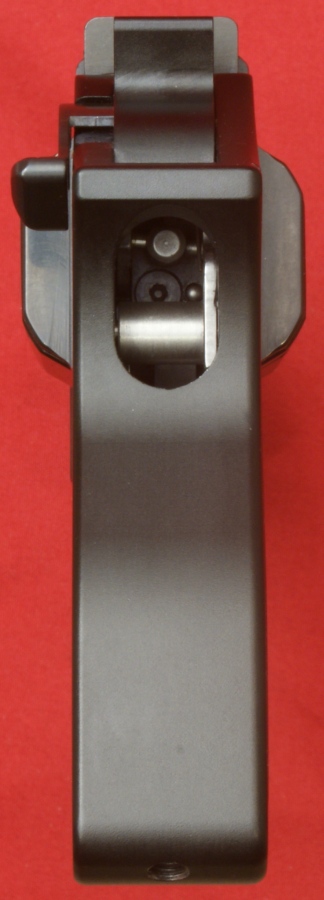
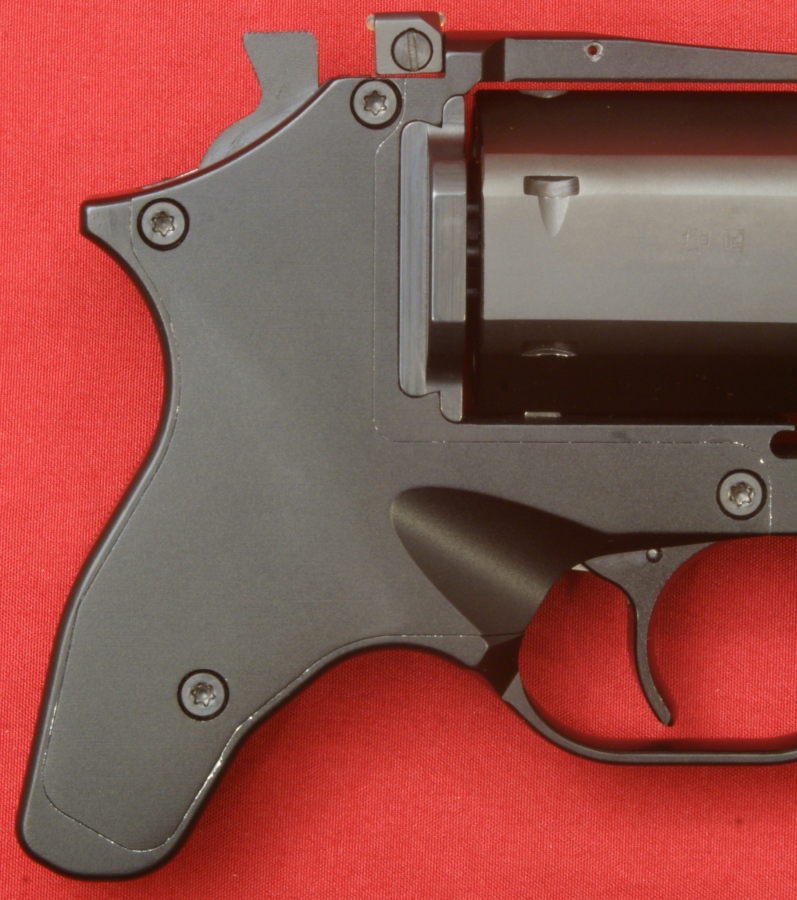
Figure 32
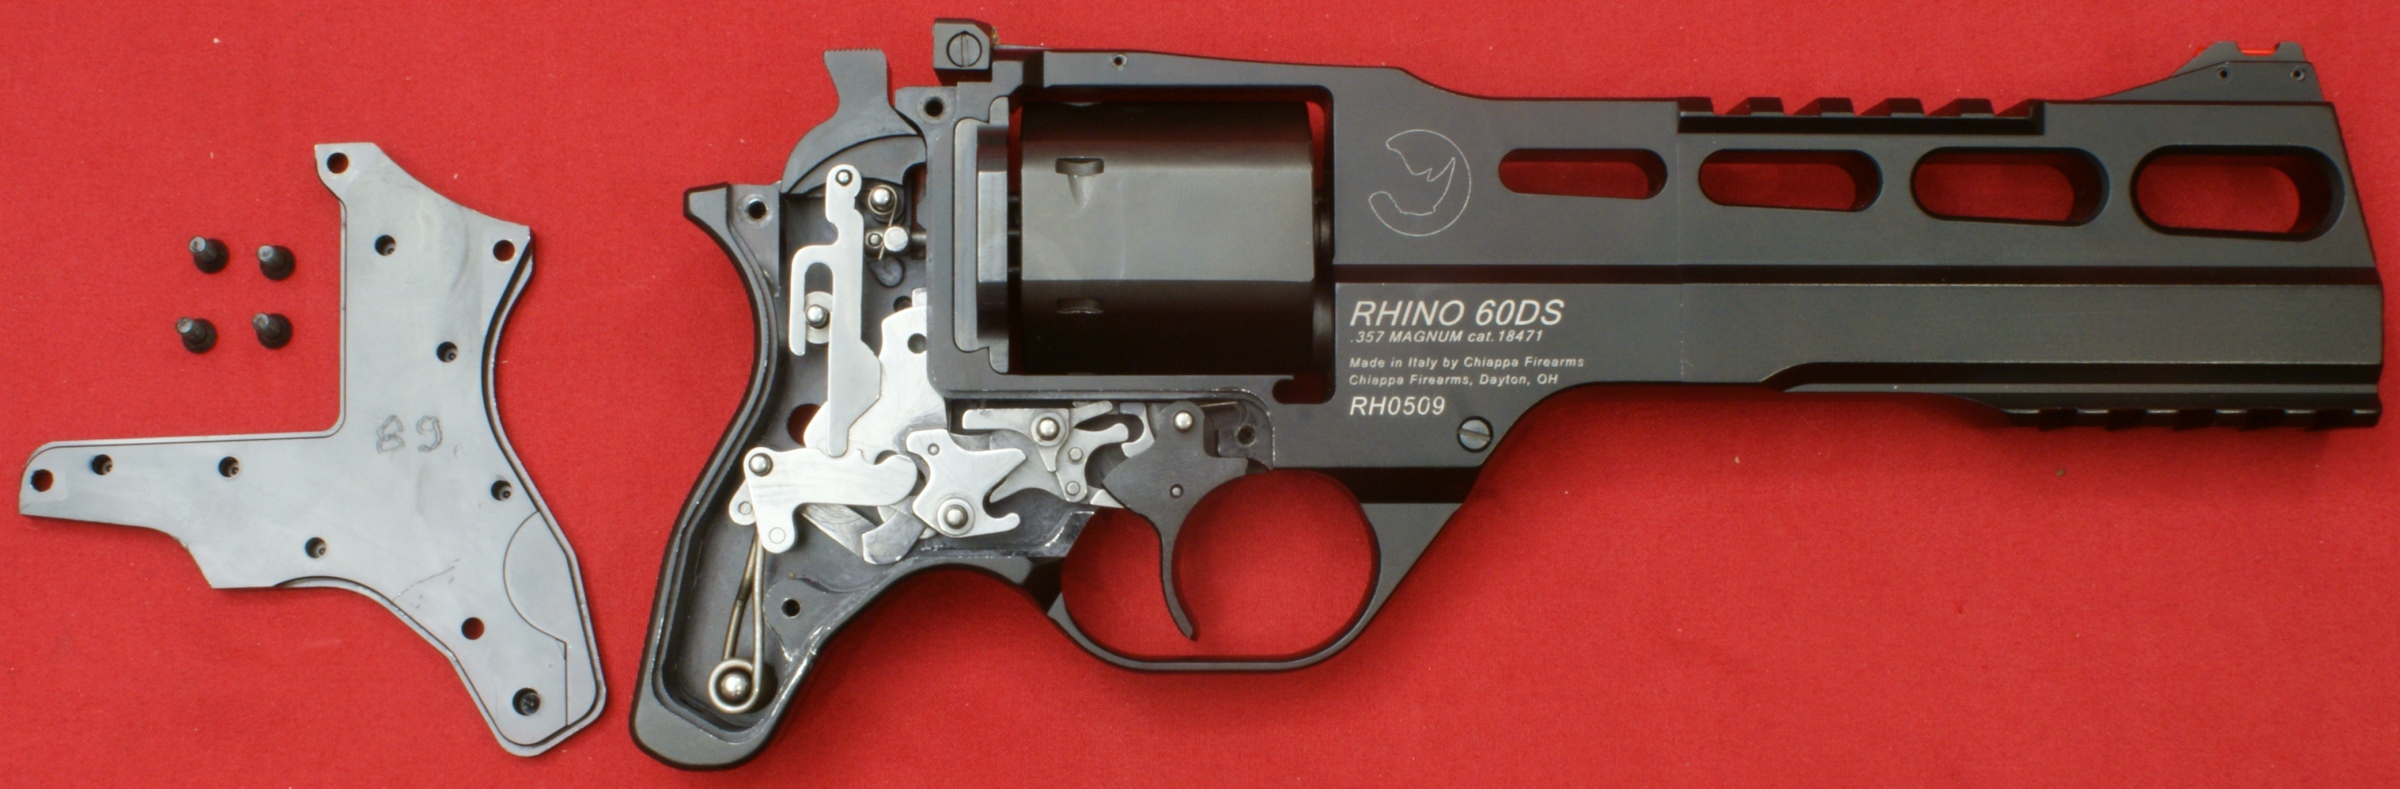
At this point I decided to so something which I DO NOT recommend for anyone who is not a gunsmith or is not willing to send the revolver back to Chiappa for reassembly. I decided to remove the lock plate. The reason I recommend against this is that when I removed the lock plate, the main spring pin was stuck in the lock plate and did not stay in the frame when I removed the lock plate. This caused the spring to send parts flying everywhere. Luckily I did this on my photographic bench which was large and I was able to find all the parts (I hope). At this point, reassembly became the issue and it took me a couple of iterations before all the mechanisms worked properly. In Part 4 of this review, I show more photos of the mechanisms, but my point in this photo is to show that inner parts of the Rhino are made from stainless steel and to also gives you an idea of the complexity of these mechanisms. If there is a price to be paid for a low position barrel, this complexity is where it gets paid.
Figure 33
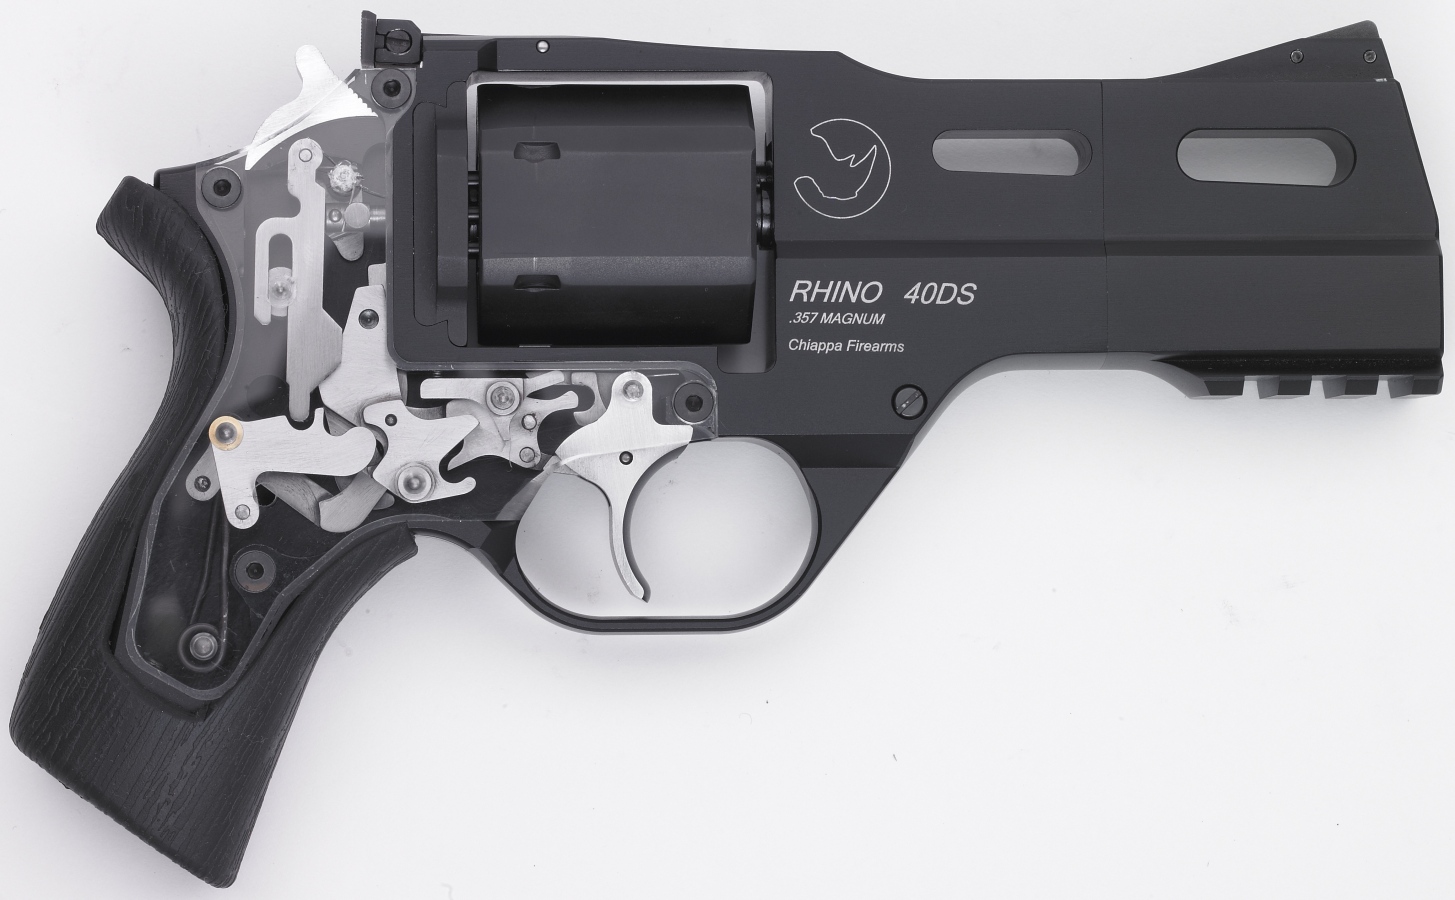
How much of a price is hard to say. In Chiappa's case, they have been full disclosure in showing the inner workings of their revolvers by creating samples with clear lock plates so you can see the internal mechanisms. The photo below was provided by Chiappa for the 40DS. If other manufacturers would do the same, there is a good chance that the complexity of some other traditional firearms would be revealed.
Figure 34
The Chiappa Rhino 60DS weighed in at 33.45 ounces empty. This is 948 grams which is close enough to their specification weight of 936 grams. This 0.4 ounce difference is probably due to manufacturing tolerance variations in non critical areas.
Figure 35

By pressing down on the cylinder opening lever, the cylinder will fold open to the left just like any other revolver. The lever will stay down as long as the cylinder is open. Clearly the Rhino is a 6 shot revolver.
Figure 36
At first glance at the steel cylinder, other than the hexagonal shape, you may think everything looks normal. You can see the extractor, six protrusion (a star like piece) and cylinder lock groves on the outside of the cylinder.
Figure 37

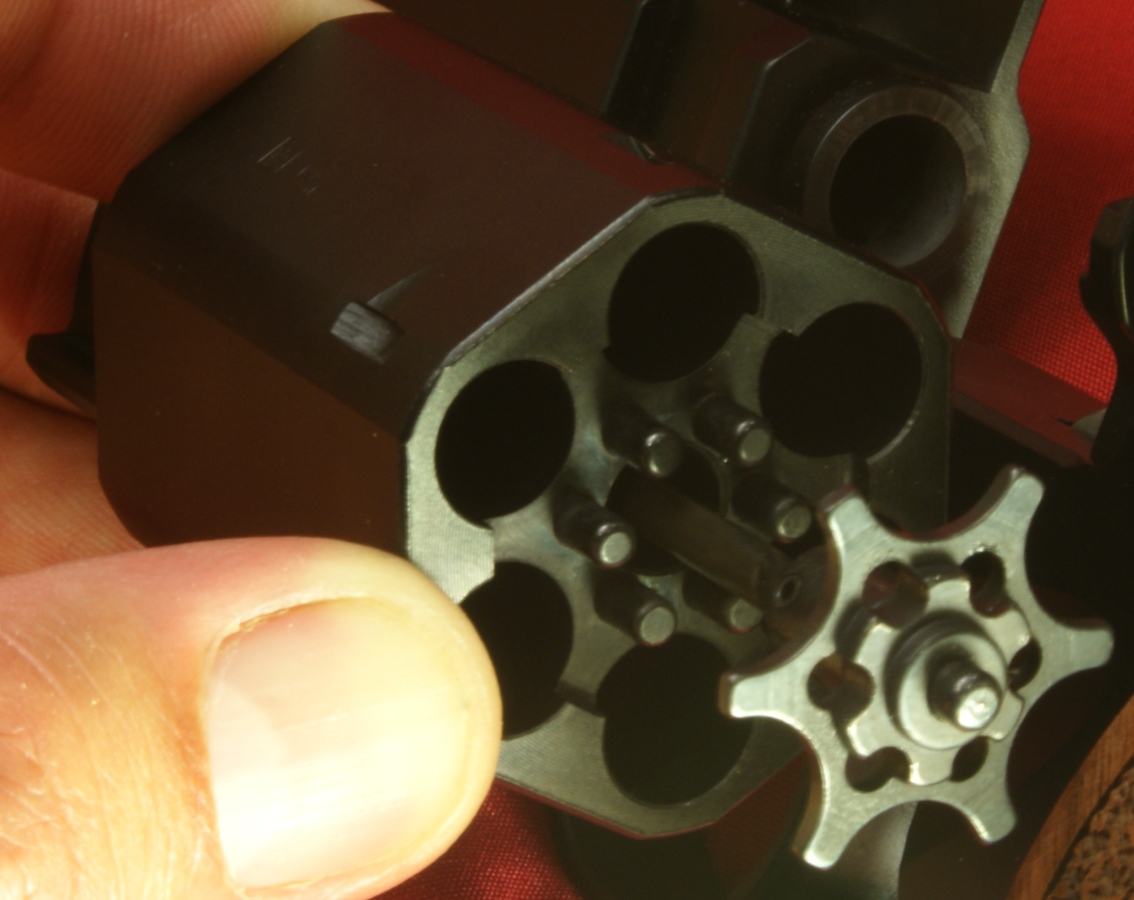
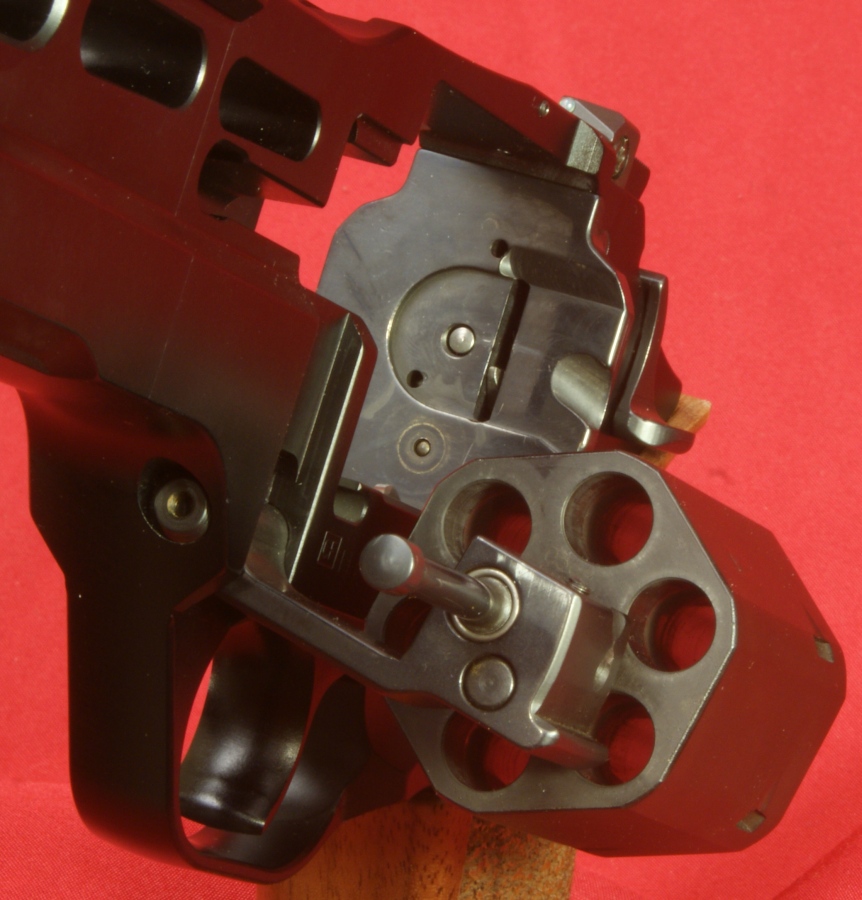
By pressing on the ejector rod and pushing the extractor out, you quickly see that those protrusions are actually the heads of six pins that are pressed into the cylinder. These pins do two functions. First they maintain the alignment of the extractor with the cylinder, but more importantly, these pins are what the lifting lever bears on when rotating the cylinder. On traditional revolvers, this bearing surface is part of the extractor and has more of a flat shape than the curved shape on the pins. Also notice that the cylinder lock groves have a slight entrance channel on the top/right side. This channel is common on revolver cylinders, but the thing that is not common is the location. On most revolvers, it is on the bottom/left side. This is your first indication that the cylinder rotates clockwise instead of counter clockwise like most standard revolvers.
Figure 38
By taking a look at the breech area, you can see that the slot for the lifting lever is on the left side of the revolver and the lifting lever is in the lower position. This is another visible indication that the rotation of the cylinder is different. Is opposite had rotation of the cylinder on Rhino a bad thing? My opinion, no. I actually believe it is a very positive thing. Since the revolver shoots from the 6 o'clock position on the cylinder, this opposite had rotation makes it so that the cartridge on the right side of the revolver is the one which will rotate in-line with the barrel. This at least keeps a somewhat standard convention to normal revolvers. Also in the photo below, the cylinder release plunger appears to be normal and other than the firing pin being located at the 6 o'clock position, the firing pin also appears to be normal.
Figure 39
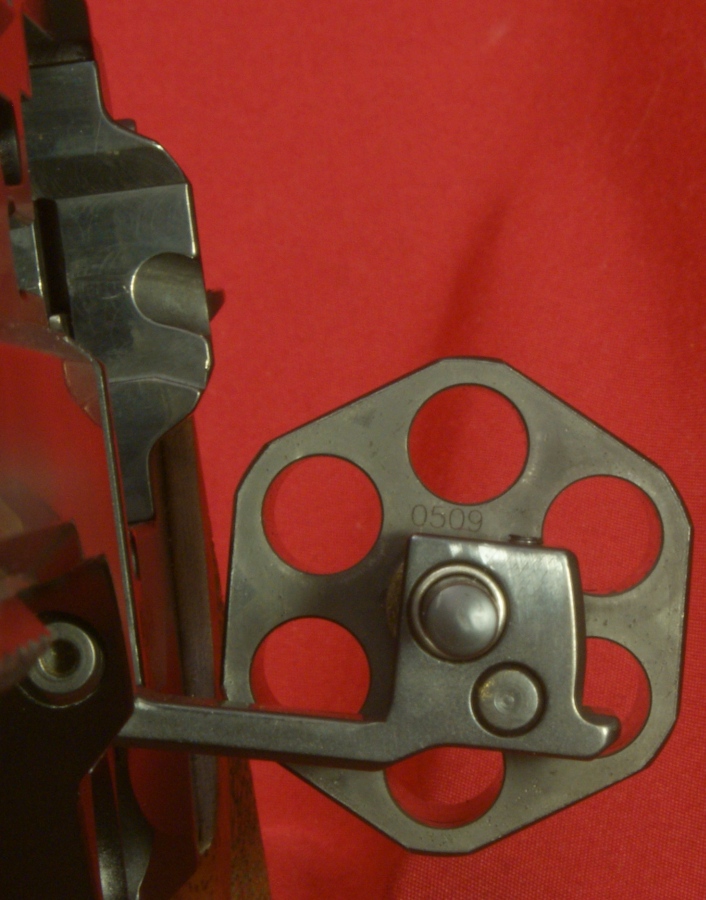
The serial number of the revolver was stamped on the front face of the cylinder. The cylinder arm and various related cylinder components all appear to be made from some type of steel alloy.
Figure 40
The top of the cylinder arm is held in place by the spring loaded cylinder unhook pin located in the top of the frame. This unhook pin is a spring loaded passive pin and is not affected by any action from the cylinder opening lever. My preference would have been a more positive locking feature similar to that on a Ruger GP100, but this may not be a problem since the Rhino fires from a location close to the pivot of the cylinder arm which is already a strong place for maintaining alignment of the front of the cylinder.
Figure 41
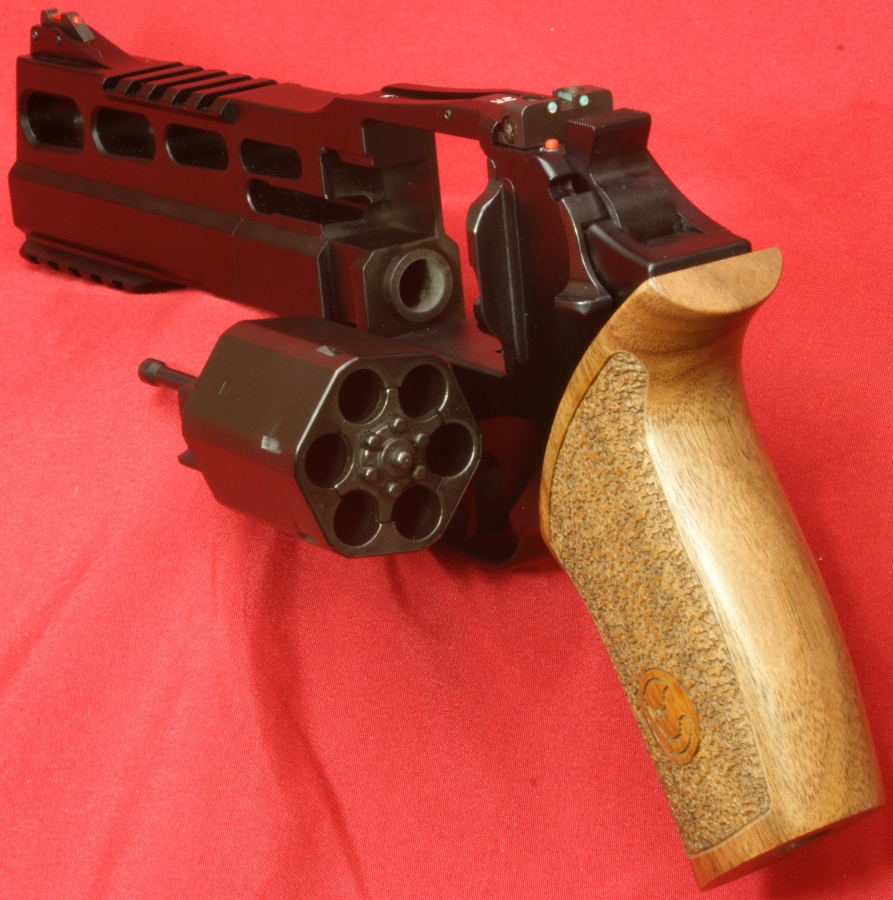
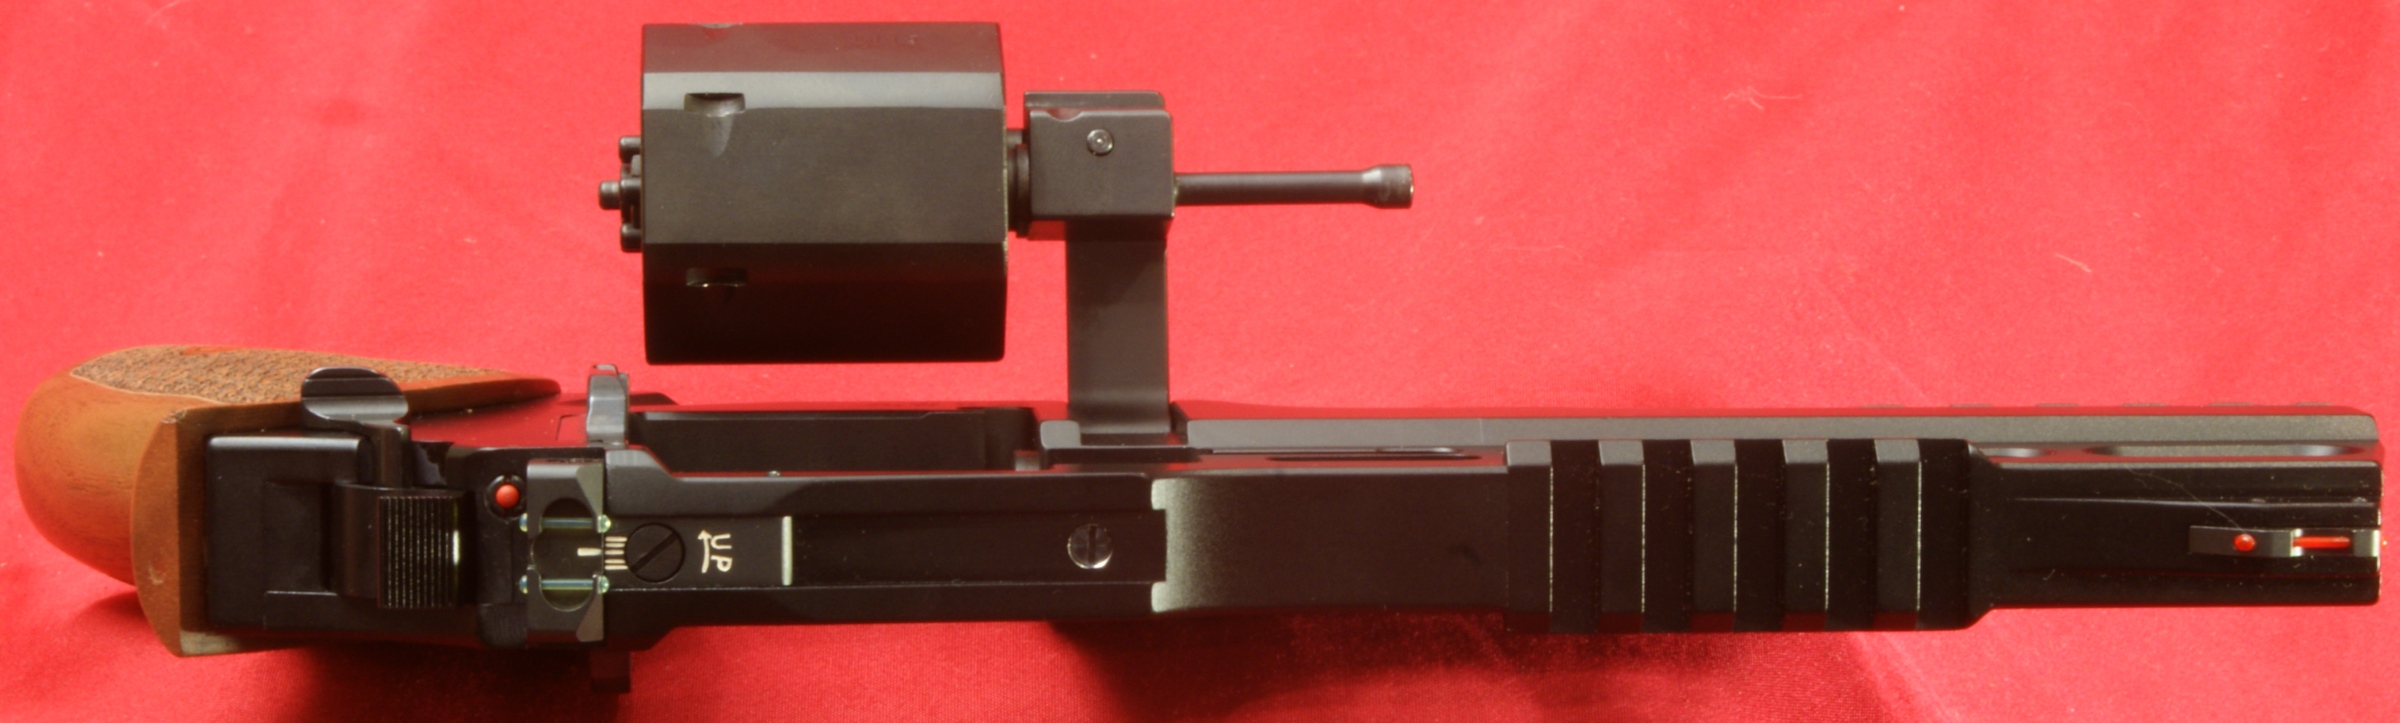
I added these next two photos to show a front and top view of the Rhino with the cylinder opened .
Figure 42
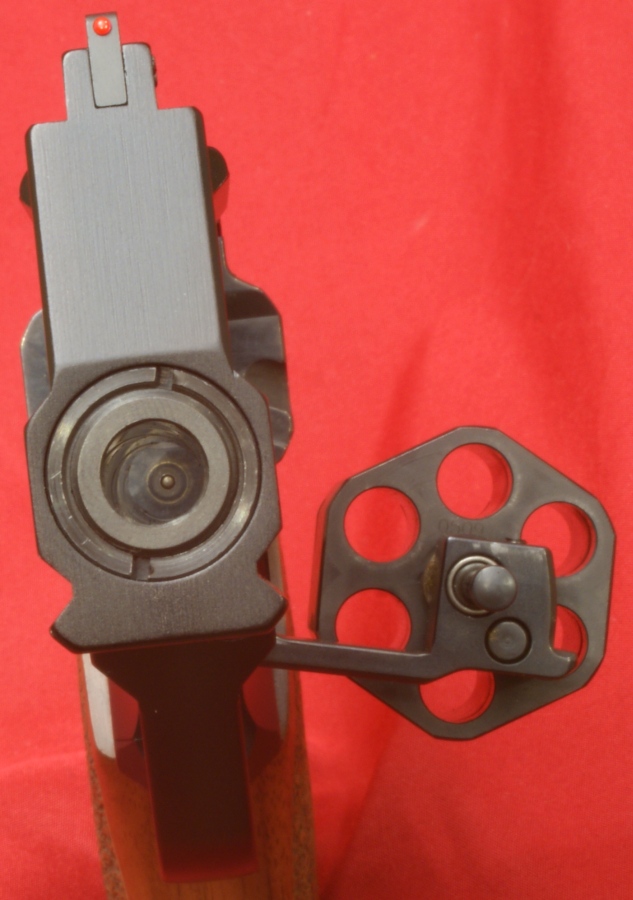
The distance between the rear sides of the front and rear sights measured about 7.2".
Figure 43
Thoughts
The more I handle and study the Chiappa Rhino Revolver, the more I like it. There are clearly some features that you must become familiar with to safely use this revolver such as the external cocking hammer, reverse rotation of the cylinder and remembering the firing cylinder is at the bottom. With a little observation and use, I feel sure the average person will become comfortable with these differences quickly. I was pleased with the finish and workmanship of this revolver.
For more detailed photos and commentary, make sure you check out the other parts of this review and feel free to leave comments on my Reader's Comments page. The following links are provided to help you see other parts of this review.
- Chiappa Rhino Review Model 60DS: Part 1 - Introduction, Specifications and Summary
- Chiappa Rhino Review Model 60DS: Part 2 - What's in the Box
- Chiappa Rhino Review Model 60DS: Part 3 - Detailed Features (this page)
- Chiappa Rhino Review Model 60DS: Part 4 - Advantage of Bottom Chamber Position and Operation
- Chiappa Rhino Review Model 60DS: Part 5 - Range Test
Or
If you would like to be notified about future Gunsumer Reports reviews via Facebook, make sure "You Like This" by clicking the Facebook "Like" button at the bottom or top of this page. If it already says "You Like This" beside the button, clicking it again will uncheck the "Like" status and you will not be notified.
| Share on Facebook | |
© 2010, 2011, 2012, 2013, 2014, 2015, 2016, 2017, 2018, 2019, 2020, 2021, 2022, 2023 & 2024 Gunsumer Reports™, All rights reserved.
FTC Disclosure