|
|
Gunsumer Reports TM Providing Detailed Objective Reviews for Firearms and Firearm Accessories |
ATN X-Sight HD Day/Night Riflescope Review
Part 8 - Connecting a Mobile Device
Via WiFi
10/8/15

One of the unique features about the ATN X-Sight Day/Night Riflescopes is the ability to wirelessly connect a mobile device utilizing the WiFi interface. With a mobile device connected, you can change some of the settings on your X-Sight, view live streaming images of what is being displayed inside the X-Sight, and a new feature is the ability to see photos and videos stored on the memory card inside your X-Sight (as of Oct-2015, only available with Android devices). To do this, you will first need to download and install the "ATN Obsidian" app on your mobile device. Once the app is installed, all you need to do is turn on the WiFi feature on the X-Sight, which looks like any other WiFi connection on your mobile device (see Instruction Manual for connection details). With your device connected wirelessly to the X-sight, you then start the ATN Obsidian app on your mobile device. It is actually very simple to do. The video below shows most of what is shown in this part of the review and also provides some additional commentary.
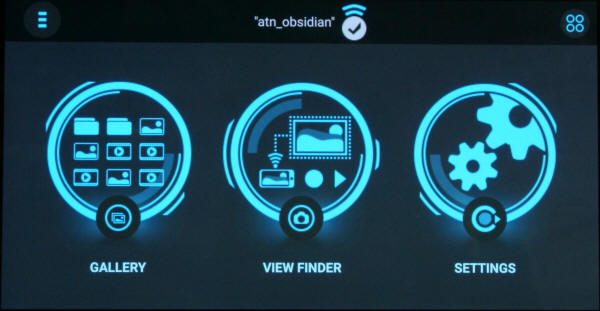
When using an Android mobile device (Samsung Galaxy S5 used in this review), there are three basic modes currently available and they are described and shown below. At this time, the GALLERY feature was not shown on my Apple iOS device (iPad).
- GALLERY - Used to view videos and photos stored on the micro-SD card inside the X-Sight
- VIEW FINDER - Used to display the image being viewed inside the X-Sight
- SETTINGS - Used to control various settings for the X-Sight
When you first start the ATN Obsidian app, the screen below will be the first screen you see on an Android device and it is called the Home Screen. If for some reason the VIEW FINDER and SETTINGS icons are not fully bright (under intensified), then your mobile device has not connected to the X-Sight via the WiFi connection. Keep in mind that I'm showing you the features for the ATN Obsidian app version 1.30 that was current at the same time as firmware versions 1.8.07.343. Newer releases of the app and firmware could and probably will be slightly different than those shown in this part of the review. Also, these screen shots are using the Android OS and the Apple iOS screens are slightly different.
Figure 1 - Home Screen
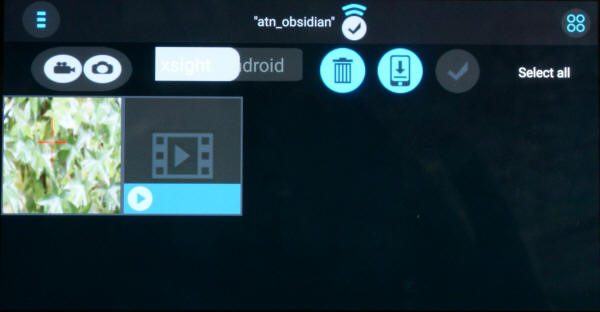
Pressing the GALLERY icon brings up the screen below. This screen allows you to select and view photos and videos on your mobile device that are stored on the micro-SD card inside your X-Sight . Note that pressing the upper left icon that looks like three bars on top of each other will allow you to select the other modes such as VIEW FINDER and SETTINGS.
You can use the check mark icon to select all videos and photos and then either move them to the trash or download them to your mobile device. Although it is not clear in the image below, there is a toggle to switch between seeing what is on your "xsight" or "Android". You can also filter the files to show both video and photos, videos only, or photos only using the two icons that look like a video recorder and camera. Once the videos and photos are downloaded to your mobile device you can view them later when not connected to the X-Sight. Unfortunately I was not able to find where these files are stored on your mobile device so you cannot easily share them with your friends.
Figure 2 - GALLERY Main Screen
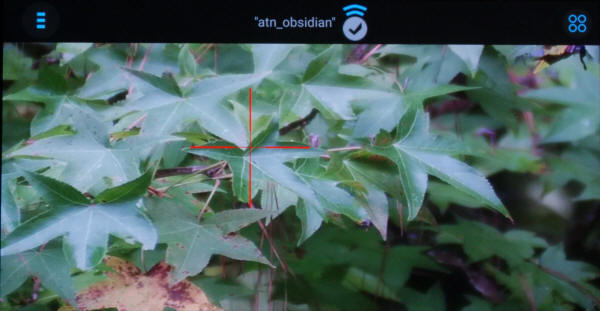
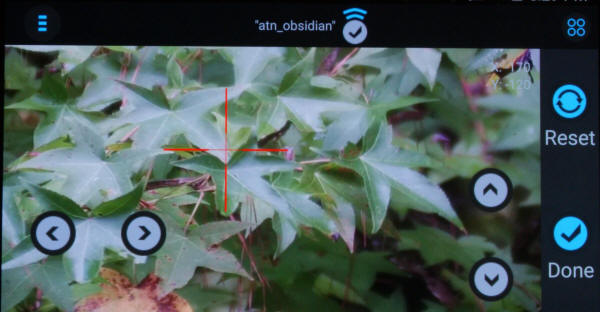
Pressing the VIEW FINDER icon brings up a screen similar to that shown below. In this case I have the rifle scope looking at the tree leaves outside my office. In this mode you will see whatever you are viewing in the X-Sight, but without the top and bottom status bars. On an Android device, you can also see the reticle displayed just as it appears when looking through the eyepiece of the X-Sight. Other than viewing, there are no options to select that are specific to this screen.
Figure 3 - VIEW FINDER Screen
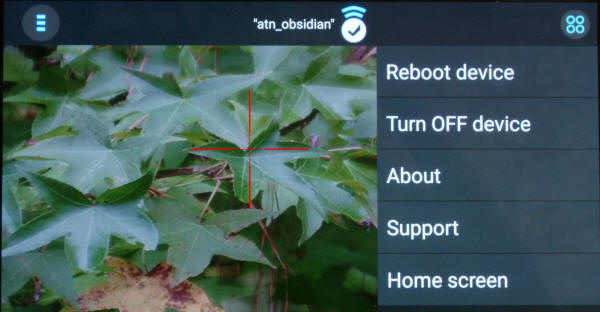
This next photo shows the drop-down menu you get when you press the icon in the upper right corner of the screen that looks like four circles in a square pattern. Just like with the three bar icon in the upper left, the four circle icon is always available regardless of which mode or screen you select.
Figure 4
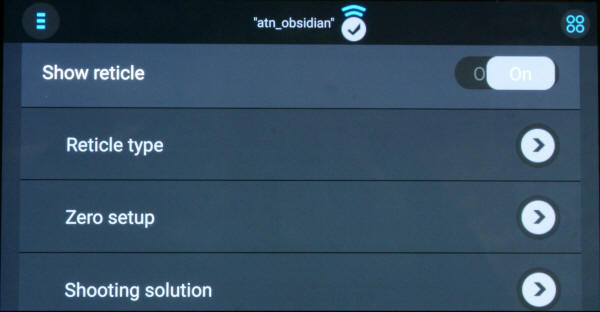
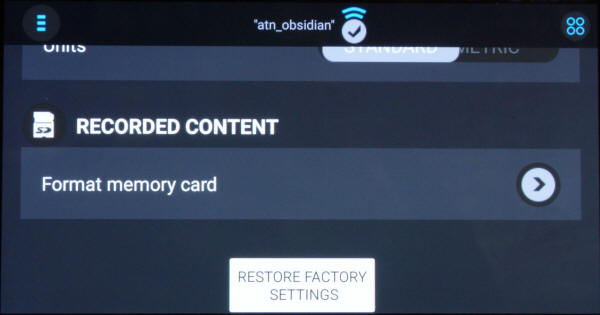
This next series of photos are related to the SETTINGS mode. In the SETTINGS mode, all you do is scroll down to access more settings options.
Figure 5
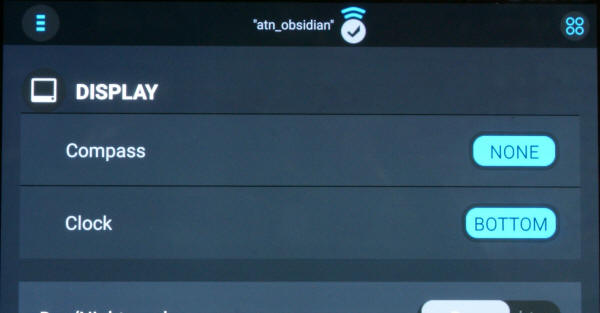
Figure 6
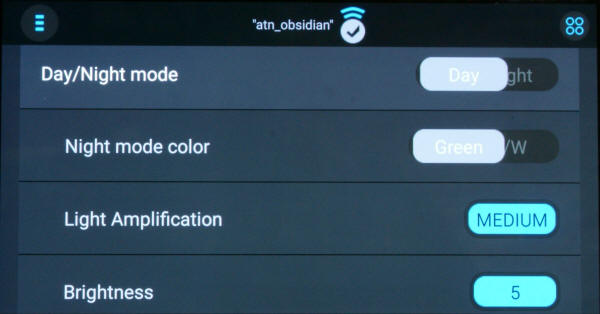
Figure 7
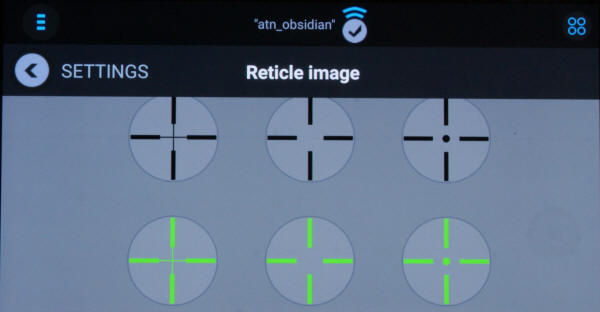
It is very easy to switch between reticle types using this screen. The current reticle selected has a check mark in the upper right corner beside the reticle image. All you do to select another reticle is touch the new reticle.
Figure 8 - Reticle Type Screen

Figure 9
The zero setup screen looks very usable, but there is one piece of information missing for adjusting your zero using the "one shot" method. The screen does not display your original aim point like it did when you were zeroing the unit when using the zeroing feature inside the X-Sight. In Part 3 of my review I calculated that each count is about 1/8" at 100 yards. Fortunately, using this adjustment value dose allows you to tweak your zero similar to how you adjust a regular riflescope. You can see your current reticle position in the upper right corner of the screen (didn't come out too well in the photo below). Once you zero your X-Sight, always record these values somewhere so you can reset your zero in the even you hit Reset by accident.
Figure 10 - Zero Setup Screen
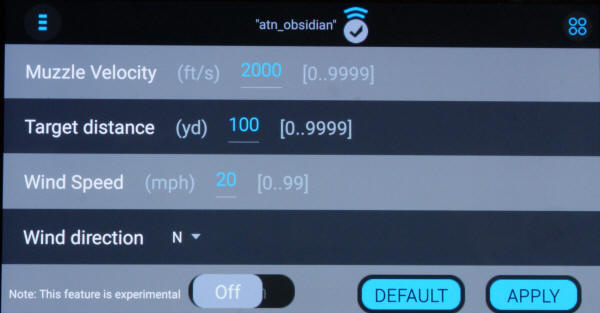
As I have already mentioned in other parts of the review, the Shooting Solution feature (also called Ballistic Compensation) has limited capability at this time. I feel this feature needs the ability to input sight height, zero range and ballistic coefficient to be of real value. I also feel that ATN should focus their attention on getting the advertised features working properly and optimized before spending resources on this experimental feature, but having this feature in the plan is a good example of how the X-Sight has the ability to be greater than currently advertised with future firmware updates.
Figure 11 - Shooting Solution Screen
When you select between the 1080P 30FPS and 720P 60FPS video capture modes, it appears that you are zooming in on the screen in the X-Sight to account for the reduced resolution, not resampling the main screen.
Figure 12
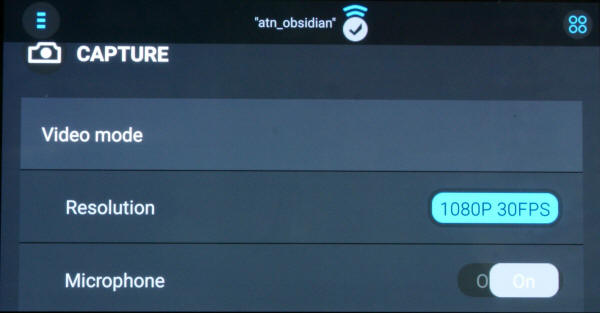
Figure 13
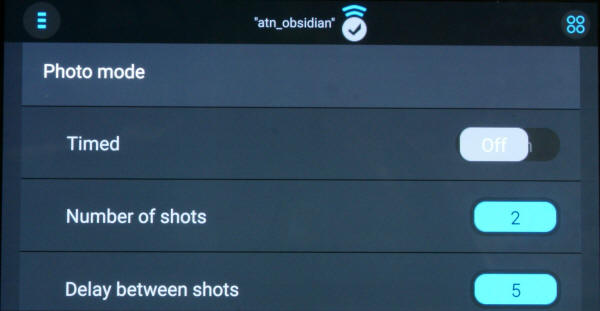
Figure 14
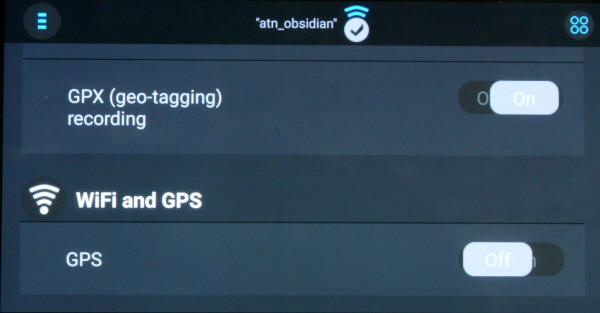
Figure 15
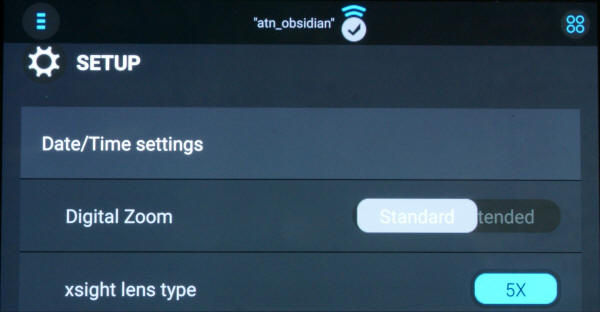
Figure 16
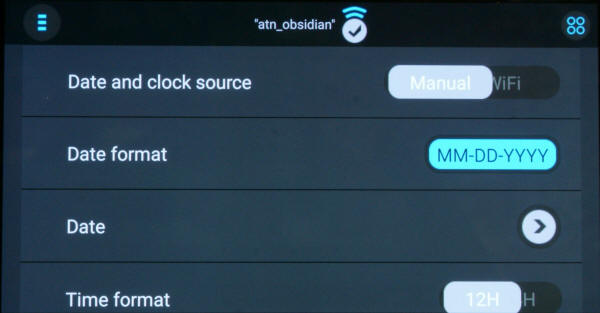
Figure 17
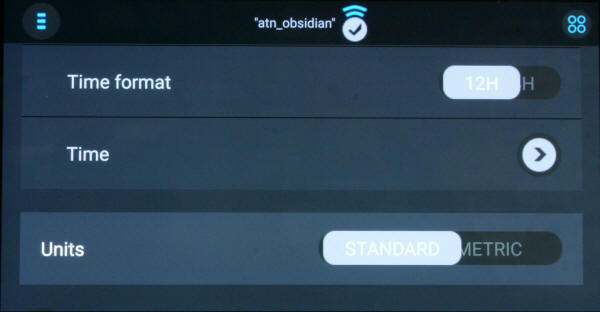
Figure 18
The below are observations worth noting when using the WiFi feature with my Android based Samsung Galaxy S5 cellphone:
- When you are trying to turn the WiFi "On" or "Off", there is a delay of about 4 seconds to switch from "On" to "Off" and 8 seconds to switch from "Off" to "On". If you happen to press the button again before it switches, then you will potentially toggle the mode again.
- With the WiFi "Off", you can reliably run on USB power. With the WiFi "On", it will not reliably run on USB power based on my experience. If you are planning to run the device and stream video to a friend using WiFi, plan on using some Lithium AA batteries for maximum reliability.
- If your battery dies with the WiFi turned "On", when you turn your X-Sight back on, you may have to go back into the settings and turn the WiFi "Off" and then back "On" again to actually make the WiFi signal broadcast.
- When you are streaming video to your mobile device using the "View Finder" feature in the app, you cannot take photos or video using your X-Sight. Although, if you switch to "Settings" in the app, you can then take photos and video with your X-Sight.
- You cannot turn the WiFi "Off" on the X-Sight while your mobile device is in the "View Finder" mode. While in the "View Finder" mode, the X-Sight considers itself to be in a recording state.
- Sometimes the reticle would shift into the upper left corner when displaying on the mobile device. It would always stay in the correct position on the X-Sight. Typically this would happen during time of instability with the video streaming.
-
There still seems to be some instability using the WiFi
features. Usually the first time you start streaming video
it will typically work because you go through a set of steps that
ensures things happen in the right order (my interpretation).
If you get out of that order while trying to reset the system, you can still connect your mobile
device to the X-Sight and use the GALLARY and SETTINGS modes,
but the VIEW FINDER mode may come up with a "streaming" error.
To dependably restart streaming, I found the following steps
were necessary. There may be other sequences, but this
was the one I found to regularly work.
- Close the app on the mobile device
- Turn off WiFi on the X-Sight
- Turn off the X-Sight
- Turn on the X-Sight
- Turn on the WiFi on the X-Sight
- Ensure your mobile device reconnects to the X-Sight
- Restart the app
- You will want to adjust your mobile device so that the screen stays active much longer or potentially turn that feature off on your mobile device while using the X-Sight. At least when using the VIEW FINDER feature, your phone will stay active, but if you are in the SETTINGS or GALLARY mode, your phone may lock or go into the sleep mode if you are not interfacing with the screen regularly.
- There is a slight delay with the image shown in the VIEW FINDER mode than what is seen through the X-Sight, but the delay is not too bad.
- I believe I got better video streaming performance with Bluetooth and Location turned off on my mobile device.
- The WiFi range is very good. I was able to go outside my house and across the street before I detected significant signal issues. When the signal is not obstructed by walls, I was able to go out much farther (about 100 yards). Comparing bars on my cell phone, the X-Sight WiFi seemed only slightly less capable that my NetGear wireless router in my home. Maybe the range is too good causing too much battery consumptions transmitting such a powerful signal.
The comments below are more observations worth noting when using the WiFi feature with my Apple iPad:
- It appears that you can only connect one mobile device at a time. I tried both my cell phone and an iPad and continually got an error message.
- Sometimes the screen would get distorted and I had to switch between VIEW FINDER and SETTINGS to cause the streaming image to reset. This typically happened after the iPad went to sleep due to lack of screen input.
- The video streaming feature via WiFi seemed to be more stable on the iOS because it seemed to allow a simple restart without issues.
- The reticle did not display on the iPad.
Thoughts
It can be a little frustrating at first when you don't know the limitations or when you don't know that you need to go through a specific restart sequence when you start running into instability or connection issues. Once you work through the learning curve, I clearly got better results when using the WiFi feature with my mobile device. With better results also came more satisfaction with this feature. Do I think that ATN has some more work to do? Yes. Am I willing to live with them taking more time to get it right? Yes. Honestly, I feel the X-Sight is a great value product that puts real night hunting capabilities into the hands of far more people with its good quality and reasonable price. The WiFi feature is in my opinion a "nice to have", not a "got to have". Also, there needs to be more development in battery power consumption when using the WiFi feature. I'm not an expert, but perhaps they should look into different broadcast powers based on how far you expect your mobile device to be from your X-Sight. Hopefully this can be corrected with a firmware update.
For more detailed photos and commentary, make sure you check out the other parts of this review and feel free to leave comments below. The following links are provided to help you see other parts of this review.
- ATN X-Sight HD Day/Night Riflescope Review: Part 1 - Introduction, Specifications and Hardware
- ATN X-Sight HD Day/Night Riflescope Review: Part 2 - Operational Details
- ATN X-Sight HD Day/Night Riflescope Review: Part 3 - Zeroing & Zooming
- ATN X-Sight HD Day/Night Riflescope Review: Part 4 - Potential Bugs & Issues Needing Firmware Update
- ATN X-Sight HD Day/Night Riflescope Review: Part 5 - Focusing the 5-18x Model
- ATN X-Sight HD Day/Night Riflescope Review: Part 6 - Daytime Videos & Photos
- ATN X-Sight HD Day/Night Riflescope Review: Part 7 - Night Vision Videos & Photos
- ATN X-Sight HD Day/Night Riflescope Review: Part 8 - Connecting a Mobile Device Via WiFi
Or
If you would like to be notified about future Gunsumer Reports reviews via Facebook, make sure "You Like This" by clicking the Facebook "Like" button at the bottom or top of this page. If it already says "You Like This" beside the button, clicking it again will uncheck the "Like" status and you will not be notified.
| Share on Facebook | |
© 2010, 2011, 2012, 2013, 2014, 2015, 2016, 2017, 2018, 2019, 2020, 2021, 2022, 2023 & 2024 Gunsumer Reports™, All rights reserved.
FTC Disclosure