|
|
Gunsumer Reports TM Providing Detailed Objective Reviews for Firearms and Firearm Accessories |
UTAS UTS-15 Review
Part 3 - External & Operational Features
October 20, 2013
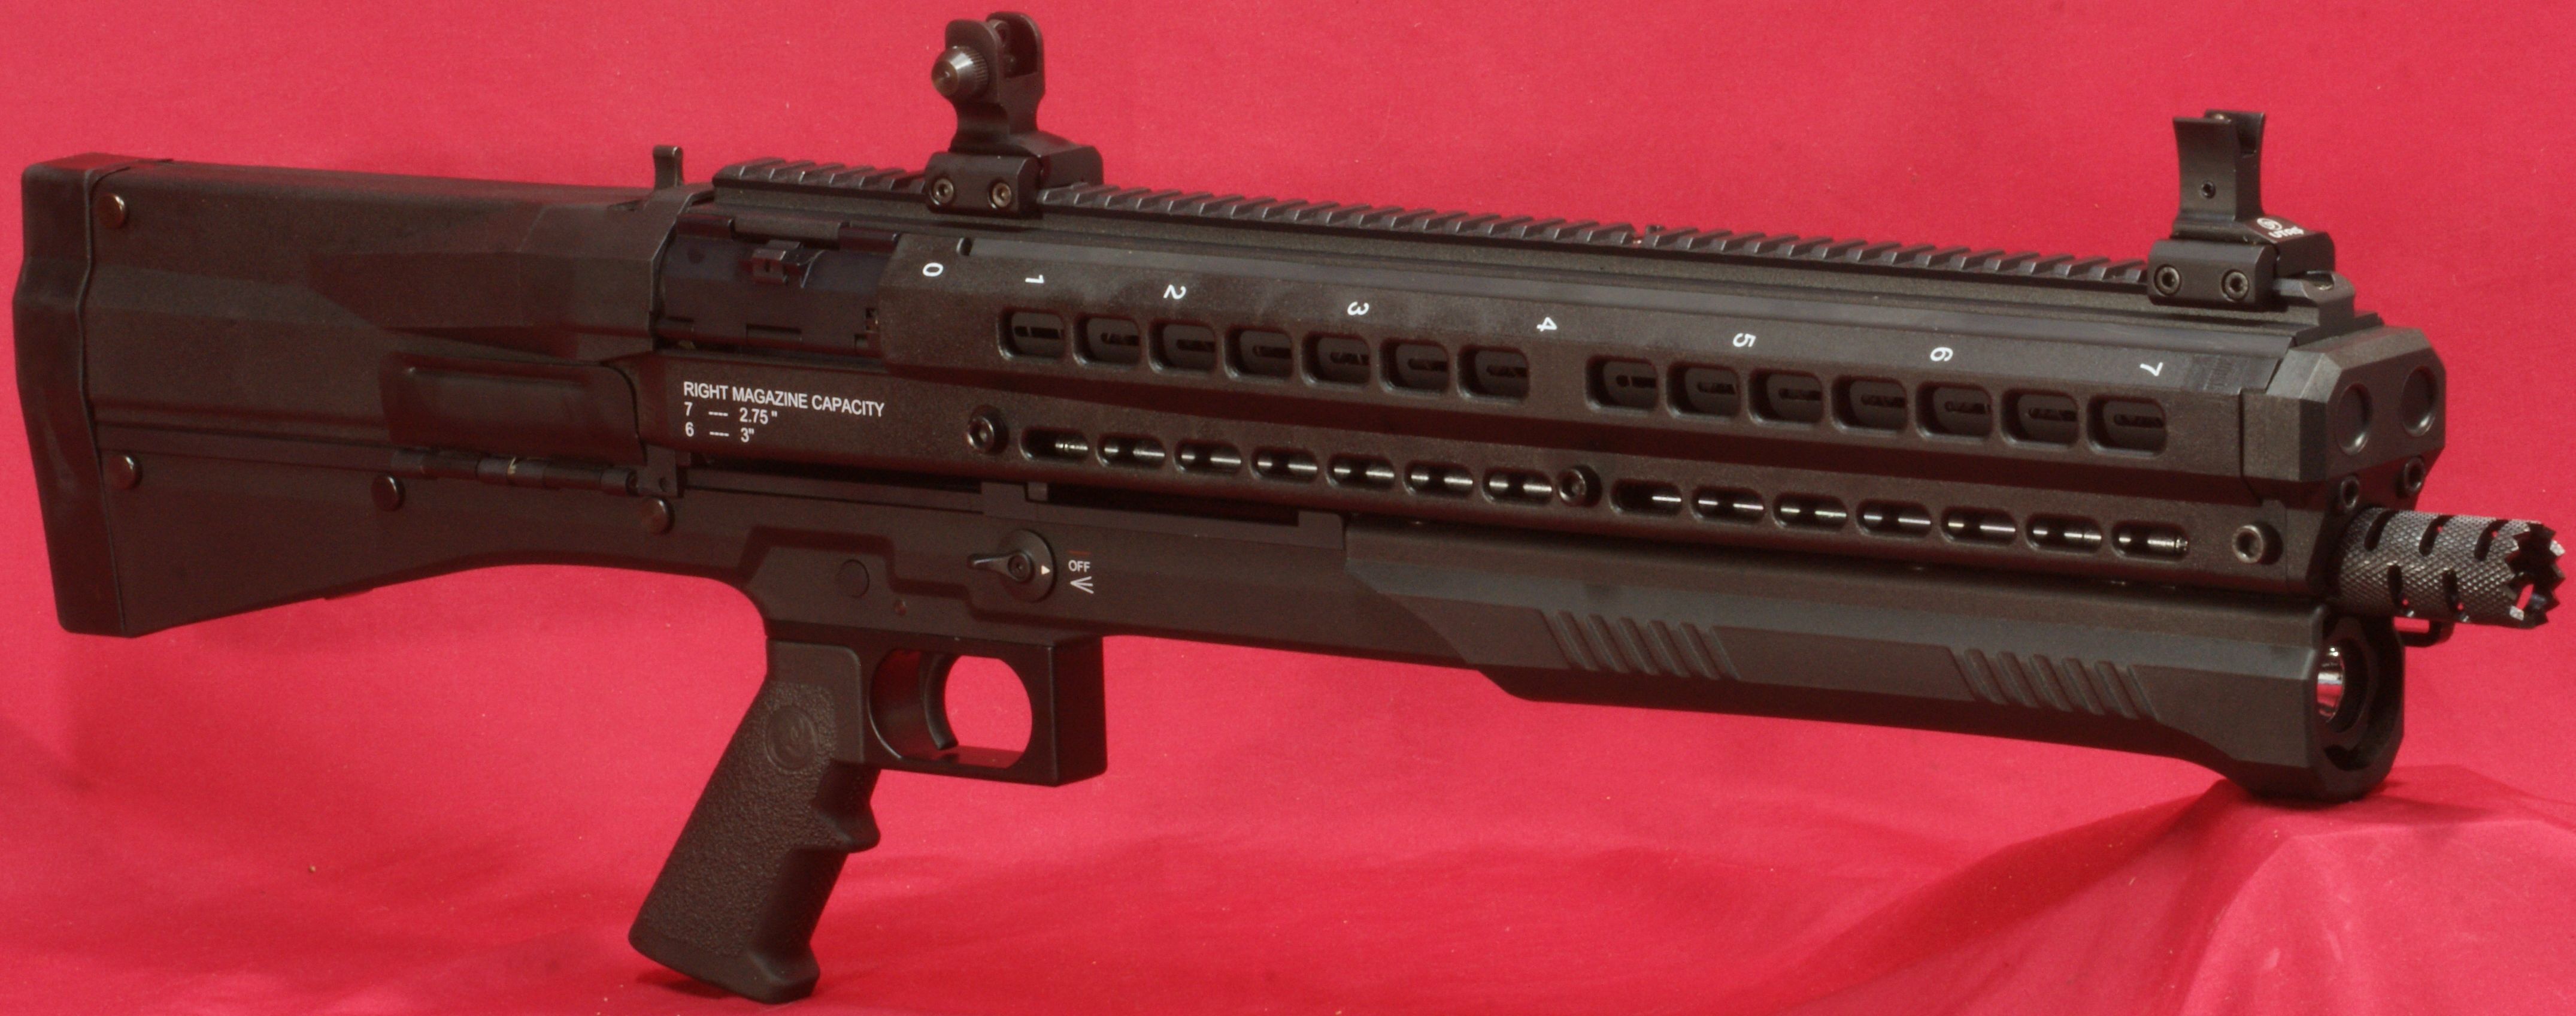
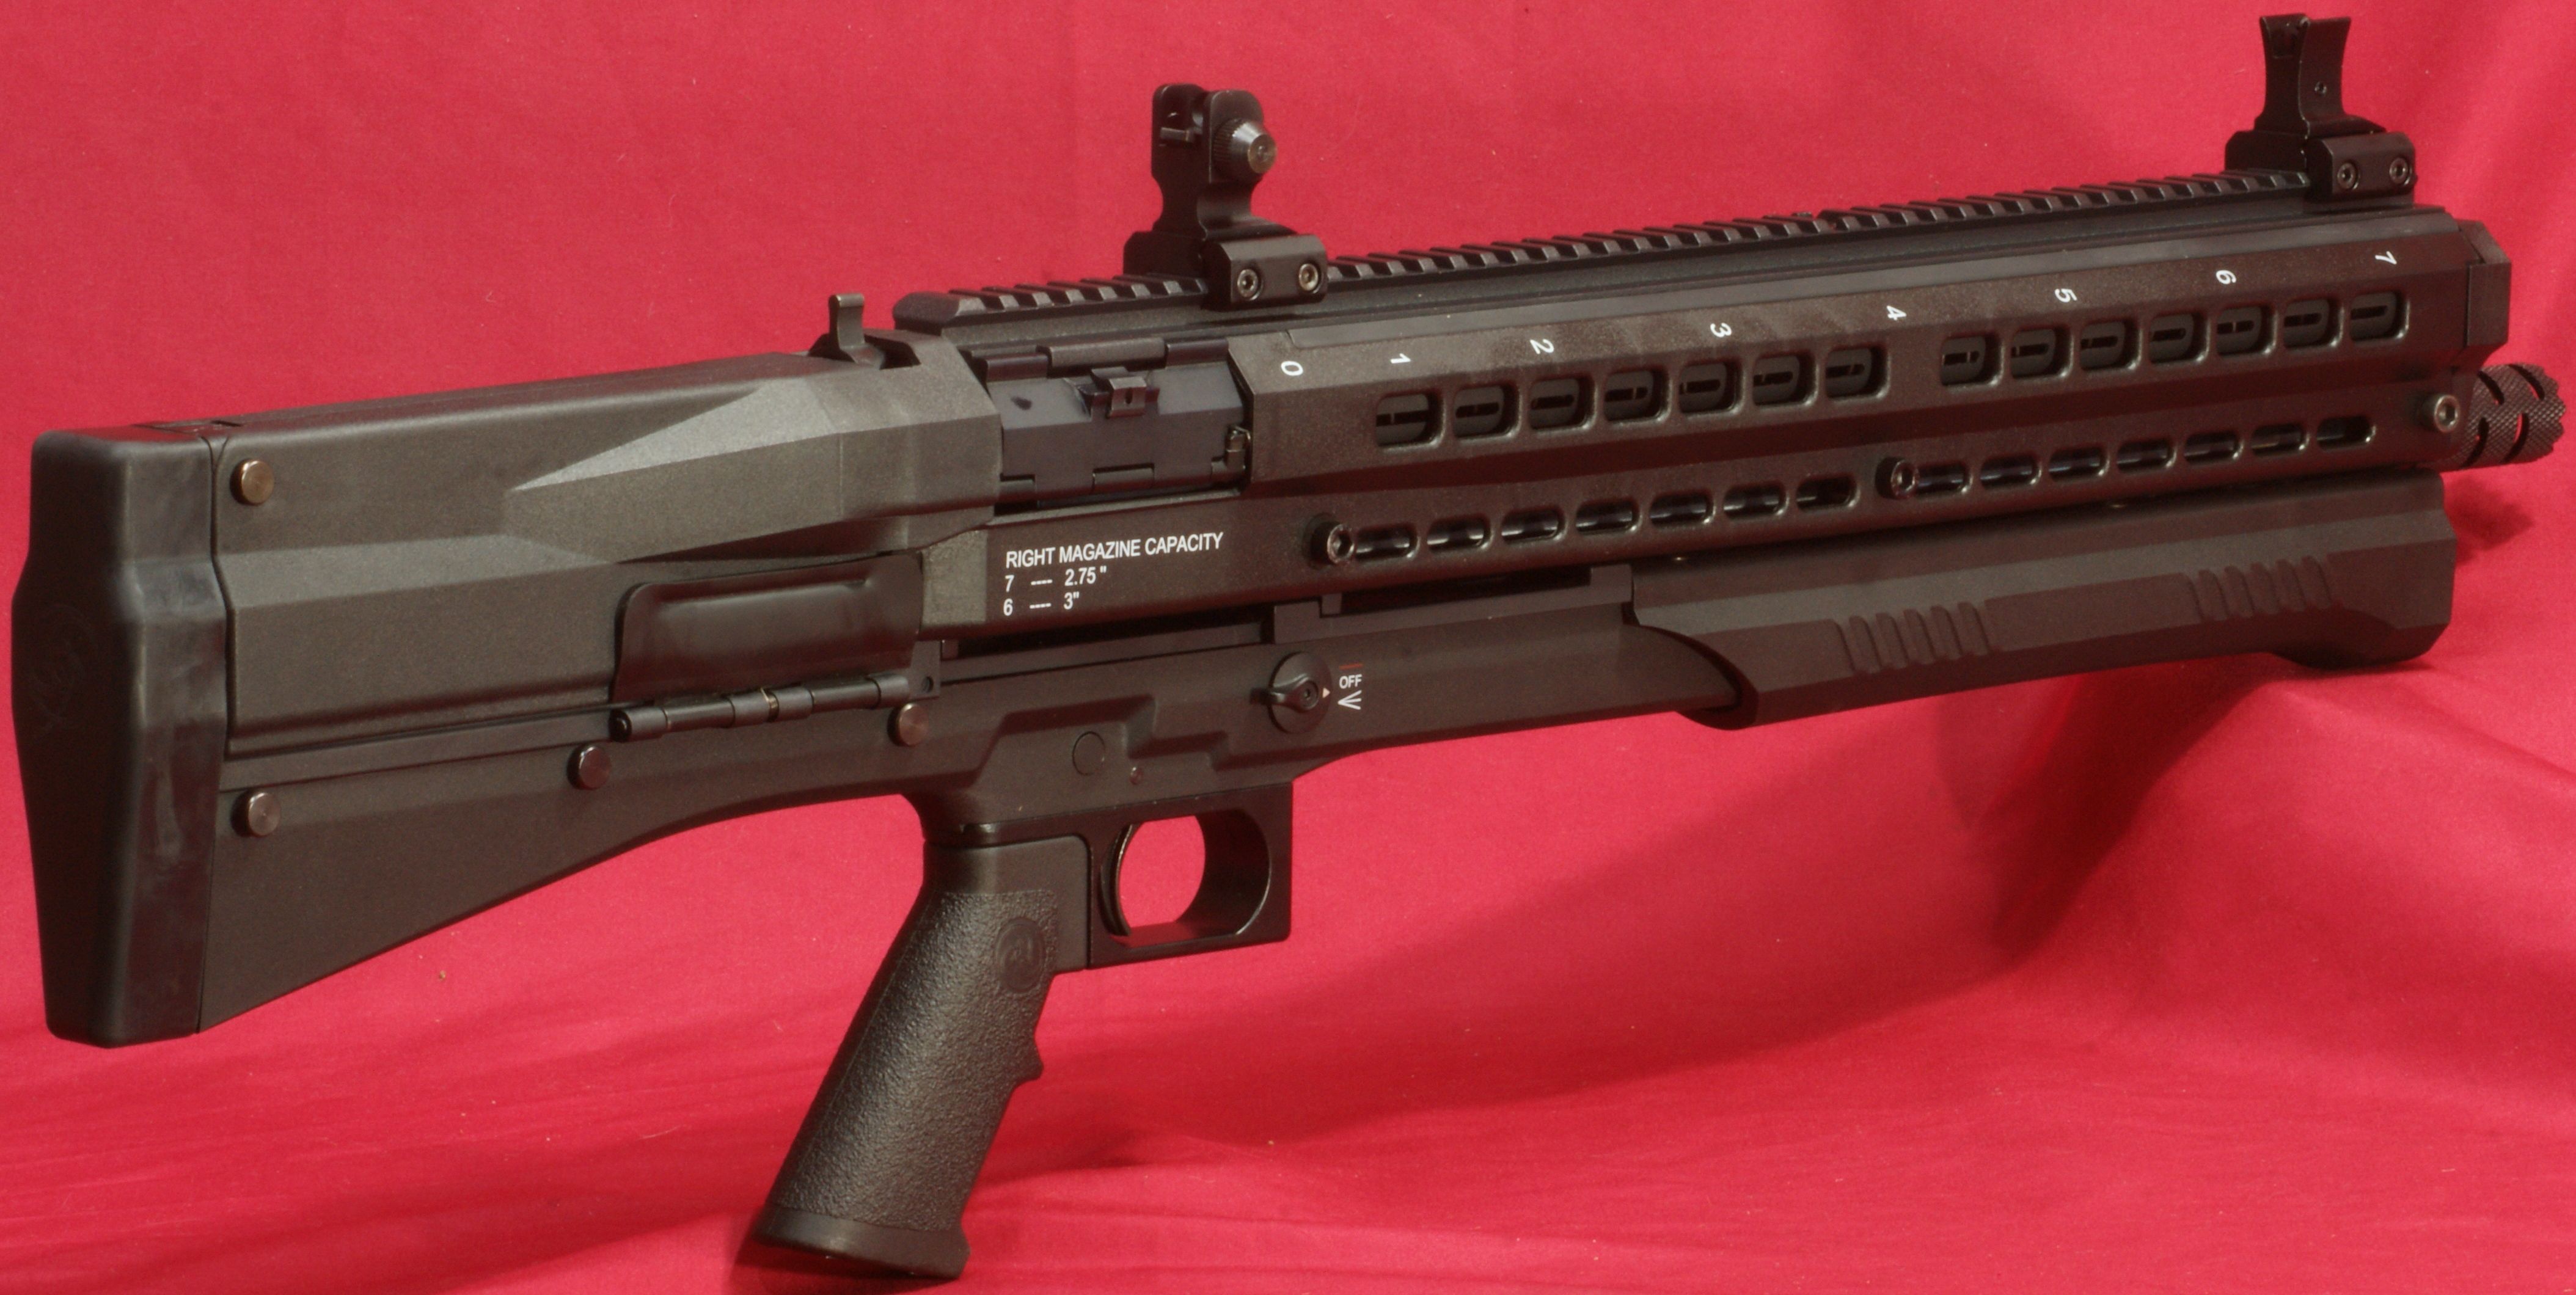
In this part of my review, I cover the external and operational features of the UTAS UTS-15 Shotgun. These next two photos show the shotgun with the UTAS sights and tactical choke installed and this configuration represents one that I feel many people will use for their shotgun. One thing to notice is that I have the rear sight moved forward on the upper rail. Due to the short length of pull and how far back the upper rail comes, I found that I needed to shift the rear sight forward because it was too close to my aging eyes. Depending on your preferences and eyesight, fully rearward may be OK and does give a longer sight radius so you should try both configurations when setting up your shotgun.
Figure 1
The UTS-15 is a 15-shot double tube 12 gauge pump shotgun in a bullpup configuration and is made primarily from black polymer components with black finished steel and aluminum parts in areas needed for strength and durability. It has a "blocky" design which is evident when you look at the styling on the trigger guard, buttpad and forearm. The barrel axis is located at the center of the buttpad which reduces muzzle rise when fired.
Figure 2
In the basic configuration, the shotgun measured 29.5" in length with the cylinder choke tube installed and the shotgun had a width of 2.55".
Figure 3

Without the sights installed, it has an overall height of about 8.7". The barrel measured 19.8" with choke removed and 20.53" with cylinder choke installed. This is different than the advertised 18.5" and I feel that UTAS needs to update their literature on this shotgun.
Figure 4
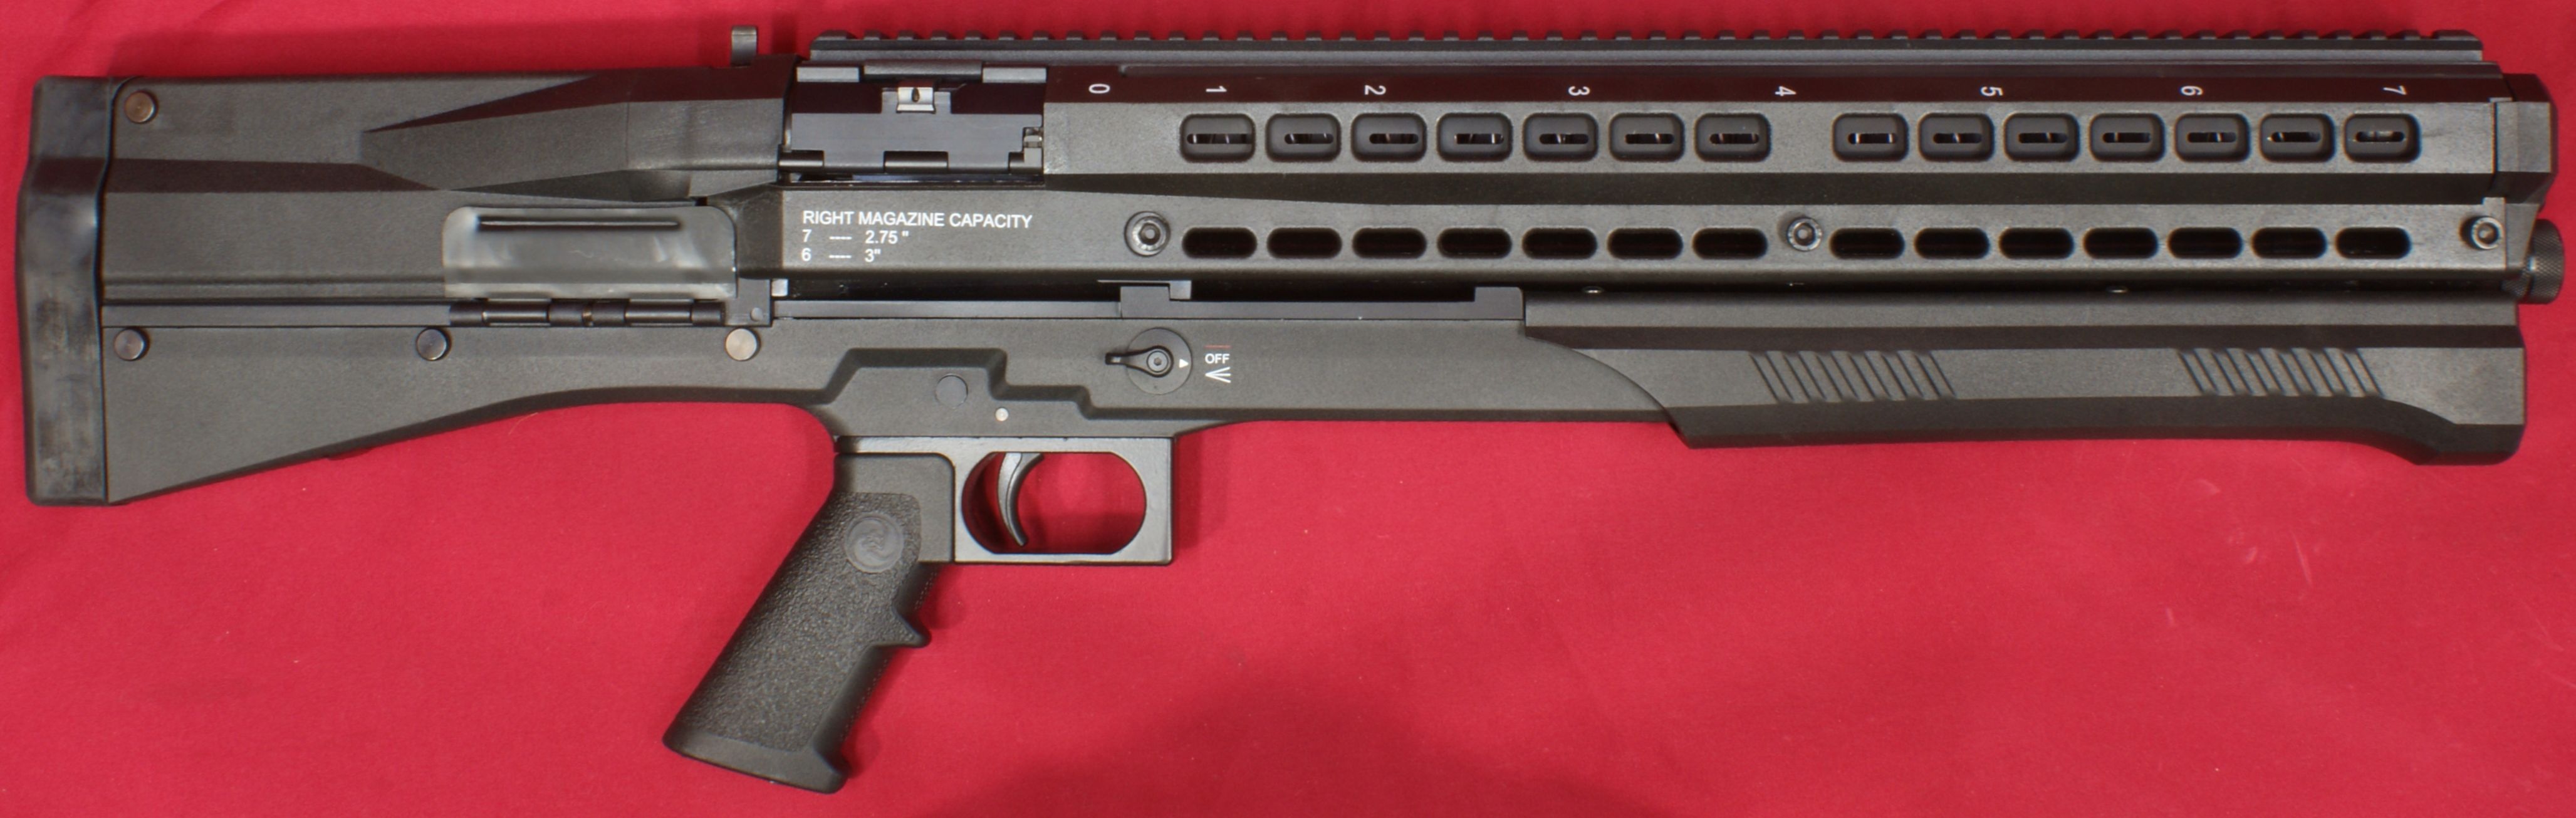
Figure 5

Figure 6
The shotgun without sights, but with the laser/light and sling swivels, weighed in at 8.33 pounds.
Figure 7
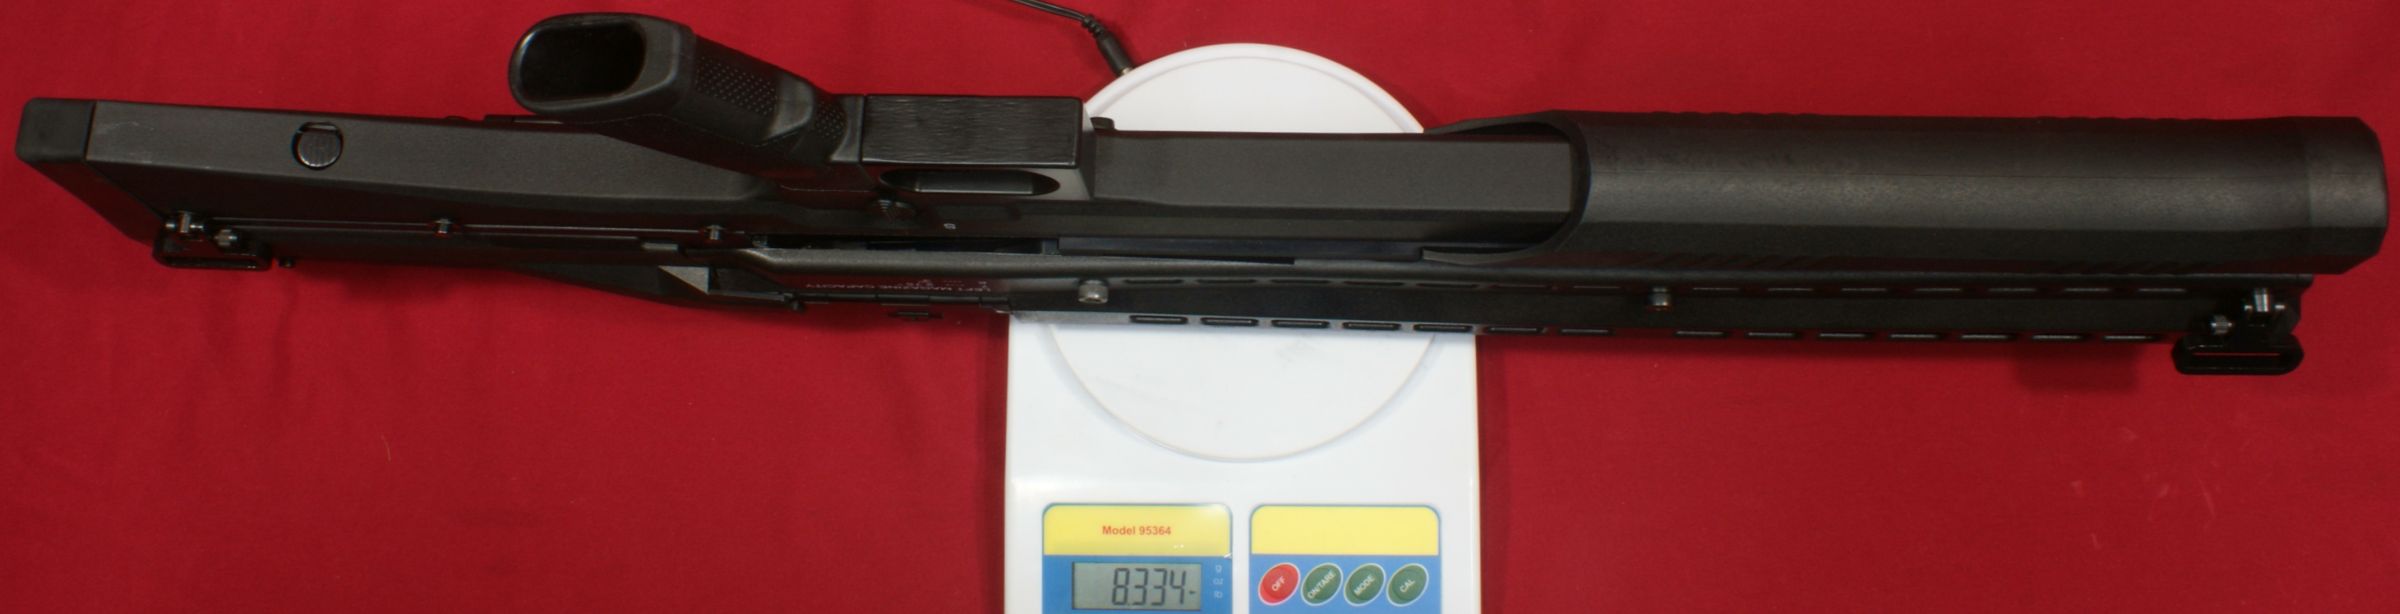
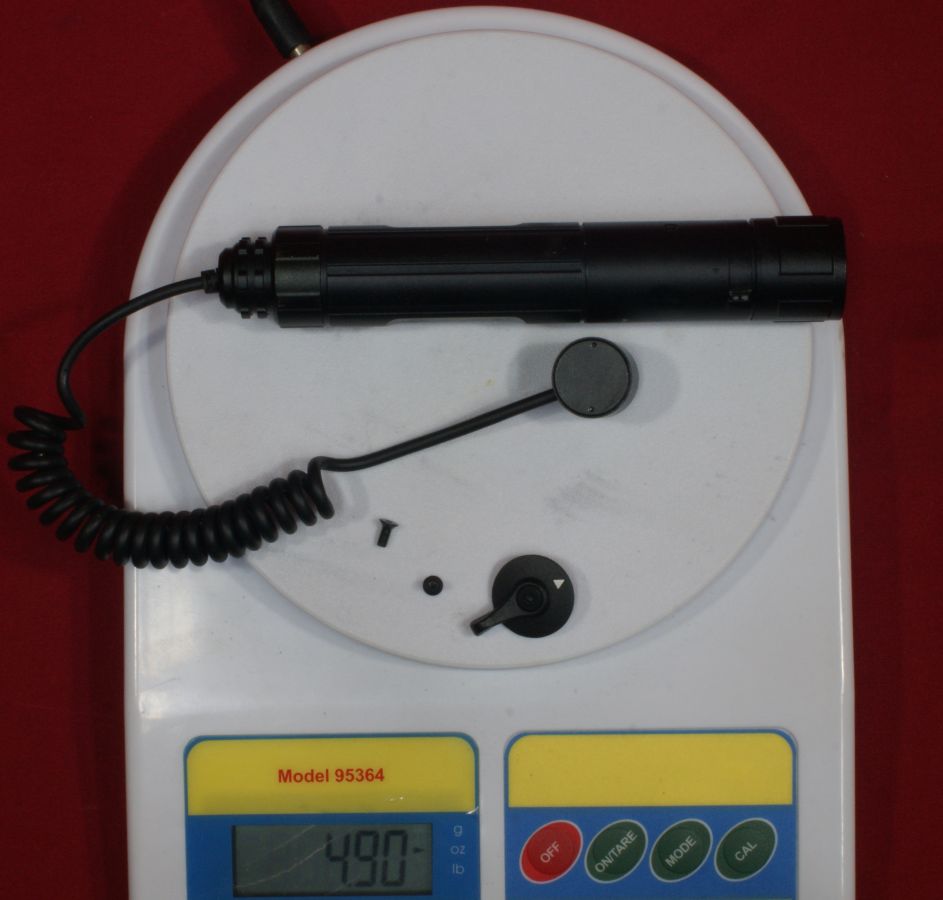
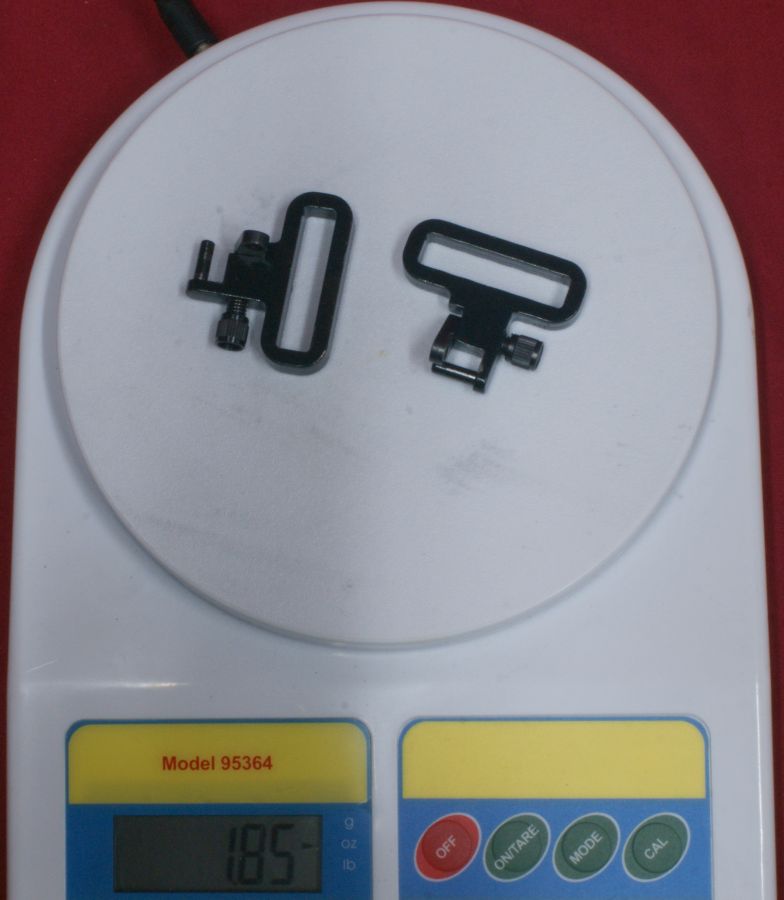
If you remove the weight of the laser/light and sling swivels, 4.90 and 1.85 ounces respectively, the shotgun weighs in at 7.90 pounds which is different that the 6.9 pounds shown at the UTAS website. Again, I think a specifications update is needed.
Figure 8
Figure 9
The max weight with all the UTAS accessories installed (laser/light, sighs, sling swivels, 7.5" extension and tactical choke) would be 9.17 pounds.
Figure 10
Figure 11
Figure 12
Figure 13

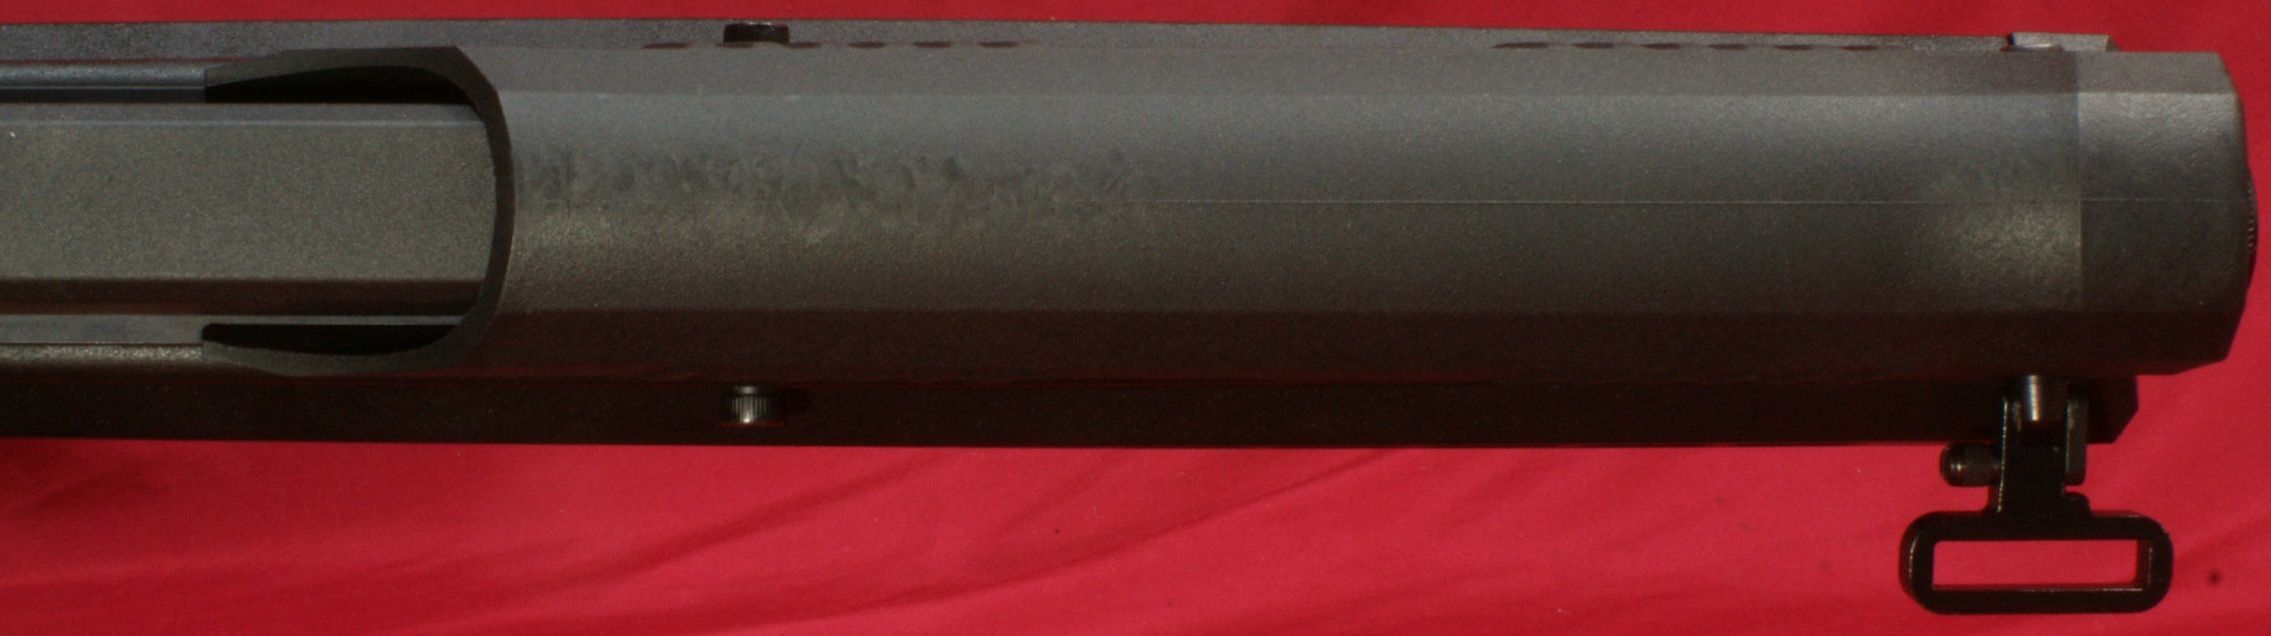
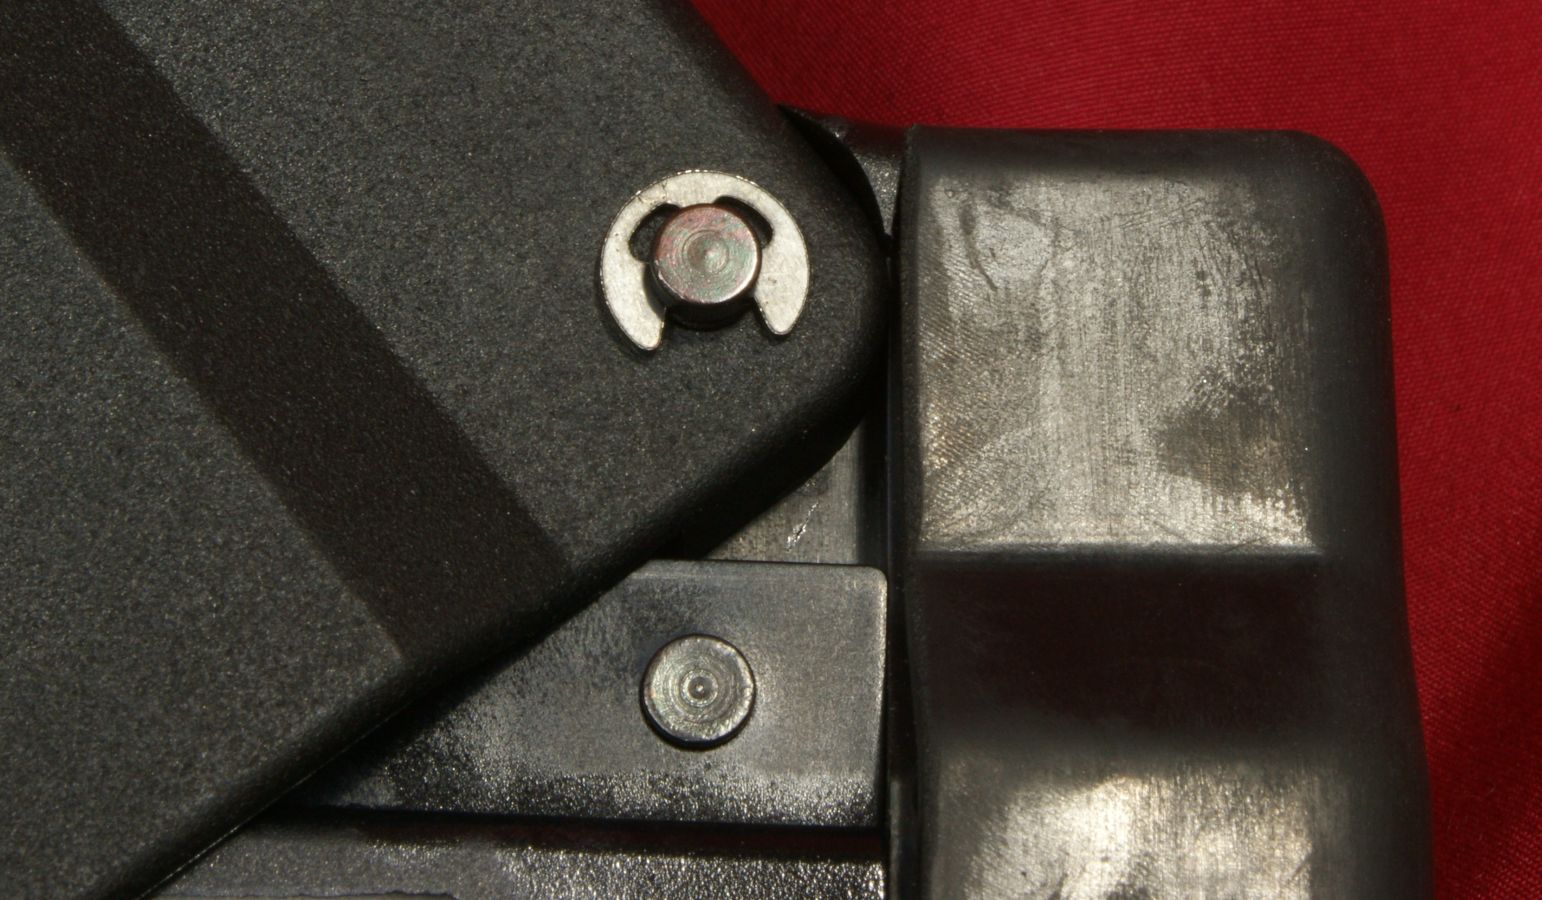
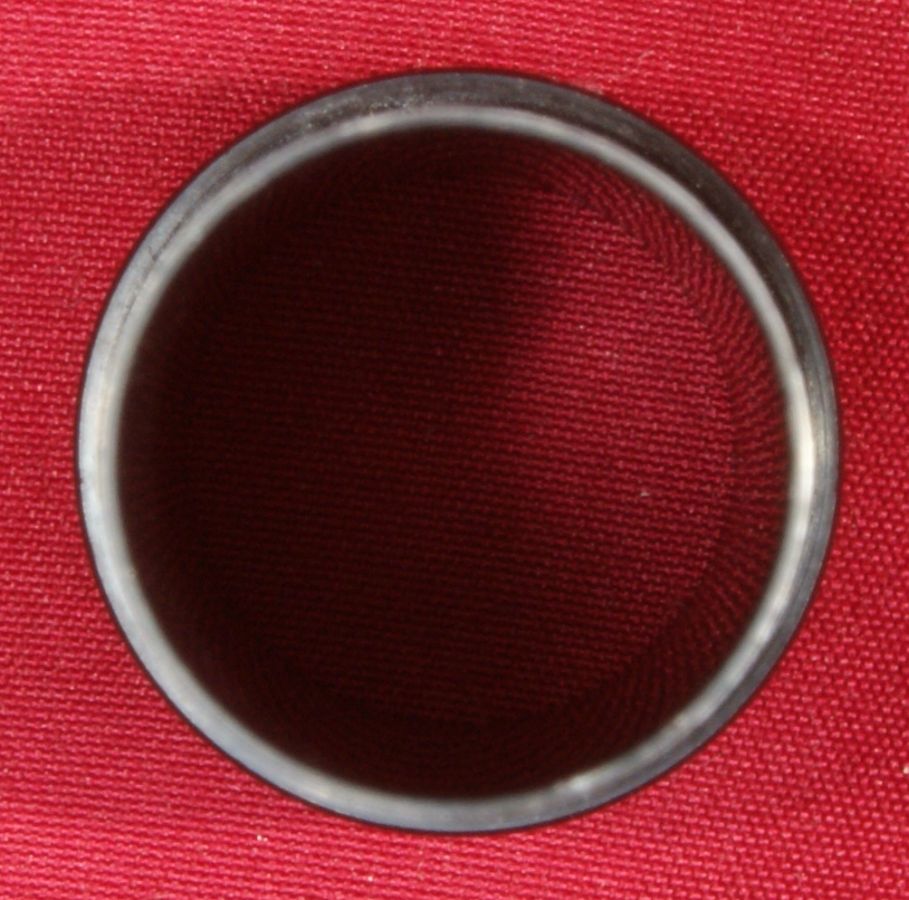
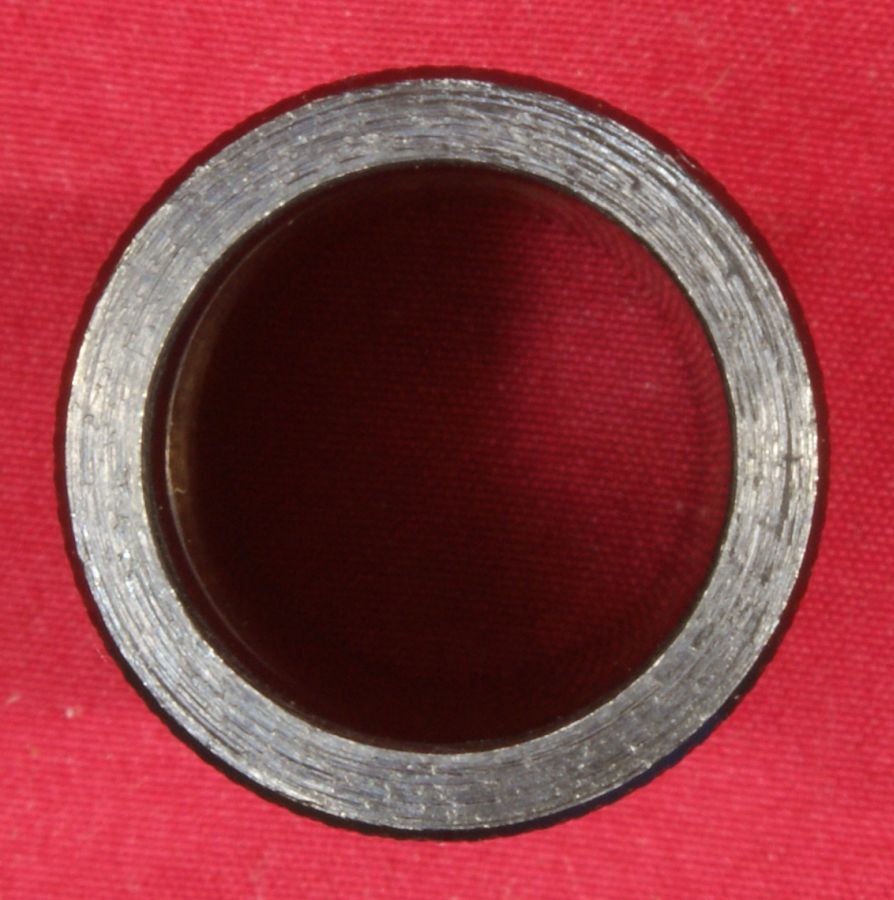
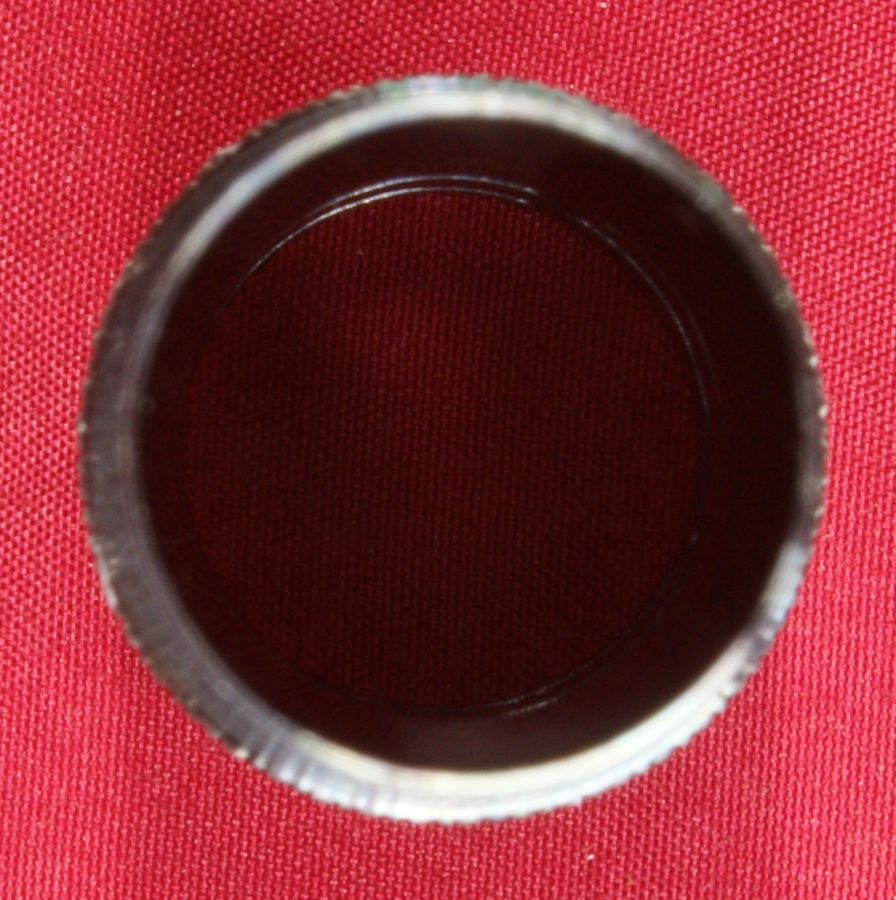
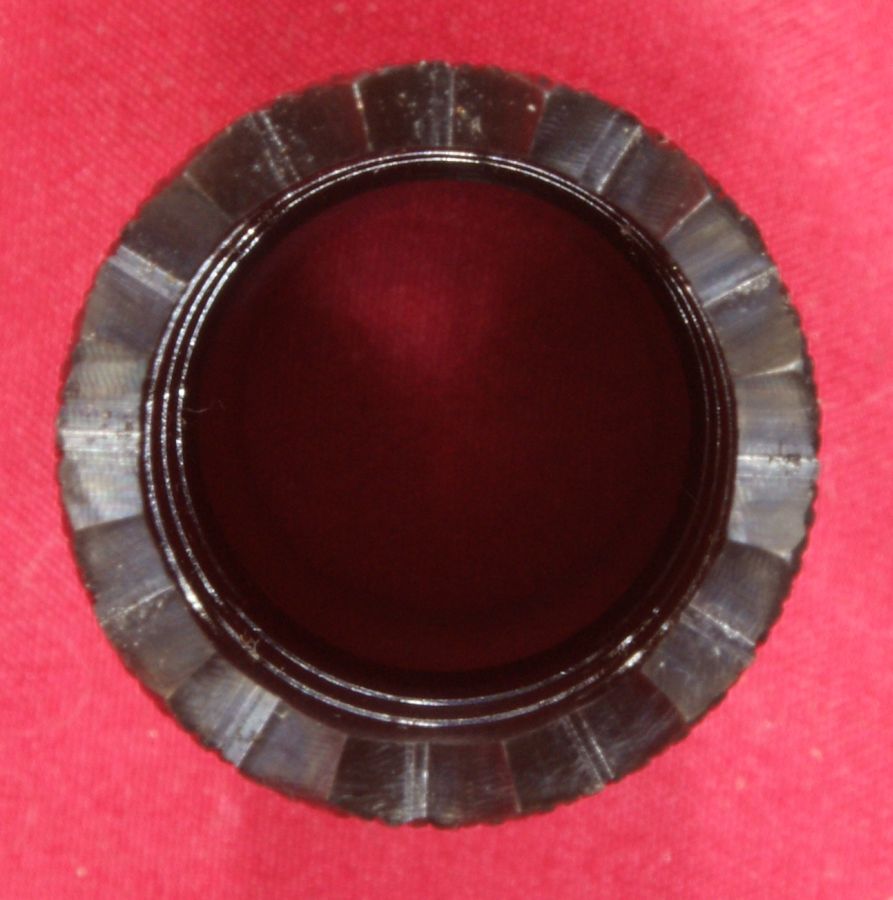
These next two photo show the front of the UTS-15 shotgun with the cylinder bore choke (left) and tactical choke (right) installed. Both the cylinder bore and tactical chokes had an inside diameter (ID) of about 0.734" which confirms there is no constriction in either of these chokes so shooting rifled slugs or buckshot should not be an issue. The end cap on the front of the magazine tubes gives you a visual indication of the center of the two tubes. UTAS used socket head screws for attaching the end caps and side magazine tube covers which adds to the industrial/sturdy/tough look of the shotgun. The shotgun comes with a "cross shaped" tool that can be used for removing these screws if needed.
Figure 14
Figure 15
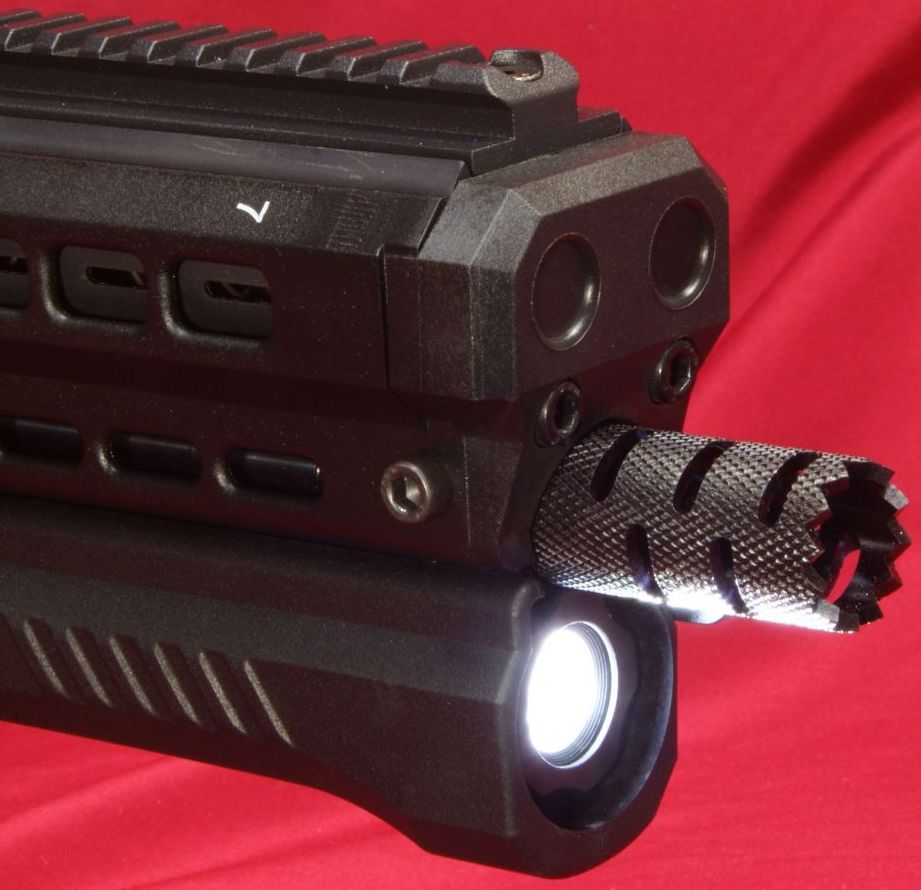
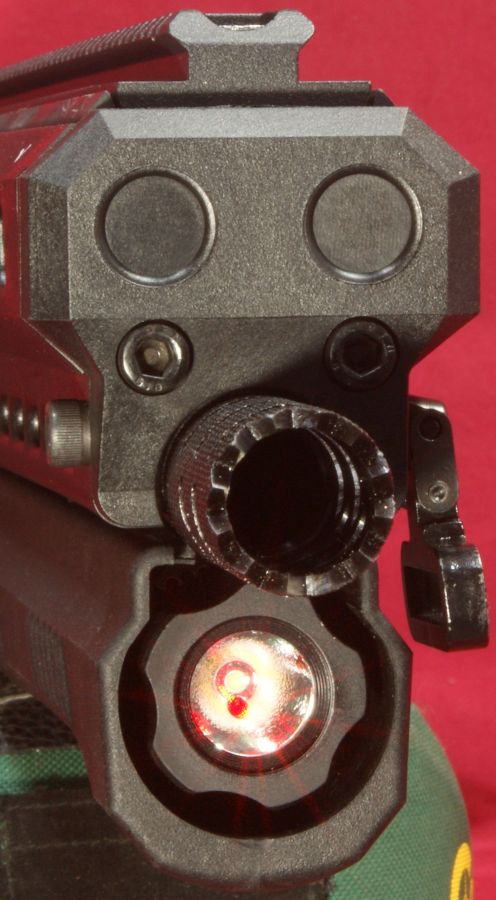
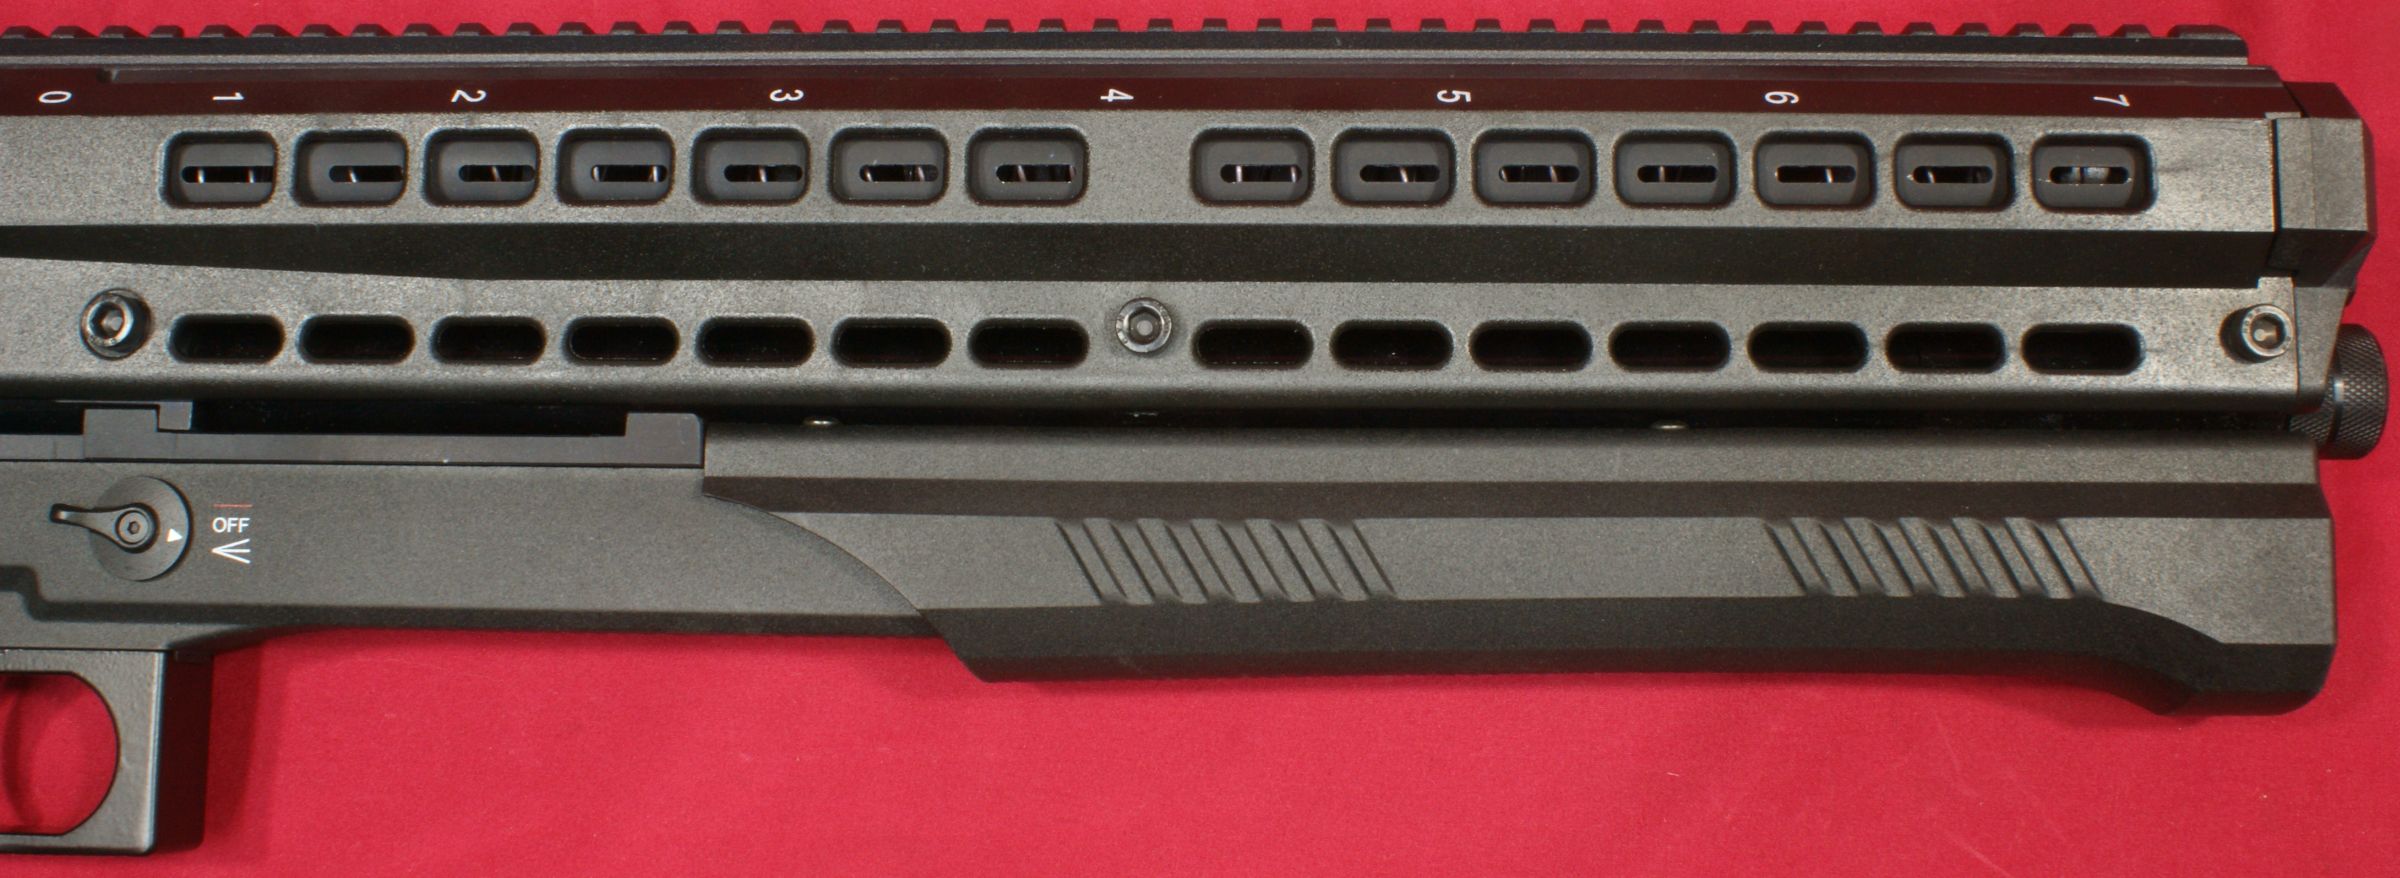
One of the great features about the UTS-15 is that it can have a combination red laser and 200 lumen light assembly embedded in the forearm of the shotgun. When in use, you can either have the light or laser turned on, but not both at the same time.
Figure 16
Figure 17
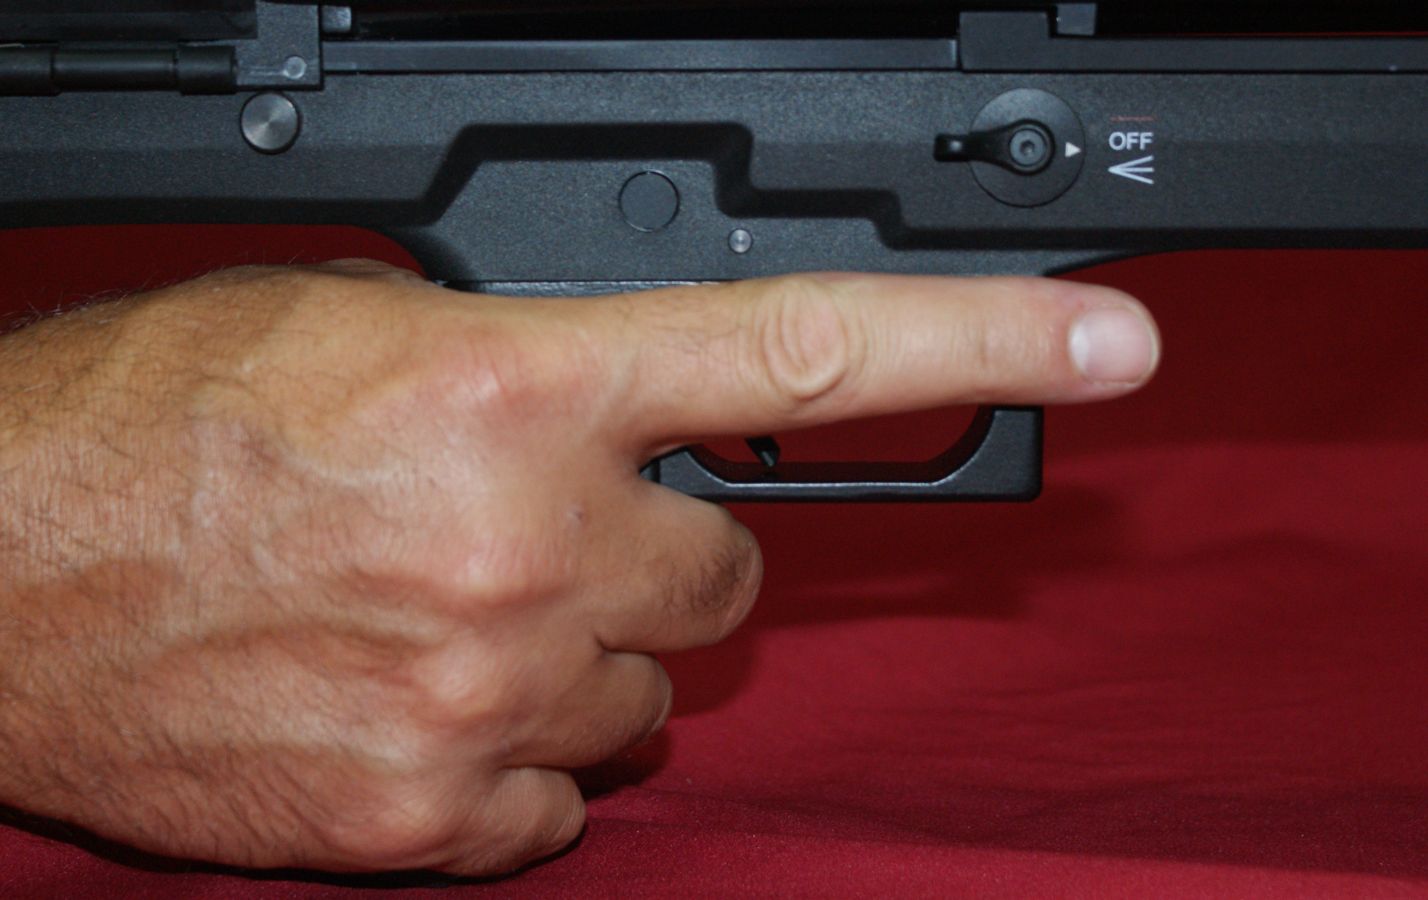
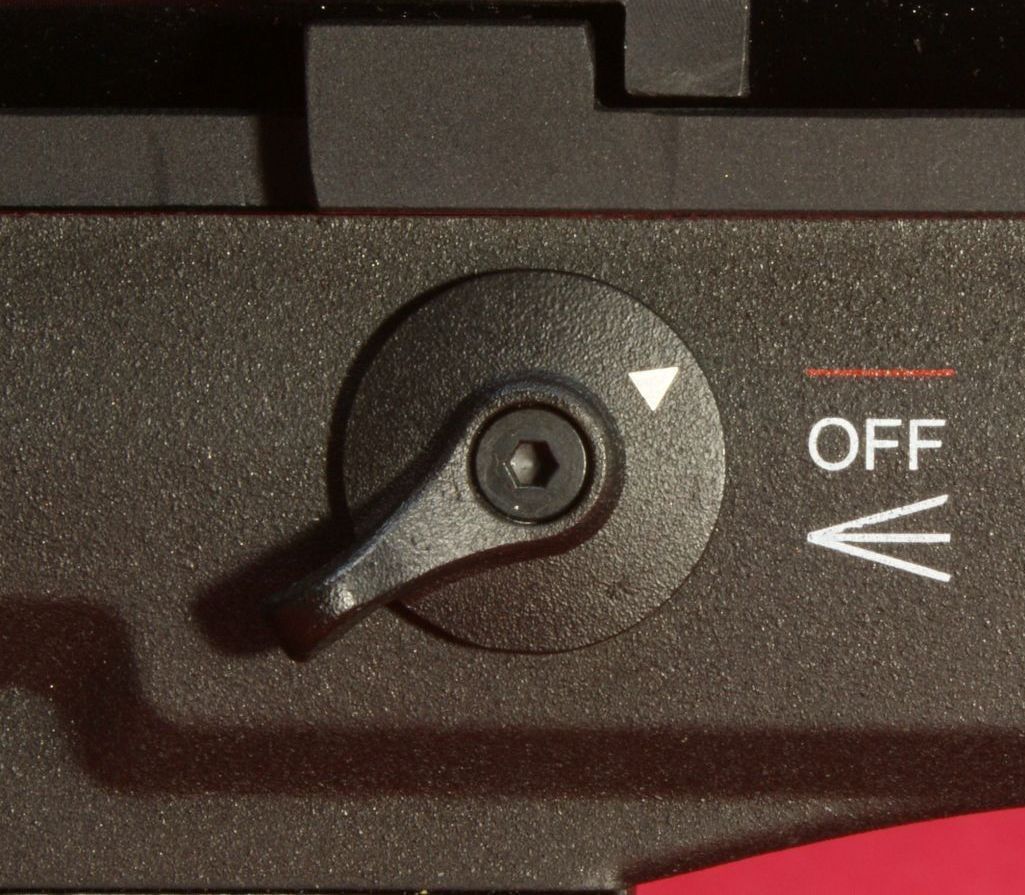
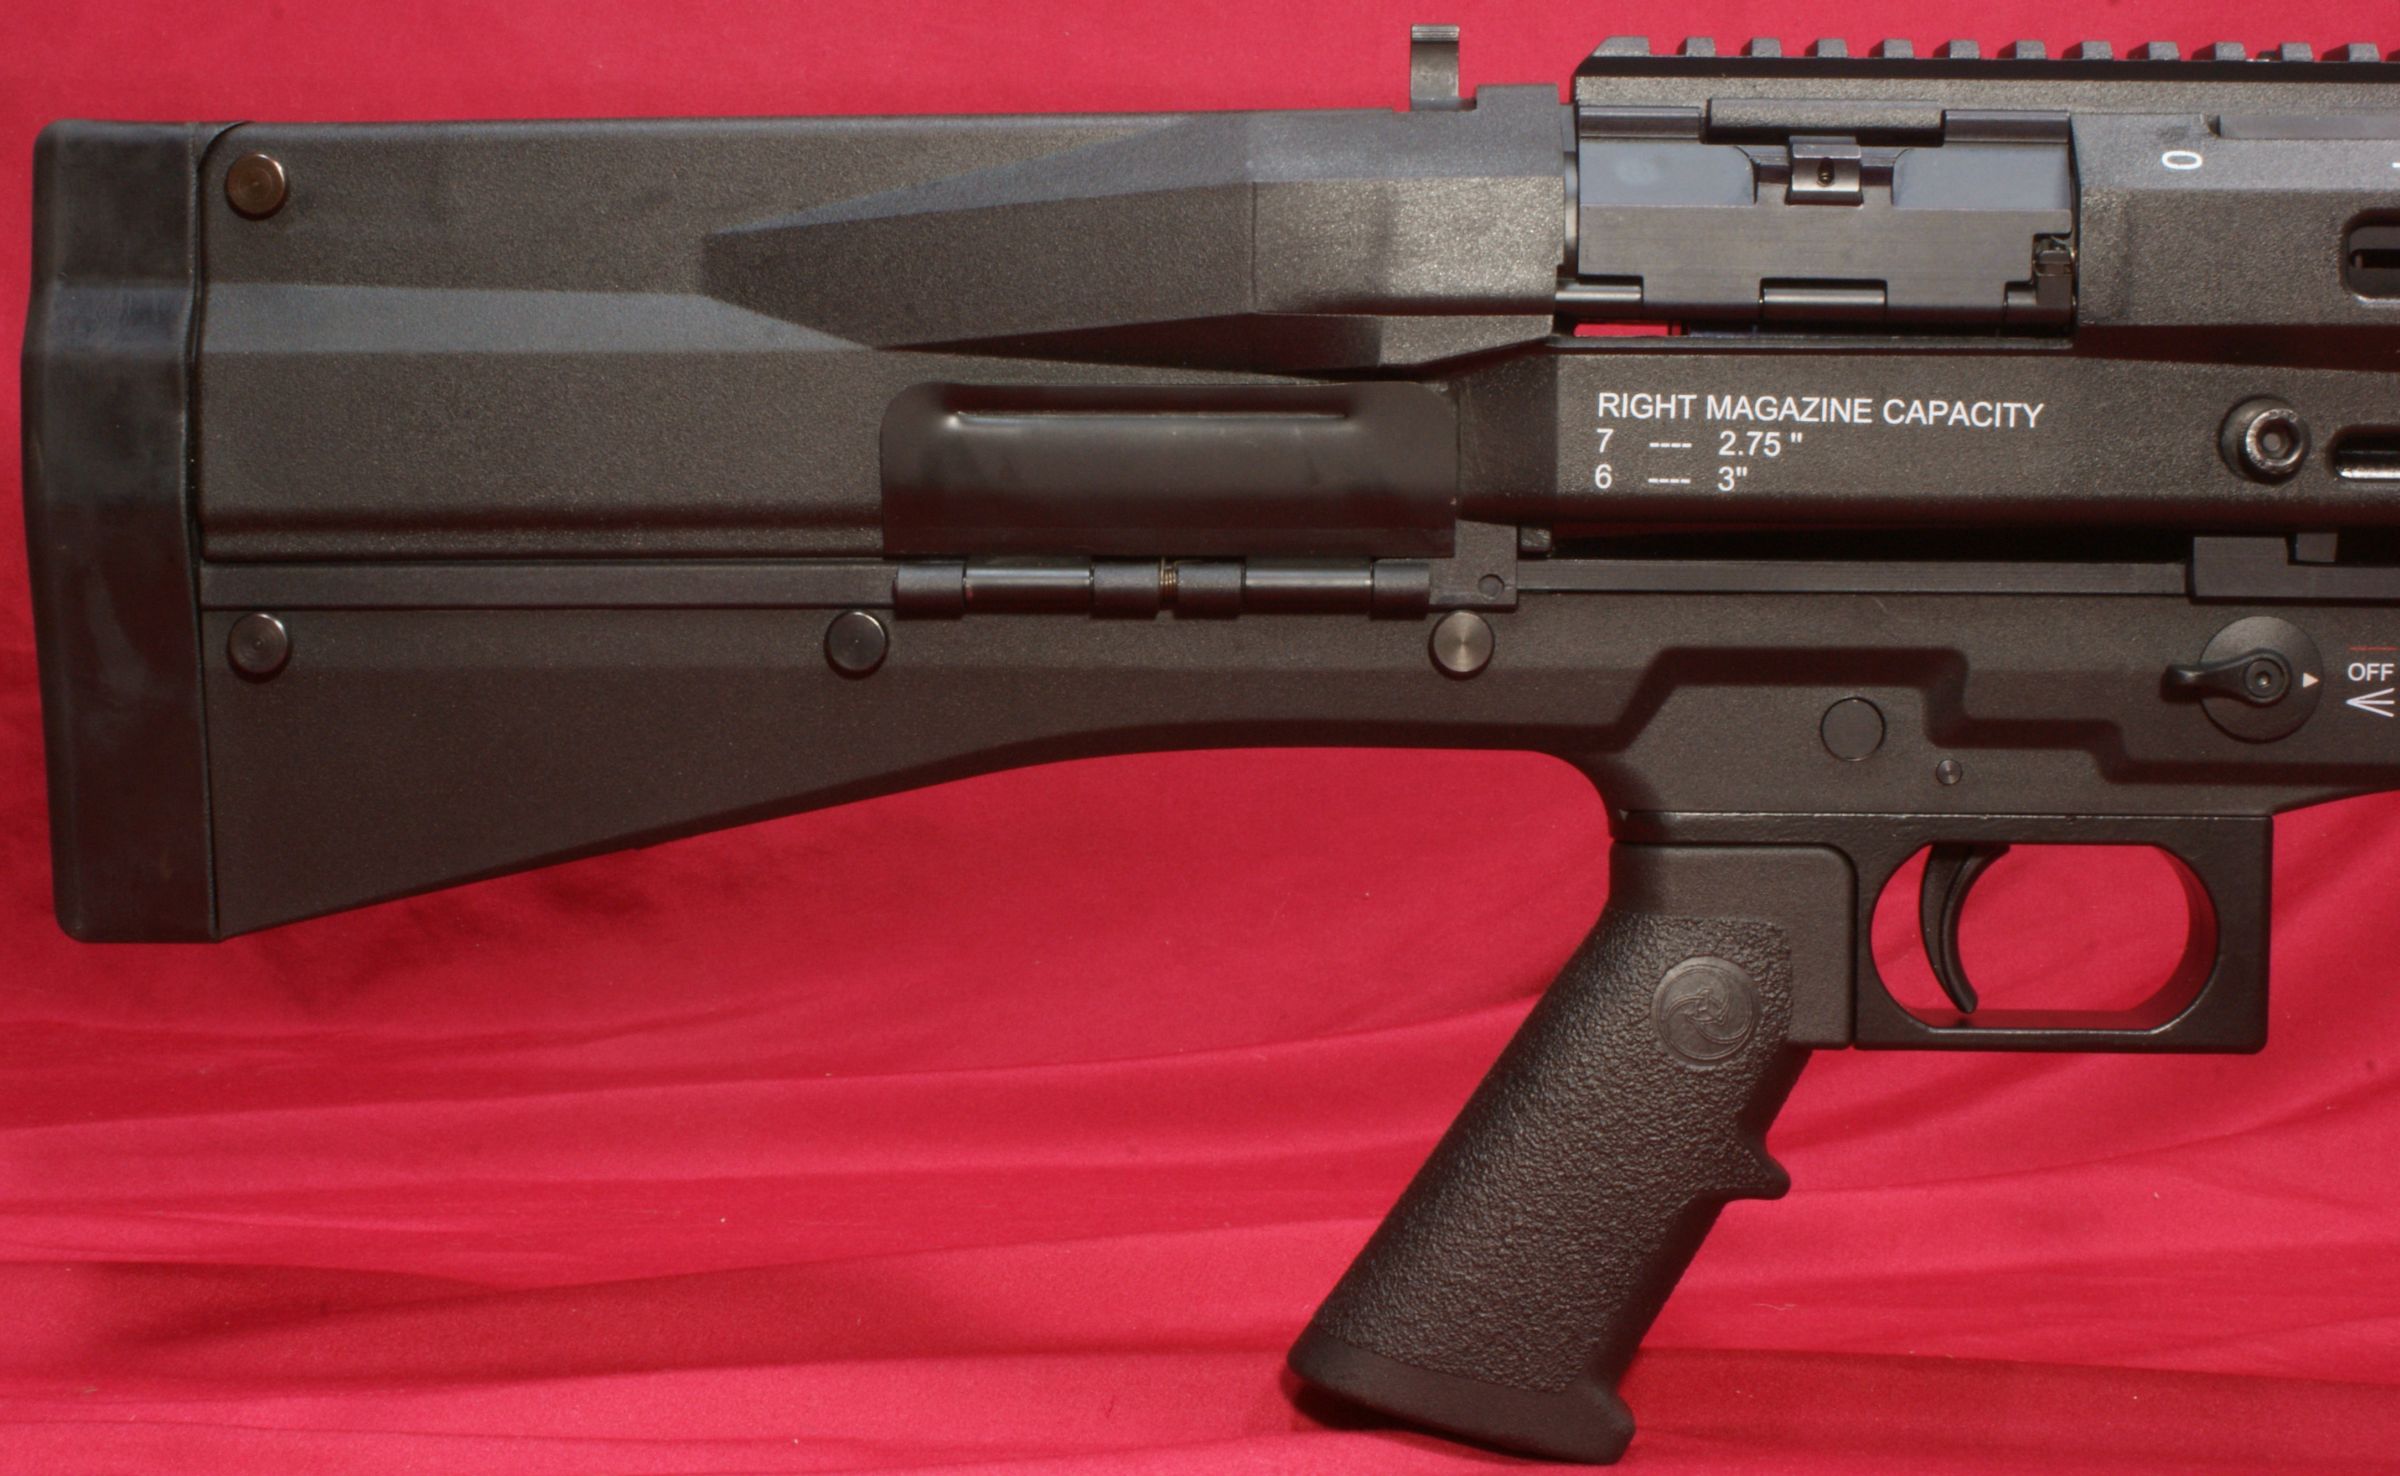
The switch for the laser and light is located on the right side of the shotgun and just above the front of the trigger guard. If you purchase the basic model, I believe the light switch is replaced by a plastic plug, but the markings on the stock remain so that you can add the laser/light in the future. You can easily reach and operate the switch with your trigger finger.
Figure 18
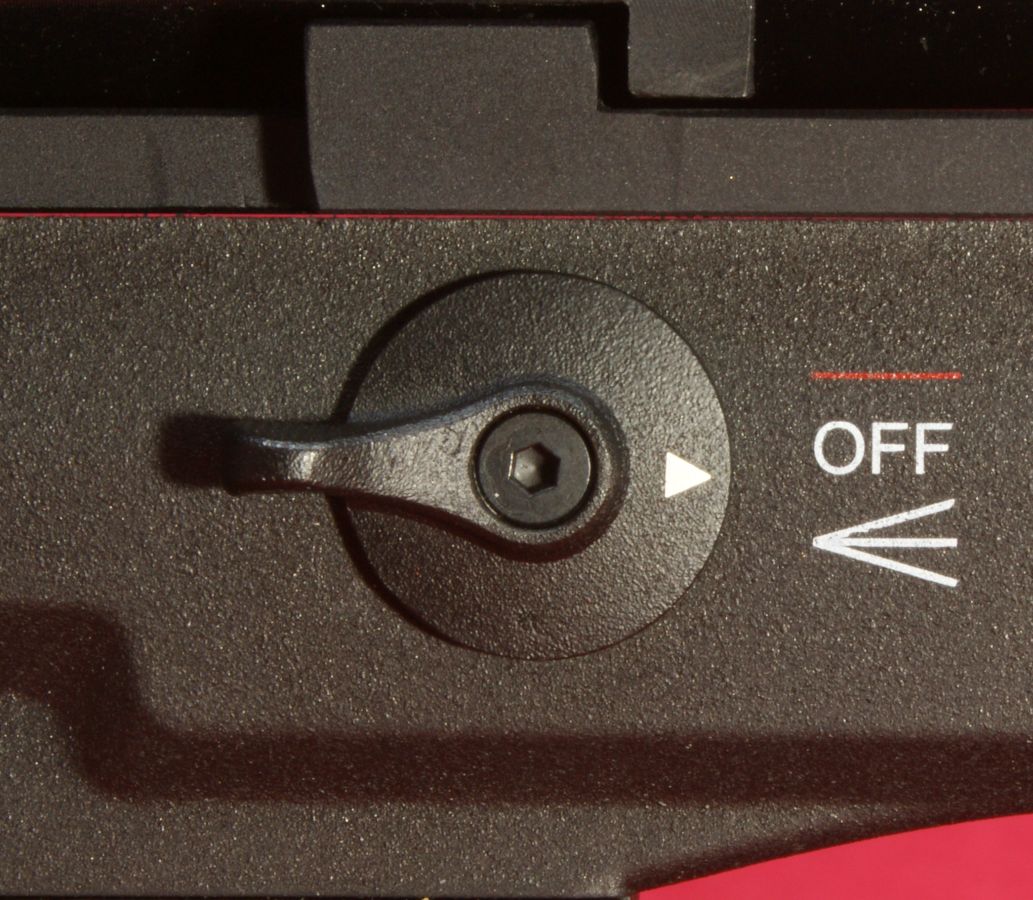
The switch has three positions and it is clear what position the switch should be in for the laser or light to operate. The switch has very distinct detent positions and I doubt it would be accidently knocked on or off.
Figure 19 - Off
Figure 20 - Laser
Figure 21 - Light

The front of the shotgun appears to be nearly all polymer with the exception of the upper rail which I believe is now magnesium. The forend is made from a polymer material and flairs out around what UTAS identifies as a magazine cap in their parts list. Since the magazine tubes are above the barrel, I think the magazine cap would be more appropriately called a takedown nut.
Figure 22 - Forend Fully Forward
These next photos show the forend in the fully rearward position and you can see the aluminum magazine cap (takedown nut) along with the barrel lug. The magazine cap holds the barrel securely in place just like most other shotguns.
Figure 23 - Forend Fully Rearward
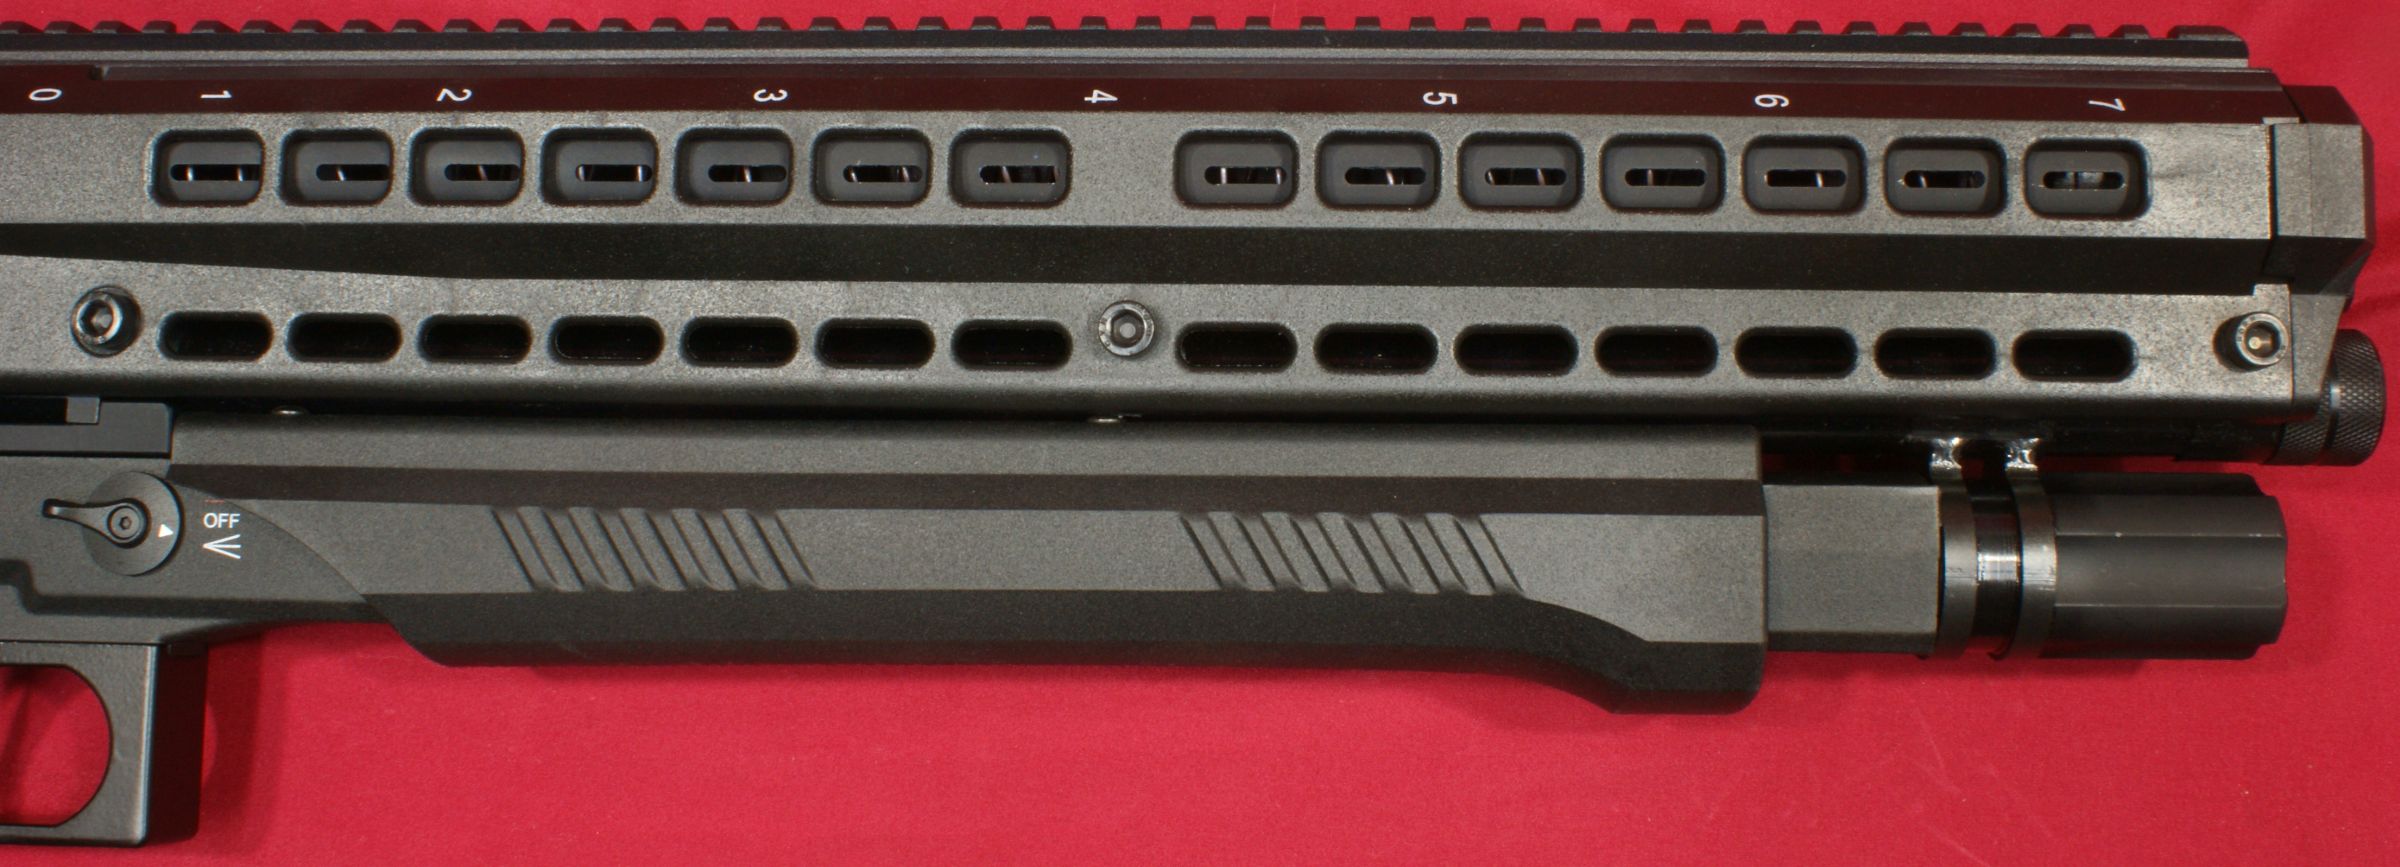
Figure 24
The forend measures about 11.2" in length and has a gripping surface of about 8.2". Each side has two ridged areas to reduce the chance of your hand from slipping while pumping the action, but since the rest of the surface of the forend has a smooth finish, the forend has an overall slick feel like most polymer parts.
Figure 25

Figure 26
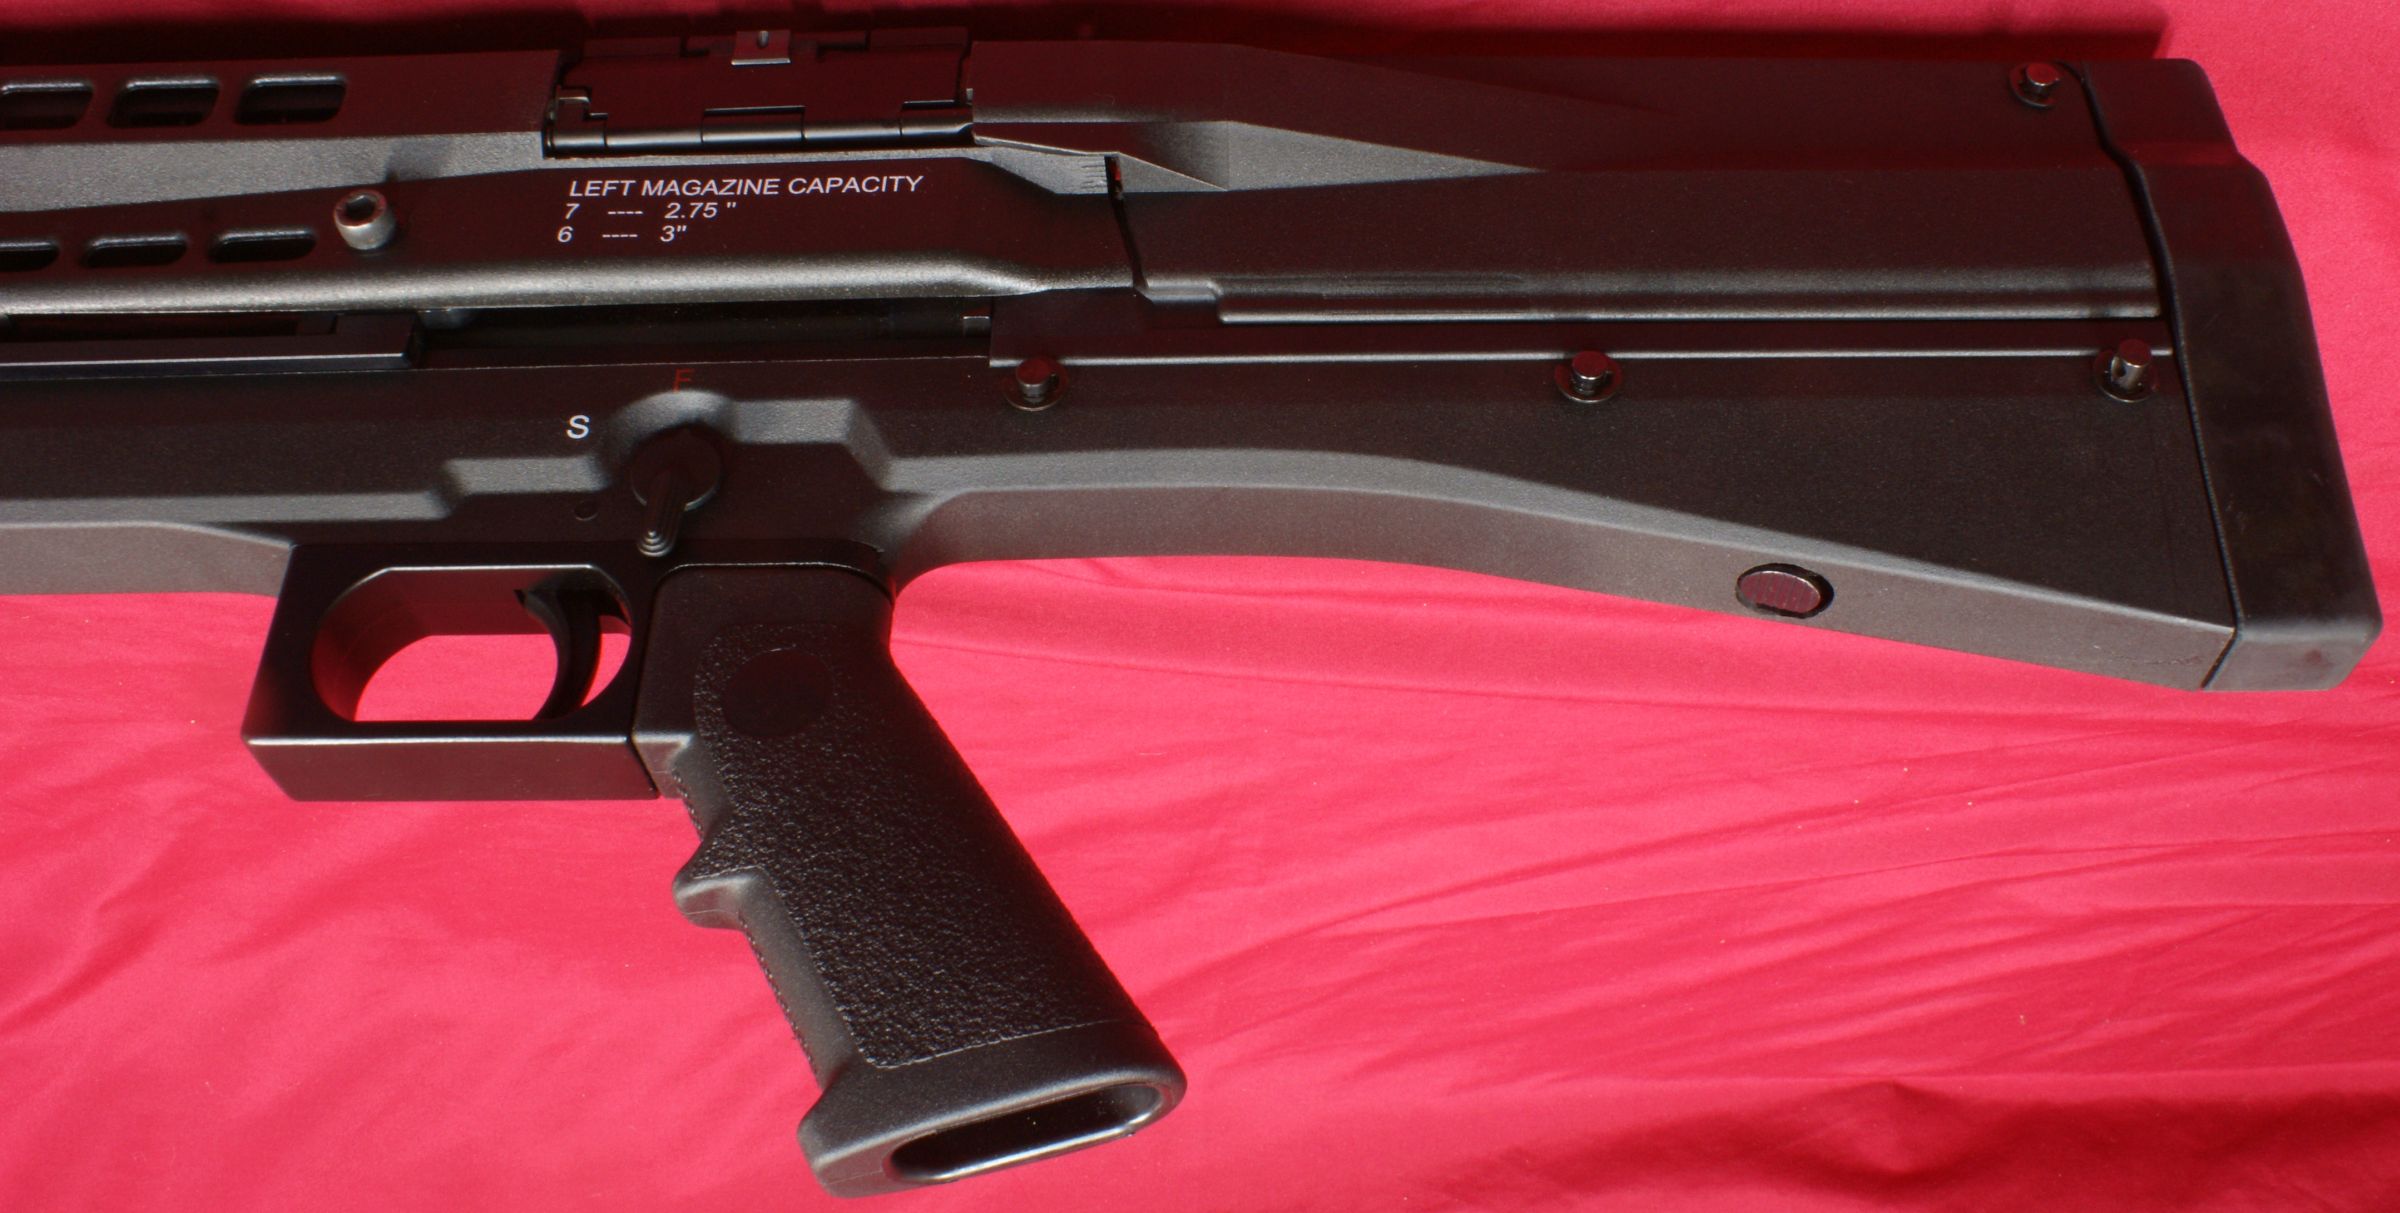
The stock of the shotgun has a tall look due the bullpup design needing more space inside the stock for the feeding along with the bolt and hammer components. The UTS-15 also incorporates the same pistol grip interface as standard AR style rifles so you can exchange the pistol grips if desired. The pistol grip provided with the shotgun has a very A2 stylish look and feel. The texturing on the sides, rear and front of the grip really do reduce the slick feel of the polymer grip and it would be a nice addition if UTAS could include this type of texturing on their forend.
Figure 27
These next two photos show the ejection port door and right loading port door in the closed and opened positions.
Figure 28
The steel ejection port door is held closed by a magnet which holds the door against the bolt. As soon as you pump the action, the spring loaded ejection port door opens and remains that way until you close it which is similar to that on an AR style rifle. Unfortunately, the spring that flips the door open on this shotgun did not have enough force/travel to press the door against the stock when in the open position and the door would rattle when open. Potentially a different spring or second magnet on the lower portion of the stock could correct this rattle. I'm not sure if this is unique to this shotgun or if all are this way. The loading port door is made of aluminum and is not spring loaded because the normal state of the door is closed when operating the shotgun and open when loading.
Figure 29
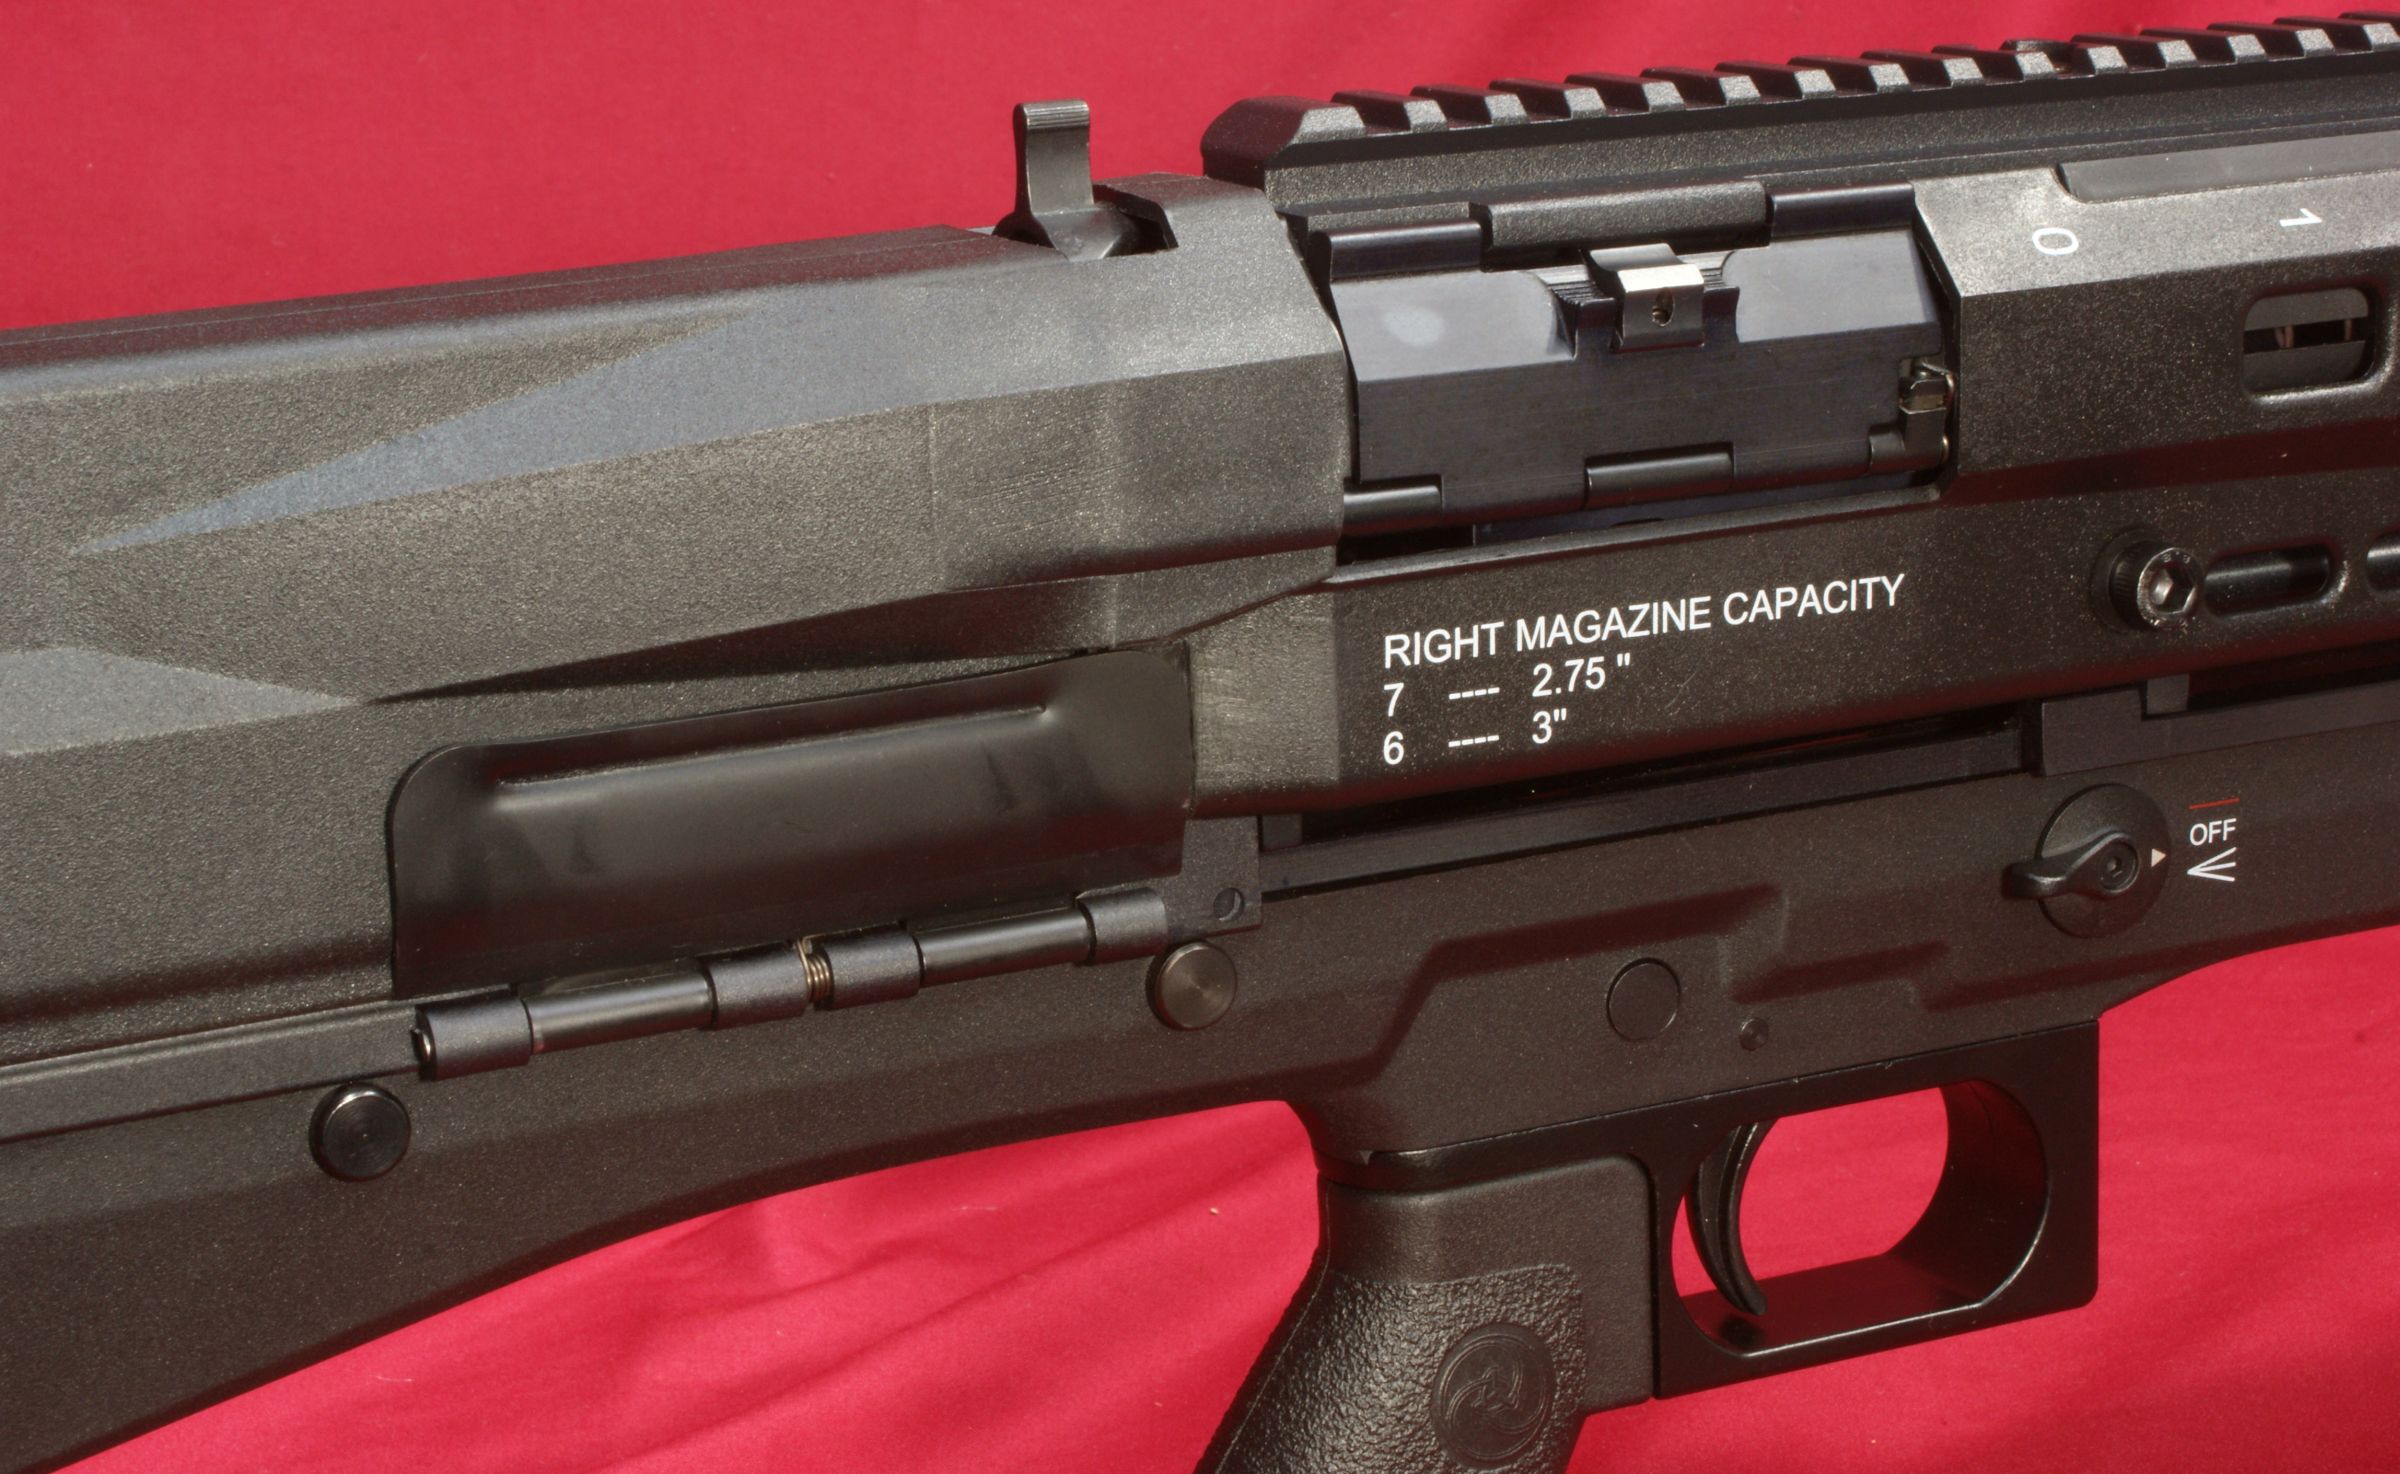
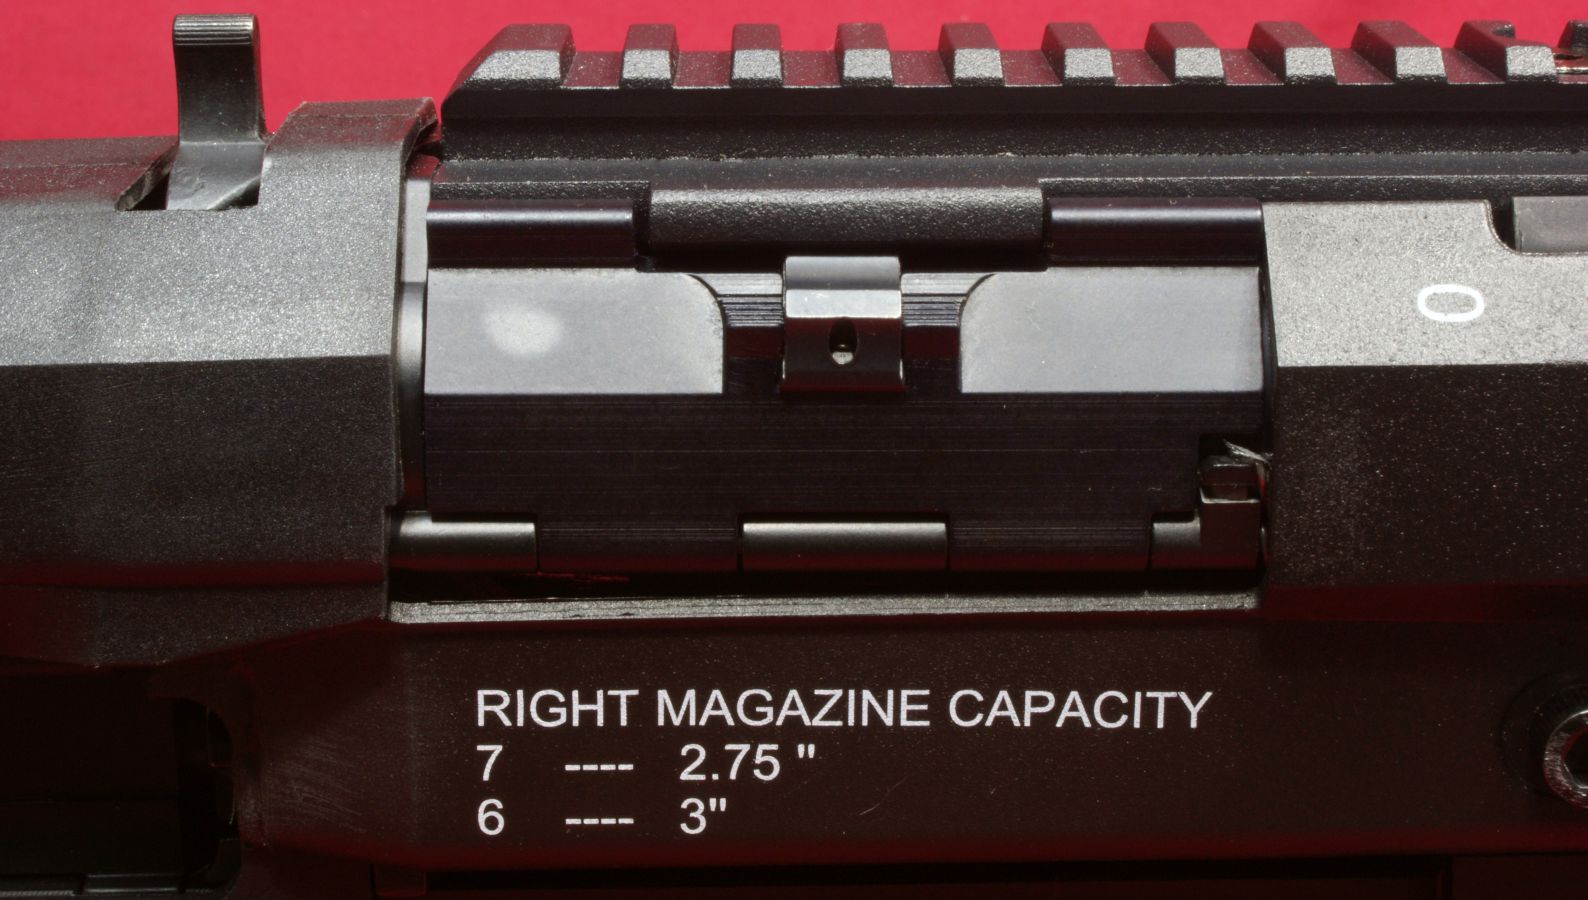
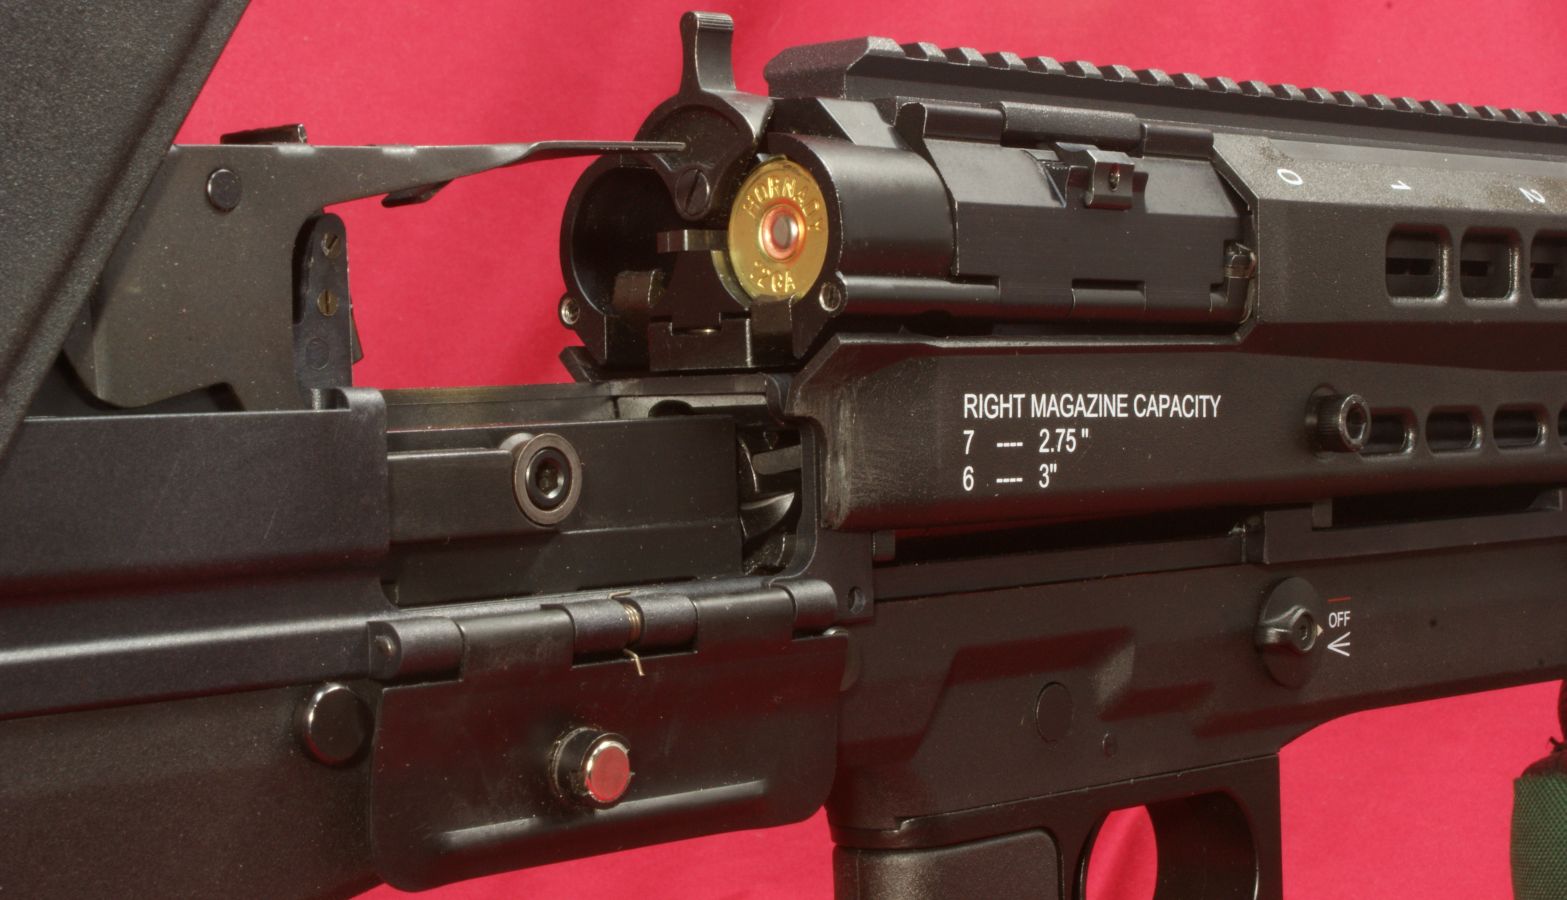
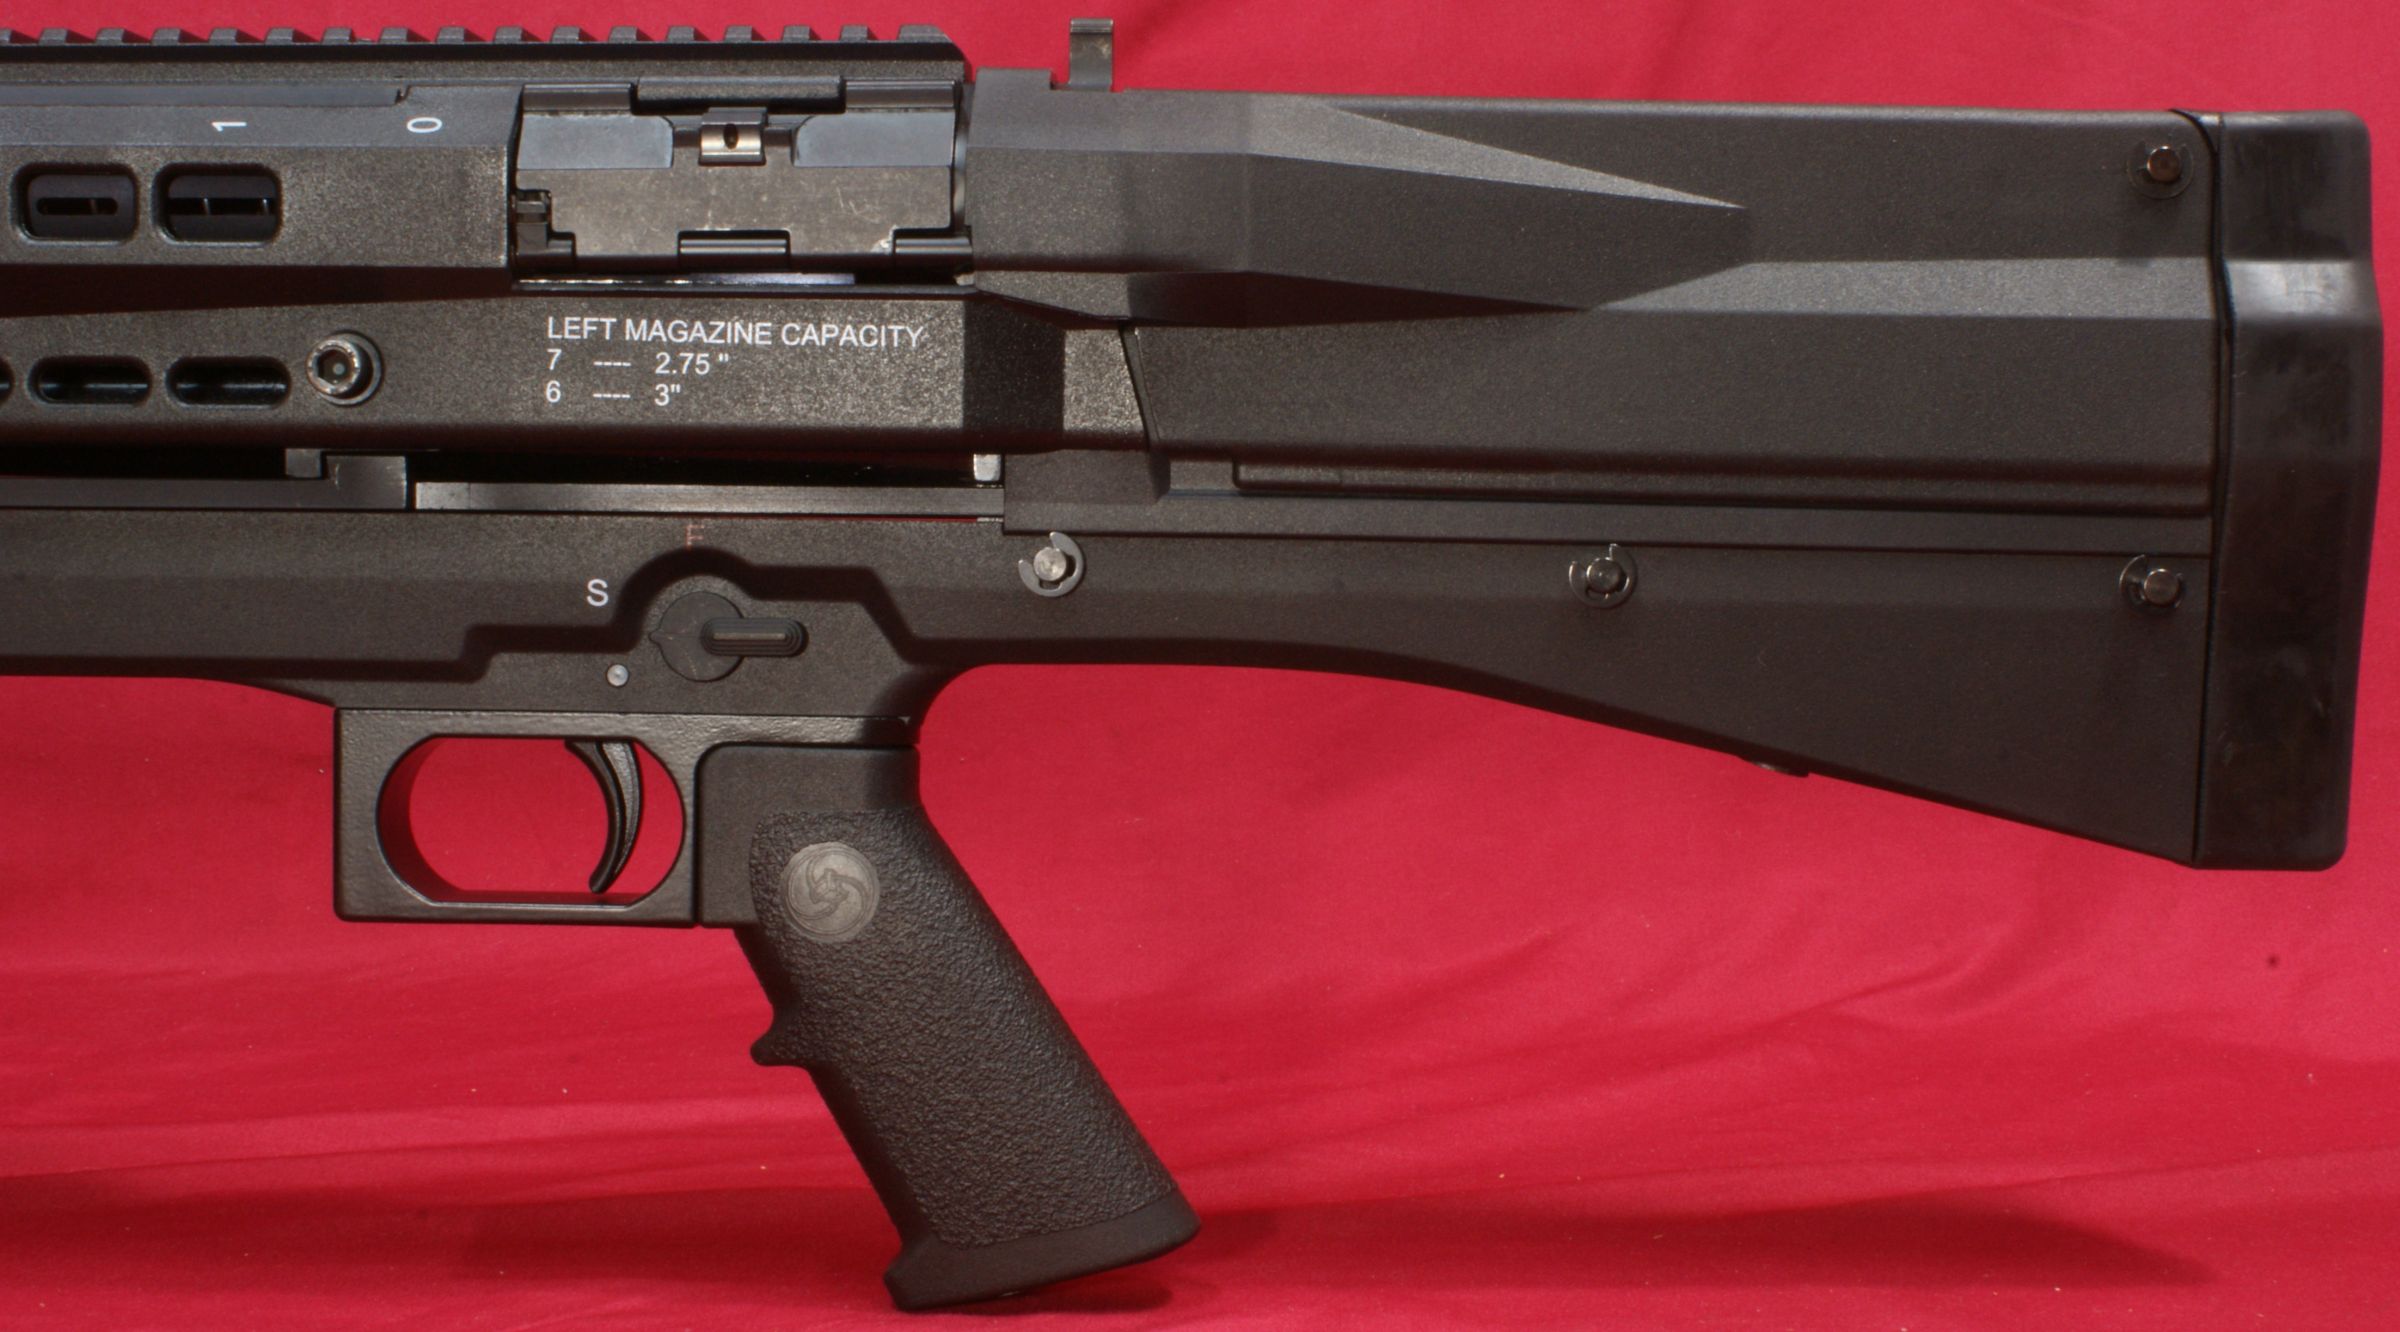
This next series of photos is intended to give you an idea on loading the UTS-15 shotgun and although I only show the right side, the same is true for the left side. To start out, the loading port door is held closed by a spring loaded latch in the center of the door. Pushing down on the latch and pulling out slightly will cause the door to open. Also note that the shotgun is clearly marked with the magazine capacity for both 2.75" and 3" shells. I consider these marking to be more useful from an advertising perspective for UTAS than them being needed for loading the shotgun.
Figure 30
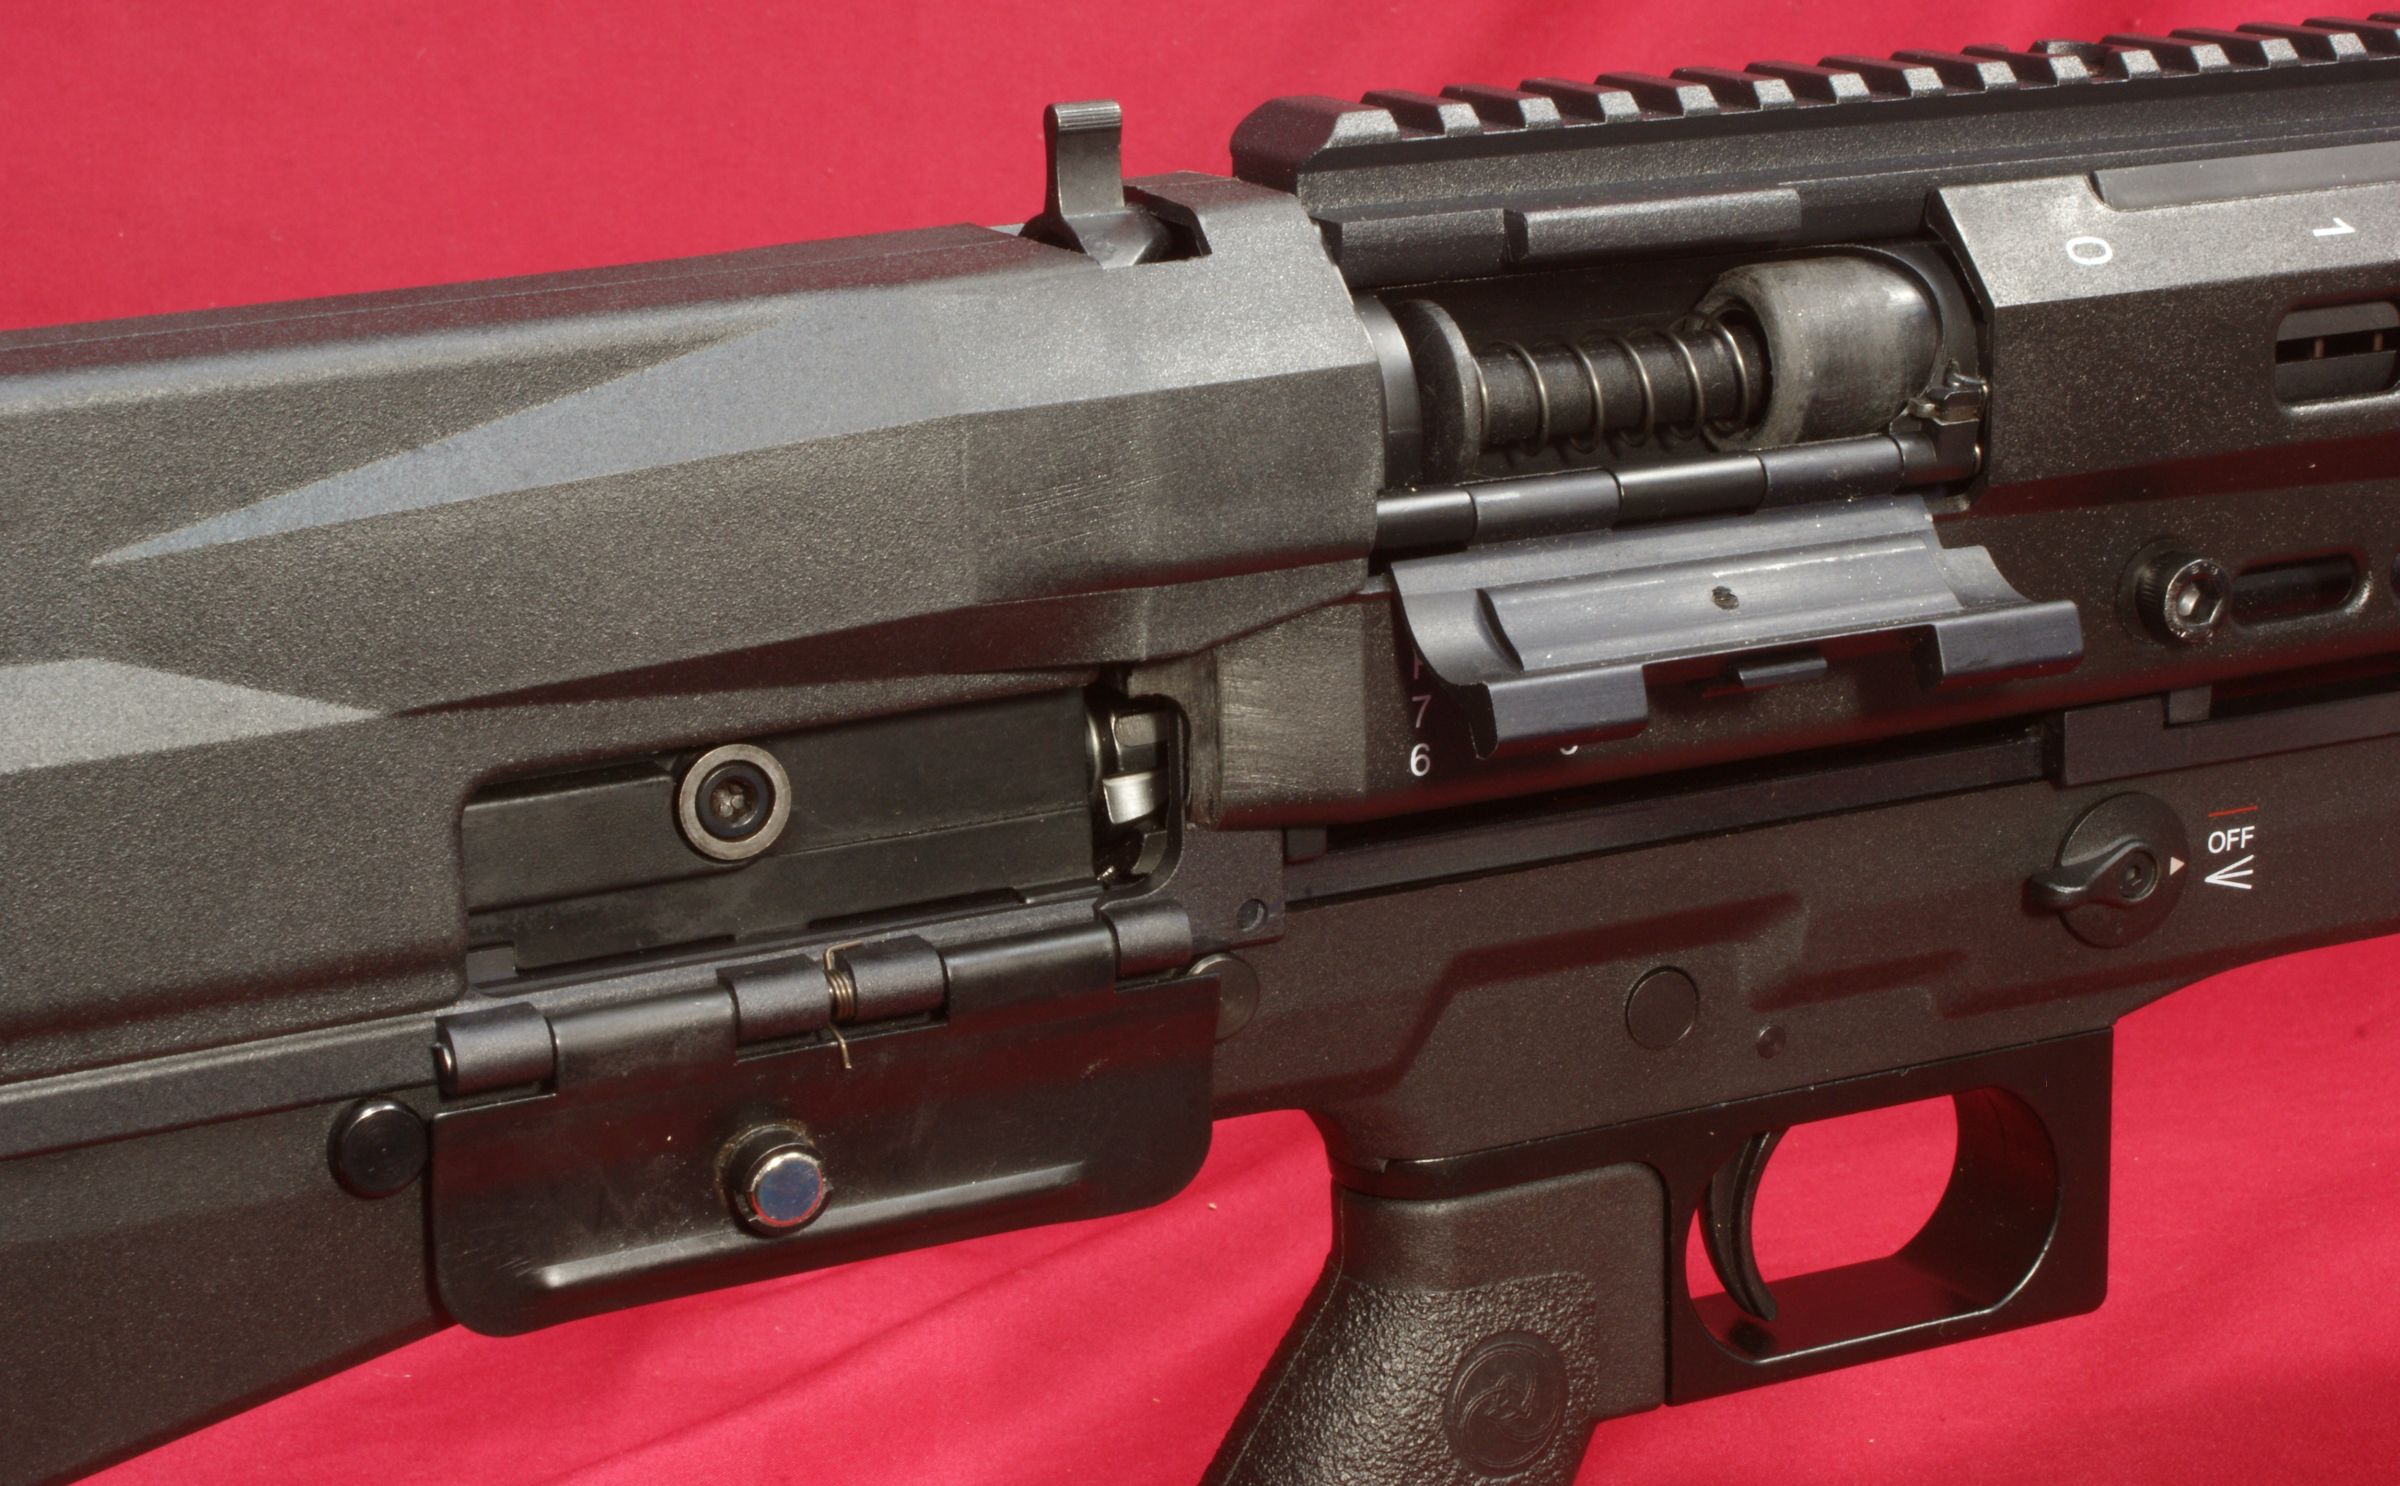
Once the door is open, you see a plunger, spring and black polymer part that acts as a follower. Actually this entire assembly is the follower for this shotgun. This spring loaded follower assembly allows for spring force to be applied to the shell that is not within the actual magazine tube.
Figure 31
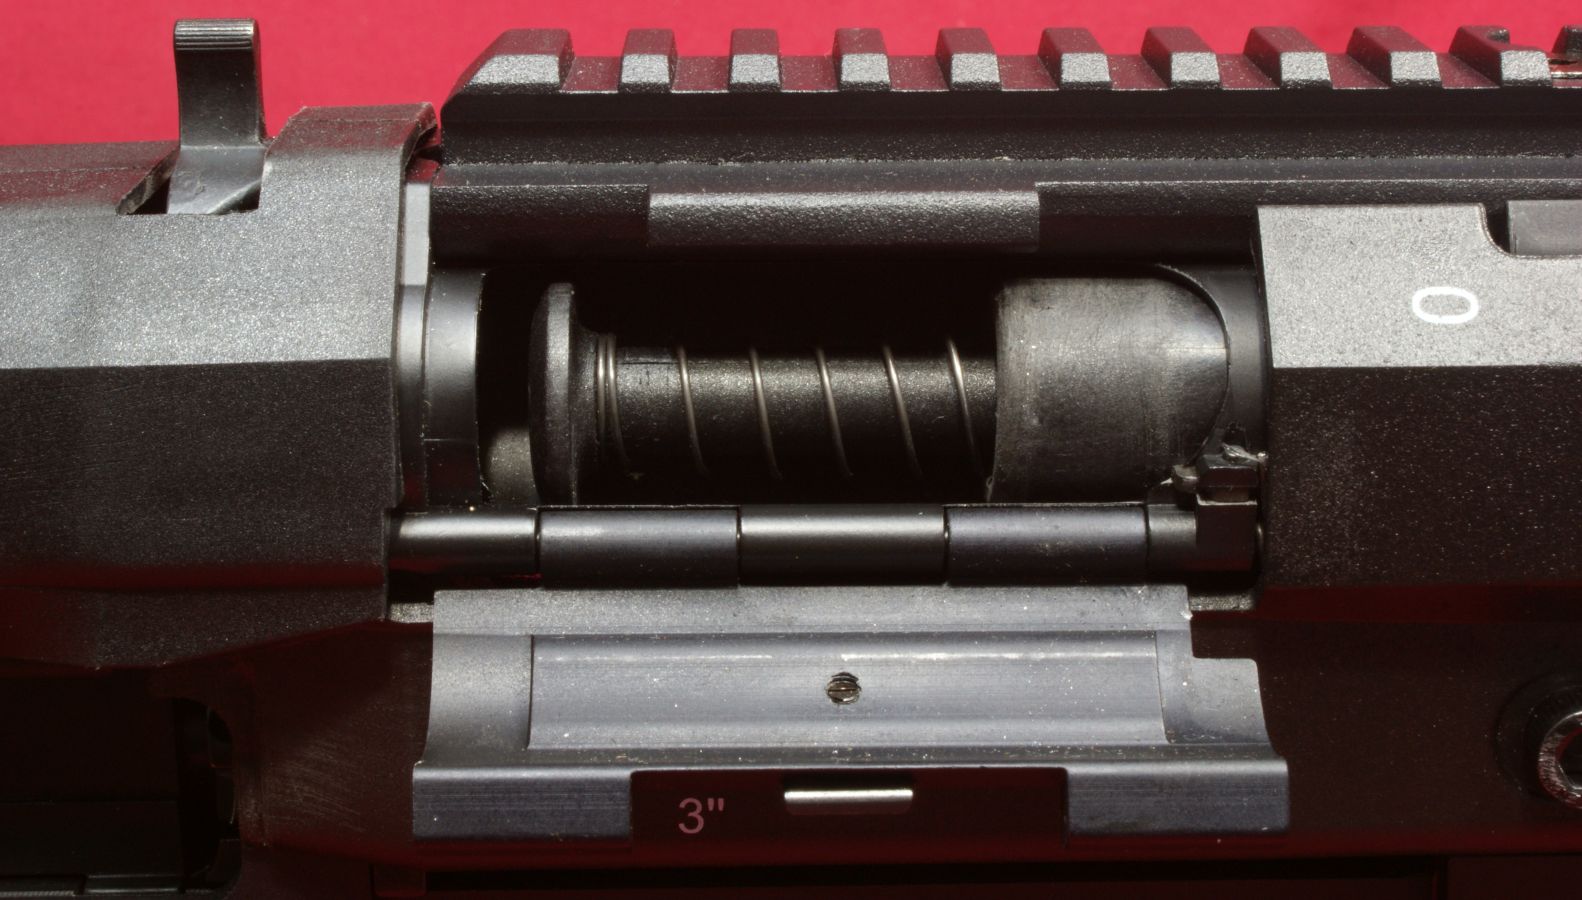
To load shells in the tubes, you first push the follower plunger forward into the magazine tube until the plunger locks in place. When the plunger is locked in place, the loading port is clear to allow you to drop in a shell.
Figure 32

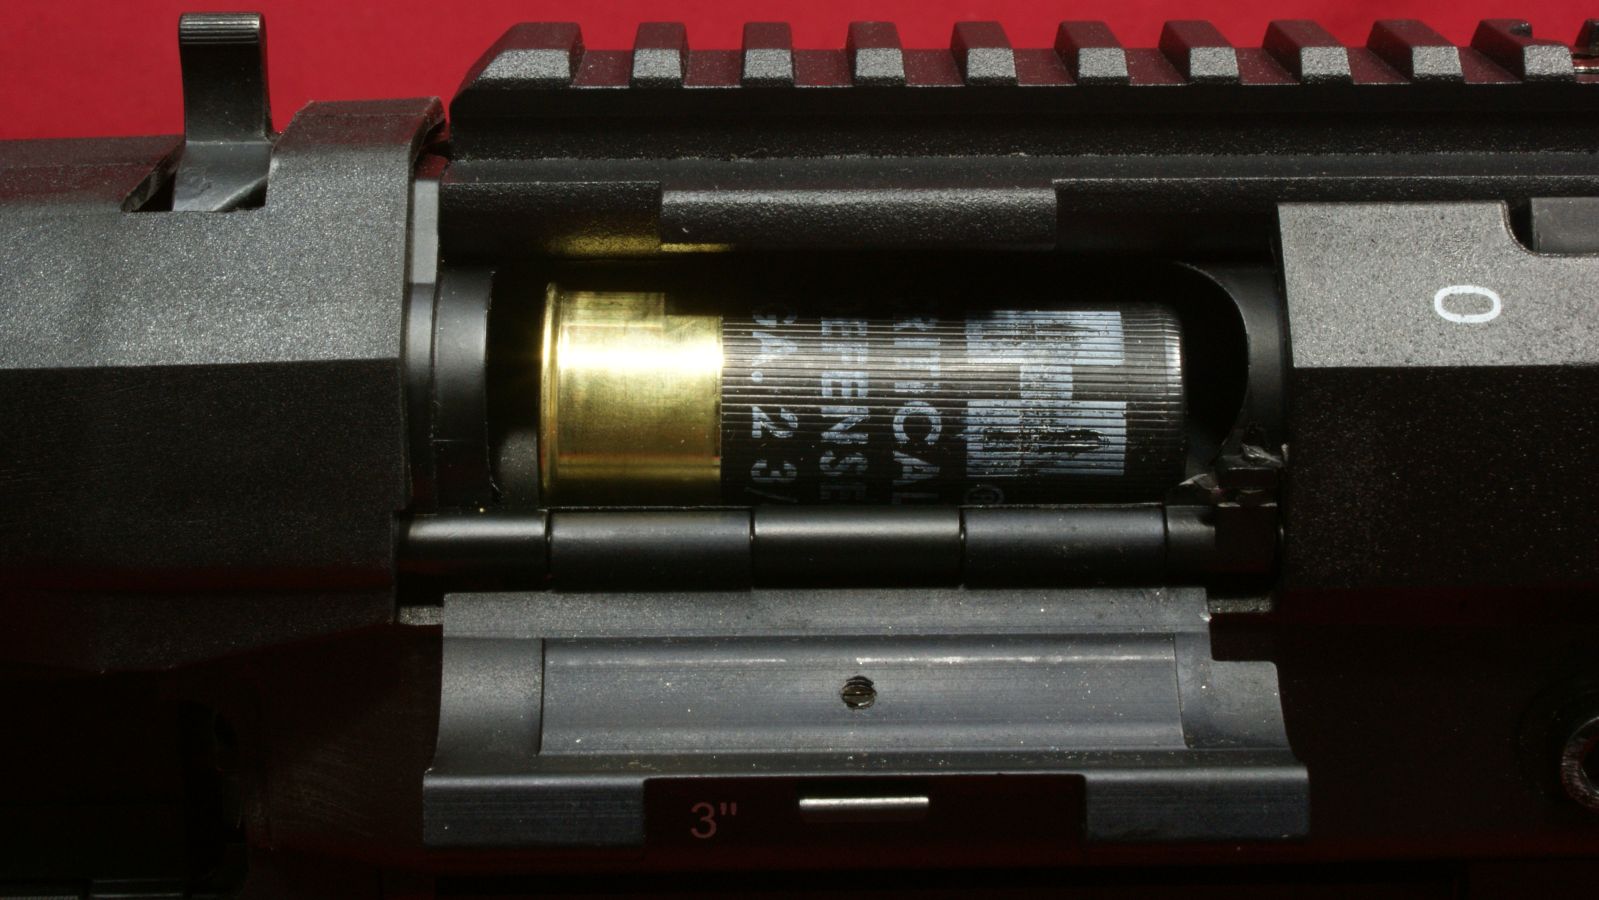
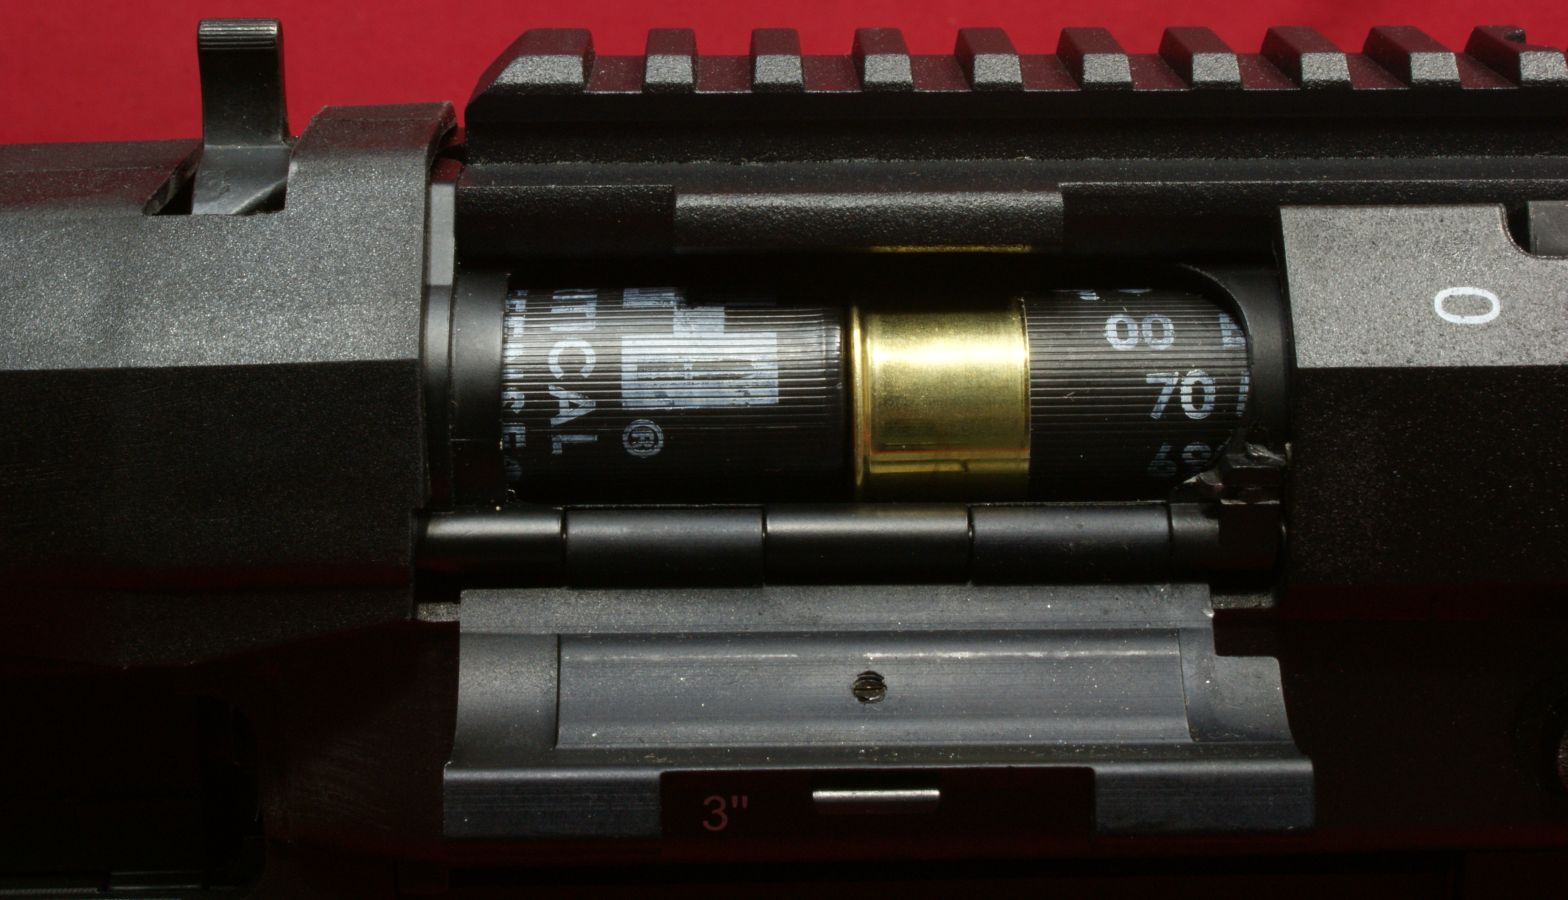
You then drop in a shell and push it forward until the shell is held in place inside the tube just like you would do on most shotguns. While the loading port door is open, a spring loaded pin holds the shell up inside the magazine tube. Once you close the door, the shells are released and the follower pushes the shells to the rear. The last shell loaded in the tube will sit loose inside the loading port until you close the door.
Figure 33
In this next photo, I have closed the door which released the shells and they are pushed to the rear and are under the magazine spring pressure. If for some reason you needed to top off the magazine tube prior to it being empty, you would need to push the shells forward until they were held in place inside the magazine tube so that you could insert another shell into the loading port.
Figure 34
This next set of photos is intended to show the approximate position of the white indicating marks on the follower as 2.75" shells are loaded into the tube. If you were to use 2.5" or 3" shells, the indicating mark would be located slightly different. Also, once you close the loading port door, the shells shift back approximately 1.5 inches, so the indicating marks would be that much further to the rear when the shotgun is in operation.
Figure 35
Loading Port Door Open

Figure 36
Shell Follower Pushed Forward Past Magazine Shell Catch

Once you put the shells into the magazine tube, you will also have an additional shell that sits in the loading port. I believe this is why the indicating mark is indicating two shells below, even though only one shell is actually inside the tube.
Figure 37
One Shell in Tube

Figure 38
Two Shells in Tube

Figure 39
Three Shells in Tube

Figure 40
Four Shells in Tube

Figure 41
Five Shells in Tube

Figure 42
Six Shells in Tube

Figure 43
Seventh Shell in Loading Port

Figure 44
Port Door Closed and Follower Released

Figure 45
Port Door Open Showing Shells Under Follower Spring Pressure

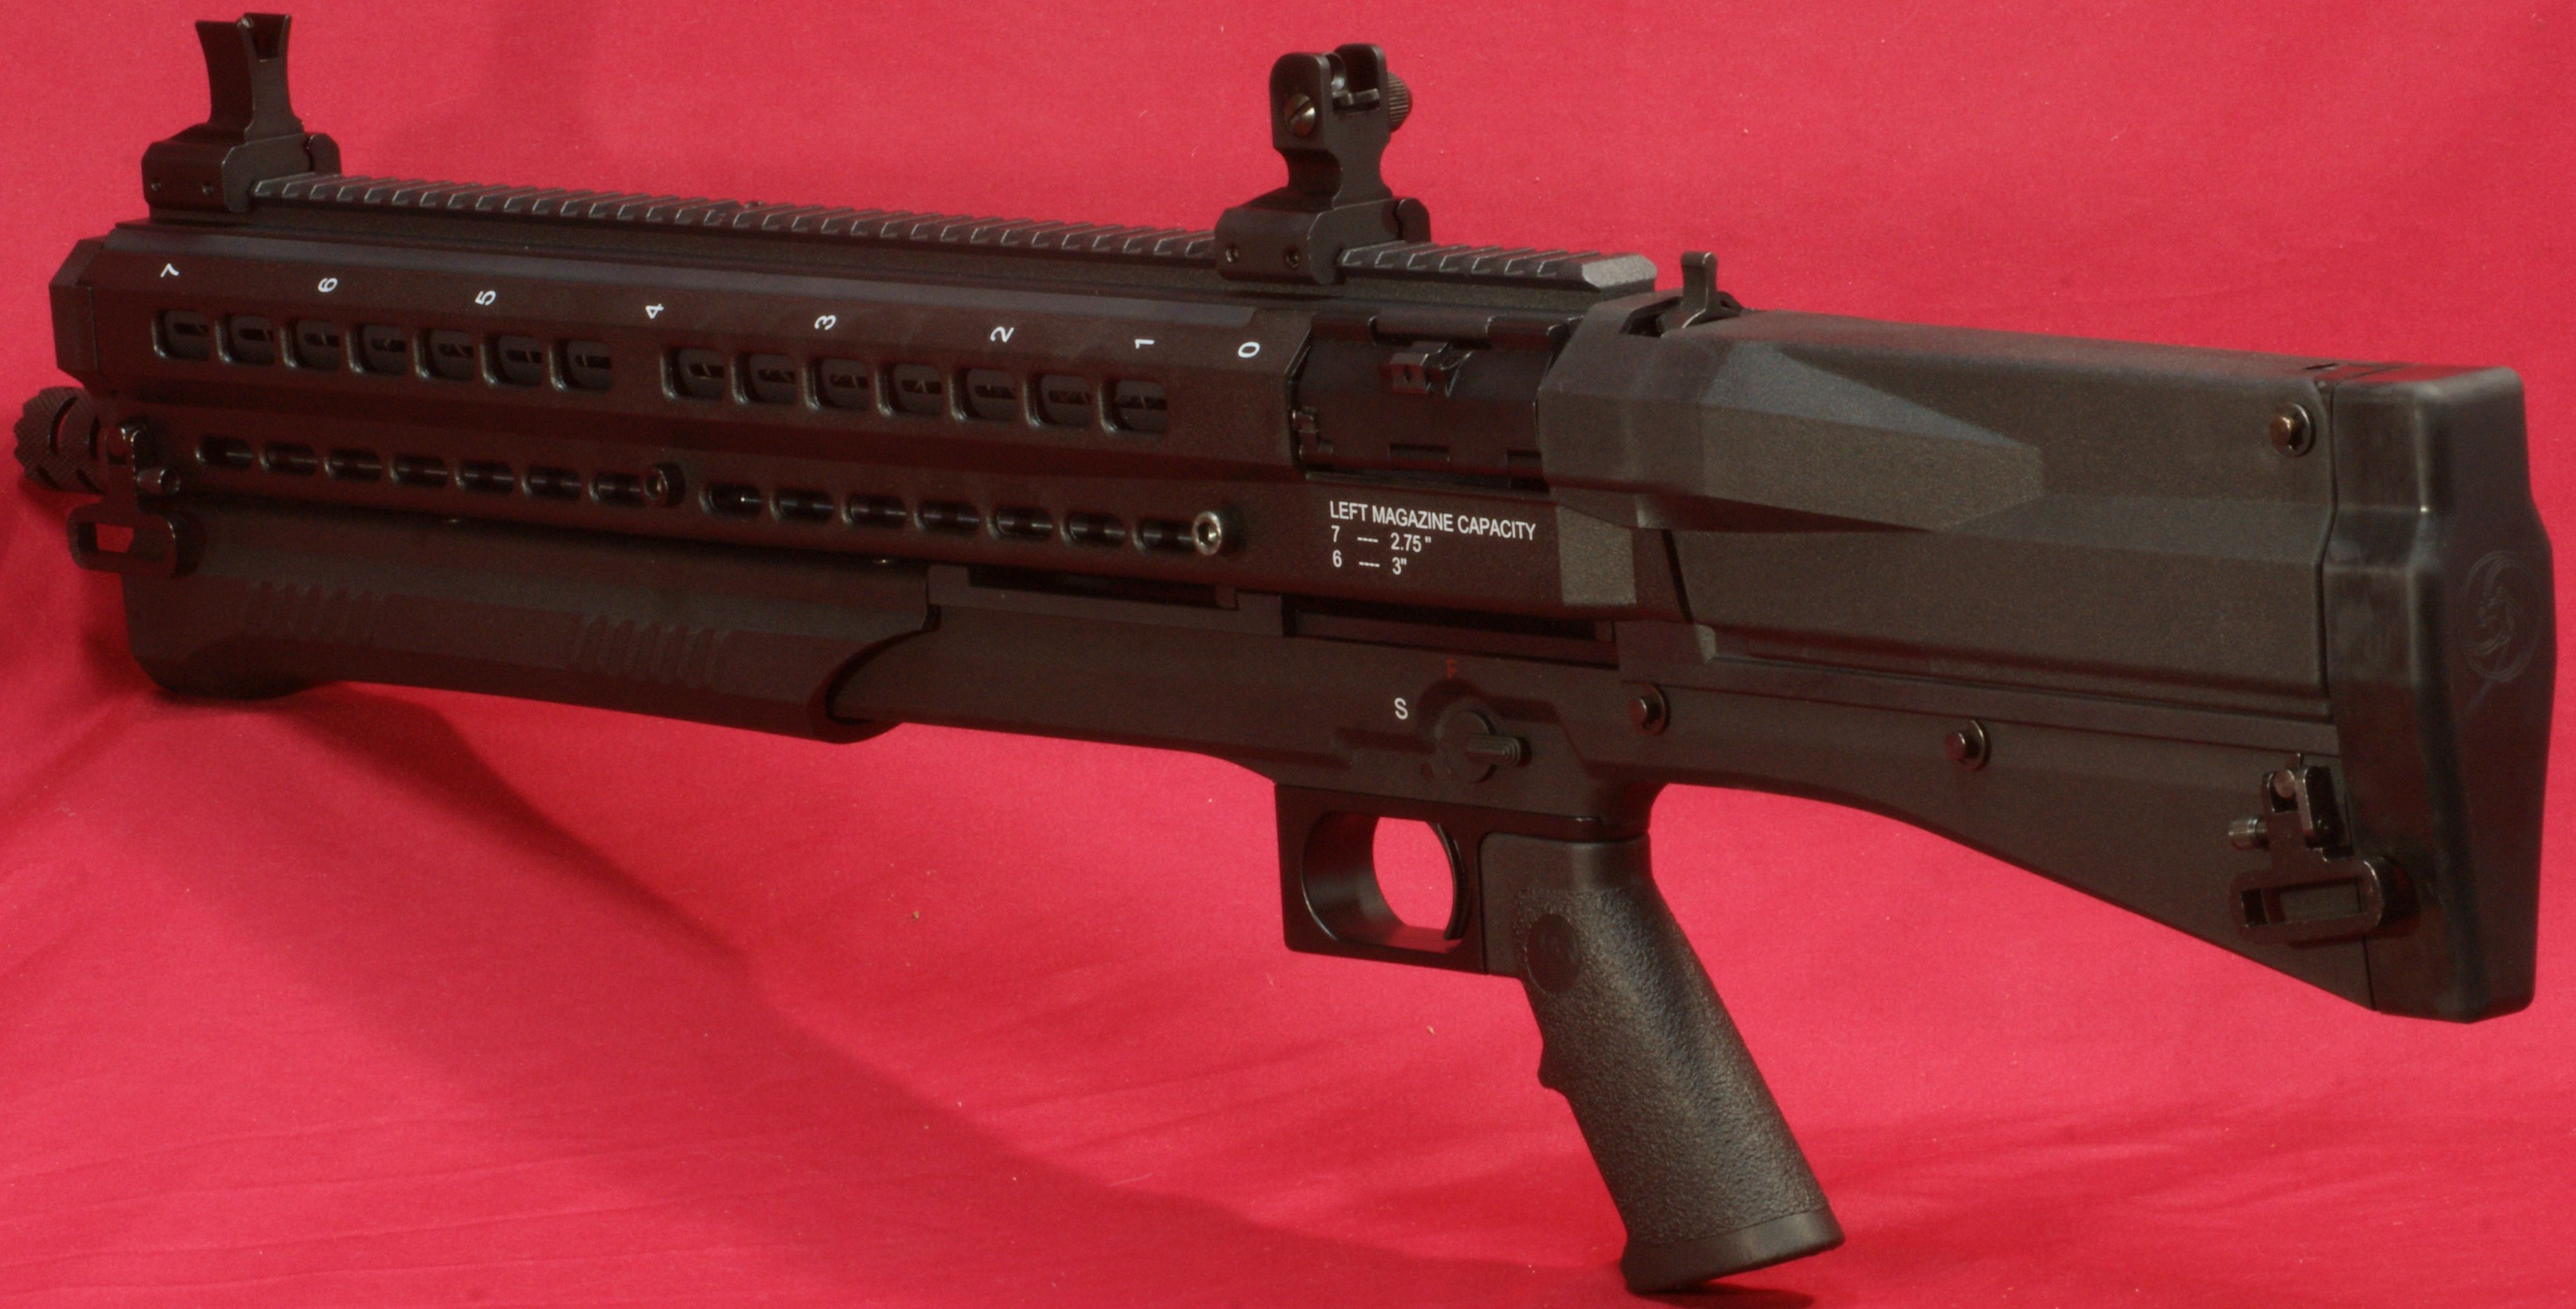
The magazine selector switch (shell stop) is located just behind the top rail and has three positions. When using this switch, you need to understand that this switch (stop) is indicating which magazine tube is being blocked so that no shells from that tube will feed into the chamber. These next three photos show the left magazine tube blocked, neither tube blocked and then the right magazine tube blocked. When one tube is blocked, all shells will feed from the other tube. When the switch is in the center position, the shells will feed alternately from both tubes.
Figure 46
Figure 47
Figure 48
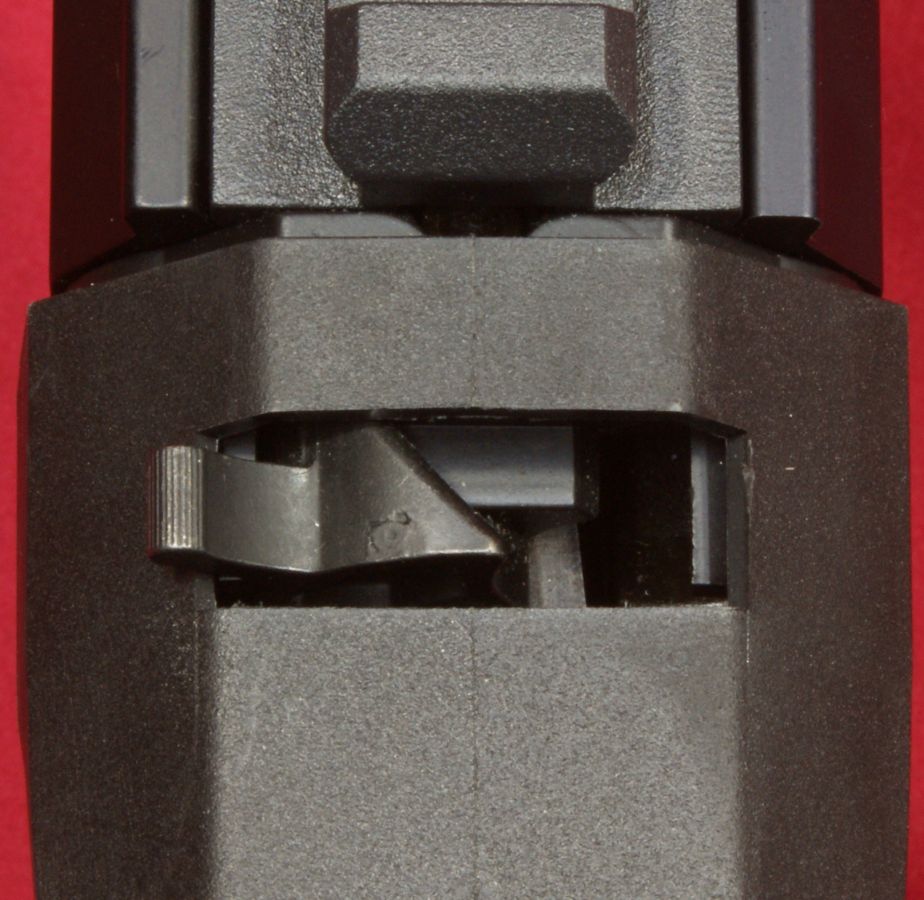
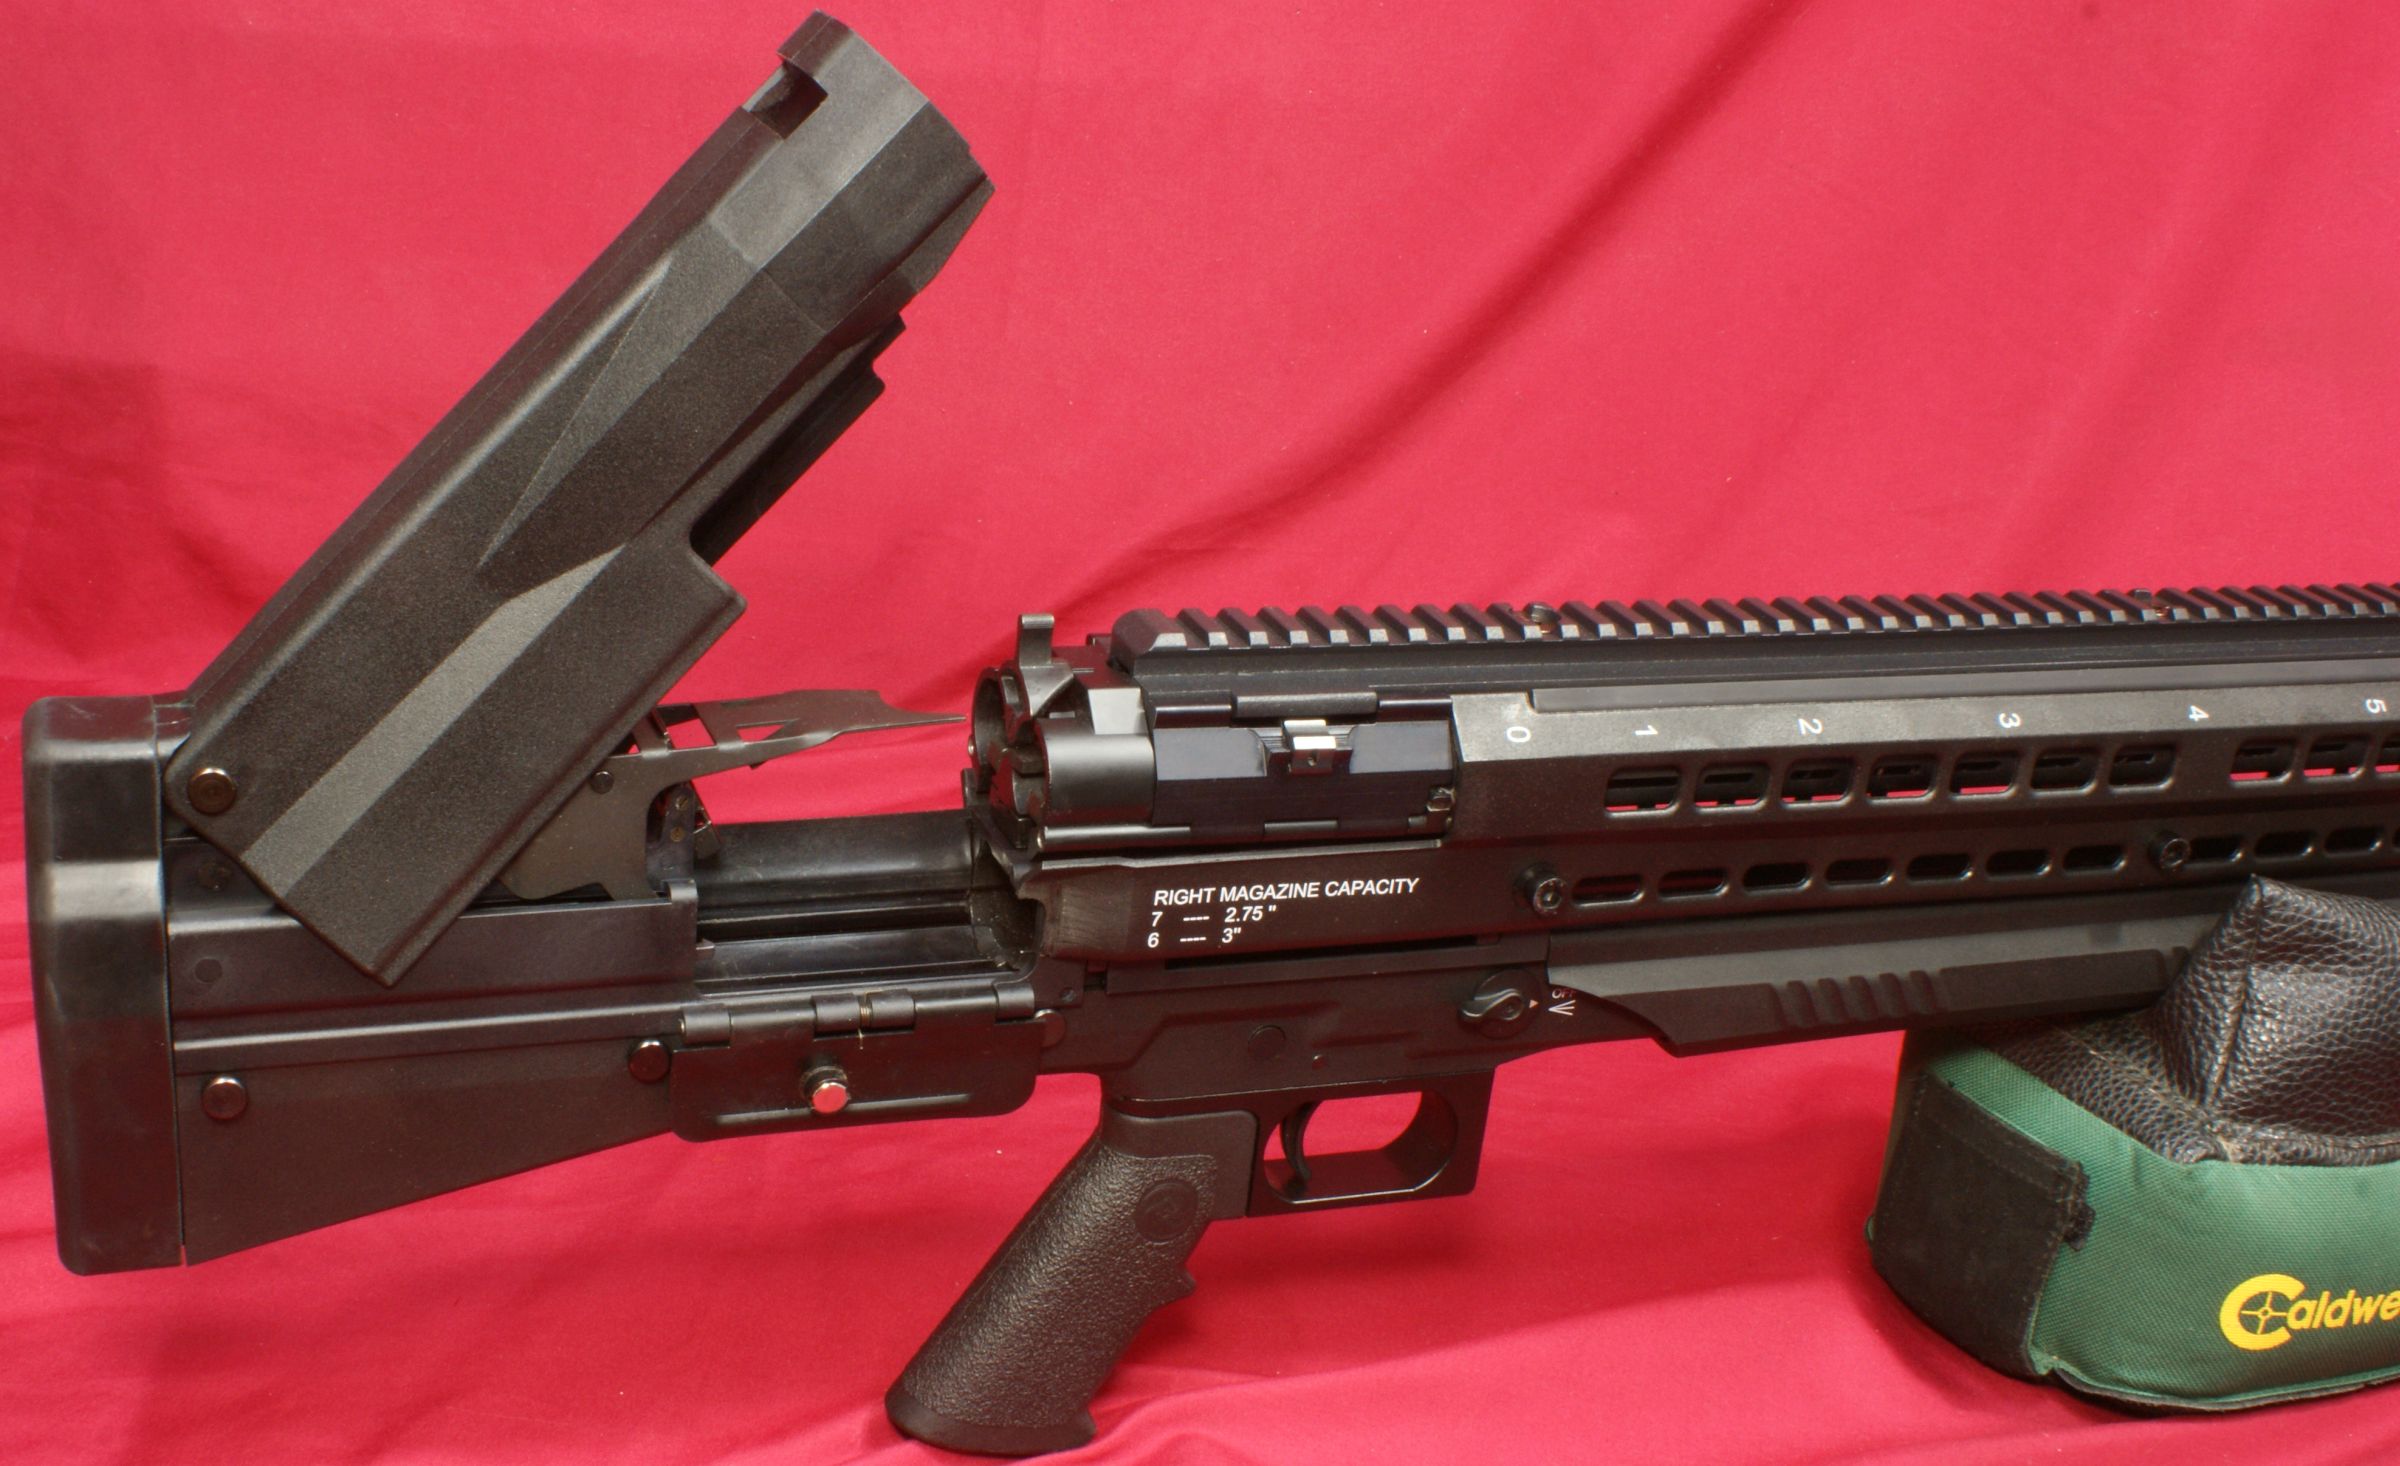
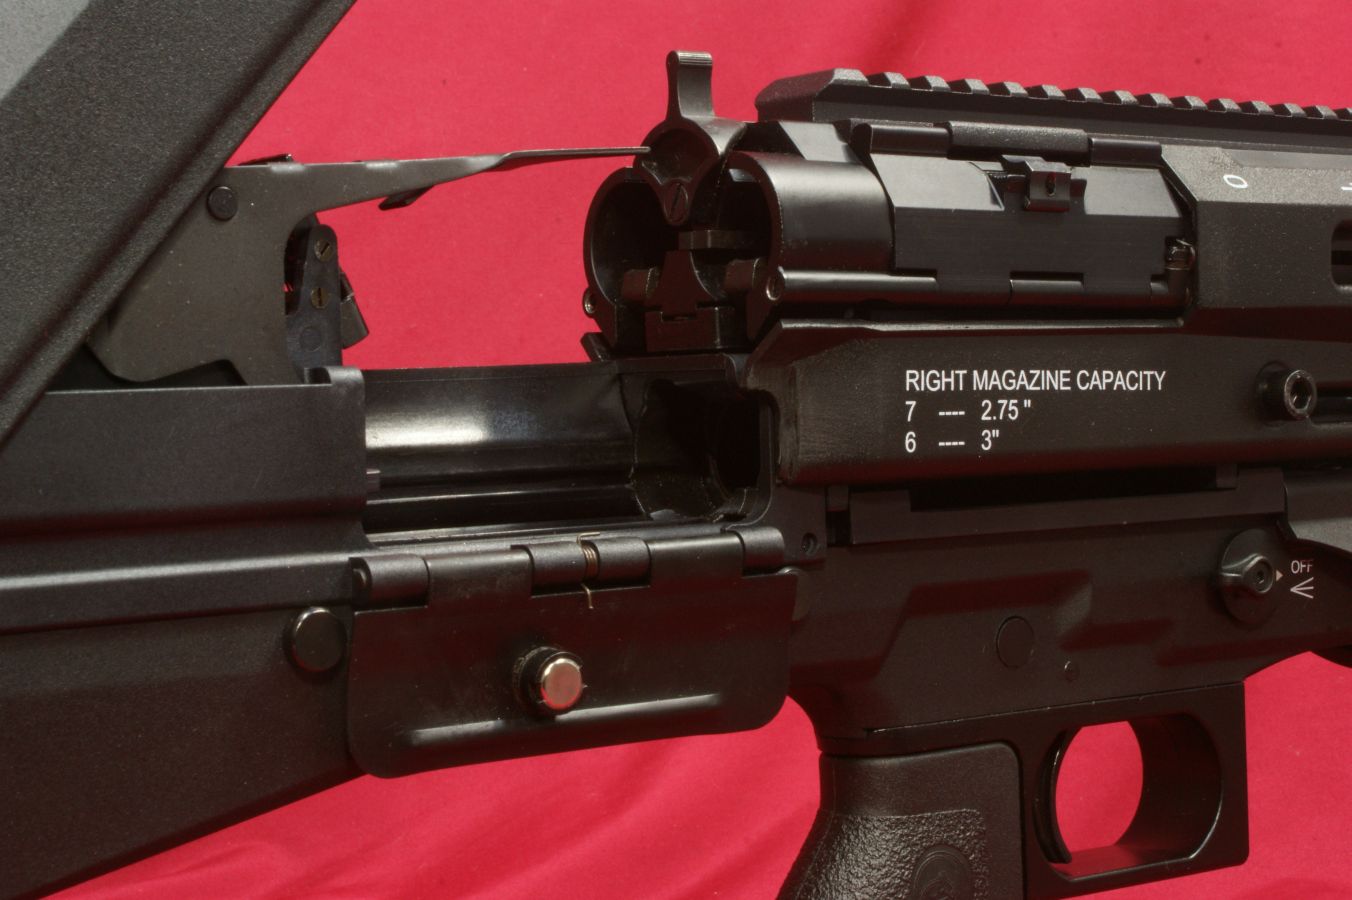
The top of the buttstock has a hinged cover which UTAS calls the "upper stock". By lifting this cover, you can see and access the inner workings of this shotgun, but this cover must be closed for proper feeding of shells into the chamber. The quick accessibility of this cover makes clearing jams quick and easy, but hopefully there will be minimal need for this use.
Figure 49
In this next photo, I have tried to identify some key components so you can understand how the shotgun feeds from the magazine tubes into the chamber; A - Mouse Trap Spoon, B - Trigger Plate, C - Left Tube and D - Right Tube. Also note that the magazine selector switch is in the center position so that shells will feed alternately from each tube.
Figure 50
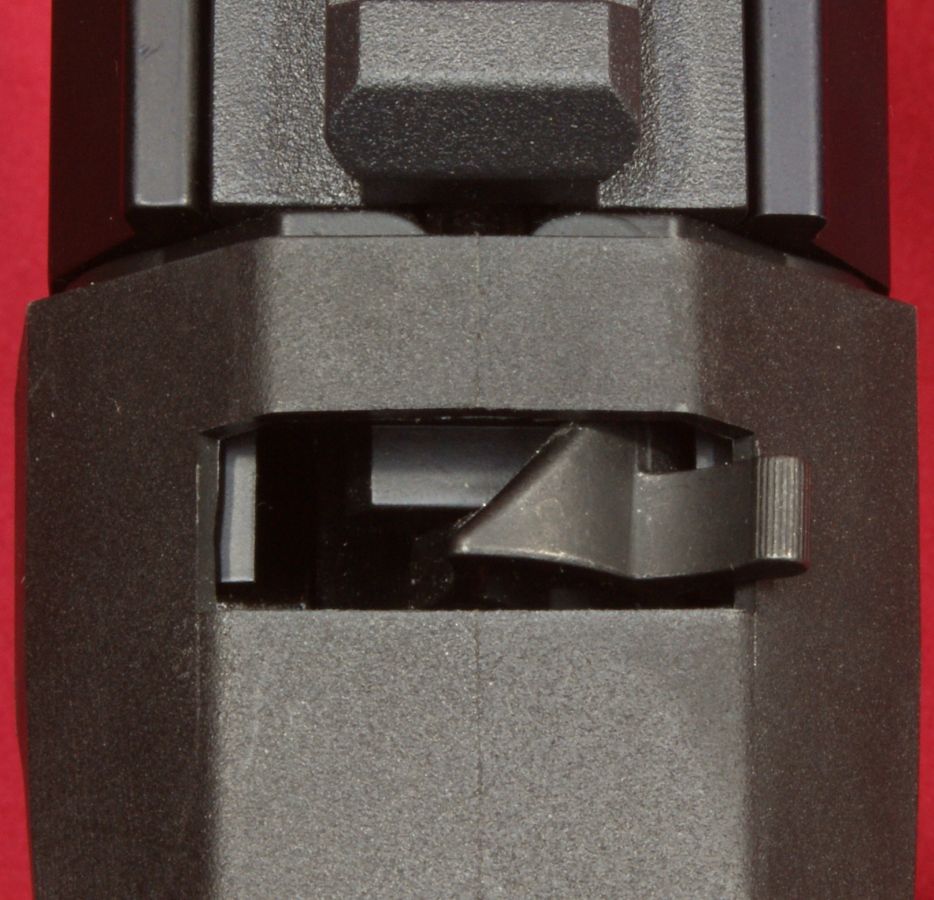
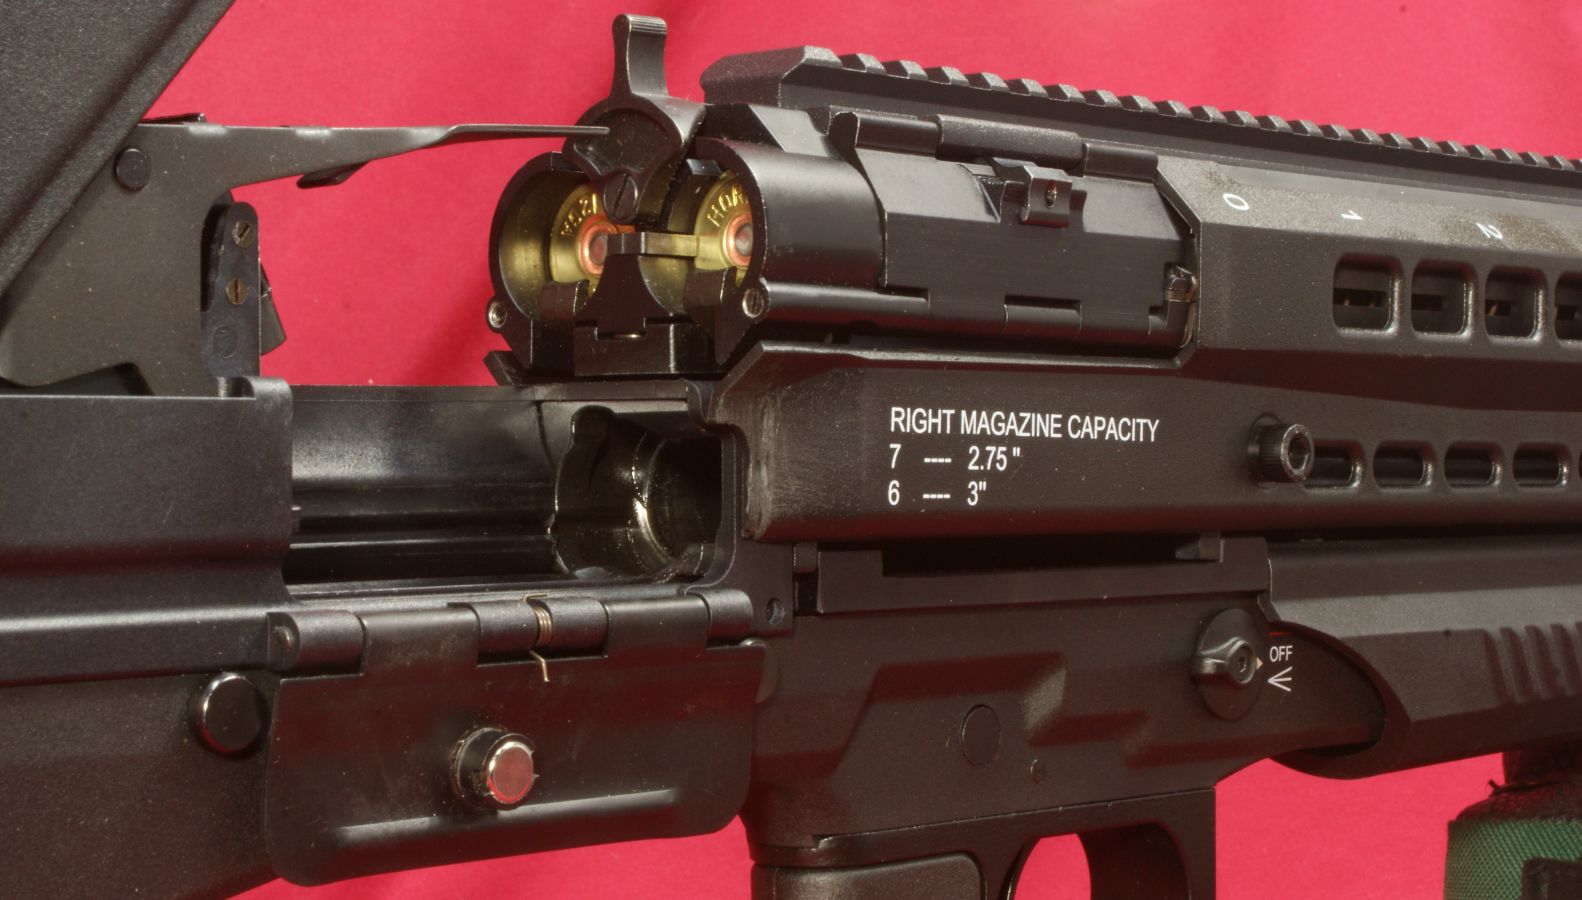
This next photo shows both the left and right tubes with a shell in each tube and with the bolt open.
Figure 51
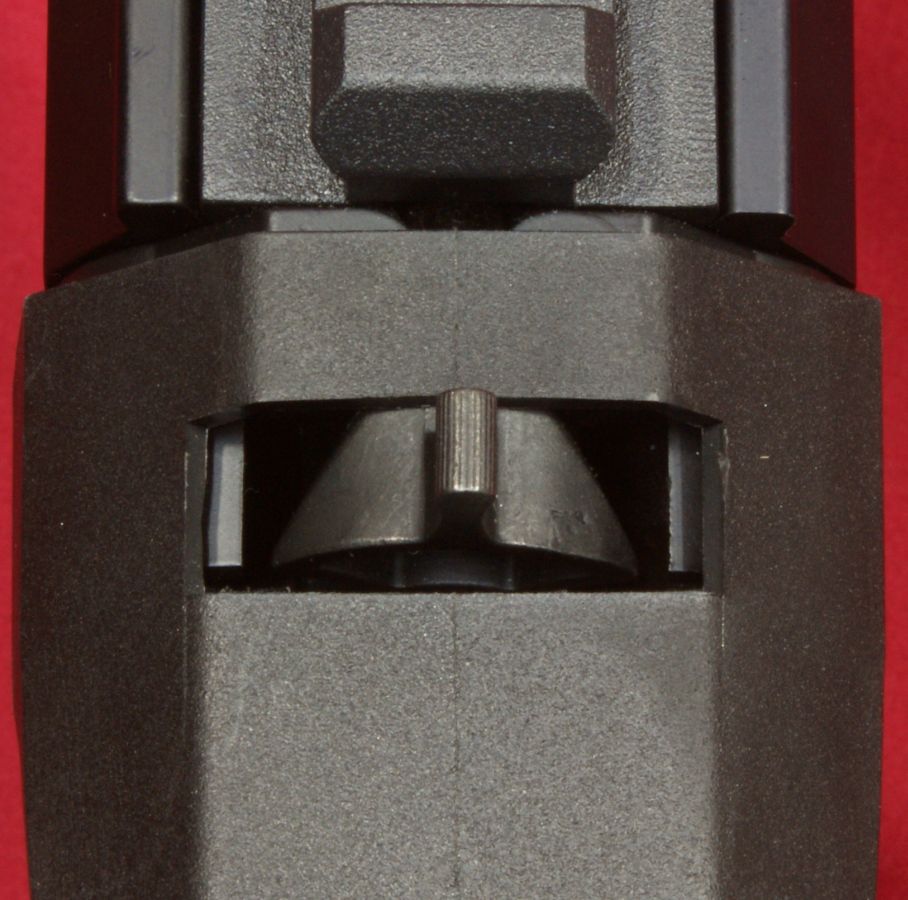
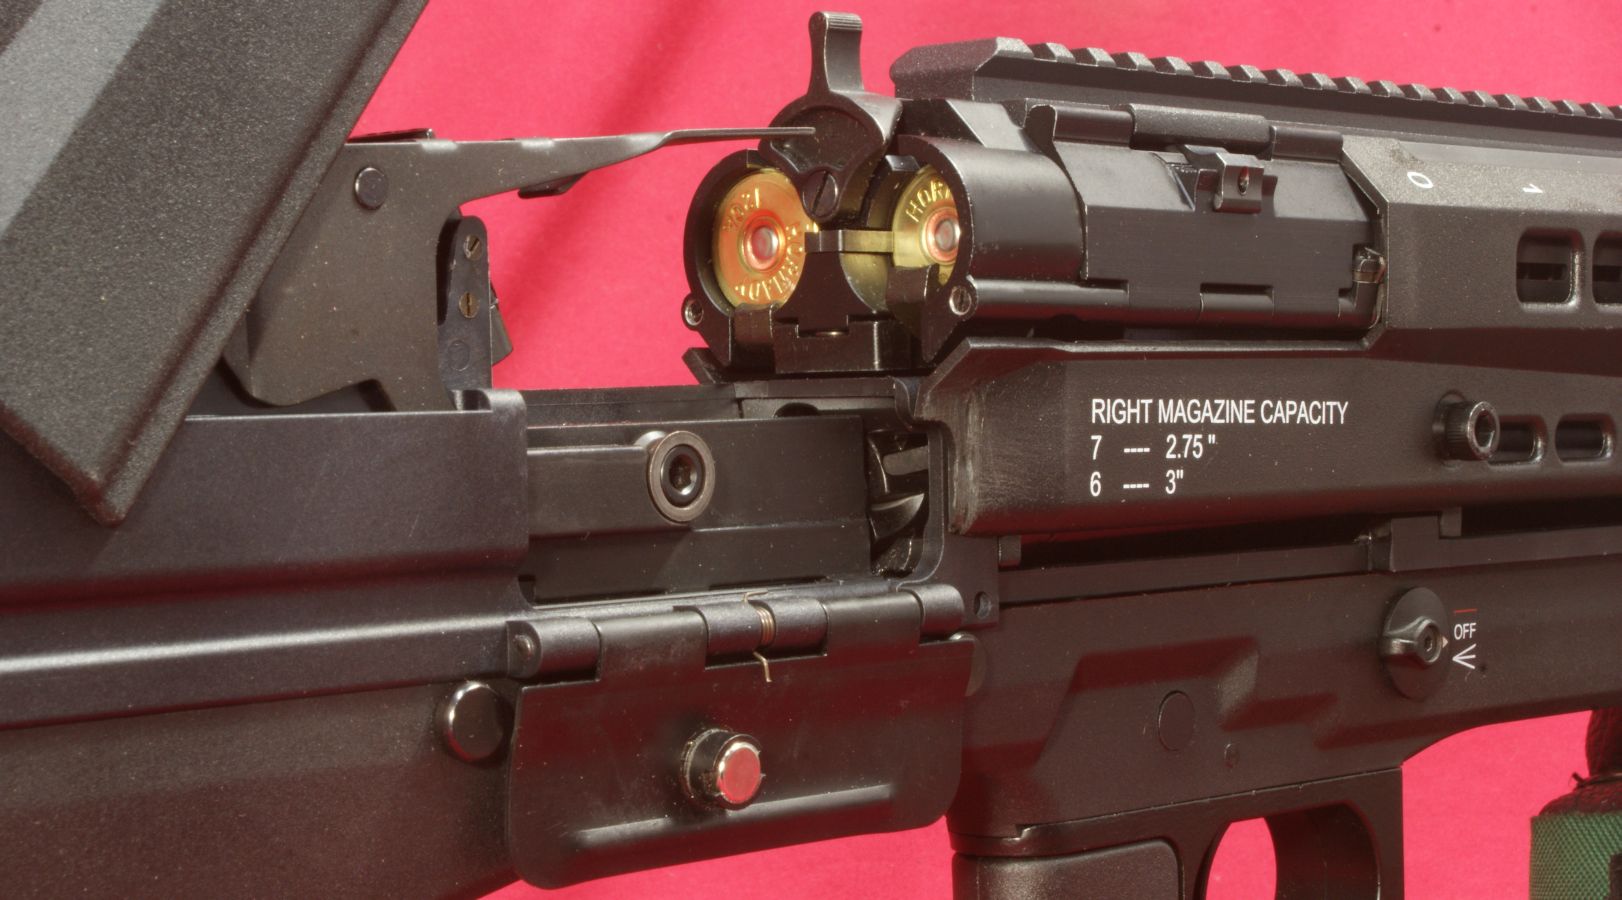
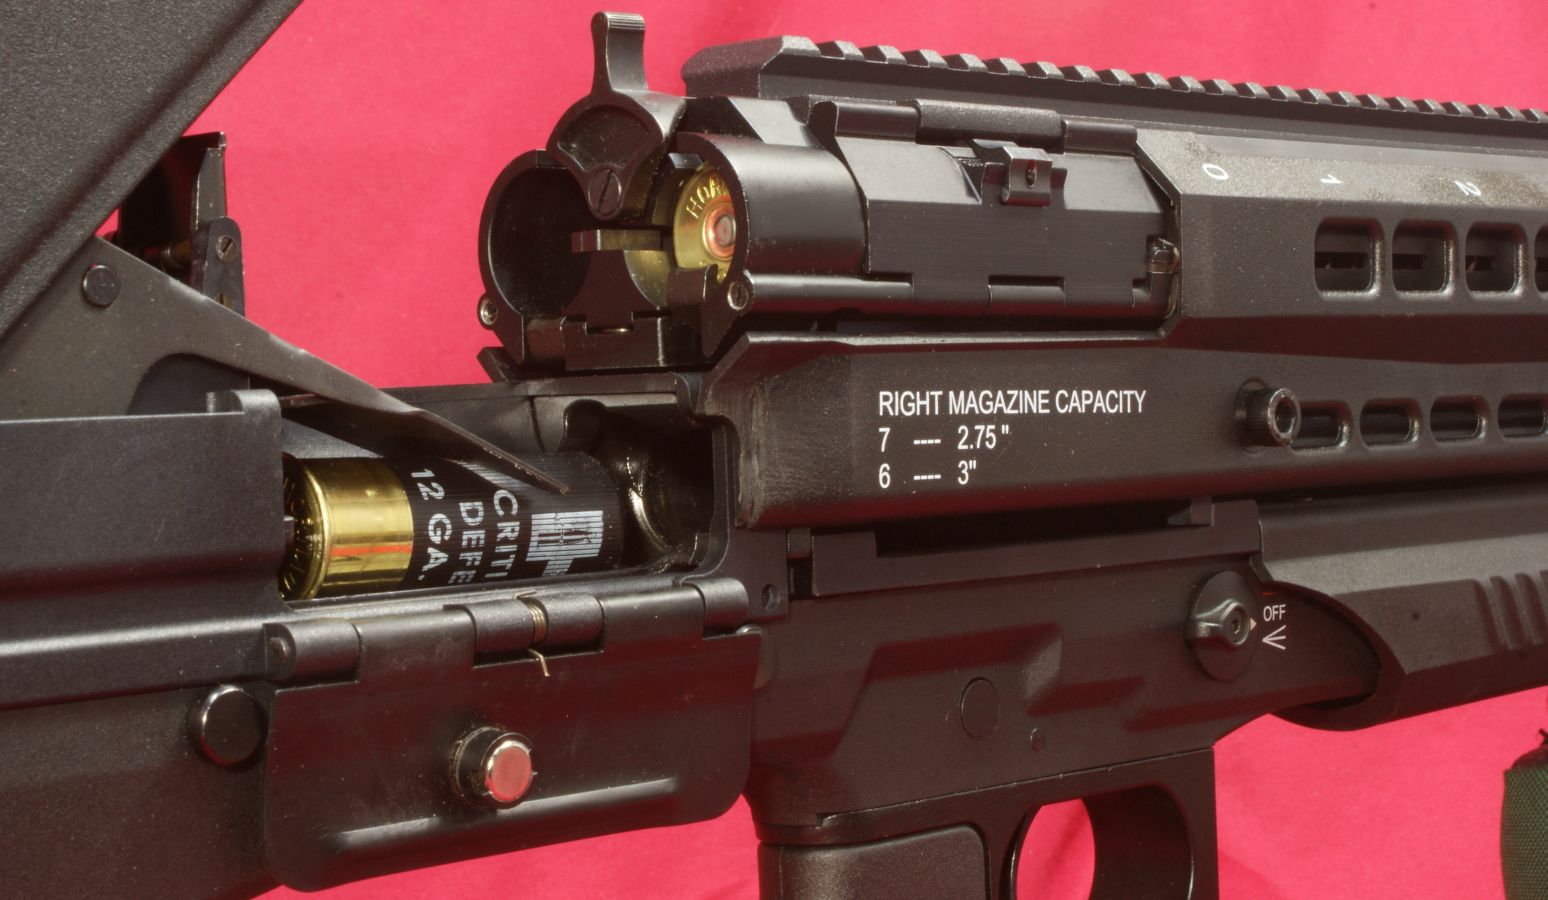
Before you close the bolt, you can drop a shell into the loading ramp to give you the +1 capability of 15 rounds (7+7+1). If you don't drop in a shell, you will need to cycle the bolt again to feed a shell from the magazine tubes. When you close the bolt, a shell (left shell below) shifts back and is ready to be ejected into the loading ramp area when you cycle the bolt back. Also notice that the bolt carriage is pressing the shell release plate to the fully forward position (circled below).
Figure 52
A couple of things happen in sequence when you pull the action fully to the rear.
- The shell case is extracted from the chamber.
- When the bolt is about 1/2" from the rear position, the bolt carriage begins to pull the shell release plate to the rear.
- When the bolt is about 1/4" from the rear position, the shell case will hit the ejector pin and begins to be flipped out of the ejection port.
- When the bolt travels about another 1/16", a shell is released from one of the tubes.
- The shell is under spring pressure and the rear of the shell hits the trigger plate allowing the mouse trap spoon to flip down and push/hold the new shell into the loading ramp.
One thing you need to understand with this sequence is that if you slow or short stroke this shotgun, a shell may not be released from the tube or the new shell could be pushed against the spent case. I believe this is why the UTAS Owner's Manual states "the action should then be moved fully rearward in a positive manner to expend the spent cartridge and have a new live round loaded into the shell loading ramp." Also, if you are studying this with live rounds being extracted from the chamber, the added weight of the live round will react differently during the ejection process and you need to make sure you are cycling the bolt to the rear in a positive (quick) motion.
Figure 53
As you push the bolt forward, this action:
- Rotates the mouse trap spoon up to it's locked position
- Pushes the shell release plate forward which allows another shell to shift to the loading position in the tube
- Rotates the bolt into the locked position in the barrel extension
- Locks the bolt/action in the fully forward position
I actually received two different shotguns for review. The bolt on the first shotgun didn't seem to be locking into place as consistently as I thought it should. You can check this out in the store by opening the upper stock and pressing the trigger plate to allow the mouse trap spoon to rotate down as you cycle the bolt. If you do this a couple of times and the bolt is not locking every time, ask the clerk to bring you another shotgun so you can check out another shotgun. The bolt locked perfectly on the second shotgun I received and this should be the case for a properly functioning shotgun.
Figure 54
The serial number plate is located on the left side of the stock and can be seen when the upper stock is rotated up.
Figure 55

Although the UTS-15 was designed in Turkey, it is made in the USA. This allows the shotgun to have a magazine capacity of more than five rounds.
Figure 56

The upper stock can rotate up to a point where it hits this small piece of polymer material on the recoil pad. Over time and if too much up pressure is applied on the upper stock, I think this small piece of material will possibly begin to break off. If it does break off, I don't see that being a significant issue.
Figure 57
The recoil pad on the UTS-15 is made from a medium density rubber with an internal polymer core. The pad will help with recoil, but it is not as cushy as its 1.07" thickness looks.
Figure 58

One of the first things I noticed when I shouldered the UTS-15 was the short length of pull (LOP). The LOP on this shotgun measured about 11.8". At first, I wasn't sure if I liked the LOP, but after shouldering it many times and getting used to the compactness of the shotgun, I have grown to like the fit.
Figure 59
At the rear of the lower surface of the stock is the bolt release button. I found this location to be a little awkward to use. The bottom of the pistol grip is hollow like you would expect on an A2 style grip and aftermarket grips will work on this shotgun.
Figure 60
The safety is located on the left side of the shotgun in a position and configuration similar to that of an AR style rifle. The switch would flip from safety "S" to fire "F" with a very positive detent feel and click. The switch could flip from safety to fire with the hammer in the cocked or uncocked positions.
Figure 61
Figure 62
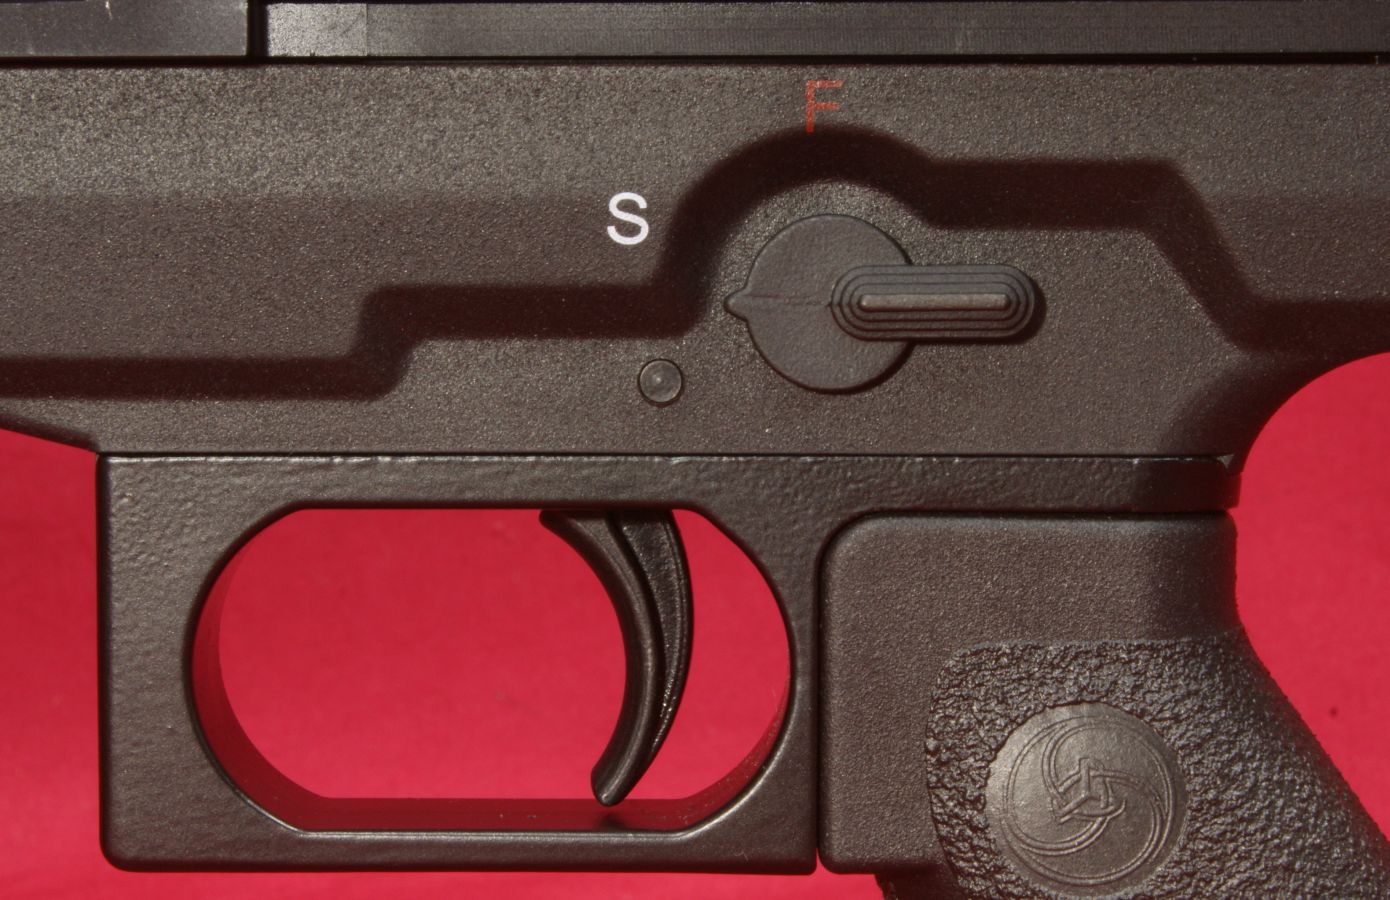
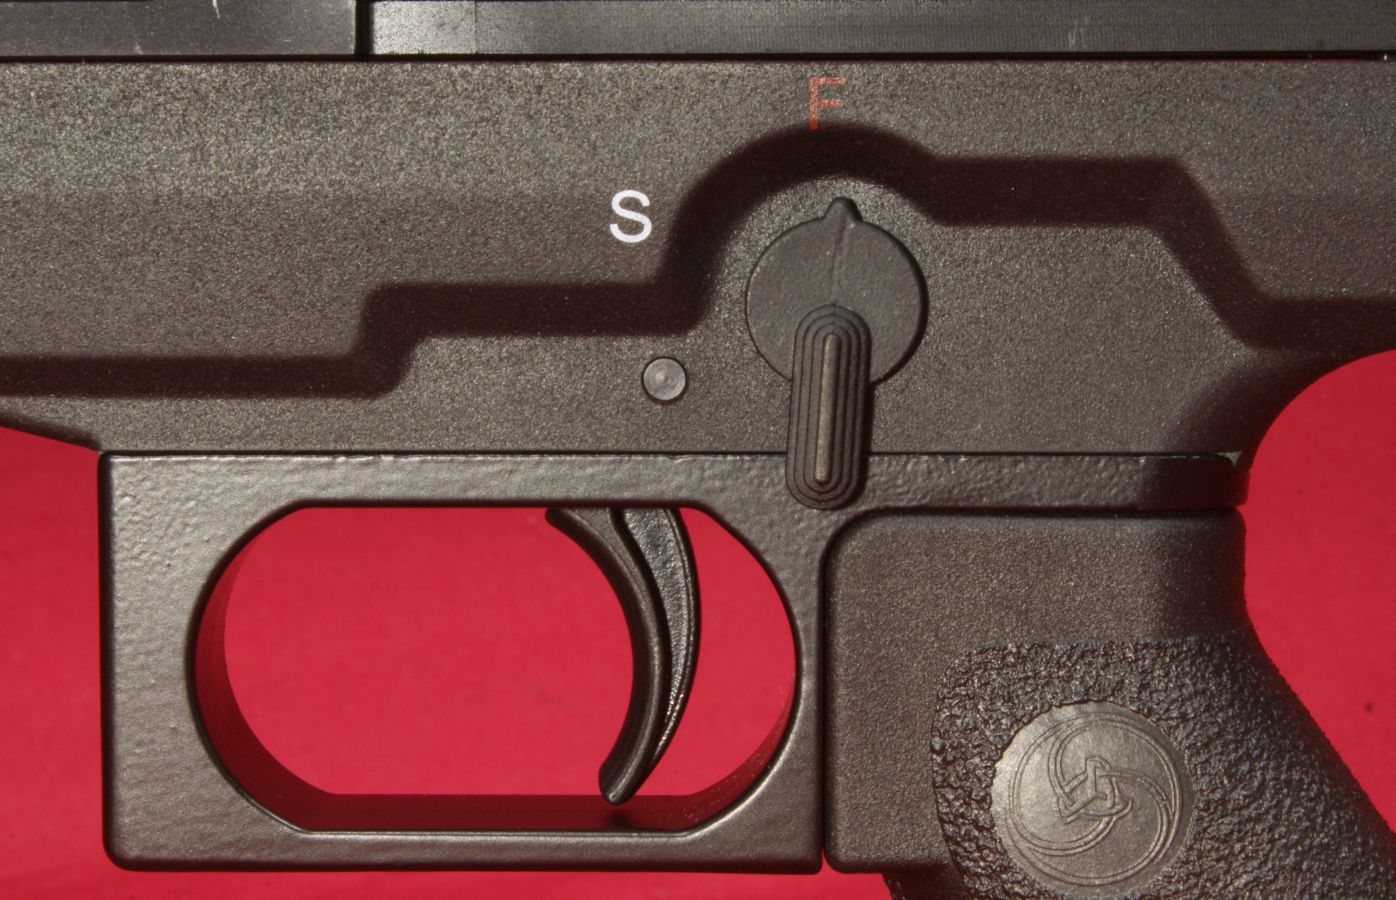
The trigger pull measured measured 4.3 pounds based on an average of 10 pulls using a Lyman Digital Trigger Pull Scale. The trigger had some initial take-up (0.04"), no perceivable creep and then seemed to break crisply at just over 4 pounds. After the break, the trigger did have some overtravel with a total trigger travel of about 0.25"
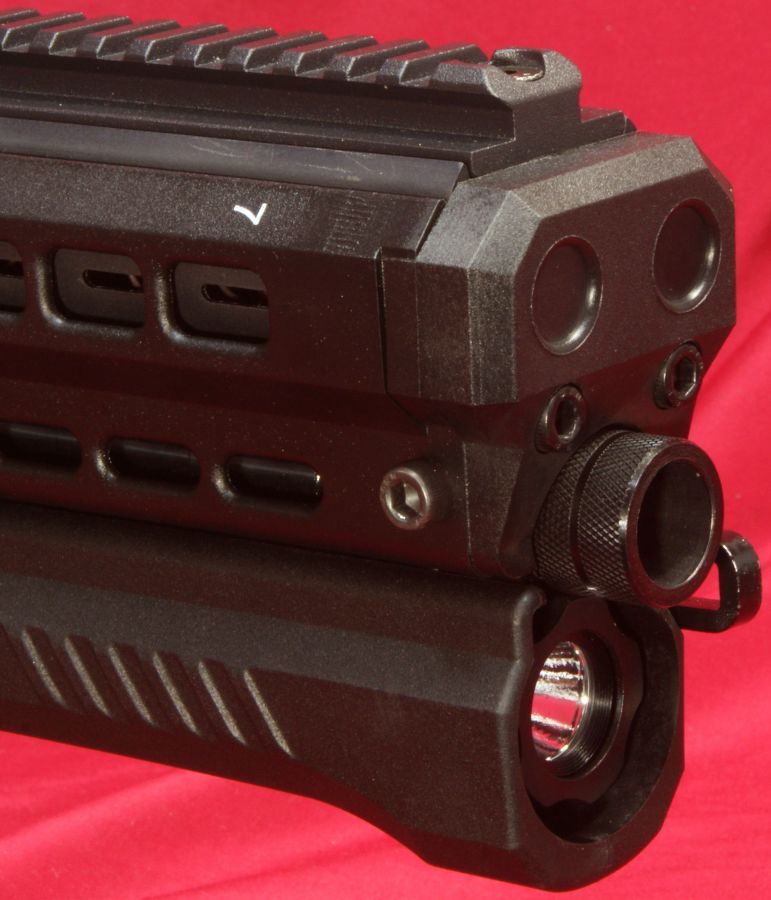
Barrel and Choke Configurations
The UTAS UTS-15 barrel can be configured four different ways based on the accessories available from UTAS. These first two configuration represent that of a short tactical styled configuration and utilizes the cylinder choke and tactical choke.
Figure 63 - Cylinder Choke, Overall Length 29.5", Barrel Length
20.53"
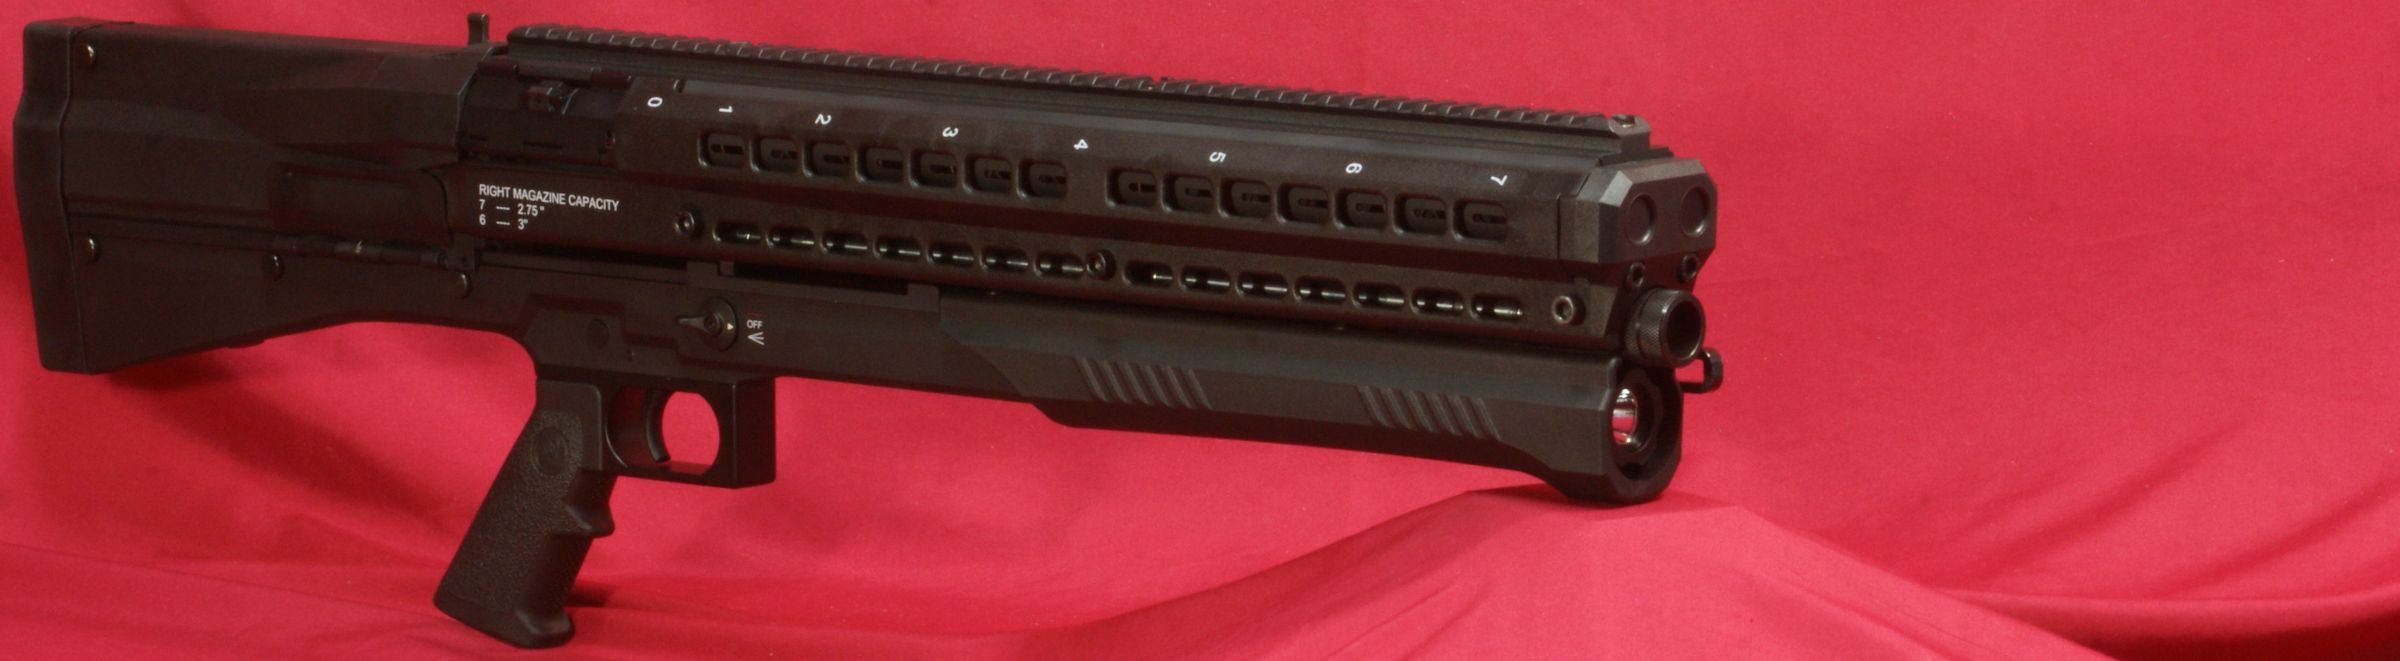
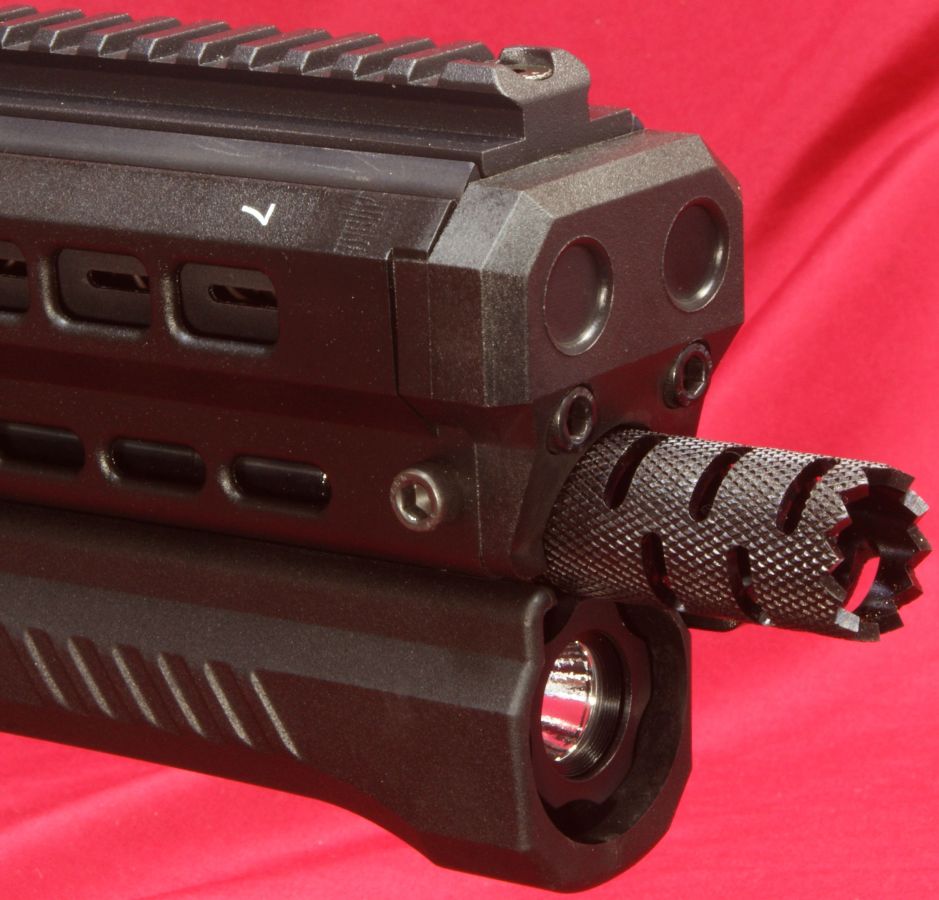
Figure 64 - Tactical Choke, Overall Length 30.8"
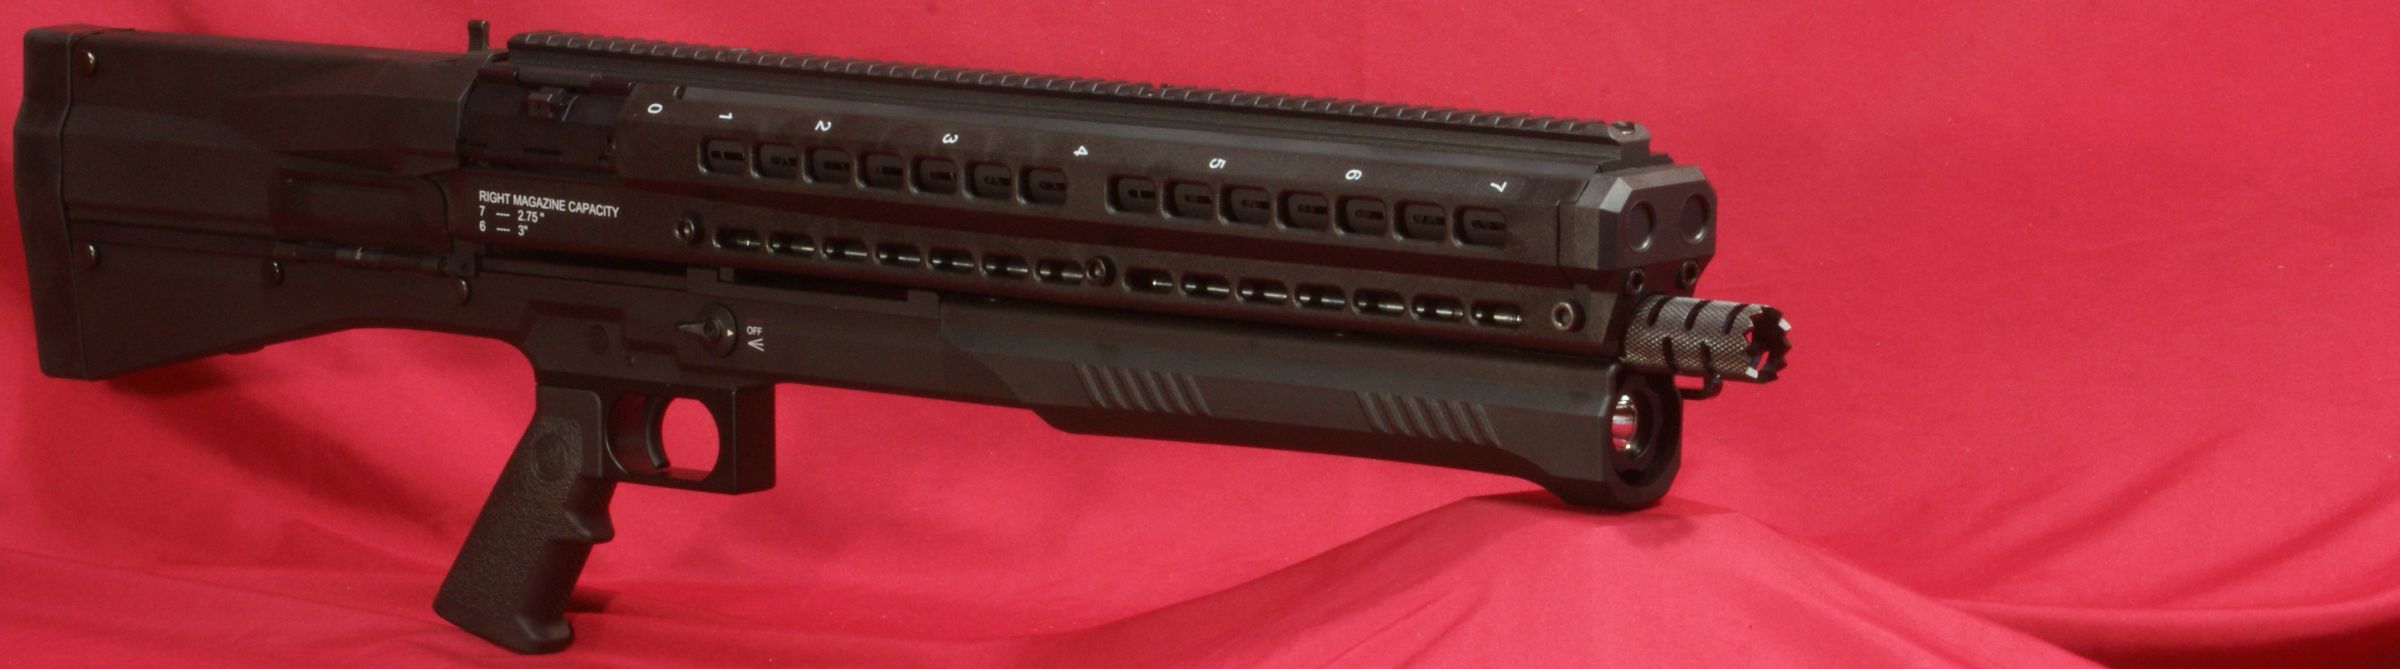
These next two configurations show the extended barrel configuration with each of the chokes. The extended barrel length gives you a 28.25" barrel length which gives the shotgun more reach and muzzle energy because the added barrel length will give you higher shot or slug velocities.
Figure 65 - 7.5" Barrel Extension and Cylinder Choke, Overall
Length 37.3", Barrel Length 28.25"
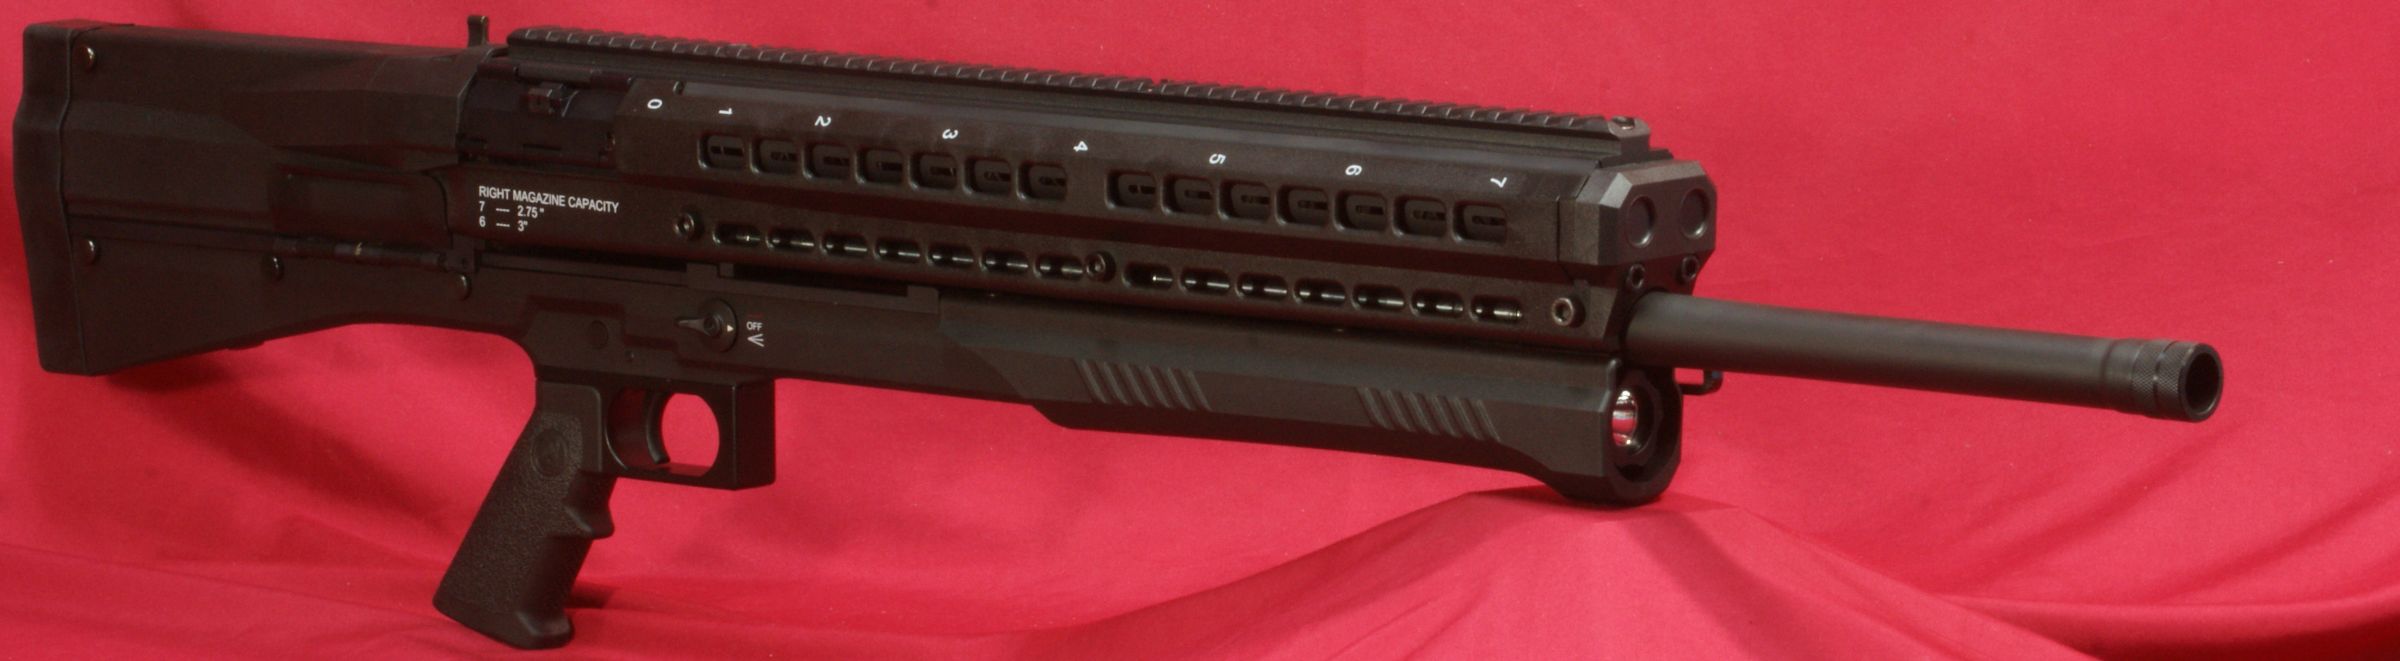
Figure 66 - 7.5" Barrel Extension and Tactical Choke, Overall
Length 38.6"

Cylinder Choke Tube
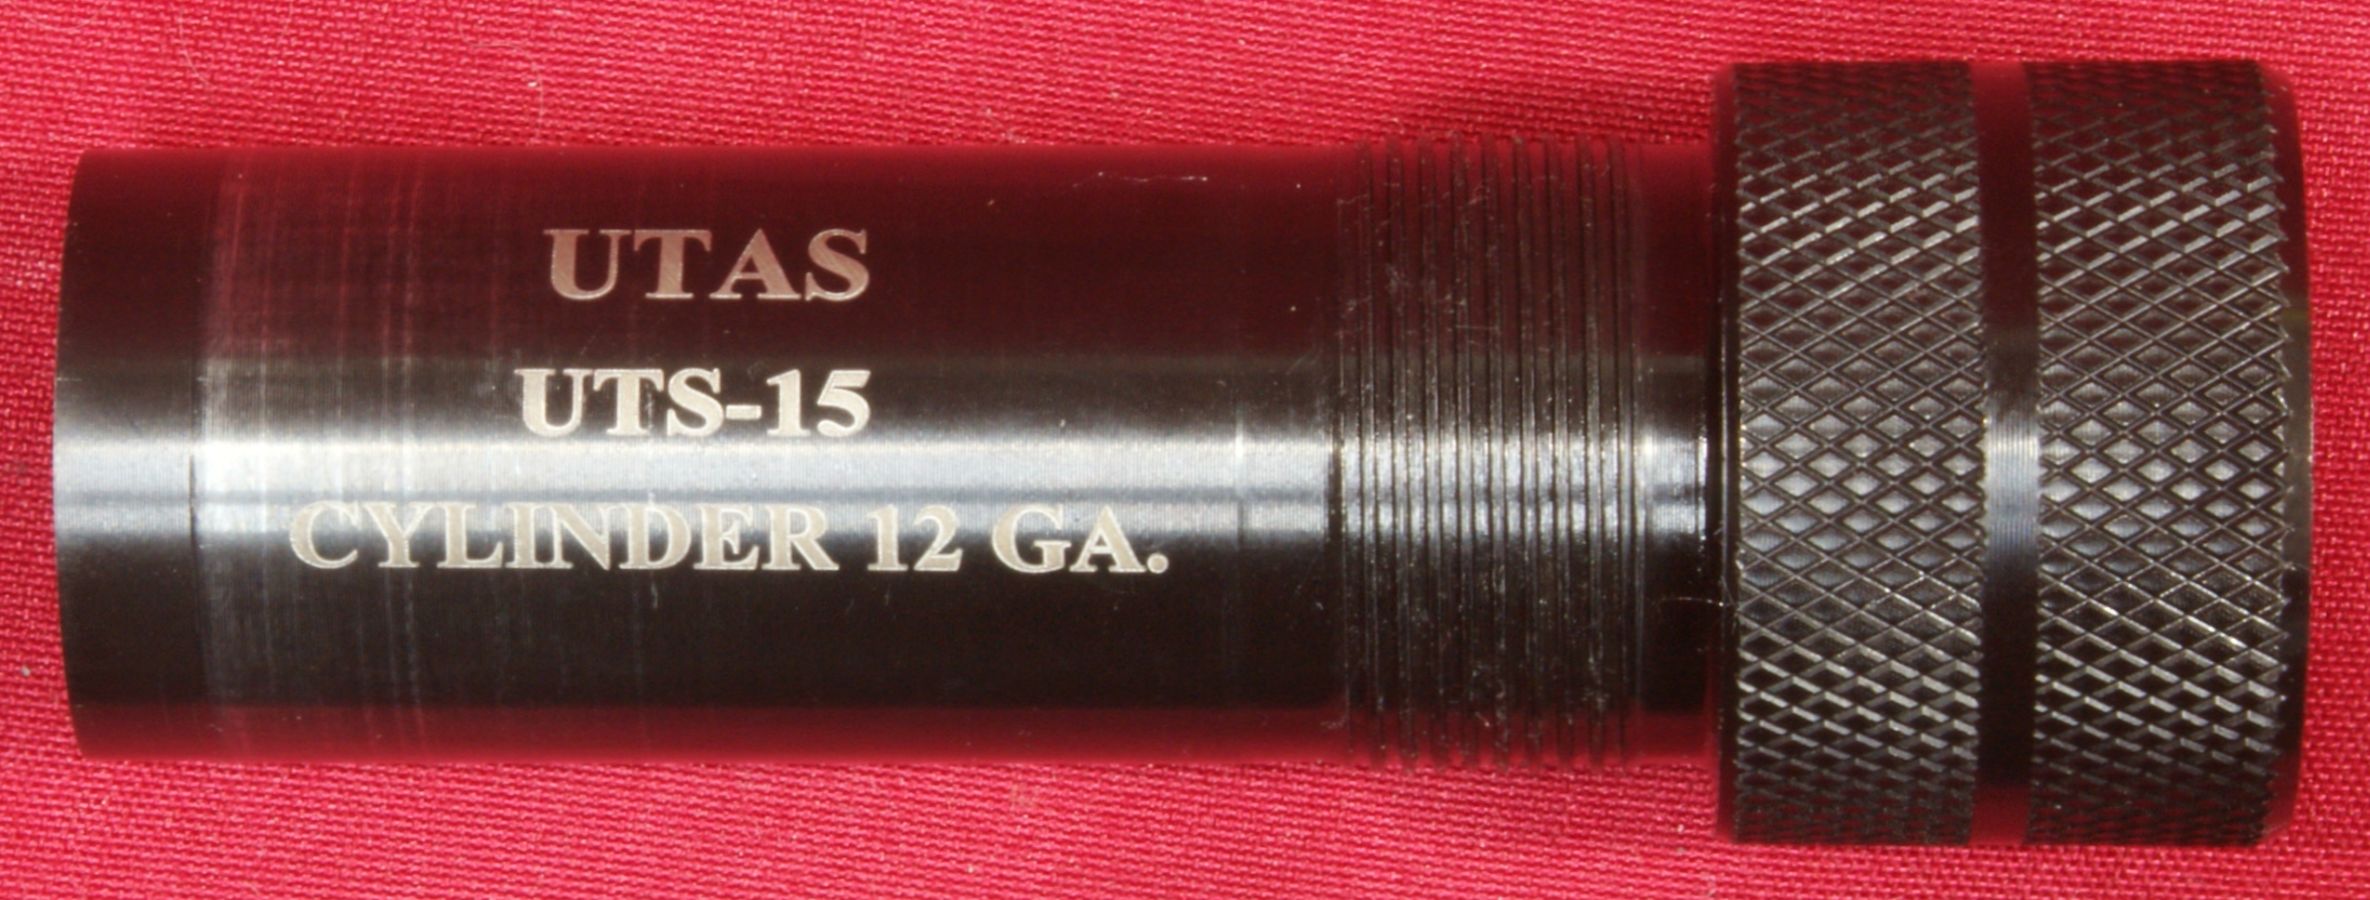
The UTAS UTS-15 comes standard with a Beretta style cylinder choke tube installed in the barrel.
Figure 67
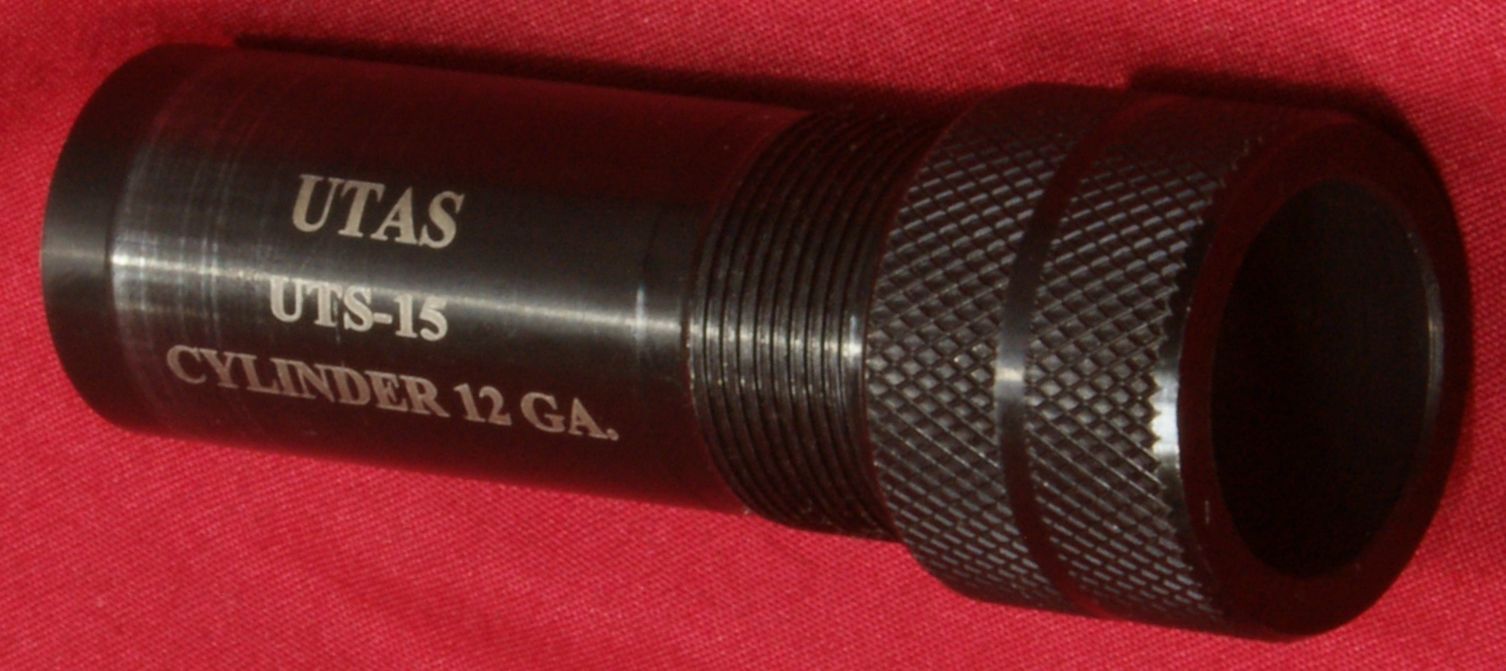
Figure 68
Figure 69
Figure 70
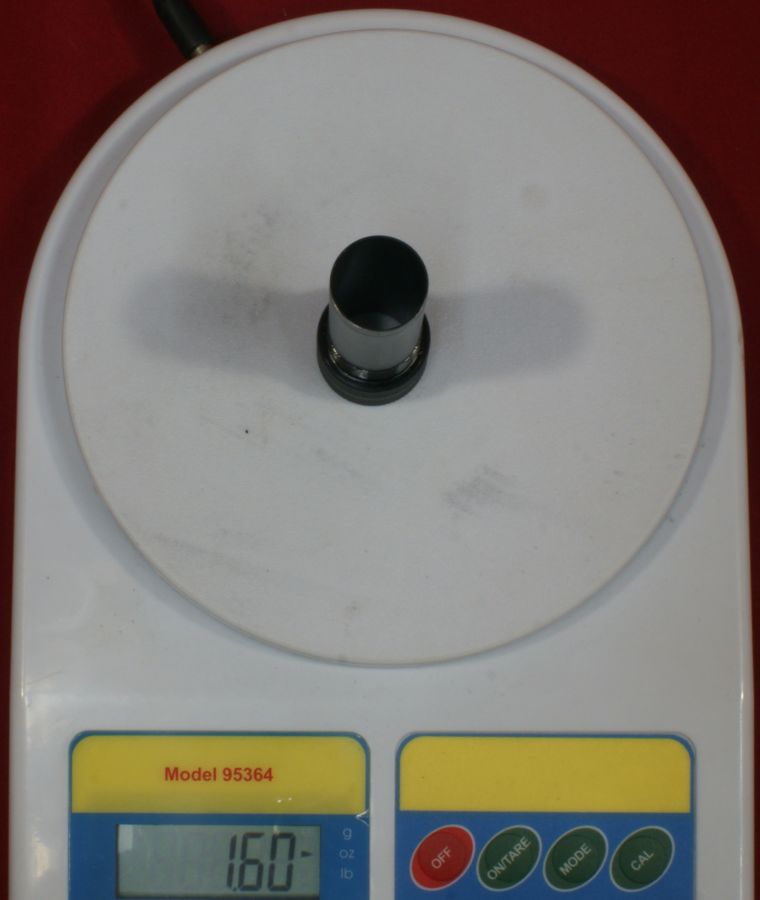
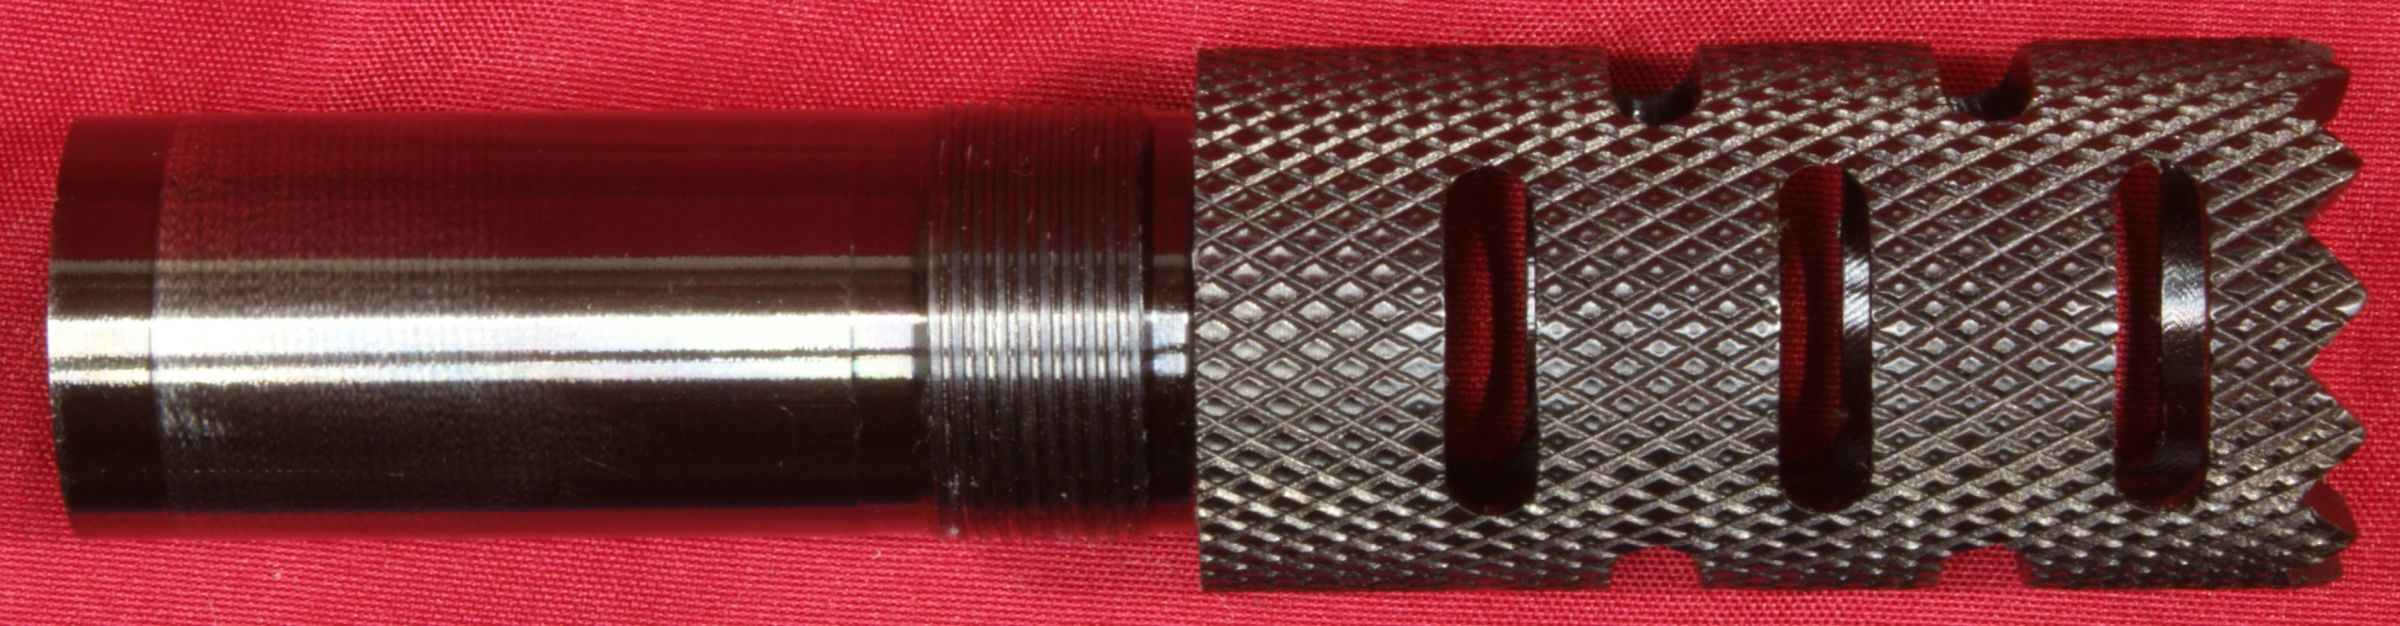
Tactical Choke Tube
You can purchase a tactical choke for this shotgun from UTAS. This choke also has a cylinder bore style choke with no constriction.
Figure 71
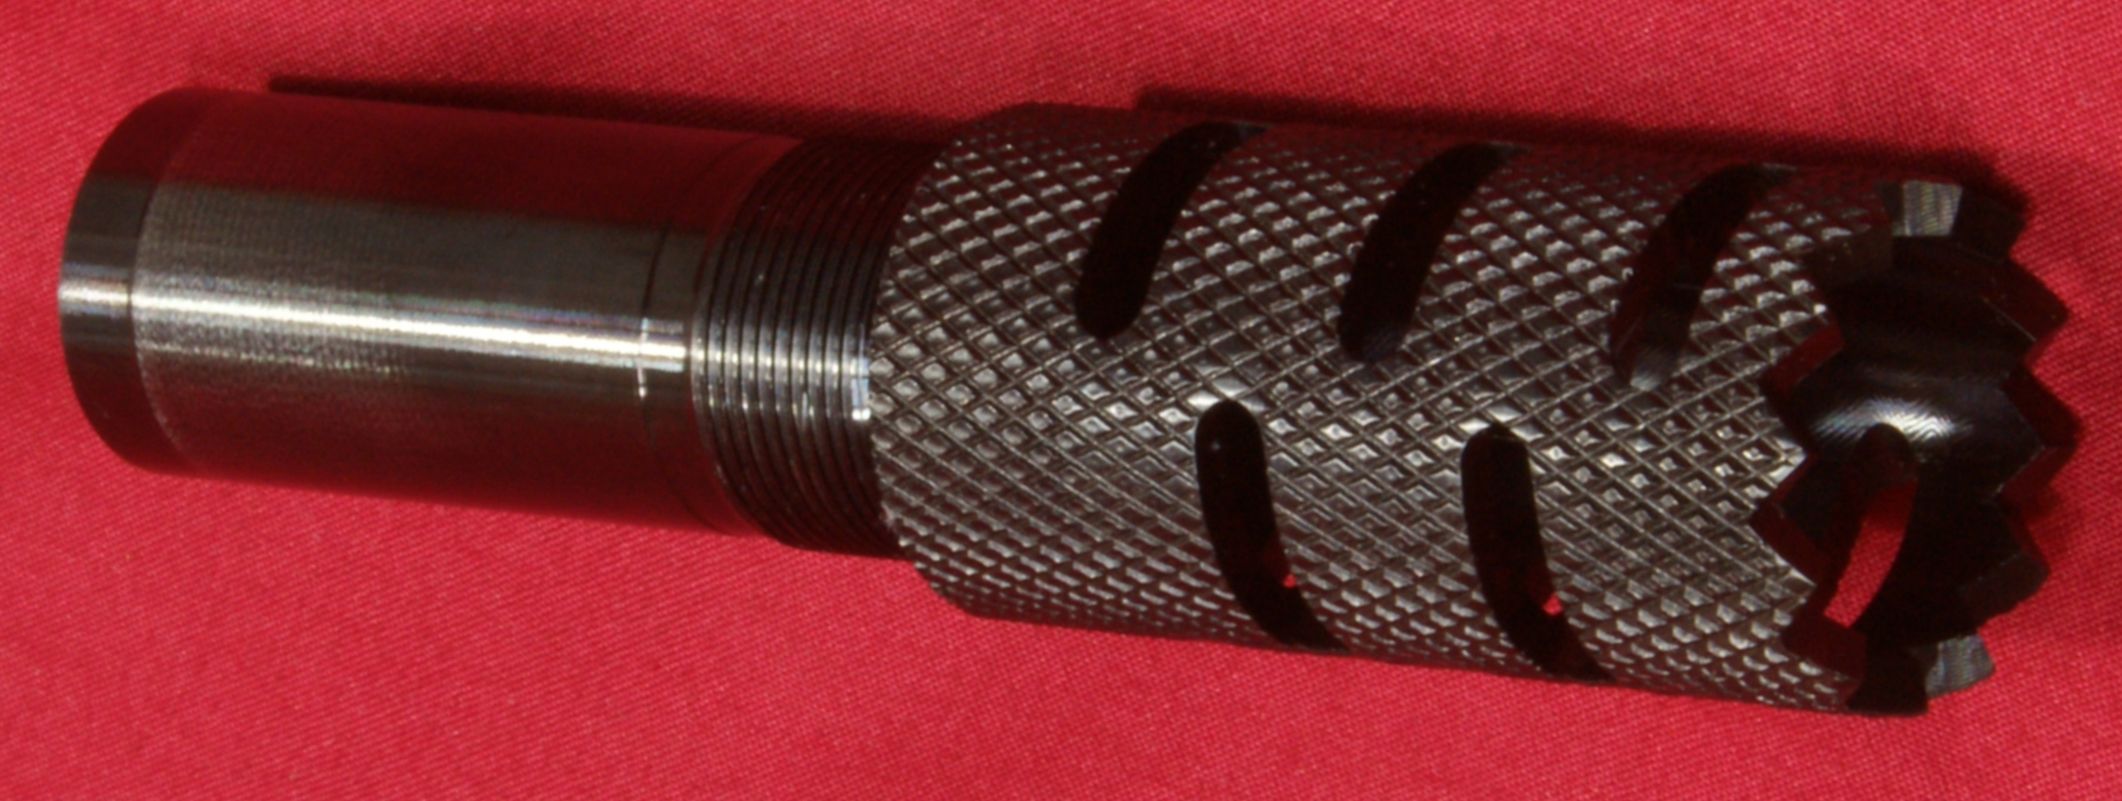
Figure 72
Figure 73
Figure 74
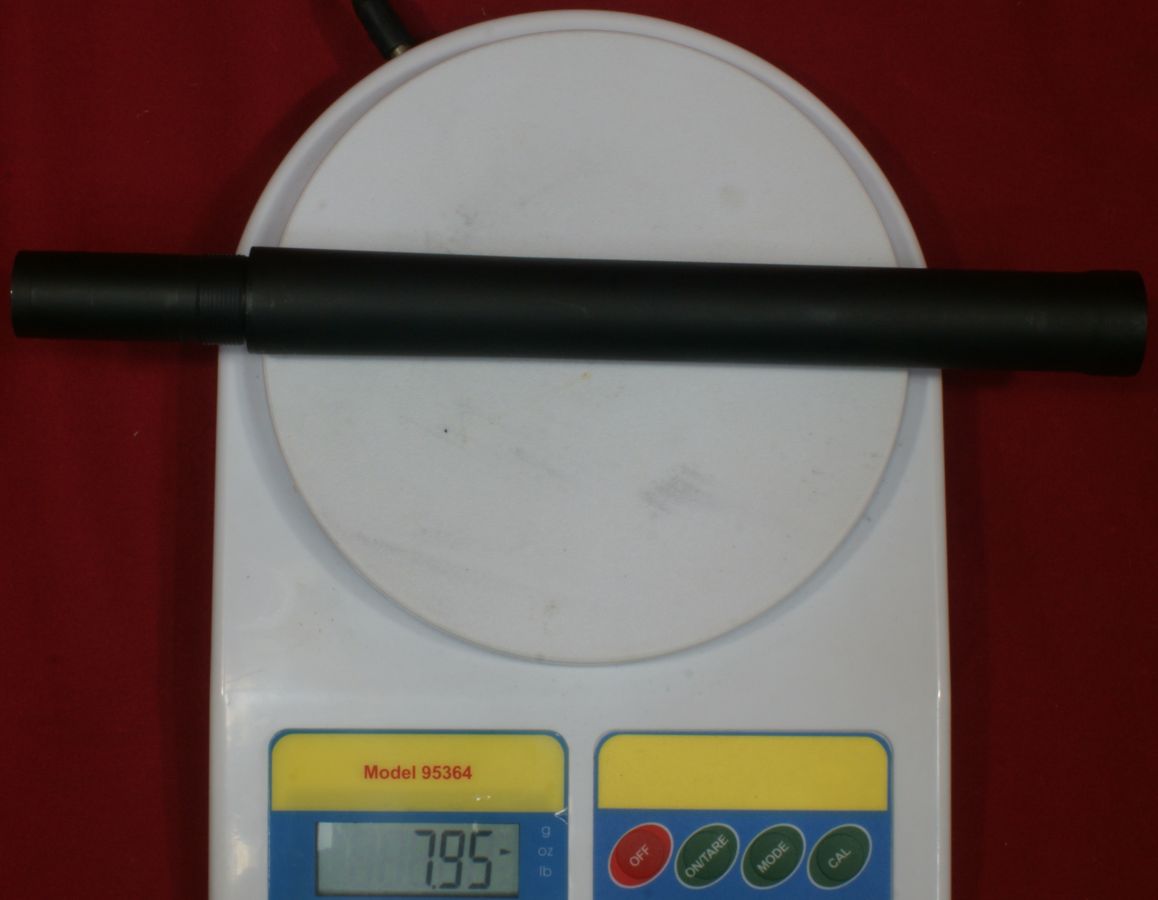
7.5" Barrel Extension
The barrel extension can also be purchased from UTAS. The barrel extension actually measured 7.8" instead of the advertised 7.5".
Figure 75
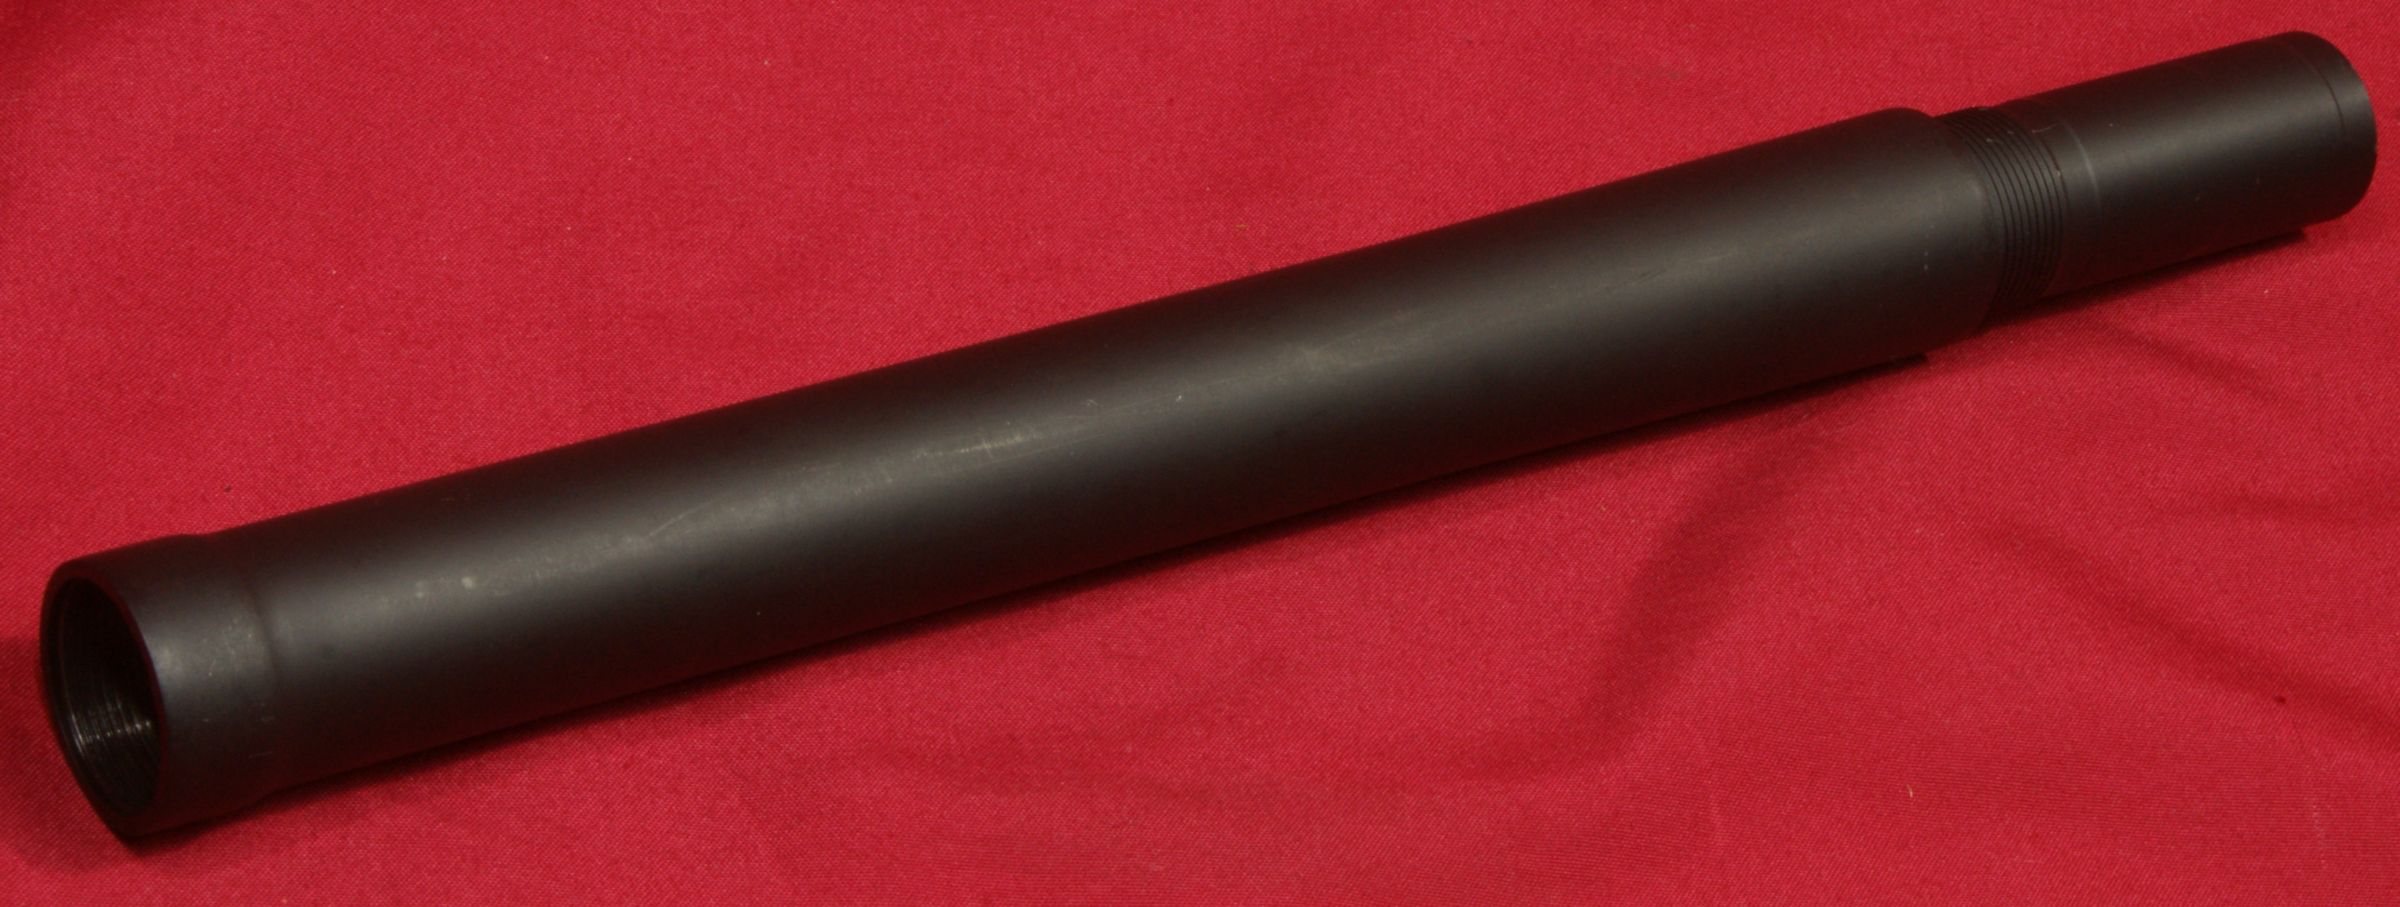
Figure 76

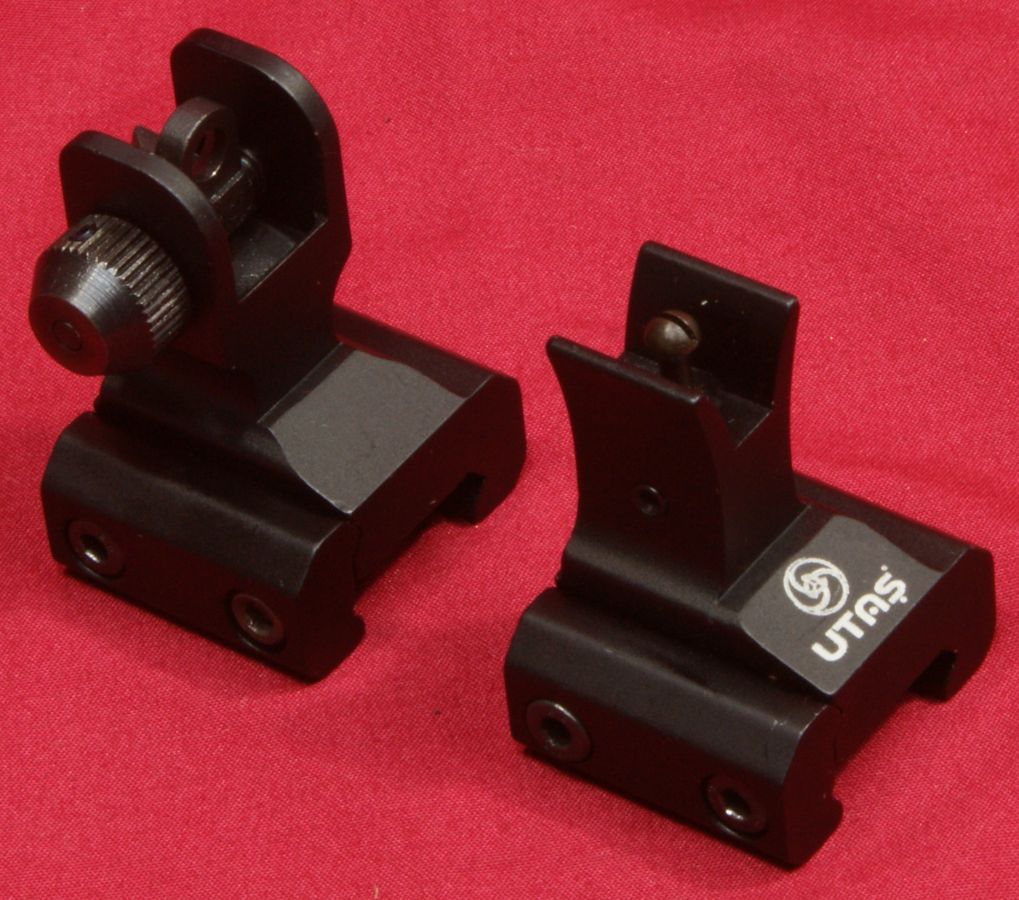
Front and Rear Sight Assemblies
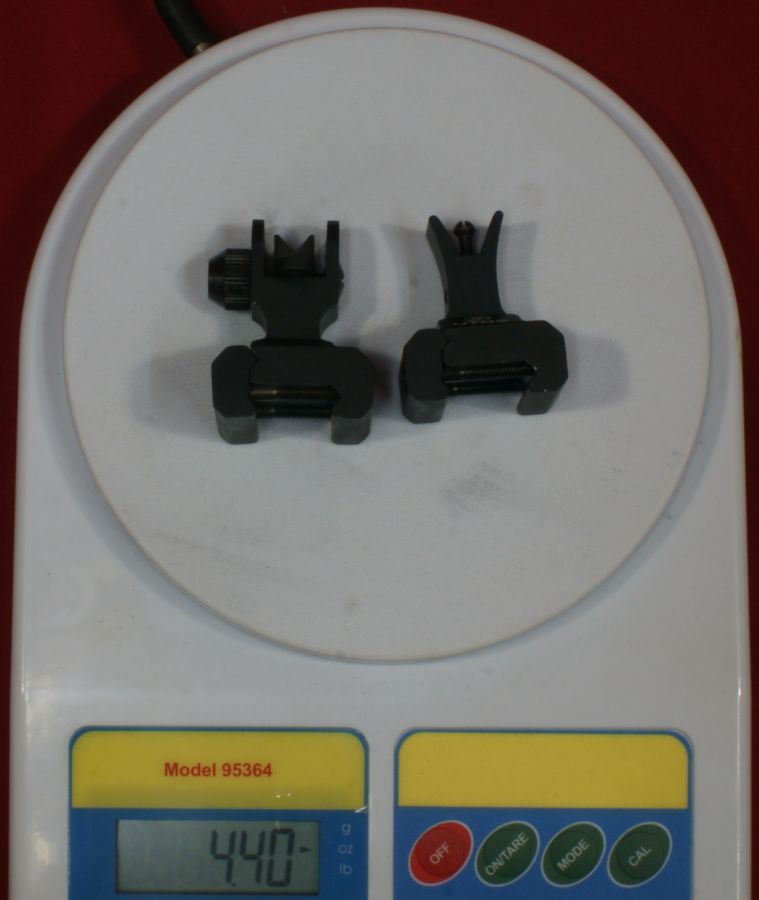
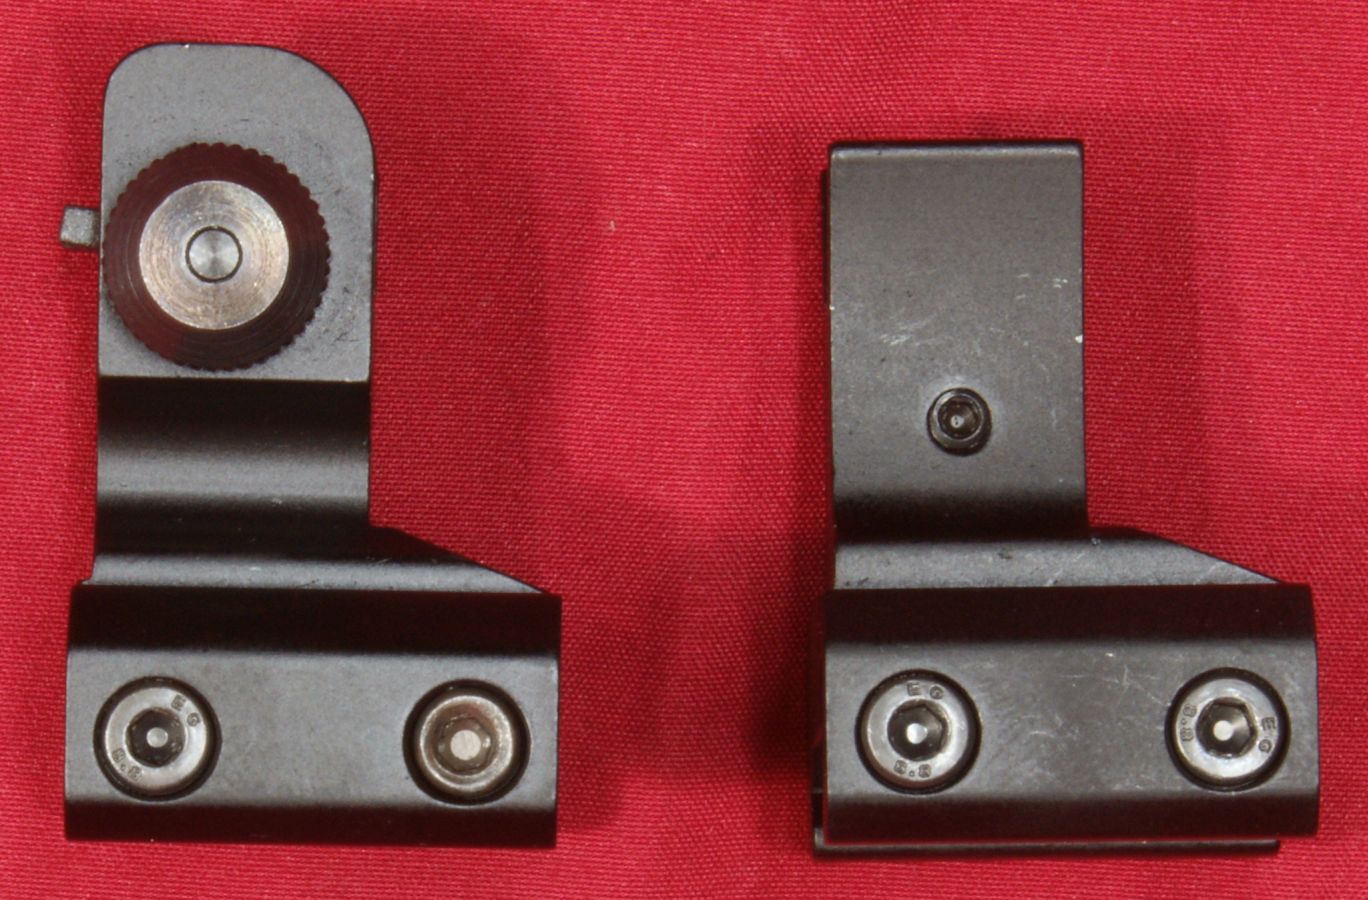
The front and rear sights can also be purchased from UTAS. They are machine from a billet of 7000 series aluminum alloy and anodized to a black matte finish. The rear sight has a ghost ring peep and flip-up V which is adjustable in windage. The front sight is adjustable in elevation by screwing the post up or down.
Figure 77
As I mentioned earlier in the review, I shifted the rear sight forward slightly due to my personal preference and eyesight.
Figure 78
If you install the sights in the positions shown by UTAS, you will have a 17.4" sight radius. I did try the sights in this configuration and found the ghost ring peep much easier to use than the V notch.
Figure 79

Overall I would say the UTAS sights are pretty beefy and basic. From the top of the rail to the center of the peep measured about 1.45" which would allow them to co-witness with some other optical sights.
Figure 80
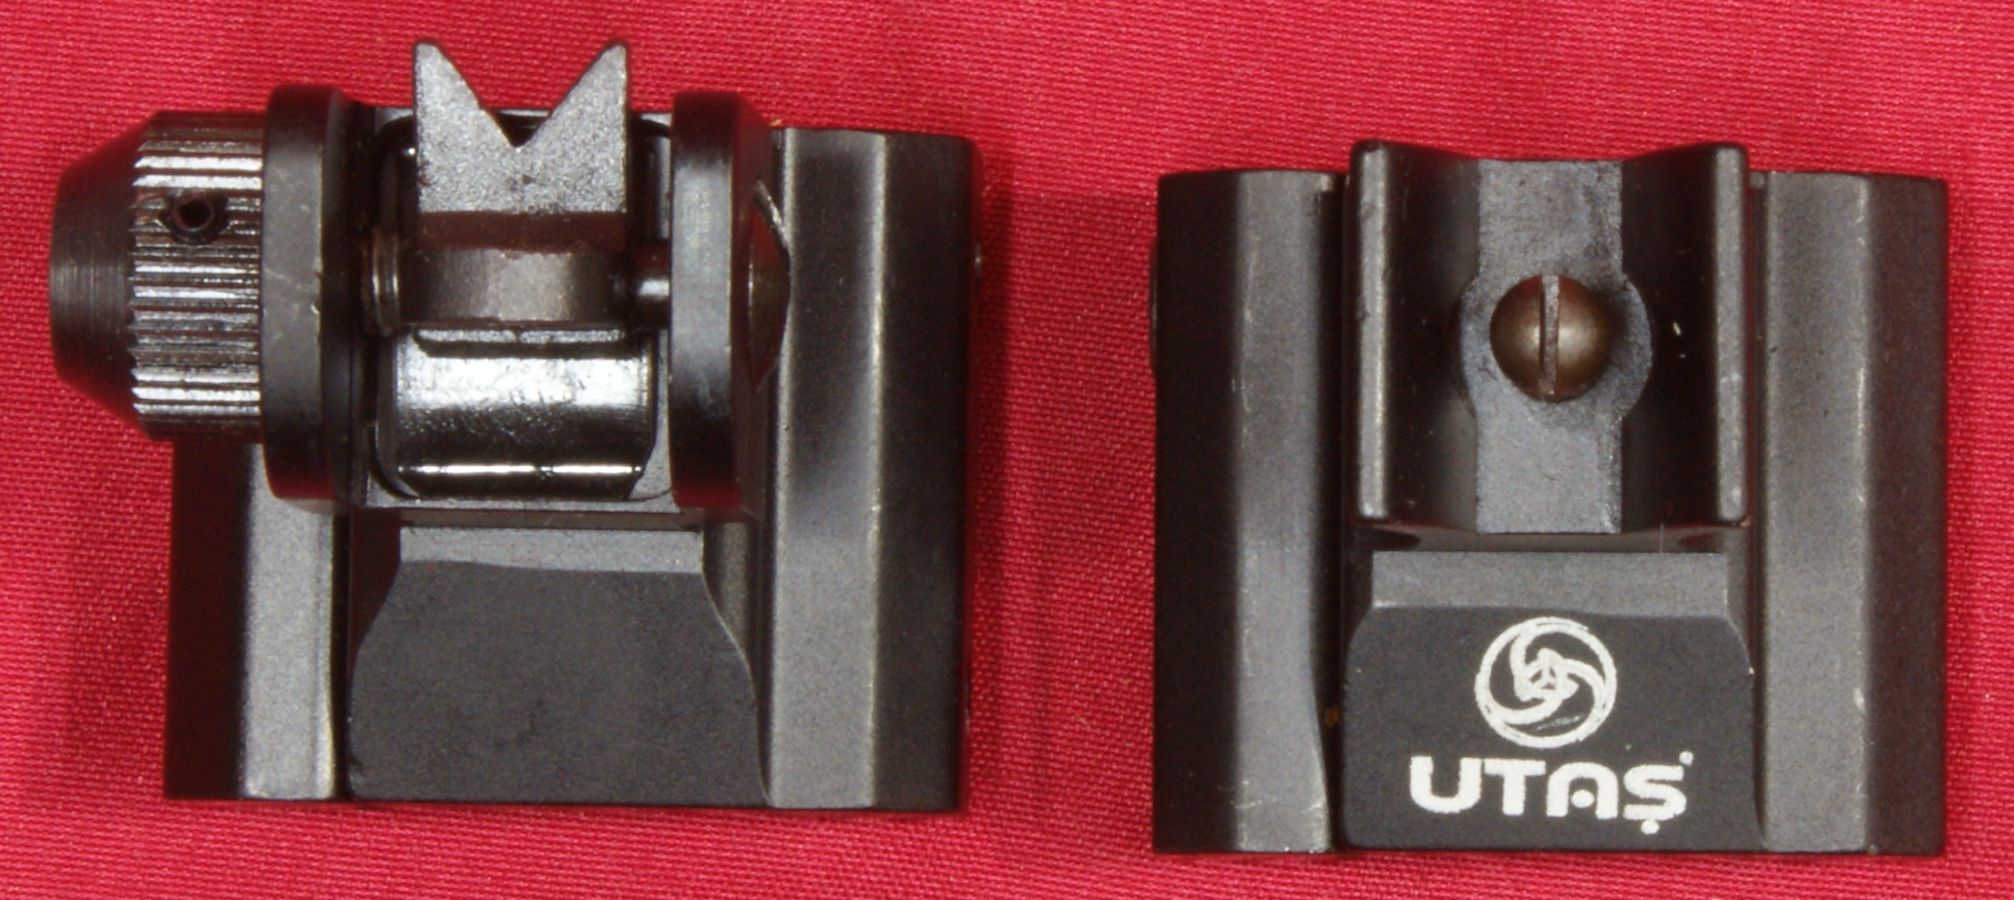
Figure 81
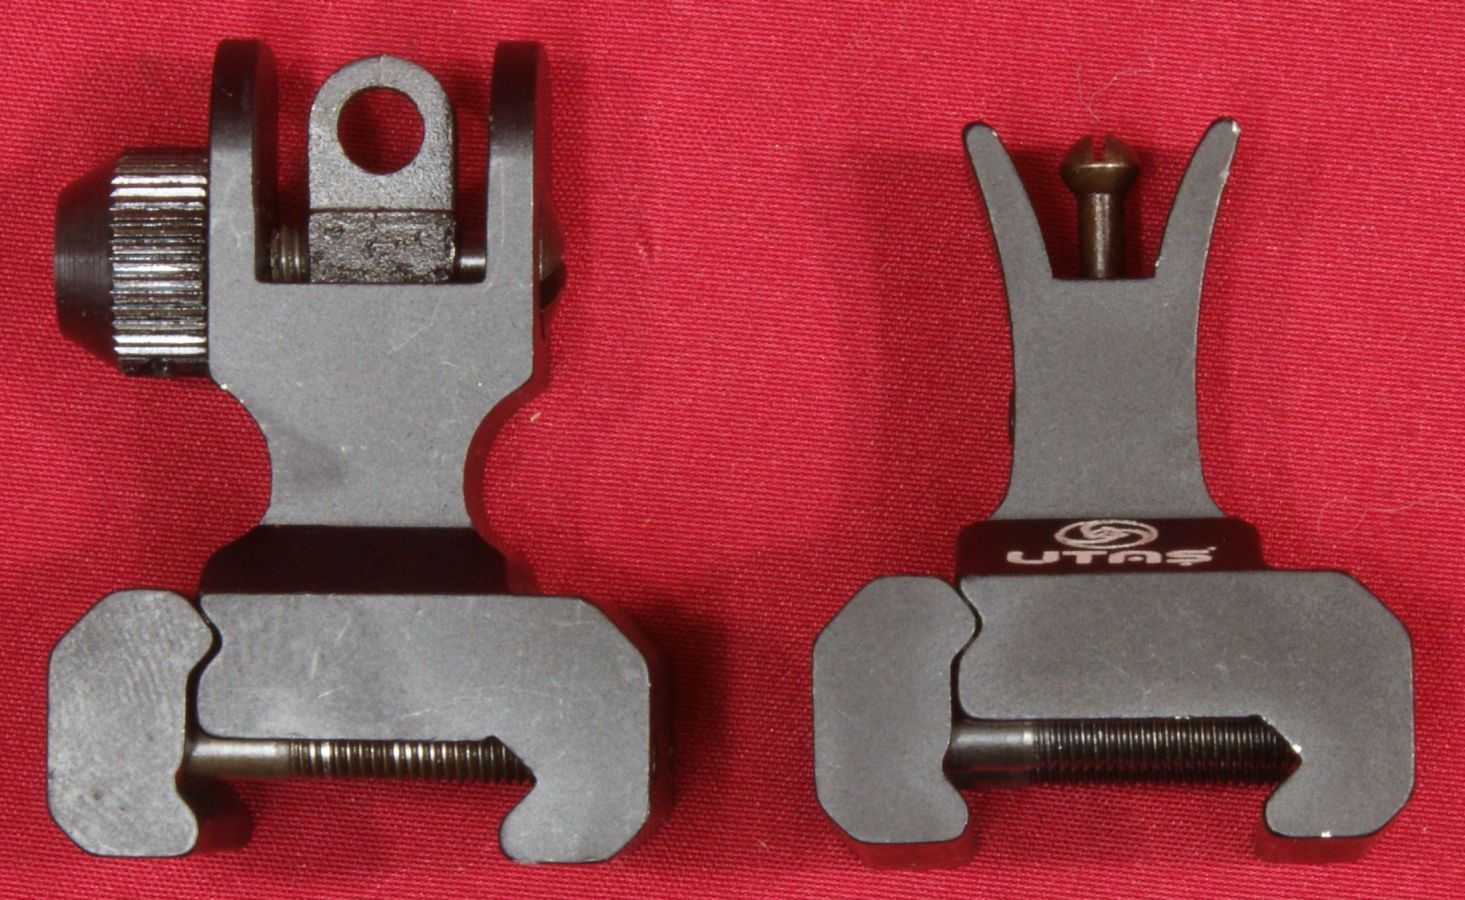
Figure 82
Light / Laser
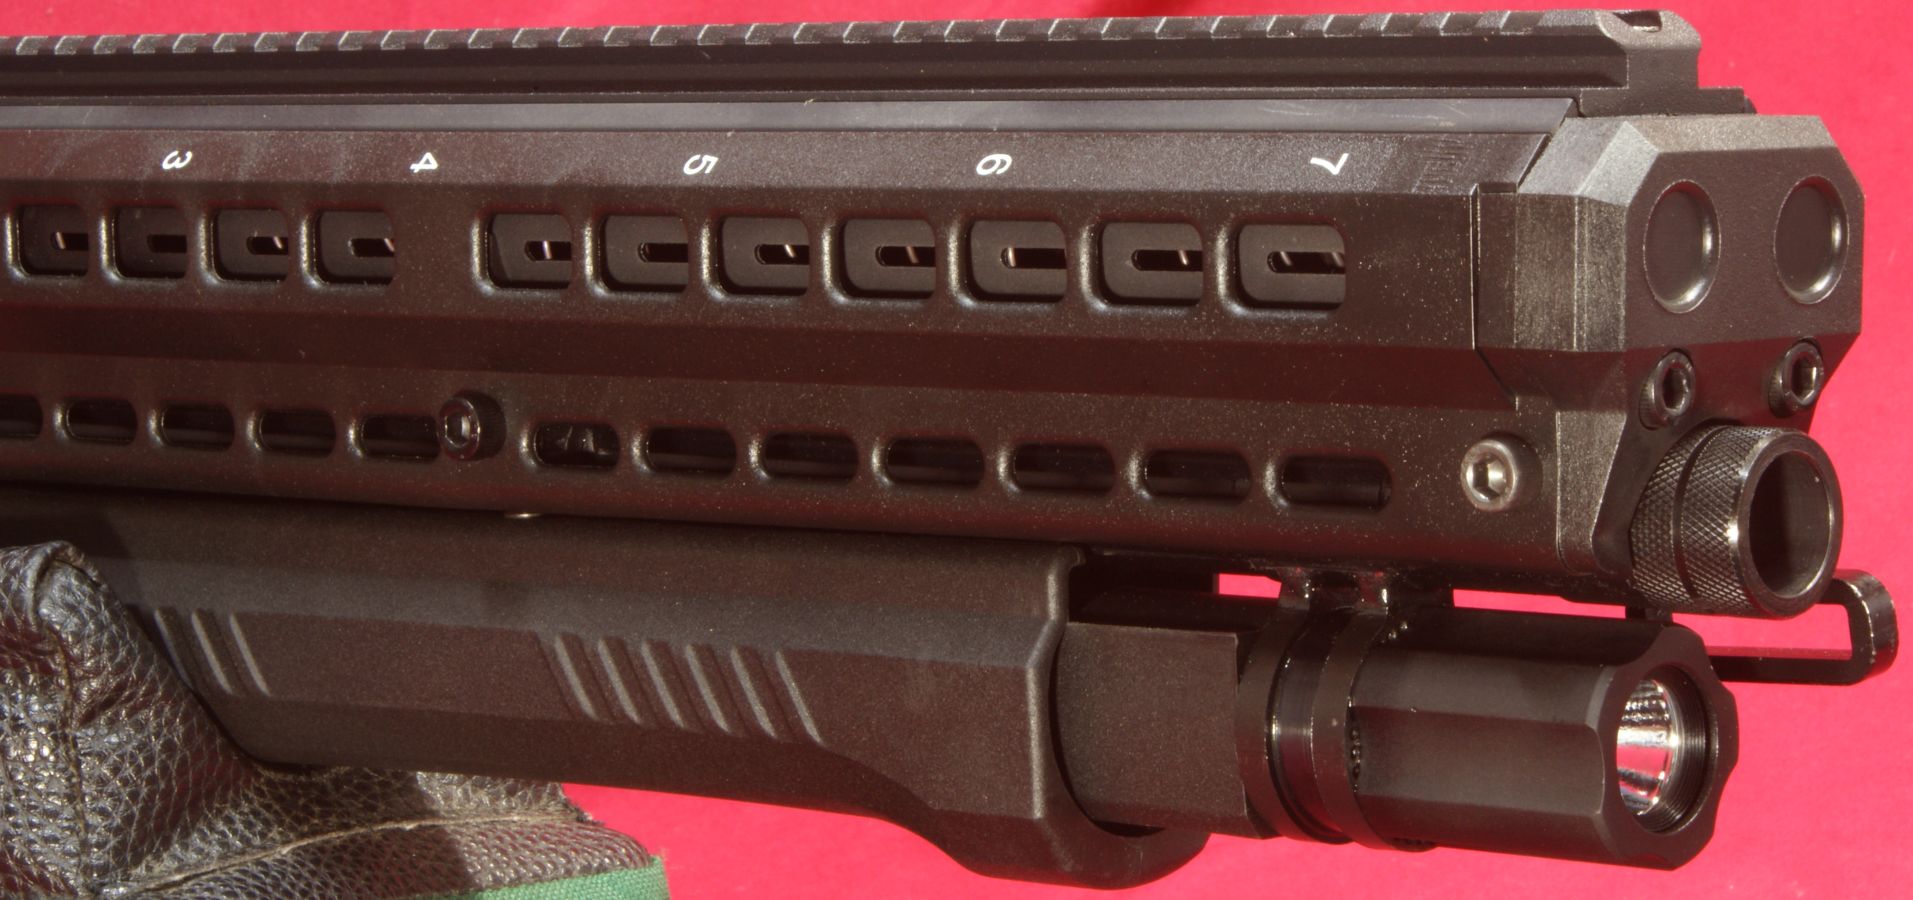
UTAS states that the UTS-15 light / laser is "specially designed as a night sight for the UTS-15 tactical shotgun." This unit is designed to slide inside the tube in the front of the stock and is held in place with the magazine cap (takedown nut). The 200 lumen light is mounted to shine the approximate center of the beam at the point of aim. If for some reason there is a significant difference in beam center than point of aim, there is no adjustability on the light, but this is no different than most weapons mounted lights. The laser is both windage and elevation adjustable to ensure that point of impact and point of aim are zeroed for a given distance. This unit is powered by two CR123A lithium batteries which can be replaced by first removing the magazine cap (takedown nut), then pulling the light assembly out of the stock and finally removing the rear cap.
Figure 83
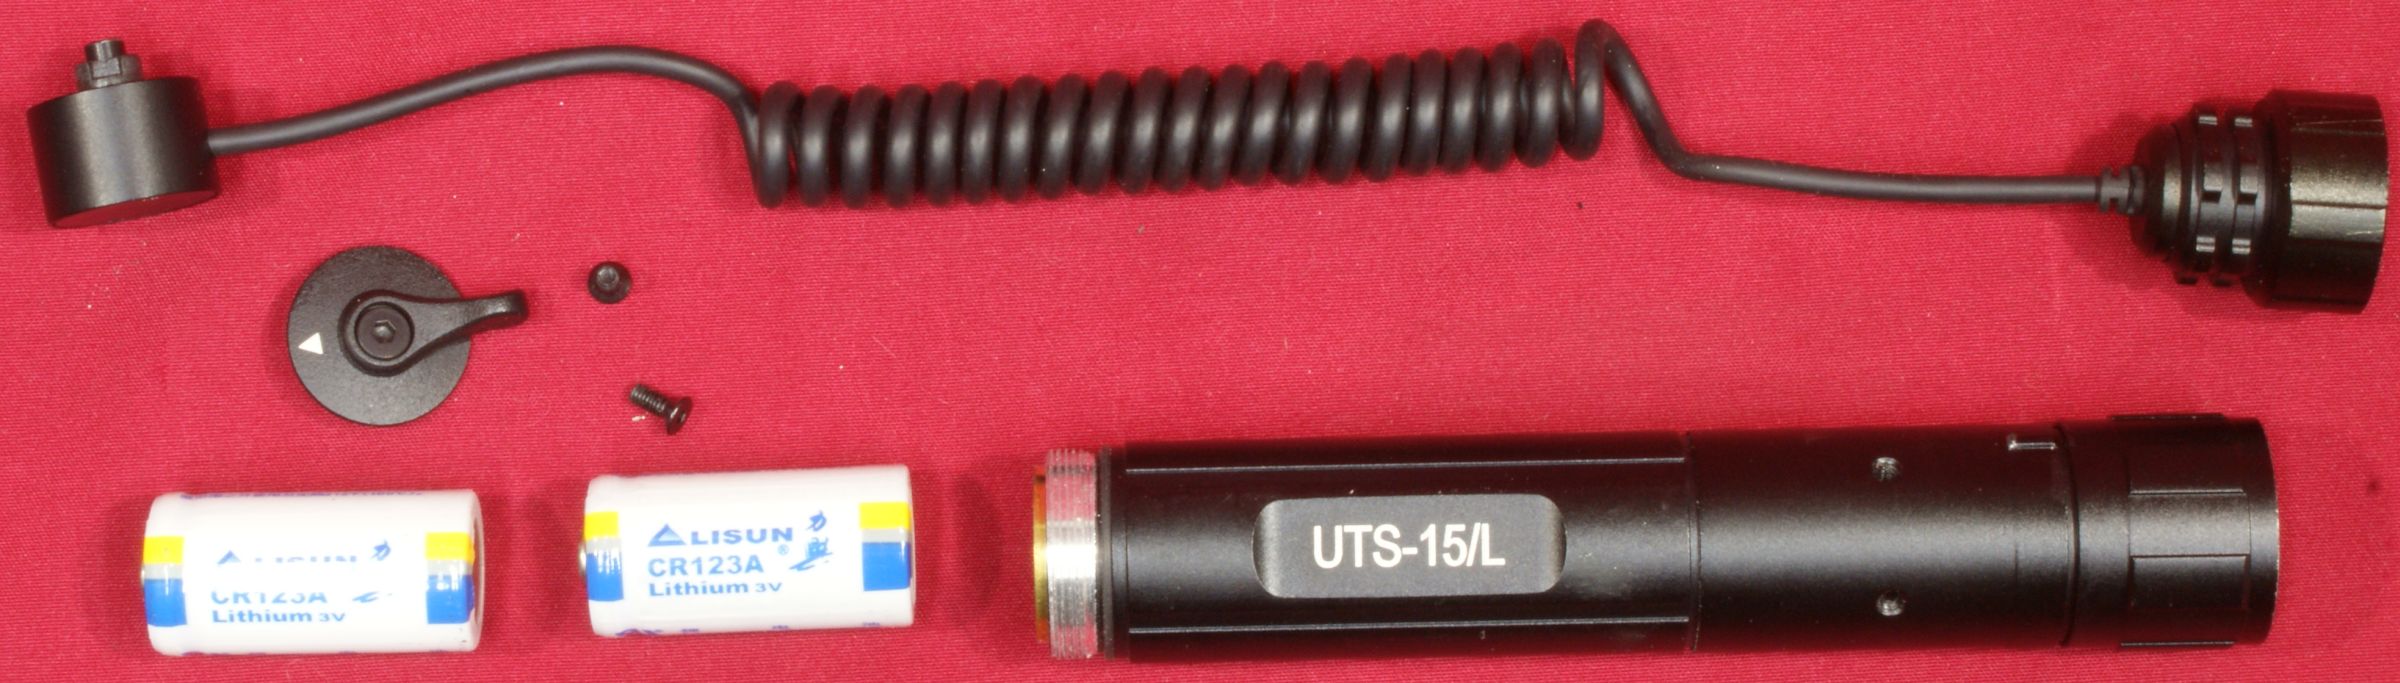
When the tactical choke or barrel extension is installed, these parts place a shadow on the upper portion of the lighted area because of the close proximity of the light to the lower surface of the barrel.
Thoughts
Although some of the advertised specifications need updating, I think the overall configuration of this shotgun is still compact and relatively light. Clearly this shotgun is not like your traditional pump shotgun (i.e. Remington 870 or Mossberg 500). Because of that, I think it is worth taking an extra close look at understanding the basic mechanisms so you will know how to make the platform be the most successful in your shooting situations.
For more detailed photos and commentary, make sure you check out the other parts of this review and feel free to leave comments on my Reader's Comments page. The following links are provided to help you see other parts of this review.
- UTAS UTS-15 Review: Part 1 - Introduction, Specifications and Summary
- UTAS UTS-15 Review: Part 2 - What's in the Box
- UTAS UTS-15 Review: Part 3 - External and Operational Features (this page)
- UTAS UTS-15 Review: Part 4 - Disassembly
- UTAS UTS-15 Review: Part 5 - Internal Features
- UTAS UTS-15 Review: Part 6 - Range Test
Or
If you would like to be notified about future Gunsumer Reports reviews via Facebook, make sure "You Like This" by clicking the Facebook "Like" button at the bottom or top of this page. If it already says "You Like This" beside the button, clicking it again will uncheck the "Like" status and you will not be notified.
| Share on Facebook | |
© 2010, 2011, 2012, 2013, 2014, 2015, 2016, 2017, 2018, 2019, 2020, 2021, 2022, 2023 & 2024 Gunsumer Reports™, All rights reserved.
FTC Disclosure