|
|
Gunsumer Reports TM Providing Detailed Objective Reviews for Firearms and Firearm Accessories |
Ruger SR1911 Review
Part 4 - Disassembly
June 10, 2012
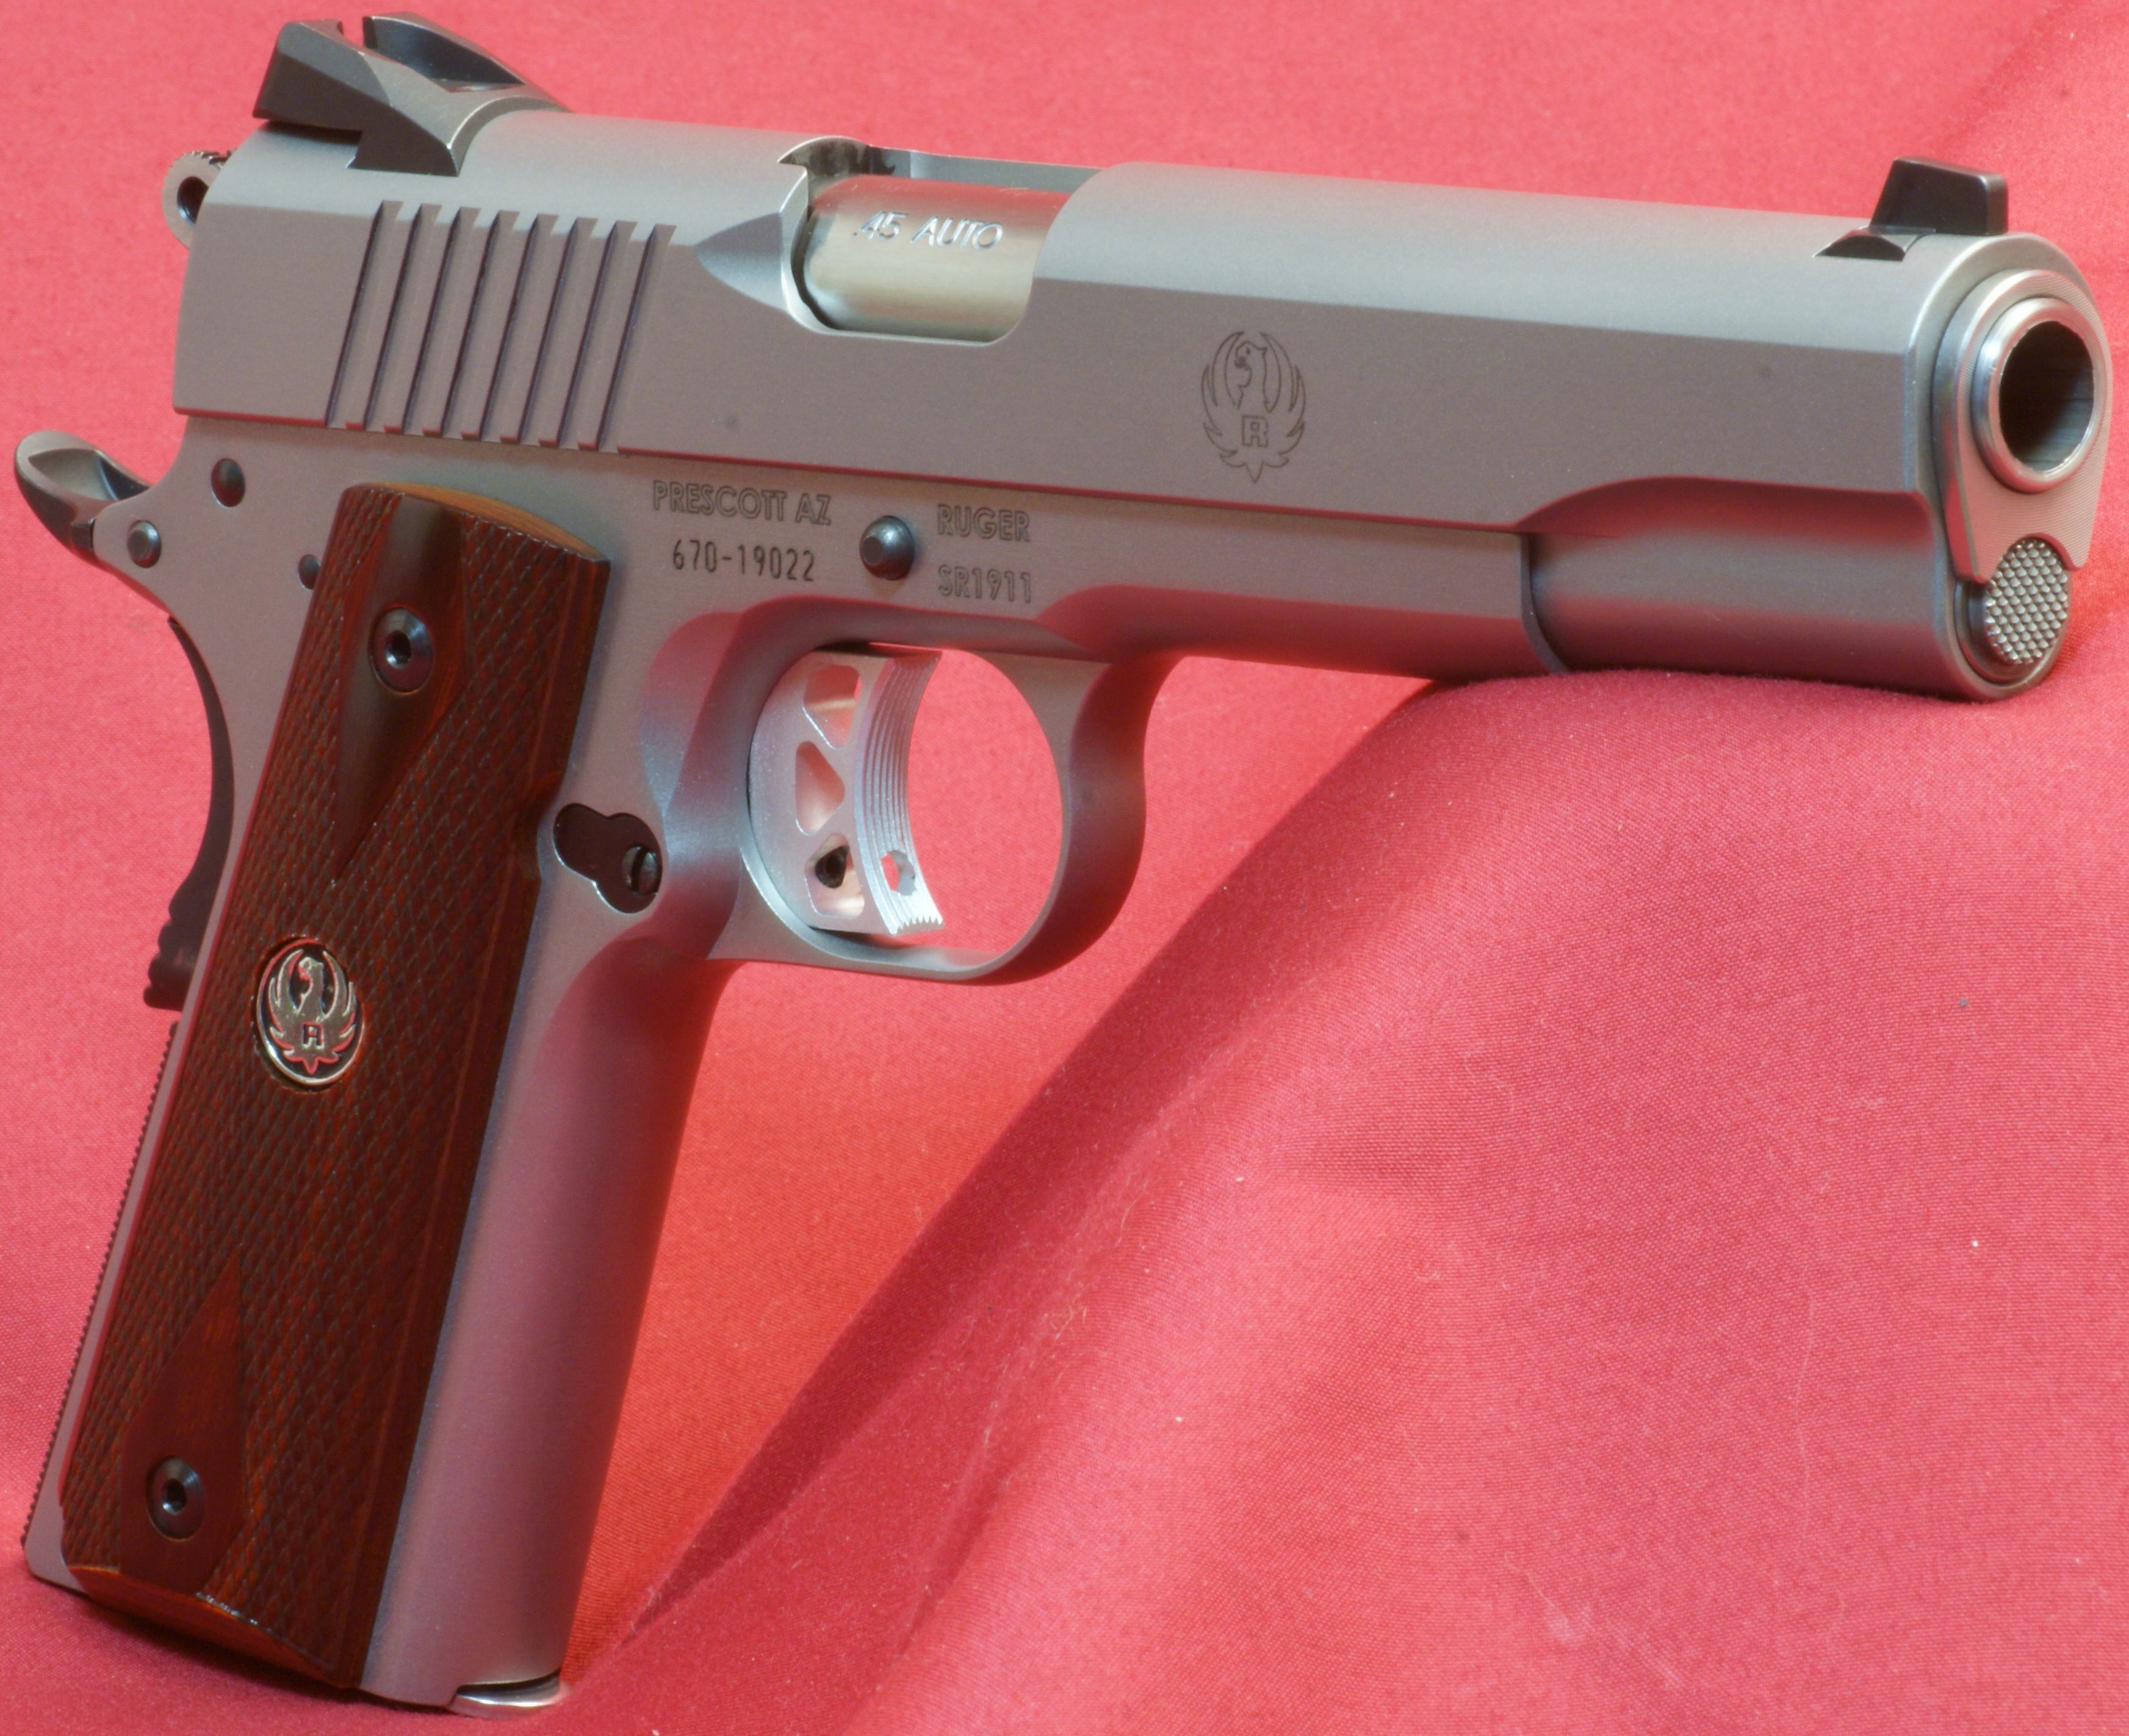
In this part of my Ruger SR1911 Pistol Review, I cover disassembly of the SR1911 pistol. In general, I follow the steps outlined in the SR1911 Instruction Manual, but keep in mind that there are some steps that can be performed in a different order. Although I show the details associated with disassembly, you should always consider the manufacturer's instruction manual as the official guide because they provide additional safety warnings and notes when necessary.
Step 1 - Remove Magazine
Press the magazine catch and remove the magazine from the pistol.
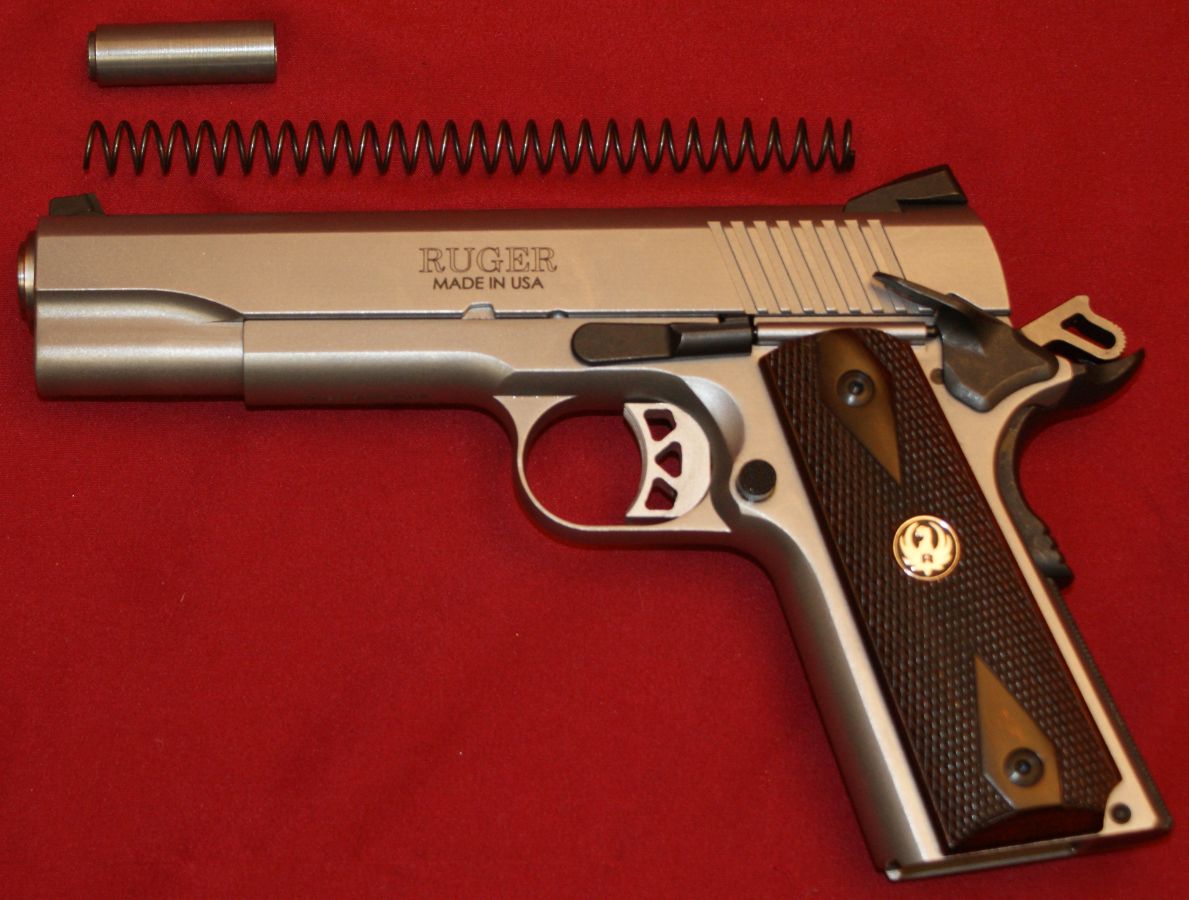
Figure 1

Step 2 - Verify Unloaded
Pull the slide to the rear and lock open to verify that the pistol is unloaded.
Figure 2
Step 3 - Release Slide
Pull the slide to the rear and allow it to go fully forward.
Figure 3

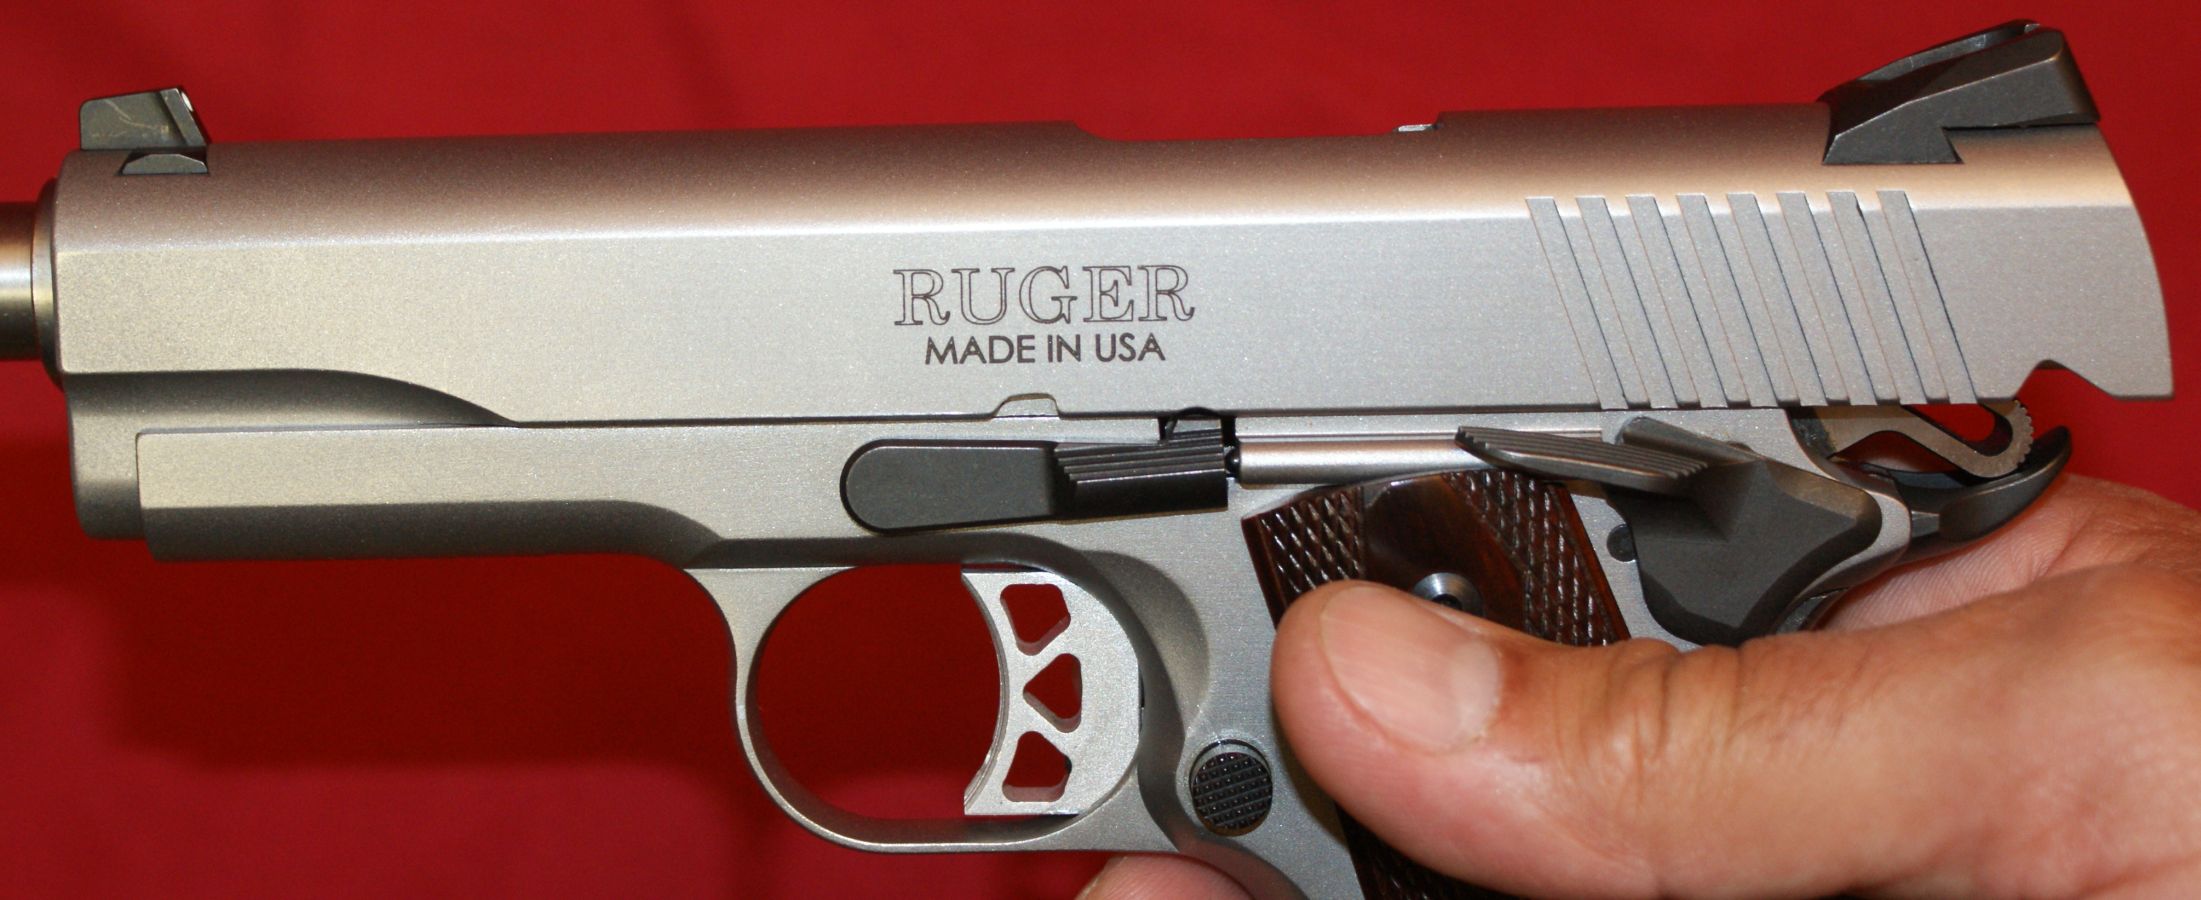
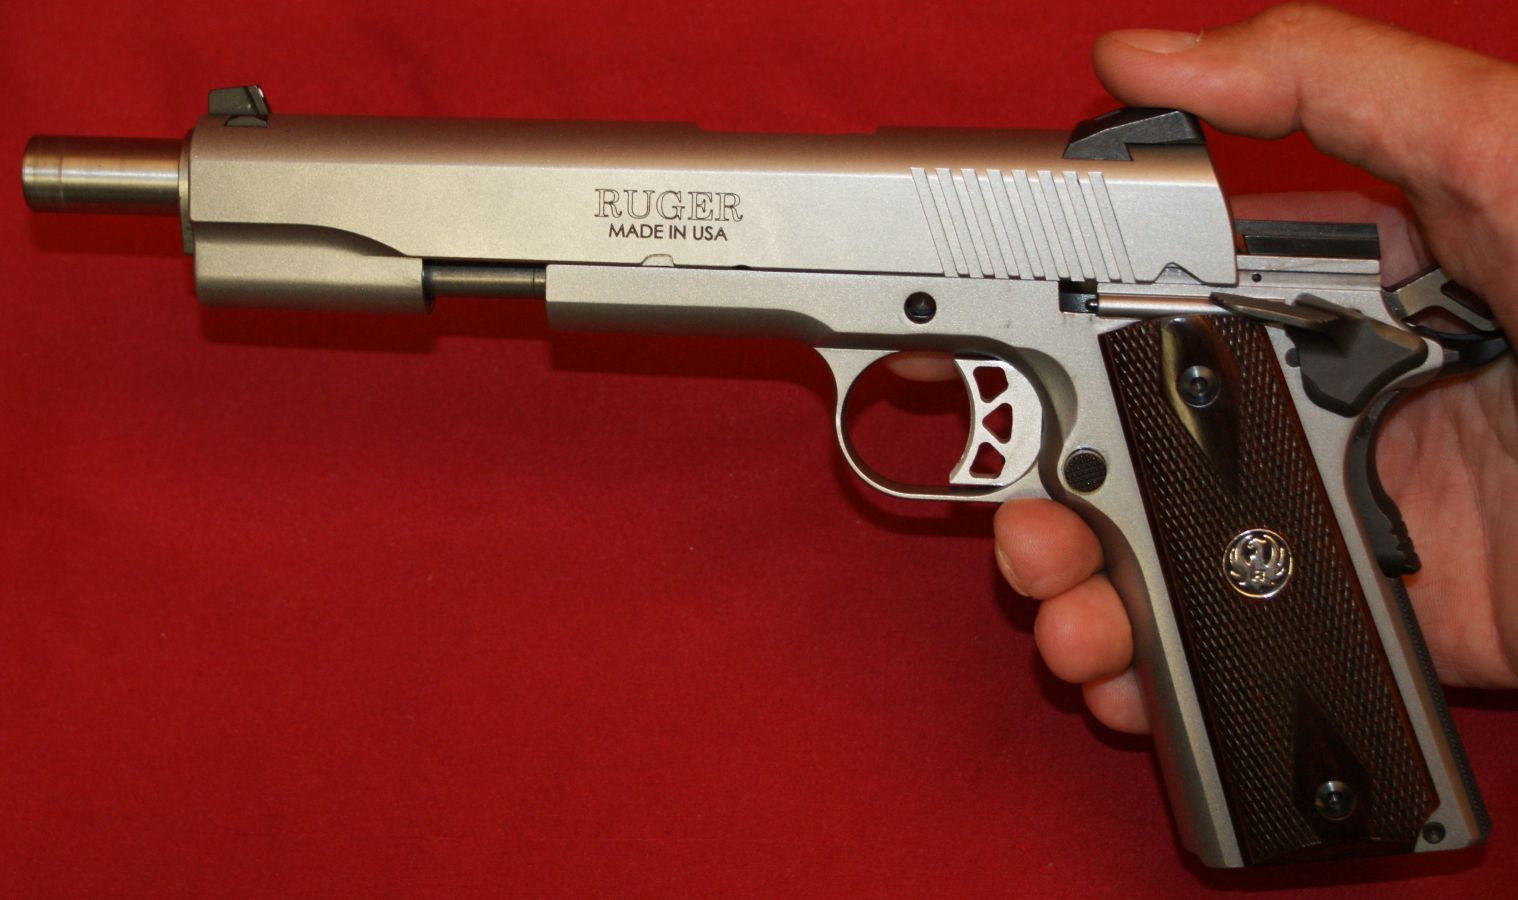
My personal preference for disassembly after I have confirmed that the pistol is unloaded is to leave the hammer cocked and flip the thumb safety up.
Figure 4
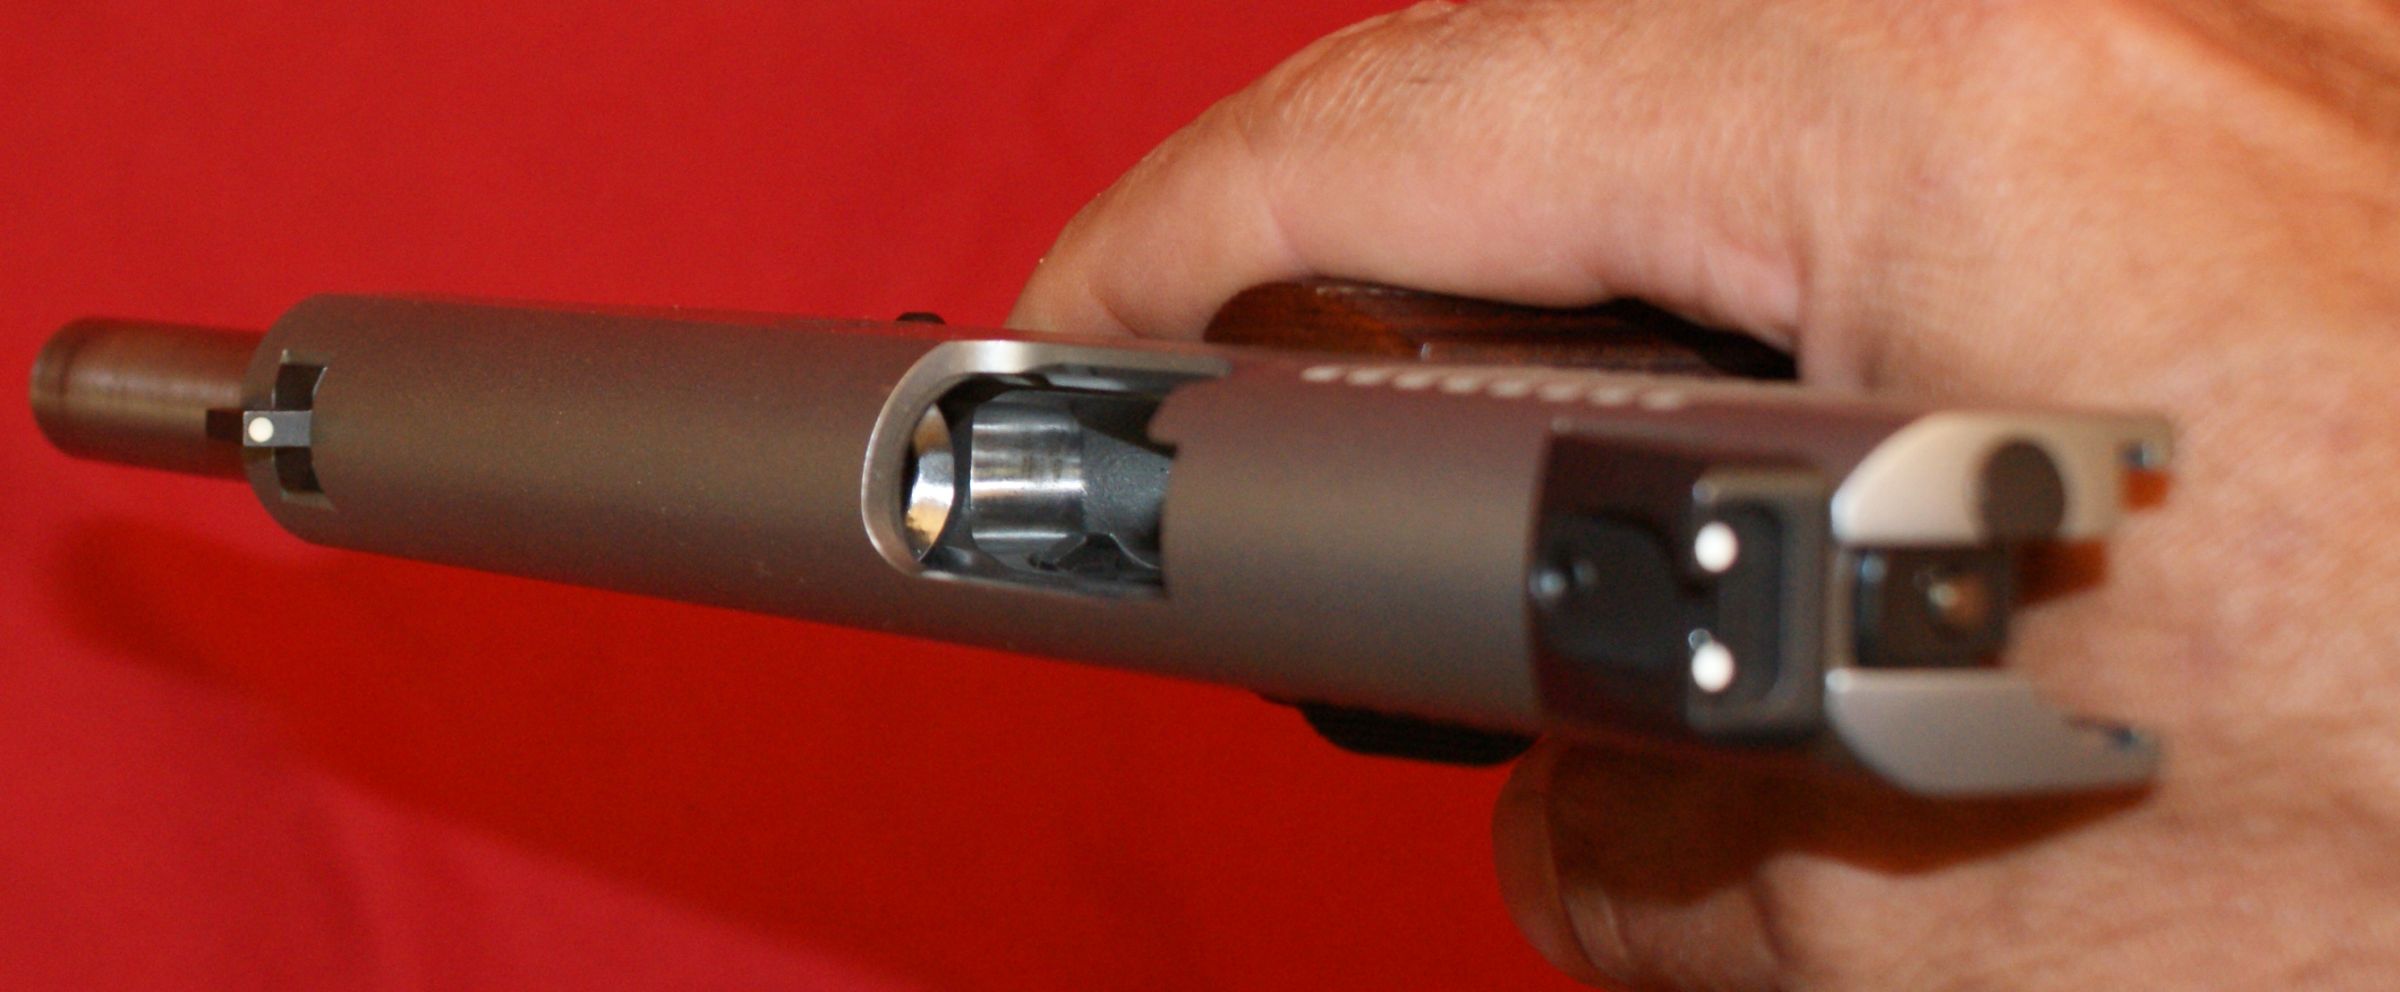
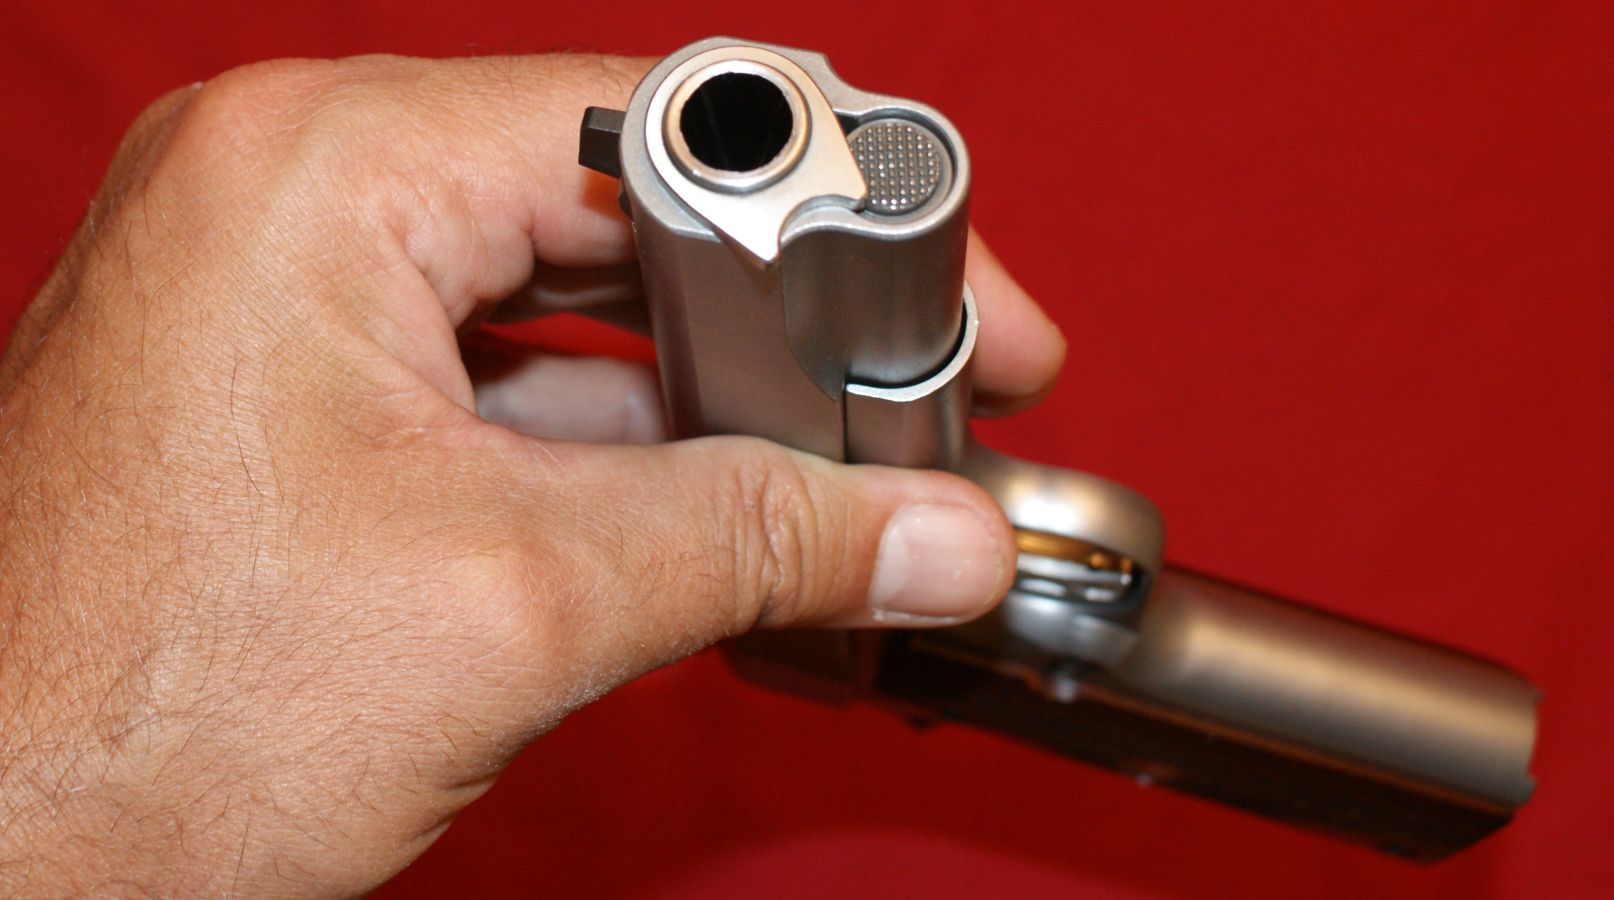
Step 4 - Rotate Barrel Bushing and Release Spring Force
Ruger provides a polymer wrench to assist in rotating the barrel bushing. When the pistol was new (out of the box), this wrench did help significantly when rotating the bushing, but after a session at the range, I was able to push down on the recoil spring retainer and rotate the bushing by hand.
Figure 5
When using the wrench, you will push down on the recoil spring retainer and rotate the barrel bushing slightly clockwise as shown below.
Figure 6
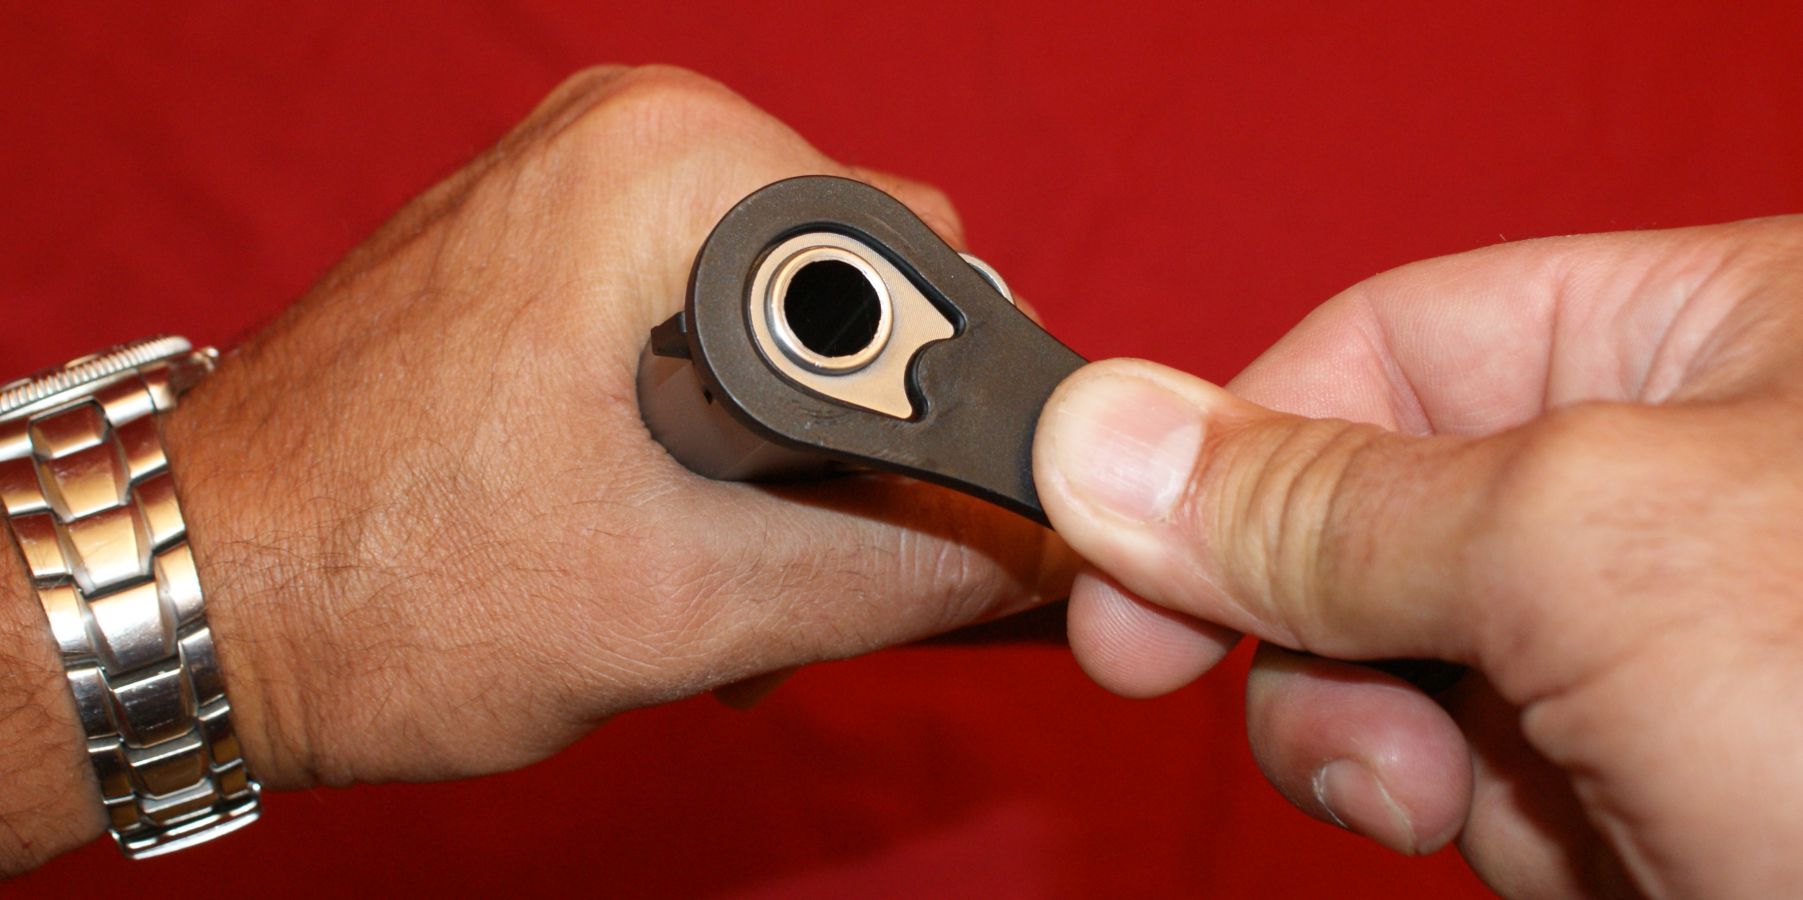
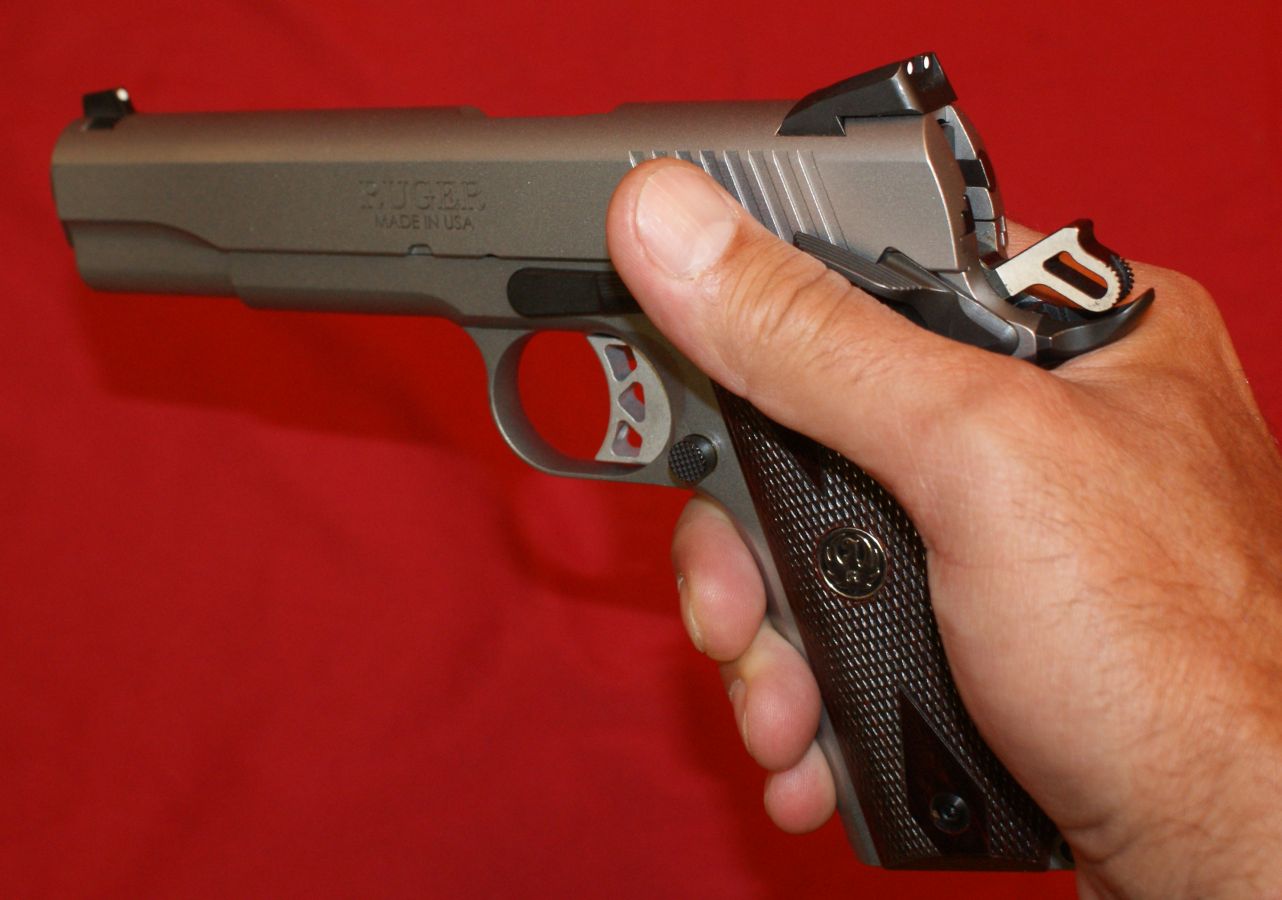
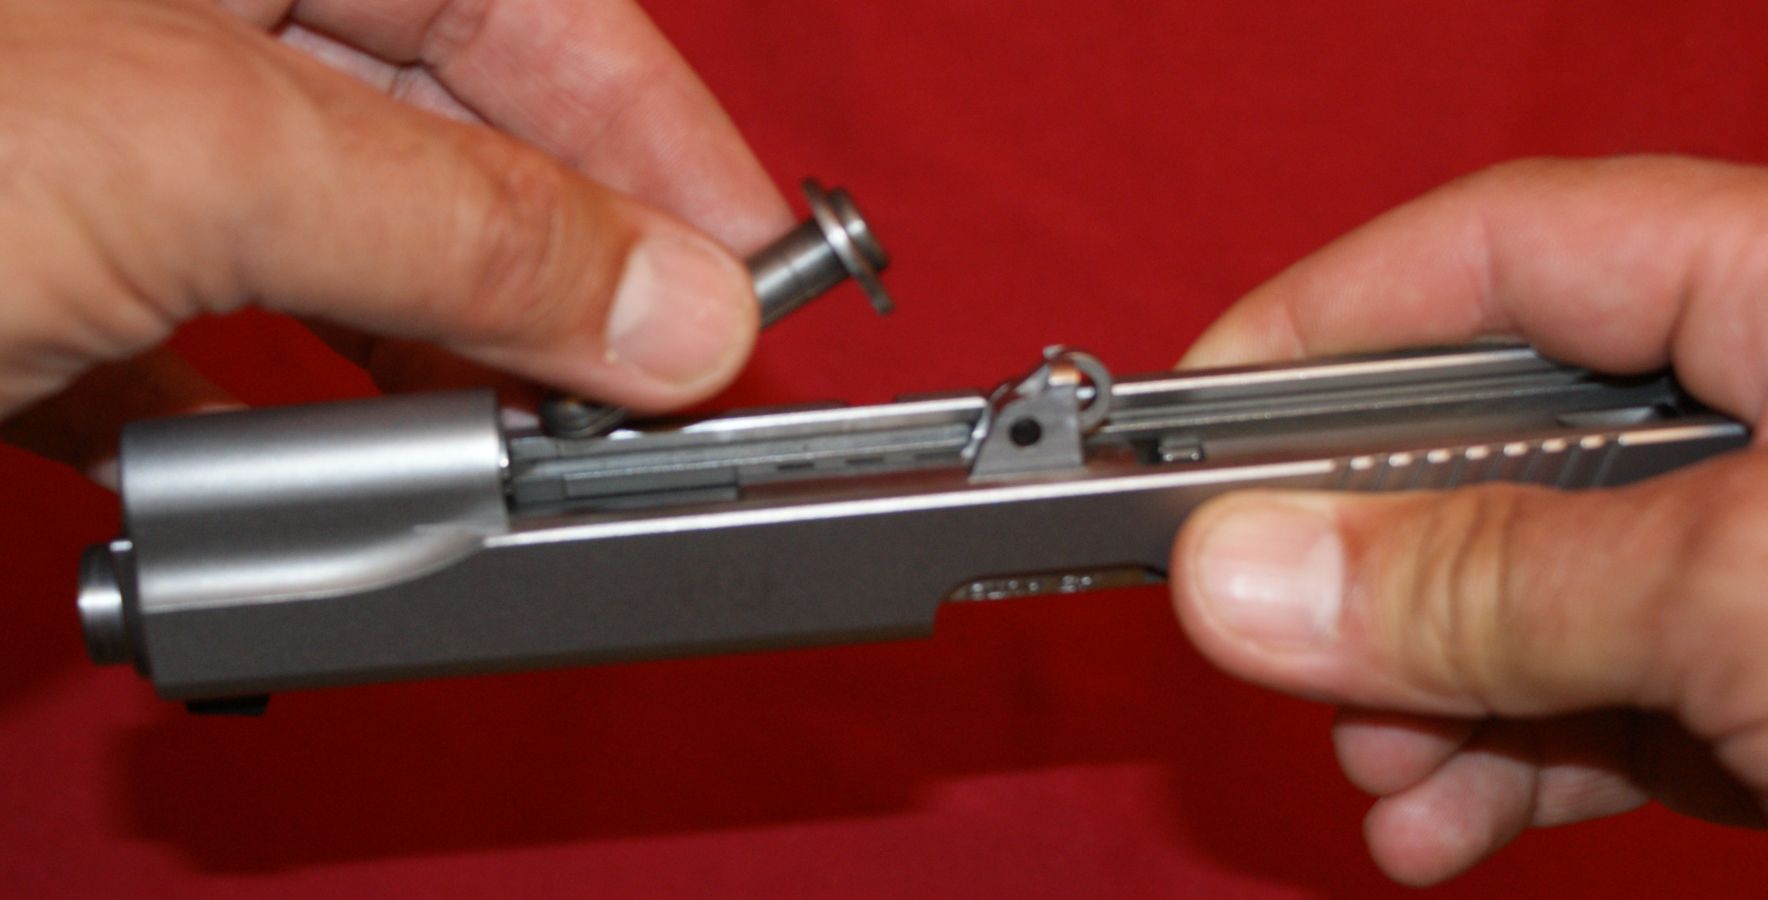
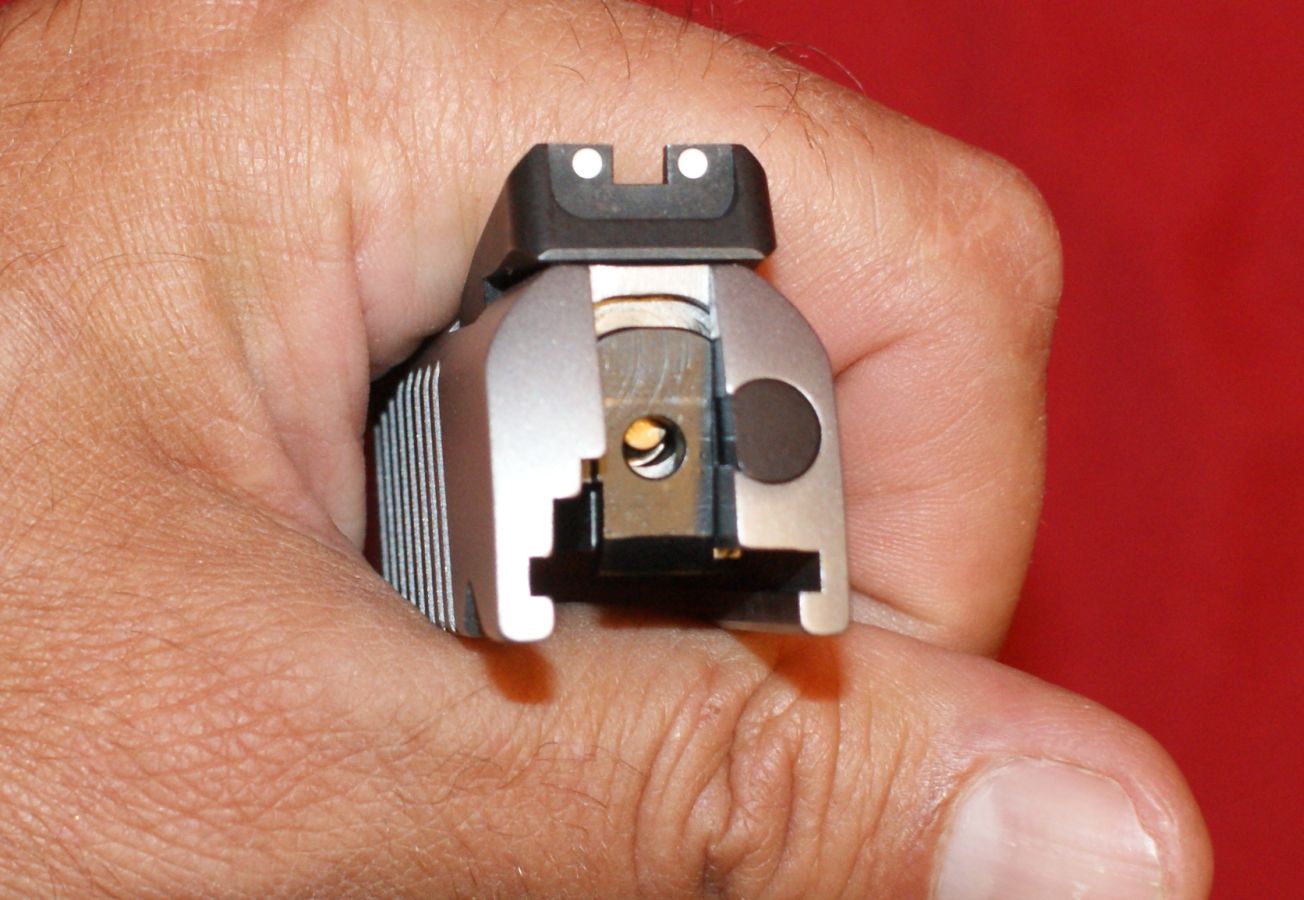
I prefer not to fully rotate the bushing with the wrench because I feel I have more control over the spring force trying to push the recoil spring retainer out by using my bare thumb.
Figure 7
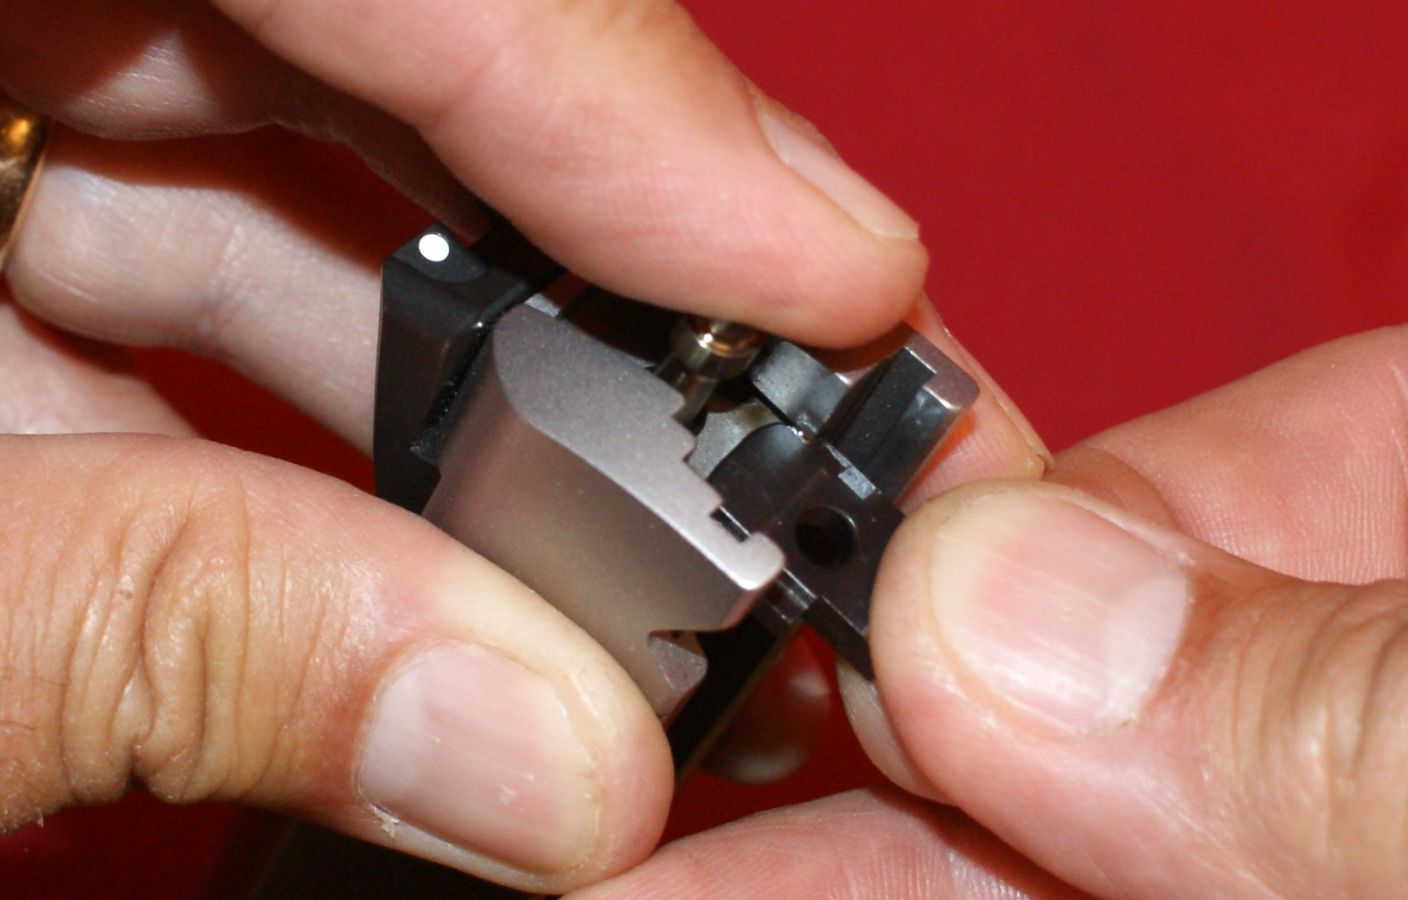
With my thumb over the end of the retainer, I was able to rotate the bushing and then release the pressure off the recoil spring.
Figure 8
Figure 9
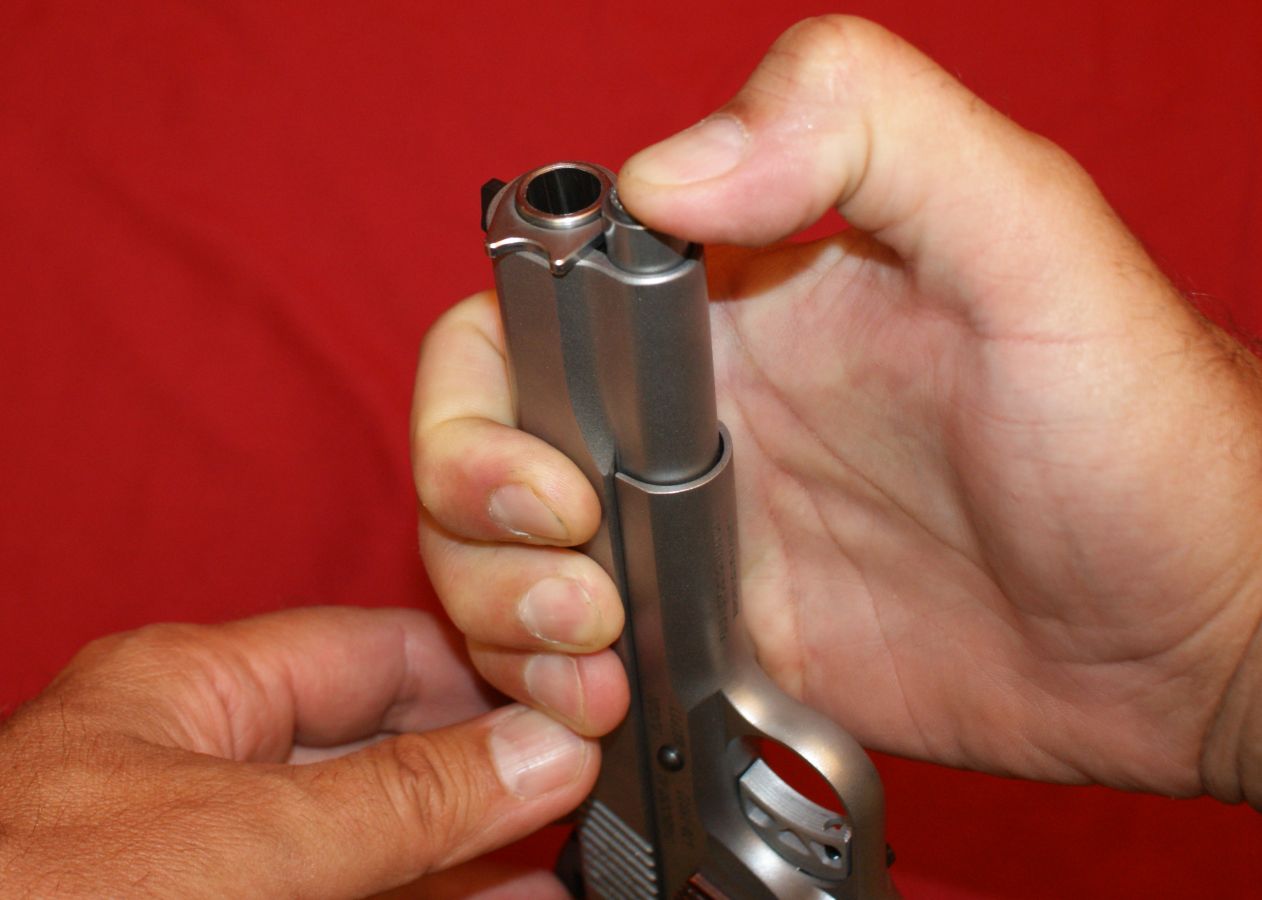
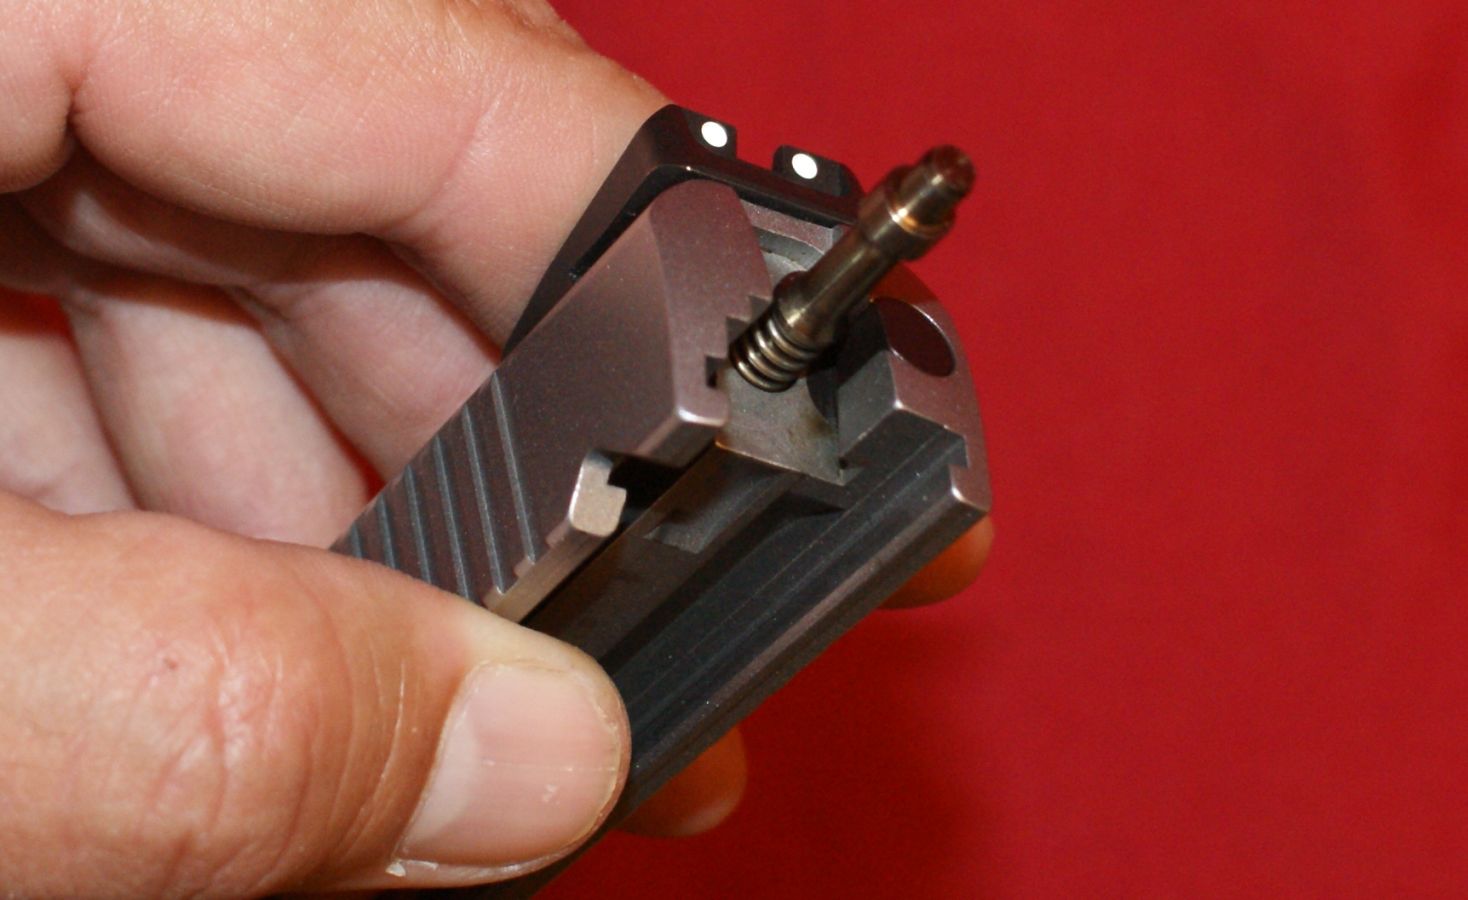
Step 5 - Remove Retainer and Spring
This step could actually be done later, but I like to go ahead and get the recoil spring retainer and spring out of the way. The retainer easily slides off of the spring, but you may need to pull the spring to get the spring to slide of the guide rod. If you are uncomfortable pulling on the spring, you can leave the spring in place and remove the guide rod and spring as an assembly once the slide is removed.
Figure 10
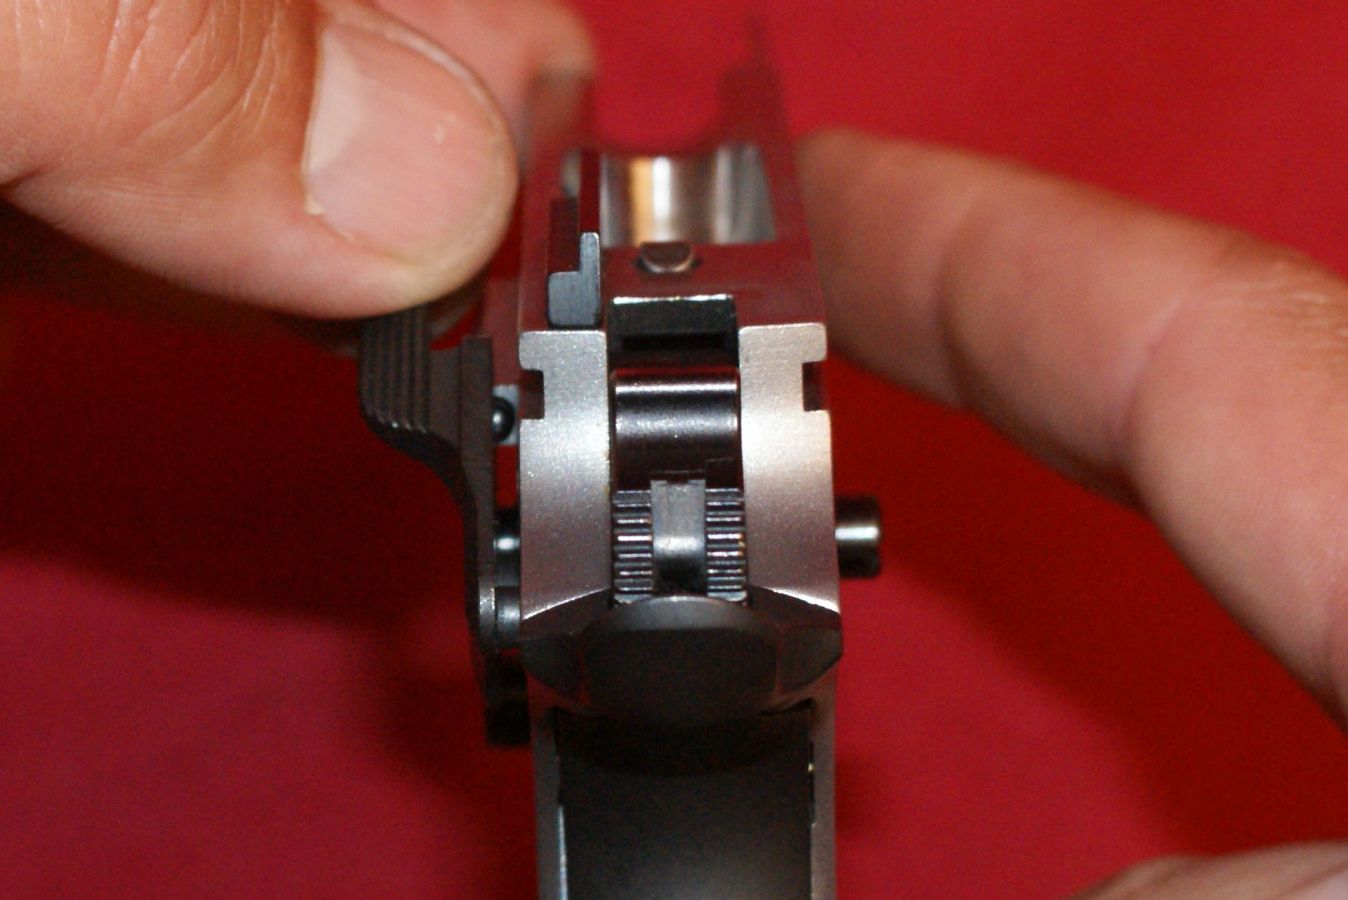
Steps 6 & 7 - Align Takedown Notch
With the hammer fully cocked and the thumb safety down (off), pull the slide rearward to position the takedown notch in the slide over the slide stop as shown below.
Figure 11
Step 8 - Remove Slide Stop
With the slide aligned, you can press on the head of the slide stop pin on the right side of the frame to get the slide stop body to push away from the left side of the frame.
Figure 12
Then you can pull the slide stop out of the frame on the left side.
Figure 13
Step 9 - Remove Slide
You then apply pressure forward on the slide while not pressing the grip safety to remove the slide.
Figure 14
When removing the slide, I like to turn the pistol upside down to ensure that the guide rod doesn't fall out of the slide.
Figure 15
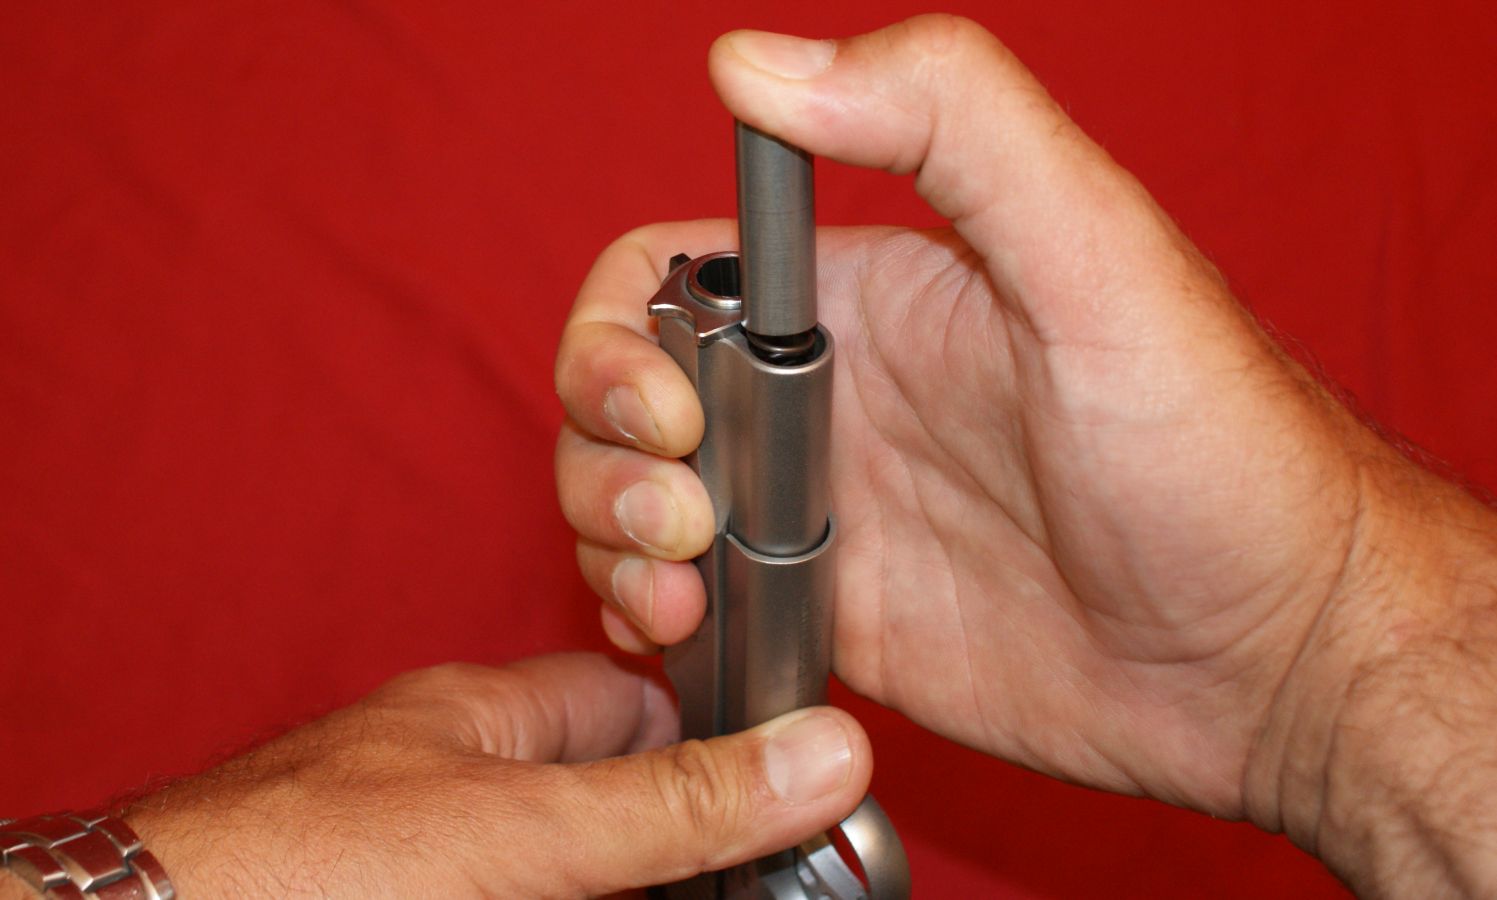
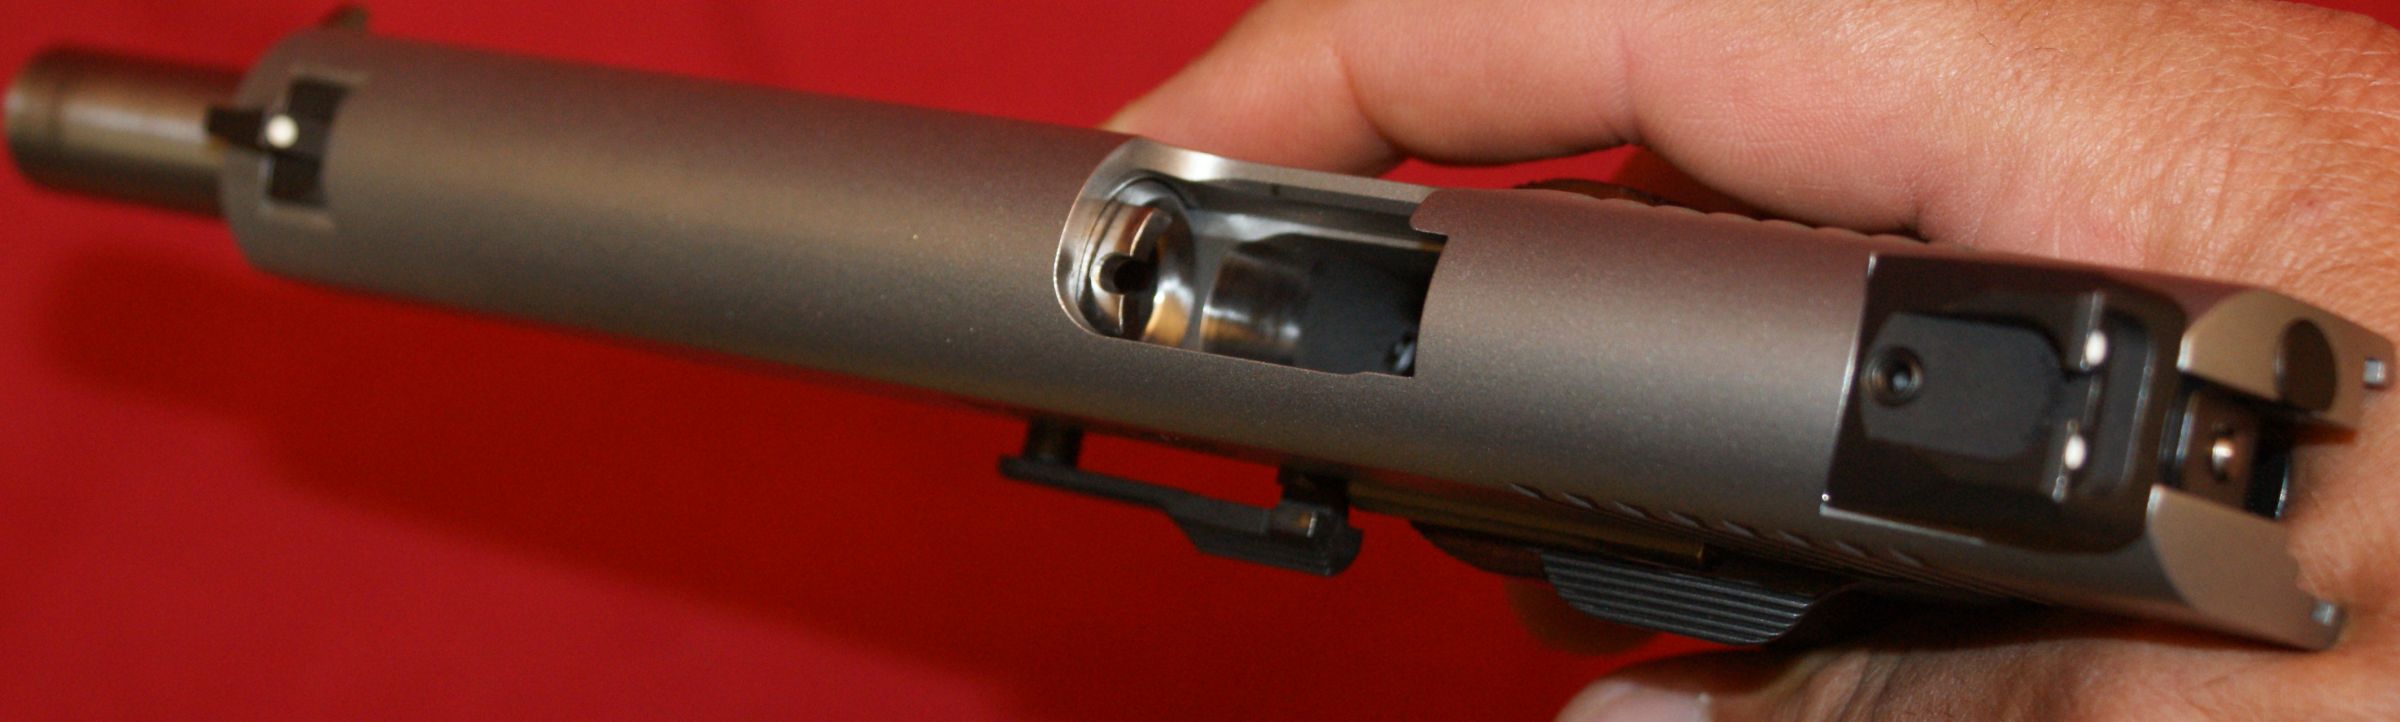
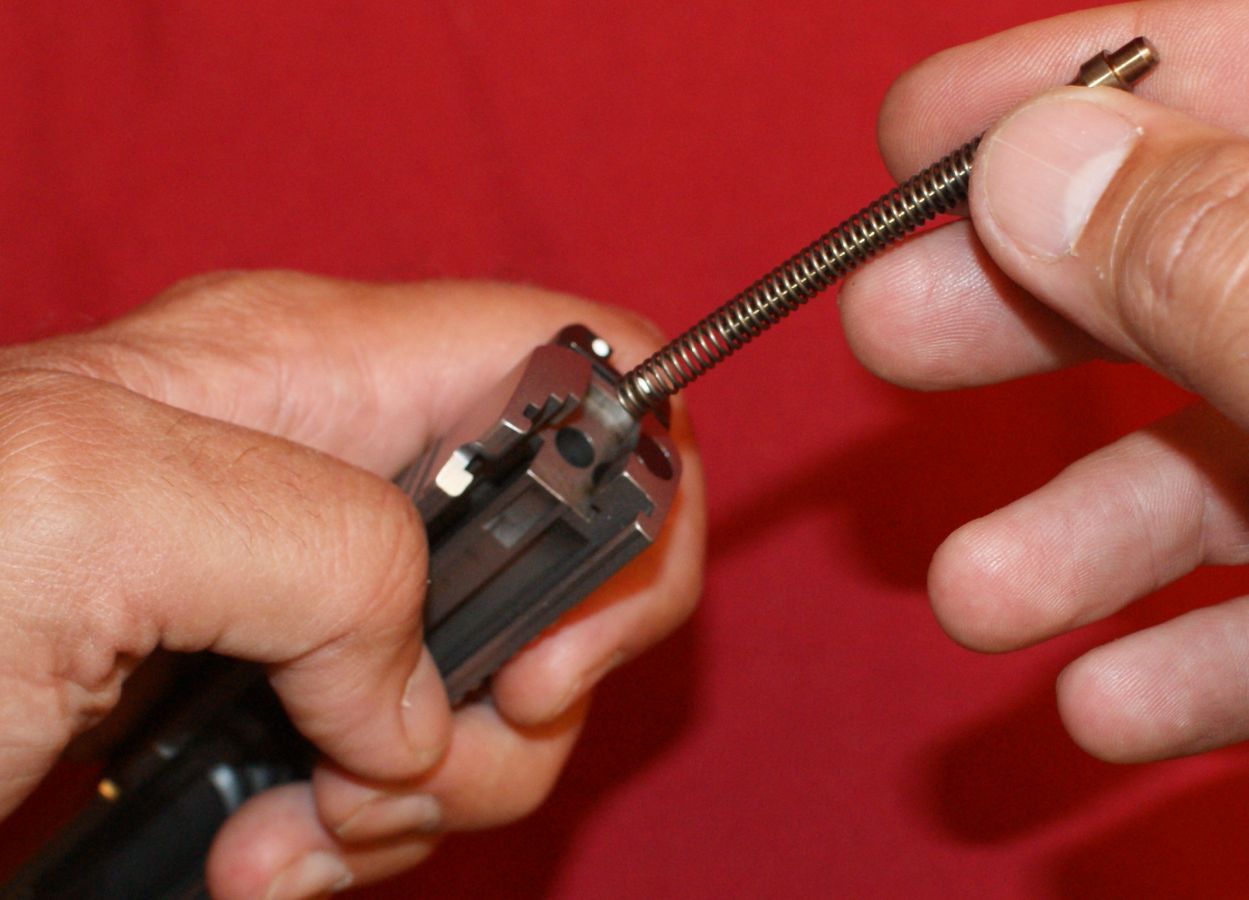
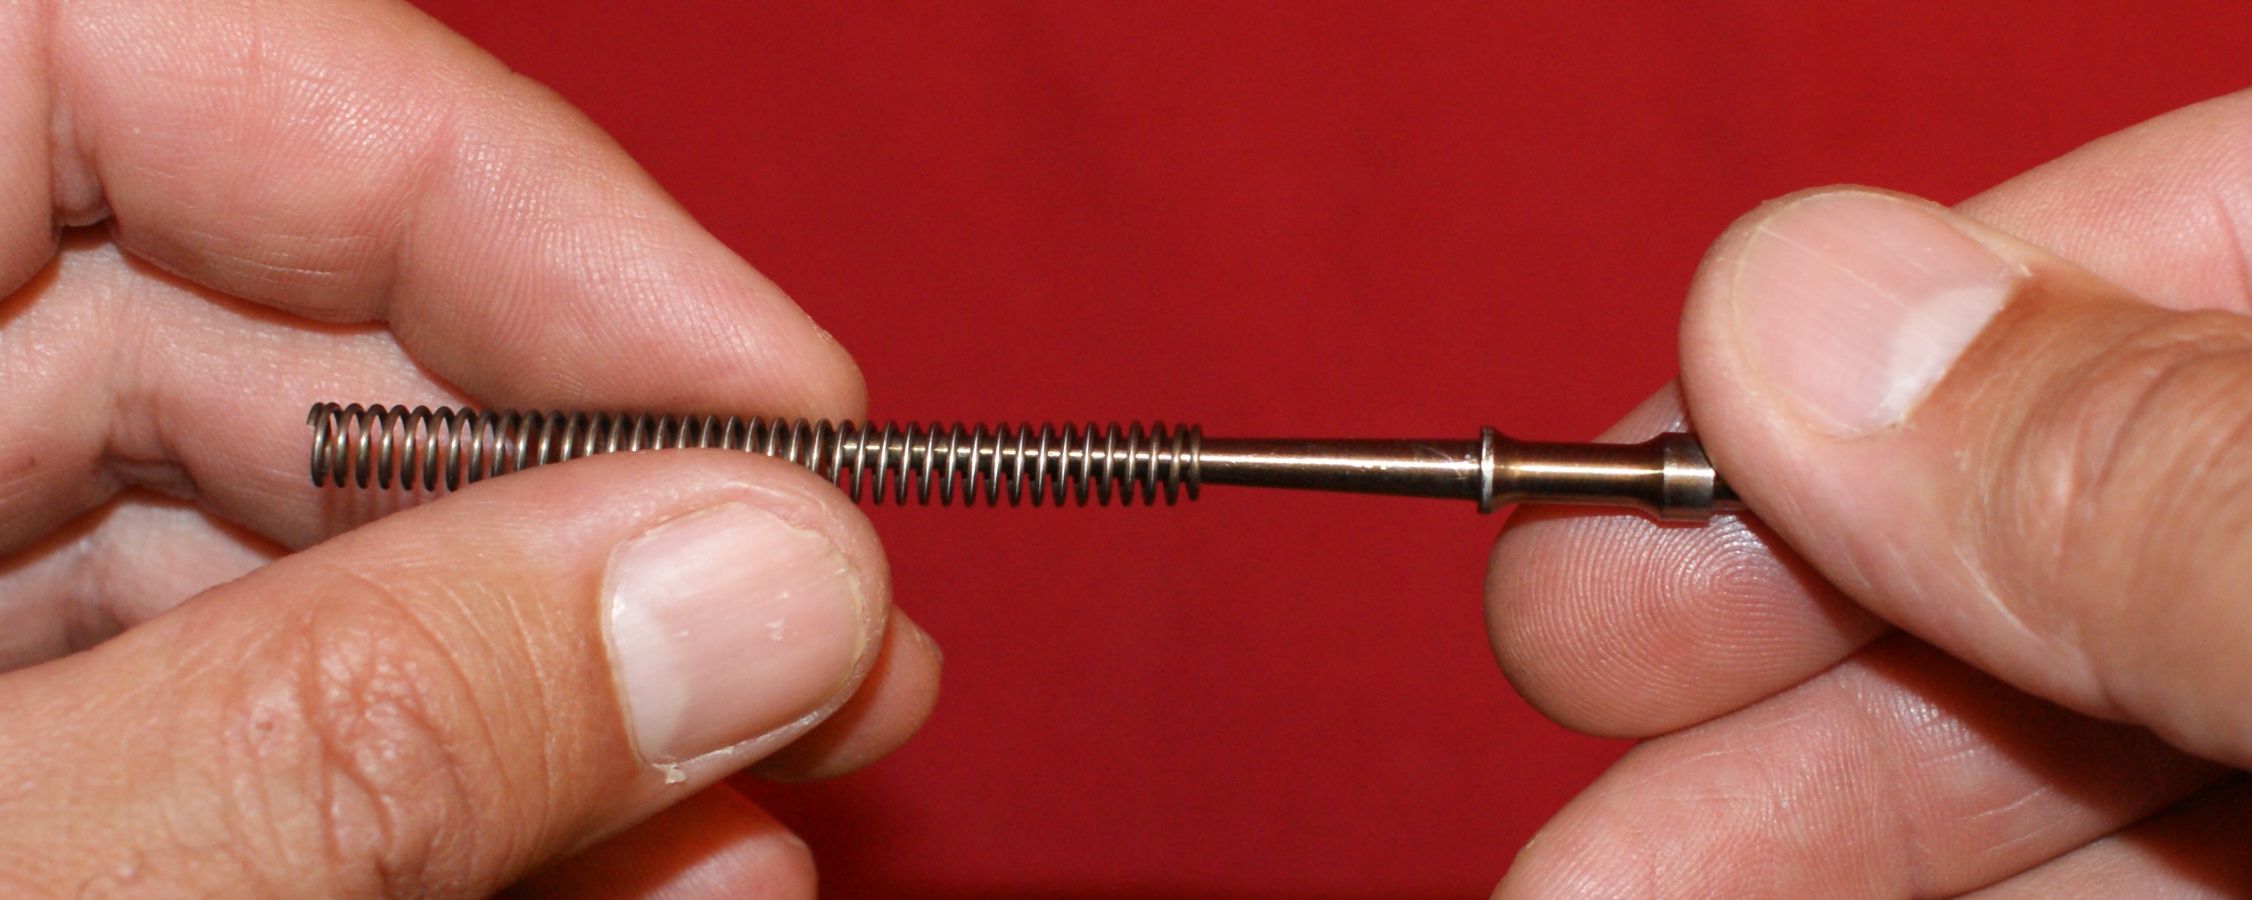
Step 10 - Remove Guide Rod
If you removed the spring earlier, the guide rod can be easily lifted off the barrel. If the spring is still attached, you can slide the guide rod and spring to the rear out of the slide.
Figure 16
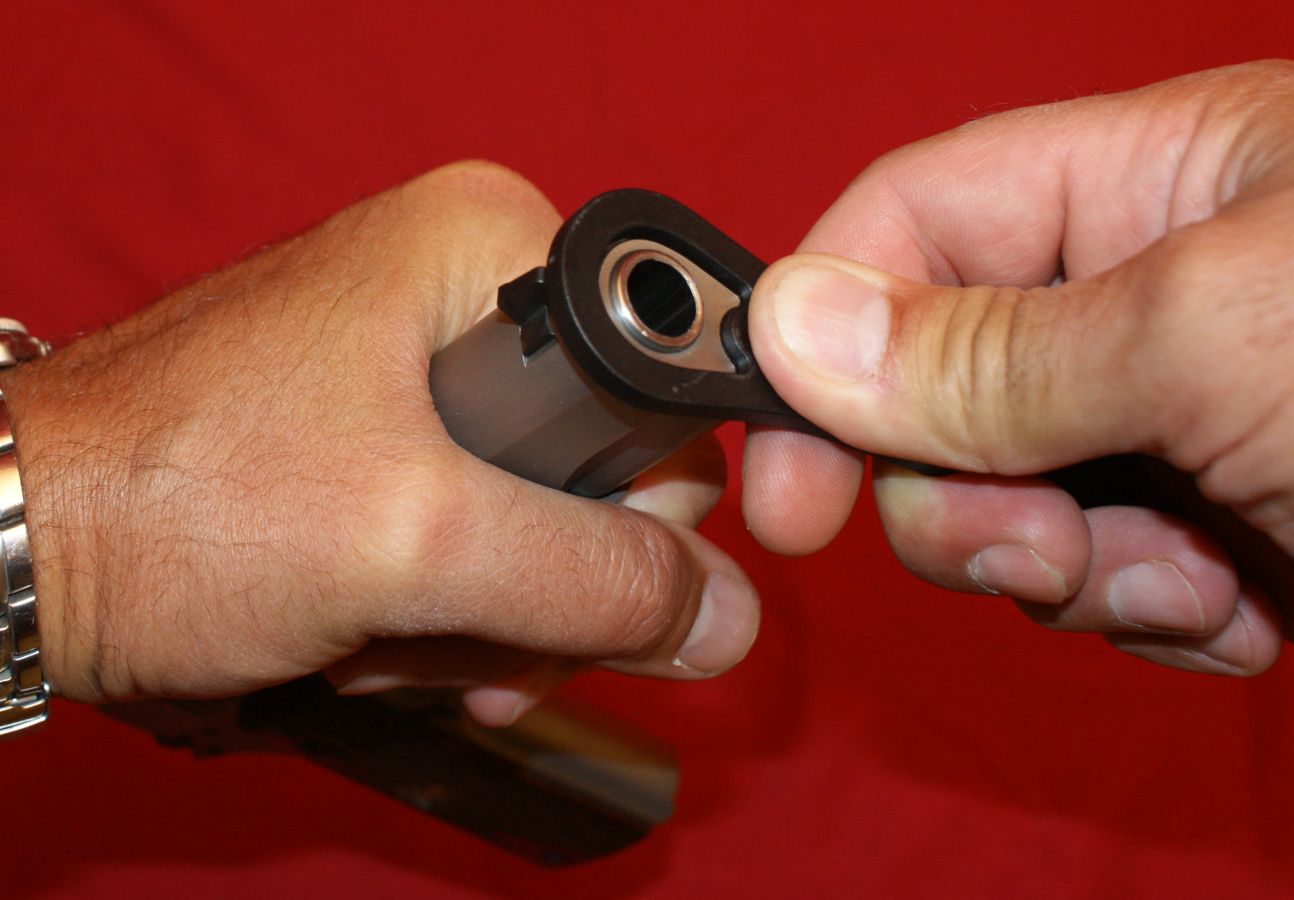
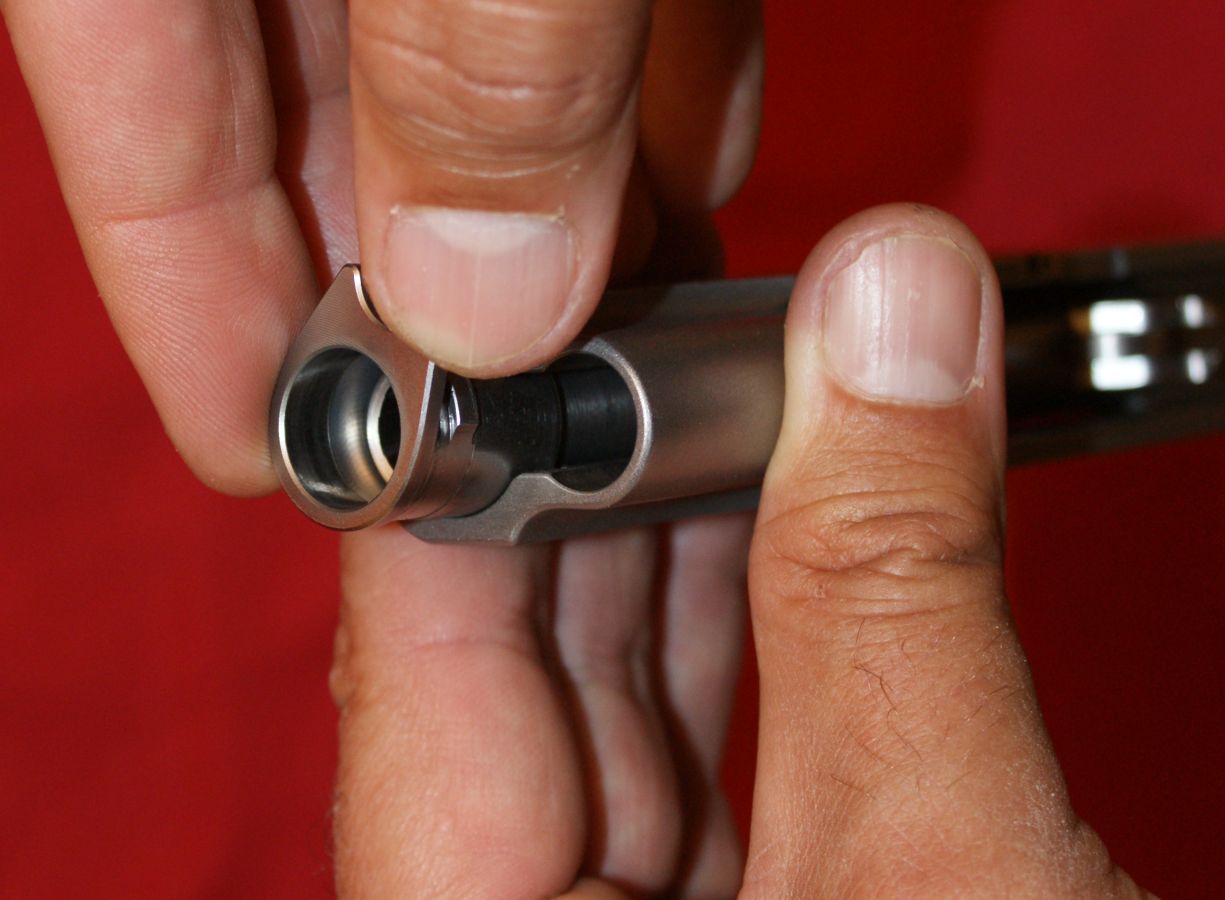
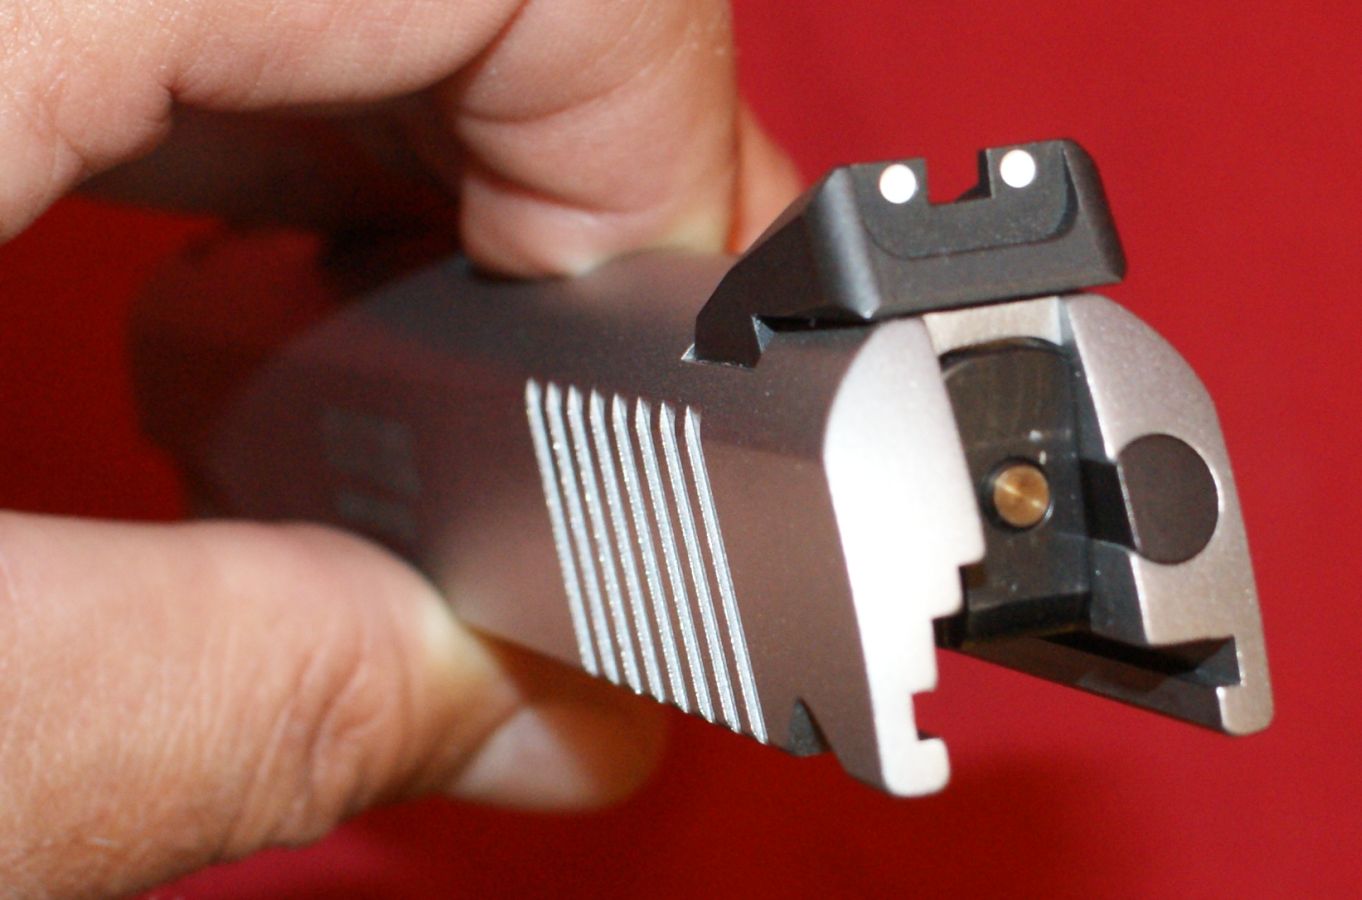
Step 11 - Remove Barrel Busing
To remove the barrel bushing, rotate the bushing counterclockwise and then the bushing can be pulled forward out of the slide.
Figure 17
Figure 18

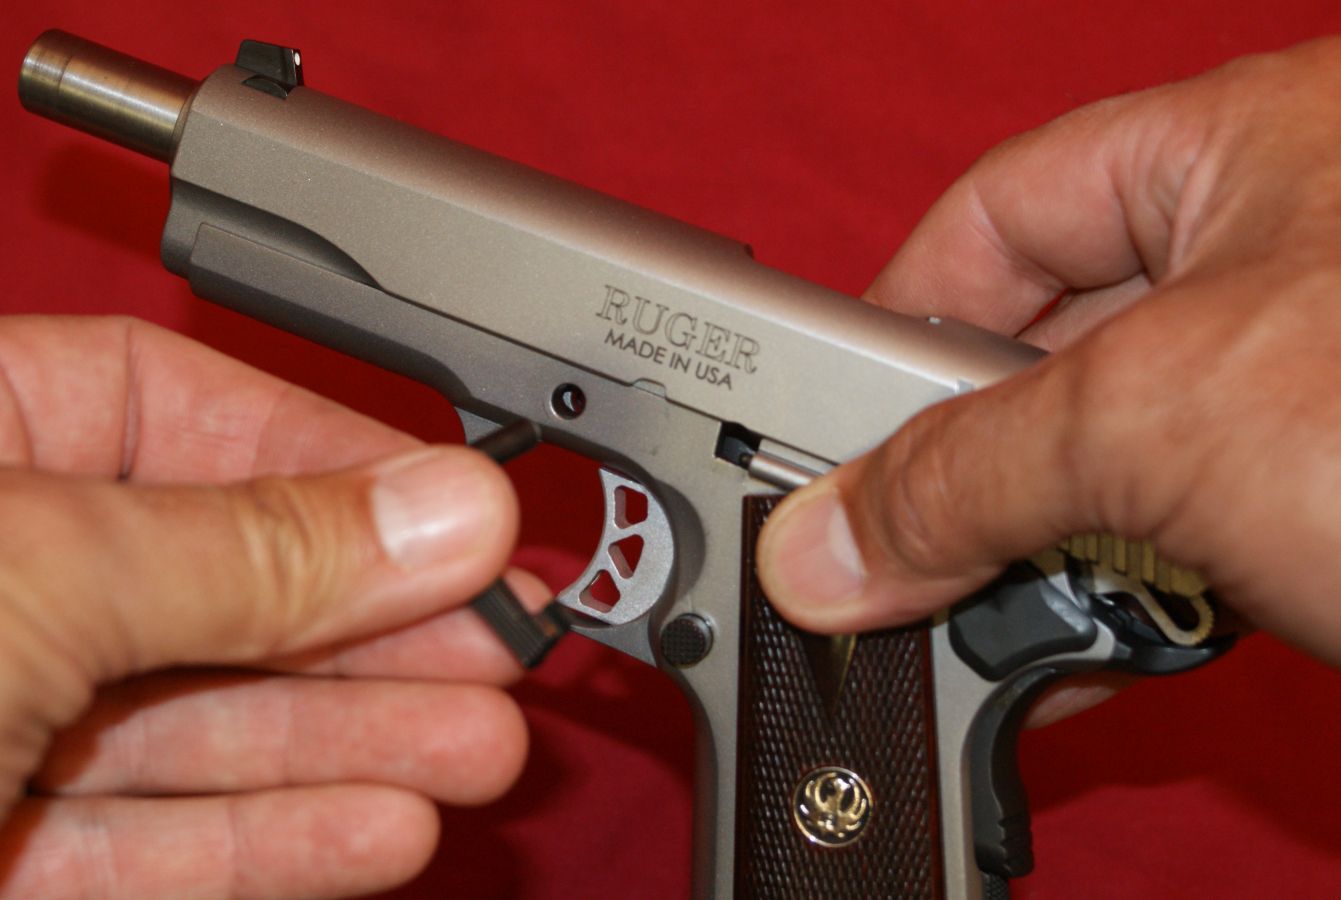
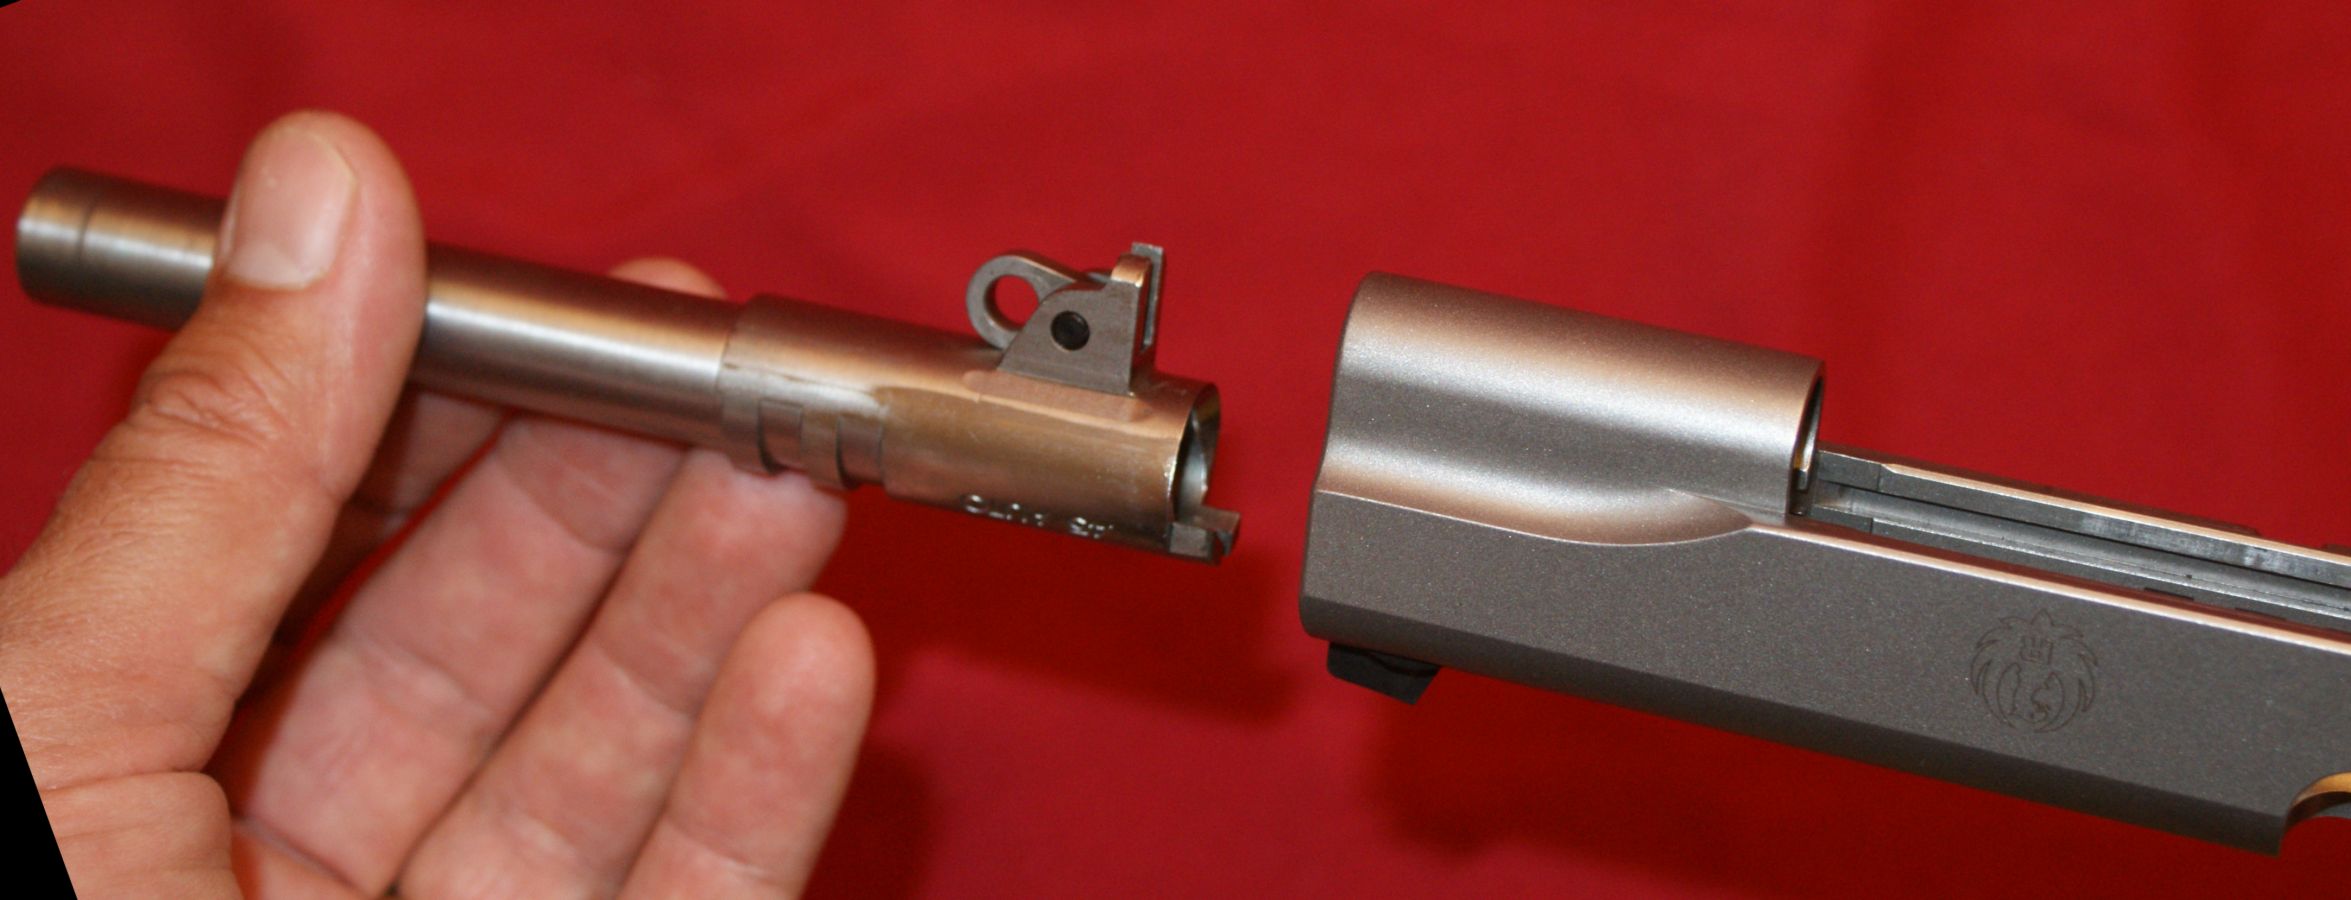
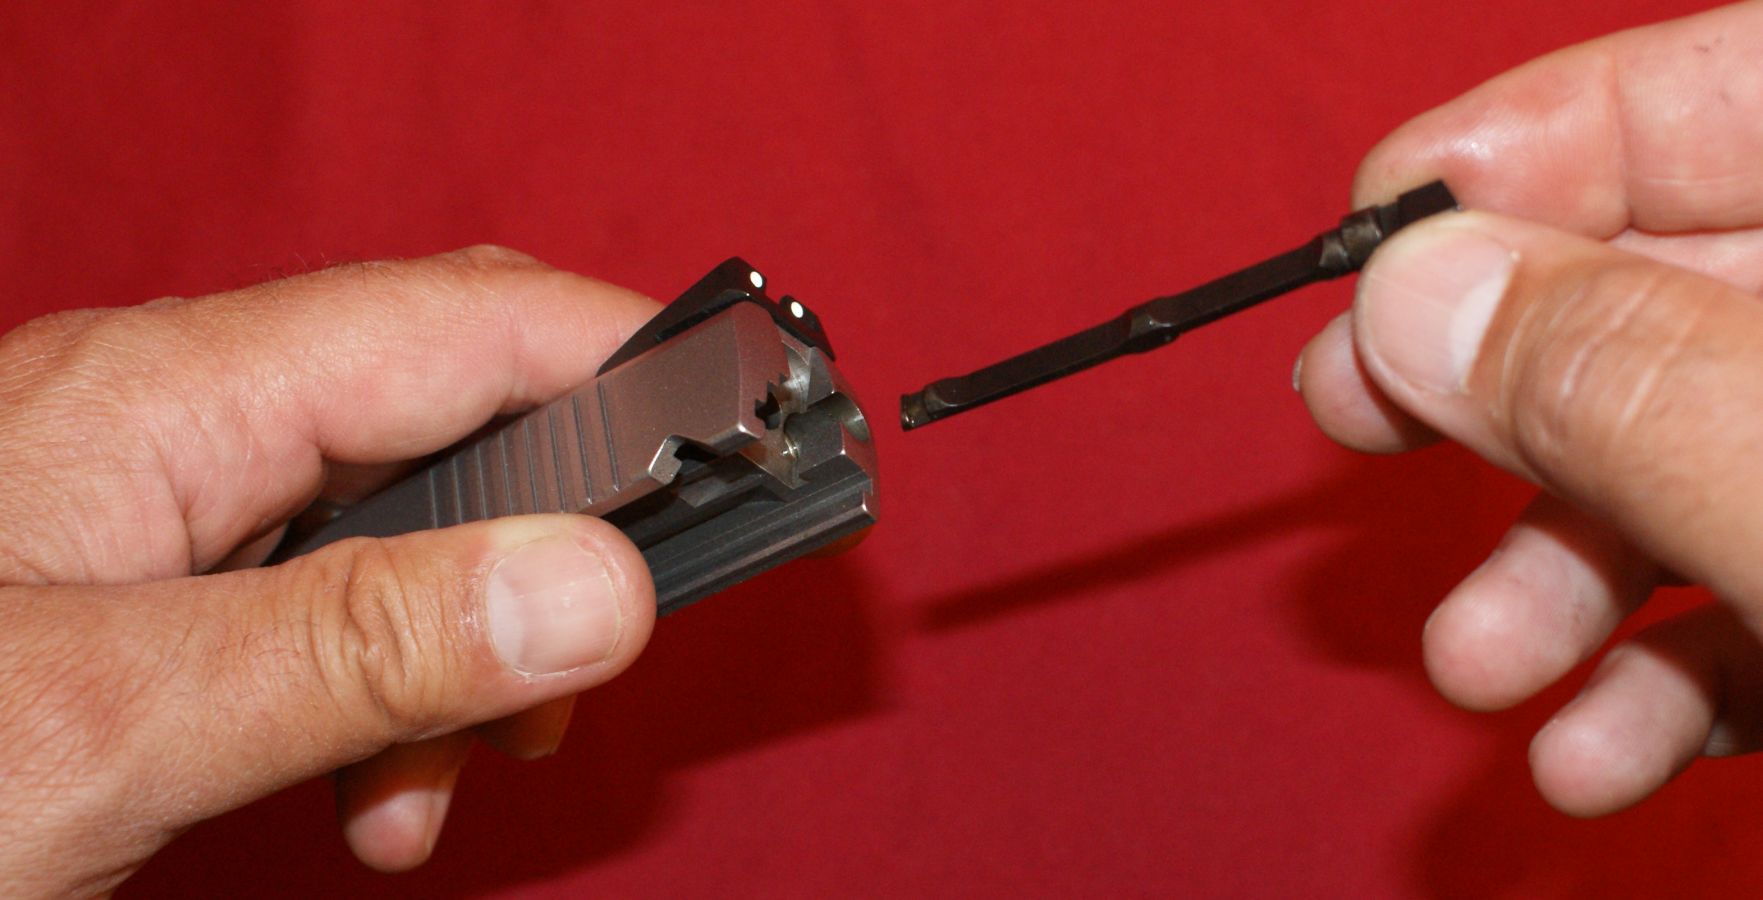
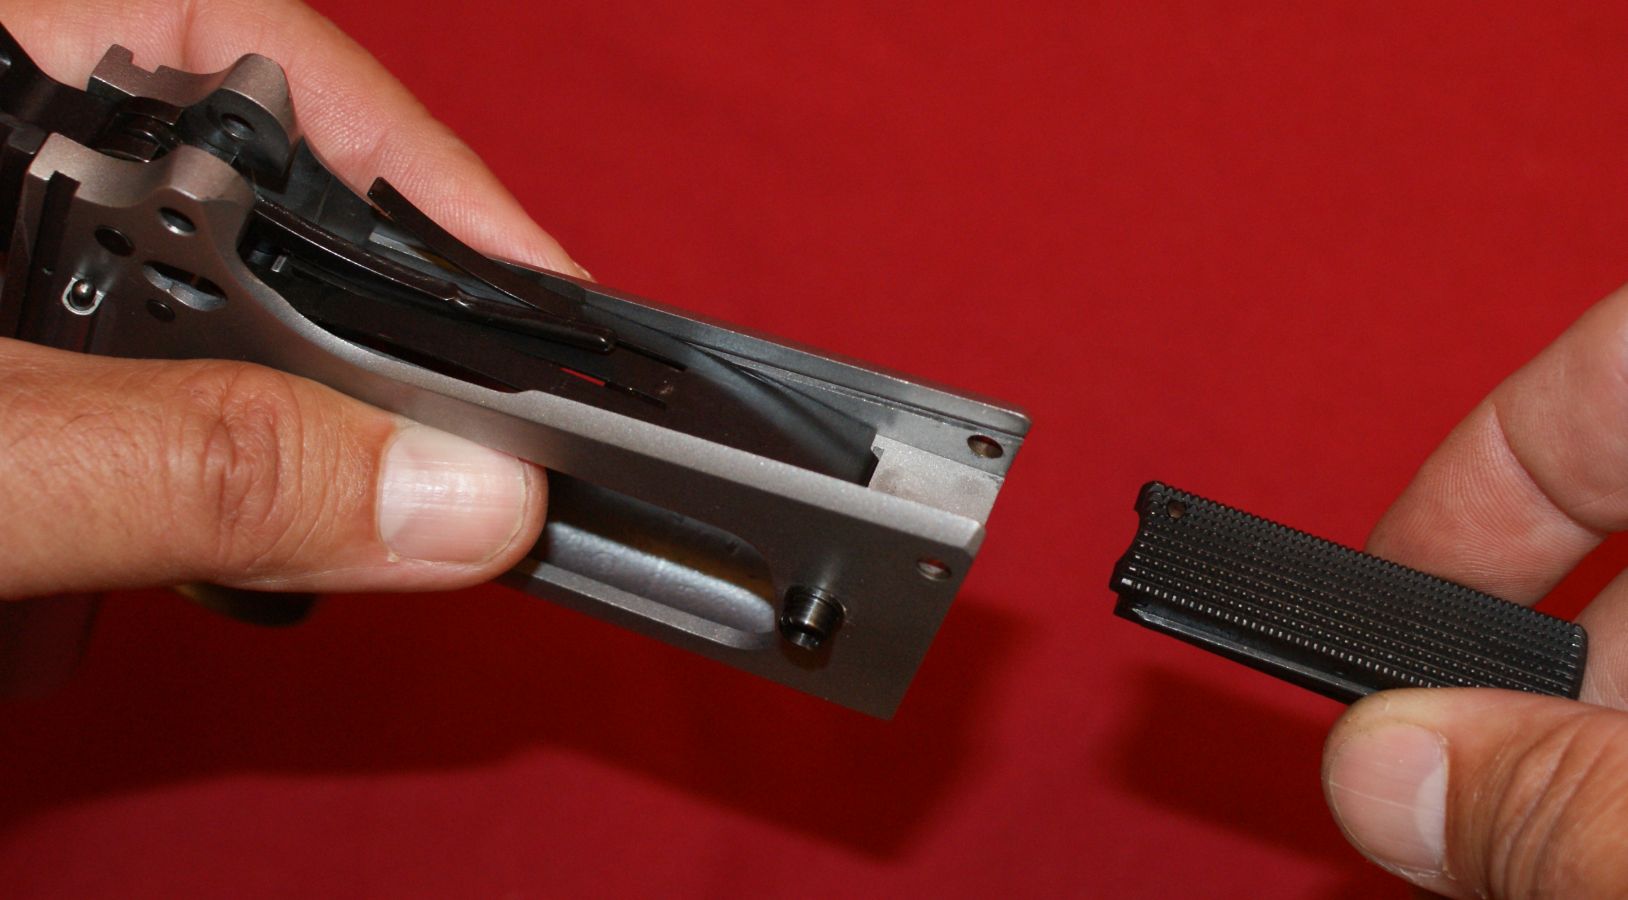
Step 12 - Remove Barrel
To remove the barrel, flip the barrel link to the forward position and then the barrel can slide out of the front of the slide.
Figure 19
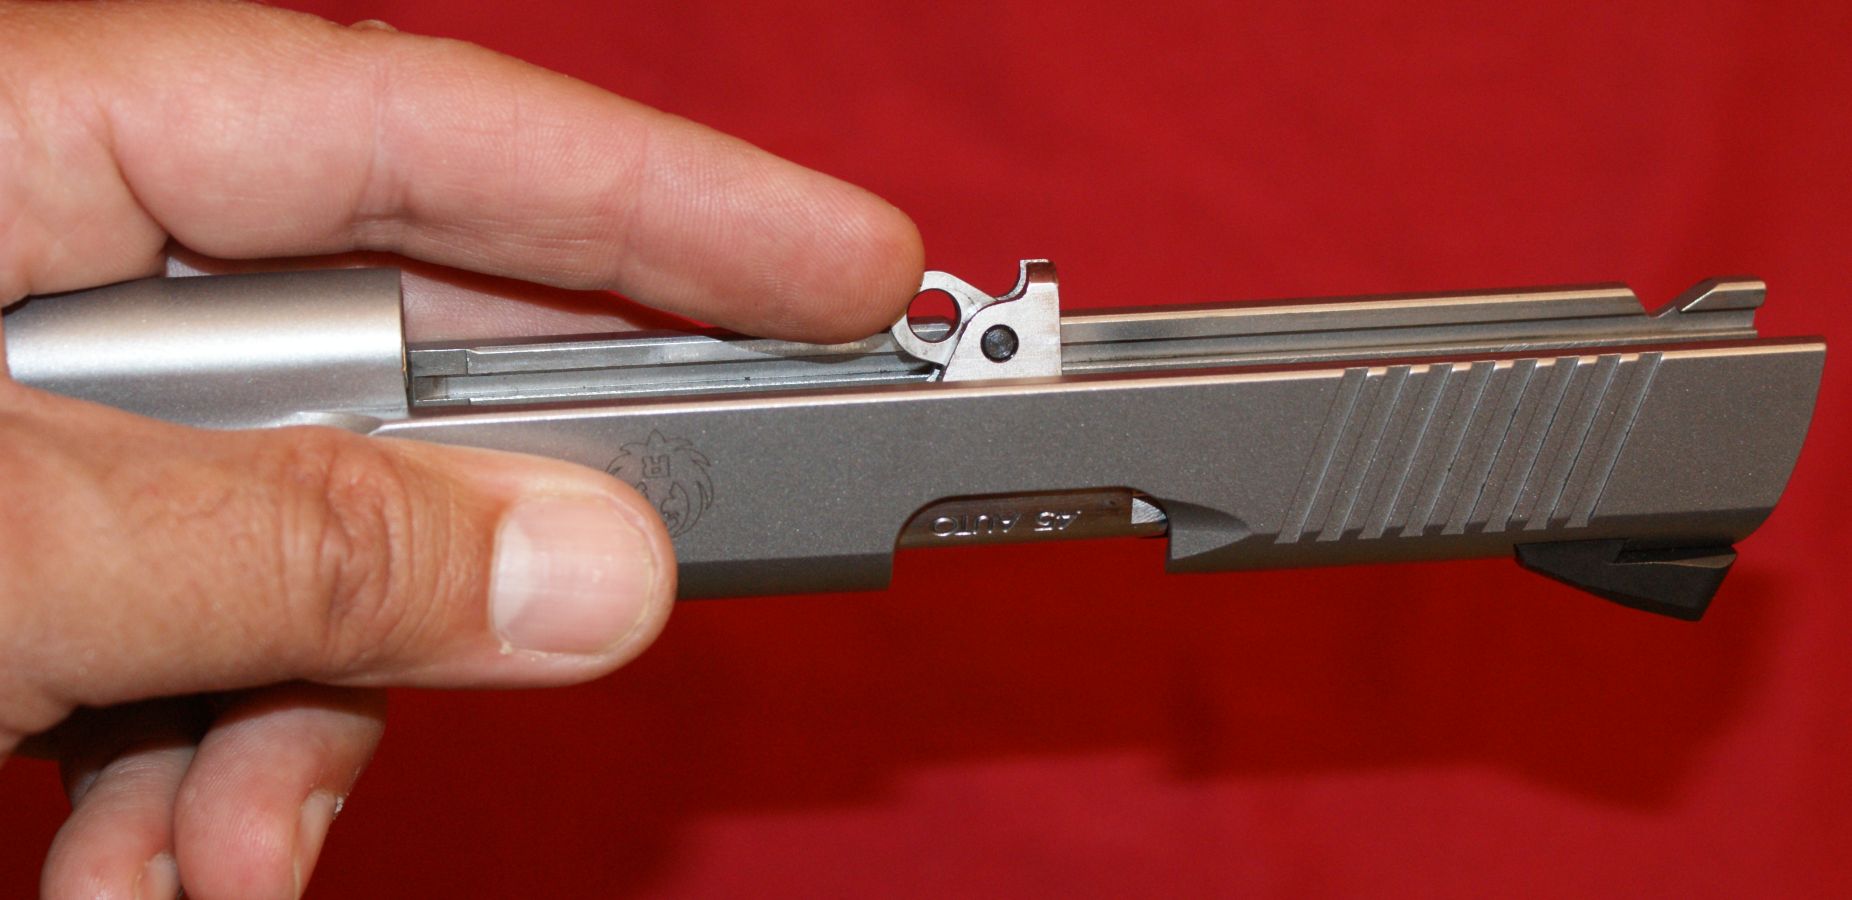
Figure 20

Figure 21
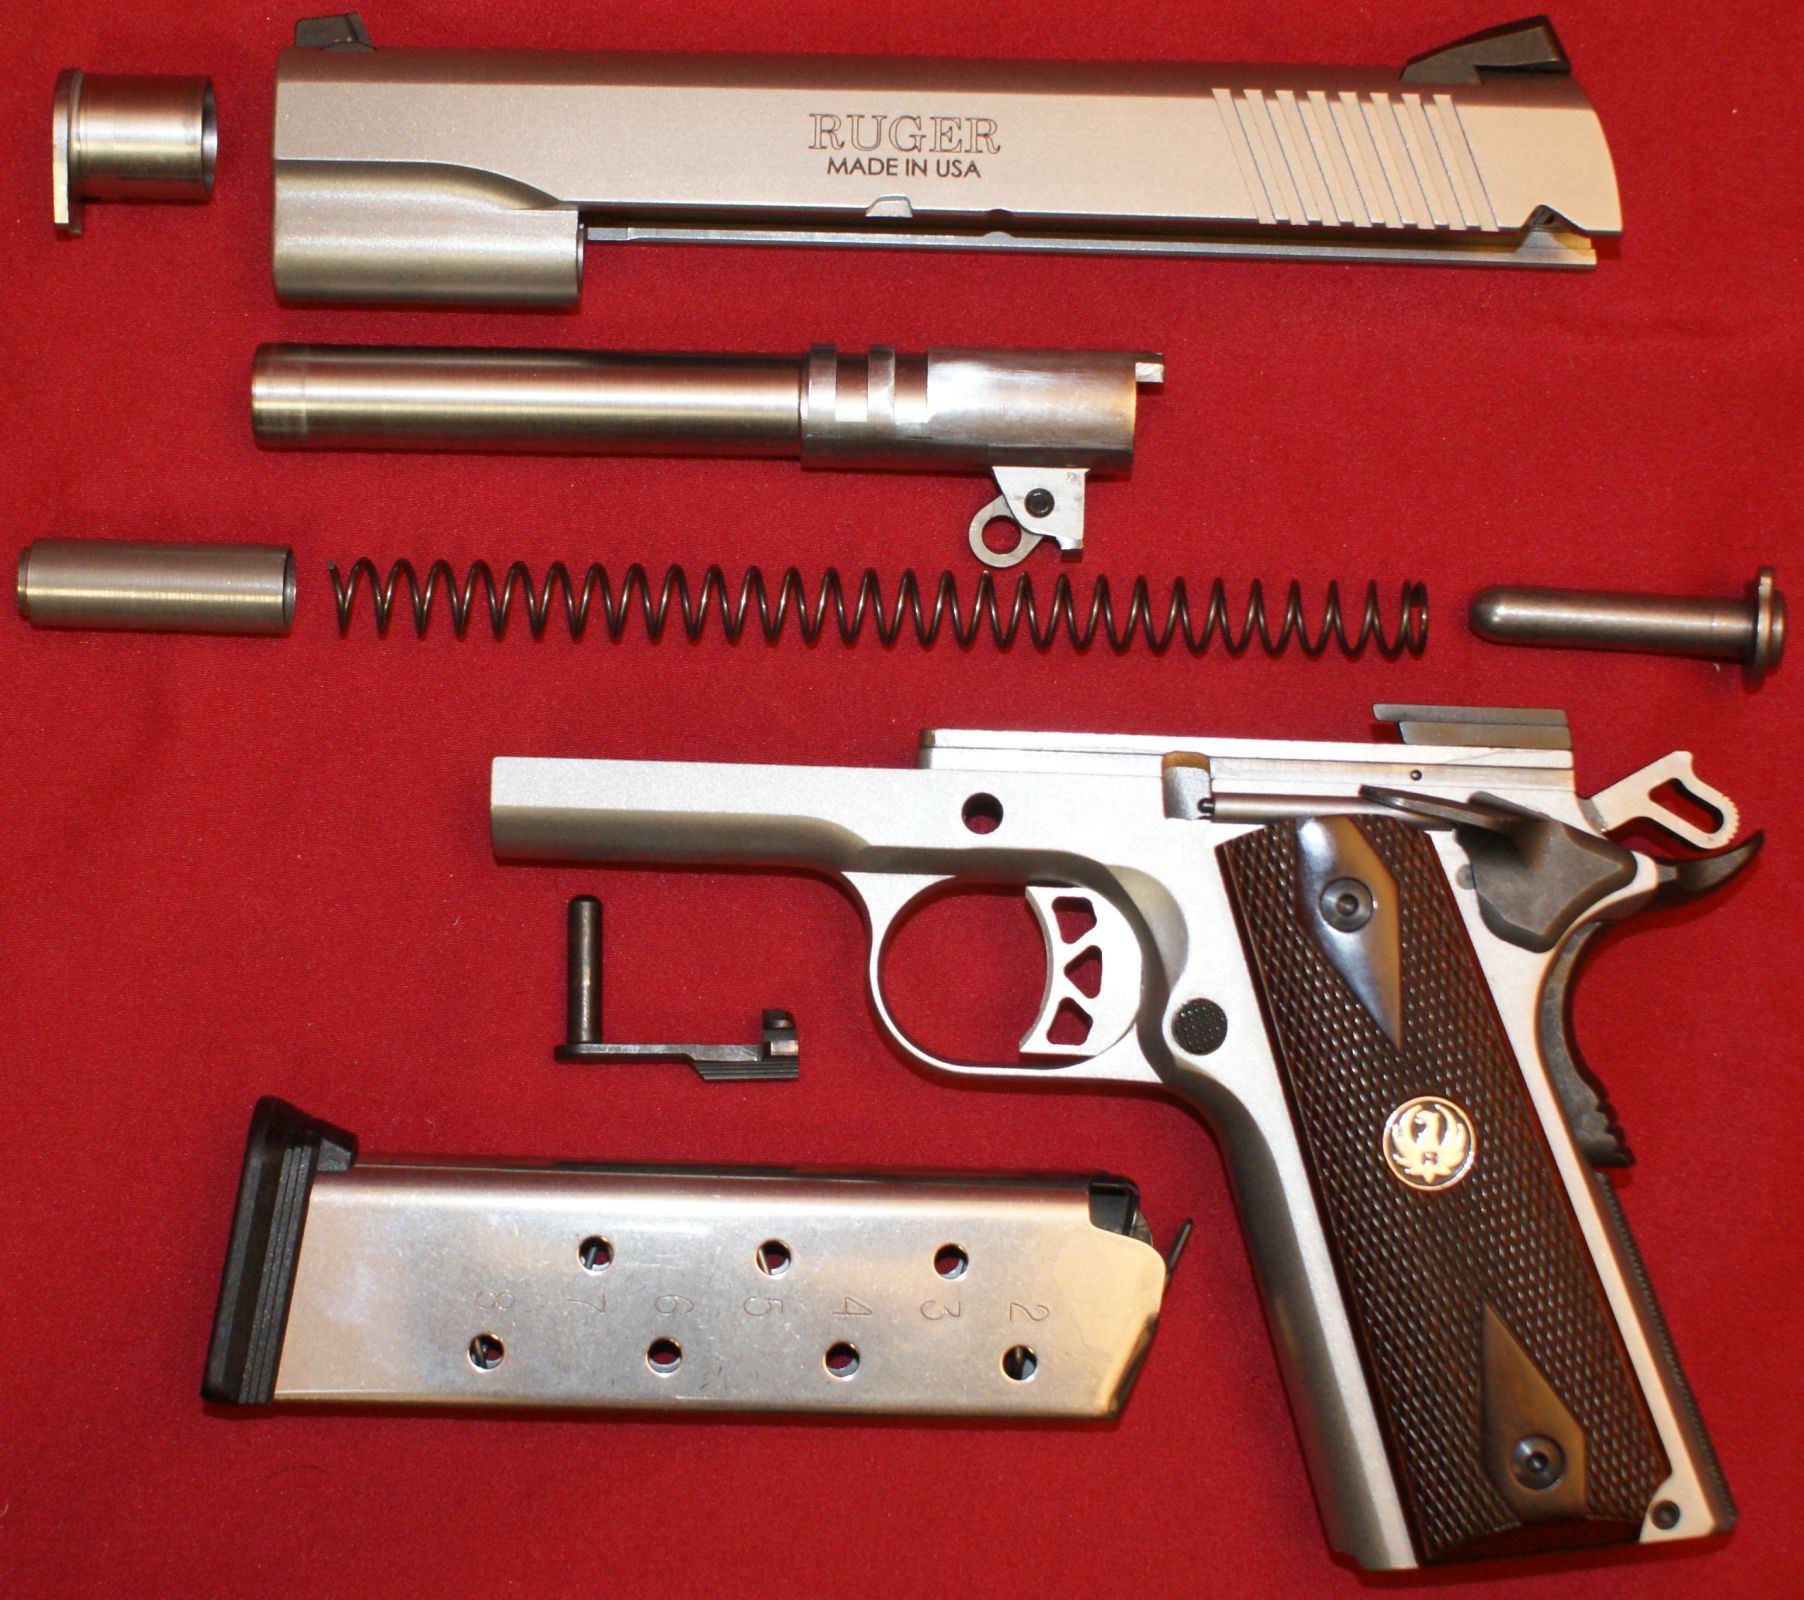
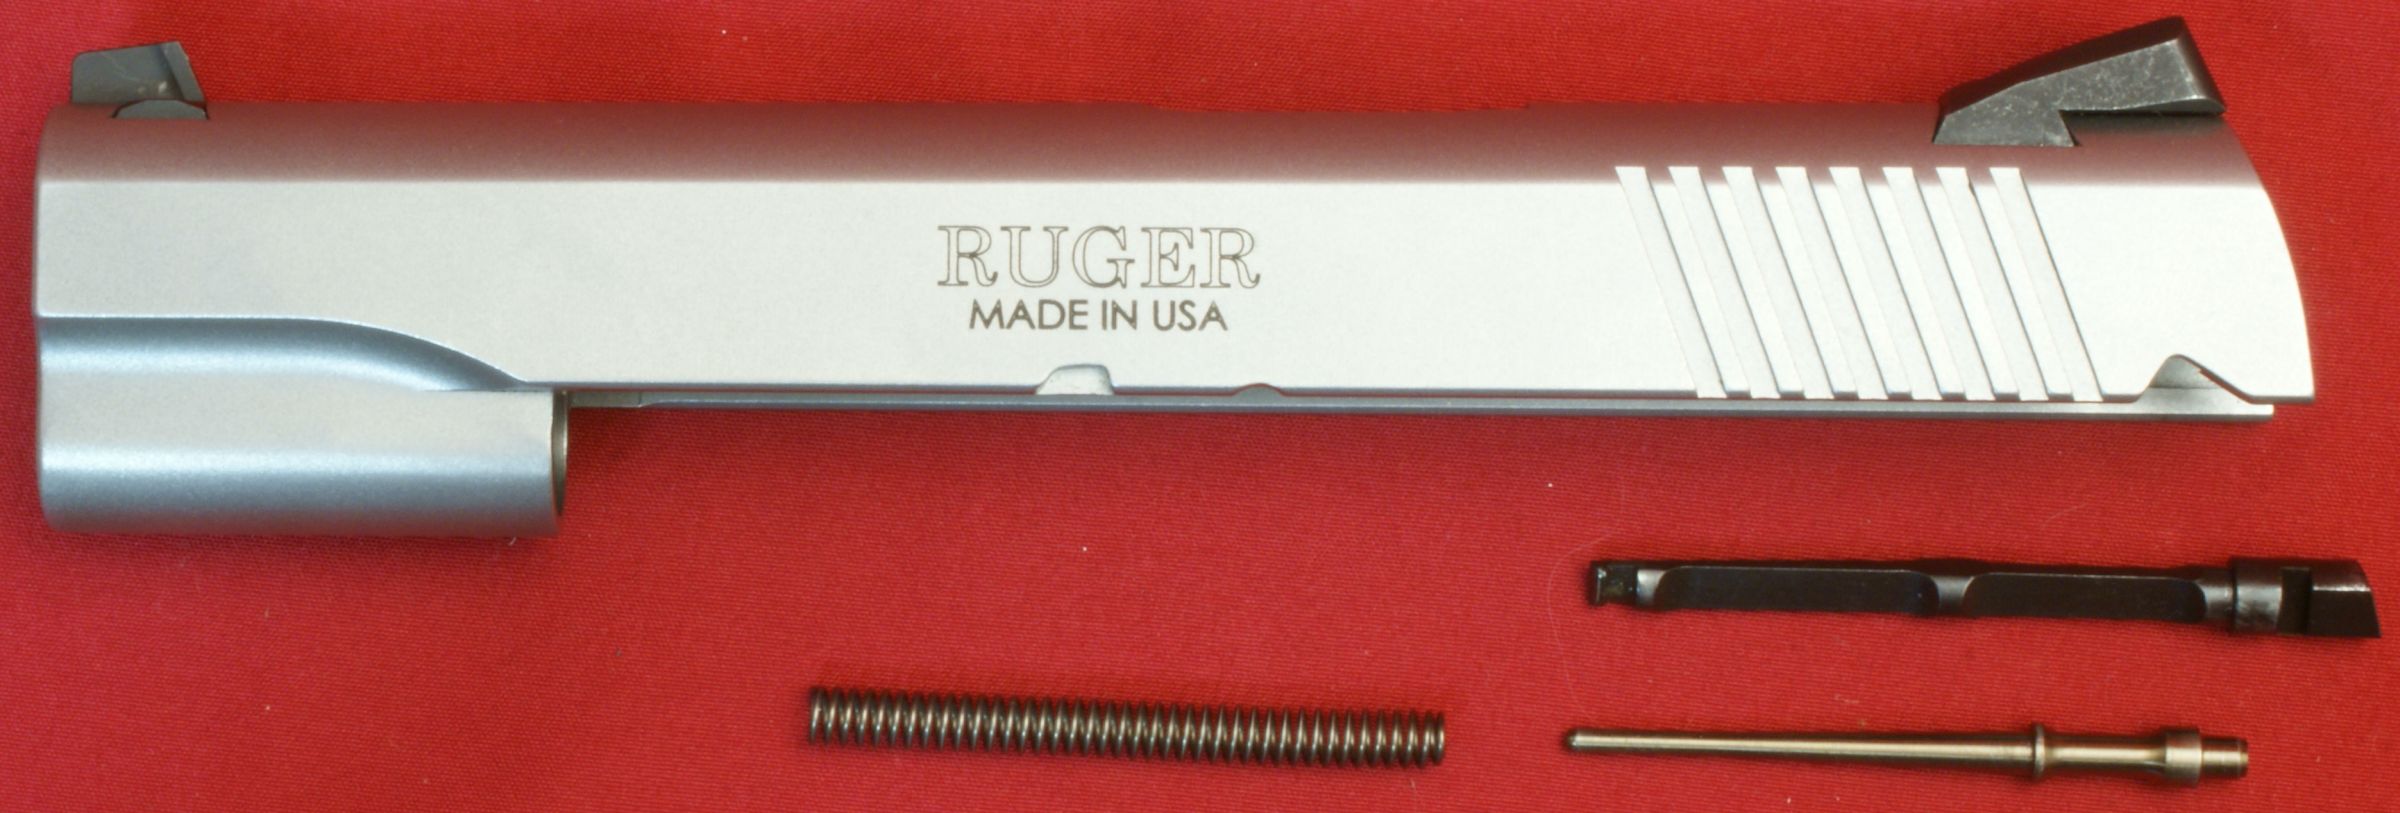
Step 13 - Fully Field Stripped
The photo below shows a fully field stripped SR1911 pistol. One thing to note is that in my photo (as compared to the Instruction Manual), the recoil spring is not on the guide rod. Notice that each end of the recoil spring is slightly different and when you reassemble the pistol you need to make sure the spring is oriented as shown below when you place it over the guide rod. Overall I would say that disassembly to this level is simple with the hardest part being rotating the barrel bushing and releasing the pressure on the recoil spring.
Figure 22
Extended Disassembly
Since the 1911 pistol platform has been around for over 100 years and I'm sure there are those who would want to see more, it didn't seem right for me to stop the disassembly process where Ruger stopped in their Instruction Manual. The below steps show the rest of the disassembly of the Ruger SR1911 Pistol, but keep in mind that Ruger states "Never disassemble your handgun beyond the field stripping process outlined in this manual" which is shown above.
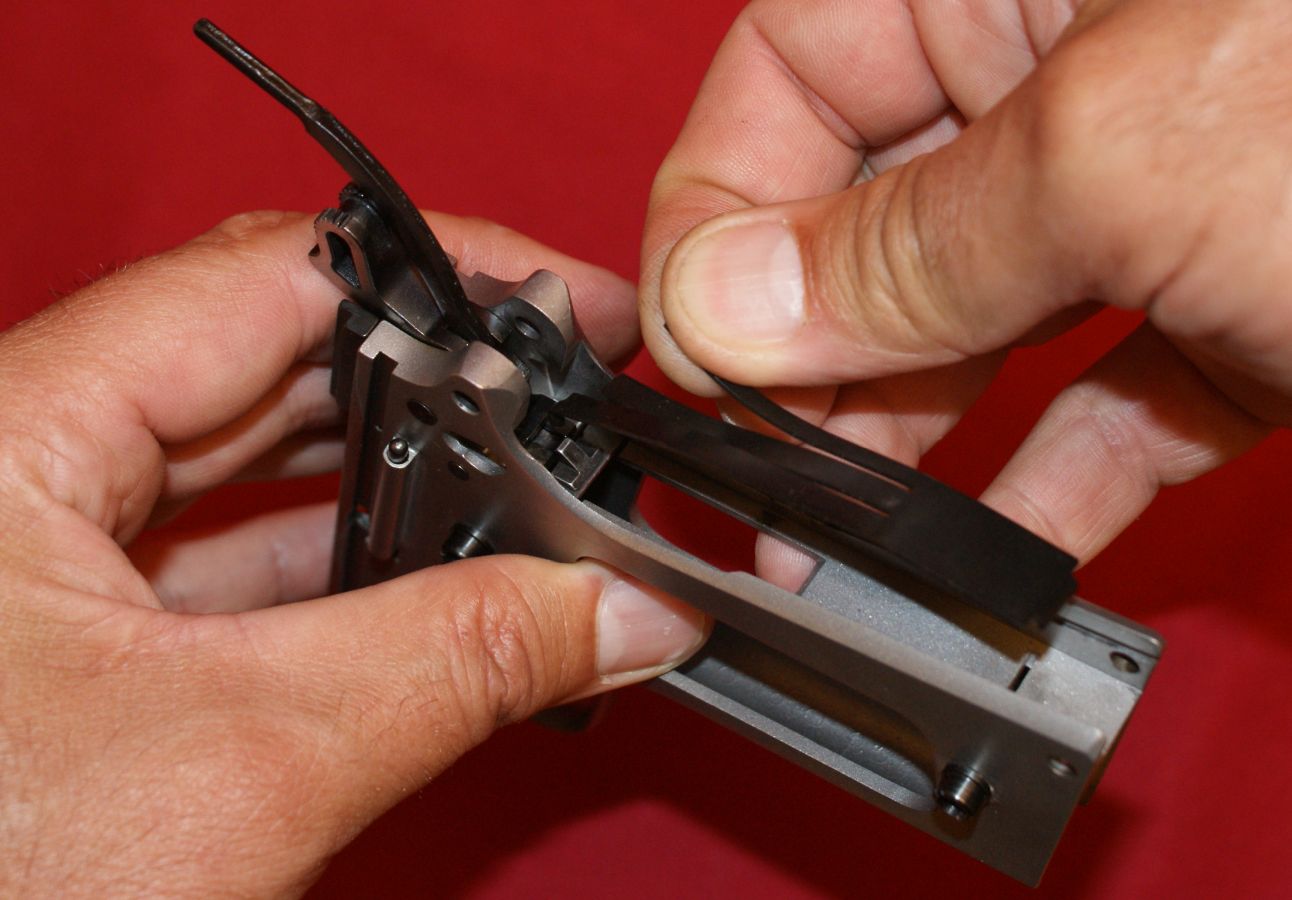
Slide Disassembly
To remove the firing pin, spring and extractor, you will first need to remove the firing pin stop (A) which is the black part shown below that surrounds the rear end of the firing pin.
Figure 23
By taking a punch, you can press the firing pin forward and push down slightly on the firing pin stop so that it holds the firing pin in the forward position.
Figure 24
Figure 25
Position a finger over the end of the firing pin area to prevent the firing pin from shooting across the room and pull the firing pin stop down and out of the slide.
Figure 26
You can then release the spring force on the firing pin and remove the firing pin from the slide.
Figure 27
Figure 28
Although the firing pin spring is snug around the base of the firing pin, the spring can be pulled off the firing pin.
Figure 29
Using a punch, press rearward on the front end of the extractor and the extractor will begin to move rearward.
Figure 30

Once the extractor is protruding from the rear of the slide, you can pull the extractor out of the slide by hand.
Figure 31

Figure 32
Removing these parts is very simple and there is little risk that you would damage them during removal or get something wrong on re-assembly. With these parts removed, you can perform a more thorough cleaning of the slide and the components.
Figure 33
Grip Removal
Grip removal is easily done by removing the four Allen head screws holding the two grip panels in place.
Figure 34
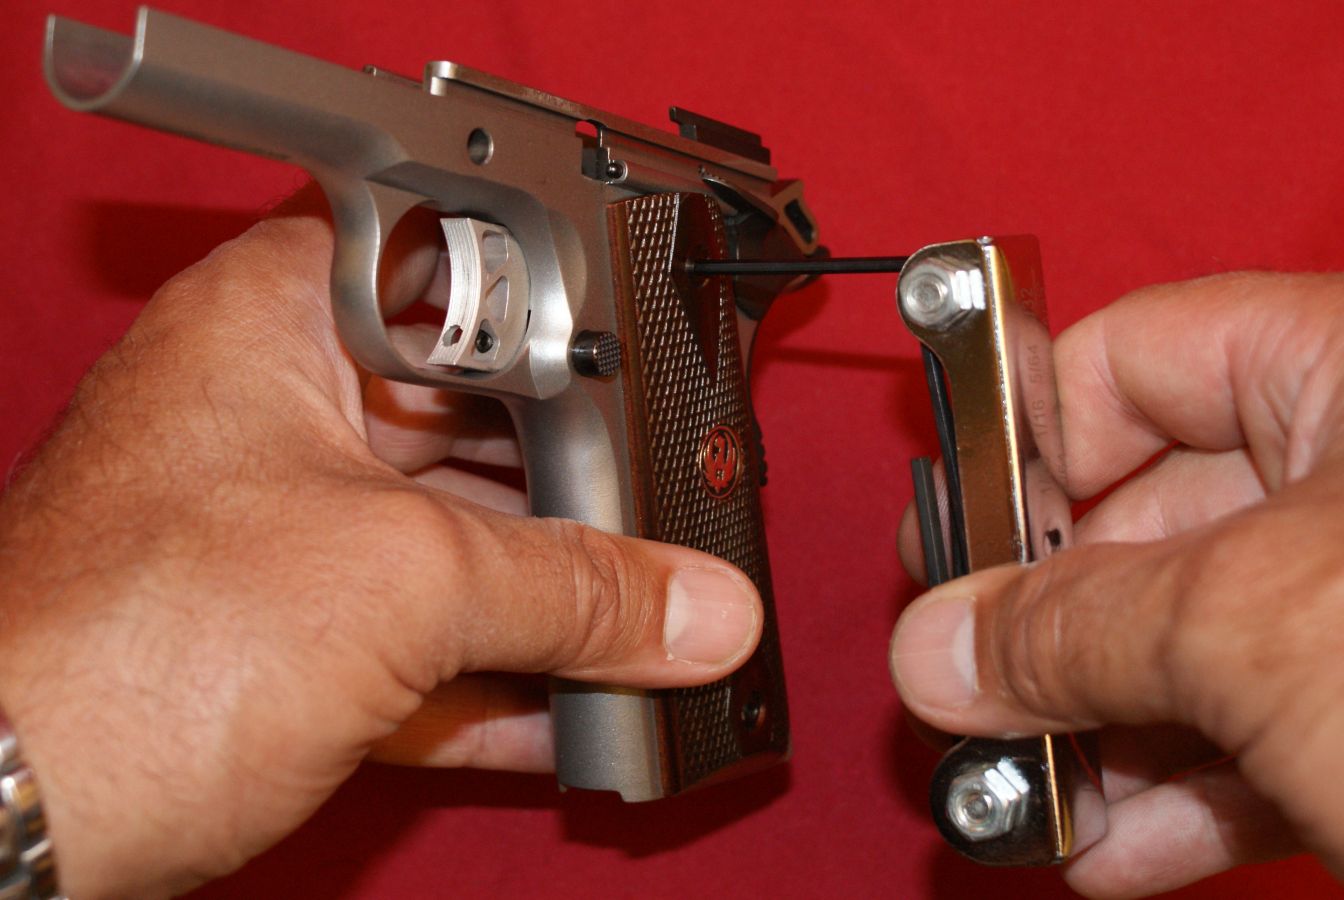
Figure 35

Removal of Frame Components
With the hammer in the fully cocked position, rotate the thumb safety up to a position shown in the photo below and press on the head of the pin on the opposite side of the frame.
Figure 36
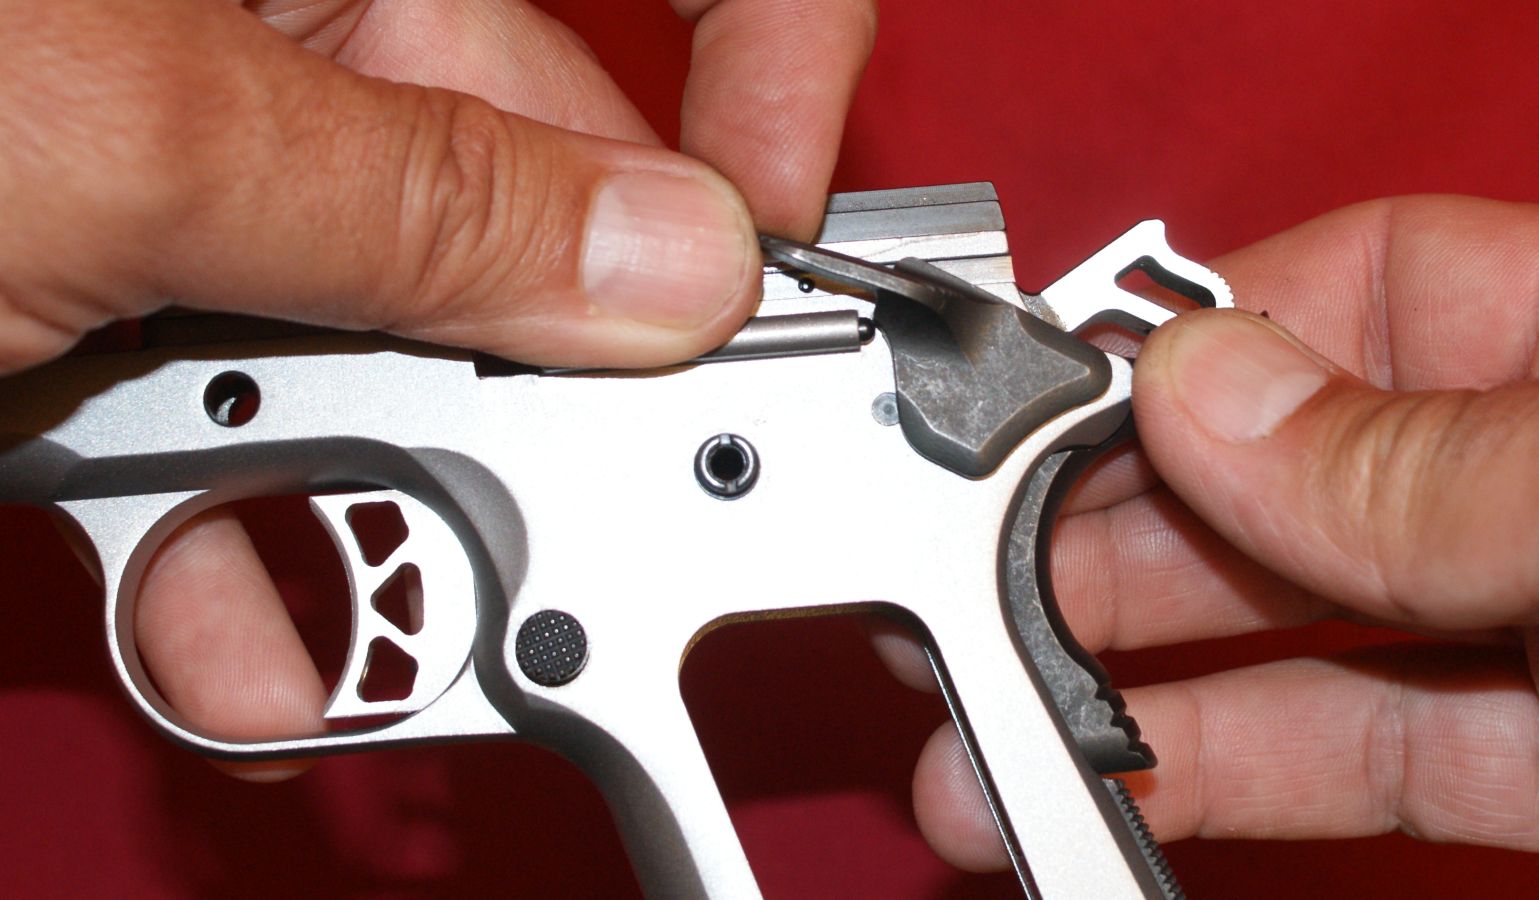
Using a combination of pressing on the head of the pin and wiggling/pulling on the thumb safety, it will start to move out of the frame. Once you get it moved to a position as shown below, you should stop and reposition your hands to catch the safety lock plunger and spring.
Figure 37
With your hand behind the frame to catch the safety lock plunger and spring, continue pulling the thumb safety out of the frame.
Figure 38
On this SR1911, the safety lock plunger and spring didn't shoot out, but instead they stayed securely in place inside the frame. Once the thumb safety is removed, you will see that the grip safety is loose because you just removed the pivot pin for the grip safety.
Figure 39
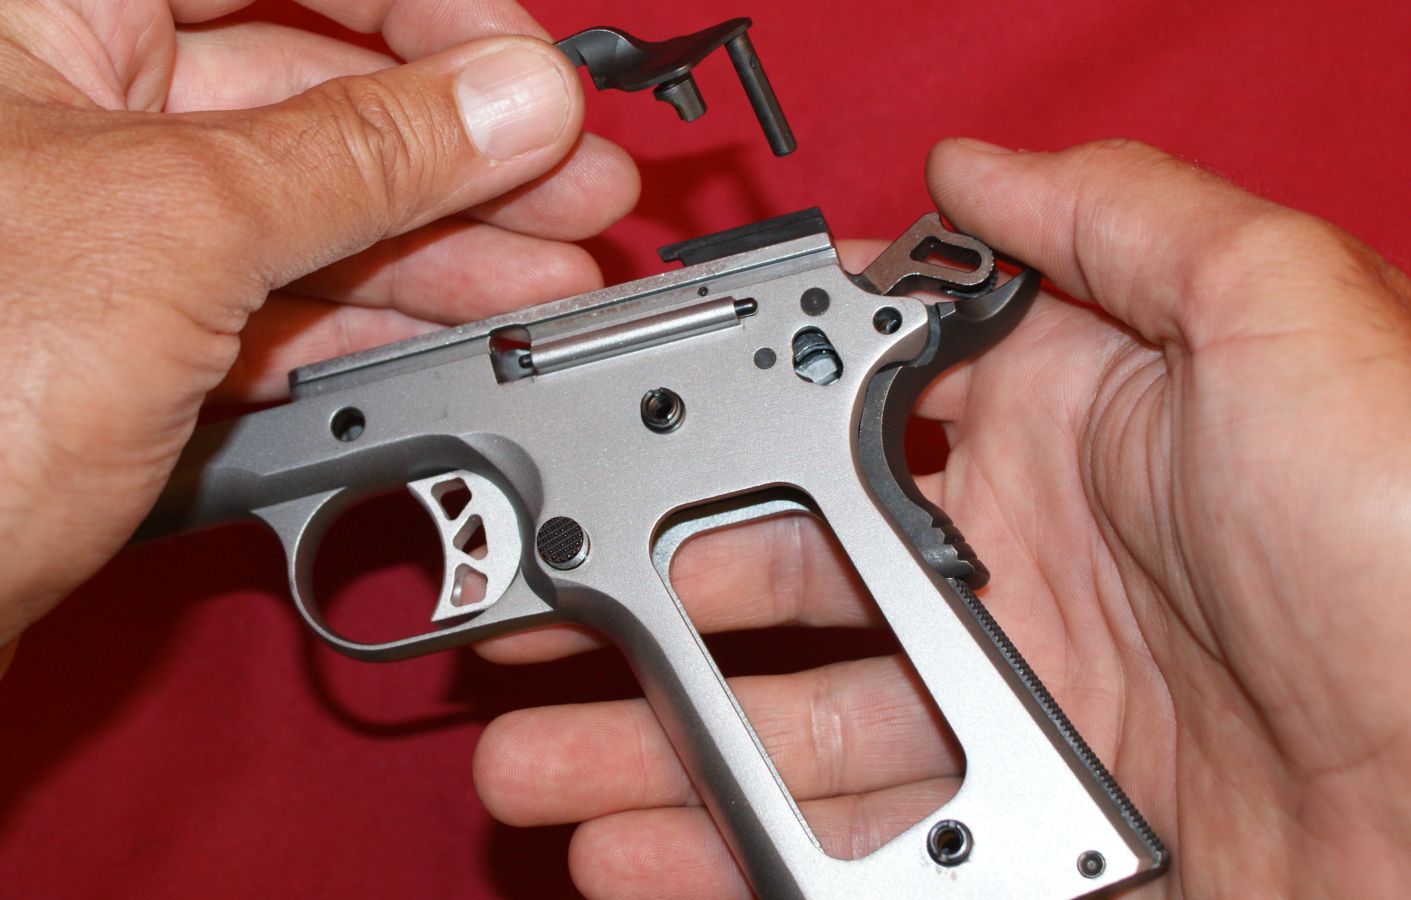
The grip safety can be remove by tilting the top rearward and pulling it from the frame.
Figure 40

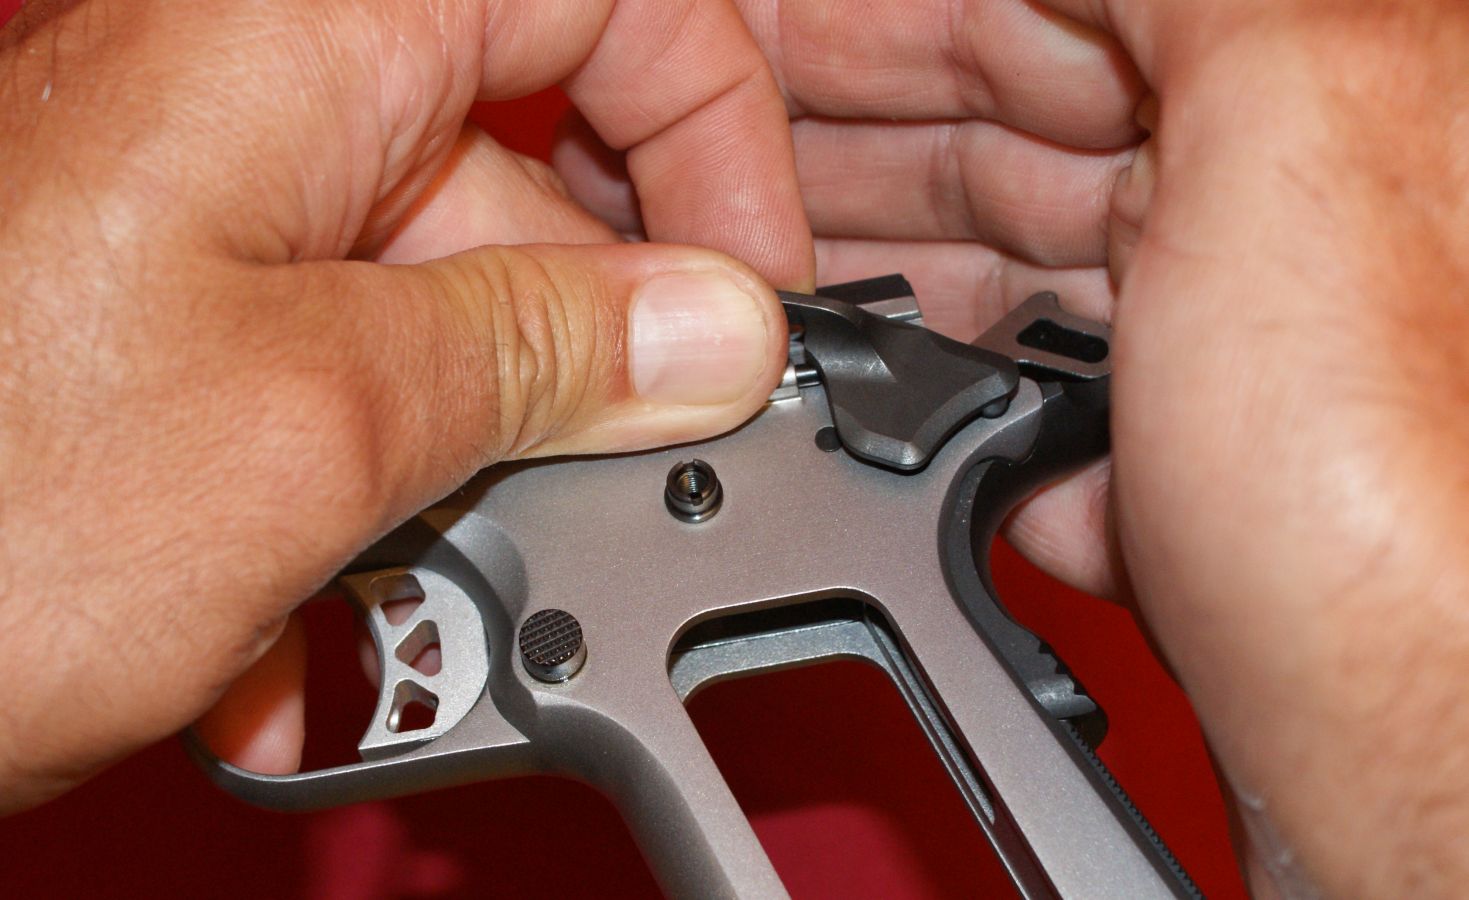
Next you need to lower the hammer to the uncocked position to remove the force on the mainspring. Do not dry fire the pistol, but instead, pull the trigger while holding rearward force on the hammer and then slowly let the hammer move forward to the uncocked position.
Figure 41

Using a punch, press the mainspring housing pin out of the frame. I had to hit the punch with the back of a screwdriver handle to get the pin to start moving.
Figure 42

Once the pin passed the detent retainer, you can pull the pin out of the frame by hand.
Figure 43

With the mainspring housing pin removed, you can slide the mainspring housing down out of the frame.
Figure 44

Figure 45
You can flip the hammer strut up out of the way and then lift the sears spring out of the frame.
Figure 46
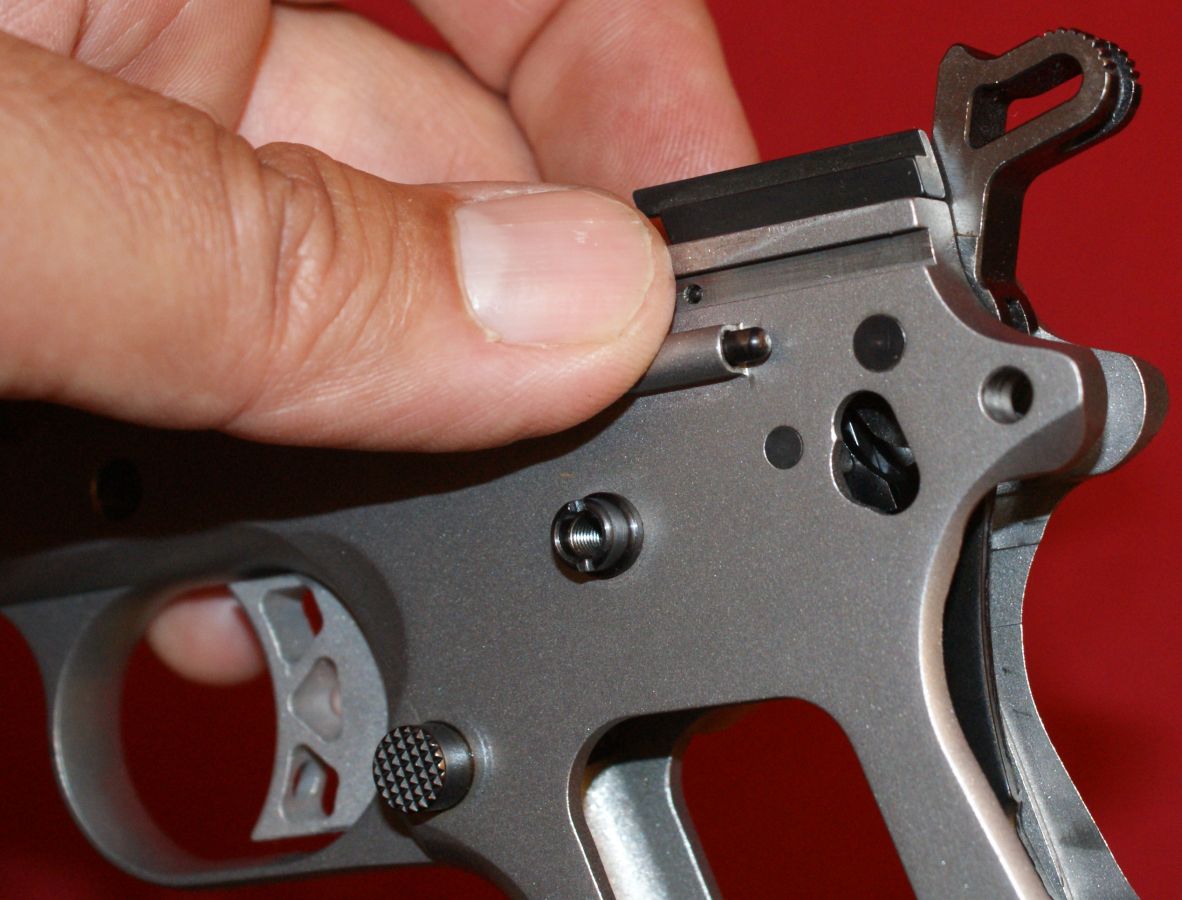
The hammer pin (A) and sear pin (B) are held in place by the thumb safety. Once the thumb safety is removed and there is no force on the hammer strut, these two pins can be removed.
Figure 47
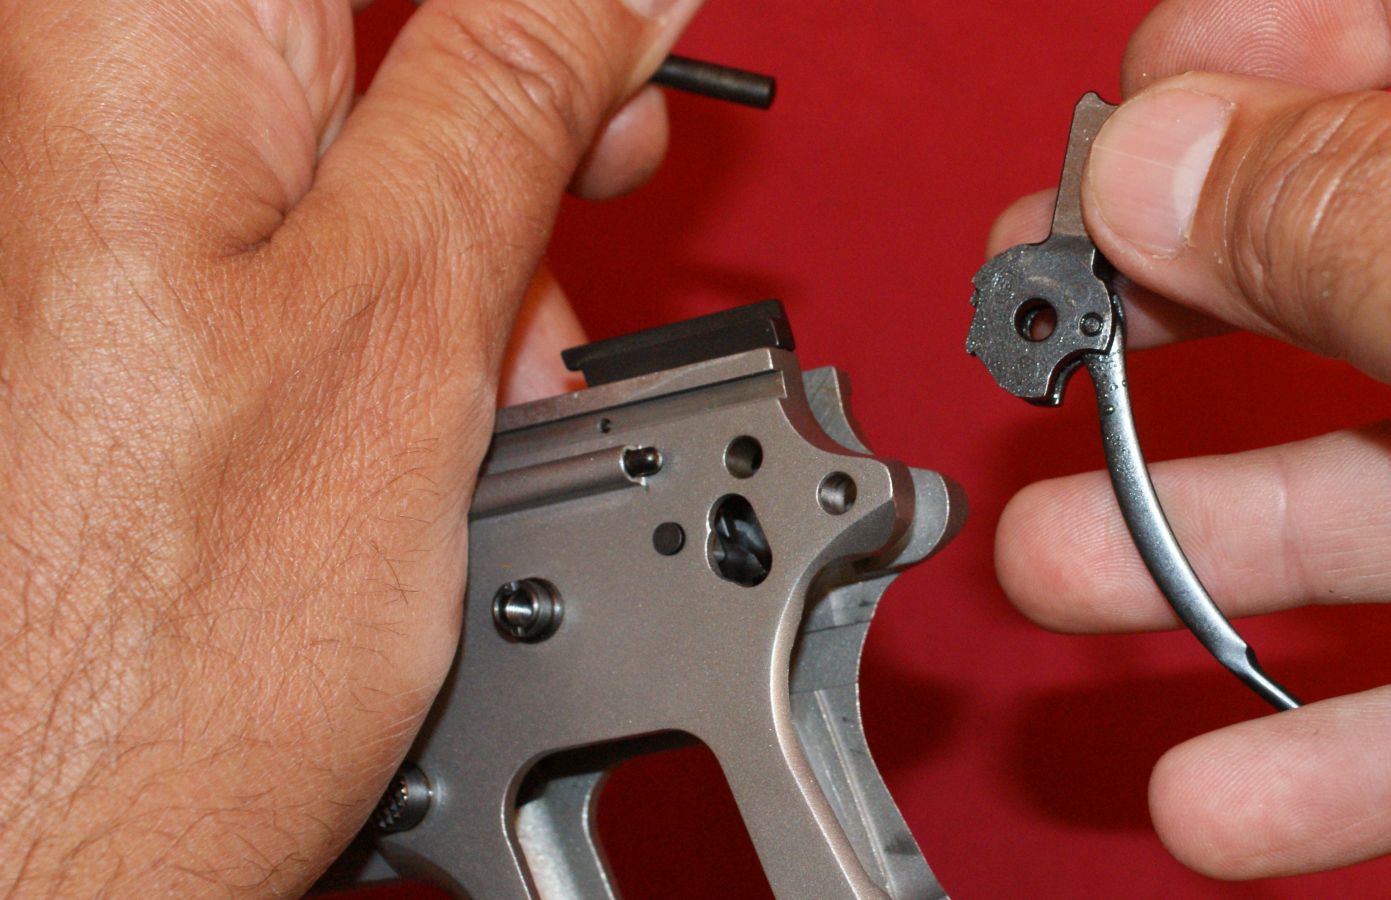
By pressing on the head of the hammer pin on the right side of the frame, the pin will push out on the left side. With the head protruding on the left side, you can remove the pin and hammer.
Figure 48
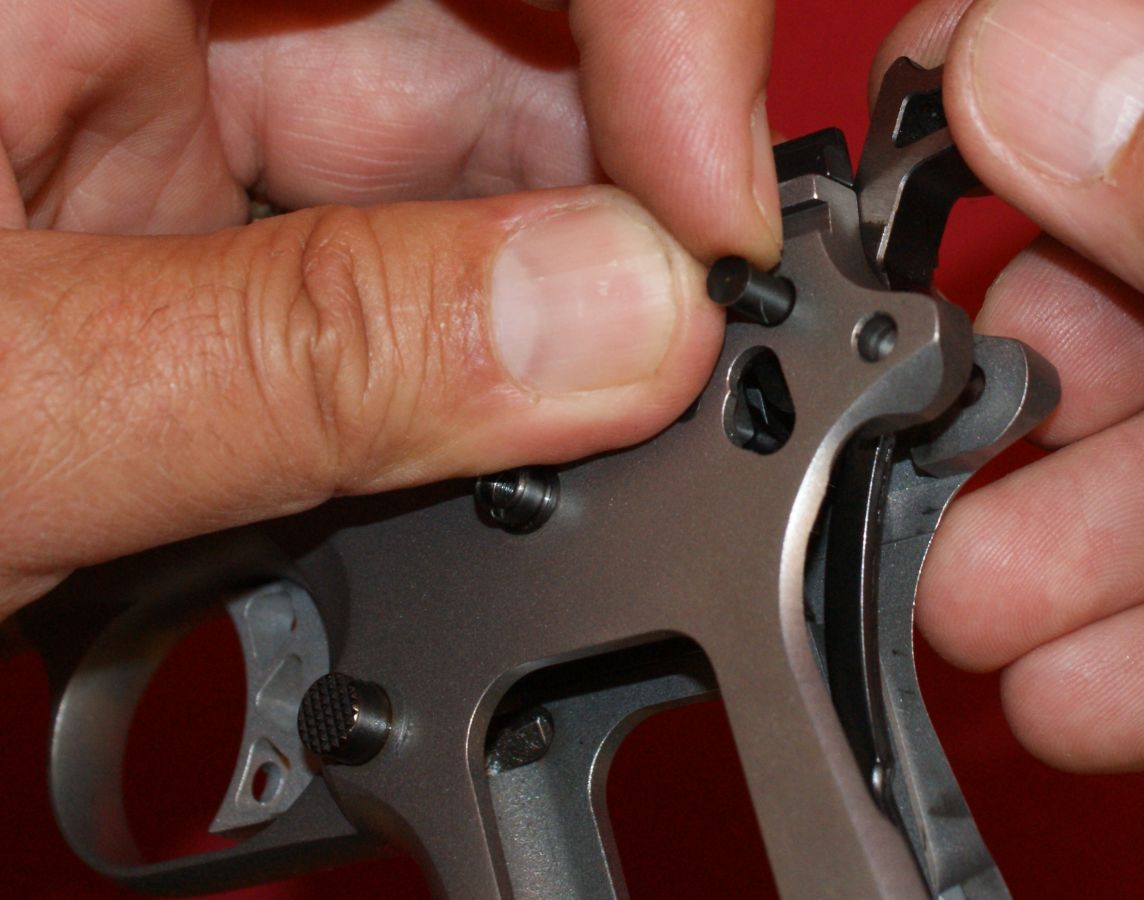
Figure 49
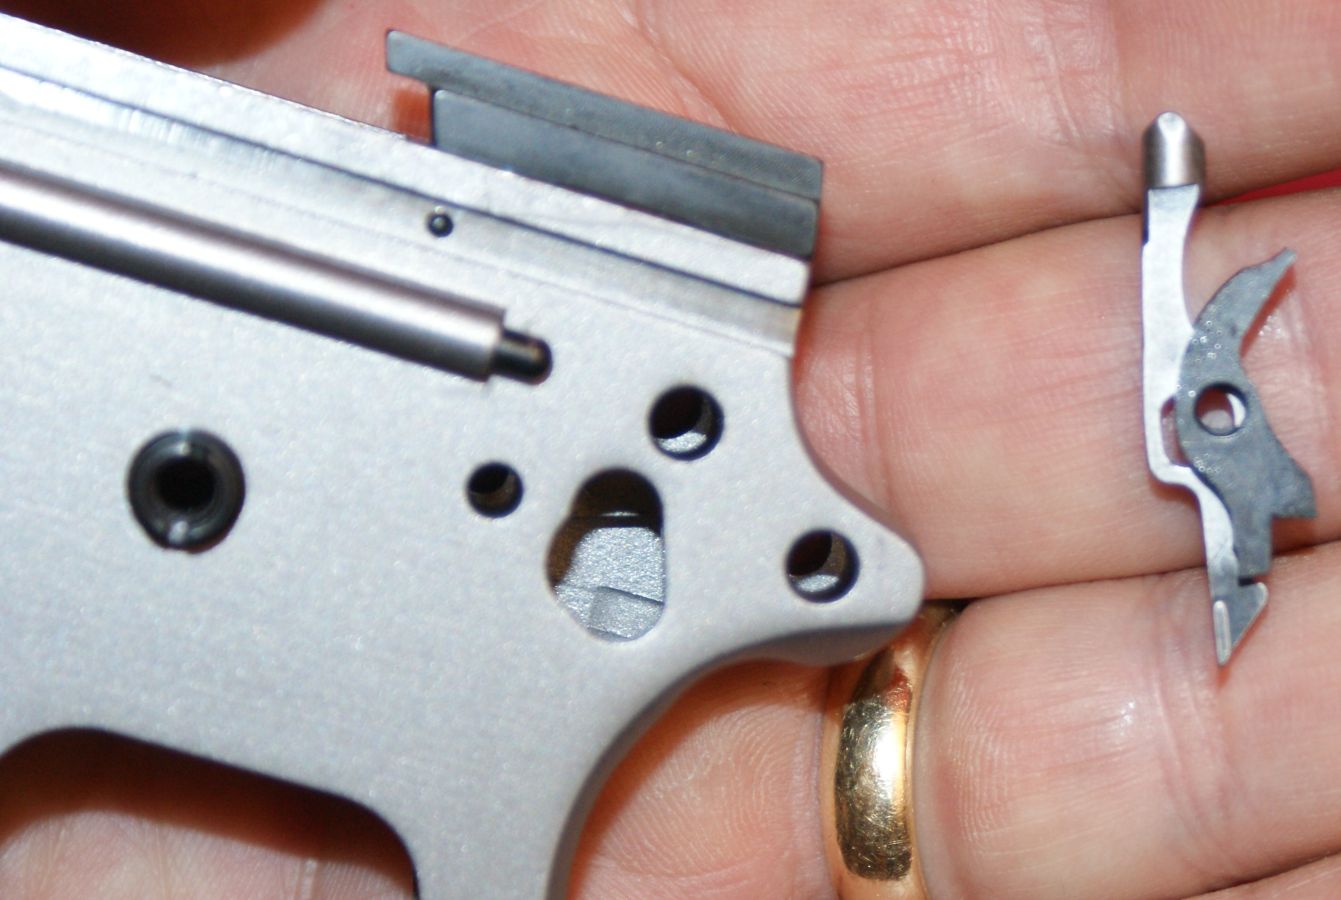
By pressing on the head of the sear pin on the right side of the frame, the pin will push out on the left side. With the head protruding on the left side, you can remove the pin, disconnector and sear.
Figure 50
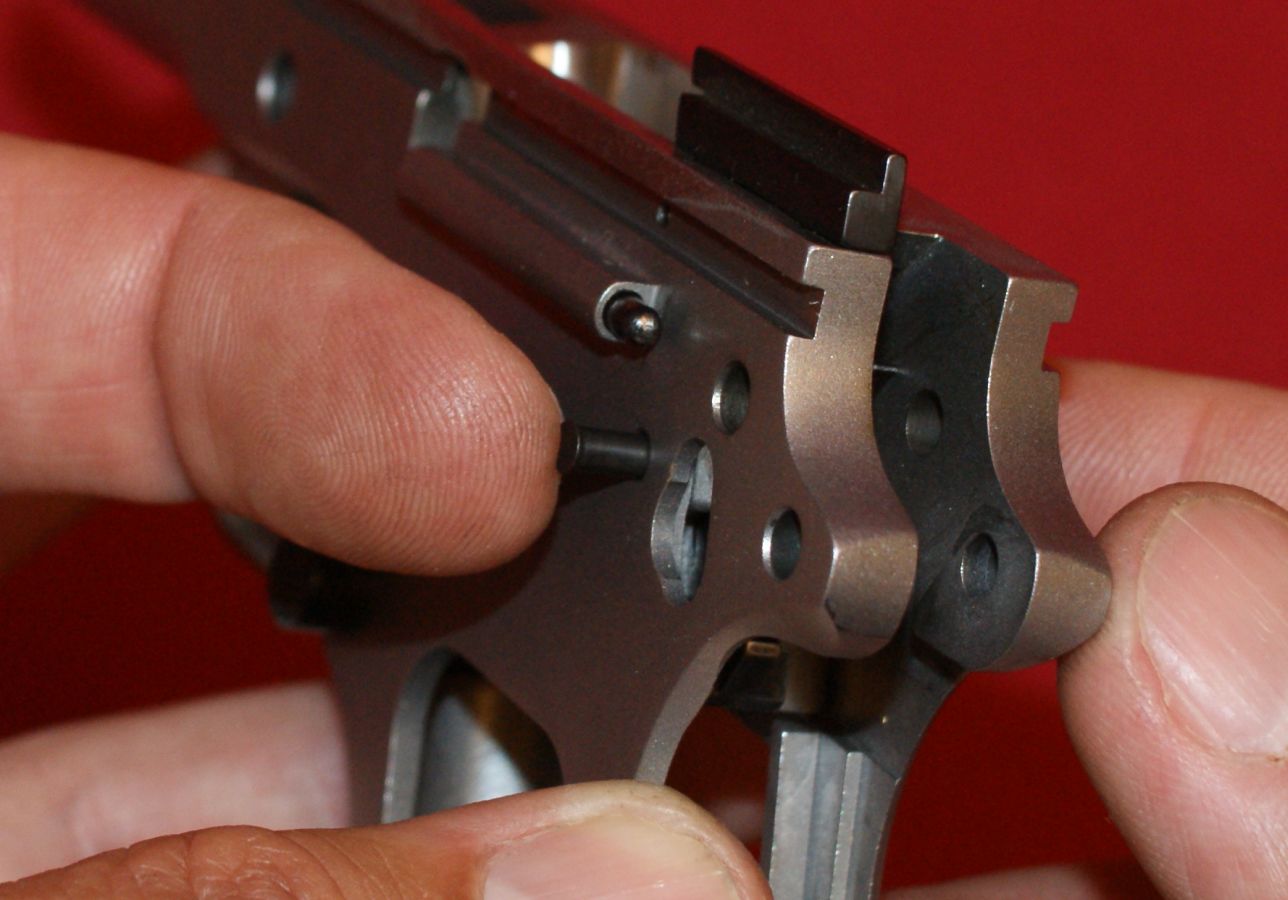
Figure 51
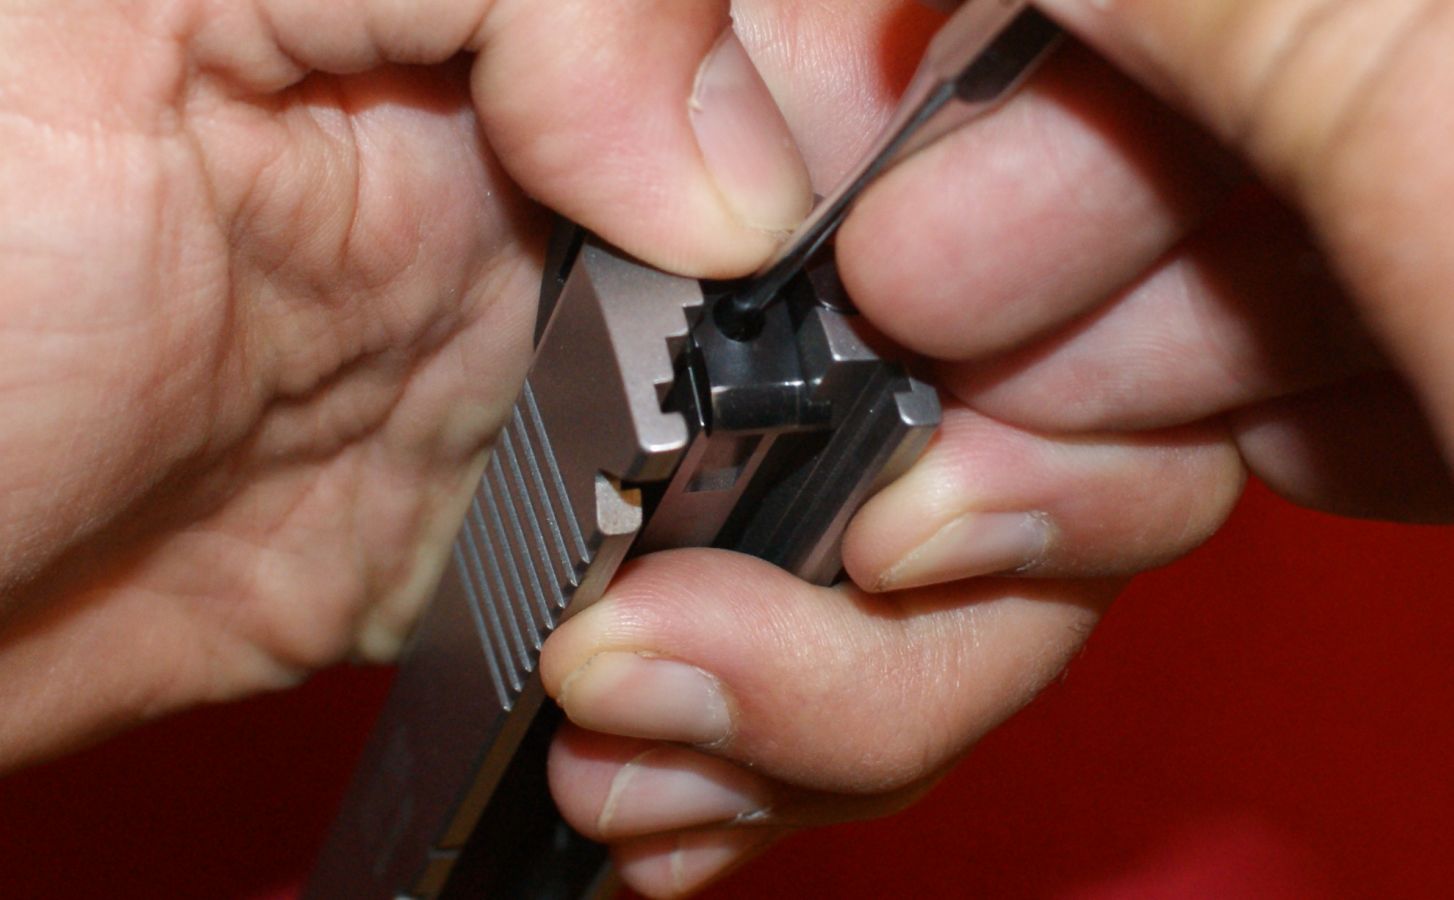
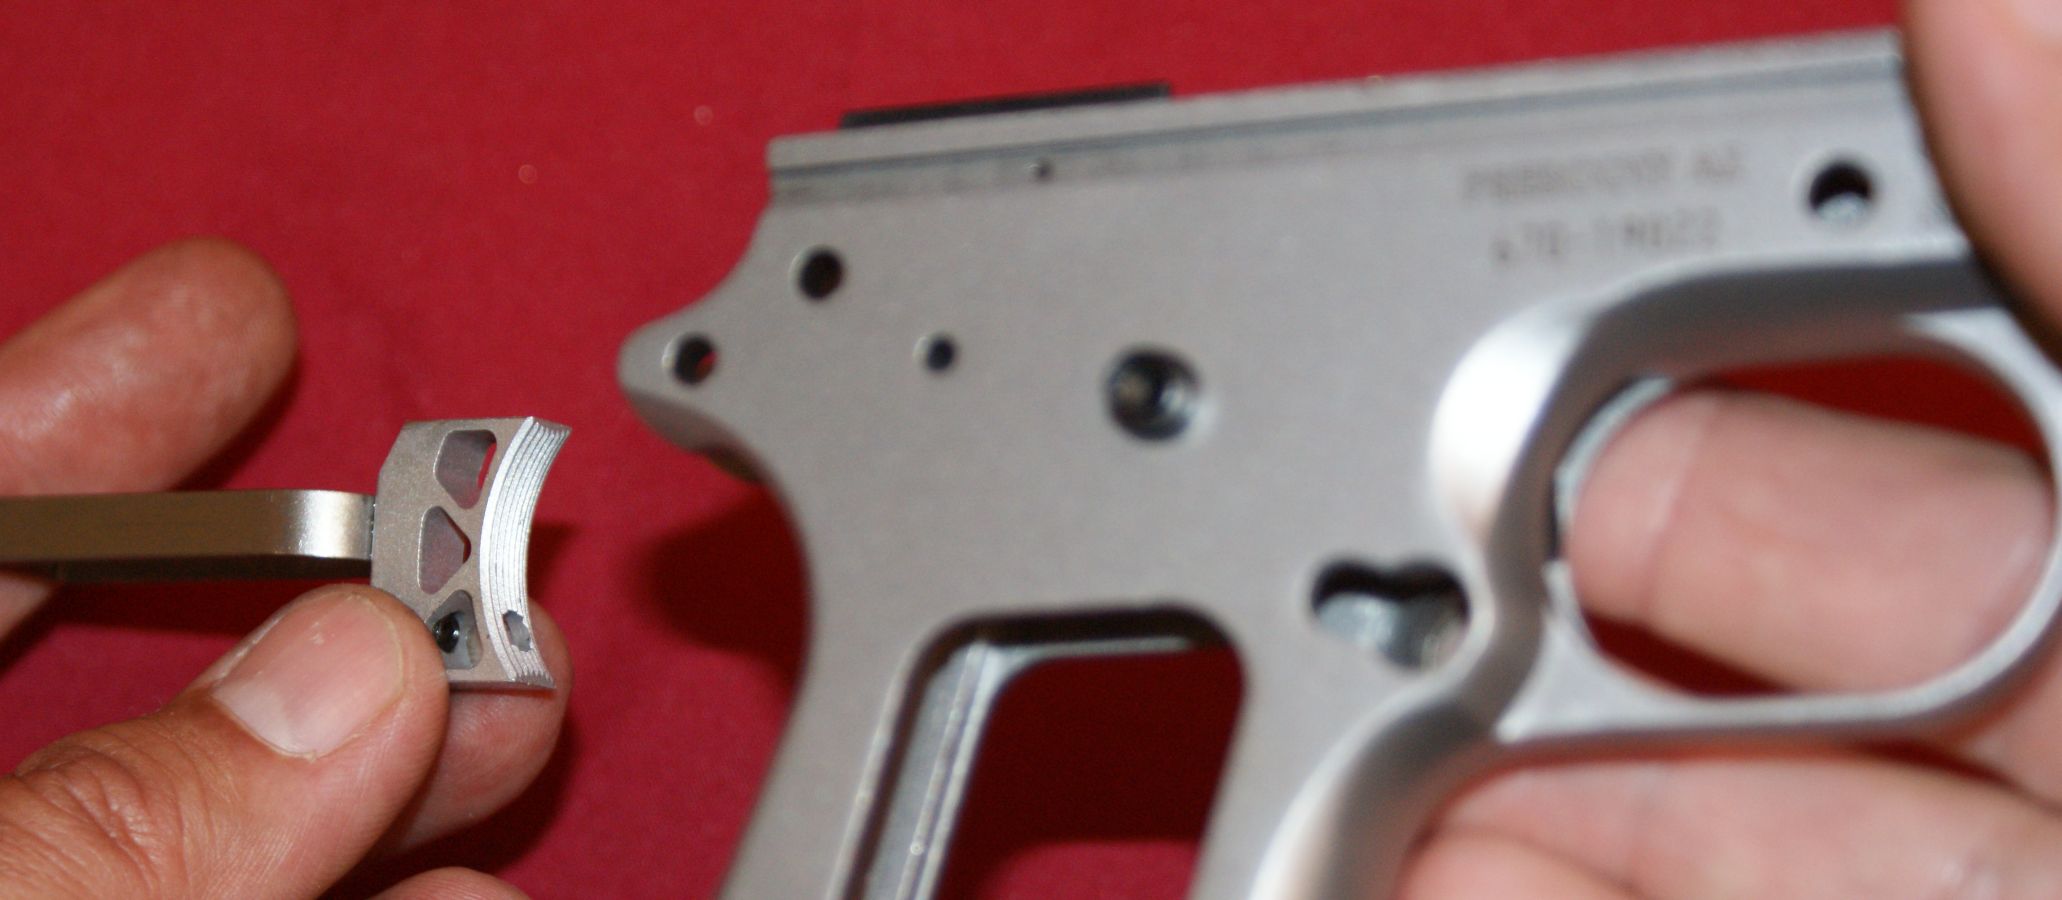
To remove the trigger, you must remove the magazine catch assembly. Using a small flat head screwdriver, rotate the screw in the catch counter clockwise while pressing in on the catch on the left and in on the head of the screw.
Figure 52
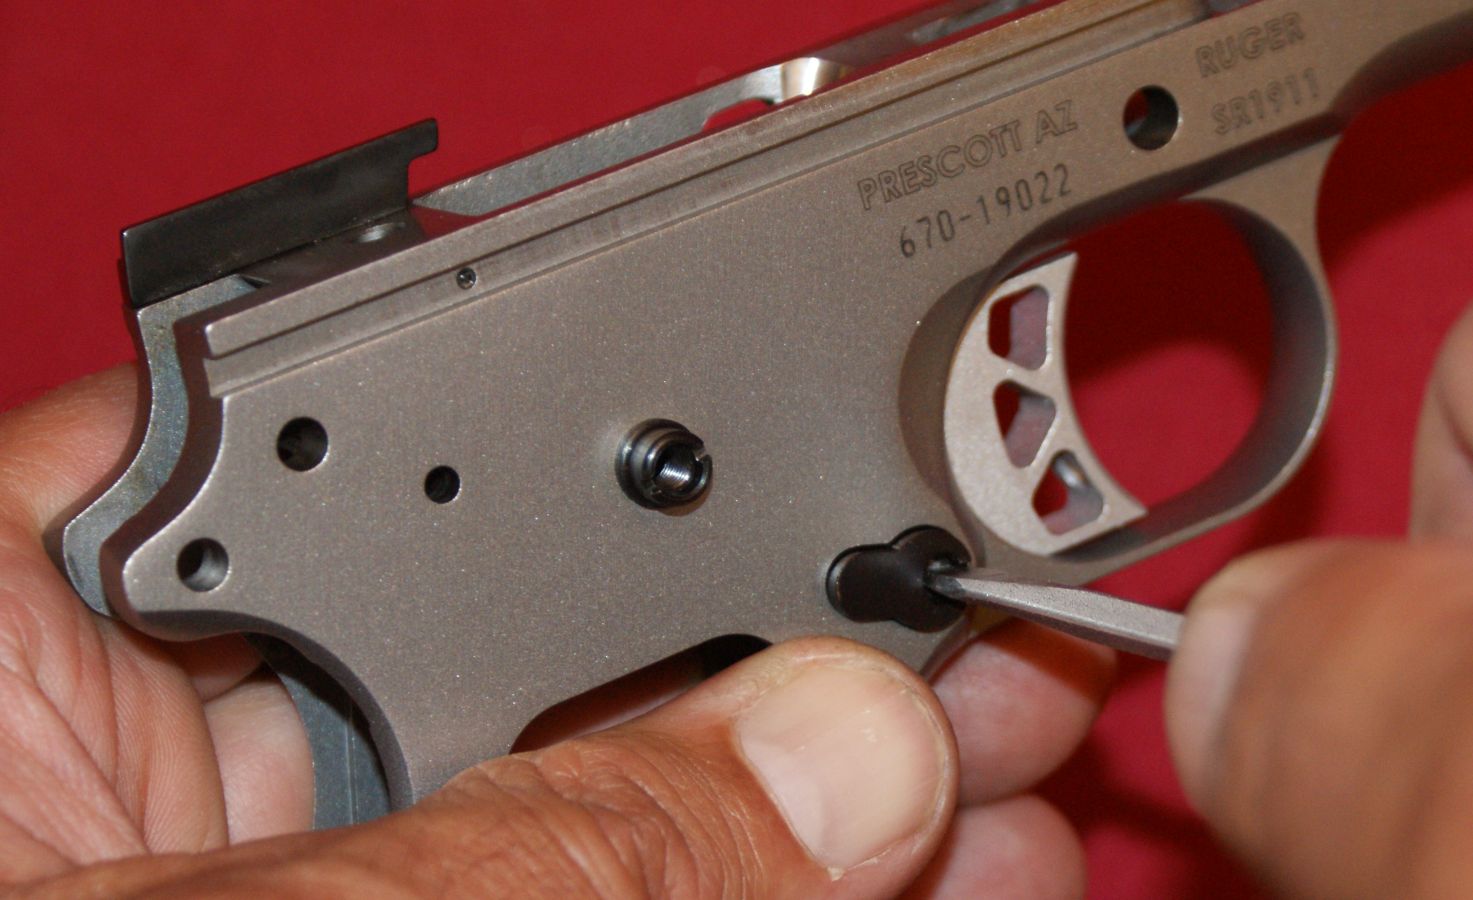
Once rotated, the magazine catch assembly is held together and can be removed from the frame.
Figure 53

With the magazine catch removed, the trigger will slide rearward out of the frame.
Figure 54
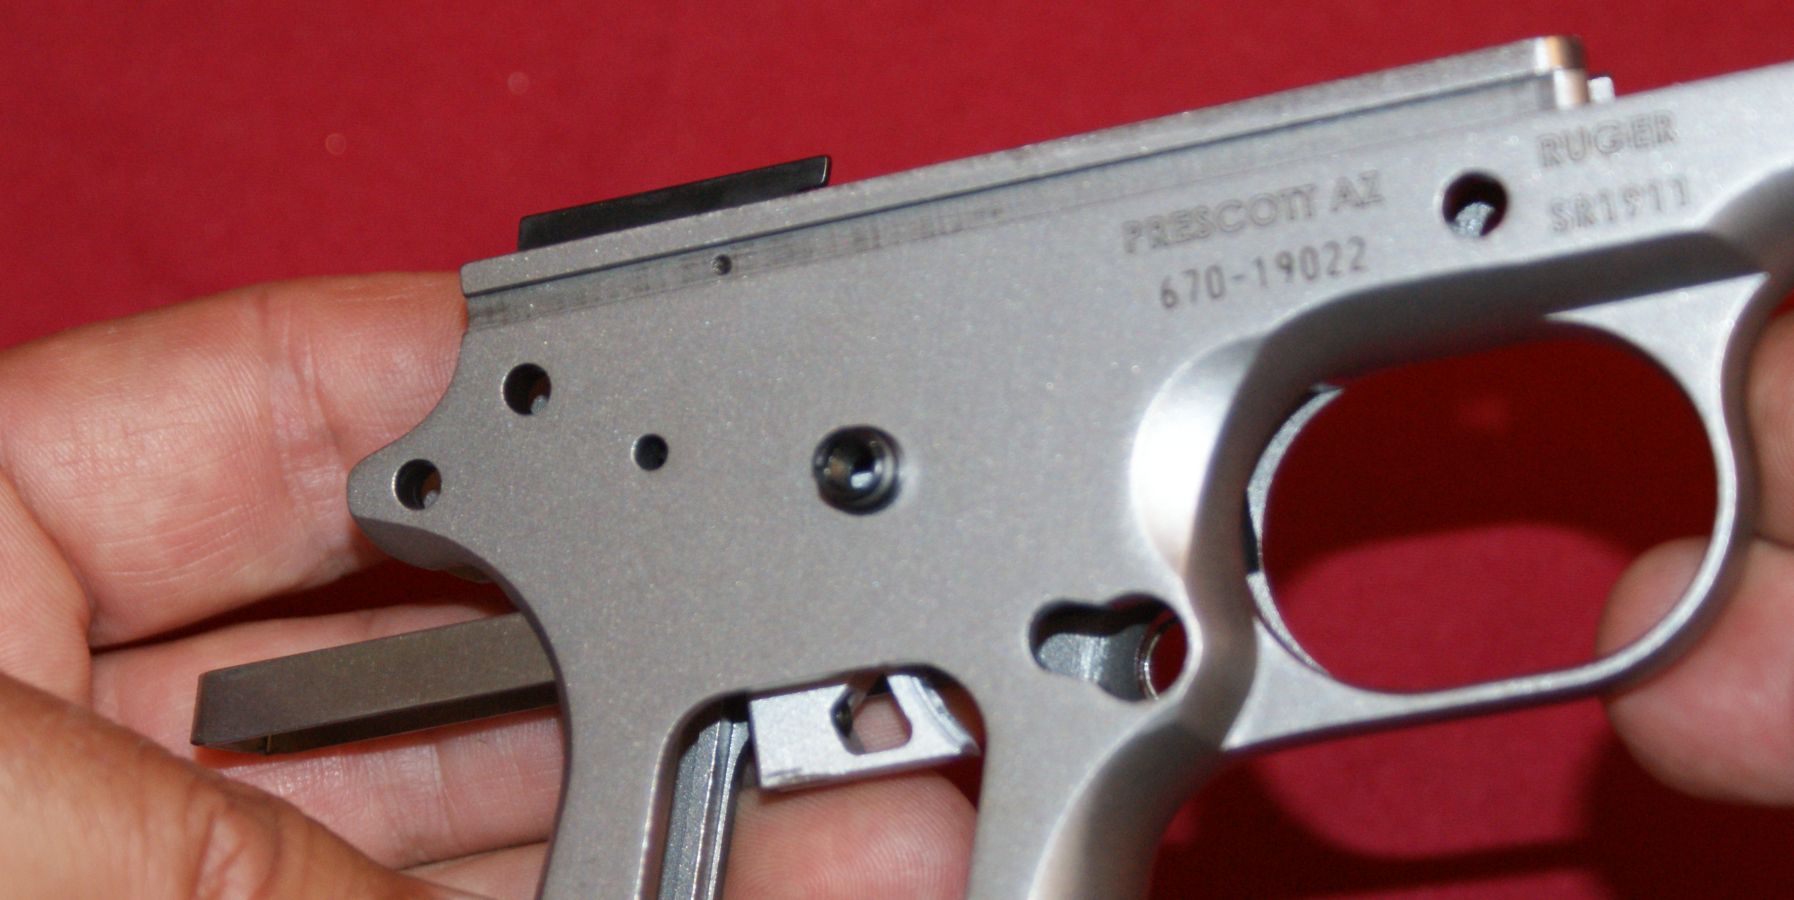
Figure 55
The photo below shows all these the part removed from the frame. There were some items which I didn't remove from the frame such as the slide stop plunger, plunger spring, safety lock plunger, ejector and grip screw bushings. I don't feel that removal of these items is really necessary for cleaning in most cases. If needed, the plungers and spring can be pressed rearward out of the housing using a small diameter punch.
Figure 56

Thoughts
Field stripping the Ruger SR1911 Pistol was easy with the hardest part rotating the barrel bushing and releasing the force on the recoil spring. Fully disassembling this Series 70 style pistol was also easy with the hardest part rotation the screw in the magazine catch.
For more detailed photos and commentary, make sure you check out the other parts of this review and feel free to leave comments on my Reader's Comments page. The following links are provided to help you see other parts of this review.
- Ruger SR1911 Review: Part 1 - Introduction, Specifications and Summary
- Ruger SR1911 Review: Part 2 - What's in the Box
- Ruger SR1911 Review: Part 3 - External and Operational Features
- Ruger SR1911 Review: Part 4 - Disassembly (this page)
- Ruger SR1911 Review: Part 5 - Internal Features
- Ruger SR1911 Review: Part 6 - Range Test
Or
If you would like to be notified about future Gunsumer Reports reviews via Facebook, make sure "You Like This" by clicking the Facebook "Like" button at the bottom or top of this page. If it already says "You Like This" beside the button, clicking it again will uncheck the "Like" status and you will not be notified.
| Share on Facebook | |
© 2010, 2011, 2012, 2013, 2014, 2015, 2016, 2017, 2018, 2019, 2020, 2021, 2022, 2023 & 2024 Gunsumer Reports™, All rights reserved.
FTC Disclosure