|
|
Gunsumer Reports TM Providing Detailed Objective Reviews for Firearms and Firearm Accessories |
Ruger® LCP® Custom Pistol Review
Part 4 - Disassembly & Internal Features
April 20, 2015
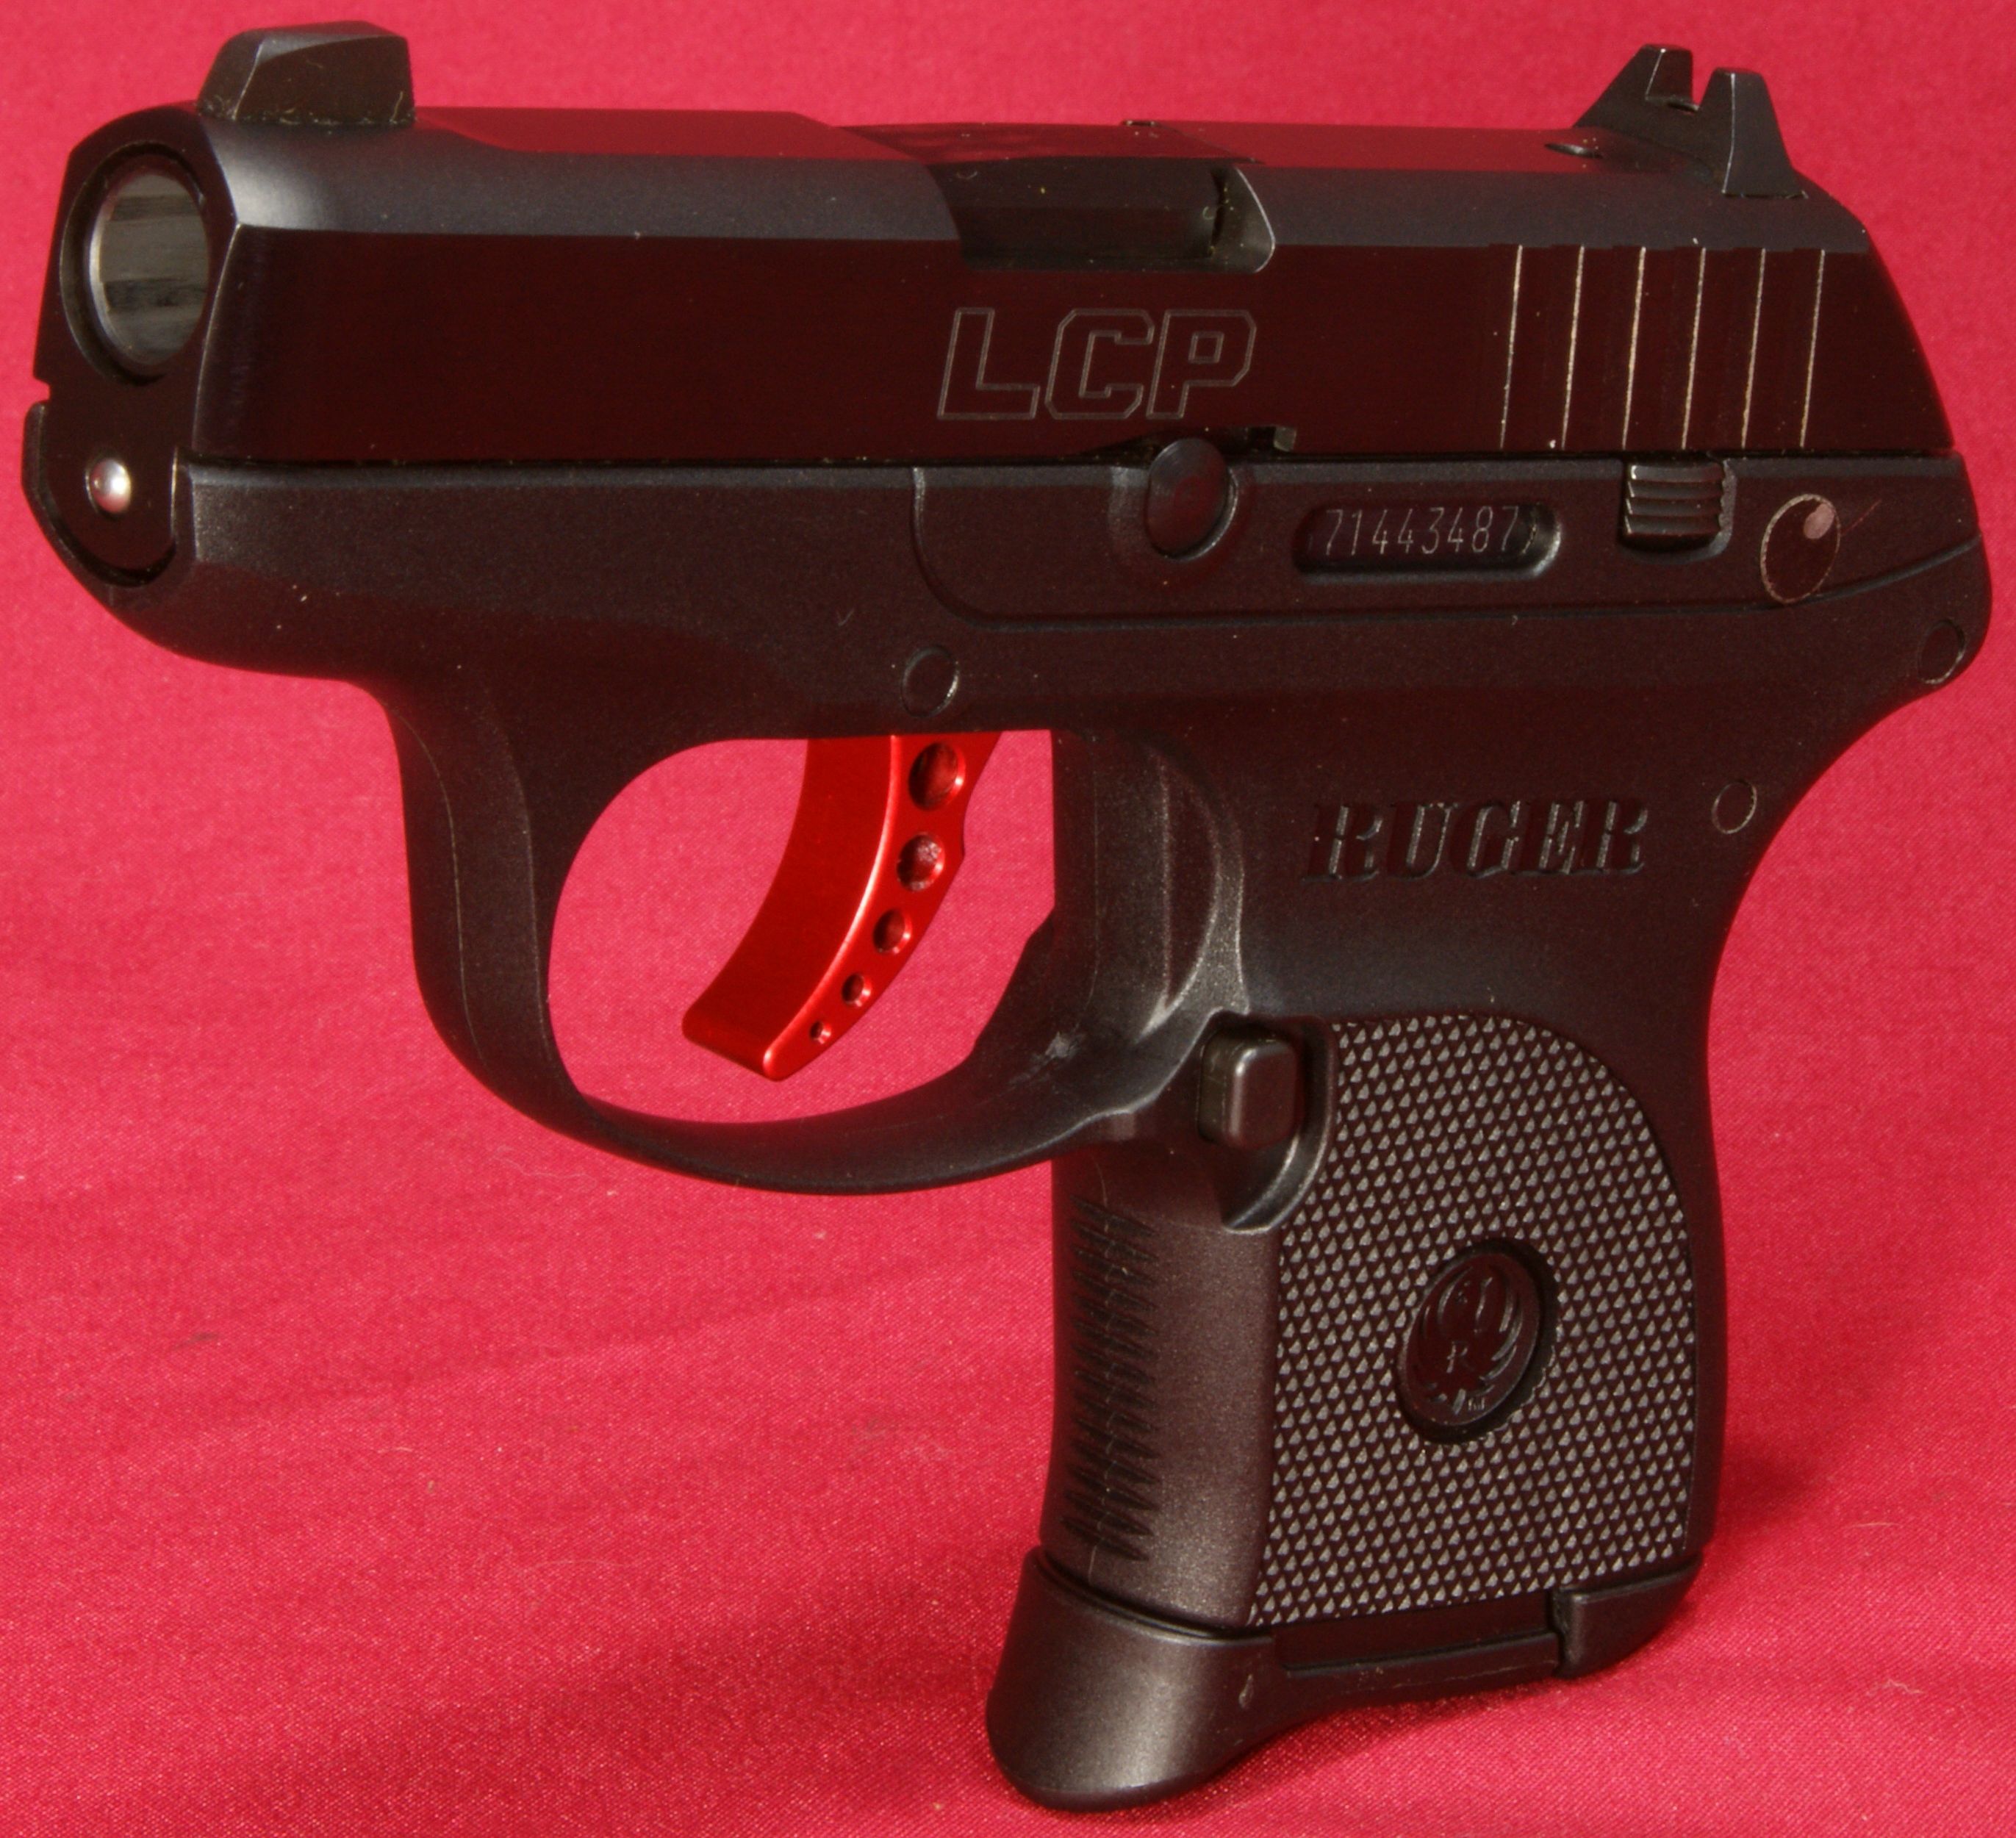
In this part of my Ruger LCP Custom pistol review, I take a look at disassembly and some of the internal features of this pistol. Since there there were only 7 new parts identified for the LCP Custom versus the standard LCP, and since these parts didn't change the function or operation of the LCP, disassembly is identical to that of the standard LCP pistols and the internal features only differ by the materials in the guide rod and the geometry of the trigger.
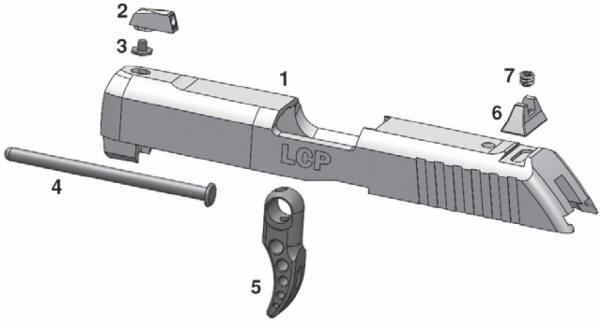
Figure 1 - Seven Unique Parts to the LCP Custom
Pistol
Disassembly
For disassembly, I basically follow the steps outlined in the Instruction Manual. Keep in mind that even though I show the disassembly steps below, you should always consider the manufacturer's instruction manual as the source when working with your firearms. For reference, Ruger created some disassembly and reassembly videos on their "Extras" page.
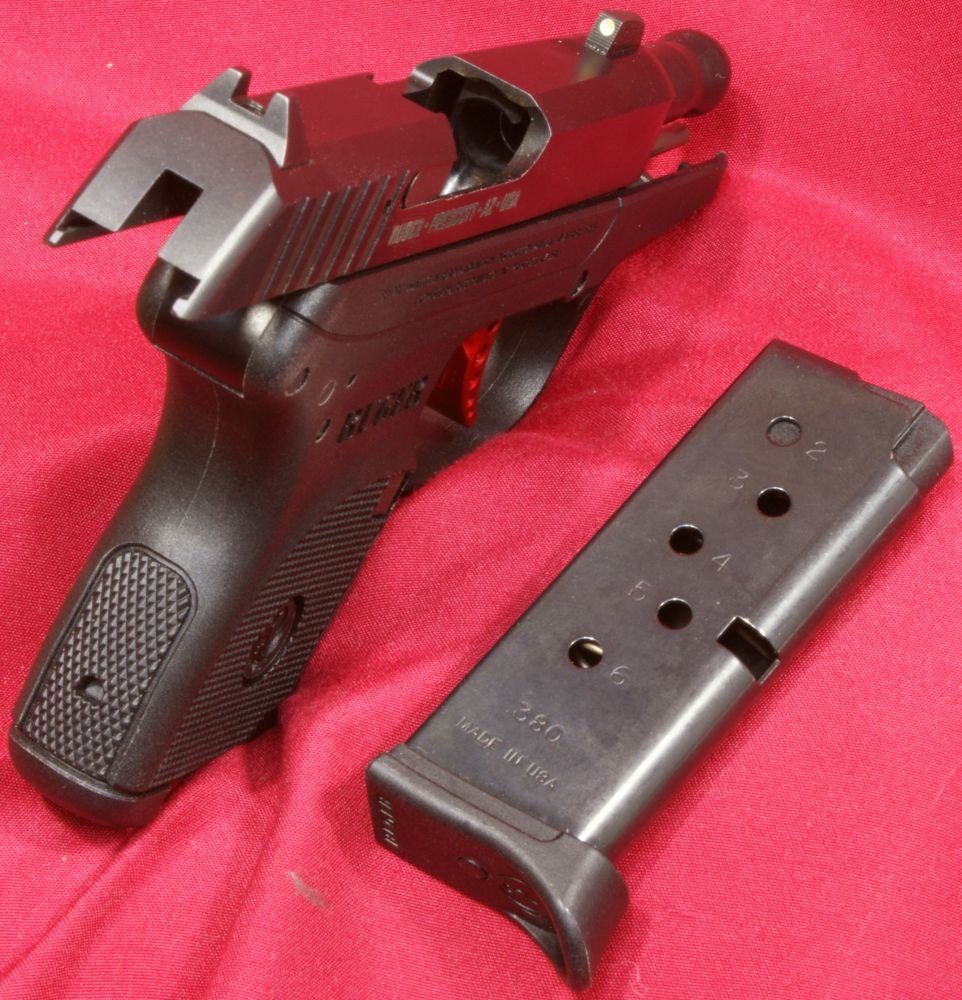
Step 1 - Remove Magazine and Inspect Chamber
Remove the magazine, pull the slide to the rear and lock the slide open by pushing up on the slide hold open. Inspect the chamber to verify the pistol is unloaded and then pull the slide to the rear and release it so that the slide goes fully forward. These instructions follow that in the instruction manual, but the Ruger video shows leaving the slide locked open when removing the takedown pin. I confirmed that you can do this either way with this pistol.
Figure 2
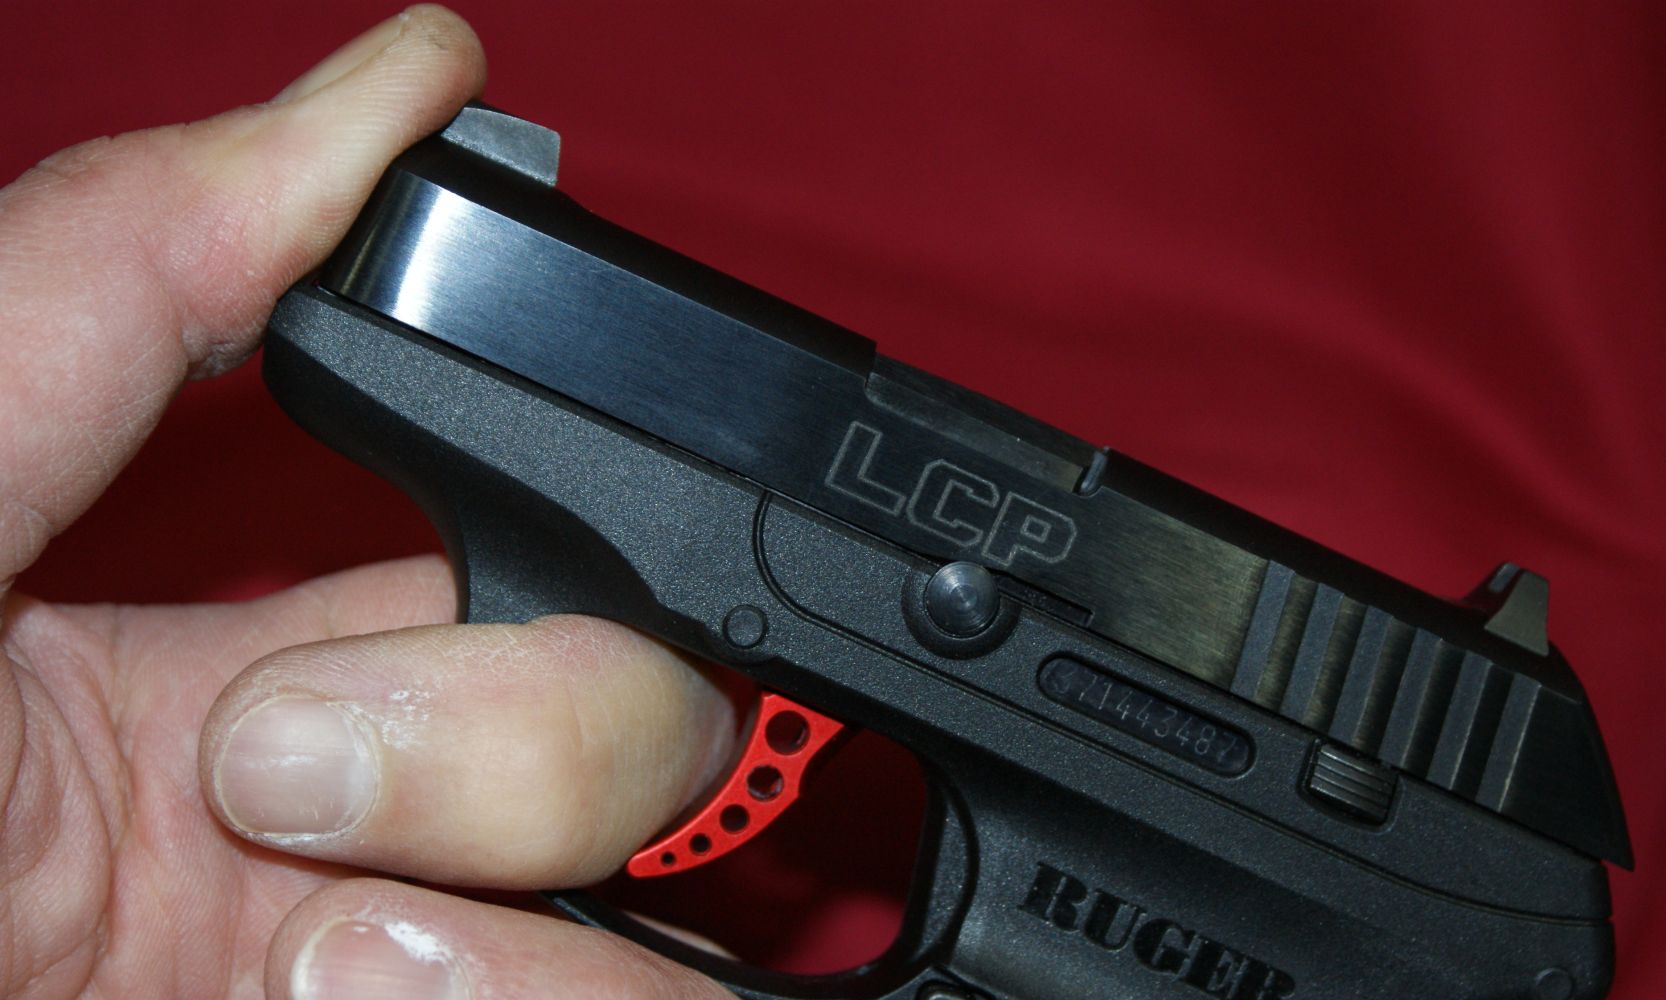
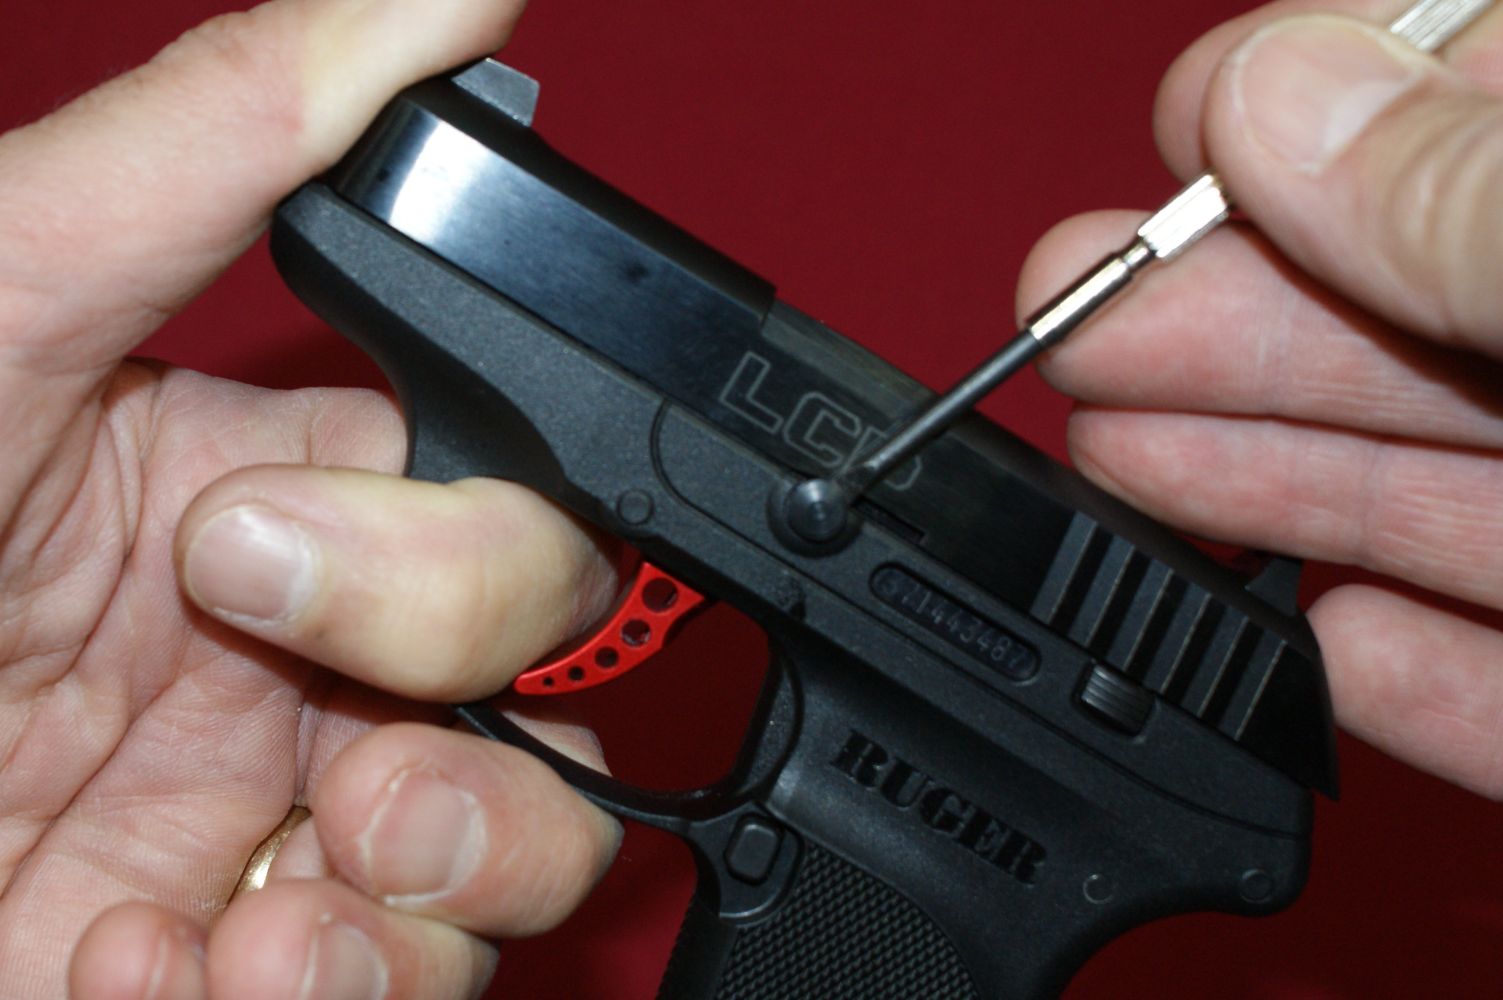
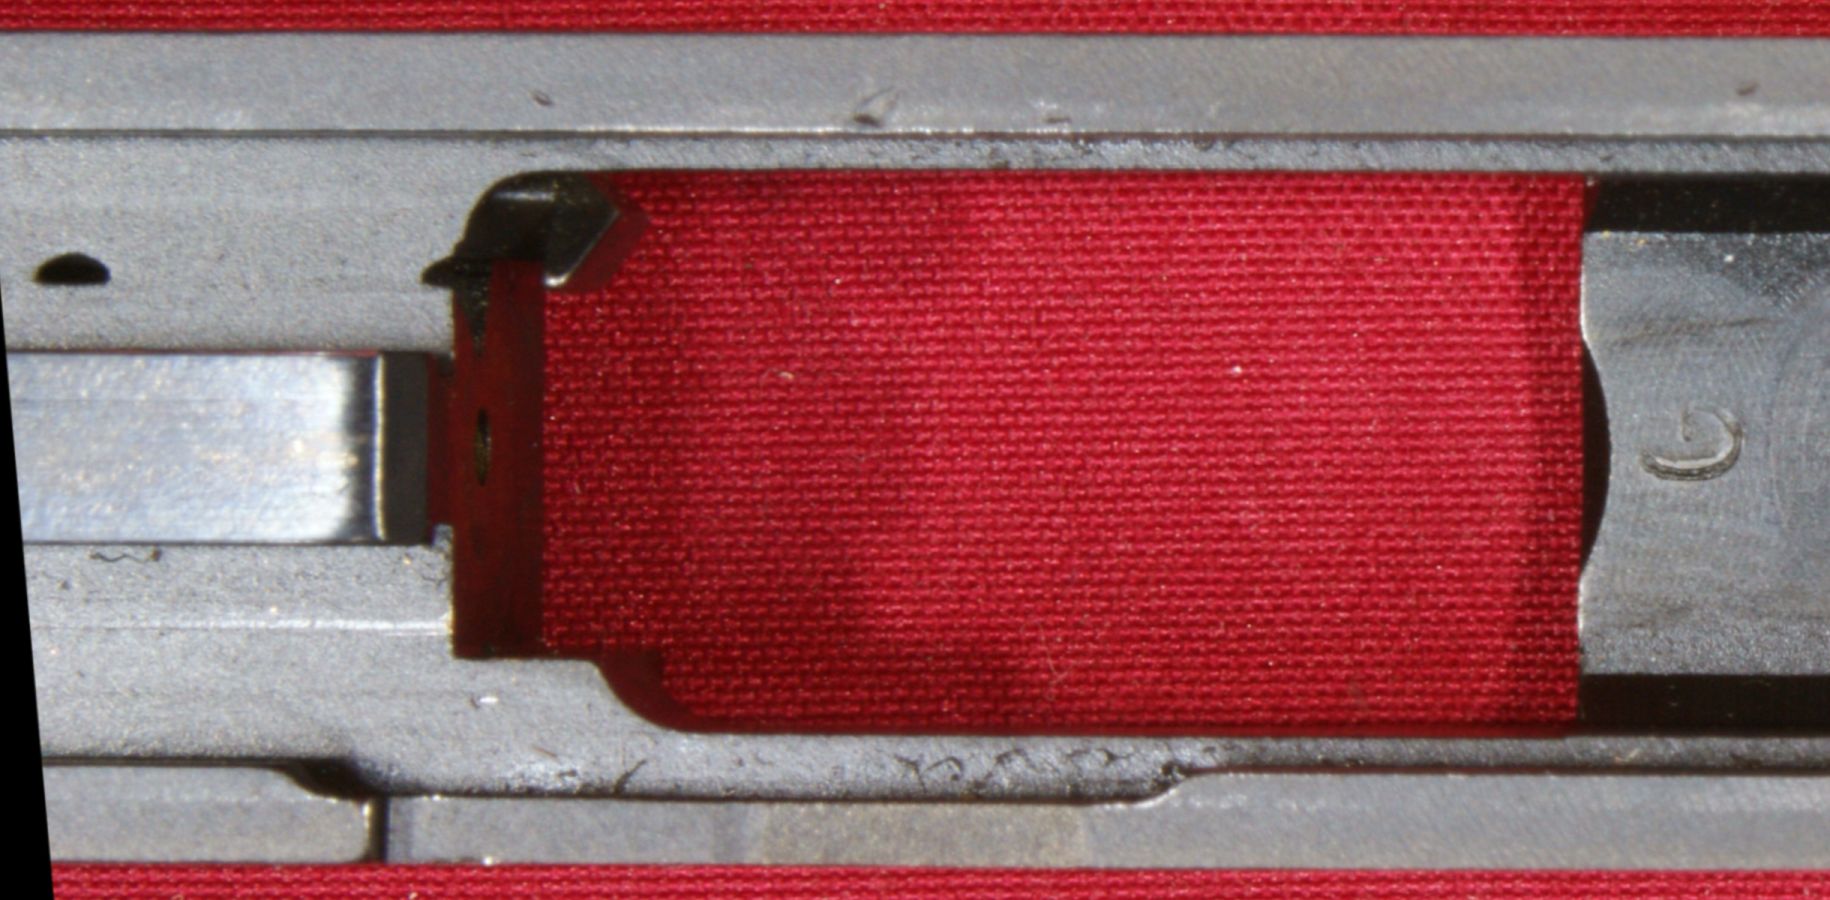
Step 2 - Remove Takedown Pin
Push the slide rearward (about 1/16" or more). I found that putting my finger through the trigger guard and pressing on the front of the slide with my thumb was an easy way to hold the slide in this position.
Figure 3
Using a small screwdriver, pry up the head of the takedown pin. After doing this the first time, I decided that wrapping some tape around the area of the screwdriver that contacts the slide might be a good way to ensure you don't eventually damage the finish on the slide by prying metal on metal.
Figure 4
It actually takes a surprising amount of prying force to get the pin to start moving (or at least it did on this pistol). The photo below shows that when you are prying, you are trying to make the pin push the leg of the detent down so that the body of the takedown pin can pass over this leg.
Figure 5
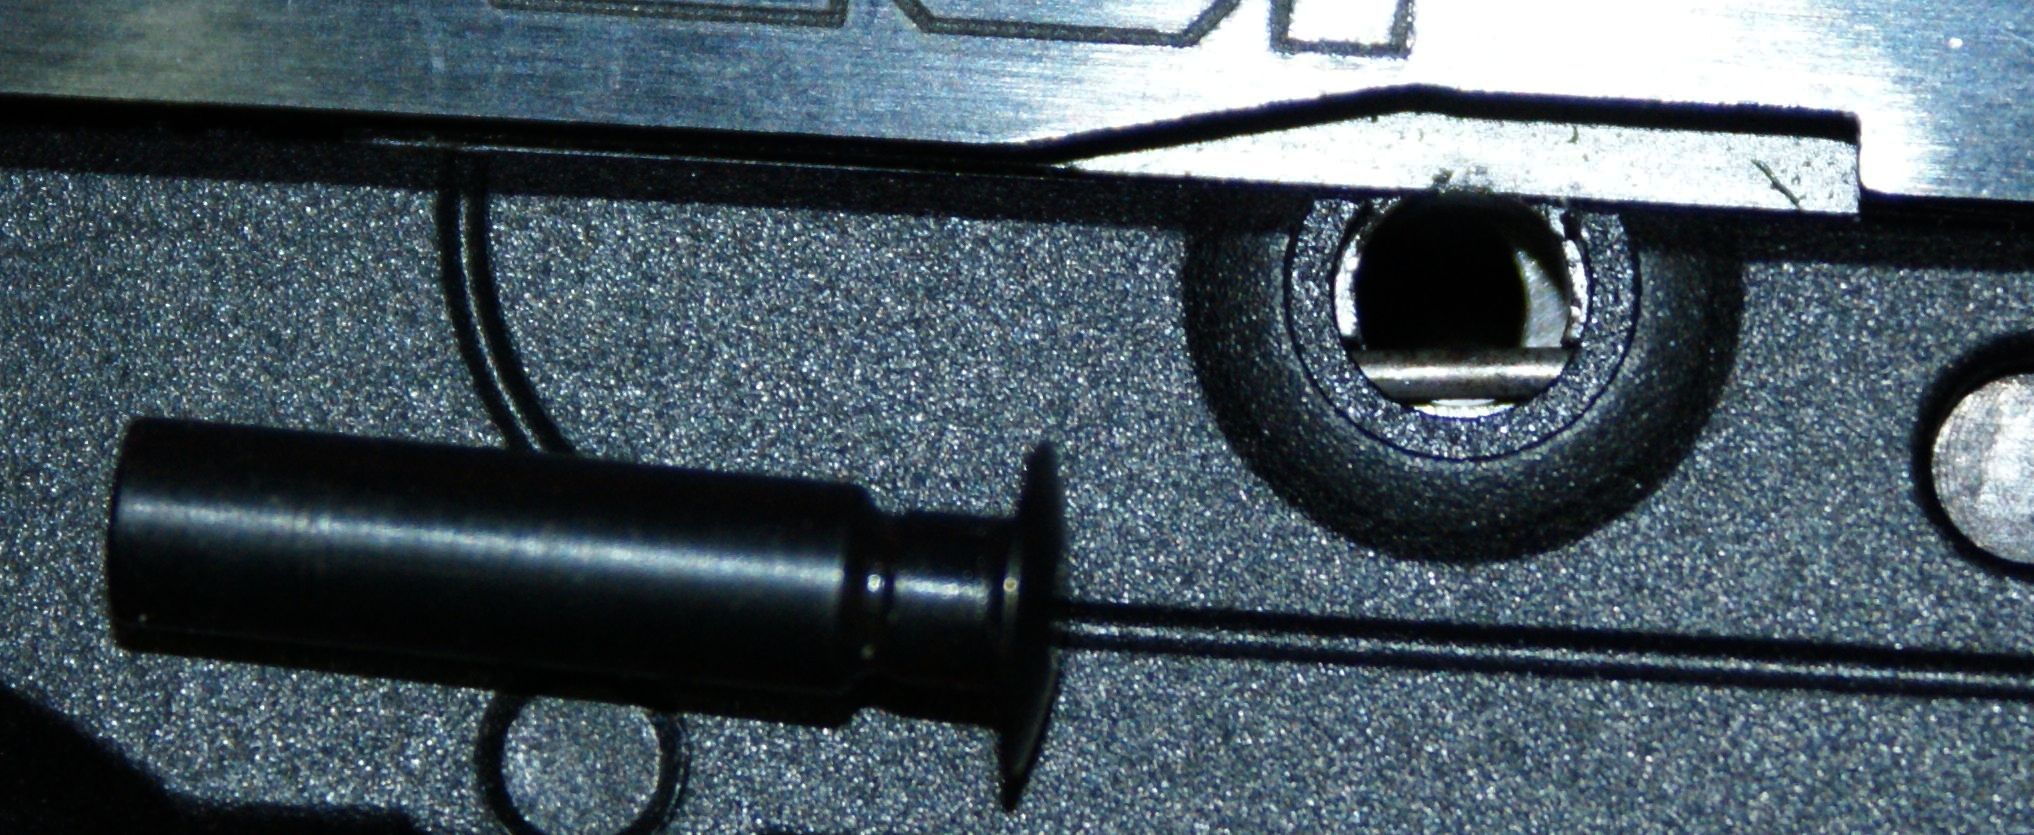
Once the body of the takedown pin is over the detent leg, you can remove the pin with your fingers.
Figure 6
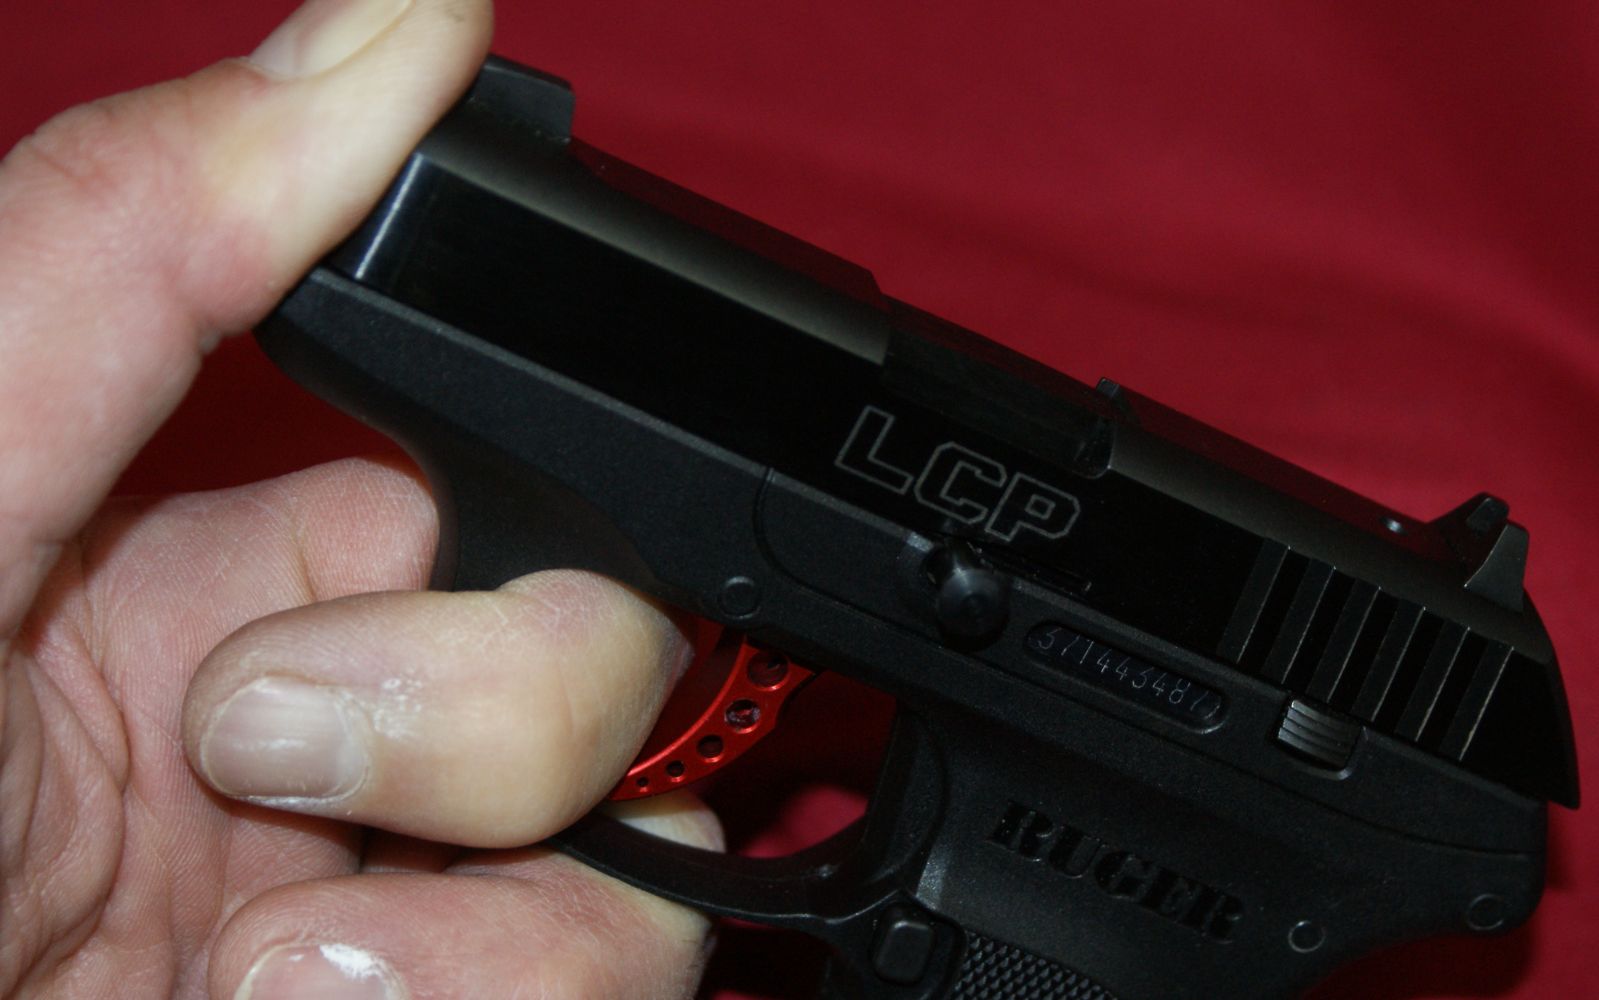
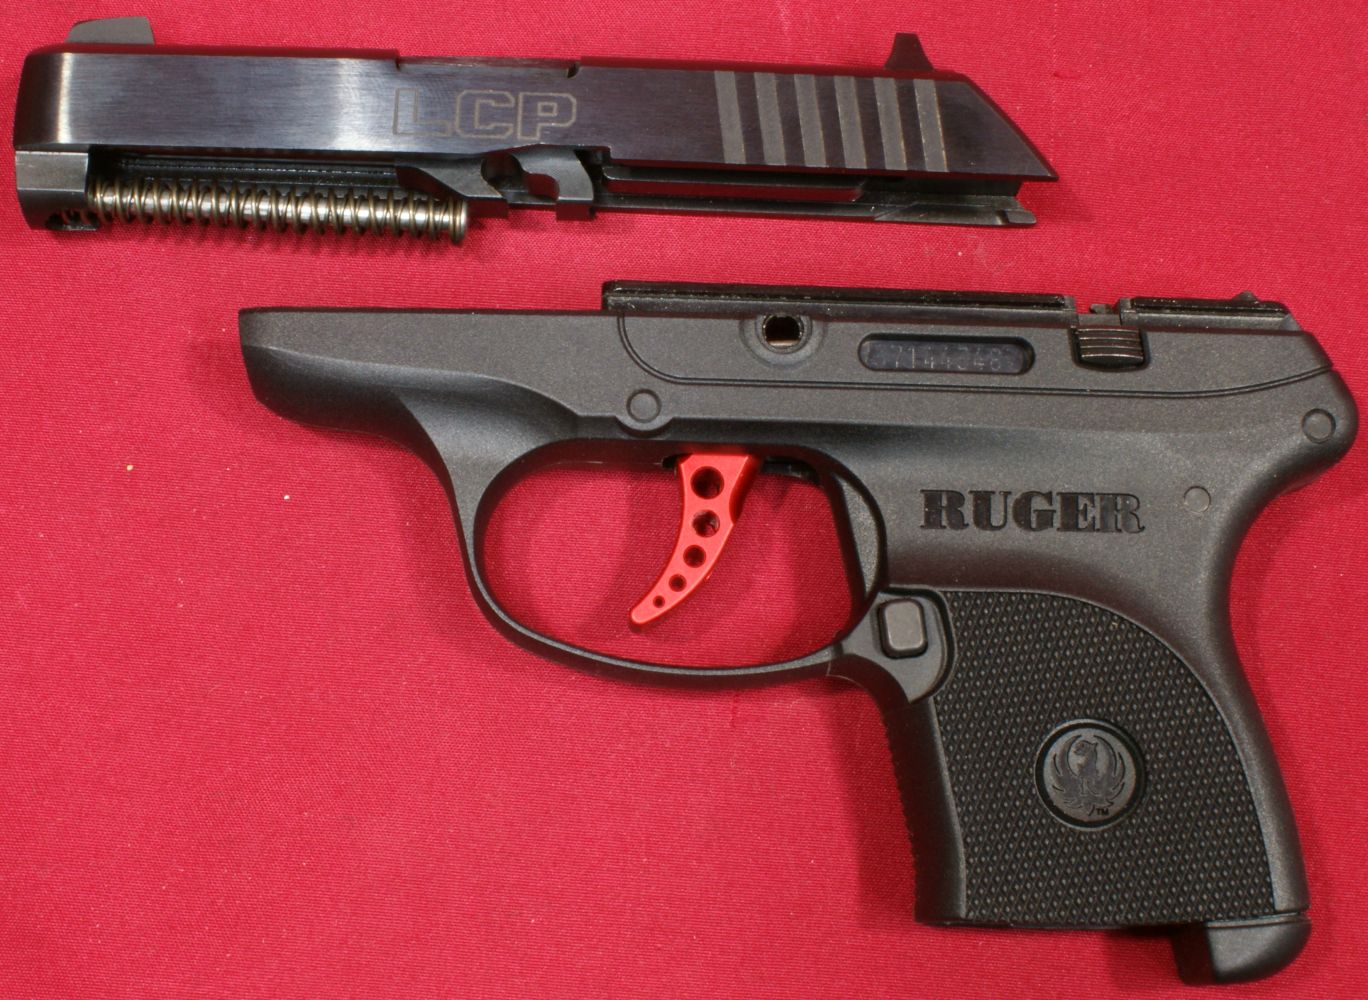
Step 3 - Remove Slide
With the takedown pin removed, you can push the slide forward and off the grip frame assembly.
Figure 7
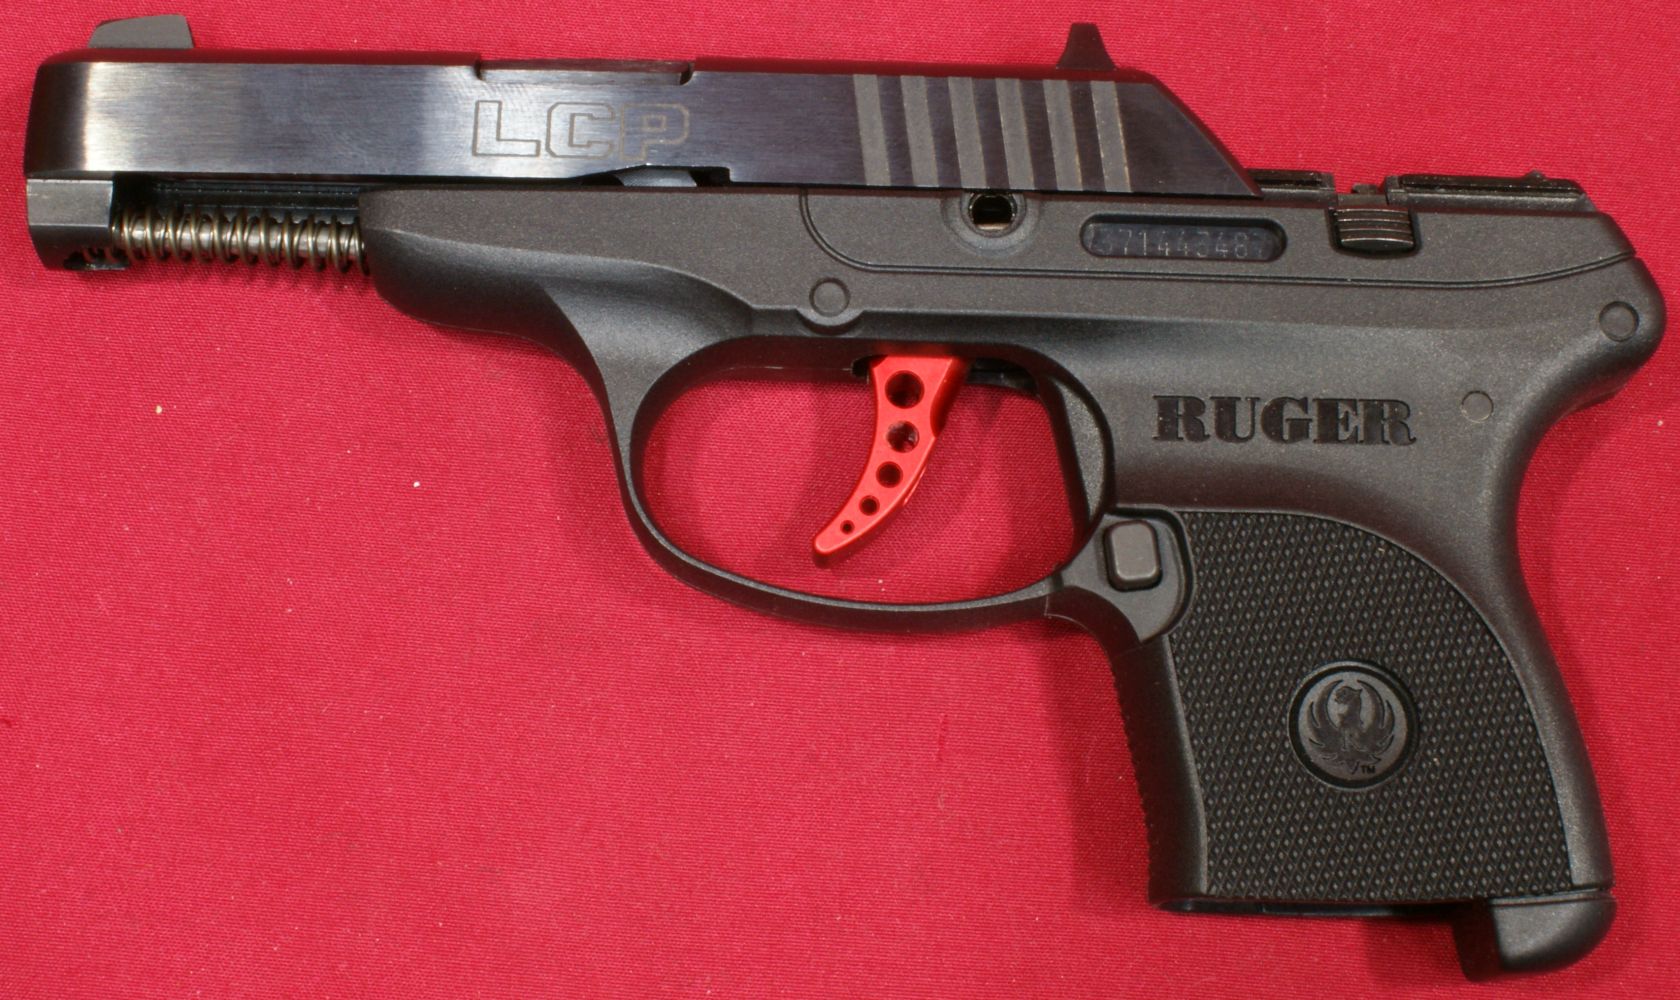
Figure 8
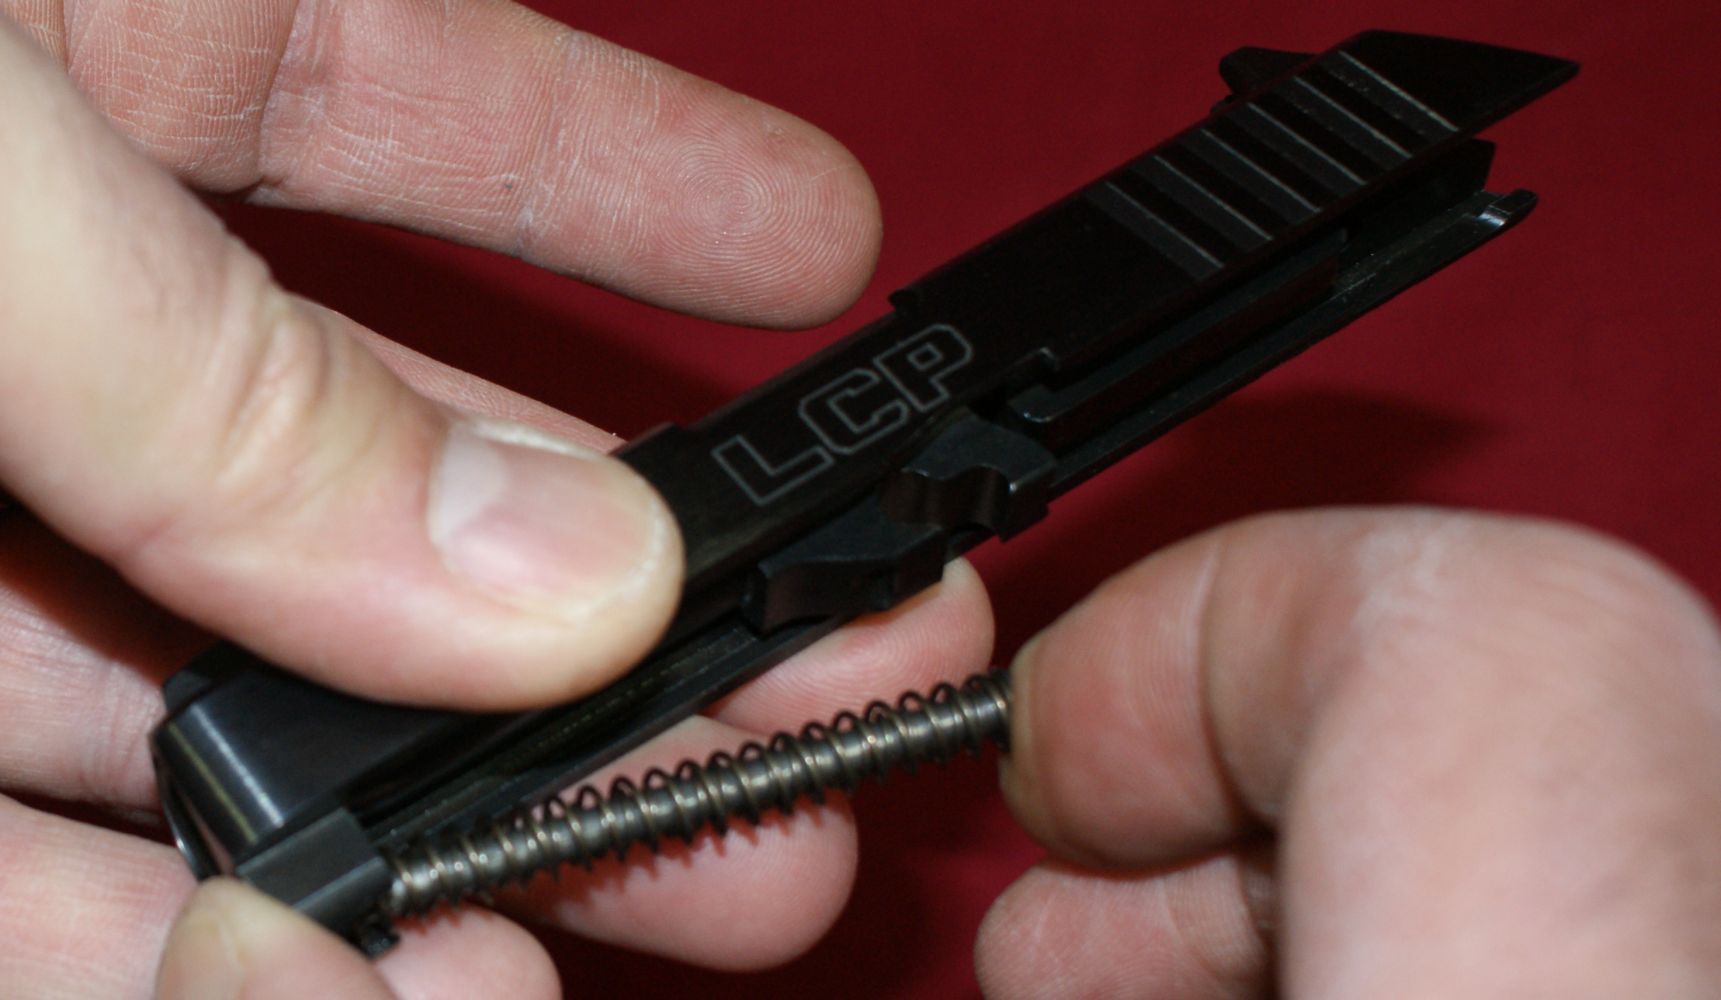
Step 4 - Remove Recoil Spring Assembly
Press the rear of the recoil spring assembly forward and pull the assembly away from the barrel to disengage it from the seat on the barrel lug. You can then pull the assembly from the front of the slide.
Figure 9
The recoil spring assembly can be separated into its three parts; inner spring, outer spring and guide rod.
Figure 10
![]()
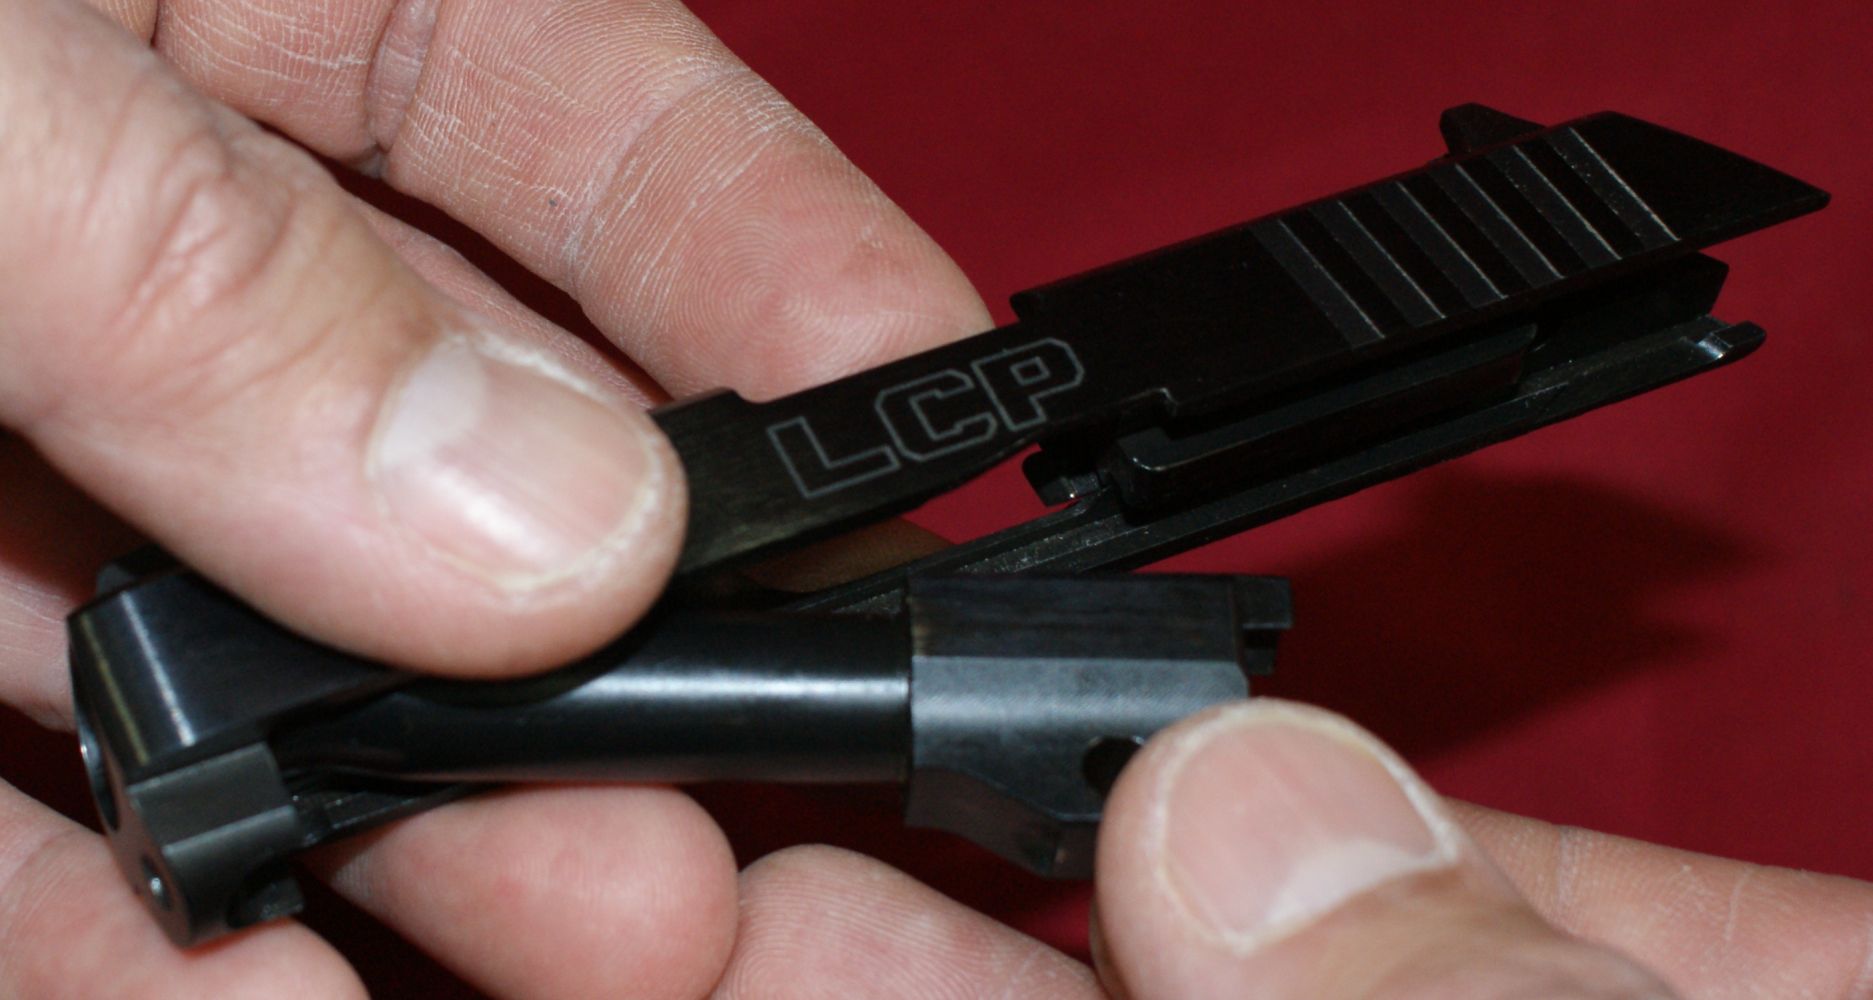
Step 5 - Remove Barrel
Pull the barrel down and slightly forward until it clears the bottom of the slide and you can then pull the barrel rearward from the front portion of the slide.
Figure 11
Disassembly Complete
The photo below shows the pistol completely disassembled for cleaning. If you have your screwdriver on hand, disassembling to this level takes less than one minute.
Figure 12

Reassembly
Reassembly is basically the reverse of disassembly. The Ruger instructions talk about making sure the flared end of the inner guide rod spring is towards the slide, but I don't believe the inner spring on this pistol has a flared end.
Internal Features
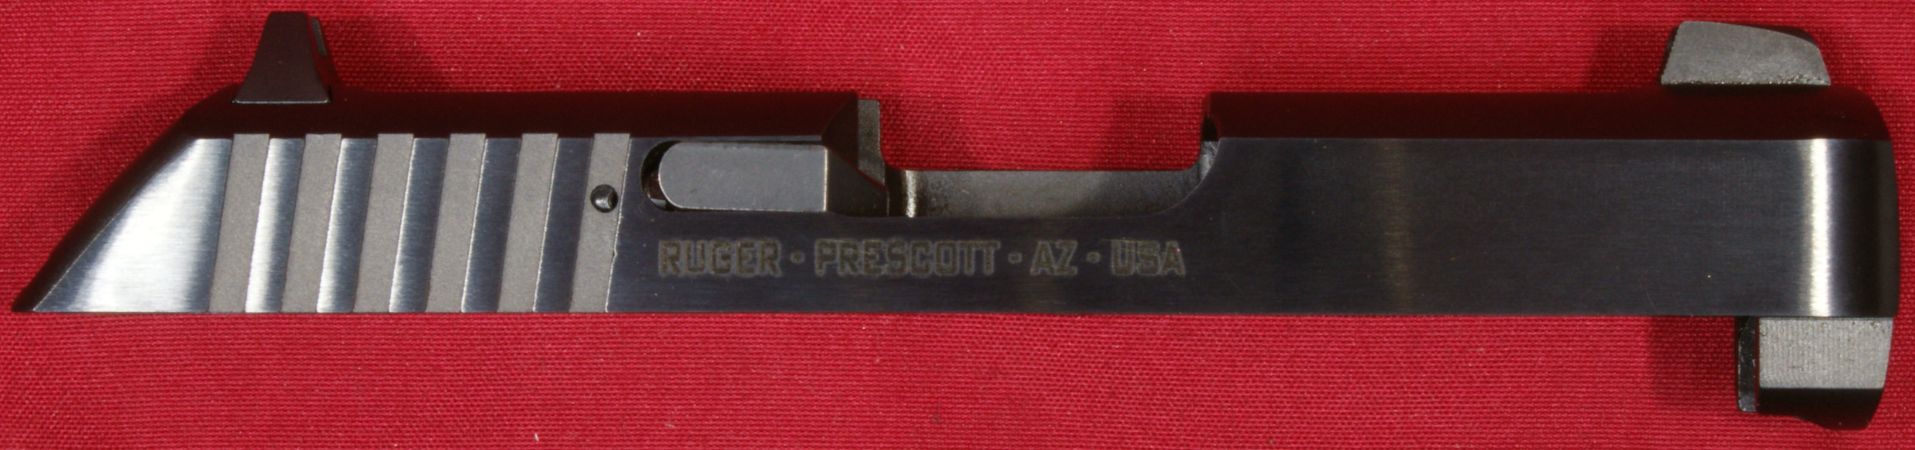
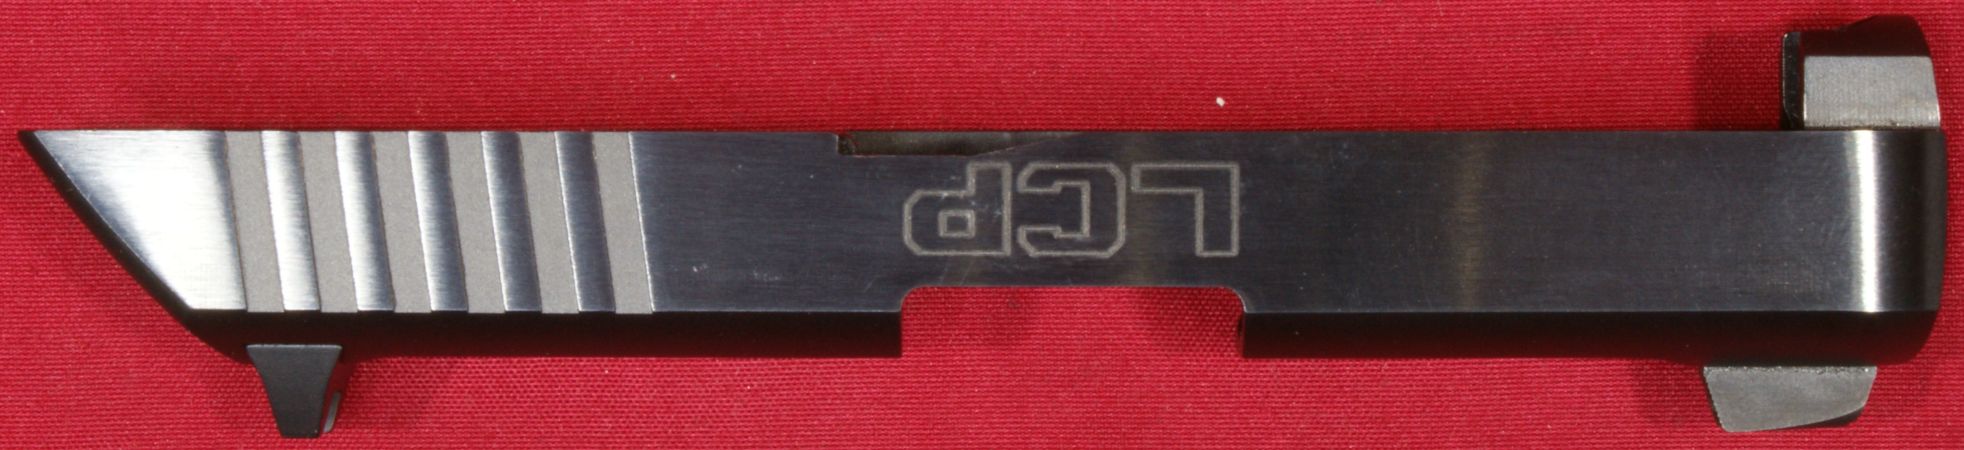
The Ruger LCP pistol is a very simple design. The slide assembly is not intended to be disassembled and the only feature that you may do something with is to make a windage adjustment with the rear sight.
Figure 13

Figure 14
The firing pin and spring is held in place by a roll pin while the extractor, plunger and spring are held in place by the engagement of the plunger on the bottom of the extractor.
Figure 15

Figure 16
This next photo give you a look at the tail of the firing pin.
Figure 17
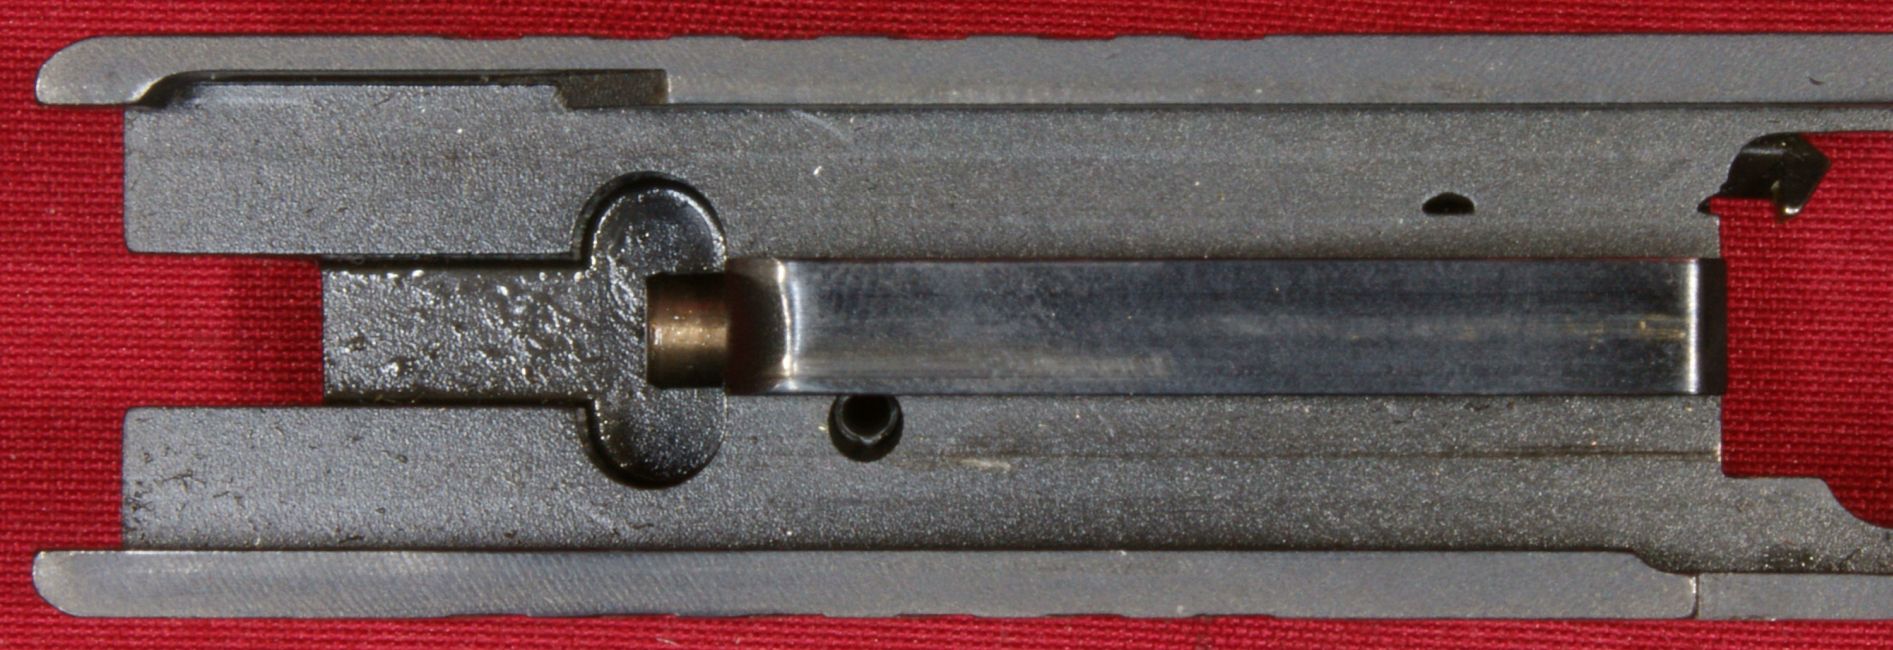
Figure 18
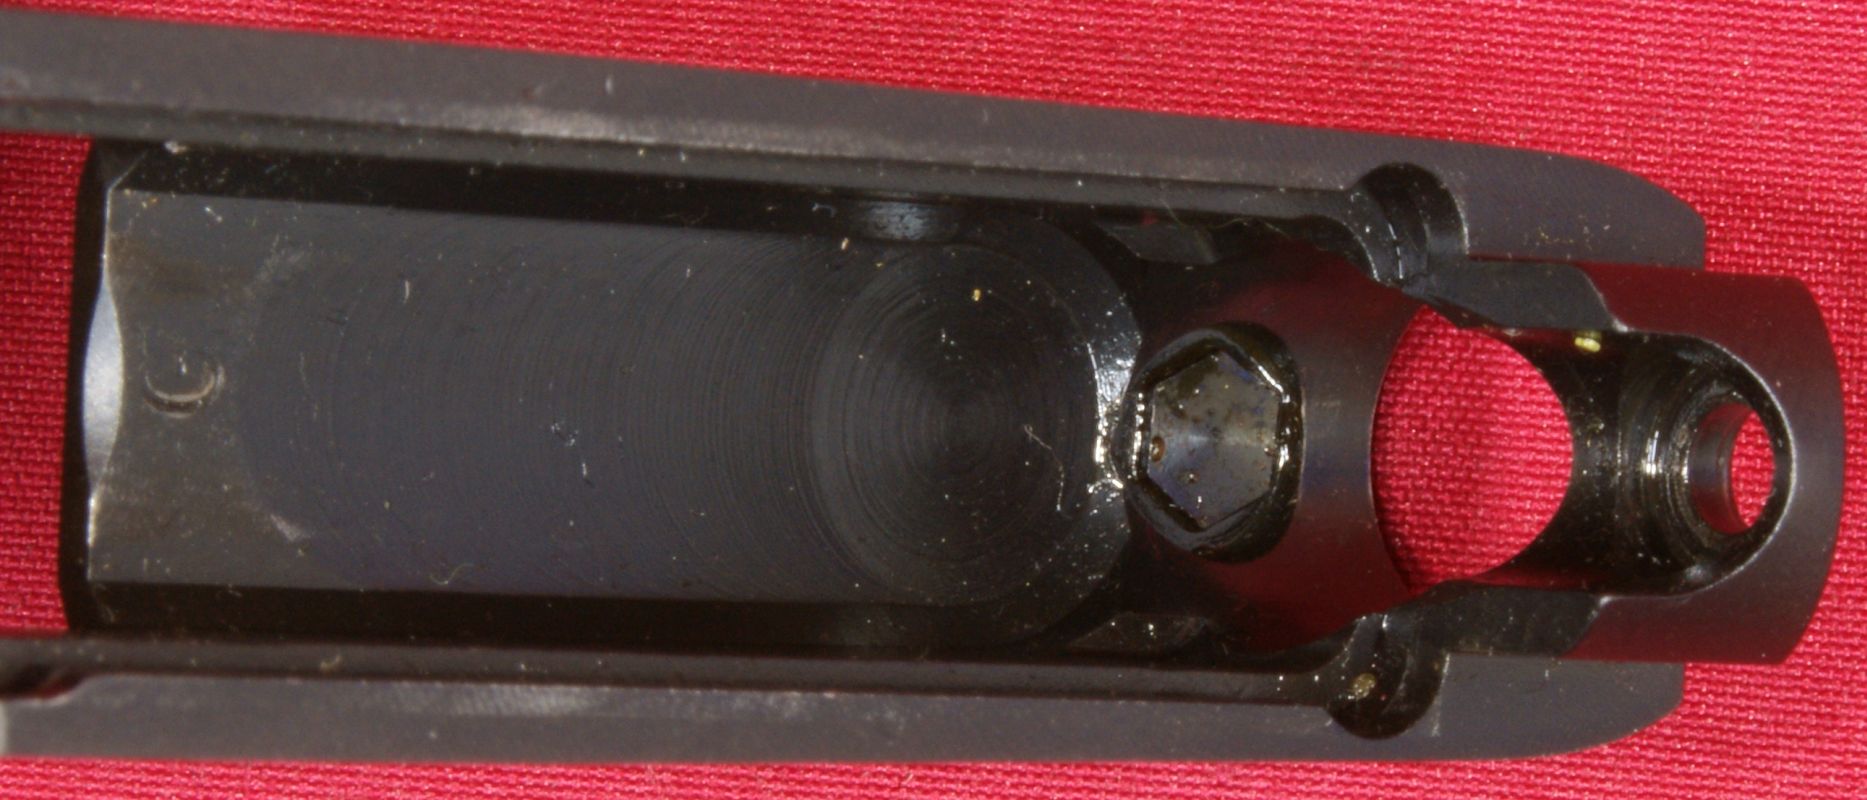
The front sight is held in place by this hex head screw shown below. Ruger makes it clear that the front sight must be factory installed. Most likely there is some type of thread locking compound on the screw threads, so I wouldn't attempt to loosen the screw unless you are having a problem.
Figure 19
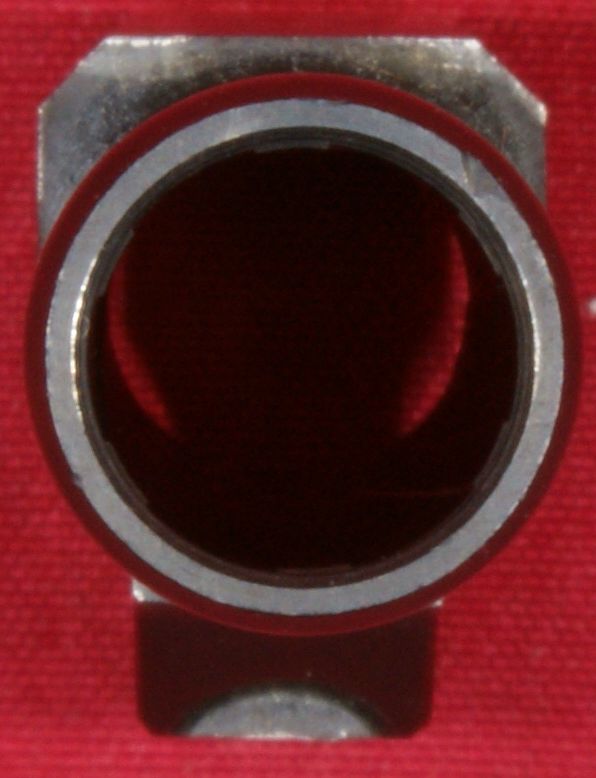
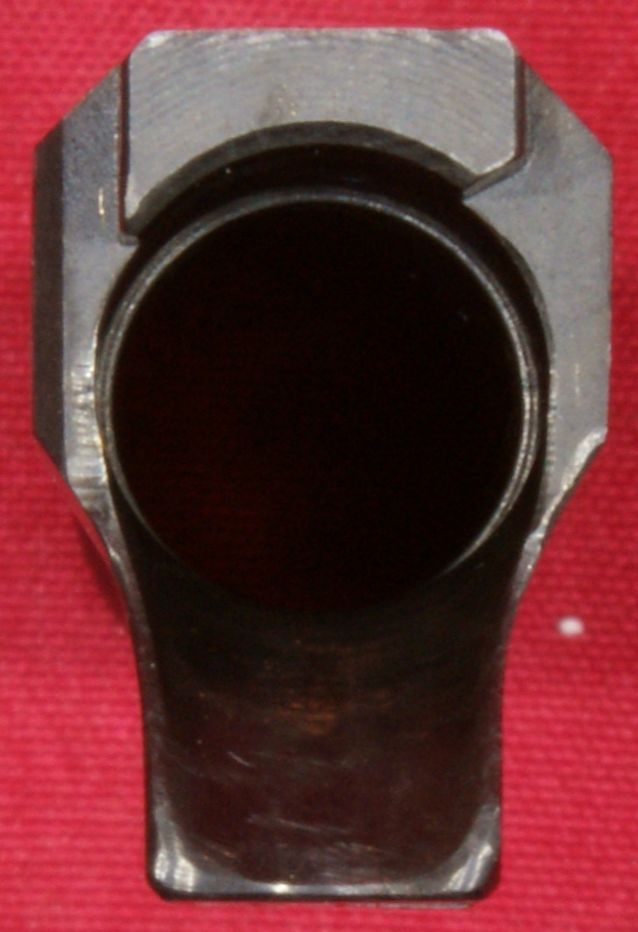
The 2.75" blued alloy steel barrel is shown in these next several photos.
Figure 20
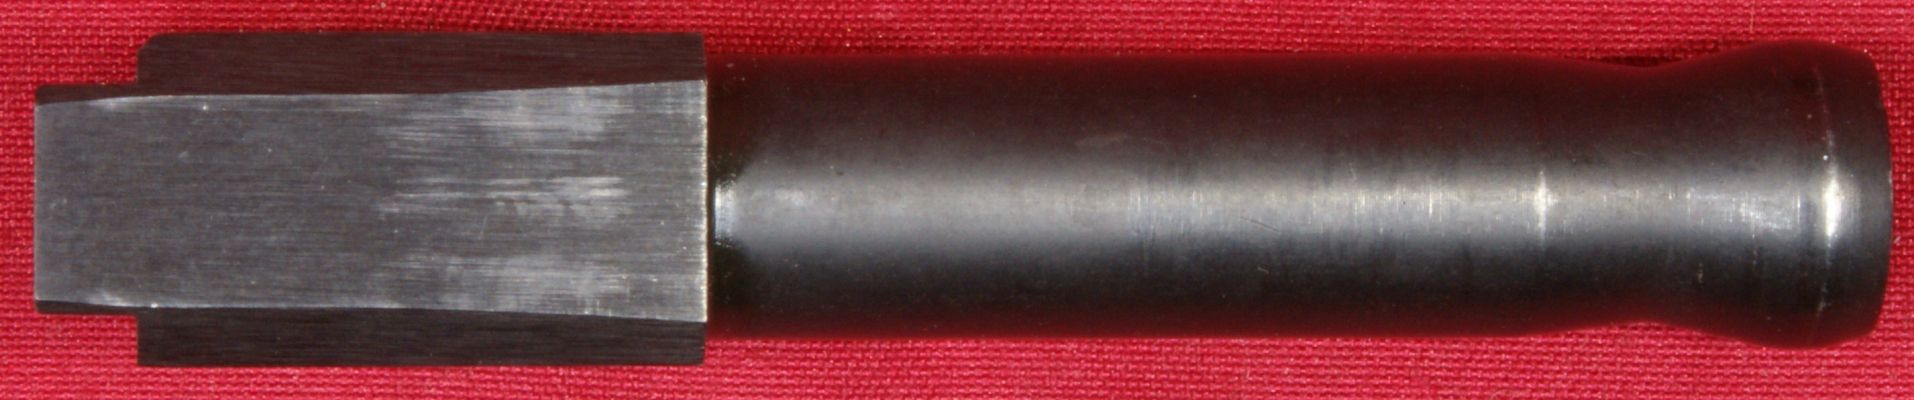
Figure 21
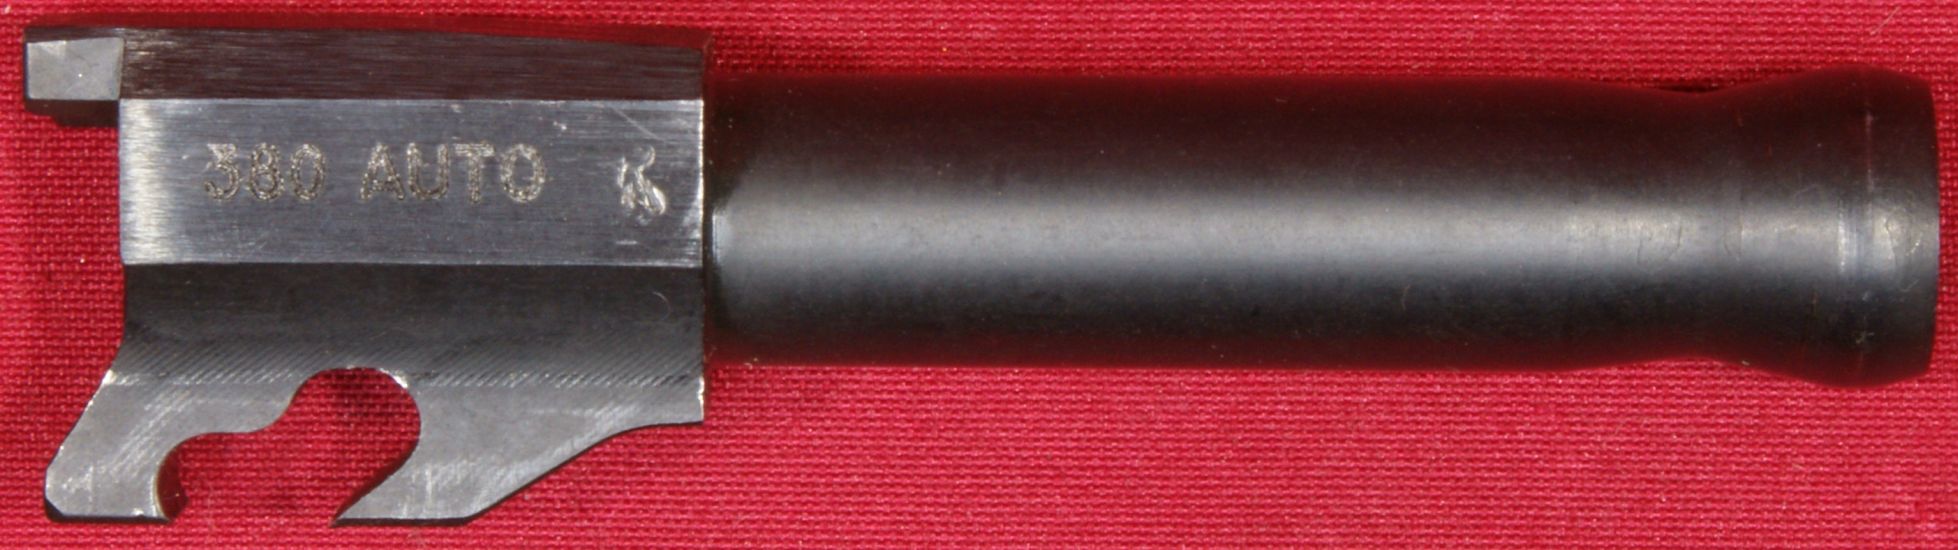
Figure 22
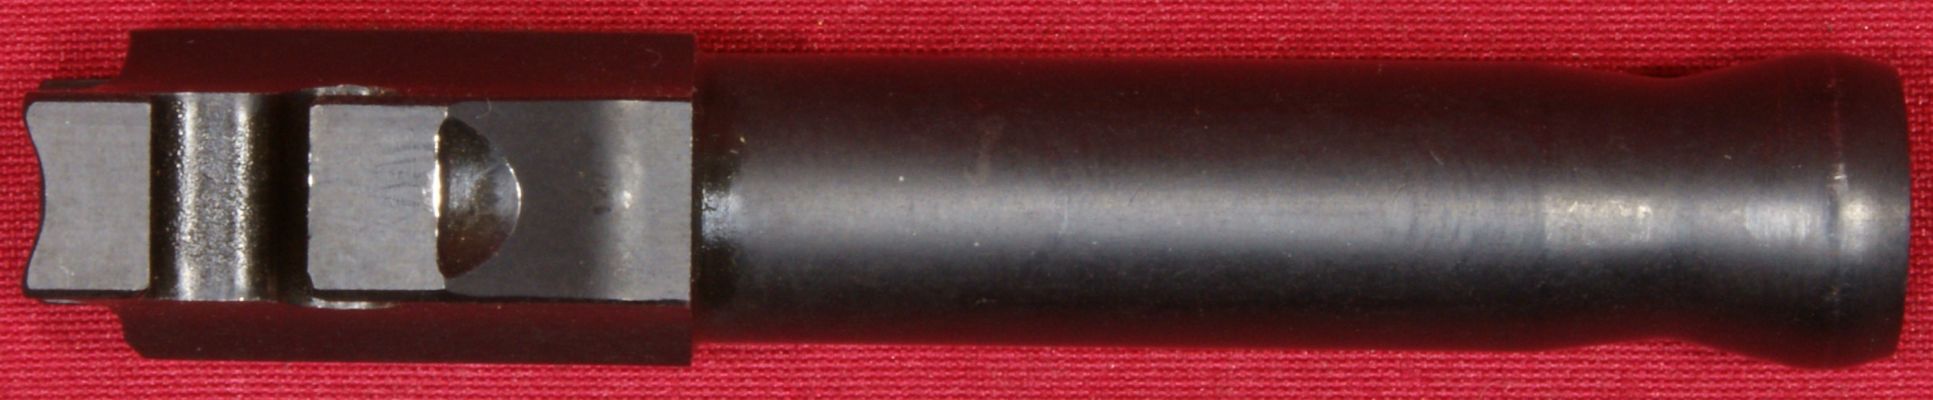
Figure 23
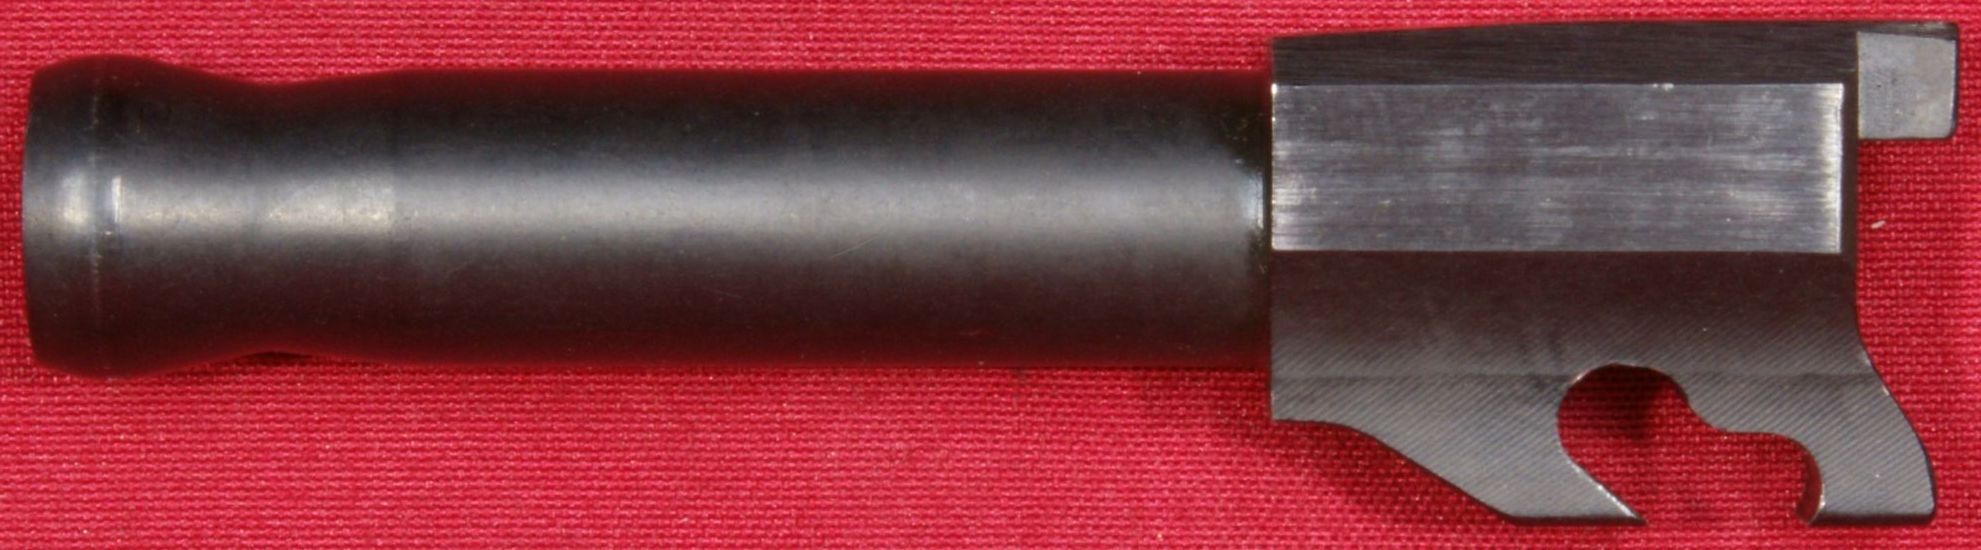
The feed ramp is integral to the barrel lug. Based on the markings on the ramp on the review pistol after range testing, it looks like the rounds are contacting the ramp above the midway point on the ramp.
Figure 24
Figure 25
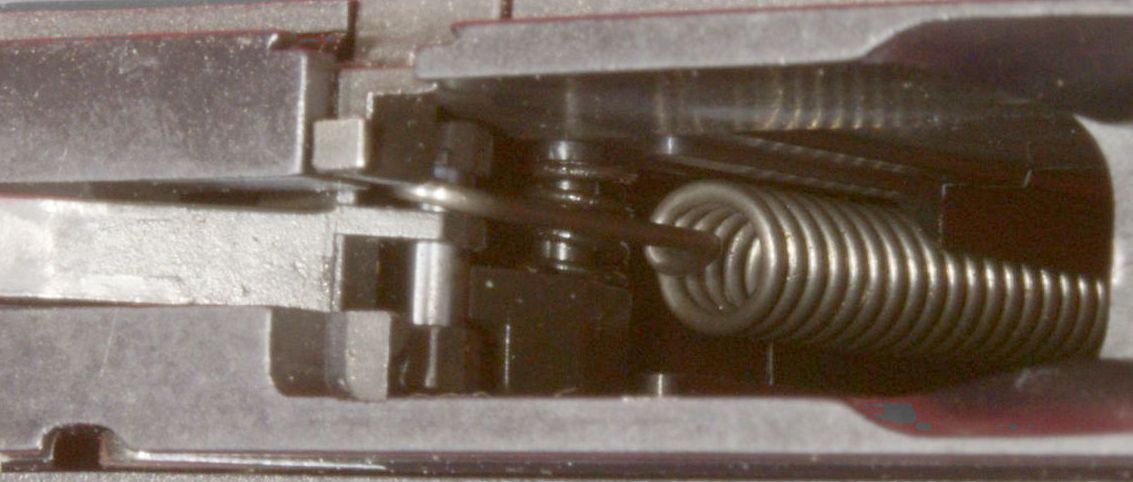
Inside the frame assembly is an aluminum frame insert which is pinned inside the grip with two frame insert pins.
Figure 26

Figure 27
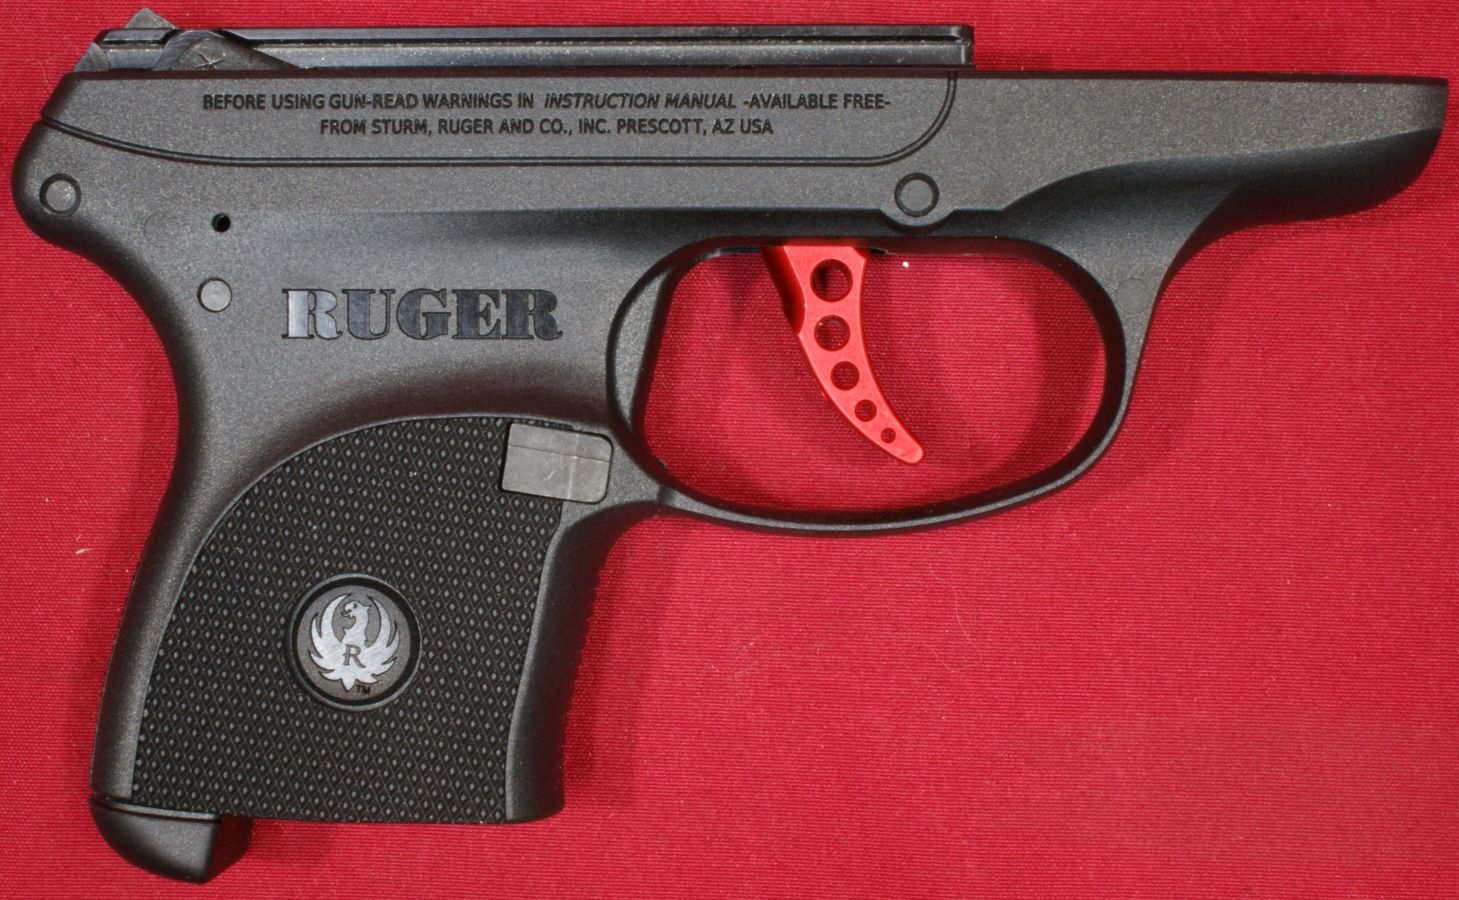
Figure 28
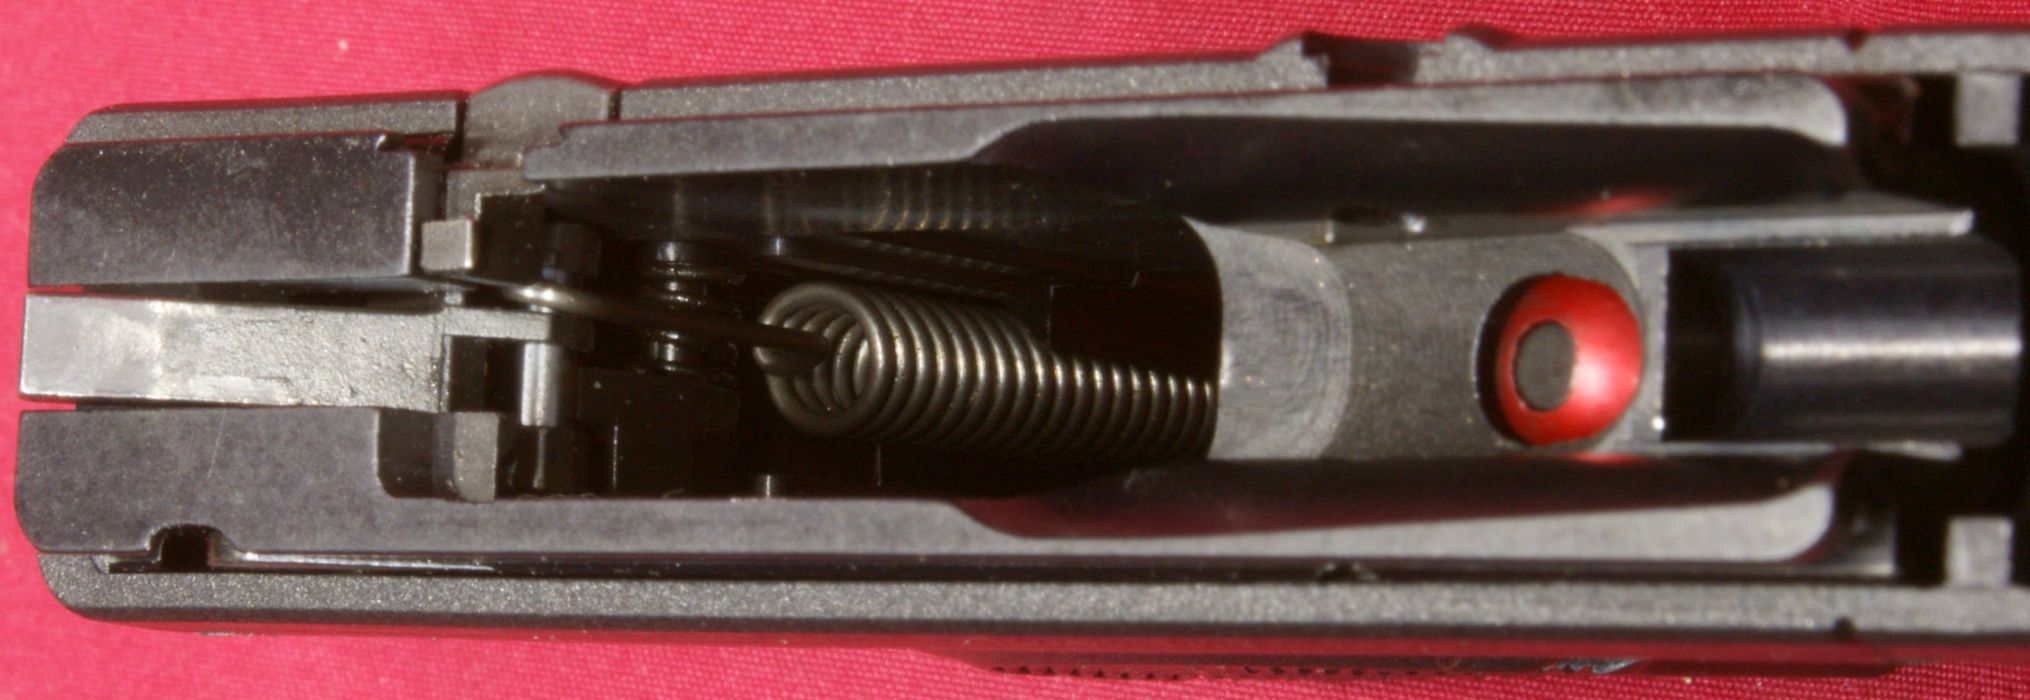
I zoomed in and lightened up the photo above to point out some of the parts such as the (A) Hammer, (B) Hammer Catch, (C) Hammer Spring and (D) Slide Hold Open.
Figure 29
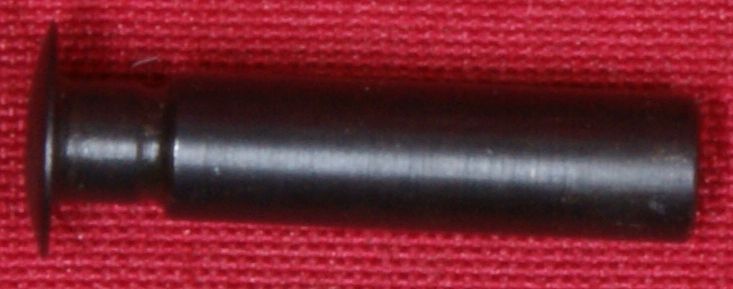
One of the new features of this LCP Custom pistol is the new stainless steel guide rod which I believe is more durable than the standard guide rod.
Figure 30 - Stainless Steel Guide Rod

Figure 31 - Inner Recoil Spring (2.54" uncompressed, 0,182" OD)

Figure 32 - Outer Recoil Spring (2.78" uncompressed, 0.244" OD)

Figure 33 - Takedown Pin (0.155" body OD")
Thoughts
The Ruger LCP Custom is a very simple pistol and easy to disassemble. Disassembly requires a small screwdriver or tool and I recommend putting tape on the slide or tool so that over time you don't scratch the finish on the slide when removing the takedown pin.
For more detailed photos and commentary, make sure you check out the other parts of this review and feel free to leave comments below. The following links are provided to help you see other parts of this review.
- Ruger LCP-Custom Review: Part 1 - Introduction, Specifications and Summary
- Ruger LCP-Custom Review: Part 2 - What's in the Box
- Ruger LCP-Custom Review: Part 3 - External & Operational Features
- Ruger LCP-Custom Review: Part 4 - Disassembly & Internal Features
- Ruger LCP-Custom Review: Part 5 - Range Test
Or
If you would like to be notified about future Gunsumer Reports reviews via Facebook, make sure "You Like This" by clicking the Facebook "Like" button at the bottom or top of this page. If it already says "You Like This" beside the button, clicking it again will uncheck the "Like" status and you will not be notified.
| Share on Facebook | |
© 2010, 2011, 2012, 2013, 2014, 2015, 2016, 2017, 2018, 2019, 2020, 2021, 2022, 2023 & 2024 Gunsumer Reports™, All rights reserved.
FTC Disclosure