|
|
Gunsumer Reports TM Providing Detailed Objective Reviews for Firearms and Firearm Accessories |
Ruger LC9s™ Review
Part 4 - Disassembly & Internal Features
January 12, 2015
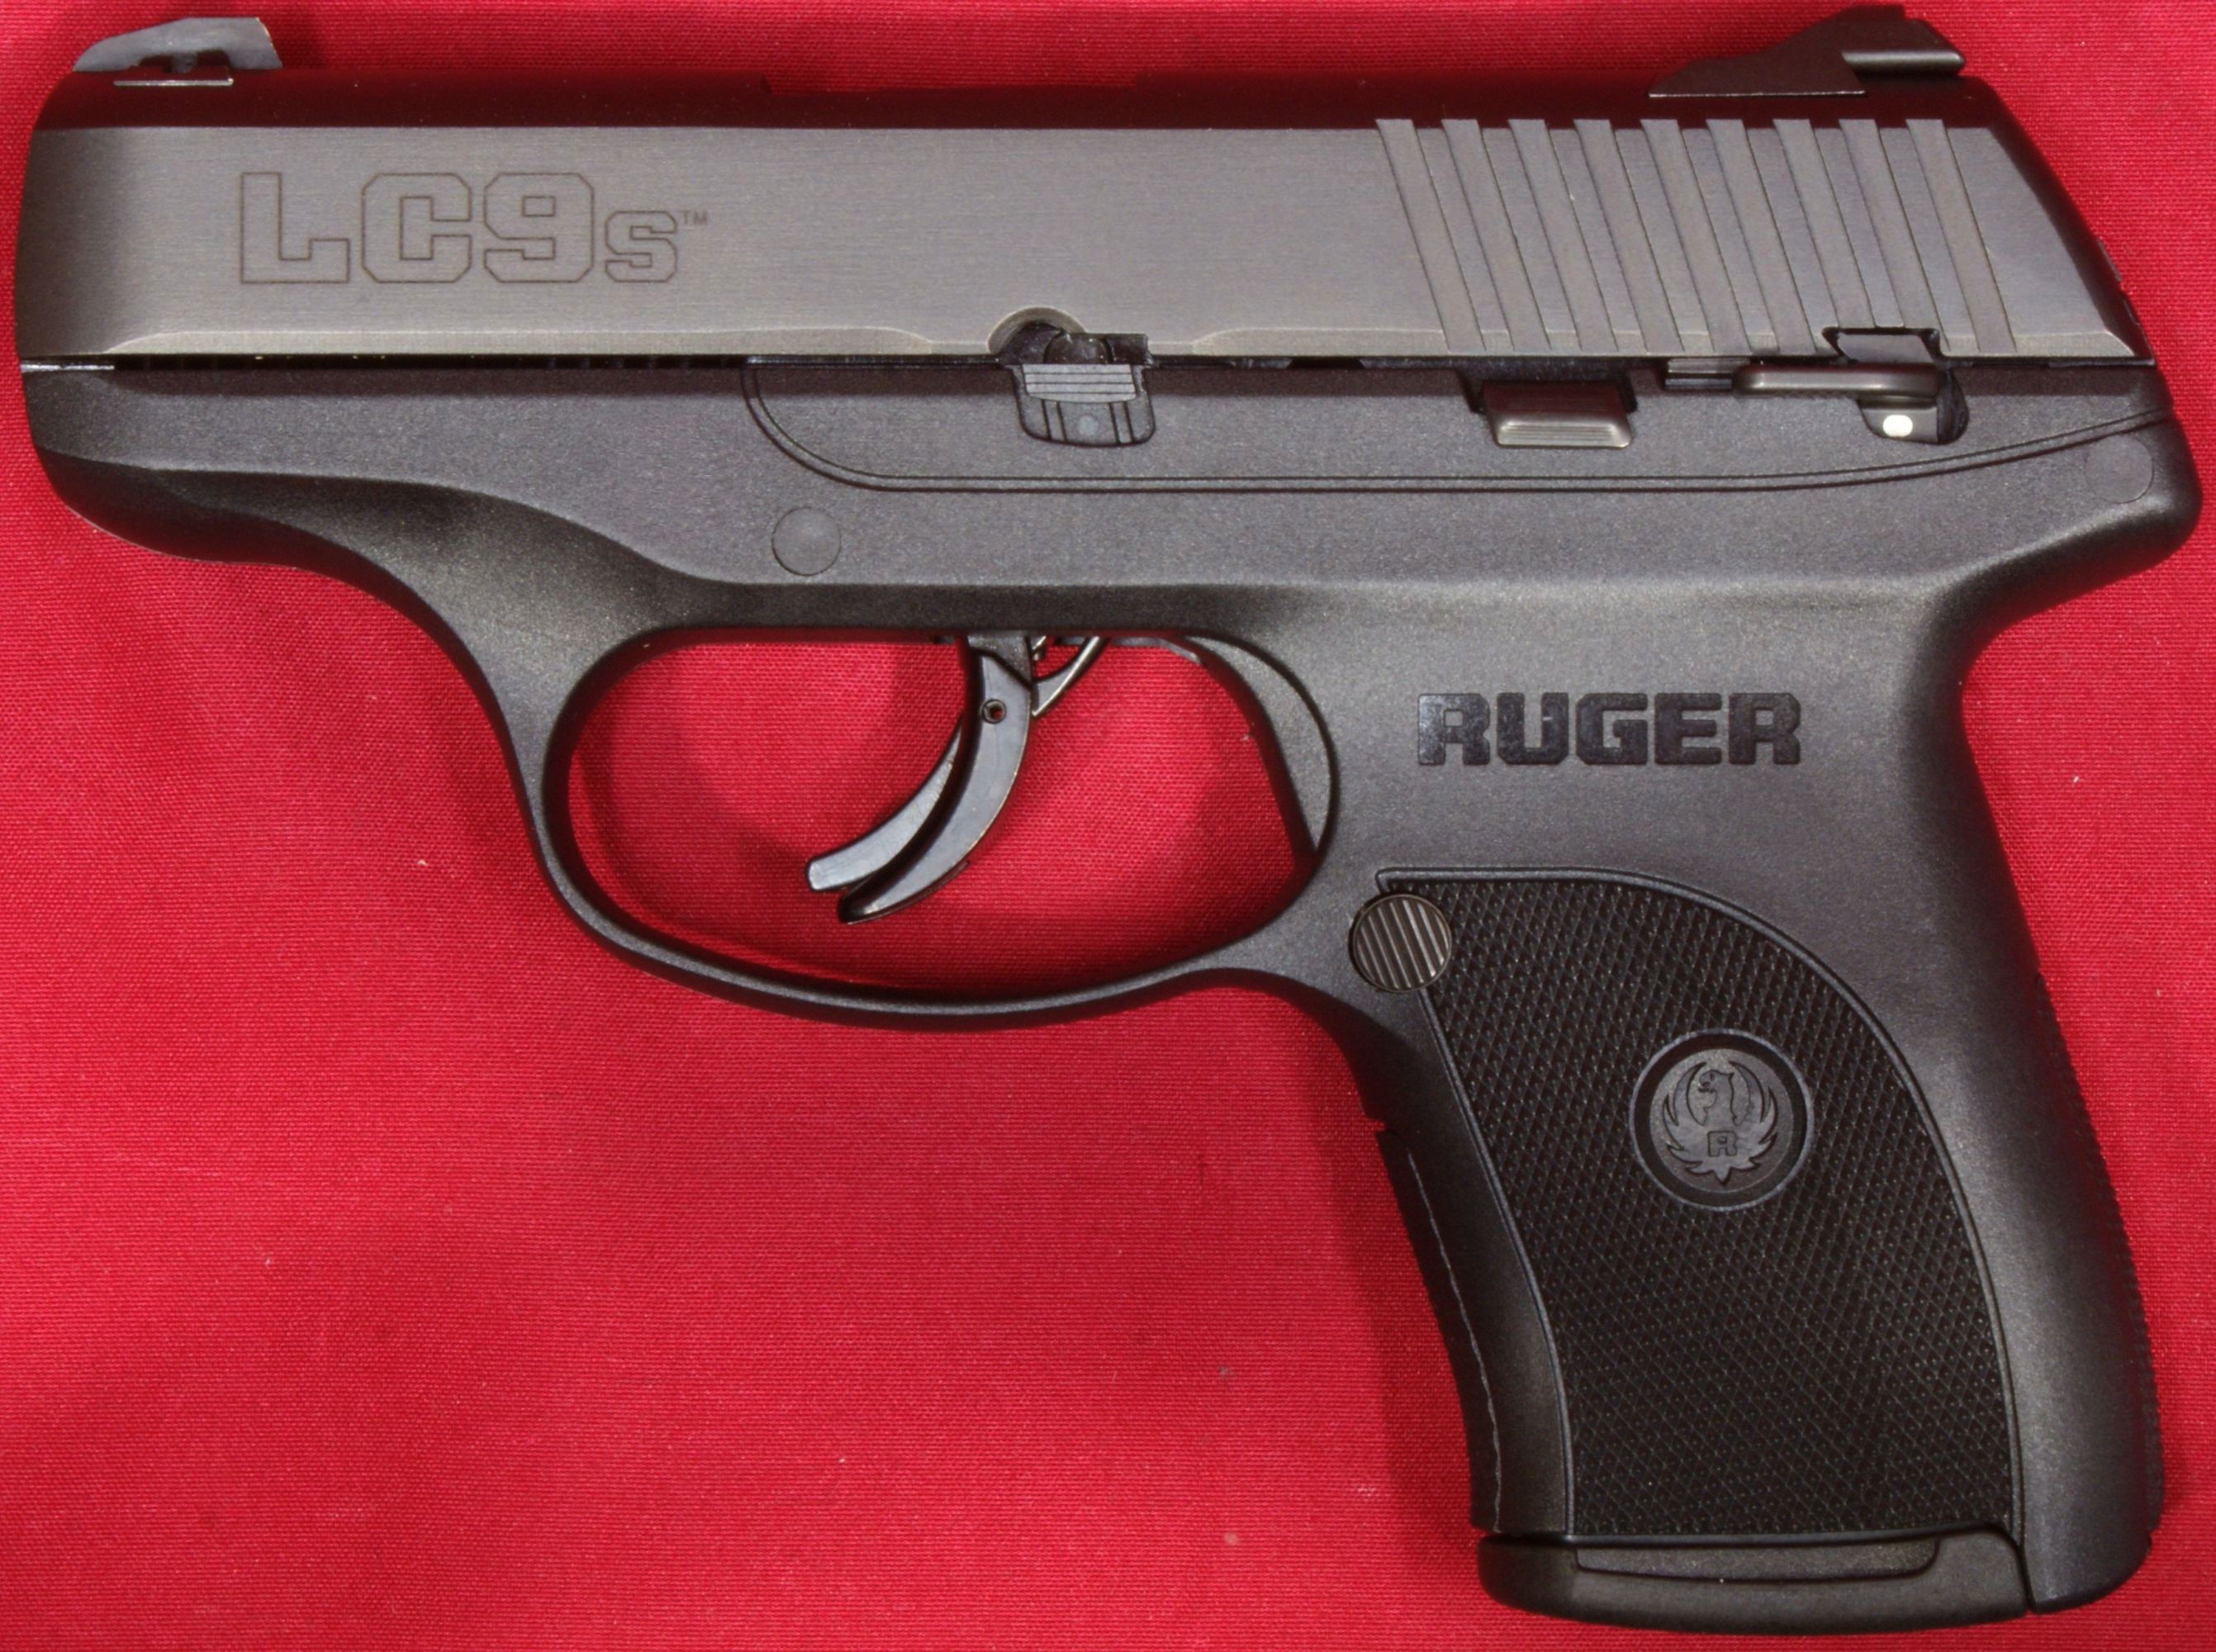
In this part of my Ruger LC9s Pistol Review, I cover disassembly and the internal features of the Ruger LC9s striker fired pistol.
Normal Disassembly
Normal disassembly of the LC9s is very similar to that of the LC9 and the steps shown below are also very similar to that shown in the Ruger LC9s Instruction Manual. Although I show these steps in detail, you should always consider the manufacturer's instruction manuals as the official source when it comes to doing anything with your firearm. Their instruction manual contains many more warnings and information to ensure your maximum safety.
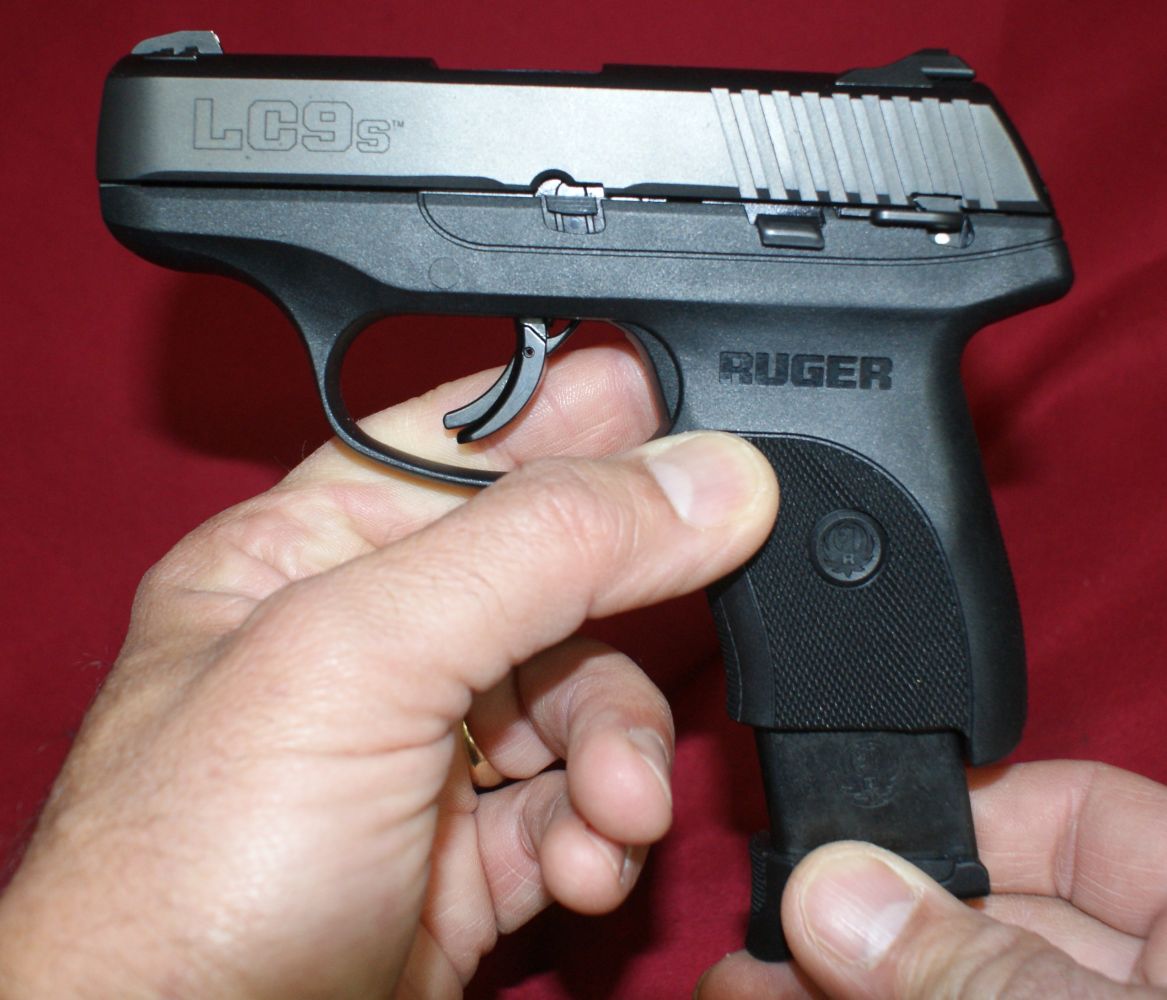
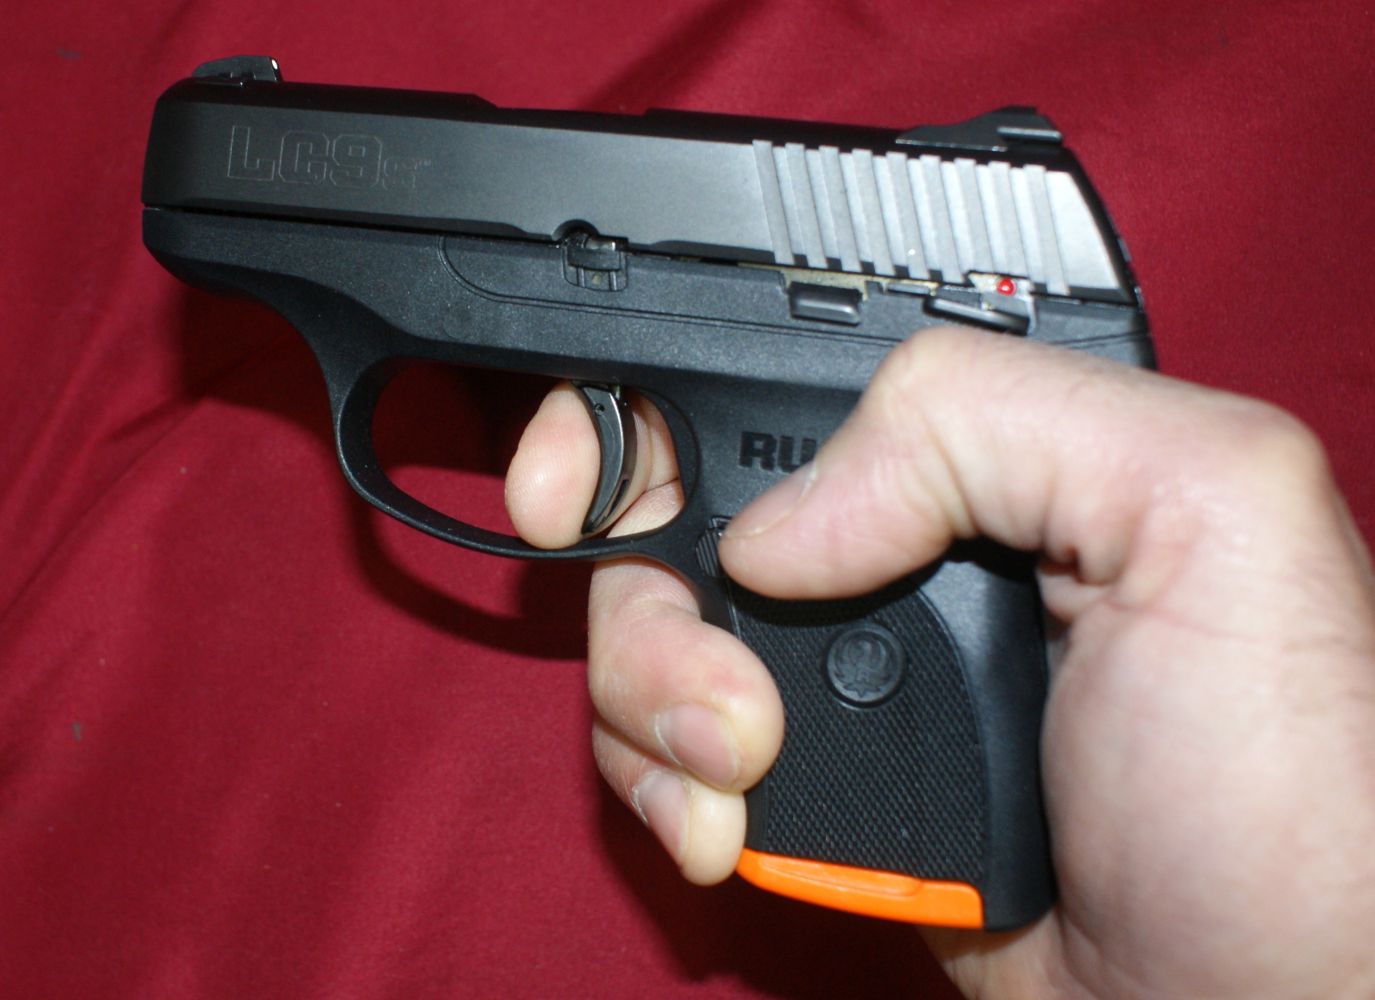
Step 1: Remove Magazine
Press the magazine latch and remove the magazine.
Figure 1
Step 2: Lock Slide Open
Move manual safety to fire, pull the slide to the rear and push up on the hold-open lever. This will lock the slide in the rear position.
Figure 2
Step 3: Inspect Chamber
Verify that the chamber is empty by looking into the chamber area. This is an important step because later you will be pulling the trigger. Believe me when I say a round can get stuck in the chamber because I experienced it first hand about 30 years ago.
Figure 3

Step 4: Release Slide
Once the pistol as been confirmed to be empty, release the slide by pulling it rearward so the hold-open lever disengages and then let the slide shift forward.
Figure 4

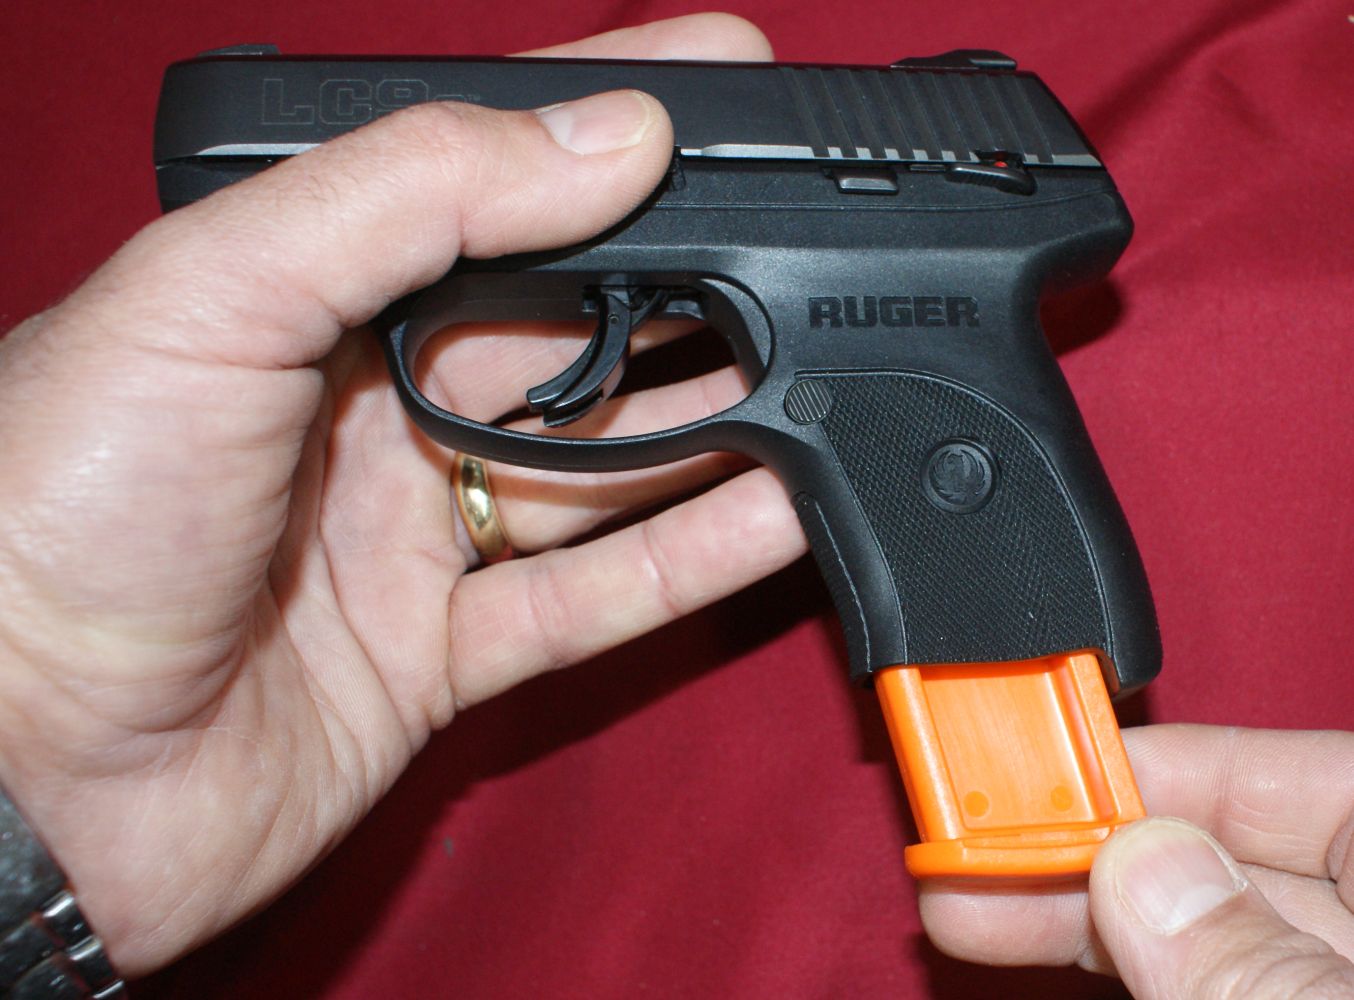
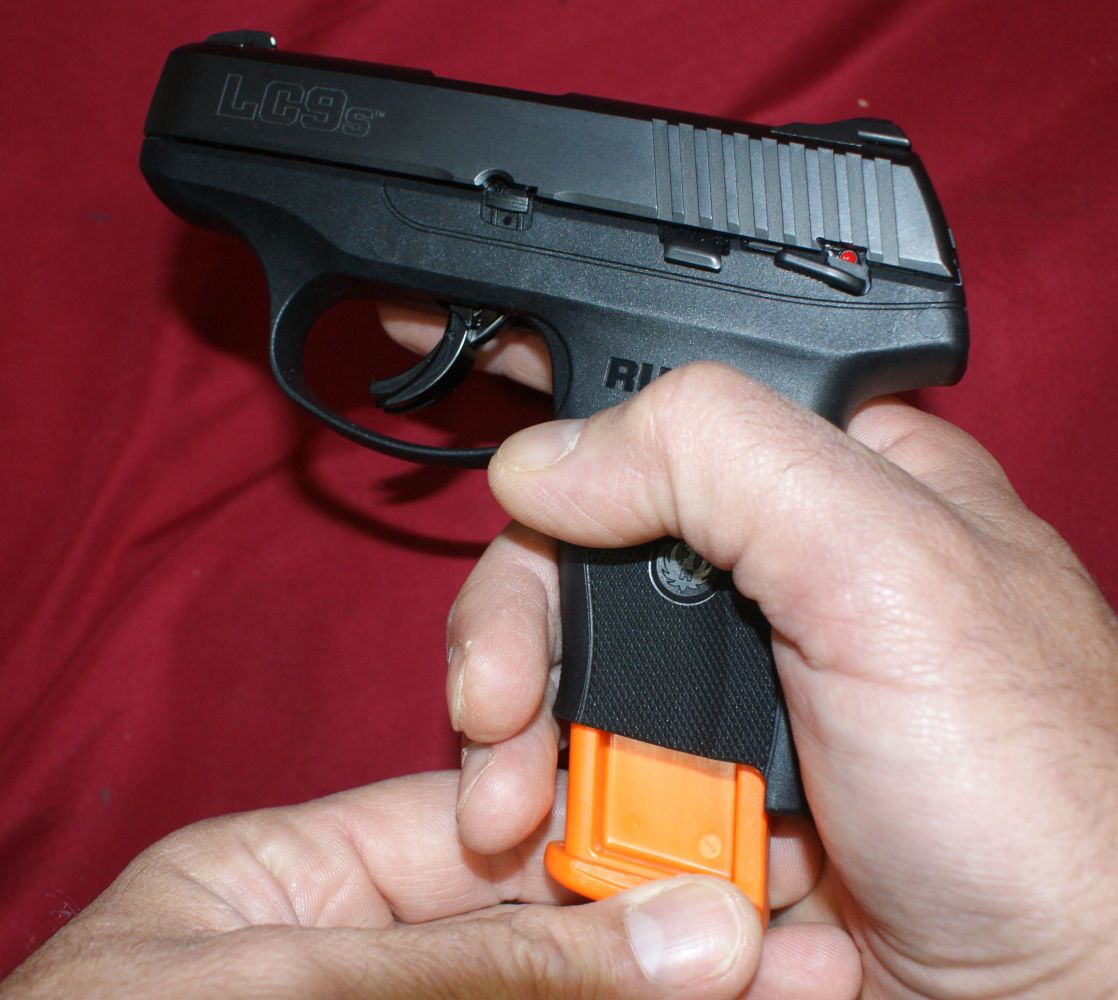
Step 5: Release Striker
Ruger provides an orange polymer magazine simulator which will allow you to insert it into the pistil which will then disengage the magazine safety and allow you to pull the trigger. These instructions are molded into the side of this "inert" magazine.
Figure 5

Insert the inert magazine (or normal unloaded magazine).
Figure 6
Point the pistol in a safe direction and pull the trigger releasing the striker.
Figure 7
Remove the inert magazine or regular magazine. Actually removal of the inert magazine is not required because this magazine does not push up on the slide stop which would get in the way of the slide moving forward if a normal magazine was installed.
Figure 8
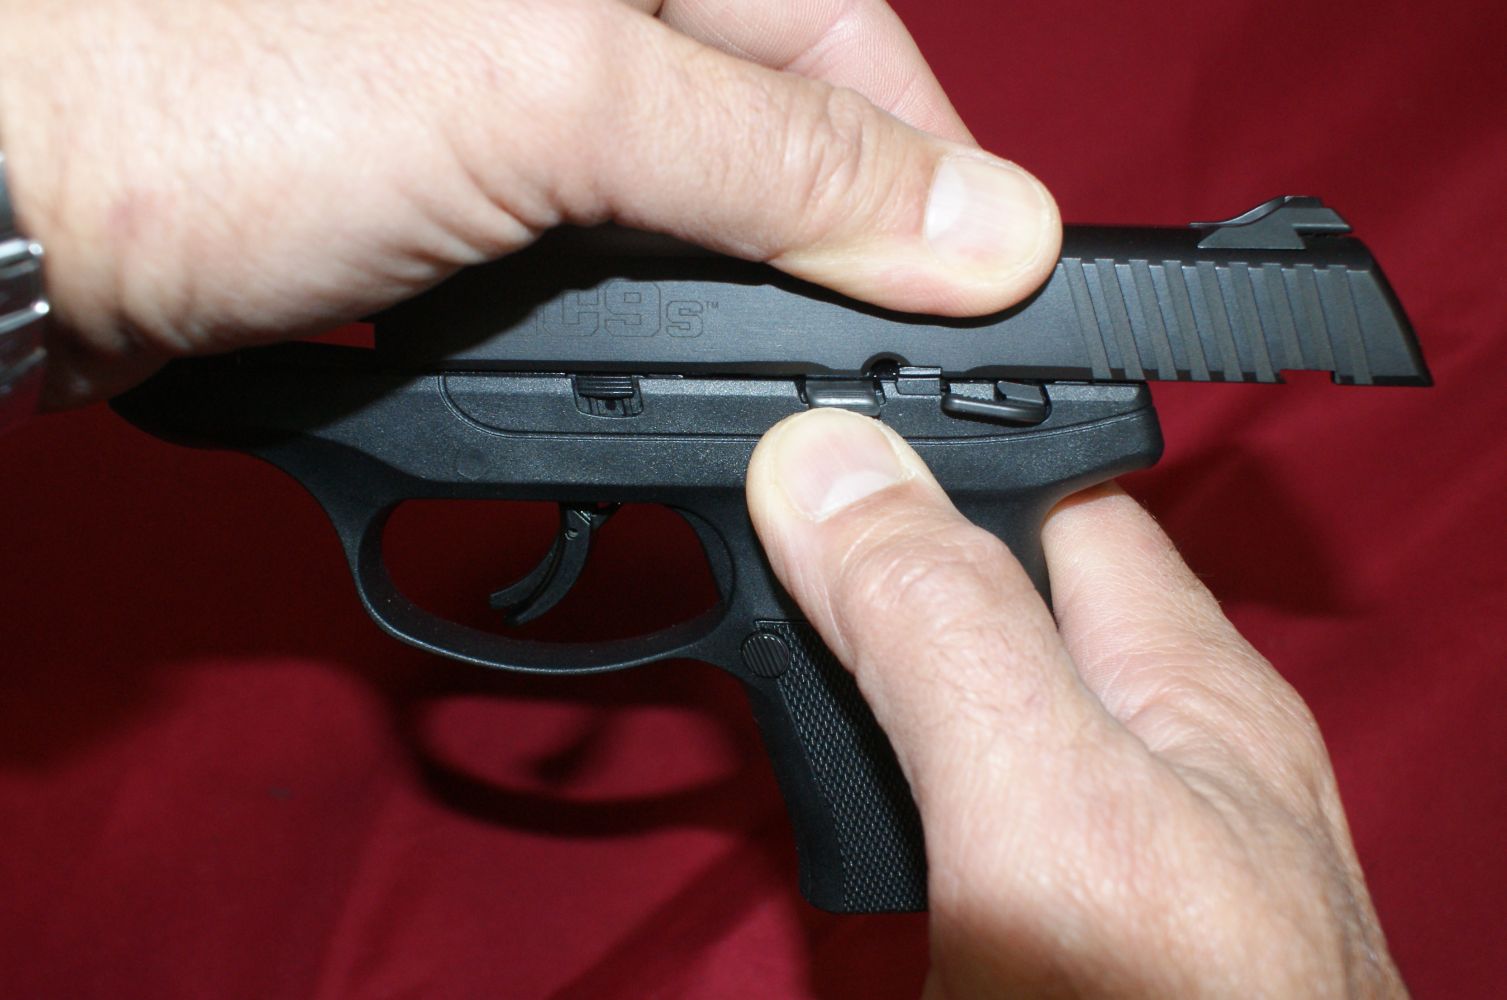
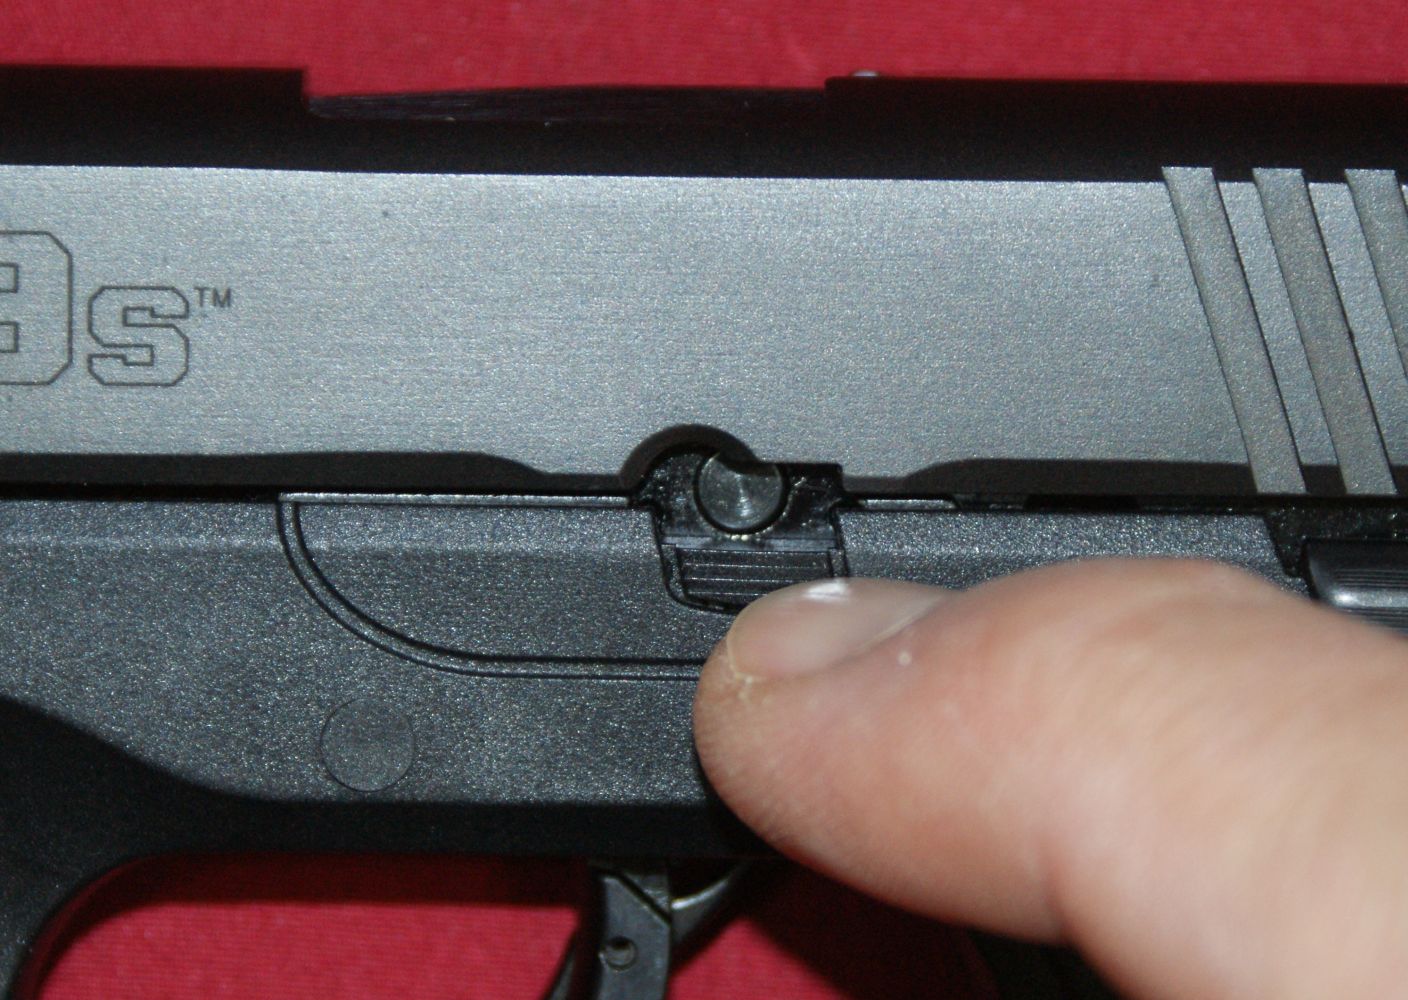
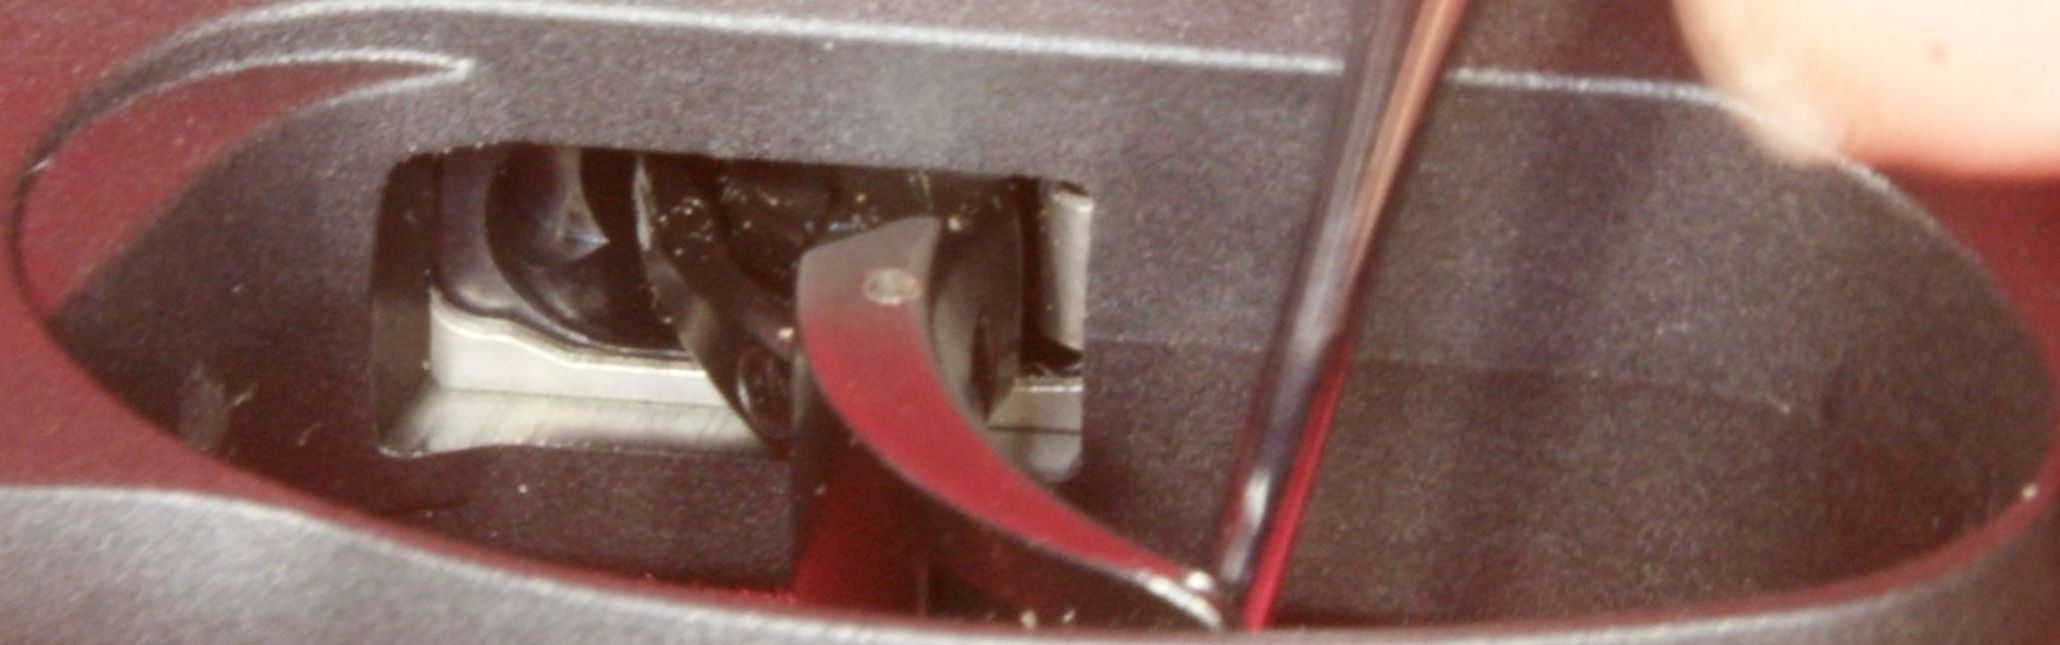
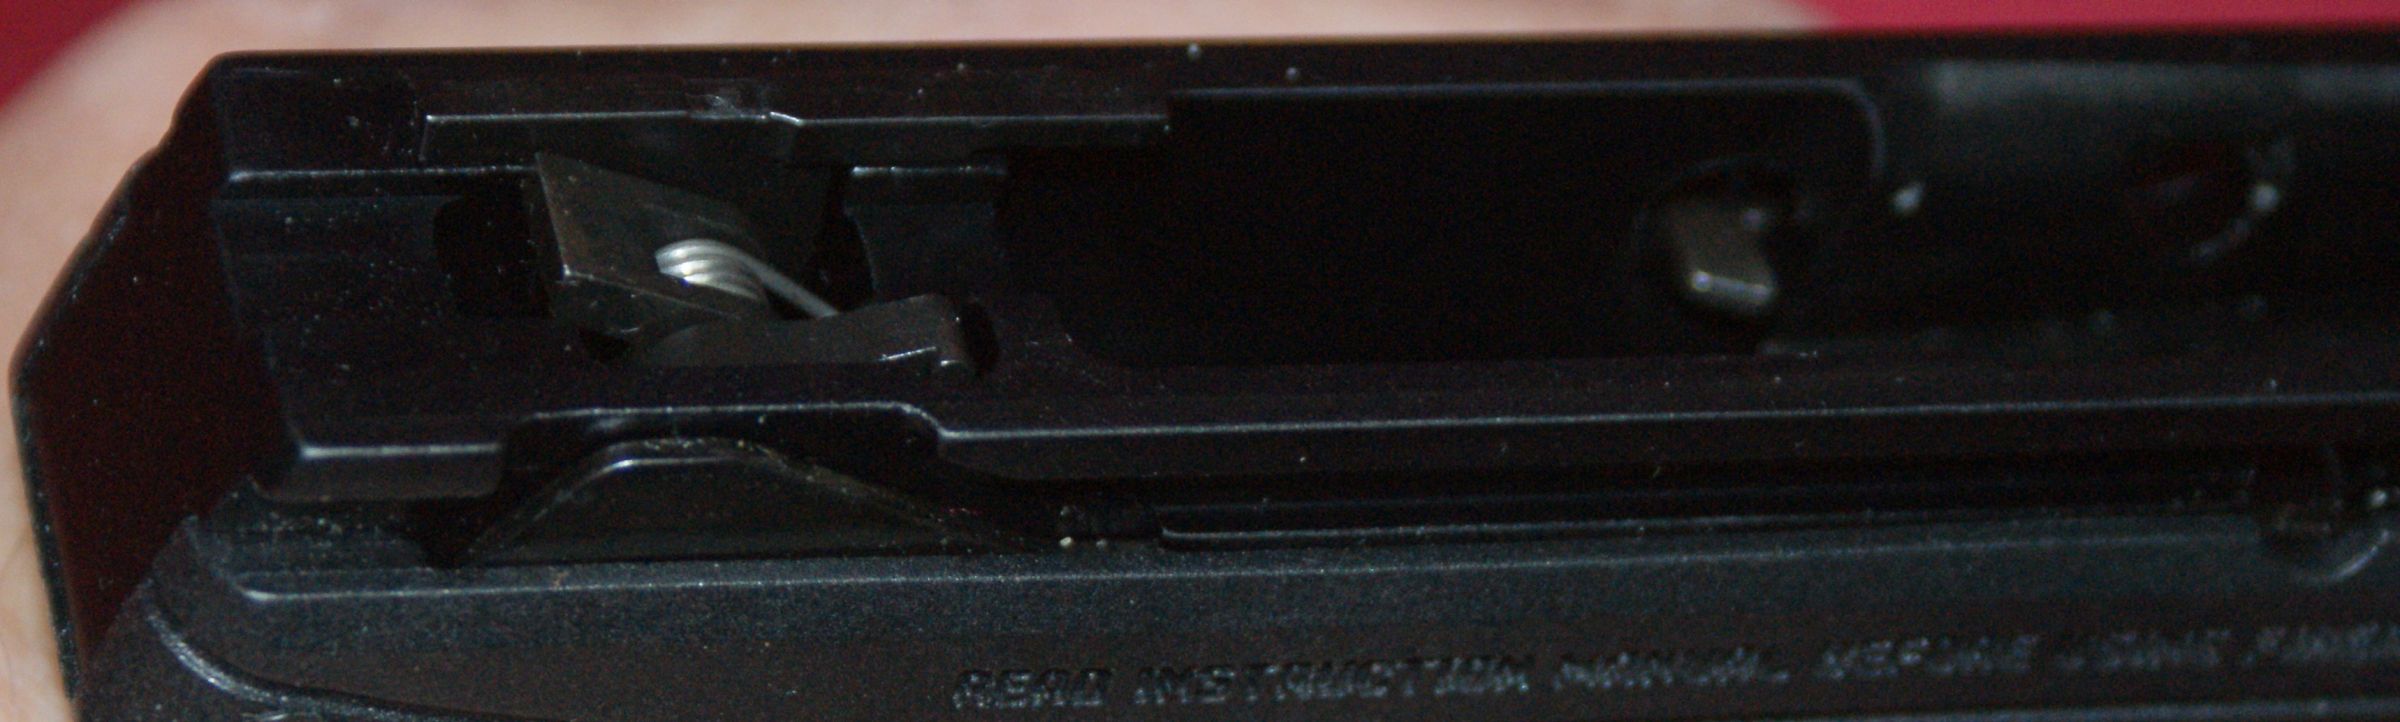
Step 6: Lower Takedown Plate
You can lower the takedown plate by pushing down on the ridged area with your finger or soft tool. I was able to easily do it with with my thumbnail.
Figure 9
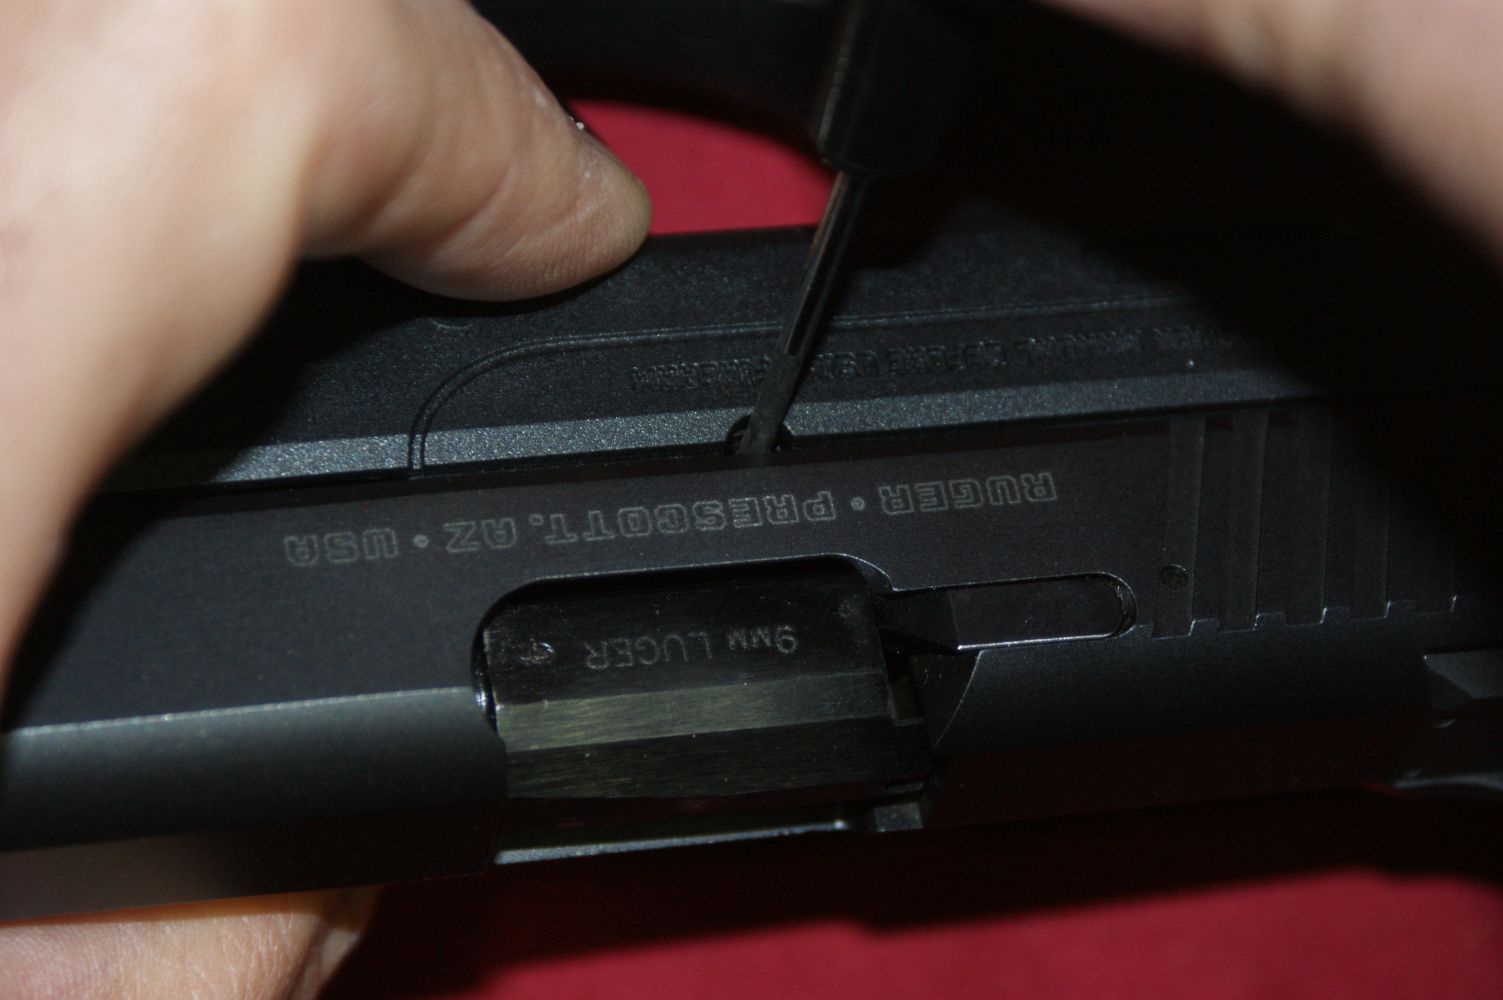
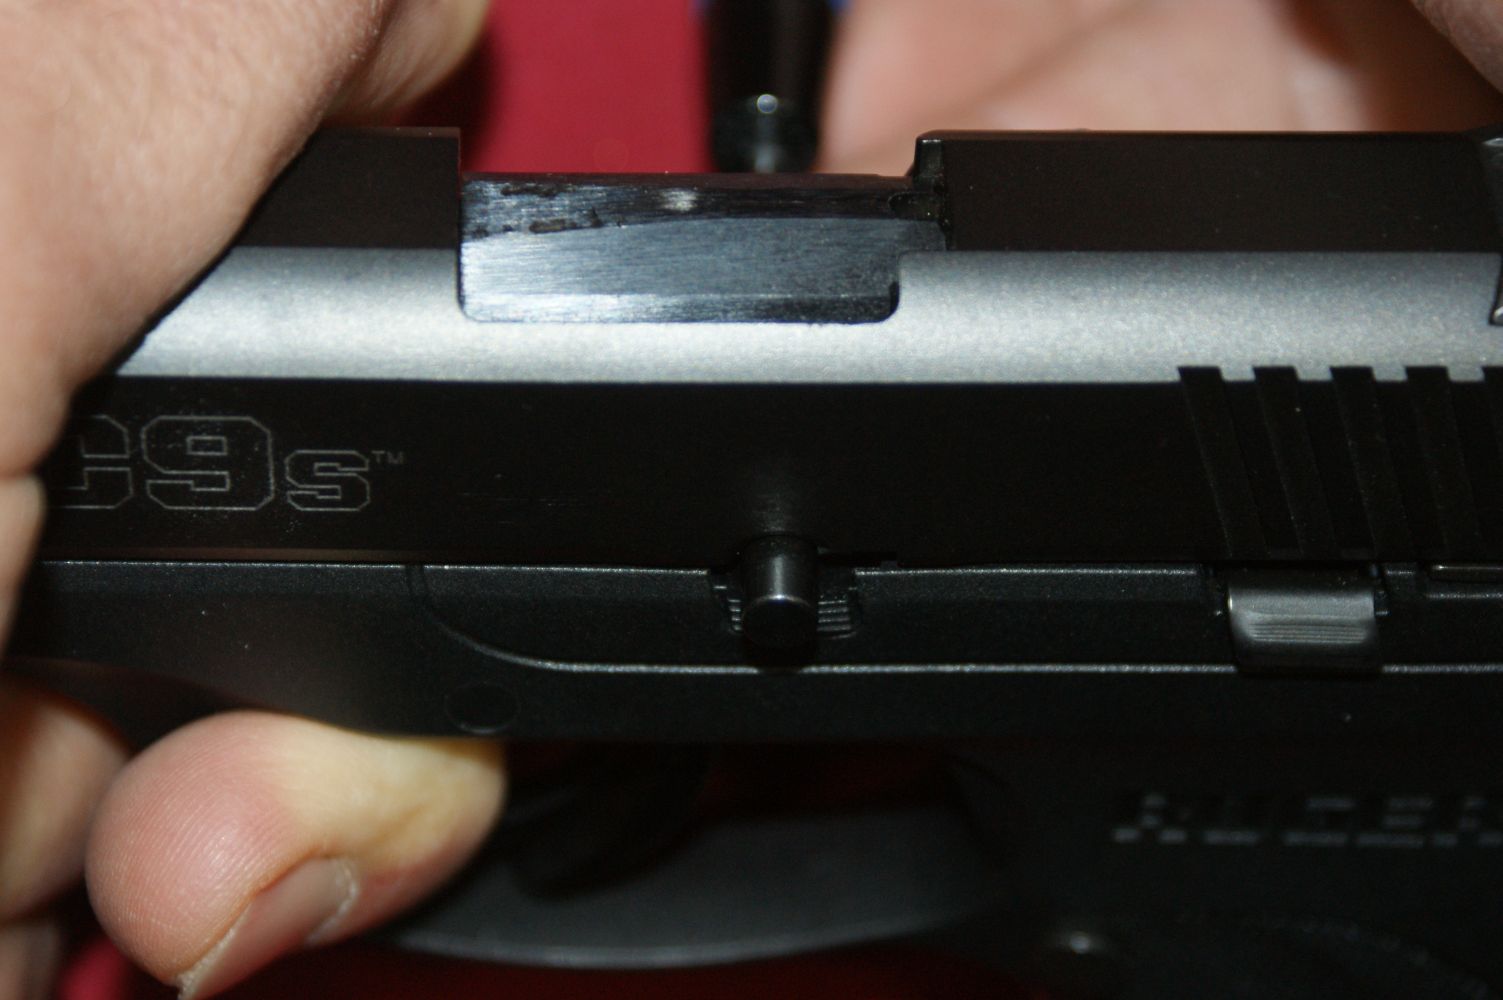
Step 7: Remove Takedown Pin
Shift the slide rearward slightly (about 1/8") so that the takedown pin lines up with the arc in the slide.
Figure 10

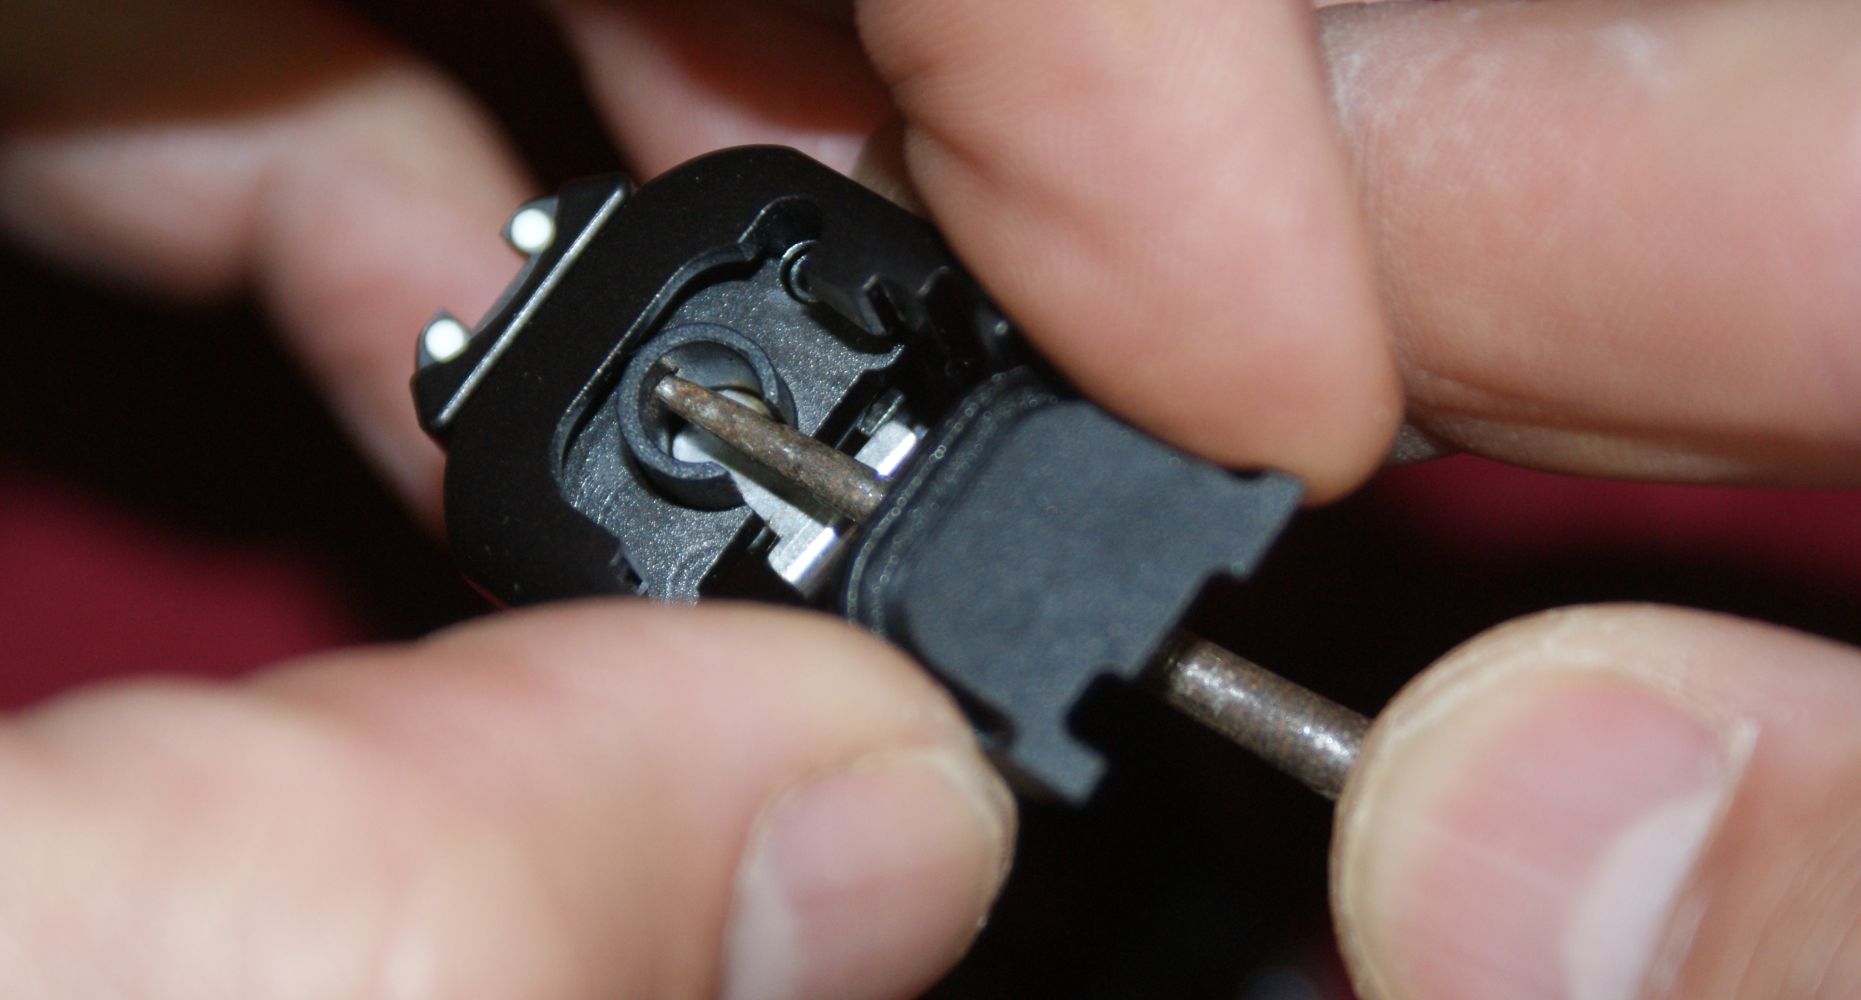
On the opposite side of the slide, insert a small tool to push the takedown pin towards the left side of the pistol.
Figure 11
As long as the arc in the slide is lined up with the pin, the pin will easily push out of the frame. If it takes significant force to make the pin move, most likely you don't have the slide lined up properly.
Figure 12
With the pin removed, the slide will shift back to the position shown below.
Figure 13

Step 8: Remove Slide
The slide can then be moved forward until it comes off the grip frame.
Figure 14
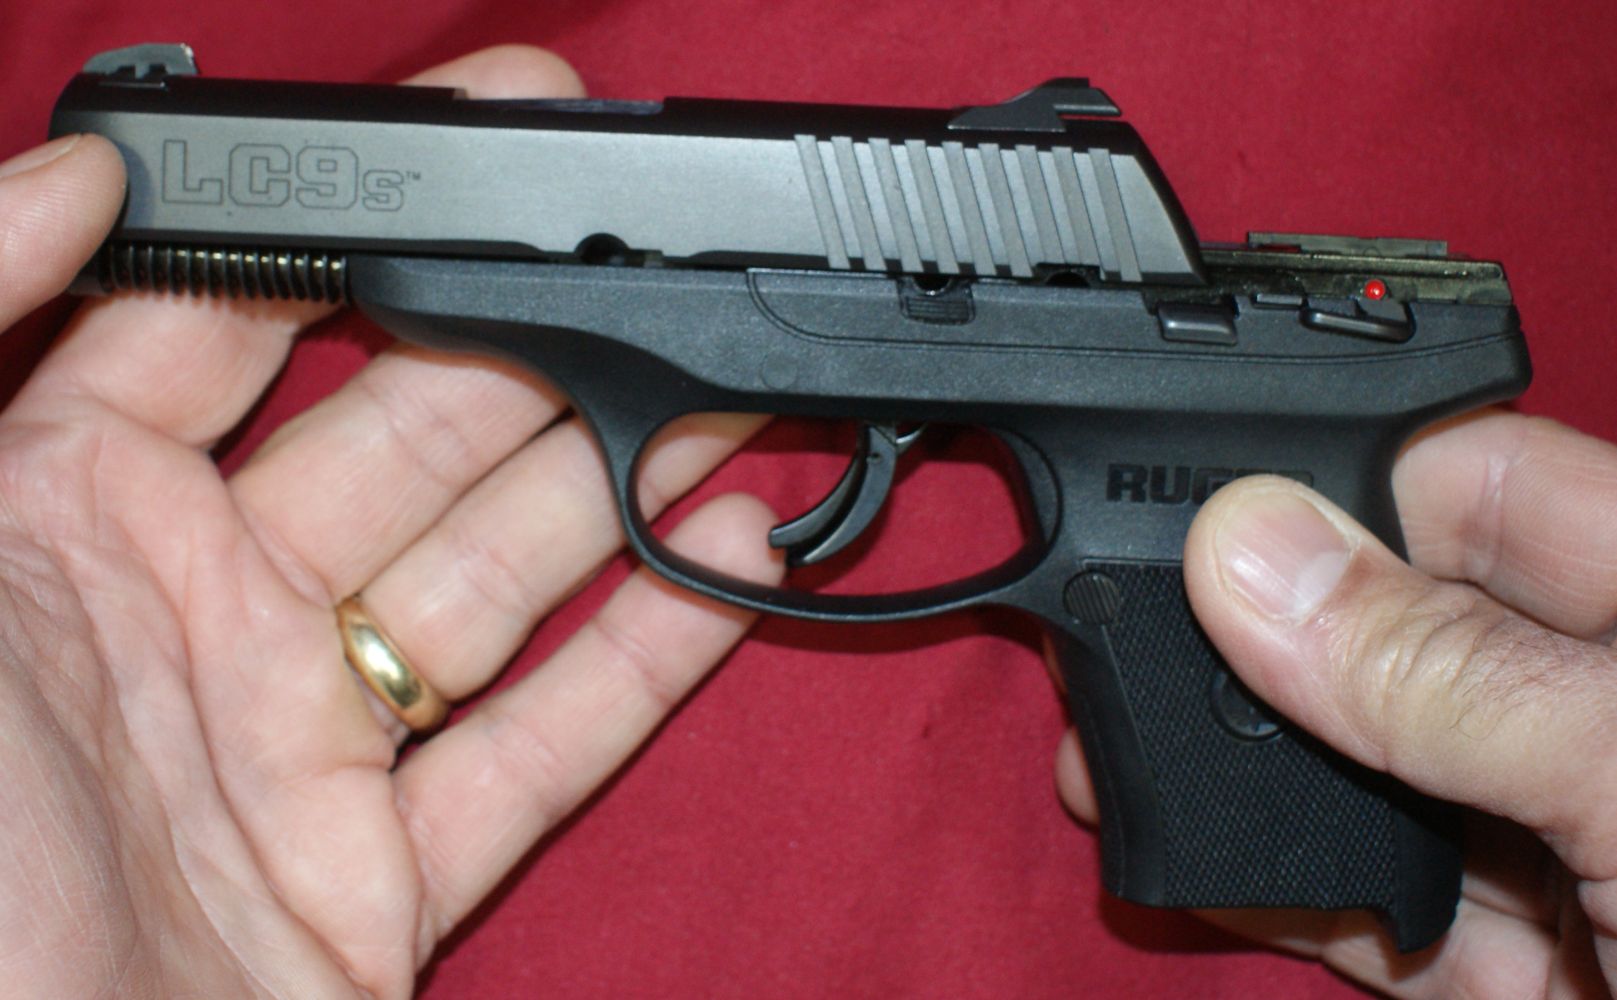
Figure 15

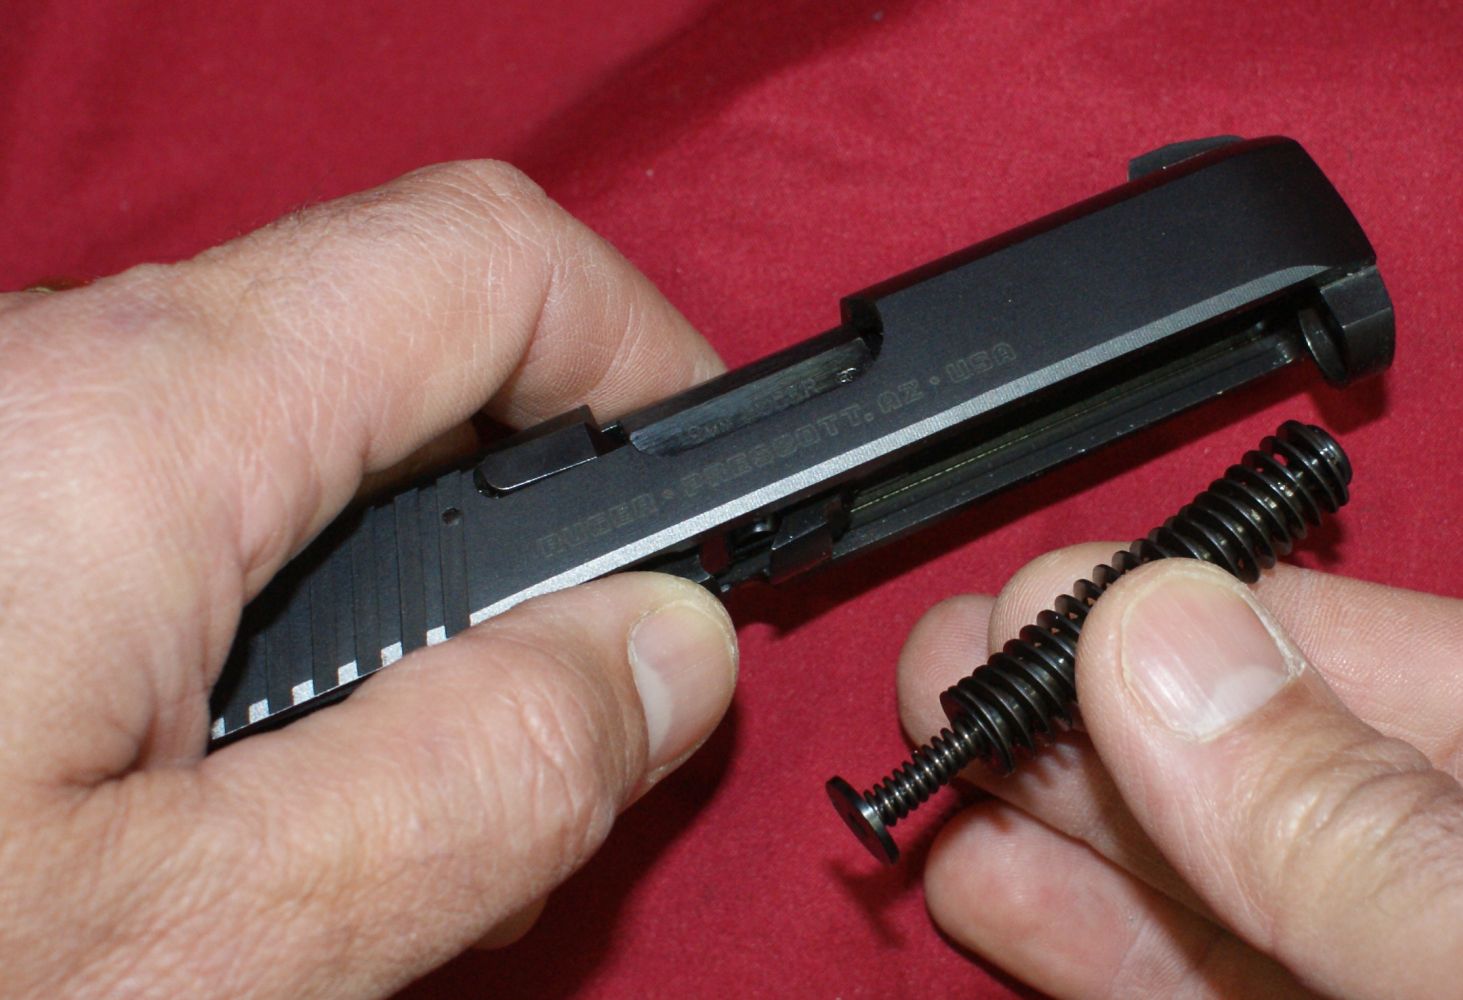
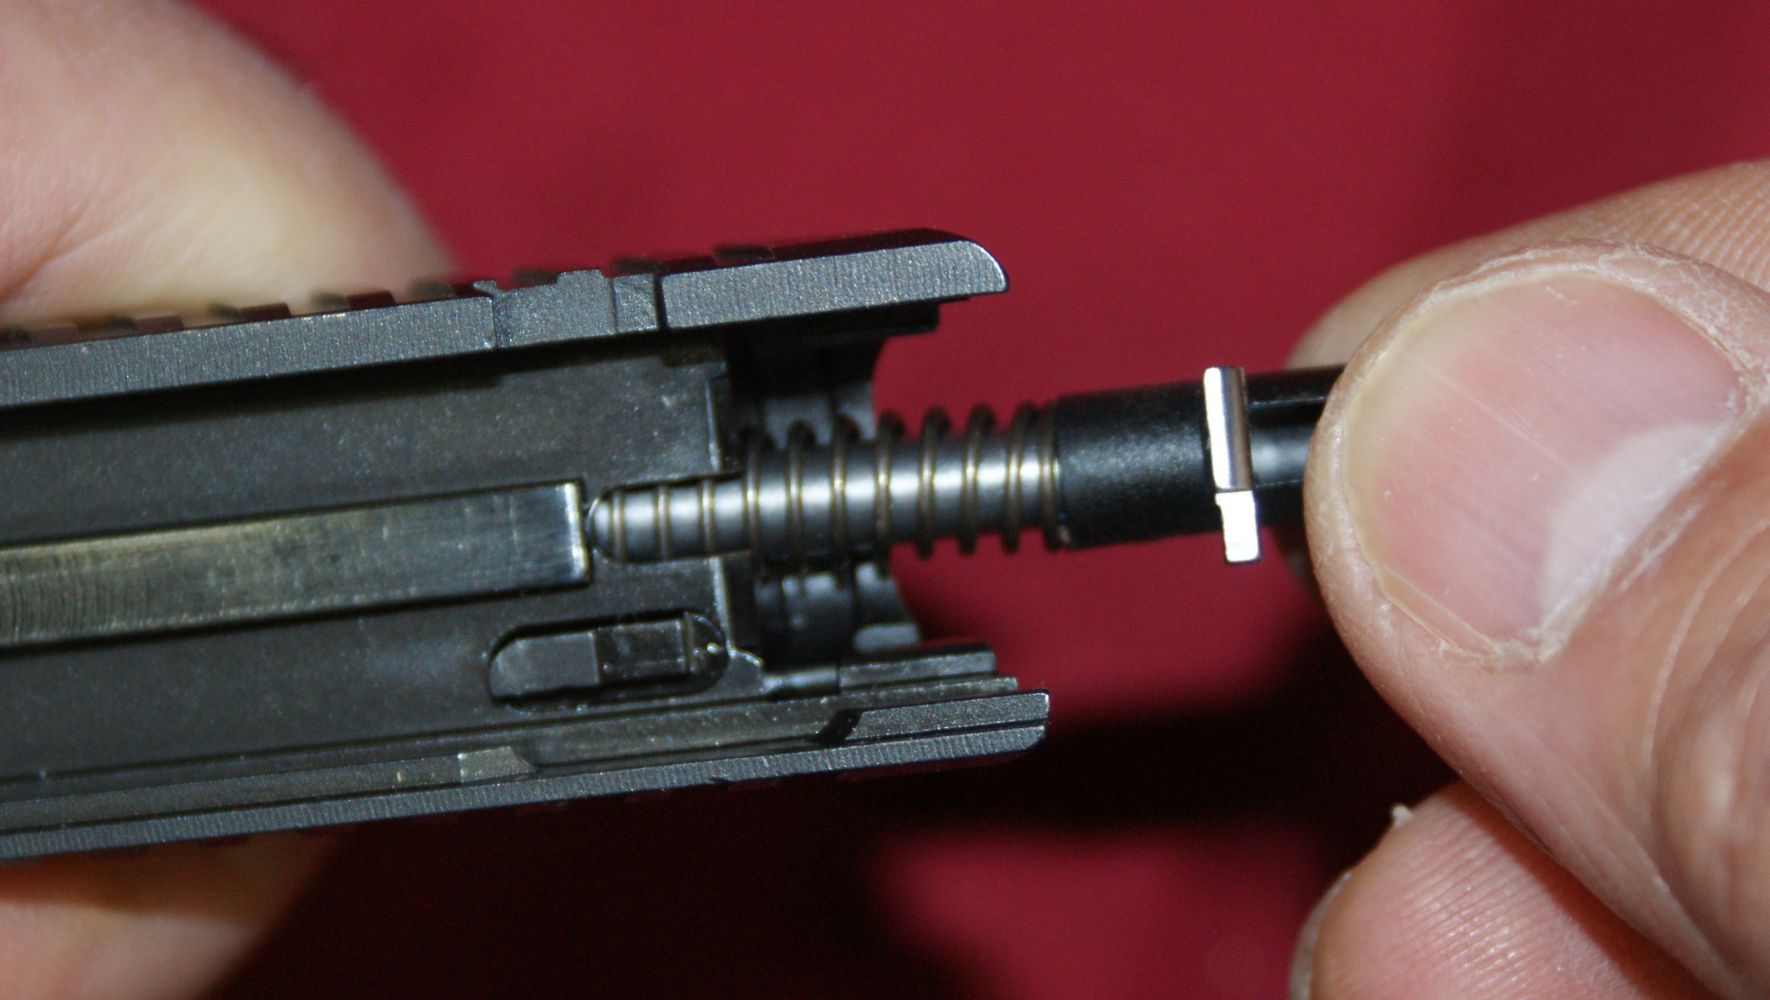
Step 9: Remove Recoil Spring Assembly
Compress the recoil spring assembly slightly to disengage it from the seat against the barrel lug. Next rotate the assembly slightly and remove it from the slide assembly.
Figure 16
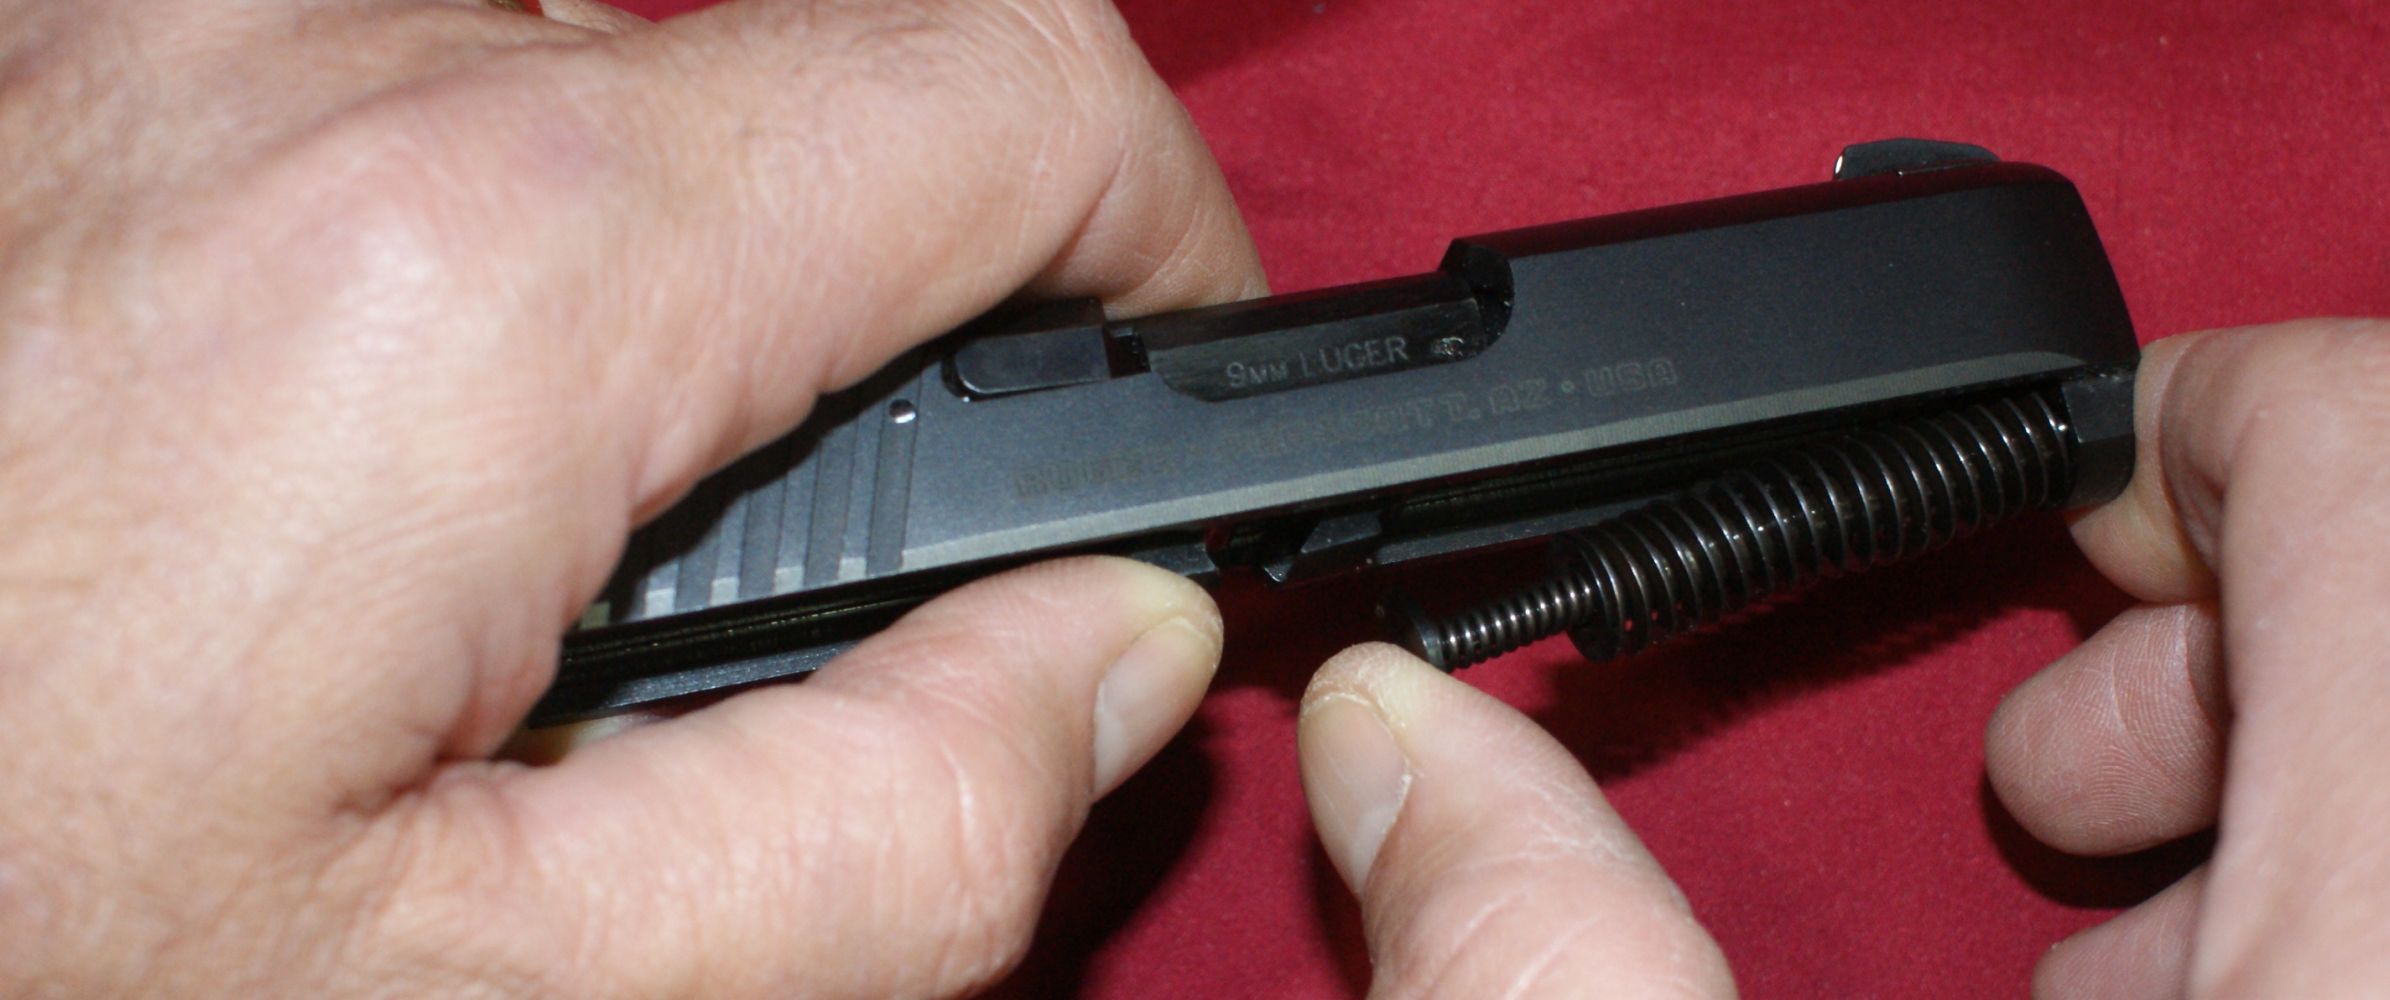
Figure 17
Step 10: Remove Barrel
Push the barrel forward slightly and then you can push it out of the slide and pull rearward to completely remove it from the slide.
Figure 18
Step 11: Normal Disassembly Complete
Normal disassembly is now complete and the pistol is ready for normal cleaning.
Figure 19
Striker Assembly Removal & Disassembly
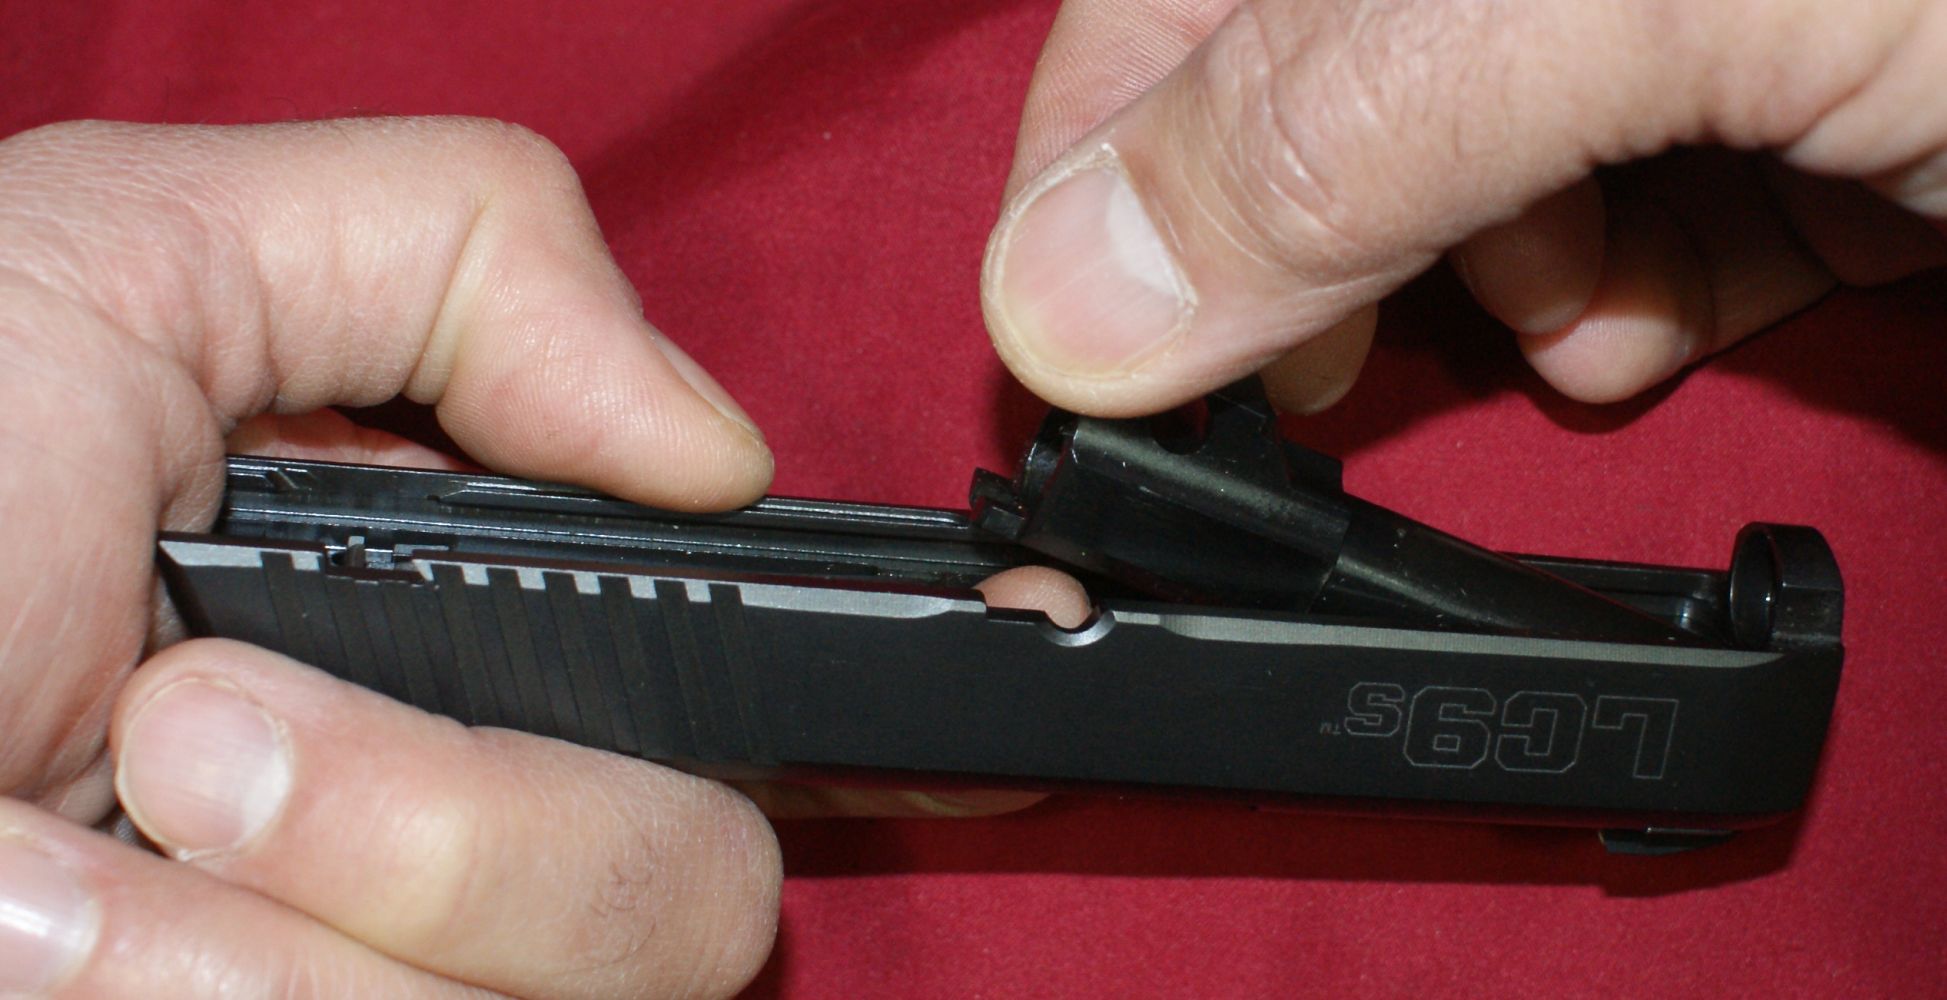
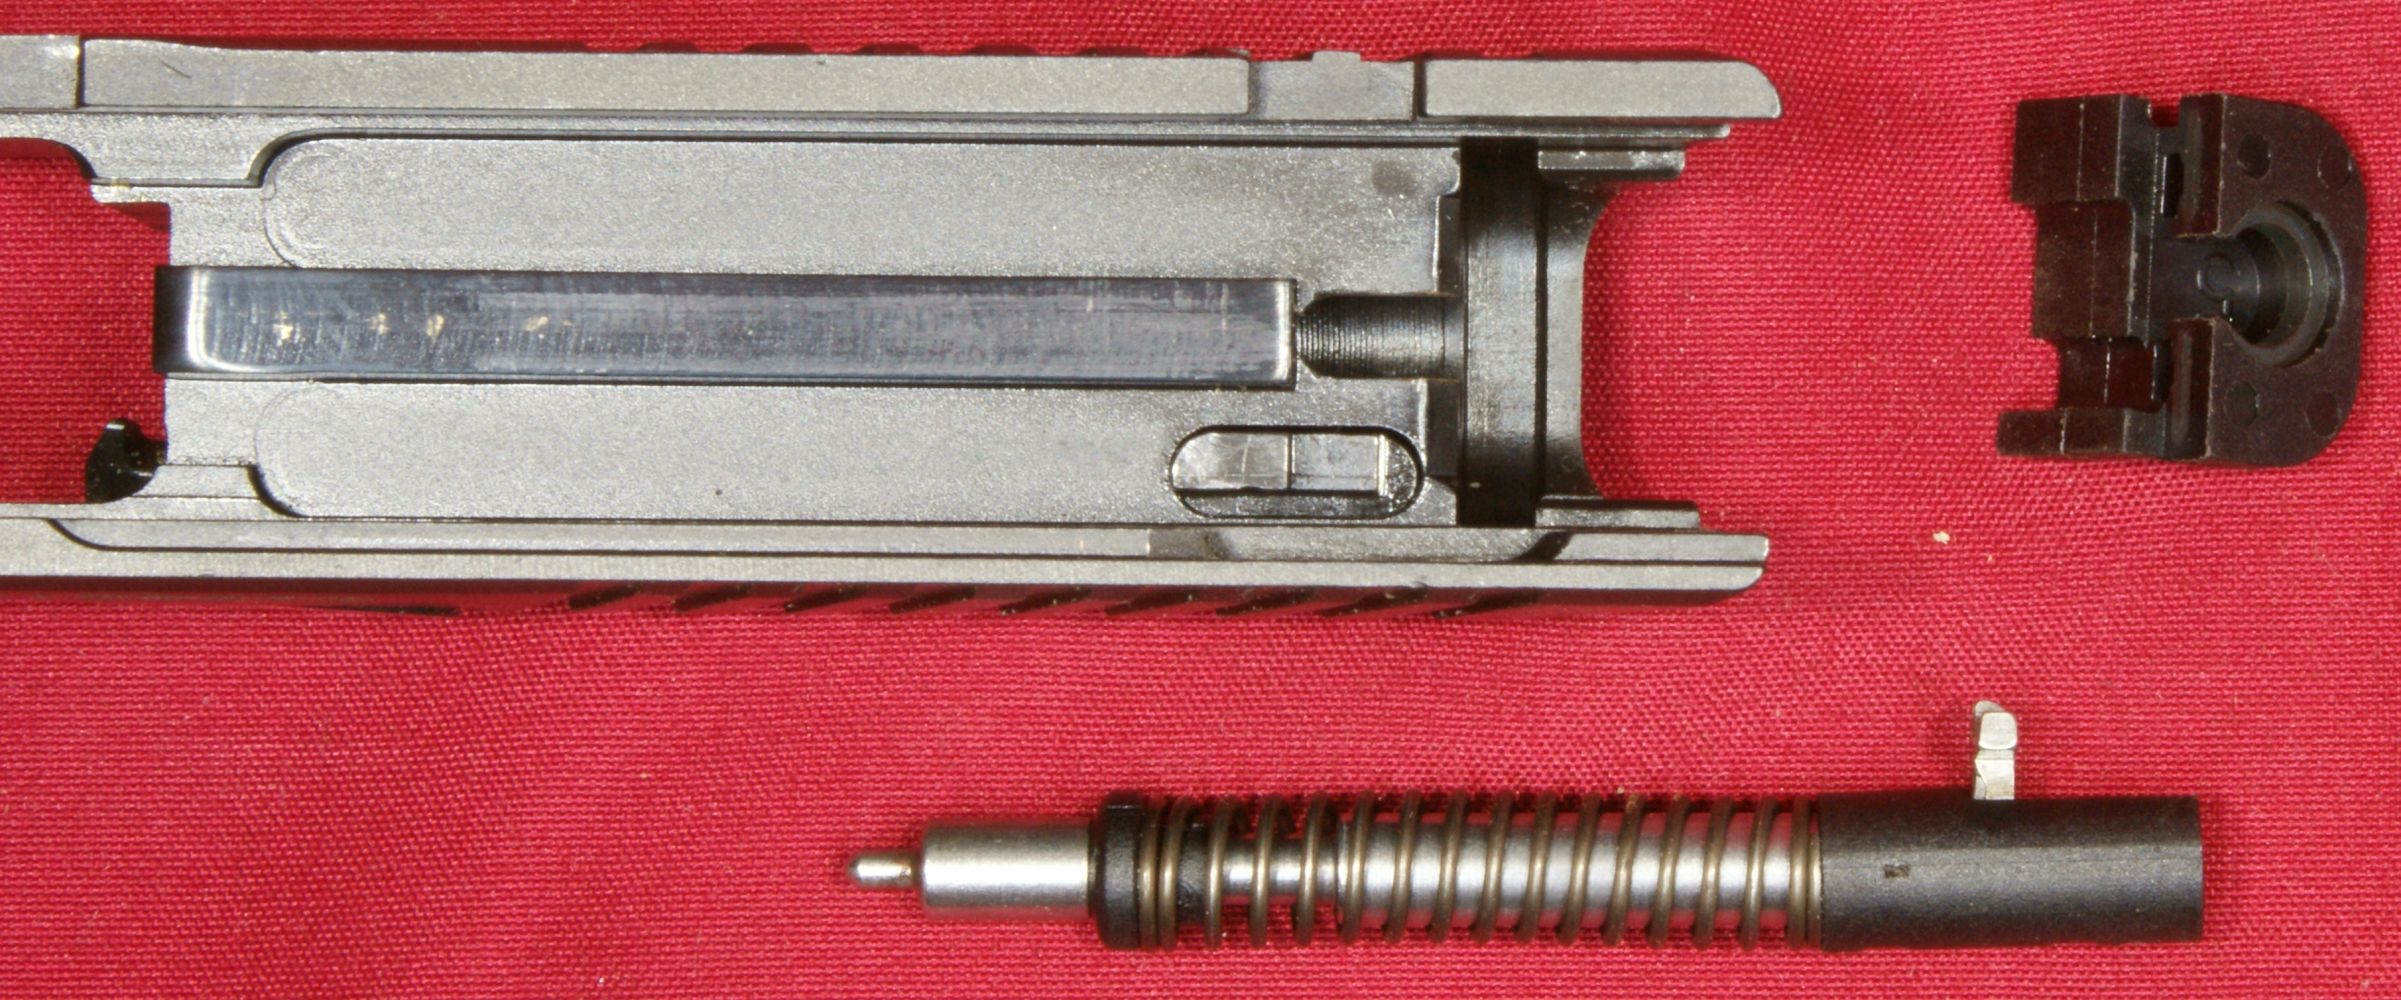
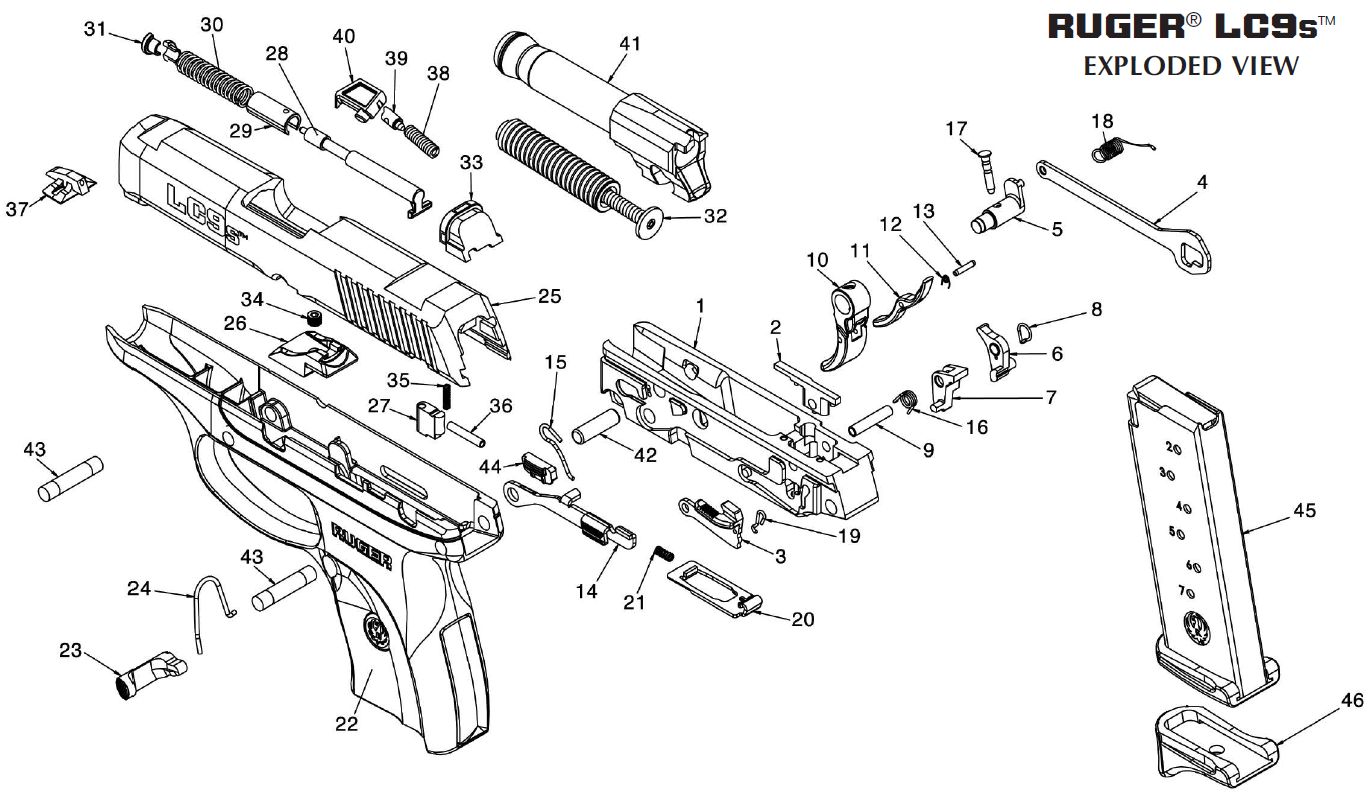
The steps above are what is shown in the Ruger Instruction Manual for normal disassembly when cleaning, but sometime I like to go a little deeper into the cleaning process and remove the striker assembly. The steps below shows how to remove and disassemble the striker assembly. The instruction manual shows the slide assembly to be made up of these parts below, and the striker assembly is made up of parts 28 through 31. To remove the striker assembly, you must first remove the striker cover (33).

To do this, the striker sleeve (29) must be pushed forward so that it no longer engages in the striker cover (33). In the photo above and below, you can see a hole in the top of the striker sleeve.
Figure 20

Using a punch or other tool, push the striker sleeve forward as shown below. Make sure the striker foot (29) is positioned over the striker blocker (27) or you will not be able to push the sleeve forward.
Figure 21

With the sleeve pressed forward, you can slide the striker cover down and out of the rear of the slide.
Figure 22
The striker assembly can then be pulled out of the slide.
Figure 23
Other than feeling like you need a third hand, doing this is actually very simple.
Figure 24
To disassemble the striker assembly, you push down on the spring as shown below by supporting the rear of the assembly on a hard surface. The two halves of the striker keepers (31) can be removed.
Figure 25

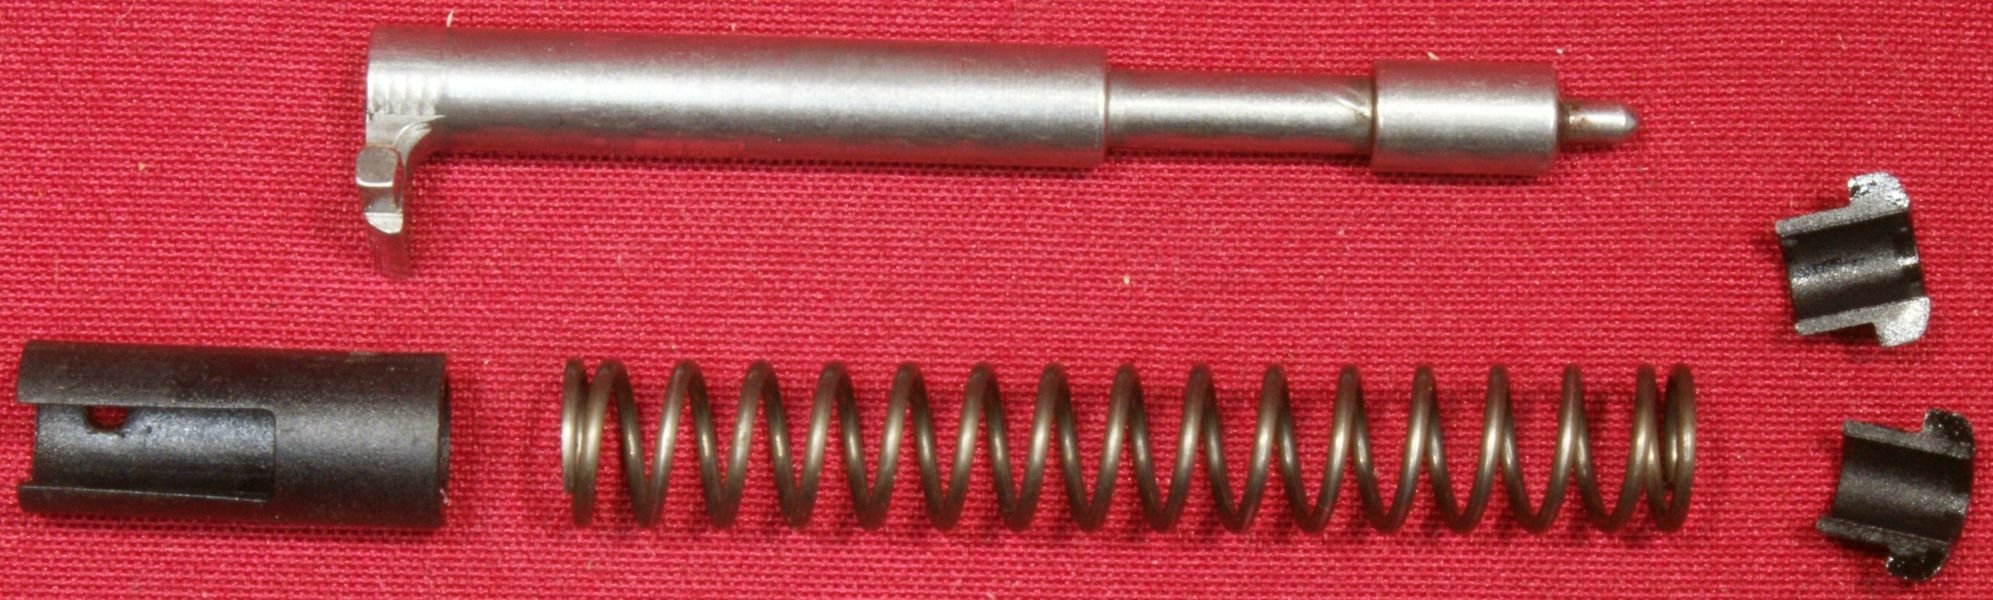
With the striker keeper halves removed, you can slide the striker spring and striker sleeve off the striker. Again, this is relatively simple. Assembly and installation of the striker assembly into the slide is the reverse of these steps.
Figure 26
Magazine Disassembly
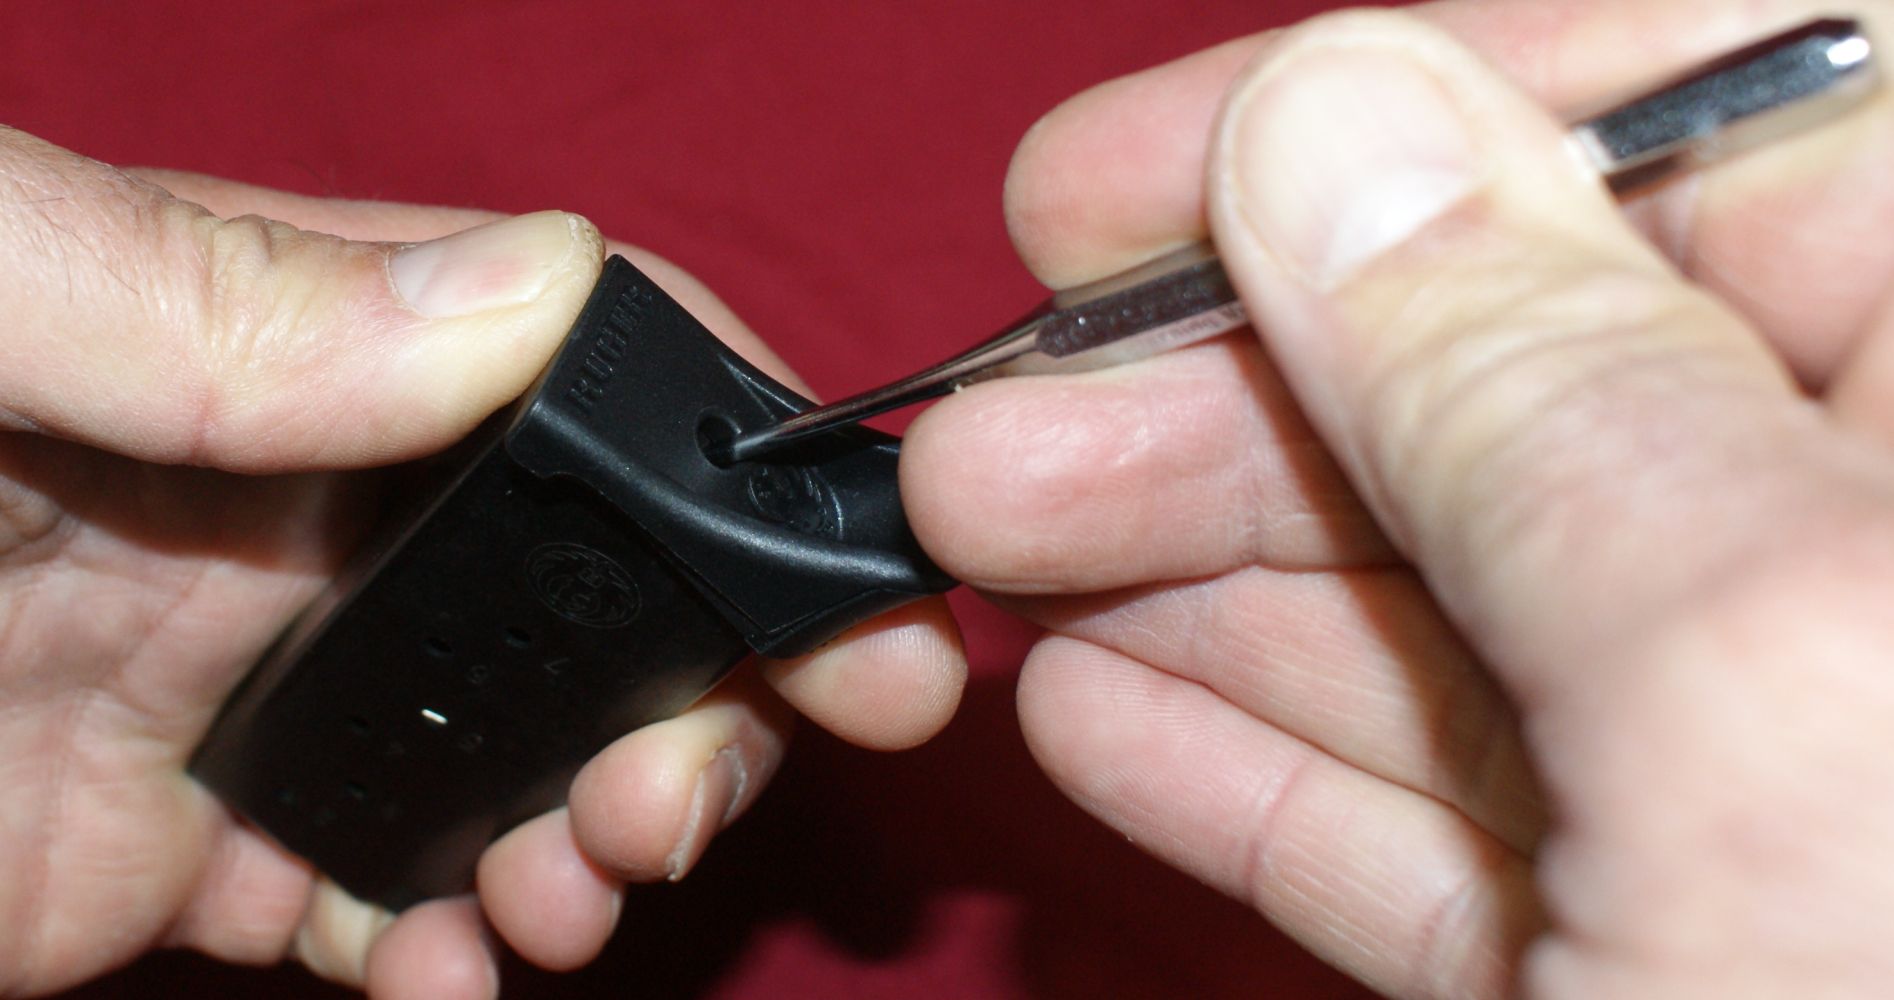
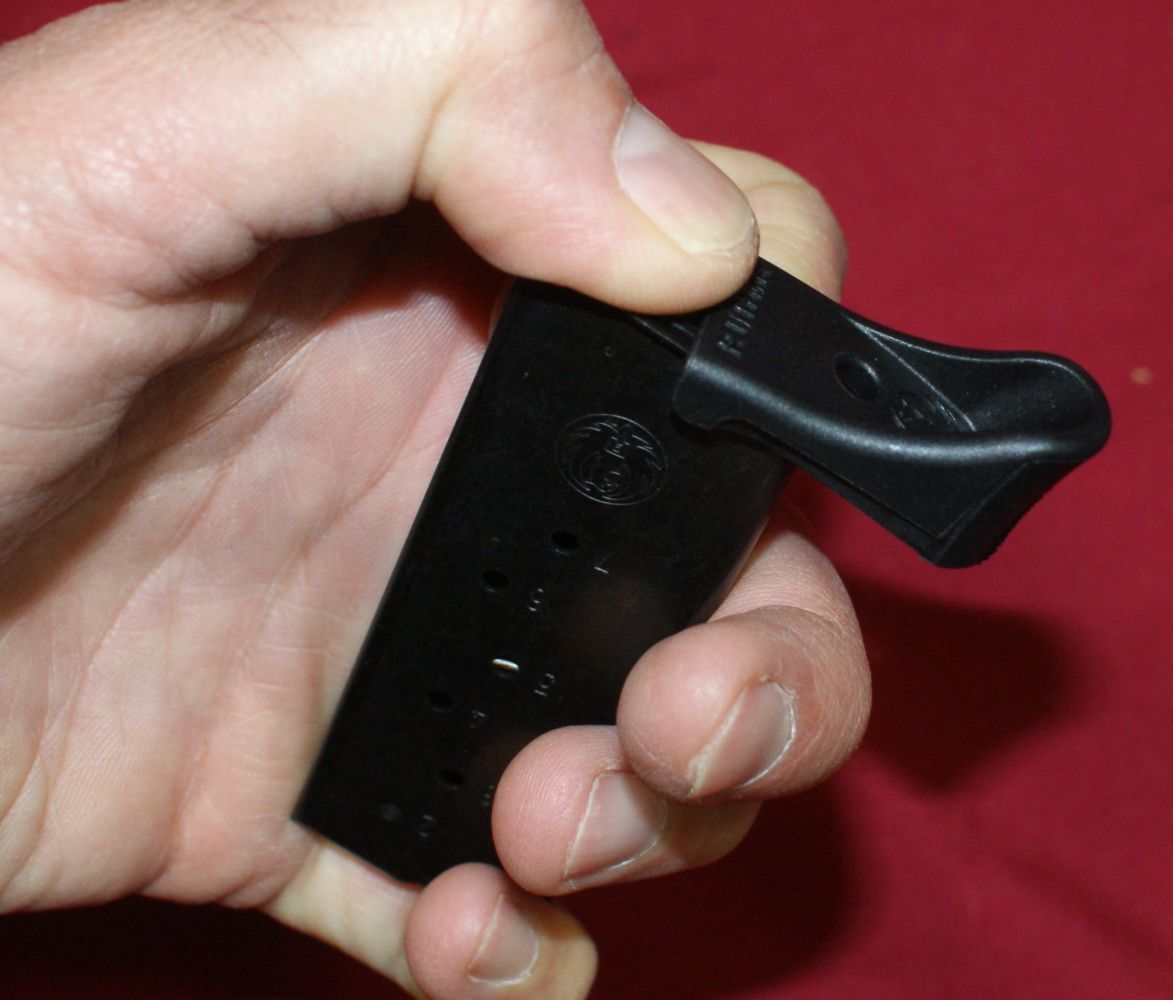
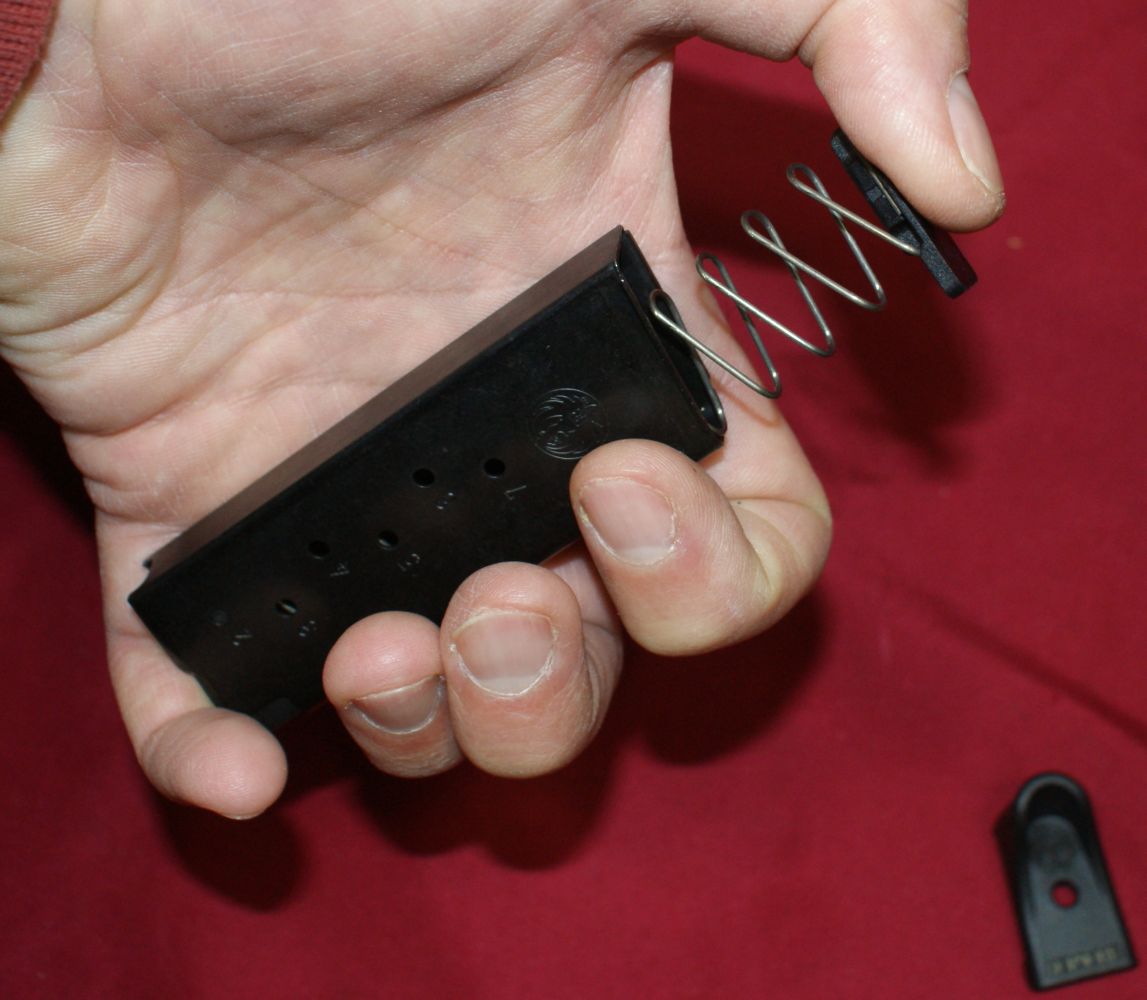
Using some type of tool, press down on the magazine spring seat by pressing through the hole in the center of the magazine floor plate. Once the spring seat protrusion is below the floor plate, start sliding the floor plate off the magazine base while keeping your thumb against the spring seat to prevent it and the spring from flying across the room.
Figure 27
Figure 28
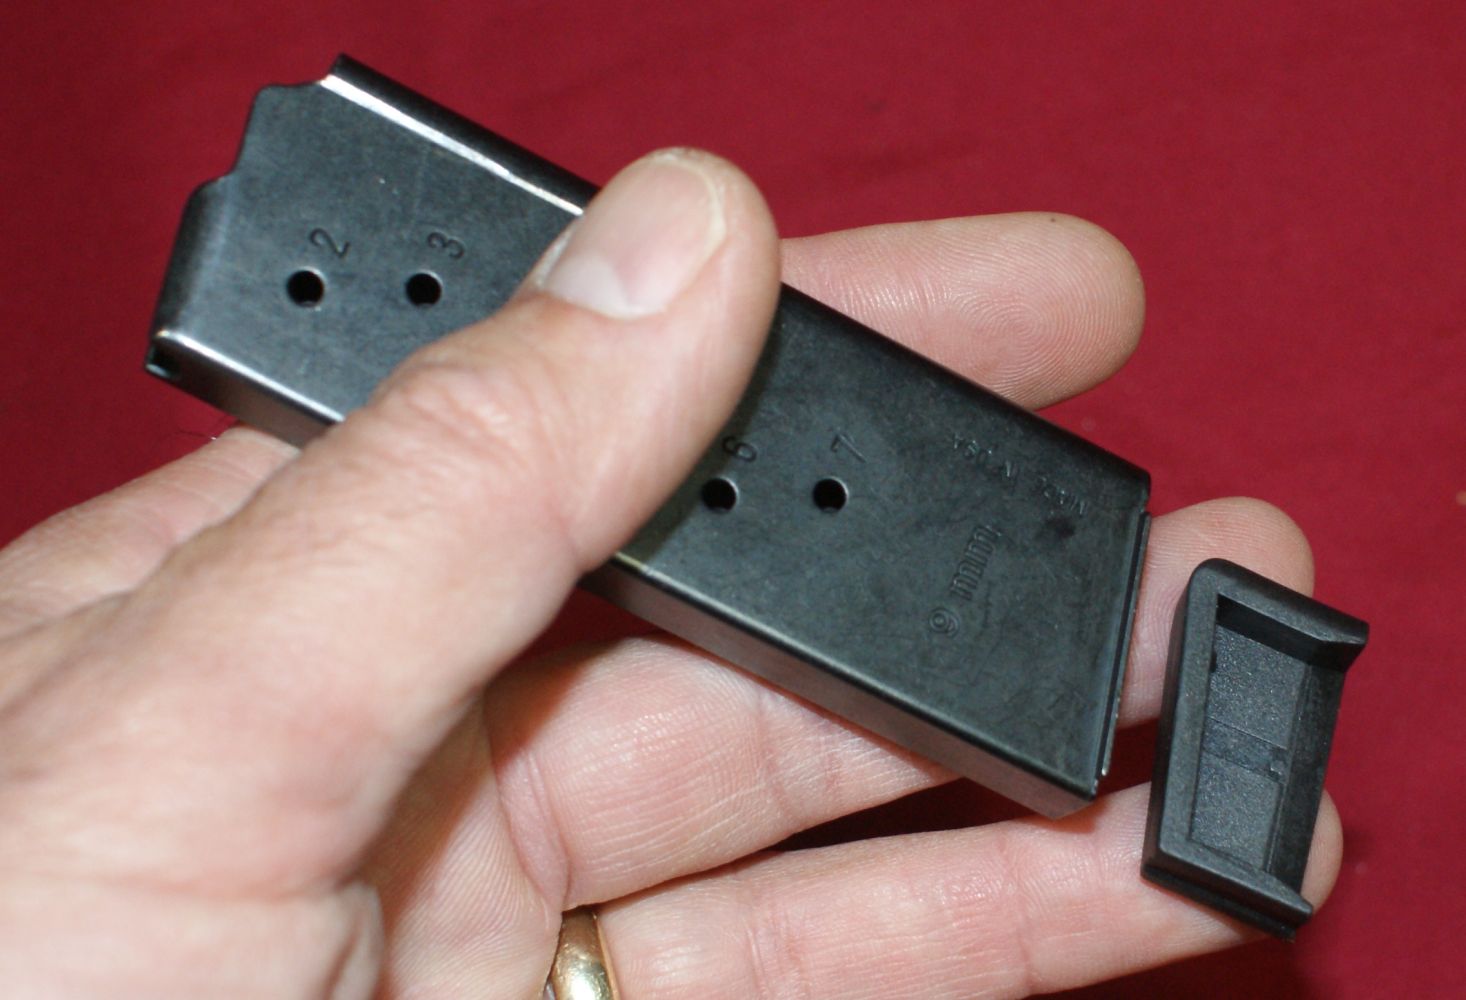
With the floor plate removed, you can release the compression on the magazine spring by relaxing your thumb pressure. The magazine follower will slide out of the magazine body.
Figure 29
Figure 30
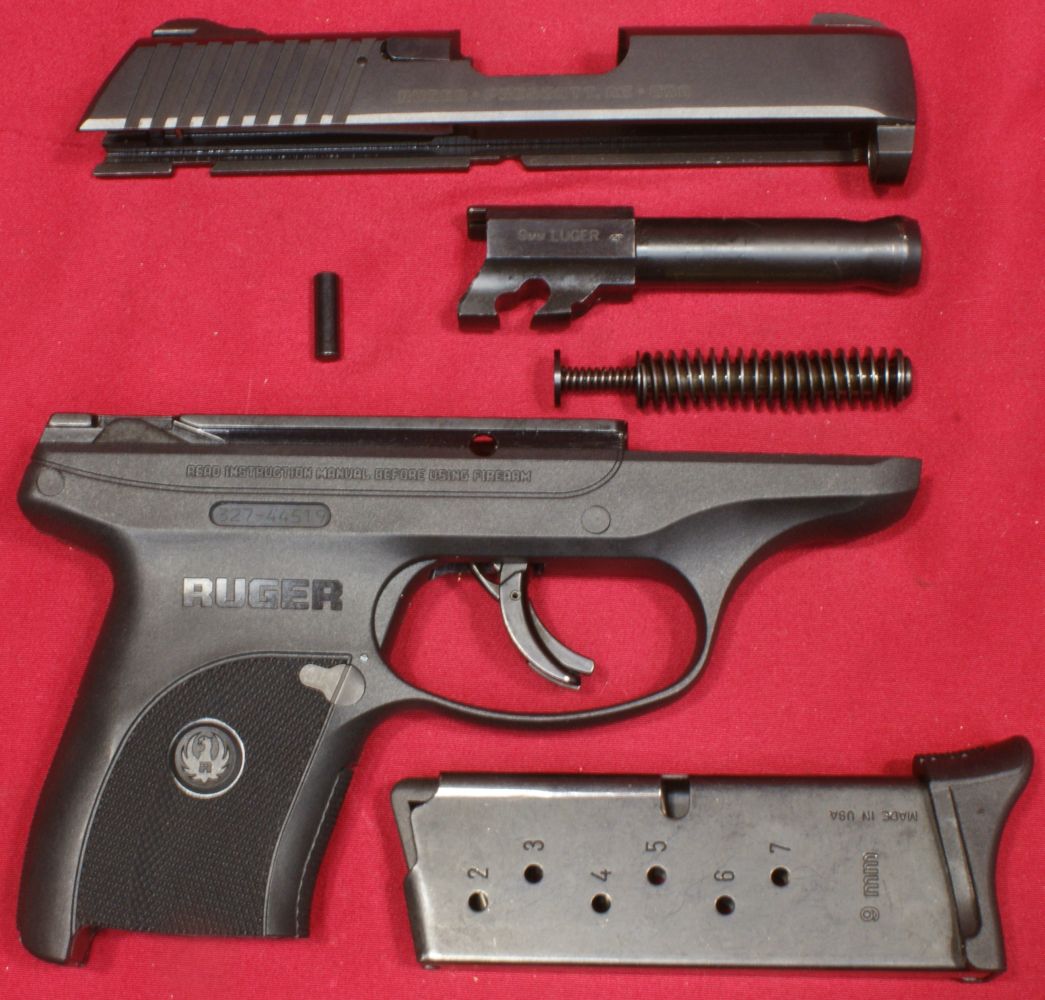
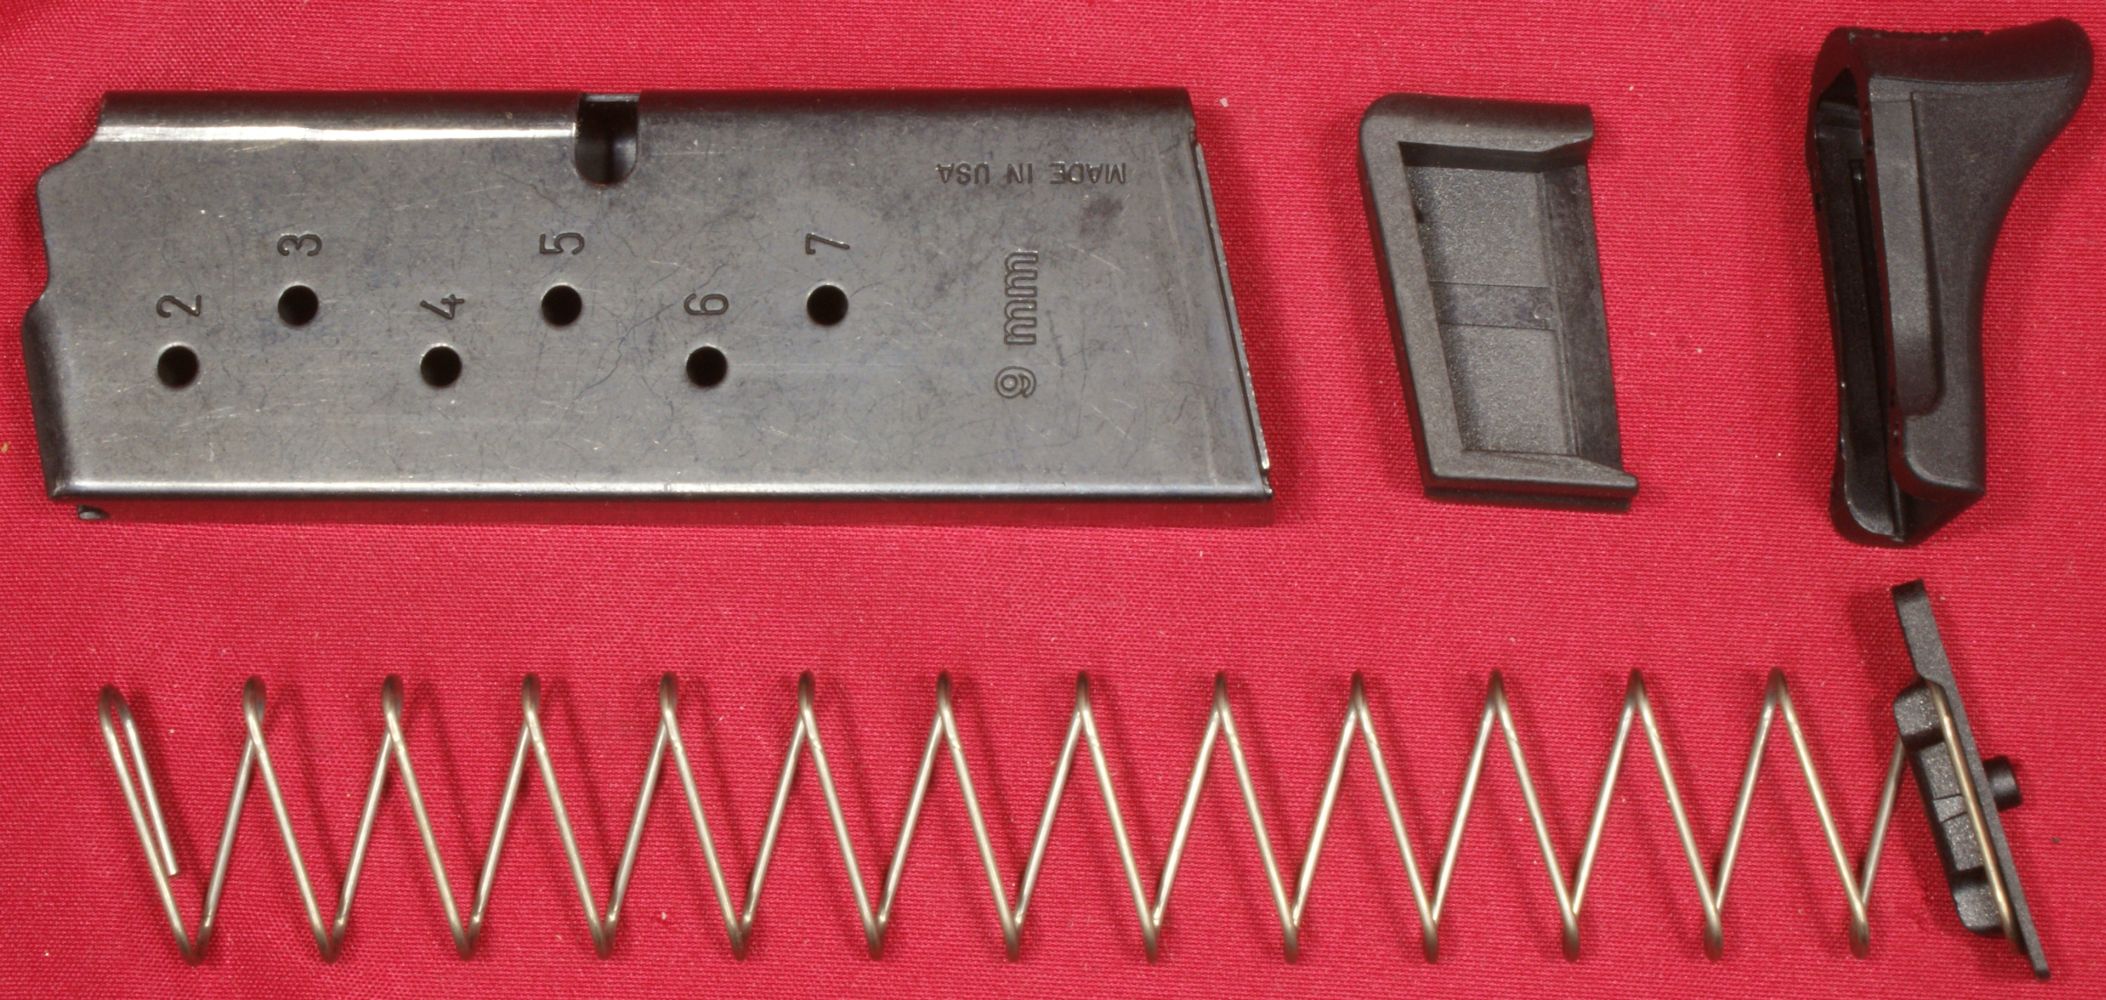
The photo below shows all the parts in the magazine assembly. They are a steel magazine body and spring, along with polymer follower, floor plate and spring seat.
Figure 31
Internal Features
I have tried to provide many photos below so you can study the detail of the internal features of the Ruger LC9s pistol, yet I only comment on features that I find interesting or significant. I have also included for reference and parts identification the exploded view below which was taken from the instruction manual.
Figure 32
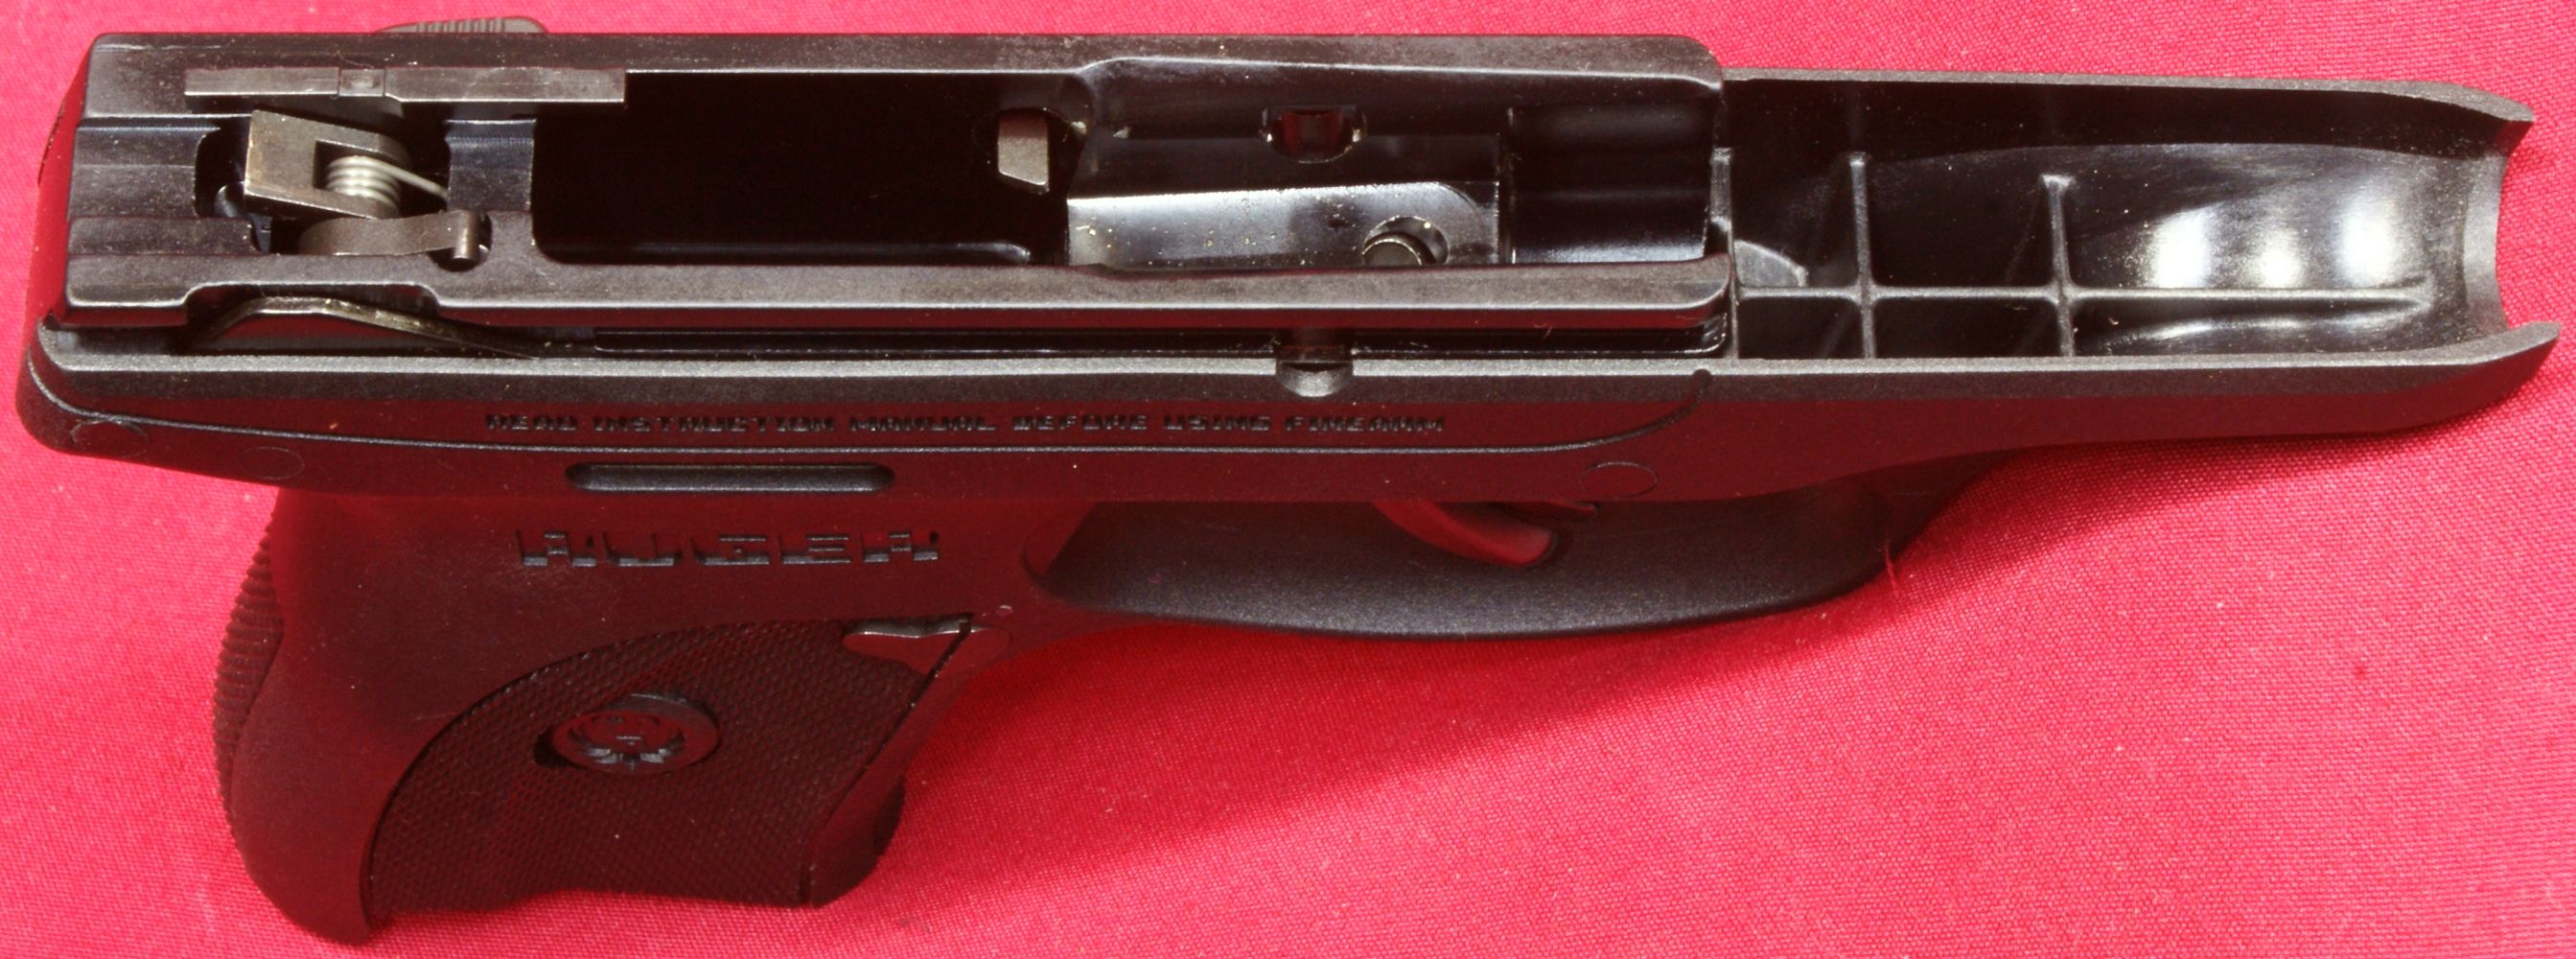
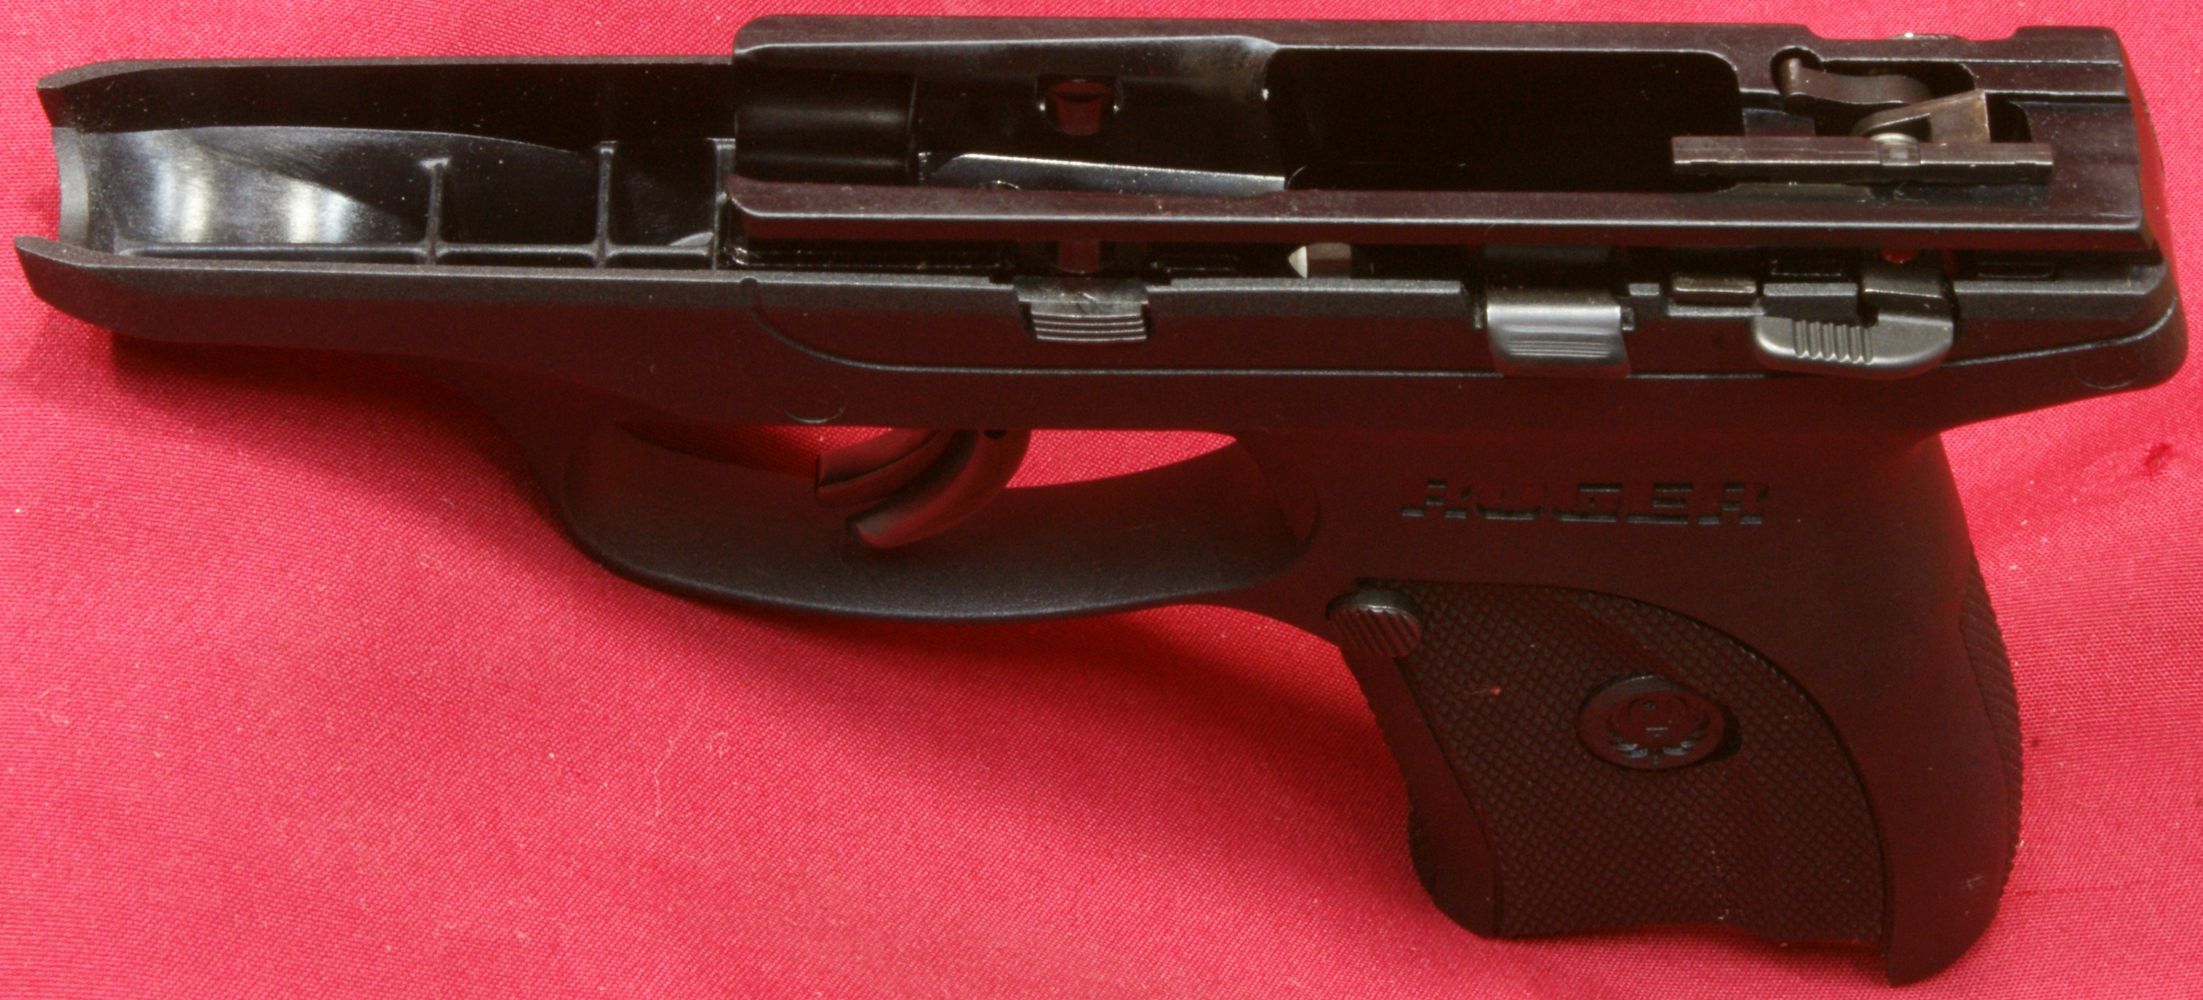
Grip Frame Assembly
The LC9s (just like the LC9) incorporates an anodized aluminum frame insert (1) inside the polymer grip frame (22).
Figure 33

Figure 34
The frame insert is held in place with two frame insert pins (43). For the purposes of this review, I chose not to remove the frame insert because I wanted to ensure I didn't mess things up before range testing.
Figure 35
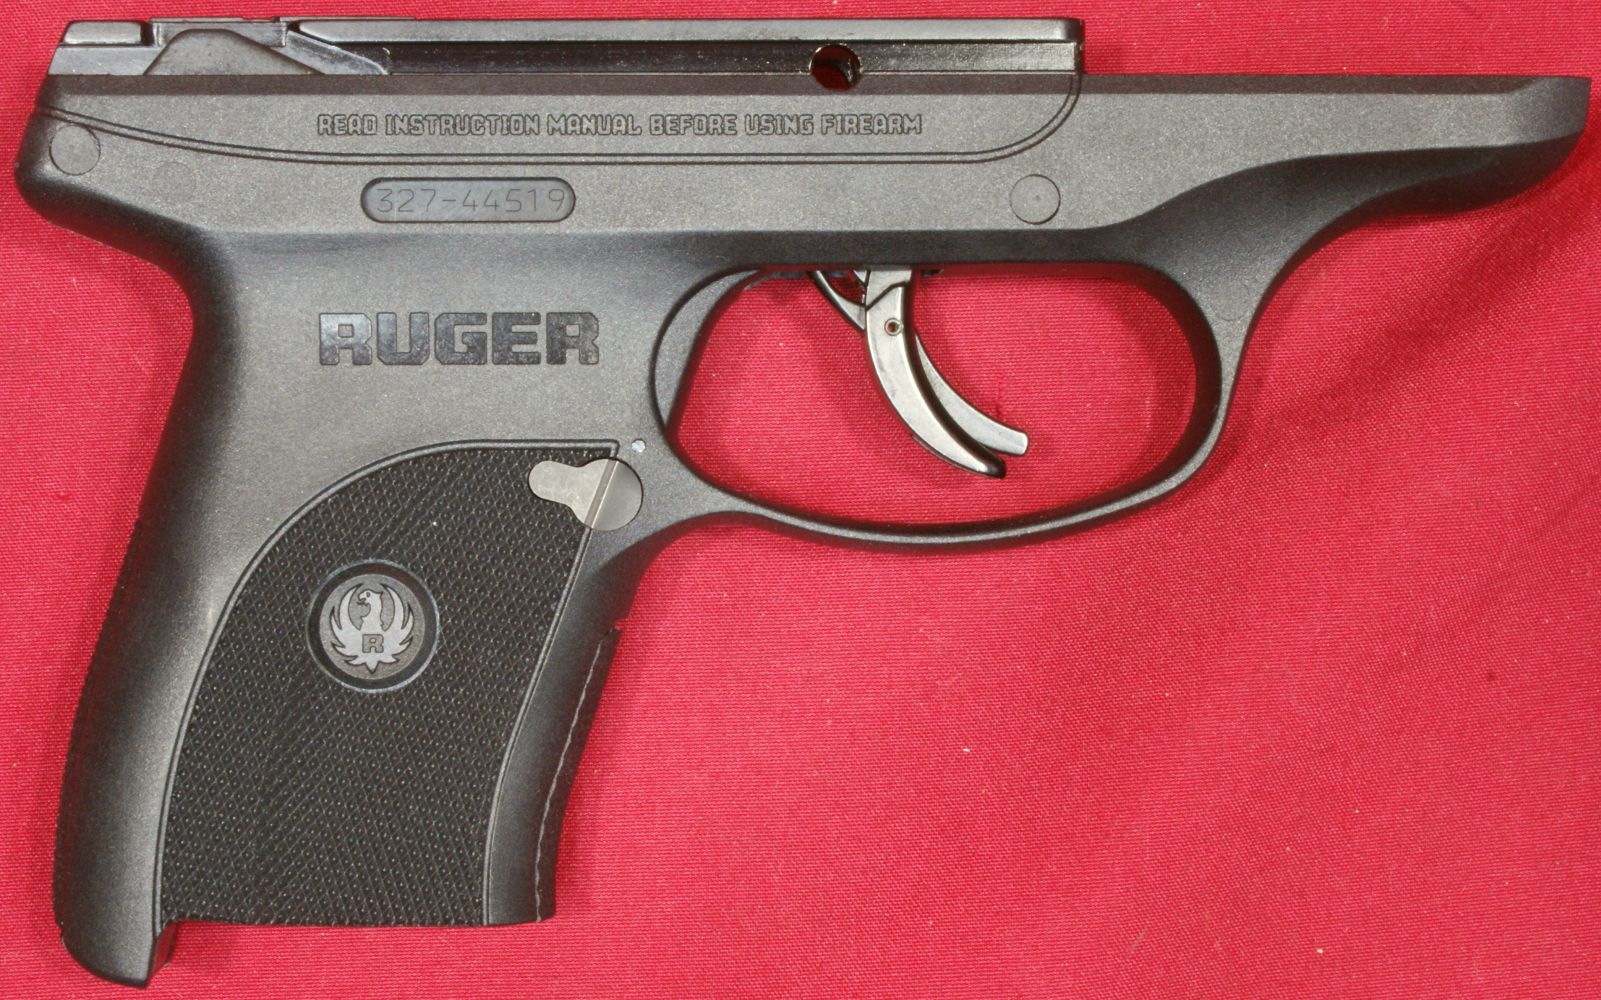
Figure 36
The figure below identifies some significant parts in the frame insert such as the ejector (2), striker blocker lifter (6), sear (7), slide stop (14) and magazine disconnect (20). When a magazine is inserted in the pistol, the front of the magazine presses on the magazine disconnect which pushes it forward and allows the trigger to be pulled. When the last round is fired, the magazine follower pushes up on the slide stop which causes the stop to engage when the slide cycles.
Figure 37

These next two photos show how the trigger safety works. The trigger (10) also has an inner trigger (11) which I call a trigger safety. The photo below shows the inner trigger spring loaded into it's normal (safe) position.
Figure 38
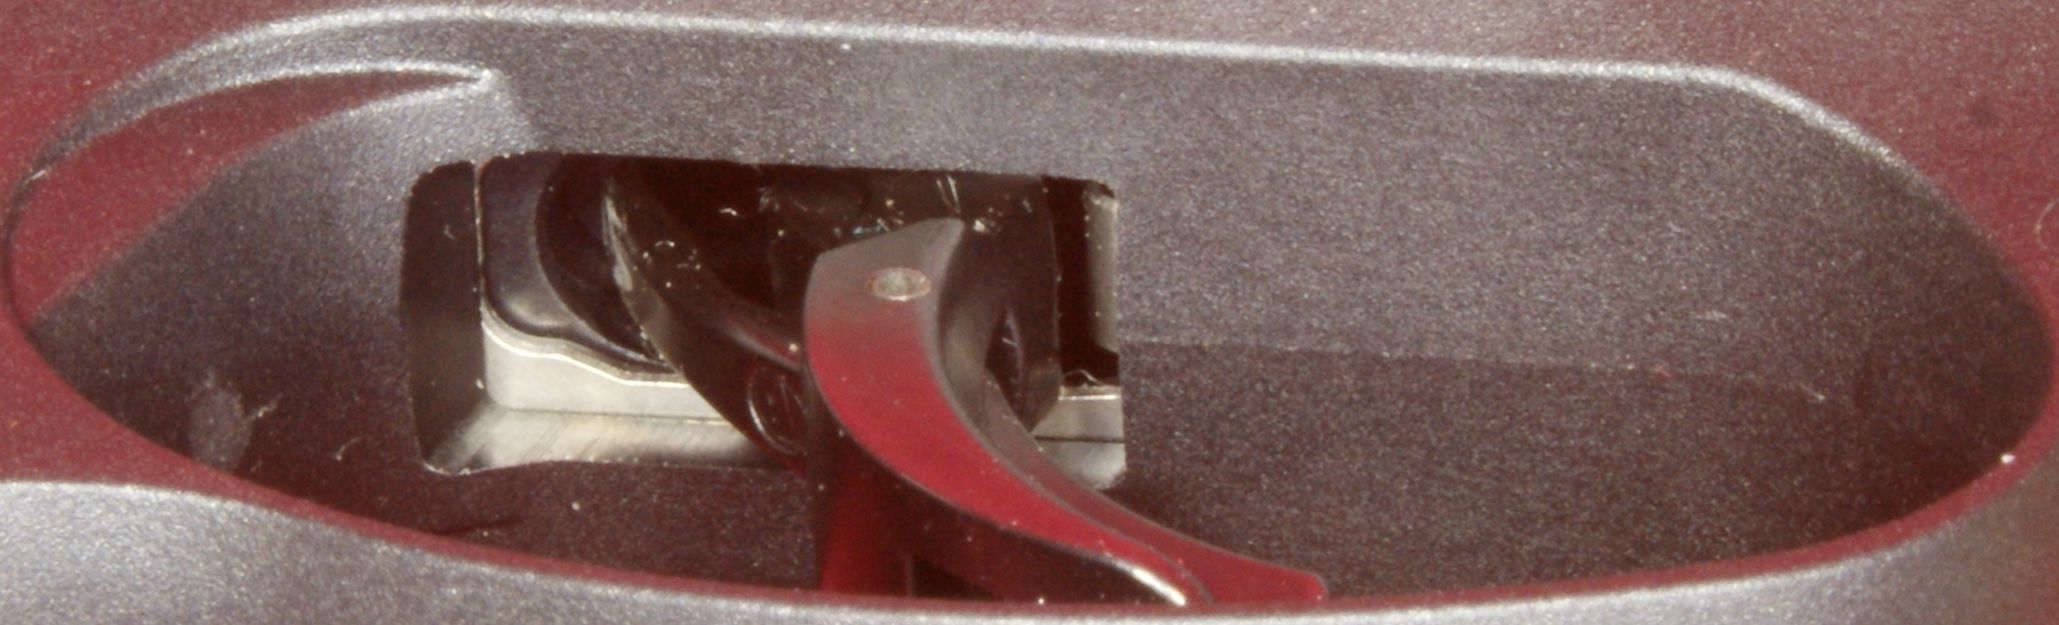
When you press the lower portion of the inner trigger, the upper portion pivots away from the shelf on the frame insert. The inner trigger pressing against this shelf is what prevents the trigger from being pulled. When the inner trigger is pressed, it will no longer make contact with the shelf when the trigger is pulled.
Figure 39
This next photo shows the normal positions of the sear (7) and blocker lifter (6). The sear is up and the blocker lifter is down.
Figure 40
When you pull the trigger, the trigger bar (4) pulls on the bottom of the blocker lifter which presses on the bottom of the sear which causes both to rotate about the pivot pin which causes the top of the blocker lifter to move up and the sear to move down.
Figure 41

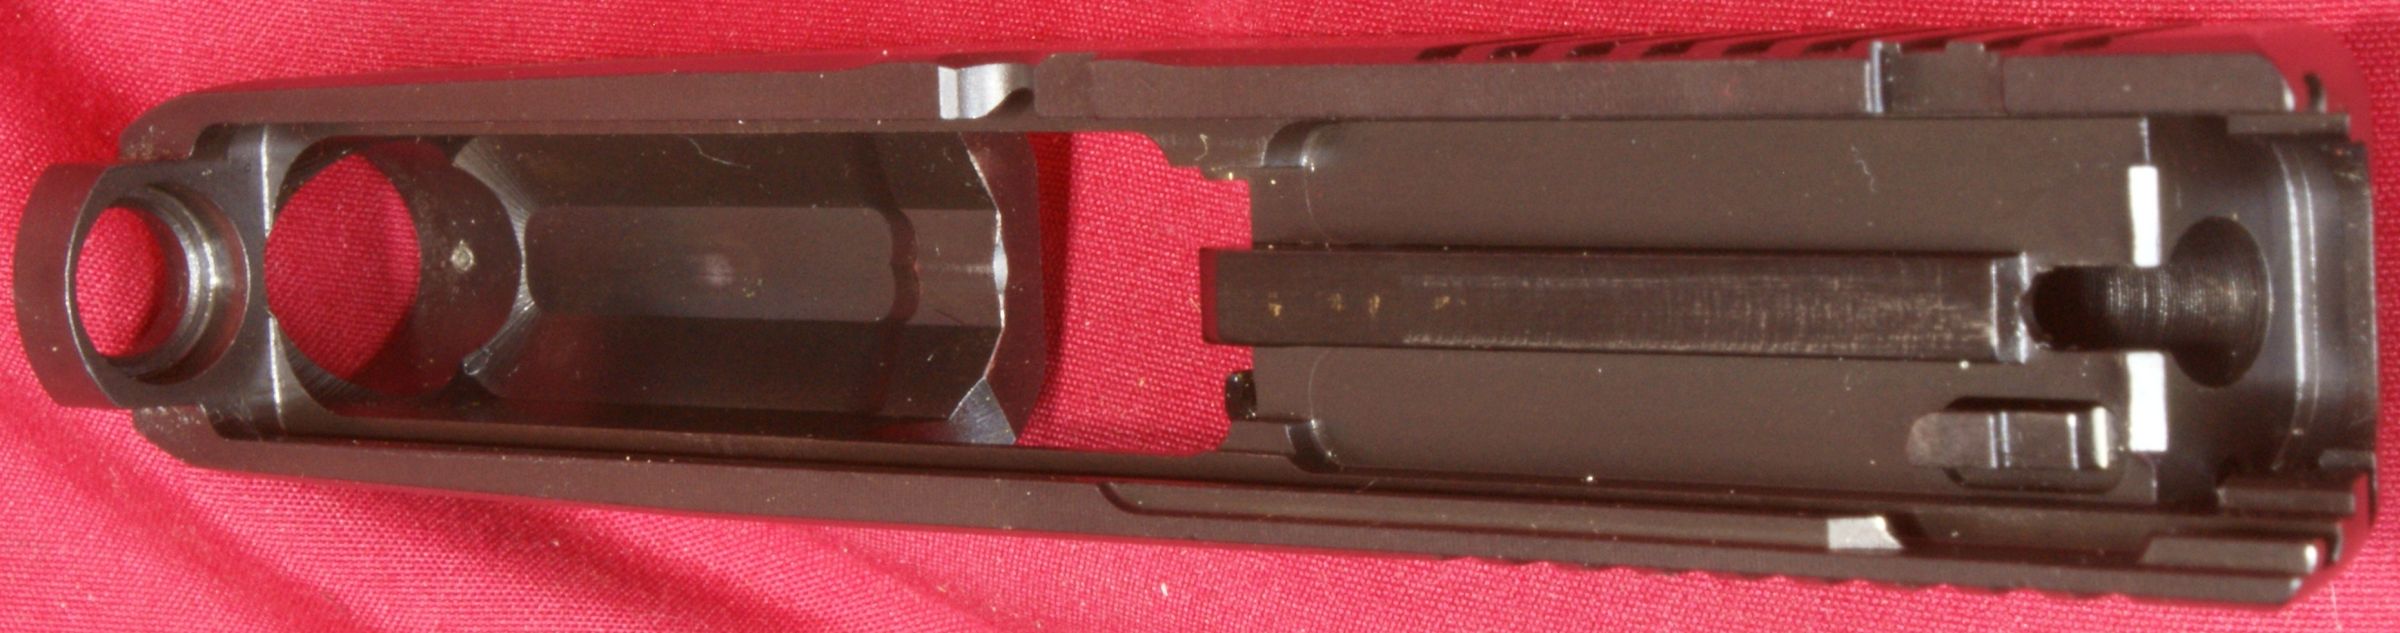
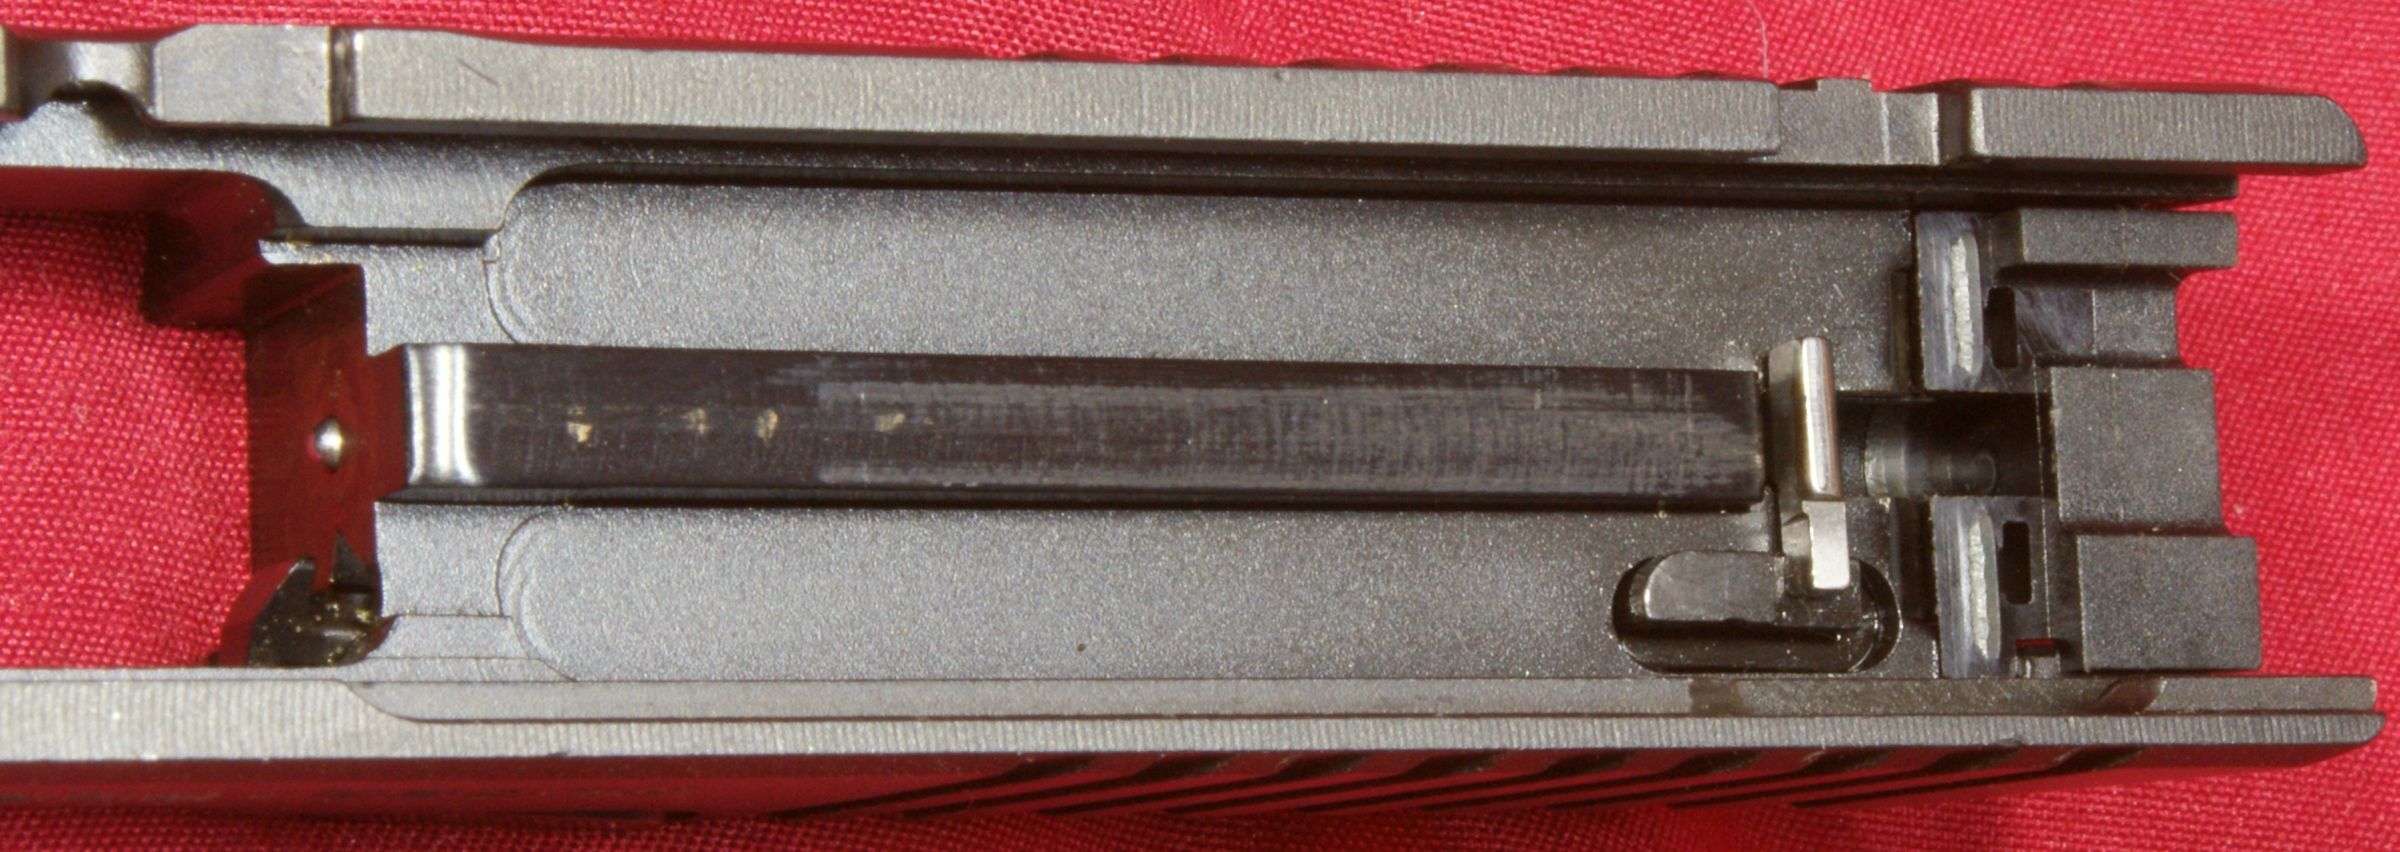
Slide Assembly
Figure 42

Figure 43
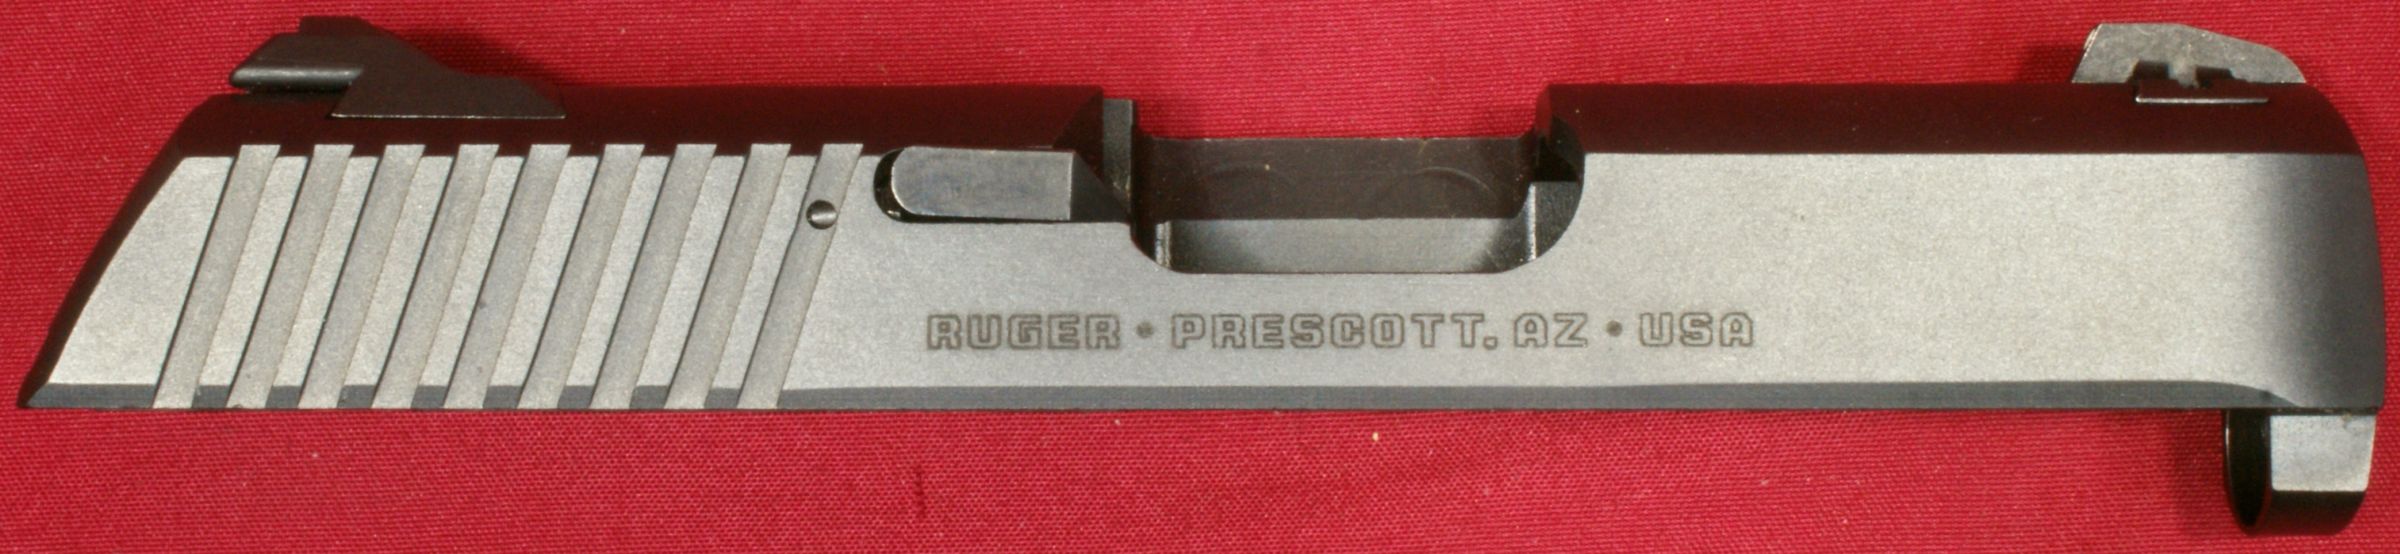
Figure 44

Figure 45
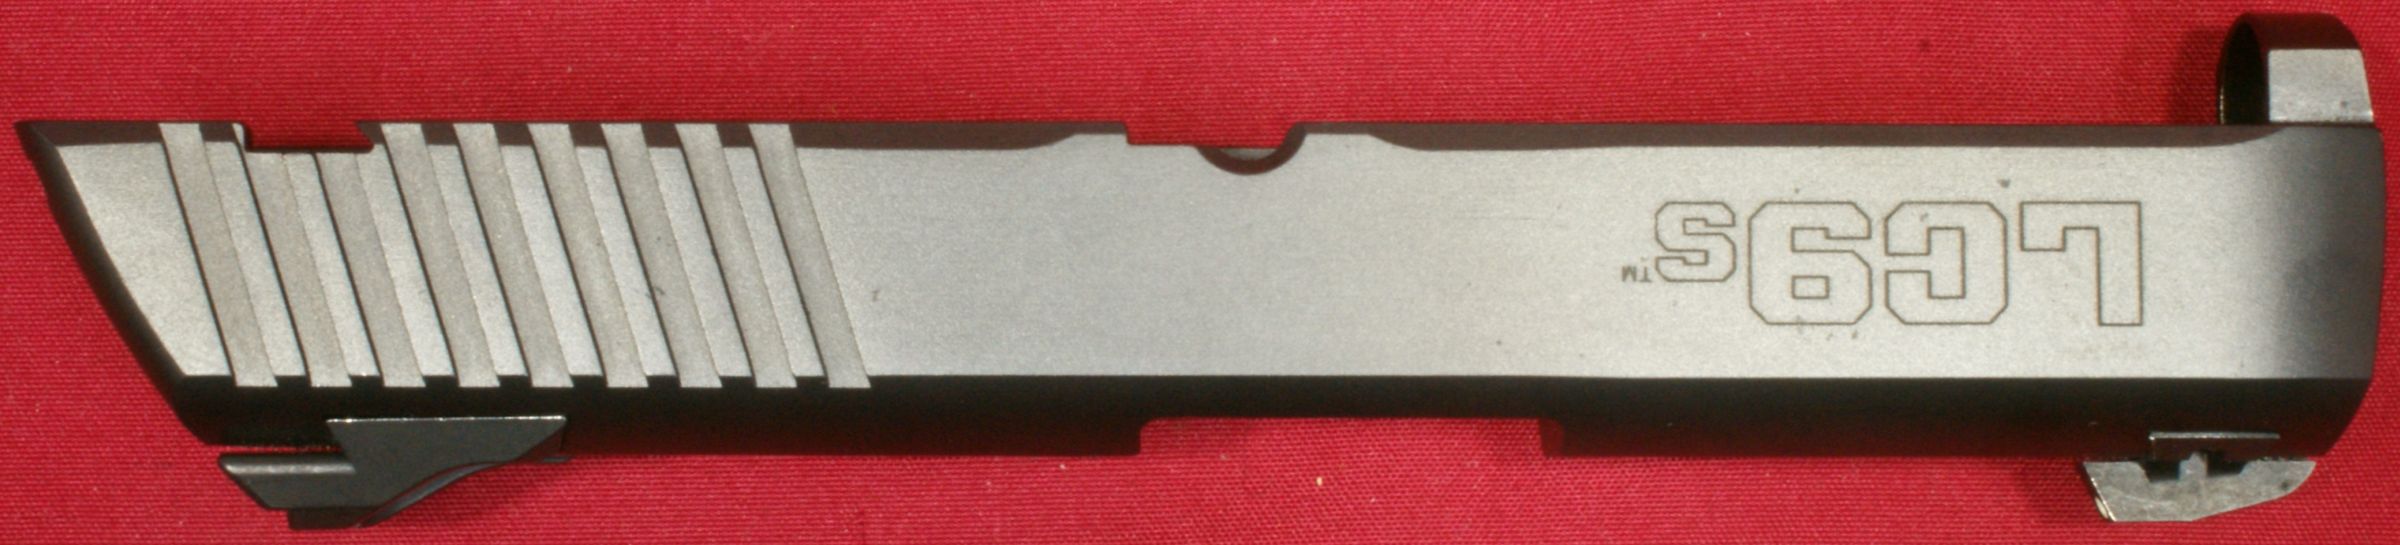
Figure 46
Figure 47
Figure 48
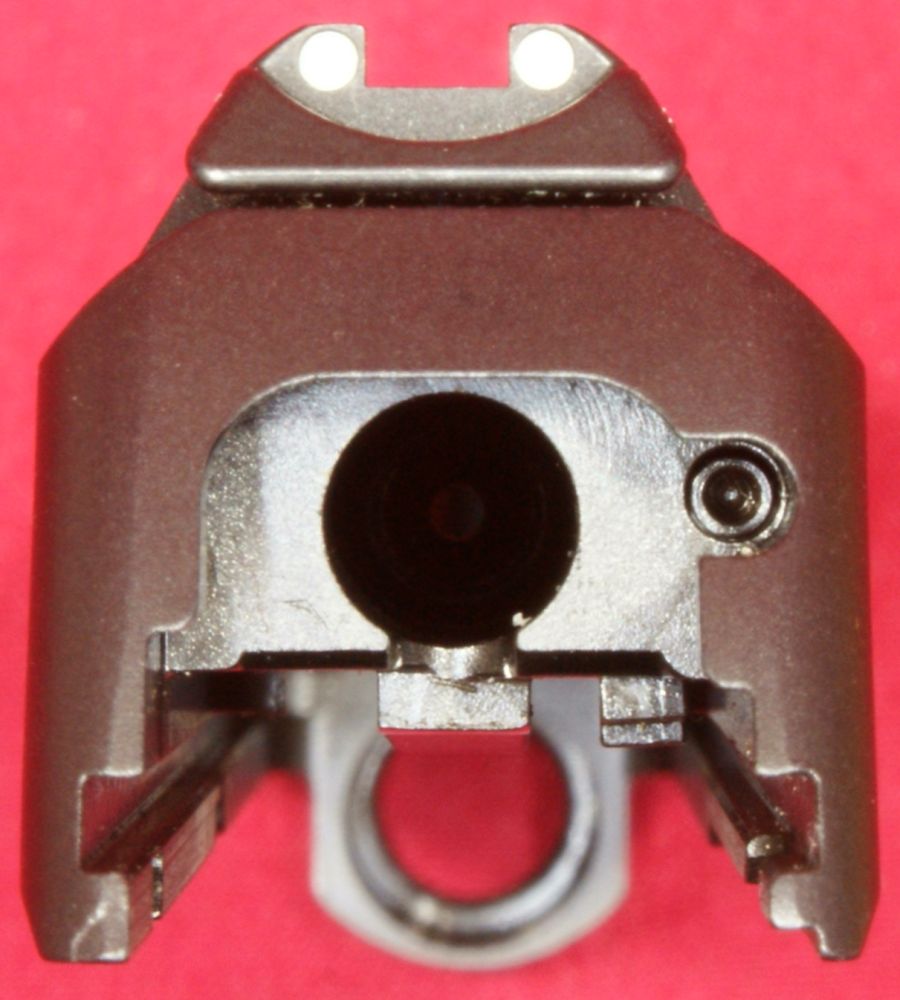

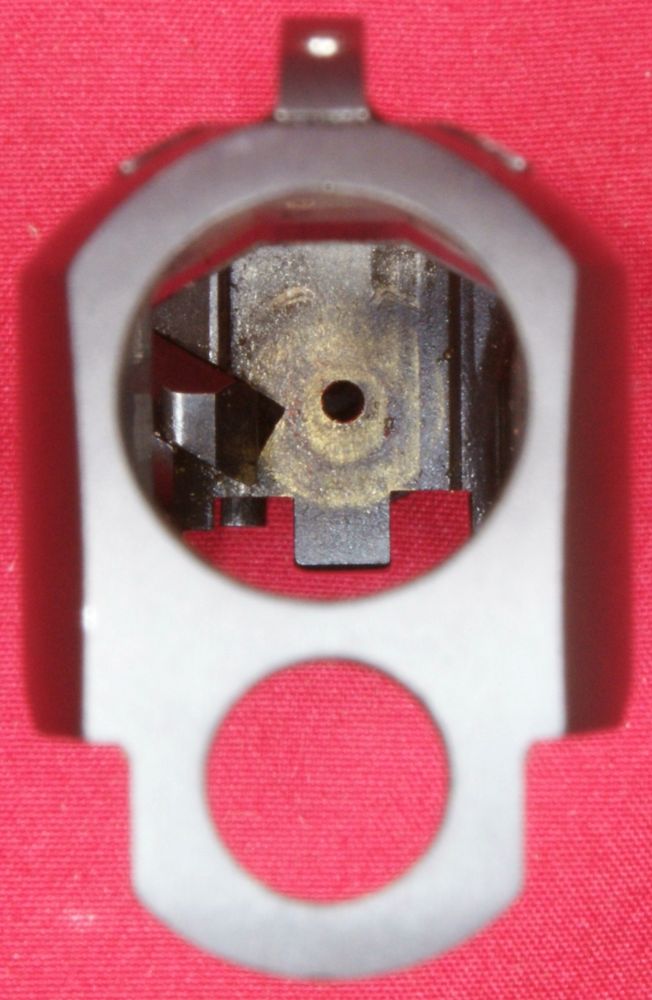
Figure 49
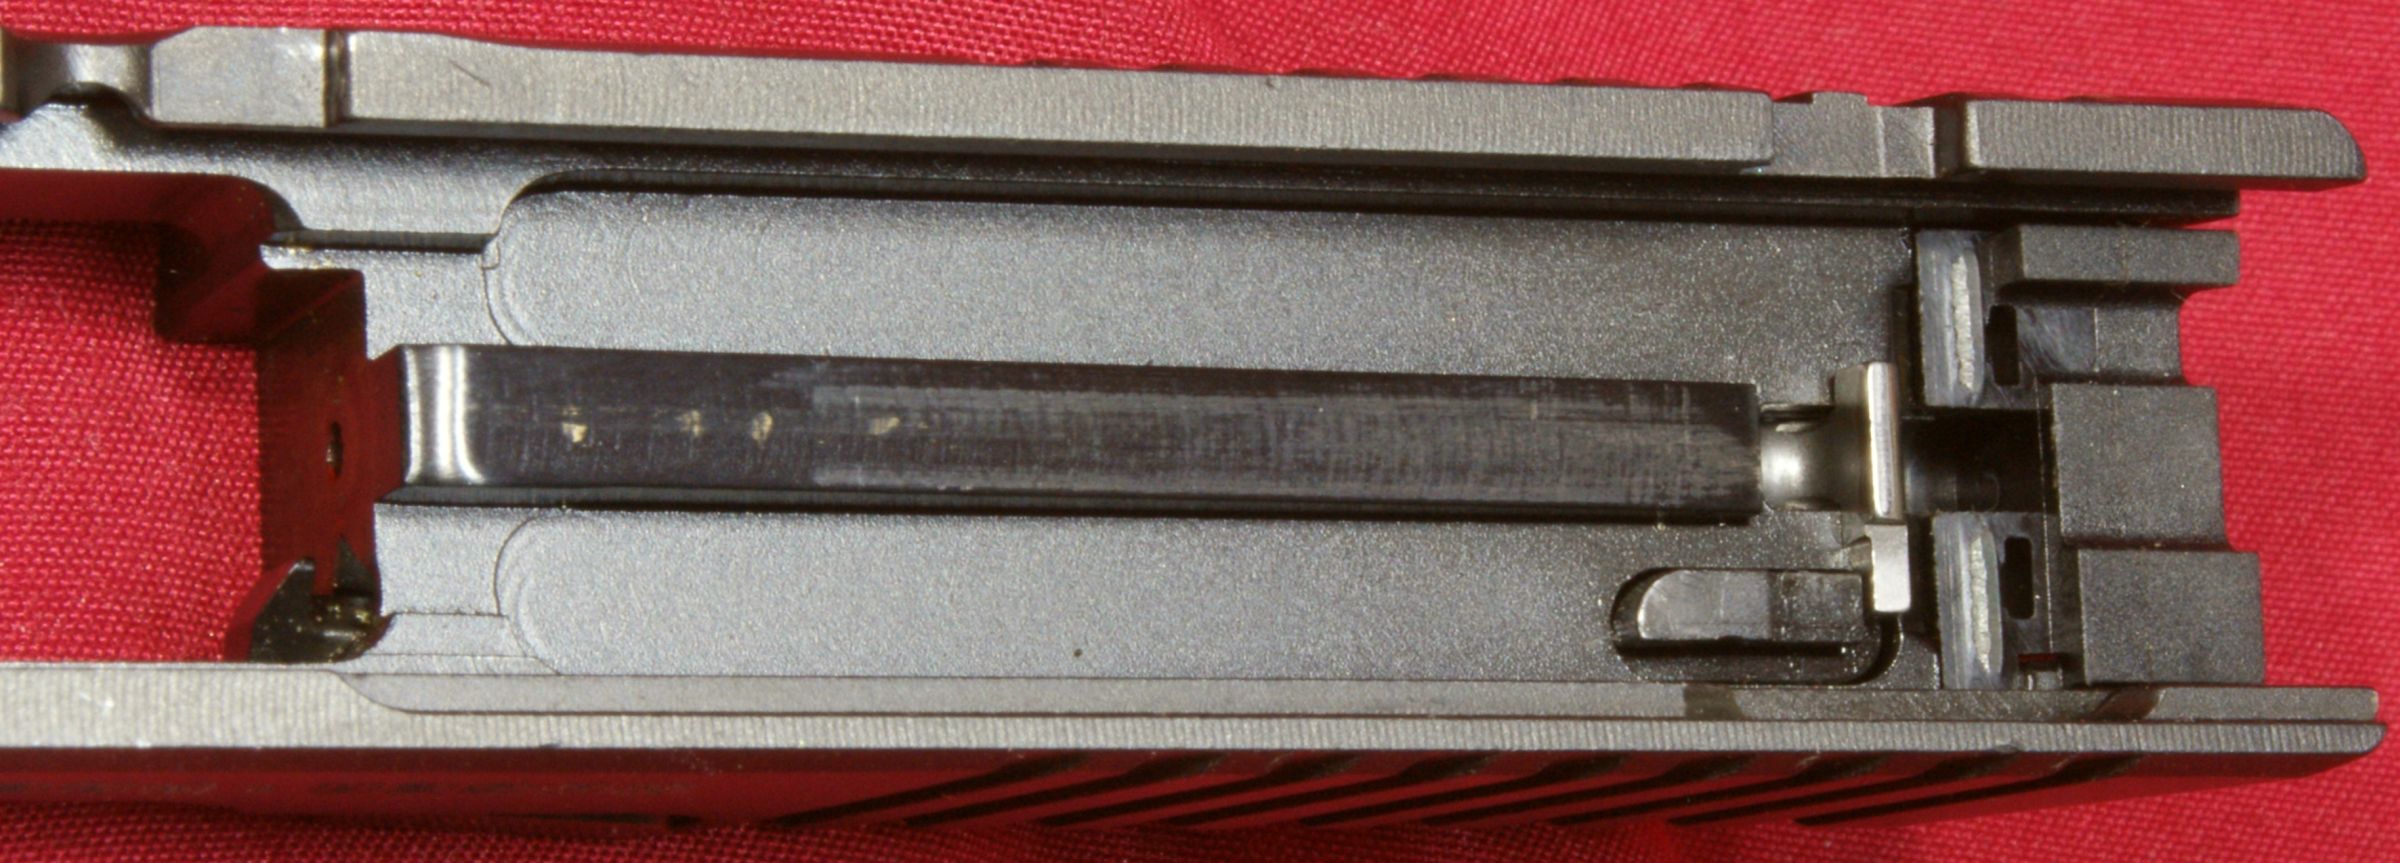
When you remove the slide on the pistol, the foot of the striker (28) is already over the striker blocker (27) and if you press the striker forward slightly, you can see the end of the striker sticking out of the breech face.
Figure 50
When the striker is cocked, the foot is past (rearward) the striker blocker and would press up against the blocker if it slipped off the sear. The striker blocker must be pressed up to allow the striker to shift forward far enough to have the striker stick out of the breech face.
Figure 51
Barrel
Figure 52
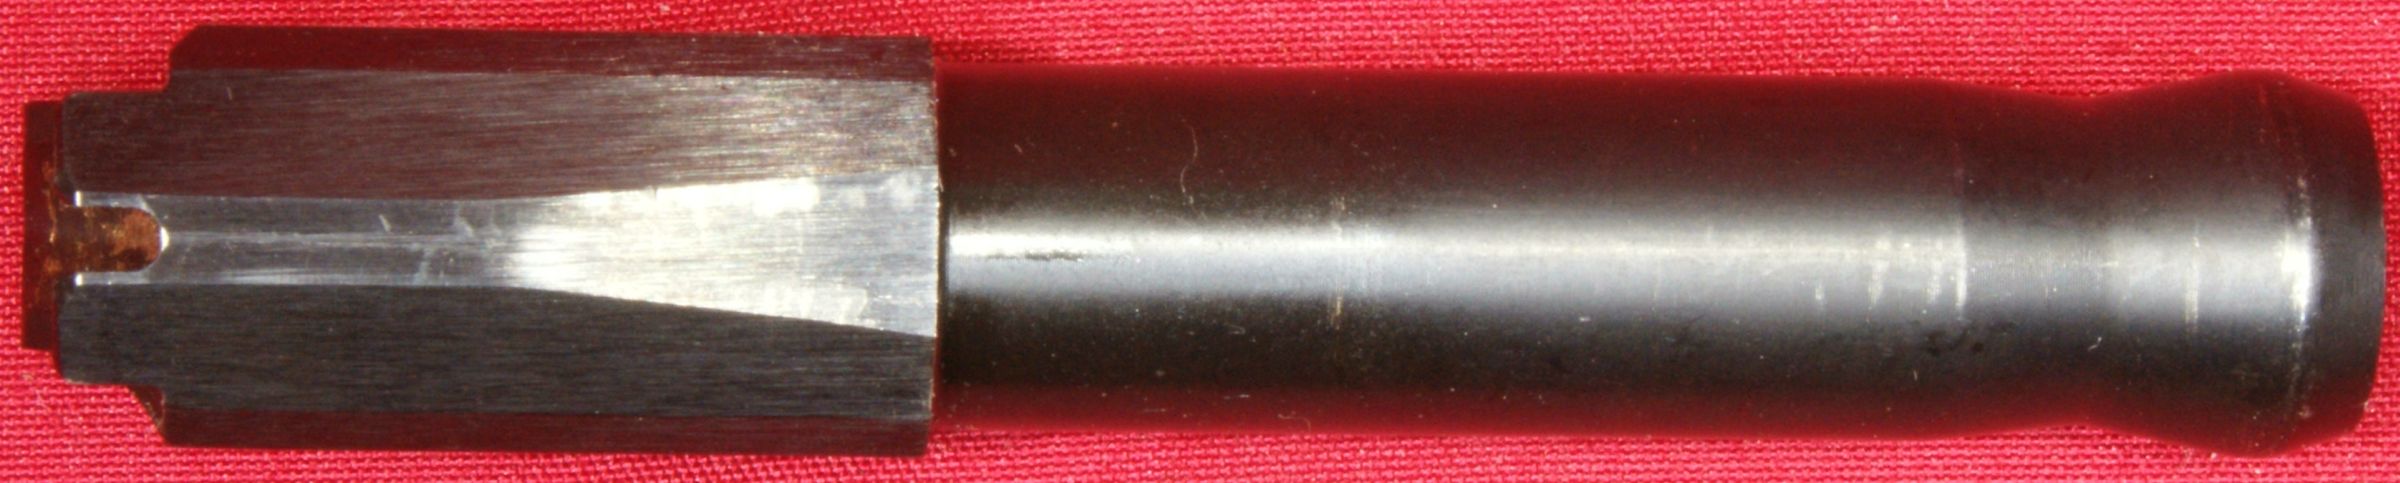
Figure 53
Figure 54
Figure 55
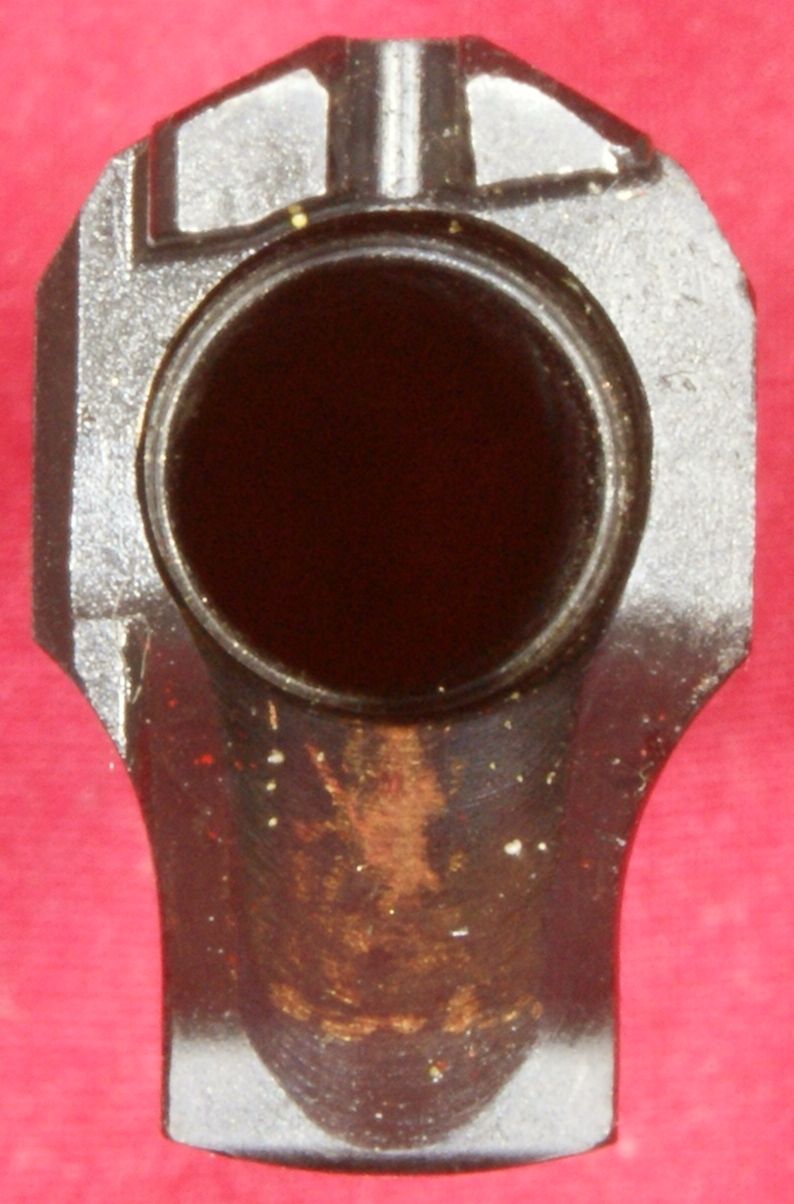

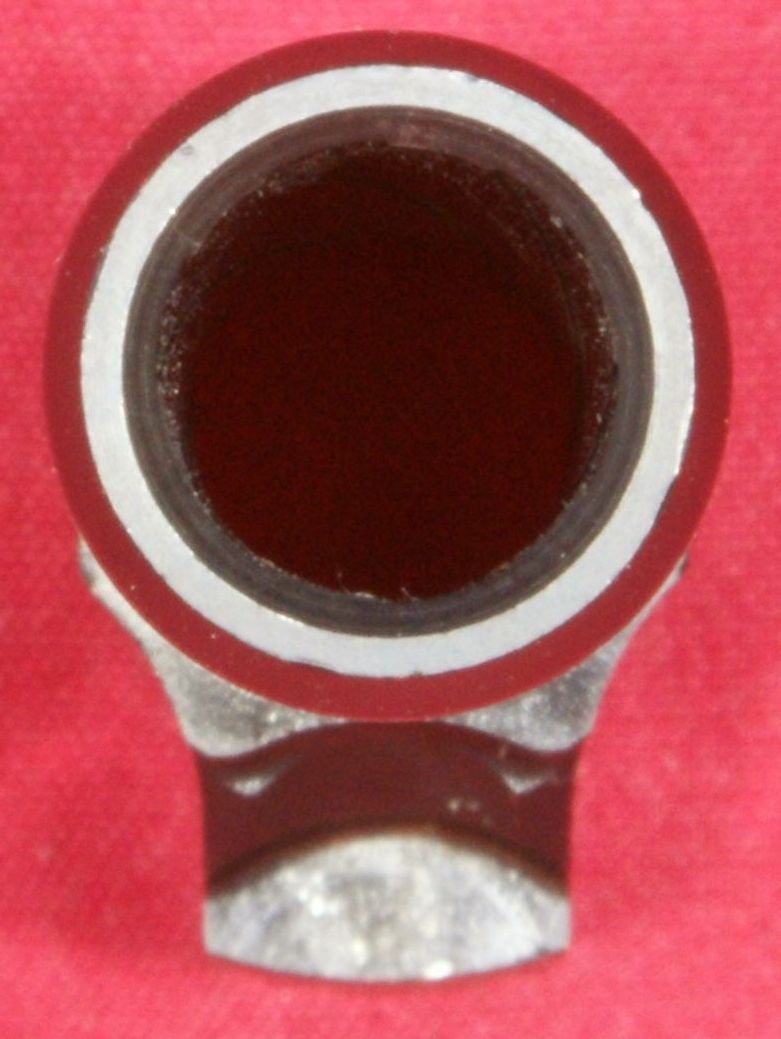
Figure 56

Figure 57

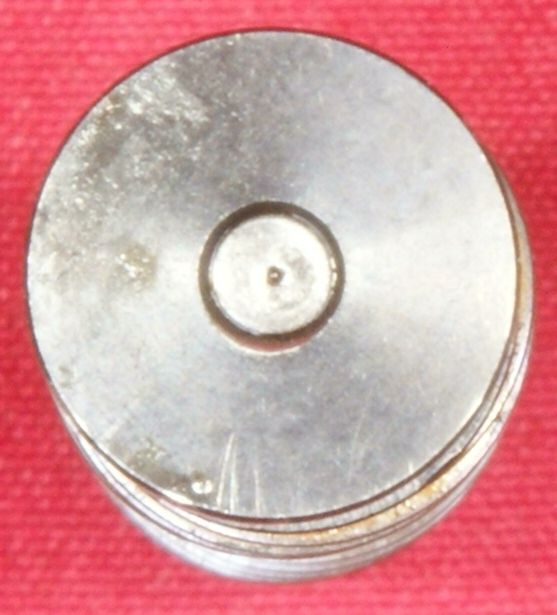
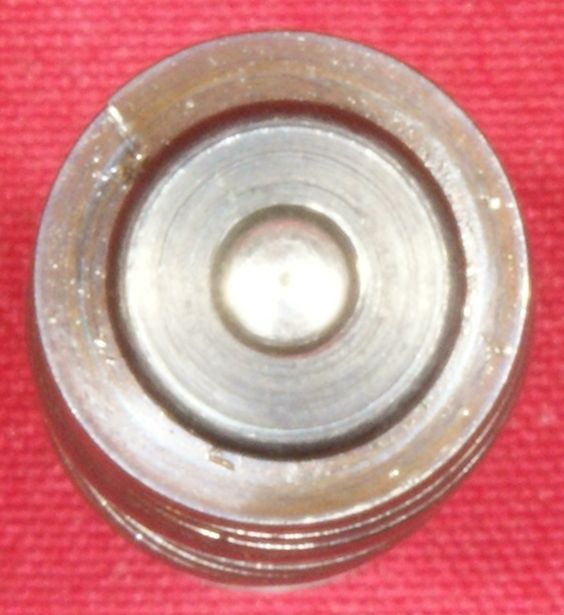
Guide Rod Assembly
Figure 58
Figure 59
Figure 60

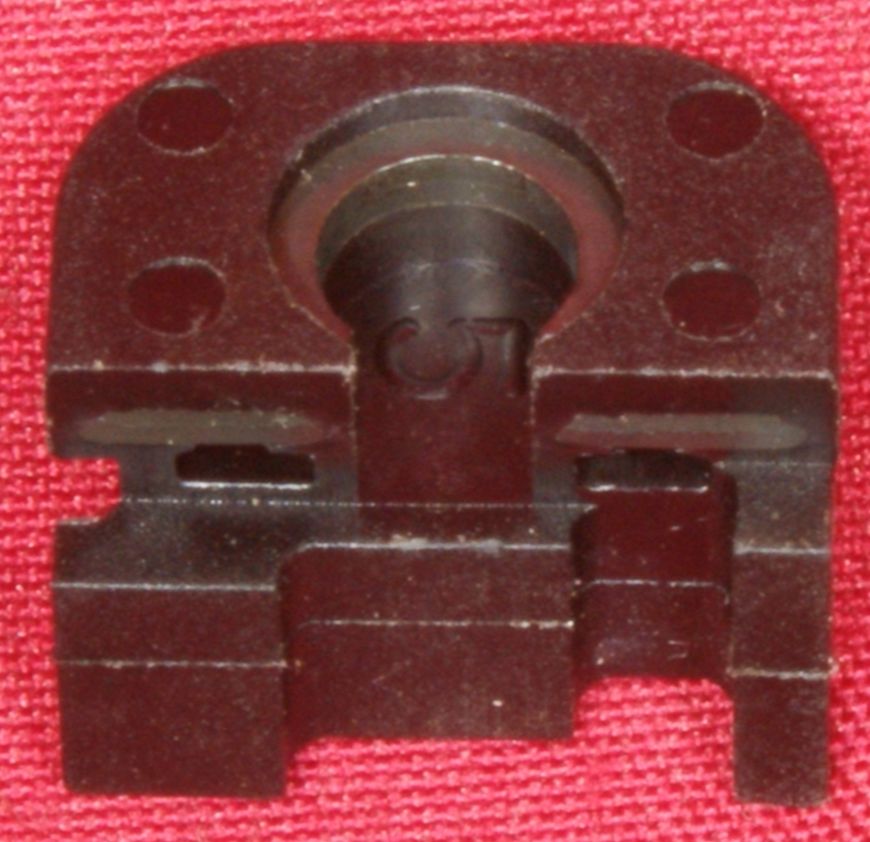
Striker Assembly
Figure 61

Figure 62

Figure 63

Striker Cover
Figure 64
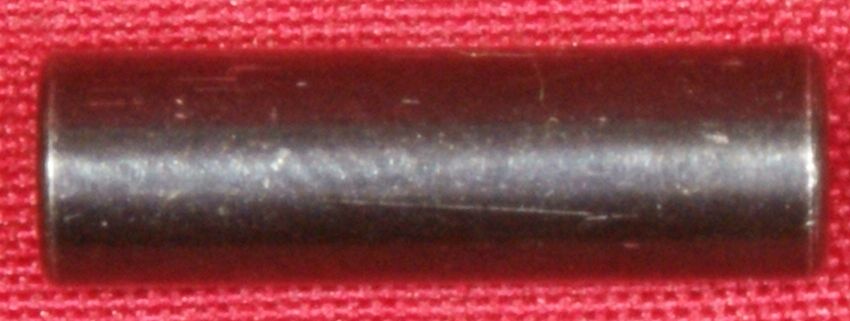
Takedown Pin
Figure 65
Figure 66

Thoughts
Disassembly for normal cleaning is simple and easy. Overall I feel the mechanisms inside the pistol are also simple and easy to understand.
For more detailed photos and commentary, make sure you check out the other parts of this review and feel free to leave comments on my Reader's Comments page. The following links are provided to help you see other parts of this review.
- Ruger LC9s Review: Part 1 - Introduction, Specifications and Summary
- Ruger LC9s Review: Part 2 - What's in the Box
- Ruger LC9s Review: Part 3 - External and Operational Features
- Ruger LC9s Review: Part 4 - Disassembly and Internal Features
- Ruger LC9s Review: Part 5 - Range Test
Or
If you would like to be notified about future Gunsumer Reports reviews via Facebook, make sure "You Like This" by clicking the Facebook "Like" button at the bottom or top of this page. If it already says "You Like This" beside the button, clicking it again will uncheck the "Like" status and you will not be notified.
| Share on Facebook | |
© 2010, 2011, 2012, 2013, 2014, 2015, 2016, 2017, 2018, 2019, 2020, 2021, 2022, 2023 & 2024 Gunsumer Reports™, All rights reserved.
FTC Disclosure