|
|
Gunsumer Reports TM Providing Detailed Objective Reviews for Firearms and Firearm Accessories |
RCBS Precision Mic Review (.308 Win)
February 11, 2012

With any type of reloading, you always need to make some type of measurements to set up your dies and perform quality control over your finished product. The type of device you use may vary depending on the level of accuracy you are trying to achieve and the difficulty of making the measurement. The first device you should purchase for making measurements is a good caliper (dial or digital). With a caliper and other measuring aids to use with it, you can successfully set up your dies and perform your quality control checks along the way. RCBS has simplified the measurement of several hard to measure critical dimensions such as head space and bullet seating depth into a set of caliber specific tools that are simple and relatively easy to use which RCBS call their Precision Mics.
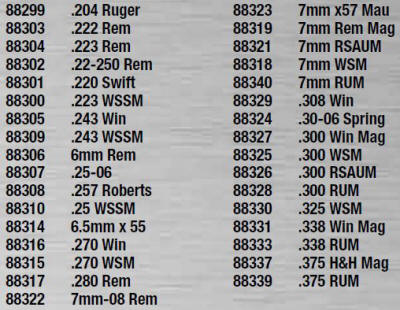
The below in colored italics was taken from the RCBS 2012 catalog and is their description of their Precision Mics along with the catalog numbers and sizes of the Precision Mics currently available.
A few twists of the Precision Mic™ and you’ll know your chamber headspace and bullet seating depth to 0.001 of an inch. The Precision Mic measures from the datum point on the case shoulder to the base, giving you spot-on SAAMI tolerance readings. An indispensable tool for safe, accurate loads that extend the life of your rifle brass.
Figure 1
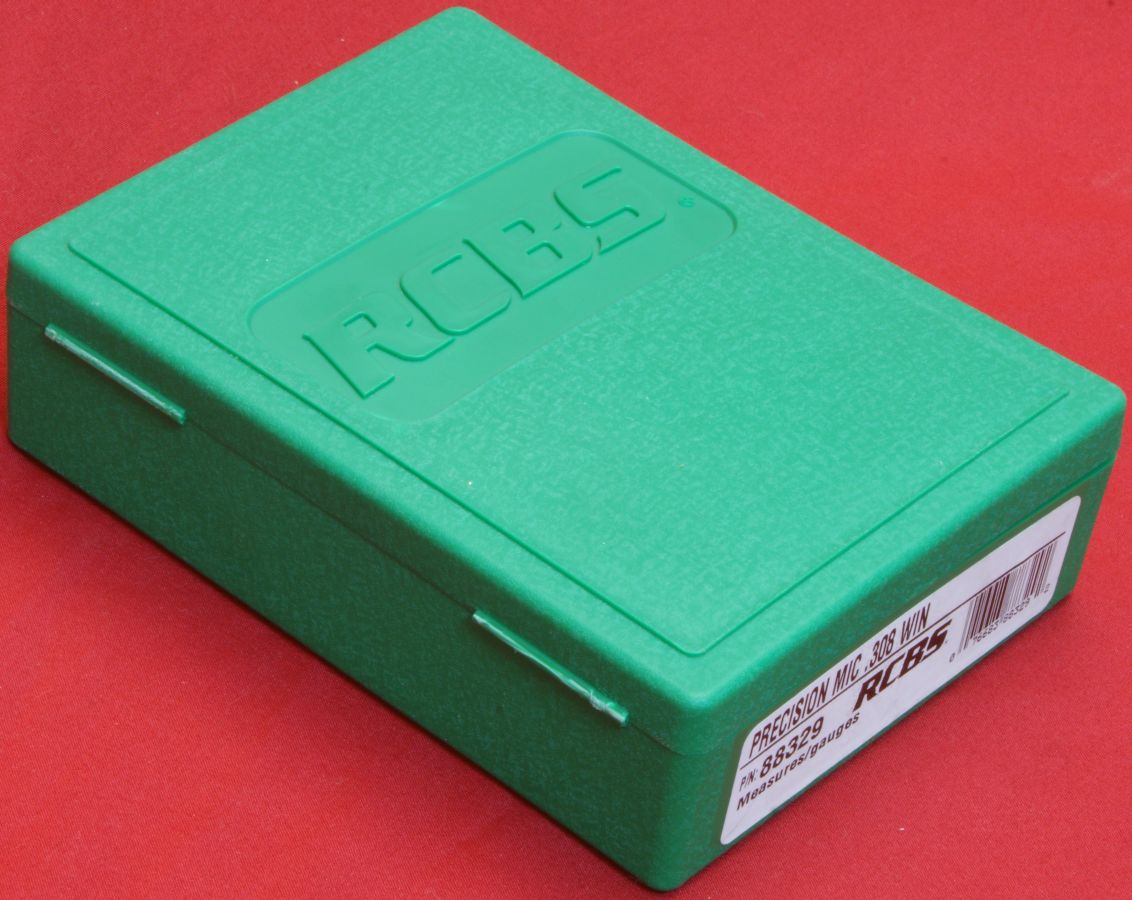
The RCBS 2012 catalog lists a suggested retail price of $69.95 per caliber but you can find them online for about $55. For this review, I purchased the RCBS Precision Mic in .308 Win from MidwayUSA.com. The Precision Mic comes boxed in one of RCBS's standard die boxes as shown below.
Figure 2
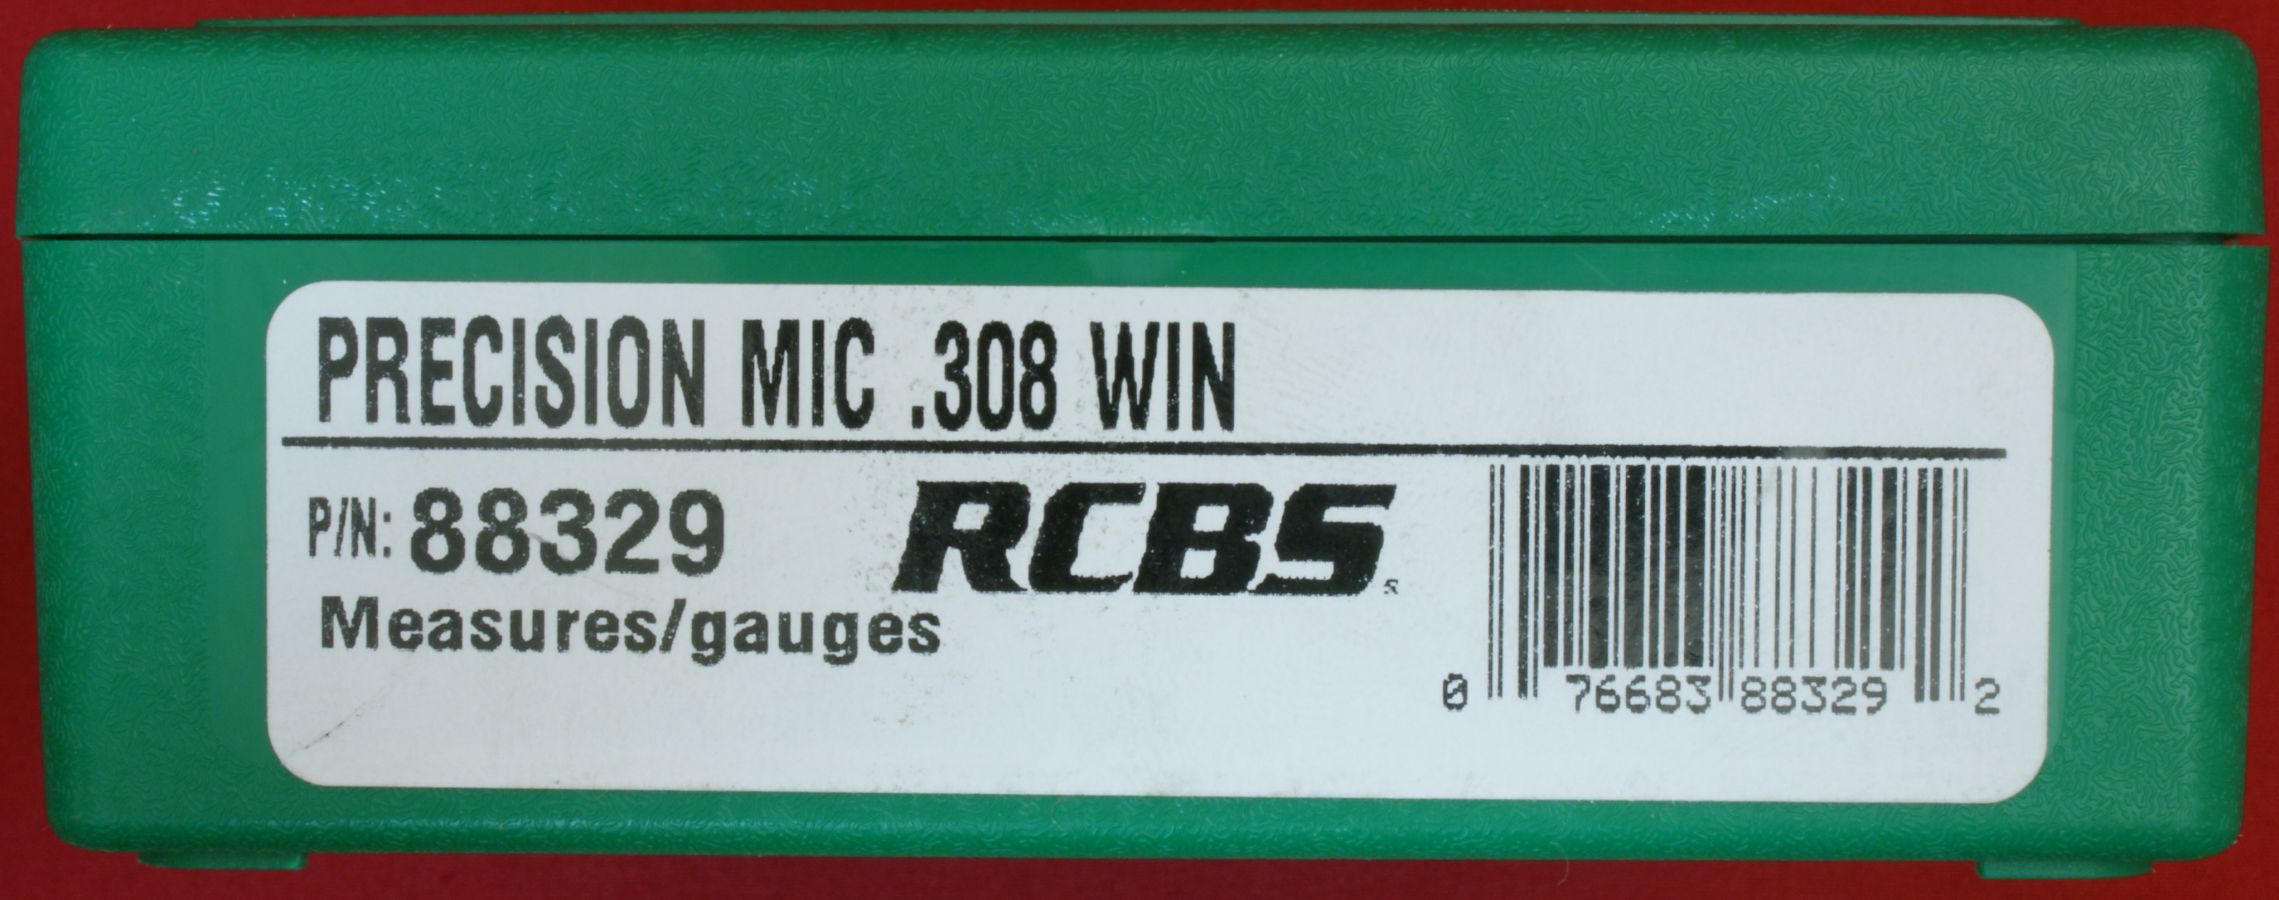
The end of the box is marked with the caliber .308 WIN and part number 88329.
Figure 3
When you open the box, you find the contents shown below plus an Instruction Manual. The primary components are:
- Body
- Headspace Nut
- Land Nut
- Freebore Tool Assembly
- 3/32" Hex Key Wrench
Figure 4
For my .308 Winchester set, the headspace nut was marked with the #4 and the land nut with 30 CAL because the headspace nut is case specific (will work for multiple calibers) and the land nut is caliber specific.
Figure 5

The body, headspace nut and land nut are steel components with a blued finish. The headspace and land nuts screw on top of the body to make your measurements.
Figure 6
Body
Headspace Nut
Land Nut
The body has a vertical mark shown below and then scale marks along the vertical mark. This vertical mark represents a line which you use to read a measurement. The 0, 1, 2 and 3 marks each represent 0.100" in length. The headspace and land nuts each have a scale around the body of the nut with 50 increments of measurement. Each increment represents 0.001" therefore it takes two full revolutions of the nut to make 0.100" of adjustments.
Figure 7
Body
Headspace Nut
Land Nut

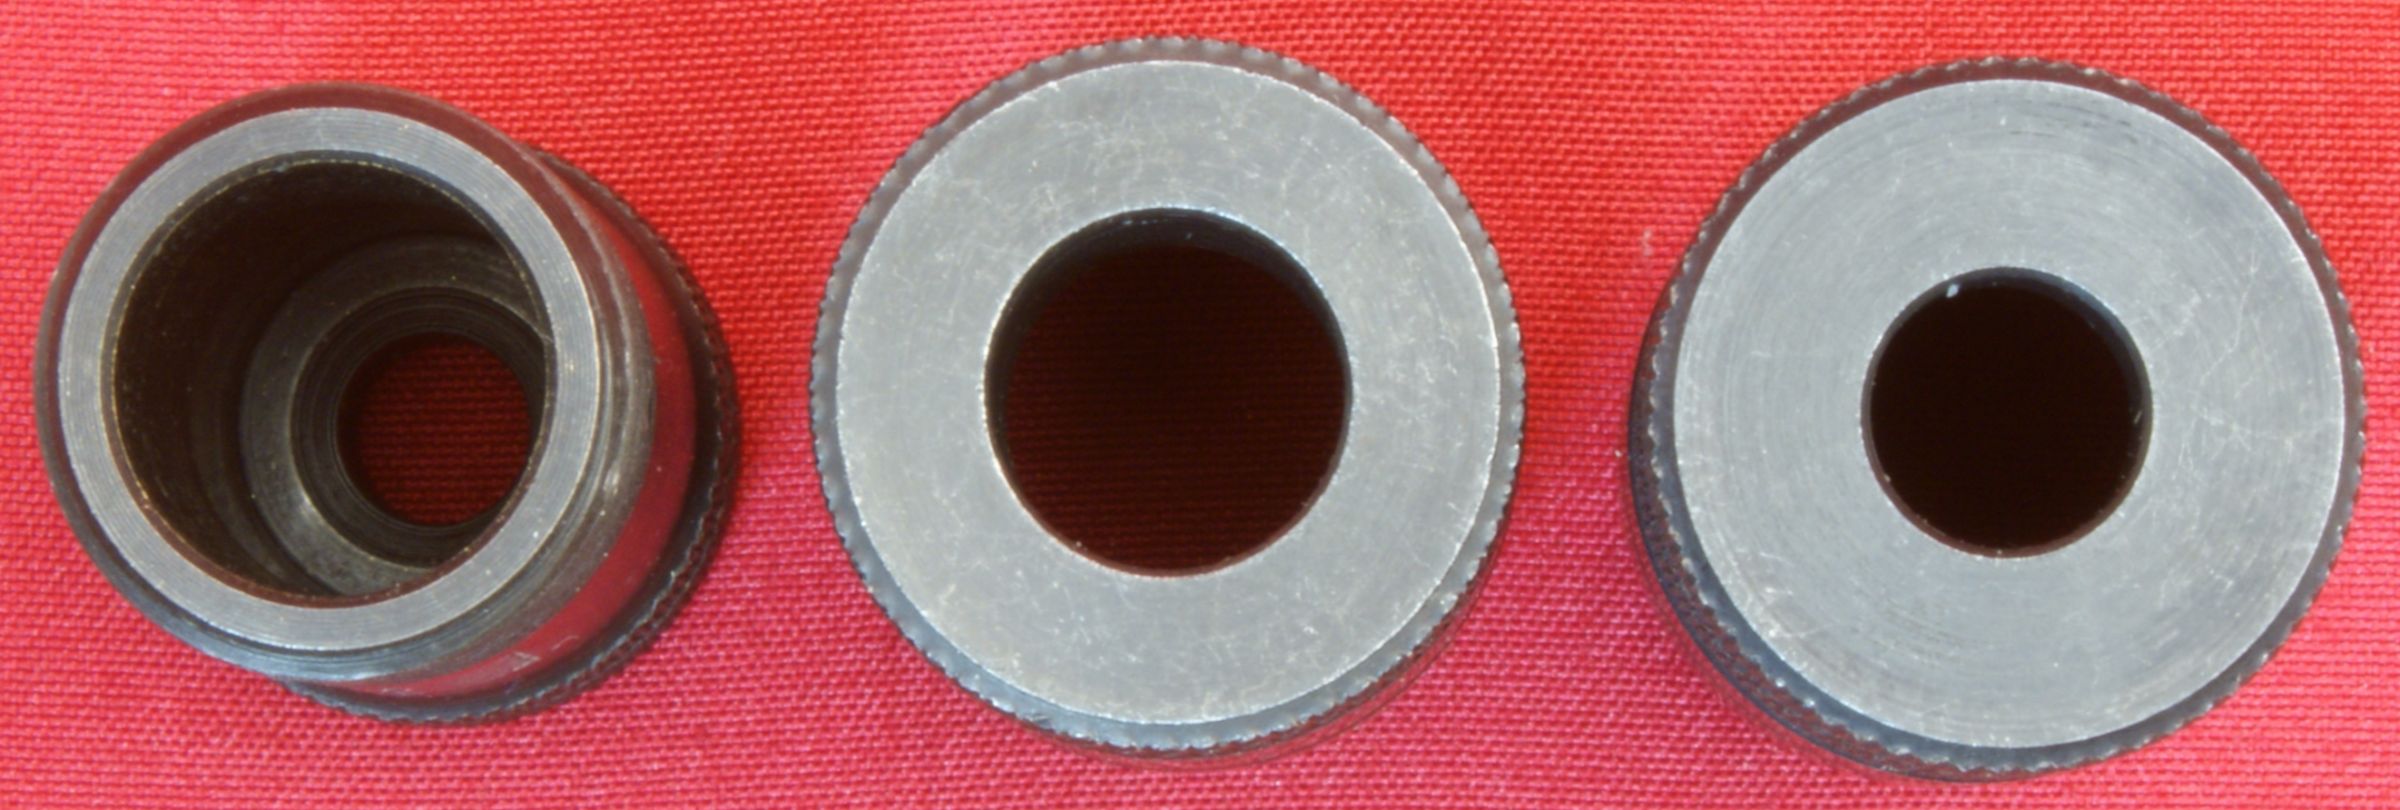
The insides of the headspace and land nuts are machined to diameters that are critical for making headspace and land measurements. Per the SAAMI standards, the diameter of the chamber or case should be 0.400" at the headspace dimension for the .308 Win cartridge. Using my dial gage, I was able to measure 0.4005" in diameter for this nut which I consider to be a good match to the standard. For the land nut, I measured a diameter of 0.3000" which would represent the bore diameter per the SAAMI standard. Since these two nuts have measured critical diameters that matched the standard, I feel confident that they will index the correct location on the case or bullet when making measurements. I will cover how to use these items later in the review.
Figure 8
Body
Headspace Nut
Land Nut
The freebore tool assembly is used to determine the seating depth of your bullets by providing a device that can match the inside of your chamber to represent the distance from the bolt face to a point where a bullet contacts at the lands.
Figure 9 - Freebore Tool Assembly

The Freebore Tool Assembly is made up of these components below which are the base, tip, nylon connector and screw. The base, tip and screw are steel components.
Figure 10
This tool works by sliding the nylon piece (tip and screw installed) inside the body and adjusting the screw until it is tight. The total length of the tool should be such that you would expect the insert to be pushed further into the body when the bolt is fully closed. The instructions say, "Adjust the screw so the nylon connector can be slipped into the base with a slight friction fit." Then they say "Insert the nylon connector about 1/4 inch into the base and tighten the screw with the hex key wrench." Next they say, "... firmly tighten ..." With the freebore tool assembly tight, you chamber the tool in your rifle. When you remove the tool, the tool should represent the desired length. During the process of measuring a rifle chamber, I found there to be significant differences in measurements between a slight friction fit and tight friction fit. I was able to get consistent measurements based on the tighter fit (firmly tighten). Making the actual measurement using the freebore tool assembly is discussed further in this review.
Figure 11
Measuring Headspace
To measure head space, you will use the Precision Mic body and headspace nut. Per the instruction, the Precision Mic is set to zero on the nut by aligning the index mark at the zero position on the body. The distance inside the mic represents the minimum headspace based on the ASSMI Standards. For the .308 Win caliber, this minimum headspace dimension is 1.630".
Figure 12
When trying to determine headspace on your rifle, you start out by measuring fired cases from factory loaded ammunition or reloads with new brass. You would measure at least 5 (based on the RCBS instructions) cases and take the average. To measure a case, you drop the case into the base and screw the headspace nut down until it lightly touches the case. In the photos below you can see that the dial on the the headspace nut rotated down another two divisions on the nut which equals 0.002". Since the head space nut continued past the zero point as you tightened it, this means that the headspace for this case measures 0.002" below the SAAMI minimum of 1.630". After measuring this for 20 fired cases (many more than the 5 suggested), I determined that the headspace measurement for my Remington Model 700 SPS Tactical Rifle was an average of 0.0017" below the SAAMI minimum. Since brass swells and then contracts slightly after firing, I infer that the headspace length on my Remington SPS Tactical is probably machined fairly close to the minimum SAAMI values. For my purposes, I will set my sizer die so that the headspace on my brass is 0.001 to 0.002 shorter than my my measured headspace which will give me 0.003" to 0.004" below the SAAMI minimum chamber headspace dimension. I can then use the Precision Mic body and headspace nut to measure sized cases when setting my sizer die.
Figure 13
Figure 14
Figure 15

Measuring Bullet Seating Depth
The RCBS Precision Mic can be used to determine the bullet seating depth. To do this, you will use the Precision Mic body and land nut to measure the length of the Freebore Tool Assembly after you have properly inserted and removed the tool from your rifle chamber. I have listed the basic steps below to properly insert the freebore tool assembly, but you should refer to the RCBS Instructions and see the comments above Figure 11 of this review.
- Insert the nylon connector into the base with the screw and tip installed on the connector.
- Adjust the length of the tool to be about .300" longer (one bore diameter) than your expected length. This should ensure that that the length of the tool will shorten to your rifles actual length.
- Tighten the screw in the base of the nylon connector until it is tight. This will create more friction between the nylon connector and the base.
- Insert the tool assembly into your chamber and close the bolt.
- Open the bolt and remove the tool. In my case, each time I had to push the tool out using a cleaning rod through the barrel.
- You would then measure the length using your Precision Mic with the land nut. If for some reason the length is still 0.300" longer, you may have a very long lead on your rifle and it may not be possible to set the bullet seating depth near the lands.
- You should repeat the process until you are comfortable that you have achieved consistent measurements. According to RCBS, if this is correctly done, the reading should not vary by more than 0.002".
I repeated these steps several times using a resized case with a split neck and 168 grain BTHP as a reference. Comparing the two methods would make me feel good about my measurement using the freebore assembly tool. One of the first things I discovered (confirmed) was that I needed the screw inside the freebore tool to be as tight as I could reasonably get it while holding it with my fingers (no pliers). This extra friction was needed to press down the ejector on my bolt. I started getting measurements of about 0.060" above my zero reference. Since my extractor was never extracting the freebore tool, I also felt that I should start the freebore tool lip under the extractor and push the ejector down while keeping the tool centered and feeding it into the chamber. After doing these two things I was able to get consistent readings on the freebore tool of 0.105" over my zero and readings on the split case method of 0.095" over my zero. Taking an average of the two gives me about 0.100". By putting the rim under the extractor and pushing down the ejector prior to inserting it in the chamber, I could possibly have reduced the tightness on the screw and achieved closer numbers because the force to push the tool and bullet would be more similar.
In an effort to make a third confirmation, I pressed the split case with bullet up in the chamber with my finger and came up with very similar results of 0.090". The 0.005" difference between the two split case methods is probably due to the headspace difference. The good news is that I felt good about my measurements. The bad news is that it seems the over all case length will define my gap if I choose to shoot heavier/longer bullets because I will be over all length (OAL) limited due to my magazine length on this rifle. I measured the magazine length and found it to be 2.854" on this rifle. The maximum length that I feel I could chamber would be about 2.834" which happens to match that of the zero on the land nut when using the Hornady 168 grain BTHP. I'm not sure if this was by design or coincidence on RCBS's part, but it gives me a good reference when adjusting my seating die for this bullet. You would need to confirm this dimension for your own bullet shape.
Figure 16
Figure 17

Last, I had to do one last check to see where the lands were making contact with the bullet so I colored the end of the bullet with a black Sharpie. Then I pressed the split case with bullet longer than needed into the chamber with my finger. The mark above the word "Here" shown below is a scratch where the rifling was making contact with the bullet. Based on the location on the bullet (how far down the ogive), I believe that I'm correctly referencing the land with my measurements.
Figure 18
The land nut screws on the body and adjusts to a zero configuration as shown below. Since there can be significant variations in bullet seating depths based on variation in the freebore length from one rifle to the next, I believe this measurement is a relative measurement (not absolute). Basically I'm saying that as long as you are consistent in your measurement, the actual value is not critical. For my purposes, I called the configuration shown below to be zero on this mic since it didn't fall exactly on zero like it did with the headspace nut.
Figure 19
This zero point on the land nut represents a length of 3.2415" using the freebore assembly tool for measurement.
Figure 20
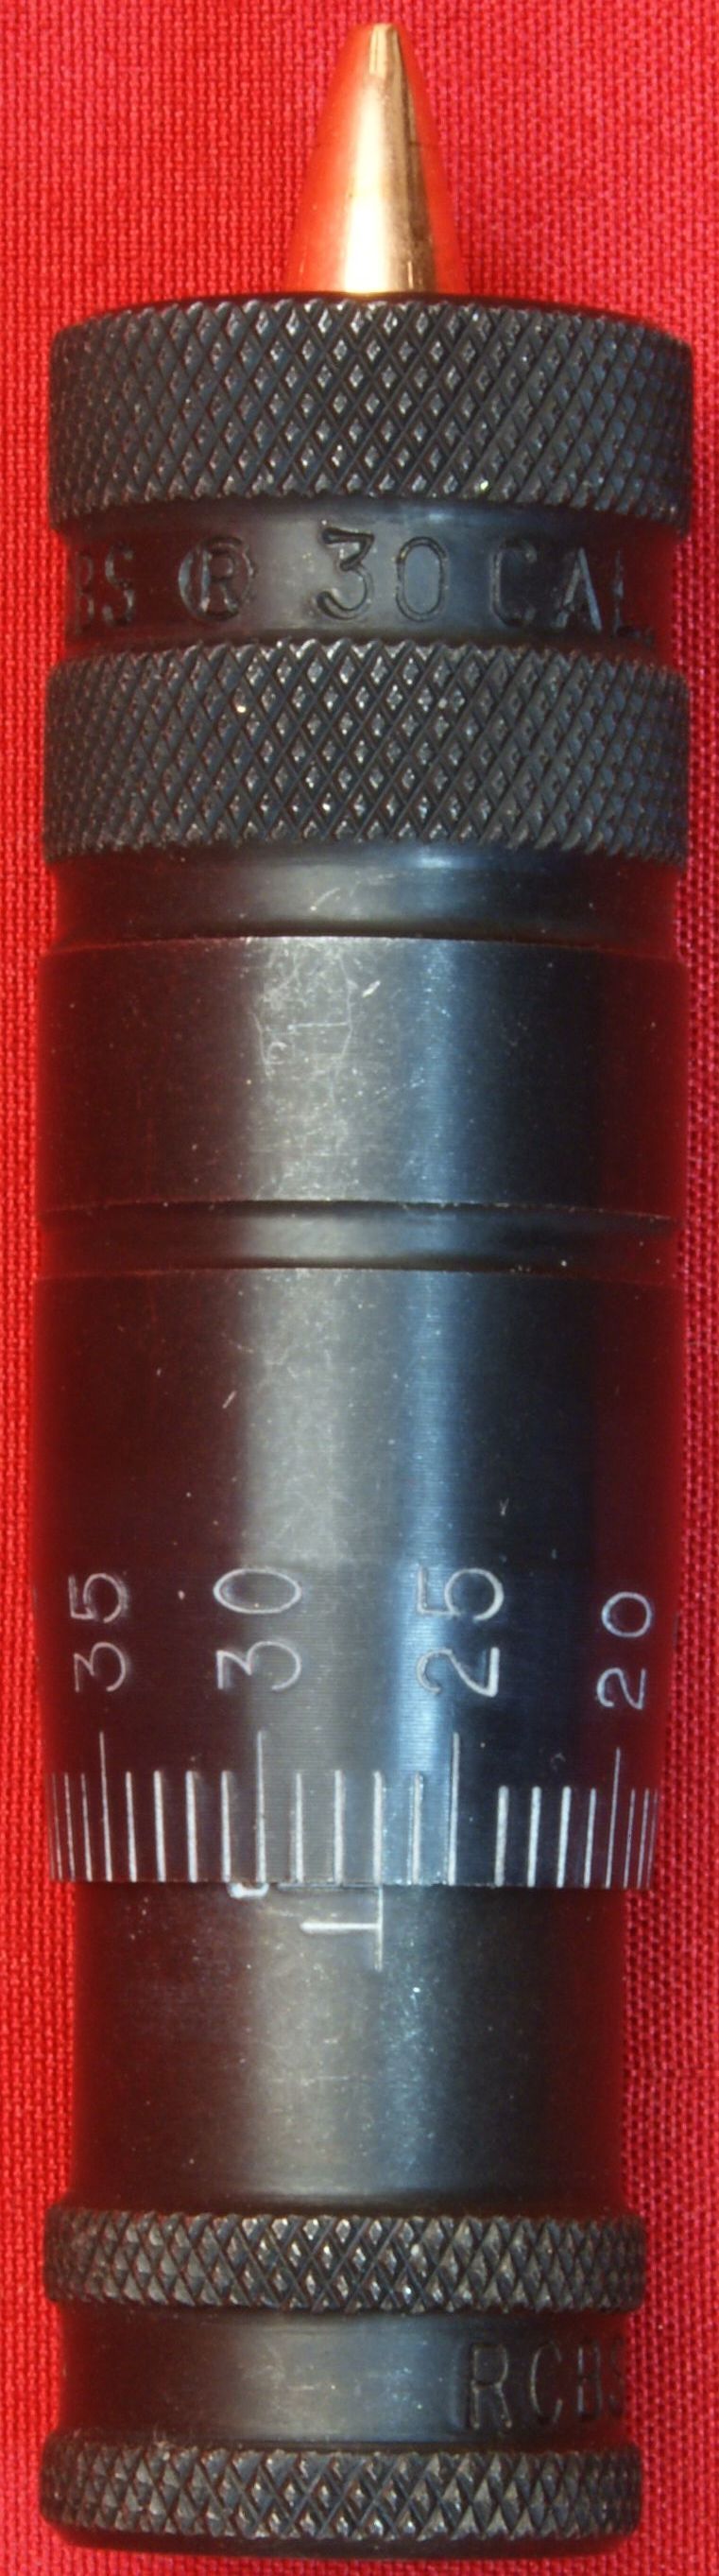
To measure the length where the bearing surface of the bullet on the ogive will contact the lands, you would use the freebore tool assembly inside the Precision Mic body along with the land nut to make the measurement. To confirm your seating depth of your bullet, you would do the same with a loaded cartridge. With the loaded cartridge below, it measured 23 thousands or 0.023" shorter than the zero position. In the case of my Remington 700 SPS Tactical, I found that the length to the lands was about 0.100" greater than zero on the mic. In this example, this factory round would need to jump a gap of 0.123" before it engaged the lands. Actually I find this extremely surprising since this rifle has proven to be capable of 1/2 MOA with the Hornady Match 168 gr BTHP. Based on my findings, I will need to set my bullet seating depth to the zero position when measuring using the land nut due to my magazine length. This will allow me to reduce the gap the bullet jumps to about 0.100".
Figure 21
Figure 22
Figure 23
Figure 24
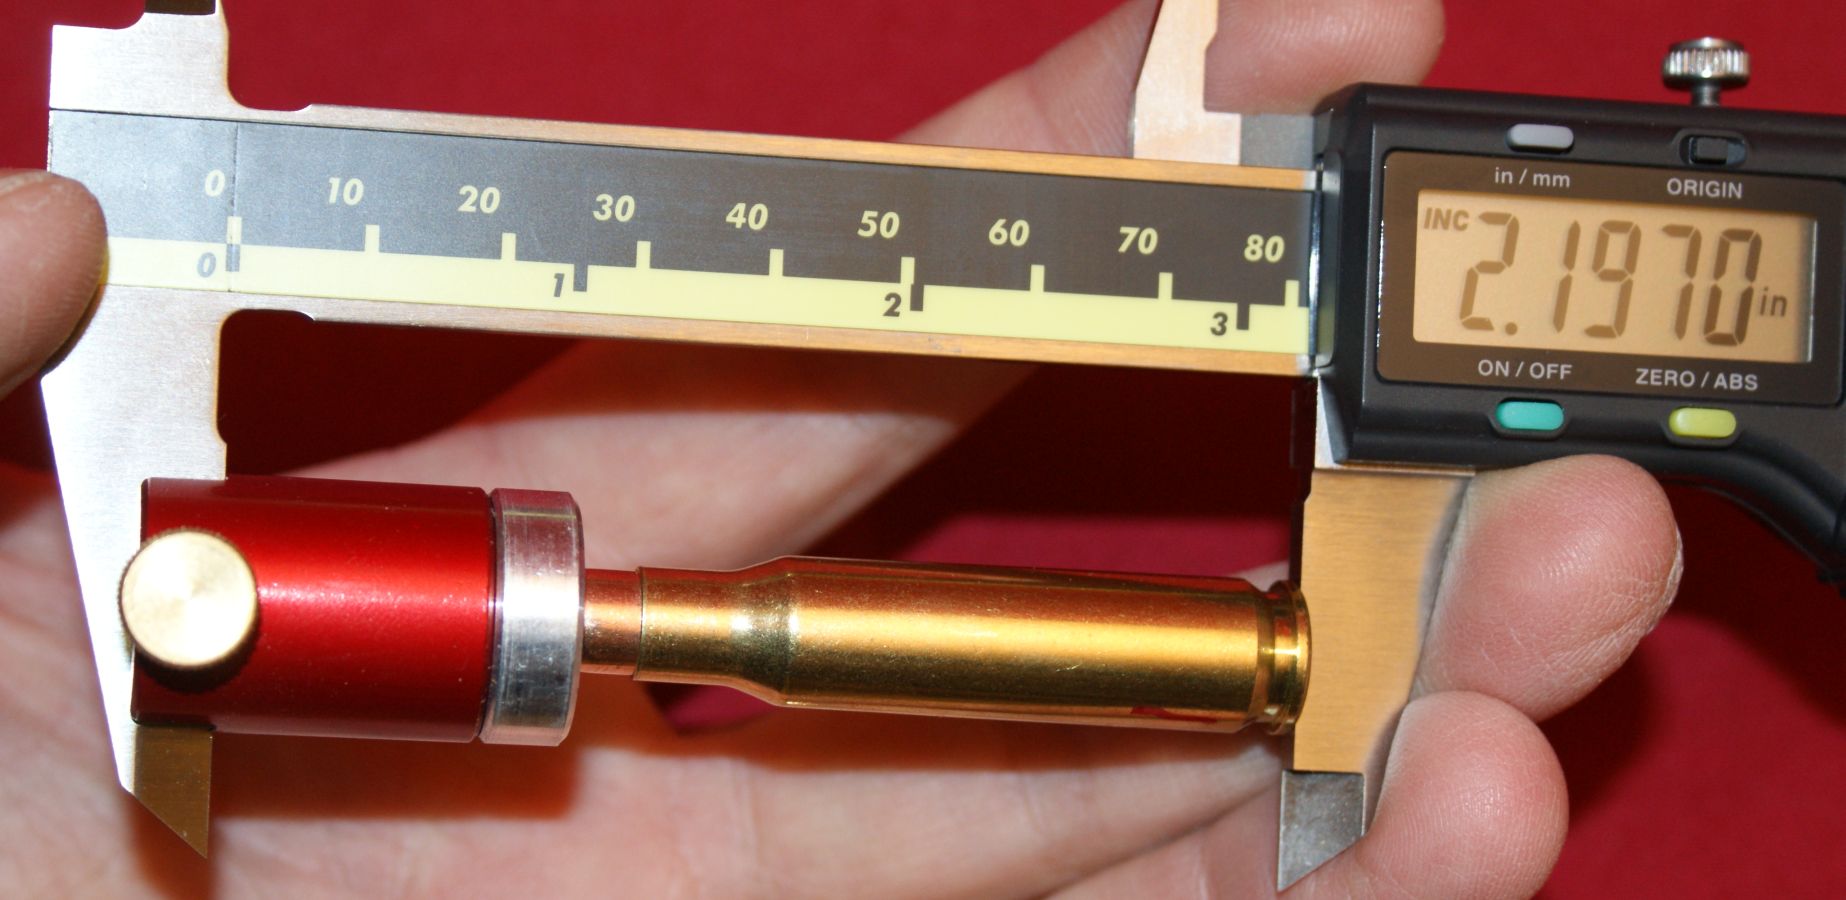
For this same cartridge above that was 0.023" shorter than the zero reference, it measured 2.197" using a Hornady Bullet Comparator and digital calipers and had a total over all length (OAL) of 2.800" which is just under the 2.810" maximum per the SAAMI standards.
Figure 25
Knowing the actual bullet bearing length on the lands for your rifle allows you to make knowledgeable adjustments to your bullet seating depth which may help you achieve a greater accuracy and prevent you from getting into some type of overpressure situation with your bullet jammed up into your lands. The RCBS Instructions go into more detail on how to use this information in determining final bullet seating depth and I suggest you read this information along with any other sources of information before proceeding to setup your dies.
Bottom Line:
In this review, I have tried to cover how to use the RCBS Precision Mic. I suggest you read the RCBS instructions carefully to gain further insight into how to use these items to setup your dies for reloading. Overall, I'm pleased with the ease of using the Precision Mic for measuring the headspace length on a case and feel that I'm already wanting Precision Mics for my other calibers for this reason alone. I can also see that the freebore assembly tool can be of benefit for trying to determine the bullet seating depth, but using this tool did take a quite a bit of practice and getting some comparative data was necessary before I was confident that I was making the correct measurements using the freebore assembly tool. Overall I'm not convinced that the freebore assembly tool is better than the split neck case method and most likely I will now do both methods in the future. Based on my findings, the magazine length may be the deciding factor on how far you want to seat your bullet out of the case unless you plan on turning your rifle into a single shot. Personally I liked the method of using the micrometer style Precision Mic for measuring the bullet seating depth over using a comparator head and calipers. This is more of a personal preference, but it seemed very easy to drop in a case and then spin the nut down to determine the lengths.
Or
If you would like to be notified about future Gunsumer Reports reviews via Facebook, make sure "You Like This" by clicking the Facebook "Like" button at the bottom or top of this page. If it already says "You Like This" beside the button, clicking it again will uncheck the "Like" status and you will not be notified.
| Share on Facebook | |
© 2010, 2011, 2012, 2013, 2014, 2015, 2016, 2017, 2018, 2019, 2020, 2021, 2022, 2023 & 2024 Gunsumer Reports™, All rights reserved.
FTC Disclosure