|
|
Gunsumer Reports TM Providing Detailed Objective Reviews for Firearms and Firearm Accessories |
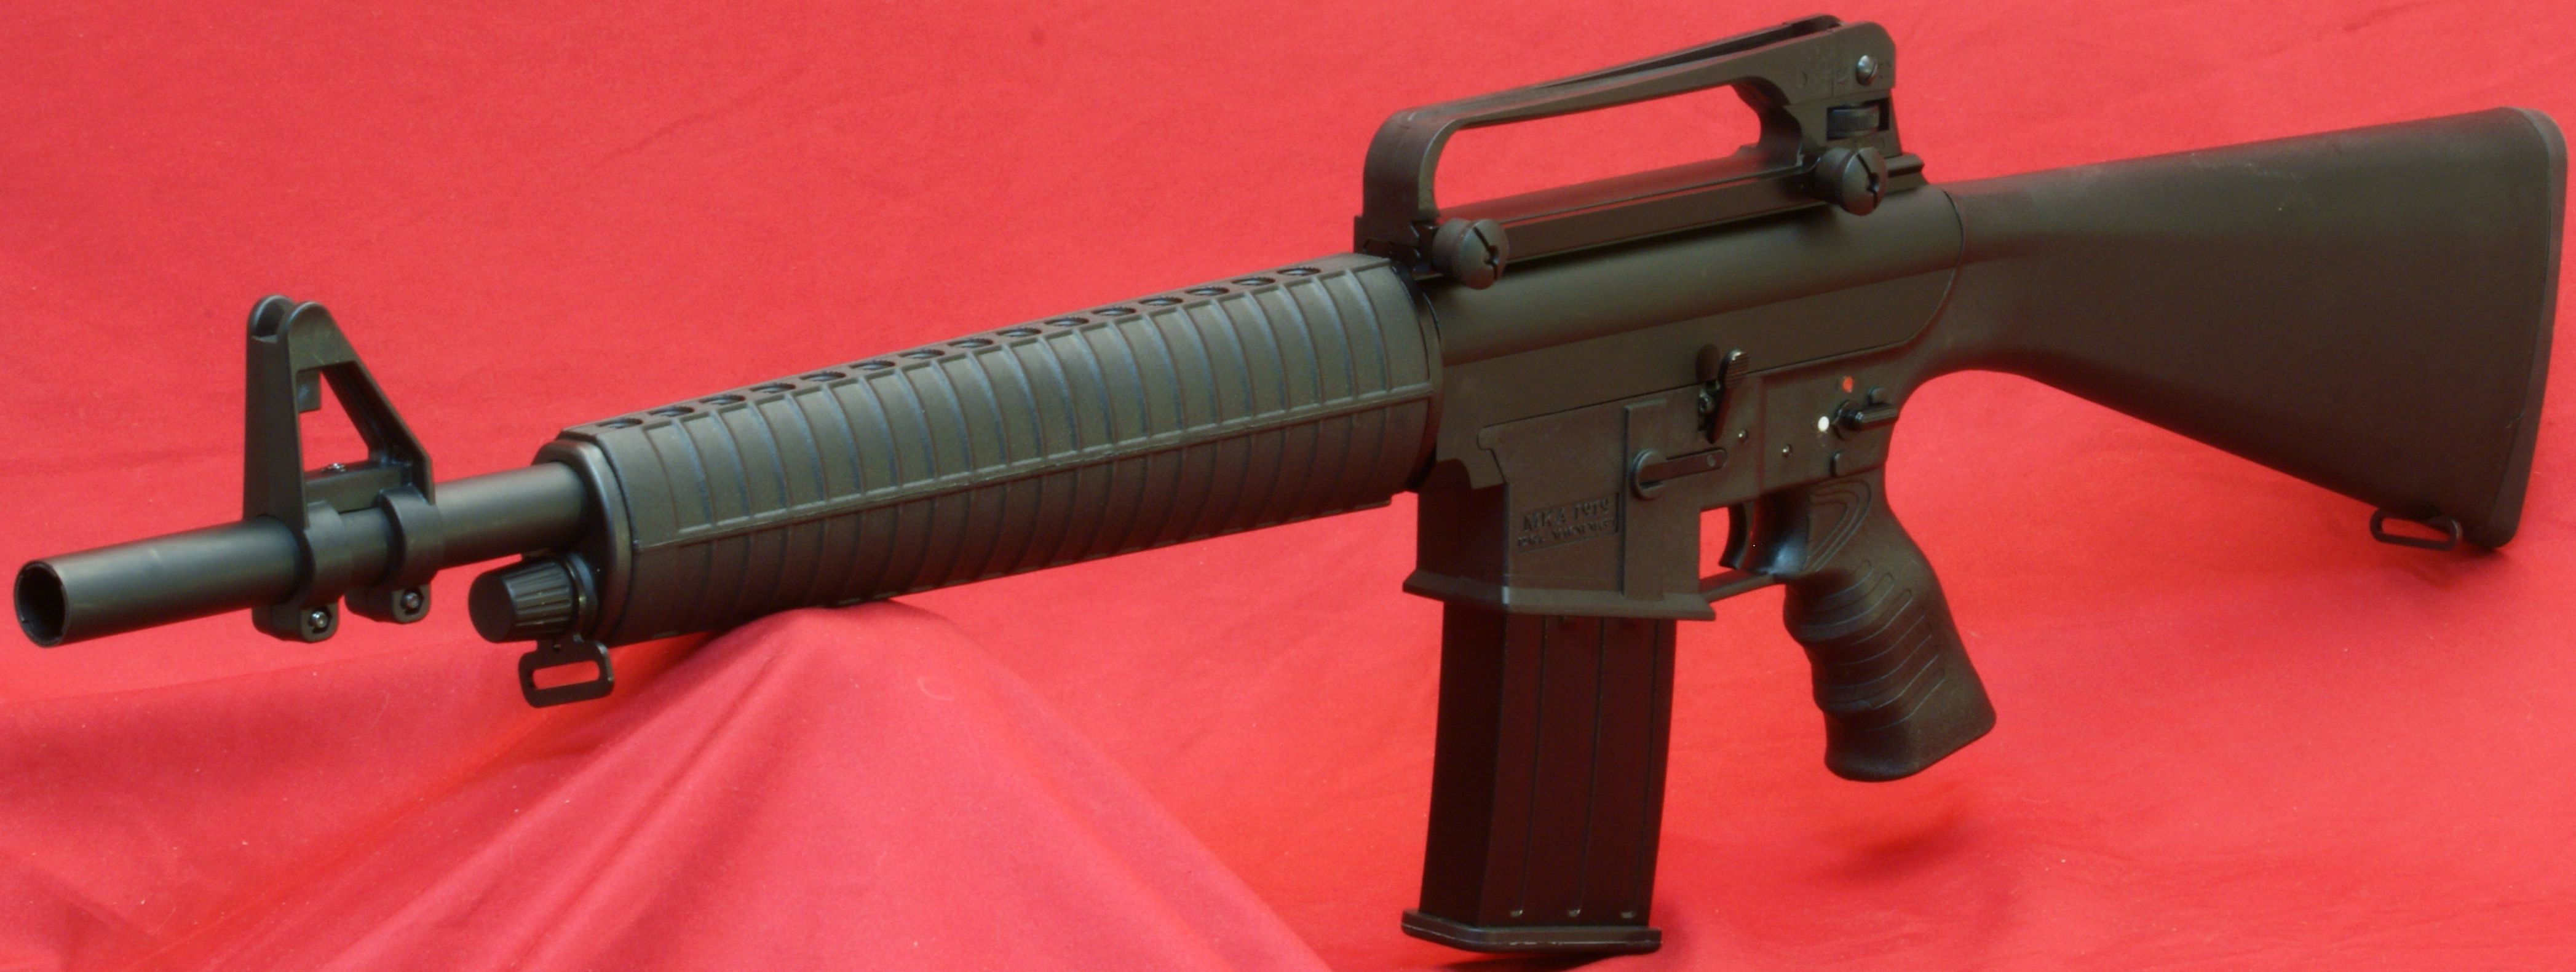
Akdal MKA 1919 Shotgun Review
Part 4 - Disassembly
April 2, 2012
In this part of my Akdal MKA 1919 Shotgun Review I show the steps for disassembly of the MKA 1919 Shotgun which are outlined in the Owner's Manual. Even though I may go into great detail showing these steps, you should always consider the Owner's Manual the official source for instructions and safety warnings when working with any firearm.
Step 1 - Safety
Point the shotgun in a safe direction while keeping fingers off the trigger and out of the trigger guard.
Step 2 - Remove Magazine
Depress the magazine catch and remove the magazine.
Step 3 - Open Bolt & Verify Empty
Pull the bolt back and lock it open by pushing in on the bottom of the "bolt hold open lever". Once open, visually inspect that the shotgun chamber is empty and magazine well is clear. Then you can cycle the bolt forward by pressing the top of the "bolt hold open lever".
Figure 1 - Empty Shotgun

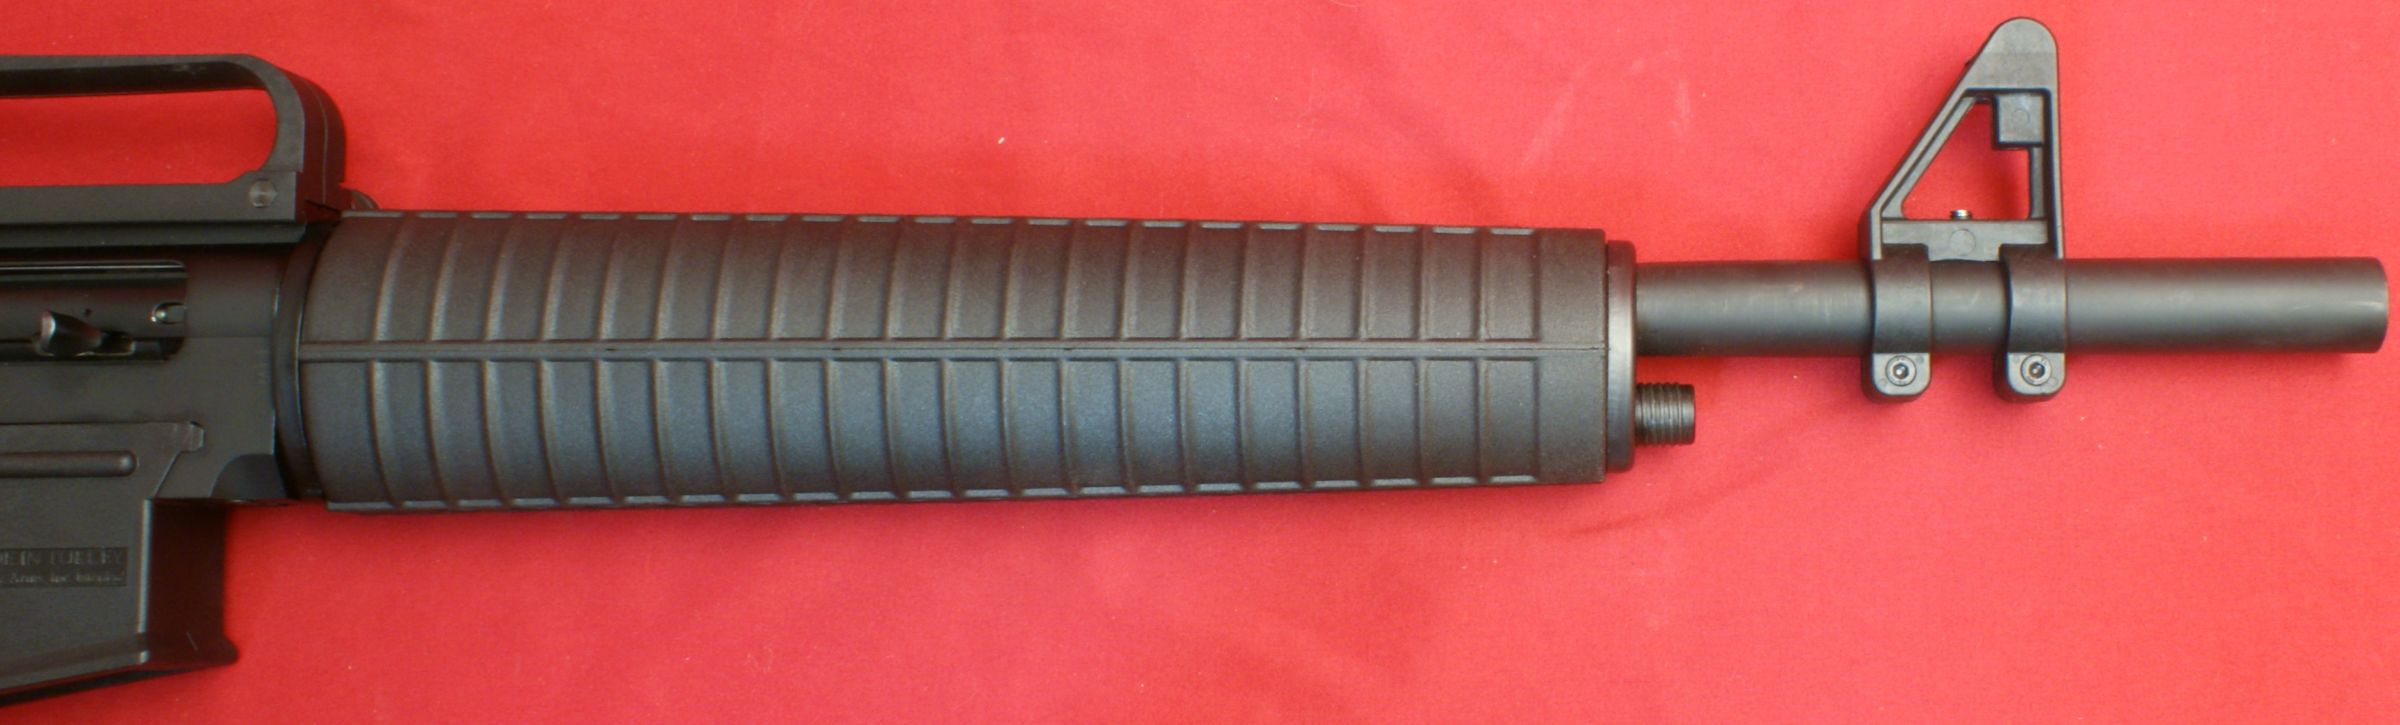
Step 4 - Remove Handguard Secure Cap
Unscrew the "handguard secure cap" and remove it from the shotgun.
Figure 2
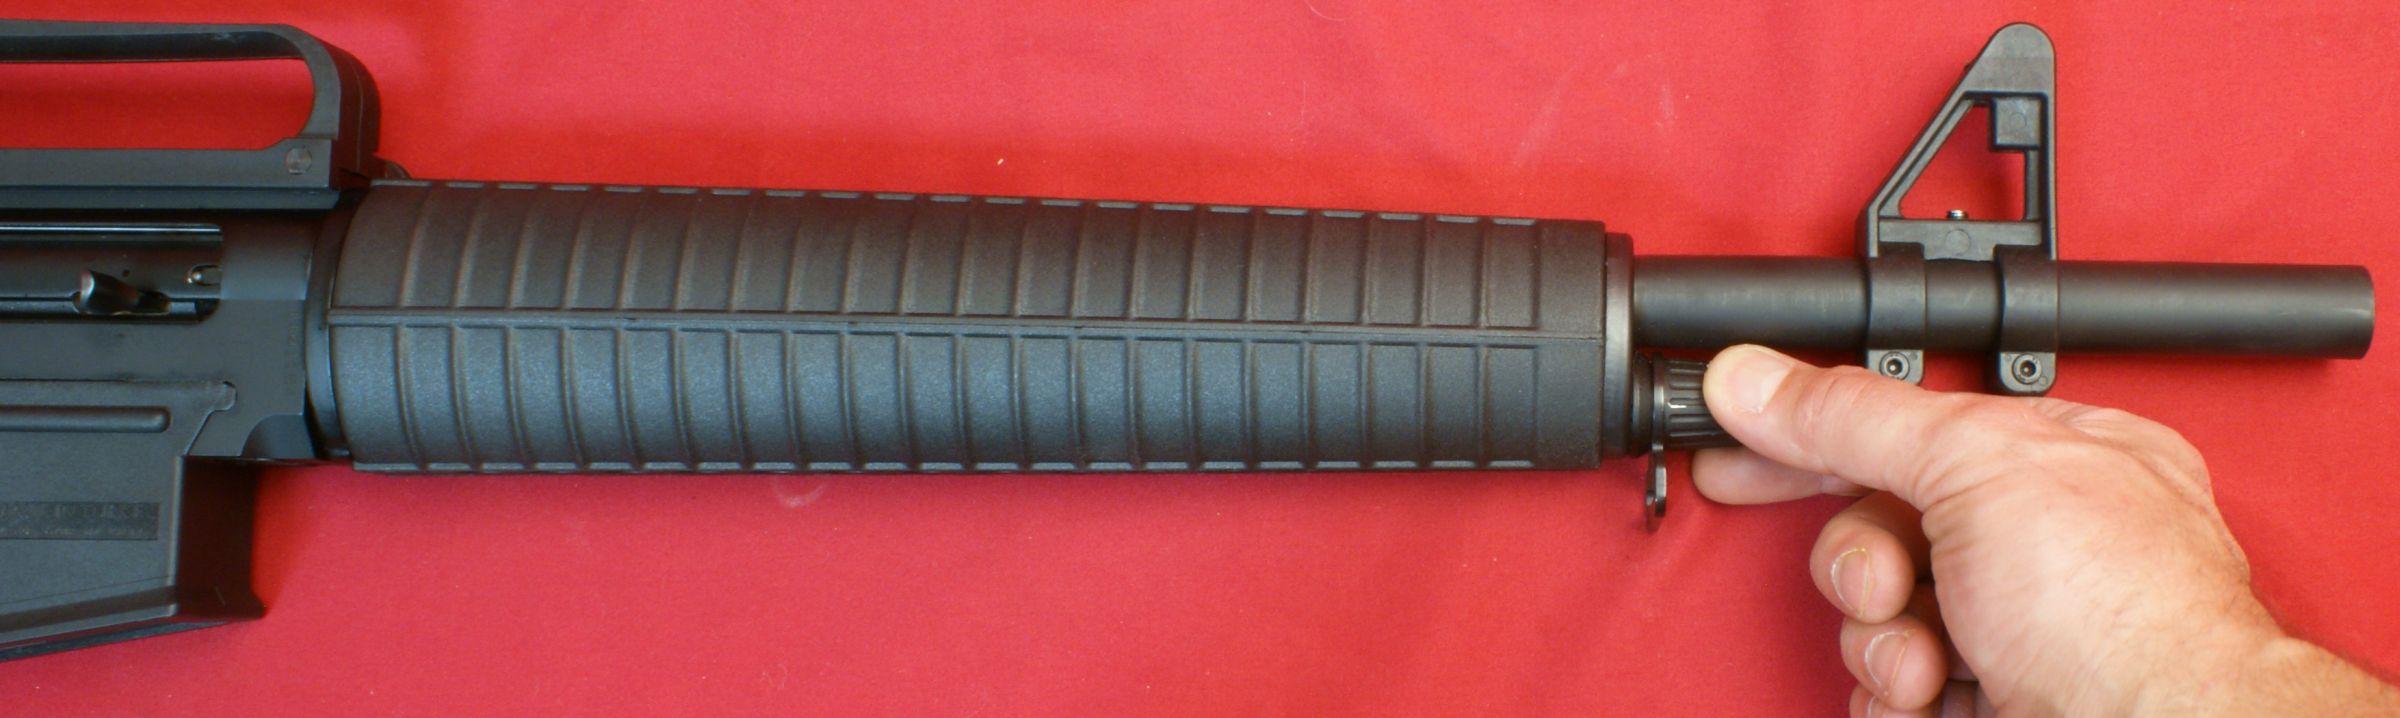
Figure 3
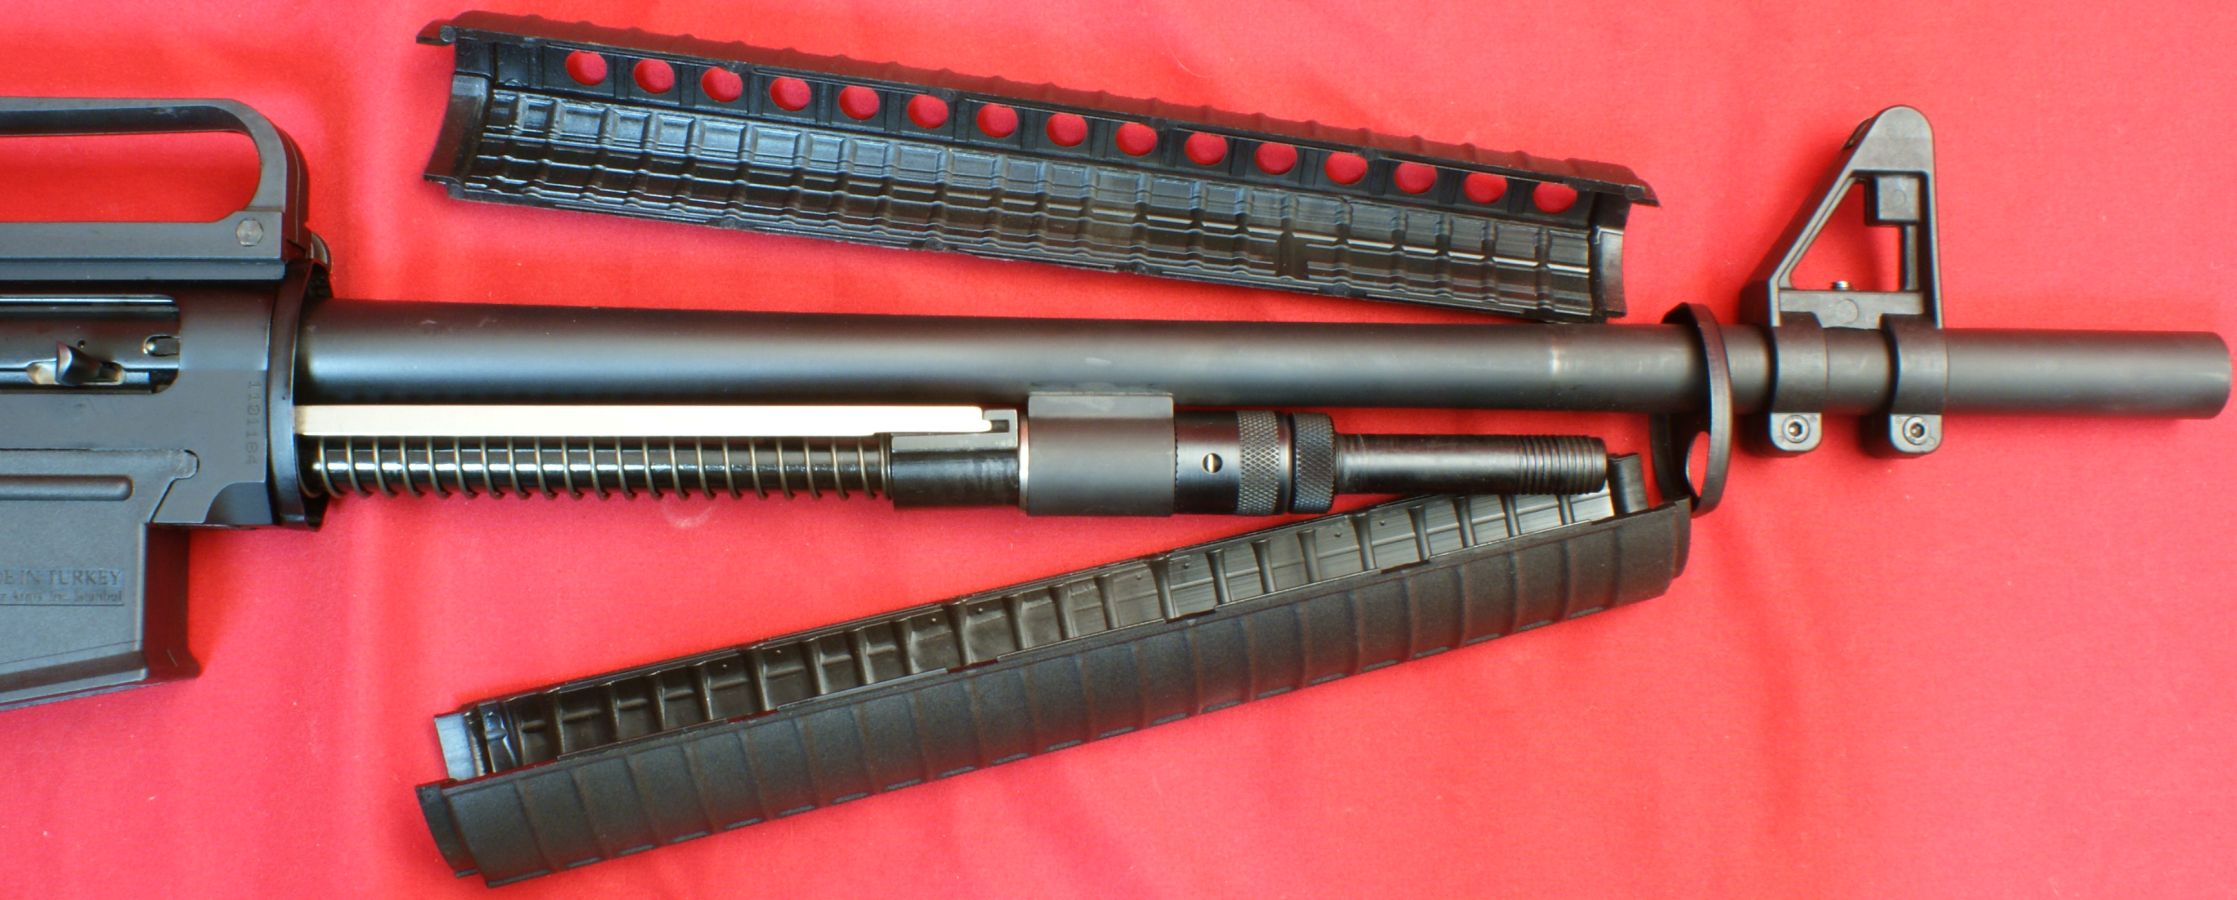
Step 5 - Remove Handguards
The instructions say to pull the forward handguard secure plate out and release it on the barrel then slide the upper and lower handguards forward and set them aside. I found the forward plate to be snug on the front of the handguards and it was easier to slide the handguards out of the rear plate and then separate them to slide them out of the forward plate.
Figure 4

Figure 5
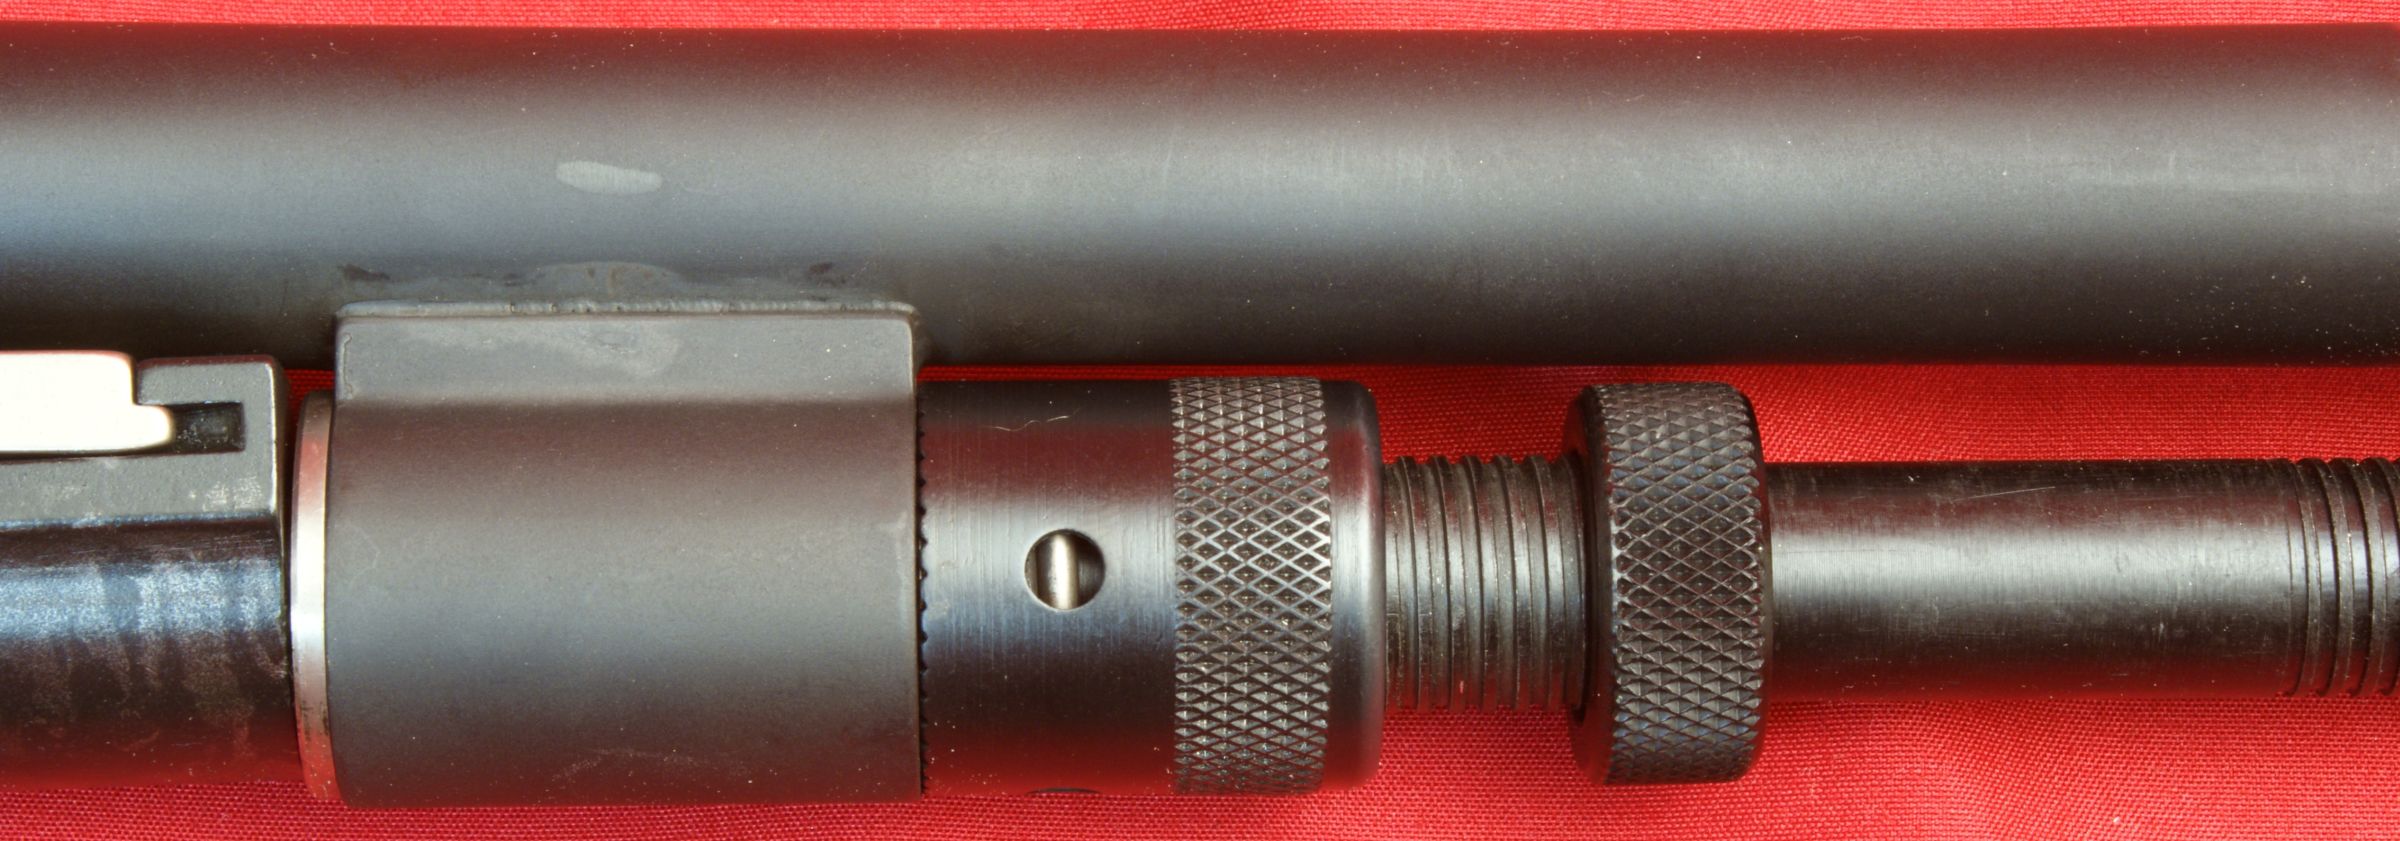
Step 6 - Remove Lock Nut, Gas Regulator Nut & Spring
The MKA 1919 includes a knurled lock nut that holds the gas regulator nut in place and prevents the regulator nut from working loose.
Figure 6

Remove the knurled lock nut. Note that this nut can be installed with either side facing the gas regulator nut.
Figure 7
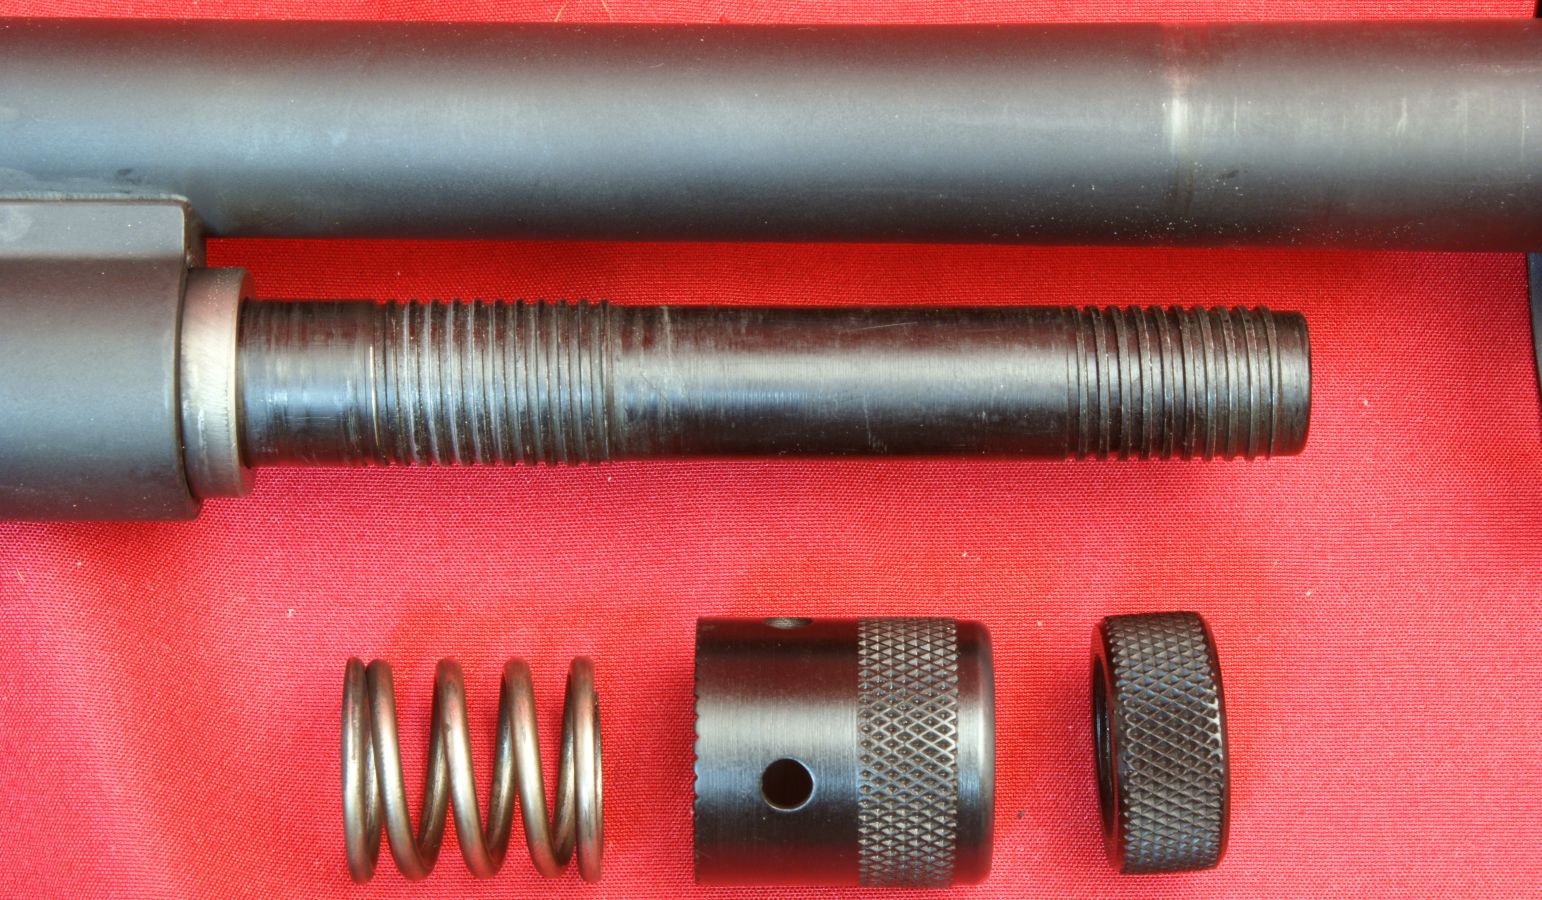
Remove the gas regulator nut and spring.
Figure 8
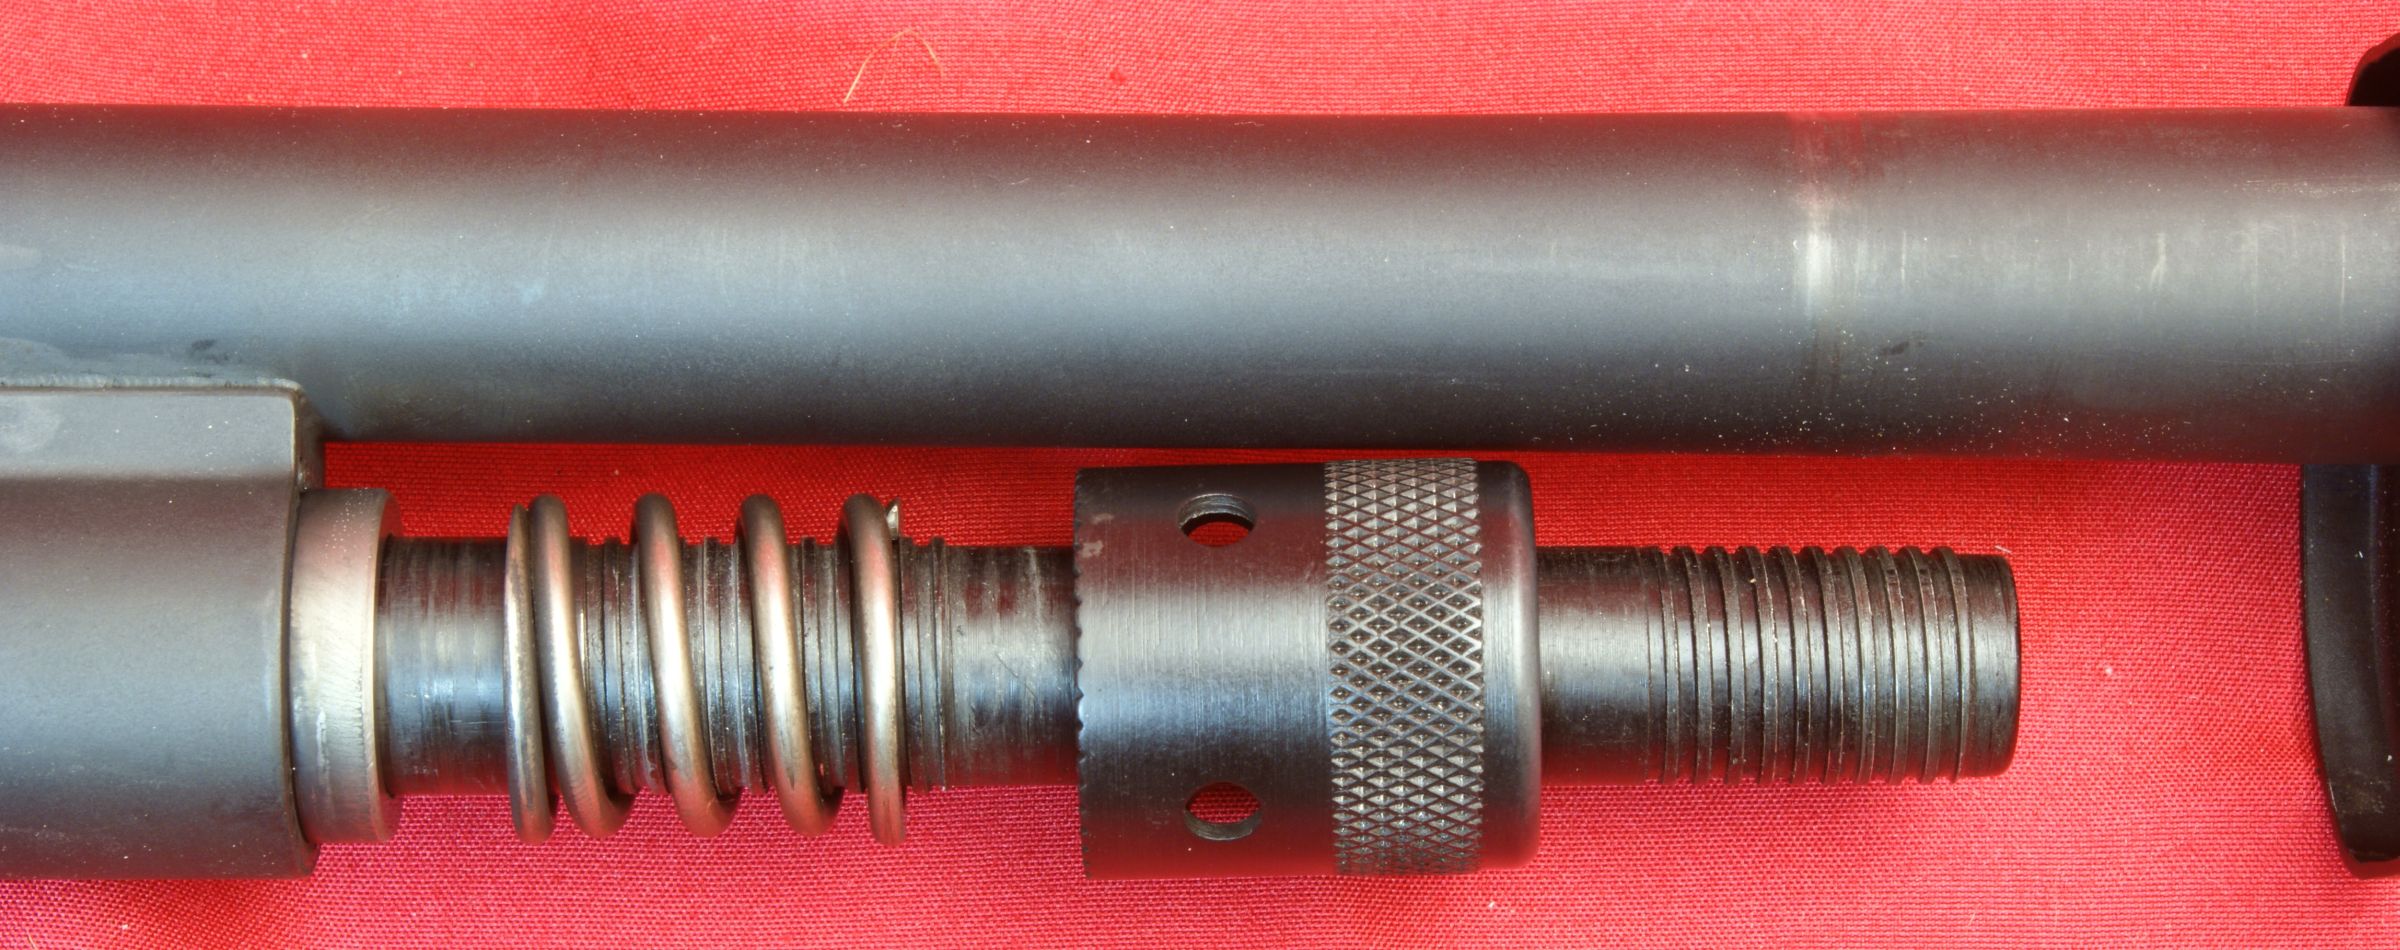
Figure 9
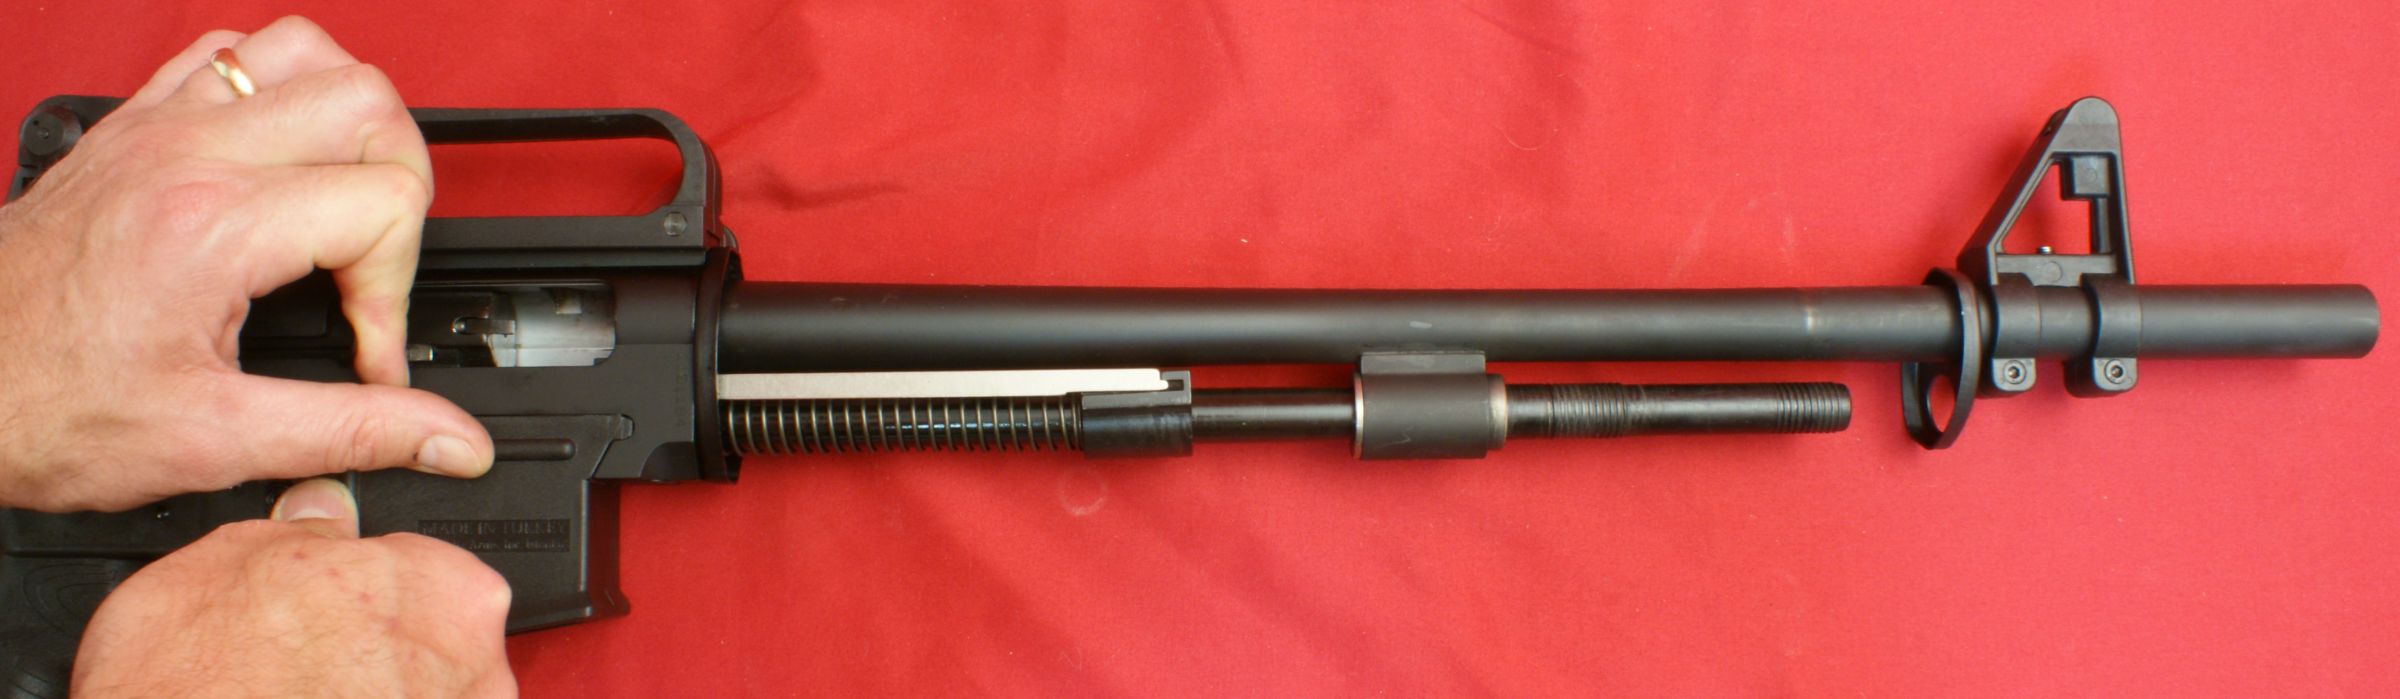
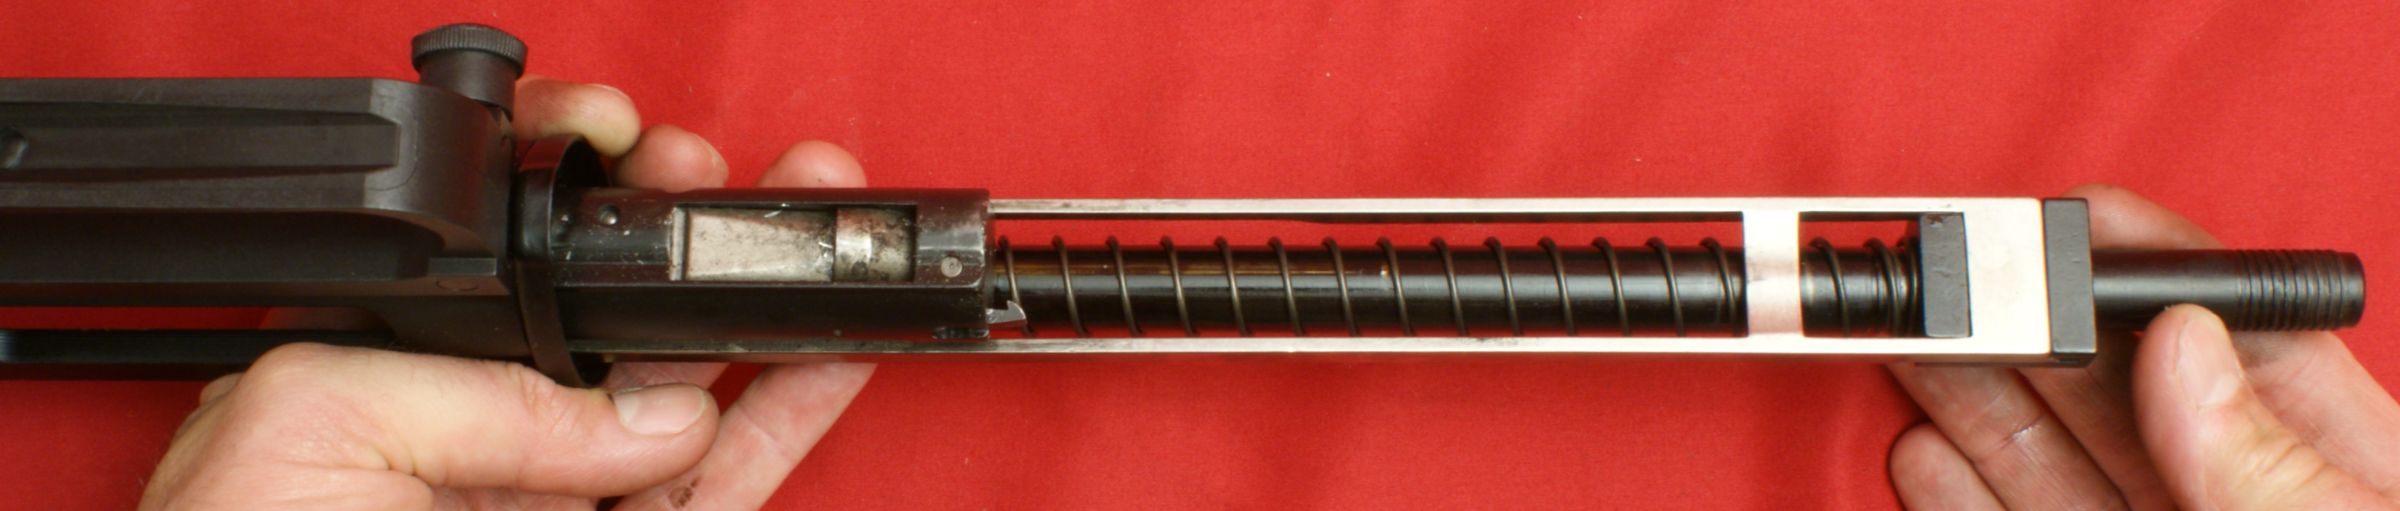
Step 7 - Remove Barrel
Pull the bolt to the rear slightly and pull forward on the barrel as you release the bolt forward.
Figure 10
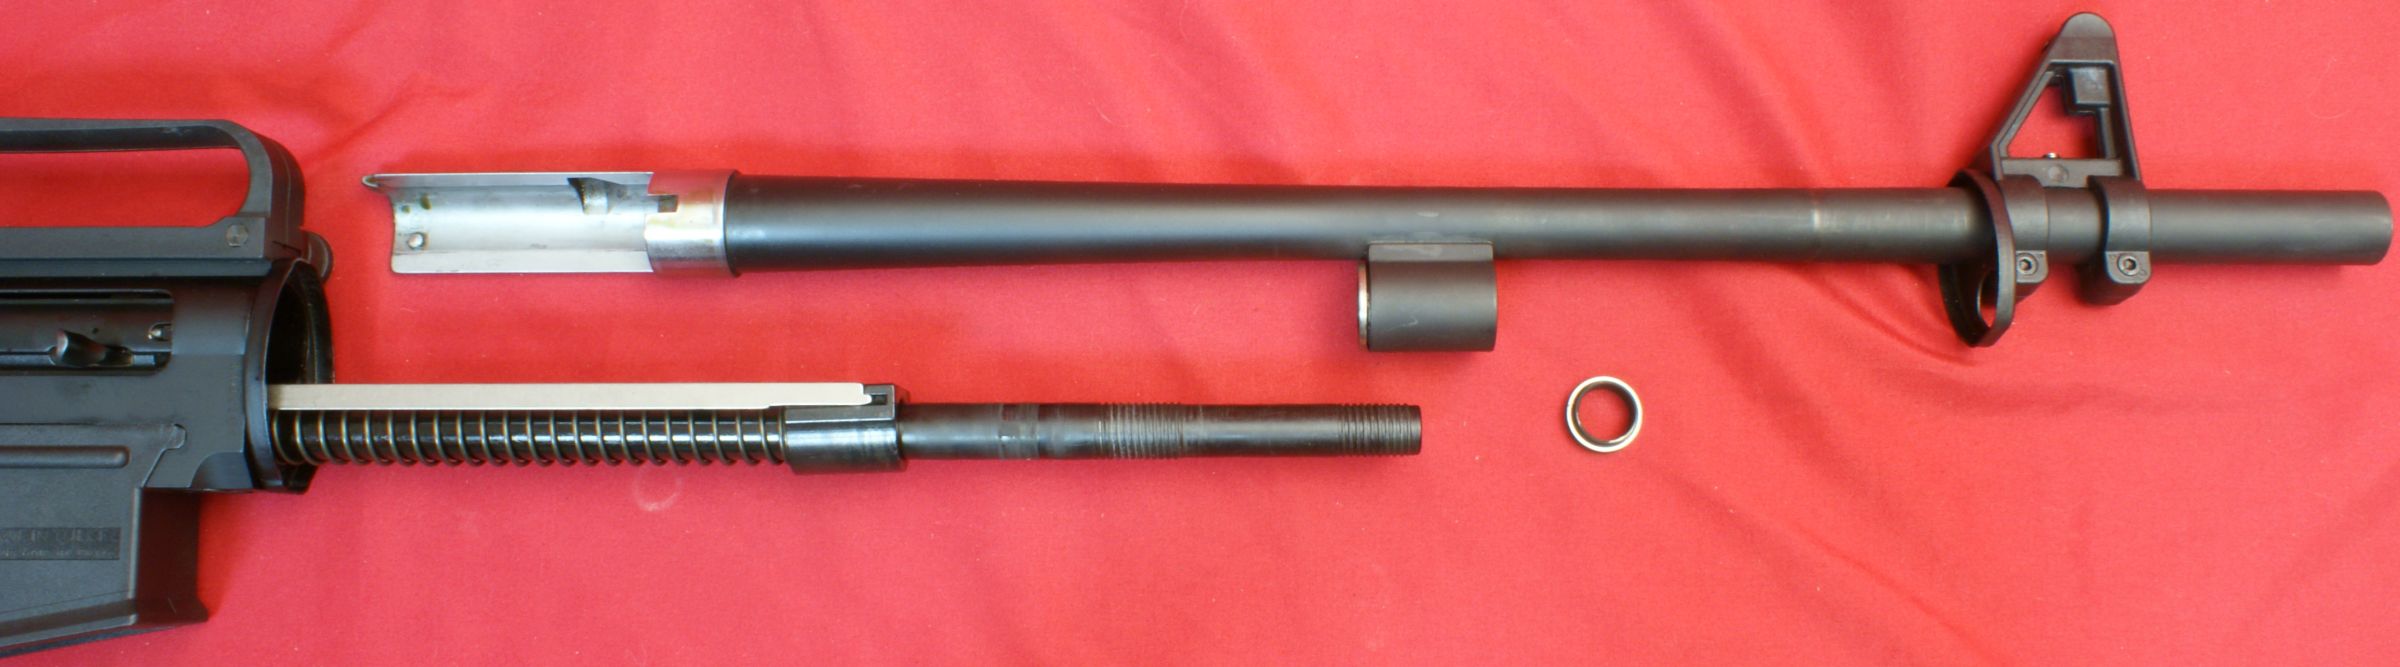
The barrel will slide out of the receiver. While doing this, you will notice an aluminum bushing/seal forward of the barrel lug that will get pushed off as you remove the barrel. Make sure you have the correct orientation of the bushing/seal when you reassemble your shotgun.
Figure 11
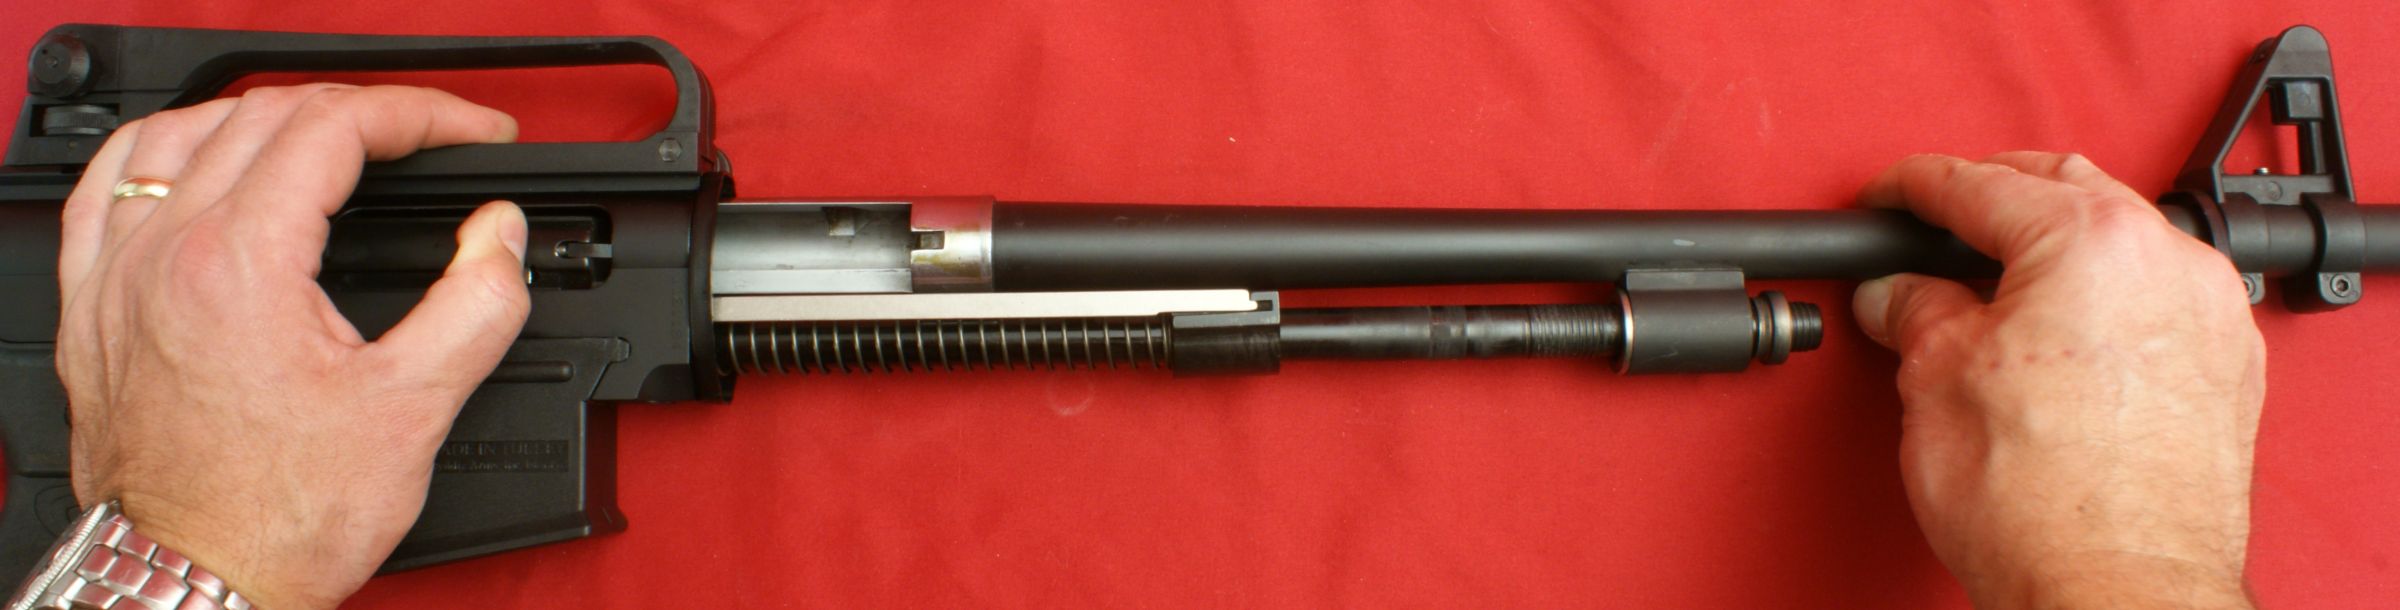
Figure 12
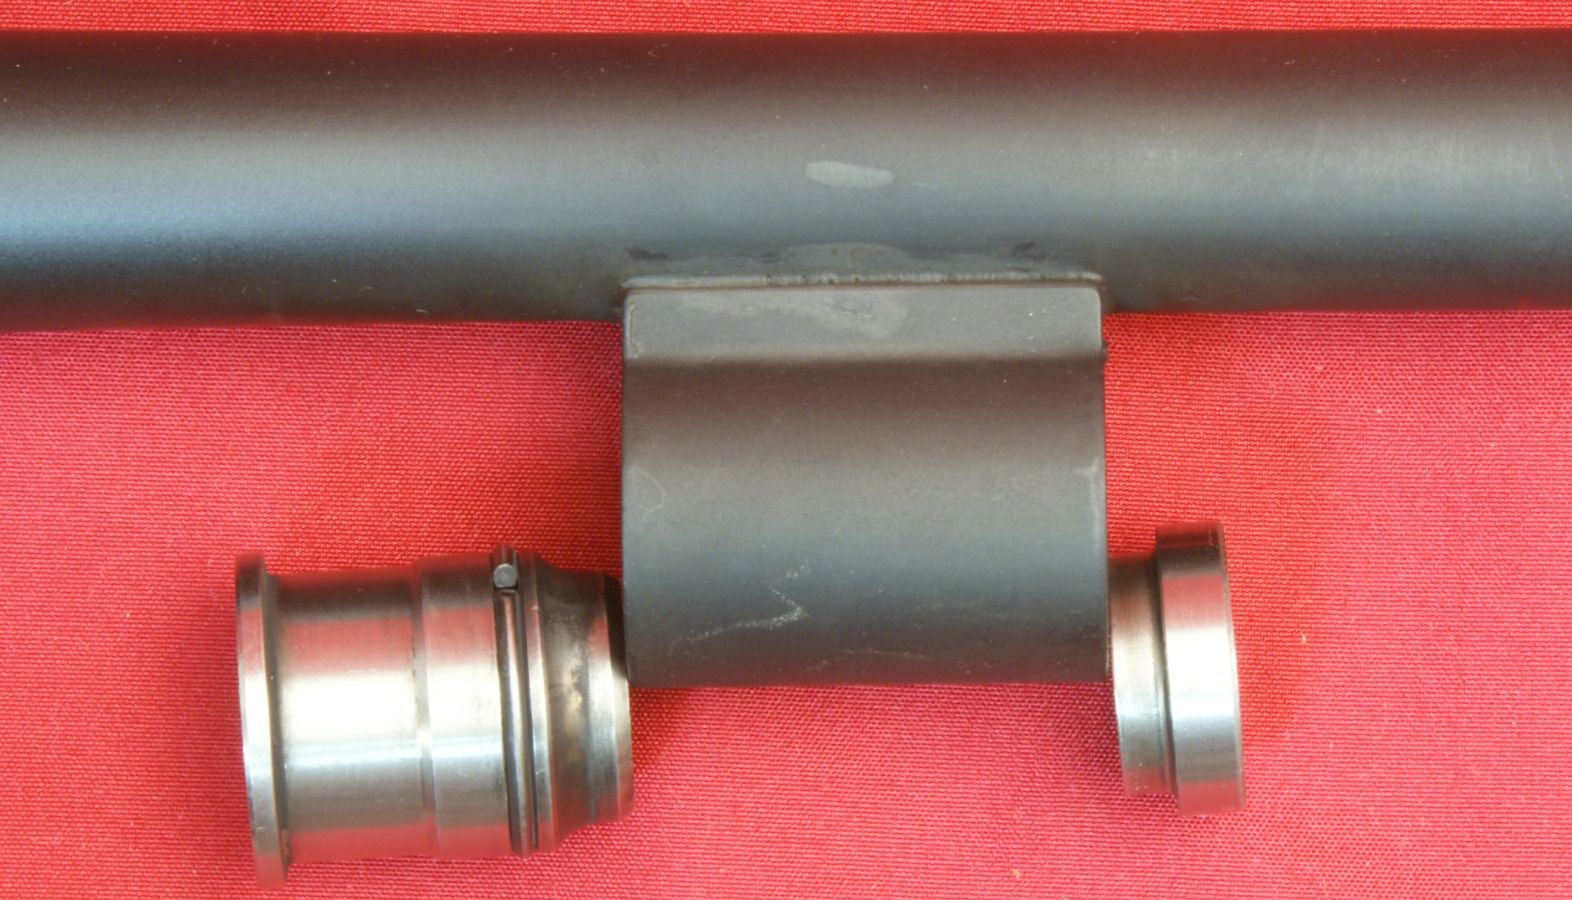
The photo below shows the gas piston (left) barrel lug (center) and bushing/seal (right).
Figure 13
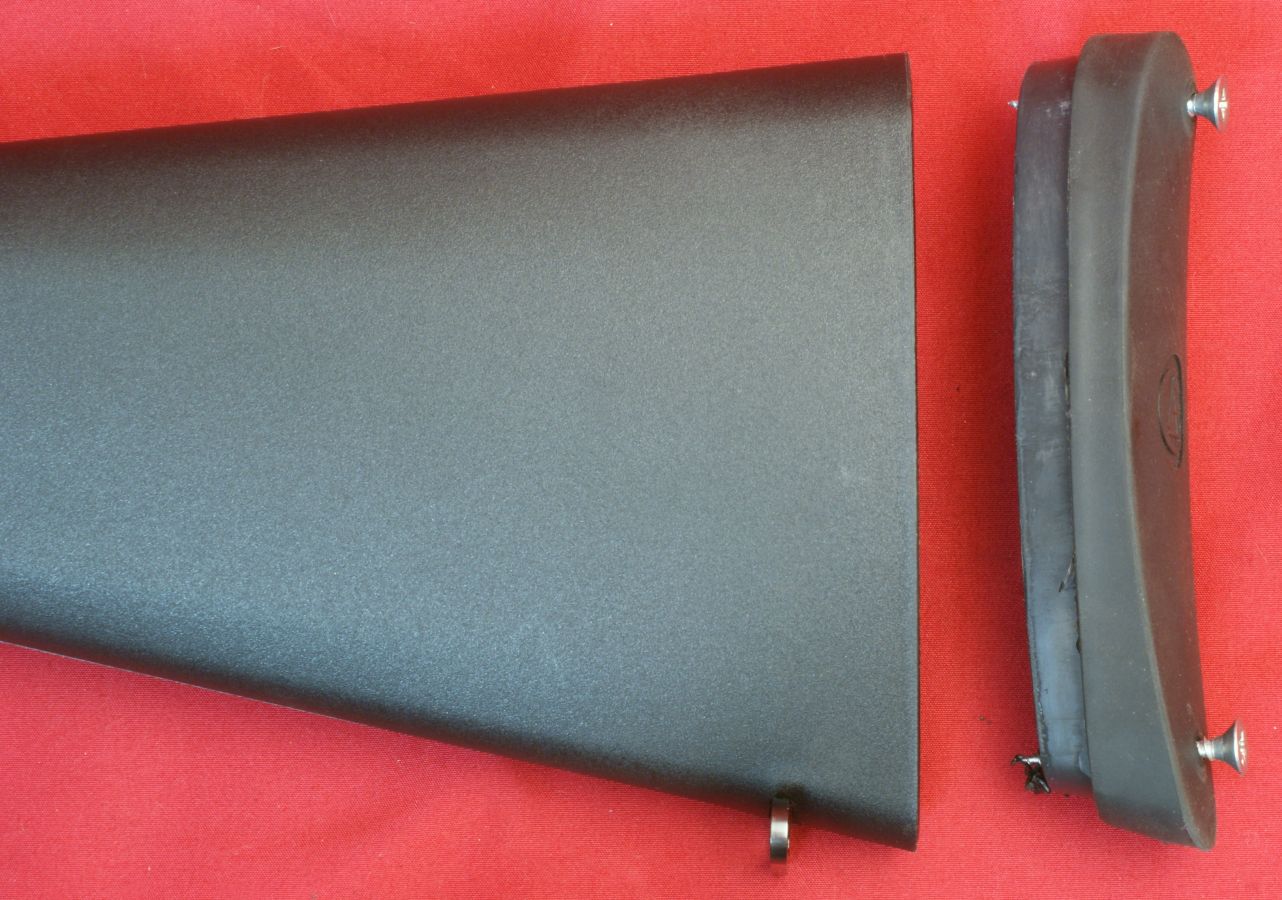
Step 8 - Remove Buttpad
The next step is to remove the buttpad. It seems odd that your next step is not to remove the bolt assembly and carrier. The way the shotgun is designed is that the upper and lower receiver must be disassembled to allow you to remove the bolt assembly and carrier. Therefore, you must next remove the buttpad to get access to the receiver retention bolt in the buttstock. The buttpad removes like most buttpads using a Phillips screwdriver to remove the two screws.
Figure 14
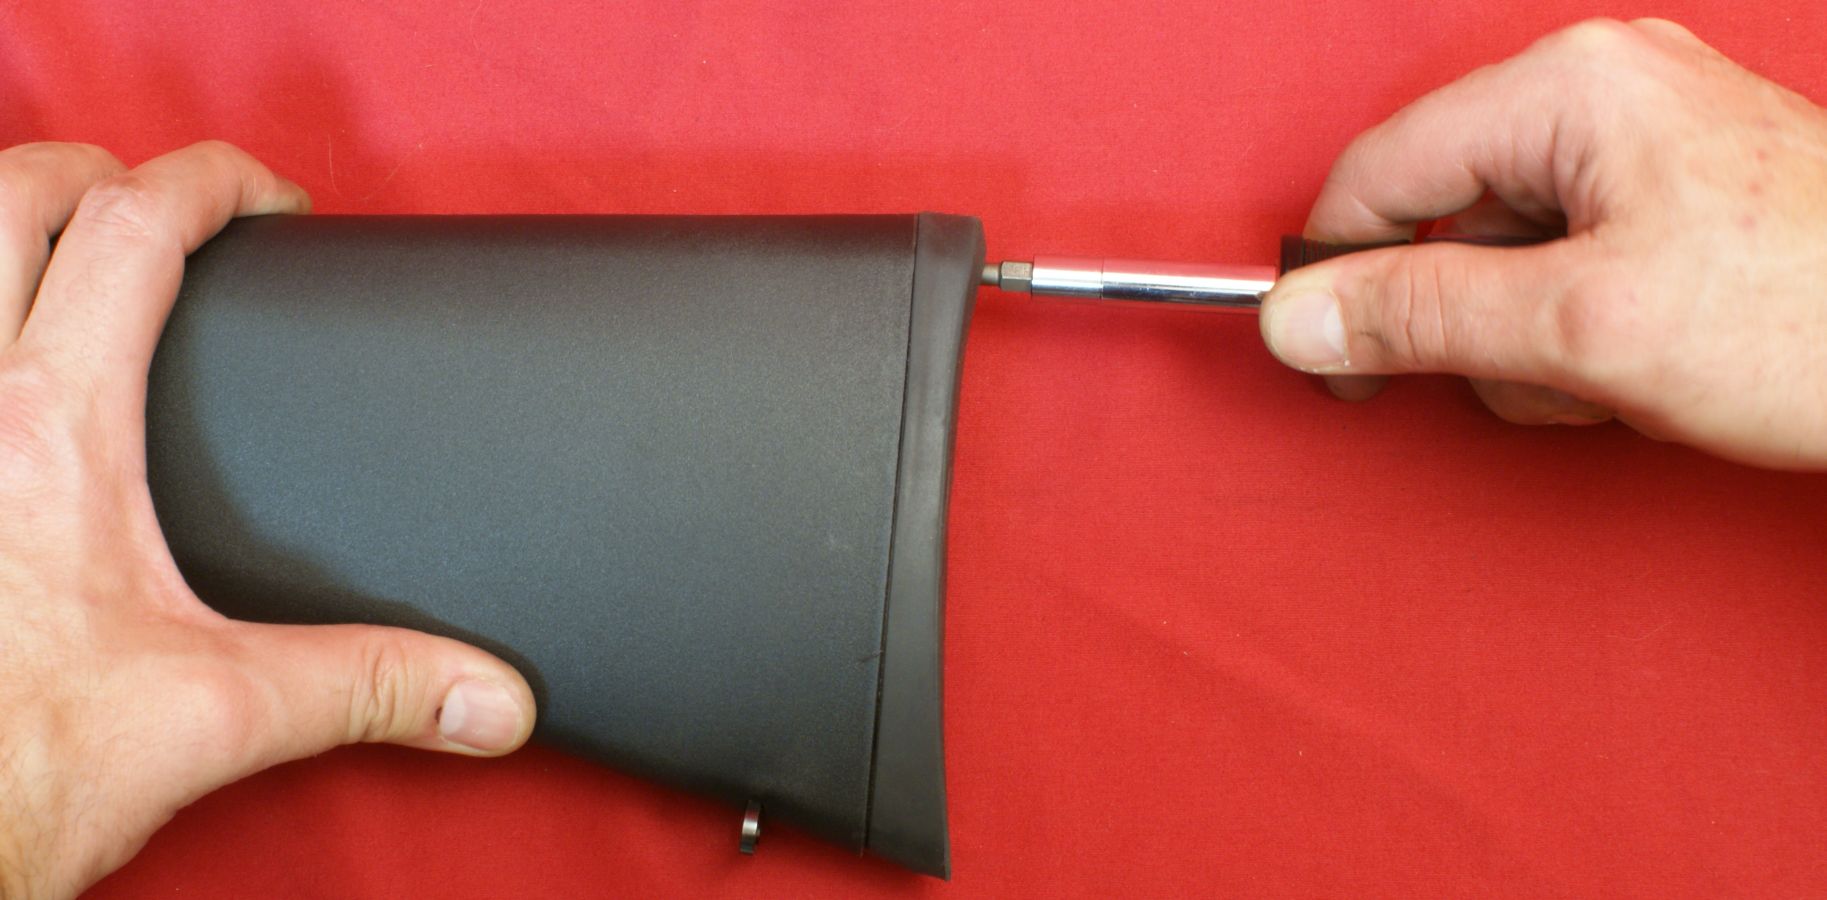
Figure 15
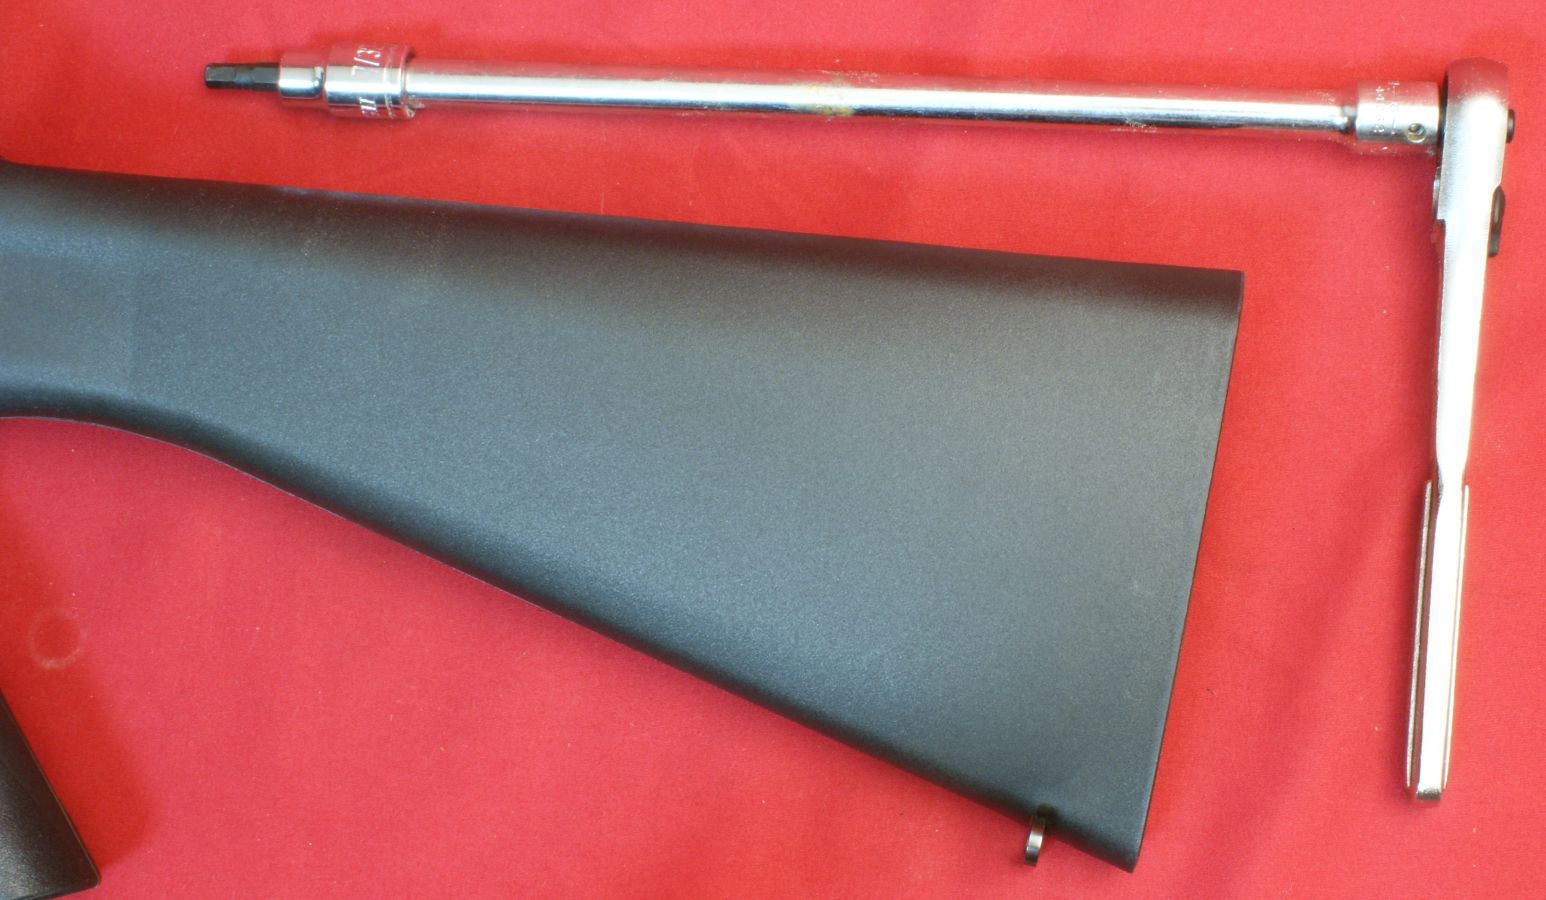
Step 9 - Get Tool to Separate Receivers
To separate the upper and lower receivers you will need to loosen, tap to separate, then remove the receiver retention bolt found in the void of the buttstock. To do this you need a 6mm Allen head bit on a socket with a 10" extension, ratchet and rubber mallet. Since I didn't have a 6mm bit on hand, I was able to do this using a 7/32" bit. I do not recommend using the wrong size bit and I plan to get the correct size in the future to prevent stripping out the head of the bolt.
Figure 16

Figure 17
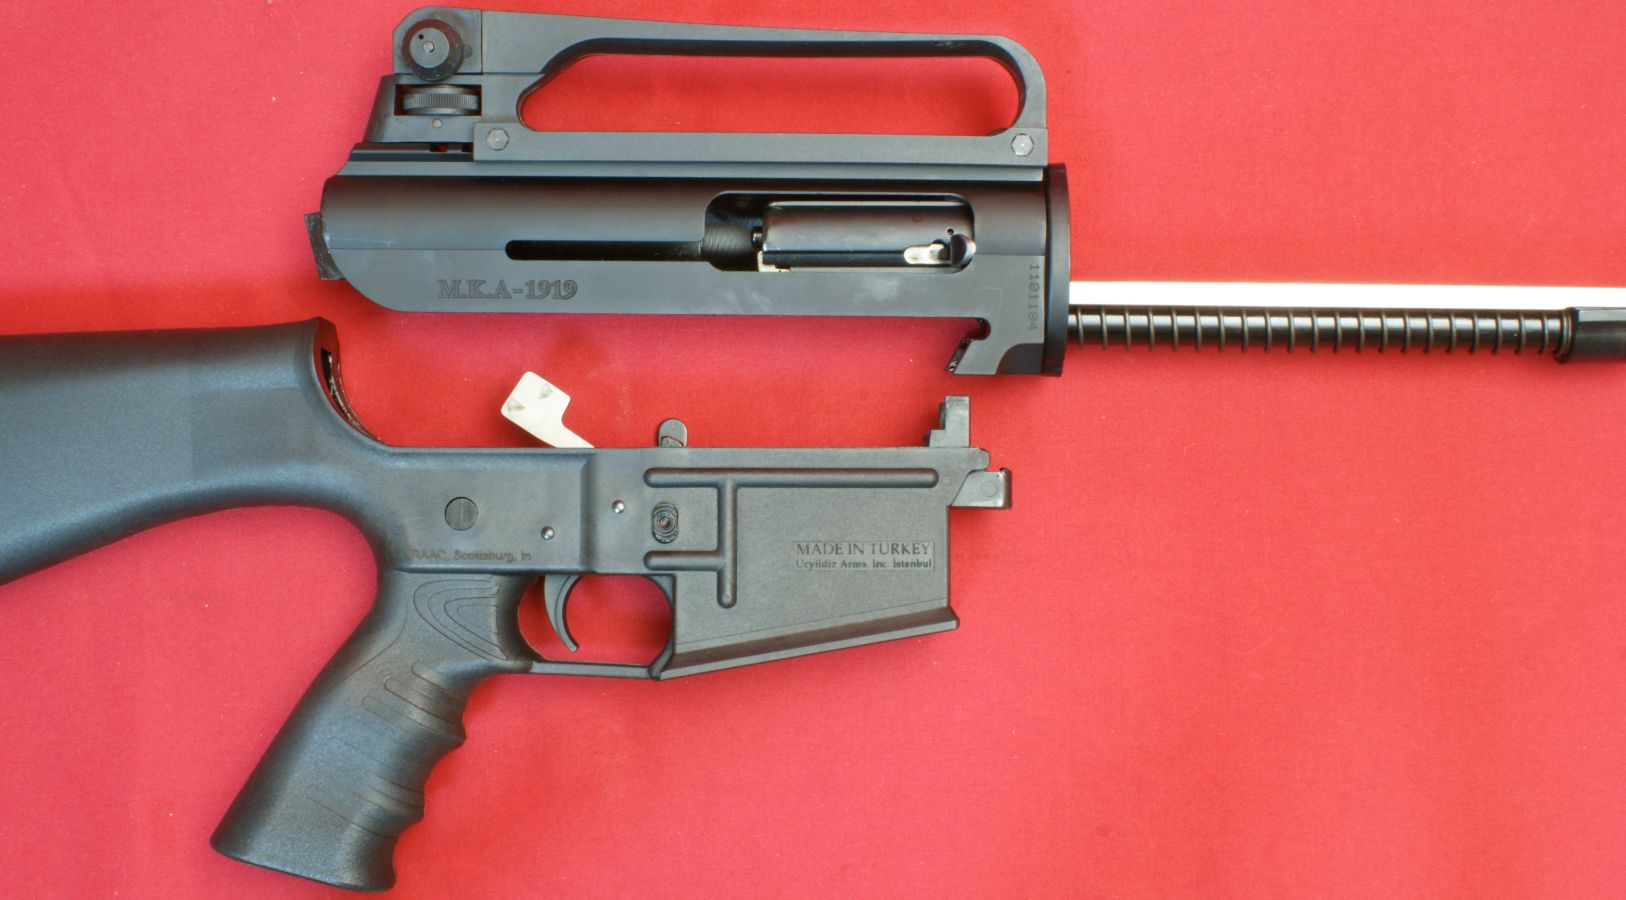
Step 10 - Separate Upper and Lower Receivers
Insert the Allen bit into the retention bolt and loosen 4 full turns. Remove the ratchet and tap the extension to push the retention bolt foreword and start separating the receivers. Once they start to separate, loosen the bolt another 2 to 3 turns then continue to tap and notice the expanding gap between the receivers. Once the gap is about 1/4" you can remove the retention bolt and washer.
Compress the recoil spring slightly on the operating rod to keep the bolt from pushing forward and damaging the feed ramp. The feed ramp is on the polymer lower receiver and you want to use as much care to prevent the metallic bolt from scratching the feed ramp. Use your other hand to separate the receivers. As the receivers separate, lift the upper receiver up and off the lower receiver. Doing this allows the bolt to clear the feed ramp.
Figure 18
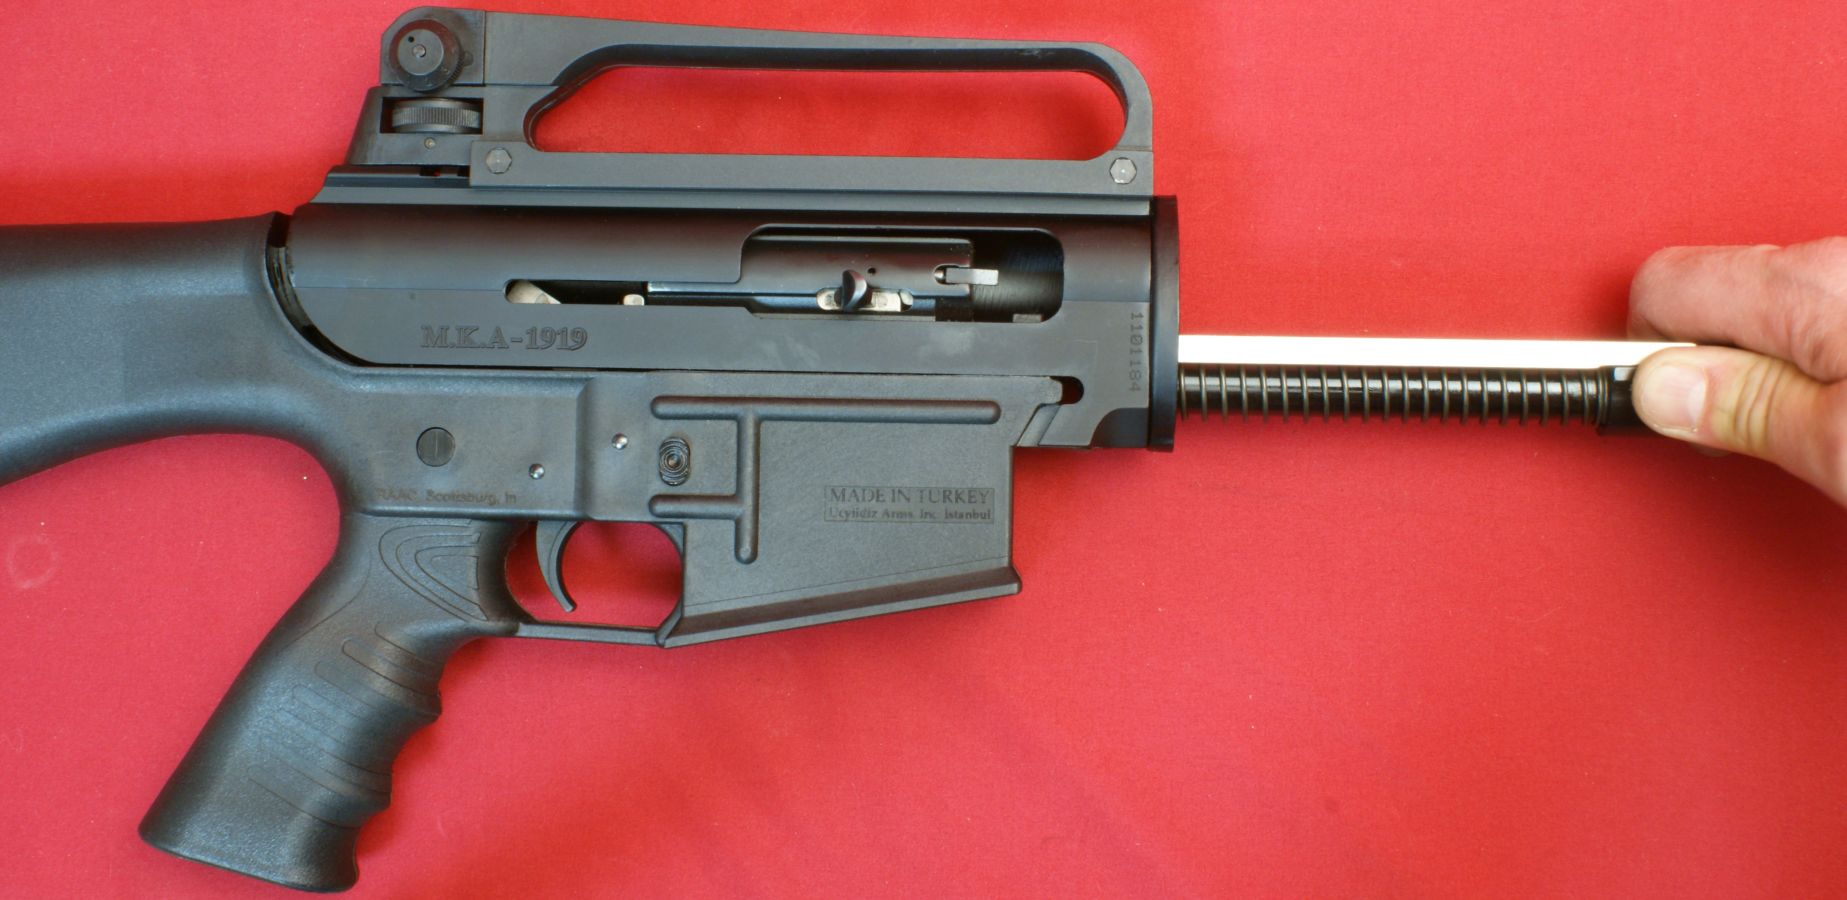
Figure 19
Step 11 - Remove Charging Handle
To remove the bolt and bolt carrier, you must first remove the charging handle. Press back on the carrier to compress the recoil spring slightly then locate and center the charging handle in the crescent shape in the bolt. You can then wiggle and pull the charging handle out of the bolt. The instructions say you can place a rag to protect the finish on the receiver and then use a flat head screwdriver in the notch on the charging handle to gently pry it upward to remove it, but I found I was able to remove it using my hands only.
Figure 20

Step 12 - Remove Bolt, Carrier & Recoil Spring
The bolt carrier and bolt will slide out of the receiver and off the operating rod with ease. These parts can then be easily separated for cleaning.
Figure 21
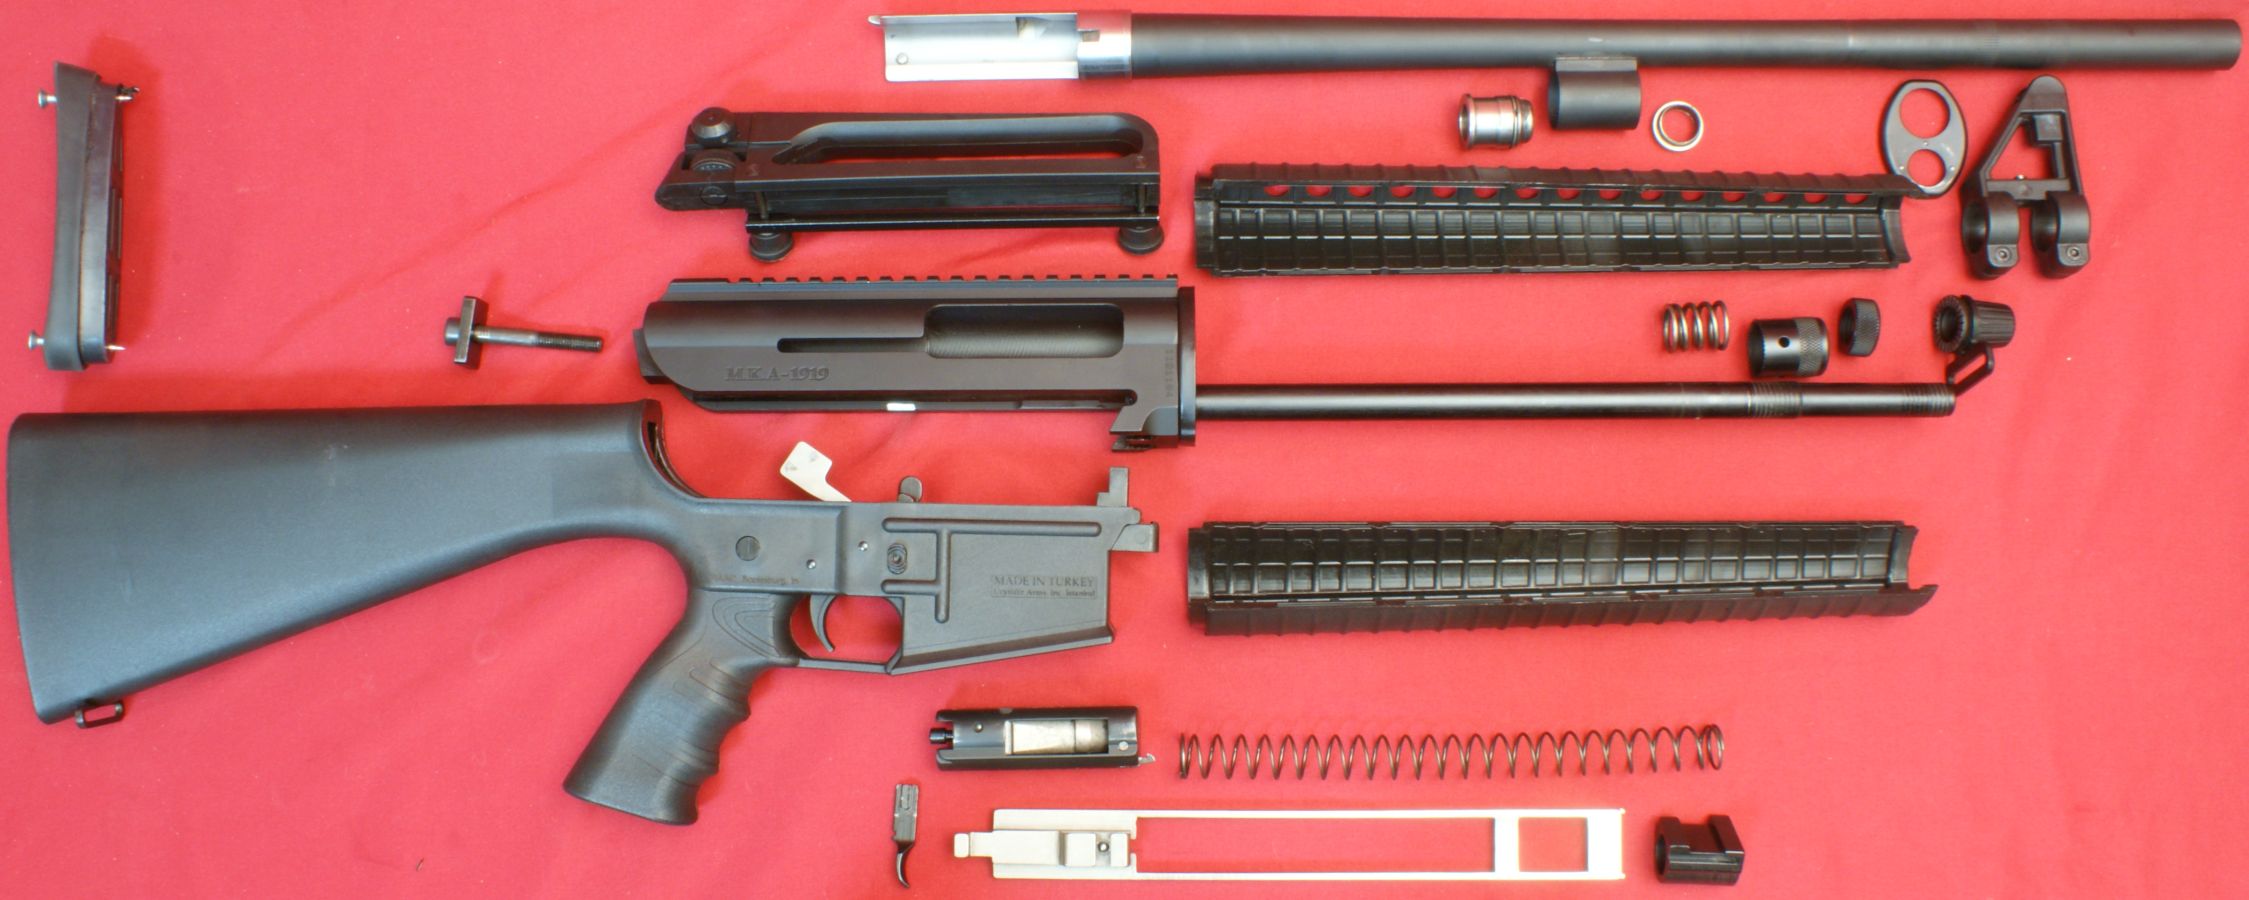
Fully Field Stripped
The photo below shows the shotgun in it's fully field stripped condition. Further disassembly is possible and may be required if you plan on replacing some of the "imported parts" with American made parts in an effort to make the shotgun legal for use with higher capacity magazines, but further disassembly is not covered in the Owner's Manual.
Figure 22
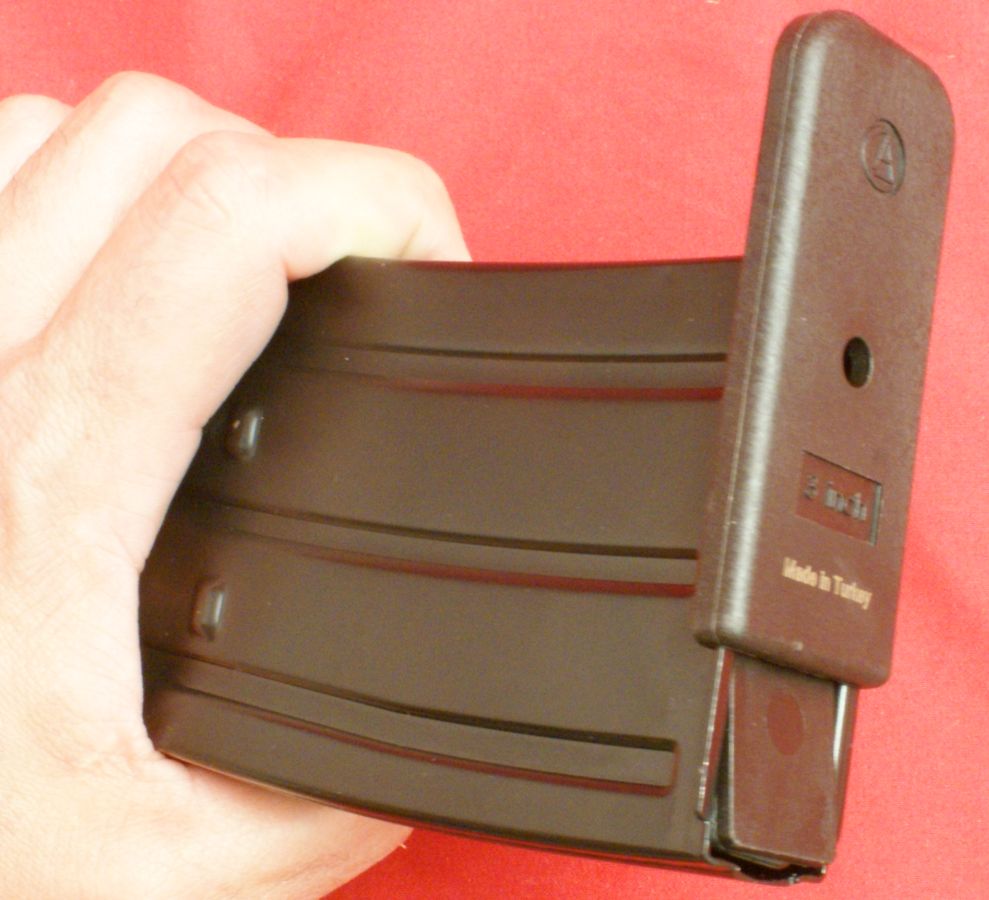
Magazine Disassembly
Magazine disassembly is similar to that of many magazines on the market today. The first step is to press in the magazine spring seat by pushing through the hole in the magazine floor plate.
Figure 23

Next you slide the magazine floor plate forward off the magazine body. Note that the magazine spring is pushing against the floor plate.
Figure 24
As you move the magazine floor plate forward, you will need to hold down on the magazine spring seat and keep the magazine spring compressed unless you like looking for parts that fly across the room.
Figure 25

Once you release the compression on the spring, the spring will extend as shown in the photo below. Note that the spring seat is not attached to the spring. You can also pull the spring from the magazine body during this step.
Figure 26

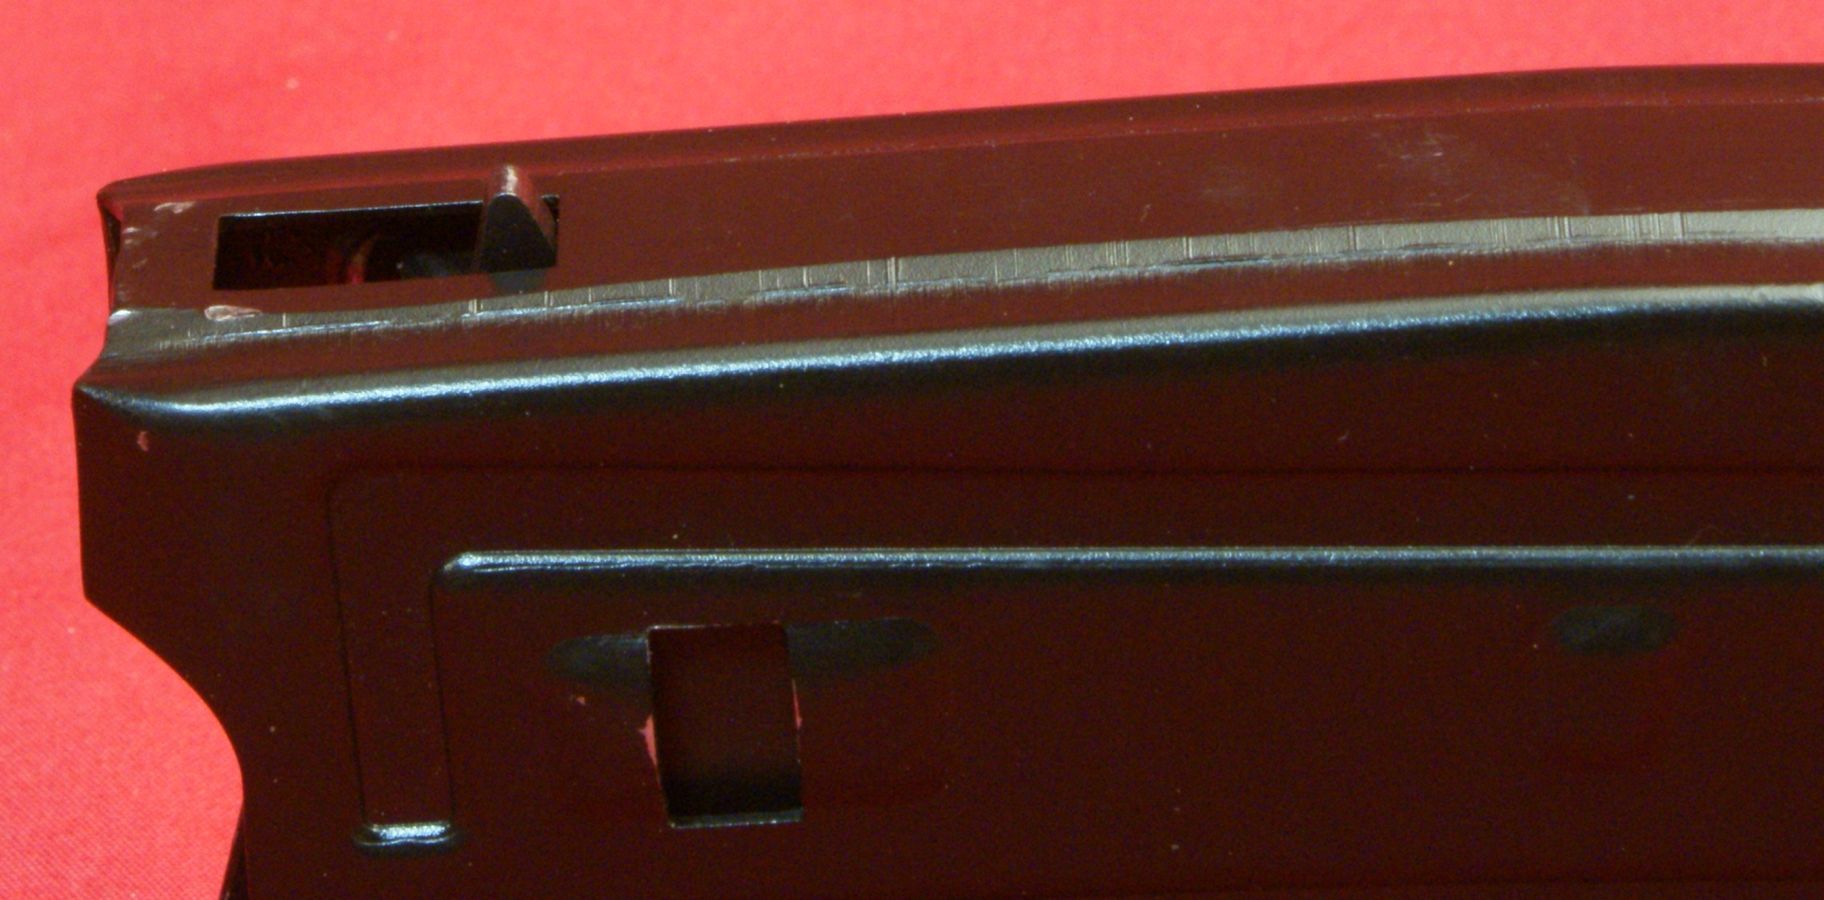
To remove the follower, you can press it inside the magazine body from the top of the magazine. Doing this will push in the "last shot stop" latch that sticks out the back of the magazine.
Figure 27
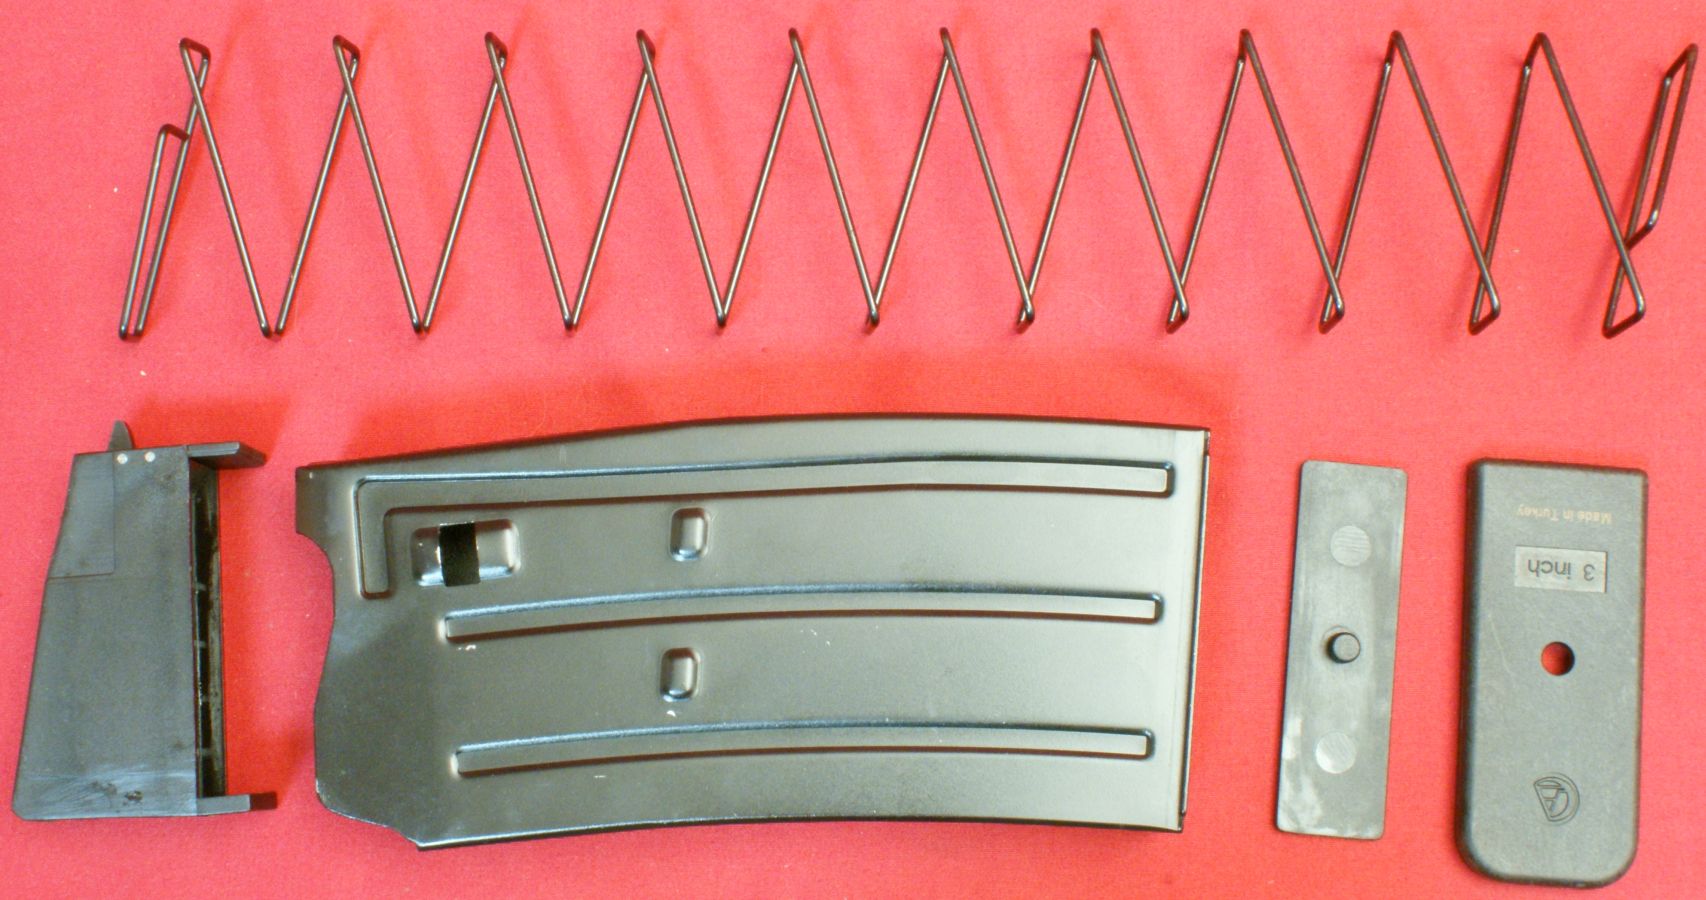
The photo below shows all the parts of the magazine. I don't feel that removal of the bolt stop latch is practical nor is needed for cleaning.
Figure 28
On reassembly, make sure the spring is seated in the pocket in the bottom of the follower as shown below. When I first reassembled the magazine, I didn't pay attention to this detail and the spring was pressing against the magazine body making the follower hard to press inside the magazine body. This is not an issue as long as you reassemble the magazine properly.
Figure 29

Thoughts
Disassembly is not difficult, but the need for a screwdriver, socket, extension, ratchet and rubber mallet adds to the complexity and makes disassembly/reassembly more time consuming. All these tools are needed to separate the upper and lower receivers which allow you to remove the bolt assembly and carrier. Since I consider cleaning the bolt assembly and carrier a standard part of cleaning a shotgun, this design will probably nag me for years to come. On the positive side, this design does produce a rock solid mating of the two receivers and I feel that Akdal keeping the lower receiver, buttstock and pistol grip all one part has a positive impact on the potential conversion of the shotgun into one that is compliant for high capacity magazines. I will make an attempt to discuss this conversion in the next part of this review.
For more detailed photos and commentary, make sure you check out the other parts of this review and feel free to leave comments on my Reader's Comments page or below. The following links are provided to help you see other parts of this review.
- MKA 1919 Shotgun Review: Part 1 - Introduction, Specifications and Summary
- MKA 1919 Shotgun Review: Part 2 - What's in the Box
- MKA 1919 Shotgun Review: Part 3 - External and Operational Features
- MKA 1919 Shotgun Review: Part 4 - Disassembly (this page)
- MKA 1919 Shotgun Review: Part 5 - Internal Features
- MKA 1919 Shotgun Review: Part 6 - Range Test
- MKA 1919 Shotgun Review: Part 7 - Flash Suppressor & High Capacity Magazine Legal
- MKA 1919 Shotgun Review: Reader's Comments
Or
If you would like to be notified about future Gunsumer Reports reviews via Facebook, make sure "You Like This" by clicking the Facebook "Like" button at the bottom or top of this page. If it already says "You Like This" beside the button, clicking it again will uncheck the "Like" status and you will not be notified.
| Share on Facebook | |
© 2010, 2011, 2012, 2013, 2014, 2015, 2016, 2017, 2018, 2019, 2020, 2021, 2022, 2023 & 2024 Gunsumer Reports™, All rights reserved.
FTC Disclosure